Embed Size (px)
Citation preview
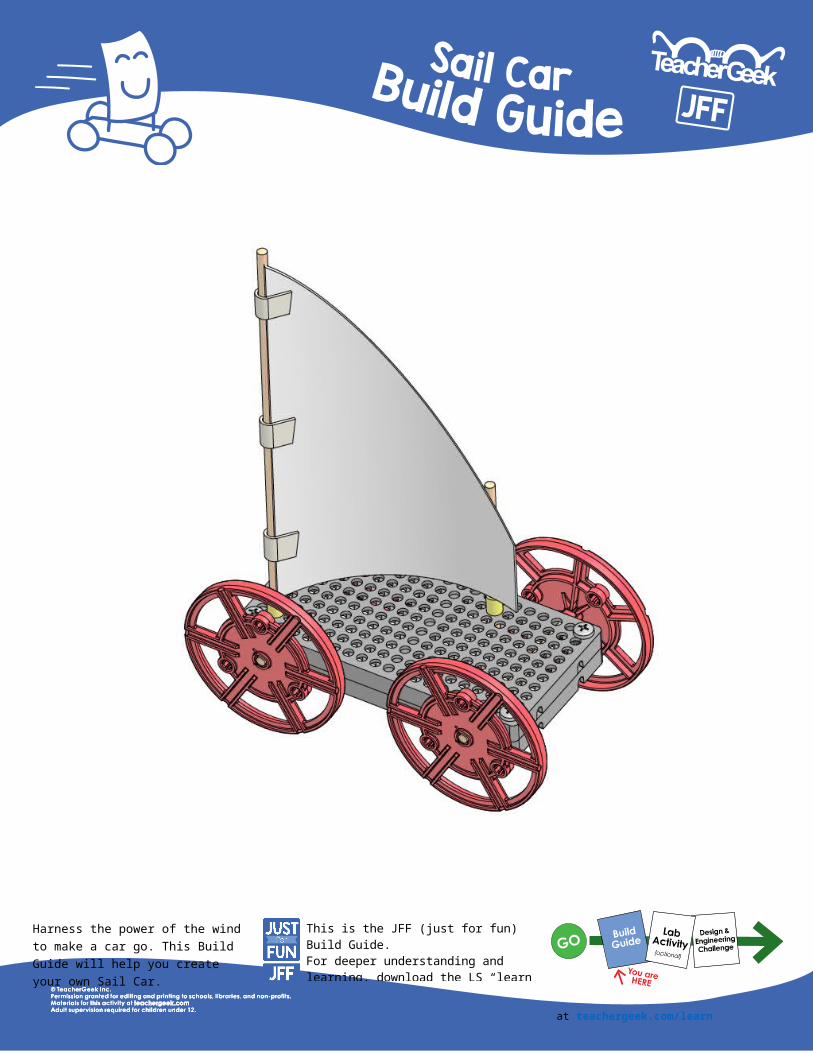
This guide will take you through the simple process of creating a Sail Car.
Harness the power of the wind to make a car go. This Build Guide will help you create your own Sail Car.
This is the JFF (just for fun) Build Guide.For deeper understanding and learning, download the LS “learn stuff” documents at teachergeek.com/learn
LS and Challenge documents available at teachergeek.com/learn
It is recommended that this step is done with the adult assistance/supervision.
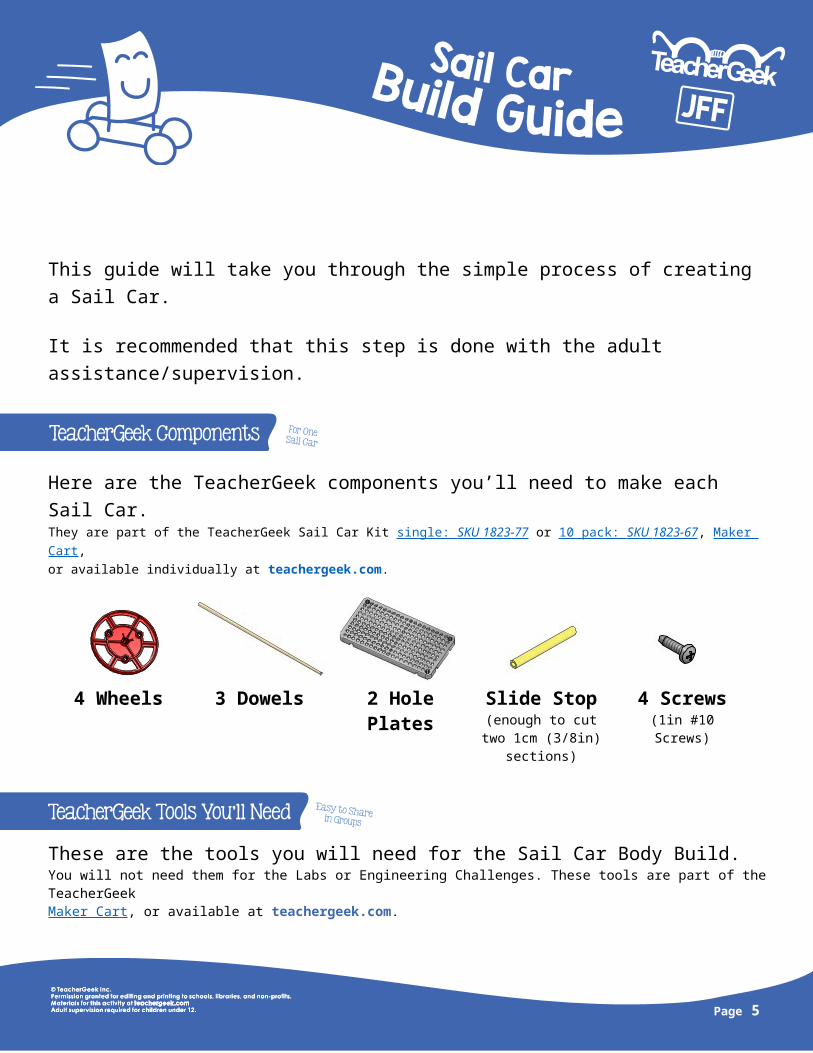
Here are the TeacherGeek components you’ll need to make each Sail Car.They are part of the TeacherGeek Sail Car Kit single: SKU 1823-77 or 10 pack: SKU 1823-67 , Maker Cart, or available individually at teachergeek.com.
4 Wheels 3 Dowels 2 Hole Plates
Slide Stop(enough to cut two 1cm (3/8in)
sections)
4 Screws(1in #10 Screws)
These are the tools you will need for the Sail Car Body Build. You will not need them for the Labs or Engineering Challenges. These tools are part of the TeacherGeek Maker Cart, or available at teachergeek.com.
Multi-CutterSKU 1823-81
Or anything else that can cut dowels & slide stop
ReamerSKU 1823-87
Phillips Screwdriver
SKU 1823-90
Hammer (optional)SKU 1824-41
Caution: Tools are to be used by ages 13+, or with close adult supervision.
Page 2

Page 3

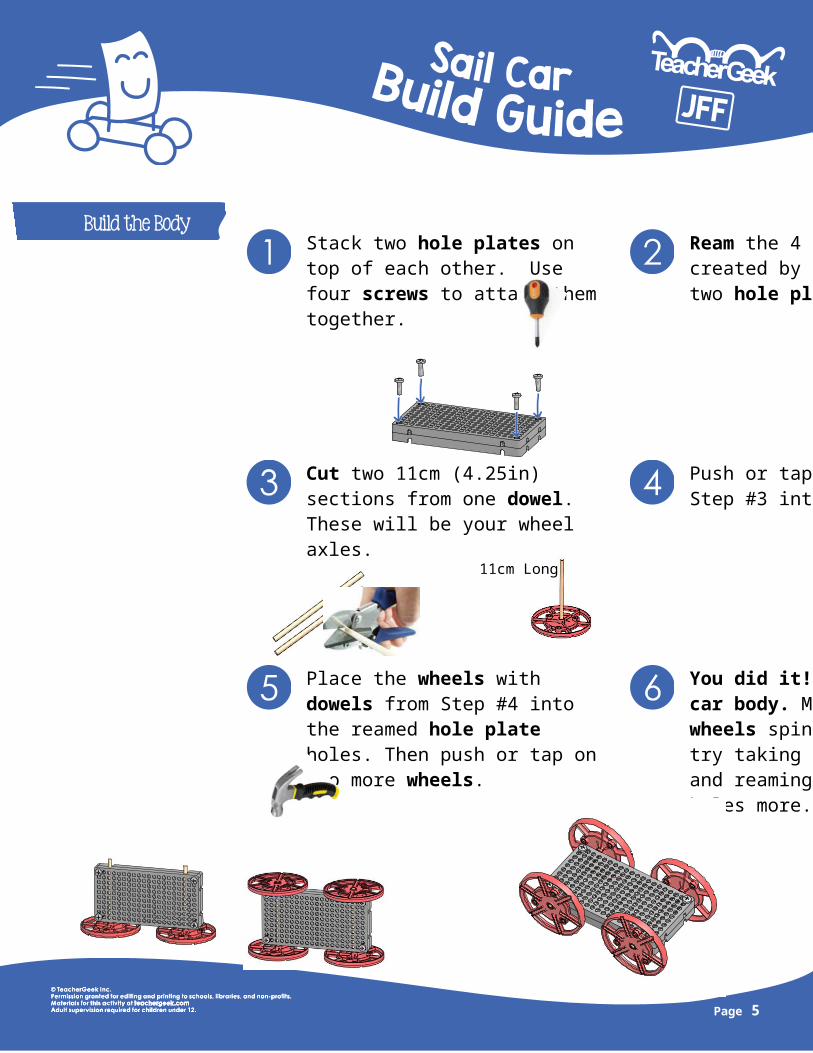
Stack two hole plates on top of each other. Use four screws to attach them together.
Ream the 4 holes that were created by attaching the two hole plates.
Cut two 11cm (4.25in) sections from one dowel. These will be your wheel axles.
Push or tap the dowels from Step #3 into wheels.
Place the wheels with dowels from Step #4 into the reamed hole plate holes. Then push or tap on two more wheels.
You did it! You made the car body. Make sure the wheels spin easily. If not, try taking the wheels off and reaming the hole plate holes more.
11cm Long
Page 4
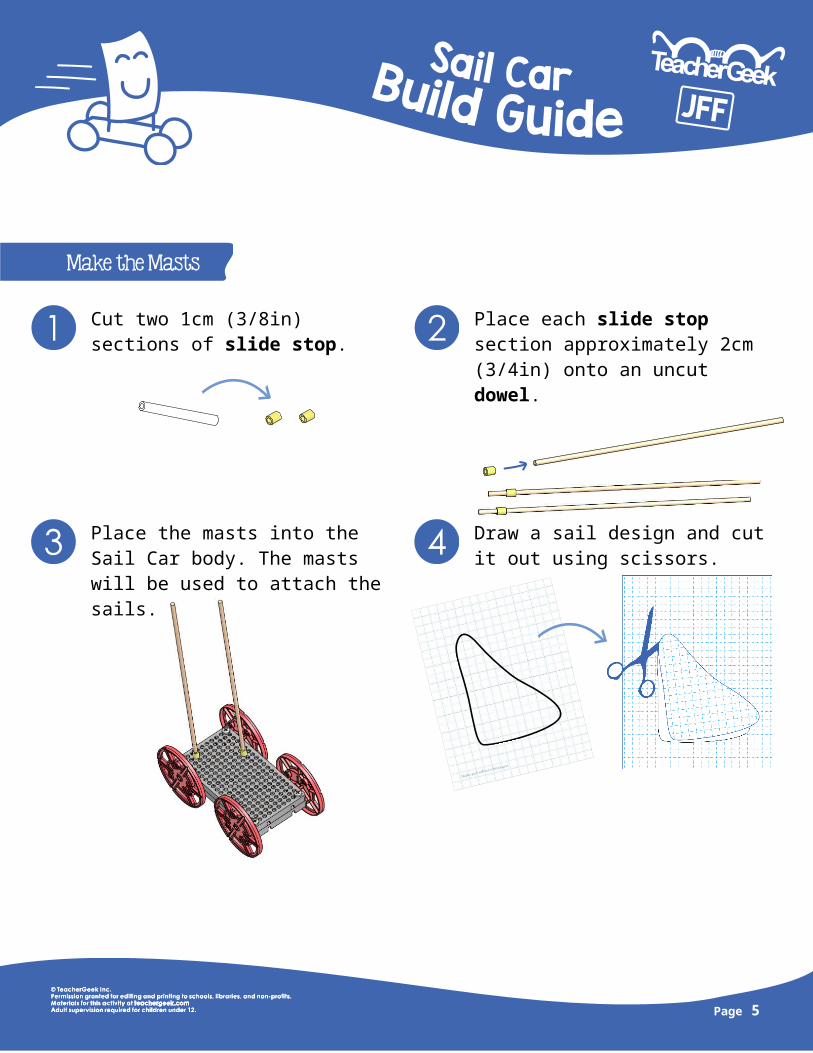
Cut two 1cm (3/8in) sections of slide stop.
Place each slide stop section approximately 2cm (3/4in) onto an uncut dowel.
Place the masts into the Sail Car body. The masts will be used to attach the sails.
Draw a sail design and cut it out using scissors.
Tape your sail to the dowel masts.
You’re done!Use a fan to push your Sail Car. Next, try the Design & Engineering Challenge.documents at teachergeek.com/learn
Page 5
Make your sail from this paper.
Page 6