Embed Size (px)
Citation preview

Web Forms

Web Forms
Survey or poll
Contact us
Sign up for an email newsletter
Register for an event
Submit comments or feedback about our site
Log in to a members-only section of the site
All our web pages thus far have had a one-way flow of information, from us to our web visitors. Now we'll see how our visitors can send information back to us via a web form. There are a number of reasons we might want our audience to fill out a form on our site:
Once the information in a web form is submitted, a web server is required to process the information. That is an advanced topic, so we'll just focus on the designing of the web form, not the processing.

The <form> ElementTo create a web form on a page, we use the opening and closing <form> and </form> tags:
The method attribute determined in which format the submitted data will be sent. The two possible values are "post" and "get".
All elements of the form must reside within the form element. As we have not added any elements to this example form yet, nothing would display on the page.
<form method="post" action="process.php">
<!-- All form content goes here -->
</form>
The action attribute declares which file will receive and process the data once submitted. This will be a file written in a scripting language, such as PHP or ASP.

Text BoxLet's begin adding some form elements. The most versatile component of a form is the <input> element. Here we are adding two text fields:
The type attribute determines which kind of input the field will be. A value of "text" creates a single-line text box with the size attribute determining the width in characters.
We must define the name attribute and supply a unique value for each element of a web form that collects data from the user. This will be used later by the web server.
<form method="post" action="process.php">
First Name: <input type="text" size="20" name="firstname" /><br />
Last Name: <input type="text" size="30" name="lastname" /><br />
</form>

Radio ButtonsBy changing the type attribute to "radio", we can create a set of options, of which the user can choose only one:
Notice that each radio option has its own input element, with the identical name attribute. Only the value attribute differs.
These are known as radio buttons because older cars used to have a set of buttons to press in for different radio stations. When a new button was pressed in, the old button would pop out.
<form method="post" action="process.php">
Eye Color:<br />
<input type="radio" name="eye" value="brown" />Brown<br />
<input type="radio" name="eye" value="blue" />Blue<br />
<input type="radio" name="eye" value="green" />Green<br />
<input type="radio" name="eye" value="other" />Other<br />
</form>
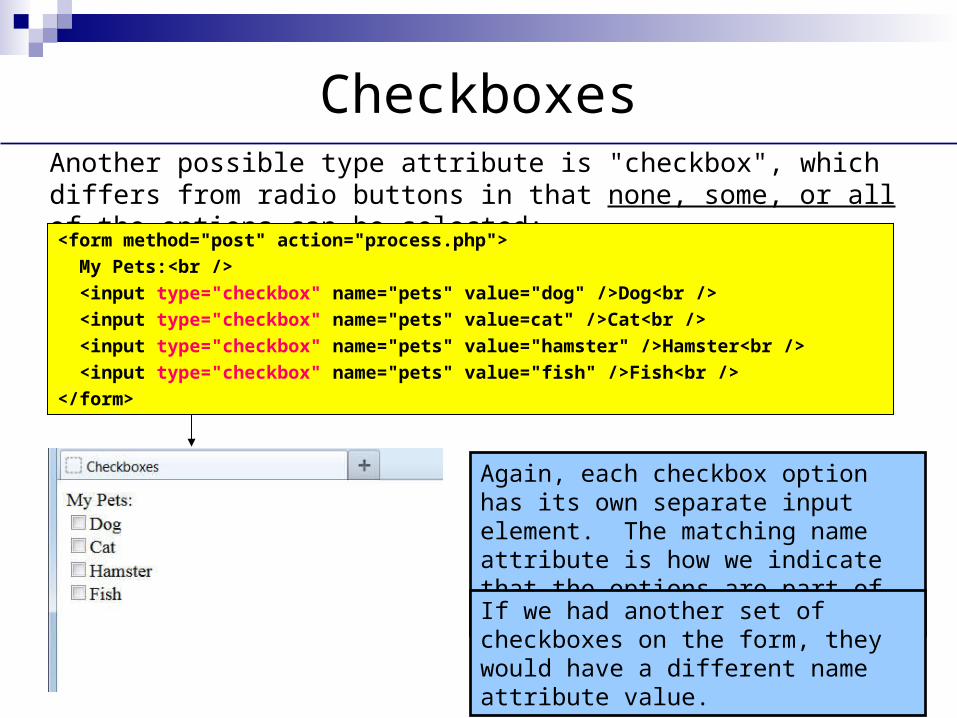
CheckboxesAnother possible type attribute is "checkbox", which differs from radio buttons in that none, some, or all of the options can be selected:
Again, each checkbox option has its own separate input element. The matching name attribute is how we indicate that the options are part of the same list.
<form method="post" action="process.php">
My Pets:<br />
<input type="checkbox" name="pets" value="dog" />Dog<br />
<input type="checkbox" name="pets" value=cat" />Cat<br />
<input type="checkbox" name="pets" value="hamster" />Hamster<br />
<input type="checkbox" name="pets" value="fish" />Fish<br />
</form>
If we had another set of checkboxes on the form, they would have a different name attribute value.

Drop-down ListWe can use the select and option elements together to create a drop-down list of options on our form:
The name attribute is applied to the select element, not the individual option elements.
<form method="post" action="process.php">
Foreign Languages Spoken:<br />
<select name="language">
<option value="spanish">Spanish</option>
<option value="french">French</option>
<option value="japanese">Japanese</option>
<option value="arabic">Arabic</option>
</select>
</form>
Drop-down lists are useful, as they can save us a lot of real estate on the screen, especially when there are a lot of options from which to choose.

Large Text BoxIf a single-line text box isn't big enough, we can use the textarea element to present a larger, expandable box that can hold a lot of text:
The width and height of the box that displays on the web page is controlled by the rows and cols attributes, respectively.
<form method="post" action="process.php">
Tell us some more about yourself:<br />
<textarea name="more" rows="8" cols="30">
Type here.
</textarea>
</form>
Whatever text is placed between the opening and closing <textarea> tags will display in the box itself when the page first loads. This could serve, for example, to provide the user with more instructions.

Preselecting OptionsSometimes, we want to prefill or preselect form data for our visitors. We can do so by using these special attributes:
First Name: <input type="text" size="20" name="firstname" value="John" />
...
<input type="radio" name="eye" value="brown" checked="checked" />Brown
...
<input type="checkbox" name="pets" value="dog" checked="checked" />Dog
<input type="checkbox" name="pets" value=cat" checked="checked" />Cat
...
<option value="french" selected="selected">French</option>
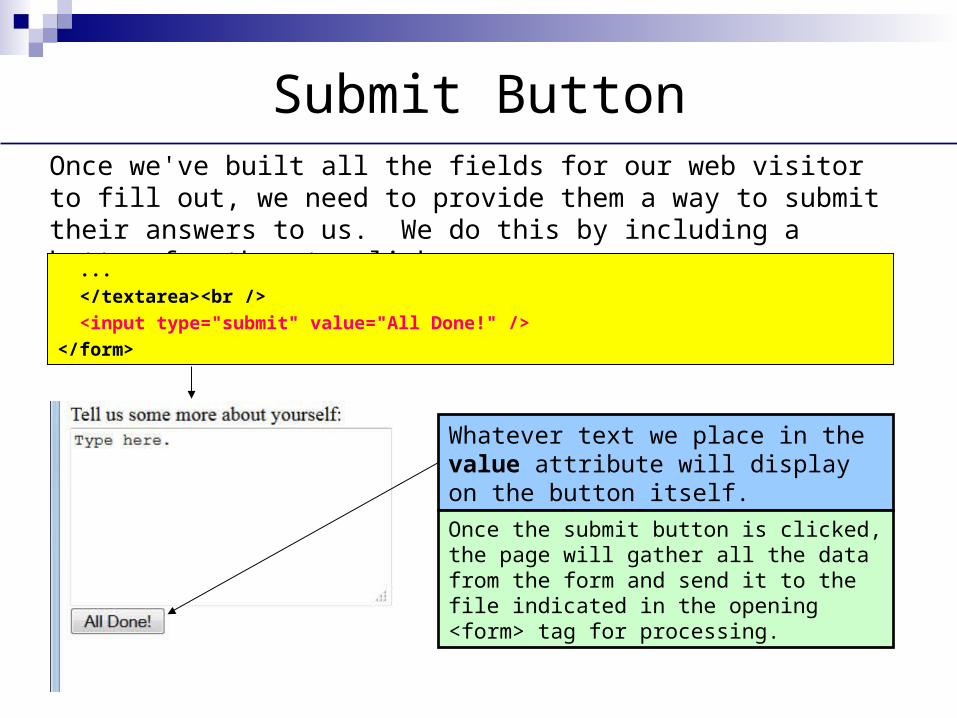
Submit ButtonOnce we've built all the fields for our web visitor to fill out, we need to provide them a way to submit their answers to us. We do this by including a button for them to click:
...
</textarea><br />
<input type="submit" value="All Done!" />
</form>
Whatever text we place in the value attribute will display on the button itself.
Once the submit button is clicked, the page will gather all the data from the form and send it to the file indicated in the opening <form> tag for processing.

Fieldset and LegendWe can group form fields together and caption them using the <fieldset> and <legend> elements:<form method="post" action="process.php">
<fieldset>
<legend>Introduce Yourself</legend>
...
</fieldset>
</form>
The fieldset will draw a line surrounding the form elements within it.
Multiple fieldset and legend pairs can be used within a single form element. For example, they could be used to set apart and title different sections of the form.
We can caption the group of form fields with whatever text we place within the opening and closing <legend> tags.

CSS Form StylingWith a dash of CSS styling, we can make our form more presentable to our visitors: