Embed Size (px)
Citation preview

Symon Communications, Inc500 North Central Expressway, Suite 175,
Plano, TX 75074972-578-8484 http://www.symon.com
W e b C o n s o l eU s e r ’ s G u i d e

NoticeCopyright © 2007 Symon Communications, Inc. All Rights Reserved.
This publication is protected by copyright and all rights are reserved. No part of this book may be reproduced or transmitted by any means or in any form, without prior written consent from Symon Communications, Inc.
The information in this publication has been carefully checked and is believed to be accurate. Symon Communications, Inc. assumes no liability for any inaccuracies that may be found in this publication.
In the interest of continued product development, Symon Communications, Inc. reserves the right to make improvements in this publication and the products it describes at any time without notice or obligation.
Publication NumberWEBCONSOLE-0518USR-V9.2-0407
First Issue, April, 2007
This publication (ses92_webconsole.pdf) is available in PDF format on the installation CD and from the Symon Support Web Site.
sbhpdf-041107
Trademark AcknowledgmentsSymon, Symon Enterprise Server, SES, and Symon NetLite II are registered trademarks of Symon Communications, Inc.
Microsoft Windows 95/98/2000/2003 and Windows XP are trademarks or registered trademarks of Microsoft Corporation.
All other products mentioned in this publication are trademarks or registered trademarks of their respective companies.
How to Reach UsSymon Communications, Inc.500 North Central Expressway, Suite 175Plano, TX 75074
Main Web Site: http://www.symon.comSupport Web Site: http://support.symon.com
Sales E-mail: [email protected]
North American CustomersPhone: (972) 578-8484Fax: (972) 422-1680Support E-mail: [email protected]
International CustomersPhone: +44 208 663 1810Fax: +44 208 663 1979Support E-mail: [email protected]

iii
Contents
Introduction v
About WebConsole . . . . . . . . . . . . . . . . . . . . . . . . . . . . . . . . . . . . . . . . . vHow to Use this Manual. . . . . . . . . . . . . . . . . . . . . . . . . . . . . . . . . . . . . . vWhere You Can Get More Information . . . . . . . . . . . . . . . . . . . . . . . . .viGetting Help and Support . . . . . . . . . . . . . . . . . . . . . . . . . . . . . . . . . . . .viOnline Help . . . . . . . . . . . . . . . . . . . . . . . . . . . . . . . . . . . . . . . . . . . . .viContacting Technical Support . . . . . . . . . . . . . . . . . . . . . . . . . . . . . .viAccessing the Symon Support Web Site . . . . . . . . . . . . . . . . . . . . . vii
Chapter 1: Getting Started 1WebConsole Features. . . . . . . . . . . . . . . . . . . . . . . . . . . . . . . . . . . . . . . . 2
Dynamic Messaging. . . . . . . . . . . . . . . . . . . . . . . . . . . . . . . . . . . . . . . 2Priority Messaging . . . . . . . . . . . . . . . . . . . . . . . . . . . . . . . . . . . . . . . . 2Message Center . . . . . . . . . . . . . . . . . . . . . . . . . . . . . . . . . . . . . . . . . . 2
Starting WebConsole . . . . . . . . . . . . . . . . . . . . . . . . . . . . . . . . . . . . . . . . 3Checking License Usage . . . . . . . . . . . . . . . . . . . . . . . . . . . . . . . . . . . 4Changing Your Password . . . . . . . . . . . . . . . . . . . . . . . . . . . . . . . . . . 5Closing WebConsole . . . . . . . . . . . . . . . . . . . . . . . . . . . . . . . . . . . . . . 6
Chapter 2: Dynamic Messaging 7Introduction . . . . . . . . . . . . . . . . . . . . . . . . . . . . . . . . . . . . . . . . . . . . . . . 8Creating a Dynamic Category . . . . . . . . . . . . . . . . . . . . . . . . . . . . . . . . . 8
Adding a Dynamic Category. . . . . . . . . . . . . . . . . . . . . . . . . . . . . . . . 9Adding Dynamic Categories to Layouts and Site Templates . . . . . 10
Selecting a Dynamic Category and Message . . . . . . . . . . . . . . . . . . . . . 11
SES WebConsole

iv Contents
Editing a Dynamic Message . . . . . . . . . . . . . . . . . . . . . . . . . . . . . . . . . . 16Deleting a Dynamic Message . . . . . . . . . . . . . . . . . . . . . . . . . . . . . . . . . 18
Deleting a Single Message . . . . . . . . . . . . . . . . . . . . . . . . . . . . . . . . . 18Deleting One Message from a Group . . . . . . . . . . . . . . . . . . . . . . . 19Deleting All Messages . . . . . . . . . . . . . . . . . . . . . . . . . . . . . . . . . . . . 21
Chapter 3: Priority Messaging 23Introduction . . . . . . . . . . . . . . . . . . . . . . . . . . . . . . . . . . . . . . . . . . . . . . 24Sending a Priority Message. . . . . . . . . . . . . . . . . . . . . . . . . . . . . . . . . . . 24Adding Text to a Priority Message. . . . . . . . . . . . . . . . . . . . . . . . . . . . . 27Removing a Priority Message . . . . . . . . . . . . . . . . . . . . . . . . . . . . . . . . . 31
Chapter 4: Message Center 33Introduction . . . . . . . . . . . . . . . . . . . . . . . . . . . . . . . . . . . . . . . . . . . . . . 34Selecting Destinations for a Message. . . . . . . . . . . . . . . . . . . . . . . . . . . 34Configuring Destination Options . . . . . . . . . . . . . . . . . . . . . . . . . . . . . 36
Add/Remove Destinations. . . . . . . . . . . . . . . . . . . . . . . . . . . . . . . . 36Configure Non-SDA Destinations . . . . . . . . . . . . . . . . . . . . . . . . . . 38Configure SDA Destinations . . . . . . . . . . . . . . . . . . . . . . . . . . . . . . 39
Creating Message Text . . . . . . . . . . . . . . . . . . . . . . . . . . . . . . . . . . . . . . 41Edit Tools for Non-SDA Destinations . . . . . . . . . . . . . . . . . . . . . . 41
Scroll Text Tool . . . . . . . . . . . . . . . . . . . . . . . . . . . . . . . . . . . . . 41Blink Text Tool . . . . . . . . . . . . . . . . . . . . . . . . . . . . . . . . . . . . . . 42Insert Pause Tool . . . . . . . . . . . . . . . . . . . . . . . . . . . . . . . . . . . . 42Insert Tune . . . . . . . . . . . . . . . . . . . . . . . . . . . . . . . . . . . . . . . . . 43Insert Alignment Tool . . . . . . . . . . . . . . . . . . . . . . . . . . . . . . . . 44Text Font Tool . . . . . . . . . . . . . . . . . . . . . . . . . . . . . . . . . . . . . . 45
Edit Tools for All Destinations . . . . . . . . . . . . . . . . . . . . . . . . . . . . 45Insert Date & Time Tool . . . . . . . . . . . . . . . . . . . . . . . . . . . . . . 45Insert Date Tool . . . . . . . . . . . . . . . . . . . . . . . . . . . . . . . . . . . . . 46Insert Time Tool . . . . . . . . . . . . . . . . . . . . . . . . . . . . . . . . . . . . . 46Text Color Tool . . . . . . . . . . . . . . . . . . . . . . . . . . . . . . . . . . . . . 47
Sending a Message . . . . . . . . . . . . . . . . . . . . . . . . . . . . . . . . . . . . . . . . . 48
Index 51
Symon Communications, Inc.

v
Introduction
About WebConsoleSymon WebConsole is a Web-based software application that allows you to create and send messages to video displays, NetLite II signs, DeskView, and TrayView. It is a part of the Symon Enterprise Server (SES) software, and works with Symon Design Studio.
How to Use this ManualThis publication is written for individuals who create and/or send messages using WebConsole. The procedures in this manual will help you perform the following tasks:
• choose and play a pre-built message on a video display with the Dynamic Messaging application
• choose and play a pre-built message that temporarily takes over a video display with the Priority Messaging application
• create and send a message to multiple types of displays (video displays, NetLites, DeskView, and TrayView) with the Message Center application
SES WebConsole

vi Introduction
Where You Can Get More InformationCertain tasks, such as creating pre-built messages and setting up dynamic areas in video display formats, must be done in Symon Design Studio before using the WebConsole applications. The following publication provides detailed information about Design Studio.
Symon Design Studio - Explains how to create custom messages for broadcast sites and Symon Digital Appliances®(SDAs). As well as simple message creation, Symon Design Studio offers additional features, such as categories, channels, and layouts.
Getting Help and SupportYou can get assistance by accessing the online help, contacting technical support, or viewing the Symon Communications, Inc. support Web site.
Online Help WebConsole includes basic online help for most windows. You can access help in a window by clicking Help in the task bar at the top of the window. A brief description of the window’s function is displayed.
Contacting TechnicalSupport
If you experience problems using WebConsole, please contact the help desk at Symon Communications, Inc.
• North American Customers: Contact the Symon Help Desk at 972-578-8484, Monday through Friday between 7:00 a.m. and 7:00 p.m., Central Daylight Saving Time (CDT), or send an e-mail to [email protected].
• International Customers: Contact the Symon Help Desk at + 44 208 663 1810, Monday through Friday between 9:00 a.m. and 5:00 p.m., Greenwich Mean Time (GMT), or send an e-mail to [email protected].
Symon Communications, Inc.

Getting Help and Support vii
Accessing theSymon Support
Web Site
You can visit Symon Communications, Inc.’s support Web site athttp://support.symon.com. There you can obtain answers to FAQs (frequently asked questions) and download product information.
SES WebConsole

viii Introduction
Symon Communications, Inc.

1CHAPTER
1
Getting Started
In this Chapter:• WebConsole Features
• Starting WebConsole

2 CHAPTER 1Getting Started
WebConsole FeaturesSymon WebConsole is Web-based software that allows you to create and send messages to video displays, NetLite II signs, DeskView, and TrayView. It is a part of the Symon Enterprise Server (SES) software, and works with Symon Design Studio.
WebConsole offers three applications, which are described in the following sections.
Each of the three WebConsole applications is licensed separately. If you do not have a license for an application, it will be grayed out on the WebConsole main window, and you will be unable to select it. If you have a question about application availability, contact your Symon Enterprise Server (SES) Administrator.
Dynamic Messaging The Dynamic Messaging application allows you to choose and play a pre-built message on a video display. Dynamic Messaging applies only to SDAs/video displays. This feature is useful for employee notification and reminder messages.
(Messages must be already created in Symon Design Studio, and dynamic categories must be set up on the video display.)
Priority Messaging The Priority Messaging application allows you to take over the whole screen of a video display temporarily to show an urgent pre-built message. Priority Messaging applies only to SDAs/video displays.
(As with Dynamic Messaging, messages must be already created in Symon Design Studio.)
Message Center The Message Center application allows you to create a message and send it to all types of displays: video displays, NetLites, DeskView, and TrayView.
(If you send messages to a video display, a dynamic category must be setup on the video display. This is done through Symon Design Studio, and instructions are included in this guide.)
Symon Communications, Inc.

Starting WebConsole 3
Starting WebConsoleWebConsole is available from any desktop that has SES installed. To start WebConsole, follow the steps below.
1 Open your Web browser.
2 In the address bar of Internet Explorer, type http://sesserver/webconsole and press Enter (sesserver is the name of your Symon Enterprise Server server). The Login window appears.
3 In the User name and Password boxes, type your current user name and password and press Enter.
Note: The User name is always “config” and the Password is “symon” until you change it.
SES WebConsole

4 CHAPTER 1Getting Started
The WebConsole main window appears.
4 To select an application, click the name of the one you want.
Checking LicenseUsage
Each WebConsole application is licensed separately, and a certain number of licenses have been purchased. If all licenses are in use and a user tries to login, he will be told no licenses are available. He must wait until someone logs off.
To check how many licenses are in use, follow the steps below.
1 Click Report Current License Usage on the WebConsole main window. A dialog box opens, similar to the one shown below:
Symon Communications, Inc.

Starting WebConsole 5
2 When you finish viewing the information, click OK.
Changing YourPassword
You can change the default password you use to login to WebConsole. To change the password, follow the steps below.
1 On the WebConsole login window, click Modify Password. The modify password window appears.
2 In the Old Password box, key in your old password and press Tab.
3 In the New Password box, key in your new password and press Tab.
SES WebConsole
6 CHAPTER 1Getting Started
Note: Your password can be 5 and 15 alphanumeric characters, with any combination of letters and/or numbers. Special characters—@#$%^&*:;/— are not permitted. Case is sensitive!
4 In the Retype New Password box, key in your new password again and click Continue.
5 To login to WebConsole, click Login.
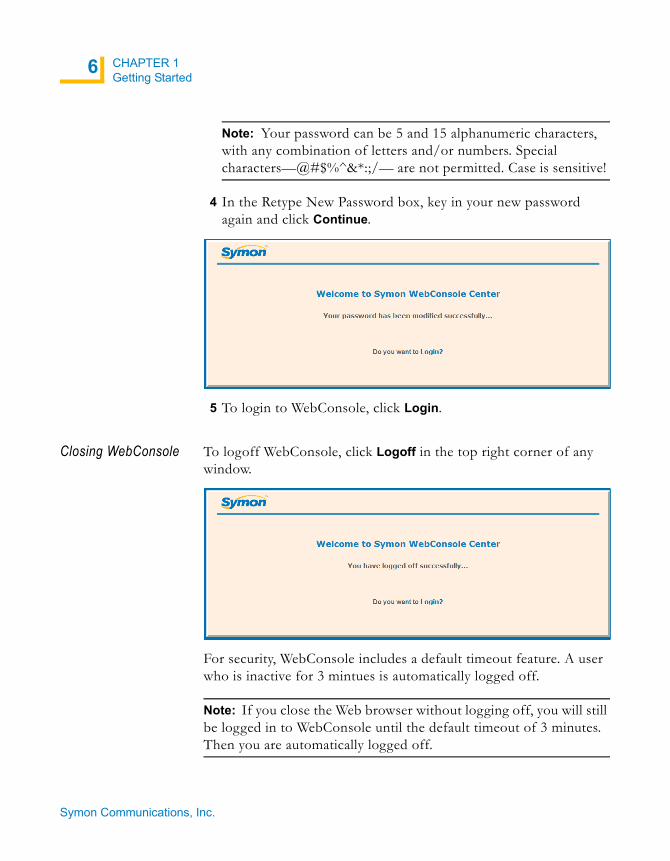
Closing WebConsole To logoff WebConsole, click Logoff in the top right corner of any window.
For security, WebConsole includes a default timeout feature. A user who is inactive for 3 mintues is automatically logged off.
Note: If you close the Web browser without logging off, you will still be logged in to WebConsole until the default timeout of 3 minutes. Then you are automatically logged off.
Symon Communications, Inc.

2CHAPTER
7
Dynamic Messaging
In this Chapter:• Introduction• Creating a Dynamic Category
• Selecting a Dynamic Category and Message
• Editing a Dynamic Message
• Deleting a Dynamic Message

8 CHAPTER 2Dynamic Messaging
IntroductionWebConsole’s Dynamic Messaging application uses messages that are pre-built in Design Studio. Dynamic messaging is available only to SDAs/video displays.
Note: Check with your SES Administrator to see if pre-built messages have been created. (It is a good idea to have a folder in Design Studio’s Messages section for WebConsole messages.)
Creating a Dynamic CategoryDynamic Categories are standard categories that support message text created in WebConsole. Dynamic Categories are created in Design Studio and assigned to site templates or layout areas. You must have access to Design Studio to create and assign dynamic categories.
Note: Check with your Symon Enterprise Server (SES) Administrator to see if dynamic categories are already set up.
Symon Communications, Inc.

Creating a Dynamic Category 9
Adding a DynamicCategory
You can add dynamic categories by inserting them into the Symon Design Studio toolbox.
1 In the Design Studio main window, click on the Toolbox tab to open the Toobox window.
2 Click on Dynamic Categories to open the current list of dynamic categories.
SES WebConsole

10 CHAPTER 2Dynamic Messaging
3 Right-click in the window and select Insert from the pop-up menu. Symon Design Studio inserts a new dynamic category with the default name of New Item.
4 Backspace over the default name and replace it with a unique name, then press Enter. Symon Design Studio adds the new dynamic category to the list.
5 Repeat steps 3 and 4 to add additional dynamic categories.
Adding DynamicCategories to
Layouts and SiteTemplates
You can add dynamic categories to layout areas and site templates. Simply drag & drop a category from the Toolbox list into a particular layout area or site template.
Note: For additional information on adding content to layout areas and site templates or on working with dynamic categories, see the Symon Design Studio User’s Guide.
Symon Communications, Inc.

Selecting a Dynamic Category and Message 11
Selecting a Dynamic Category and MessageFollow the steps below to select a dynamic category and message.
1 In the WebConsole main window, click Dynamic Messaging. The Select a Dynamic Category and Message window appears.
2 In the Available Dynamic Categories boxes, click on the location to which you want to send the message, and then click Insert. The Select a Message Template window appears.
SES WebConsole

12 CHAPTER 2Dynamic Messaging
3 If your messages are stored in folders, double click the folder in the Message Folders box. The messages in that folder appear in the Available Messages box.
4 Click the name of a message to select it. The message appears in the Message Preview box.
5 Click Next. The Edit Dynamic Message Properties window appears.
Symon Communications, Inc.

Selecting a Dynamic Category and Message 13
6 Set the Message Lifetime Options. (The Message Lifetime is a restriction that controls when a message is available for play. This restriction overrides any playtime scheduled for categories to which the message is assigned.)
- No Lifetime – the default is checked. This means that the message will continue to play indefinitely. To change it, uncheck the box and use the other options to select play dates and times.
- Available For Play On – default is current date. To change it, click the calendar button and select another date.
- at (hh:mm:ss) – to specify the time, click the arrow beside each box and select the hour:minutes:seconds from the list.
- Unavailable For Play After – default is current date. To change it, click the calendar button and select another date.
- at (hh:mm:ss) – to specify the time, click the arrow beside each box and select the hour:minutes:seconds from the list.
- Synchronized Across All Time Zones – default is checked. If the video displays to which you’re sending this message are in more than one time zone, the message will play at the same time in each time zone. For example, if you set it to play from 11:00:00 a.m. to 2:00:00 p.m., the message will play 11-2 in each time zone.
Note: In the example, the message tells employees to turn in their timesheets by noon, and the message is set to play from 7:30 a.m. to 12:00 p.m. on that day only.
SES WebConsole

14 CHAPTER 2Dynamic Messaging
7 Set the Message Play Options. (The Message Play Options allow you to specify how many times to play the message or how often the message will play.)
- Play Only _ Times – Key in the number of times you want the message to play, or
- Make Available Every _ Second(s) – Key in the number of seconds between message plays.
- Seconds Per Slide – default is 10 seconds; to change it, key in another number.
8 If desired, you can view and/or edit the Message Elements.
a) To see the message elements, check the Show All Message Elements box.
b) To edit text, click Edit at the end of the line showning the text you want to edit.
c) Click in the box and delete any text you want to remove. Key in your new text and then click Save.
Note: Use the Style buttons to apply color, bold, italic, or underline properties to your text.
Symon Communications, Inc.

Selecting a Dynamic Category and Message 15
9 When you finish editing message properties, click Save.
10 Click OK. The Select a Dynamic Category and Message window appears with the selected message in the Available Dynamic Messages box. (The message has been sent.)
SES WebConsole

16 CHAPTER 2Dynamic Messaging
Editing a Dynamic MessageWhen a dynamic message is scheduled, it appears in the Available Dynamic Messages box in the Select a Dynamic Category and Message window. To change the message or any of its properties, follow the steps below.
1 In the WebConsole main window, click Dynamic Messaging. The Select a Dynamic Category and Message window appears.
Symon Communications, Inc.

Editing a Dynamic Message 17
2 In the Available Dynamic Messages box, click on the message you want to change and then click Edit. The Edit Dynamic Message properties window appears, showing the message properties.
3 Make your changes to the message properties and click Save.
Note: See the previous section if you need instructions for setting the properties or entering text.
4 Click OK.
SES WebConsole

18 CHAPTER 2Dynamic Messaging
Deleting a Dynamic MessageWhen a dynamic message is scheduled, it appears in the Available Dynamic Messages box in the Select a Dynamic Category and Message window until it is deleted.
Deleting a SingleMessage
Follow these steps to delete a dynamic message.
1 In the WebConsole main window, click Dynamic Messaging. The Select a Dynamic Category and Message window appears.
The time set for this message to play has expired, so the message has a red border.
2 Click Delete.
Symon Communications, Inc.

Deleting a Dynamic Message 19
3 Click OK.
4 Click OK.
Deleting OneMessage from a
Group
If there are several messages in the Available Dynamic Messages box but you only want to delete one message, follow these steps.
1 Click on the message you want to delete and then click Delete.
SES WebConsole

20 CHAPTER 2Dynamic Messaging
2 Click OK.
3 Click OK. The other message(s) will remain in the box.
Symon Communications, Inc.

Deleting a Dynamic Message 21
Deleting AllMessages
If there are several messages in the Available Dynamic Messages box and you want to delete all of them, follow these steps.
1 To delete all of the messages, click Delete All.
2 Click OK.
3 Click OK.
SES WebConsole

22 CHAPTER 2Dynamic Messaging
Symon Communications, Inc.

3CHAPTER
23
Priority Messaging
In this Chapter:• Introduction• Sending a Priority Message
• Adding Text to a Priority Message
• Removing a Priority Message

24 CHAPTER 3Priority Messaging
IntroductionPriority messages are pre-built in Design Studio for use in WebConsole. Priority messaging is available only to SDAs/video displays.
Note: Check with your SES Administrator to see if pre-built priority messages have been created. (It is a good idea to have a folder in Design Studio’s Messages section for WebConsole messages.)
There are two kinds of priority messages: those that can be edited and those that cannot be edited. Priority messages that can be edited are discussed in a later section, “Adding Text to a Priority Message” on page 27. Priority messages that cannot be edited are discussed in the following section.
Sending a Priority MessageFollow the steps below to send a pre-built, uneditable priority message.
1 In the WebConsole main window, click Priority Messaging. The Select a Message Template window appears.
Symon Communications, Inc.

Sending a Priority Message 25
2 If your messages are stored in folders, double click the folder in the Message Folders box. The messages in that folder appear in the Available Messages box.
3 Click the name of a message to select it. The message appears in the Message Preview box.
4 Click Next. The Select Broadcast Sites window appears.
SES WebConsole

26 CHAPTER 3Priority Messaging
5 In the Available Sites box, click the checkbox(es) of the site(s) to which you want to send the priority message.
- To select all the sites in the list click Select All.
- If all the sites are selected and you do not want all the sites, click Unselect All and then click the sites you want.
6 Click Send Message to send the priority message.
Symon Communications, Inc.

Adding Text to a Priority Message 27
Adding Text to a Priority MessagePriority messages that can be edited will allow you to add text. For example, a message is set up for meeting announcements. When you want to send the message, you key in the correct text.
Editable priority messages must have the property setting shown in the illustration below.
A sample message named Team Meeting has been created in Design Studio. In the Element Properties section, the Element ID must be set to PriorityMessageText, as shown. This message will be editable in WebConsole’s Priority Messaging application.
Note: If a priority message is editable, you must add text to it before you send it. If you don’t, the message will be blank. Text entered through WebConsole writes over any text already in the message. If no text is entered through WebConsole, blank space writes over any existing text.
SES WebConsole

28 CHAPTER 3Priority Messaging
Follow the steps below to add text to a priority message.
1 In the WebConsole main window, click Priority Messaging. The Select a Message Template window appears.
2 If your messages are stored in folders, double click the folder in the Message Folders box. The messages in that folder appear in the Available Messages box.
3 Click the name of a message to select it. The message appears in the Message Preview box.
Symon Communications, Inc.

Adding Text to a Priority Message 29
4 Click Next. The Select Broadcast Sites window appears.
5 In the Available Sites box, click the checkbox(es) of the site(s) to which you want to send the priority message.
- To select all the sites in the list click Select All.
- If all the sites are selected and you do not want all the sites, click Unselect All and then click the sites you want.
The current message text is shown in the Text column in the Available Sites box.
SES WebConsole

30 CHAPTER 3Priority Messaging
6 Click in the Priority Message Text box and key in the new text.
7 Click Send Message to send the new priority message.
8 Click OK.
Symon Communications, Inc.

Removing a Priority Message 31
Removing a Priority MessageWhen the priority message is no longer needed, you can remove the message from the video display(s). Follow these steps to remove a message.
1 In the WebConsole main window, click Priority Messaging. The Select a Message Template window appears.
2 Click Next. The Select Broadcast Sites window appears.
SES WebConsole

32 CHAPTER 3Priority Messaging
3 In the Available Sites box, click the checkbox(es) of the site(s) from which you want to remove the priority message.
- To select all the sites in the list click Select All.
- If all the sites are selected and you do not want all the sites, click Unselect All and then click the sites you want.
4 Click Remove Message to remove the priority message.
5 Click OK.
Symon Communications, Inc.

4CHAPTER
33
Message Center
In this Chapter:• Introduction• Selecting Destinations for a Message
• Configuring Destination Options
• Creating Message Text
• Sending a Message

34 CHAPTER 4Message Center
IntroductionThe WebConsole Message Center allows you to send the same message to multiple types of displays (video displays, NetLites, DeskView, and TrayView) at the same time.
The process of creating a message in Message Center involves several steps which are divided into smaller sections for clarity. These include:
• Selecting destinations for a message.
• Configuring options for the destinations (both SDA and non-SDA).
• Creating the message text, with formatting for both SDA and non-SDA.
Selecting Destinations for a MessageFollow the steps below to select destinations for a message in Message Center.
1 In the WebConsole main window, click Message Center. The Select Destinations window appears.
Symon Communications, Inc.

Selecting Destinations for a Message 35
2 In the Available Destinations box, click on a location and then click > to add it to the Selected Destinations box.
3 Click Next. The Edit Message Properties window appears.
The selected destinations are listed in the box at the top right corner of the window.
SES WebConsole

36 CHAPTER 4Message Center
Configuring Destination OptionsMessage Center allows you to set play times and other options for both SDA and non-SDA destinations in the Edit Message Properties window. In addition, you can add or remove destinations that you have selected.
Add/RemoveDestinations
The message destinations that you selected in the Select a Destination window are listed in the box at the top right corner of the Edit Message Properties window.
Follow the steps below to change the selected destinations.
Symon Communications, Inc.

Configuring Destination Options 37
1 In the Edit Message Properties window, click Add/Remove Destinations. The Select Destinations pop-up window appears.
2 Make your new selections.
- To select all the available destinations, click Select All.
- To clear all the selections, click Clear Selection.
- To select an individual destination, click on the destination. (To select more than one destination in the same box, hold down the Ctrl key and click the destinations you want.)
3 Click Done. The Edit Message Properties window appears with the new destinations listed.
SES WebConsole

38 CHAPTER 4Message Center
Configure Non-SDADestinations
Follow the steps below to select configuration options for non-SDA destinations. (Non-SDA destinations include NetLite signs, DeskView, and TrayView.)
1 In the Edit Message Properties window, click the button after Configuration Options for Non-SDA Destinations.
2 Select the destination options.
- End Message After (hh:mm:ss) – to specify the time when the message should stop playing, click the arrow beside each box and select the hour:minute:second from the list.
- Re-display _Time(s) – click in the box and key in the number of times you want the message to play.
- Every (hh:mm:ss) – to specify the time between message plays, click the arrow beside each box and select the hour:minute:second from the list.
- Priority – the default is Follow; to change it, click in the box and select Yield, Round Robin, Interrupt, or Override.
- Slot Assignment – Default is selected; to change it, click in the box and select Automatic.
Note: It is important to put in configuration options to define the time you want the message to run, especially if you do not have access to WebConsole’s Dynamic Messaging application. If you don’t specify time limits, the message will continue to run until it is deleted in the Dynamic Messaging window. If you have any questions about this, ask your SES Administrator.
Symon Communications, Inc.

Configuring Destination Options 39
Configure SDADestinations
Follow the steps below to select configuration options for SDA destinations. (SDA destinations are video displays controlled by SDAs.)
1 In the Edit Message Properties window, click the button after Configuration Options for SDA Destinations.
2 Set the Message Lifetime Options. (The Message Lifetime is a restriction that controls when a message is available for play. This restriction overrides any playtime scheduled for categories to which the message is assigned.)
- No Lifetime – the default is checked. This means that the message will continue to play indefinitely. To change it, uncheck the box and use the other options to select play dates and times.
- Synchronized Across All Time Zones – default is checked. If the video displays to which you’re sending this message are in more than one time zone, the message will play at the same time in each time zone. For example, if you set it to play from 11:00:00 a.m. to 2:00:00 p.m., the message will play 11-2 in each time zone.
- Available For Play On – default is current date; to change it, click the calendar button and select another date.
- at (hh:mm:ss) – to specify the time, click the arrow beside each box and select the hour:minute:second from the list.
- Unavailable For Play After – default is current date. To change it, click the calendar button and select another date.
- at (hh:mm:ss) – to specify the time, click the arrow beside each box and select the hour:minute:second from the list.
SES WebConsole

40 CHAPTER 4Message Center
- Text Horizontal Alignment – Left is the default; to change it, click in the box and select Center, Right, or Indented.
- Text Vertical Alignment – Top is the default; to change it, click in the box and select Middle or Bottom.
- Crawling Text? – If you want the text to crawl, click the checkbox. (Text will crawl from right to left.)
- Crawl Rate – The speed at which the message text scrolls across the element from right to left. The default is 15; to change it, click in the box and key in another crawl rate (the higher the value, the faster the crawl rate).
3 Set the Message Play Options. (The Message Play Options allow you to specify how many times to play the message or how often the message will play.)
- Play Only _ Times – Key in the number of times you want the message to play, or
- Make Available Every _ Second(s) – Key in the number of seconds between message plays.
- Seconds Per Slide – default is 10 seconds; to change it, key in another number.
Note: It is important to put in configuration options to define the time you want the message to run, especially if you do not have access to WebConsole’s Dynamic Messaging application. If you don’t specify time limits, the message will continue to run until it is deleted in the Dynamic Messaging window. If you have any questions about this, ask your SES Administrator.
Symon Communications, Inc.

Creating Message Text 41
Creating Message TextWhen you create your message text, you can format or edit it before sending the message.
The Edit Message Properties window provides text editing tools for Non-SDA Destinations and for All Destinations.
• Selections made with the All Destinations editing tools will apply to all types of displays.
• Selections made with Non-SDA Destinations editing tools will apply only on non-SDA displays (such as NetLite signs and DeskView).
The editing tools are discussed in detail in the next two sections.
Edit Tools for Non-SDA Destinations
Messages that are sent only to non-SDA destinations (NetLites, DeskViews, TrayViews) can be formatted with any of the tools on the Message Edit Tools for Non-SDA Destinations toolbar.
These tools are described in the following sections.
Scroll Text Tool
The Scroll Text tool lets you change the scrolling attribute of selected message text. When formatted with the Scroll Text attribute, text scrolls on the sign from right to left. Highlight the text and click the Scroll Text tool.
In the message composition window, the text of your message appears in italics to visually indicate that it’s formatted with the scroll text attribute.
To remove this attribute, highlight the text and click the Scroll Text tool.
SES WebConsole

42 CHAPTER 4Message Center
Blink Text Tool
The Blink Text tool lets you change the blinking attribute of selected message text. When formatted with the Blink Text attribute, text flashes on and off when displayed on a physical or virtual sign. Highlight the text and click the Blink Text tool.
In the message composition window, the text of your message appears underlined to visually indicate that it’s formatted with the blink text attribute.
To remove this attribute, highlight the text and click the Blink Text tool.
Note: You can format message text with both the Blink Text and Scroll Text attributes so that the message text scrolls and flashes on and off at the same time.
Insert Pause Tool
The Insert Pause tool lets you insert a pause in the message. A pause between phrases in a message increases the readability of the message. Click the pointer in the message text where you want the pause to occur, then click the Insert Pause tool. The Insert Pause icon appears in the message text.
To remove this attribute, click the icon in the message text and press Delete.
Note: The pause lasts for the number of seconds defined for the sign area defaults. To change the default pause duration for different devices, refer to the SES Administrator user guide or contact your SES Administrator.
Symon Communications, Inc.

Creating Message Text 43
Insert Tune
Use the Insert Tune tool to play a predefined series of notes at the insertion point of the message text. This type of sound notification is usually reserved to get the viewer’s attention. Click the pointer in the message text where you want the tune to play, then click the Insert Tune tool. The Insert Tune menu appears.
Select the tune you want to play. The selected tune icon appears in the message text.
To remove this attribute, click the icon in the message text and press Delete.
SES WebConsole

44 CHAPTER 4Message Center
Insert Alignment Tool
Use the Insert Alignment tool to set the horizontal and vertical alignment of the message when it plays. Click the pointer at the beginning of the message text, then click the Insert Alignment tool. The Insert Alignment menu appears.
Select the alignment you want from the menu. The selected alignment icon appears before the message text.
• Align Left –aligns the message text against the left edge of the message area.
• Align Center Horizontally – centers the message text horizontally within the message area.
• Align Right – aligns the message text against the right edge of the message area.
• Align Top – aligns the message text with the top edge of the message area.
• Align Center Vertically – centers the message text vertically within the message area.
• Align Bottom – aligns the message text with the bottom edge of the message area.
To remove this attribute, click the icon in the message text and press Delete.
Symon Communications, Inc.

Creating Message Text 45
Text Font Tool
Use the Text Font tool to change the message text font. When you key in the text, it appears in the default font. To change the font, highlight the text and click the arrow beside Use Default Font to display the font list.
Select the new font from the font list. The appearance of the text changes, and the font name you selected replaces Use Default Font.
Note: You can change the font of all the text or only selected words.
Edit Tools for AllDestinations
Messages that are sent to both SDA and non-SDA destinations can be formatted with the tools on the Message Edit Tools for All Destinations toolbar.
These tools are described in the following sections.
Insert Date & Time Tool
The Insert Date & Time tool lets you insert the current date and a real-time clock into the message text. Click the pointer in the message text where you want the date and time to appear, then click the Insert Date & Time tool. The date and time icon appears in the message text.
The date updates automatically for each new day the message is displayed, and the time updates automatically to display the current time based on the destination’s assigned time zone.
To remove this attribute, click the icon in the message text and press Delete.
SES WebConsole

46 CHAPTER 4Message Center
Insert Date Tool
The Insert Date tool lets you insert the current date into the message text. Click the pointer in the message text where you want the date to appear, then click the Insert Date tool. The date icon appears in the message text.
The date updates automatically for each new day the message is displayed.
To remove this attribute, click the icon in the message text and press Delete.
Insert Time Tool
The Insert Time tool lets you insert a real-time clock into the message text. Click the pointer in the message text where you want the time to appear, then click the Insert Time tool. The time icon appears in the message text.
The time updates automatically to display the current time based on the destination’s assigned time zone.
To remove this attribute, click the icon in the message text and press Delete.
Symon Communications, Inc.

Creating Message Text 47
Text Color Tool
The Text Color tool allows you to change the color of the message text. (The default color is purple). To change the text color, highlight the text, and click the arrow beside Use Default Font Color to display the color list.
Select the new color from the color list. The text turns the color you selected.
Note: You can change the font color of all the text or only selected words.
SES WebConsole

48 CHAPTER 4Message Center
Sending a MessageFollow the steps below to send a message from the Message Center. (This is an overview of the steps discussed throughout this chapter.)
1 In the WebConsole main window, click Message Center. The Select Destinations window appears.
Symon Communications, Inc.

Sending a Message 49
2 Select the destinations to which you want to send the message and click Next. The Edit Message Properties window appears.
SES WebConsole

50 CHAPTER 4Message Center
3 Select the configuration options for SDAs and/or Non-SDAs.
4 Key in your message and select any edits you want to make.
5 Click Send Message.
6 Click OK.
Note: To delete a message created in Message Center, use the Deleting a Dynamic Message application in Dynamic Messaging (see page 18). If you do not have access to the Dynamic Messaging application, contact your SES Administrator.
Symon Communications, Inc.

51
Index
A customer support, for North American and
Add/Remove Destinations 36adding a dynamic category 9to a layout 10to a site template 10
adding text to a priority message 27Align Bottom 44Align Center Horizontally 44Align Center Vertically 44Align Left 44Align Right 44Align Top 44Available For Play On 13, 39available messages 12
BBlink Text tool 42
Cchange password window 5changing your password 5checking license usage 4closing WebConsole 6configuring destination options 36
non-SDA destinations 38SDA destinations 39
Crawl Rate 40Crawling Text 40creating a dynamic category 8creating message text 41
International customers vi
Ddeleting a message 18
all messages 21one message from a group 19single message 18
Design Studio v, vi, 2, 8, 24, 27Toolbox 9
DeskView v, 2, 34, 41dynamic category 2
adding 9adding to layout 10adding to site template 10creating 8
dynamic messagedeleting 18editing 16
Dynamic Messaging v, 2deleting a message 18, 38, 40editing a dynamic message 16editing a message element 14editing message properties 12Message Lifetime Options 13Message Play Options 14selecting a message 11
EEdit Dynamic Message Properties window 12
SES WebConsole

52 Index
Edit Message Properties window 35, 49Edit Tools
all destinations 41, 45non-SDA destinations 41
editing a dynamic message 16Editing a Message Element window 14Element ID 27End Message After 38expired message 18, 31
Ffont color list 47
Hhelp, accessing vi
IInsert Alignment menu 44Insert Alignment tool 44Insert Date & Time tool 45Insert Date tool 46Insert Pause tool 42Insert Time tool 46Insert Tune menu 43Insert Tune tool 43international customers, support contacts viInternet Explorer 3
Llicense usage 4login to WebConsole 3Login window 3logoff WebConsole 6Logoff window 6
MMake Available Every __ Seconds 14, 40message
creating text 41deleting all messages 21deleting one message from a group 19expired 18, 31
pre-built 2, 24removing a priority message 31sending a priority message 24
Message Center v, 2, 34Add/Remove Destinations 36configuring destination options 36configuring non-SDA destinations 38configuring SDA destinations 39creating message text 41selecting message destinations 34sending a message 48
Message Lifetime Options 13, 39Message Play Options 14, 40Modify Password 5modify password window 5modifying your password 5
NNetLite v, 2, 34, 41No Lifetime 13, 39non-SDA destinations 38North American customers, support contacts vi
Oonline help, accessing vi
Ppassword 3
changing 5default 3modifying 5requirements 6
Play Only __ Times 14, 40pre-built message 2, 24Priority 38Priority Messaging v, 2
adding text to a message 27removing a message 31selecting a site 26sending a message 24setting an element ID 27
Symon Communications, Inc.

Index 53
RRe-display __ Times 38removing a priority message 31Report Current License Usage 4
SScroll Text tool 41SDA viSDA destinations 39Seconds Per Slide 14, 40Select a Dynamic Category and Message
window 11, 16, 18Select a Message Template window 11, 24, 28,
31Select Broadcast Site window 25, 29, 31Select Destinations pop-up window 37Select Destinations window 34, 48selecting an available site 26selecting destinations for a message 34sending a message 48sending a priority message 24SES Administrator 8Slot Assignment 38starting WebConsole 3support contacts viSymon Communications, Inc.
contact information iitechnical support and Web site vi
Symon Design Studio v, viSymon Digital Appliance (SDA) viSymon Enterprise Server (SES) v, 2, 3Symon Support Web Site viiSynchronized Across All Time Zones 13, 39
Ttechnical support, contacting viText Color tool 47Text Font tool 45Text Horizontal Alignment 40Text Vertical Alignment 40Toolbox 9tools
Blink Text 42
Insert Alignment 44Insert Date 46Insert Date & Time 45Insert Pause 42Insert Time 46Insert Tune 43Scroll Text 41Text Color 47Text Font 45
TrayView v, 2, 34
UUnavailable For Play After 13, 39user name 3
Vvideo display v, 2, 34
WWeb browser 3WebConsole v, 2
closing 6licensing 4login 3logoff 6starting 3
WebConsole main window 4window
Edit Dynamic Message Properties 12Edit Message Properties 35, 49Editing a Message Element 14Login 3Logoff 6modify password 5Select a Dynamic Category and Message 11,
16, 18Select a Message Template 11, 24, 28, 31Select Broadcast Site 25, 29, 31Select Destinations 34, 48Select Destinations pop-up 37WebConsole main window 4
SES WebConsole

54 Index
Symon Communications, Inc.