Embed Size (px)
Citation preview

If you have any problems, comments, questions, or concerns please email us at [email protected] 1 | P a g e
Voucher Information Processing System (ViPS)
The Voucher Information Processing System is a new Harris County application designed to automate and
replace the current paper Vouchers that are used in our Criminal and Juvenile Delinquency Courts. Once
complete, the application will provide an all-electronic process for submitting and processing vouchers.
You access ViPS via the Internet. The browsers currently supported are Internet Explorer version 11 and
Google Chrome. You may use other browsers but be aware that we have not yet confirmed that the application
will function properly in those browsers.
ViPS has been designed to be used primarily on a workstation or laptop. However, we have developed the
application using technology that gives the application the ability to automatically adjust the display when it is
used on mobile devices such as tablets and smartphones. These automatic adjustments are meant to improve
the user experience on these devices. We are not yet finished with fine tuning these adjustments but if you have
the opportunity to use ViPS on these devices we encourage you to do so and to provide feedback on your
experience. At this point in time we know that the document/invoice upload process does not work on iPads or
iPhones.

If you have any problems, comments, questions, or concerns please email us at [email protected] 2 | P a g e
User Guide
Signing in
You will access ViPS via a new Attorney Portal site. Open your internet browser and enter
aty.harriscountytx.gov/ViPS in the address bar (do not include www).
This will take you to the Authentication Portal where you will need to log in to the application.
Authentication Method: set to “BAR”
Username: Enter your Bar Number (all 8 digits including any leading zeros)
Password: Enter your Password
Click on the Authenticate button to log into the application. The first page displayed will be the ViPS
Main Menu.

If you have any problems, comments, questions, or concerns please email us at [email protected] 3 | P a g e
ViPS Main Menu
The ViPS Main Menu is a landing spot that provides access to the different functional areas of the
application.
My Appointed Cases is used to create Individual Case Appointment vouchers.
My Term Assignments is used to create your Term Assignment Vouchers.
My Vouchers is used to track your draft and submitted Vouchers.

If you have any problems, comments, questions, or concerns please email us at [email protected] 4 | P a g e
My Appointed Cases
The My Appointed Cases page provides a listing of your defendants/cases that may be pending a voucher.
Initially the data may not be very helpful since we are using historical data, but as you continue to use ViPS
this data should become much more timely and beneficial.
The defendants are listed in alphabetical sequence. The first defendant in the list is expanded to show their
cases. You may scroll through the list to locate the defendant that you would like to create a voucher for.
Once you locate that defendant, click on their name. This will expand the defendant to show a list of their
cases.
Once you have located your defendant and expanded their case listing, you can then make your case(s)
selection. You may click on the radio button in front of the court division (i.e. Felony) to select all cases
within that division or you can select case(s) individually by clicking on the checkbox in front of each case.
When you are finished selecting your case(s), then click on the Continue button at the bottom of the page.
As mentioned above, the cases listed are the application’s attempt to determine what cases you may want to
submit a voucher for instead of displaying all cases that you have ever been appointed to. There will be
times where the case that you are looking for is not in the list. When this occurs you can use the Search
feature to find that case. To do this, click on the Search button at the bottom right hand side of the page.

If you have any problems, comments, questions, or concerns please email us at [email protected] 5 | P a g e
The Search feature will allow you to search for cases based on Defendant Name, Defendant SPN, or a Case
Number. Currently, only the Case Number search is active. Enter the Case Number in the Case/Cause
Number field and then click on the Ok button. The resulting page will then display the defendant and
case(s) that match those criteria.

If you have any problems, comments, questions, or concerns please email us at [email protected] 6 | P a g e
The application allows you to start a voucher and then come back later to finish entering the data and print
it. Once you start a voucher it is put into a status of ‘Draft’. While a voucher is in Draft status you may
change and add data to the voucher. Once you submit a voucher then you may no longer make any changes
to it.
If a case is attached to a voucher that is in Draft status, then you cannot start a new voucher for that case.
You must complete and submit the existing draft voucher. Once the draft voucher has been submitted then a
new voucher can be created for that case. On the My Appointed Cases page you can identify that a draft
voucher exists for a case by the appearance of a pencil icon in front of the case number instead of the normal
checkbox. Clicking on the pencil icon will allow you to edit that existing draft voucher. The page flow will
be the same as with a new voucher. The pages will display the data that has previously been entered for that
voucher.
If you have any problems, comments, questions, or concerns please email us at [email protected] 7 | P a g e
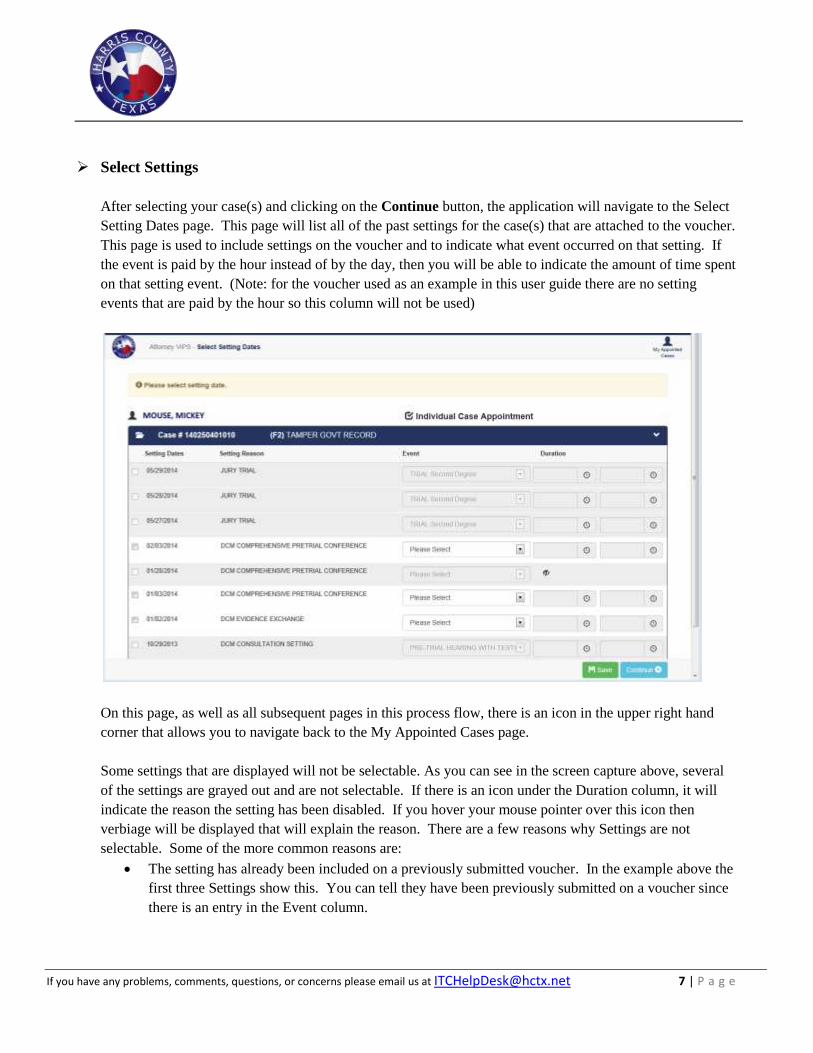
Select Settings
After selecting your case(s) and clicking on the Continue button, the application will navigate to the Select
Setting Dates page. This page will list all of the past settings for the case(s) that are attached to the voucher.
This page is used to include settings on the voucher and to indicate what event occurred on that setting. If
the event is paid by the hour instead of by the day, then you will be able to indicate the amount of time spent
on that setting event. (Note: for the voucher used as an example in this user guide there are no setting
events that are paid by the hour so this column will not be used)
On this page, as well as all subsequent pages in this process flow, there is an icon in the upper right hand
corner that allows you to navigate back to the My Appointed Cases page.
Some settings that are displayed will not be selectable. As you can see in the screen capture above, several
of the settings are grayed out and are not selectable. If there is an icon under the Duration column, it will
indicate the reason the setting has been disabled. If you hover your mouse pointer over this icon then
verbiage will be displayed that will explain the reason. There are a few reasons why Settings are not
selectable. Some of the more common reasons are:
The setting has already been included on a previously submitted voucher. In the example above the
first three Settings show this. You can tell they have been previously submitted on a voucher since
there is an entry in the Event column.

If you have any problems, comments, questions, or concerns please email us at [email protected] 8 | P a g e
Our Court Management system indicates that the attorney was not present for that setting and
therefore cannot be paid for the setting. (The screen capture above shows this situation on the 5th
setting in the list.)
The setting was for multiple cases for the same defendant. Once the setting has been selected for
one of the cases, then the setting cannot be selected on the other case(s).
For District Courts there is a limit of 4 setting per day. You have already reached that limit and
cannot select any additional settings for that day. (Not implemented at this time)
To include a setting on the voucher click the checkbox in front of the setting date. Then indicate the event
that occurred during that setting by selecting the appropriate item from the event drop down list. Refer to
the offense degree of the case that is displayed in the header line after the case number to help you identify
the appropriate degree to select for the event.
Select all setting events that you would like to include on the voucher.

If you have any problems, comments, questions, or concerns please email us at [email protected] 9 | P a g e
The Save button at the bottom right hand side of the page will save your data in ViPS and provides the
ability to save the data and then return back later to finish out your voucher.
Once you are finished selecting settings and events then click on the Continue button at the bottom right
hand side of the page. This will save your data and will navigate to the next page in the process flow.

If you have any problems, comments, questions, or concerns please email us at [email protected] 10 | P a g e
Generate Voucher
After selecting your setting events and pressing the Continue button, the application will navigate to the
Generate Voucher page. This page is a summary page for all of your voucher entries.
The main display table on the page lists all of the line items that are defined for your voucher. The line
items in gray indicate items that must be entered/updated on a different page in the process flow. The line
items in white can be entered/updated on this page.
You will notice in the above screen capture that the setting events that you entered on the previous page are
summarized here showing the total number of days for each setting event as well as the dates that they
occurred on. If you would like to update the information on these items, click on the Previous button to
navigate back to the Select Setting Dates page.

If you have any problems, comments, questions, or concerns please email us at [email protected] 11 | P a g e
Other line items that appear in gray are Out of Court Hours and Investigation Hours. These items are
entered/updated via the Activity Log page. Click on the Activity Log button at the bottom left hand side of
the page to navigate to the Activity Log page.
The items in white can be updated on this page. For Investigation Other Expenses, Expert, and Other line
items you can enter the total dollar amount for these expenses. For Bilingual Supplement you will click on
the checkbox that is to the right of the description if this supplement should be applied to the voucher.
When checked the application will automatically calculate the number of unique setting days and include
them on the voucher. The number of days will not appear on the page right away after checking the box, it
will appear after the data is saved.
Certain voucher line items require supporting information (invoices, receipts, etc.) to be included with and
attached to the voucher. This can be done by utilizing the Attached Documents table in the upper right hand
side of this page. The green button with the white plus sign is used to upload and attach a document to the
voucher. Documents need to be in a PDF file format.
After they are attached then the documents will be listed in the table with the same name as the original file.
Following the document name will be a red trash can icon. You can click on the red trash can icon to
remove the document from the voucher. You will be asked to confirm that you do want to delete the
document. You can click on the document name to open the document for review.

If you have any problems, comments, questions, or concerns please email us at [email protected] 12 | P a g e
The Save button at the bottom of the page will save your data in ViPS and provides the ability to save the
data and then return back later to finish out your voucher.
Once you have reviewed the information on the page and feel it is correct then you can then proceed to
submit your voucher packet. Click on the Submit Voucher button in the lower right hand corner of the
page. This will navigate to the Pre-Certification page.

If you have any problems, comments, questions, or concerns please email us at [email protected] 13 | P a g e
Activity Log
This page is used to add information for line items on the voucher. These are things such as Out of Court
Hours, Investigator Hours, etc. You access this page via the Activity Log button on the Generate Voucher
page.
When you come to this page for the first time on a voucher, there will not be any activity items displayed.
Use the green button with the white plus sign to add an entry to the Activity Log.
A window will then pop up over the main page that will allow for the entry of the activity.

If you have any problems, comments, questions, or concerns please email us at [email protected] 14 | P a g e
In the pop up window start filling out the information about the activity by entering the Date and selecting
the Activity from the options in the drop down list. Once the Activity is selected then other data entry fields
such as Case Number and Duration (HH:mm) may appear in the window. Once you are finished entering
the Activity information click on the Save button in the lower right hand corner of the window. You will
then be returned to the Activity Log page and the activity that you just entered will be added to the list.
In front of the activity is a green icon with a white pencil. You can click on this icon to edit the information
for the Activity. At the end of the Activity is a red trash can icon. You can click on this icon to delete the
Activity from the list.
You can add as many Activities as you need for this voucher.
Once you are finished entering Activities then press the Save and Return button in the lower left hand
corner of the page to return to the Generate Voucher page. When you return to that page you will notice
that the data from the Activity Log now appears in the appropriate areas on the voucher.
If you have any problems, comments, questions, or concerns please email us at [email protected] 15 | P a g e
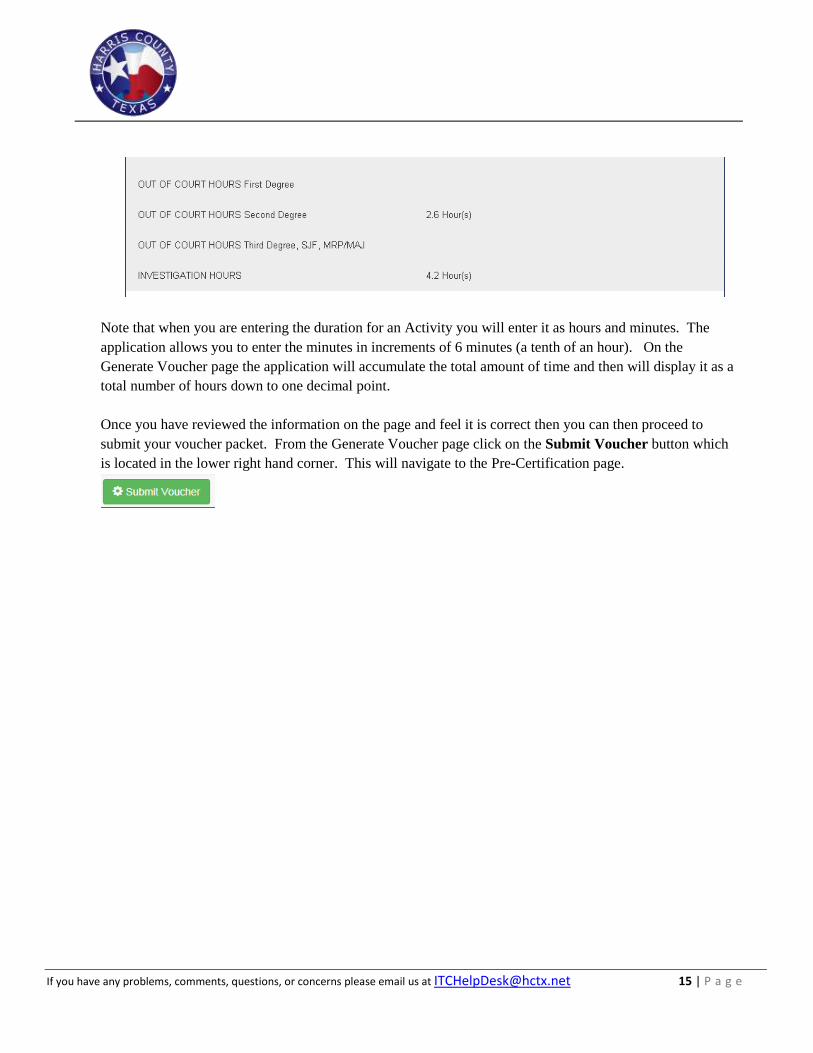
Note that when you are entering the duration for an Activity you will enter it as hours and minutes. The
application allows you to enter the minutes in increments of 6 minutes (a tenth of an hour). On the
Generate Voucher page the application will accumulate the total amount of time and then will display it as a
total number of hours down to one decimal point.
Once you have reviewed the information on the page and feel it is correct then you can then proceed to
submit your voucher packet. From the Generate Voucher page click on the Submit Voucher button which
is located in the lower right hand corner. This will navigate to the Pre-Certification page.
If you have any problems, comments, questions, or concerns please email us at [email protected] 16 | P a g e
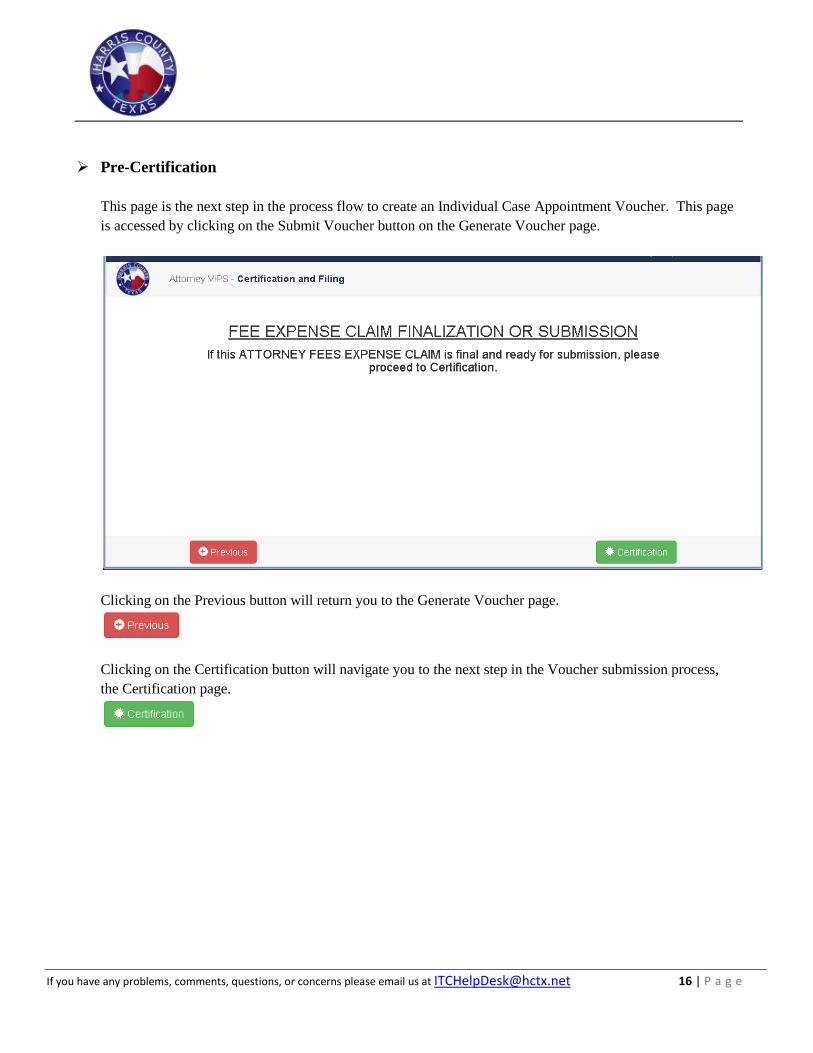
Pre-Certification
This page is the next step in the process flow to create an Individual Case Appointment Voucher. This page
is accessed by clicking on the Submit Voucher button on the Generate Voucher page.
Clicking on the Previous button will return you to the Generate Voucher page.
Clicking on the Certification button will navigate you to the next step in the Voucher submission process,
the Certification page.

If you have any problems, comments, questions, or concerns please email us at [email protected] 17 | P a g e
Certification
This page is the last step in the process flow to create an Individual Case Appointment Voucher. This page
is accessed by clicking on the Certification button on the Pre-Certification page.
The application will place your name and bar number in the signature line of this page. This will be your
electronic signature for use on the Voucher.
Clicking on the Cancel button will return you to the Generate Voucher page.
Clicking on the I Affirm button will electronically submit your voucher to the District Clerks office for
filing. You will then be navigated back to the My Appointed Cases page so that you can start working on
another voucher.

If you have any problems, comments, questions, or concerns please email us at [email protected] 18 | P a g e
Example of an Individual Case Appointment voucher:

If you have any problems, comments, questions, or concerns please email us at [email protected] 19 | P a g e
Example of the Activity Log that will be included, if applicable, in the Exhibits/Attachments document.
If you have any problems, comments, questions, or concerns please email us at [email protected] 20 | P a g e
Other Helpful Information
The Harris County logo in the upper left hand corner of the page provides an easy way to return to the ViPS
Main Menu from almost all of the pages in the application. Just click on the logo and you will be returned
to the Main Menu page.
If you are on a data entry page and attempt to navigate away from the page without saving your changes
first, the application will pop up a window informing you that if you continue with your navigation that
unsaved data will be lost. You will have the option to either continue with the navigation and lose those
unsaved changes or to return to your page where you can then save those changes.
The application monitors for inactivity and will automatically log you out after 20 minutes of inactivity.
You will need to log in again to continue your work.
There is no Log Out functionality needed for the application. When you are finished using ViPS you can
just close your browser window.