Embed Size (px)
Citation preview

VMware PowerCLI User's GuideVMware PowerCLI 12.1.0

You can find the most up-to-date technical documentation on the VMware website at:
https://docs.vmware.com/
VMware, Inc.3401 Hillview Ave.Palo Alto, CA 94304www.vmware.com
Copyright ©
1998-2020 VMware, Inc. All rights reserved. Copyright and trademark information.
VMware PowerCLI User's Guide
VMware, Inc. 2

Contents
VMware PowerCLI User's Guide 9
1 Introduction to VMware PowerCLI 10Microsoft PowerShell Basics 10
PowerShell Command-Line Syntax 11
PowerShell Pipelines 11
PowerShell Wildcards 11
PowerShell Common Parameters 11
PowerCLI Concepts 12
PowerCLI Modules 13
Interoperability Between the PowerCLI and VMware Cloud Director PowerCLI Modules 14
Selecting Objects in PowerCLI 16
Providing Login Credentials 16
Running PowerCLI Cmdlets Asynchronously 17
Managing Default Server Connections 17
Customization Specification Objects in PowerCLI 18
Using ESXCLI with PowerCLI 18
PowerCLI Inventory Provider 18
PowerCLI Datastore Provider 19
PowerCLI About Articles 19
2 Installing VMware PowerCLI 21Supported Operating Systems 22
Supported VMware Products 22
Supported PowerShell Versions 22
Prerequisites for Installing and Running PowerCLI 22
Install PowerCLI 23
Allow Execution of Local Scripts 23
Update a PowerCLI Module 24
Uninstall PowerCLI 24
3 Configuring VMware PowerCLI 25Scoped Settings of vSphere PowerCLI 25
Configuring the Scope of the PowerCLI Settings 25
Priority of Settings Scopes in PowerCLI 26
PowerCLI Configuration Files 26
4 Configuring Customer Experience Improvement Program 28
VMware, Inc. 3

Categories of Information That VMware Receives 28
Join the Customer Experience Improvement Program in PowerCLI 28
5 Sample Scripts for Managing vSphere with VMware PowerCLI 29Connect to a vCenter Server System 34
Manage Virtual Machines on vSphere 34
Add a Standalone Host to a vCenter Server System 35
Set the License Key for a Host on vCenter Server 35
Activate Maintenance Mode for a Host on vCenter Server 36
Create vSphere Inventory Objects 37
Create Virtual Machines on vCenter Server Using an XML Specification File 38
Manage Virtual Machine Templates on vCenter Server 38
Create and Use Snapshots on vCenter Server 39
Update the Resource Configuration Settings of a Virtual Machine on vCenter Server 40
Get a List of Hosts on a vCenter Server System and View Their Properties 40
Change the Host Advanced Configuration Settings on vCenter Server 41
Move a Virtual Machine to a Different Host Using VMware vSphere vMotion 42
Move a Virtual Machine to a Different Datastore Using VMware vSphere Storage vMotion 42
Move a Virtual Machine to a Different vCenter Server System 43
Create a Host Profile on a vCenter Server System 43
Apply a Host Profile to a Host on vCenter Server 44
Manage Statistics and Statistics Intervals on vCenter Server 45
Modify the Settings of the NIC Teaming Policy for a Virtual Switch 45
Create a vApp on vCenter Server 46
Modify the Properties of a vApp 46
Export or Import vApps 47
Create an iSCSI Host Storage 47
Add Passthrough Devices to a Host and Virtual Machine 48
Create a Custom Property Based on an Extension Data Property 48
Create a Script-Based Custom Property for a vSphere Object 49
Apply a Customization Object to a Cloned Virtual Machine 49
Modify the Default NIC Mapping Object of a Customization Specification 50
Modify Multiple NIC Mapping Objects of a Customization Specification 51
Create Multiple Virtual Machines that Use Static IP Addresses 51
Create Multiple Virtual Machines with Two Network Adapters 53
Create a vSphere Role and Assign Permissions to a User 54
View Actions and Triggers for an Alarm on vCenter Server 55
Create Alarm Definitions on vCenter Server 55
Modify Alarm Definitions on vCenter Server 56
Create Alarm Actions and Triggers on vCenter Server 56
Remove Alarm Definitions and Actions 57
VMware PowerCLI User's Guide
VMware, Inc. 4

Create and Modify Advanced Settings for a Cluster 57
Modify the vCenter Server Email Configuration 58
Modify the vCenter Server SNMP Configuration 59
Use Esxtop to Get Information on the Virtual CPUs of a Virtual Machine 59
Filter vSphere Objects with Get-View 60
Populate a View Object with Get-View 61
Update the State of a Server-Side Object 61
Reboot a Host with Get-View 62
Modify the CPU Levels of a Virtual Machine with Get–View and Get–VIObjectByVIView 62
Browse the Default Inventory Drive 63
Create a New Custom Inventory Drive 64
Manage Inventory Objects Through Inventory Drives 64
Browse the Default Datastore Drives 65
Create a New Custom Datastore Drive 65
Manage Datastores Through Datastore Drives 66
Modify the Timeout Setting for Web Tasks 67
Using Tags 68
Retrieve a Tag and Save It into a Variable 68
Retrieve a Tag Category and Save It into a Variable 68
Create a Tag Category and a Tag 69
Assign a Tag to Virtual Machines 69
Retrieve Objects by Tag 69
Generate Tags Automatically by Using a Script 70
Add an Entity Type to a Tag Category 71
Retrieve Tag Assignments 71
Network Management with vSphere Distributed Switches 71
Create a Distributed Switch and Configure Networking 71
Configure a Distributed Switch 72
Migrate Virtual Machine Networking Configuration from a vSphere Standard Switch to a vSphere Distributed Switch 73
Migrate Physical and Virtual NICs to a vSphere Standard Switch 74
Migrate Physical and Virtual NICs to a vSphere Distributed Switch 74
Configure the Traffic Shaping Policy 75
Configure the Security Policy 75
Create a Local Content Library 76
Create a Subscribed Content Library 76
Create a Content Library Item 77
Create a Virtual Machine from a Content Library Item 77
Create a vApp from a Content Library Item 78
Export Content Library Item's Files to a Local Machine 78
Create a New VM-VM DRS Rule 78
Create a New VM-VMHost DRS Rule 79
VMware PowerCLI User's Guide
VMware, Inc. 5

6 Sample Scripts for Managing vSphere Policy-Based Storage with VMware PowerCLI 81Create a Tag-Based Storage Policy 81
Create a Capability-Based Storage Policy 82
Associate a Storage Policy with a Virtual Machine and Its Hard Disk 83
Disassociate a Storage Policy Associated with a Virtual Machine and Its Hard Disk 84
Remove a Storage Policy 84
Edit a Storage Policy 85
Export and Import a Storage Policy 85
Create a Virtual Machine in a Datastore Compatible with Storage Policy 86
Create a vSAN Datastore 87
Modify a vSAN Datastore 89
Create a vSAN Stretched Cluster 89
Enable a vSAN File Service 90
Create a vSAN File Service Domain 91
Create a vSAN File Share 92
Create an NFS 4.1 Datastore 92
Add a VASA Provider and Create a Policy 93
Invoke a Planned Failover on a Replication Group and Reverse the Replication 94
Attach a Flat VDisk to a Virtual Machine 96
7 Sample Scripts for Managing VMware Site Recovery Manager with VMware PowerCLI 98Connect to an SRM Server 98
Protect a Virtual Machine 99
Create a Report of the Protected Virtual Machines 99
Create a Report of the Virtual Machines Associated with All Protection Groups 100
8 Sample Scripts for Managing the vSphere Automation SDK with VMware PowerCLI 102Create a Local Content Library on an Existing Datastore 102
9 Sample Scripts for Managing VMware Cloud Director with VMware PowerCLI104
Connect to a VMware Cloud Director Server 105
Create and Manage Organizations 106
Create and Manage Organization Virtual Data Centers 106
Filter and Retrieve Organization Virtual Data Center Networks 107
Import a vApp Template from the Local Storage 108
Create a vApp Template from a vApp 108
Import a vApp from vSphere 109
Create and Modify a vApp 110
VMware PowerCLI User's Guide
VMware, Inc. 6

Manage Virtual Machines with vApps 110
Manage Virtual Machines and Their Guest Operating Systems 111
Retrieve a List of the Internal and External IP Addresses of Virtual Machines in vApps 112
Create and Manage Access Control Rules 113
Filter and Retrieve vApp Networks 113
Create vApp Networks for a Selected vApp 114
Create an Isolated vApp Network 114
Create an NAT Routed vApp Network 115
Create a Direct vApp Network 115
Modify or Remove vApp Networks 116
10 Sample Scripts for Managing vSphere Update Manager with VMware PowerCLI118
Connect to a vCenter Server System 118
Create Patch Baselines 119
Attach and Detach Baselines 119
Scan a Virtual Machine 120
Check Virtual Machine Baseline Status 120
Stage Patches 121
Remediate a Virtual Machine 121
Upgrade Virtual Machine Hardware 122
Remediate a Cluster 122
Remediate a Host 123
Download Patches and Scan Objects 123
11 Sample Scripts for Managing vRealize Operations Manager with VMware PowerCLI 125Connect to a vRealize Operations Manager Server 125
Check Memory Waste Levels 126
Get Remediation Recommendations 127
Change Alert Ownership 127
Create a Report for Problematic Hosts 128
12 Sample Scripts for Managing VMware Cloud on AWS with VMware PowerCLI 129
Connecting to VMware Cloud on AWS 129
Connect to VMware Cloud on AWS by Using an API Token 129
Connect to VMware Cloud on AWS by Using an OAuth Security Context 130
Connect to a vCenter Server System Running in VMware Cloud on AWS 130
Connect to a vCenter Server System by Using an OAuth 2.0 Authentication 131
Connect to a Specific Instance of VMware Cloud on AWS 131
View the Available Software-Defined Data Centers 132
VMware PowerCLI User's Guide
VMware, Inc. 7

Create a Software-Defined Data Center 132
VMware PowerCLI User's Guide
VMware, Inc. 8

VMware PowerCLI User's Guide
The VMware PowerCLI User's Guide provides information about installing and using the VMware PowerCLI cmdlets (pronounced “commandlets”) for managing, monitoring, automating, and handling operations for VMware® vSphere, VMware Site Recovery Manager, vSphere Automation SDK, vSAN, VMware Cloud Director, vSphere Update Manager, vRealize Operations Manager, VMware Horizon, NSX-T, VMware HCX, and VMware Cloud on AWS components.
To help you start with PowerCLI, this documentation includes descriptions of specific PowerCLI concepts and features. In addition, this documentation provides a set of use case examples and sample scripts.
Intended Audience
This guide is intended for anyone who wants to install and use PowerCLI. This documentation is written for administrators and developers who are familiar with virtual machine technology and PowerShell.
n Basic administrators can use cmdlets included in PowerCLI to manage their vSphere, VMware Site Recovery Manager, vSphere Automation SDK, vSAN, VMware Cloud Director, vSphere Update Manager, vRealize Operations Manager, VMware Horizon, NSX-T, VMware HCX, and VMware Cloud on AWS infrastructure from the command line.
n Advanced administrators can develop PowerShell scripts that other administrators can reuse or integrate into other applications.
VMware, Inc. 9

Introduction to VMware PowerCLI 1VMware PowerCLI contains modules of cmdlets based on Microsoft PowerShell for automating vSphere, VMware Site Recovery Manager, vSphere Automation SDK, vSAN, VMware Cloud Director, vSphere Update Manager, vRealize Operations Manager, VMware Horizon, NSX-T, VMware HCX, and VMware Cloud on AWS administration. VMware PowerCLI provides a PowerShell interface to the VMware product APIs.
n Microsoft PowerShell Basics
PowerCLI is based on Microsoft PowerShell and uses the PowerShell basic syntax and concepts.
n PowerCLI Concepts
PowerCLI cmdlets are created to automate VMware environments administration and to introduce some specific features in addition to the PowerShell concepts.
Microsoft PowerShell Basics
PowerCLI is based on Microsoft PowerShell and uses the PowerShell basic syntax and concepts.
Microsoft PowerShell is both a command-line and scripting environment. It uses the .NET object model and provides administrators with system administration and automation capabilities. To work with PowerShell, you run commands, named cmdlets.
n PowerShell Command-Line Syntax
PowerShell cmdlets use a consistent verb-noun structure, where the verb represents the action and the noun represents the object to operate on.
n PowerShell Pipelines
A pipeline is a series of commands separated by the pipe operator |.
n PowerShell Wildcards
PowerShell has a number of pattern-matching operators named wildcards that you can use to substitute one or more characters in a string, or substitute the complete string.
VMware, Inc. 10

n PowerShell Common Parameters
The PowerShell engine retains a set of parameter names, referred to as common parameters. All PowerShell cmdlets, including the PowerCLI cmdlets, support them.
PowerShell Command-Line Syntax
PowerShell cmdlets use a consistent verb-noun structure, where the verb represents the action and the noun represents the object to operate on.
PowerShell cmdlets follow consistent naming patterns, ensuring that construction of a command is easy if you know the object that you want to work with.
All command categories take parameters and arguments. A parameter starts with a hyphen and is used to control the behavior of the command. An argument is a data value consumed by the command.
A simple PowerShell command has the following syntax:
command -parameter1 -parameter2 argument1, argument2
PowerShell Pipelines
A pipeline is a series of commands separated by the pipe operator |.
Each command in the pipeline receives an object from the previous command, performs some operation on it, and then passes it to the next command in the pipeline. Objects are output from the pipeline as soon as they become available.
PowerShell Wildcards
PowerShell has a number of pattern-matching operators named wildcards that you can use to substitute one or more characters in a string, or substitute the complete string.
All wildcard expressions can be used with the PowerCLI cmdlets. For example, you can view a list of all files with a .txt extension by running dir *.txt. In this case, the asterisk * operator matches any combination of characters.
With wildcard patterns you can indicate character ranges as well. For example, to view all files that start with the letter S or T and have a .txt extension, you can run dir [st]*.txt.
You can use the question mark ? wildcard to match any single character within a sequence of characters. For example, to view all .txt files with names that consist of string and one more character at the end, run dir string?.txt.
PowerShell Common Parameters
The PowerShell engine retains a set of parameter names, referred to as common parameters. All PowerShell cmdlets, including the PowerCLI cmdlets, support them.
VMware PowerCLI User's Guide
VMware, Inc. 11

Some of the PowerShell common parameters are Verbose, Debug, ErrorAction, ErrorVariable, OutVariable, and OutBuffer. For a full list of the common parameters and more details on their usage, run Get-Help about_CommonParameters.
PowerShell offers two risk mitigation parameters: WhatIf and Confirm.
WhatIf Displays the effects of a command without running it.
Confirm Prompts for confirmation before running a command that stops a program or service, or deletes data.
PowerCLI Concepts
PowerCLI cmdlets are created to automate VMware environments administration and to introduce some specific features in addition to the PowerShell concepts.
n PowerCLI Modules
VMware PowerCLI 12.1.0 consists of multiple modules that you can install and use according to your needs and environments.
n Interoperability Between the PowerCLI and VMware Cloud Director PowerCLI Modules
With the RelatedObject parameter of PowerCLI cmdlets, you can retrieve vSphere inventory objects from cloud resources. This interoperability between the PowerCLI and VMware Cloud Director PowerCLI modules expands cloud administration, automation, reporting, and troubleshooting options for provider administrators.
n Selecting Objects in PowerCLI
In PowerCLI, you can pass strings and wildcards to all parameters that take inventory objects, datastores, OSCustomizationSpec objects, and VIServer objects as arguments. This PowerCLI approach is named Object-by-Name (OBN) selection.
n Providing Login Credentials
When you provide login credentials in the command prompt or in a script file, a PowerShell limitation might prevent PowerCLI from processing non-alphanumeric characters correctly. To prevent login problems, escape the non-alphanumeric characters in your credentials.
n Running PowerCLI Cmdlets Asynchronously
By default, PowerCLI cmdlets return an output only after completion of the requested tasks. If you want a cmdlet to return to the command line immediately, without waiting for the tasks to complete, you can use the RunAsync parameter.
n Managing Default Server Connections
By default, PowerCLI and PowerCLI cmdlets run on the vCenter Server systems or VMware Cloud Director servers you are connected to, if no target servers can be determined from the provided parameters.
VMware PowerCLI User's Guide
VMware, Inc. 12

n Customization Specification Objects in PowerCLI
PowerCLI provides two types of objects for customization specification: persistent and nonpersistent.
n Using ESXCLI with PowerCLI
PowerCLI provides you the capability to use ESXCLI through its console.
n PowerCLI Inventory Provider
The Inventory Provider is designed to expose an unfiltered inventory view of the inventory items from a server.
n PowerCLI Datastore Provider
The Datastore Provider is designed to provide access to the contents of one or more datastores.
n PowerCLI About Articles
You can learn more about some PowerCLI concepts and features from the built-in help articles named about articles. You can access them through a running PowerCLI process.
PowerCLI Modules
VMware PowerCLI 12.1.0 consists of multiple modules that you can install and use according to your needs and environments.
The following table lists all official VMware PowerCLI modules.
Module Description
VMware.PowerCLI Provides a root module which other modules are dependent on. This module ensures the PowerCLI product can be installed, upgraded, and removed as a complete package if needed.
VMware.VimAutomation.Core Provides cmdlets for automated administration of the vSphere environment.
VMware.VimAutomation.Common Provides functionality that is common to all PowerCLI modules. This module has no cmdlets, but is required for other modules to function correctly.
VMware.VimAutomation.Sdk Provides SDK functionality that is needed by all PowerCLI modules. This module has no cmdlets, but is required for other modules to function correctly.
VMware.VimAutomation.Vds Provides cmdlets for managing vSphere distributed switches and distributed port groups.
VMware.VimAutomation.Cis.Core Provides cmdlets for managing vSphere Automation SDK servers.
VMware.VimAutomation.Storage Provides cmdlets for managing vSAN and vSphere policy-based storage.
VMware.VimAutomation.StorageUtility Provides utility scripts for storage.
VMware PowerCLI User's Guide
VMware, Inc. 13

Module Description
VMware.VimAutomation.License Provides the Get-LicenseDataManager cmdlet for managing VMware License components.
VMware.ImageBuilder Provides cmdlets for managing depots, image profiles, and VIBs.
VMware.DeployAutomation Provides cmdlets that provide an interface to VMware Auto Deploy for provisioning physical hosts with ESXi software.
VMware.VimAutomation.Cloud Provides cmdlets for automating VMware Cloud Director features.
VMware.VumAutomation Provides cmdlets for automating vSphere Update Manager features.
VMware.VimAutomation.vROps Provides cmdlets for automating vRealize Operations Manager features.
VMware.VimAutomation.Srm Provides cmdlets for managing VMware Site Recovery Manager features.
VMware.VimAutomation.HorizonView Provides cmdlets for automating VMware Horizon features.
VMware.VimAutomation.Nsxt Provides cmdlets for managing NSX-T servers.
VMware.VimAutomation.Vmc Provides cmdlets for automating VMware Cloud on AWS features.
VMware.Vim Provides a module that contains the vSphere low-level binding libraries.
VMware.VimAutomation.Security Provides cmdlets for managing vSphere Security, including virtual Trusted Platform Module.
VMware.VimAutomation.Hcx Provides cmdlets for managing VMware HCX features.
VMware.VimAutomation.WorkloadManagement Provides cmdlets for managing Project Pacific.
VMware.CloudServices Provides cmdlets for managing VMware Cloud Services.
Interoperability Between the PowerCLI and VMware Cloud Director PowerCLI Modules
With the RelatedObject parameter of PowerCLI cmdlets, you can retrieve vSphere inventory objects from cloud resources. This interoperability between the PowerCLI and VMware Cloud
VMware PowerCLI User's Guide
VMware, Inc. 14

Director PowerCLI modules expands cloud administration, automation, reporting, and troubleshooting options for provider administrators.
Note To use the interoperability feature, you must install the PowerCLI and VMware Cloud Director PowerCLI modules, and connect both to a VMware Cloud Director server and a vCenter Server system.
n Retrieving vSphere Inventory Objects from Cloud Resources
Provider administrators can use the RelatedObject parameter of PowerCLI cmdlets to retrieve vSphere inventory objects from VMware Cloud Director objects. Passing the retrieved objects to the cmdlets of the VMware.VimAutomation.Core and VMware.VimAutomation.VDS modules, extends administration options.
Retrieving vSphere Inventory Objects from Cloud Resources
Provider administrators can use the RelatedObject parameter of PowerCLI cmdlets to retrieve vSphere inventory objects from VMware Cloud Director objects. Passing the retrieved objects to the cmdlets of the VMware.VimAutomation.Core and VMware.VimAutomation.VDS modules, extends administration options.
Important Use of the VMware.VimAutomation.Core and VMware.VimAutomation.VDS modules to modify the configuration of objects that are managed by VMware Cloud Director might result in unpredictable behavior of the cloud environment.
Table 1-1. List of Supported vSphere Inventory Objects You Can Retrieve from Cloud Objects
Cloud Object Retrieved vSphere Inventory ObjectSample Script for Retrieving the vSphere Inventory Object
ProviderVdc DatastoreGet-ProviderVdc -Name 'MyProviderVdc' | Get-Datastore
CIVM VirtualMachineGet-CIVM -Name 'MyCloudVM' | Get-VM
NetworkPool VDSwitchGet-NetworkPool -Name 'MyNetworkPool' | Get-VDSwitch
NetworkPool VDPortgroupGet-NetworkPool -Name 'MyNetworkPool' | Get-VDPortGroup
ExternalNetwork VDPortgroupGet-ExternalNetwork -Name 'MyExternalNetwork' | Get-VDPortGroup
VMware PowerCLI User's Guide
VMware, Inc. 15
Selecting Objects in PowerCLI
In PowerCLI, you can pass strings and wildcards to all parameters that take inventory objects, datastores, OSCustomizationSpec objects, and VIServer objects as arguments. This PowerCLI approach is named Object-by-Name (OBN) selection.
Instead of assigning an object name to a cmdlet parameter, users can pass the object through a pipeline or a variable. For example, the following three commands are interchangeable:
n Remove-VM -VM "Win 7 SP1"
n Get-VM -Name "Win 7 SP1" | Remove-VM
n Remove-VM -VM (Get-VM -Name "Win 7 SP1")
Note In PowerCLI, passing strings as pipeline input is not supported.
If you provide a non-existing object name, an OBN failure occurs. In such cases, PowerCLI generates a non-terminating error and runs the cmdlet ignoring the invalid name.
For more details about OBN, run help about_OBN.
Example: An OBN failure
This example illustrates the occurrence of an OBN failure.
Set-VM –VM “VM1”, “VM2”, “VM3” –Server $server1, $server2 –MemoryGB 4
If the VM2 virtual machine does not exist on either of the selected servers, PowerCLI generates a non-terminating error and applies the command only on the VM1 and VM3 virtual machines.
Providing Login Credentials
When you provide login credentials in the command prompt or in a script file, a PowerShell limitation might prevent PowerCLI from processing non-alphanumeric characters correctly. To prevent login problems, escape the non-alphanumeric characters in your credentials.
To escape non-alphanumeric characters in PowerCLI, you need to place the expression that contains them in single quotes (').
Note When you provide your login credentials in the Specify Credential dialog box, you do not need to escape non-alphanumeric characters.
Example: Connecting to a vCenter Server System
This example illustrates how to escape non-alphanumeric characters when connecting to a selected vCenter Server instance with the Adminis!ra!or user name and the pa$$word password.
Connect-VIServer -Server 10.23.112.235 -Protocol https -Username 'Adminis!ra!or' -Password 'pa$$word'
VMware PowerCLI User's Guide
VMware, Inc. 16

Running PowerCLI Cmdlets Asynchronously
By default, PowerCLI cmdlets return an output only after completion of the requested tasks. If you want a cmdlet to return to the command line immediately, without waiting for the tasks to complete, you can use the RunAsync parameter.
When you use the RunAsync parameter, the cmdlet returns Task objects instead of its usual output. The Status property of a returned Task object contains a snapshot of the initial state of the task. This state is not updated automatically and has the values Error, Queued, Running, or Success. You can refresh a task state by retrieving the task object with the Get-Task cmdlet. If you want to observe the progress of a running task and wait for its completion before running other commands, use the Wait-Task cmdlet.
Note In PowerCLI, the RunAsync parameter affects only the invocation of a cmdlet and does not control whether the initiated tasks run consecutively or in parallel. For example, the Remove-VM cmdlet might remove the selected virtual machines simultaneously or consecutively depending on the internal design of PowerCLI. To make sure that tasks initiated by a cmdlet run consecutively, run the cmdlet in a loop, each time applying it to a single object.
Example: Running Remove-VM with and without the RunAsync parameter
Remove-VM $vmList
The command returns no output when all virtual machines stored in the $vmList variable are removed, irrespective of whether they are removed simultaneously.
Remove-VM $vmList -RunAsync
The command returns an output that consists of one or more Task objects immediately.
Managing Default Server Connections
By default, PowerCLI and PowerCLI cmdlets run on the vCenter Server systems or VMware Cloud Director servers you are connected to, if no target servers can be determined from the provided parameters.
When you connect to a vCenter Server system by using Connect-VIServer, the server connection is stored in the $DefaultVIServers array variable. This variable contains all connected servers for the current PowerCLI session. To remove a server from the $DefaultVIServers variable, you can either use Disconnect-VIServer to close all active connections to this server, or modify the value of $DefaultVIServers manually.
When you connect to a VMware Cloud Director system by using Connect-CIServer, the server connection is stored in the $DefaultCIServers array variable. This variable contains all connected servers for the current session. To remove a server from the $DefaultCIServers variable, you can either use Disconnect-CIServer to close all active connections to this server, or modify the value of $DefaultCIServers manually.
VMware PowerCLI User's Guide
VMware, Inc. 17

Customization Specification Objects in PowerCLI
PowerCLI provides two types of objects for customization specification: persistent and nonpersistent.
Persistent Customization
Persistent customization specification objects are stored on the vSphere server. All persistent customization specifications created by using vSphere Client or VMware PowerCLI 4.1 or later are encrypted. Encrypted customization specifications can be applied only by the server that has encrypted them.
Nonpersistent Customization
Nonpersistent customization specification objects exist only inside the current PowerShell process. Nonpersistent customization specification objects are not encrypted, but cloning them to a vSphere server encrypts them.
Using ESXCLI with PowerCLI
PowerCLI provides you the capability to use ESXCLI through its console.
PowerCLI provides two approaches for working with ESXCLI:
n Through the Get-ESXCli cmdlet, which provides direct access to the ESXCLI namespaces, applications, and commands.
n Through .NET methods, which you use to create managed objects that correspond to specific ESXCLI applications. To access the ESXCLI, you can call methods on these managed objects.
Note To call a method of an ESXCLI object, you must provide values for all parameters. If you want to omit a given parameter, pass $null as its argument.
PowerCLI Inventory Provider
The Inventory Provider is designed to expose an unfiltered inventory view of the inventory items from a server.
It enables navigation and file-style management of the VMware vSphere inventory. By creating a PowerShell drive based on a managed object (such as a data center), you can obtain a view of its contents and the relationships between the items. In addition, you can move, rename, or delete objects by running commands from the PowerShell console.
When you connect to a server with Connect-VIServer, the cmdlet builds two default inventory drives: vi and vis. The vi inventory drive shows the inventory on the last connected server. The vis drive contains the inventory of all vSphere servers connected within the current PowerCLI session.
You can use the default inventory drives or create custom drives based on the default ones.
VMware PowerCLI User's Guide
VMware, Inc. 18

PowerCLI Datastore Provider
The Datastore Provider is designed to provide access to the contents of one or more datastores.
The items in a datastore are files that contain configuration, virtual disk, and the other data associated with a virtual machine.
When you connect to a server with Connect-VIServer, the cmdlet builds two default datastore drives: vmstore and vmstores. The vmstore drive provides a list of the datastores available on the vSphere server that you last connected to.
Note If you establish multiple connections to the same vSphere server, the vmstore drive is not updated.
The vmstores drive contains all datastores available on all vSphere servers that you connected to within the current PowerCLI session.
You can use the default datastore drives or create custom drives based on the default ones.
PowerCLI About Articles
You can learn more about some PowerCLI concepts and features from the built-in help articles named about articles. You can access them through a running PowerCLI process.
Running Help About_* lists all built-in PowerShell and VMware PowerCLI about articles.
Table 1-2. Accessing Built-In Help Articles for PowerCLI
Article Title Command Article Description
Customer Experience Improvement Program (CEIP)
Help About_CEIP Provides information about VMware's Customer Experience Improvement Program ("CEIP").
Handling Invalid Certificates Help About_Invalid_Certificates When you connect to a server, VMware PowerCLI checks if the server certificate is valid. If the certificate is not trusted for this server, by default, VMware PowerCLI fails to connect to the server.
Object-by-Name (OBN) Help About_OBN To help you save time and effort, PowerCLI lets you select objects by their names.
VMware PowerCLI Objects Help About_PowerCLI_Objects For their input and output, the PowerCLI cmdlets use a set of .NET types that reside in the VMware.VimAutomation.ViCore.Types
namespace.
Using the RunAsync Parameter Help About_RunAsync When you set the RunAsync parameter, you indicate that you want to run the cmdlet asynchronously.
VMware PowerCLI User's Guide
VMware, Inc. 19

Table 1-2. Accessing Built-In Help Articles for PowerCLI (continued)
Article Title Command Article Description
Authenticating with a vCenter Server System or a VMware Cloud Director Server
Help About_Server_Authentication To authenticate with vCenter Server and VMware Cloud Director servers, you can provide a user name and password through the User and Password parameters, or a PSCredential object through the Credential parameter.
Unique Identifiers for PowerCLI Objects (UID)
Help About_UID You can uniquely identify a PowerCLI object on a server or across multiple servers by providing its UID.
Datastore Provider (VimDatastore) Help About_VimDatastore The Datastore Provider (VimDatastore) provides a filesystem-style view and access to the contents of datastores.
LicenseDataManager Help About_LicenseDataManager The LicenseDataManager component lets you extend the vCenter Server inventory with license data.
VMware PowerCLI User's Guide
VMware, Inc. 20

Installing VMware PowerCLI 2VMware PowerCLI lets you manage, monitor, automate, and handle lifecycle operations on vCenter Server, vRealize Operations Manager, vSphere Automation SDK, vSAN, VMware Cloud Director, vSphere Update Manager, NSX-T, and VMware Cloud on AWS systems from the command line. You can install VMware PowerCLI modules on all supported operating systems.
After installing the package on your machine, you can connect to your vCenter Server, vRealize Operations Manager, vSphere Automation SDK, VMware Cloud Director, or vSphere Update Manager system by providing valid authentication credentials.
n Supported Operating Systems
You can install PowerCLI on supported operating systems. You can run guest cmdlets against virtual machines on which supported guest operating systems are installed.
n Supported VMware Products
You can use the PowerCLI modules to manage all supported VMware products.
n Supported PowerShell Versions
PowerCLI is compatible with multiple versions of PowerShell.
n Prerequisites for Installing and Running PowerCLI
Before installing and running PowerCLI, verify that you have installed the required software on the same machine.
n Install PowerCLI
You can install PowerCLI by running a PowerShell command. You can install all official modules with a single command, or install modules individually.
n Allow Execution of Local Scripts
If you want to run scripts and load configuration files with PowerCLI, you must set the execution policy of PowerShell to RemoteSigned.
n Update a PowerCLI Module
You can update a PowerCLI module when a new version of the module becomes available.
VMware, Inc. 21

n Uninstall PowerCLI
You can uninstall PowerCLI by running PowerShell commands. You can uninstall all official modules, or uninstall modules individually.
Supported Operating Systems
You can install PowerCLI on supported operating systems. You can run guest cmdlets against virtual machines on which supported guest operating systems are installed.
PowerCLI Local Operating Systems
For a list of operating systems on which you can install VMware PowerCLI 12.1.0, see Compatibility Matrixes for VMware PowerCLI 12.1.0.
PowerCLI Guest Operating Systems
You can run VMware PowerCLI 12.1.0 guest cmdlets against virtual machines with supported guest operating systems. For a list of supported operating systems, see Compatibility Matrixes for VMware PowerCLI 12.1.0.
Note Guest cmdlets are not compatible with IPv6 environments.
Supported VMware Products
You can use the PowerCLI modules to manage all supported VMware products.
For a list of VMware products with which VMware PowerCLI 12.1.0 is compatible, see VMware Product Interoperability Matrixes.
Supported PowerShell Versions
PowerCLI is compatible with multiple versions of PowerShell.
For a list of PowerShell versions with which VMware PowerCLI 12.1.0 is compatible, see Compatibility Matrixes for VMware PowerCLI 12.1.0.
Prerequisites for Installing and Running PowerCLI
Before installing and running PowerCLI, verify that you have installed the required software on the same machine.
For a list of software that you need if you want to work with VMware PowerCLI 12.1.0, see Compatibility Matrixes for VMware PowerCLI 12.1.0.
VMware PowerCLI User's Guide
VMware, Inc. 22

Install PowerCLI
You can install PowerCLI by running a PowerShell command. You can install all official modules with a single command, or install modules individually.
The PowerCLI modules are available on the PowerShell Gallery Web site. When you run Install-Module from the PowerShell prompt, the command downloads and installs the specified module. For a list of available PowerCLI modules, see the PowerShell Gallery Web site.
Prerequisites
n Before installing PowerCLI, see Prerequisites for Installing and Running PowerCLI.
n Verify that you have uninstalled PowerCLI 6.5 R1 or earlier from your system.
n Verify that your system is connected to the Internet.
n Verify that you have registered the PowerShell Gallery as a local repository.
n If you use Windows PowerShell 3.0 or 4.0, install the PowerShellGet and PackageManagement modules from the PowerShell Gallery Web site.
Procedure
1 Open the PowerShell console.
2 To install all official PowerCLI modules, run the following command.
Install-Module VMware.PowerCLI -Scope CurrentUser
What to do next
Enable execution of local scripts. See Allow Execution of Local Scripts.
Allow Execution of Local Scripts
If you want to run scripts and load configuration files with PowerCLI, you must set the execution policy of PowerShell to RemoteSigned.
For security reasons, PowerShell supports an execution policy feature. It determines whether scripts are allowed to run and whether they must be digitally signed. By default, the execution policy is set to Restricted, which is the most secure policy. For more information about the execution policy and script digital signing in PowerShell, run Get-Help About_Signing.
You can change the execution policy by using the Set-ExecutionPolicy cmdlet.
Procedure
1 Open the PowerShell console.
2 Run Set-ExecutionPolicy RemoteSigned.
VMware PowerCLI User's Guide
VMware, Inc. 23

Update a PowerCLI Module
You can update a PowerCLI module when a new version of the module becomes available.
If you use Update-Module, the existing version of the module is not removed. To update a module, you should first uninstall the existing version of the module and then install the new version.
Procedure
1 Open the PowerShell console.
2 Uninstall the existing version of the module.
Get-Module VMware.Module_Name | Uninstall-Module -Force
3 Install the new version of the module.
Install-Module VMware.Module_Name
Uninstall PowerCLI
You can uninstall PowerCLI by running PowerShell commands. You can uninstall all official modules, or uninstall modules individually.
Prerequisites
n Verify that you have closed all PowerShell sessions which are running PowerCLI modules.
Procedure
1 Open the PowerShell console.
2 To uninstall all official PowerCLI modules except VMware.PowerCLI, run the following command.
(Get-Module VMware.PowerCLI -ListAvailable).RequiredModules | Uninstall-Module -Force
3 To uninstall the PowerCLI main module, run the following command.
Get-Module VMware.PowerCLI -ListAvailable | Uninstall-Module -Force
VMware PowerCLI User's Guide
VMware, Inc. 24

Configuring VMware PowerCLI 3To extend and customize the features of VMware PowerCLI, you can configure the application settings for different users and user groups, modify the script configuration file of VMware PowerCLI, and add custom scripts.
This chapter includes the following topics:
n Scoped Settings of PowerCLI
Scoped Settings of PowerCLI
In PowerCLI you can set the scope of the settings to enhance security and personalize the configuration.
n Configuring the Scope of the PowerCLI Settings
Scoped configuration enhances system security and prevents nonadministrator users from introducing global changes to the configuration of PowerCLI.
n Priority of Settings Scopes in PowerCLI
PowerCLI loads the program configuration based on the scope that you select for each setting.
n PowerCLI Configuration Files
The copies of the PowerCLI_settings.xml file on your system contain User and AllUsers settings for PowerCLI.
Configuring the Scope of the PowerCLI Settings
Scoped configuration enhances system security and prevents nonadministrator users from introducing global changes to the configuration of PowerCLI.
For greater control over the PowerCLI configuration, the Set-PowerCLIConfiguration cmdlet provides the Scope parameter.
VMware, Inc. 25

Table 3-1. Valid Values for the Scope Parameter
Parameter Value Description
Session Configures settings for the current PowerCLI session and does not modify any PowerCLI configuration files on your system.
User Configures settings for the current Windows user and modifies some PowerCLI configuration files on your system.
AllUsers Configures settings for all users and modifies some PowerCLI configuration files on your system.
Priority of Settings Scopes in PowerCLI
PowerCLI loads the program configuration based on the scope that you select for each setting.
Table 3-2. Scope Impact on the Behavior of PowerCLI
Scope Priority Impact
Session High n When started, PowerCLI tries to load settings with the Session scope first.
n Session settings override User and AllUsers settings.
n Session settings are valid for the current PowerCLI session only.
User Medium n When PowerCLI cannot detect Session settings, the program tries to load User settings from the PowerCLI configuration files.
n User settings override AllUsers settings.
n User settings are automatically detected from the PowerCLI configuration files.
AllUsers Low n When PowerCLI cannot detect Session and User settings, the program loads AllUsers settings.
n AllUsers settings do not override Session and User settings.
n AllUsers settings are automatically detected from the PowerCLI configuration files.
PowerCLI Configuration Files
The copies of the PowerCLI_settings.xml file on your system contain User and AllUsers settings for PowerCLI.
Configuring PowerCLI by running Set-PowerCLIConfiguration creates a copy of PowerCLI_settings.xml on your system. The location of the PowerCLI_settings.xml file depends on the value of the Scope parameter.
Note You must have administrator privileges to change the settings for AllUsers.
VMware PowerCLI User's Guide
VMware, Inc. 26
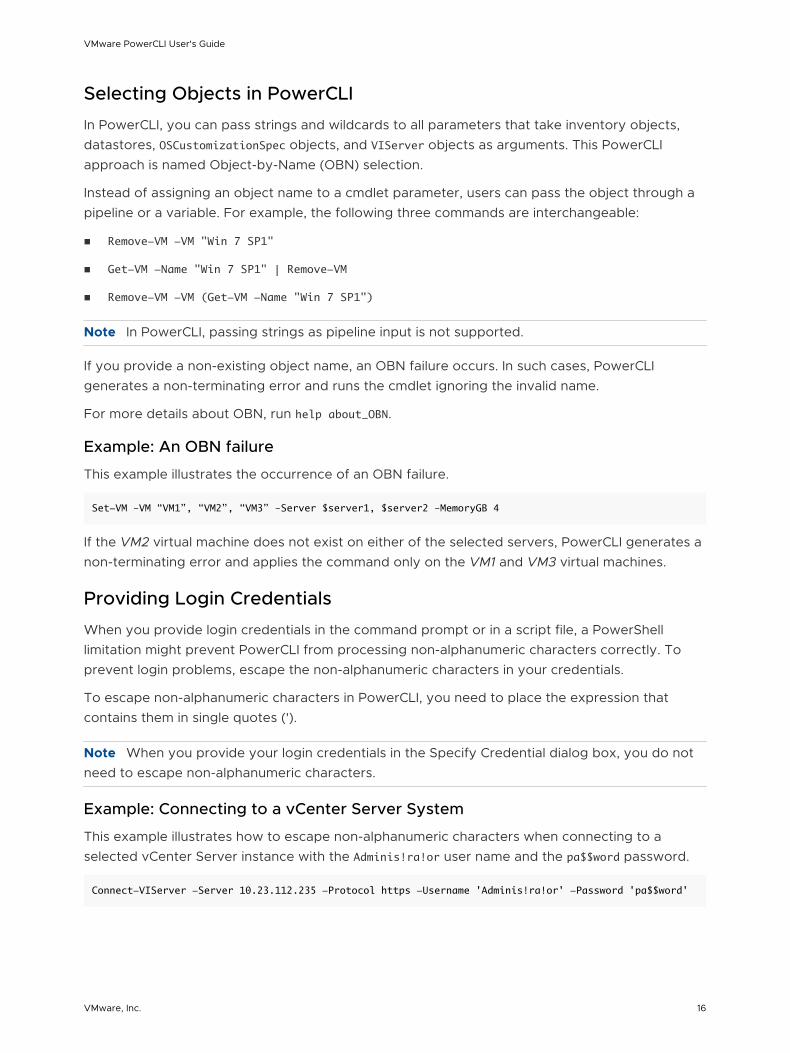
Table 3-3. Location of PowerCLI_settings.xml
Windows OS Version Scope Location Description
Windows 7 and later
User %APPDATA%\Roaming\VMWare\PowerCLI Contains settings for the current Windows user only.
AllUsers %SYSTEMDRIVE%\ProgramData\VMware
\PowerCLI
Contains settings for all users.
Users with advanced knowledge and understanding of PowerShell and VMware PowerCLI can manually modify the contents of PowerCLI_settings.xml to change PowerCLI settings. Modifying PowerCLI_settings.xml might require administrator privileges.
Note If you modify the contents of PowerCLI_settings.xml manually while PowerCLI is running, you must restart PowerCLI for the changes to take effect.
VMware PowerCLI User's Guide
VMware, Inc. 27

Configuring Customer Experience Improvement Program 4When you choose to participate in the Customer Experience Improvement Program (CEIP), VMware receives anonymous information to improve the quality, reliability, and functionality of VMware products and services.
This chapter includes the following topics:
n Categories of Information That VMware Receives
n Join the Customer Experience Improvement Program in PowerCLI
Categories of Information That VMware Receives
This product participates in VMware's Customer Experience Improvement Program ("CEIP").
Details regarding the data collected through CEIP and the purposes for which it is used by VMware are set forth at the Trust & Assurance Center at http://www.vmware.com/trustvmware/ceip.html. To join or leave the CEIP for this product, see Join the Customer Experience Improvement Program in PowerCLI.
Join the Customer Experience Improvement Program in PowerCLI
You can choose to join the Customer Experience Improvement Program (CEIP), or leave the CEIP at any time.
Procedure
u Run Set-PowerCLIConfiguration.
n To join the CEIP, run the following command.
Set-PowerCLIConfiguration -ParticipateInCeip $true
n To leave the CEIP, run the following command.
Set-PowerCLIConfiguration -ParticipateInCeip $false
VMware, Inc. 28

Sample Scripts for Managing vSphere with VMware PowerCLI 5To help you get started with VMware PowerCLI, this documentation provides a set of sample scripts that illustrate basic and advanced tasks in vSphere administration.
n Connect to a vCenter Server System
To run PowerCLI cmdlets on vSphere and perform administration or monitoring tasks, you must establish a connection to an ESXi host or a vCenter Server system.
n Manage Virtual Machines on vSphere
With PowerCLI, you can automate various administration tasks on virtual machines, for example retrieving information, shutting down and powering off virtual machines.
n Add a Standalone Host to a vCenter Server System
You can add standalone hosts to a vCenter Server system by using the Add-VMHost cmdlet. After adding the hosts, you will be able to manage them through the vCenter Server system.
n Set the License Key for a Host on vCenter Server
You can set the license key for a host on a vCenter Server system by using the LicenseKey parameter of the Set-VMHost cmdlet.
n Activate Maintenance Mode for a Host on vCenter Server
To complete some specific administration tasks, you might need to activate maintenance mode for a host. On vCenter Server, you can activate maintenance mode by using the Set-VMHost cmdlet.
n Create vSphere Inventory Objects
By using PowerCLI cmdlets, you can automate creating different inventory objects on vSphere.
n Create Virtual Machines on vCenter Server Using an XML Specification File
You can use a specification provided in an XML file to automate the creation of virtual machines on vCenter Server.
n Manage Virtual Machine Templates on vCenter Server
You can use PowerCLI to create virtual machines templates and convert them to virtual machines on vCenter Server.
VMware, Inc. 29

n Create and Use Snapshots on vCenter Server
You can use the Snapshot parameter of Get-VM to take a snapshot of virtual machines and then revert the states of the virtual machines back to the snapshot.
n Update the Resource Configuration Settings of a Virtual Machine on vCenter Server
You can use the Set-VMResourceConfiguration cmdlet to modify the resource configuration properties of a virtual machine, including memory, CPU shares, and other settings.
n Get a List of Hosts on a vCenter Server System and View Their Properties
With PowerCLI, you can get information about all available hosts in a data center and view their properties.
n Change the Host Advanced Configuration Settings on vCenter Server
You can modify host configuration, including advanced settings related to virtual machine migration, and apply them to another host.
n Move a Virtual Machine to a Different Host Using VMware vSphere vMotion
You can migrate a virtual machine between vCenter Server hosts by using vSphere vMotion.
n Move a Virtual Machine to a Different Datastore Using VMware vSphere Storage vMotion
You can migrate a virtual machine between datastores using the VMware Storage vMotion feature of vCenter Server.
n Move a Virtual Machine to a Different vCenter Server System
You can migrate a virtual machine from one vCenter Server system to another by using Cross vCenter Server vMotion.
n Create a Host Profile on a vCenter Server System
The VMware Host Profiles feature enables you to create standard configurations for ESXi hosts. With PowerCLI, you can automate creation and modifying of host profiles.
n Apply a Host Profile to a Host on vCenter Server
To simplify operational management of large-scale environments, you can apply standard configurations called host profiles to hosts on vCenter Server. If you want to set up a host to use the same host profile as a reference host, you can attach the host to a profile.
n Manage Statistics and Statistics Intervals on vCenter Server
You can use the PowerCLI cmdlets to automate tasks for viewing and managing statistics for vCenter Server inventory objects.
n Modify the Settings of the NIC Teaming Policy for a Virtual Switch
You can set the NIC teaming policy on a vSwitch. The NIC teaming policy determines the load balancing and failover settings of a virtual switch and lets you mark NICs as unused.
n Create a vApp on vCenter Server
With PowerCLI, you can create and manage vApps.
VMware PowerCLI User's Guide
VMware, Inc. 30

n Modify the Properties of a vApp
With PowerCLI, you can start and stop vApps, and modify their properties.
n Export or Import vApps
You can import and export vApps to OVA and OVF files.
n Create an iSCSI Host Storage
For a host, you can enable iSCSI, add iSCSI targets, and create new host storages.
n Add Passthrough Devices to a Host and Virtual Machine
You can get information about existing passthrough devices and add new SCSI and PCI devices to virtual machines and hosts.
n Create a Custom Property Based on an Extension Data Property
You can create custom properties to add more information to vSphere objects. Custom properties based on extension data properties correspond directly to the property of the corresponding .NET view object.
n Create a Script-Based Custom Property for a vSphere Object
You can create a custom property by writing a script and providing a name for the property. The script evaluates when the custom property is called for the first time.
n Apply a Customization Object to a Cloned Virtual Machine
You can apply a custom configuration to a cloned virtual machine by using a customization object.
n Modify the Default NIC Mapping Object of a Customization Specification
You can modify the default NIC mapping object of a customization specification and apply the specification on a newly created virtual machine.
n Modify Multiple NIC Mapping Objects of a Customization Specification
You can modify multiple NIC mapping objects of a customization specification and apply the specification to an existing virtual machine.
n Create Multiple Virtual Machines that Use Static IP Addresses
You can deploy multiple virtual machines with a single network adapter and configure the deployed virtual machines to use static IP addresses by applying a customization specification.
n Create Multiple Virtual Machines with Two Network Adapters
You can deploy multiple virtual machines with two network adapters each and configure each adapter to use specific network settings by applying a customization specification.
n Create a vSphere Role and Assign Permissions to a User
With PowerCLI, you can automate management of vSphere permissions, roles, and privileges.
n View Actions and Triggers for an Alarm on vCenter Server
You can see which actions and triggers are configured for an alarm.
VMware PowerCLI User's Guide
VMware, Inc. 31

n Create Alarm Definitions on vCenter Server
With PowerCLI, you can create vCenter Server alarm definitions.
n Modify Alarm Definitions on vCenter Server
With PowerCLI, you can modify vCenter Server alarm definitions.
n Create Alarm Actions and Triggers on vCenter Server
With PowerCLI, you can create vCenter Server alarm actions and triggers.
n Remove Alarm Definitions and Actions
In some cases, you might want to remove obsolete alarm definitions and actions.
n Create and Modify Advanced Settings for a Cluster
You can customize the behavior of a cluster on a vCenter Server system by creating and modifying custom advanced settings for it.
n Modify the vCenter Server Email Configuration
You can modify the email configuration settings of a vCenter Server.
n Modify the vCenter Server SNMP Configuration
To use SNMP, you must first configure the SNMP settings of the vCenter Server.
n Use Esxtop to Get Information on the Virtual CPUs of a Virtual Machine
You can use the Get-EsxTop cmdlet to retrieve real-time data for troubleshooting performance problems.
n Filter vSphere Objects with Get-View
You can use the Get-View cmdlet to filter vSphere objects before performing various actions on them.
n Populate a View Object with Get-View
To save time and efforts, you can use Get-View to retrieve PowerCLI views from previously retrieved view objects.
n Update the State of a Server-Side Object
You can use the Get-View cmdlet to update server-side objects.
n Reboot a Host with Get-View
You can reboot a host by using its corresponding view object.
n Modify the CPU Levels of a Virtual Machine with Get–View and Get–VIObjectByVIView
You can modify the CPU levels of a virtual machine using a combination of the Get-View and Get-VIObjectByVIView cmdlets.
n Browse the Default Inventory Drive
You can browse the default inventory drive and view its contents.
VMware PowerCLI User's Guide
VMware, Inc. 32

n Create a New Custom Inventory Drive
In addition to the default drive, you can create new custom inventory drives by using the New-PSDrive cmdlet.
n Manage Inventory Objects Through Inventory Drives
You can use the PowerCLI Inventory Provider to browse, modify, and remove inventory objects from inventory drives.
n Browse the Default Datastore Drives
You can use the PowerCLI Datastore Provider to browse the default datastore drives: vmstore and vmstores.
n Create a New Custom Datastore Drive
You can use the PowerCLI Datastore Provider to create custom datastore drives.
n Manage Datastores Through Datastore Drives
You can use the PowerCLI Datastore Provider to browse datastores from datastore drives.
n Modify the Timeout Setting for Web Tasks
To avoid unexpected timeouts, you can run Set-PowerCLIConfiguration to modify the PowerCLI settings for long-running Web tasks.
n Using Tags
You can assign tags to different types of objects, such as virtual machines, resource pools, datastores, and vSphere distributed switches. You can use tags to retrieve a specific group of objects.
n Network Management with vSphere Distributed Switches
The cmdlets provided in the VMware.VimAutomation.VDS module let you manage networking with vSphere distributed switches and port groups.
n Create a Local Content Library
With PowerCLI, you can create a local content library.
n Create a Subscribed Content Library
With PowerCLI, you can create a subscribed content library.
n Create a Content Library Item
With PowerCLI, you can create content library items.
n Create a Virtual Machine from a Content Library Item
You can deploy a virtual machine from a content library template.
n Create a vApp from a Content Library Item
You can deploy a vApp from a content library template.
n Export Content Library Item's Files to a Local Machine
With PowerCLI, you can export content library item's files to a local machine.
VMware PowerCLI User's Guide
VMware, Inc. 33

n Create a New VM-VM DRS Rule
You can create a VM-VM DRS affinity rule within a cluster.
n Create a New VM-VMHost DRS Rule
You can create a VM-VMHost DRS rule within a cluster after creating a VM DRS cluster group and a VMHost DRS cluster group.
Connect to a vCenter Server System
To run PowerCLI cmdlets on vSphere and perform administration or monitoring tasks, you must establish a connection to an ESXi host or a vCenter Server system.
You can have more than one connection to the same server. For more information, see Managing Default Server Connections.
If your login credentials contain non-alphanumeric characters, you might need to escape them. For more information, see Providing Login Credentials.
Prerequisites
If you use a proxy server for the connection, verify that it is configured properly, so that the connection is kept alive long enough for tasks to finish.
Note If you do not want to use a proxy server for the connection, run Set-PowerCLIConfiguration -ProxyPolicy NoProxy.
Procedure
u Run Connect-VIServer with the server name and valid credentials.
Connect-VIServer -Server esx3.example.com -Protocol http -User 'MyAdministratorUser' -Password
'MyPassword'
Manage Virtual Machines on vSphere
With PowerCLI, you can automate various administration tasks on virtual machines, for example retrieving information, shutting down and powering off virtual machines.
Procedure
1 View all virtual machines on the target system.
Get-VM
2 Save the name and the power state properties of the virtual machines in the ResourcePool resource pool into a file named myVMProperties.txt.
$respool = Get-ResourcePool ResourcePool
Get-VM -Location $respool | Select-Object Name, PowerState > myVMProperties.txt
VMware PowerCLI User's Guide
VMware, Inc. 34

3 Start the VM virtual machine.
Get-VM VM | Start-VM
4 Get information of the guest OS of the VM virtual machine.
Get-VMGuest VM | fc
5 Shut down the OS of the VM virtual machine.
Stop-VMGuest VM
6 Power off the VM virtual machine.
Stop-VM VM
7 Move the virtual machine VM from the Host01 host to the Host02 host.
Get-VM -Name VM -Location Host01 | Move-VM –Destination Host02
Note If the virtual machine you want to move across hosts is powered on, it must be located on a shared storage registered as a datastore on both the original and the new host.
Add a Standalone Host to a vCenter Server System
You can add standalone hosts to a vCenter Server system by using the Add-VMHost cmdlet. After adding the hosts, you will be able to manage them through the vCenter Server system.
Prerequisites
Verify that you are connected to a vCenter Server system.
Procedure
1 View all hosts on the vCenter Server system that you have established a connection with.
Get-VMHost
2 Add the Host standalone host.
Add-VMHost -Name Host -Location (Get-Datacenter DC) -User root -Password pass
Set the License Key for a Host on vCenter Server
You can set the license key for a host on a vCenter Server system by using the LicenseKey parameter of the Set-VMHost cmdlet.
Prerequisites
Verify that you are connected to a vCenter Server system.
VMware PowerCLI User's Guide
VMware, Inc. 35

Procedure
1 Save the Host host object as a variable.
$vmhost = Get-VMHost -Name Host
2 Set the host to evaluation mode or provide a valid license key.
u Set the host to evaluation mode by providing the evaluation key.
Set-VMHost -VMHost $vmhost -LicenseKey 00000-00000-00000-00000-00000
u Provide a valid license key.
Set-VMHost -VMHost $vmhost -LicenseKey Your_license_key
Activate Maintenance Mode for a Host on vCenter Server
To complete some specific administration tasks, you might need to activate maintenance mode for a host. On vCenter Server, you can activate maintenance mode by using the Set-VMHost cmdlet.
Prerequisites
Verify that you are connected to a vCenter Server system.
Procedure
1 Save the Host host object as a variable.
$vmhost = Get-VMHost -Name Host
2 Get the cluster to which Host belongs and save the cluster object as a variable.
$vmhostCluster = Get-Cluster -VMHost $vmhost
3 Start a task that activates maintenance mode for the Host host and save the task object as a variable.
$updateHostTask = Set-VMHost -VMHost $vmhost -State "Maintenance" -RunAsync
Note If the host is not automated or is partially automated and has powered-on virtual machines running on it, you must use the RunAsync parameter and wait until all powered-on virtual machines are relocated or powered off before applying DRS recommendations.
4 Get and apply the recommendations generated by DRS.
Get-DrsRecommendation -Cluster $vmhostCluster | where {$_.Reason -eq "Host is entering
maintenance mode"} | Invoke-DrsRecommendation
VMware PowerCLI User's Guide
VMware, Inc. 36

5 Get the task output object and save it as a variable.
$myUpdatedHost = Wait-Task $updateHostTask
Create vSphere Inventory Objects
By using PowerCLI cmdlets, you can automate creating different inventory objects on vSphere.
Prerequisites
Verify that you are connected to a vCenter Server system.
Procedure
1 Get the inventory root folder and create a new folder named Folder in it.
$folder = Get-Folder -NoRecursion | New-Folder -Name Folder
2 Create a new data center named DC in the Folder folder.
New-Datacenter -Location $folder -Name DC
3 Create a folder named Folder1 under DC.
Get-Datacenter DC | New-Folder -Name Folder1
$folder1 = Get-Folder -Name Folder1
4 Create a new cluster Cluster1 in the Folder1 folder.
New-Cluster -Location $folder1 -Name Cluster1 -DrsEnabled -DrsAutomationLevel FullyAutomated
Distributed Resource Scheduler (DRS) is a feature that provides automatic allocation of cluster resources.
5 Add a host in the cluster by using the Add-VMHost command, and provide credentials when prompted.
$vmhost1 = Add-VMHost -Name 10.23.112.345 -Location (Get-Cluster Cluster1)
6 Create a resource pool in the root resource pool of the cluster.
$myClusterRootRP = Get-Cluster Cluster1 | Get-ResourcePool -Name Resources
New-ResourcePool -Location $myClusterRootRP -Name MyRP1 -CpuExpandableReservation $true -
CpuReservationMhz 500 -CpuSharesLevel high -MemExpandableReservation $true -MemReservationGB 1 -
MemSharesLevel high
7 Create a virtual machine asynchronously.
$vmCreationTask = New-VM -Name VM2 -VMHost $vmhost1 -ResourcePool MyRP01 -DiskGB 100 -MemoryGB 2 -
RunAsync
VMware PowerCLI User's Guide
VMware, Inc. 37

The RunAsync parameter indicates that the command runs asynchronously. This means that in contrast to a synchronous operation, you do not have to wait for the process to complete before supplying the next command at the command line.
Create Virtual Machines on vCenter Server Using an XML Specification File
You can use a specification provided in an XML file to automate the creation of virtual machines on vCenter Server.
Prerequisites
Verify that you are connected to a vCenter Server system.
The myVM.xml file must be present with the following content:
<CreateVM>
<VM>
<Name>MyVM1</Name>
<HDDCapacity>100</HDDCapacity>
</VM>
<VM>
<Name>MyVM2</Name>
<HDDCapacity>100</HDDCapacity>
</VM>
</CreateVM>
Procedure
1 Read the content of the myVM.xml file.
[xml]$s = Get-Content myVM.xml
2 Create the virtual machines.
$s.CreateVM.VM | foreach {New-VM -VMHost $vmHost1 -Name $_.Name -DiskGB $_.HDDCapacity}
Manage Virtual Machine Templates on vCenter Server
You can use PowerCLI to create virtual machines templates and convert them to virtual machines on vCenter Server.
Note A virtual machine template is a reusable image created from a virtual machine. The template, as a derivative of the source virtual machine, includes virtual hardware components, an installed guest operating system, and software applications.
Prerequisites
Verify that you are connected to a vCenter Server system.
VMware PowerCLI User's Guide
VMware, Inc. 38
Procedure
1 Create a template from the VM1 virtual machine.
New-Template -VM VM1 -Name VM1Template -Location (Get-Datacenter DC )
2 Convert the VM1Template template for use by a virtual machine named VM3.
Get-Template VM1Template | Set-Template -ToVM -Name VM3
3 Create a template from the VM2 virtual machine.
New-Template -VM VM2 -Name VM2Template -Location (Get-Datacenter DC )
4 Convert the VM2Template template to a virtual machine named VM4.
Get-Template VM2Template | Set-Template -ToVM -Name VM4
5 Convert the VM4 virtual machine to a template.
Set-VM –VM VM4 –ToTemplate –Name “VM4Template”
6 Create a template called VM3Template by cloning VM2Template.
Get-Template VM2Template | New-Template -Name VM3Template –VMHost $targetVMHost
Create and Use Snapshots on vCenter Server
You can use the Snapshot parameter of Get-VM to take a snapshot of virtual machines and then revert the states of the virtual machines back to the snapshot.
Note A snapshot captures the memory, disk, and settings state of a virtual machine at a particular moment. When you revert to a snapshot, you return all these items to the state they were in at the time you took that snapshot.
Prerequisites
Verify that you are connected to a vCenter Server system.
Procedure
1 Take a snapshot of all virtual machines in the MyRP01 resource pool.
Get-ResourcePool MyRP01 | Get-VM | New-Snapshot -Name InitialSnapshot
The Location parameter takes arguments of the VIContainer type, on which Cluster, Datacenter, Folder, ResourcePool, and VMHost object types are based. Therefore, the Location parameter can use arguments of all these types.
VMware PowerCLI User's Guide
VMware, Inc. 39

2 Revert all virtual machines in the MyRP01 resource pool to the InitialSnapshot snapshot.
$VMs = Get-ResourcePool MyRP01 | Get-VM
foreach( $vm in $VMs ) { Set-VM -VM $vm –Snapshot InitialSnapshot }
Update the Resource Configuration Settings of a Virtual Machine on vCenter Server
You can use the Set-VMResourceConfiguration cmdlet to modify the resource configuration properties of a virtual machine, including memory, CPU shares, and other settings.
Prerequisites
Verify that you are connected to a vCenter Server system.
Procedure
1 View the resource configuration for the VM1 virtual machine.
Get-VMResourceConfiguration -VM VM1
2 View the disk share of the VM1 virtual machine.
Get-VMResourceConfiguration -VM VM1 | Format-Custom -Property DiskResourceConfiguration
3 Change the memory share of the VM1 virtual machine to low.
Get-VM VM1 | Get-VMResourceConfiguration | Set-VMResourceConfiguration -MemSharesLevel low
4 Change the CPU shares of the VM1 virtual machine to high.
Get-VM VM1 | Get-VMResourceConfiguration | Set-VMResourceConfiguration -CpuSharesLevel high
5 Change the disk share of the VM1 virtual machine to 100.
$vm1 = Get-VM VM1
$vm1disk = Get-HardDisk $vm1
Get-VMResourceConfiguration $vm1 | Set-VMResourceConfiguration -Disk $vm1disk -DiskSharesLevel
custom -NumDiskShares 100
Get a List of Hosts on a vCenter Server System and View Their Properties
With PowerCLI, you can get information about all available hosts in a data center and view their properties.
Prerequisites
Verify that you are connected to a vCenter Server system.
VMware PowerCLI User's Guide
VMware, Inc. 40

Procedure
1 Get a list of all hosts that are part of a data center.
Get-Datacenter DC | Get-VMHost | Format-Custom
2 View the properties of the first host in the data center.
Get-Datacenter DC | Get-VMHost | Select-Object -First 1 | Format-Custom
3 View the Name and the OverallStatus properties of the hosts in the DC data center.
Get-Datacenter DC | Get-VMHost | Get-View | Format-Table -Property Name, OverallStatus -AutoSize
4 View all hosts and their properties, and save the results to a file.
Get-Datacenter DC | Get-VMHost | Format-Custom | Out-File –FilePath hosts.txt
5 View a list of the hosts that are in maintenance mode and can be configured for vMotion operations.
Get-VMHost -State maintenance | Get-View | Where-Object -FilterScript { $_.capability -ne $null -
and $_.capability.vmotionSupported }
Change the Host Advanced Configuration Settings on vCenter Server
You can modify host configuration, including advanced settings related to virtual machine migration, and apply them to another host.
Prerequisites
Verify that you are connected to a vCenter Server system.
Procedure
1 Change the migration timeout for the ESXHost1 host.
Get-VMHost ESXHost1 | Set-VmHostAdvancedConfiguration -Name Migrate.NetTimeout -Value
( [system.int32] 10 )
2 Enable creation of a checksum of the virtual machines memory during the migration.
Get-VMHost ESXHost1 | Set-VmHostAdvancedConfiguration -Name Migrate.MemChksum -Value
( [system.int32] 1 )
3 Get the ESXHost1 host migration settings.
$migrationSettings = Get-VMHost ESXHost1 | Get-VmHostAdvancedConfiguration -Name Migrate.*
VMware PowerCLI User's Guide
VMware, Inc. 41

4 Apply the migration settings to ESXHost2.
Set-VmHostAdvancedConfiguration -VMHost ESXHost2 -Hashtable $migrationSettings
Move a Virtual Machine to a Different Host Using VMware vSphere vMotion
You can migrate a virtual machine between vCenter Server hosts by using vSphere vMotion.
Note You can use vSphere vMotion to move a powered-on virtual machine from one host to another.
Prerequisites
Verify that you are connected to a vCenter Server system.
The virtual machine must be stored on a datastore shared by the current and the destination host, and the vMotion interfaces on the two hosts must be configured.
Procedure
u Get the VM1 virtual machine and move it to a host named ESXHost2.
Get-VM VM1 | Move-VM -Destination (Get-VMHost ESXHost2)
Move a Virtual Machine to a Different Datastore Using VMware vSphere Storage vMotion
You can migrate a virtual machine between datastores using the VMware Storage vMotion feature of vCenter Server.
Note You can use Storage vMotion to move a powered-on virtual machine from one datastore to another.
Prerequisites
Verify that you are connected to a vCenter Server system.
The host on which the virtual machine is running must have access both to the datastore where the virtual machine is located and to the destination datastore.
Procedure
u Get the VM1 virtual machine and move it to a datastore named DS2:
Get-VM VM1 | Move-VM -Datastore DS2
VMware PowerCLI User's Guide
VMware, Inc. 42

Move a Virtual Machine to a Different vCenter Server System
You can migrate a virtual machine from one vCenter Server system to another by using Cross vCenter Server vMotion.
You can move virtual machines between vCenter Server systems of vSphere version 6.0 and later by using the Move-VM cmdlet. When you move a virtual machine from one vCenter Server system to another, only datastores are supported as storage destinations.
Procedure
1 Connect to the myVC1 source vCenter Server system.
Connect-VIServer 'myVC1' -Username MyUser1 -Password MyPass1
2 Connect to the myVC2 destination vCenter Server system.
Connect-VIServer 'myVC2' -Username MyUser2 -Password MyPass2
3 Store the MyVM virtual machine, its network adapters, the destination host, port group, and datastore in variables.
$vm = Get-VM 'myVM' -Location 'myVMhostOnVC1'
$destination = Get-VMHost 'MyVMhostOnVc2'
$networkAdapter = Get-NetworkAdapter -VM $vm
$destinationPortGroup = Get-VDPortgroup -VDSwitch 'myVDSwitchOnVC2' -Name 'myPortGroup'
$destinationDatastore = Get-Datastore 'MyDatastoreOnVc2'
4 Migrate the virtual machine to the specified destination host and datastore and attach the virtual machine network adapters to the destination port group.
Move-VM -VM $vm -Destination $destination -NetworkAdapter $networkAdapter -PortGroup
$destinationPortGroup -Datastore $destinationDatastore
Create a Host Profile on a vCenter Server System
The VMware Host Profiles feature enables you to create standard configurations for ESXi hosts. With PowerCLI, you can automate creation and modifying of host profiles.
Prerequisites
Verify that you are connected to a host that runs vCenter Server 4.1 or later.
Procedure
1 Get the host named Host1 and store it in the $vmhost variable.
$vmhost = Get-VMHost Host1
VMware PowerCLI User's Guide
VMware, Inc. 43

2 Create a profile based on the Host1 host.
New-VMHostProfile -Name MyHostProfile01 -Description "This is my test profile based on Host1." -
ReferenceHost $vmhost
3 Get the newly created host profile.
$hp1 = Get-VMHostProfile -Name MyHostProfile01
4 Change the description of the HostProfile1 host profile.
Set-VMHostProfile -Profile $hp1 -Description "This is my old test host profile based on Host1."
Apply a Host Profile to a Host on vCenter Server
To simplify operational management of large-scale environments, you can apply standard configurations called host profiles to hosts on vCenter Server. If you want to set up a host to use the same host profile as a reference host, you can attach the host to a profile.
Prerequisites
Verify that you are connected to a host that runs vCenter Server 4.1 or later.
Procedure
1 Get the Host2 host.
$vmhost2 = Get-VMHost Host2
2 Attach the Host2 host to the HostProfile1 host profile.
Set-VMHost -VMHost $vmhost2 -Profile HostProfile1
3 Verify that the Host2 host is compliant with the HostProfile1 profile.
Test-VMHostProfileCompliance -VMHost $vmhost2
The output of this command contains the incompliant settings of the host, if any.
4 Apply the profile to the Host2 host.
$neededVariables = Invoke-VMHostProfile -Entity $vmhost2 -Profile $hp1 -Confirm:$false
The $neededVariables variable contains the names of all required variables and their default or current values, as returned by the server. Otherwise, the $neededVariables variable contains the name of the host on which the profile has been applied.
VMware PowerCLI User's Guide
VMware, Inc. 44

Manage Statistics and Statistics Intervals on vCenter Server
You can use the PowerCLI cmdlets to automate tasks for viewing and managing statistics for vCenter Server inventory objects.
You can modify the properties of a statistics interval and view statistics for a selected cluster.
Prerequisites
Verify that you are connected to a vCenter Server system.
Procedure
1 Increase the amount of time for which statistics of the previous day are stored.
Set-StatInterval -Interval "past day" -StorageTimeSecs 700000
2 View the available memory metric types for the Cluster1 cluster.
$cluster = Get-Cluster Cluster1
$statTypes = Get-StatType -Entity $cluster -Interval "past day" -Name mem.*
3 View the cluster statistics collected for the day.
Get-Stat -Entity $cluster -Start ([System.DateTime]::Now.AddDays(-1)) -Finish
([System.DateTime]::Now) -Stat $statTypes
Modify the Settings of the NIC Teaming Policy for a Virtual Switch
You can set the NIC teaming policy on a vSwitch. The NIC teaming policy determines the load balancing and failover settings of a virtual switch and lets you mark NICs as unused.
Prerequisites
Verify that you are connected to a vCenter Server system.
Procedure
1 Get a list of the physical NIC objects on the host network and store them in a variable.
$pn = Get-VMHost 10.23.123.128 | Get-VMHostNetwork | Select -Property physicalnic
2 Store the physical NIC objects you want to mark as unused in separate variables.
$pn5 = $pn.PhysicalNic[2]
$pn6 = $pn.PhysicalNic[3]
$pn7 = $pn.PhysicalNic[0]
VMware PowerCLI User's Guide
VMware, Inc. 45

3 View the NIC teaming policy of the VSwitch01 virtual switch.
$policy = Get-VirtualSwitch -VMHost 10.23.123.128 -Name VSwitch01 | Get-NicTeamingPolicy
4 Change the policy of the switch to indicate that the $pn5, $pn6, and $pn7 network adapters are unused.
$policy | Set-NicTeamingPolicy -MakeNicUnused $pn5, $pn6, $pn7
5 Modify the load balancing and failover settings of the virtual switch NIC teaming policy.
$policy | Set-NicTeamingPolicy -BeaconInterval 3 -LoadBalancingPolicy 3 -
NetworkFailoverDetectionPolicy 1 -NotifySwitches $false -FailbackEnabled $false
Create a vApp on vCenter Server
With PowerCLI, you can create and manage vApps.
Prerequisites
Verify that you are connected to a vCenter Server system.
Procedure
1 Create a new vApp named VApp on a host.
New-VApp -Name VApp -CpuLimitMhz 4000 -CpuReservationMhz 1000 -Location (Get-VMHost Host1)
2 Start the new virtual appliance.
Start-VApp VApp
Modify the Properties of a vApp
With PowerCLI, you can start and stop vApps, and modify their properties.
Prerequisites
Verify that you are connected to a vCenter Server system.
Procedure
1 Get the vApp named VApp and stop it.
Get-VApp VApp | Stop-VApp -Confirm:$false
2 Change the name and memory reservation for the vApp.
Get-VApp VApp | Set-VApp -Name OldVApp -MemReservationGB 2
VMware PowerCLI User's Guide
VMware, Inc. 46

Export or Import vApps
You can import and export vApps to OVA and OVF files.
Prerequisites
Verify that you are connected to a vCenter Server system.
Procedure
1 Get the vApp you want to export.
$oldVApp = Get-VApp OldVApp
2 Export the OldVApp vApp to a local directory and name the exported appliance WebApp.
Export-VApp -VApp $oldVApp -Name WebApp -Destination D:\vapps\ -CreateSeparateFolder
3 Import the WebApp vApp from a local directory to the Storage2 datastore.
Import-VApp -Source D:\vapps\WebApp\WebApp.ovf -VMHost (Get-VMHost Host1) -Datastore (Get-
Datastore -VMHost MyHost01 -Name Storage2)
Create an iSCSI Host Storage
For a host, you can enable iSCSI, add iSCSI targets, and create new host storages.
Prerequisites
Verify that you are connected to a vCenter Server system.
Procedure
1 Enable software iSCSI on a host.
$vmhost = Get-VMHost ESXHost1
Get-VMHostStorage $myHost | Set-VMHostStorage -SoftwareIScsiEnabled $true
2 Get the iSCSI HBA that is on the host.
$iscsiHba = Get-VMHostHba -Type iScsi
3 Add a new iSCSI target for dynamic discovery.
$iscsiHba | New-IScsiHbaTarget -Address 192.168.0.1 -Type Send
4 Rescan the HBAs on the host.
Get-VMHostStorage $vmhost -RescanAllHba
VMware PowerCLI User's Guide
VMware, Inc. 47

5 Get the path to the SCSI LUN.
$lunPath = Get-ScsiLun -VMHost $vmhost -CanonicalName ($iscsiHba.Device + "*") | Get-ScsiLunPath
You can provide the LUN path by using its canonical name beginning with the device name of the iSCSI HBA.
6 Create a new host storage.
New-Datastore -Vmfs -VMHost $vmhost -Path $lunpath.LunPath -Name iSCSI
Add Passthrough Devices to a Host and Virtual Machine
You can get information about existing passthrough devices and add new SCSI and PCI devices to virtual machines and hosts.
Prerequisites
Verify that you are connected to a vCenter Server system.
Procedure
1 Get a list of the PCI passthrough devices of the VMHost host
$vmhost = Get-VMHost ESXHost
Get-PassthroughDevice -VMHost $vmhost -Type Pci
2 Get a list of the SCSI passthrough devices of the VM virtual machine
$vm = Get-VM VM
Get-PassthroughDevice -VM $vm -Type Scsi
3 Add a SCSI passthrough device to the VM virtual machine
$scsiDeviceList = Get-PassthroughDevice -VMHost ESXHost -Type Scsi
Add-PassthroughDevice -VM $vm -PassthroughDevice $scsiDeviceList[0]
Create a Custom Property Based on an Extension Data Property
You can create custom properties to add more information to vSphere objects. Custom properties based on extension data properties correspond directly to the property of the corresponding .NET view object.
Prerequisites
Verify that you are connected to a vCenter Server system.
VMware PowerCLI User's Guide
VMware, Inc. 48
Procedure
1 Create a new custom property based on the Guest.ToolsVersion property.
New-VIProperty -ObjectType VirtualMachine -Name ToolsVersion -ValueFromExtensionProperty
'Guest.ToolsVersion'
2 View the ToolsVersion properties of the available virtual machines.
Get-VM | Select Name, ToolsVersion
Results
You have created a custom property named ToolsVersion for VirtualMachine objects.
Create a Script-Based Custom Property for a vSphere Object
You can create a custom property by writing a script and providing a name for the property. The script evaluates when the custom property is called for the first time.
Prerequisites
Verify that you are connected to a vCenter Server system.
Procedure
1 Create a new custom property named NameOfHost that stores the name of the host on which a virtual machine resides.
New-VIProperty -Name NameOfHost -ObjectType VirtualMachine -Value { return $args[0].VMHost.Name }
2 View the NameOfHost properties of the available virtual machines.
Get-VM | select Name, NameOfHost | Format-Table -AutoSize
Results
You created a custom script property named NameOfHost for VirtualMachine objects.
Apply a Customization Object to a Cloned Virtual Machine
You can apply a custom configuration to a cloned virtual machine by using a customization object.
Note This feature runs only on a 32-bit PowerCLI process.
Prerequisites
Verify that you are connected to a vCenter Server system.
VMware PowerCLI User's Guide
VMware, Inc. 49

Procedure
1 Get the Spec customization specification and clone it for temporary use.
Get-OSCustomizationSpec Spec | New-OSCustomizationSpec -Type NonPersistent -Name ClientSpec
2 Change the NamingPrefix property of the customization object to the name of the virtual machine you want to create.
Set-OSCustomizationSpec -Spec ClientSpec -NamingPrefix VM1
3 Create a virtual machine named VM1 by cloning the existing VM virtual machine and applying the customization specification.
Get-VM VM | New-VM -VMHost Host -Datastore Storage1 -OSCustomizationSpec ClientSpec -Name VM1
Modify the Default NIC Mapping Object of a Customization Specification
You can modify the default NIC mapping object of a customization specification and apply the specification on a newly created virtual machine.
Procedure
1 Create a nonpersistent customization specification for Windows operating systems.
New-OSCustomizationSpec -Type NonPersistent -Name Spec -OSType Windows -Workgroup Workgroup -
OrgName Company -Fullname User -ProductKey “valid_key” -ChangeSid -TimeZone "Central European" -
NamingScheme VM
2 View the default NIC mapping objects of the Spec specification.
Get-OSCustomizationNicMapping -Spec Spec | Set-OSCustomizationNicMapping -IpMode UseStaticIP -
IpAddress 172.16.1.30 -SubnetMask 255.255.255.0 -DefaultGateway 172.16.1.1 -Dns 172.16.1
Each customization specification object has one default NIC mapping object.
3 Modify the default NIC mapping object of the Spec customization specification to use static IP.
Get-OSCustomizationNicMapping -Spec Spec | Set-OSCustomizationNicMapping -IpMode UseStaticIP -
IpAddress 172.16.1.30 -SubnetMask 255.255.255.0 -DefaultGateway 172.16.1.1 -Dns 172.16.1.1
4 Create a new virtual machine named VM1 from a template, and apply the static IP settings.
New-VM -Name VM1 -VMHost Host -Datastore Storage1 -OSCustomizationSpec Spec -Template Template
VMware PowerCLI User's Guide
VMware, Inc. 50
Modify Multiple NIC Mapping Objects of a Customization Specification
You can modify multiple NIC mapping objects of a customization specification and apply the specification to an existing virtual machine.
Procedure
1 Get the network adapters of a virtual machine named VM.
Get-NetworkAdapter VM
When you apply a customization specification, each network adapter of the customized virtual machine must have a corresponding NIC mapping object. You can correlate network adapters and NIC mapping objects either by their position numbers, or by MAC address.
2 Create a customization specification named Spec.
New-OSCustomizationSpec -Type NonPersistent -Name Spec -OSType Windows -Workgroup Workgroup -
OrgName Company -Fullname User -ProductKey “valid_key” -ChangeSid -TimeZone "Central European" -
NamingScheme VM
3 Add a new NIC mapping object that uses a static IP address.
New-OSCustomizationNicMapping -Spec Spec -IpMode UseStaticIP -IpAddress 172.16.1.30 -SubnetMask
255.255.255.0 -DefaultGateway 172.16.1.1 -Dns 172.16.1.1
4 View the NIC mapping objects and verify that two NIC mapping objects are available.
Get-OSCustomizationNicMapping -Spec Spec
The default NIC mapping object is DHCP enabled, and the newly added one uses a static IP address.
5 Apply the Spec customization specification to the VM virtual machine.
Get-VM VM | Set-VM -OSCustomizationSpec -Spec Spec
6 Associate a network adapter from the VMNetwork network with the NIC mapping object that uses DHCP mode.
$netAdapter = Get-NetworkAdapter VM | where { $_.NetworkName -eq 'VMNetwork' }
Get-OSCustomizationNicMapping -Spec Spec | where { $_.IPMode -eq 'UseDHCP' } | Set-
OSCustomizationNicMapping -NetworkAdapterMac $netAdapter.MacAddress
Create Multiple Virtual Machines that Use Static IP Addresses
You can deploy multiple virtual machines with a single network adapter and configure the deployed virtual machines to use static IP addresses by applying a customization specification.
VMware PowerCLI User's Guide
VMware, Inc. 51
Prerequisites
Verify that you have defined a list of static IP addresses in a CSV file.
Procedure
1 Define the naming convention for the virtual machines.
$vmNameTemplate = "VM-{0:D3}"
2 Save the cluster in which the virtual machines should be created into a variable.
$cluster = Get-Cluster MyCluster
3 Save the template on which the virtual machines should be based into a variable.
$template = Get-Template MyTemplate
4 Create the virtual machines.
$vmList = @()
for ($i = 1; $i –le 100; $i++) {
$vmName = $vmNameTemplate –f $i
$vmList += New-VM –Name $vmName –ResourcePool $cluster –Template $template
}
5 Save the static IP addresses from the stored CSV file into a variable.
$staticIpList = Import-CSV C:\StaticIPs.csv
6 Create the customization specification.
$linuxSpec = New-OSCustomizationSpec –Name LinuxCustomization –Domain vmware.com –DomainUsername
"your_domain_username" –DomainPassword "your_domain_password" –DnsServer "192.168.0.10",
"192.168.0.20" –NamingScheme VM –OSType Linux
7 Clone the customization specification to a nonpersistent type.
$specClone = New-OSCustomizationSpec –Spec $linuxSpec –Type NonPersistent
8 Apply the customization specification to each virtual machine.
for ($i = 0; $i –lt $vmList.Count; $i++) {
# Acquire a new static IP from the list
$ip = $staticIpList[$i].IP
# The specification has a default NIC mapping – retrieve it and update it with the static IP
$nicMapping = Get-OSCustomizationNicMapping –OSCustomizationSpec $specClone
$nicMapping | Set-OSCustomizationNicMapping –IpMode UseStaticIP –IpAddress $ip –SubnetMask
"255.255.252.0" –DefaultGateway "192.168.0.1"
VMware PowerCLI User's Guide
VMware, Inc. 52

# Apply the customization
Set-VM –VM $vmList[$i] –OSCustomizationSpec $specClone –Confirm:$false
}
Create Multiple Virtual Machines with Two Network Adapters
You can deploy multiple virtual machines with two network adapters each and configure each adapter to use specific network settings by applying a customization specification.
You can configure each virtual machine to have one network adapter attached to a public network and one network adapter attached to a private network. You can configure the network adapters on the public network to use static IP addresses and the network adapters on the private network to use DHCP.
Prerequisites
Verify that you have defined a list of static IP addresses in a CSV file.
Procedure
1 Define the naming convention for the virtual machines.
$vmNameTemplate = "VM-{0:D3}"
2 Save the cluster in which the virtual machines should be created into a variable.
$cluster = Get-Cluster MyCluster
3 Save the template on which the virtual machines should be based into a variable.
$template = Get-Template MyTemplate
4 Create the virtual machines.
$vmList = @()
for ($i = 1; $i –le 100; $i++) {
$vmName = $vmNameTemplate –f $i
$vmList += New-VM –Name $vmName –ResourcePool $cluster –Template $template
}
5 Save the static IP addresses from the stored CSV file into a variable.
$staticIpList = Import-CSV C:\StaticIPs.csv
6 Create the customization specification.
$linuxSpec = New-OSCustomizationSpec –Name LinuxCustomization –Domain vmware.com –DnsServer
"192.168.0.10", "192.168.0.20" –NamingScheme VM –OSType Linux –Type NonPersistent
VMware PowerCLI User's Guide
VMware, Inc. 53

7 Apply the customization specification to each virtual machine.
for ($i = 0; $i –lt $vmList.Count; $i++) {
# Acquire a new static IP from the list
$ip = $staticIpList[$i].IP
# Remove any NIC mappings from the specification
$nicMapping = Get-OSCustomizationNicMapping –OSCustomizationSpec $linuxSpec
Remove-OSCustomizationNicMapping –OSCustomizationNicMapping $nicMapping –Confirm:$false
# Retrieve the virtual machine’s network adapter attached to the public network named "Public"
$publicNIC = $vmList[$i] | Get-NetworkAdapter | where {$_.NetworkName -eq "Public"}
# Retrieve the virtual machine’s network adapter attached to the private network named
"Private"
$privateNIC = $vmList[$i] | Get-NetworkAdapter | where {$_.NetworkName -eq "Private"}
# Create a NIC mapping for the "Public" NIC that should use static IP
$linuxSpec | New-OSCustomizationNicMapping –IpMode UseStaticIP –IpAddress $ip –SubnetMask
"255.255.252.0" –DefaultGateway "192.168.0.1" –NetworkAdapterMac $publicNIC.MacAddress
# Create a NIC mapping for the "Private" NIC that should use DHCP
$linuxSpec | New-OSCustomizationNicMapping –IpMode UseDhcp –NetworkAdapterMac
$privateNIC.MacAddress
# Apply the customization
Set-VM –VM $vmList[$i] –OSCustomizationSpec $linuxSpec –Confirm:$false
}
Create a vSphere Role and Assign Permissions to a User
With PowerCLI, you can automate management of vSphere permissions, roles, and privileges.
Note vSphere permissions determine your level of access to vCenter Server, and ESXi hosts. Privileges define individual rights to perform actions and access object properties. Roles are predefined sets of privileges.
Prerequisites
Verify that you are connected to a vCenter Server system.
Procedure
1 Get the privileges of the Readonly role.
$readOnlyPrivileges = Get-VIPrivilege -Role Readonly
2 Create a new role with custom privileges.
$role1 = New-VIRole -Privilege $readOnlyPrivileges -Name Role1
VMware PowerCLI User's Guide
VMware, Inc. 54

3 Add the PowerOn privileges to the new role.
$powerOnPrivileges = Get-VIPrivilege -Name "PowerOn"
$role1 = Set-VIRole –Role $role1 –AddPrivilege $powerOnPrivileges
4 Create a permission and apply it to a vSphere root object.
$rootFolder = Get-Folder -NoRecursion
$permission1 = New-VIPermission -Entity $rootFolder -Principal "user" -Role readonly -Propagate
The Principal parameter accepts both local and domain users and groups if the vCenter Server system is joined in AD.
5 Update the new permission with the custom role.
$permission1 = Set-VIPermission -Permission $permission1 -Role $role1
Results
You created a new role and assigned permissions to a user.
View Actions and Triggers for an Alarm on vCenter Server
You can see which actions and triggers are configured for an alarm.
Prerequisites
Verify that you are connected to a vCenter Server system.
Procedure
1 Get all PowerCLI supported alarm actions for the Host Processor Status alarm.
Get-AlarmDefinition -Name "Host Processor Status" | Get-AlarmAction -ActionType "ExecuteScript",
"SendSNMP", "SendEmail"
2 Get all the triggers for the first alarm definition found.
Get-AlarmDefinition | select -First 1 | Get-AlarmTrigger
Create Alarm Definitions on vCenter Server
With PowerCLI, you can create vCenter Server alarm definitions.
Prerequisites
Verify that you are connected to a vCenter Server system.
VMware PowerCLI User's Guide
VMware, Inc. 55

Procedure
1 Create an alarm action trigger.
$actionTrigger = New-AlarmActionTrigger -StartStatus Green -EndStatus Yellow
2 Create an alarm action email.
$emailAction = New-AlarmAction -Email -To '[email protected]' -CC @('[email protected]',
'[email protected]') -Body 'Email text' -Subject 'Email subject' -AlarmActionTrigger $actionTrigger
3 Create an event-based alarm trigger.
$vmReconfigEvt = Get-EventType | Where-Object {$_.Description -eq "VM reconfigured"}
$eventTrigger = New-AlarmTrigger -EventType $vmReconfigEvt -EntityStatus Yellow -EntityType
"VirtualMachine"
4 Create an alarm definition.
$vm = Get-VM | Select-Object -First 1
New-AlarmDefinition -Name "MyAlarm" -Description "Description" -AlarmTrigger $eventTrigger -
AlarmAction $emailAction -Entity $vm
Modify Alarm Definitions on vCenter Server
With PowerCLI, you can modify vCenter Server alarm definitions.
Prerequisites
Verify that you are connected to a vCenter Server system.
Procedure
1 For all host alarms, modify the interval after the action repeats.
Get-AlarmDefinition -Entity (Get-VMHost) | foreach { $_ | Set-AlarmDefinition -
ActionRepeatMinutes ($_.ActionRepeatMinutes + 1)}
2 Modify the name and the description of a selected alarm definition, and enable the alarm.
Get-AlarmDefinition -Name AlarmDefinition | Set-AlarmDefinition -Name AlarmDefinitionNew -
Description 'Alarm Definition Description' -Enabled:$true
Create Alarm Actions and Triggers on vCenter Server
With PowerCLI, you can create vCenter Server alarm actions and triggers.
Prerequisites
Verify that you are connected to a vCenter Server system.
VMware PowerCLI User's Guide
VMware, Inc. 56

Procedure
1 Create an alarm action email for the renamed alarm definition.
Get-AlarmDefinition -Name AlarmDefinitionNew | New-AlarmAction -Email -To '[email protected]' -CC
@('[email protected]', '[email protected]') -Body 'Email text' -Subject 'Email subject'
2 Create an snmp alarm action.
Get-AlarmDefinition -Name AlarmDefinitionNew | New-AlarmAction -Snmp
3 Create a script alarm action.
Get-AlarmDefinition -Name AlarmDefinitionNew | New-AlarmAction -Script -ScriptPath 'c:\test.ps1'
4 Create a metric-based alarm trigger.
$metric = Get-Metric -MetricGroup CPU -Name Usage | Where-Object {$_.Key -eq 2}
$metricTrigger = New-AlarmTrigger -Metric $metric -Red 9000 -RedIntervalSeconds 3000 -EntityType
"VirtualMachine" -MetricAlarmOperator Above
5 Create a state-based alarm trigger.
$stateTrigger = New-AlarmTrigger -StatePath "runtime.powerState" -Value "poweredOff" -
EntityStatus Red -EntityType "VirtualMachine" -StateAlarmOperator Equal
Remove Alarm Definitions and Actions
In some cases, you might want to remove obsolete alarm definitions and actions.
Prerequisites
Verify that you are connected to a vCenter Server system.
Procedure
1 Remove all the actions for an alarm definition.
Get-AlarmDefinition -Name AlarmDefinition | Get-AlarmAction | Remove-AlarmAction -Confirm:$false
2 Remove an alarm definition.
Get-AlarmDefinition -Name AlarmDefinition | Remove-AlarmDefinition
Create and Modify Advanced Settings for a Cluster
You can customize the behavior of a cluster on a vCenter Server system by creating and modifying custom advanced settings for it.
VMware PowerCLI User's Guide
VMware, Inc. 57

Prerequisites
Verify that you are connected to a vCenter Server system.
Procedure
1 Create a new cluster named Cluster.
$cluster = New-Cluster -Name Cluster -Location (Get-Datacenter Datacenter)
2 Create two advanced settings for the new cluster.
$setting1 = New-AdvancedSetting -Type "ClusterHA" -Entity $cluster -Name
'das.defaultfailoverhost' -Value '192.168.10.1'
$setting2 = New-AdvancedSetting -Type "ClusterHA" -Entity $cluster -Name 'das.isolationaddress' -
Value '192.168.10.2'
3 Modify the value of the advanced setting stored in the $setting2 variable.
Get-AdvancedSetting -Entity $cluster -Name 'das.isolationaddress' | Set-AdvancedSetting -Value
'192.168.10.3' -Confirm:$false
4 Create another advanced setting.
New-AdvancedSetting -Entity $cluster -Name 'das.allowNetwork[Service Console]' -Value $true -Type
'ClusterHA'
5 Get the Service Console setting and store it in a variable.
$setting3 = Get-AdvancedSetting -Entity $entity -Name 'das.allowNetwork`[Service Console`]'
The ` character is used to escape the wildcard characters [ and ] in the advanced setting name.
Modify the vCenter Server Email Configuration
You can modify the email configuration settings of a vCenter Server.
Prerequisites
Verify that you are connected to a vCenter Server system.
Procedure
1 View the current email configuration settings of the vCenter Server from the $srv variable.
Get-AdvancedSetting –Entity $srv –Name mail.*
VMware PowerCLI User's Guide
VMware, Inc. 58

2 Update the SMTP server name and port.
Get-AdvancedSetting –Entity $srv –Name mail.smtp.server | Set-AdvancedSetting –Value
smtp.vmware.com
Get-AdvancedSetting –Entity $srv –Name mail.smtp.port | Set-AdvancedSetting –Value 25
Modify the vCenter Server SNMP Configuration
To use SNMP, you must first configure the SNMP settings of the vCenter Server.
Prerequisites
Verify that you are connected to a vCenter Server system.
Procedure
1 View the current SNMP configuration settings of the vCenter Server from the $srv variable.
Get-AdvancedSetting –Entity $srv –Name snmp.*
2 Modify the SNMP receiver data.
Get-AdvancedSetting –Entity $srv –Name snmp.receiver.2.community | Set-AdvancedSetting –Value
public
Get-AdvancedSetting –Entity $srv –Name snmp.receiver.2.enabled | Set-AdvancedSetting –Value $true
Get-AdvancedSetting –Entity $srv –Name snmp.receiver.2.name | Set-AdvancedSetting –Value
192.168.1.10
Results
Now you can use SNMP with vCenter Server.
Use Esxtop to Get Information on the Virtual CPUs of a Virtual Machine
You can use the Get-EsxTop cmdlet to retrieve real-time data for troubleshooting performance problems.
Prerequisites
Verify that you are connected to a server that runs ESX 4.1, vCenter Server 5.0 or later.
Procedure
1 Get the group to which the virtual machine belongs and save it as a variable.
$group = Get-EsxTop -CounterName SchedGroup | where {$_.VMName -eq $vm.Name}
VMware PowerCLI User's Guide
VMware, Inc. 59

2 Get the IDs of all virtual CPUs of the virtual machine and store them in an array.
$gr = Get-EsxTop -TopologyInfo -Topology SchedGroup | %{$_.Entries} | where {$group.GroupID -
contains $_.GroupId} $group.GroupID
$cpuIds = @()
$gr.CpuClient | %{$cpuIds += $_.CPUClientID}
3 Get the CPU statistics for the virtual machine.
$cpuStats = Get-EsxTop -CounterName VCPU | where {$cpuIds -contains $_.VCPUID}
4 Calculate the used and ready for use percentage by using the UsedTimeInUsec and ReadyTimeInUsec stats.
$result = @()
$cpuStats | %{ `
$row = "" | select VCPUID, Used, Ready; `
$row.VCPUID = $_.VCPUID; `
$row.Used = [math]::Round(([double]$_.UsedTimeInUsec/[double]$_.UpTimeInUsec)*100, 2); `
$row.Ready = [math]::Round(([double]$_.ReadyTimeInUsec/[double]$_.UpTimeInUsec)*100, 2);`
$result += $row
}
5 View the used and ready for use percentage for each virtual CPU of the virtual machine.
$result | Format-Table –AutoSize
Filter vSphere Objects with Get-View
You can use the Get-View cmdlet to filter vSphere objects before performing various actions on them.
The filter parameter is a HashTable object containing one or more pairs of filter criteria. Each of the criteria consists of a property path and a value that represents a regular expression pattern used to match the property.
Prerequisites
Verify that you are connected to a vCenter Server system.
Procedure
1 Create a filter by the power state and the guest operating system name of the virtual machines.
$filter = @{"Runtime.PowerState" ="poweredOn"; "Config.GuestFullName" = "Windows XP"}
2 Get a list of the virtual machines by using the created filter and call the ShutdownGuest method for each virtual machine in the list.
Get-View -ViewType "VirtualMachine" -Filter $filter | foreach{$_.ShutdownGuest()}
VMware PowerCLI User's Guide
VMware, Inc. 60

Results
The filter gets a list of the powered-on virtual machines whose guest OS names contain the string Windows XP. The Get-View cmdlet then initiates shutdown for each guest operating system in the list.
Populate a View Object with Get-View
To save time and efforts, you can use Get-View to retrieve PowerCLI views from previously retrieved view objects.
Prerequisites
Verify that you are connected to a vCenter Server system.
Procedure
1 Get a view of the VM2 virtual machine by name.
$vm2 = Get-View -ViewType VirtualMachine -Filter @{"Name" = "VM2"}
2 Populate the $vmhostView object.
$vmhostView = Get-View -Id $vm2.Runtime.Host
3 Retrieve the runtime information for the $vmhostView object.
$vmhostView.Summary.Runtime
Update the State of a Server-Side Object
You can use the Get-View cmdlet to update server-side objects.
Prerequisites
Verify that you are connected to a vCenter Server system.
Procedure
1 Get the VM2 virtual machine by name.
$vm2 = Get-View -ViewType VirtualMachine -Filter @{"Name" = "VM2"}
$vmhostView = Get-View -Id $vm2.Runtime.Host
2 View the current power state.
$vm2.Runtime.PowerState
VMware PowerCLI User's Guide
VMware, Inc. 61

3 Power off the virtual machine.
If ($vm2.Runtime.PowerState -ne “PoweredOn”) {
$vm.PowerOnVM($vm2.Runtime.Host)
} else {
$vm2.PowerOffVM()
}
4 View the value of the $vm2 power state.
$vm2.Runtime.PowerState
The power state is not updated yet because the virtual machine property values are not updated automatically.
5 Update the view object.
$vm2.UpdateViewData()
6 Obtain the actual power state of the virtual machine.
$vm2.Runtime.PowerState
Reboot a Host with Get-View
You can reboot a host by using its corresponding view object.
Prerequisites
Verify that you are connected to a vCenter Server system.
Procedure
1 Use the Get-VMHost cmdlet to get a host by its name, and pass the result to the Get-View cmdlet to get the corresponding view object.
$vmhostView = Get-VMHost -Name Host | Get-View
2 Call the reboot method of the host view object to reboot the host.
$vmhostView.RebootHost()
Modify the CPU Levels of a Virtual Machine with Get–View and Get–VIObjectByVIView
You can modify the CPU levels of a virtual machine using a combination of the Get-View and Get-VIObjectByVIView cmdlets.
VMware PowerCLI User's Guide
VMware, Inc. 62

Prerequisites
Verify that you are connected to a vCenter Server system.
Procedure
1 Get the VM2 virtual machine, shut it down, and pass it to the Get-View cmdlet to view the virtual machine view object.
$vmView = Get-VM VM2 | Stop-VM | Get-View
2 Create a VirtualMachineConfigSpec object to modify the virtual machine CPU levels and call the ReconfigVM method of the virtual machine view managed object.
$spec = New-Object VMware.Vim.VirtualMachineConfigSpec;
$spec.CPUAllocation = New-Object VMware.Vim.ResourceAllocationInfo;
$spec.CpuAllocation.Shares = New-Object VMware.Vim.SharesInfo;
$spec.CpuAllocation.Shares.Level = "normal";
$spec.CpuAllocation.Limit = -1;
$vmView .ReconfigVM_Task($spec)
3 Get the virtual machine object by using the Get-VIObjectByVIView cmdlet and start the virtual machine.
$vm = Get-VIObjectByVIView $vmView | Start-VM
Browse the Default Inventory Drive
You can browse the default inventory drive and view its contents.
Note For more information about the Inventory Provider and the default inventory drive, see PowerCLI Inventory Provider.
Prerequisites
Verify that you are connected to a vCenter Server system.
Procedure
1 Navigate to the vi inventory drive.
cd vi:
2 View the drive content.
dir
dir is an alias of the Get-ChildItem cmdlet.
VMware PowerCLI User's Guide
VMware, Inc. 63

Create a New Custom Inventory Drive
In addition to the default drive, you can create new custom inventory drives by using the New-PSDrive cmdlet.
Note An alternative to creating an inventory drive is to map an existing inventory path. For example, run: New-PSDrive -Name myVi -PSProvider VimInventory -Root “vi:\Folder01\Datacenter01”.
Prerequisites
Verify that you are connected to a vCenter Server system.
Procedure
1 Get the root folder of the server.
$root = Get-Folder -NoRecursion
2 Create a PowerShell drive named myVi in the server root folder.
New-PSDrive -Location $root -Name myVi -PSProvider VimInventory -Root '\'
Note You can use the New-InventoryDrive cmdlet, which is an alias of New-PSDrive. This cmdlet creates a new inventory drive using the Name and Datastore parameters. For example: Get-Folder -NoRecursion | New-VIInventoryDrive -Name myVi.
Manage Inventory Objects Through Inventory Drives
You can use the PowerCLI Inventory Provider to browse, modify, and remove inventory objects from inventory drives.
Prerequisites
Verify that you are connected to a vCenter Server system.
Procedure
1 Navigate to a host in your server inventory by running the cd command with the full path to the host.
cd Folder01\DataCenter01\host\Web\Host01
2 View the content of the host using the ls command.
ls
ls is the UNIX style alias of the Get-ChildItem cmdlet.
This command returns the virtual machines and the root resource pool of the host.
VMware PowerCLI User's Guide
VMware, Inc. 64

3 View only the virtual machines on the host.
Get-VM
When called within the inventory drive, Get-VM gets a list only of the virtual machines on the current drive location.
4 Delete a virtual machine named VM1.
del VM1
5 Rename a virtual machine, for example, from VM1New to VM1.
ren VM1New VM1
6 Start all virtual machines with names that start with VM.
dir VM* | Start-VM
Browse the Default Datastore Drives
You can use the PowerCLI Datastore Provider to browse the default datastore drives: vmstore and vmstores.
Note For more information about default datastore drives, see PowerCLI Datastore Provider.
Prerequisites
Verify that you are connected to a vCenter Server system.
Procedure
1 Navigate to the vmstore drive.
cd vmstore:
2 View the drive content.
dir
Create a New Custom Datastore Drive
You can use the PowerCLI Datastore Provider to create custom datastore drives.
Prerequisites
Verify that you are connected to a vCenter Server system.
VMware PowerCLI User's Guide
VMware, Inc. 65

Procedure
1 Get a datastore by its name and assign it to the $datastore variable.
$datastore = Get-Datastore Storage1
2 Create a new PowerShell drive ds: in $datastore.
New-PSDrive -Location $datastore -Name ds -PSProvider VimDatastore -Root '\'
Note You can use the New-PSDrive cmdlet, which is an alias of New-DatastoreDrive. It creates a new datastore drive using the Name and Datastore parameters. For example: Get-Datastore Storage1 | New-DatastoreDrive -Name ds.
Manage Datastores Through Datastore Drives
You can use the PowerCLI Datastore Provider to browse datastores from datastore drives.
Prerequisites
Verify that you are connected to a vCenter Server system.
Procedure
1 Navigate to a folder on the ds: drive.
cd VirtualMachines\XPVirtualMachine
2 View the files of the folder by running the ls command.
ls
ls is the UNIX style alias of the Get-ChildItem cmdlet.
3 Rename a file by running the Rename-Item cmdlet or its alias ren.
For example, to change the name of the vmware-3.log file to vmware-3old.log, run:
ren vmware-3.log vmware-3old.log
All file operations apply only on files in the current folder.
4 Delete a file by running the Remove-Item cmdlet or its alias del.
For example, to remove the vmware-3old.log file from the XPVirtualMachine folder, run:
del ds:\VirtualMachines\XPVirtualMachine\vmware-2.log
5 Copy a file by running the Copy-Item cmdlet or its alias copy.
copy ds:\VirtualMachines\XPVirtualMachine\vmware-3old.log ds:\VirtualMachines\vmware-3.log
VMware PowerCLI User's Guide
VMware, Inc. 66

6 Copy a file to another datastore by running the Copy-Item cmdlet or its alias copy.
copy ds:\Datacenter01\Datastore01\XPVirtualMachine\vmware-1.log
ds:\Datacenter01\Datastore02\XPVirtualMachine02\vmware.log
7 Create a new folder by running the New-Item cmdlet or its alias mkdir.
mkdir -Path ds:\VirtualMachines -Name Folder01 -Type Folder
8 Download a file from the datastore drive to the local machine by running the Copy-DatastoreItem cmdlet.
Copy-DatastoreItem ds:\VirtualMachines\XPVirtualMachine\vmware-3.log C:\Temp\vmware-3.log
9 Upload a file from the local machine by running the Copy-DatastoreItem cmdlet.
Copy-DatastoreItem C:\Temp\vmware-3.log ds:\VirtualMachines\XPVirtualMachine\vmware-3new.log
Modify the Timeout Setting for Web Tasks
To avoid unexpected timeouts, you can run Set-PowerCLIConfiguration to modify the PowerCLI settings for long-running Web tasks.
Prerequisites
Verify that you are connected to a vCenter Server system.
Procedure
1 (Optional) Learn more about what settings you can configure with Set-PowerCLIConfiguration.
Get-Help Set-PowerCLIConfiguration
2 Store the value of the timeout setting for the current session in the $initialTimeout variable.
$initialTimeout = (Get-PowerCLIConfiguration -Scope Session).WebOperationTimeoutSeconds
3 Set the timeout setting for the current session to 30 minutes.
Set-PowerCLIConfiguration -Scope Session -WebOperationTimeoutSeconds 1800
4 Run your Web task.
n You can run an esxcli command to install a software profile.
$vmHost = Get-VMHost "vmHostIp"
$esxcli = Get-EsxCli -VMHost $vmHost -V2
VMware PowerCLI User's Guide
VMware, Inc. 67

$arguments = $esxcli.software.profile.install.CreateArgs()
$arguments.depot = "http://mysite.com/publish/proj/index.xml"
$arguments.profile = "proj-version"
$esxcli.software.profile.install.Invoke($arguments)
n Alternatively, you can directly specify the arguments hash table in-line.
$vmHost = Get-VMHost "vmHostIp"
$esxcli = Get-EsxCli -VMHost $vmHost -V2
$esxcli.software.profile.install.Invoke(@{depot="http://mysite.com/publish/proj/index.xml";
profile="proj-version"})
Note The two examples use the ESXCLI V2 interface of PowerCLI.
5 Revert the timeout setting for the current session to the initial value.
Set-PowerCLIConfiguration -Scope Session -WebOperationTimeoutSeconds $initialTimeout
Using Tags
You can assign tags to different types of objects, such as virtual machines, resource pools, datastores, and vSphere distributed switches. You can use tags to retrieve a specific group of objects.
Retrieve a Tag and Save It into a Variable
You can retrieve existing tags defined in vSphere and save a specific tag into a variable.
Prerequisites
Verify that you are connected to a vCenter Server system.
Procedure
1 Get the tag named MyTag.
Get-Tag -Name 'MyTag'
2 Save the tag into a variable.
$tag = Get-Tag -Name 'MyTag'
Retrieve a Tag Category and Save It into a Variable
You can retrieve existing tag categories defined in vSphere and save a specific tag category into a variable.
Prerequisites
Verify that you are connected to a vCenter Server system.
VMware PowerCLI User's Guide
VMware, Inc. 68

Procedure
1 Get the tag category named MyTagCategory.
Get-TagCategory -Name 'MyTagCategory'
2 Save the tag category into a variable.
$tagCategory = Get-TagCategory -Name 'MyTagCategory'
Create a Tag Category and a Tag
You can create a tag category and add a new tag in that category.
Prerequisites
Verify that you are connected to a vCenter Server system.
Procedure
1 Create a tag category named Department.
$departmentTagCategory = New-TagCategory -Name 'Department'
2 Create a new tag named SalesDpt in the Department category.
$salesDptTag = New-Tag -Name 'SalesDpt' -Category $departmentTagCategory
Assign a Tag to Virtual Machines
You can assign a tag to a group of virtual machines. For example, you can assign a custom tag to all virtual machines that belong to a specific department in your organization.
Prerequisites
Verify that you are connected to a vCenter Server system.
Procedure
1 Get the virtual machines of a department in your organization.
$vms = Get-VM sales-dpt*
2 Assign the custom tag to the group of virtual machines.
New-TagAssignment -Tag $salesDptTag -Entity $vms
Retrieve Objects by Tag
You can retrieve all objects that have a specific tag assigned to them.
VMware PowerCLI User's Guide
VMware, Inc. 69

Prerequisites
Verify that you are connected to a vCenter Server system.
Procedure
u Get all virtual machines tagged with the salesDptTag tag.
Get-VM -Tag 'salesDptTag'
Note You can only specify a tag filter parameter for the VM, VMHost, Datastore, and VirtualPortGroup object types.
Generate Tags Automatically by Using a Script
You can use a script to generate tags automatically. For example, you can create a virtual machine owner tag for each user account in a domain.
You must use the Get-VIAccount cmdlet to retrieve user accounts. For more information, see the documentation of the cmdlet.
Prerequisites
n Verify that you are connected to a vCenter Server system.
n Verify that the user accounts and the vCenter Server system are in the same domain.
Procedure
1 Create a new tag category and specify that tags in this category can only be assigned to entities of type VirtualMachine.
$ownerTagCategory = New-TagCategory -Name Owner -EntityType VirtualMachine
Note If you do not specify an entity type, tags from this category can be assigned to all entity types.
2 Retrieve all domain user accounts and save them in a variable.
$accounts = Get-VIAccount -User -Domain 'DomainName' -Category | select -ExpandProperty Id
3 Create a tag for each user account.
$accounts | foreach { New-Tag -Category $ownerTagCategory -Name $_ }
4 Retrieve a specific tag from the Owner category, so that you can later assign it to a specific virtual machine.
$ownerTag = Get-Tag -Category $ownerTagCategory -Name 'John_Smith'
VMware PowerCLI User's Guide
VMware, Inc. 70
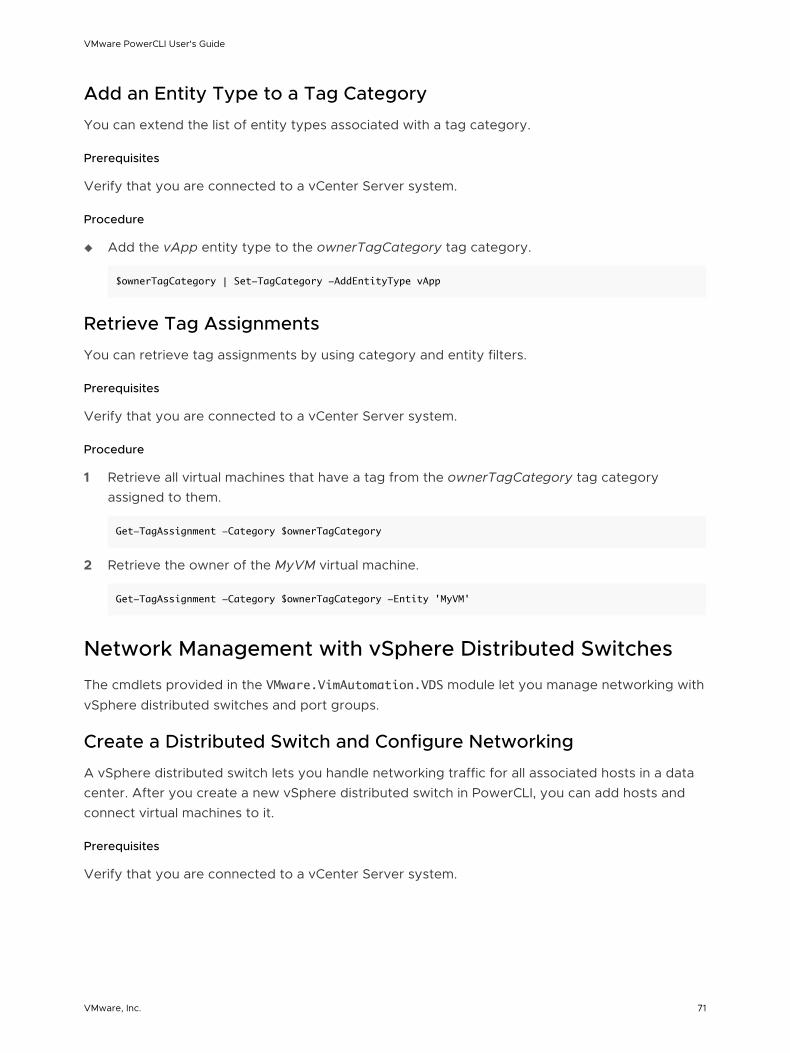
Add an Entity Type to a Tag Category
You can extend the list of entity types associated with a tag category.
Prerequisites
Verify that you are connected to a vCenter Server system.
Procedure
u Add the vApp entity type to the ownerTagCategory tag category.
$ownerTagCategory | Set-TagCategory -AddEntityType vApp
Retrieve Tag Assignments
You can retrieve tag assignments by using category and entity filters.
Prerequisites
Verify that you are connected to a vCenter Server system.
Procedure
1 Retrieve all virtual machines that have a tag from the ownerTagCategory tag category assigned to them.
Get-TagAssignment -Category $ownerTagCategory
2 Retrieve the owner of the MyVM virtual machine.
Get-TagAssignment -Category $ownerTagCategory -Entity 'MyVM'
Network Management with vSphere Distributed Switches
The cmdlets provided in the VMware.VimAutomation.VDS module let you manage networking with vSphere distributed switches and port groups.
Create a Distributed Switch and Configure Networking
A vSphere distributed switch lets you handle networking traffic for all associated hosts in a data center. After you create a new vSphere distributed switch in PowerCLI, you can add hosts and connect virtual machines to it.
Prerequisites
Verify that you are connected to a vCenter Server system.
VMware PowerCLI User's Guide
VMware, Inc. 71

Procedure
1 Get the data center where you want to create the vSphere distributed switch.
$myDatacenter = Get-Datacenter -Name "MyDatacenter"
2 Get all hosts in your data center.
$vmHosts = $myDatacenter | Get-VMHost
3 Create a new vSphere distributed switch.
$myVDSwitch = New-VDSwitch -Name "MyVDSwitch" -Location $myDatacenter
The distributed switch is created with no port groups.
4 Add the hosts in your data center to the distributed switch.
Add-VDSwitchVMHost -VDSwitch $myVDSwitch -VMHost $vmHosts
5 Get a physical network adapter from your hosts.
$hostsPhysicalNic = $vmHosts | Get-VMHostNetworkAdapter -Name "vmnic2"
6 Add the physical network adapter to the distributed switch that you created.
Add-VDSwitchPhysicalNetworkAdapter -VMHostNetworkAdapter $hostsPhysicalNic -DistributedSwitch
$myVDSwitch
7 Create a new distributed port group with 1000 ports and add it to the distributed switch.
$myVDPortGroup = New-VDPortgroup -Name "MyVMsPortGroup" -VDSwitch $myVDSwitch -NumPorts 1000
8 Connect all virtual machines running on the hosts in your data center to the distributed port group.
$vmHosts | Get-VM | Get-NetworkAdapter | Set-NetworkAdapter -PortGroup $myVDPortGroup
What to do next
Adjust the settings of the distributed switch. See Configure a Distributed Switch.
Configure a Distributed Switch
Based on your networking requirements, you can adjust the settings of a newly created or an existing distributed switch.
Prerequisites
Verify that you are connected to a vCenter Server system.
VMware PowerCLI User's Guide
VMware, Inc. 72

Procedure
u Modify the maximum MTU size setting for a distributed switch.
Get-VDSwitch -Name 'MyVDSwitch' | Set-VDSwitch -Mtu 2000
u Modify the number of uplink ports on a distributed switch.
Get-VDSwitch -Name 'MyVDSwitch' | Set-VDSwitch -NumUplinkPorts 4
u Modify the maximum number of ports on a distributed switch.
Get-VDSwitch -Name 'MyVDSwitch' | Set-VDSwitch -MaxPorts 1000
u Modify the discovery protocol settings on a vSphere distributed switch.
Get-VDSwitch -Name 'MyVDSwitch' | Set-VDSwitch -LinkDiscoveryProtocol LLDP -
LinkDiscoveryProtocolOperation Both
Migrate Virtual Machine Networking Configuration from a vSphere Standard Switch to a vSphere Distributed Switch
To manage virtual machine networks on a data center level, you might need to migrate existing networks from vSphere standard switches to vSphere distributed switches.
Prerequisites
Verify that you are connected to a vCenter Server system.
Procedure
1 Get the source vSphere standard switch from which you want to migrate the virtual machine networking.
$virtualSwitch = Get-VirtualSwitch -Name 'MyVirtualSwitch'
2 Get the source standard port group to which the virtual machines are connected.
$vmsPortGroup = $virtualSwitch | Get-VirtualPortGroup -Name 'VM Network'
3 Get the target vSphere distributed switch to which you want to migrate the virtual machine networking.
$vdSwitch = Get-VDSwitch -Name 'MyTargetVDSwitch'
4 Get the target port group to which you want to connect the virtual machines.
$vdPortGroup = Get-VDPortGroup -VDSwitch $vdSwitch -Name 'DPortGroup'
VMware PowerCLI User's Guide
VMware, Inc. 73
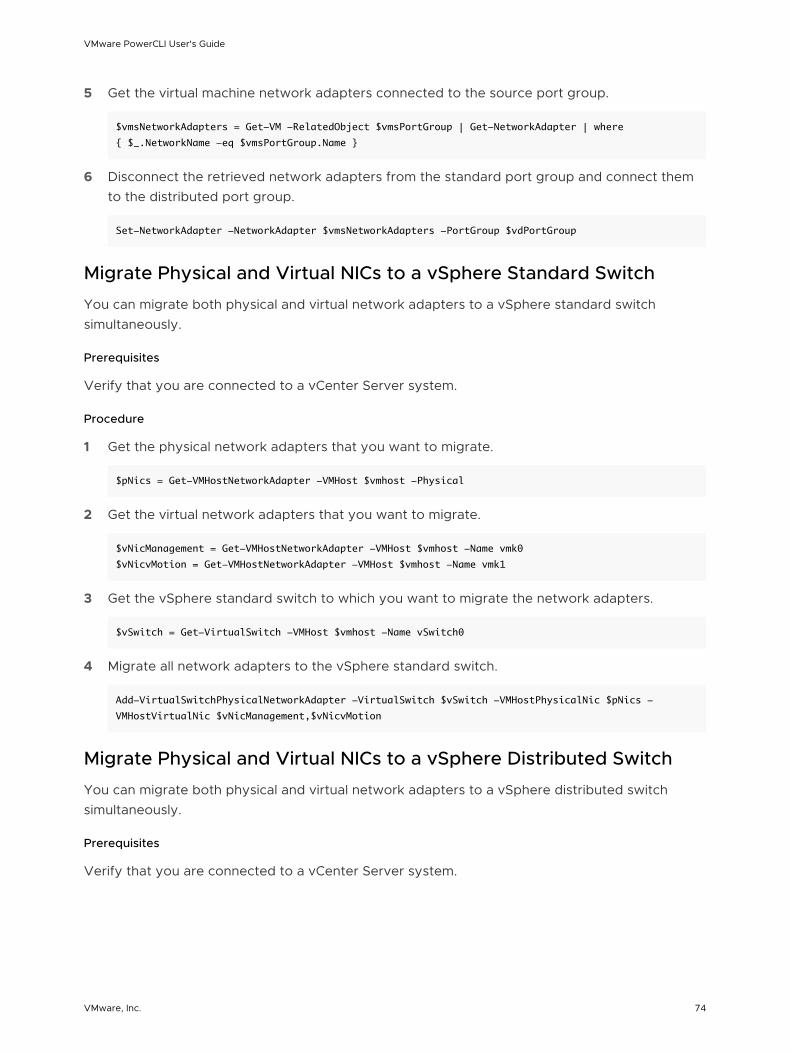
5 Get the virtual machine network adapters connected to the source port group.
$vmsNetworkAdapters = Get-VM -RelatedObject $vmsPortGroup | Get-NetworkAdapter | where
{ $_.NetworkName -eq $vmsPortGroup.Name }
6 Disconnect the retrieved network adapters from the standard port group and connect them to the distributed port group.
Set-NetworkAdapter -NetworkAdapter $vmsNetworkAdapters -PortGroup $vdPortGroup
Migrate Physical and Virtual NICs to a vSphere Standard Switch
You can migrate both physical and virtual network adapters to a vSphere standard switch simultaneously.
Prerequisites
Verify that you are connected to a vCenter Server system.
Procedure
1 Get the physical network adapters that you want to migrate.
$pNics = Get-VMHostNetworkAdapter -VMHost $vmhost -Physical
2 Get the virtual network adapters that you want to migrate.
$vNicManagement = Get-VMHostNetworkAdapter -VMHost $vmhost -Name vmk0
$vNicvMotion = Get-VMHostNetworkAdapter -VMHost $vmhost -Name vmk1
3 Get the vSphere standard switch to which you want to migrate the network adapters.
$vSwitch = Get-VirtualSwitch -VMHost $vmhost -Name vSwitch0
4 Migrate all network adapters to the vSphere standard switch.
Add-VirtualSwitchPhysicalNetworkAdapter -VirtualSwitch $vSwitch -VMHostPhysicalNic $pNics -
VMHostVirtualNic $vNicManagement,$vNicvMotion
Migrate Physical and Virtual NICs to a vSphere Distributed Switch
You can migrate both physical and virtual network adapters to a vSphere distributed switch simultaneously.
Prerequisites
Verify that you are connected to a vCenter Server system.
VMware PowerCLI User's Guide
VMware, Inc. 74

Procedure
1 Get the physical network adapters that you want to migrate.
$pNics = Get-VMHostNetworkAdapter -VMHost $vmhost -Physical
2 Get the virtual network adapters that you want to migrate.
$vNicManagement = Get-VMHostNetworkAdapter -VMHost $vmhost -Name vmk0
$vNicvMotion = Get-VMHostNetworkAdapter -VMHost $vmhost -Name vmk1
3 Get the port groups corresponding to the virtual network adapters that you want to migrate to the vSphere distributed switch.
$vdPortgroupManagement = Get-VDPortgroup -VDSwitch $vds -Name 'Management Network'
$vdPortgroupvMotion = Get-VDPortgroup -VDSwitch $vds -Name 'vMotion Network'
4 Migrate all network adapters to the vSphere distributed switch.
Add-VDSwitchPhysicalNetworkAdapter -DistributedSwitch $vds -VMHostPhysicalNic $pNics -
VMHostVirtualNic $vNicManagement,$vNicvMotion -VirtualNicPortGroup $vdPortGroupManagement,
$vdPortGroupvMotion
Results
You migrated the $vNicManagement network adapter to the Management Network port group and the $vNicvMotion network adapter to the vMotion Network port group.
Configure the Traffic Shaping Policy
You can modify the traffic shaping policy of a port group to limit the bandwidth of the incoming traffic and ensure that enough bandwidth is available for other port groups on the same vSphere distributed switch.
Prerequisites
Verify that you are connected to a vCenter Server system.
Procedure
1 Get the current traffic shaping policy of the port group.
$policy = Get-VDTrafficShapingPolicy -Direction In -VDPortGroup $myVDPortGroup
2 Set the peak bandwidth to 100 Mbps.
Set-VDTrafficShapingPolicy -Policy $policy -PeakBandwidth 104857600
Configure the Security Policy
You can modify the security policy of a port group to enable promiscuous mode, which allows monitoring of the traffic generated by virtual machines.
VMware PowerCLI User's Guide
VMware, Inc. 75

Prerequisites
Verify that you are connected to a vCenter Server system.
Procedure
1 Get the current security policy of the port group.
$policy = Get-VDSecurityPolicy -VDPortGroup $myVDPortGroup
2 Enable promiscuous mode for the port group.
Set-VDSecurityPolicy $policy -AllowPromiscuous $true
Create a Local Content Library
With PowerCLI, you can create a local content library.
Prerequisites
Verify that you are connected to a vCenter Server system.
Procedure
1 Get the datastore that you want to use to store files for library items in this library.
$datastore = Get-Datastore myDatastore
2 Create the My Local Content Library published local content library that uses the myDatastore datastore.
New-ContentLibrary -Name 'My Local Content Library' -Description 'Local content library
description.' -Datastore $Datastore1 -Published
Create a Subscribed Content Library
With PowerCLI, you can create a subscribed content library.
Prerequisites
Verify that you are connected to a vCenter Server system.
Procedure
u Create the My Subscribed Content Library subscribed content library that uses the myDatastore datastore.
New-ContentLibrary -Name 'My Subscribed Content Library' -Description 'Subscribed content library
description.' -Datastore $Datastore1 -SubscriptionUrl $Url
VMware PowerCLI User's Guide
VMware, Inc. 76

Create a Content Library Item
With PowerCLI, you can create content library items.
Prerequisites
Verify that you are connected to a vCenter Server system.
Procedure
1 Get the files that you want to upload to the content library.
$files = Get-ChildItem -File
2 Get the content library that you want to upload.
$contentLibrary = Get-ContentLibrary -name 'MyContentLibrary'
3 Create a content library item.
New-ContentLibraryItem -ContentLibrary $contentLibrary -name 'New item' -Files $files
Create a Virtual Machine from a Content Library Item
You can deploy a virtual machine from a content library template.
Note VMware PowerCLI 12.1.0 cannot distinguish between OVF content library items of type virtual machine template and vApp template. As a result, New-VM creates a vApp if you specify a vApp template from the content library by using the ContentLibraryItem parameter of the cmdlet. If this happens, New-VM returns an error, notifying that the cmdlet produced an inventory item of the wrong type. Avoid creating vApps by using the New-VM cmdlet, as this behavior will be deprecated in future releases.
Prerequisites
n Verify that you are connected to a vCenter Server system.
n Verify that you have a content library with virtual machine templates available.
Procedure
1 Get the virtual machine host.
$myVMHost = Get-VMHost myVMHost
2 Create the MyVM virtual machine from the MyVMContentLibrayItemName content library item.
Get-ContentLibraryItem –Name MyVMContentLibrayItemName | New-VM –Name MyVM –VMHost $myVMHost
VMware PowerCLI User's Guide
VMware, Inc. 77

Create a vApp from a Content Library Item
You can deploy a vApp from a content library template.
Note VMware PowerCLI 12.1.0 cannot distinguish between OVF content library items of type virtual machine template and vApp template. As a result, New-VApp creates a virtual machine if you specify a virtual machine template from the content library by using the ContentLibraryItem parameter of the cmdlet. If this happens, New-VApp returns an error, notifying that the cmdlet produced an inventory item of the wrong type. Avoid creating virtual machines by using the New-VApp cmdlet, as this behavior will be deprecated in future releases.
Prerequisites
n Verify that you are connected to a vCenter Server system.
n Verify that you have a content library with vApp templates available.
Procedure
1 Get the virtual machine host.
$myVMHost = Get-VMHost myVMHost
2 Create the MyVApp vApp from the MyVAppContentLibrayItemName content library item.
Get-ContentLibraryItem –Name MyVAppContentLibrayItemName | New-VApp –Name MyVApp –VMHost $myVMHost
Export Content Library Item's Files to a Local Machine
With PowerCLI, you can export content library item's files to a local machine.
Prerequisites
Verify that you are connected to a vCenter Server system.
Procedure
1 Get a content library item.
$item = Get-ContentLibraryItem -Name 'myVM'
2 Export a content library item to a local machine.
Export-ContentLibraryItem -ContentLibraryItem $item -Destination ./myVM-files
Create a New VM-VM DRS Rule
You can create a VM-VM DRS affinity rule within a cluster.
VMware PowerCLI User's Guide
VMware, Inc. 78

Prerequisites
n Verify that you are connected to a vCenter Server system.
n Verify that virtual machines and hosts exist within a cluster with enabled DRS in the vCenter Server environment.
Procedure
1 Get the virtual machines for the VM-VM DRS rule.
$affinityVMs = Get-VM "VM1", "VM2"
2 Get the cluster where you want to create the rule.
$cluster = Get-Cluster "MyCluster"
3 Create the VM-VM DRS rule within the MyCluster cluster.
New-DrsRule -Cluster $cluster -Name "AffinityRule1" -KeepTogether $true -VM $affinityVMs
Create a New VM-VMHost DRS Rule
You can create a VM-VMHost DRS rule within a cluster after creating a VM DRS cluster group and a VMHost DRS cluster group.
Prerequisites
n Verify that you are connected to a vCenter Server system.
n Verify that virtual machines and hosts exist within a cluster with enabled DRS in the vCenter Server environment.
Procedure
1 Get the virtual machines for the VM DRS cluster group.
$vms = Get-VM "VM1", "VM2"
2 Get the hosts for the VMHost DRS cluster group.
$vmHosts = Get-VMHost "hostname1", "hostname2"
3 Get the cluster where you want to create the rule.
$cluster = Get-Cluster "MyCluster"
4 Create a VM DRS cluster group.
$vmGroup = New-DrsClusterGroup -Name "MyVmsDrsClusterGroup" -VM $vms -Cluster $cluster
VMware PowerCLI User's Guide
VMware, Inc. 79

5 Create a VMHost DRS cluster group.
$vmHostGroup = New-DrsClusterGroup -Name "MyVmHostsDrsClusterGroup" -VMHost $vmHosts -Cluster
$cluster
6 Create the VM-VMHost DRS rule by using the newly created VM DRS cluster group and VMHost DRS cluster group.
New-DrsVMHostRule -Name "MyDrsRule" -Cluster $cluster -VMGroup $vmGroup -VMHostGroup $vmHostGroup
-Type "MustRunOn"
VMware PowerCLI User's Guide
VMware, Inc. 80

Sample Scripts for Managing vSphere Policy-Based Storage with VMware PowerCLI
6To help you get started with VMware PowerCLI, this documentation provides a set of sample scripts that illustrate basic and advanced tasks in vSphere policy-based storage management.
This chapter includes the following topics:
n Create a Tag-Based Storage Policy
n Create a Capability-Based Storage Policy
n Associate a Storage Policy with a Virtual Machine and Its Hard Disk
n Disassociate a Storage Policy Associated with a Virtual Machine and Its Hard Disk
n Remove a Storage Policy
n Edit a Storage Policy
n Export and Import a Storage Policy
n Create a Virtual Machine in a Datastore Compatible with Storage Policy
n Create a vSAN Datastore
n Modify a vSAN Datastore
n Create a vSAN Stretched Cluster
n Enable a vSAN File Service
n Create a vSAN File Service Domain
n Create a vSAN File Share
n Create an NFS 4.1 Datastore
n Add a VASA Provider and Create a Policy
n Invoke a Planned Failover on a Replication Group and Reverse the Replication
n Attach a Flat VDisk to a Virtual Machine
Create a Tag-Based Storage Policy
You can create storage policies by using tags from vCenter Server.
VMware, Inc. 81
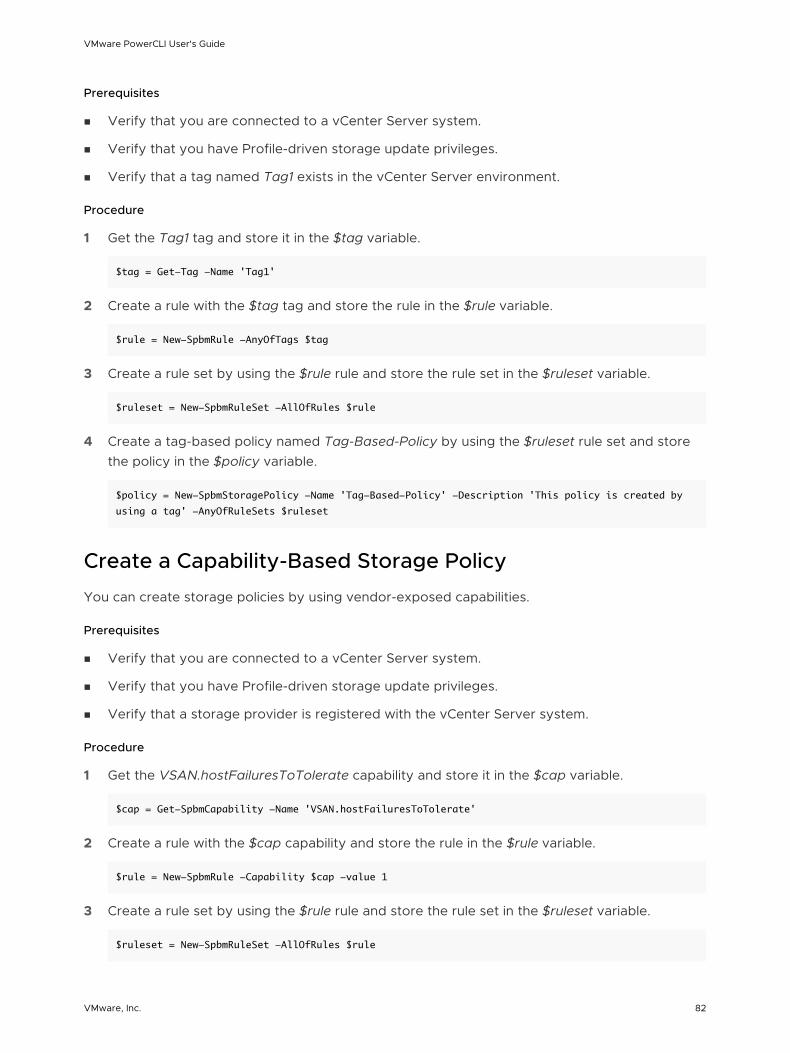
Prerequisites
n Verify that you are connected to a vCenter Server system.
n Verify that you have Profile-driven storage update privileges.
n Verify that a tag named Tag1 exists in the vCenter Server environment.
Procedure
1 Get the Tag1 tag and store it in the $tag variable.
$tag = Get-Tag -Name 'Tag1'
2 Create a rule with the $tag tag and store the rule in the $rule variable.
$rule = New-SpbmRule -AnyOfTags $tag
3 Create a rule set by using the $rule rule and store the rule set in the $ruleset variable.
$ruleset = New-SpbmRuleSet -AllOfRules $rule
4 Create a tag-based policy named Tag-Based-Policy by using the $ruleset rule set and store the policy in the $policy variable.
$policy = New-SpbmStoragePolicy -Name 'Tag-Based-Policy' -Description 'This policy is created by
using a tag' -AnyOfRuleSets $ruleset
Create a Capability-Based Storage Policy
You can create storage policies by using vendor-exposed capabilities.
Prerequisites
n Verify that you are connected to a vCenter Server system.
n Verify that you have Profile-driven storage update privileges.
n Verify that a storage provider is registered with the vCenter Server system.
Procedure
1 Get the VSAN.hostFailuresToTolerate capability and store it in the $cap variable.
$cap = Get-SpbmCapability -Name 'VSAN.hostFailuresToTolerate'
2 Create a rule with the $cap capability and store the rule in the $rule variable.
$rule = New-SpbmRule -Capability $cap -value 1
3 Create a rule set by using the $rule rule and store the rule set in the $ruleset variable.
$ruleset = New-SpbmRuleSet -AllOfRules $rule
VMware PowerCLI User's Guide
VMware, Inc. 82

4 Create a capability-based policy named Capability-Based-Policy by using the $ruleset rule set and store the policy in the $policy variable.
$policy = New-SpbmStoragePolicy -Name 'Capability-Based-Policy' -Description 'This policy is
created by using capabilities' -AnyOfRuleSets $ruleset
Associate a Storage Policy with a Virtual Machine and Its Hard Disk
You can associate a storage policy with a virtual machine and its hard disk and check if they are compliant with the policy.
Prerequisites
n Verify that you are connected to a vCenter Server system.
n Verify that a storage policy named Str-Policy exists in the vCenter Server environment.
n Verify that a virtual machine named Target-VM exists in the vCenter Server environment.
Procedure
1 Get the Str-Policy storage policy and store it in the $policy variable.
$policy = Get-SpbmStoragePolicy -Name 'Str-Policy'
2 Get the Target-VM virtual machine and store it in the $vm variable.
$vm = Get-VM -Name 'Target-VM'
3 Get the hard disk associated with the $vm virtual machine and store it in the $hd variable.
$hd = Get-HardDisk -VM $vm
4 Assign the $policy storage policy to the $vm virtual machine and the $hd hard disk.
Set-SpbmEntityConfiguration $vm, $hd -StoragePolicy $policy
5 View the $policy storage policy's compliance with the $vm virtual machine and the $hd hard disk.
Get-SpbmEntityConfiguration $vm, $hd
Note The storage policy can be compliant only if the datastore on which the virtual machine and hard disk are created is compliant with the storage policy.
VMware PowerCLI User's Guide
VMware, Inc. 83

Disassociate a Storage Policy Associated with a Virtual Machine and Its Hard Disk
You can disassociate a storage policy that is associated with a virtual machine and its hard disk.
Prerequisites
n Verify that you are connected to a vCenter Server system.
n Verify that a virtual machine named Target-VM exists in the vCenter Server environment.
n Verify that a storage policy is associated with the Target-VM virtual machine.
Procedure
1 Get the Target-VM virtual machine and store it in the $vm variable.
$vm = Get-VM -Name 'Target-VM'
2 Get the hard disk associated with the $vm virtual machine and store it in the $hd variable.
$hd = Get-HardDisk -VM $vm
3 Disassociate all storage policies that are associated with the $vm virtual machine and the $hd hard disk.
Set-SpbmEntityConfiguration $vm, $hd -StoragePolicy $null
Remove a Storage Policy
You can disassociate all entities associated with a storage policy and remove the policy completely.
Prerequisites
n Verify that you are connected to a vCenter Server system.
n Verify that you have Profile-driven storage update privileges.
n Verify that a storage policy named pol-tag exists in the vCenter Server environment.
Procedure
1 Get the pol-tag storage policy and store it in the $policy variable.
$policy = Get-SpbmStoragePolicy -Name 'pol-tag'
2 Disassociate all entities associated with the $policy storage policy.
Set-SpbmEntityConfiguration (Get-SpbmEntityConfiguration -StoragePolicy $policy) -StoragePolicy
$null
VMware PowerCLI User's Guide
VMware, Inc. 84

3 Remove the $policy storage policy.
Remove-SpbmStoragePolicy -StoragePolicy $policy
Edit a Storage Policy
You can modify a storage policy to replace an existing rule set with a new rule set.
Prerequisites
n Verify that you are connected to a vCenter Server system.
n Verify that you have Profile-driven storage update privileges.
n Verify that a storage provider is registered with the vCenter Server system.
n Verify that a storage policy named pol-tag exists in the vCenter Server environment.
Procedure
1 Get the pol-tag storage policy and store it in the $policy variable.
$policy = Get-SpbmStoragePolicy -Name 'pol-tag'
2 Create a new rule and store it in the $newRule variable.
$newRule = New-SpbmRule -Capability (Get-SpbmCapability -Name 'VSAN.hostFailuresToTolerate') -
Value 1
3 Create a new rule set by using the $newRule rule and store it in the $newRuleset variable.
$newRuleset = New-SpbmRuleSet -AllOfRules $newRule
4 Modify the $policy storage policy by replacing the existing rule set with the newly created $newRuleset rule set.
$modPolicy = Set-SpbmStoragePolicy -StoragePolicy $policy -AnyOfRuleSets $newRuleset
Export and Import a Storage Policy
You can back up a storage policy by exporting it as a file. You can later import the same storage policy.
Prerequisites
n Verify that you are connected to a vCenter Server system.
n Verify that you have Profile-driven storage update privileges.
n Verify that you have read-write permissions for the directory in which the storage policy is saved.
VMware PowerCLI User's Guide
VMware, Inc. 85

n Verify that a storage policy named pol-tag exists in the vCenter Server environment.
Procedure
1 Export the pol-tag storage policy.
Export-SpbmStoragePolicy -StoragePolicy 'pol-tag' -FilePath 'C:\Policy\pol-tag.xml'
2 Import the pol-tag storage policy and name it Imported-Policy.
Import-SpbmStoragePolicy -FilePath 'C:\Policy\pol-tag.xml' -Name 'Imported-Policy' -Description
'Imported policy description'
Create a Virtual Machine in a Datastore Compatible with Storage Policy
You can retrieve a datastore compatible with storage policy and create a virtual machine in the datastore.
Prerequisites
n Verify that you are connected to a vCenter Server system.
n Verify that a tag-based storage policy named Tag-Policy exists in the vCenter Server environment.
n Verify that the tag of the Tag-Policy storage policy is associated with one of the available datastores in the vCenter Server environment.
Procedure
1 Get the tag-based Tag-Policy storage policy and store it in the $policy variable.
$policy = Get-SpbmStoragePolicy -Name 'Tag-Policy'
2 Get the tag used in the Tag-Policy storage policy and store it in the $tag variable.
$tag = ($($($policy.AnyOfRulesets).AllOfRules).AnyOfTags)[0]
3 Get a datastore compatible with the $policy storage policy and store it in the $ds variable.
$ds = Get-SpbmCompatibleStorage -StoragePolicy $policy
4 Get the virtual machine host that contains the $ds datastore and store it in the $vmhost variable.
$vmHost = Get-VMHost -Datastore $ds
VMware PowerCLI User's Guide
VMware, Inc. 86

5 Create a virtual machine named VM-Tag in the $ds datastore and store the virtual machine object in the $vm variable.
$vm = New-VM -Name 'VM-Tag' -ResourcePool $vmHost -Datastore $ds -NumCPU 2 -MemoryGB 4 -DiskMB 1
6 Associate the $policy storage policy with the $vm virtual machine.
Set-SpbmEntityConfiguration $vm -StoragePolicy $policy
7 Verify that the $vm virtual machine is compliant with the $policy storage policy.
Get-SpbmEntityConfiguration $vm
The status should be Compliant.
8 Get the Tag-Assignment object for the $ds datastore and store it in the $tagAs variable.
$tagAs = Get-TagAssignment -Entity $ds
9 Remove the $tag tag association from the $ds datastore.
Remove-TagAssignment -TagAssignment $tagAs
10 Check the compliance of the $vm virtual machine with the $policy storage policy.
Get-SpbmEntityConfiguration $vm
The status should be NonCompliant.
Create a vSAN Datastore
You can create vSAN disk groups on standalone hosts and add the hosts to a vSAN-enabled cluster to form a vSAN datastore. You can then create a virtual machine on the vSAN datastore and assign a storage policy to the virtual machine and its hard disk.
Prerequisites
n Verify that you are connected to a vCenter Server system.
n Verify that you have access to at least three virtual machine hosts.
n Verify that each of the virtual machine hosts has at least one SSD and one HDD.
n Verify that the virtual machine hosts are in maintenance mode.
Procedure
1 Create a vSAN enabled cluster with manual disk claim mode.
$vsanCluster = New-Cluster -Name 'VsanCluster' -Location (Get-Datacenter) -VsanEnabled -
VsanDiskClaimMode 'Manual'
VMware PowerCLI User's Guide
VMware, Inc. 87
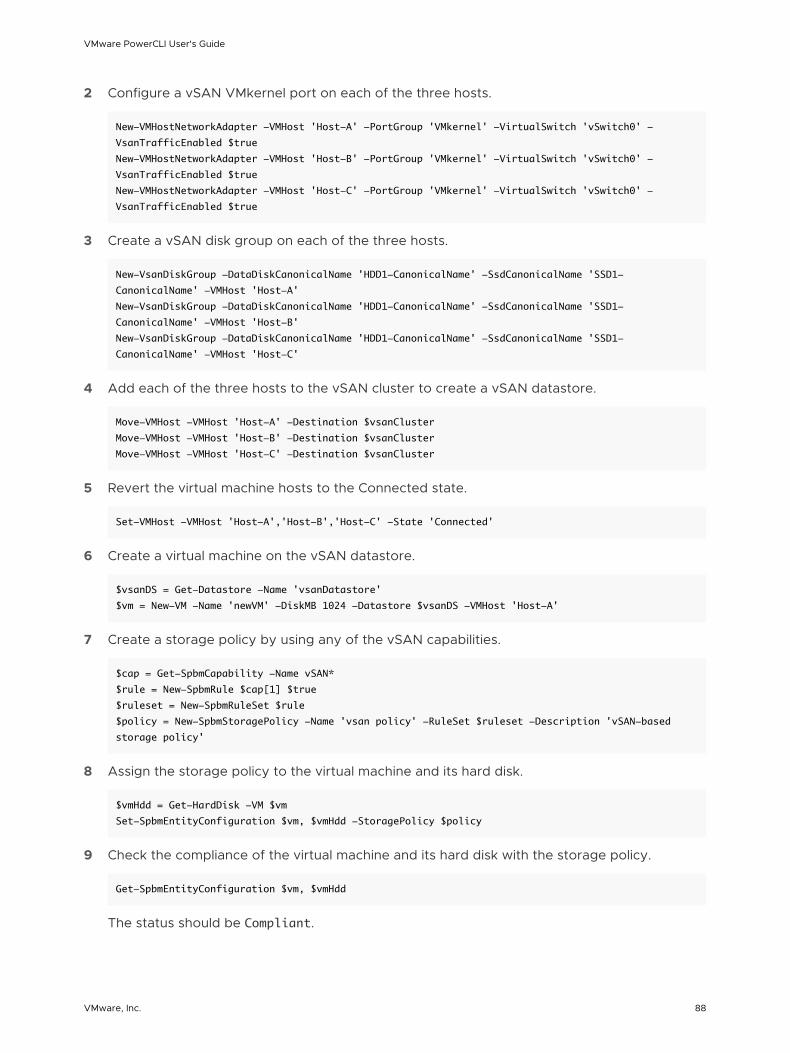
2 Configure a vSAN VMkernel port on each of the three hosts.
New-VMHostNetworkAdapter -VMHost 'Host-A' -PortGroup 'VMkernel' -VirtualSwitch 'vSwitch0' -
VsanTrafficEnabled $true
New-VMHostNetworkAdapter -VMHost 'Host-B' -PortGroup 'VMkernel' -VirtualSwitch 'vSwitch0' -
VsanTrafficEnabled $true
New-VMHostNetworkAdapter -VMHost 'Host-C' -PortGroup 'VMkernel' -VirtualSwitch 'vSwitch0' -
VsanTrafficEnabled $true
3 Create a vSAN disk group on each of the three hosts.
New-VsanDiskGroup -DataDiskCanonicalName 'HDD1-CanonicalName' -SsdCanonicalName 'SSD1-
CanonicalName' -VMHost 'Host-A'
New-VsanDiskGroup -DataDiskCanonicalName 'HDD1-CanonicalName' -SsdCanonicalName 'SSD1-
CanonicalName' -VMHost 'Host-B'
New-VsanDiskGroup -DataDiskCanonicalName 'HDD1-CanonicalName' -SsdCanonicalName 'SSD1-
CanonicalName' -VMHost 'Host-C'
4 Add each of the three hosts to the vSAN cluster to create a vSAN datastore.
Move-VMHost -VMHost 'Host-A' -Destination $vsanCluster
Move-VMHost -VMHost 'Host-B' -Destination $vsanCluster
Move-VMHost -VMHost 'Host-C' -Destination $vsanCluster
5 Revert the virtual machine hosts to the Connected state.
Set-VMHost -VMHost 'Host-A','Host-B','Host-C' -State 'Connected'
6 Create a virtual machine on the vSAN datastore.
$vsanDS = Get-Datastore -Name 'vsanDatastore'
$vm = New-VM -Name 'newVM' -DiskMB 1024 -Datastore $vsanDS -VMHost 'Host-A'
7 Create a storage policy by using any of the vSAN capabilities.
$cap = Get-SpbmCapability -Name vSAN*
$rule = New-SpbmRule $cap[1] $true
$ruleset = New-SpbmRuleSet $rule
$policy = New-SpbmStoragePolicy -Name 'vsan policy' -RuleSet $ruleset -Description 'vSAN-based
storage policy'
8 Assign the storage policy to the virtual machine and its hard disk.
$vmHdd = Get-HardDisk -VM $vm
Set-SpbmEntityConfiguration $vm, $vmHdd -StoragePolicy $policy
9 Check the compliance of the virtual machine and its hard disk with the storage policy.
Get-SpbmEntityConfiguration $vm, $vmHdd
The status should be Compliant.
VMware PowerCLI User's Guide
VMware, Inc. 88

Modify a vSAN Datastore
You can add or remove local disks from existing vSAN disk groups or remove entire vSAN disk groups.
Prerequisites
n Verify that you are connected to a vCenter Server system.
n Verify that at least one vSAN disk group exists in the cluster.
Procedure
1 Get the vSAN disk group from a cluster.
$dgs = Get-VsanDiskGroup -Cluster 'VsanCluster'
2 Get all vSAN disks from the vSAN disk group.
$dg = $dgs[0]
Get-VsanDisk –VsanDiskGroup $dg
3 Add a hard disk to the vSAN disk group.
$disk = New-VsanDisk -CanonicalName 'HDD-CanonicalName' -VsanDiskGroup $dg
4 Remove a hard disk from the vSAN disk group.
Remove-VsanDisk -VsanDisk $disk
5 Remove the entire vSAN disk group.
Remove-VsanDiskGroup -VsanDiskGroup $dg
Create a vSAN Stretched Cluster
You can create a vSAN stretched cluster with a witness node. You can then create a vSAN storage policy and enable performance service on the vSAN cluster.
Prerequisites
n Verify that you are connected to a vCenter Server system.
n Verify that you have access to at least two virtual machine hosts.
n Verify that each of the virtual machine hosts has at least one SSD and one HDD.
n Verify that the virtual machine hosts are in maintenance mode.
n Verify that you have access to an ESXi host that can be used as a witness host or deploy a witness appliance on any node. Ensure that the witness host or appliance is outside the vSAN cluster.
VMware PowerCLI User's Guide
VMware, Inc. 89

Procedure
1 Configure a vSAN VMkernel port on each of the two hosts.
New-VMHostNetworkAdapter -VMHost 'Host-A' -PortGroup 'VMkernel' -VirtualSwitch 'vSwitch0' -
VsanTrafficEnabled $true
New-VMHostNetworkAdapter -VMHost 'Host-B' -PortGroup 'VMkernel' -VirtualSwitch 'vSwitch0' -
VsanTrafficEnabled $true
2 Create a vSAN enabled cluster with automatic disk claim mode.
$vsanCluster = New-Cluster -Name 'VsanCluster' -Location (Get-Datacenter) -VsanEnabled -
VsanDiskClaimMode 'Automatic'
3 Add the two hosts to the vSAN cluster to create a vSAN datastore.
Move-VMHost -VMHost 'Host-A' -Destination $vsanCluster
Move-VMHost -VMHost 'Host-B' -Destination $vsanCluster
4 Revert the virtual machine hosts to the Connected state.
Set-VMHost -VMHost 'Host-A','Host-B' -State 'Connected'
5 Create two fault domains in the vSAN cluster.
$primaryFd = New-VsanFaultDomain -Name 'Primary' -VMHost 'Host-A'
$secondaryFd = New-VsanFaultDomain -Name 'Secondary' -VMHost 'Host-B'
6 Enable stretched cluster.
Set-VsanClusterConfiguration -Configuration $vsanCluster -StretchedClusterEnabled $true -
PreferredFaultDomain $primaryFd -WitnessHost 'Witness-Virtual-Appliance-IP'
7 Create a storage policy by using any vSAN capability.
$cap = Get-SpbmCapability -Name vSAN*
$rule = New-SpbmRule $cap[1] $true
$ruleset = New-SpbmRuleSet $rule
$policy = New-SpbmStoragePolicy -Name 'vsan policy' -RuleSet $ruleset -Description 'vSAN-based
storage policy'
8 Enable performance service on the vSAN cluster.
Set-VsanClusterConfiguration -Configuration $vsanCluster -PerformanceServiceEnabled $true –
StoragePolicy $policy
Enable a vSAN File Service
With PowerCLI, you can enable a vSAN file service.
VMware PowerCLI User's Guide
VMware, Inc. 90

Prerequisites
Verify that you are connected to a vCenter Server system.
Procedure
1 Add a vSAN file service OVF to the OVF repository of the vCenter Server system.
Add-VsanFileServiceOvf
2 Verify that the vSAN file service OVF is successfully added.
Get-VsanFileServiceOvfInfo
3 Increase the PowerCLI timeout for the current session, so that the operation does not stop.
Set-PowerCLIConfiguration -WebOperationTimeoutSeconds 3600 -Scope Session
4 Retrieve the network that you want to use for the vSAN file service.
$net = Get-VirtualNetwork -Name ‘MyNetwork’
5 Modify the vSAN cluster configuration that you want to use to enable the vSAN file service.
$config = Get-VsanClusterConfiguration
Set-VsanClusterConfiguration $config -FileServiceEnabled $true -FileServiceNetwork $net
Create a vSAN File Service Domain
With PowerCLI, you can create a vSAN file service domain.
Prerequisites
n Verify that you are connected to a vCenter Server system.
n Verify that the vSAN file service is enabled.
Procedure
1 Configure a vSAN file server IP configuration. You can use the IPs as an IP pool for the file service domain.
$ipConfig = New-VsanFileServerIpConfig -Fqdn "h101.vmware.com" -Gateway "192.2.8.3" -IpAddress
"192.2.8.4" -SubnetMask "255.255.254.0" -IsPrimary
2 Create a vSAN file service domain.
New-VsanFileServiceDomain -DnsServerAddress "10.172.199.241" -VsanFileServerIpConfig $ipConfig -
Name "MyFileServiceDomain" -DnsSuffix "vmware.com" -Cluster $config.Cluster
VMware PowerCLI User's Guide
VMware, Inc. 91

Create a vSAN File Share
With PowerCLI, you can create a vSAN file share.
Prerequisites
n Verify that you are connected to a vCenter Server system.
n Verify that the vSAN file service is enabled.
n Verify that the vSAN file service domain is created.
Procedure
1 Get a vSAN file service domain.
$domain = Get-VsanFileServiceDomain -Name “MyFileServiceDomain”
2 Create a vSAN file share.
New-vsanfileshare -FileServiceDomain $domain -Name "MyVsanFileShare"
Create an NFS 4.1 Datastore
You can create an NFS 4.1 datastore with Kerberos authentication and multipathing.
Prerequisites
n Verify that you are connected to a vCenter Server system.
n Verify that the remote NFS share supports multipathing and Kerberos authentication.
Procedure
1 Get the virtual machine host where you want to create the NFS 4.1 datastore.
$vmhost = Get-VMHost 'hostname'
2 Set NTP servers for the virtual machine host.
Add-VMHostNtpServer -VMHost $vmhost -NtpServer 'ntp_server_ip'
3 Set a DNS server and search the domain for the virtual machine host.
$vmhostnetwork = Get-VMHostNetwork -VMHost $vmhost
Set-VMHostNetwork -Network $vmhostnetwork -DnsFromDhcp $false -DnsAddress 'dns_server_ip' -
DomainName 'domain_name' -SearchDomain 'search_domain'
4 Add the virtual machine to the Active Directory domain.
$vmhost | Get-VMHostAuthentication | Set-VMHostAuthentication -JoinDomain -Domain
'AD_domain_name' -Username 'AD_user_name' -Password 'AD_password'
VMware PowerCLI User's Guide
VMware, Inc. 92

5 Create an NFS user on the virtual machine host for Kerberos-based authentication for the NFS 4.1 datastore.
New-NfsUser -VMHost $vmhost -Username 'NFS_user_name' -Password 'password'
6 Create an NFS 4.1 datastore with Kerberos authentication and multipathing.
New-Datastore -Name 'NFS_datastore_name' -Nfs -FileSystemVersion '4.1' -VMHost $vmhost -NfsHost
@('remote_host_1_ip', 'remote_host_2_ip') -Path 'NFS_datastore_remote_path' –Kerberos
7 (Optional) Retrieve the datastore.
$ds = Get-Datastore 'NFS_datastore_name'
8 (Optional) Remove the datastore.
Remove-Datastore $ds -VMHost $vmhost
9 (Optional) Get the NFS user from the virtual machine host.
$user = Get-NfsUser -VMHost $vmhost
10 (Optional) Update the password of the NFS user.
$user = Set-NfsUser -NfsUser $user -Password 'new_password'
11 (Optional) Remove the NFS user.
Remove-NfsUser -NfsUser $user
Add a VASA Provider and Create a Policy
You can add a VASA provider to a vCenter Server system and create a storage policy.
Prerequisites
n Verify that you are connected to a vCenter Server system.
n Verify that the datastore is mounted to the ESXi host.
Procedure
1 Add a VASA provider to the vCenter Server system.
$script:vasProvider = New-VasaProvider -Name 'name' -Url 'URL' -Username 'user_name' -Password
'password' -Description 'description' -Force
2 Get all SPBM capabilities exposed by the registered VASA provider.
Get-SpbmCapability
VMware PowerCLI User's Guide
VMware, Inc. 93
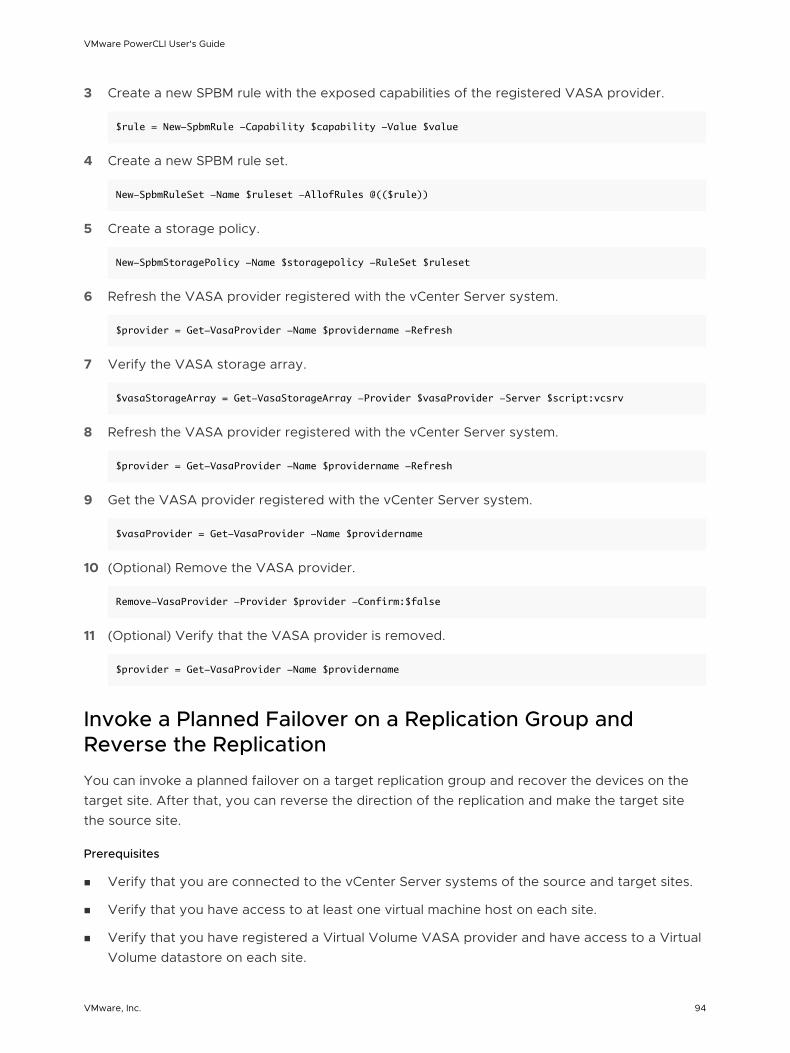
3 Create a new SPBM rule with the exposed capabilities of the registered VASA provider.
$rule = New-SpbmRule -Capability $capability -Value $value
4 Create a new SPBM rule set.
New-SpbmRuleSet -Name $ruleset -AllofRules @(($rule))
5 Create a storage policy.
New-SpbmStoragePolicy -Name $storagepolicy -RuleSet $ruleset
6 Refresh the VASA provider registered with the vCenter Server system.
$provider = Get-VasaProvider -Name $providername -Refresh
7 Verify the VASA storage array.
$vasaStorageArray = Get-VasaStorageArray -Provider $vasaProvider -Server $script:vcsrv
8 Refresh the VASA provider registered with the vCenter Server system.
$provider = Get-VasaProvider -Name $providername -Refresh
9 Get the VASA provider registered with the vCenter Server system.
$vasaProvider = Get-VasaProvider -Name $providername
10 (Optional) Remove the VASA provider.
Remove-VasaProvider -Provider $provider -Confirm:$false
11 (Optional) Verify that the VASA provider is removed.
$provider = Get-VasaProvider -Name $providername
Invoke a Planned Failover on a Replication Group and Reverse the Replication
You can invoke a planned failover on a target replication group and recover the devices on the target site. After that, you can reverse the direction of the replication and make the target site the source site.
Prerequisites
n Verify that you are connected to the vCenter Server systems of the source and target sites.
n Verify that you have access to at least one virtual machine host on each site.
n Verify that you have registered a Virtual Volume VASA provider and have access to a Virtual Volume datastore on each site.
VMware PowerCLI User's Guide
VMware, Inc. 94

Procedure
1 Create a storage policy with replication capability on the source site.
$replicationCapability = Get-SpbmCapability -Name *replication.RPO -Server $srcServer
$persistenceCapability = Get-SpbmCapability -Name *persistence1-readLatency -Server $srcServer
$replicationRule = New-SpbmRule -Capability $ replicationCapability -Value (New-TimeSpan -Hours 4)
$persistenceRule = New-SpbmRule $persistenceCapability -Value 25
$ruleSet = New-SpbmRuleSet -AllOfRules $replicationRule, $persistenceRule
$replicationPolicy = New-SpbmStoragePolicy -Name cokeRep -AnyOfRuleSets $ruleSet -Server
$srcServer
2 Get a datastore compatible with the created replication storage policy and store it in the $ds variable.
$ds = Get-SpbmCompatibleStorage -StoragePolicy $replicationPolicy
3 Create a virtual machine named MyVM with a hard disk in the $ds datastore.
$vm = New-VM -Name 'MyVM' -VMHost 'Host-Source' -DiskMB 512 -Datastore $ds
$hd = Get-HardDisk -VM $vm
4 Get a replication group for the $ds datastore and the $replicationPolicy storage policy, and store the replication group in the $rg variable.
$rg = Get-SpbmReplicationGroup –Datastore $ds –StoragePolicy $replicationPolicy
5 Associate the $vm virtual machine and its hard disk with the $replicationPolicy storage policy, and put them in the $rg replication group.
Set-SpbmEntityConfiguration -Configuration $vm, $hd -StoragePolicy $replicationPolicy -
ReplicationGroup $rg
6 Check the compliance of the $vm virtual machine and $hd hard disk with the $replicationPolicy storage policy.
Get-SpbmEntityConfiguration $vm, $hd
7 Get the replication pair corresponding to the $rg source replication group, and store that pair in the $rgPair variable.
$rgPair = Get-SpbmReplicationPair -Source $rg
8 Synchronize the target replication group.
Sync-SpbmReplicationGroup $rgPair.Target
9 Power off the $vm virtual machine and unregister it.
Stop-VM $vm
Remove-VM $vm
VMware PowerCLI User's Guide
VMware, Inc. 95

10 Prepare the failover on the source replication group.
Start-SpbmReplicationPrepareFailover $rgPair.Source
11 Synchronize the target replication group again, to get the latest state of the source devices.
Sync-SpbmReplicationGroup $rgPair.Target
12 Invoke the planned failover on the source replication group and store the virtual machine file path on the target site in the $vmFilePath variable.
$vmFilePath = Start-SpbmReplicationFailover $rgPair.Target
13 Register the virtual machine on the Host-Target host and power on the virtual machine.
$vm = New-VM -VMFilePath $vmFilePath -VMHost 'Host-Target'
Start-VM $vm
14 Reverse the direction of the replication.
Start-SpbmReplicationReverse $rgPair.Target
Attach a Flat VDisk to a Virtual Machine
You can create a flat VDisk object and attach it to a virtual machine as a hard disk. After that, you can verify whether the operation was completed successfully.
Prerequisites
n Verify that you are connected to a vCenter Server system.
n Verify that you have access to at least one virtual machine host.
n Verify that there is at least one datastore mounted on the virtual machine host.
Procedure
1 Mount the datastore on the virtual machine host and store the datastore in the $ds variable.
$vmHost = Get-VMHost 'Host-A'
$ds = Get-Datastore -RelatedObject $vmHost
2 Create a flat, thin-provisioned virtual disk with 2-GB capacity on the $ds datastore.
$vDisk = New-VDisk -Name 'VirtualDisk' -DiskType Flat -StorageFormat Thin -CapacityGB 2 -
Datastore $ds
3 Create a virtual machine named VirtualMachine with one hard disk and store this virtual machine in the $vm variable.
$vm = New-VM -Name 'VirtualMachine' -VMHost 'Host-A' -Datastore $ds -DiskMB 512
VMware PowerCLI User's Guide
VMware, Inc. 96

4 Power on the $vm virtual machine.
Start-VM -VM $vm
5 Attach the VDisk object to the $vm virtual machine.
New-HardDisk -VM $vm -VDisk $vDisk
6 Verify that the VDisk object has been attached and the virtual machine now has two hard disks.
Get-HardDisk -VM $vm
VMware PowerCLI User's Guide
VMware, Inc. 97

Sample Scripts for Managing VMware Site Recovery Manager with VMware PowerCLI
7To help you get started with VMware PowerCLI, this documentation provides a set of sample scripts that illustrate basic and advanced tasks in VMware Site Recovery Manager (SRM) administration.
This chapter includes the following topics:
n Connect to an SRM Server
n Protect a Virtual Machine
n Create a Report of the Protected Virtual Machines
n Create a Report of the Virtual Machines Associated with All Protection Groups
Connect to an SRM Server
To use the SRM API, you must establish a connection to an SRM server.
Some of the objects returned by the SRM API are objects from the vSphere API. To use those objects in integration with the vSphere API through PowerCLI, you can connect to the vCenter Server system that the SRM server is registered with.
Procedure
1 To connect to the vCenter Server system that the SRM server is registered with, run Connect-VIServer with the server name and valid credentials.
Connect-VIServer -Server vc3.example.com -User 'MyAdministratorUser' -Password 'MyPassword'
2 To connect to the SRM server registered with the connected vCenter Server system, run Connect-SrmServer.
$srmConnection = Connect-SrmServer
Note If you have previously connected to other vCenter Server systems configured with SRM server support, this cmdlet invocation establishes a connection to their corresponding SRM servers as well.
VMware, Inc. 98
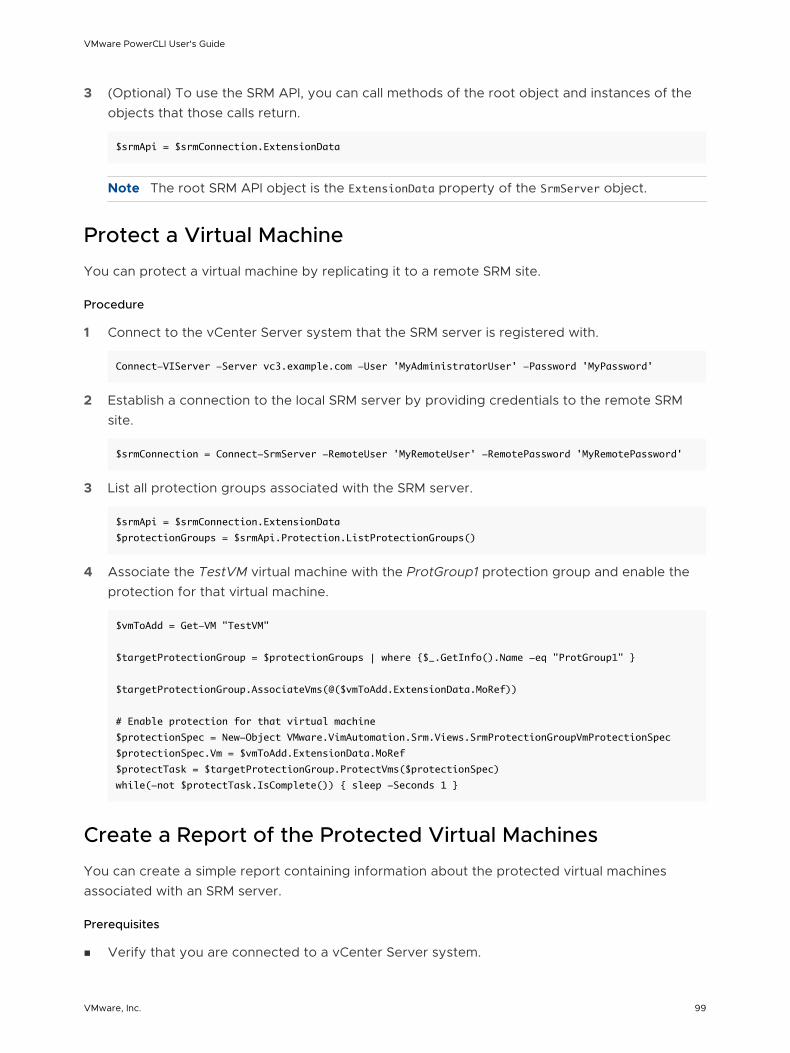
3 (Optional) To use the SRM API, you can call methods of the root object and instances of the objects that those calls return.
$srmApi = $srmConnection.ExtensionData
Note The root SRM API object is the ExtensionData property of the SrmServer object.
Protect a Virtual Machine
You can protect a virtual machine by replicating it to a remote SRM site.
Procedure
1 Connect to the vCenter Server system that the SRM server is registered with.
Connect-VIServer -Server vc3.example.com -User 'MyAdministratorUser' -Password 'MyPassword'
2 Establish a connection to the local SRM server by providing credentials to the remote SRM site.
$srmConnection = Connect-SrmServer -RemoteUser 'MyRemoteUser' -RemotePassword 'MyRemotePassword'
3 List all protection groups associated with the SRM server.
$srmApi = $srmConnection.ExtensionData
$protectionGroups = $srmApi.Protection.ListProtectionGroups()
4 Associate the TestVM virtual machine with the ProtGroup1 protection group and enable the protection for that virtual machine.
$vmToAdd = Get-VM "TestVM"
$targetProtectionGroup = $protectionGroups | where {$_.GetInfo().Name -eq "ProtGroup1" }
$targetProtectionGroup.AssociateVms(@($vmToAdd.ExtensionData.MoRef))
# Enable protection for that virtual machine
$protectionSpec = New-Object VMware.VimAutomation.Srm.Views.SrmProtectionGroupVmProtectionSpec
$protectionSpec.Vm = $vmToAdd.ExtensionData.MoRef
$protectTask = $targetProtectionGroup.ProtectVms($protectionSpec)
while(-not $protectTask.IsComplete()) { sleep -Seconds 1 }
Create a Report of the Protected Virtual Machines
You can create a simple report containing information about the protected virtual machines associated with an SRM server.
Prerequisites
n Verify that you are connected to a vCenter Server system.
VMware PowerCLI User's Guide
VMware, Inc. 99

n Verify that you are connected to an SRM server.
Procedure
1 List all protection groups associated with the SRM server.
$srmApi = $srmConnection.ExtensionData
$protectionGroups = $srmApi.Protection.ListProtectionGroups()
2 Generate a report of the protected virtual machines.
$protectionGroups | % {
$protectionGroup = $_
$protectionGroupInfo = $protectionGroup.GetInfo()
# The following command lists the virtual machines associated with a protection group
$protectedVms = $protectionGroup.ListProtectedVms()
# The result of the above call is an array of references to the virtual machines at the
vSphere API
# To populate the data from the vSphere connection, call the UpdateViewData method on each
virtual machine view object
$protectedVms | % { $_.Vm.UpdateViewData() }
# After the data is populated, use it to generate a report
$protectedVms | %{
$output = "" | select VmName, PgName
$output.VmName = $_.Vm.Name
$output.PgName = $protectionGroupInfo.Name
$output
}
} | Format-Table @{Label="VM Name"; Expression={$_.VmName} }, @{Label="Protection group name";
Expression={$_.PgName} }
Create a Report of the Virtual Machines Associated with All Protection Groups
You can create a simple report containing information about the virtual machines associated with all protection groups.
Prerequisites
n Verify that you are connected to a vCenter Server system.
n Verify that you are connected to an SRM server.
Procedure
1 List all protection groups associated with the SRM server.
$srmApi = $srmConnection.ExtensionData
$protectionGroups = $srmApi.Protection.ListProtectionGroups()
VMware PowerCLI User's Guide
VMware, Inc. 100
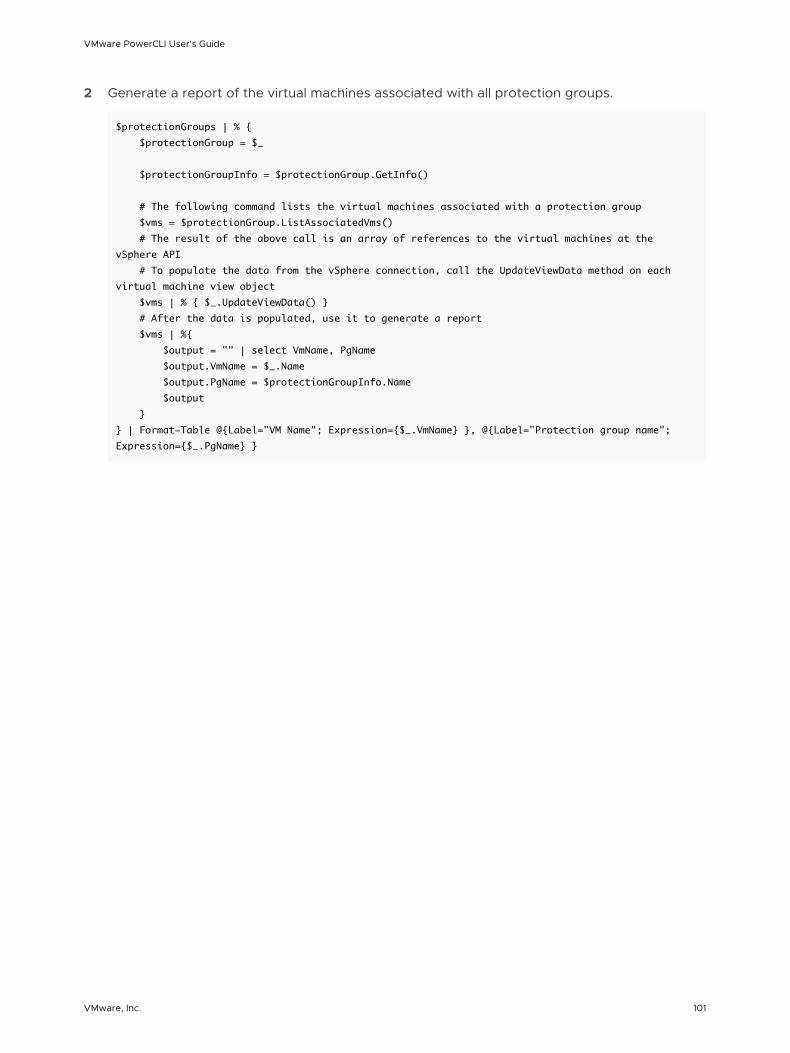
2 Generate a report of the virtual machines associated with all protection groups.
$protectionGroups | % {
$protectionGroup = $_
$protectionGroupInfo = $protectionGroup.GetInfo()
# The following command lists the virtual machines associated with a protection group
$vms = $protectionGroup.ListAssociatedVms()
# The result of the above call is an array of references to the virtual machines at the
vSphere API
# To populate the data from the vSphere connection, call the UpdateViewData method on each
virtual machine view object
$vms | % { $_.UpdateViewData() }
# After the data is populated, use it to generate a report
$vms | %{
$output = "" | select VmName, PgName
$output.VmName = $_.Name
$output.PgName = $protectionGroupInfo.Name
$output
}
} | Format-Table @{Label="VM Name"; Expression={$_.VmName} }, @{Label="Protection group name";
Expression={$_.PgName} }
VMware PowerCLI User's Guide
VMware, Inc. 101

Sample Scripts for Managing the vSphere Automation SDK with VMware PowerCLI
8To help you get started with VMware PowerCLI, this documentation provides a set of sample scripts that illustrate basic and advanced tasks in the vSphere Automation SDK administration.
PowerCLI exposes the vSphere Automation SDK on a low level, similarly to what the Get-CisService cmdlet offers for other supported APIs. The returned vSphere Automation SDK views are dynamic objects that expose a specific suite service that you request, and provide helper utilities for instantiating sample values for parameters, obtaining metadata, and so on.
This chapter includes the following topics:
n Create a Local Content Library on an Existing Datastore
Create a Local Content Library on an Existing Datastore
You can use the vSphere Automation SDK to work with content library features. For example, you can create a local content library on a datastore.
The following sample script illustrates how you can get the content library service and retrieve information about existing content libraries. You can then combine working with both the vCenter Server API and the vSphere Automation SDK, as well as their corresponding objects, to create a new content library on a specific datastore. Optionally, you can create an advanced function that lets you list all content libraries and their details.
Prerequisites
n Verify that you are connected to a vCenter Server system.
Procedure
1 Connect to a vSphere Automation SDK server.
Connect-CisServer -Server cis3.example.com -User 'MyAdministratorUser' -Password 'MyPassword'
2 Get the service that works with local content libraries.
$contentLibrary = Get-CisService com.vmware.content.local_library
VMware, Inc. 102

3 List the IDs of existing content libraries.
$contentLibrary.list()
4 Retrieve details of existing content libraries.
$clID = $contentLibrary.list() | Select -first 1
$contentLibrary.get($clID.Value)
5 Get a datastore on which to create the content library.
$datastoreID = (Get-Datastore | select -first 1).extensiondata.moref.value
6 Create a local content library on the existing datastore.
$createSpec = $contentLibrary.help.create.create_spec.Create()
$createSpec.name = "New Content Library 2"
$createSpec.description = "A new sample Content Library from PowerCLI"
$createSpec.type = "LOCAL"
$createSpec.publish_info.persist_json_enabled = $false
$createSpec.publish_info.published = $false
$createSpec.storage_backings = $contentLibrary.help.create.create_spec.storage_backings.Create()
$storageSpec = $contentLibrary.help.create.create_spec.storage_backings.Element.Create()
$storageSpec.datastore_id = $datastoreID
$storageSpec.type = "DATASTORE"
$createSpec.storage_backings.Add($storageSpec)
$uniqueID = [guid]::NewGuid().tostring()
$contentLibrary.create($uniqueID, $createSpec)
7 Create a PowerShell advanced function that lists all content libraries and their details.
Function Get-ContentLibrary ($name) {
$contentLibrary = Get-CisService com.vmware.content.local_library
$libraryIDs = $contentLibrary.list()
Foreach ($library in $libraryIDs) {
if ($name) {
$contentLibrary.get($library.Value) | Where { $_.name -eq $Name } | Select Name,
Type, Creation_Time, Last_Modified_Time, Storage_Backings
} else {
$contentLibrary.get($library.Value) | Select Name, Type, Creation_Time,
Last_Modified_Time, Storage_Backings
}
}
}
VMware PowerCLI User's Guide
VMware, Inc. 103

Sample Scripts for Managing VMware Cloud Director with VMware PowerCLI
9To help you get started with VMware PowerCLI, this documentation provides a set of scripts that illustrate basic and advanced tasks in cloud administration.
n Connect to a VMware Cloud Director Server
To run cmdlets on a VMware Cloud Director server and perform administration or monitoring tasks, you must establish a connection to the server.
n Create and Manage Organizations
Organizations provide resources to a group of users and set policies that determine how users can consume those resources. Create and manage organizations for each group of users that requires its own resources, policies, or both.
n Create and Manage Organization Virtual Data Centers
To allocate resources to an organization, you need to create an organization virtual data center (vDC). When the demands of the organization change, you can modify or remove the organization vDC.
n Filter and Retrieve Organization Virtual Data Center Networks
To generate reports about organization vDC networks, you need to retrieve the respective organization vDC networks. You can use search criteria to filter the results returned by Get-OrgVdcNetwork.
n Import a vApp Template from the Local Storage
To make an OVF package from your local storage available to other cloud users, you can import the package and save it as a vApp template in a catalog.
n Create a vApp Template from a vApp
Creating vApp templates from vApps in the cloud might minimize future efforts for cloning vApps. You can use the templates later to create vApps that are based on the source vApp.
n Import a vApp from vSphere
To make a virtual machine from the underlying vSphere infrastructure available to your VMware Cloud Director server, you can import it and save it as a vApp.
VMware, Inc. 104

n Create and Modify a vApp
You can use vApp templates to instantiate vApps. After creating the vApp, you can modify its settings to minimize the consumption of computing and storage resources.
n Manage Virtual Machines with vApps
For a large-scale approach to administration, you can start, stop, or restart virtual machines or their guest operating systems by running cmdlets on the associated vApps.
n Manage Virtual Machines and Their Guest Operating Systems
For a targeted approach to administration, you can use the CIVM and CIVMGuest cmdlets to handle lifecycle operations for one or more virtual machines.
n Retrieve a List of the Internal and External IP Addresses of Virtual Machines in vApps
When managing vApps in the cloud, you might need to obtain information about the NIC settings of the associated virtual machines.
n Create and Manage Access Control Rules
By defining access control rules you can assign levels of access to separate users, user groups, or everyone in the organization. You can define access control rules for catalogs and vApps.
n Filter and Retrieve vApp Networks
To generate reports about vApp networks, you need to retrieve the respective vApp networks. You can use search criteria to filter the results returned by Get-CIVAppNetwork.
n Create vApp Networks for a Selected vApp
To define how the virtual machines in a vApp connect to each other and access other networks, you need to create a vApp network. When creating the vApp network, you can select the settings for the network, or adopt them from an organization policy.
n Modify or Remove vApp Networks
Based on the type of the vApp network, you can configure various network settings, such as DNS, static IP pools, and firewalls. If you no longer need a vApp network, you can remove it.
Connect to a VMware Cloud Director Server
To run cmdlets on a VMware Cloud Director server and perform administration or monitoring tasks, you must establish a connection to the server.
You can have more than one connection to the same server. For more information, see Managing Default Server Connections.
If your login credentials contain non-alphanumeric characters, you might need to escape them. For more information, see Providing Login Credentials.
VMware PowerCLI User's Guide
VMware, Inc. 105

Prerequisites
If you use a proxy server for the connection, verify that it is configured properly, so that the connection is kept alive long enough for tasks to finish.
Note If you do not want to use a proxy server for the connection, run Set-PowerCLIConfiguration -ProxyPolicy NoProxy.
Procedure
u Run Connect-CIServer with the server name and valid credentials.
Connect-CIServer -Server cloud.example.com -User 'MyAdministratorUser' -Password 'MyPassword'
Create and Manage Organizations
Organizations provide resources to a group of users and set policies that determine how users can consume those resources. Create and manage organizations for each group of users that requires its own resources, policies, or both.
Prerequisites
Verify that you are connected to a VMware Cloud Director server as a provider administrator.
Procedure
1 Generate a customized report for all organizations on the server.
Get-Org | Select Name, Enabled, StoredVMQuota, DeployedVMQuota
2 Add a new organization on the server and provide a name and a full name for it.
New-Org -Name 'MyOrg1' -FullName 'My Organization 1'
By default, the new organization is enabled. Enabling the organization lets users log in.
3 Add a description for the new organization.
Get-Org -Name 'MyOrg1' | Set-Org -Description "This organization provides resources to John Doe."
4 Disable and remove the new organization.
Get-Org -Name 'MyOrg1' | Set-Org -Enabled $false | Remove-Org
Create and Manage Organization Virtual Data Centers
To allocate resources to an organization, you need to create an organization virtual data center (vDC). When the demands of the organization change, you can modify or remove the organization vDC.
VMware PowerCLI User's Guide
VMware, Inc. 106

Prerequisites
n Verify that you are connected to a VMware Cloud Director server as a provider administrator.
n Verify that at least one enabled provider vDC is available on the server.
Procedure
1 Create a new organization vDC using the Pay As You Go model for resource allocation.
$myOrg = Get-Org -Name 'MyOrg1'
$myPVdc = Get-ProviderVdc -Name 'MyProvidervDC'
New-OrgVdc -Name 'MyOrgvDC' -AllocationModelPayAsYouGo -Org $myOrg -ProviderVdc $myPVdc -
VMCPUCoreMHz 1000
To create the organization vDC, VMware Cloud Director PowerCLI uses a default configuration based on the selected resource allocation model.
n VMMaxCount is set to 100
n NetworkMaxCount is set to 1024
n The vDC is automatically enabled
n Thin provisioning is disabled
n Fast provisioning is disabled
n NicMaxCount is set to $null (unlimited)
n MemoryGuaranteedPercent is set to 100
n CpuGuaranteedPercent is set to 0
2 Modify the vCPU speed setting for the virtual machines in the organization vDC.
Get-OrgVdc -Name 'MyOrgVdc' | Set-OrgVdc -VMCpuCoreMhz 2000
3 Enable fast provisioning for the virtual machines in the organization vDC.
Get-OrgVdc -Name 'MyOrgVdc' | Set-OrgVdc -UseFastProvisioning $true
4 Disable and remove the new organization vDC.
Get-OrgVdc -Name 'MyOrgVdc' | Set-OrgVdc -Enabled $false | Remove-OrgVdc
Filter and Retrieve Organization Virtual Data Center Networks
To generate reports about organization vDC networks, you need to retrieve the respective organization vDC networks. You can use search criteria to filter the results returned by Get-OrgVdcNetwork.
VMware PowerCLI User's Guide
VMware, Inc. 107

Prerequisites
Verify that you are connected to a VMware Cloud Director server.
Procedure
u Get all organization vDC networks for the organization named MyOrgVdc.
Get-OrgVdc -Name 'MyOrgVdc' | Get-OrgVdcNetwork
u Get the organization vDC network that is named MyOrgVdcNetwork.
Get-OrgVdc -Name 'MyOrgVdc' | Get-OrgVdcNetwork -Name 'MyOrgVdcNetwork'
Import a vApp Template from the Local Storage
To make an OVF package from your local storage available to other cloud users, you can import the package and save it as a vApp template in a catalog.
Prerequisites
Verify that you are connected to a VMware Cloud Director server.
Procedure
1 Retrieve the catalog to which you want to add the imported vApp template.
$myCatalog = Get-Catalog -Name 'MyCatalog'
2 Retrieve the organization virtual data center (vDC) to which you want to add the imported vApp template.
$myOrgVdc = Get-OrgVdc -Name 'MyOrgVdc'
3 Import a virtual machine from your local storage and save it as a vApp template in the cloud.
Import-CIVAppTemplate -SourcePath 'C:\OVFs\WindowsXP\WindowsXP.ovf' -Name
'MyWindowsXPVAppTemplate' -OrgVdc $myOrgVdc -Catalog $myCatalog
Create a vApp Template from a vApp
Creating vApp templates from vApps in the cloud might minimize future efforts for cloning vApps. You can use the templates later to create vApps that are based on the source vApp.
Prerequisites
Verify that you are connected to a VMware Cloud Director server.
VMware PowerCLI User's Guide
VMware, Inc. 108

Procedure
1 Retrieve the source vApp for the vApp template that you want to create.
$myVApp = Get-CIVApp -Name 'MyVApp'
2 If the source vApp is running, stop it.
$myVApp = Stop-CIVApp -VApp $myVApp
3 Retrieve the catalog to which you want to add the new vApp template.
$myCatalog = Get-Catalog -Name 'MyCatalog'
4 Retrieve the organization vDC to which you want to add the new vApp template.
$myOrgVdc = Get-OrgVdc -Name 'MyOrgVdc'
5 Create a vApp template.
New-CIVAppTemplate -Name 'MyVAppTemplate' -VApp $myVApp -OrgVdc $myOrgVDC -Catalog $myCatalog
6 Start the source vApp.
$myVApp = Start-CIVApp -VApp $myVApp
What to do next
Create a vApp from the template and modify the vApp. See Create and Modify a vApp.
Import a vApp from vSphere
To make a virtual machine from the underlying vSphere infrastructure available to your VMware Cloud Director server, you can import it and save it as a vApp.
Prerequisites
n Verify that you are connected to a VMware Cloud Director server as a provider administrator.
n Verify that you are connected to a vCenter Server system.
Procedure
1 Retrieve the vSphere virtual machine that you want to import.
$myVm = Get-VM -Name 'MyVMToImport'
2 Retrieve the organization vDC to which you want to import the virtual machine.
$myOrgVdc = Get-OrgVdc -Name 'MyOrgVdc'
VMware PowerCLI User's Guide
VMware, Inc. 109
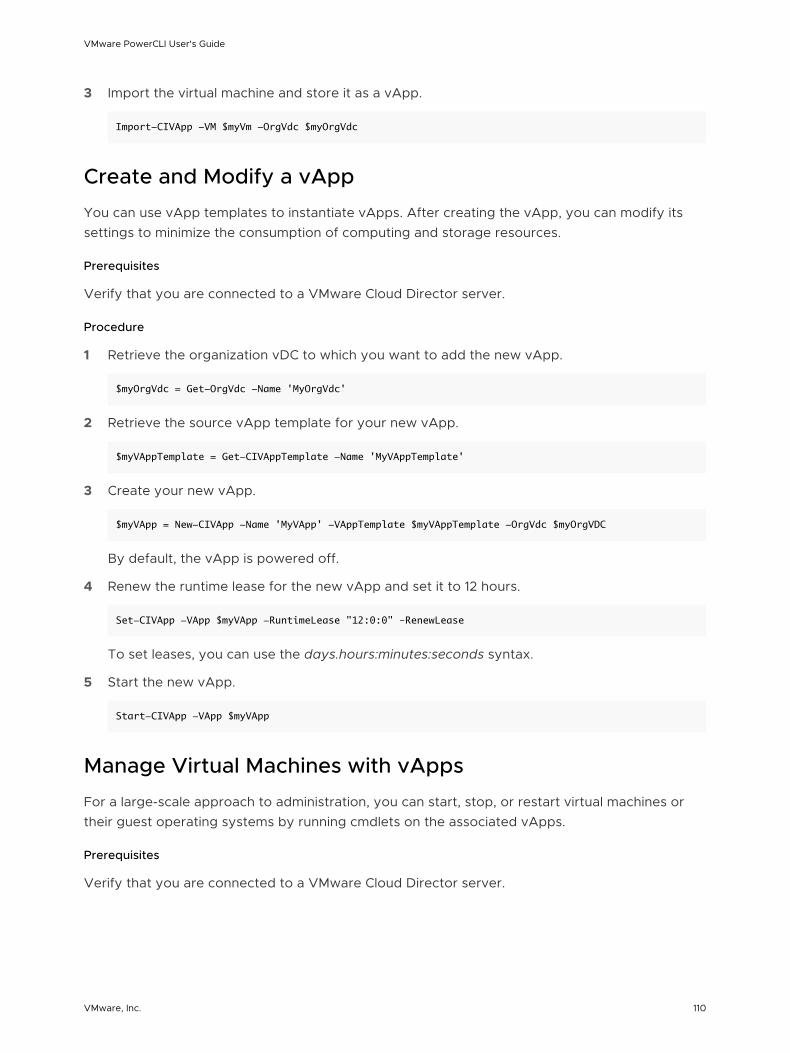
3 Import the virtual machine and store it as a vApp.
Import-CIVApp -VM $myVm -OrgVdc $myOrgVdc
Create and Modify a vApp
You can use vApp templates to instantiate vApps. After creating the vApp, you can modify its settings to minimize the consumption of computing and storage resources.
Prerequisites
Verify that you are connected to a VMware Cloud Director server.
Procedure
1 Retrieve the organization vDC to which you want to add the new vApp.
$myOrgVdc = Get-OrgVdc -Name 'MyOrgVdc'
2 Retrieve the source vApp template for your new vApp.
$myVAppTemplate = Get-CIVAppTemplate -Name 'MyVAppTemplate'
3 Create your new vApp.
$myVApp = New-CIVApp -Name 'MyVApp' -VAppTemplate $myVAppTemplate -OrgVdc $myOrgVDC
By default, the vApp is powered off.
4 Renew the runtime lease for the new vApp and set it to 12 hours.
Set-CIVApp -VApp $myVApp -RuntimeLease "12:0:0" –RenewLease
To set leases, you can use the days.hours:minutes:seconds syntax.
5 Start the new vApp.
Start-CIVApp -VApp $myVApp
Manage Virtual Machines with vApps
For a large-scale approach to administration, you can start, stop, or restart virtual machines or their guest operating systems by running cmdlets on the associated vApps.
Prerequisites
Verify that you are connected to a VMware Cloud Director server.
VMware PowerCLI User's Guide
VMware, Inc. 110

Procedure
1 Power on all virtual machines in all vApps with names starting with MyVApp.
Get-CIVApp -Name 'MyVApp*' | Start-CIVApp
2 Suspend all virtual machines in all vApps with names starting with YourVApp.
Get-CIVApp -Name 'YourVApp*' | Suspend-CIVApp
3 Power off all virtual machines in the vApp named MyVApp1.
Get-CIVApp -Name 'MyVApp1' | Stop-CIVApp
4 Shut down the guest operating systems of all virtual machines in the vApp named MyVApp2.
Get-CIVApp -Name 'MyVApp2' | Stop-CIVAppGuest
5 Restart the guest operating systems of all virtual machines in the vApp named MyVApp3.
Get-CIVApp -Name 'MyVApp3' | Restart-CIVAppGuest
6 Reset all virtual machines in the vApp.
Get-CIVApp -Name 'MyVApp4' | Restart-CIVApp
Manage Virtual Machines and Their Guest Operating Systems
For a targeted approach to administration, you can use the CIVM and CIVMGuest cmdlets to handle lifecycle operations for one or more virtual machines.
Prerequisites
Verify that you are connected to a VMware Cloud Director server.
Procedure
1 Retrieve all virtual machines with names starting with MyVM and power them on.
Get-CIVM -Name 'MyVM*' | Start-CIVM
2 Suspend all virtual machines with names starting with YourVM.
Get-CIVM -Name 'YourVM*' | Suspend-CIVM
3 Power off the virtual machine named MyVM1.
Get-CIVM -Name 'MyVM1' | Stop-CIVM
VMware PowerCLI User's Guide
VMware, Inc. 111

4 Shut down the guest operating system of the virtual machine named MyVM2.
Get-CIVM -Name 'MyVM2' | Stop-CIVMGuest
5 Restart the guest operating system of the virtual machine named MyVM3.
Get-CIVM -Name 'MyVM3' | Restart-CIVMGuest
6 Reset the nonresponsive virtual machine named MyVM4.
Get-CIVM -Name 'MyVM4' | Restart-CIVM
Retrieve a List of the Internal and External IP Addresses of Virtual Machines in vApps
When managing vApps in the cloud, you might need to obtain information about the NIC settings of the associated virtual machines.
Prerequisites
Verify that you are connected to a VMware Cloud Director server.
Procedure
1 Retrieve the organization for which you want to generate the report.
$myOrg = Get-Org -Name 'MyOrg'
2 Retrieve all vApps in the organization.
$vApps = Get-CIVApp -Org $myOrg
3 Populate an array with the information that you want to report.
$vAppNetworkAdapters = @()
foreach ($vApp in $vApps) {
$vms = Get-CIVM -VApp $vApp
foreach ($vm in $vms) {
$networkAdapters = Get-CINetworkAdapter -VM $vm
foreach ($networkAdapter in $networkAdapters) {
$vAppNicInfo = New-Object "PSCustomObject"
$vAppNicInfo | Add-Member -MemberType NoteProperty -Name VAppName -Value
$vApp.Name
$vAppNicInfo | Add-Member -MemberType NoteProperty -Name VMName -Value
$vm.Name
$vAppNicInfo | Add-Member -MemberType NoteProperty -Name NIC -Value
("NIC" + $networkAdapter.Index)
$vAppNicInfo | Add-Member -MemberType NoteProperty -Name ExternalIP -
Value $networkAdapter.ExternalIpAddress
$vAppNicInfo | Add-Member -MemberType NoteProperty -Name InternalIP -
Value $networkAdapter.IpAddress
VMware PowerCLI User's Guide
VMware, Inc. 112

$vAppNetworkAdapters += $vAppNicInfo
}
}
}
Running this script retrieves the names of the virtual machines and their associated vApp, the IDs of the NICs of the virtual machines, and external, and internal IP addresses of the NICs.
4 Display the report on the screen.
$vAppNetworkAdapters
Create and Manage Access Control Rules
By defining access control rules you can assign levels of access to separate users, user groups, or everyone in the organization. You can define access control rules for catalogs and vApps.
Prerequisites
Verify that you are connected to a VMware Cloud Director server.
Procedure
1 Create a new rule for accessing the vApp named MyVApp.
New-CIAccessControlRule -Entity 'MyVApp' -EveryoneInOrg -AccessLevel "Read"
All users in the organization have read-only access to the vApp.
2 Modify the access rule for a trusted user who needs full control over MyVApp.
New-CIAccessControlRule -Entity 'MyVApp' -User "MyAdvancedUser" -AccessLevel "FullControl"
3 Restrict the full control access of MyAdvancedUser to read/write access.
$accessRule = Get-CIAccessControlRule -Entity 'MyVApp' -User 'MyAdvancedUser'
$accessRule | Set-CIAccessControlRule -AccessLevel "ReadWrite"
4 Remove the custom rule that you created earlier for MyAdvancedUser.
$accessRule | Remove-CIAccessControlRule
Filter and Retrieve vApp Networks
To generate reports about vApp networks, you need to retrieve the respective vApp networks. You can use search criteria to filter the results returned by Get-CIVAppNetwork.
Prerequisites
Verify that you are connected to a VMware Cloud Director server.
VMware PowerCLI User's Guide
VMware, Inc. 113

Procedure
u Get the vApp network named MyVAppNetwork.
Get-CIVAppNetwork -Name 'VAppNetwork'
u Get all vApp networks for the vApp named MyVApp.
Get-CIVApp -Name 'MyVApp'| Get-CIVAppNetwork
u Get all vApp networks of connection type direct and direct fenced.
Get-CIVAppNetwork -ConnectionType Direct, DirectFenced
u Get all direct vApp networks that connect to the organization vDC network named MyOrgVdcNetwork.
Get-OrgVdcNetwork -Name 'MyOrgVdcNetwork' | Get-CIVAppNetwork -ConnectionType Direct
Create vApp Networks for a Selected vApp
To define how the virtual machines in a vApp connect to each other and access other networks, you need to create a vApp network. When creating the vApp network, you can select the settings for the network, or adopt them from an organization policy.
To address multiple networking scenarios for a vApp, you can create multiple vApp networks.
n Create an Isolated vApp Network
When you do not want the virtual machines in a vApp to connect to objects outside the vApp, you must create an isolated vApp network.
n Create an NAT Routed vApp Network
To provide a vApp network with DHCP, firewall, NAT, and VPN services, you must create it as an NAT routed vApp network.
n Create a Direct vApp Network
To establish a network connection between the virtual machines in a vApp and an organization network, you need to create a direct vApp network.
Create an Isolated vApp Network
When you do not want the virtual machines in a vApp to connect to objects outside the vApp, you must create an isolated vApp network.
Prerequisites
Verify that you are connected to a VMware Cloud Director server.
VMware PowerCLI User's Guide
VMware, Inc. 114

Procedure
1 Retrieve the vApp for which you want to create a vApp network.
$myVApp = Get-CIVApp -Name 'MyVApp'
2 Create the new vApp network with a selected gateway and network mask.
New-CIVAppNetwork -VApp $myVApp -Name 'MyVAppInternalNetwork' -Routed -Gateway '192.168.2.1' -
Netmask '255.255.255.0' -ParentOrgVdcNetwork $null
By default, the vApp network has an enabled firewall.
Create an NAT Routed vApp Network
To provide a vApp network with DHCP, firewall, NAT, and VPN services, you must create it as an NAT routed vApp network.
Prerequisites
Verify that you are connected to a VMware Cloud Director server.
Procedure
1 Retrieve the vApp for which you want to create a vApp network.
$myVApp = Get-CIVApp -Name 'MyVApp'
2 Retrieve the organization vDC network to which you want to connect the vApp network.
$myOrgVdcNetwork = Get-OrgVdcNetwork -Name 'MyOrgVdcNetwork'
3 Create the new vApp network with a gateway and network mask, defined pool of static IP addresses, and a disabled firewall.
New-CIVAppNetwork -VApp $myVApp -ParentOrgVdcNetwork $myOrgVdcNetwork -Name
'MyVAppInternalNetwork' -Routed -Gateway '192.168.2.1' -Netmask '255.255.255.0' -DisableFirewall -
StaticIPPool "192.168.2.100 - 192.168.2.199"
If you do not run New-CIVAppNetwork with the DisableFirewall parameter, the new vApp network has an enabled firewall by default.
Create a Direct vApp Network
To establish a network connection between the virtual machines in a vApp and an organization network, you need to create a direct vApp network.
Prerequisites
Verify that you are connected to a VMware Cloud Director server.
VMware PowerCLI User's Guide
VMware, Inc. 115

Procedure
1 Retrieve the vApp for which you want to create a vApp network.
$myVApp = Get-CIVApp -Name 'MyVApp'
2 Retrieve the organization vDC network that you want to connect to.
$myOrgVdcNetwork = Get-OrgVdcNetwork -Name 'MyOrgVdcNetwork'
3 Create a direct vApp network that connects to the selected organization vDC network.
New-CIVAppNetwork -VApp $myVapp -Direct -ParentOrgVdcNetwork $myOrgVdcNetwork
By default, the new vApp network has an enabled firewall.
Modify or Remove vApp Networks
Based on the type of the vApp network, you can configure various network settings, such as DNS, static IP pools, and firewalls. If you no longer need a vApp network, you can remove it.
Prerequisites
Verify that you are connected to a VMware Cloud Director server.
Procedure
1 Retrieve the vApp for which you want to modify vApp networks.
$myVApp = Get-CIVApp -Name 'MyVApp'
2 Modify the settings for DNS and static IP pool for the vApp network named MyVAppNetwork.
Get-CIVAppNetwork -VApp $myVApp -Name 'MyVAppNetwork' | Set-CIVAppNetwork -PrimaryDns 10.17.0.94 -
SecondaryDns 10.17.0.95 -DnsSuffix 'my.domain.com' -StaticIPPool "10.151.168.1 - 10.151.169.240"
3 (Optional) Remove MyVAppNetwork.
$myVApp | Get-CIVAppNetwork -Name 'MyVAppNetwork' | Remove-CIVAppNetwork
4 (Optional) Remove all isolated vApp networks for the vApp named MyVapp.
$myVApp | Get-CIVAppNetwork -ConnectionType Isolated | Remove-CIVAppNetwork
5 Retrieve the organization vDC network named MyOrgVdcNetwork1.
$myOrgVdcNetwork1 = Get-OrgVdcNetwork -Name 'MyOrgVdcNetwork1'
6 Retrieve the organization vDC network named MyOrgVdcNetwork2.
$myOrVdcgNetwork2 = Get-OrgVdcNetwork -Name 'MyOrgVdcNetwork2'
VMware PowerCLI User's Guide
VMware, Inc. 116

7 Redirect all vApp networks that connect to MyOrgVdcNetwork1 to connect to MyOrgVdcNetwork2.
Get-CIVAppNetwork -ParentOrgVdcNetwork $myOrgVdcNetwork1 | Set-CIVAppNetwork -ParentOrgVdcNetwork
$myOrgVdcNetwork2 -NatEnabled $false -FirewallEnabled $false
The operation disables the firewall and NAT routing for all vApp networks that are connected to MyOrgVdcNetwork1.
VMware PowerCLI User's Guide
VMware, Inc. 117

Sample Scripts for Managing vSphere Update Manager with VMware PowerCLI
10To help you get started with VMware PowerCLI, this documentation provides a set of sample scripts that illustrate basic and advanced tasks in vSphere Update Manager administration.
The vSphere Update Manager module provides a set of cmdlets for downloading software patches, creating and modifying baselines, and for scanning and remediating virtual machines or hosts.
This chapter includes the following topics:
n Connect to a vCenter Server System
n Create Patch Baselines
n Attach and Detach Baselines
n Scan a Virtual Machine
n Check Virtual Machine Baseline Status
n Stage Patches
n Remediate a Virtual Machine
n Upgrade Virtual Machine Hardware
n Remediate a Cluster
n Remediate a Host
n Download Patches and Scan Objects
Connect to a vCenter Server System
To run Update Manager PowerCLI cmdlets on vSphere, you must establish a connection to an ESXi host or a vCenter Server system.
You can have more than one connection to the same server. For more information, see Managing Default Server Connections.
If your login credentials contain non-alphanumeric characters, you might need to escape them. For more information, see Providing Login Credentials.
VMware, Inc. 118

Prerequisites
If you use a proxy server for the connection, verify that it is configured properly, so that the connection is kept alive long enough for tasks to finish.
Note If you do not want to use a proxy server for the connection, run Set-PowerCLIConfiguration -ProxyPolicy NoProxy.
Procedure
u Run Connect-VIServer with the server name and valid credentials.
Connect-VIServer -Server vc3.example.com -User 'MyAdministratorUser' -Password 'MyPassword'
Create Patch Baselines
You can apply patch baselines to hosts. Depending on the patch criteria you select, patch baselines can be either dynamic or fixed.
Patch data in dynamic baselines changes depending on the criteria you specify each time Update Manager downloads new patches. Fixed baselines contain only the patches you have selected, regardless of new patch downloads.
Prerequisites
Verify that you are connected to a vCenter Server system.
Procedure
1 Retrieve all host patches released after 1 Jan 2015 for ESXi products, and create a fixed baseline named Static Baseline, containing the retrieved patches.
$patches = Get-Patch -After "1 Jan 2015" -Product "ESXi"
$staticBaseline = New-PatchBaseline -Static -Name "Static Baseline" -IncludePatch $patches
2 Create a critical dynamic baseline named Dynamic Baseline by using a fetch-all query.
$criticalPatchBaseline = New-PatchBaseline -Dynamic -Name "Dynamic Baseline" -SearchPatchSeverity
Critical
3 Create an extension baseline that contains all available extensions.
$extensions = Get-Patch -BundleType Extension
New-PatchBaseline -Static -Name "Extension Baseline" -Extension -IncludePatch $extensions
Attach and Detach Baselines
You can attach baselines to individual objects and to container objects, such as folders, hosts, clusters, and data centers. Attaching a baseline to a container object attaches the baseline to all objects in the container.
VMware PowerCLI User's Guide
VMware, Inc. 119

Prerequisites
Verify that you are connected to a vCenter Server system.
Procedure
1 Attach the host patch baselines stored in the provided variables to the host named Host.
Add-EntityBaseline -Baseline $staticBaseline, $criticalPatchBaseline -Entity Host
2 Detach the two baselines from the host.
Remove-EntityBaseline -Baseline $dynamicBaseline, $staticBaseline -Entity Host
Scan a Virtual Machine
You can scan a virtual machine against the baselines attached to it or inherited by its parent object.
Prerequisites
Verify that you are connected to a vCenter Server system.
Procedure
1 Initialize scanning on a virtual machine that is named VM against baselines containing virtual machine hardware upgrades and VMware Tools upgrades.
$task = Test-Compliance -Entity VM -UpdateType VmHardwareUpgrade, VmToolsUpgrade -RunAsync
The command initializes a task on the server, returns a snapshot object of the initial state of the task, and saves it in the $task variable.
2 View the initial status of the scanning task.
$task
Note The task object is not updated with the actual state of the task process running on the server. Even after the task is completed, the $task variable value is running. To view the actual status of the tasks running on the server, use the Get-Task cmdlet.
3 (Optional) Run the Wait-Task cmdlet to monitor the process progress and wait for the task to complete before running other commands.
Wait-Task -Task $task
Check Virtual Machine Baseline Status
You can check whether a virtual machine has any baselines with unknown compliance status attached to it and start a scan.
VMware PowerCLI User's Guide
VMware, Inc. 120

Prerequisites
Verify that you are connected to a vCenter Server system.
Procedure
1 Retrieve the compliance statuses with the value Unknown for the baselines attached to the VM virtual machine and store them in the $statuses variable.
$statuses = Get-Compliance -Entity VM -ComplianceStatus Unknown
2 Check whether the virtual machine has any baselines with unknown compliance status attached to it and start a scan.
if ($statuses.Count -gt 0) {
Test-Compliance -Entity VM -RunAsync"
}
Stage Patches
Staging allows you to download patches and extensions from the Update Manager server to the ESXi hosts without applying the patches and extensions immediately.
Note Staging can be performed only for hosts, clusters, and data centers.
Prerequisites
Verify that you are connected to a vCenter Server system.
Procedure
1 Retrieve a host and store it in the $vmHost variable.
$vmHost = Get-VMHost -Name 10.23.112.233
2 Stage the patches for upgrading the host.
Stage-Patch -Entity $vmHost
Remediate a Virtual Machine
You can retrieve all baselines attached to a virtual machine and remediate the virtual machine.
Prerequisites
Verify that you are connected to a vCenter Server system.
VMware PowerCLI User's Guide
VMware, Inc. 121

Procedure
1 Retrieve all baselines attached to the VM virtual machine.
$baselines = Get-Baseline –Entity VM
2 Remediate the virtual machine.
Update-Entity –Entity VM –Baseline $baselines
Upgrade Virtual Machine Hardware
You can upgrade virtual machine hardware and VMware Tools for all virtual machines in a data center.
Prerequisites
Verify that you are connected to a vCenter Server system.
Procedure
1 Retrieve all virtual machines in the Datacenter data center.
$vms = Get-VM -Location Datacenter
2 Retrieve all virtual machine upgrade baselines.
$ugradeBaselines = Get-Baseline -TargetType VM -BaselineType Upgrade
3 Remediate all virtual machines against the virtual machine upgrade baselines.
foreach ($vm in $vms) {
Update-Entity -Entity $vm -Baseline $upgradeBaselines
}
Remediate a Cluster
You can retrieve all baselines attached to a cluster and remediate the cluster.
Note Before remediation, you must temporarily disable the Distributed Power Management (DPM), High Availability (HA) admission control, and Fault Tolerance (FT) features of the clusters you want to remediate. After remediation, Update Manager automatically enables the disabled features.
Prerequisites
Verify that you are connected to a vCenter Server system.
VMware PowerCLI User's Guide
VMware, Inc. 122

Procedure
1 Retrieve all baselines attached to the Cluster cluster.
$baselines = Get-Baseline –Entity Cluster
2 Remediate the cluster.
Update-Entity –Entity Cluster –Baseline $baselines -ClusterDisableDistributedPowerManagement
$true –ClusterDisableHighAvailability $true -ClusterDisableFaultTolerance $true
Remediate a Host
You can retrieve all baselines attached to a host and remediate the host.
Note When remediating a host, you can configure the maintenance mode settings. You can temporarily disable any removable media devices that might prevent the host from entering maintenance mode as well.
Prerequisites
Verify that you are connected to a vCenter Server system.
Procedure
1 Retrieve all baselines attached to the Host host.
$baselines = Get-Baseline –Entity Host
2 Remediate the host.
Update-Entity –Entity Host –Baseline $baselines –HostFailureAction Retry –HostNumberOfRetries 2 -
HostDisableMediaDevices $true
Download Patches and Scan Objects
You can download patches from a previously defined location.
Prerequisites
Verify that you are connected to a vCenter Server system.
Procedure
1 Retrieve all entities from the Datacenter data center and store the result in a variable.
$entities = Get-Inventory -Location Datacenter
2 Download all available patches and store the result in a variable.
$result = Sync-Patch
VMware PowerCLI User's Guide
VMware, Inc. 123

3 Check whether new patches are downloaded and start scanning the entities in the Datacenter data center.
if ($result.Count > 0) {
Test-Compliance -Entity $entities
}
VMware PowerCLI User's Guide
VMware, Inc. 124

Sample Scripts for Managing vRealize Operations Manager with VMware PowerCLI
11To help you get started with VMware PowerCLI, this documentation provides a set of sample scripts that illustrate basic and advanced tasks in vRealize Operations Manager.
This chapter includes the following topics:
n Connect to a vRealize Operations Manager Server
n Check Memory Waste Levels
n Get Remediation Recommendations
n Change Alert Ownership
n Create a Report for Problematic Hosts
Connect to a vRealize Operations Manager Server
To run vRealize Operations Manager cmdlets, you must establish a connection to a vRealize Operations Manager server and a vCenter Server system that is monitored by the vRealize Operations Manager instance.
You can have more than one connection to the same server. For more information, see Managing Default Server Connections.
If your login credentials contain non-alphanumeric characters, you might need to escape them. For more information, see Providing Login Credentials.
Prerequisites
If you use a proxy server for the connection, verify that it is configured properly, so that the connection is kept alive long enough for tasks to finish.
Note If you do not want to use a proxy server for the connection, run Set-PowerCLIConfiguration -ProxyPolicy NoProxy.
VMware, Inc. 125

Procedure
1 Run Connect-OMServer with the server name and valid credentials.
Connect-OMServer -Server vrops3.example.com -User 'MyAdministratorUser' -Password 'MyPassword'
2 Run Connect-VIServer with the server name and valid credentials.
Connect-VIServer -Server vc3.example.com -User 'MyAdministratorUser' -Password 'MyPassword'
Check Memory Waste Levels
You can check the memory waste levels of a virtual machine host for a specific period of time. For example, you can check the memory waste levels in the last month.
Prerequisites
n Verify that you are connected to a vRealize Operations Manager instance.
n Verify that you are connected to the vCenter Server system that is monitored by the vRealize Operations Manager instance.
Procedure
1 Browse the vCenter Server inventory and select a virtual machine host for which you want to check the memory waste levels.
$vmHost = Get-VMHost 'MyHost'
2 Get the vRealize Operations Manager resource that refers to this virtual machine host.
$hostResource = $vmHost | Get-OMResource
3 Check the defined metrics for this vRealize Operations Manager resource type.
Get-OMStatKey -AdapterKind $hostResource.AdapterKind -ResourceKind $hostResource.ResourceKind
4 Get data for a specific metric.
$hostResource | Get-OMStat -Key "mem|waste"
Note This command retrieves all available metric data with the highest available granularity.
5 Get metric data for the last month aggregated on a daily basis.
$hostResource | Get-OMStat -Key "mem|waste" -From ([datetime]::Now.AddMonths(-1)) -IntervalType
Days -IntervalCount 1 -RollupType Avg
VMware PowerCLI User's Guide
VMware, Inc. 126

Get Remediation Recommendations
You can get remediation recommendations for a specific resource, such as a problematic virtual machine.
Prerequisites
n Verify that you are connected to a vRealize Operations Manager instance.
n Verify that you are connected to the vCenter Server system that is monitored by the vRealize Operations Manager instance.
n Verify that at least one alert is triggered for the virtual machine.
Procedure
1 Get the virtual machine you want to check for alerts.
$myVm = Get-VM 'MyVM'
2 Get the associated vRealize Operations Manager resource and its associated active alerts.
$myVmAlerts = $myVm | Get-OMResource | Get-OMAlert –Status Active
3 List the remediation recommendations for the obtained alerts.
$myVmAlerts | Get-OMRecommendation
Change Alert Ownership
You can retrieve all active alerts for a specific datastore and assign the alert ownership to your user profile.
Prerequisites
n Verify that you are connected to a vRealize Operations Manager instance.
n Verify that you are connected to the vCenter Server system that is monitored by the vRealize Operations Manager instance.
Procedure
1 Get all active alerts for the datastore.
$alerts = Get-Datastore 'shared' | Get-OMResource | Get-OMAlert –Status Active | where
{ ($_.AssignedUser -eq $null) -and ($_.ControlState -eq 'Open') }
2 Assign the obtained alerts to the user profile you are currently using.
$alerts | Set-OMAlert –TakeOwnership
VMware PowerCLI User's Guide
VMware, Inc. 127

Create a Report for Problematic Hosts
You can create a report for virtual machine hosts that have problematic health status.
Prerequisites
n Verify that you are connected to a vRealize Operations Manager instance.
n Verify that you are connected to the vCenter Server system that is monitored by the vRealize Operations Manager instance.
Procedure
1 Get all problematic host resources in vRealize Operations Manager that have red or yellow health status.
$hosts = Get-OMResource | where { $_.ResourceKind -eq 'HostSystem' -and $_.Health -in ('Red',
'Yellow') }
2 Get the virtual machine hosts that cause the problem.
$hosts | Get-VmHost
VMware PowerCLI User's Guide
VMware, Inc. 128

Sample Scripts for Managing VMware Cloud on AWS with VMware PowerCLI
12To familiarize yourself with VMware PowerCLI, you can use a set of scripts that illustrate basic and advanced tasks in the VMware Cloud on AWS administration.
This chapter includes the following topics:
n Connecting to VMware Cloud on AWS
n Connect to VMware Cloud on AWS by Using an API Token
n Connect to VMware Cloud on AWS by Using an OAuth Security Context
n Connect to a vCenter Server System Running in VMware Cloud on AWS
n Connect to a vCenter Server System by Using an OAuth 2.0 Authentication
n Connect to a Specific Instance of VMware Cloud on AWS
n View the Available Software-Defined Data Centers
n Create a Software-Defined Data Center
Connecting to VMware Cloud on AWS
You can use VMware Cloud on AWS to provision and manage vCenter Server virtual data centers in the cloud. VMware Cloud on AWS is a cloud service that belongs to the VMware Cloud services platform.
The VMware Cloud services platform is a web-based application that supports any number of VMware Cloud services. When you sign up for VMware Cloud services, you access your services and manage all your users, organizations, and payment methods through this platform. The VMware Cloud services platform manages common requirements for all cloud services, such as authentication, user roles, and so on.
When connecting to a VMware Cloud on AWS service, you need to authenticate with the corresponding VMware Cloud services platform.
Connect to VMware Cloud on AWS by Using an API Token
To authenticate with VMware Cloud on AWS, you can use an API token from the VMware Cloud service web portal.
VMware, Inc. 129

Prerequisites
Use the VMware Cloud service web portal to generate an API token for authentication with PowerCLI.
Procedure
u To connect to a VMware Cloud on AWS server by using the API token, run the following command.
Connect-Vmc -ApiToken "Your API token"
Connect to VMware Cloud on AWS by Using an OAuth Security Context
To connect to VMware Cloud on AWS through an OAuth 2.0 authentication mechanism, you need an OAuth security context for the VMware Cloud services platform.
You can create an OAuth security context by using the New-VcsOAuthSecurityContext cmdlet.
Prerequisites
Use the VMware Cloud service web portal to generate an API token for authentication with PowerCLI.
Procedure
1 Create an OAuth security context for the VMware Cloud services platform by using an API token.
$oauthSecContext = New-VcsOAuthSecurityContext -ApiToken "Your API token"
2 Connect to VMware Cloud on AWS by using an OAuth security context.
Connect-Vmc -OAuthSecurityContext $oauthSecContext
Connect to a vCenter Server System Running in VMware Cloud on AWS
If you want to connect to a vCenter Server system as a cloud administrator, you must configure the network for VMware Cloud on AWS so that you can access the system.
Prerequisites
n Configure the VMware Cloud on AWS networking to provide access to the vCenter Server system running in the cloud.
n Use VMware Cloud on AWS to see the user name and password of the vCenter Server system cloud administrator.
VMware PowerCLI User's Guide
VMware, Inc. 130
Procedure
u To connect to the vCenter Server system, run Connect-VIServer with the user name and password from the VMware Cloud services web portal.
Connect-VIServer "vCenter Server FQDN" -User 'Cloud administrator user name' -Password 'Cloud
administrator password'
Connect to a vCenter Server System by Using an OAuth 2.0 Authentication
If the vCenter Server system has an OpenID authentication enabled, you can authenticate with the vCenter Server system by using an OAuth security context for the VMware Cloud services platform.
Prerequisites
Use the VMware Cloud service web portal to generate an API token for authentication with PowerCLI.
Procedure
1 Create an OAuth security context for the VMware Cloud service by using an API token.
$oauthSecContext = New-VcsOAuthSecurityContext -ApiToken "Your API token"
2 Exchange the OAuth security context for an SAML security context.
$samlSecContext = New-VISamlSecurityContext -VCenterServer "vCenter Server FQDN" -
OAuthSecurityContext $oauthSecContext
3 Connect to a vCenter Server system by using an SAML security context.
Connect-VIServer -Server "vCenter Server FQDN" -SamlSecurityContext $samlSecContext
Connect to a Specific Instance of VMware Cloud on AWS
By default, commands run on the public instance of VMware Cloud on AWS.
You can establish a connection to a specific instance by using the Connect-Vmc cmdlet.
Prerequisites
Use the developer center and the API explorer to identify the domain names for the VMware Cloud services platform and the VMware Cloud on AWS service that you want to target.
VMware PowerCLI User's Guide
VMware, Inc. 131

Procedure
1 Create an OAuth security context for the target instance of the VMware Cloud services platform.
$oauthSecContext = New-VcsOAuthSecurityContext -VcsServer "VMware Cloud service FQDN" -ApiToken
"Your API token"
2 Connect to the target instance of VMware Cloud on AWS by specifying its domain name.
Connect-Vmc -Server "VMware Cloud on AWS service FQDN" -OAuthSecurityContext $oauthSecContext
View the Available Software-Defined Data Centers
With PowerCLI, you can view the available Software-Defined Data Centers (SDDC) in your VMware Cloud on AWS organization.
Prerequisites
Verify that you are connected to VMware Cloud on AWS.
Procedure
u View the available SDDCs in your VMware Cloud on AWS organization.
Get-VmcSddc
Create a Software-Defined Data Center
With PowerCLI, you can create a Software-Defined Data Center (SDDC) in your VMware Cloud on AWS organization.
Prerequisites
Verify that you are connected to VMware Cloud on AWS.
Procedure
1 Get a VMware Cloud on AWS account.
$awsAccount = Get-AwsAccount
2 Get the VMware Cloud on AWS Virtual Private Cloud (VPC) subnets.
$awsVpcSubnets = Get-AwsVpcSubnet -AwsAccount $awsAccount -Region "US_EAST_1"
3 Create an SDDC.
New-VmcSddc -Name "MySDDC" -HostCount 3 -Region "US_EAST_1" -AwsAccount $awsAccount -AwsVpcSubnet
$awsVpcSubnets[0]
VMware PowerCLI User's Guide
VMware, Inc. 132