Embed Size (px)
Citation preview

Visi-58V
VisilifOwne
8/VisionVisi-48
ft Elevater’s Manu
n 830
tors ual

© Visilift, LLC Version 1.1.1 - Revised 2012-04-05 2 of 20
Table of Contents
1.0 Introduction ............................................................................................................................................. 3
2.0 Normal Operation .................................................................................................................................... 4
3.0 Cleaning ................................................................................................................................................... 6
4.0 Maintenance ............................................................................................................................................. 8
5.0 Troubleshooting ....................................................................................................................................... 9
6.0 Frequently Asked Questions ................................................................................................................... 10
7.0 Contact Information ............................................................................................................................... 12
Appendix A - Maintenance Control Program ............................................................................................... 13

© Visilift, LLC Version 1.1.1 - Revised 2012-04-05 3 of 20
1.0 Introduction Thank you for purchasing the Visilift Visi-58 Round Acrylic Glass Elevator. Visilift is committed to designing, and producing one of the finest elevators in the world. This manual is designed to inform owners and users about the functionality of their new elevator, provide cleaning and maintenance guidance, as well as basic troubleshooting for issues which may arise. As with any mechanical product, it is important to follow these instructions to ensure proper functionality and operation, and to guarantee the longest operational life out of your new equipment. Failure to follow the directions provided in this manual may result in serious injury or irreparable damage to your equipment. For any questions which may arise and are not covered in this manual please feel free to contact the Visilift factory.
Visilift Elevators
75 Oak Avenue Eaton, Colorado 80615 USA
Tel: 970.454.1200 Fax: 970.454.1201
Email: [email protected]
Hours of Operation: 09:00 to 17:00 MST Monday - Friday
© Visilift, LLC Version 1.1.1 - Revised 2012-04-05 4 of 20
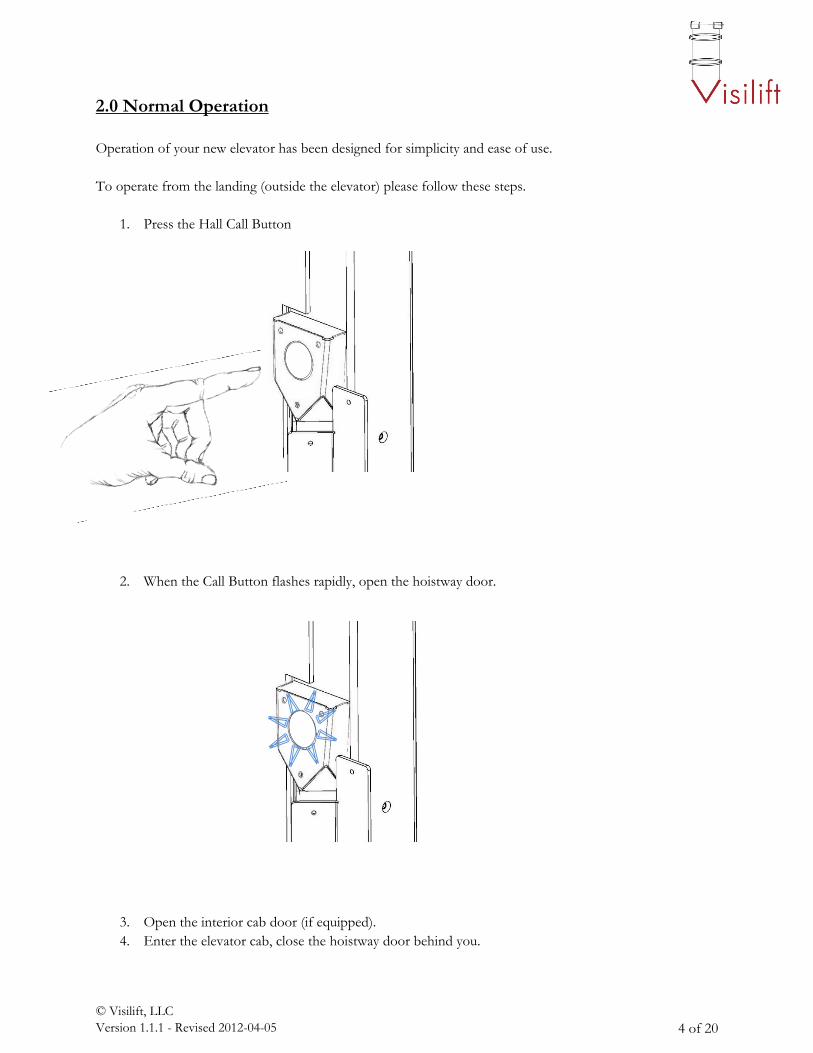
2.0 Normal Operation
Operation of your new elevator has been designed for simplicity and ease of use. To operate from the landing (outside the elevator) please follow these steps.
1. Press the Hall Call Button
2. When the Call Button flashes rapidly, open the hoistway door.
3. Open the interior cab door (if equipped). 4. Enter the elevator cab, close the hoistway door behind you.

© Visilift, LLC Version 1.1.1 - Revised 2012-04-05 5 of 20
5. Close the cab door behind you (if equipped). 6. Press a button on the Car Operation Panel to select a level.
7. When the appropriate level has been reached, open the interior cab door, exit the cab and close the cab door behind you (if equipped with cab door).
8. Close the hoistway door.

© Visilift, LLC Version 1.1.1 - Revised 2012-04-05 6 of 20
3.0 Cleaning Cleaning the panels on your Visilift Elevator is a simple task and can be performed with a mild soap and water solution or with acrylic cleaner. A few precautions must be taken to ensure a long operating life and to maintain the acrylic panel clarity on your unit. The most important rule is DO NOT USE ANY CLEANING PRODUCT WITH AMMONIA OR PETROLEUM. This includes Windex ® and most traditional glass cleaners. 3.1 Washing Wash your Visilift Acrylic panels with a solution of mild soap or detergent and lukewarm water. Use a clean soft cloth, applying only light pressure. Rinse with clean water and dry by blotting with a damp cloth or chamois. DO NOT USE: Window cleaning sprays, kitchen scouring compounds or solvents such as acetone, gasoline, benzene, alcohol, carbon tetrachloride, or lacquer thinner. These can scratch the sheet’s surface and/or weaken the sheet causing small surface cracks called “crazing.” 3.2 Dusting Dust with a soft, damp cloth or chamois. Dry or gritty cloths may cause surface scratches and create a static electric charge on the surface (see section on neutralizing static electricity). 3.3 Polishing Protect Visilift Acrylic Panels and maintain their surface gloss by occasional polishing with a good plastic cleaner and polish (see Section 3.5 for a list of acceptable cleaners and polishes). Apply a thin, even coat with a soft clean cloth and polish slightly with cotton flannel. Then wipe with a damp cloth to help eliminate electrostatic charges that can attract dust particles. 3.4 Neutralizing Static Electricity A static electrical charge can develop on Visilift Acrylic Panels during handling and processing. This is not unique to Visilift Acrylic Panels, but is common to many materials, particularly plastics. When the paper or film masking is stripped off the acrylic sheet, a static charge is created on the sheet surface. Static electricity attracts dust, chips, etc. floating in the air or on nearby work surfaces and holds these contaminants tightly to the surface. A compressed air gun will remove some of this surface dirt, but much of it continues to cling to the sheet. Several anti-static cleaners for plastics are also available which will reduce static electricity and dust attraction. Wiping with a soft damp cloth or chamois is all that is necessary to keep Visilift Acrylic Panels dust-free between applications of these cleaners.

© Visilift, LLC Version 1.1.1 - Revised 2012-04-05 7 of 20
3.5 Cleaners Cleaners which MAY BE USED:
□ Plexus® (Anti-Static Cleaner) □ Novus® #1 Acrylic Cleaner and Polish □ ATM Mirage Glass and Acrylic Cleaner □ Plexi-Clean (Anti-Static Cleaner) □ Prist Aerospace Anti-Static Acrylic, Plastic & Glass Cleaner □ Cleaners which explicitly state “ Safe for use with plastics and acrylic”
Cleaners which MAY NOT BE USED:
□ Windex® Glass Cleaner □ Zep® Glass Cleaner □ Sprayway Ammonia-Free Glass Cleaner □ Goo-Gone ®
These lists are for reference and are not comprehensive. If you have any questions about the acceptability of a specific cleaner, please contact the Visilift factory. Damage caused by inappropriate cleaners and techniques is not covered under the Visilift warranty.

© Visilift, LLC Version 1.1.1 - Revised 2012-04-05 8 of 20
4.0 Maintenance
Visilift Elevators are designed to require minimal maintenance (See Appendix A). Annual inspection of certain components is required to maintain the Visilift Factory Warranty. The first required service of the drivetrain components (Motor/Gearbox, Drums, etc.) is after 2,000 operational hours (approximately 160,000 trips).
Rail lubrication is not allowed for the Visilift hoistway or cab rails.
For items which are required during the annual inspection, see Appendix A - “Maintenance Control Program”

© Visilift, LLC Version 1.1.1 - Revised 2012-04-05 9 of 20
5.0 Troubleshooting
The Visilift Elevator Controller has been designed to provide users with a basic set of diagnostic tools through the call buttons. During normal operation, you may notice that the call buttons flash either slowly or quickly, depending on the operation. These same flashes can assist in diagnosing potential operational issues you may experience.
Basic information about the call buttons is as follows:
Quick Blinking Call Button - This signals that the hoistway (Exterior) door is ready to open at a landing.
Slow Blinking Call Button - This signals that there is a break in the safety chain, (i.e. the hoistway door is open, the cab door is open, a safety has been tripped).
© Visilift, LLC Version 1.1.1 - Revised 2012-04-05 10 of 20
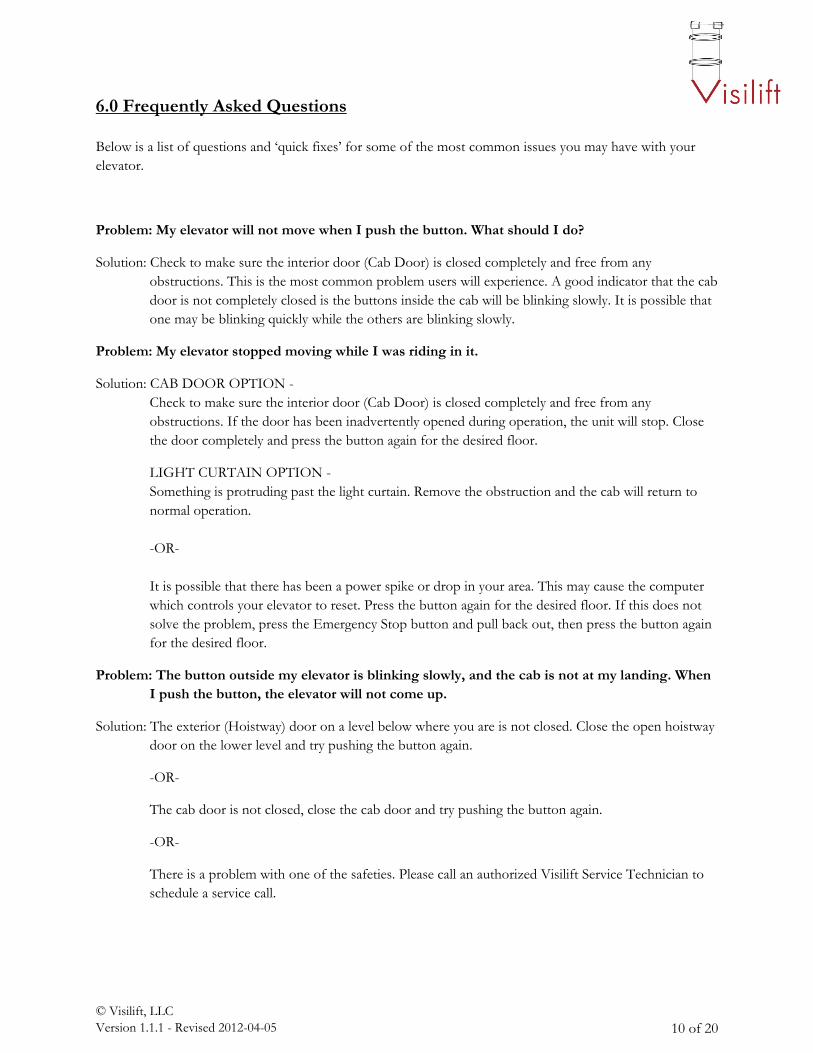
6.0 Frequently Asked Questions Below is a list of questions and ‘quick fixes’ for some of the most common issues you may have with your elevator.
Problem: My elevator will not move when I push the button. What should I do?
Solution: Check to make sure the interior door (Cab Door) is closed completely and free from any obstructions. This is the most common problem users will experience. A good indicator that the cab door is not completely closed is the buttons inside the cab will be blinking slowly. It is possible that one may be blinking quickly while the others are blinking slowly.
Problem: My elevator stopped moving while I was riding in it.
Solution: CAB DOOR OPTION - Check to make sure the interior door (Cab Door) is closed completely and free from any obstructions. If the door has been inadvertently opened during operation, the unit will stop. Close the door completely and press the button again for the desired floor.
LIGHT CURTAIN OPTION - Something is protruding past the light curtain. Remove the obstruction and the cab will return to normal operation. -OR-
It is possible that there has been a power spike or drop in your area. This may cause the computer which controls your elevator to reset. Press the button again for the desired floor. If this does not solve the problem, press the Emergency Stop button and pull back out, then press the button again for the desired floor.
Problem: The button outside my elevator is blinking slowly, and the cab is not at my landing. When I push the button, the elevator will not come up.
Solution: The exterior (Hoistway) door on a level below where you are is not closed. Close the open hoistway door on the lower level and try pushing the button again.
-OR-
The cab door is not closed, close the cab door and try pushing the button again.
-OR-
There is a problem with one of the safeties. Please call an authorized Visilift Service Technician to schedule a service call.

© Visilift, LLC Version 1.1.1 - Revised 2012-04-05 11 of 20
Problem: My elevator has gone past the top/bottom landing and now it won’t move.
Solution: The elevator is actuating the final limit switch or the slack cable switch. Please call an authorized Visilift Service Technician to schedule a service call.
Problem: My elevator was installed not too long ago, but now when it stops at a floor the cab is below the floor level.
Solution: During the first six months to a year, the elevator cables may stretch slightly. This is normal. It may be necessary for your Visilift Service Technician to come out and adjust the floor heights.
Problem: There were a few people riding in my elevator at the same time, they pushed the button to go up/down and the elevator moved then stopped.
Solution: It is possible that the capacity of the elevator was exceeded. Turn the power to the elevator off at the disconnect switch, wait 30 seconds, then turn the power back on. If this does not solve the problem, please call an authorized Visilift Service Technician to schedule a service call.
Problem: The light stays on for a long time in my elevator cab.
Solution: Code requires that the light in the elevator cab stay on for a minimum of 5 minutes from the last time the safety chain was broken (i.e. the cab or hoistway door was open or closed, a button was pushed). If the light is staying on for longer than 10 minutes, it is possible that there may be a power failure on the cab light circuit. If the problem does not remedy itself (the cab light does not turn off within 10 minutes of the safety chain being broken) please contact an authorized Visilift Service Technician.
Problem: I live in a foreign country and my elevator came equipped with a light curtain. When I push the button, the elevator will not move, but the button is illuminated completely.
Solution: There is an obstruction between the light curtain send and receive units. Remove the obstruction and the unit will begin to move.
The light curtain may be dirty. Clean the light curtain using plastic cleaner and a soft cloth.
© Visilift, LLC Version 1.1.1 - Revised 2012-04-05 12 of 20
7.0 Contact Information Customer satisfaction and your safety are our number one priorities. For any questions which may arise and are not covered in this manual please feel free to contact the Visilift factory.
Visilift Elevators
75 Oak Avenue Eaton, Colorado 80615 USA
Tel: 970.454.1200 Fax: 970.454.1201
Email: [email protected] www.visiliftelevators.com
Hours of Operation:
09:00 to 17:00 MST Monday - Friday

© Visilift, LLC Version 1.1.1 - Revised 2012-04-05 13 of 20
Appendix A - Maintenance Control Program Visilift, LLC Maintenance Control Program Visi-58/Vision 830 and Visi-48
MAINTENANCE CHECK CHART
Building/Job: Address: Location in Building: Elevator ID/Serial :
INSIDE CAR 1ST MCP Visit 2ND MCP Visit 1.1 Car Interior 1.2 Car Controls and Panel 1.3 Leveling, Stop, Accel. and Decel. 1.4 Car Door(s) operation 1.5 Ride Terminal to Terminal 1.6 Car Lights and Ventilation 1.7 Door Restrictors
OUTSIDE HOISTWAY 2.1 Hall Call Station and Lanterns 2.2 Hoistway Doors 2.3 Unlocking Device Access 2.4 Firefighters Service Tests
MACHINE ROOM 3.1 Housekeeping 3.2 Trash, Used Parts, etc. 3.3 Controller and Starter
TOP OF CAR 4.1 Top Car Stop Switch 4.2 Cleanliness 4.3 Top Guides 4.4 Guide Rails 4.5 Travelling Cable 4.6 Doors, Hangers and Locks 4.7 Hoistway Cleaning 4.8 Other 4.9 Examine the Ropes 4.10 Leaving Car Top
PIT (If Applicable) 5.1 Stop Switch and Light 5.2 Cleaning 5.3 Bottom Car Guides 5.4 Travelling Cables 5.5 Leaving the Pit

© Visilift, LLC Version 1.1.1 - Revised 2012-04-05 14 of 20
COMPLIANCE RECORD DATE INITIAL & PRINT NAME
1ST MCP Visit 2ND MCP Visit 3RD MCP Visit 4TH MCP Visit 5TH MCP Visit 6TH MCP Visit 7TH MCP Visit 8TH MCP Visit 9TH MCP Visit 10TH MCP Visit
INSTRUCTIONS 1. For each section in the MAINTENANCE CHECK CHART, refer to the corresponding item
number in the MAINTENANCE PLAN for instructions. 2. After maintenance/examination or test has been done, initial in the appropriate box 3. When completed with testing, initial and print your name in the appropriate box above, then date.

© Visilift, LLC Version 1.1.1 - Revised 2012-04-05 15 of 20
MAINTENANCE PLAN
INSIDE THE CAR 1.1 Car Interior
□ Examine the Car interior for damage including ceiling, handrails, door panels, lighting and floor. Tighten all fasteners in the car panel and replace as needed.
1.2 Car Controls and Panel
□ Examine the car control panels and position indicators for condition and operation of all lamps. Replace all burned out lamps, or lights.
1.3 Leveling, Stopping, Acceleration and Deceleration
□ Operate elevator to each floor in both directions to observe the leveling accuracy, stopping, acceleration and deceleration. Make adjustments as needed.
1.4 Car Door Operation
□ Observe the door for proper operation including smooth movement, starts and stops, and alignment. 1.5 Ride Terminal to Terminal
□ Run the car from terminal to terminal and observe for smooth travel and unusual noises. Make needed adjustments or repairs.
1.6 Car Lights and Ventilation
□ Verify proper operation of car emergency light.
1.7 Restricted Opening Device Mechanism □ Examine the restricted opening device mechanism for proper operation and make any necessary
adjustments.
REMARKS:

© Visilift, LLC Version 1.1.1 - Revised 2012-04-05 16 of 20
OUTSIDE HOISTWAY 2.1 Hall Call Stations and Lanterns
□ Examine hall stations and directional lanterns for condition and replace all burned out lamps. Observe operation of audible signal when emergency stop is activated.
2.2 Hoistway Doors
□ Examine door panel and clearance between panel and entrance frames. Examine proper interlock functionality and operation. Adjust as necessary.
2.3 Hoistway Door Unlocking Device Access
□ Examine hoistway door unlocking device access escutcheon for damage. Repair or adjust as needed.
2.4 Firefighters Service Tests □ Observer for proper operation of the firefighters service and record in test log (where applicable).
REMARKS:

© Visilift, LLC Version 1.1.1 - Revised 2012-04-05 17 of 20
MACHINE ROOM 3.1 Housekeeping (Required with Remote Controller Option)
□ Clean the machine room floor to prevent slipping and trip hazards, fire hazards and contamination of the equipment. Ensure the machine room is not being used for storage, and inform customer of any violation.
3.2 Trash, Used Parts and Oil
□ Discard of trash after maintenance is completed.
3.3 Controller and Motor Starter □ Examine the controller and motor starter for:
1. Cleanliness 2. Condition of contacts and remaining contact material 3. Fuses for correct size and fit in holders and corrosion in fuse holder 4. Relays for worn shunts and signs of overheating 5. Evidence of overheating.
REMARKS:

© Visilift, LLC Version 1.1.1 - Revised 2012-04-05 18 of 20
TOP OF CAR 4.1 Stop Switch
□ Verify the car will not run with stop switch in the “STOP” position.
4.2 Cleanliness □ Clean all debris from car top.
4.3 Top Car Guide □ Examine car rail to hoistway rail conditions at car top. Notate any abnormal wear patterns or changes
in alignment.
4.4 Guide Rails □ Examine car rails for loose fastenings and fit at all joints.
4.5 Travelling Cables □ Examine the travelling cables for wear, chafing, kinking and alignment. Examine attachment points for
secure fastening and looseness.
4.6 Door Hangers, Locks, etc. 1. Verify the interlock is functioning properly 2. With the door open, attempt to mover the car using the hall call, and COP call buttons. 3. Observe door closing for any roughness in bearings, inconsistent operation, or misalignment.
4.7 Hoistway Cleaning
□ Clean dirt and trash from all horizontal surfaces including car and entrance sills.
4.8 Other - Observe any problems with or within the hoistway that should be addressed such as: 1. Unauthorized equipment installed in the hoistway 2. Damage to the hoistway enclosure which would affect its fire resistance rating 3. Evidence of intentional acts. 4. Any evidence of unauthorized people entering the hoistway
4.9 Examine the Ropes □ Examine car ropes for equal tension, visually inspect for any frays, or deformation of the ropes which
would negatively impact their strength.
4.10 Leaving the Car Top □ Clean up and dispose of debris properly. Return car to normal operation and stop switch to “RUN”
position.
REMARKS:

© Visilift, LLC Version 1.1.1 - Revised 2012-04-05 19 of 20
PIT (if applicable)
5.1 Stop Switch □ Examine operation and condition of the stop switch. Repair if necessary.
5.2 Cleaning □ Clean pit. Examine the bottom level landing sill and clean as needed.
5.3 Bottom Car Glides □ Examine car rail to hoistway rail conditions at car top. Notate any abnormal wear patterns or changes
in alignment. 5.4 Travelling Cables
□ Examine the travelling cables for wear, chafing, kinking and alignment. Examine attachment points for secure fastening and looseness.
5.5 Leaving the Pit
□ Remove all tools and verify operation of the elevator.
REMARKS:
Signature: ________________________________________ Date:_______________________ Authorized Visilift Installer/Service Technician License No.:________________________
NOTES:

© Visilift, LLC Version 1.1.1 - Revised 2012-04-05 20 of 20
<THIS PAGE LEFT INTENTIONALLY BLANK>