Embed Size (px)
Citation preview
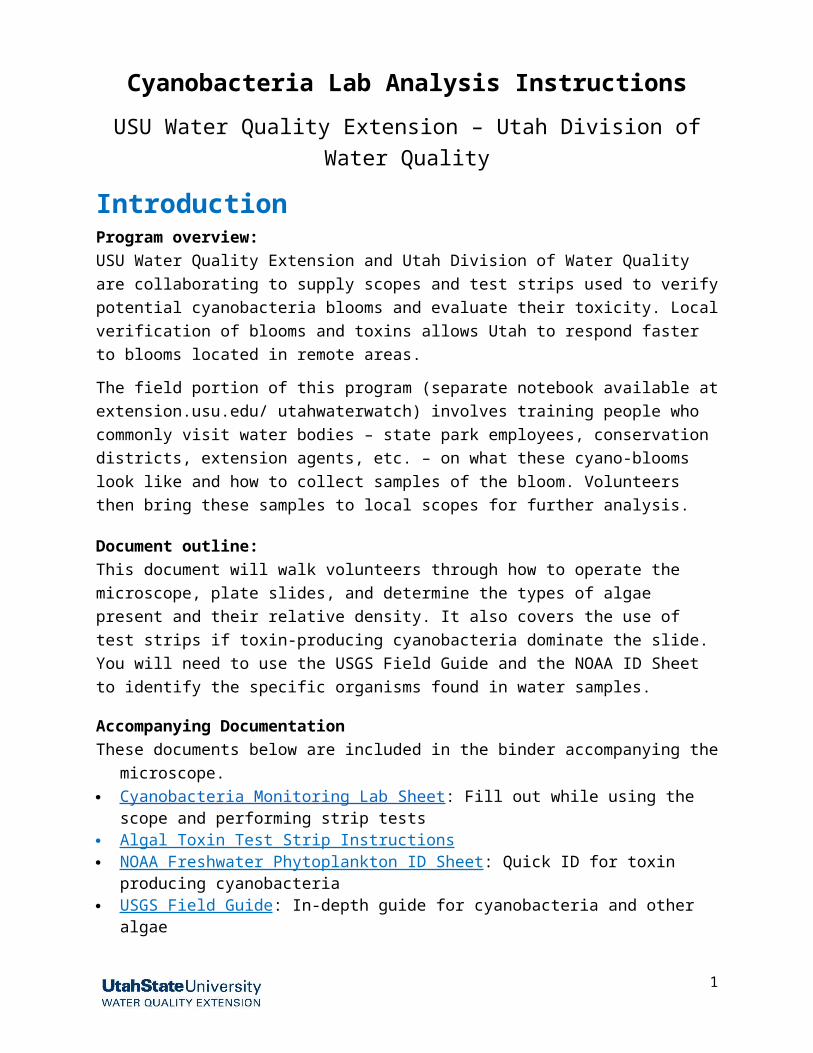
Cyanobacteria Lab Analysis Instructions
USU Water Quality Extension – Utah Division of Water Quality
IntroductionProgram overview:USU Water Quality Extension and Utah Division of Water Quality are collaborating to supply scopes and test strips used to verify potential cyanobacteria blooms and evaluate their toxicity. Local verification of blooms and toxins allows Utah to respond faster to blooms located in remote areas.
The field portion of this program (separate notebook available at extension.usu.edu/ utahwaterwatch) involves training people who commonly visit water bodies – state park employees, conservation districts, extension agents, etc. – on what these cyano-blooms look like and how to collect samples of the bloom. Volunteers then bring these samples to local scopes for further analysis.
Document outline:This document will walk volunteers through how to operate the microscope, plate slides, and determine the types of algae present and their relative density. It also covers the use of test strips if toxin-producing cyanobacteria dominate the slide. You will need to use the USGS Field Guide and the NOAA ID Sheet to identify the specific organisms found in water samples.
Accompanying DocumentationThese documents below are included in the binder accompanying the microscope. Cyanobacteria Monitoring Lab Sheet : Fill out while using the scope and performing strip
tests Algal Toxin Test Strip Instructions NOAA Freshwater Phytoplankton ID Sheet : Quick ID for toxin producing cyanobacteria USGS Field Guide : In-depth guide for cyanobacteria and other algae
Sample StorageA sample should be stored in a refrigerator and analyzed within 24 hours of collection. Store the completed bloom report form in the folder provided with the microscope.Receiving a sample:
Accompanying the sample should be a completed “bloom report form” with information on the date, time, and location of the sample collection. If you have not received one, print one from our website and ask the collector to fill it out.
The sample should be stored in a sealed plastic 1L bottle, labeled with the site name, collector’s initials and date (DDMMYYYY).
After receiving the sample, immediately place in in refrigerator or complete the lab procedure.
1
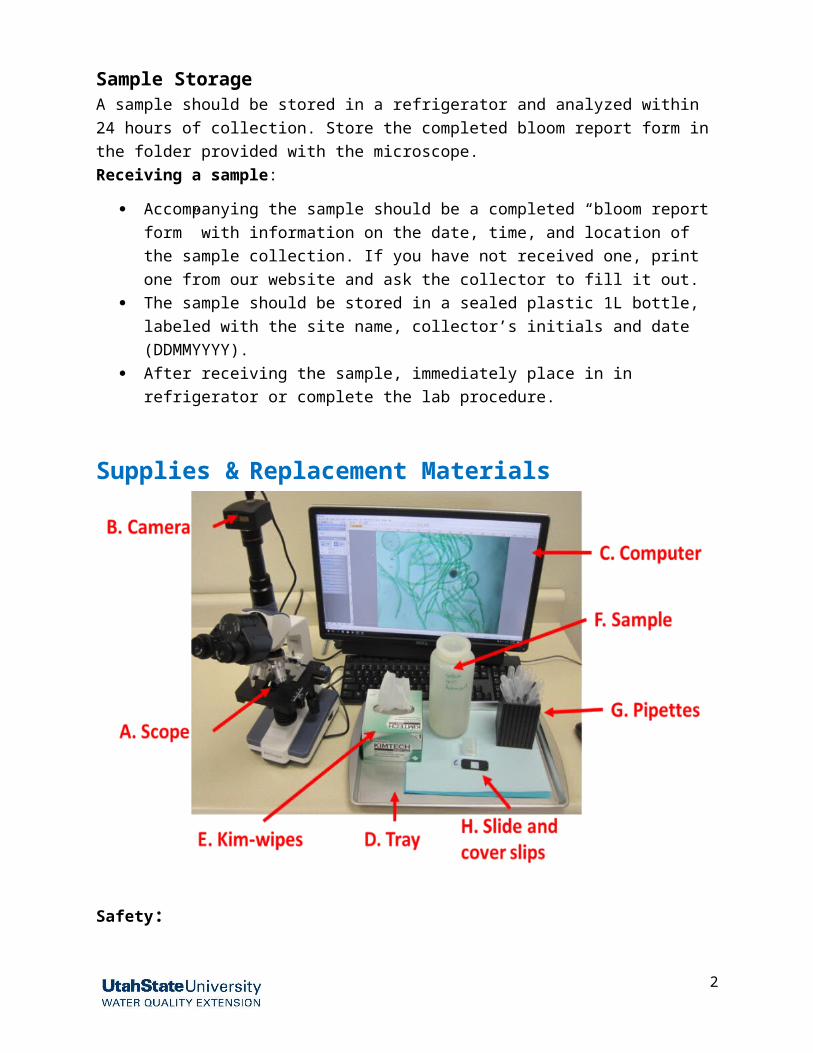
Supplies & Replacement Materials
Safety: Protective eyewear (goggles or glasses to stop splashing into the eyes), plastic tray or tub to hold supplies, latex or nitrile gloves.
Plating materials: Kim-wipes, gridded slide, coverslips, small pipettes
Scope:Scope, computer, mounted camera, and a toxin test - Abraxis test kit.
Replacement Supplies
Microscope Partshttp://www.amscope.com / or call 1-888-950-2888 for help ordering a specific part.
The scope product ID is T120B-5M
Replacement Lab Supplies 5 ml pipettes, amazon 100 for $7. Gridded microscope slides, http://labscientific.com/ Catalog number 4456 one box costs
$65. Glass Cover slips 18X18 mm, http://labscientific.com/ catalog number 7781 $7
2

Microscope InstructionsUSU Water Quality Extension provides the model scope pictured above, higher-end models with attached tablets are present at several locations. Use is similar. Do not use 4th oil lens (100x); this lens requires specially prepared slides and can be damaged by improper use.
1: Get to Know the Microscope
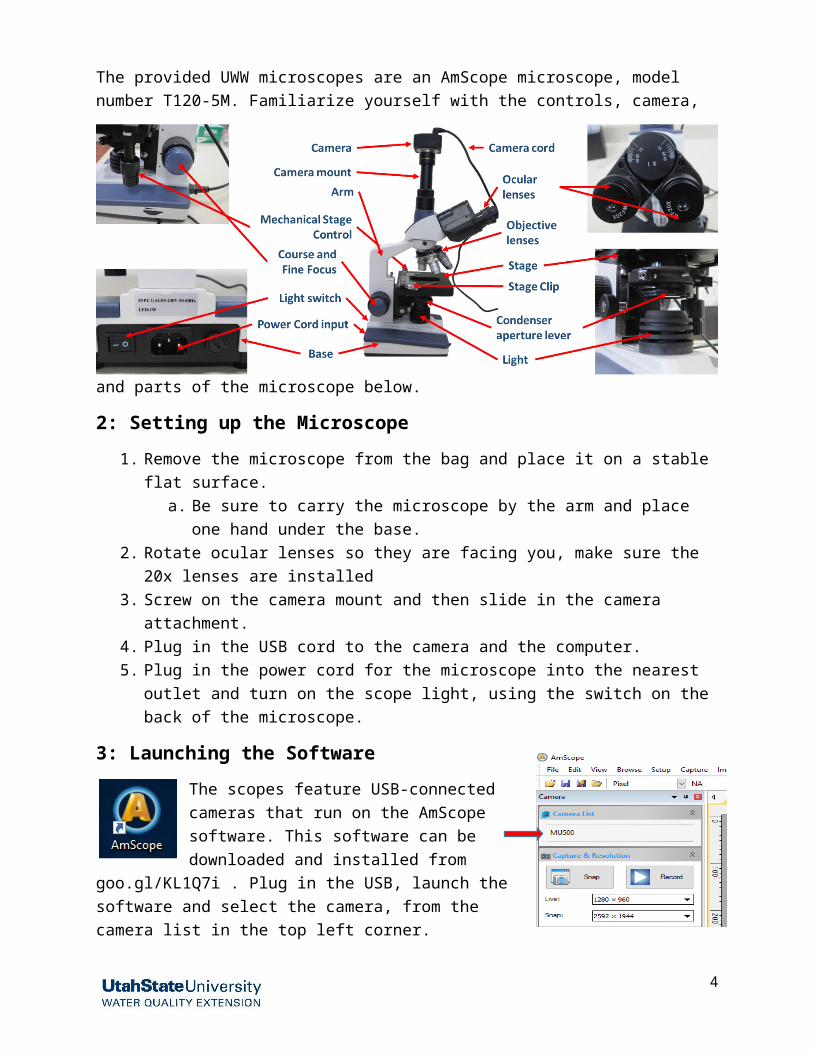
The provided UWW microscopes are an AmScope microscope, model number T120-5M. Familiarize yourself with the controls, camera, and parts of the microscope below.
2: Setting up the Microscope
1. Remove the microscope from the bag and place it on a stable flat surface. a. Be sure to carry the microscope by the arm and place one hand under the base.
2. Rotate ocular lenses so they are facing you, make sure the 20x lenses are installed3. Screw on the camera mount and then slide in the camera attachment. 4. Plug in the USB cord to the camera and the computer.5. Plug in the power cord for the microscope into the nearest outlet and turn on the scope
light, using the switch on the back of the microscope.
3: Launching the Software
The scopes feature USB-connected cameras that run on the AmScope software. This software can be downloaded and installed from goo.gl/KL1Q7i . Plug in the USB, launch the
software and select the camera, from the camera list in the top left corner.
By connecting the scope to the computer, you can view the slide in real time on the screen and take pictures of the sample.
3
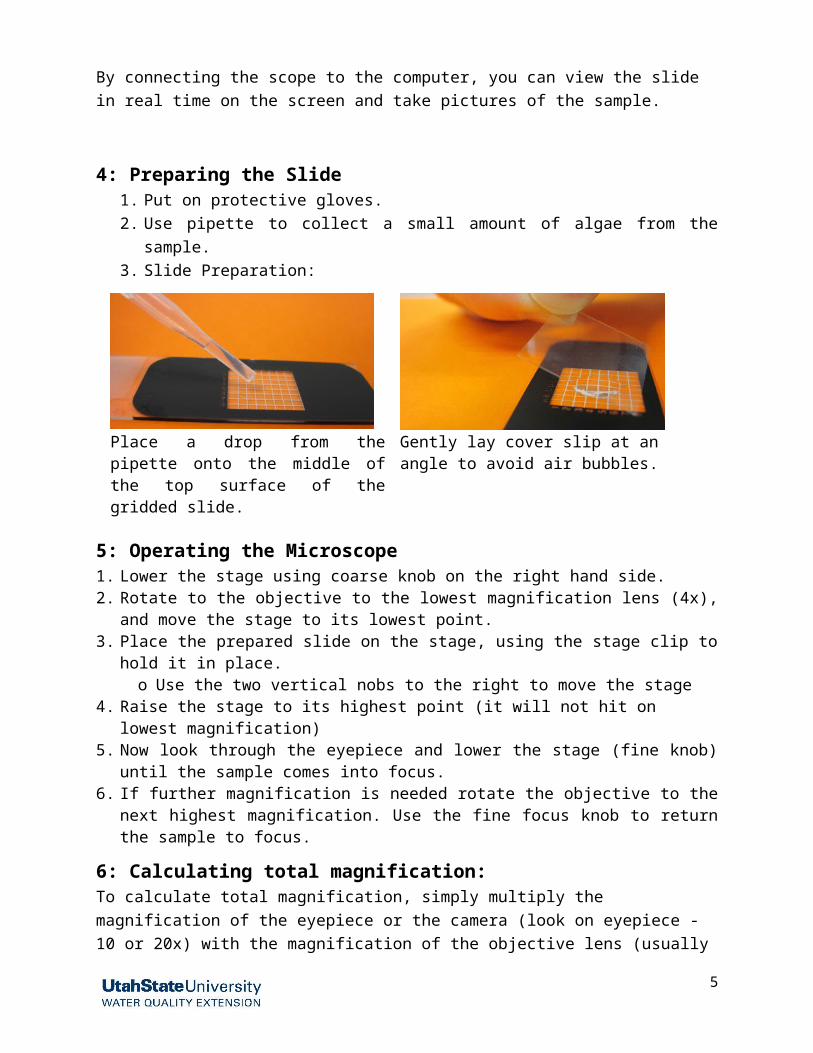
4: Preparing the Slide 1. Put on protective gloves.2. Use pipette to collect a small amount of algae from the sample. 3. Slide Preparation:
Place a drop from the pipette onto the middle of the top surface of the gridded slide.
Gently lay cover slip at an angle to avoid air bubbles.
5: Operating the Microscope1. Lower the stage using coarse knob on the right hand side.2. Rotate to the objective to the lowest magnification lens (4x), and move the stage to its
lowest point.3. Place the prepared slide on the stage, using the stage clip to hold it in place.
o Use the two vertical nobs to the right to move the stage4. Raise the stage to its highest point (it will not hit on lowest magnification)5. Now look through the eyepiece and lower the stage (fine knob) until the sample comes into
focus.6. If further magnification is needed rotate the objective to the next highest magnification.
Use the fine focus knob to return the sample to focus.
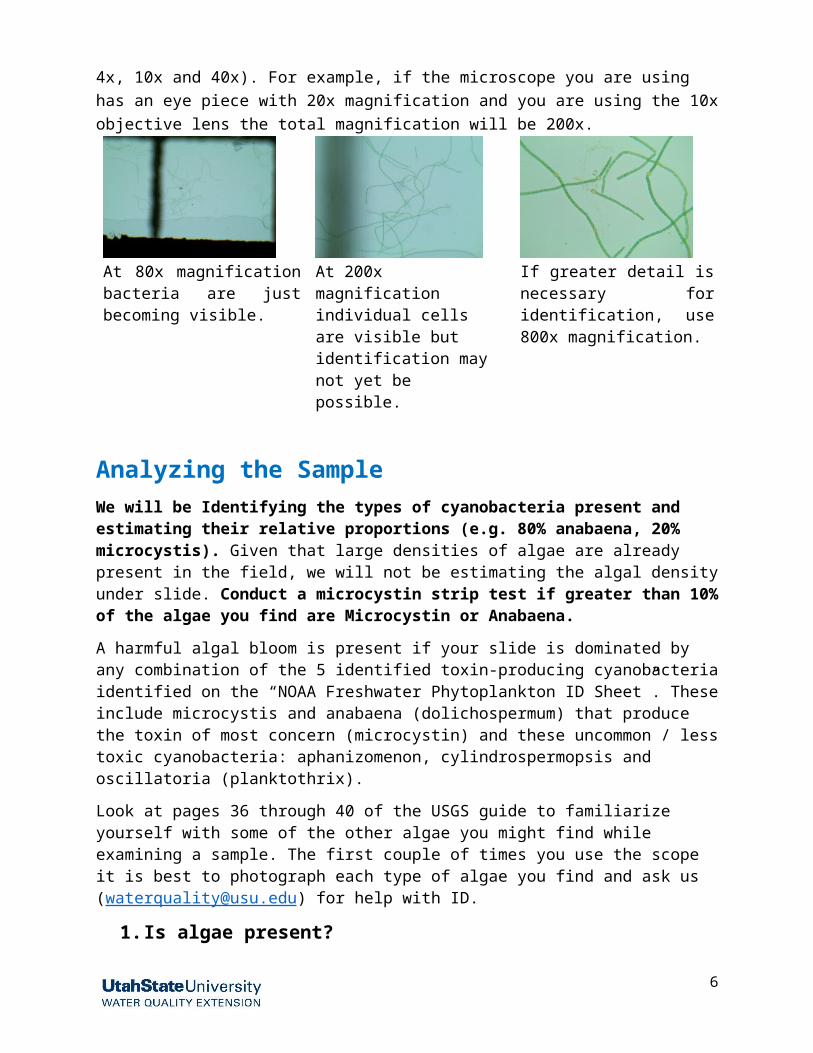
6: Calculating total magnification:To calculate total magnification, simply multiply the magnification of the eyepiece or the camera (look on eyepiece - 10 or 20x) with the magnification of the objective lens (usually 4x, 10x and 40x). For example, if the microscope you are using has an eye piece with 20x magnification and you are using the 10x objective lens the total magnification will be 200x.
At 80x magnification bacteria are just becoming visible.
At 200x magnification individual cells are visible but identification may not yet be possible.
If greater detail is necessary for identification, use 800x magnification.
4
Analyzing the SampleWe will be Identifying the types of cyanobacteria present and estimating their relative proportions (e.g. 80% anabaena, 20% microcystis). Given that large densities of algae are already present in the field, we will not be estimating the algal density under slide. Conduct a microcystin strip test if greater than 10% of the algae you find are Microcystin or Anabaena.
A harmful algal bloom is present if your slide is dominated by any combination of the 5 identified toxin-producing cyanobacteria identified on the “NOAA Freshwater Phytoplankton ID Sheet”. These include microcystis and anabaena (dolichospermum) that produce the toxin of most concern (microcystin) and these uncommon / less toxic cyanobacteria: aphanizomenon, cylindrospermopsis and oscillatoria (planktothrix).
Look at pages 36 through 40 of the USGS guide to familiarize yourself with some of the other algae you might find while examining a sample. The first couple of times you use the scope it is best to photograph each type of algae you find and ask us ([email protected]) for help with ID.
1. Is algae present?
First, determine the presence or absence of algal cells. These cells are green to yellow in color and form a distinct shape. There may be many other things on the slide including animals, bubbles, and debris. Take pictures of each type of algae you observe, including their identifying features, and share them with Water Quality Extension. This is best done using the “lawnmower method”.
Lawnmower method: The lawnmower method is moving up and down or side to side in a grid pattern to look for cyanobacterial cells.
If you do not find algae, consult both the Water Quality Extension and the sampler.
2. Determine relative abundance
Determine the relative coverage for each of the five common toxin producing cyanobacteria Compare the cells to the 5 species on the Freshwater ID sheet.
For further guidance refer to the Microscope Images section of the USGS Freshwater Cyano ID Guide
3. What do I do after finding a HAB?
If most of the algae on the slide are cyanobacteria, we will consider it a HAB.
Contact both (Ben Holcolmb 801-536-4373 and Jodi Gardberg, 801-536-4372) as well as the DEQ’s 24-hour spill line (801-536-4123).
5
Email [email protected] and [email protected] a sharing link to the folder in google drive (see instructions below) containing scope pictures, lab form and photos of the completed test strip.
Test Strip ProtocolIf at least 10% of the algae on your slide are microcystis or anabaena conduct the Abraxis Algal Toxin Strip Test for Recreational Water. This will test the water for Microcystin, the greatest toxin of concern in Utah. The result is given in parts per billion (ppb) or ug/L. Draft EPA guidance suggest that concentrations over 4ppb can be dangerous to recreationists.
Perform all of the steps on the ABRAXIS instruction sheet. Email photographs of the resulting test strip, along with your suspected Microcyctin value
(ppb) to the WQE and Ben Holcomb.
After completing the lab procedures be sure to clean up the station. Carefully wash and dry slides and covers. Cover the microscope and place it is a safe place. Wipe down the workspace with a disinfecting spray and a moist rag. If you are finished with the sample dispose of it down the drain and wash the sample
bottle.
Photo ManagementTaking picturesUsing the AmScope software and camera you can take photos of the prepared slide under the microscope using the “Snap” tool in the upper left hand section of the screen. Save these pictures into a file on your computer.Naming your picturesThe name of each picture should contain site name, volunteer initials, suspected type of cyanobacteria and the date (DDMMYY). eg: “Mantua_BNM_Mycrocystis_140817” You can easily edit the photo’s file name via your computers file manager. Submitting PicturesPhotos should be saved on the Utah Photo Point Google Drive. If you do not have a google account you may log in using this email: [email protected] and password: utahphoto. There will be a folder for each microscope location. In your respective microscope folder create a new folder for the site, (if one does not already exist) (Site name_Date ex: Mantua_120717) and put all of your photos and documents related to the bloom in this folder. Share this folder with Utah Water Watch and Ben Holcomb ([email protected], [email protected]).
6