Embed Size (px)
Citation preview
A ginormous number of clones of the original cell, visible to the naked eye = a colony!
Two clones of the original cell
Unit 3
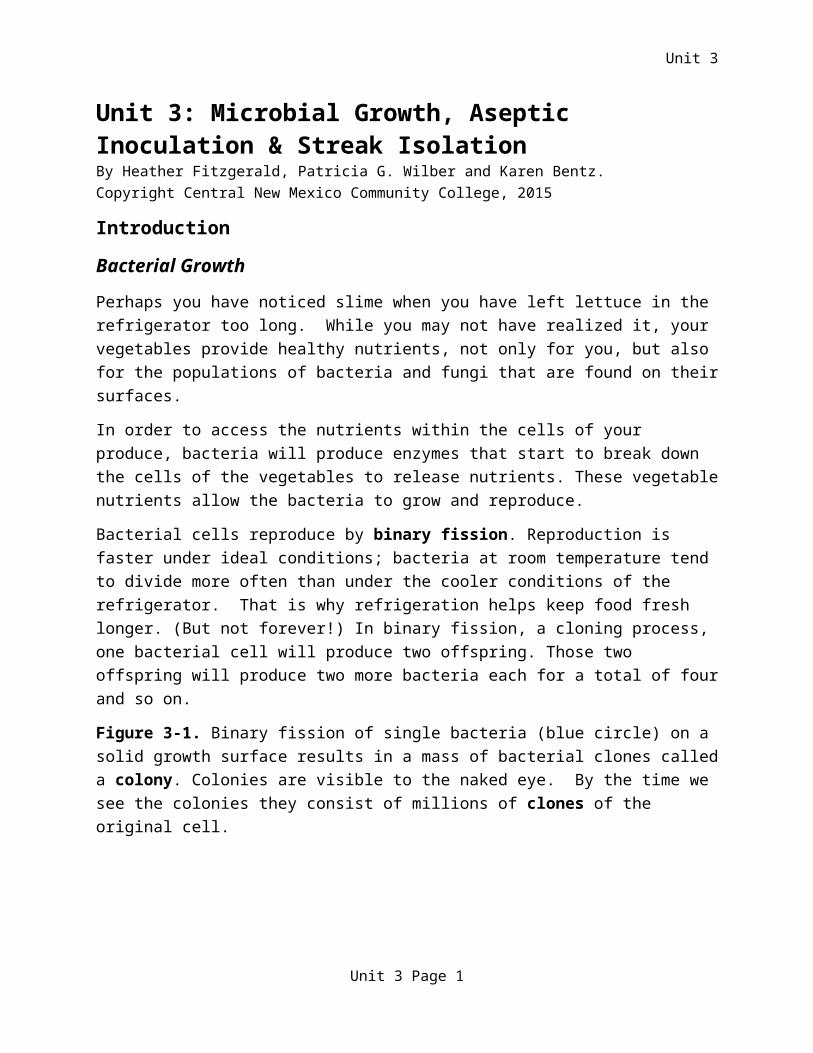
Unit 3: Microbial Growth, Aseptic Inoculation & Streak IsolationBy Heather Fitzgerald, Patricia G. Wilber and Karen Bentz.Copyright Central New Mexico Community College, 2015
Introduction
Bacterial Growth
Perhaps you have noticed slime when you have left lettuce in the refrigerator too long. While you may not have realized it, your vegetables provide healthy nutrients, not only for you, but also for the populations of bacteria and fungi that are found on their surfaces.
In order to access the nutrients within the cells of your produce, bacteria will produce enzymes that start to break down the cells of the vegetables to release nutrients. These vegetable nutrients allow the bacteria to grow and reproduce.
Bacterial cells reproduce by binary fission. Reproduction is faster under ideal conditions; bacteria at room temperature tend to divide more often than under the cooler conditions of the refrigerator. That is why refrigeration helps keep food fresh longer. (But not forever!) In binary fission, a cloning process, one bacterial cell will produce two offspring. Those two offspring will produce two more bacteria each for a total of four and so on.
Figure 3-1. Binary fission of single bacteria (blue circle) on a solid growth surface results in a mass of bacterial clones called a colony. Colonies are visible to the naked eye. By the time we see the colonies they consist of millions of clones of the original cell.
Figure created by Heather Fitzgerald and Patricia G. Wilber
But, you may think, I don’t really care about the bacteria growing on my produce! I am interested in saving patients’ lives! Well! Binary fission of bacteria occurs in all environments with adequate growth conditions, including the human environment.
Unit 3 Page 1
Original cell

Unit 3
If you have a patient who comes in complaining of a very sore throat with white patches on her throat (those may be colonies combined with inflammation of the throat tissue) and a fever, you may suspect that she has strep throat (caused by the bacteria Streptoccocus pyogenes). You may do tests to confirm or reject that hypothesis. A swab of the throat can be used to test a least two things: 1) whether or not any bacteria picked up on the swab secrete an enzyme that reacts in a rapid strep lab test, and 2) whether or not any bacteria picked up on the swab, when grown outside the patient, are indeed of the Streptococcal genus.
Once the bacteria has been cultured (grown) in vitro (that is, in a lab), tests can be applied to determine its identity.
In this unit we will discuss several techniques used in labs to grow (or culture) bacteria and other microbes to help identify the organisms to species. This may be done to determine the possible cause of a disease or pathology.
To culture bacteria, many different combinations of nutrients can be used. A mix of nutrients used to grow microbes, is referred to as a growth, or culture medium.
Growth Media
Agar and Forms of Media.Growth media is most commonly prepared in three different physical forms: liquid (broths), semi-solid (deeps), and solid (Petri dishes and slants). Since all growth media contain nutrients, the major difference in these three forms is the amount of solidifying agent added to each mix. The most common solidifying agent used in growth media is called agar. The liquid broth lacks agar, the semi-solid deep has less than 1% agar and the solid Petri dishes and slants have more than 1% agar.
Agar is a mix of complex sugars extracted from the cell walls of a red marine algae in the genus Gelidium. A Japanese innkeeper may have been the first to discover its solidifying properties, but its widespread use in labs today is thought to originate from the suggestion of Angelina Hesse, the wife of microbiologist Robert Koch’s technician, Walter Hesse.
Agar is comprised of the complex sugars, agarose and agaropectin (basically long chains of the disaccharide, galactose). Why does this chemical composition matter? Just as humans can break down some types of sugars for food (e.g. glucose) but not others (e.g. cellulose- a complex polysaccharide that we also call “fiber”), bacteria can break down and use some, but not all sugars. Bacteria cannot commonly break down the sugars in agar, thus agar cannot be digested by bacteria and is simply used to make a surface for growth. If agar was digested, it would turn slimy like the old produce in your fridge.
Unit 3 Page 2

Unit 3
Agar is also unique among solidifying agents in that at room temperature (~22oC) and up to about 40oC it is solid. At 100oC, agar becomes liquid. This high temperature can be found in autoclaves, a type of commercial pressure cooker.
Table 3-1. Physical Characteristics and Forms of Common Growth Media.
Physical form How contained Amount of agar present
Liquid media (or broth)
A liquid Broth No agar present
Semi-solid A semi-solid deep Less than 1% agar
Solid A solid Petri dish A solid Slant Greater than 1% agar
Figures created by Patricia G. Wilber
These temperature properties of agar are excellent for microbiology labs. Bacteria can be grown on solid agar, then, when disposal is needed, the bacteria, and the agar it is on, can be heated in an autoclave. Heating at about 120oC destroys the agar and the bacteria and allows for proper decontamination.
Gelatin, potato slices and other items can be used to provide surfaces for bacterial growth, but agar is the mostly widely used.
Unit 3 Page 3
Front Side

Unit 3
Chemically Defined vs. Complex MediaGrowth media, no matter the form (broth, slant, deep or Petri dish, see Figure 3-1) must have added nutrients for microbe growth because the microbes do not digest the agar. Growth media can be one of two general types.
Chemically-defined (synthetic): a culture medium whose exact chemicals are known. Chemically defined media typically includes known amounts of amino acids, vitamins, and energy sources, among other things. It never contains animal-derived material.
Complex (non-synthetic, basic) media: a medium made with complex materials rich in nutrients and vitamins, but whose exact amounts are not precisely defined. Complex media contains animal-derived organic material such as beef broth or serum albumin.
Two common types of complex media are Tryptic Soy Agar (T-Soy, or TSA) and Nutrient agar (NA). Tryptic Soy Agar (T-Soy) is made from enzymatically digesting milk and soy meal. Chemicals which balance the pH and salt concentrations are also generally added. Nutrient agar is prepared from digests of milk, beef and yeast.
Aseptic Transfer and Inoculation TechniquesIt is important to transfer, or move, the bacteria from one location (or growth medium) to another, using aseptic technique. Aseptic means without contamination (‘a’=without and ‘septic’= contamination -- think Septic tanks- Eww!).
This is not a sterile technique! Sterile means without any microbe growth. If there were no bacterial growth this would be a very boring lab! Our goal is to use aseptic technique, so we grow only the bacteria we are studying, without contamination by other living organisms.
Inoculation is transfer of a bacterial sample onto a growth media for the purpose of growing the sample. Of course, you must use aseptic technique to avoid contamination.
Tools used for inoculation must be sterile. That is, there is nothing growing or alive on the tools. Tools that will be used in lab include metal “needles”and loops, glass rods, cotton swabs, plastic pipettes, and wooden dowels.
Metal and glass tools must be sterilized for 20-30 seconds with the microincinerator, prior to use.
Swabs, plastic pipette and wooden dowels can be used once and then must be disposed of.
Figure 3-2. Metal needle (A) and metal loop (B). Sterilize with the microincinerator( C) for 20-30 seconds prior to use. DO NOT REST THE TOOL IN THE INCINERATOR. ALWAYS HOLD IT.
Unit 3 Page 4

Video Links:
Unit 3
DAY ONE
I. Introduction to Inoculation Techniques
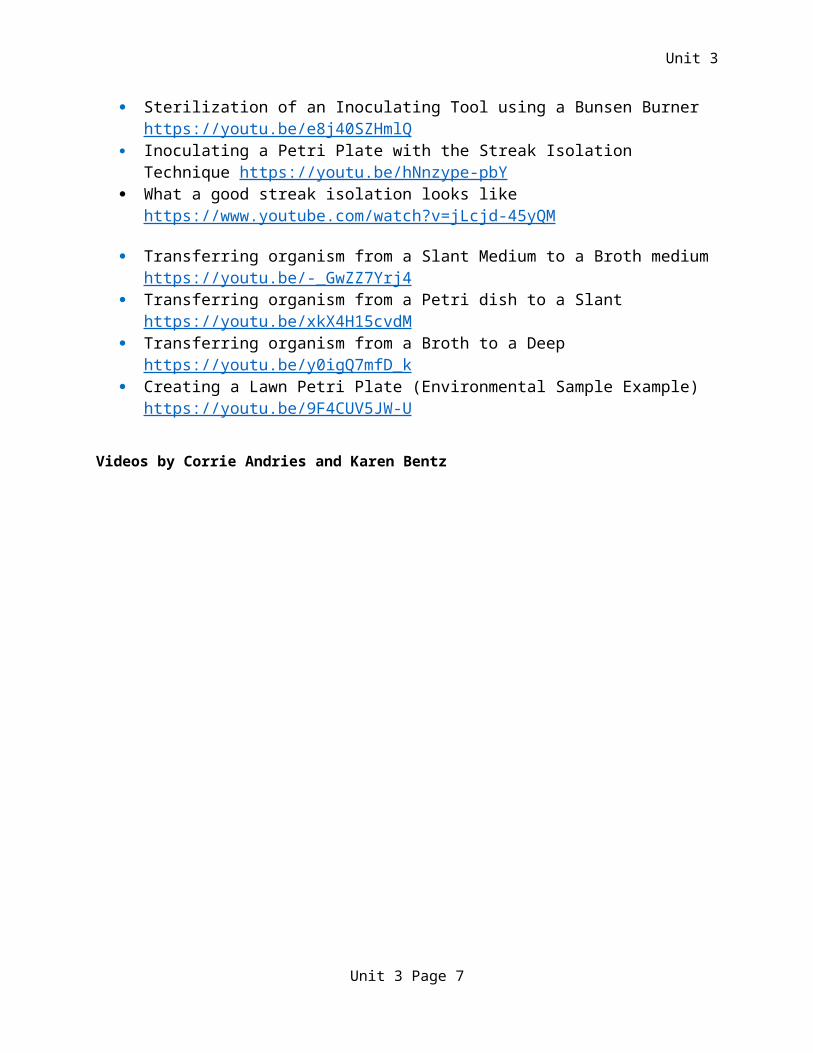
Sterilization of an Inoculating Tool using a Microincinerator https://youtu.be/6xFWIqU0uXg
Sterilization of an Inoculating Tool using a Bunsen Burner https://youtu.be/e8j40SZHmlQ
Inoculating a Petri Plate with the Streak Isolation Technique https://youtu.be/hNnzype-pbY
What a good streak isolation looks like https://www.youtube.com/watch?v=jLcjd-45yQM
Transferring organism from a Slant Medium to a Broth medium https://youtu.be/-_GwZZ7Yrj4
Transferring organism from a Petri dish to a Slant https://youtu.be/xkX4H15cvdM Transferring organism from a Broth to a Deep https://youtu.be/y0igQ7mfD_k Creating a Lawn Petri Plate (Environmental Sample Example)
https://youtu.be/9F4CUV5JW-U
Videos by Corrie Andries and Karen Bentz
Unit 3 Page 5
A
Figures created by Patricia G. Wilber; photograph by Heather Fitzgerald

Unit 3
Materials
Metal Inoculating loops, needles and cotton swabs Test tube racks to hold tools and tubes Microincinerators Black Sharpie-style markers Appropriate personal protective gear (lab coats, gloves, face shield, hair ties)
Media (For each student)o 1 T-soy broth in test tubes (T-soy broth)o 1 T-soy agar as a semi-solid deep in test tubes (T-soy deep)o 1 T-soy agar as a solid poured as a slant (T-soy slant)o 1 T-soy agar plate, solid (T-soy plate) (for the environmental sample)o 1 Chocolate agar plate (for the streak isolation)
Bacteria Cultures, from which to inoculate new media (Note: substitutions may be made as needed by lab technicians)
o Escherichia coli (Ec) (grown on a T-soy slant)o Pseudomonas aeruginosa (Pa) (grown in a T-soy broth)o Staphylococcus aureus (Sa) (grown on a T-soy plate)
Labeling.
Use a Sharpie to label all the media that you will inoculate with the following:
a. Your name or initialsb. Today’s datec. Medium type (e.g. T-soy)d. Organism you will inoculate onto the medium e.g. Escherichia coli (you can use
abbreviations like Ec so long as you record what Ec means in your notes!!).
Label for Test Tubes: anywhere EXCEPT the lid.
Label for Petri Dishes: On the outside of the dish on the AGAR side. NOT the lid. Lids can fall off or move or get lost.
Unit 3 Page 6
Agar side, not the lid!
Organism
e.g. EC
Date
Unit 3
Figure 3-3. Labeling a Petri dish.
Aseptic Technique: Sterilize metal tools.
As a routine part of aseptic inoculation, you must use sterilized tools.
a. Place the loop or the needle end into the microincinerator. Approximately ¾ of the length of the wire should fit into the opening of the incinerator. DO NOT LEAVE THE TOOLS RESTING IN THE INCINERATOR. THEY MELT.
b. Hold the tool in the incinerator for 20-30 seconds. Do NOT lay it down in the incinerator! Did we mention THEY MELT?
c. Remove and allow the tool to cool for at least 30 seconds before use. You may place the handle side of the tool into an empty test-tube rack for sterile storage.
CAUTION!!!!! Incinerators are HOT. Do NOT touch these devices with your bare hands. Have hair properly secured and wear proper lab attire. (Loose hair or clothing can catch on fire. This is bad.)
Do NOT place plastic, glass or wood tools inside the incinerators- they will melt AND burn.
Culture Storage and Disposal
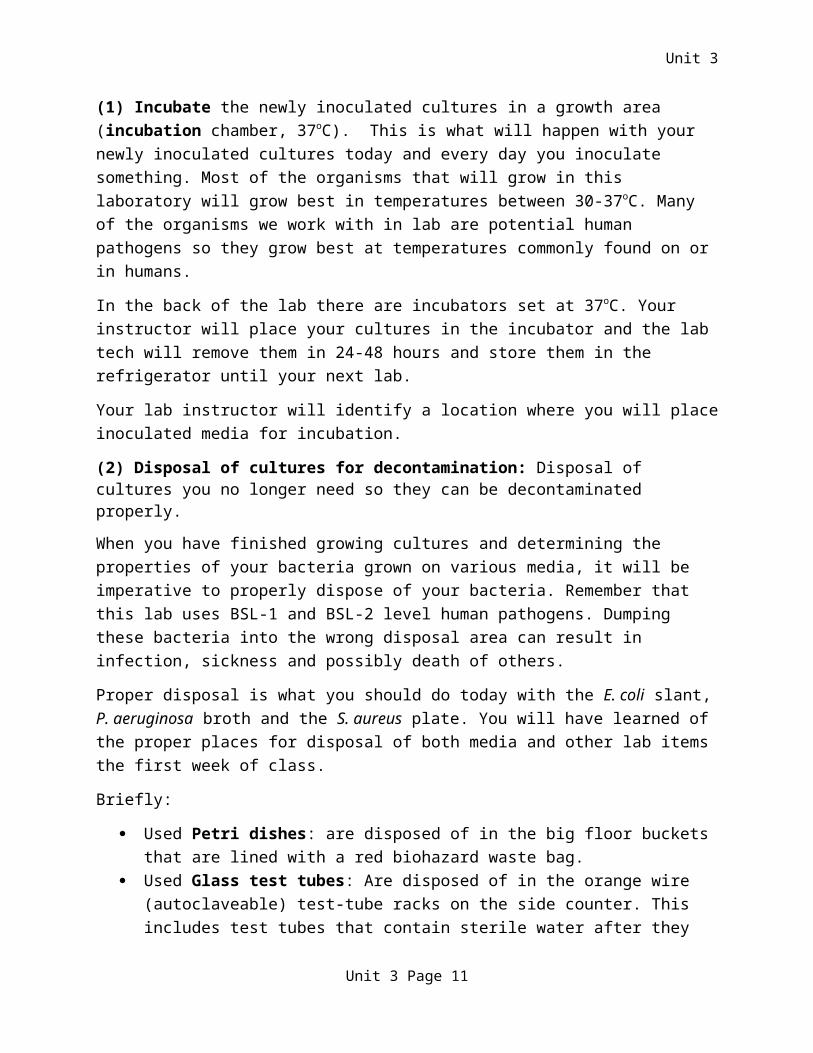
There are three things that can be done with media in our lab.(1) Incubate the newly inoculated cultures in a growth area (incubation chamber, 37oC). This is what will happen with your newly inoculated cultures today and every day you inoculate something. Most of the organisms that will grow in this laboratory will grow best in temperatures between 30-37oC. Many of the organisms we work with in lab are potential human pathogens so they grow best at temperatures commonly found on or in humans.
In the back of the lab there are incubators set at 37oC. Your instructor will place your cultures in the incubator and the lab tech will remove them in 24-48 hours and store them in the refrigerator until your next lab.
Your lab instructor will identify a location where you will place inoculated media for incubation.
Unit 3 Page 7
Your name
Medium type (e.g.T-SOY)
Figure created by Patricia G. Wilber

Unit 3
(2) Disposal of cultures for decontamination: Disposal of cultures you no longer need so they can be decontaminated properly.
When you have finished growing cultures and determining the properties of your bacteria grown on various media, it will be imperative to properly dispose of your bacteria. Remember that this lab uses BSL-1 and BSL-2 level human pathogens. Dumping these bacteria into the wrong disposal area can result in infection, sickness and possibly death of others.
Proper disposal is what you should do today with the E. coli slant, P. aeruginosa broth and the S. aureus plate. You will have learned of the proper places for disposal of both media and other lab items the first week of class.
Briefly:
Used Petri dishes: are disposed of in the big floor buckets that are lined with a red biohazard waste bag.
Used Glass test tubes: Are disposed of in the orange wire (autoclaveable) test-tube racks on the side counter. This includes test tubes that contain sterile water after they have been opened. Do NOT dispose of these tubes in the regular trash or the red bucket.
(3) Storage. For storage, our cultures are kept in a refrigerator at 4oC where neither grow nor death will occur. Media that have been incubated for 24-48 hours at 37 oC will then be moved to storage in a refrigerator. The cultures you used today to perform your inoculations were stored in the refrigerator after they were incubated.
Unit 3 Page 8

Unit 3
A: Streak Isolation Technique: Isolating Individual Microbe Colonies
IntroductionOne of the most important techniques in microbiology is the Streak Isolation Technique. This procedure allows isolation of single bacterial cells that will then grow in to single colonies. This technique can be used so colony morphology can be studied, and it can also allow separation of species from a mixed culture so that the different species can be identified.
To perform this technique, we drag the microbe sample (that contains billions of cells) across an agar surface (usually a Petri dish) in a sequential pattern that reduces the number of cells and allows isolation of individual cells. We won’t be able see these single cells when performing the technique, but we will see the colonies that grow from those isolated cells (that underwent binary fission—See Figure 3-1) on the Petri dish after incubation.
Materials (Per student) Inoculating metal loops Test tube racks to hold tools Microincinerators Black Sharpie-style markers Appropriate personal protective gear (lab coats, gloves, face shield, hair ties) Medium
o One Chocolate agar Petri plate Bacterial cultures
o Escherichia coli (grown on a T-soy slant)o Pseudomonas aeruginosa (grown in a T-soy broth)o Staphylococcus aureus (grown on a T-soy plate)
Unit 3 Page 9

B, 10 streaks through A
A, 1 cm smear
C
D
E
Unit 3
Procedure
Figure 3-4. General procedure for the Streak Isolation Technique.
Figure by Patricia G. Wilber
Figure 3-5. The clam shell technique for aseptic removal of bacteria from a Petri dish.
Choose ONE of the two procedures described below and follow it carefully to perform a Streak Isolation.
a. Streak Isolation from a broth1. Label your plate with your name, the date, the species and the type of media. 2. Sterilize your loop using the microincinerator or Bunsen burner. Allow it to cool for
15 seconds.3. Stir the broth sample with your sterile cooled loop to mix the organism throughout
the liquid. 4. Tap your loop on the inside edge of the upper part of the test tube to decrease the
amount of liquid on the loop. YOU DO NOT WANT MUCH AT ALL!!!
Unit 3 Page 10
Figure by Patricia G. Wilber
Single plate, agar side up Stack of plates, agar side up
Unit 3
5. Clam shell your Petri dish. Smear your loop in a vertical 1 cm smear on your plate. (“A” on Figure 3-4).
6. Sterilize your loop using the microincinerator to get rid of the bacteria—we are trying to get isolation. Allow it to cool for 15 seconds
7. Clam shell your Petri dish. Using the edge of the newly sterilized and cooled loop, gently streak through your smear “A”, 10 times, from the outer edge of the plate inwards, as shown on the diagram. This is streak “B”.
8. Sterilize your loop using the microincinerator to get rid of the bacteria—we are trying to get isolation. Allow it to cool for 15 seconds
9. Using the edge of the cooled loop, gently streak through your smear “B”, 10 times, from the outer edge of the plate inwards. This is streak “C”.
10. Sterilize your loop using the microincinerator to get rid of the bacteria—we are trying to get isolation. Allow it to cool for 15 seconds
11. Using the edge of the loop, gently streak through your smear “C”, 10 times, from the outer edge of the plate inwards. This is streak “D”.
12. Sterilize your loop using the microincinerator to get rid of the bacteria—we are trying to get isolation. Allow it to cool for 15 seconds
13. Streak through “D” and into the middle on the plate WITHOUT touching streak “A”14. Put your Petri plate, inverted (agar side up Figure 3.6), in the correct classroom
location for incubation.15. Observe your results in the next class period. Your goal is 8-10 isolated colonies in
steaks D or E.
Figure 3-6. Proper incubation for Petri dishes: AGAR SIDE UP. Agar side up allows you to read the label and reduces condensation in the plate.
Figure created by Patricia G. Wilber
b. Streak Isolation from a plate (Petri dish)
Unit 3 Page 11

Unit 3
1. Label your plate with your name, the date, the species and the type of media. 2. Using a sterile, cooled loop, obtain 1-2 colonies from the source bacteria grown on
the Petri plate (that means NOT VERY MUCH) of identical morphology (shape) using just the tip of your loop. USE A VERY SMALL AMOUNT!! THE SIZE OF A SMALL FRECKLE! Smear those colonies in a vertical 1 cm smear on your plate with the tip of your loop (“A” on Figure 3-4).
3. Follow the steps 6-15 above.
Precautions
Make sure to cool the metal inoculation loop before transferring bacteria to the Petri plate for the first streak (A), otherwise you will kill your bacteria.
Use VERY SMALL amounts of bacteria when sampling from a plate. A sample that is 1mm X 1mm has billions of bacteria.
Make sure to sterilize the metal loop after the original (A) streak and each subsequent streak. The idea is to REDUCE the number of cells each streak.
Don’t gouge the surface of the agar. Maximize the physical dilution by making sure your streaks (or lines) use up as much of
the Petri dish as possible without inappropriately overlapping (see Figure 3-10.) Practicing the pattern with pencil and paper can help develop muscle memory and make
the pattern easier to draw.
Unit 3 Page 12
Unit 3
Figure 3-7. Hoped for results from a streak isolation. This example was created by a student using the Streak Isolation from a plate technique. Note the colony characteristics: +/- circular, entire, elevation cannot be observed from this angle, mucoid, whitish in color and somewhat translucent, about 1 mm in size. Note also the label on the agar side of the plate,
Photograph by Patricia G. Wilber
Figure 3-8. Less desirable results of a streak isolation of Streptococcus faecalis from a broth onto a Chocolate Agar plate.
Photograph by Patricia G. Wilber
Why are the results shown in Figure 3-6 less desirable than those in Figure 3-5?
What is the circled item in Figure 3-6?
What is one possible explanation as to why the circle item is growing on the plate?
Unit 3 Page 13

Unit 3
B: The Lawn Technique: Microbes in the Environment!IntroductionMicrobes are everywhere! They are on us and in us and all over our shoes. We MUST have certain microbes in order to live a healthy life. Current studies, such as those on the human microbiome (the bacteria that call the human host home) are starting to reveal the complex interactions between microbes and their human hosts. For example, microbes play a critical role in proper digestion, metabolism rates and the development of our immune systems. Of course there are other microbes that cause illness. These pathogenic microbes are the ones that tend to be most studied in medical microbiology.
As a first introduction to the world of unseen microbes that are part of your everyday lives, you will sample and try to grow microbes from the laboratory environment. Samples can be taken from anywhere in the lab but please don’t sample directly from humans or human fluid samples. These are more likely to contain pathogenic organisms! We do not want to accidentally grow Clostridium difficile, for instance, a microbe that kills tens of thousands of people a year.
Materials (per student) One sterile, wrapped, cotton swab One tube sterile water Black Sharpie-style marker Appropriate personal protective gear (lab coat, gloves, face shield, hair ties)
Medium o One T-soy agar plate
Bacterial cultureso Microbes to be sampled from the classroom environment (shoe!)
Procedure1. Label the T-soy agar Petri plate appropriately, including the sampling location.2. Since the site of the sample will most likely be dry, wet the sterile cotton swab with
the sterile water. Do NOT to place your swab down on any surface (except those from which you are sampling) after it is wet.
3. Swab (rub the cotton tip across the sample surface several times or roll the cotton swab on the sample surface) of something in the classroom environment in which you are interested. (The bottom of your shoe will usually produce amazing results!)
4. Clam-shell the T-soy agar Petri plate, and create a lawn on the surface of the agar. a. To create a lawn, draw your swab across the surface of the agar in the left to
right pattern shown in Figure 3-9. Make sure you cover the whole area, leaving no gaps between the swab lines, but do leave a bit of the edge visible.
Unit 3 Page 14
Streak as shown but with no gaps. Leave a bit of the agar on the edges unstreaked
Repeat the streak going up and down instead of side to side, with no gaps. Leave a bit of the agar on the edges unstreaked.
Uninoculated plate
Unit 3
b. Now make a similar pattern but up and down. The idea is to create bacterial growth in a solid pattern over your plate.
5. Discard the cotton swab in the sharps waste bucket (brownish-reddish, hard plastic, square container on the top of each bench). Do not reuse the swab!
6. Dispose of the water that was previously sterile in the biohazard tube racks.7. Place the Petri dish, inverted (AGAR SIDE UP. See Figure 3-6), in the correct
classroom location for incubation.
Figure 3-9. How to Make a Lawn
Figure created by Patricia G. Wilber
Precautions Do not sample from human skin, orifices or clothes Do not sample from human fluids, or bathrooms Make sure to run the swab over the sample site several times
Unit 3 Page 15

Unit 3
C. Inoculating from a Slant (solid) into a Broth (liquid)
Figure 3-10: Inoculating From a Slant to a Broth.
From the slant with the E. coli
using a sterilized loop to an un-inoculated, properly labelled, broth
E. coli is represented by theblack squiggle on the surface of the slant.
GENTLY draw the loop over the surface of the slant to pick up a very small amount of bacteria.
Then, put the loop with the E. coli into the broth and swirl gently.
Figures created by Patricia G. Wilber
1. Label your medium.2. Incinerate your loop and store in the test tube rack.3. Pick up your un-inoculated broth and your E. coli slant. 4. Unscrew the lids and place them with the open end facing down, on a clean kimwipe to
prevent bacteria from landing on the inside. DO NOT MIX THEM UP.5. Pick up your cooled, sterilized loop. 6. The bacteria will resemble a whitish slime on the slanted surface of the agar.
GENTLY draw the loop over the surface of the slant to pick up a very small amount of bacteria- the area of a small freckle (about 1mm X 1mm) of the E.coli. A sample of this size will contain millions of bacteria cells. Do NOT dig into the agar.
7. Put the loop with the E. coli in the broth and gently swirl the loop. Remove the loop but keep holding it.
8. Put the lid back on the E. coli slant. 9. Put the lid back on your newly inoculated T-soy broth.10. Leave the lid loose on your broth so that the bacteria have access to oxygen. 11. Re-sterilize your metal tool and return to the canister.12. Place your newly inoculated T-soy broth in the correctly labeled classroom location for
incubating media.
Unit 3 Page 16

Unit 3
D. Inoculating from a Broth (liquid) to a Deep (Semi-solid)
Figure 3-11: Inoculating From a Broth to a Deep.
From the broth with the Pseudomonas aeruginosa
using a needle to an un-inoculated, properly labelled, deep.
Tap the (liquid) broth to mix the bacteria.
Put the needle into the broth to collect bacteria
Stab the needle into the solid deep about ½ to ¾ of the way down.
Figures created by Patricia G. Wilber
1. Label your medium.2. Incinerate your needle and store in the test tube rack.3. Pick up your un-inoculated deep and your Pseudomonas aeruginosa broth. 4. Unscrew the lids and place them with the open end facing down, on a clean kimwipe.
DO NOT MIX THEM UP.5. Pick up your cooled, sterilized needle. 6. Put the needle into the Pseudomonas aeruginosa broth. 7. Remove the needle from the broth and stab the needle into your solid un-inoculated
deep about ½ to ¾ of the way down. 8. Remove the needle but keep holding it.9. Put the lid back on the Pseudomonas aeruginosa broth.10. Put the lid back on your newly inoculated T-soy deep.11. Leave the lid loose on your deep so that the bacteria have access to oxygen. 12. Re-sterilize your metal tool and return to the canister.13. Place your newly inoculated T-soy deep in the correctly labeled classroom location for
incubating media
Unit 3 Page 17
Stab line

Unit 3
E. Inoculating from a Petri Dish (solid) to a Slant (solid)
Figure 3-12. Inoculation of Slant from a Petri Dish.
From the Petri dish with the Staphlyococcus aureus
using a sterilized loop to an un-inoculated, properly labelled, slant
GENTLY pick up a very small amount of bacteria from the Petri dish using the loop.
Streak the surface of the slant as shown.
Figures created by Patricia G. Wilber
1. Label your medium.2. Incinerate your loop and store in the test tube rack.3. Unscrew the lid of your un-inoculated slant and place it with the open end facing down
on a clean kimwipe. 4. Pick up your cooled, sterilized loop. 5. Clam-shell the lid of your Staphlyococcus aureus containing Petri dish and pick up only a
very small amount of bacteria (about 1mm X 1mm). A sample of this size will contain millions of bacteria cells. Do NOT dig into the agar.
6. Replace the lid of the Petri dish.7. Streak the surface of the slant as shown in Figure 3-12. Do NOT dig into the medium.8. Remove the loop but keep holding it.9. Put the lid back on your newly inoculated T-soy slant.10. Leave the lid loose on your deep so that the bacteria have access to oxygen. 11. Re-sterilize your metal tool and return to the canister.12. Place your newly inoculated T-soy slant in the correct classroom location for incubation
Unit 3 Page 18

Unit 3
DAY TWO.
I. Inoculation Techniques
Results and Interpretation
Collect your cultures for observation.
A. Streak isolationObserve your Streak Isolation Petri dish.
1. Did you do your streak isolation from a broth or a plate? (circle one)
2. In the space below, draw or insert a photograph of the results from your isolation.
3. Do you have 8-10 isolated colonies? (yes or no)
4. How could you improve your next streak isolation from a Petri dish?
Unit 3 Page 19

Unit 3
B. Environmental SampleIf you see colonies of various colors, sizes and shapes on the surface of your Petri plate you have successfully cultivated microbes from the environment you sampled! The more variety observed between the colonies, the greater the number of different microbe species there were in the environment you sampled!
For your unknown identification project it will be critical that you can distinguish between colonies based on differences in colony morphology.
The various colonies that grew from the individual cells your isolated are from different microbe species. Each species has its own combination of form, elevation, margin, appearance, colors, opacity and size. These colony morphologic characteristics can be recorded to help distinguish microbe species from one another. Probably the most important for this class are size, appearance and color
(1) The size of the colony – commonly ranging from 0.5mm to 5mm in diameter. Measure with a ruler, but do not touch the colony.
(2) The appearance of the colony:o smooth (a shiny or reflective surface)o rough (a matte, granular, or bumpy surface) o mucoid or viscous (a slimy, gel-like or gummy surface)
(3) The color of the colony:o Usually white, clear or tan, but orange, blue, pink and other colors are possible!
(4) The form, or overall shape of the colony as it is viewed from above on a Petri plate.
(5) The elevation of the colony as viewed from the side. That is, how the colony appears when holding a Petri plate at the level of the eyes of the observer.
(6) The margin of the colony as viewed from above on the Petri dish.
(7) The opacity of the colony:o transparent -can see though the colony to the dish; clearo translucent- can partially see through the colonyo opaque- cannot see the medium through the colony; solid
Unit 3 Page 20

Unit 3
Figure 3-13. Colonies of Sinorhizobium meliloti grown on trypticase soy agar are approximately 1 to 2 mm in diameter (size!). They lack pigmentation and are translucent (color!). Colonies are smooth (appearance!) and are circular in form with an entire margin. They have a convex elevation. When manipulated with a needle, the colonies are viscous.
http://www.microbelibrary.org/component/resource/laboratory-test/3136-colony-morphology-protocol Authors Donald Breakwell, Christopher Woolverton, Bryan MacDonald, Kyle Smith, Richard Robison. Accessed 5/26/2015
Creative Commons Attribution – Noncommercial – NoDerivatives 4.0 International
Table 3-2. Pick one colony from your environmental sample and one from your streak isolation plate. Compare the size, appearance and color and any other characteristics that are necessary to distinguish between them. You may use a ruler to measure the diameter of the colony for the size column. Do NOT place the ruler on top of the living cultures, nor should you keep the lid open for long periods of time. Make your observations through the lid of the Petri dish.
Comparison of one colony from your environmental sample Petri dish to one colony from your Streak Isolation plate.
Environmental Sample Colony
Streak Isolation Plate Colony
Size (mm)
Color
Appearance
Other
Unit 3 Page 21

Unit 3
SAVE your plates as indicated by your instructor for staining next lab!C. Broth
For your broth, the medium may be cloudy with bacteria, or bacteria may have settled on the bottom of the tube.
If you do not observe growth, ask your instructor.
Optional Broth photo: Label the growth as seen prior to agitating.
D. Deep
For your deep you should see growth where you stabbed into the medium.
If you do not observe growth, ask your instructor.
Optional Deep photo or drawing: label the stab and the growth.
E. Slant
Hopefully, you will see bacterial growth in a streak on the surface of your slant. The growth will probably be white, clear or tan.
If you do not observe growth, ask your instructor.
Optional Slant photo or drawing: Label the growth.
Unit 3 Page 22

Unit 3
POST-ACTIVITY QUESTIONS
1. Explain the role of agar in media.
2. Angel inoculated a Petri dish with E.coli. When she looks at her plate after it has been incubated for 24 hours, she observes that the plate looks exactly the same as it did on the day of inoculation.
a. This indicates there was no ________________ on her plate.
b. List three things that may have occurred that would give her this result.
3. Why should you keep test tube lids on your inoculated cultures for incubation screwed on loosely?
4. Match the following terms with the descriptions:
a. __________To place newly inoculated media in an environment Deep optimal for growth.
b.__________ A procedure that is done without contamination. Sterile
c.__________ One form of semisolid media. T-soy
d.__________Is made with materials rich in vitamins and nutrients in Slant non-specific amounts.
e.__________ One form of solid media. Incubate
f.___________A term applied to metal tools after they are heated Aseptic
5. The sink and door knobs typically have far fewer species of bacteria than the bottom of a shoe. Develop a hypothesis for the sink and for the door knob as a possible explanation for these results.
a. Sink vs. shoe
b. Door knob vs. shoe
Unit 3 Page 23

Unit 3
6. Suppose you have a mix of two bacteria in a culture, bacteria “A” and bacteria “B”. Bacteria “A” produces colonies that are smooth, circular, pink and opaque. Bacteria “B” produces colonies that are irregular, mucoid, tan and translucent. Bacteria “B” grows at a rate 10X faster than bacteria “A”. You inoculate a sample containing equal numbers of these two bacteria types using a streak isolation technique onto a plate. Draw your expected results below (using colored pencils or the computer draw tools and labels).
The authors of this lab unit would like to thank Andrea Peterson and Deyanna Decatur for testing new media and organisms, our associate dean Linda Martin for many kinds of aid, Michael Jillson and Alex Silage for IT support, and our dean, John Cornish.
Unit 3 Page 24