Embed Size (px)
Citation preview

Utility Guide
Adaptive Server® Enterprise
12.5.1

DOCUMENT ID: DC30191-01-1251-02
LAST REVISED: November 2004
Copyright © 1989-2004 by Sybase, Inc. All rights reserved.
This publication pertains to Sybase software and to any subsequent release until otherwise indicated in new editions or technical notes. Information in this document is subject to change without notice. The software described herein is furnished under a license agreement, and it may be used or copied only in accordance with the terms of that agreement.
To order additional documents, U.S. and Canadian customers should call Customer Fulfillment at (800) 685-8225, fax (617) 229-9845.
Customers in other countries with a U.S. license agreement may contact Customer Fulfillment via the above fax number. All other international customers should contact their Sybase subsidiary or local distributor. Upgrades are provided only at regularly scheduled software release dates. No part of this publication may be reproduced, transmitted, or translated in any form or by any means, electronic, mechanical, manual, optical, or otherwise, without the prior written permission of Sybase, Inc.
Sybase, the Sybase logo, AccelaTrade, ADA Workbench, Adaptable Windowing Environment, Adaptive Component Architecture, Adaptive Server, Adaptive Server Anywhere, Adaptive Server Enterprise, Adaptive Server Enterprise Monitor, Adaptive Server Enterprise Replication, Adaptive Server Everywhere, Adaptive Server IQ, Adaptive Warehouse, Anywhere Studio, Application Manager, AppModeler, APT Workbench, APT-Build, APT-Edit, APT-Execute, APT-Translator, APT-Library, Backup Server, BizTracker, ClearConnect, Client-Library, Client Services, Convoy/DM, Copernicus, Data Pipeline, Data Workbench, DataArchitect, Database Analyzer, DataExpress, DataServer, DataWindow, DataWindow .NET, DB-Library, dbQueue, Developers Workbench, Direct Connect Anywhere, DirectConnect, Distribution Director, e-ADK, E-Anywhere, e-Biz Impact, e-Biz Integrator, E-Whatever, EC Gateway, ECMAP, ECRTP, eFulfillment Accelerator, Embedded SQL, EMS, Enterprise Application Studio, Enterprise Client/Server, Enterprise Connect, Enterprise Data Studio, Enterprise Manager, Enterprise SQL Server Manager, Enterprise Work Architecture, Enterprise Work Designer, Enterprise Work Modeler, eProcurement Accelerator, EWA, Financial Fusion, Financial Fusion Server, Gateway Manager, GlobalFIX, iAnywhere, iAnywhere Application Alerts, iAnywhere Mobile Delivery, iAnywhere Mobile Document Viewer, iAnywhere Mobile Inspection, iAnywhere Mobile Marketing Channel, iAnywhere Mobile Pharma, iAnywhere Mobile Sales, iAnywhere Pylon, iAnywhere Pylon Application Server, iAnywhere Pylon Conduit, iAnywhere Pylon PIM Server, iAnywhere Pylon Pro, iAnywhere Solutions, ImpactNow, Industry Warehouse Studio, InfoMaker, Information Anywhere, Information Everywhere, InformationConnect, InternetBuilder, iScript, Jaguar CTS, jConnect for JDBC, Mail Anywhere Studio, MainframeConnect, Maintenance Express, Manage Anywhere Studio, M-Business Channel, M-Business Network, M-Business Server, MDI Access Server, MDI Database Gateway, media.splash, MetaWorks, My iAnywhere, My iAnywhere Media Channel, My iAnywhere Mobile Marketing, MySupport, Net-Gateway, Net-Library, New Era of Networks, ObjectConnect, ObjectCycle, OmniConnect, OmniSQL Access Module, OmniSQL Toolkit, Open Biz, Open Client, Open ClientConnect, Open Client/Server, Open Client/Server Interfaces, Open Gateway, Open Server, Open ServerConnect, Open Solutions, Optima++, Orchestration Studio, PB-Gen, PC APT Execute, PC DB-Net, PC Net Library, PocketBuilder, Pocket PowerBuilder, Power++, power.stop, PowerAMC, PowerBuilder, PowerBuilder Foundation Class Library, PowerDesigner, PowerDimensions, PowerDynamo, PowerJ, PowerScript, PowerSite, PowerSocket, Powersoft, PowerStage, PowerStudio, PowerTips, Powersoft Portfolio, Powersoft Professional, PowerWare Desktop, PowerWare Enterprise, ProcessAnalyst, Rapport, RepConnector, Replication Agent, Replication Driver, Replication Server, Replication Server Manager, Replication Toolkit, Report-Execute, Report Workbench, Resource Manager, RW-DisplayLib, RW-Library, S-Designor, SDF, Secure SQL Server, Secure SQL Toolset, Security Guardian, SKILS, smart.partners, smart.parts, smart.script, SQL Advantage, SQL Anywhere, SQL Anywhere Studio, SQL Code Checker, SQL Debug, SQL Edit, SQL Edit/TPU, SQL Everywhere, SQL Modeler, SQL Remote, SQL Server, SQL Server Manager, SQL SMART, SQL Toolset, SQL Server/CFT, SQL Server/DBM, SQL Server SNMP SubAgent, SQL Station, SQLJ, STEP, SupportNow, S.W.I.F.T. Message Format Libraries, Sybase Central, Sybase Client/Server Interfaces, Sybase Financial Server, Sybase Gateways, Sybase MPP, Sybase SQL Desktop, Sybase SQL Lifecycle, Sybase SQL Workgroup, Sybase User Workbench, SybaseWare, Syber Financial, SyberAssist, SyBooks, System 10, System 11, System XI (logo), SystemTools, Tabular Data Stream, TotalFix, TradeForce, Transact-SQL, Translation Toolkit, UltraLite, UltraLite.NET, UNIBOM, Unilib, Uninull, Unisep, Unistring, URK Runtime Kit for UniCode, VisualWriter, VQL, WarehouseArchitect, Warehouse Control Center, Warehouse Studio, Warehouse WORKS, Watcom, Watcom SQL, Watcom SQL Server, Web Deployment Kit, Web.PB, Web.SQL, WebSights, WebViewer, WorkGroup SQL Server, XA-Library, XA-Server and XP Server are trademarks of Sybase, Inc. 05/04
Unicode and the Unicode Logo are registered trademarks of Unicode, Inc.
All other company and product names used herein may be trademarks or registered trademarks of their respective companies.
Use, duplication, or disclosure by the government is subject to the restrictions set forth in subparagraph (c)(1)(ii) of DFARS 52.227-7013 for the DOD and as set forth in FAR 52.227-19(a)-(d) for civilian agencies.
Sybase, Inc., One Sybase Drive, Dublin, CA 94568.

Contents
Utility Guide iii
CHAPTER 1 Building Servers Using dataserver ............................................... 1Introduction ...................................................................................... 1Building a new master device .......................................................... 2
Environments when using dataserver ....................................... 3build mode................................................................................. 3start mode ................................................................................. 6Upgrading to a server with larger page sizes ............................ 6Viewing the current server limits ............................................... 6
CHAPTER 2 Using the isql Utility........................................................................ 9Before you begin .............................................................................. 9Starting and stopping isql ................................................................. 9
Login failure to Adaptive Server .............................................. 10How to use Transact-SQL in isql.................................................... 10
Formatting isql output .............................................................. 11Correcting input ....................................................................... 12set options that affect output ................................................... 12
Changing the command terminator ................................................ 13Performance statistics interaction with command terminator values 14Setting the network packet size ..................................................... 15Input and output files...................................................................... 15
UNIX command-line redirection .............................................. 16
CHAPTER 3 Using bcp to Transfer Data to and from Adaptive Server ......... 17Methods for moving data................................................................ 18
Importing and exporting data with bcp .................................... 18bcp requirements ........................................................................... 19bcp modes...................................................................................... 20bcp performance ............................................................................ 21
Using fast or slow bcp ............................................................. 22Copying in data with fast bcp .................................................. 24Bulk copying data into partitioned tables................................. 25Using parallel bulk copy to copy data into a specific partition . 27
Contents
iv Adaptive Server Enterprise
Using the bcp options..................................................................... 34Using the default formats ........................................................ 34Changing terminators from the command line ........................ 35
Changing the defaults: interactive bcp ........................................... 36Responding to bcp prompts .................................................... 37File storage type...................................................................... 38Prefix length ............................................................................ 40Field length.............................................................................. 41Field and row terminators........................................................ 43
Using format files ........................................................................... 46Elements of the bcp format file................................................ 47
Examples: copying out data interactively ....................................... 50Copying out data with field lengths.......................................... 51Copying out data with delimiters ............................................. 52
Examples: copying in data interactively ......................................... 53Copying in data with field lengths............................................ 54Copying in data with delimiters................................................ 56Copying in data with a format file ............................................ 56
Using bcp with alternate languages ............................................... 57bcp and row-level access rules ...................................................... 58Copy in and batch files................................................................... 58
Improving recoverability .......................................................... 59Batches and partitioned tables ................................................ 60
Copy out and text and image data ................................................. 60Specifying a network packet size ................................................... 61Copy in and error files .................................................................... 61Copy out and error files.................................................................. 62Data integrity: defaults, rules, and triggers..................................... 63
Defaults and datatypes............................................................ 63Rules and triggers ................................................................... 63
How bcp differs from other utilities ................................................. 63
CHAPTER 4 Using dsedit ................................................................................... 65Getting started with dsedit.............................................................. 65
Starting dsedit ......................................................................... 65Opening an editing session ..................................................... 67
Adding, viewing, and editing server entries.................................... 69Modifying server entries in Windows NT ................................. 69Modifying server entries in UNIX platforms ............................. 72Copying server entries ............................................................ 74
Troubleshooting dsedit ................................................................... 76The dsedit utility does not start................................................ 76Error message: “Unable to open X display” ............................ 76Cannot add, modify, or delete server entries .......................... 77

Contents
Utility Guide v
CHAPTER 5 Using dscp..................................................................................... 79Getting started with dscp................................................................ 79
Using a dscp session .............................................................. 80Working with server entries............................................................ 81
Adding and modifying server entries ....................................... 81Copying server entries ............................................................ 83Listing and viewing contents of server entries......................... 84Deleting server entries ............................................................ 85
Exiting dscp.................................................................................... 86Quick reference for dscp utility commands .................................... 86
CHAPTER 6 Migration Utility............................................................................. 89Overview ........................................................................................ 89
Existing solutions..................................................................... 90Benefits of sybmigrate............................................................. 90What sybmigrate does............................................................. 90What sybmigrate does not do.................................................. 92
Before you begin ............................................................................ 93Required components for the sybmigrate ............................... 93Dependencies ......................................................................... 94Installation ............................................................................... 94Upgrade................................................................................... 94Permissions............................................................................. 94Platforms ................................................................................. 95Environment settings............................................................... 95
Migration process........................................................................... 96Overview of the migration process .......................................... 96Pre-migration considerations................................................... 97Configuration and tuning for higher performance.................. 100Possible errors to avoid......................................................... 102Auto-select depedent objects for migration ........................... 102Starting sybmigrate ............................................................... 102GUI mode .............................................................................. 105Resource file mode ............................................................... 112
Post-migration activities ............................................................... 119Migrating Replication Server data to Adaptive Server 12.5 ......... 120
Pre-migration procedures for databases with replication data 121Post-migration procedures for replicated databases............. 122
Limitations .................................................................................... 127Troubleshooting and error messages .......................................... 129
Objects fail to migrate............................................................ 129Beginning database migration............................................... 129“Connection refused” and “Unable to obtain connection to the
server” ............................................................................ 129
Contents
vi Adaptive Server Enterprise
Target server cannot be reached from source server ........... 130If sybmigrate hangs during migration .................................... 130Merging two databases ......................................................... 130Post-migration failure cleanup............................................... 131Remigrating one database .................................................... 131Re-creating an individual object ............................................ 131Connection fail....................................................................... 132“Insufficient memory in JVM shared class”............................ 132“There is not enough memory in the procedure cache” ........ 132java.lang related error ........................................................... 132
CHAPTER 7 Installing the Adaptive Server Plug-in ....................................... 133Introduction .................................................................................. 133
Adaptive Server plug-in distribution....................................... 133Comparing functional differences between versions.................... 134Accessing the Monitor Client GUI ................................................ 135
Running Monitor Client GUI as a standalone ........................ 136
CHAPTER 8 Utility Commands Reference...................................................... 139Getting started.............................................................................. 140
*_dce and *_r utilities............................................................. 142Utilities quick reference ................................................................ 142
Installation or configuration utilities ....................................... 143Utilities for languages, character sets, and sort orders ......... 143Utilities to start servers .......................................................... 143Database creation and manipulation utilities......................... 144Utilities to gather information................................................. 144
backupserver................................................................................ 146bcp ............................................................................................... 152buildmaster................................................................................... 163certauth ........................................................................................ 164certpk12 ....................................................................................... 167certreq .......................................................................................... 170charset ......................................................................................... 173cobpre .......................................................................................... 174cpre .............................................................................................. 175dataserver .................................................................................... 176dataxtr .......................................................................................... 183ddlgen .......................................................................................... 184defncopy....................................................................................... 198dscp.............................................................................................. 204dsedit............................................................................................ 205extractjava.................................................................................... 206

Utility Guide vii
installjava...................................................................................... 209isql ................................................................................................ 213langinstall...................................................................................... 223optdiag.......................................................................................... 226pwdcrypt ....................................................................................... 232showserver ................................................................................... 233sqldbgr.......................................................................................... 234sqlloc ............................................................................................ 239sqllocres ....................................................................................... 240sqlsrvr ........................................................................................... 241sqlupgrade.................................................................................... 248sqlupgraderes............................................................................... 249srvbuild ......................................................................................... 250srvbuildres .................................................................................... 251startserver..................................................................................... 252sybmigrate .................................................................................... 255xpserver........................................................................................ 259
Index............................................................................................................................................ 261

viii Adaptive Server Enterprise

Utility Guide ix
About This Book
Adaptive Server Enterprise Utility Guide is a guide to the Sybase® Adaptive Server® Enterprise utility programs available for UNIX platforms and Windows NT. Utility programs are commands that you invoke directly from the operating system.
Audience This manual is for anyone using Transact-SQL® and Adaptive Server Enterprise version 12.5. It assumes that you have the basic knowledge to use Adaptive Server and your operating system.
How to use this book This manual includes the following:
• Chapter 1, “Building Servers Using dataserver” – discusses how to use the dataserver utility to build new servers.
• Chapter 2, “Using the isql Utility” – discusses how to use the interactive SQL (isql) utility that allows access to SQL from your operating system.
• Chapter 3, “Using bcp to Transfer Data to and from Adaptive Server” – discusses, in detail, the bulk copy (bcp) utility which you use to move data between Adaptive Server and an operating system file.
• Chapter 4, “Using dsedit” – explains how to use the directory services editor (dsedit) utility to modify the interfaces (sql.ini) file in Windows NT, and in X-Windows to view and edit server entries in the interfaces file in UNIX platforms.
• Chapter 5, “Using dscp” – explains how to use the dscp utility to view and edit server entries in the interfaces file in UNIX platforms.
• Chapter 6, “Migration Utility” – explains how to use the sybmigrate utility to move data and database schema from pre-12.5 databases into 12.5 databases.
• Chapter 7, “Installing the Adaptive Server Plug-in” – describes how to install Adaptive Server Sybase Central plugins.
• Chapter 8, “Utility Commands Reference” – lists and describes the utility commands that you use to manage and maintain your databases and Adaptive Server Enterprise.
x Adaptive Server Enterprise
The examples in this manual are based on the pubs2 sample database. Ask your System Administrator how to access a clean copy of pubs2.
Related documents The Sybase® Adaptive Server® Enterprise documentation set consists of the following:
• The release bulletin for your platform – contains last-minute information that was too late to be included in the books.
A more recent version of the release bulletin may be available on the World Wide Web. To check for critical product or document information that was added after the release of the product CD, use the Sybase Technical Library.
• The Installation Guide for your platform – describes installation, upgrade, and configuration procedures for all Adaptive Server and related Sybase products.
• What’s New in Adaptive Server Enterprise? – describes the new features in Adaptive Server version 12.5.1, the system changes added to support those features, and the changes that may affect your existing applications.
• ASE Replicator User’s Guide – describes how to use the ASE Replicator feature of Adaptive Server to implement basic replication from a primary server to one or more remote Adaptive Servers.
• Component Integration Services User’s Guide – explains how to use the Adaptive Server Component Integration Services feature to connect remote Sybase and non-Sybase databases.
• Configuring Adaptive Server Enterprise for your platform – provides instructions for performing specific configuration tasks for Adaptive Server.
• EJB Server User’s Guide – explains how to use EJB Server to deploy and execute Enterprise JavaBeans in Adaptive Server.
• Error Messages and Troubleshooting Guide – explains how to resolve frequently occurring error messages and describes solutions to system problems frequently encountered by users.
• Full-Text Search Specialty Data Store User’s Guide – describes how to use the Full-Text Search feature with Verity to search Adaptive Server Enterprise data.
• Glossary – defines technical terms used in the Adaptive Server documentation.
About This Book
Utility Guide xi
• Historical Server User’s Guide – describes how to use Historical Server to obtain performance information for SQL Server® and Adaptive Server.
• Java in Adaptive Server Enterprise – describes how to install and use Java classes as data types, functions, and stored procedures in the Adaptive Server database.
• Job Scheduler User's Guide – provides instructions on how to install and configure, and create and schedule jobs on a local or remote Adaptive Server using the command line or a graphical user interface (GUI).
• Monitor Client Library Programmer’s Guide – describes how to write Monitor Client Library applications that access Adaptive Server performance data.
• Monitor Server User’s Guide – describes how to use Monitor Server to obtain performance statistics from SQL Server and Adaptive Server.
• Performance and Tuning Guide – is a series of four books that explains how to tune Adaptive Server for maximum performance:
• Basics – the basics for understanding and investigating performance questions in Adaptive Server.
• Locking – describes how the various locking schemas can be used for improving performance in Adaptive Server.
• Optimizer and Abstract Plans – describes how the optimizer processes queries and how abstract plans can be used to change some of the optimizer plans.
• Monitoring and Analyzing – explains how statistics are obtained and used for monitoring and optimizing performance.
• Quick Reference Guide – provides a comprehensive listing of the names and syntax for commands, functions, system procedures, extended system procedures, datatypes, and utilities in a pocket-sized book.
• Reference Manual – is a series of four books that contains the following detailed Transact-SQL® information:
• Building Blocks – Transact-SQL datatypes, functions, global variables, expressions, identifiers and wildcards, and reserved words.
• Commands – Transact-SQL commands.
• Procedures – Transact-SQL system procedures, catalog stored procedures, system extended stored procedures, and dbcc stored procedures.

xii Adaptive Server Enterprise
• Tables – Transact-SQL system tables and dbcc tables.
• System Administration Guide – provides in-depth information about administering servers and databases. This manual includes instructions and guidelines for managing physical resources, security, user and system databases, and specifying character conversion, international language, and sort order settings.
• System Tables Diagram – illustrates system tables and their entity relationships in a poster format. Available only in print version.
• Transact-SQL User’s Guide – documents Transact-SQL, Sybase’s enhanced version of the relational database language. This manual serves as a textbook for beginning users of the database management system. This manual also contains descriptions of the pubs2 and pubs3 sample databases.
• Using Adaptive Server Distributed Transaction Management Features – explains how to configure, use, and troubleshoot Adaptive Server DTM features in distributed transaction processing environments.
• Using Sybase Failover in a High Availability System – provides instructions for using Sybase’s Failover to configure an Adaptive Server as a companion server in a high availability system.
• Utility Guide – documents the Adaptive Server utility programs, such as isql and bcp, which are executed at the operating system level.
• Web Services User’s Guide – explains how to configure, use, and troubleshoot Web Services for Adaptive Server.
• XA Interface Integration Guide for CICS, Encina, and TUXEDO – provides instructions for using the Sybase DTM XA interface with X/Open XA transaction managers.
• XML Services in Adaptive Server Enterprise – describes the Sybase native XML processor and the Sybase Java-based XML support, introduces XML in the database, and documents the query and mapping functions that comprise XML Services.
Sybase certifications on the web
Technical documentation at the Sybase web site is updated frequently.
❖ Finding the latest information on product certifications
1 Point your web browser to Technical Documents at http://www.sybase.com/support/techdocs/.
2 Select Products from the navigation bar on the left.

About This Book
Utility Guide xiii
3 Select a product name from the product list and click Go.
4 Select the Certification Report filter, specify a time frame, and click Go.
5 Click a Certification Report title to display the report.
❖ Creating a personalized view of the Sybase web site (including support pages)
Set up a MySybase profile. MySybase is a free service that allows you to create a personalized view of Sybase web pages.
1 Point your web browser to Technical Documents at http://www.sybase.com/support/techdocs/.
2 Click MySybase and create a MySybase profile.
Sybase EBFs and software updates
❖ Finding the latest information on EBFs and software updates
1 Point your web browser to the Sybase Support Page at http://www.sybase.com/support.
2 Select EBFs/Updates. Enter user name and password information, if prompted (for existing web accounts) or create a new account (a free service).
3 Select a product.
4 Specify a time frame and click Go.
5 Click the Info icon to display the EBF/Update report, or click the product description to download the software.
Conventions In the regular text of this document, the names of files and directories appear in italics, for example:
• In Windows NT: %SYBASE%\bin
• In UNIX platforms: $SYBASE
Note Substitute your Sybase installation drive and directory for $SYBASE in UNIX, and %SYBASE% in Windows NT.
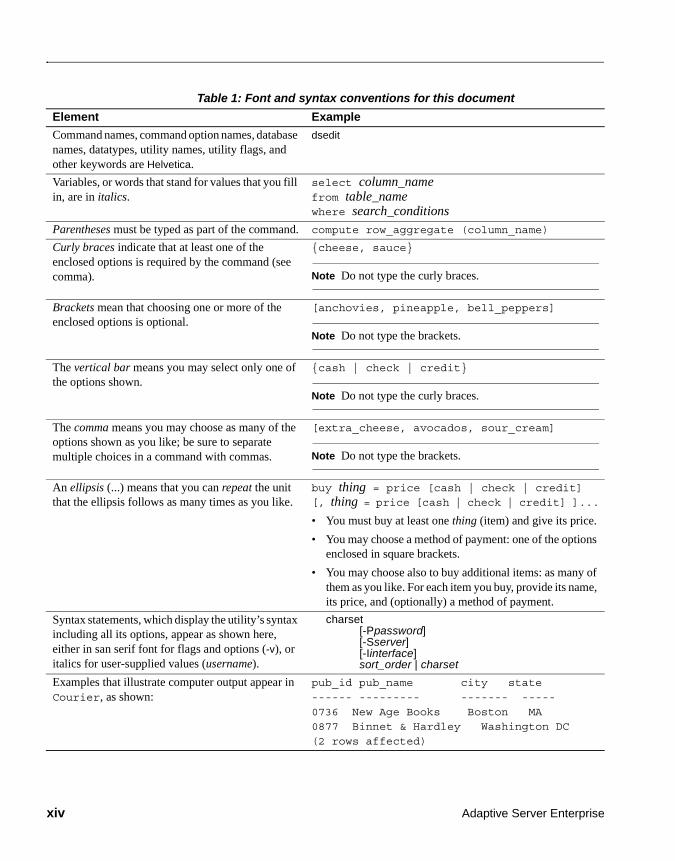
Table 1 details the typographic (font and syntax) conventions as used in this document.
xiv Adaptive Server Enterprise
Table 1: Font and syntax conventions for this document
Element Example
Command names, command option names, database names, datatypes, utility names, utility flags, and other keywords are Helvetica.
dsedit
Variables, or words that stand for values that you fill in, are in italics.
select column_name from table_name where search_conditions
Parentheses must be typed as part of the command. compute row_aggregate (column_name)
Curly braces indicate that at least one of the enclosed options is required by the command (see comma).
{cheese, sauce}
Note Do not type the curly braces.
Brackets mean that choosing one or more of the enclosed options is optional.
[anchovies, pineapple, bell_peppers]
Note Do not type the brackets.
The vertical bar means you may select only one of the options shown.
{cash | check | credit}
Note Do not type the curly braces.
The comma means you may choose as many of the options shown as you like; be sure to separate multiple choices in a command with commas.
[extra_cheese, avocados, sour_cream]
Note Do not type the brackets.
An ellipsis (...) means that you can repeat the unit that the ellipsis follows as many times as you like.
buy thing = price [cash | check | credit][, thing = price [cash | check | credit] ]...
• You must buy at least one thing (item) and give its price.
• You may choose a method of payment: one of the options enclosed in square brackets.
• You may choose also to buy additional items: as many of them as you like. For each item you buy, provide its name, its price, and (optionally) a method of payment.
Syntax statements, which display the utility’s syntax including all its options, appear as shown here, either in san serif font for flags and options (-v), or italics for user-supplied values (username).
charset[-Ppassword][-Sserver][-Iinterface]sort_order | charset
Examples that illustrate computer output appear in Courier, as shown:
pub_id pub_name city state------ --------- ------- -----0736 New Age Books Boston MA0877 Binnet & Hardley Washington DC(2 rows affected)

About This Book
Utility Guide xv
If you need help Each Sybase installation that has purchased a support contract has one or more designated people who are authorized to contact Sybase Technical Support. If you cannot resolve a problem using the manuals or online help, please have the designated person contact Sybase Technical Support or the Sybase subsidiary in your area.

xvi Adaptive Server Enterprise

Utility Guide 1
C H A P T E R 1 Building Servers Using dataserver
Adaptive Server version 12.5 no longer uses the buildmaster binary to build the master device. Instead, Sybase has incorporated the buildmaster functionality in the dataserver binary. This chapter discusses how to use dataserver to build your server.
Note The dataserver binary in Windows NT is called sqlsrvr.exe. If you are using the Windows NT platform, substitute all reference to dataserver in this chapter with sqlsrvr.
For a detailed description of dataserver syntax, see dataserver on page 176. For a detailed description of sqlsrvr syntax, see sqlsrvr on page 241.
IntroductionThe dataserver command allows you to create master devices and databases with logical pages of size 2K, 4K, 8K, or 16K. Larger logical pages allow you to create larger rows, which can improve your performance because Adaptive Server accesses more data each time it reads a page. For example, a 16K page can hold eight times the amount of data as a 2K page, an 8K page holds four times as much data as a 2K page, and so on, for all the sizes for logical pages.
The logical page size is a server-wide setting; you cannot have databases with varying size logical pages within the same server. All tables are appropriately sized so that the row size does not exceed the current page size of the server. That is, rows cannot span multiple pages.
Topic PageIntroduction 1
Building a new master device 2

Building a new master device
2 Adaptive Server Enterprise
Building a new master deviceThis section describes the process for creating a new master device using the dataserver utility. The master device is built using the build mode in dataserver. After the master device is built, the server shuts down. You must then manually start the server in the start mode. After this you can start, stop, and restart Adaptive Server whenever necessary without having to rebuild the master device
Adaptive Server uses three types of page sizes:
• Logical page size – these are the pages that the database objects are built with. A databases and any of its related objects must use the same logical page size. Logical page sizes come in sizes of 2K, 4K, 8K, and 16K.
• Virtual page size – this is the physical page allocation at the disk level, and is always done in 2K pages. All disk I/O is done in multiples of virtual page size.
• Memory page size – the memory allocated and managed within Adaptive Server. The memory page size is always in units of 2K pages.
The following syntax creates a new master device with dataserver:
dataserver -ddevice_name. . .
-b [master_device_size [k|K|m|M|g|G][-z logical_page_size [k|K]
-h
Where:
-d device_name – is the full path name of the device for the master database. The master database device must be writable by the user who starts Adaptive Server. The default master database device name is d_master.
-b – indicates that dataserver is in build mode and creating a new master device, and indicates the size of the master device. If you do not provide a unit specifier (k, m, g) for the size of the device, dataserver assumes a size in virtual pages. The size of a virtual page is always 2K. For example:
• -b 51204 – specifies a device of 51,204 virtual pages (100.0078125MB).
• -b 100M – specifies a device of 100Mb

CHAPTER 1 Building Servers Using dataserver
Utility Guide 3
-z – specifies the logical page size, which is always 2K, 4K, 8K, or 16K. That is, one logical page = N virtual pages. This parameter is optional during the build phase and is ignored during the start mode. If you do not include the -z parameter during the build mode, the master device is built with 2K logical pages.
-h – prints the syntax for the dataserver command.
See dataserver on page 176 for a full list of dataserver parameters and their definitions.
Environments when using dataserverWhen you start an Adaptive Server with the dataserver program, Adaptive Server derives its running environment from:
• The configuration file you specify in -c configuration_file
• The default configuration file, servername.cfg, if you did not specify the -c parameter
• Default values if you did not specify either -c configuration_file or servername.cfg
For more information on these configuration parameters, see Chapter 17, “Setting Configuration Parameters,” in the System Administration Guide.
build modeTo create a new Adaptive Server, issue dataserver using the -b and -z options. For example, to:
• Build a 100MB master device using the default logical page size (2K) and start the server:
dataserver -d /var/sybase/masterdb.dat -b100M -sMASTER2K
• Build a 100MB master device with a logical page size of size 4K:
dataserver -d /var/sybase/masterdb.dat -b100M -z4K -sMASTER4K
• Build a master device of 102,400 virtual pages of size 2K, create databases using a logical page size of 8K, and boot the server:
dataserver -d /var/sybase/masterdb.dat -b102400 -z8K -sMASTER8K
Building a new master device
4 Adaptive Server Enterprise
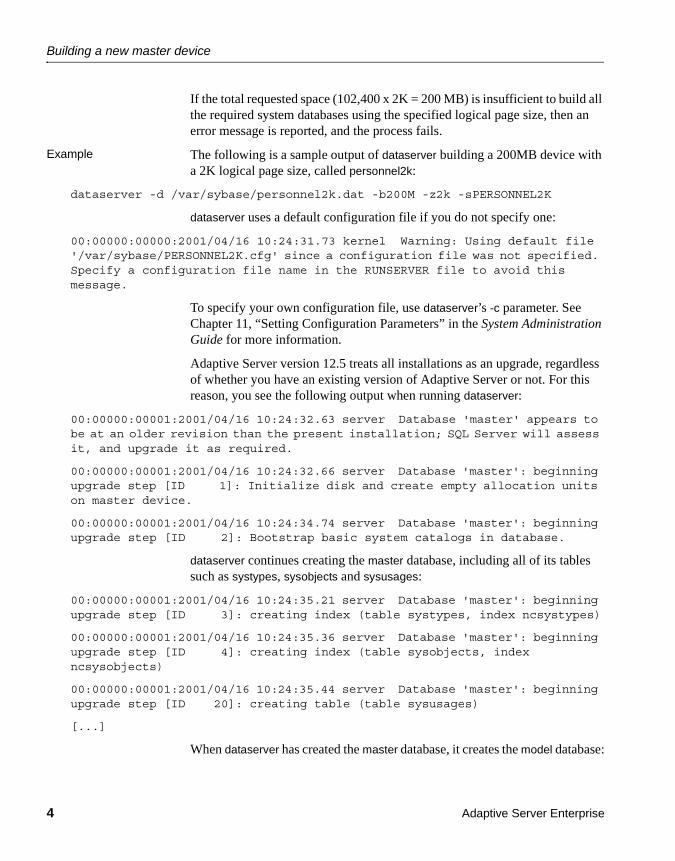
If the total requested space (102,400 x 2K = 200 MB) is insufficient to build all the required system databases using the specified logical page size, then an error message is reported, and the process fails.
Example The following is a sample output of dataserver building a 200MB device with a 2K logical page size, called personnel2k:
dataserver -d /var/sybase/personnel2k.dat -b200M -z2k -sPERSONNEL2K
dataserver uses a default configuration file if you do not specify one:
00:00000:00000:2001/04/16 10:24:31.73 kernel Warning: Using default file '/var/sybase/PERSONNEL2K.cfg' since a configuration file was not specified. Specify a configuration file name in the RUNSERVER file to avoid this message.
To specify your own configuration file, use dataserver’s -c parameter. See Chapter 11, “Setting Configuration Parameters” in the System Administration Guide for more information.
Adaptive Server version 12.5 treats all installations as an upgrade, regardless of whether you have an existing version of Adaptive Server or not. For this reason, you see the following output when running dataserver:
00:00000:00001:2001/04/16 10:24:32.63 server Database 'master' appears to be at an older revision than the present installation; SQL Server will assess it, and upgrade it as required.
00:00000:00001:2001/04/16 10:24:32.66 server Database 'master': beginning upgrade step [ID 1]: Initialize disk and create empty allocation units on master device.
00:00000:00001:2001/04/16 10:24:34.74 server Database 'master': beginning upgrade step [ID 2]: Bootstrap basic system catalogs in database.
dataserver continues creating the master database, including all of its tables such as systypes, sysobjects and sysusages:
00:00000:00001:2001/04/16 10:24:35.21 server Database 'master': beginning upgrade step [ID 3]: creating index (table systypes, index ncsystypes)
00:00000:00001:2001/04/16 10:24:35.36 server Database 'master': beginning upgrade step [ID 4]: creating index (table sysobjects, index ncsysobjects)
00:00000:00001:2001/04/16 10:24:35.44 server Database 'master': beginning upgrade step [ID 20]: creating table (table sysusages)
[...]
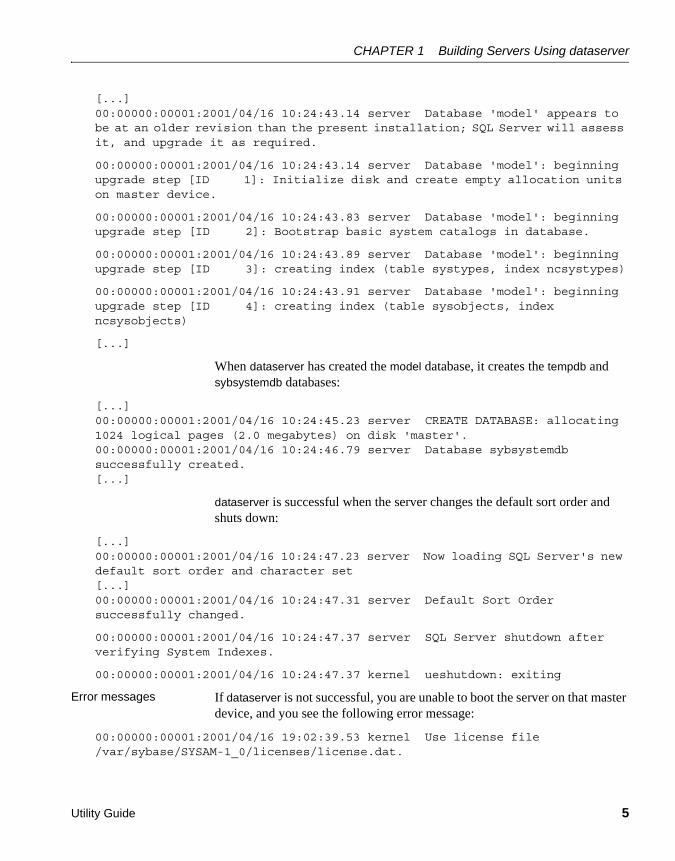
When dataserver has created the master database, it creates the model database:
CHAPTER 1 Building Servers Using dataserver
Utility Guide 5
[...]00:00000:00001:2001/04/16 10:24:43.14 server Database 'model' appears to be at an older revision than the present installation; SQL Server will assess it, and upgrade it as required.
00:00000:00001:2001/04/16 10:24:43.14 server Database 'model': beginning upgrade step [ID 1]: Initialize disk and create empty allocation units on master device.
00:00000:00001:2001/04/16 10:24:43.83 server Database 'model': beginning upgrade step [ID 2]: Bootstrap basic system catalogs in database.
00:00000:00001:2001/04/16 10:24:43.89 server Database 'model': beginning upgrade step [ID 3]: creating index (table systypes, index ncsystypes)
00:00000:00001:2001/04/16 10:24:43.91 server Database 'model': beginning upgrade step [ID 4]: creating index (table sysobjects, index ncsysobjects)
[...]
When dataserver has created the model database, it creates the tempdb and sybsystemdb databases:
[...]00:00000:00001:2001/04/16 10:24:45.23 server CREATE DATABASE: allocating 1024 logical pages (2.0 megabytes) on disk 'master'.00:00000:00001:2001/04/16 10:24:46.79 server Database sybsystemdb successfully created.[...]
dataserver is successful when the server changes the default sort order and shuts down:
[...]00:00000:00001:2001/04/16 10:24:47.23 server Now loading SQL Server's new default sort order and character set[...]00:00000:00001:2001/04/16 10:24:47.31 server Default Sort Order successfully changed.
00:00000:00001:2001/04/16 10:24:47.37 server SQL Server shutdown after verifying System Indexes.
00:00000:00001:2001/04/16 10:24:47.37 kernel ueshutdown: exiting
Error messages If dataserver is not successful, you are unable to boot the server on that master device, and you see the following error message:
00:00000:00001:2001/04/16 19:02:39.53 kernel Use license file /var/sybase/SYSAM-1_0/licenses/license.dat.

Building a new master device
6 Adaptive Server Enterprise
00:00000:00001:2001/04/16 19:02:39.54 kernel The master device's configuration area appears to be corrupt. The server needs this data to boot, and so cannot continue. The server will shut down.
If you run dataserver with a user-specified configuration file that includes options that make it impossible to allocate a shared segment and start up a server, dataserver fails with an error message, and you are unable to boot the server on that master device:
00:00000:00001:2001/04/16 19:04:01.11 kernel Use license file /var/sybase/SYSAM-1_0/licenses/license.dat.
00:00000:00000:2001/02/09 19:04:01.25 kernel Using config area from primary master device.
00:00000:00001:2001/04/16 19:04:01.36 server The value of the 'max total_memory' parameter (33792) defined in the configuration file is not high enough to set the other parameter values specified in the configuration file. 'max total_memory' should be greater than the logical memory '34343'.
start modeTo start an existing Adaptive Server, issue dataserver without the -b and -z options.
dataserver -d /sybase/masterdb.dat
Upgrading to a server with larger page sizesAdaptive Servers earlier than version 12.5 used 2K logical page sizes. You cannot change an installation’s page size by upgrading. That is, if your current Adaptive Server uses 2K logical pages, you can upgrade only to an Adaptive Server that uses 2K logical pages.
However, you can migrate databases with 2K logical pages from earlier versions of Adaptive Server. For information on how to use the dataxtr data migration tool, see the Adaptive Server Enterprise release bulletin for your platform.
Viewing the current server limitsTo display information about Adaptive Server’s limits:
CHAPTER 1 Building Servers Using dataserver
Utility Guide 7
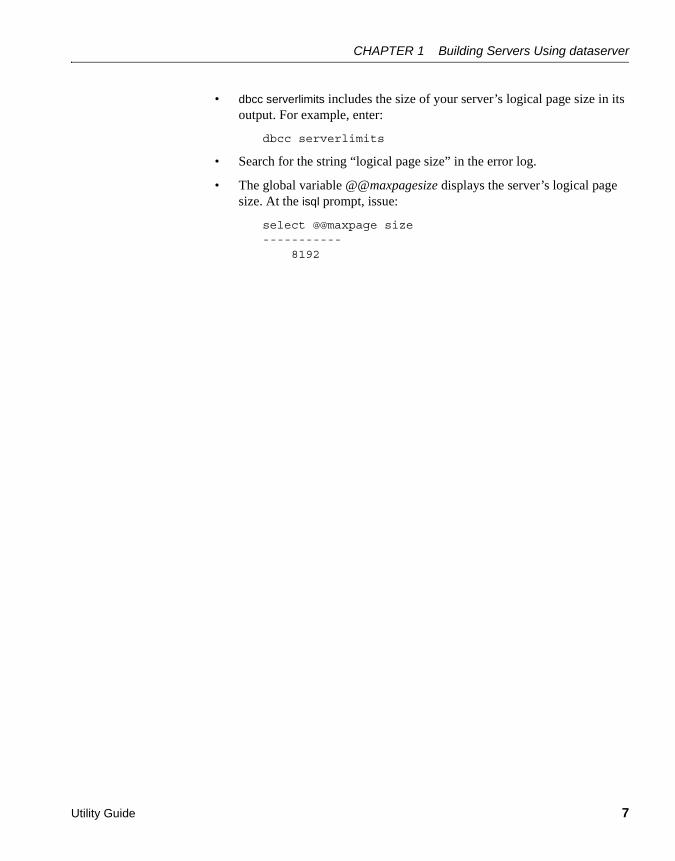
• dbcc serverlimits includes the size of your server’s logical page size in its output. For example, enter:
dbcc serverlimits
• Search for the string “logical page size” in the error log.
• The global variable @@maxpagesize displays the server’s logical page size. At the isql prompt, issue:
select @@maxpage size-----------
8192

Building a new master device
8 Adaptive Server Enterprise
Utility Guide 9
C H A P T E R 2 Using the isql Utility
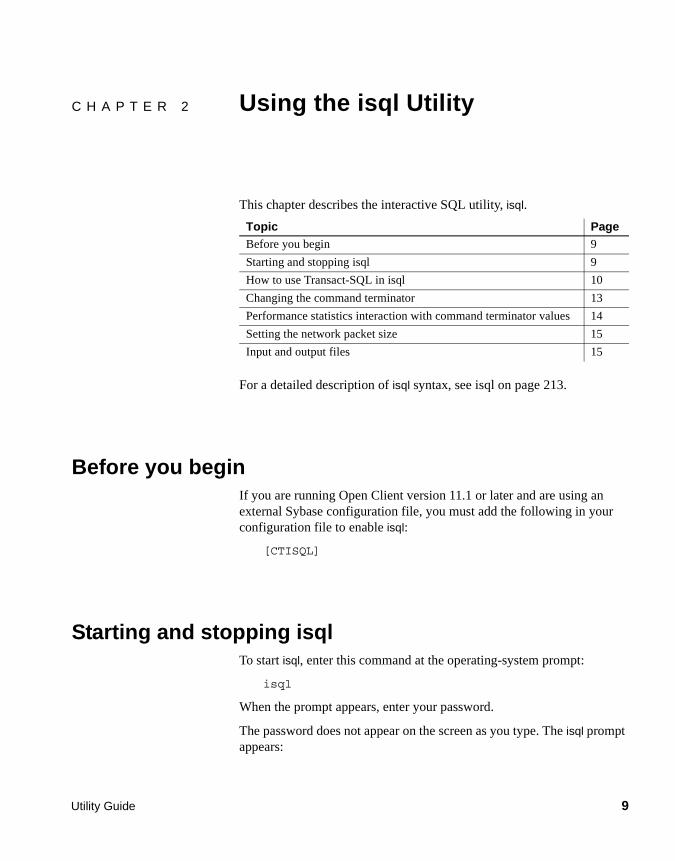
This chapter describes the interactive SQL utility, isql.
For a detailed description of isql syntax, see isql on page 213.
Before you beginIf you are running Open Client version 11.1 or later and are using an external Sybase configuration file, you must add the following in your configuration file to enable isql:
[CTISQL]
Starting and stopping isqlTo start isql, enter this command at the operating-system prompt:
isql
When the prompt appears, enter your password.
The password does not appear on the screen as you type. The isql prompt appears:
Topic PageBefore you begin 9
Starting and stopping isql 9
How to use Transact-SQL in isql 10
Changing the command terminator 13
Performance statistics interaction with command terminator values 14
Setting the network packet size 15
Input and output files 15
How to use Transact-SQL in isql
10 Adaptive Server Enterprise
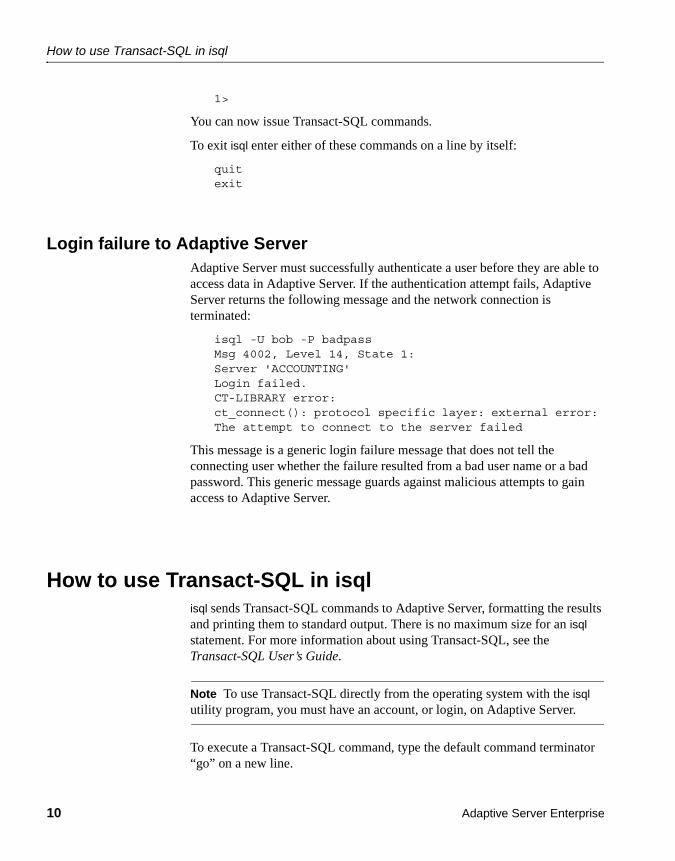
1>
You can now issue Transact-SQL commands.
To exit isql enter either of these commands on a line by itself:
quitexit
Login failure to Adaptive ServerAdaptive Server must successfully authenticate a user before they are able to access data in Adaptive Server. If the authentication attempt fails, Adaptive Server returns the following message and the network connection is terminated:
isql -U bob -P badpassMsg 4002, Level 14, State 1:Server 'ACCOUNTING'Login failed.CT-LIBRARY error:ct_connect(): protocol specific layer: external error: The attempt to connect to the server failed
This message is a generic login failure message that does not tell the connecting user whether the failure resulted from a bad user name or a bad password. This generic message guards against malicious attempts to gain access to Adaptive Server.
How to use Transact-SQL in isqlisql sends Transact-SQL commands to Adaptive Server, formatting the results and printing them to standard output. There is no maximum size for an isql statement. For more information about using Transact-SQL, see the Transact-SQL User’s Guide.
Note To use Transact-SQL directly from the operating system with the isql utility program, you must have an account, or login, on Adaptive Server.
To execute a Transact-SQL command, type the default command terminator “go” on a new line.
CHAPTER 2 Using the isql Utility
Utility Guide 11
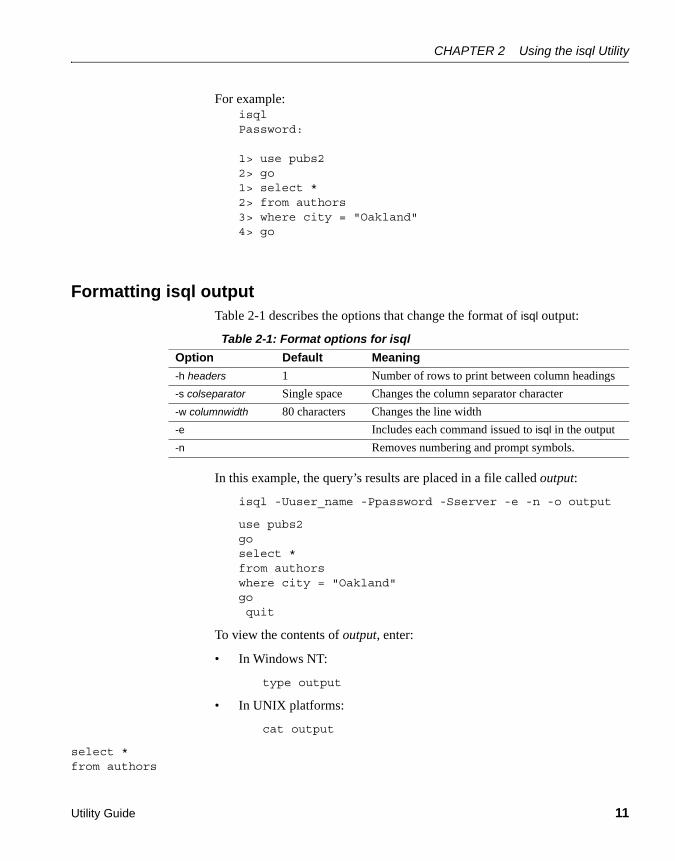
For example:isqlPassword: 1> use pubs22> go1> select *2> from authors3> where city = "Oakland"4> go
Formatting isql outputTable 2-1 describes the options that change the format of isql output:
Table 2-1: Format options for isql
In this example, the query’s results are placed in a file called output:
isql -Uuser_name -Ppassword -Sserver -e -n -o output
use pubs2goselect *from authorswhere city = "Oakland"go quit
To view the contents of output, enter:
• In Windows NT:
type output
• In UNIX platforms:
cat output
select *from authors
Option Default Meaning
-h headers 1 Number of rows to print between column headings
-s colseparator Single space Changes the column separator character
-w columnwidth 80 characters Changes the line width
-e Includes each command issued to isql in the output
-n Removes numbering and prompt symbols.

How to use Transact-SQL in isql
12 Adaptive Server Enterprise
where city = "Oakland"au_id au_lname au_fnamephone addresscity state country postalcode----------- -------------------------------------------- ----------------------------- ---------------------------------------------------------- ---- ----------- -----------213-46-8915 Green Marjorie
415 986-7020 309 63rd St. #411Oakland CA USA 94618
274-80-9391 Straight Dick415 834-2919 5420 College Av.Oakland CA USA 94609
724-08-9931 Stringer Dirk415 843-2991 5420 Telegraph Av.Oakland CA USA 94609
724-80-9391 MacFeather Stearns415 354-7128 44 Upland Hts.Oakland CA USA 94612
756-30-7391 Karsen Livia415 534-9219 5720 McAuley St.Oakland CA USA 94609
Note The output file does not include the command terminator.
Correcting inputIf you make an error when typing a Transact-SQL command, you can:
• Press Ctrl-c or type the word “reset” on a line by itself – this clears the query buffer and returns the isql prompt.
• Type the name of your text editor on a line by itself – this opens a text file where you can edit the query. When you write and save the file, you are returned to isql and the corrected query appears. Type “go” to execute it.
set options that affect outputTable 2-2 lists the set options that affect Transact-SQL output. For more information, see set in the Reference Manual.
CHAPTER 2 Using the isql Utility
Utility Guide 13
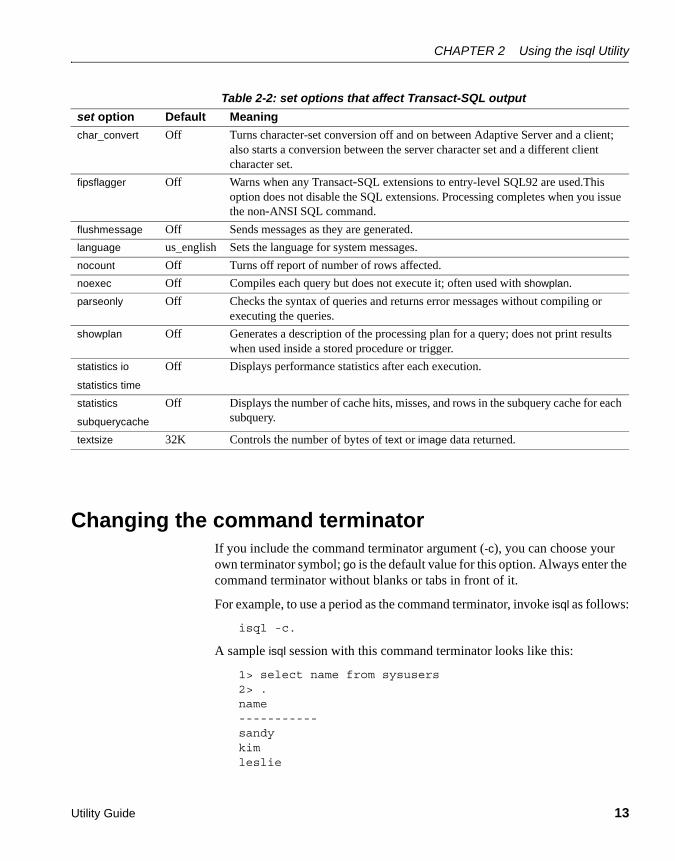
Table 2-2: set options that affect Transact-SQL output
Changing the command terminatorIf you include the command terminator argument (-c), you can choose your own terminator symbol; go is the default value for this option. Always enter the command terminator without blanks or tabs in front of it.
For example, to use a period as the command terminator, invoke isql as follows:
isql -c.
A sample isql session with this command terminator looks like this:
1> select name from sysusers2> .name-----------sandykimleslie
set option Default Meaning
char_convert Off Turns character-set conversion off and on between Adaptive Server and a client; also starts a conversion between the server character set and a different client character set.
fipsflagger Off Warns when any Transact-SQL extensions to entry-level SQL92 are used.This option does not disable the SQL extensions. Processing completes when you issue the non-ANSI SQL command.
flushmessage Off Sends messages as they are generated.
language us_english Sets the language for system messages.
nocount Off Turns off report of number of rows affected.
noexec Off Compiles each query but does not execute it; often used with showplan.
parseonly Off Checks the syntax of queries and returns error messages without compiling or executing the queries.
showplan Off Generates a description of the processing plan for a query; does not print results when used inside a stored procedure or trigger.
statistics io
statistics time
Off Displays performance statistics after each execution.
statistics
subquerycache
Off Displays the number of cache hits, misses, and rows in the subquery cache for each subquery.
textsize 32K Controls the number of bytes of text or image data returned.
Performance statistics interaction with command terminator values
14 Adaptive Server Enterprise
(3 rows affected)
Using the isql command terminator option with scripts requires advance planning:
• Adaptive Server-supplied scripts, such as installmaster, use “go”. Do not change the command terminator for any session that uses these scripts.
• Your own scripts may already have “go” in them. Remember to update your scripts to include the terminator you plan to use.
Performance statistics interaction with command terminator values
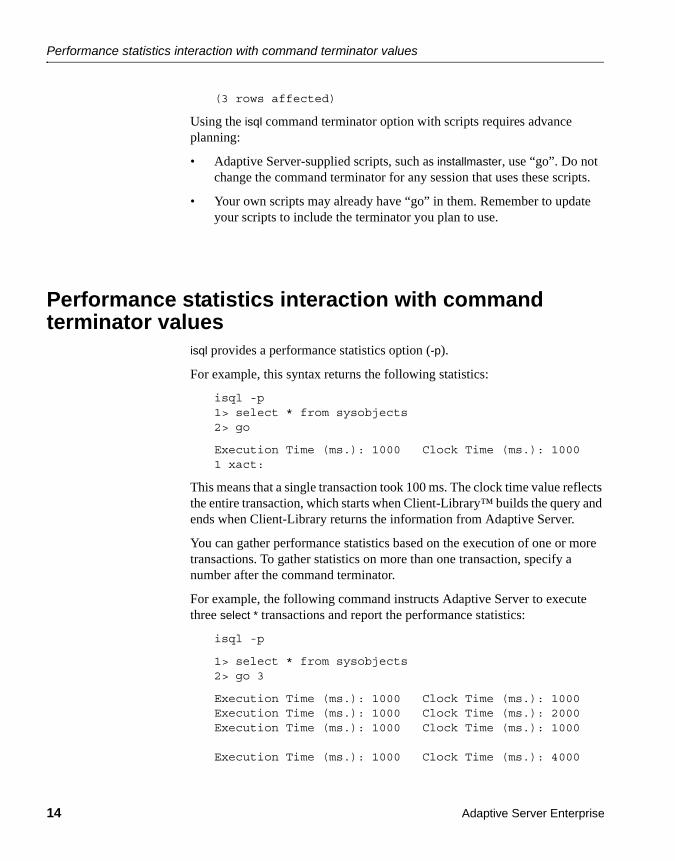
isql provides a performance statistics option (-p).
For example, this syntax returns the following statistics:
isql -p1> select * from sysobjects2> go
Execution Time (ms.): 1000 Clock Time (ms.): 10001 xact:
This means that a single transaction took 100 ms. The clock time value reflects the entire transaction, which starts when Client-Library™ builds the query and ends when Client-Library returns the information from Adaptive Server.
You can gather performance statistics based on the execution of one or more transactions. To gather statistics on more than one transaction, specify a number after the command terminator.
For example, the following command instructs Adaptive Server to execute three select * transactions and report the performance statistics:
isql -p
1> select * from sysobjects2> go 3
Execution Time (ms.): 1000 Clock Time (ms.): 1000Execution Time (ms.): 1000 Clock Time (ms.): 2000Execution Time (ms.): 1000 Clock Time (ms.): 1000
Execution Time (ms.): 1000 Clock Time (ms.): 4000

CHAPTER 2 Using the isql Utility
Utility Guide 15
3xact:
Setting the network packet sizeSetting the correct network packet size can greatly increase the performance of Adaptive Server.
The -A size option specifies the network packet size to use for an isql session. For example, to set the packet size to 2048 bytes for the current isql session, enter:
• In UNIX platforms:
isql -A 2048
• In Windows NT:
load isql -A 2048
To check your network packet size, type:
select * from sysprocesses
The value for this isql session appears under the network_pktsz heading in the sysprocesses table.
See the System Administration Guide for more information about setting the network packet size.
Input and output filesYou can specify input and output files on the command line with the -i and -o options.
isql does not provide formatting options for the output. However, you can use the -n option to eliminate the isql prompts and other tools to reformat the output.
If you use the -e option, isql echoes the input to output. The resulting output file contains both the queries and their results.
Input and output files
16 Adaptive Server Enterprise
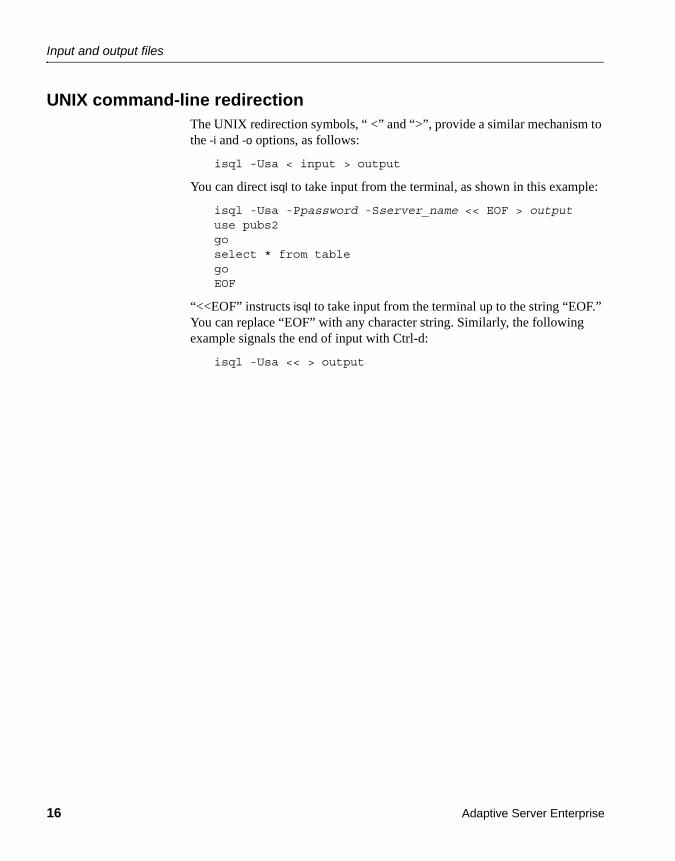
UNIX command-line redirectionThe UNIX redirection symbols, “ <” and “>”, provide a similar mechanism to the -i and -o options, as follows:
isql -Usa < input > output
You can direct isql to take input from the terminal, as shown in this example:
isql -Usa -Ppassword -Sserver_name << EOF > outputuse pubs2goselect * from tablegoEOF
“<<EOF” instructs isql to take input from the terminal up to the string “EOF.” You can replace “EOF” with any character string. Similarly, the following example signals the end of input with Ctrl-d:
isql -Usa << > output

Utility Guide 17
C H A P T E R 3 Using bcp to Transfer Data to and from Adaptive Server
This chapter explains how to use the bulk copy utility, bcp, to move data between Adaptive Server and an operating system file.
bcp provides a convenient, high-speed method for transferring data between a database table or view and an operating system file. bcp can read or write files in a wide variety of formats. When copying in from a file, bcp inserts data into an existing database table; when copying out to a file, bcp overwrites any previous contents of the file.
For a detailed description of bcp syntax, see bcp on page 152.
Topic PageMethods for moving data 18
bcp requirements 19
bcp modes 20
bcp performance 21
Using the bcp options 34
Changing the defaults: interactive bcp 36
Using format files 46
Examples: copying out data interactively 50
Examples: copying in data interactively 53
Using bcp with alternate languages 57
Copy in and batch files 58
Copy out and text and image data 60
Specifying a network packet size 61
Copy in and error files 61
Copy out and error files 62
Data integrity: defaults, rules, and triggers 63
How bcp differs from other utilities 63

Methods for moving data
18 Adaptive Server Enterprise
Methods for moving dataYou can use the following methods to move data to and from your Adaptive Server databases:
• bcp as a standalone program from the operating system. This chapter provides instructions for this method.
• Client-Library, which calls bulk library routines. For more information about the Client-Library, see the Open Client and Open Server Common Libraries Reference Manual.
Importing and exporting data with bcpTransact-SQL commands cannot transfer data in bulk. For this reason, you must use bcp for any large transfers. You can use bcp to:
• Import data that was previously associated with another program, such as the records from another database management system. This is the most common use for bcp.
Before using bcp, you must create a file of the records you want to import. The general steps are:
a Put the data to transfer into an operating system file.
b Run bcp from the operating system command line.
• Move tables between Adaptive Servers or between Adaptive Server and other data sources that can produce an operating-system file.
• Copy out data from a view. See bcp on page 152 for a description of the syntax for using bcp to copy out from a view.
Note You cannot use bcp to copy in data to a view.
• Transfer data for use with other programs, for example, with a spreadsheet program. The general steps to transfer data are:
a Use bcp to move the data from Adaptive Server into an operating-system file from which the other program imports the data.
b When you finish using your data with the other program, copy it into an operating-system file, and then use bcp to copy it into Adaptive Server.
CHAPTER 3 Using bcp to Transfer Data to and from Adaptive Server
Utility Guide 19
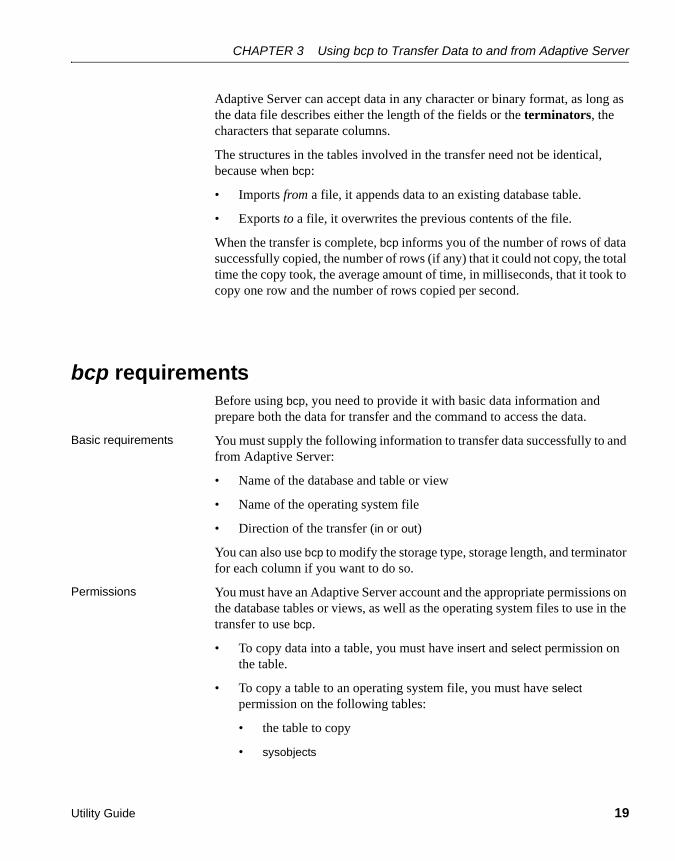
Adaptive Server can accept data in any character or binary format, as long as the data file describes either the length of the fields or the terminators, the characters that separate columns.
The structures in the tables involved in the transfer need not be identical, because when bcp:
• Imports from a file, it appends data to an existing database table.
• Exports to a file, it overwrites the previous contents of the file.
When the transfer is complete, bcp informs you of the number of rows of data successfully copied, the number of rows (if any) that it could not copy, the total time the copy took, the average amount of time, in milliseconds, that it took to copy one row and the number of rows copied per second.
bcp requirementsBefore using bcp, you need to provide it with basic data information and prepare both the data for transfer and the command to access the data.
Basic requirements You must supply the following information to transfer data successfully to and from Adaptive Server:
• Name of the database and table or view
• Name of the operating system file
• Direction of the transfer (in or out)
You can also use bcp to modify the storage type, storage length, and terminator for each column if you want to do so.
Permissions You must have an Adaptive Server account and the appropriate permissions on the database tables or views, as well as the operating system files to use in the transfer to use bcp.
• To copy data into a table, you must have insert and select permission on the table.
• To copy a table to an operating system file, you must have select permission on the following tables:
• the table to copy
• sysobjects
bcp modes
20 Adaptive Server Enterprise
• syscolumns
• sysindexes
Pre-transfer tasks Before you can use bcp in, you must prepare the command and the data for transfer:
• To use either fast or slow bcp, set select into/bulkcopy/pllsort to true. For example, to turn on this option for the pubs2 database, you would enter:
sp_dboption pubs2, "select into/bulkcopy/pllsort", true
For more information, see “bcp modes” on page 20.
• To use fast bcp, remove indexes and triggers on the target table. For more information about this requirement, see “bcp performance” on page 21.
In addition:
• If you are running Open Client version 11.1 or later and are using an external Sybase configuration file, you must addthe following to enable bcp:
[BCP]
• You must set the SYBASE environment variable to the location of the current version of Adaptive Server before you can use bcp.
• To use a previous version of bcp, you must set the CS_BEHAVIOR property in the [bcp] section of the ocs.cfg file:
[bcp]
CS_BEHAVIOR = CS_BEHAVIOR_100
If CS_BEHAVIOR is not set to CS_BEHAVIOR_100, you can use functionality for bcp 11.1 and later.
bcp modesbcp in works in one of two modes:
• Fast bcp – logs each row insert that it makes, used for tables that have one or more indexes or triggers.
• Slow bcp – logs only page allocations, copying data into tables without indexes or triggers at the fastest speed possible.
CHAPTER 3 Using bcp to Transfer Data to and from Adaptive Server
Utility Guide 21
To determine the bcp mode that is best for your copying task, consider the:
• Size of the table into which you are copying data
• Amount of data that you are copying in
• Number of indexes on the table
• Amount of spare database device space that you have for re-creating indexes
Note Fast bcp might enhance performance; however, slow bcp gives you greater data recoverability.
bcp performanceKeeping indexes and triggers on a table causes the bulk copy utility to use slow bcp automatically. However, slow bcp can fill the transaction log very quickly.
• When you are copying a large number of rows, the performance penalty and log space requirements for using slow bcp can be severe.
• For extremely large tables, using slow bcp is not an option because its detailed log makes it much too slow.
To improve the performance of bcp:
• Use partitioned tables. Several bcp sessions with a partitioned table can reduce dramatically the time required to copy the data. However, such performance improvements are more noticeable in fast bcp than in slow bcp.
• Use bcp in parallel to increase performance dramatically. Parallel bulk copy can provide balanced data distribution across partitions. For more information, see “Using parallel bulk copy to copy data into a specific partition” on page 27.

bcp performance
22 Adaptive Server Enterprise
Using fast or slow bcpThe existence of indexes and triggers on tables affects transfer speed. When you use bcp on such tables, bcp automatically uses its slow mode, which logs data inserts in the transaction log. These logged inserts can cause the transaction log to become very large.
To control this data excess and ensure that the database is fully recoverable in the event of a failure, you can back up the log with dump transaction.
Note bcp does not fire any trigger that exists on the target table.
Fast bcp logs only the page allocations. For copying data in, bcp is fastest if your database table has no indexes or triggers.
However, if you used fast bcp to make data inserts, which fast bcp does not log, you cannot back up (dump) the transaction log to a device. The changes are not in the log, and a restore cannot recover nonexistent backup data. The requested backup (dump transaction) produces an error message that instructs you to use dump database instead. This restriction remains in force until a dump database successfully completes.
For more information about dump database and dump transaction, see the System Administration Guide, and the Reference Manual.
Copying tables with indexes or triggers
The bcp program is optimized to load data into tables that do not have indexes or triggers associated with them. It loads data into tables without indexes or triggers at the fastest possible speed, with a minimum of logging. Page allocations are logged, but the insertion of rows is not.
When you copy data into a table that has one or more indexes or triggers, a slower version of bcp is automatically used, which logs row inserts. This includes indexes implicitly created using the unique integrity constraint of a create table statement. However, bcp does not enforce the other integrity constraints defined for a table.
CHAPTER 3 Using bcp to Transfer Data to and from Adaptive Server
Utility Guide 23
By default, the select into/bulkcopy/pllsort option is false (off) in newly created databases. To change the default situation, turn this option on in the model database.
Note The log can grow very large during slow bcp because bcp logs inserts into a table that has indexes or triggers. After the bulk copy completes, back up your database with dump database, then truncate the log with dump transaction after the bulk copy completes and after you have backed up your database with dump database.
While the select into/bulkcopy/pllsort option is on, you cannot dump the transaction log. Issuing dump transaction produces an error message instructing you to use dump database instead.
Warning! Be certain that you dump your database before you turn off the select into/bulkcopy/pllsort flag. If you have inserted unlogged data into your database, and you then perform a dump transaction before performing a dump database, you will not be able to recover your data.
Fast bcp runs more slowly while a dump database is taking place.
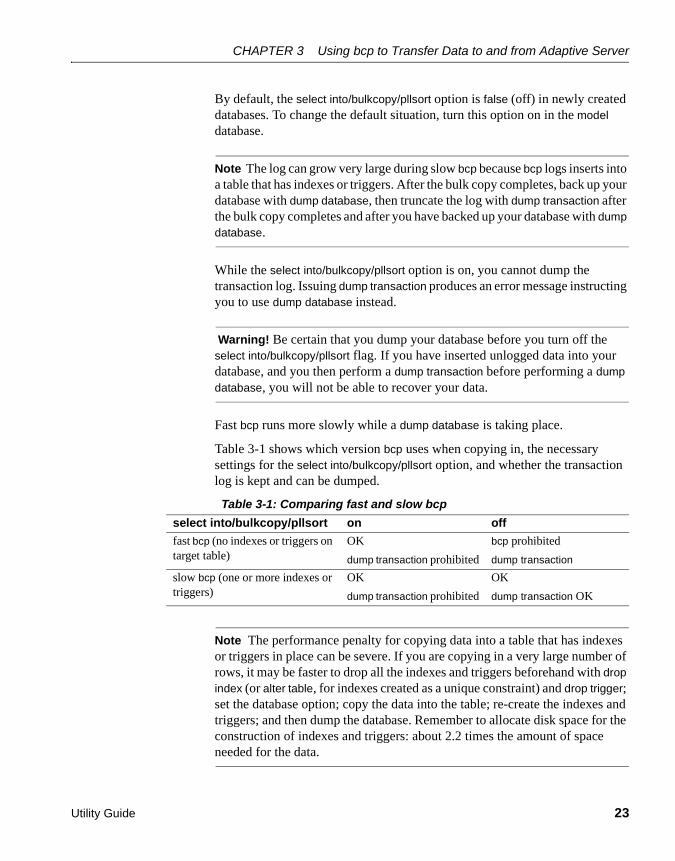
Table 3-1 shows which version bcp uses when copying in, the necessary settings for the select into/bulkcopy/pllsort option, and whether the transaction log is kept and can be dumped.
Table 3-1: Comparing fast and slow bcp
Note The performance penalty for copying data into a table that has indexes or triggers in place can be severe. If you are copying in a very large number of rows, it may be faster to drop all the indexes and triggers beforehand with drop index (or alter table, for indexes created as a unique constraint) and drop trigger; set the database option; copy the data into the table; re-create the indexes and triggers; and then dump the database. Remember to allocate disk space for the construction of indexes and triggers: about 2.2 times the amount of space needed for the data.
select into/bulkcopy/pllsort on off
fast bcp (no indexes or triggers on target table)
OK
dump transaction prohibited
bcp prohibited
dump transaction
slow bcp (one or more indexes or triggers)
OK
dump transaction prohibited
OK
dump transaction OK

bcp performance
24 Adaptive Server Enterprise
Configuring databases for fast bcp
To allow a user to copy in data using fast bcp, either a System Administrator or the Database Owner first must use sp_dboption to set select into/bulkcopy/pllsort to true on the database that contains the target table or tables. If the option is set to false when a user tries to use fast bcp to copy data into a table without indexes or triggers, Adaptive Server generates an error message.
Note You do not need to set the select into/bulkcopy/pllsort option to true to copy out data from, or to copy in data to a table that has indexes or triggers. Slow bcp always copies tables with indexes or triggers and logs all inserts.
By default, the select into/bulkcopy/pllsort option is set to false (off) in newly created databases. To change the default setting for future databases, turn this option on (set to true) in the model database.
Dropping indexes and triggers
If you are copying a very large number of rows, you must have 1.2 times the amount of space needed for the data and enough space for the server to reconstruct a clustered index.
• If space is available, you can use drop index and drop trigger to drop all the indexes and triggers beforehand.
• If you do not have enough space for the server to sort the data and build the index or indexes, use slow bcp.
Copying in data with fast bcpTable 3-2 summarizes the steps for copying in data to Adaptive Server using fast bcp.
Table 3-2: Steps for copying in data using fast bcp
Step Who can do it
Use sp_dboption to set select into/bulkcopy/pllsort to true.
Run checkpoint in the database that was changed.
System Administrator or Database Owner
Have enough space to re-create any indexes and triggers on the table.
Drop the indexes and triggers on the table.
Table owner
Have insert permission on the table. Granted by the table owner
Perform the copy with bcp. Any user with insert permission
Re-create the indexes and triggers. Table owner
Reset sp_dboption, if desired, and run checkpoint in the database that was changed.
System Administrator or Database Owner
CHAPTER 3 Using bcp to Transfer Data to and from Adaptive Server
Utility Guide 25
Bulk copying data into partitioned tablesIn certain circumstances, you can improve bcp performance dramatically by executing several bcp sessions with a partitioned table.
Partitioned tables improve insert performance by reducing lock contention and by distributing I/O over multiple devices. bcp performance with partitioned tables is improved primarily because of this distributed I/O.
When you execute a bcp session on a partitioned table, consider:
• A partitioned table improves performance only when you are bulk copying in to the table.
• The performance of slow bcp does not improve as much with partitioned tables. Instead, drop all indexes and triggers and use fast bcp, as described in Table 3-2 on page 24, to increase performance.
• Network traffic can quickly become a bottleneck when multiple bcp sessions are being executed. If possible, use a local connection to the Adaptive Server to avoid this bottleneck.
To copy data into a partitioned heap table, you can either:
• Copy the data randomly without regard to the partition to which data is copied, or
• Copy the data into a specific partition
If the table has a clustered index, bcp runs in slow mode and allows the index to control the placement of rows.
❖ Copying data randomly into partitions
To copy data randomly into partitioned tables when using multiple bcp sessions, you must:
1 Configure the table with as many partitions and physical devices as you require for your system.
Use dump database to back up the newly inserted data. System Administrator, Operator, or Database Owner
Run stored procedures or queries to determine whether any of the newly loaded data violates rules.
Table owner or stored procedure owner
Step Who can do it

bcp performance
26 Adaptive Server Enterprise
For more information, see the Performance and Tuning Guide, and “Using parallel bulk copy to copy data into a specific partition” on page 27 of this manual.
2 Make sure Adaptive Server is configured with enough locks to support multiple bcp sessions. For information on configuring locks, see the System Administration Guide.
3 Remove the triggers and indexes on the table and enable fast bcp. See “Using fast or slow bcp” on page 22 for instructions.
Note If you use slow bcp, performance may not improve significantly after you remove the triggers and indexes. Also, if the table contains indexes, you may experience deadlocks on the index pages.
4 Divide the bcp input file into as many files of equal size as the number of planned simultaneous bcp sessions.
You also can use the -F first_row and -L last_row options to specify the start and end of each “input file.”
5 Execute the bcp sessions with separate files in parallel on the local Adaptive Server machine.
For example, on UNIX platforms, you can execute different sessions in different shell windows or start individual bcp sessions in the background.
Read the Performance and Tuning Guide for a detailed description of copying data into partitioned tables.
Monitoring bcp sessions with dbcc checktable and sp_helpsegment
If you do not specify which partition the bcp sessions should use, Adaptive Server randomly assigns the multiple bcp sessions to the table’s available partitions. If this random assignment occurs, be sure to monitor the partitions to ensure that the process has evenly distributed the inserts by using either of the following:
• dbcc checktable – to periodically to check the total page counts for each partition
• sp_helpsegment or sp_helpartition – to perform a similar check, but without locking the database objects

CHAPTER 3 Using bcp to Transfer Data to and from Adaptive Server
Utility Guide 27
For more information about dbcc checktable, see the System Administration Guide. For more information about sp_helpsegment and sp_helpartition, see the Reference Manual.
For more information about table partitions, see the Performance and Tuning Guide.
Reducing logging by increasing page allocations
If you are using fast bcp, consider that each bcp in batch requires the page manager to allocate one or more extents. Each such allocation generates a single log record.
Use the number of preallocated extents configuration parameter to specify how many extents Adaptive Server is to allocate through the page manager.
• Valid values for the number of preallocated extents configuration parameter are from 0 to 31; the default value is 2.
• You must restart Adaptive Server to change the value.
• When performing large bcp operations, increase this number to prevent the page allocations from filling the log.
• Set this value to 0 to prevent large extent allocations, so that the page manager performs only single-page allocations.
Adaptive Server may allocate more pages than are actually needed, so keep the value small when space is limited. These pages are deallocated at the end of the batch.
For more information, see the System Administration Guide.
Using parallel bulk copy to copy data into a specific partitionUse parallel bulk copy to copy data in parallel to a specific partition. Parallel bulk copy substantially increases performance during bcp sessions because it can split large bulk copy jobs into multiple sessions and run the sessions concurrently.
To use parallel bulk copy:
• The destination table must be partitioned.
• Use sp_helpartition to see the number of partitions on the table.

bcp performance
28 Adaptive Server Enterprise
• Use alter table ... partition to partition the table, if the table is not already partitioned.
• The destination table should not contain indexes because:
• If the table has a clustered index, this index determines the physical placement of the data, causing the partition specification in the bcp command to be ignored.
• If any indexes exist, bcp automatically uses its slow bulk copy instead of its fast bulk copy mode.
• If nonclustered indexes exist on the tables, parallel bulk copy is likely to lead to deadlocks on index pages.
• Each partition should reside on a separate physical disk for the best performance.
• Before you copy data into your database, you must partition the table destined to contain the data.
• Parallel bulk copy can copy in to a table from multiple operating system files. To do so, use:
bcp tablename :partition_number in file_name
Figure 3-1 illustrates the parallel bulk copy process.
CHAPTER 3 Using bcp to Transfer Data to and from Adaptive Server
Utility Guide 29
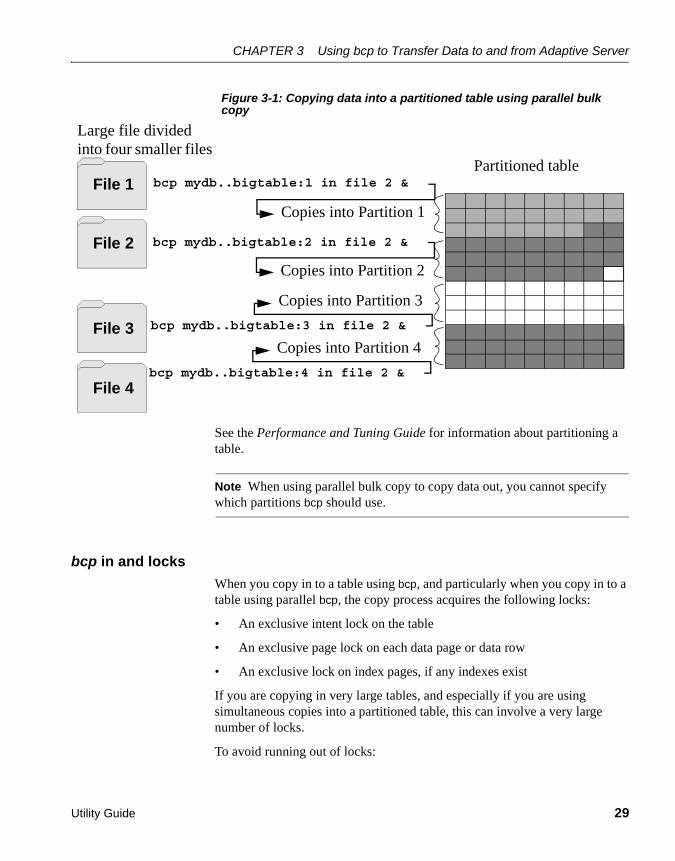
Figure 3-1: Copying data into a partitioned table using parallel bulk copy
See the Performance and Tuning Guide for information about partitioning a table.
Note When using parallel bulk copy to copy data out, you cannot specify which partitions bcp should use.
bcp in and locks
When you copy in to a table using bcp, and particularly when you copy in to a table using parallel bcp, the copy process acquires the following locks:
• An exclusive intent lock on the table
• An exclusive page lock on each data page or data row
• An exclusive lock on index pages, if any indexes exist
If you are copying in very large tables, and especially if you are using simultaneous copies into a partitioned table, this can involve a very large number of locks.
To avoid running out of locks:
Large file divided into four smaller files
bcp mydb..bigtable:1 in file 2 &Partitioned table
Copies into Partition 1
bcp mydb..bigtable:2 in file 2 &File 2
Copies into Partition 2
bcp mydb..bigtable:3 in file 2 &
Copies into Partition 3
bcp mydb..bigtable:4 in file 2 &File 4
Copies into Partition 4
File 1
File 3
bcp performance
30 Adaptive Server Enterprise
• Increase the number of locks.
• To estimate the number of locks needed, use:
# of simultaneous batches * (rows_per_batch / (2016/row_length))
• To see the row length for a table, use:
1> select maxlen2> from sysindexes3> where id = object_id("tablename") and (indid = 0 or indid = 1)
See the System Administration Guide for more information about setting the number of locks.
• Use the -b batchsize flag to copy smaller batches; the default batch size is 1000 rows.
• Run fewer batches concurrently.
Parallel bulk copy methods
Use one of the following methods to copy in data using parallel bulk copy:
• Start multiple bcp sessions in the background, being sure to:
• Specify the password at the command line.
• Use native mode, character mode, or a format file.
You can start bcp as many times as the table is partitioned.
• Create and use a format file:
a Start bcp in interactive mode.
b Answer the prompts.
c Create a format file that stores your responses.
d Put the process in the background when the copy begins.
e Issue the next bcp command, and specify the format file created with the first bcp command.
• Start bcp sessions in multiple windows.
Parallel bulk copy syntax
The syntax for parallel bulk copy is:
bcp table_name[:partition_number] in file_name -Pmypassword
CHAPTER 3 Using bcp to Transfer Data to and from Adaptive Server
Utility Guide 31
Where:
• table_name is the name of the table into which you are copying the data
• partition_number is the number of the partition into which you are copying
• file_name is the host file that contains the data
• mypassword is your password
Using parallel bulk copy on partitioned tables
To copy sorted data in parallel into a specific partition:
• Specify the partition by appending a colon (:) plus the partition number to the table name. For example:
publishers:10
Note The partition you specify must exist before you issue the bcp command.
• Split the sorted data into separate files, or delineate the “files” by specifying the first row (-F first_row) and the last row (-L last_row) of the host file.
• Note the number of partitions in the table. This number limits the number of parallel bulk copy sessions that you can start.
For example, if a table has four partitions, and you start five parallel bulk copy jobs, only the first four jobs can run in parallel; the fifth job does not start until one of the first four jobs finish.
bcp copies each file or set of line numbers to a separate partition. For example, to use parallel bulk copy to copy in sorted data to mydb..bigtable from four files into four partitions, enter:
bcp mydb..bigtable:1 in file1 -Pmypassword -c &bcp mydb..bigtable:2 in file2 -Pmypassword -c &bcp mydb..bigtable:3 in file3 -Pmypassword -c &bcp mydb..bigtable:4 in file4 -Pmypassword -c &

bcp performance
32 Adaptive Server Enterprise
Parallel bulk copy and IDENTITY columns
When you are using parallel bulk copy, IDENTITY columns can cause a bottleneck. As bcp reads in the data, the utility both generates the values of the IDENTITY column and updates the IDENTITY column’s maximum value for each row. This extra work may adversely affect the performance improvement that you expected to receive from using parallel bulk copy.
To avoid this bottleneck, you can explicitly specify the IDENTITY starting point for each session.
Retaining sort order
If you copy sorted data into the table without explicitly specifying the IDENTITY starting point, bcp might not generate the IDENTITY column values in sorted order. Parallel bulk copy reads the information into all the partitions simultaneously and updates the values of the IDENTITY column as it reads in the data.
A bcp statement with no explicit starting point would produce IDENTITY column numbers similar to those shown in Figure 3-2:
Figure 3-2: Producing IDENTITY columns in sorted order
The table has a maximum IDENTITY column number of 119, but the order is no longer meaningful.
If you want Adaptive Server to enforce unique IDENTITY column values, you must run bcp with either the -g or -E parameter.
Specifying the starting point from the command line
Use the -g id_start_value flag to specify an IDENTITY starting point for a session in the command line.
ID column
Partition 1 Partition 2 Partition 3 Partition 4
100 A104 A107 B108 B114 B
ID column
102 C106 C109 C112 D117 E
ID column
103 F105 F111 F116 G119 G
ID column
101 H110 H113 I115 J118 J
CHAPTER 3 Using bcp to Transfer Data to and from Adaptive Server
Utility Guide 33
The -g parameter instructs Adaptive Server to generate a sequence of IDENTITY column values for the bcp session without checking and updating the maximum value of the table’s IDENTITY column for each row. Instead of checking, Adaptive Server updates the maximum value at the end of each batch.
Warning! Be cautious about creating duplicate identity values inadvertently when you specify identity value ranges that overlap.
To specify a starting IDENTITY value, enter:
bcp [-gid_start_value]
For example, to copy in four files, each of which has 100 rows, enter:
bcp mydb..bigtable in file1 -g100bcp mydb..bigtable in file2 -g200bcp mydb..bigtable in file3 -g300bcp mydb..bigtable in file4 -g400
Using the -g parameter does not guarantee that the IDENTITY column values are unique. To ensure uniqueness, you must:
• Know how many rows are in the input files and what the highest existing value is. Use this information to set the starting values with the -g parameter and generate ranges that do not overlap.
In the example above, if any file contains more than 100 rows, the identity values overlap into the next 100 rows of data, creating duplicate identity values.
• Make sure that no one else is inserting data that can produce conflicting IDENTITY values.
Specifying the starting point using the data file
Use the -E parameter to set the IDENTITY starting point explicitly from the data file.
The -E parameter instructs bcp to prompt you to enter an explicit IDENTITY column value for each row. If the number of inserted rows exceeds the maximum possible IDENTITY column value, Adaptive Server returns an error.
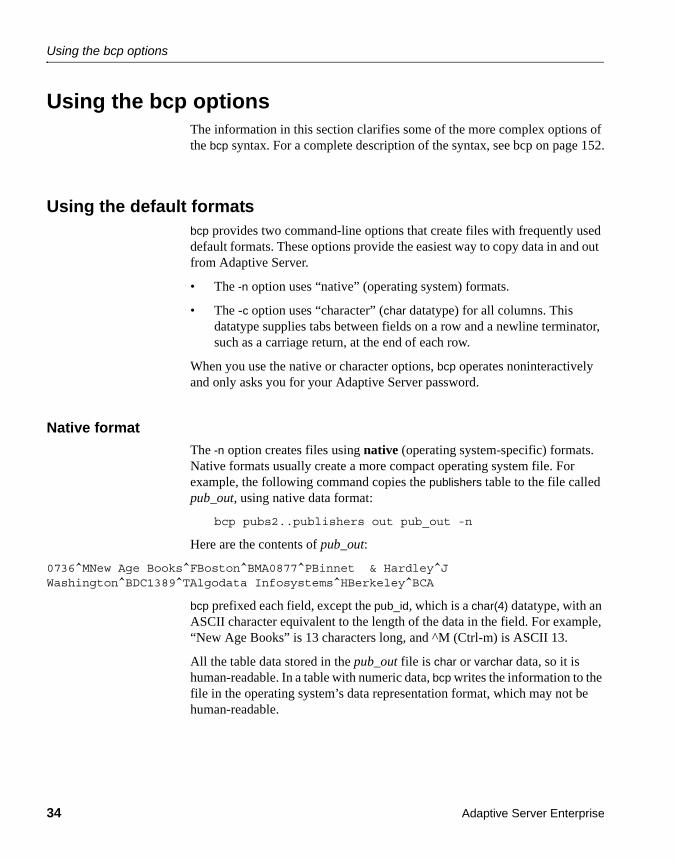
Using the bcp options
34 Adaptive Server Enterprise
Using the bcp optionsThe information in this section clarifies some of the more complex options of the bcp syntax. For a complete description of the syntax, see bcp on page 152.
Using the default formatsbcp provides two command-line options that create files with frequently used default formats. These options provide the easiest way to copy data in and out from Adaptive Server.
• The -n option uses “native” (operating system) formats.
• The -c option uses “character” (char datatype) for all columns. This datatype supplies tabs between fields on a row and a newline terminator, such as a carriage return, at the end of each row.
When you use the native or character options, bcp operates noninteractively and only asks you for your Adaptive Server password.
Native format
The -n option creates files using native (operating system-specific) formats. Native formats usually create a more compact operating system file. For example, the following command copies the publishers table to the file called pub_out, using native data format:
bcp pubs2..publishers out pub_out -n
Here are the contents of pub_out:
0736^MNew Age Books^FBoston^BMA0877^PBinnet & Hardley^JWashington^BDC1389^TAlgodata Infosystems^HBerkeley^BCA
bcp prefixed each field, except the pub_id, which is a char(4) datatype, with an ASCII character equivalent to the length of the data in the field. For example, “New Age Books” is 13 characters long, and ^M (Ctrl-m) is ASCII 13.
All the table data stored in the pub_out file is char or varchar data, so it is human-readable. In a table with numeric data, bcp writes the information to the file in the operating system’s data representation format, which may not be human-readable.
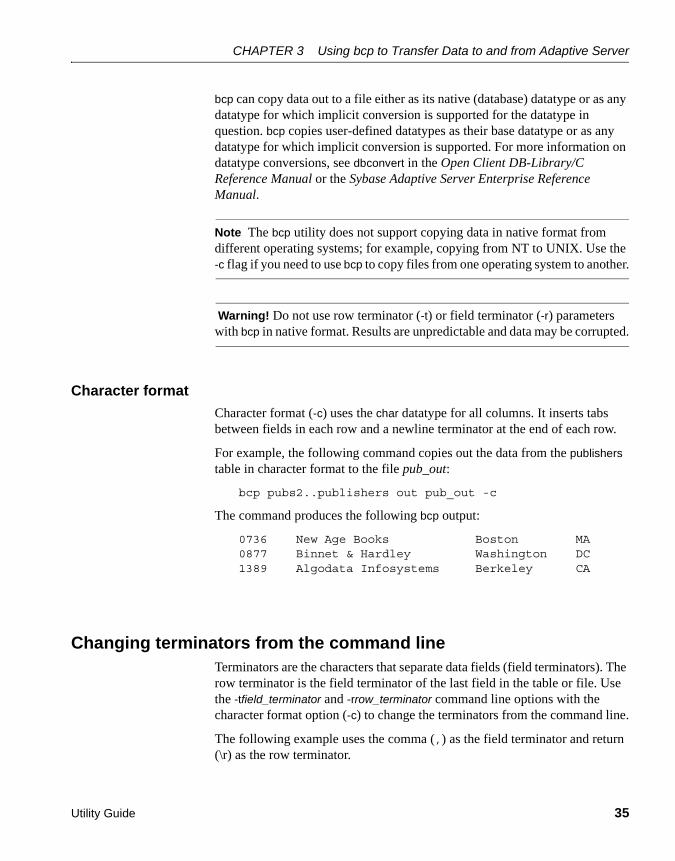
CHAPTER 3 Using bcp to Transfer Data to and from Adaptive Server
Utility Guide 35
bcp can copy data out to a file either as its native (database) datatype or as any datatype for which implicit conversion is supported for the datatype in question. bcp copies user-defined datatypes as their base datatype or as any datatype for which implicit conversion is supported. For more information on datatype conversions, see dbconvert in the Open Client DB-Library/C Reference Manual or the Sybase Adaptive Server Enterprise Reference Manual.
Note The bcp utility does not support copying data in native format from different operating systems; for example, copying from NT to UNIX. Use the -c flag if you need to use bcp to copy files from one operating system to another.
Warning! Do not use row terminator (-t) or field terminator (-r) parameters with bcp in native format. Results are unpredictable and data may be corrupted.
Character format
Character format (-c) uses the char datatype for all columns. It inserts tabs between fields in each row and a newline terminator at the end of each row.
For example, the following command copies out the data from the publishers table in character format to the file pub_out:
bcp pubs2..publishers out pub_out -c
The command produces the following bcp output:
0736 New Age Books Boston MA0877 Binnet & Hardley Washington DC1389 Algodata Infosystems Berkeley CA
Changing terminators from the command lineTerminators are the characters that separate data fields (field terminators). The row terminator is the field terminator of the last field in the table or file. Use the -tfield_terminator and -rrow_terminator command line options with the character format option (-c) to change the terminators from the command line.
The following example uses the comma (,) as the field terminator and return (\r) as the row terminator.

Changing the defaults: interactive bcp
36 Adaptive Server Enterprise
• In UNIX platforms:
bcp pubs2..publishers out pub_out -c -t , -r \\r
Remember to “escape” the backslash, if necessary, for your operating system command shell.
• In Windows NT:
bcp pubs2..publishers out pub_out -c -t , -r \r
This bcp command line produces the following information:
0736,New Age Books,Boston,MA0877,Binnet & Hardley,Washington,DC1389,Algodata Infosystems,Berkeley,CA
Note You can use the -t and -r options to change the default terminators without including the character option (-c).
Changing the defaults: interactive bcpIf you do not specify native (-n) or character (-c) format, bcp prompts you interactively for:
• The file storage type
• The prefix length
• The terminator for each column of data to be copied
• A field length for fields that are to be stored as char or binary
The default values for these prompts produce the same results as using the native format and provide a simple means for copying data out of a database for later reloading into Adaptive Server.
If you are copying data to or from Adaptive Server for use with other programs, base your answers to the prompts on the format required by the other software.
These four prompts provide an extremely flexible system that allows you either to read a file from other software or to create a file that requires little or no editing to conform to many other data formats.
The following sections discuss these prompts and the way they interact to affect the data.
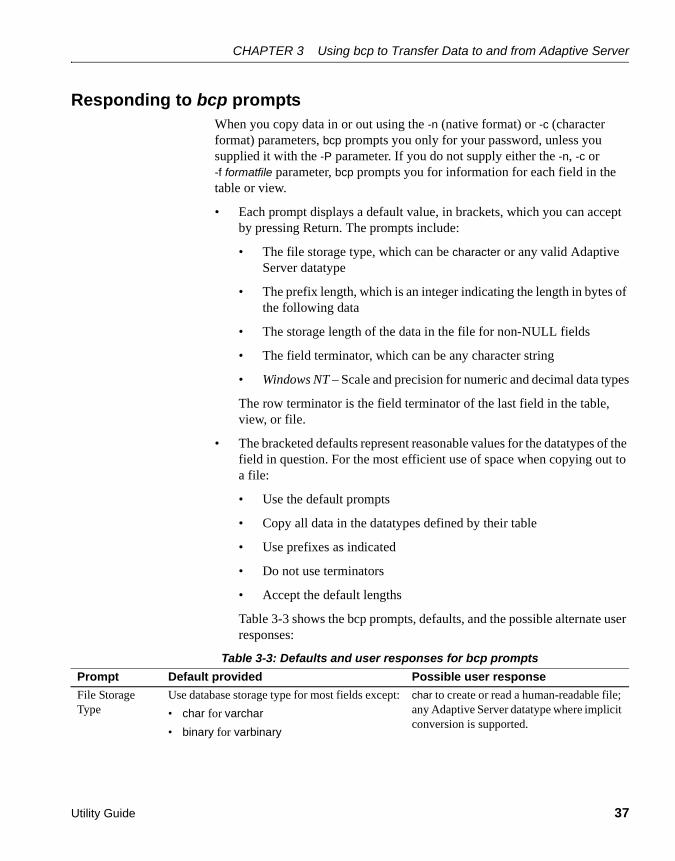
CHAPTER 3 Using bcp to Transfer Data to and from Adaptive Server
Utility Guide 37
Responding to bcp promptsWhen you copy data in or out using the -n (native format) or -c (character format) parameters, bcp prompts you only for your password, unless you supplied it with the -P parameter. If you do not supply either the -n, -c or -f formatfile parameter, bcp prompts you for information for each field in the table or view.
• Each prompt displays a default value, in brackets, which you can accept by pressing Return. The prompts include:
• The file storage type, which can be character or any valid Adaptive Server datatype
• The prefix length, which is an integer indicating the length in bytes of the following data
• The storage length of the data in the file for non-NULL fields
• The field terminator, which can be any character string
• Windows NT – Scale and precision for numeric and decimal data types
The row terminator is the field terminator of the last field in the table, view, or file.
• The bracketed defaults represent reasonable values for the datatypes of the field in question. For the most efficient use of space when copying out to a file:
• Use the default prompts
• Copy all data in the datatypes defined by their table
• Use prefixes as indicated
• Do not use terminators
• Accept the default lengths
Table 3-3 shows the bcp prompts, defaults, and the possible alternate user responses:
Table 3-3: Defaults and user responses for bcp prompts
Prompt Default provided Possible user response
File Storage Type
Use database storage type for most fields except:
• char for varchar
• binary for varbinary
char to create or read a human-readable file; any Adaptive Server datatype where implicit conversion is supported.

Changing the defaults: interactive bcp
38 Adaptive Server Enterprise
File storage typeThe file storage type prompt offers you choices about how to store the data in the file. You can copy data into a file as:
• Its database table type,
• A character string, or
• Any datatype for which implicit conversion is supported.
Note bcp copies user-defined datatypes as their base types.
Table 3-4 shows the default storage type for each Adaptive Server datatype and the abbreviations that are acceptable to bcp.
• For the most compact storage, use the default value.
• For character files, use char.
• Keep in mind that the date storage type is the Adaptive Server internal storage format of datetime, not the host operating system format of the date.
Prefix Length • 0 for fields defined with char datatype (not storage type) and all fixed-length datatypes
• 1 for most other datatypes
• 2 for binary and varbinary saved as char
• 4 for text and image
0 if no prefix is desired; otherwise, defaults are recommended.
Storage Length • For char and varchar, use defined length.
• For binary and varbinary saved as char, use double the defined length.
• For all other datatypes, use maximum length needed to avoid truncation or data overflow.
Default values, or greater, are recommended.
Field or Row Terminator
None Up to 30 characters, or one of the following:
• \t – tab
• \n – newline
• \r – carriage return
• \0 – null terminator
• \ – backslash
Prompt Default provided Possible user response

CHAPTER 3 Using bcp to Transfer Data to and from Adaptive Server
Utility Guide 39
• timestamp data is treated as binary(8).
In Table 3-4, brackets [ ] indicate that you can use the initial character or the beginning characters of the word. For example, for “bit” you can use “b,” “bi,” or “bit.”
Table 3-4: File storage datatypes for bcp
To display this list while using bcp interactively, type a question mark (?) in response to the prompt “Enter the file storage type”.
The suggested values that appear in the prompts are the defaults. Remember that your response determines how the data is stored in the output file; you need not indicate the column’s type in the database table.
bcp fails if you enter a type that is not either implicitly convertible or char. For example, you may not be able to use smallint for int data (you may get overflow errors), but you can use int for smallint.
When storing noncharacter datatypes as their database types, bcp writes the data to the file in Adaptive Server’s internal data representation format for the host operating system, rather than in human-readable form.
Table datatype Storage type
char, varchar c[har]
text T[ext]
int i[nt]
smallint s[mallint]
tinyint t[inyint]
float f[loat]
money m[oney]
bit b[it]
datetime d[atetime]
binary, varbinary, timestamp x
image I[mage]
smalldatetime D
real r
smallmoney M
numeric n
decimal e
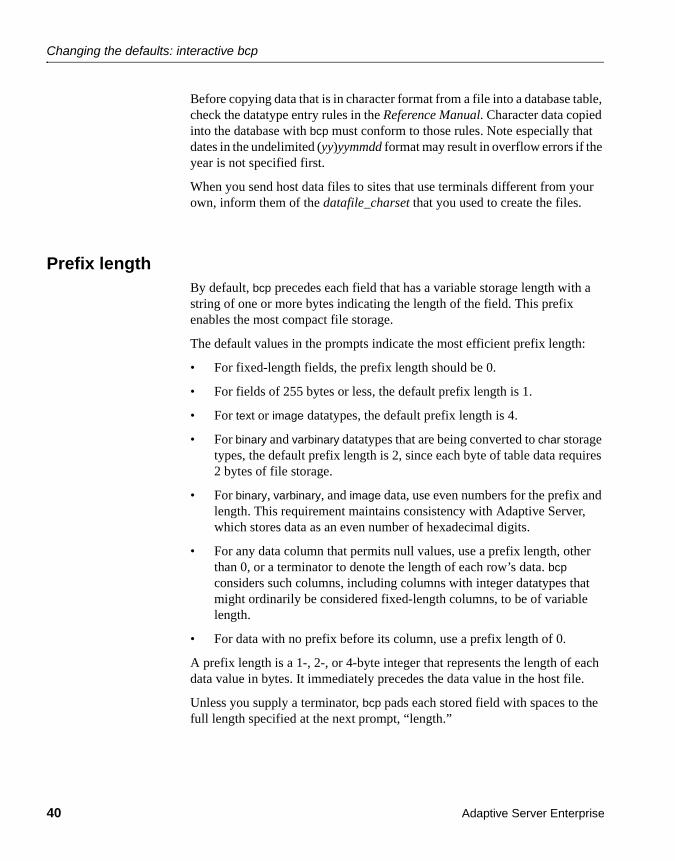
Changing the defaults: interactive bcp
40 Adaptive Server Enterprise
Before copying data that is in character format from a file into a database table, check the datatype entry rules in the Reference Manual. Character data copied into the database with bcp must conform to those rules. Note especially that dates in the undelimited (yy)yymmdd format may result in overflow errors if the year is not specified first.
When you send host data files to sites that use terminals different from your own, inform them of the datafile_charset that you used to create the files.
Prefix lengthBy default, bcp precedes each field that has a variable storage length with a string of one or more bytes indicating the length of the field. This prefix enables the most compact file storage.
The default values in the prompts indicate the most efficient prefix length:
• For fixed-length fields, the prefix length should be 0.
• For fields of 255 bytes or less, the default prefix length is 1.
• For text or image datatypes, the default prefix length is 4.
• For binary and varbinary datatypes that are being converted to char storage types, the default prefix length is 2, since each byte of table data requires 2 bytes of file storage.
• For binary, varbinary, and image data, use even numbers for the prefix and length. This requirement maintains consistency with Adaptive Server, which stores data as an even number of hexadecimal digits.
• For any data column that permits null values, use a prefix length, other than 0, or a terminator to denote the length of each row’s data. bcp considers such columns, including columns with integer datatypes that might ordinarily be considered fixed-length columns, to be of variable length.
• For data with no prefix before its column, use a prefix length of 0.
A prefix length is a 1-, 2-, or 4-byte integer that represents the length of each data value in bytes. It immediately precedes the data value in the host file.
Unless you supply a terminator, bcp pads each stored field with spaces to the full length specified at the next prompt, “length.”
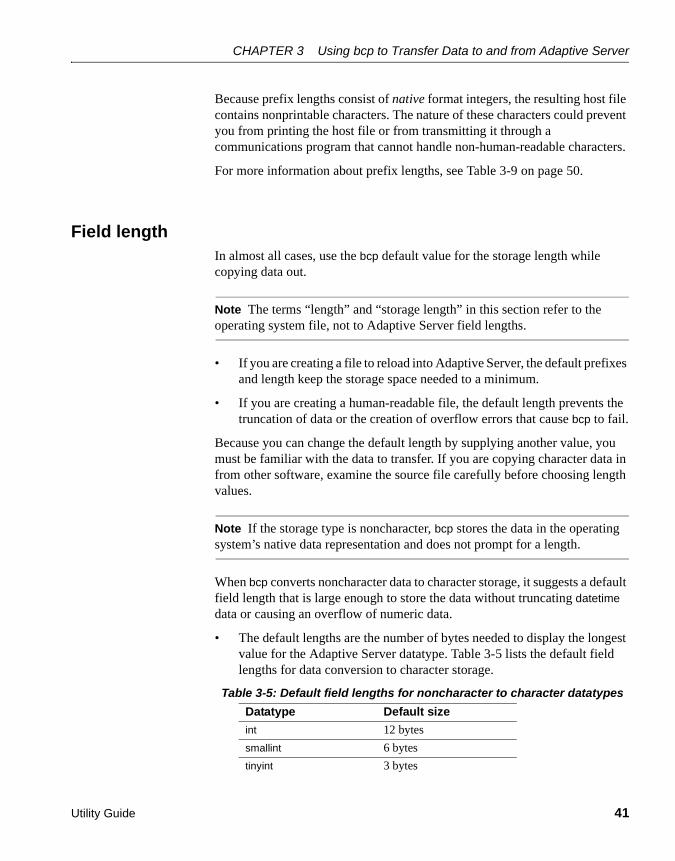
CHAPTER 3 Using bcp to Transfer Data to and from Adaptive Server
Utility Guide 41
Because prefix lengths consist of native format integers, the resulting host file contains nonprintable characters. The nature of these characters could prevent you from printing the host file or from transmitting it through a communications program that cannot handle non-human-readable characters.
For more information about prefix lengths, see Table 3-9 on page 50.
Field lengthIn almost all cases, use the bcp default value for the storage length while copying data out.
Note The terms “length” and “storage length” in this section refer to the operating system file, not to Adaptive Server field lengths.
• If you are creating a file to reload into Adaptive Server, the default prefixes and length keep the storage space needed to a minimum.
• If you are creating a human-readable file, the default length prevents the truncation of data or the creation of overflow errors that cause bcp to fail.
Because you can change the default length by supplying another value, you must be familiar with the data to transfer. If you are copying character data in from other software, examine the source file carefully before choosing length values.
Note If the storage type is noncharacter, bcp stores the data in the operating system’s native data representation and does not prompt for a length.
When bcp converts noncharacter data to character storage, it suggests a default field length that is large enough to store the data without truncating datetime data or causing an overflow of numeric data.
• The default lengths are the number of bytes needed to display the longest value for the Adaptive Server datatype. Table 3-5 lists the default field lengths for data conversion to character storage.
Table 3-5: Default field lengths for noncharacter to character datatypes
Datatype Default size
int 12 bytes
smallint 6 bytes
tinyint 3 bytes

Changing the defaults: interactive bcp
42 Adaptive Server Enterprise
• If you specify a field length that is too short for numeric data when copying data out, bcp prints an overflow message and does not copy the data.
• The default length for binary and varbinary fields is twice the length defined for the column, since each byte of the field requires 2 bytes of file storage.
• If you accept the default storage length, the actual amount of storage space allocated depends on whether or not you specify a prefix length and terminators.
• If you specify a prefix length of 1, 2, or 4, bcp uses a storage space of the actual length of the data, plus the length of the prefix, plus any terminators.
• If you specify a prefix length of 0 and no terminator, bcp allocates the maximum amount of space shown in the prompt, which is the maximum space that may be needed for the datatype in question. In other words, bcp treats the field as if it were fixed length to determine where one field ends and the next begins.
For example, if the field is defined as varchar(30), bcp uses 30 bytes for each value, even if some of the values are only 1 character long.
• Fields defined in the database as char, nchar, and binary, and those that do not permit null values, are always padded with spaces (null bytes for binary) to the full length defined in the database. timestamp data is treated as binary(8).
• If data in the varchar and varbinary fields is longer than the length specified for copy out, bcp silently truncates the data in the file at the specified length.
• bcp does not know how large any one data value will be before copying all the data, so it always pads char datatypes to their full specified length.
float 25 bytes
money 24 bytes
bit 1 byte
datetime 26 bytes
smalldatetime 26 bytes
real 25 bytes
smallmoney 24 bytes
Datatype Default size
CHAPTER 3 Using bcp to Transfer Data to and from Adaptive Server
Utility Guide 43
• The file storage type and length of a column do not have to be the same as the type and length of the column in the database table. If the types and formats copied in are incompatible with the structure of the database table, the copy fails.
• File storage length generally indicates the maximum amount of data that can be transferred for the column, excluding terminators and/or prefixes.
• When copying data into a table, bcp observes any defaults defined for columns and user-defined datatypes. However, bcp ignores rules in order to load data at the fastest possible speed.
• bcp considers any data column that can contain a null value to be variable length, so use either a length prefix or a terminator to denote the length of each row of data.
• The file storage type and length of a column need not be the same as the type and length of the column in the database table. (If types and formats copied in are incompatible with the structure of the database table, the copy fails.)
Field and row terminatorsYou can use a terminator to mark the end of a column or row, separating one from the next. The default is no terminator.
• Field terminators separate table columns.
• A row terminator is a field terminator for the last field in the row of the table or file.
Terminators are very useful for dealing with character data because you can choose human-readable terminators. The bcp character option, which uses tabs between each column with a newline terminator at the end of each row, is an example of using terminators that enhance the readability of a data file.
When you prepare data for use with other programs, and when you want to use bcp to prepare tabular data, supply your own terminators. The available terminators are:
• Tabs, indicated by \t
• New lines, indicated by \n
• Carriage returns, indicated by \r
• Backslash, indicated by \
Changing the defaults: interactive bcp
44 Adaptive Server Enterprise
• Null terminators (no visible terminator), indicated by \0
• Any printable character, for example, *, A, t, |
• Strings of up to 10 printable characters, including some or all of the terminators listed above (for example, **\t**, end, !!!!!!!!!!, and \t--\n)
Note Control characters (ASCII 0–25) cannot be printed.
Choosing Terminators
Choose terminators with patterns that do not appear in any of the data.
For example, using a tab terminator with a string of data that also contains a tab creates an ambiguity: which tab represents the end of the string? bcp always looks for the first possible terminator, which in this case would be incorrect, since the first tab it would encounter would be the one that is part of the data string.
Data in native format can also conflict with terminators. Given a column that contains a 4-byte integer in native format, if the values of these integers are not strictly limited, it will be impossible to choose a terminator that is guaranteed not to appear inside the data. Use bcp’s native format option for data in native format.
Note “No terminator” is different from a “null terminator,” which is an invisible, but real, character.
• A field terminator string can be up to 30 characters long. The most common terminators are a tab (entered as \t and used for all columns except the last one), and a newline (entered as \n and used for the last field in a row). Other terminators are: \0 (the null terminator), \ (backslash), and \r (Return). When choosing a terminator, be sure that its pattern does not appear in any of your character data, because bcp always looks for the first possible terminator.
For example, if you used tab terminators with a string that contained a tab, bcp would not be able to identify which tab represents the end of the string. bcp always looks for the first possible terminator, so, in this example it would find the wrong one.
A terminator or prefix affects the actual length of data transferred:
CHAPTER 3 Using bcp to Transfer Data to and from Adaptive Server
Utility Guide 45
When a terminator or prefix is present, it affects the length of data transferred. If the length of an entry being copied out to a file is less than the storage length, it is immediately followed by the terminator or the prefix for the next field. The entry is not padded to the full storage length (char, nchar, and binary data is returned from Adaptive Server already padded to the full length).
When bcp is copying in from a file, data is transferred until either the number of bytes indicated in the “Length” prompt has been copied or the terminator is encountered. Once the number of bytes equal to the specified length has been transferred, the rest of the data is flushed until the terminator is encountered. When no terminator is used, the table storage length is strictly observed.
• Fields stored as char (except char, nchar, and binary fields) instead of their database datatypes take less file storage space with the default length and prefix or a terminator. bcp can use either a terminator or a prefix to determine the most efficient use of storage space. bcp suggests the maximum amount of storage space required for each field as the default. For char or varchar data, bcp accepts any length.
• Table 3-6 and Table 3-7 show the interaction of prefix lengths, terminators, and field length on the information in the file. “P” indicates the prefix in the stored table; “T” indicates the terminator; and dashes, (--) show appended spaces. An ellipsis (…) indicates that the pattern repeats for each field. The field length is 8 bytes for each column; “string” represents the 6-character field each time.
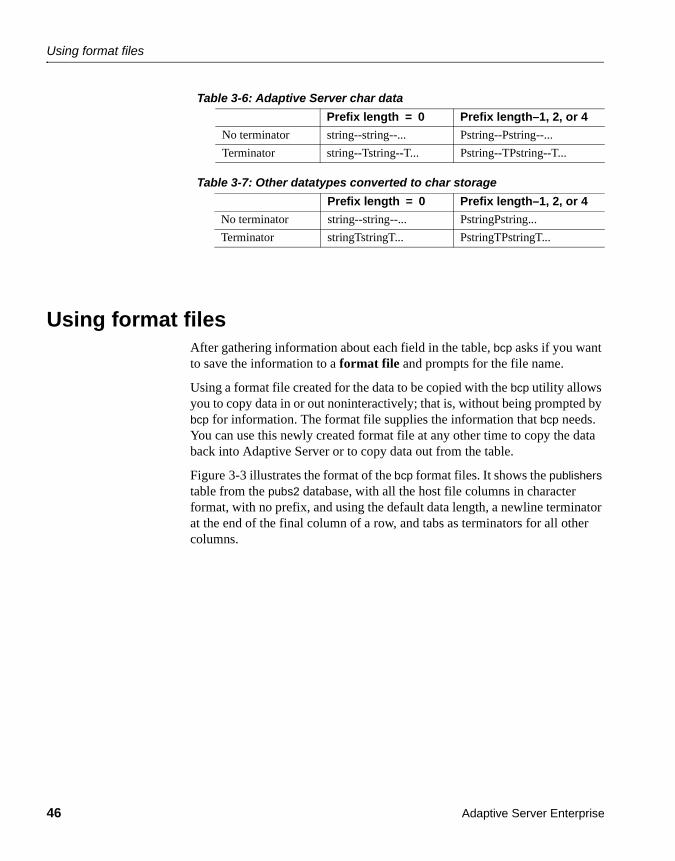
Using format files
46 Adaptive Server Enterprise
Table 3-6: Adaptive Server char data
Table 3-7: Other datatypes converted to char storage
Using format filesAfter gathering information about each field in the table, bcp asks if you want to save the information to a format file and prompts for the file name.
Using a format file created for the data to be copied with the bcp utility allows you to copy data in or out noninteractively; that is, without being prompted by bcp for information. The format file supplies the information that bcp needs. You can use this newly created format file at any other time to copy the data back into Adaptive Server or to copy data out from the table.
Figure 3-3 illustrates the format of the bcp format files. It shows the publishers table from the pubs2 database, with all the host file columns in character format, with no prefix, and using the default data length, a newline terminator at the end of the final column of a row, and tabs as terminators for all other columns.
Prefix length = 0 Prefix length–1, 2, or 4
No terminator string--string--... Pstring--Pstring--...
Terminator string--Tstring--T... Pstring--TPstring--T...
Prefix length = 0 Prefix length–1, 2, or 4
No terminator string--string--... PstringPstring...
Terminator stringTstringT... PstringTPstringT...
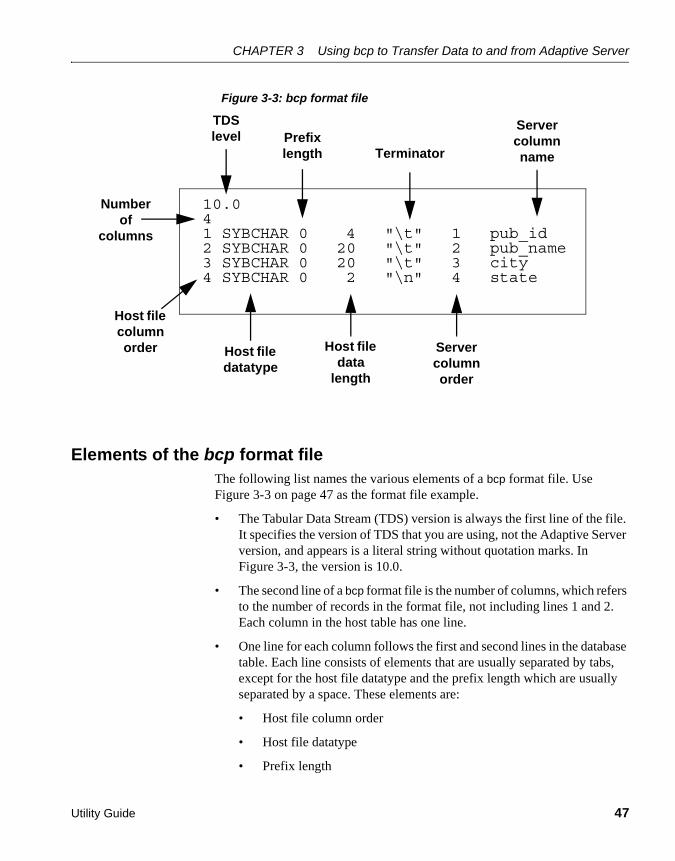
CHAPTER 3 Using bcp to Transfer Data to and from Adaptive Server
Utility Guide 47
Figure 3-3: bcp format file
Elements of the bcp format fileThe following list names the various elements of a bcp format file. Use Figure 3-3 on page 47 as the format file example.
• The Tabular Data Stream (TDS) version is always the first line of the file. It specifies the version of TDS that you are using, not the Adaptive Server version, and appears is a literal string without quotation marks. In Figure 3-3, the version is 10.0.
• The second line of a bcp format file is the number of columns, which refers to the number of records in the format file, not including lines 1 and 2. Each column in the host table has one line.
• One line for each column follows the first and second lines in the database table. Each line consists of elements that are usually separated by tabs, except for the host file datatype and the prefix length which are usually separated by a space. These elements are:
• Host file column order
• Host file datatype
• Prefix length
10.041 SYBCHAR 0 4 "\t" 1 pub_id2 SYBCHAR 0 20 "\t" 2 pub_name3 SYBCHAR 0 20 "\t" 3 city4 SYBCHAR 0 2 "\n" 4 state
Server column order
Host file data
length
Host file datatype
Host file column order
Number of
columns
TDS level Prefix
length Terminator
Server column name

Using format files
48 Adaptive Server Enterprise
• Host file data length
• Terminator
• Server column order
• Server column name
• Column precision
• Column scale
The following sections describe the column elements in the format file.
Host file column order The host file column order is the sequential number of the field in the host data file, which begins numbering at 1.
Host file datatype The host file datatype refers to the storage format of the field in the host data file, not the datatype of the database table column.
Table 3-8 lists the valid storage formats.
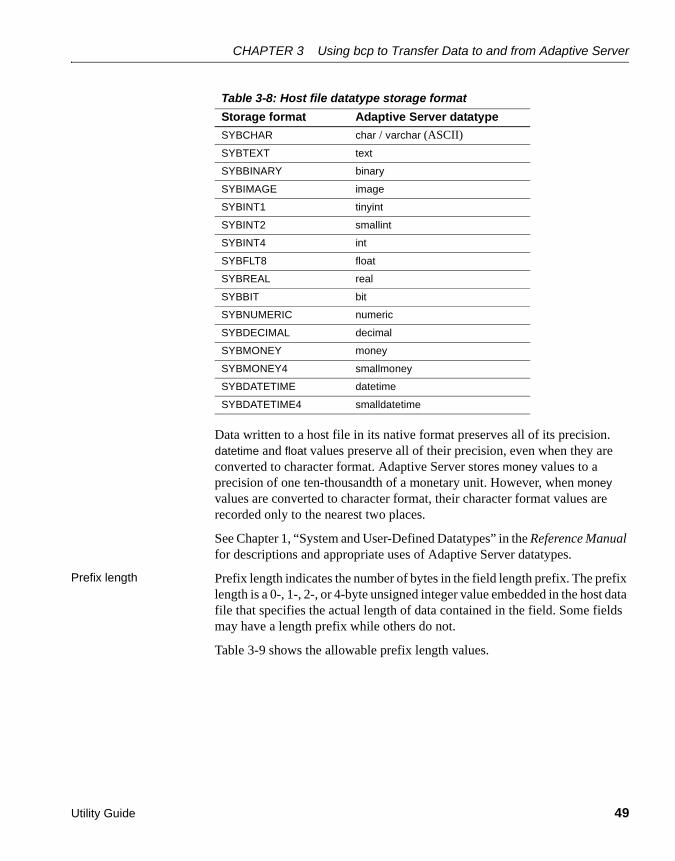
CHAPTER 3 Using bcp to Transfer Data to and from Adaptive Server
Utility Guide 49
Table 3-8: Host file datatype storage format
Data written to a host file in its native format preserves all of its precision. datetime and float values preserve all of their precision, even when they are converted to character format. Adaptive Server stores money values to a precision of one ten-thousandth of a monetary unit. However, when money values are converted to character format, their character format values are recorded only to the nearest two places.
See Chapter 1, “System and User-Defined Datatypes” in the Reference Manual for descriptions and appropriate uses of Adaptive Server datatypes.
Prefix length Prefix length indicates the number of bytes in the field length prefix. The prefix length is a 0-, 1-, 2-, or 4-byte unsigned integer value embedded in the host data file that specifies the actual length of data contained in the field. Some fields may have a length prefix while others do not.
Table 3-9 shows the allowable prefix length values.
Storage format Adaptive Server datatype
SYBCHAR char / varchar (ASCII)
SYBTEXT text
SYBBINARY binary
SYBIMAGE image
SYBINT1 tinyint
SYBINT2 smallint
SYBINT4 int
SYBFLT8 float
SYBREAL real
SYBBIT bit
SYBNUMERIC numeric
SYBDECIMAL decimal
SYBMONEY money
SYBMONEY4 smallmoney
SYBDATETIME datetime
SYBDATETIME4 smalldatetime
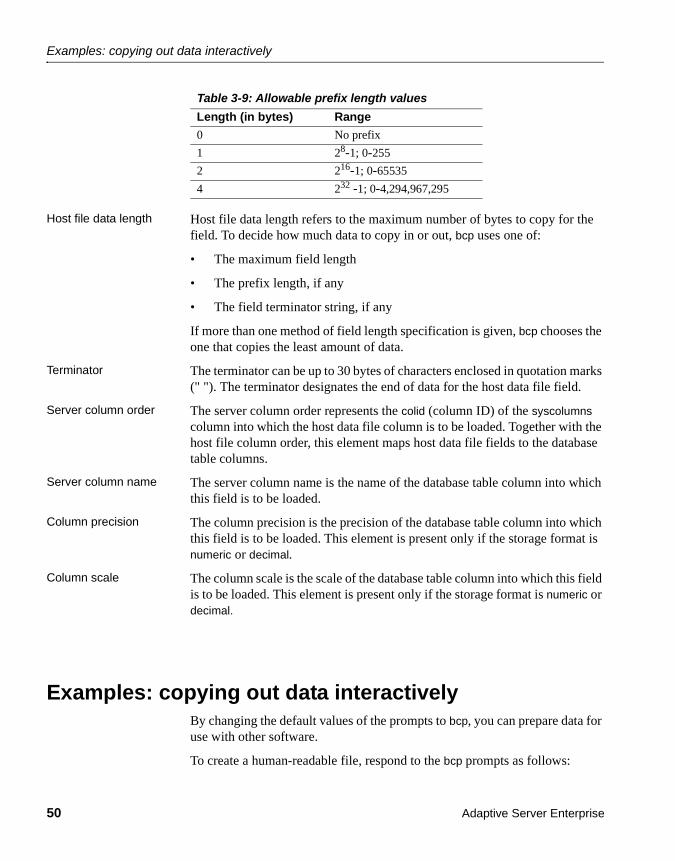
Examples: copying out data interactively
50 Adaptive Server Enterprise
Table 3-9: Allowable prefix length values
Host file data length Host file data length refers to the maximum number of bytes to copy for the field. To decide how much data to copy in or out, bcp uses one of:
• The maximum field length
• The prefix length, if any
• The field terminator string, if any
If more than one method of field length specification is given, bcp chooses the one that copies the least amount of data.
Terminator The terminator can be up to 30 bytes of characters enclosed in quotation marks (" "). The terminator designates the end of data for the host data file field.
Server column order The server column order represents the colid (column ID) of the syscolumns column into which the host data file column is to be loaded. Together with the host file column order, this element maps host data file fields to the database table columns.
Server column name The server column name is the name of the database table column into which this field is to be loaded.
Column precision The column precision is the precision of the database table column into which this field is to be loaded. This element is present only if the storage format is numeric or decimal.
Column scale The column scale is the scale of the database table column into which this field is to be loaded. This element is present only if the storage format is numeric or decimal.
Examples: copying out data interactivelyBy changing the default values of the prompts to bcp, you can prepare data for use with other software.
To create a human-readable file, respond to the bcp prompts as follows:
Length (in bytes) Range
0 No prefix
1 28-1; 0-255
2 216-1; 0-65535
4 232 -1; 0-4,294,967,295

CHAPTER 3 Using bcp to Transfer Data to and from Adaptive Server
Utility Guide 51
• File storage type, enter 0.
• Prefix length, enter 0.
• Field length, accept the default.
• Terminator – the field terminator you enter depends on the software that you plan to use.
• Choose between delimited fields or fixed-length fields. Always use \n, the newline terminator, to terminate the last field.
For fixed-length fields, do not use a terminator. Each field has a fixed length, with spaces to pad the fields. Adjacent fields, where the data completely fills the first field seem to run together, since there are no field separators on each line of output. See the example below.
• For comma-delimited output, use a comma (,) as the terminator for each field. To create tabular output, use the tab character (\t).
Copying out data with field lengthsThe following example uses fixed-length fields to create output in the personal computer format called SDF (system data format). This format can be easily read or produced by other software.
Note For information about format files, see “Using format files” on page 46.
bcp pubs2..sales out sal_out
The results as stored in the sal_out file are as follows:
5023 AB-123-DEF-425-1Z3 Oct 31 1985 12:00AM5023 AB-872-DEF-732-2Z1 Nov 6 1985 12:00AM5023 AX-532-FED-452-2Z7 Dec 1 1990 12:00AM5023 BS-345-DSE-860-1F2 Dec 12 1986 12:00AM5023 GH-542-NAD-713-9F9 Mar 15 1987 12:00AM5023 NF-123-ADS-642-9G3 Jul 18 1987 12:00AM5023 XS-135-DER-432-8J2 Mar 21 1991 12:00AM5023 ZA-000-ASD-324-4D1 Jul 27 1988 12:00AM5023 ZD-123-DFG-752-9G8 Mar 21 1991 12:00AM5023 ZS-645-CAT-415-1B2 Mar 21 1991 12:00AM5023 ZZ-999-ZZZ-999-0A0 Mar 21 1991 12:00AM6380 234518 Sep 30 1987 12:00AM6380 342157 Dec 13 1985 12:00AM6380 356921 Feb 17 1991 12:00AM

Examples: copying out data interactively
52 Adaptive Server Enterprise
7066 BA27618 Oct 12 1985 12:00AM7066 BA52498 Oct 27 1987 12:00AM7066 BA71224 Aug 5 1988 12:00AM7067 NB-1.142 Jan 2 1987 12:00AM7067 NB-3.142 Jun 13 1990 12:00AM7131 Asoap132 Nov 16 1986 12:00AM7131 Asoap432 Dec 20 1990 12:00AM7131 Fsoap867 Sep 8 1987 12:00AM7896 124152 Aug 14 1986 12:00AM7896 234518 Feb 14 1991 12:00AM8042 12-F-9 Jul 13 1986 12:00AM8042 13-E-7 May 23 1989 12:00AM8042 13-J-9 Jan 13 1988 12:00AM8042 55-V-7 Mar 20 1991 12:00AM8042 91-A-7 Mar 20 1991 12:00AM8042 91-V-7 Mar 20 1991 12:00AM
The contents of the sal_fmt format file are as follows:
10.031 SYBCHAR 04 "" 1 stor_id2 SYBCHAR 020 "" 2 ord_num3 SYBCHAR 026 "" 3 date
For information about format files, see “Using format files” on page 46.
Copying out data with delimitersIn the following examples, bcp copies data interactively from the publishers table to a file.
Note For information about format files, see “Using format files” on page 46.
Comma-delimited, newline-delimited with format file
The first example creates an output file with commas between all fields in a row and a newline terminator at the end of each row. This example creates a format file (pub_fmt) that you can use later to copy the same or similar data back into Adaptive Server.
bcp pubs2..publishers out pub_out

CHAPTER 3 Using bcp to Transfer Data to and from Adaptive Server
Utility Guide 53
The results as stored in the pub_out file are:
0736,New Age Books,Boston,MA0877,Binnet & Hardley,Washington,DC1389,Algodata Infosystems,Berkeley,CA
The contents of the pub_fmt format file are:
10.041 SYBCHAR 0 4 "," 1 pub_id2 SYBCHAR 0 40 "," 2 pub_name3 SYBCHAR 0 20 "," 3 city4 SYBCHAR 0 2 "\n" 4 state
Tab-delimited with format file
Similarly, the following example creates tab-delimited output from the table pubs2..publishers in the pub_out file.
bcp pubs2..publishers out pub_out
The results as stored in the pub_out file are:
0736 New Age Books Boston MA0877 Binnet & Hardley Washington DC1389 Algodata Infosystems Berkeley CA
The contents of the pub_fmt format file are:
10.041 SYBCHAR 04 "\t" 1 pub_id2 SYBCHAR 040 "\t" 2 pub_name3 SYBCHAR 020 "\t" 3 city4 SYBCHAR 02 "\n" 4 state
Examples: copying in data interactivelyTo copy in data successfully to a table from a file, you must know what the terminators in the file are or what the field lengths are and specify them when you use bcp.
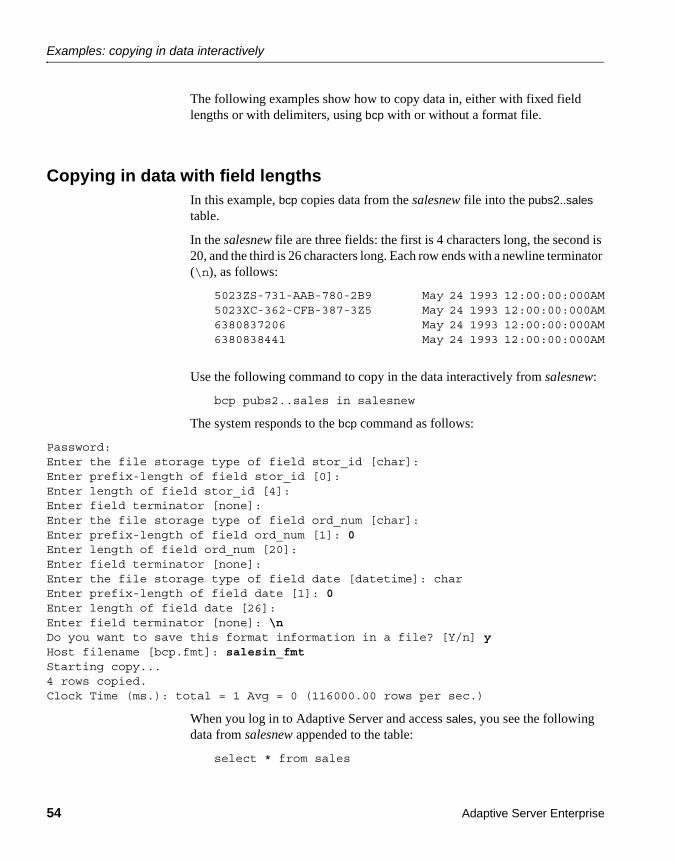
Examples: copying in data interactively
54 Adaptive Server Enterprise
The following examples show how to copy data in, either with fixed field lengths or with delimiters, using bcp with or without a format file.
Copying in data with field lengthsIn this example, bcp copies data from the salesnew file into the pubs2..sales table.
In the salesnew file are three fields: the first is 4 characters long, the second is 20, and the third is 26 characters long. Each row ends with a newline terminator (\n), as follows:
5023ZS-731-AAB-780-2B9 May 24 1993 12:00:00:000AM5023XC-362-CFB-387-3Z5 May 24 1993 12:00:00:000AM6380837206 May 24 1993 12:00:00:000AM6380838441 May 24 1993 12:00:00:000AM
Use the following command to copy in the data interactively from salesnew:
bcp pubs2..sales in salesnew
The system responds to the bcp command as follows:
Password:Enter the file storage type of field stor_id [char]:Enter prefix-length of field stor_id [0]:Enter length of field stor_id [4]:Enter field terminator [none]:Enter the file storage type of field ord_num [char]:Enter prefix-length of field ord_num [1]: 0Enter length of field ord_num [20]:Enter field terminator [none]:Enter the file storage type of field date [datetime]: charEnter prefix-length of field date [1]: 0Enter length of field date [26]:Enter field terminator [none]: \nDo you want to save this format information in a file? [Y/n] yHost filename [bcp.fmt]: salesin_fmtStarting copy...4 rows copied.Clock Time (ms.): total = 1 Avg = 0 (116000.00 rows per sec.)
When you log in to Adaptive Server and access sales, you see the following data from salesnew appended to the table:
select * from sales
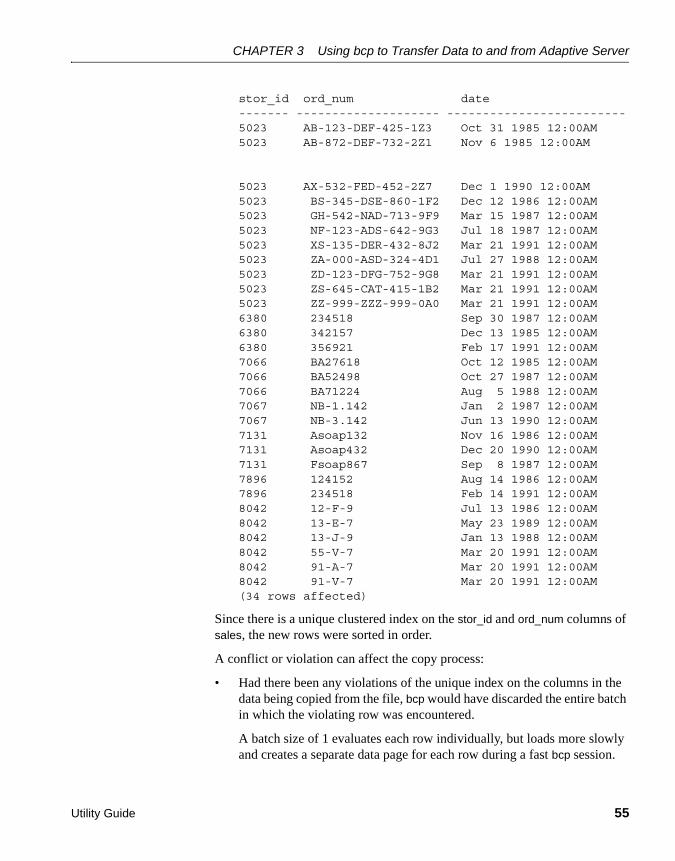
CHAPTER 3 Using bcp to Transfer Data to and from Adaptive Server
Utility Guide 55
stor_id ord_num date------- -------------------- -------------------------5023 AB-123-DEF-425-1Z3 Oct 31 1985 12:00AM5023 AB-872-DEF-732-2Z1 Nov 6 1985 12:00AM
5023 AX-532-FED-452-2Z7 Dec 1 1990 12:00AM5023 BS-345-DSE-860-1F2 Dec 12 1986 12:00AM5023 GH-542-NAD-713-9F9 Mar 15 1987 12:00AM5023 NF-123-ADS-642-9G3 Jul 18 1987 12:00AM5023 XS-135-DER-432-8J2 Mar 21 1991 12:00AM5023 ZA-000-ASD-324-4D1 Jul 27 1988 12:00AM5023 ZD-123-DFG-752-9G8 Mar 21 1991 12:00AM5023 ZS-645-CAT-415-1B2 Mar 21 1991 12:00AM5023 ZZ-999-ZZZ-999-0A0 Mar 21 1991 12:00AM6380 234518 Sep 30 1987 12:00AM6380 342157 Dec 13 1985 12:00AM6380 356921 Feb 17 1991 12:00AM7066 BA27618 Oct 12 1985 12:00AM7066 BA52498 Oct 27 1987 12:00AM7066 BA71224 Aug 5 1988 12:00AM7067 NB-1.142 Jan 2 1987 12:00AM7067 NB-3.142 Jun 13 1990 12:00AM7131 Asoap132 Nov 16 1986 12:00AM7131 Asoap432 Dec 20 1990 12:00AM7131 Fsoap867 Sep 8 1987 12:00AM7896 124152 Aug 14 1986 12:00AM7896 234518 Feb 14 1991 12:00AM8042 12-F-9 Jul 13 1986 12:00AM8042 13-E-7 May 23 1989 12:00AM8042 13-J-9 Jan 13 1988 12:00AM8042 55-V-7 Mar 20 1991 12:00AM8042 91-A-7 Mar 20 1991 12:00AM8042 91-V-7 Mar 20 1991 12:00AM(34 rows affected)
Since there is a unique clustered index on the stor_id and ord_num columns of sales, the new rows were sorted in order.
A conflict or violation can affect the copy process:
• Had there been any violations of the unique index on the columns in the data being copied from the file, bcp would have discarded the entire batch in which the violating row was encountered.
A batch size of 1 evaluates each row individually, but loads more slowly and creates a separate data page for each row during a fast bcp session.

Examples: copying in data interactively
56 Adaptive Server Enterprise
• If the types copied in are incompatible with the database types, the entire copy fails.
Copying in data with delimitersIn the following example, bcp copies data from the file newpubs into the table pubs2..publishers. In the newpubs file, each field in a row ends with a tab character (\t) and each row ends with a newline terminator (\n), as follows:
1111 Stone Age Books Boston MA2222 Harley & Davidson Washington DC3333 Infodata Algosystems Berkeley CA
Since newpubs contains all character data, you can use the character command-line flag and specify the terminators with command line options:
• In UNIX platforms:
bcp pubs2..publishers in newpubs -c -t\\t -r\\n
• In Windows NT:
bcp pubs2..publishers in newpubs -c -t\t -r\n
Copying in data with a format fileTo copy data back into Adaptive Server using the saved pub_fmt format file, run the following command:
bcp pubs2..publishers in pub_out -fpub_fmt
You can use the pub_fmt file to copy any data with the same format into Adaptive Server. If you have a similar data file with different delimiters, you can change the delimiters in the format file.
Similarly, you can edit the format file to reflect any changes to the field lengths, as long as all fields have the same length. For example, the moresales file contains:
804213-L-9 Jan 21 1993 12:00AM804255-N-8 Mar 12 1993 12:00AM804291-T-4 Mar 23 1993 12:00AM804291-W-9 Mar 23 1993 12:00AM
Edit the sal_fmt format file to read as follows:

CHAPTER 3 Using bcp to Transfer Data to and from Adaptive Server
Utility Guide 57
10.031 SYBCHAR 0 4 "" 1 stor_id2 SYBCHAR 0 7 "" 2 ord_num3 SYBCHAR 0 21 "\n" 3 date
Then enter the following command:
• In UNIX platforms:
bcp pubs2..sales in moresales -fsal_fmt
• In Windows NT:
bcp pubs2..sales in moresale -fsal_fmt
The system responds as follows:
Starting copy...4 rows copied. Clock Time (ms.): total = 1 Avg = 0 (116000.00 rows per sec.)
Using bcp with alternate languagesAdaptive Server stores data using its default character set, which is configured during installation. If your terminal does not support that default character set, it may send confusing characters to bcp when you respond to prompts either by typing or by using host file scripts.
Omitting all character-set options causes bcp to use the character set that was named as the default for the platform. This default can cause communications problems:
• The default is not necessarily the same character set that was configured for Adaptive Server.
• The default may not necessarily be the character set that the client is using.
For more information about character sets and the associated flags, see Chapter 8, “Configuring Client/Server Character Set Conversions” in the System Administration Guide.
bcp and row-level access rules
58 Adaptive Server Enterprise
bcp and row-level access rulesIf Adaptive Server is enabled for row-level access, and you bulk-copy-out data, bcp copies out only the rows of data to which you have access. To copy out the entire table, you must first drop the access rules, then bcp out. Reinstate the access rules after you are done, if applicable.
If you bulk-copy-in data to a table that has access rules enabled, Adaptive Server may issue “uniqueness violation” errors. For example, if you load data from a bcp data file that was generated before the access rules were created on the table, and the bcp data file contains rows that were previously inserted into the table, you may receive this type of error.
If this happens, the table may look to the user like it does not include the rows that failed the bcp insert because of the uniqueness violation, but the user does not have access to the “missing” rows because of the access rules.
To copy in the entire table, drop the access rules, load the data, address any errors, then reinstate the access rules.
Copy in and batch filesBatching applies only to bulk copying in; it has no effect when copying out. By default, Adaptive Server copies all the rows in batches of 1000 lines. To specify a different batch size, use the command-line option (-b).
bcp copies each batch in a single transaction. If Adaptive Server rejects any row in the batch, the entire transaction is rolled back. By default, bcp copies all rows in a single batch; use the -b parameter to change the default batch size. Adaptive Server considers each batch a single bcp operation, writes each batch to a separate data page, and continues to the next batch, regardless of whether the previous transaction succeeded.
When data is being copied in, it can be rejected by either Adaptive Server or bcp.
• Adaptive Server treats each batch as a separate transaction. If the server rejects any row in the batch, it rolls back the entire transaction.
• When bcp rejects a batch, it then continues to the next batch. Only fatal errors roll back the transaction.

CHAPTER 3 Using bcp to Transfer Data to and from Adaptive Server
Utility Guide 59
• Adaptive Server generates error messages on a batch-by-batch basis, instead of row-by-row, and rejects each batch in which it finds an error. Error messages appear on your terminal and in the error file.
Improving recoverabilityTo ensure better recoverability:
• Break large input files into smaller units.
For example, if you use bcp with a batch size of 100,000 rows to bulk copy in 300,000 rows, and a fatal error occurs after row 200,000, bcp would have successfully copied in the first two batches—200,000 rows—to Adaptive Server. If you had not used batching, bcp would not have been able to copy in any rows to Adaptive Server.
• Set the trunc log on chkpt to true (on).
The log entry for the transaction is available for truncation after the batch completes. If you copy into a database that has the trunc log on chkpt database option set on (true), the next automatic checkpoint removes the log entries for completed batches. This log cleaning breaks up large bcp operations and keeps the log from filling.
• Set -b batch_size to 10.
The batch size parameter set to 10 causes bcp to reject the batch of 10 rows, including the defective row. The error log from this setting allows you to identify exactly which row failed.
Copy out and text and image data
60 Adaptive Server Enterprise
A batch size of 1 is the smallest that bcp processes.
Note bcp creates 1 data page per batch, and setting b batch_size to 10 creates data pages with 10 rows on each page. If you set -b batch_size to 1, the setting creates data pages with 1 row on each page. This setting causes the data to load slowly and takes up storage space.
Batches and partitioned tablesWhen you bulk copy data into a partitioned table without specifying a partition number, Adaptive Server randomly assigns each batch to an available partition. Copying rows in a single batch places all those rows in a single partition, which can lead to load imbalance in the partitioned table.
To help keep partitioned tables balanced, use a small batch size when bulk copying data or specify the partition ID during the bcp session. For information about partitioning tables, see the Performance and Tuning Guide.
Copy out and text and image dataWhen you copy out text or image data, Adaptive Server, by default, copies only the first 32K of data in a text or image field. The -T text_or_image_size parameter allows you to specify a different value. For example, if the text field to copy out contains up to 40K of data, you can use the following command to copy out all 40K:
bcp pubs2..publishers out -T40960
Note If a text or image field is larger than the given value or the default, bcp does not copy out the remaining data.
CHAPTER 3 Using bcp to Transfer Data to and from Adaptive Server
Utility Guide 61
Specifying a network packet sizeTo improve the performance of large bulk copy operations, you may want to use larger network packet sizes than the defaults. The -A size option specifies the network packet size to use for the bcp session that you are beginning.
The value of size must be:
• Between the values of the default network packet size and max network packet size configuration parameters, and
• A multiple of 512.
Note The new packet size remains in effect for the current bcp session only.
For example, this command specifies that Adaptive Server send 40K of text or image data using a packet size of 2048 bytes for the bcp session:
bcp pubs2..authors out -A 2048 -T40960
Copy in and error filesWhen you specify the -e error_file option with copy in, bcp stores the rows that it cannot copy in to Adaptive Server in the specified error file.
• The error file stores:
• A line that indicates which row failed and the error that occurred, and
• A line that is an exact copy of the row in the host file.
• If the file name specified after -e already exists, bcp overwrites the existing file.
• If bcp does not encounter any errors, it does not create the file.
bcp in detects two types of errors:
• Data conversion errors
• Errors in building the row; for example, attempts to insert a NULL into columns that do not accept null values or to use invalid data formats, such as a 3-byte integer
The copy in process displays error messages on your monitor.
Copy out and error files
62 Adaptive Server Enterprise
The following example loads the newpubs file into the publishers database, storing any error rows in the pub_err file:
bcp pubs2..publishers in newpubs -epub_err
Keep the following in mind when working with error files generated by copy in:
• bcp stores rows in an error file only when the bcp program itself detects the error.
• bcp continues to copy rows until bcp encounters the maximum number of error rows, at which point bcp stops the copy.
• bcp sends rows to Adaptive Server in batches, so bcp cannot save copies of rows that are rejected by Adaptive Server, for example, a duplicate row for a table that has a unique index.
• Adaptive Server generates error messages on a batch-by-batch basis, instead of row-by-row, and rejects the entire batch if it finds an error.
• It is not considered an error for Adaptive Server to reject duplicate rows if either allow_dup_row or ignore_dup_key was set when a table’s index was created. The copy proceeds normally, but the duplicate rows are neither stored in the table nor in the bcp error file.
Copy out and error filesDuring the copy out process, as with copy in, bcp overwrites any file of the same name and does not create an error file if no errors occurred.
There are two situations that cause rows to be logged in the error file during a copy out:
• A data conversion error in one of the row’s columns
• An I/O error in writing to the host file
Keep the following in mind when working with error files generated by copy out:
• bcp logs rows in the error file in the default character format.
• All data values print as characters with tabs between the columns and a newline terminator at the end of each row.

CHAPTER 3 Using bcp to Transfer Data to and from Adaptive Server
Utility Guide 63
Data integrity: defaults, rules, and triggersTo ensure integrity, bcp handles data to copy depending upon its element.
Defaults and datatypesWhen copying data into a table, bcp observes any defaults defined for the columns and datatypes. That is, if there is a null field in the data in a file, bcp loads the default value instead of the null value during the copy.
For example, here are two rows in a file to be loaded into authors:
409-56-7008,Bennet,David,415 658-9932,622 Pine St.,Berkeley,CA,USA,94705213-46-8915,Green,Marjorie,,309 63rd St. #411,Oakland,CA,USA,94618
Commas separate the fields; a newline terminator separates the rows. There is no phone number for Marjorie Green. Because the phone column of the authors table has a default of “unknown,” the rows in the loaded table look like this:
409-56-7008 Bennet David 415 658-9932 622 Pine St.Berkeley CA USA 94705
213-46-8915 Green Marjorie unknown 309 63rd St. #411Oakland CA USA 94618
Rules and triggersbcp, to enable its maximum speed for loading data, does not fire rules and triggers.
To find any rows that violate rules and triggers, copy the data into the table and run queries or stored procedures that test the rule or trigger conditions.
How bcp differs from other utilitiesThe bcp utility, which copies entire tables or portions of a single table, is distinct from the other utilities that move data from one place to another.
The following list names these other utilities and their commands and describes how you can best use them to move data.

How bcp differs from other utilities
64 Adaptive Server Enterprise
dump database, load database, dump transaction, and load transaction
Use the SQL commands dump database, load database, dump transaction, and load transaction for backup purposes only. Unlike bcp, the dump commands create a physical image of the entire database.
You must use load database or load transaction to read data backed up with dump database or dump transaction.
For information on using the SQL dump and load commands, see the System Administration Guide and the Reference Manual.
insert, update, and delete
Use the data modification commands insert, update, and delete, respectively, to add new rows to, change existing rows in, or remove rows from a table or view.
• Use the insert command with a select statement to move data between tables.
• Use the select statement with an into clause to create a new table, based on:
• the columns named in the select statement,
• the tables named in the from clause, and
• data in the rows named in the where clause.
For details on adding, changing, and deleting data, see insert, update, and delete in the Reference Manual.
Utility Guide 65
C H A P T E R 4 Using dsedit
This chapter explains how to use the dsedit utility to edit the Adaptive Server interfaces file.
Getting started with dseditdsedit is a graphical utility that lets you view and edit server entries in the interfaces file (sql.ini in Windows 98 and Windows NT). For a detailed description of dsedit syntax, see dsedit on page 205.
Note UNIX users: If your system does not have X-Windows, use dscp to configure server entries in the interfaces file. See Chapter 5, “Using dscp” for more information.
Starting dseditWindows NT You can start dsedit from the command prompt, the Windows NT
Explorer, or the Sybase for Windows NT program group.
❖ Starting dsedit from the command prompt
• Enter:
dsedit
You can specify the following command-line arguments:
Topic PageGetting started with dsedit 65
Adding, viewing, and editing server entries 69
Troubleshooting dsedit 76
Getting started with dsedit
66 Adaptive Server Enterprise
• -ddsname – Specifies which directory service to connect to. dsname is the local name of the directory service, as listed in the libtcl.cfg file. If you do not specify the -ddsname argument, dsedit presents a list of directory service options in the first dialog box.
• -lpath – Specifies the path to the libtcl.cfg file, if other than SYBASE_home\INI. Use this argument only if you want to use a libtcl.cfg file other than the one located in SYBASE_home\INI.
❖ Starting dsedit through the Windows NT Explorer
1 Go to the %SYBASE%\bin\ directory.
2 Double-click on the DSEDIT.exe file.
❖ Starting dsedit from the Sybase for Windows program group
1 Choose Sybase for Windows NT from the Start menu.
2 Choose dsedit from the Sybase for Windows NT menu. The Select Directory Service dialog box appears.
UNIX platforms Before starting dsedit, make sure that you have write permission on the interfaces file.
If you are running dsedit from a remote machine, make sure that the DISPLAY environment variable is set so the dsedit screens will show on your machine instead of on the remote machine.
❖ Setting the DISPLAY environment variable
1 Log in to the remote machine.
2 Enter:
setenv DISPLAY your_machine_name:0.0
❖ Starting dsedit
• Enter:
$SYBASE/bin/dsedit
The Select a Directory Service window appears. This window lets you open editing sessions for the interfaces file. The full path name of the default interfaces file is shown in the Interfaces File to Edit box. The full path name of the configuration file is shown below it.

CHAPTER 4 Using dsedit
Utility Guide 67
Opening an editing sessionWindows NT The Select Directory Service dialog box allows you to open a session with a
directory service. You can open a session with:
• Any directory service that has a driver listed in the libtcl.cfg file
• The sql.ini file
❖ Opening a session in Windows NT
1 Double-click on the local name of the directory service you want to connect to, as listed in the DS Name box, or
2 Click on the local name of the directory service you want to connect to, as listed in the DS Name box, and click the OK button.
Note dsedit uses the SYBASE environment variable to locate the libtcl.cfg file. If the SYBASE environment variable is not set correctly, dsedit cannot locate the libtcl.cfg file.
The session number and local name of the directory service appear in the header bar.
❖ Opening additional sessions
dsedit allows you to have multiple sessions open at one time.
1 Choose Open Directory Service from the File menu.
The Select Directory Service box appears.
2 Double-click the local name of the directory service to which you want to be connected (or click on the directory service name and click OK).
Opening multiple sessions allows you to copy entries between directory services. See “Copying server entries” on page 74 for more information.
❖ Switching between sessions
If you have multiple sessions open at one time, you need to activate a session before you can work in it.
• Activate a session by either:
• Clicking in the session window
• Choosing the session from the Windows menu
The dsedit title bar shows which session is active.

Getting started with dsedit
68 Adaptive Server Enterprise
UNIX platforms
❖ Opening the default interfaces file for editing
1 Select Sybase Interfaces File.
2 Click OK.
❖ Opening a file other than the default interfaces file
1 Select Sybase Interfaces File.
2 Edit the displayed file name.
3 Click OK.
The Directory Service Session window appears.
You can open multiple interfaces file sessions with different files.
The Directory Service Session screen displays the full path name of the interfaces file and lists the server entries contained within it.
• Add new server entry – displays the Server Entry Editor window, where you specify the name and network addresses for a new server entry.
• Modify server entry – lets you view and modify the network addresses for a selected server entry. To view or modify a server entry, select the server in the list, then click Modify server entry to display the server’s attributes in the Server Entry Editor window.
• Copy server entry – lets you copy one or more entries to another interfaces file.
• Close Session – closes the session window and writes changes to the interfaces file.
For procedures on using these buttons, see “Modifying server entries in Windows NT” on page 69.
Clicking the Add new server entry or Modify server entry button in the Session screen displays the Server Entry Editor window.
You use the Server Entry Editor window to view or edit server entries in an interfaces file:
• Server name – if you are adding a server entry, type the name of the new server. If you are editing a server entry, you can edit the name field to rename the server. The new name cannot already exist in the interfaces file.

CHAPTER 4 Using dsedit
Utility Guide 69
• Available network transports – a list of the network addresses where the server accepts client connections.
• To create a new address, click Add network transport. See “Modifying server entries in Windows NT” on page 69.
• To edit an existing address, click Modify network transport. See “Modifying server entries in Windows NT” on page 69.
• To remove a selected network address, click Delete network transport.
• To rearrange the order of addresses in the list, click Move network transport up or Move network transport down.
• OK – commits your changes and closes the window. Changes to the interfaces file are not applied until you close the session using the Close Session button in the Directory Service Session screen.
• Cancel – closes the window and discards any edits.
Adding, viewing, and editing server entriesOnce you are in an open session, you can add, modify, rename and delete server entries associated with that session, as well as copy server entries within a session and between sessions.
Modifying server entries in Windows NTThe server entries associated with the session appear in the Server box. Click on a server entry to select it.
Each server entry is made up of a set of attributes. The attributes are described in Table 4-1.
Table 4-1: Server attributes
Attribute name Type of value Description
Default value
Server Version Integer Version level of the server object definition. Sybase provides this attribute to identify future changes to the object definition.
110
Server Name Character string Server name. N/A
Server Service Character string A description of the service provided by the server. This value can be any meaningful description.
Adaptive Server
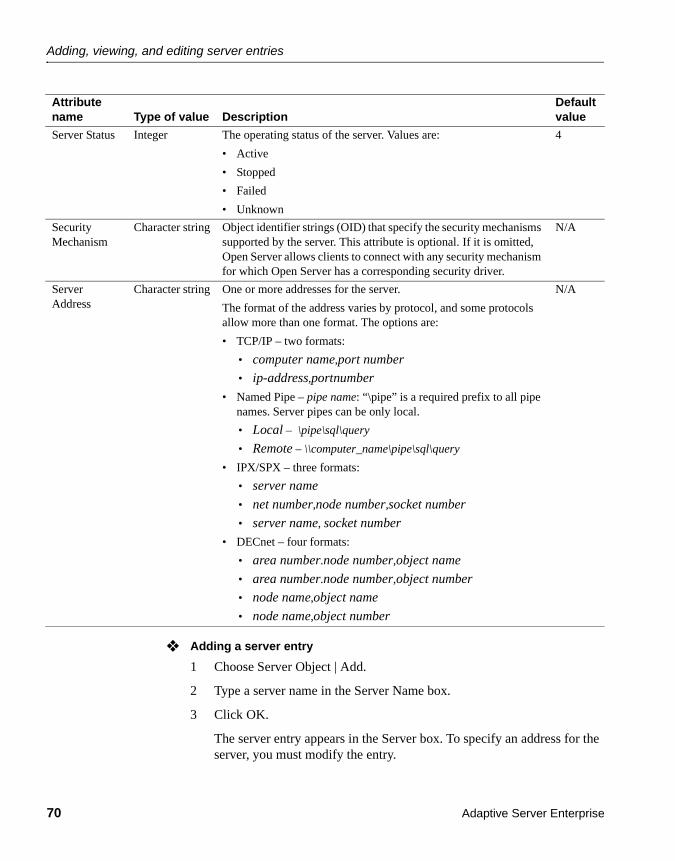
Adding, viewing, and editing server entries
70 Adaptive Server Enterprise
❖ Adding a server entry
1 Choose Server Object | Add.
2 Type a server name in the Server Name box.
3 Click OK.
The server entry appears in the Server box. To specify an address for the server, you must modify the entry.
Server Status Integer The operating status of the server. Values are:
• Active
• Stopped
• Failed
• Unknown
4
Security Mechanism
Character string Object identifier strings (OID) that specify the security mechanisms supported by the server. This attribute is optional. If it is omitted, Open Server allows clients to connect with any security mechanism for which Open Server has a corresponding security driver.
N/A
Server Address
Character string One or more addresses for the server.
The format of the address varies by protocol, and some protocols allow more than one format. The options are:
• TCP/IP – two formats:
• computer name,port number
• ip-address,portnumber
• Named Pipe – pipe name: “\pipe” is a required prefix to all pipe names. Server pipes can be only local.
• Local – \pipe\sql\query
• Remote – \\computer_name\pipe\sql\query
• IPX/SPX – three formats:
• server name
• net number,node number,socket number
• server name, socket number
• DECnet – four formats:
• area number.node number,object name
• area number.node number,object number
• node name,object name
• node name,object number
N/A
Attribute name Type of value Description
Default value

CHAPTER 4 Using dsedit
Utility Guide 71
❖ Modifying a server attribute
You can modify any attribute of a server entry.
1 Click on a server entry in the Server box.
2 Choose Server Object | Modify Attribute.
3 Click on the attribute you want to modify in the Attributes box.
A dialog box appears that shows the current value of the attribute.
4 Type a new value for the attribute, or select a value from the drop-down list.
See Table 4-1 on page 69 for a description of each attribute.
5 Click OK.
❖ Renaming a server entry
1 Click on a server entry in the Server box.
2 Choose Server Object | Rename.
3 Type a new name for the server entry in the Server Name box.
4 Click OK.
❖ Deleting a server entry
1 Click on a server entry in the Server box.
2 Choose Server Object | Delete.
❖ Copying server entries within the current session
1 Click on one or more server entries in the Server box.
Use the Shift key to select multiple entries.
2 Click the Copy button (below the menu bar), or choose Edit | Copy.
3 Click the Paste button (below the menu bar), or choose Edit | Paste.
dsedit appends the copied server entries with a version number of _n. You can rename the copied server entries Server Object | Rename option on. See “Renaming a server entry” on page 71 for more information.
❖ Copying server entries between sessions
1 Open a session with the directory service or sql.ini file that you want the entries copied to.
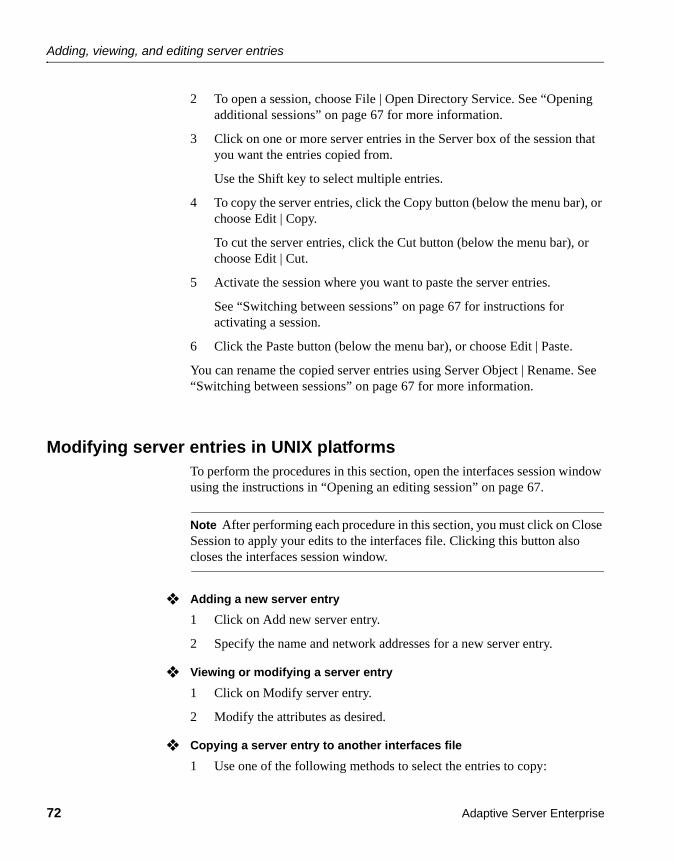
Adding, viewing, and editing server entries
72 Adaptive Server Enterprise
2 To open a session, choose File | Open Directory Service. See “Opening additional sessions” on page 67 for more information.
3 Click on one or more server entries in the Server box of the session that you want the entries copied from.
Use the Shift key to select multiple entries.
4 To copy the server entries, click the Copy button (below the menu bar), or choose Edit | Copy.
To cut the server entries, click the Cut button (below the menu bar), or choose Edit | Cut.
5 Activate the session where you want to paste the server entries.
See “Switching between sessions” on page 67 for instructions for activating a session.
6 Click the Paste button (below the menu bar), or choose Edit | Paste.
You can rename the copied server entries using Server Object | Rename. See “Switching between sessions” on page 67 for more information.
Modifying server entries in UNIX platformsTo perform the procedures in this section, open the interfaces session window using the instructions in “Opening an editing session” on page 67.
Note After performing each procedure in this section, you must click on Close Session to apply your edits to the interfaces file. Clicking this button also closes the interfaces session window.
❖ Adding a new server entry
1 Click on Add new server entry.
2 Specify the name and network addresses for a new server entry.
❖ Viewing or modifying a server entry
1 Click on Modify server entry.
2 Modify the attributes as desired.
❖ Copying a server entry to another interfaces file
1 Use one of the following methods to select the entries to copy:
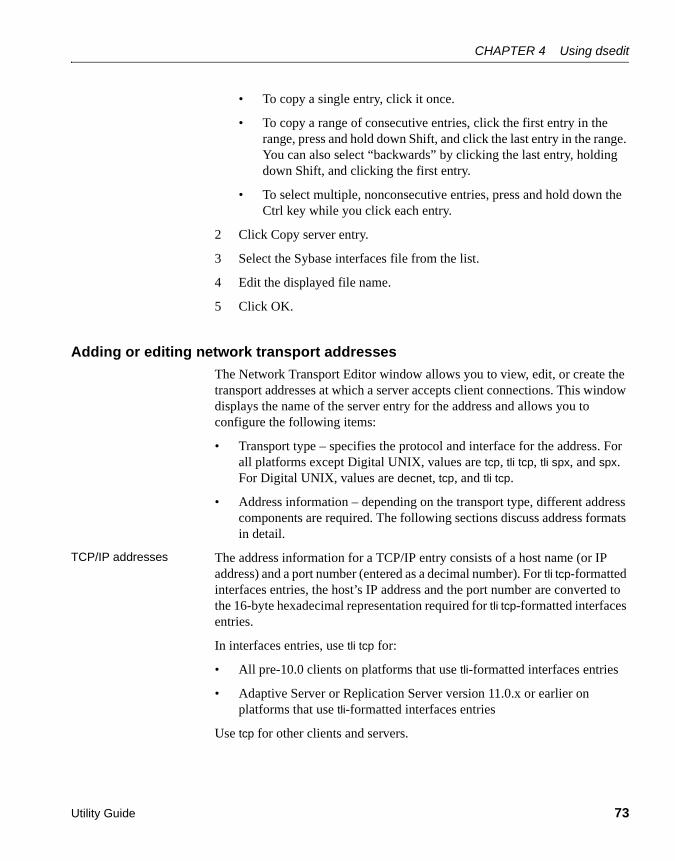
CHAPTER 4 Using dsedit
Utility Guide 73
• To copy a single entry, click it once.
• To copy a range of consecutive entries, click the first entry in the range, press and hold down Shift, and click the last entry in the range. You can also select “backwards” by clicking the last entry, holding down Shift, and clicking the first entry.
• To select multiple, nonconsecutive entries, press and hold down the Ctrl key while you click each entry.
2 Click Copy server entry.
3 Select the Sybase interfaces file from the list.
4 Edit the displayed file name.
5 Click OK.
Adding or editing network transport addresses
The Network Transport Editor window allows you to view, edit, or create the transport addresses at which a server accepts client connections. This window displays the name of the server entry for the address and allows you to configure the following items:
• Transport type – specifies the protocol and interface for the address. For all platforms except Digital UNIX, values are tcp, tli tcp, tli spx, and spx. For Digital UNIX, values are decnet, tcp, and tli tcp.
• Address information – depending on the transport type, different address components are required. The following sections discuss address formats in detail.
TCP/IP addresses The address information for a TCP/IP entry consists of a host name (or IP address) and a port number (entered as a decimal number). For tli tcp-formatted interfaces entries, the host’s IP address and the port number are converted to the 16-byte hexadecimal representation required for tli tcp-formatted interfaces entries.
In interfaces entries, use tli tcp for:
• All pre-10.0 clients on platforms that use tli-formatted interfaces entries
• Adaptive Server or Replication Server version 11.0.x or earlier on platforms that use tli-formatted interfaces entries
Use tcp for other clients and servers.

Adding, viewing, and editing server entries
74 Adaptive Server Enterprise
To indicate a TCP/IP address, choose tcp or tli tcp from the Transport Type menu.
SPX/IPX addresses
SPX/IPX addresses allow Adaptive Server to listen for connections from client applications running on a Novell network. SPX/IPX addresses consist of the following information:
• Host address – an eight-digit hexadecimal value representing the IP address of the computer on which the server runs. Each component of the dot-separated decimal IP address format maps to one byte in the hex address format. For example, if your host’s IP address is 128.15.15.14, enter “800F0F0E” as the SPX/IPX host address value.
• Port number – the port number, expressed as a four-digit hexadecimal number.
• Endpoint – the path for the device file that points to the SPX device driver. Defaults to /dev/mspx on Solaris and /dev/nspx on any other platform. If necessary, adjust the path so that it is correct for the machine on which the server runs. The default path is based on the platform on which you are running dsedit.
To indicate an SPX/IPX address, choose tli spx or spx from the Transport Type menu.
Copying server entriesdsedit allows you to copy server entries within a session and between sessions. This includes copying entries from a sql.ini file to a directory service.
Windows NT
❖ Copying server entries within the current session
1 Click on one or more server entries in the Server box.
Use the Shift key to select multiple entries.
2 Click the Copy button (below the menu bar), or choose Edit | Copy.
3 Click the Paste button (below the menu bar), or choose Edit | Paste.
dsedit appends the copied server entries with a version number of _n. You can rename the copied server entries using Server Object | Rename. See “Renaming a server entry” on page 71 for more information.
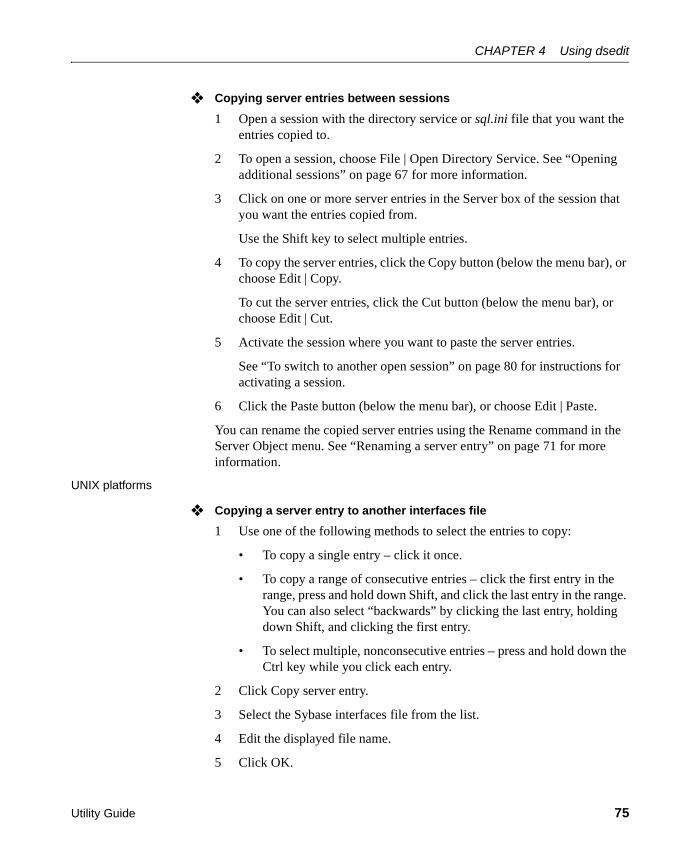
CHAPTER 4 Using dsedit
Utility Guide 75
❖ Copying server entries between sessions
1 Open a session with the directory service or sql.ini file that you want the entries copied to.
2 To open a session, choose File | Open Directory Service. See “Opening additional sessions” on page 67 for more information.
3 Click on one or more server entries in the Server box of the session that you want the entries copied from.
Use the Shift key to select multiple entries.
4 To copy the server entries, click the Copy button (below the menu bar), or choose Edit | Copy.
To cut the server entries, click the Cut button (below the menu bar), or choose Edit | Cut.
5 Activate the session where you want to paste the server entries.
See “To switch to another open session” on page 80 for instructions for activating a session.
6 Click the Paste button (below the menu bar), or choose Edit | Paste.
You can rename the copied server entries using the Rename command in the Server Object menu. See “Renaming a server entry” on page 71 for more information.
UNIX platforms
❖ Copying a server entry to another interfaces file
1 Use one of the following methods to select the entries to copy:
• To copy a single entry – click it once.
• To copy a range of consecutive entries – click the first entry in the range, press and hold down Shift, and click the last entry in the range. You can also select “backwards” by clicking the last entry, holding down Shift, and clicking the first entry.
• To select multiple, nonconsecutive entries – press and hold down the Ctrl key while you click each entry.
2 Click Copy server entry.
3 Select the Sybase interfaces file from the list.
4 Edit the displayed file name.
5 Click OK.
Troubleshooting dsedit
76 Adaptive Server Enterprise
Troubleshooting dseditThis section lists some common dsedit problems and describes how to correct them.
The dsedit utility does not startCheck for the following:
• The SYBASE environment variable is not set or points to the wrong directory.
• UNIX platforms X-Windows is not configured correctly. If you are running dsedit on a remote host, make sure that X-Windows clients on the remote host can connect to the X-Windows server on your own machine. See your X-Windows documentation for more troubleshooting information. If X-Windows is not available, use dscp instead of dsedit.
Error message: “Unable to open X display”UNIX platforms dsedit might not work if the display machine is set up to reject X-Windows connections from remote hosts. If this is the problem, you see a message similar to the following:
Unable to open X display. Check the value of your $DISPLAY variable. If it is set correctly, use the 'xhost +' command on the display machine to authorize use of the X display. If no X display is available, run dscp instead of dsedit.
This error may be caused by either of the following situations:
• The value for the DISPLAY environment variable is not entered correctly or is not set.
Solution: Enter the DISPLAY environment variable correctly.
• You are not authorized to open windows on the machine to which DISPLAY refers.
Solution: Run the command ‘xhost +’ on the display machine.

CHAPTER 4 Using dsedit
Utility Guide 77
Cannot add, modify, or delete server entriesCheck for permissions problems with the interfaces file. To edit interfaces entries, you must have write permission on both the interfaces file and the Sybase installation directory.

Troubleshooting dsedit
78 Adaptive Server Enterprise

Utility Guide 79
C H A P T E R 5 Using dscp
dscp is a UNIX utility program that you use to view and edit server entries in the interfaces file.
Note dscp is not available for Windows NT.
For a detailed description of dscp syntax, see dscp on page 204.
Getting started with dscp❖ To start dscp
• Enter:
$SYBASE/bin/dscp
The dscp prompt, >>, appears.
❖ To get help with dscp
• To view the dscp help screen, enter one of the following commands:
helph?
Topic PageGetting started with dscp 79
Working with server entries 81
Exiting dscp 86
Quick reference for dscp utility commands 86
Getting started with dscp
80 Adaptive Server Enterprise
Using a dscp sessionBefore you can view, add, or modify server entries, you must open a session so that you can interact with the interfaces file.
You can have multiple sessions open at one time.
❖ To open a session with the interfaces file
• Enter:
open InterfacesDriver
When you open a session, dscp provides the session’s number. For example, if you open a session using the open InterfacesDriver command, dscp displays the following message:
okSession 1 InterfacesDriver>>
❖ To list all open sessions
• Enter:
sess
❖ To switch to another open session
• Enter the following, where sess is the session number:
switch sess
For example, you are switched to session 3 if you enter:
switch 3
The switch keyword is optional. For example, entering “3” also switches you to session 3.
❖ To close a session
• Enter the following, where sess is the session number:
close sess
For example, session 3 closes if you enter:
close 3
If you do not specify a session number, dscp closes the current session.

CHAPTER 5 Using dscp
Utility Guide 81
Working with server entriesUse dscp to add or modify server entries.
Adding and modifying server entriesAfter you open a session, you can add or modify server entries associated with that session.
Note When you add or modify a server entry, dscp automatically creates or modifies both master and query lines. The master line and the query line of an interfaces file entry contain identical information.
Each server entry is made up of a set of attributes. When you add or modify a server entry, dscp prompts you for information about each attribute. Table 5-2 describes each attribute.
Table 5-1: Server attributes
Attributes Type of value Default value and valid values
Can be edited when adding or modifying a server entry
Server Object Version
Integer 110 Adding: No
Modifying: No
Server Name Character string n/a Adding: n/a
Modifying: No
Server Service Character string SQL SERVER Adding: Yes
Modifying: No
Server Status Integer 4
Valid values are:
1 Active
2 Stopped
3 Failed
4 Unknown
Adding: No
Modifying: No
Transport Type Character string tcp. Valid values are: decnet, spx, tcp, tli, spx, tli tcp
Adding: Yes
Modifying: Yes
Transport Address
Character string None. Valid values are character strings recognized by the specified transport type
Adding: Yes
Modifying: Yes

Working with server entries
82 Adaptive Server Enterprise
❖ To add a server entry
1 Enter:
add servername
You are now in add mode. You can continue to add server entries, but you cannot execute any other dscp commands until you exit this mode. While in add mode, dscp prompts you for information about servername.
2 Do one of the following:
• Enter a value for each attribute, or
• Press Return to accept the default value, which is shown in brackets [ ].
For example, dscp prompts for the following information when you enter:
add myserver
Service: [SQL Server]Transport Type: [tcp] tcpTransport Address: victory 8001Security Mechanism []:
A server entry can have up to 20 transport type/address combinations associated with it.
For a description of the server attributes, see Table 5-1 on page 81.
3 To exit add mode, enter:
#done
❖ To modify a server entry
You cannot use dscp to modify the Version, Service, and Status entries in the interfaces file.
1 Enter:
Security Mechanism
Character string
Note You can add up to 20 security mechanism strings for each server entry
NoneValid values are character strings associated with object identifiers defined in the user’s objectid.dat.
Adding: Yes
Modifying: Yes
Attributes Type of value Default value and valid values
Can be edited when adding or modifying a server entry
CHAPTER 5 Using dscp
Utility Guide 83
mod servername
You are now in modify mode. You can continue to modify server entries, but you cannot execute any other dscp commands until you exit this mode. In modify mode, dscp prompts you for information about servername.
2 Do one of the following:
• Enter a value for each attribute, or
• Press Return to accept the default value, which is shown in brackets [ ].
For example, dscp prompts for the following information when you enter:
mod myserver
Version: [1]Service: [SQL Server] Open ServerStatus: [4]Address:Transport Type: [tcp]Transport Address: [victory 1824] victory 1826Transport Type: [tcp]Transport Address: [victory 1828]Transport Type: []Security Mechanism []:
For a description of the server attributes, see Table 5-1 on page 81.
3 To delete an address, enter:
#del
4 To exit modify mode, enter:
#done
Copying server entriesdscp allows you to copy server entries within a session and between two sessions. You have four options when copying a server entry.
You can copy:
• A server entry to a new name in the current session
• A server entry to a different session
• A server entry to a new name in a different session
Working with server entries
84 Adaptive Server Enterprise
• All entries in the current session to a different session
❖ To create a new server entry within a session by copying
• Enter:
copy name1 to name2
For example, if you enter:
copy myserver to my_server
dscp creates a new entry, “my_server,” that is identical to “myserver.” You can then modify the new entry and leave the original intact.
❖ To copy a server entry without changing the name
• Enter:
copy name1 to sess
For example, dscp copies the “myserver” entry in the current session to session 2 when you enter:
copy myserver to 2
❖ To copy a server entry and rename it
• Enter:
copy name1 to sess name2
For example, dscp copies the “myserver” entry in the current session to session 2 and renames it “my_server” when you enter:
copy myserver to 2 my_server
❖ To copy all entries in the current session to a different session
• Enter:
copyall sess
For example, dscp copies all entries in the current session to session 2 when you enter:
copyall 2
Listing and viewing contents of server entriesYou can list names and attributes associated with a session.
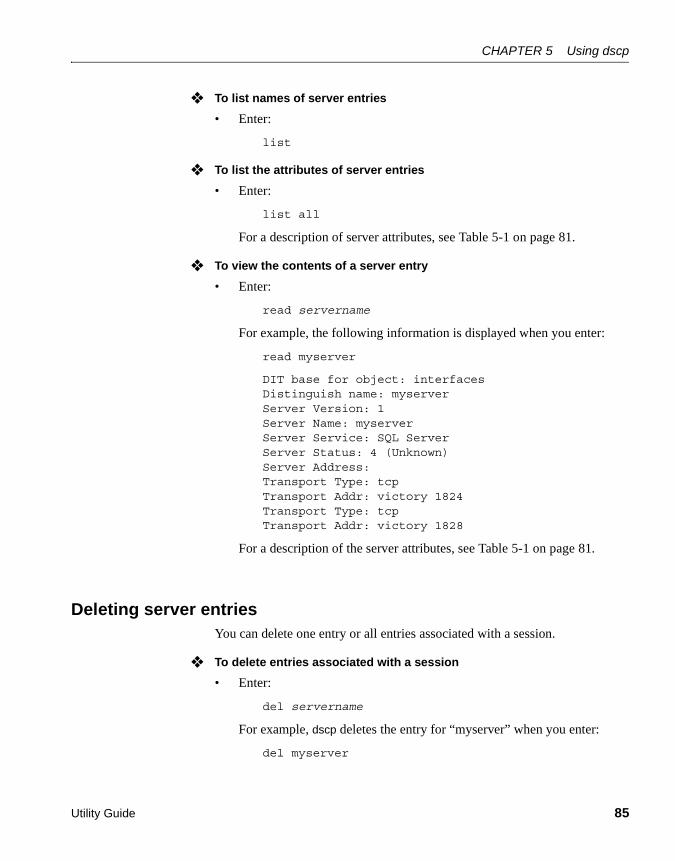
CHAPTER 5 Using dscp
Utility Guide 85
❖ To list names of server entries
• Enter:
list
❖ To list the attributes of server entries
• Enter:
list all
For a description of server attributes, see Table 5-1 on page 81.
❖ To view the contents of a server entry
• Enter:
read servername
For example, the following information is displayed when you enter:
read myserver
DIT base for object: interfacesDistinguish name: myserverServer Version: 1Server Name: myserverServer Service: SQL ServerServer Status: 4 (Unknown)Server Address:Transport Type: tcpTransport Addr: victory 1824Transport Type: tcpTransport Addr: victory 1828
For a description of the server attributes, see Table 5-1 on page 81.
Deleting server entriesYou can delete one entry or all entries associated with a session.
❖ To delete entries associated with a session
• Enter:
del servername
For example, dscp deletes the entry for “myserver” when you enter:
del myserver
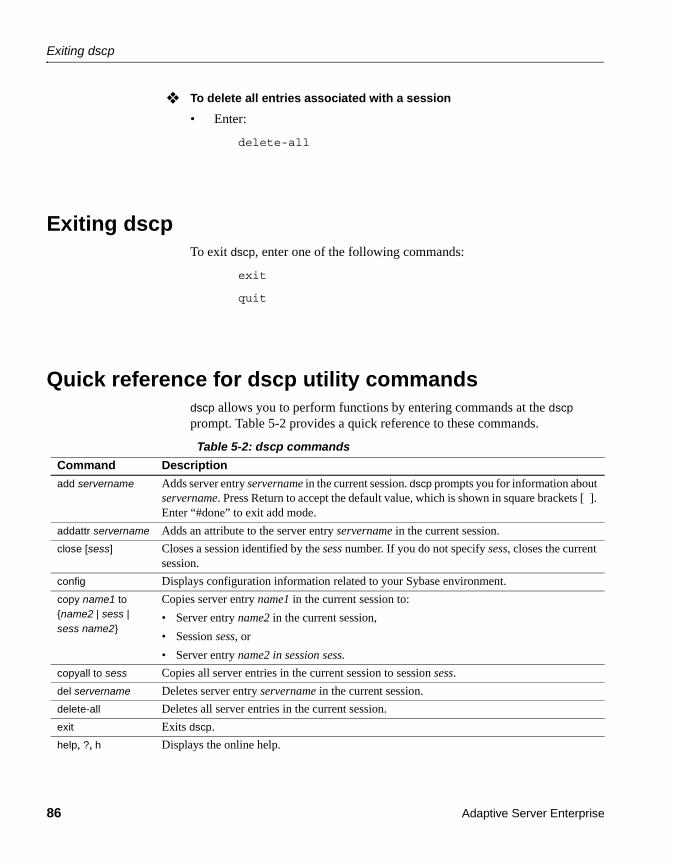
Exiting dscp
86 Adaptive Server Enterprise
❖ To delete all entries associated with a session
• Enter:
delete-all
Exiting dscpTo exit dscp, enter one of the following commands:
exit
quit
Quick reference for dscp utility commandsdscp allows you to perform functions by entering commands at the dscp prompt. Table 5-2 provides a quick reference to these commands.
Table 5-2: dscp commands
Command Description
add servername Adds server entry servername in the current session. dscp prompts you for information about servername. Press Return to accept the default value, which is shown in square brackets [ ]. Enter “#done” to exit add mode.
addattr servername Adds an attribute to the server entry servername in the current session.
close [sess] Closes a session identified by the sess number. If you do not specify sess, closes the current session.
config Displays configuration information related to your Sybase environment.
copy name1 to {name2 | sess | sess name2}
Copies server entry name1 in the current session to:
• Server entry name2 in the current session,
• Session sess, or
• Server entry name2 in session sess.
copyall to sess Copies all server entries in the current session to session sess.
del servername Deletes server entry servername in the current session.
delete-all Deletes all server entries in the current session.
exit Exits dscp.
help, ?, h Displays the online help.
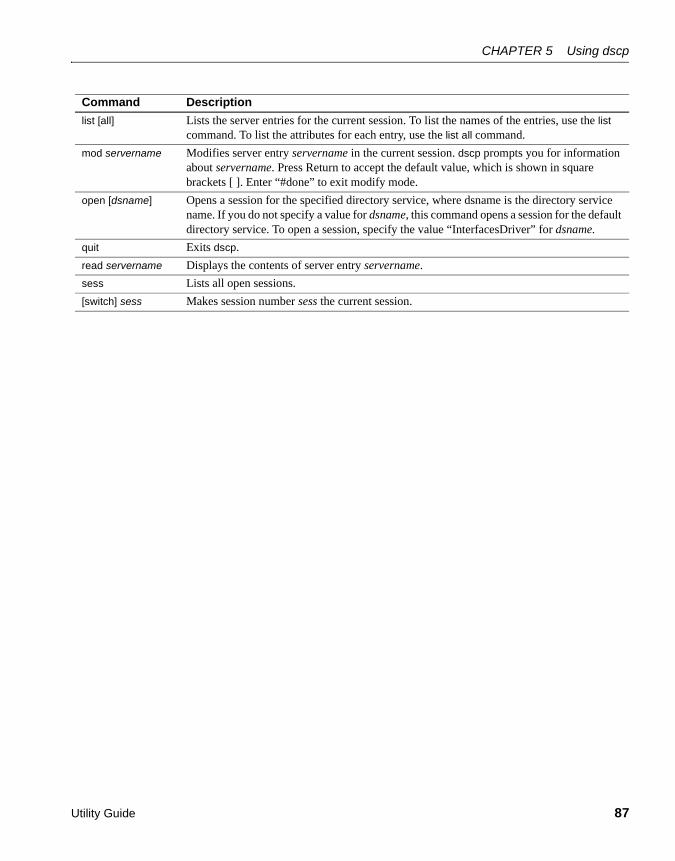
CHAPTER 5 Using dscp
Utility Guide 87
list [all] Lists the server entries for the current session. To list the names of the entries, use the list command. To list the attributes for each entry, use the list all command.
mod servername Modifies server entry servername in the current session. dscp prompts you for information about servername. Press Return to accept the default value, which is shown in square brackets [ ]. Enter “#done” to exit modify mode.
open [dsname] Opens a session for the specified directory service, where dsname is the directory service name. If you do not specify a value for dsname, this command opens a session for the default directory service. To open a session, specify the value “InterfacesDriver” for dsname.
quit Exits dscp.
read servername Displays the contents of server entry servername.
sess Lists all open sessions.
[switch] sess Makes session number sess the current session.
Command Description

Quick reference for dscp utility commands
88 Adaptive Server Enterprise
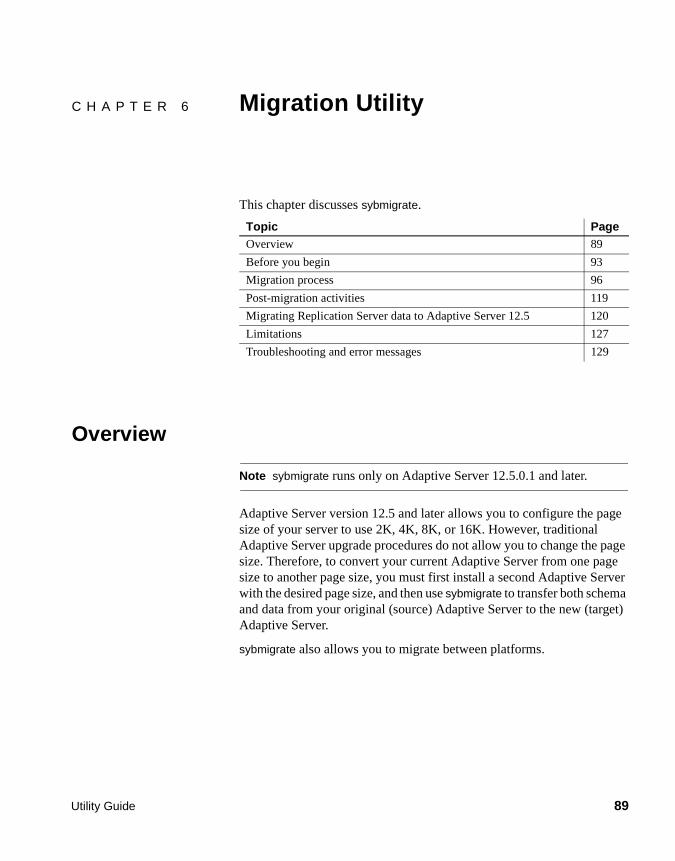
Utility Guide 89
C H A P T E R 6 Migration Utility
This chapter discusses sybmigrate.
Overview
Note sybmigrate runs only on Adaptive Server 12.5.0.1 and later.
Adaptive Server version 12.5 and later allows you to configure the page size of your server to use 2K, 4K, 8K, or 16K. However, traditional Adaptive Server upgrade procedures do not allow you to change the page size. Therefore, to convert your current Adaptive Server from one page size to another page size, you must first install a second Adaptive Server with the desired page size, and then use sybmigrate to transfer both schema and data from your original (source) Adaptive Server to the new (target) Adaptive Server.
sybmigrate also allows you to migrate between platforms.
Topic PageOverview 89
Before you begin 93
Migration process 96
Post-migration activities 119
Migrating Replication Server data to Adaptive Server 12.5 120
Limitations 127
Troubleshooting and error messages 129
Overview
90 Adaptive Server Enterprise
Existing solutionsThe variable page size feature enhances the functionality and usability of Adaptive Server, but does not provide an upgrade path for existing customers. Users who need to change the page size of an existing Adaptive Server must build a new server with the intended page size and migrate the data from the source Adaptive Server to the target Adaptive Server. Since dump and load mechanisms are not supported across different page sizes, the only option available is to use ddlgen or a similar means to generate schema, and then use bcp to extract the data from the source Adaptive Server and to load it into the target Adaptive Server. This technique is complex and difficult to manage.
Benefits of sybmigratesybmigrate:
• Aids users in changing the page sizes of their database applications.
• Provides a manageable and smooth migration process.
• Allows customers to take advantage of the variable page size feature for existing databases with user data, thus realizing the full benefit of Adaptive Server versions 12.5 and later.
What sybmigrate doesDuring the setup portion of the migration process, the following server data is migrated to the target Adaptive Server:
• Remote servers
• Logins
• Login attributes
• Server roles
• Login roles
• Role attributes
• Users
• Alternate users
• Roles
CHAPTER 6 Migration Utility
Utility Guide 91
• Permissions
• Remote logins
• External login attributes
• Timer
• Resource limits
• Replication attributes
• Display level attributes
• User messages in the master database
• Java classes in the master database
• JAR files in the master database
During the migration portion of the migration process, the following database-specific data is migrated to the target database:
• Defaults
• User-defined datatypes
• Rules
• User tables
• User table data
• Views
• Triggers
• Indexes
• Stored procedures
• Extended stored procedures
• Users
• Logins
• Roles
• Remote servers
• Database data
• Users
• Alternate users

Overview
92 Adaptive Server Enterprise
• Roles
• Role attributes
• Permissions
• User messages
• Java classes
• JAR files
• Defaults
• Rules
• User-defined types
• Tables
• Indexes
• Referential constraints
• Views
• Stored procedures
• Triggers
What sybmigrate does not doThe following items must be migrated manually:
• User-defined thresholds
• Abstract plan definitions maintained in sysqueryplans
• All system databases except the model database
• Any required database options like cache binding, recovery order, and the associated log I/O size as specified by sp_logiosize
• Proxy databases
• Engine groups
• Engine bindings
• Execution classes
• Cache configurations

CHAPTER 6 Migration Utility
Utility Guide 93
• Auditing tables and auditing configuration
• Server-wide row-lock promotion settings
• Access rules
Note Drop access rules before beginning data migration; they can prevent the Database Owner from accessing all rows in a table, which prevents complete data migration.
• Compiled objects with hidden SQL text
• User-defined segments
• Constraints are migrated but when they are bound by name to user-defined message numbers, the bindings must be re-created manually
• Settings for objects such as ascinserts, maxwritedes, indextrips, oamtrips, datatrips, and sortbufsize created using dbcc tune
• Device definitions
• SQLJ functions
• Proxy tables for external files
• Audit options and audit events
• Server configuration
Before you begin
Required components for the sybmigratesybmigrate requires JRE 1.3, jConnect™ for JDBC™ 5.5, ddlgen components, and Component Integration Services in the source Adaptive Server.
Because sybmigrate requires a server-to-server connection, two Adaptive Servers must be running. Make sure that you have the appropriate licenses.
Before you begin
94 Adaptive Server Enterprise
DependenciesBefore you begin the migration process, create databases, devices, and segments on the target Adaptive Server. Server and cache configurations must also be already installed on the target Adaptive Server.
Use ddlgen to extract the corresponding scripts from the source Adaptive Server, and modify them as needed before applying them to the target Adaptive Server. For more information, see ddlgen on page 184.
Installationsybmigrate is installed as part of the Adaptive Server 12.5.0.1 software. For information about how to install Adaptive Server, see the Installation Guide for your platform.
UpgradeBefore you run sybmigrate, upgrade the source Adaptive Server to version 12.5.0.1 or later, and install the target Adaptive Server as version 12.5.0.1 or later. Perform all upgrade-related checks before migrating data.
You must install the target Adaptive Server with the new page size. Use either srvbuild or sysconfig.exe to build the new Adaptive Server.
The major version of the source and the target Adaptive Server must be the same. That is, when you are running sybmigrate on a 12.5.0.1 version Adaptive Server the 12.5 should be the same, but the 0.1 may increase.
PermissionsThe System Administrator login is needed for the setup portion of the migration process. For the remainder of the process, the login must have “sa_role” and “sso_role” privileges to run sybmigrate.
CHAPTER 6 Migration Utility
Utility Guide 95
Changing target login accounts
Once you have migrated between different platforms, login passwords are not compatible. However, sybmigrate allows you to change the password on target Adaptive Server login accounts during the setup session of the migration process.
To change the password on the target login account, the System Administrator must log into the target Adaptive Server and issue sp_password on all login accounts.
Note If you do not change target Adaptive Server login account passwords during the setup session of the migration process, a System Administrator must change them manually on the target Adaptive Server once the migration process is complete.
In addition to the changing password options, sybmigrate also allows you to lock and unlock target Adaptive Server accounts. This option is provided so that the System Administrator can block a user from logging into the target Adaptive Server during the migration process.
Platformssybmigrate works on both UNIX and Windows NT platforms.
• For UNIX, the executable file is located in the $SYBASE/$SYBASE_ASE/bin/sybmigrate directory.
• For NT, the executable file is located in the %SYBASE%\%SYBASE_ASE%\bin\sybmigrate.bat directory.
Environment settingsThe following environment variables must be set correctly. With the exception of SYBMIGRATE_MEMORY, these environment variables are defined in the SYBASE.csh or SYBASE.sh files that are created during the Studio Installer installation process.
• SYBASE – defines the location of the Sybase release path.
• SYBASE_ASE – defines the location of the Adaptive Server component directory.

Migration process
96 Adaptive Server Enterprise
• SYBASE_JRE – defines the location of the Java runtime environment. This is generally set to $SYBASE/shared-1_0/jre1.2.2 in the Adaptive Server release area. This environment variable overrides JAVA_HOME.
SYBASE_JRE defaults to $SYBASE/shared-1_0/jre1.2.2.
• JAVA_HOME – defines the location of the Java runtime environment if SYBASE_JRE is not set.
Note Either SYBASE_JRE or JAVA_HOME is required for sybmigrate to run properly.
• SYBMIGRATE_MEMORY – specifies the amount of memory to be used when invoking the Java virtual machine (JVM). This environment variable should be specified with a number, which refers to the amount of memory in megabytes. If SYBMIGRATE_MEMORY is not set, JVM uses the default memory setting of 512MB.
If sybmigrate is using a large number of threads, or working on many tables or indexes in parallel, increase the amount of memory allocated to the JVM on the client side.
Migration processThe goal of sybmigrate is to provide a means to migrate all objects and user data that exist on the source Adaptive Server. However, when migration takes place, there is some server-wide data that needs to be migrated before any user data or user objects can be migrated to individual databases.
The hierarchy of objects dictates the order in which objects are re-created. Generally, server-wide objects from the master database are created first. Independent objects like default languages and character into databases first.
Overview of the migration processThe migration procedure consists of configuring the source and target Adaptive Servers, setting up the migration paths, migrating objects, and validating the migrated objects.

CHAPTER 6 Migration Utility
Utility Guide 97
The setup session establishes the migration paths from the source database to the target database. The setup creates the repository database and the work databases, and registers the option to migrate the server data. The setup session can only be executed by an “sa” login.
The migrate session is used to migrate objects and data from the source database to the target database.
The validate session validates the migrated objects. Validation ensures the integrity of data and objects that have been successfully migrated from the source database to the target database.
Pre-migration considerationsYou must have the source Adaptive Server and the target Adaptive Server running concurrently when you migrate data from one to the other.
sybmigrate assumes that the target Adaptive Server has been installed and configured prior to data migration. Use srvbuild or syconfig to create a new Adaptive Server with the required logical page size.
Keep the following items in mind prior to migration, when you are creating the target Adaptive Server and configuring the source Adaptive Server:
• When you create a new Adaptive Server with a different logical page size into which you want to migrate data, you must adequately adjust the size of the database on the target Adaptive Server to accommodate the inbound data. If you are migrating data to an Adaptive Server with a larger logical page size, this is especially important.
Use the space estimation report, space_est, to determine how much space is available on your target database. For more information about space_est, see “Starting sybmigrate” on page 102.
• To speed the migration process, you can run multiple sessions of sybmigrate within the same server. However, running more than one session of sybmigrate on the same source and target database path is not allowed.
• You must manually create segments on the target database before migrating tables and indexes.
• The data transfer rate for sybmigrate is configured through CIS bulk insert array size. The default configuration for CIS bulk insert array size is 50 rows. This means that as many as 50 rows of data are buffered by CIS before being transferred to the target Adaptive Server.

Migration process
98 Adaptive Server Enterprise
To increase throughput, increase the configuration of CIS bulk insert array size to a larger value.
However, increasing CIS bulk insert array size causes the source Adaptive Server to use memory from the operating system for local buffers. This can lead to excessive consumption of operating system memory.
Sybase recommends that if you do choose to increase the CIS bulk insert array size default value, you do so modestly. See the CIS documentation for more information.
• CIS bulk insert array size has no effect on data throughput if the table being transferred has a text, image, or Java ADT column. When a table has a text, image, or Java ADT column in it, all data is migrated one row at a time, for the duration of the migration of that particular table. Also, no array buffering takes place.
• As the data migration is being done using CIS bulk transfer, the value for the configuration parameter CIS packet size on the source Adaptive Server can affect the speed of the data transfer. The recommended value for CIS packet size on the source Adaptive Server is the logical page size (2K, 4K, 8K, or 16K) of the target Adaptive Server.
• max packet size allowed on the target Adaptive Server should match the value of CIS packet size on the source Adaptive Server.
For more information on max packet size allowed, see the System Administration Guide.
• To maximize the performance of sybmigrate, increase the additional network memory configuration parameter on the target Adaptive Server to a value larger than the default.
For more information on additional network memory, see the System Administration Guide.
• All the above considerations affect the max memory configuration parameter. Before migrating your data, make sure that max memory is set to a sufficiently large value.
• There are three types of data that are migrated: server data, database data, and user objects. To migrate metadata (the server and database data), the target Adaptive Server must be newly installed so that the migrated metadata does not conflict with any residual data from previous usage.
If you are migrating only user objects, you can use a previously used Adaptive Server. For user data however, the target tables must be empty.

CHAPTER 6 Migration Utility
Utility Guide 99
• Before migrating data, create the databases into which you want to migrate data on the target Adaptive Server. The databases should have the same name that they have on the source Adaptive Server.
• To enable conversion of character sets that do not have an internal Adaptive Server conversion routine, configure the target Adaptive Server with enable unicode conversions set to 1.
• Determine the size of the named caches and buffer pools on the target Adaptive Server. sybmigrate does not migrate cache configurations. You can use the information that is generated by ddlgen and apply it to the target Adaptive Server, or you can choose to configure larger amounts of memory, in light of the larger page size being used.
However, sybmigrate migrates cache bindings, therefore if the required cache is not in the target Adaptive Server, warnings are generated in the migration log.
• Before running sybmigrate, you must install the desired languages on the target Adaptive Server. The default language should be the same on the source and the target Adaptive Server.
If there are user messages on the source Adaptive Server that are not installed on the target Adaptive Server, sybmigrate aborts user message migration and reports an error.
• If you are migrating Java columns, you must enable Java on the source and target Adaptive Server prior to migration. Enter:
sp_configure 'enable java', 1
• After you have upgraded your source Adaptive Server to version 12.5.0.1 or later, restart it before you begin migration.
• To complete the migration, the source and target Adaptive Servers must have different local server names. Set the local server name, and then restart the servers for the change to take effect.
• If multibyte character sets are configured on the target Adaptive Server after initiating the migration process, you must manually run dbcc fix_text on the sysattributes and sysxtypes system catalogs to make the text columns in these catalogs consistent with the multibyte character sets.
Sybase recommends that you configure the target server character set first, and then initiate the migration process.

Migration process
100 Adaptive Server Enterprise
Configuration and tuning for higher performanceDepending upon your server resources, you can configure sybmigrate and Adaptive Server for optimal performance.
Configuration considerations for sybmigrate
Copy threads and create index threads are used to migrate tables and re-create indexes. When you are configuring sybmigrate during setup mode, the values of COPY_THREADS and INDEX_THREADS can increase the speed at which sybmigrate copies and migrates data.
The number of copy threads controls the number of tables for which data migration is done simultaneously. One copy thread is assigned to each table. When the thread has successfully completed one task, it moves on to another. Depending upon the size of your database and the resources for your Adaptive Server, you can increase the number of copy threads used during the migration process to improve performance.
Note When you are migrating a large number of objects in parallel, check the value of SYBMIGRATE_MEMORY to verify that there is sufficient memory allocated to sybmigrate.
Index threads control the number of threads used to re-create indexes on the target Adaptive Server tables. One thread per table is used to re-create the indexes. Once the indexes have been re-created on a table, the thread proceeds to the next successfully migrated table. Any threads without a task exits. The number of create index threads is expected to be substantially smaller than the number of copy threads.
If you configure INDEX_THREADS to a large number, be sure that the target Adaptive Server is also configured with a large number of sort buffers. The use of index threads takes up space in the target database, so make sure that the target database is configured with adequate space for the designated number of index threads. Also, you must configure the target database with extra space if you are going to be re-creating clustered indexes.
Configuration considerations for Adaptive Server
There are several configuration parameters on both the source and target Adaptive Server that affect the performance of the migration process.
On the source Adaptive Server:
CHAPTER 6 Migration Utility
Utility Guide 101
• cis packet size – should be equal to max page size of the target Adaptive Server.
• number of user connections – should be high enough to accommodate the migration of multiple tables simultaneously according to the value of COPY_THREADS and INDEX_THREADS.
• max parallel degree – should be set to a value that is larger than the largest number of partitions in a single table. Data migration is done in parallel, and if max parallel degree is not set to a value large enough to accommodate the partitioned tables, the tables do not migrate.
• number of worker processes – data migration for partitioned tables requires one worker thread per partition. Therefore, if t partitioned tables with p partitions each are migrating simultaneously, configure a total of t multiplied by p worker threads on the source Adaptive Server.
• cis bulk insert batch size – controls the number of rows after which the data transfer transaction is committed. The default value is 0. Using the default value is the safest way to ensure data integrity while migrating data, but it can result in a large number of page and row locks on the source Adaptive Server. To reduce the number of locks, increase this value.
If you increase the value of cis bulk insert batch size, only a partial data migration completes if an error occurs during the process. In this situation, manually truncate the target table and restart sybmigrate.
• cis bulk insert array size – controls the number of rows that are copied in bulk at one time. The default is 50 rows per batch. For faster data migration, increase this value.
If the table contains text or image columns, the data is transferred one row at a time, regardless of the value for cis bulk insert array size.
The following configuration parameters on the target Adaptive Server affect the performance of sybmigrate:
• max network packet size – should be set to a value that is at least equal to max page size.
• number of user connections – should be set to accommodate the migration of multiple tables in parallel and partitioned tables.
For parallel data transfer for partitioned tables, worker processes are required on the source Adaptive Server, but user connections are required on the target Adaptive Server. If you are migrating partitioned tables, set the number of user connections on the target Adaptive Server to the same value as number of worker processes on the source Adaptive Server.

Migration process
102 Adaptive Server Enterprise
• number of sort buffers – the default value of 500 is sufficient during the migration process. You can increase this value when sybmigrate rebuilds the indexes, especially if you are migrating indexes on partitioned tables.
Possible errors to avoidBefore beginning the data migration process, sybmigrate checks for the following error conditions. If any of these conditions are detected, the migration procedure is aborted.
• A target table with existing data – any attempt to migrate data to a table that already contains data results in the failure of sybmigrate.
• A target table with existing indexes – the presence of indexes on a target table causes sybmigrate to operate in slow bcp. Manually drop all indexes before you begin the data migration.
• Unmatching numbers of partitions on the source and target tables – if the number of partitions on the source and target table do not match, the attempt to migrate data fails. sybmigrate only migrates data; it does not redistribute it across partitions.
Auto-select depedent objects for migrationsybmigrate selects depedent objects for migration when you use the auto-select feature. The auto-select feature checks for the existence of dependent objects, and automatically migrates them to the target Adaptive Server. For a successful migration, Sybase recommends that you use this feature.
Starting sybmigrate
Warning! sybmigrate assumes that the source and target Adaptive Servers will not have any activity during the migration. If objects are created, modified, or deleted during the migration process (setup, migrate, and validate), Sybase cannot guarantee migration integrity.
Whether you are running the GUI or the resource file version of sybmigrate, start it with the following relevant command line arguments:
CHAPTER 6 Migration Utility
Utility Guide 103
sybmigrate [-v ] [-h ] [-f ][-D 1 | 2 | 3 | 4 ][-I interfaces file ][-r input resource file ][-m setup | migrate | validate | report ][-rn status | space_est | repl | diff | password ][-l log file ][-t output template resource file ][-J client_charset ][-z language ][-T trace_flags ][-Tase trace flags ][-f ]
Where:
• -v – prints the version string and exits.
• -h – prints the help information and syntax usage and exits.
• -f overrides the locking session.
If sybmigrate exited a session inappropriately, use -f to override the source and target database binding that is created so that only one session of sybmigrate can run on a source and target database path.
• -D sets the debug level for sybmigrate. The default debug level is 2.
• -I identifies a specific interfaces file to find server names. If no interfaces file location is designated, for Windows $SYBASE/interfaces or for UNIX %SYBASE%\ini\sql.ini is used.
Note You can override sybmigrate, and use the interfaces file by providing the -I arguement if the LDAP entry is defined in $SYBASE/$SYBASE_OCS/config/libtcl.cfg on Unix or in %SYBASE%\%SYBASE_OCS%\ini\libtcl.cfg on NT.
• -r specifies that the resource file mode is to be used in the migration process. If the input resource file is not specified by using the -r parameter, sybmigrate operates in GUI mode.
If you use the -r parameter, then you also need to use the -m argument to specify the type of operation to perform: setup, migrate, validate, or report. You can run the entire migration process in the resource file mode, or you can choose to run only parts of in this fashion.
• -m designates the types of operations that are performed:

Migration process
104 Adaptive Server Enterprise
• setup – to set up the repository and migration working database, and to migrate the server-wide data.
• migrate – to perform data and object migration.
• validate – to validate the migrated objects.
• report – to run any of the five reports. The reports can be run in the GUI and resource file mode. The available reports are:
• status – the migrate object status report gives information about objects that have been migrated. To run this report, issue:
sybmigrate -r resource file -m report -rn status
• space_est – use the target database space estimation report to verify that you have sufficient resources allocated to your target database. In the resource file mode, issue the following command to run the space_est report:
sybmigrate -r resource file -m report -rn space_est
• repl – use the replication report to check any explicitly replicated objects that have been migrated, determine the type of replication system, and to produce SQL commands for users to execute on the target Adaptive Server and the Replication Server. To run the repl report, issue:
sybmigrate -r resource file -m report -rn repl
• diff – checks the objects between the source and target databases. Users can run the report on individual objects, or the entire database, except for server and database information or metadata. You can run the diff report at any time. You do not need to run a setup session to run the diff report. The source and target database name do not need to be the same when running the diff report.
The diff report provides the following information for the following object types:
• Server information – compares the master database system catalogs row count between the source and target Adaptive Server. This task is similar to the validation session.
• Database information – compares the user database system catalogs row count between the source and target Adaptive Server. This task is similar to the validation session.

CHAPTER 6 Migration Utility
Utility Guide 105
• DDL objects – the report displays whether the objects exist on the source or the target Adaptive Servers. If the objects exists in both databases, that object is not displayed in the report.
• User table data – compares the row count of the user tables in the source and target Adaptive Server. If the table only exists in the source or target databases, the table is not displayed in the report.
• password – creates a file for the changed passwords. This report can only be run by a System Administrator.
• -rn indicates what type of report to generate. If -rn is not specified, all five reports are run.
• -l indicates a user-defined log file where the output of the migration process is stored. If -l is not used, the logs are stored in $SYBASE/$SYBASE_ASE/init/logs or the working directory.
• -t directs sybmigrate to generate an output template resource file, to be used for subsequent migrations in the resource file mode.
-t requires that you start sybmigrate using the -r argument specifying the login information. This argument also requires -m to specify what type of resource file is to be generated.
Note You can use -t only in the resource file mode.
• -J specifies the character set to be used for the Adaptive Server connection.
• -z specifies the language to be used for the Adaptive Server connection.
• -T sets command line trace flags.
• -Tase is used to run Adaptive Server trace flags (turned on using dbcc traceon) for all Adaptive Server connections opened by sybmigrate. The trace flags should be specified in a comma-separated list.
GUI modeYou can use either the GUI or the resource file mode for the migration process. You can also elect to run parts of the migration process in GUI mode, and parts of it in resource file mode.
Migration process
106 Adaptive Server Enterprise
When running sybmigrate in GUI mode, there are three phases of the migration process that you must follow: setup, migrate, and validate.
Setup
Before migrating data, indicate your source and target Adaptive Servers and register the paths between the source and target databases they contain. To do this, start sybmigrate with the -m setup command line option, or by selecting “Setup source databases for migration” when you are prompted in the Session Type window.
❖ Indicating your source and target Adaptive Servers and registering the paths between the source and target databases
1 The Connect to ASE window allows you to designate the source and the target Adaptive Servers for your migration process.
• You can choose from the drop-down menu in the Server fields. The menus provide a list of Adaptive Servers that are located in the default interfaces file ($SYBASE/interfaces on UNIX or %SYBASE%\ini\sql.ini on NT) or in the interfaces file that you specify with the -I command line argument.
If you are not using the interfaces file, you cannot use the -I command line argument; you must specify the source and the target Adaptive Servers in the host:port format.
• During the setup phase, you must be logged in to the servers as a System Administrator. Enter “sa” into the Login field, enter your password, and select Connect.
Note You can run only one session of sybmigrate at a time. Therefore, if there is another user running sybmigrate on the same source and target Adaptive Servers, you see the error message “Setup session lock: Either previous setup exit abnormal or there is another setup session running. Do you want to override?” You can override the session lock because it is possible that the previous session may have crashed or quit prematurely.
Before proceeding with the setup and migration process, verify that there are no other users running sybmigrate. If there is more than one user running sybmigrate simultaneously, Sybase cannot guarantee data integrity.
2 The Session Type window prompts you to select the type of operation you want to perform. Choose from:

CHAPTER 6 Migration Utility
Utility Guide 107
• Setup source databases for migration
• Migrate database objects and data
• Validate the migrated objects and data
• Reports – when you select Reports, a Reports type indow displays. You can choose from status, space_est, repl, diff, or password. When you select either the space estimation or the replication report, a Report Paths Window prompts you to select the database paths on which to run the reports.
The Password, Status, and Replications reports are disabled if the setup session has not been completed between the source and target Adaptive Servers.
If you started sybmigrate with the -m option specifying setup, migrate, validate, or reports you do not see this window.
3 The Setup Paths window prompts you to select the source and target databases located within your source and target Adaptive Servers, so that sybmigrate knows where to put the data from the source Adaptive Server in the target Adaptive Server.
Note The source and target databases must have identical names.
The Source Database drop-down list has a list of the databases in your source Adaptive Server.
The Target Database drop-down list has a list of the databases available in the target Adaptive Server. sybmigrate requires that you create the databases in the target Adaptive Server before beginning the migration process.
sybmigrate allows you to set the copy thread, create index thread, and work thread values during the setup, migration, or validate session of migration. The value you assign to each of these properties in the setup session becomes the default value, but you can temporarily override this value in the migrate or validate sessions.
The Copy Thread field tells sybmigrate how many threads to use during the data migration process. There is no limit on the number of threads that you can use, so depending on the amount of data to be migrated and the server resources available, you can increase the number of copy threads to maximize performance.

Migration process
108 Adaptive Server Enterprise
The Create Index Thread field tells sybmigrate how many create index threads to use when migrating data. There are no limits to how many create index threads you can use, so again, you can increase this number to maximize performance.
Note Copy thread, and create index thread values are limited to the resources available to Adaptive Server.
Select the number of copy threads and create index threads for each database path that you create. If you have large and small databases within the same server, you can increase or decrease the number of threads accordingly.
Once you have selected a source and target database, and the number of copy threads and create index threads, click Add Path. Your choices are reflected in Migrate Paths above.
You can create as many paths as desired. If you require additional paths at a later point, you can add new paths by running sybmigrate through the setup mode again. If you run sybmigrate through the setup mode more than once, your original choices are still reflected, and any changes that you make are additions to these choices.
To change the number of copy threads or create index threads after you have added the path to sybmigrate, select the column you want to change and enter the new value. To change the source or target database, select the entire row and delete it. The Reset button on the bottom of the window clears all of the information that you have entered and returns the Setup Paths window to its original state.
CHAPTER 6 Migration Utility
Utility Guide 109
When you have finished creating paths, click the Next... button.
Note The user controls the number of threads used for parallel table transfer. Every table to be transferred concurrently requires one server-to-server CIS connection. Consider the ramifications of this requirement while designing the capacity of your system.
In a simple scenario, the tables to be migrated are non-partitioned. When you migrate non-partitioned tables, a single server-to-server connection is established. This connection consumes one user connection on the source Adaptive Server and one user connection on the target Adaptive Server.
If data migration is performed for n-way partition tables, the data transfer is done in parallel with a n-way degree of parallelism. This requires n worker processes on the source Adaptive Server, and 2n user connections on the target Adaptive Server.
For example, if you have 10 n-way partition tables and decide to use four threads in sybmigrate, configure the source Adaptive Server to have at least four worker processes and eight user connections. Configure the target Adaptive Server to have at least eight user connections.
4 The Setup Devices window asks you to indicate the size of the repository database and the device on which you want to run sybmigrate.
The Create Database Size field provides you with a default value in megabytes. This default is based on the number of copy and create index threads that you specified in the previous window. The default is the value that is the mandatory minimum value. If you choose to change this value, you can only increase it.
The Use Device field allows you to indicate the device on which you want to create the working database. You can accept the default device, or you can specify another device.
The Repository Database Size field allows you to specify additional space to be allocated to the repository database. When you run sybmigrate in setup mode for the first time, the repository database size is specified for you in megabytes based on information that you have previously entered, and on the contents of the source database. If you run sybmigrate through setup mode again, the number you enter into the Repository Database Size field indicates the number of megabytes by which you want to increase the repository database.

Migration process
110 Adaptive Server Enterprise
Select the logical device from the Logical Device drop-down list. The logical device is used to create and to alter the repository database. Select a device with ample space for the anticipated size of your repository database.
In the Migrate Server Data field, indicate whether or not to migrate server data. You can choose yes, no, or undecided.
When you choose yes, the server data is migrated at the end of the setup phase. When you subsequently run sybmigrate in the setup phase, you cannot migrate the server data because this task has already been completed.
If you selected “Yes” to migrate server data, an Option... button is enabled. When you click the option button a Login Account dialog box displays.
Use the Login Account Options dialog box to lock or unlock accounts or change the password on the target Adaptive Server.
If you choose no, the server data is not migrated, but you can go back and choose to migrate server data at any time, provided that database migration has not begun.
If you choose undecided, you can go back and choose yes or no at any time. However, when you select undecided, you cannot begin the migration phase. Undecided is a helpful option when you are trying to set up all the information for the migration process, but do not plan on actually migrating data until a later time.
When you have finished setting up the devices, click Setup.
5 The Setup Progress window displays the progress of the setup phase.
During this time, sybmigrate is creating the repository database, installing the database schema, creating a working database for each selected path, and migrating the server data based on your selection, in that order. If you are running sybmigrate in setup mode a subsequent time, it is creating new paths for data migration. If you do not want to create new paths, there is no reason to run sybmigrate through the setup mode more than once.
You can to view the progress in the log by clicking Show Log. The completion of the setup process is indicated when the Current Task window displays DONE, and when the log shows SETUP_COMPLETE. Click Close to exit the log and the Setup Progress window.
6 You return to the Connect to ASE window. Select Quit to exit sybmigrate. To begin the migration phase of the data migration process, exit sybmigrate and restart it in the migrate mode.
CHAPTER 6 Migration Utility
Utility Guide 111
Migrate
After you have completed setup, you are ready to begin migrating. Restart sybmigrate with the -m migrate command line option, or choose the migrate database objects and data option from the GUI window.
1 In the Connect to ASE window, select the source and target Adaptive Servers to which you want to connect.
2 If you have not started sybmigrate with the -m migrate command line argument, select the session type in the Session Type window.
3 The Object Selection window allows you to choose what types of database data you want to migrate.
In the Object Selection window, you can set the Copy thread, create index thread, and work thread parameters from the Setting menu bar.
In the Object Selection window, you can also request that sybmigrate Auto-Select Dependent Objects on your selected objects by right clicking the object tree node.
When you expand the database data folder, there is a file for each path that you created during setup. Each file allows you to select the data you want to migrate for that particular database. You can choose from the following:
• Database Data
Note If you choose to migrate database data, you must migrate all of it. If you deselect parts of the database data, you see an error message asking you whether or not you want to migrate database data.
If you do not migrate the server data during setup, the Database Data selection is disabled.
• Defaults
• Rules
• User-defined Datatypes
• Tables
• Indexes
• Referential Constraints
• Views
• Stored Procedures
Migration process
112 Adaptive Server Enterprise
• Triggers
The Status field for these objects indicates whether or not the data has successfully migrated. “Success” indicates that the data has already migrated. “Initial” means that the migration has not yet begun. If you find an error in the data that has been migrated, you can reset the Status field to Initial so that the data migrates again. The validation process acts only on those objects that have been migrated successfully, so to begin the validation process without all of the data having successfully migrated, reset the Status field to Success. “Work in Progress” means that the object was selected for migration, but that the migration was not attempted because there was some error causing sybmigrate to exit abnormally.
You can see whether or not the server data has been selected to be migrated, but this is for informational purposes only since the server data has already been migrated at this point in the migration process.
When you have selected the data that you want to migrate, click Migrate.
Validate
The validation phase is the same as the migrate phase. The windows ask you to indicate the same information, but rather than selecting data for migration, you are selecting data for validation.
You can validate only those objects that have successfully been migrated.
Resource file modeYou must make the following changes to the resource file mode:
• data_copy_thread, create_index_thread, and work_thread attributes are recognized in the setup, migration, and validate sessions of sybmigrate. In the setup session, these values are recorded in the repository database, and used as default values during the migrate and validate sessions. During the migrate and validate sessions, you can override the default values by specifying a new value.
• lock_account is a new login account management feature. lock_account tells sybmigrate to lock or unlock all accounts on the target Adaptive Server after copying the login information. Valid values are “Yes” and “No”, with “Yes” instructing sybmigrate to lock the target Adaptive Server accounts. To activate lock_account, you must set migrate_server_data to “Yes” in the setup session.

CHAPTER 6 Migration Utility
Utility Guide 113
If the lock_account attribute is not set, nothing is done to target login accounts.
• login_password_file has been added to support changing the passwords on the target Adaptive Server. In the setup session, login_password_file takes the input password file or the value “<generate>”. “<generate>” is a special key used to tell sybmigrate to generate the passwords instead of reading them from the password file. If this attribute is not set in the resource file during the setup session, there is no change to the target Adaptive Server login passwords. To activate login_password_file, you must set migrate_server_data to “Yes” in the setup session.
• The password file must be in plain text. The content of this file consists of two columns: the login name column and the password string column. The separator between the columns are tabs and or spaces. Any lines beginning with “#” are comments.
• auto_select_dependent_objects is a new value that is available during the migrate and validate sessions. This attribute tells sybmigrate to automatically select the dependent objects for migration and validation. The valid values for this attribute are either “Yes” or “No”; “No” is the default.
• If source_ase, source_ase_login, source_ase_password, target_ase, target_ase_login, and target_ase_password attributes are not in the resource file, sybmigrate prompts the user for these attributes.
• In the database section of the resource file, if you do not specify any objects or SQL, all objects and types are selected.
For example, in the following resource file all object types (default, rule, table, and so on) are migrated from pubs2 and pubs3 databases:
[server}source_ase=tho:5002 source_ase_login=sa source_ase_password=
target_ase=tho:6002 target_ase_login=sa target_ase_password=
[database]source_database_name=pubs2 target_database_name=pubs2
[database]
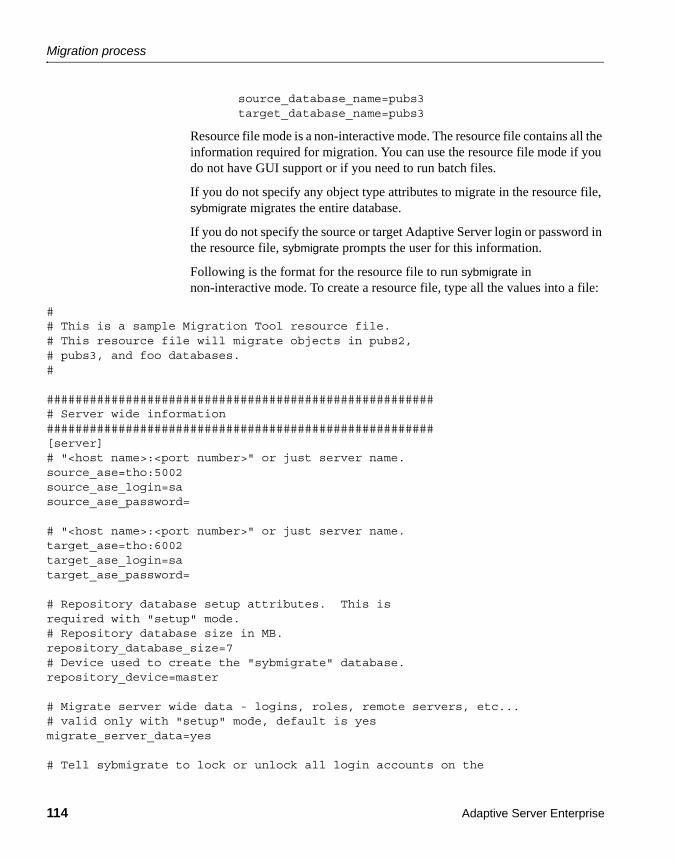
Migration process
114 Adaptive Server Enterprise
source_database_name=pubs3 target_database_name=pubs3
Resource file mode is a non-interactive mode. The resource file contains all the information required for migration. You can use the resource file mode if you do not have GUI support or if you need to run batch files.
If you do not specify any object type attributes to migrate in the resource file, sybmigrate migrates the entire database.
If you do not specify the source or target Adaptive Server login or password in the resource file, sybmigrate prompts the user for this information.
Following is the format for the resource file to run sybmigrate in non-interactive mode. To create a resource file, type all the values into a file:
## This is a sample Migration Tool resource file.# This resource file will migrate objects in pubs2,# pubs3, and foo databases.#
####################################################### Server wide information######################################################[server]# "<host name>:<port number>" or just server name.source_ase=tho:5002source_ase_login=sasource_ase_password=
# "<host name>:<port number>" or just server name.target_ase=tho:6002target_ase_login=satarget_ase_password=
# Repository database setup attributes. This isrequired with "setup" mode.# Repository database size in MB.repository_database_size=7# Device used to create the "sybmigrate" database.repository_device=master
# Migrate server wide data - logins, roles, remote servers, etc...# valid only with "setup" mode, default is yesmigrate_server_data=yes
# Tell sybmigrate to lock or unlock all login accounts on the
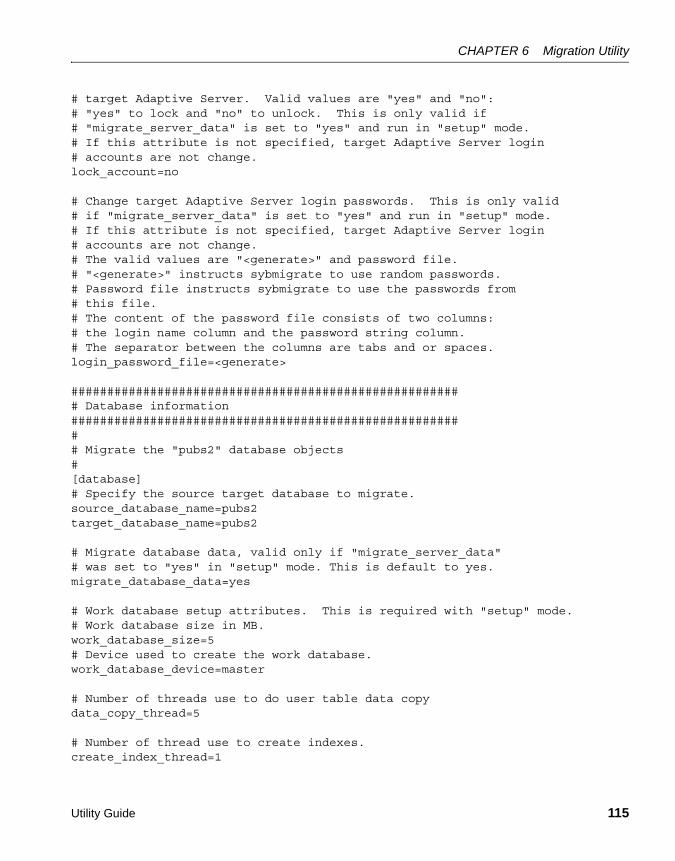
CHAPTER 6 Migration Utility
Utility Guide 115
# target Adaptive Server. Valid values are "yes" and "no":# "yes" to lock and "no" to unlock. This is only valid if# "migrate_server_data" is set to "yes" and run in "setup" mode.# If this attribute is not specified, target Adaptive Server login# accounts are not change.lock_account=no
# Change target Adaptive Server login passwords. This is only valid# if "migrate_server_data" is set to "yes" and run in "setup" mode.# If this attribute is not specified, target Adaptive Server login# accounts are not change. # The valid values are "<generate>" and password file.# "<generate>" instructs sybmigrate to use random passwords.# Password file instructs sybmigrate to use the passwords from# this file.# The content of the password file consists of two columns: # the login name column and the password string column.# The separator between the columns are tabs and or spaces.login_password_file=<generate>
####################################################### Database information######################################################## Migrate the "pubs2" database objects#[database]# Specify the source target database to migrate.source_database_name=pubs2target_database_name=pubs2
# Migrate database data, valid only if "migrate_server_data"# was set to "yes" in "setup" mode. This is default to yes.migrate_database_data=yes
# Work database setup attributes. This is required with "setup" mode.# Work database size in MB.work_database_size=5# Device used to create the work database.work_database_device=master
# Number of threads use to do user table data copydata_copy_thread=5
# Number of thread use to create indexes.create_index_thread=1
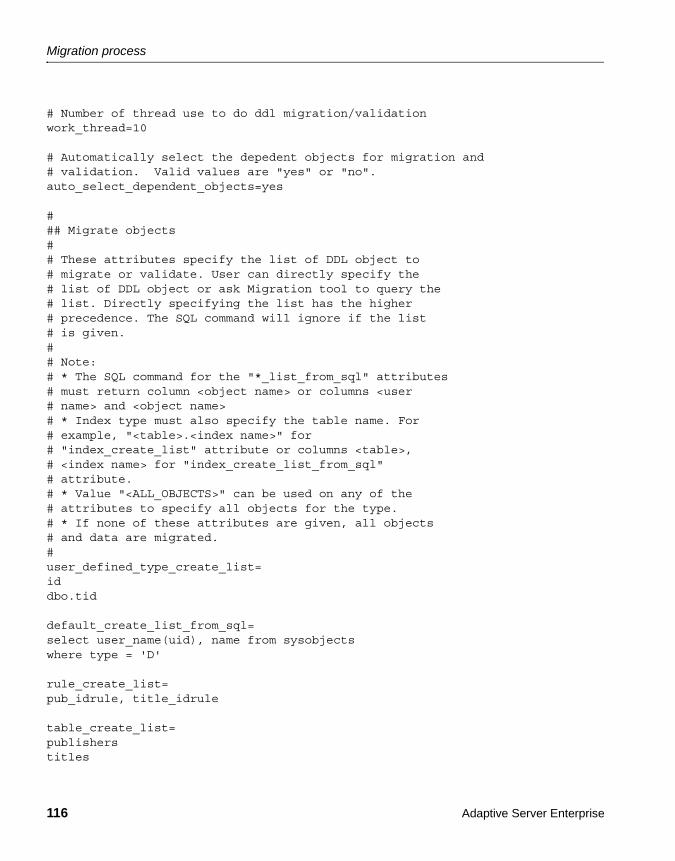
Migration process
116 Adaptive Server Enterprise
# Number of thread use to do ddl migration/validation work_thread=10
# Automatically select the depedent objects for migration and# validation. Valid values are "yes" or "no".auto_select_dependent_objects=yes
### Migrate objects## These attributes specify the list of DDL object to# migrate or validate. User can directly specify the# list of DDL object or ask Migration tool to query the# list. Directly specifying the list has the higher # precedence. The SQL command will ignore if the list # is given.## Note:# * The SQL command for the "*_list_from_sql" attributes# must return column <object name> or columns <user # name> and <object name># * Index type must also specify the table name. For# example, "<table>.<index name>" for# "index_create_list" attribute or columns <table>, # <index name> for "index_create_list_from_sql"# attribute.# * Value "<ALL_OBJECTS>" can be used on any of the# attributes to specify all objects for the type.# * If none of these attributes are given, all objects# and data are migrated.#user_defined_type_create_list=iddbo.tid
default_create_list_from_sql=select user_name(uid), name from sysobjectswhere type = 'D'
rule_create_list=pub_idrule, title_idrule
table_create_list=publisherstitles
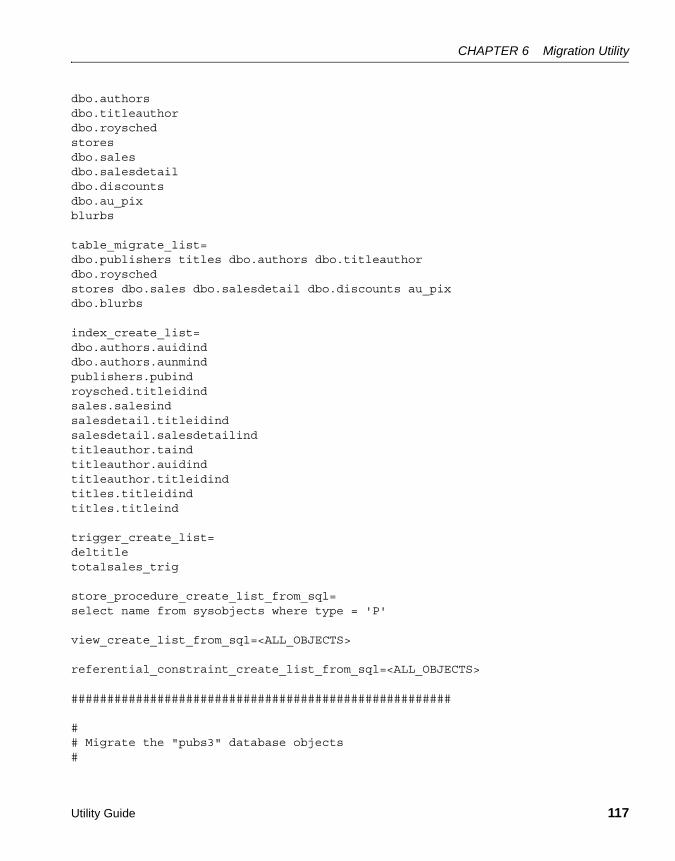
CHAPTER 6 Migration Utility
Utility Guide 117
dbo.authorsdbo.titleauthordbo.royschedstoresdbo.salesdbo.salesdetaildbo.discountsdbo.au_pixblurbs
table_migrate_list=dbo.publishers titles dbo.authors dbo.titleauthordbo.royschedstores dbo.sales dbo.salesdetail dbo.discounts au_pixdbo.blurbs
index_create_list=dbo.authors.auidind dbo.authors.aunmind publishers.pubind roysched.titleidind sales.salesind salesdetail.titleidind salesdetail.salesdetailind titleauthor.taind titleauthor.auidind titleauthor.titleidind titles.titleidind titles.titleind
trigger_create_list=deltitletotalsales_trig
store_procedure_create_list_from_sql=select name from sysobjects where type = 'P'
view_create_list_from_sql=<ALL_OBJECTS>
referential_constraint_create_list_from_sql=<ALL_OBJECTS>
#####################################################
## Migrate the "pubs3" database objects#

Migration process
118 Adaptive Server Enterprise
[database]source_database_name=pubs3target_database_name=pubs3
# Migrate database data - user, etc.migrate_database_data=yes
# These two attributes valid only with "setup" modework_database_size=5work_database_device=master
# Number of threads use to do user table data copydata_copy_thread=5
# Number of thread use to create indexes.create_index_thread=1
# Number of thread use to do ddl migration/validation work_thread=10
# Migrate objectsuser_defined_type_create_list=<ALL_OBJECTS>
default_create_list=<ALL_OBJECTS>
rule_create_list=<ALL_OBJECTS>
table_create_list=dbo.authorspublishersdbo.titlesdbo.royschedstoresdbo.salesdbo.store_employeessalesdetaildbo.titleauthordbo.discountsblurbs
table_migrate_list_from_sql=<ALL_OBJECTS>
index_create_list=<ALL_OBJECTS>
trigger_create_list=<ALL_OBJECTS>

CHAPTER 6 Migration Utility
Utility Guide 119
store_procedure_create_list=<ALL_OBJECTS>
view_create_list=<ALL_OBJECTS>
referential_constraint_create_list_from_sql=<ALL_OBJECTS>
#####################################################
## Migrate all the "foo" database objects with default settings.#[database]source_database_name=footarget_database_name=foo
# Migrate database data - user, etc.migrate_database_data=yes
# These two attributes valid only with "setup" modework_database_size=5work_database_device=master
# Number of threads use to do user table data copydata_copy_thread=5
# Number of thread use to create indexes.create_index_thread=1
# Number of thread use to do ddl migration/validationwork_thread=10
Post-migration activities• sybmigrate supports the migration of only the objects listed elsewhere in
this document. Manually migrate other schema objects and configuration information to ensure the target Adaptive Server is fully functional.

Migrating Replication Server data to Adaptive Server 12.5
120 Adaptive Server Enterprise
• Statistics for indexes are automatically re-created when you rebuild the indexes. However, sybmigrate does not re-create statistics from non-index columns. Any user-defined step values for index statistics are not retained during migration. To obtain target-server-side statistics similar to the source-server-side statistics, use optdiag to identify the tables with non-index columns that include statistics. Once you have determined which non-index columns include statistics, update the statistics manually.
• Any message requiring user attention preceded by the word “attention” and logged in the migration log.
• Run the object migrations status report to verify that all objects have been migrated.
Migrating Replication Server data to Adaptive Server 12.5
Adaptive Server version 12.5 can generate data wider than what Replication Server version 12.1 can handle, regardless of Adaptive Server’s page size. For example, a 2K page Adaptive Server can have more than 250 columns, and columns wider than 255 bytes.
Replication Server version 12.1 and earlier cannot handle wide data. If wide data is passed to it by the RepAgent, different Replication Server threads may shut down.
When the RepAgent connects to the Replication Server, it returns an LTL version. This version and data limits filter mode setting determine how RepAgent treats wide data. The Replication Server version and LTL version compatibility is as follows:
Table 6-1: Replication Server and LTL versions
The compatibility for the limits, depending on the LTL version is as follows:
Table 6-2: Replication Server column counts/width limits
Replication Server version LTL version
12.1 and earlier < 400
post-12.1 >= 400
Property12.1 and earlier Replication Server
Post-12.1 Replication Server
column count 250 65535

CHAPTER 6 Migration Utility
Utility Guide 121
For Adaptive Server 12.5 connecting to Replication Server version 12.1 and earlier, the default data limits filter mode is “stop.” The RepAgent shuts down when it encounters data that is wider than what Replication Server can handle. If data limits filter mode is set to “skip,” the RepAgent skips over wide data that is wider than what Replication Server can handle, and logs an informational message when it does so.
If data limits filter mode is set to “truncate,” the RepAgent truncates wide data so that the Replication Server can handle it. In Replication Servers version 12.1 and earlier, if the table or stored procedure has more than 250 columns or parameters, only the first 250 columns or parameters are sent. If the column or parameter is wider than 255, only the first 255 bytes are sent.
Note If data limits filter mode is set to “off”, wide data is sent to Replication Server, and may cause errors in Replication Server.
Replication Server identifies all connections by servername.database; this means that after migration, you must change the name of the target server to the name of the source server.
Pre-migration procedures for databases with replication dataYou must ensure that replication from or into each database is complete. This means that for a primary database, all changes have been completely applied to all replicated databases that subscribe to data from this database, and for a replicate database, all changes to which this replicate database subscribes have been completely applied to this database. This also means that there should not be any Replication DDL that has not been completed, including routes, connections, and subscriptions. See the Replication Server documents for instructions on how to check whether Replication DDL is still in progress.
“Completely applied” includes transactions in the Replication Server inbound and outbound queues. After migration, there is no way to restore data in the Replication Server queues, so you must be absolutely sure that replication data has been fully applied.
column width 255 65535
Property12.1 and earlier Replication Server
Post-12.1 Replication Server
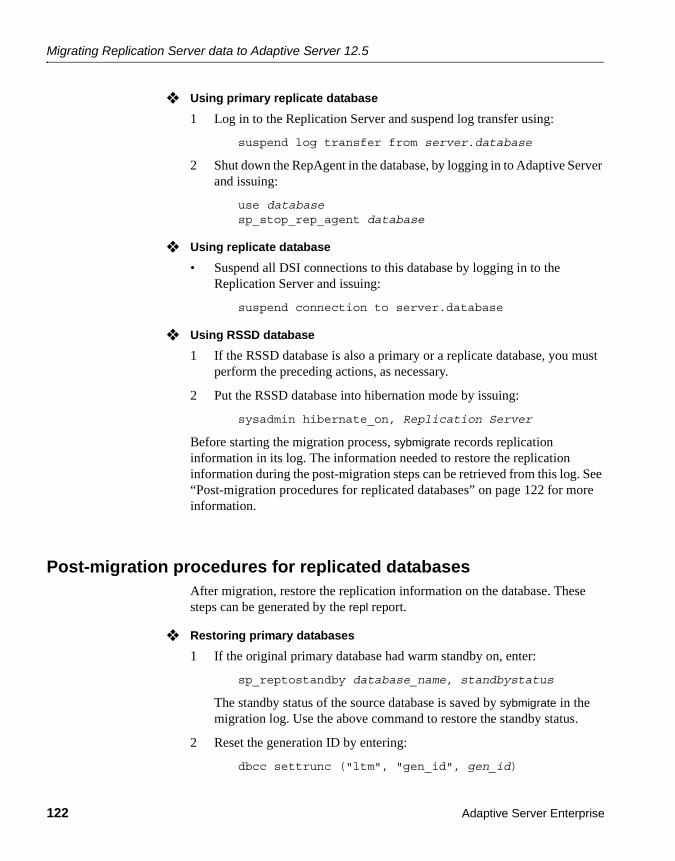
Migrating Replication Server data to Adaptive Server 12.5
122 Adaptive Server Enterprise
❖ Using primary replicate database
1 Log in to the Replication Server and suspend log transfer using:
suspend log transfer from server.database
2 Shut down the RepAgent in the database, by logging in to Adaptive Server and issuing:
use databasesp_stop_rep_agent database
❖ Using replicate database
• Suspend all DSI connections to this database by logging in to the Replication Server and issuing:
suspend connection to server.database
❖ Using RSSD database
1 If the RSSD database is also a primary or a replicate database, you must perform the preceding actions, as necessary.
2 Put the RSSD database into hibernation mode by issuing:
sysadmin hibernate_on, Replication Server
Before starting the migration process, sybmigrate records replication information in its log. The information needed to restore the replication information during the post-migration steps can be retrieved from this log. See “Post-migration procedures for replicated databases” on page 122 for more information.
Post-migration procedures for replicated databasesAfter migration, restore the replication information on the database. These steps can be generated by the repl report.
❖ Restoring primary databases
1 If the original primary database had warm standby on, enter:
sp_reptostandby database_name, standbystatus
The standby status of the source database is saved by sybmigrate in the migration log. Use the above command to restore the standby status.
2 Reset the generation ID by entering:
dbcc settrunc ("ltm", "gen_id", gen_id)

CHAPTER 6 Migration Utility
Utility Guide 123
The generation ID of the source database is saved by sybmigrate in the migration log. Use the above command to restore the generation ID.
3 Reset the secondary truncation point:
dbcc settrunc ("ltm", "valid")
4 Zero the Replication Server location for this database in the RSSD of the Replication Server that this database belongs to, using:
rs_zeroltm server, database_name
5 If this database is an active connection of a warm standby configuration, rematerialize the standby database by dumping the primary and loading the dumps into the standby. See the Replication Server documentation for instructions.
6 Start the RepAgent on the primary database, using:
sp_start_rep_agent database_name
7 Log in to the Replication Server and restart the log transfer:
resume log transfer from server.database
Restoring replicate databases
If the database is a replicate database, issue the following commands to alter rs_lastcommit and rs_threads, because they are dependent on the logical page size.
To alter rs_lastcommit, issue:
declare @pad8_size integer declare @alter_cmd varchar(200)
select @pad8_size = (@@maxpagesize / 2) - (select sum(A.length) from syscolumns A, sysobjects B where A.id = B.id and B.name = 'rs_lastcommit') + (select A.length from syscolumns A, sysobjects B where A.id = B.id and B.name = 'rs_lastcommit' and A.name = 'pad8')
select @alter_cmd = "alter table rs_lastcommit " + "modify pad8 char("
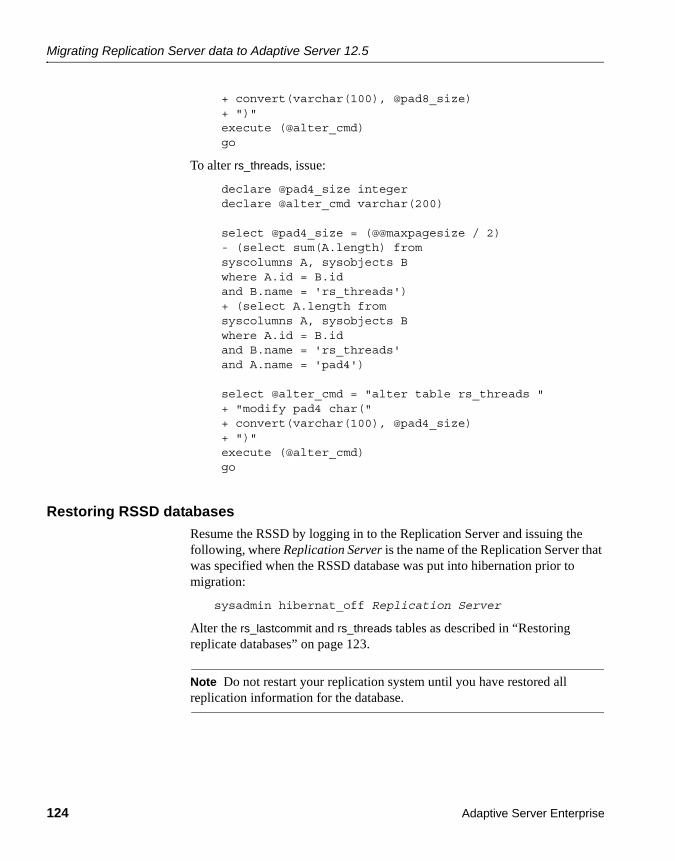
Migrating Replication Server data to Adaptive Server 12.5
124 Adaptive Server Enterprise
+ convert(varchar(100), @pad8_size) + ")" execute (@alter_cmd) go
To alter rs_threads, issue:
declare @pad4_size integer declare @alter_cmd varchar(200)
select @pad4_size = (@@maxpagesize / 2) - (select sum(A.length) from syscolumns A, sysobjects B where A.id = B.id and B.name = 'rs_threads') + (select A.length from syscolumns A, sysobjects B where A.id = B.id and B.name = 'rs_threads' and A.name = 'pad4')
select @alter_cmd = "alter table rs_threads " + "modify pad4 char(" + convert(varchar(100), @pad4_size) + ")" execute (@alter_cmd) go
Restoring RSSD databases
Resume the RSSD by logging in to the Replication Server and issuing the following, where Replication Server is the name of the Replication Server that was specified when the RSSD database was put into hibernation prior to migration:
sysadmin hibernat_off Replication Server
Alter the rs_lastcommit and rs_threads tables as described in “Restoring replicate databases” on page 123.
Note Do not restart your replication system until you have restored all replication information for the database.
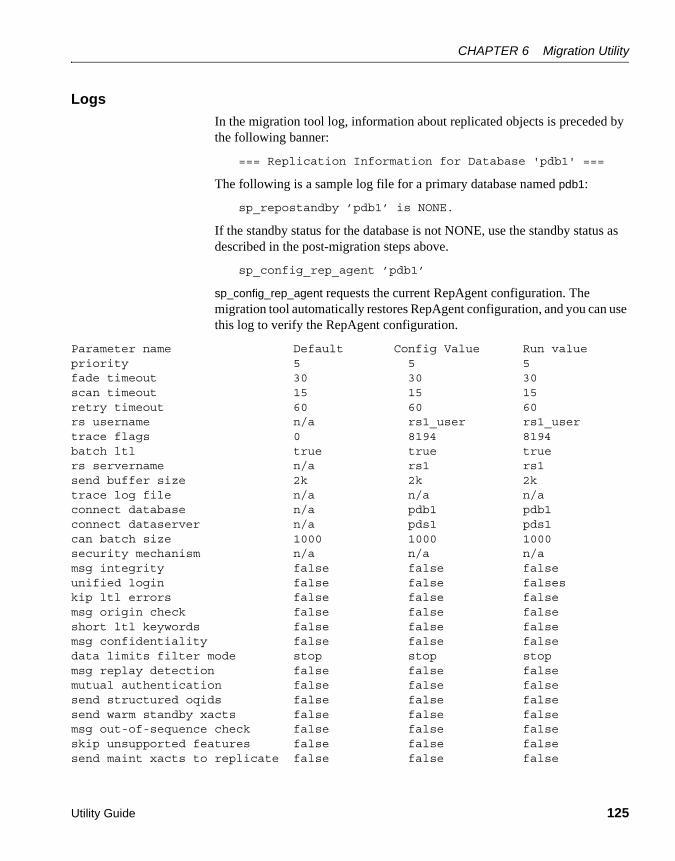
CHAPTER 6 Migration Utility
Utility Guide 125
Logs
In the migration tool log, information about replicated objects is preceded by the following banner:
=== Replication Information for Database 'pdb1' ===
The following is a sample log file for a primary database named pdb1:
sp_repostandby ’pdb1’ is NONE.
If the standby status for the database is not NONE, use the standby status as described in the post-migration steps above.
sp_config_rep_agent ’pdb1’
sp_config_rep_agent requests the current RepAgent configuration. The migration tool automatically restores RepAgent configuration, and you can use this log to verify the RepAgent configuration.
Parameter name Default Config Value Run valuepriority 5 5 5fade timeout 30 30 30scan timeout 15 15 15retry timeout 60 60 60rs username n/a rs1_user rs1_usertrace flags 0 8194 8194batch ltl true true truers servername n/a rs1 rs1send buffer size 2k 2k 2ktrace log file n/a n/a n/aconnect database n/a pdb1 pdb1connect dataserver n/a pds1 pds1can batch size 1000 1000 1000security mechanism n/a n/a n/amsg integrity false false falseunified login false false falseskip ltl errors false false falsemsg origin check false false falseshort ltl keywords false false falsemsg confidentiality false false falsedata limits filter mode stop stop stopmsg replay detection false false falsemutual authentication false false falsesend structured oqids false false falsesend warm standby xacts false false falsemsg out-of-sequence check false false falseskip unsupported features false false falsesend maint xacts to replicate false false false
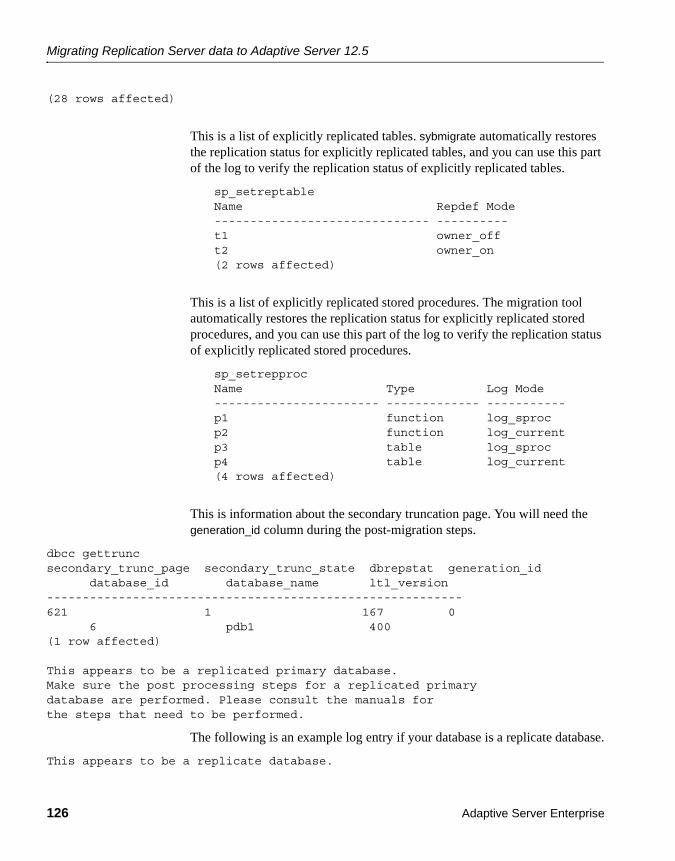
Migrating Replication Server data to Adaptive Server 12.5
126 Adaptive Server Enterprise
(28 rows affected)
This is a list of explicitly replicated tables. sybmigrate automatically restores the replication status for explicitly replicated tables, and you can use this part of the log to verify the replication status of explicitly replicated tables.
sp_setreptableName Repdef Mode------------------------------ ----------t1 owner_offt2 owner_on(2 rows affected)
This is a list of explicitly replicated stored procedures. The migration tool automatically restores the replication status for explicitly replicated stored procedures, and you can use this part of the log to verify the replication status of explicitly replicated stored procedures.
sp_setrepprocName Type Log Mode----------------------- ------------- -----------p1 function log_sprocp2 function log_currentp3 table log_sprocp4 table log_current(4 rows affected)
This is information about the secondary truncation page. You will need the generation_id column during the post-migration steps.
dbcc gettrunc secondary_trunc_page secondary_trunc_state dbrepstat generation_id
database_id database_name ltl_version----------------------------------------------------------621 1 167 0
6 pdb1 400(1 row affected)
This appears to be a replicated primary database. Make sure the post processing steps for a replicated primary database are performed. Please consult the manuals for the steps that need to be performed.
The following is an example log entry if your database is a replicate database.
This appears to be a replicate database.

CHAPTER 6 Migration Utility
Utility Guide 127
If the pagesize is greater than 2K, make sure the post processing steps for a replicate database are performed. Please consult the manuals for the steps that need to be performed.
The following is an example log entry for an RSSD database.
This appears to be a replication system database Make sure the post processing steps for a replication system database are performed. Please consult the manuals for the steps that need to be performed
All three logs can be present for a database, since a database can list the three categories.
Limitations
Note When migrating server data, sybmigrate requires that the target Adaptive Server catalog contain only default data. Default data on Windows machines is different from UNIX machines. This causes problems when migrating from UNIX to NT machines. To successfully migrate from a UNIX machine to an NT machine, delete the XP Server name and the mon_user login on the target NT machine.
High availability Data migration is not supported while you are in high availability. You must stop high availability before beginning database migration.
❖ Stopping high availability before beginning database migration
1 Decouple primary and secondary Adaptive Servers.
2 Migrate primary source Adaptive Server and secondary source Adaptive Server data to the primary target Adaptive Server and secondary target Adaptive Server separately.
3 Configure the target Adaptive Server for high availability.
Warning! The primary and the secondary Adaptive Server must be configured to the same logical page size to run high availability.

Limitations
128 Adaptive Server Enterprise
Other limitations • sybmigrate does not support major cross-version migration. Both the source and the target servers must be Adaptive Server version 12.5.0.1 or later.
To verify that you are running version 12.5.0.1 or later of Adaptive Server, run @@version on the server.
• sybmigrate does not do any special processing for a DTM/XA environment. The status of open transactions and outstanding prepared transactions should be given consideration. If any special handling is required, you must do it manually.
• There is no reliable way for sybmigrate to determine the dependency of various objects. sybmigrate does not attempt to create an order in which objects are migrated based on their dependencies on other objects. Table re-creation can fail if foreign keys or common keys are defined using sp_foreignkey or sp_commonkey. Views can be dependent upon other views, and they will not be re-created if the view on which they are dependent has not yet been migrated. The migration of stored procedures and triggers may not be successful if the data on which they depend has not yet been migrated. Cross-database dependencies mean that you need to coordinate the migration of related objects. If dependencies are within the selected set, sybmigrate takes care of those dependencies. However, if dependencies exist outside the selected set, you may need to run sybmigrate through migration more than one time. For this reason, you may need to perform some partial retries to successfully complete the data migration.
• The name of the source and the target databases must be the same. SQL schema generated by ddlgen may have objects that must be qualified with the source Adaptive Server name.
• sybmigrate does not support any kind of auditing for migration activities.
• When renaming any of the compiled objects (procs, views, rules, defaults) the object name in syscomments is not updated.
During the migration, the DDLGen query the object from syscomments with the old name in the text. This old name in the text causes problems for sybmigrate during the DDL migration.

CHAPTER 6 Migration Utility
Utility Guide 129
Troubleshooting and error messagesThis section discusses common errors and how to address them, as well as different error messages and their meaning.
Objects fail to migrateObjects often fail to migrate on the first attempt. sybmigrate automatically retries all failed migration attempts. However, if you choose to migrate an object that is dependent upon another object that is not migrated, the migration fails.
To prevent failed migration of objects, examine the dependencies of objects that you select for migration. For example, you cannot migrate a trigger if the table on which the trigger is defined is not also migrated. Similarly, views can be created on other views or tables, and if these objects are not migrated, the migration of the view fails.
Beginning database migrationWhen you are in the setup phase of the migration process, you are asked to decide whether or not you want to migrate server data. You must select from yes, no, or undecided.
“Undecided” provides you with the flexibility of setting up the migration process, but being able to return to the process at a later date that is more convenient for migration. If you select Undecided, you cannot begin the database migration until you indicate whether you want to migrate server data.
If you indicate that you do not want to migrate server data during setup, you cannot database data during migration.
“Connection refused” and “Unable to obtain connection to the server”
There are two possible reasons why you may encounter these error messages.
• If either the source or the target Adaptive Server is not running, sybmigrate cannot establish a connection.

Troubleshooting and error messages
130 Adaptive Server Enterprise
• The number of user connections configuration parameter must be configured to provide sufficient resources on both the source and target Adaptive Servers.
Target server cannot be reached from source serverThe interfaces file is used to start the source Adaptive Server. Verify that it has an entry that identifies the target Adaptive Server.
Verify that your login can access the target Adaptive Server from the source Adaptive Server.
If sybmigrate hangs during migrationIf sybmigrate hangs during the migration process, check the sybmigrate log in $SYBASE/$SYBASE_ASE/init/logs for any errors or exceptions.
Also, check your Adaptive Server logs. If the Adaptive Server logs run out of space on the database, increase the database size, and install the sp_threasholdaction stored procedure to do dump tran when the log is full.
Merging two databasesTo merge two databases on the source Adaptive Server into one database on the target Adaptive Server, use the following procedure.
❖ Merging two databases
1 Set up and migrate the first database.
2 After migrating the first database, rename the target database so that it has the same name as the second source database.
3 Set up and migrate the second database.
Note You cannot migrate the database data for the second database because the users, roles and other database data already exist on the target database.
CHAPTER 6 Migration Utility
Utility Guide 131
Post-migration failure cleanupIf sybmigrate fails unexpectedly, clean up the source and target Adaptive Servers, and begin migration again. There are actions that you must perform on both the source and target Adaptive Server.
On the source Adaptive Server:
• Drop the temporary working databases mtpdb$%.
• Drop the repository database sybmigratedb.
• Drop all remote servers mtrs$%.
On the target Adaptive Server:
• If server data was migrated, rebuild the target Adaptive Server with srvbuild or syconfig.
• Re-create the target databases.
Remigrating one databaseTo remigrate a specific database, you must:
1 Start sybmigrate.
2 In the Setup Paths window, during the setup session, right-click the migration path you want to redo.
3 Select Delete Migration Path on the pop-up menu.
4 Clean up or remove the migrated data and objects on the target database, or drop and re-create the target database.
5 Restart sybmigrate and run it from setup mode.
Re-creating an individual objectTo re-create an individual object:
1 In the target Adaptive Server, drop the object you want to re-create.
2 Start sybmigrate in the migration session, and go to the Migrate Object Selection window. Highlight the object you want to create and right-click.
3 From the pop-up menu, select Reset Object to Initial status.
Troubleshooting and error messages
132 Adaptive Server Enterprise
4 Complete the migration process.
Connection fail If you receive a connection fail error message even though the source and target Adaptive Servers are running, you may be using the wrong character set. When you are using sybmigrate, you must use the default character set. Run sybmigrate with the -J charset option, to change the character set you are using.
“Insufficient memory in JVM shared class” If you see the following error in the server log, it indicates that you must reconfigure the size of shared class heap configuration parameter to a larger value.
01:00000:00036:2002/01/28 14:17:05.63 server Java VM Host: Memory allocation request failed because of insufficient memory in Jvm Shared Class.
“There is not enough memory in the procedure cache”If you see the error message there is not enough memory in the procedure cache during the migration of indexes, use sp_configure procedure cache size to increase the procedure cache.
java.lang related errorIf you receive java.lang.NoClassDefFoundError:com/sybasejdbcx/Sybdriver when you are connecting to Adaptive Server, check to make sure you have JConnect 5.5 installed in your $SYBASE directory ($SYBASE/jConnect-5_5).
Utility Guide 133
C H A P T E R 7 Installing the Adaptive Server Plug-in
This chapter describes the Adaptive Server Enterprise plug-in, and also addresses:
• Use of the Monitor Client GUI as a part of the Adaptive Server plug-in and as a standalone application
• Use of the C++ version of the Adaptive Server plug-in
IntroductionThe Adaptive Server plug-in is developed using the Sybase Central toolkit. It runs as a plug-in within a viewer that allows you to load multiple plug-ins concurrently. The Adaptive Server plug-in built using the Sybase Central C++ version, which runs only on Windows NT, Windows 2000, and Windows 98, is no longer being developed. It is being replaced with the plug-in for Adaptive Server version 12.5, which was developed using the Sybase Central Java Edition toolkit, and which runs on all platforms.
For specific information on how to use the features of the plug-in, see the online help for Sybase Central.
Adaptive Server plug-in distributionAdaptive Server version 12.5 contains two versions of the Adaptive Server plug-in:
Topic PageIntroduction 133
Comparing functional differences between versions 134
Accessing the Monitor Client GUI 135

Comparing functional differences between versions
134 Adaptive Server Enterprise
• The Java Adaptive Server plug-in using the Sybase Central Java Edition Framework – included on all Server installation CDs and in the PC Client installation CD.
• The C++ Adaptive Server plug-in using the Sybase Central C++ Version – included only on the PC Client installation CD. To access to the C++ version, you must install it on a Windows platform using the PC Client installation CD.
Comparing functional differences between versionsThe functionality of the Java and C++ plug-ins differs in a number of ways. You should use the Java edition for performing administrative operations on Adaptive Server 12.5. The C++ version of the plug-in was included in the 12.5 version only to provide access to the Monitor Client GUI.
The Java plug-in contains support for all of the Adaptive Server 12.5.x features, including EJB Server, large page sizes, larger column lengths, Unicode datatypes, and the new Adaptive Server Replicator. The C++ version of the plug-in shipped with Adaptive Server 12.5 does not contain any of these functional enhancements.
Some features in the C++ version of the plug-in are not currently available in the Java version.
Table 7-1 provides a comparison of the main differences between the C++ and Java editions of the Adaptive Server plug-in.
Table 7-1: Feature comparison
Feature C++ Java
Runs on all platforms No – runs only on Windows platforms.
Yes
Can start local server Yes – can start an Adaptive Server on the local machine.
No
SQL Monitor Client support Yes No

CHAPTER 7 Installing the Adaptive Server Plug-in
Utility Guide 135
Accessing the Monitor Client GUIYou can acces the Monitor Client GUI application from the Monitors folder of the C++ version of the Adaptive Server plug-in. This application is available only on Windows platforms. The Java edition of the Adaptive Server plug-in does not contain the Monitors folder or the Monitor Client GUI application that are included in the C++ version. If you want to use the Monitor Client GUI with an Adaptive Server 12.5 installation, you must use the C++ version of the plug-in that shipped with Adaptive Server version 12.5.
CT-Lib interface to servers Yes – the C++ edition uses Client-Library, while the Java edition uses jConnect. Therefore, for example, interface parsing and directory services are not ‘native’ for the Java edition and behave differently from the C++ edition.
No – The current Java version interfaces parser supports only a subset of all interfaces file syntax (for example, uses TLI format on all UNIX platforms).
JConnect interface to servers No Yes
Modeless dialogs No Yes
Client side sorting No – uses server-side sorting. Yes – performs sorts in the client for improved performance.
SQL history Yes Planned
Editing of stored procedures and updating stored procedure definitions
Yes Planned
DDLGen No Yes
Support for 12.5.0.1 features: large columns, multiple page sizes, Unicode datatypes, EJB Server, ASE Replicator
No Yes
Proxy table support Yes Yes – improved proxy table support features for version 12.5.0.1 and later.
Login using LDAP directory services No Yes – from version 12.5.0.1 and later.
Feature C++ Java
Accessing the Monitor Client GUI
136 Adaptive Server Enterprise
There is no plan to integrate the Monitor Client into the Java edition of the Adaptive Server plug-in.
Note The C++ version of the Adaptive Server plug-in that was shipped with versions of Adaptive Server earlier than 12.5 will work with a Adaptive Server 12.5 server. However, the Monitor Client GUI in these versions cannot access the Adaptive Server 12.5 Monitor Server. To use the Monitor Client GUI with an Adaptive Server 12.5 server and Monitor Server, you must use the version of the C++ plug-in that was shipped with the Adaptive Server version 12.5.
Running Monitor Client GUI as a standaloneYou can also run the Monitor Client GUI as a standalone Java application. This can be done only on Windows platforms. Follow the instructions below to do this. You may want to create a batch file for these steps.
❖ Running Monitor Client GUI as a standalone Java application
• You must have a copy of the version 1.1.8 Java Runtime Environment (JRE) installed on your system.
• You must have the following Monitor Client GUI files installed on your system:
• Mclib.dll
• Mchelp.dll
• 3pclass.zip
• monclass.zip
• The Adaptive Servers and Monitor Server must have entries in your local sql.ini file.
• Any Adaptive Server you want to monitor must have a Monitor Server running.
From the command line or within a batch file:
1 Set JAVA_HOME to the JRE 1.1.8 directory.
2 Set PATH to %JAVA_HOME%\bin;%PATH%.
3 Set your CLASSPATH to include the following files:
set

CHAPTER 7 Installing the Adaptive Server Plug-in
Utility Guide 137
CLASSPATH=DRIVENAME:PATHNAME\monclass.zip;<DRIVENAME>:<PATHNAME>\3pclass.zip;%JAVA_HOME%\lib\rt.jar
where:
• DRIVENAME is the drive letter for the drive on which your files are installed.
• PATHNAME is the directory within which the files are located.
4 Execute the Monitor Client application in the Java Virtual Machine by issuing the following command:
jre sybase.monclt.mcgui.procact.ProcActApp SQL_SERVER_NAME 12.5 MS_SERVER_NAME sa "" en 0 scssen.hlp
where:
• SQL_SERVER_NAME is the name of the Adaptive Server you want to monitor in your sql.ini file.
• MS_SERVER_NAME is the name of the Monitor Server for this Adaptive Server in your sql.ini file.
5 Use the options on the Monitor Client File menu to select monitoring values you want to display.

Accessing the Monitor Client GUI
138 Adaptive Server Enterprise
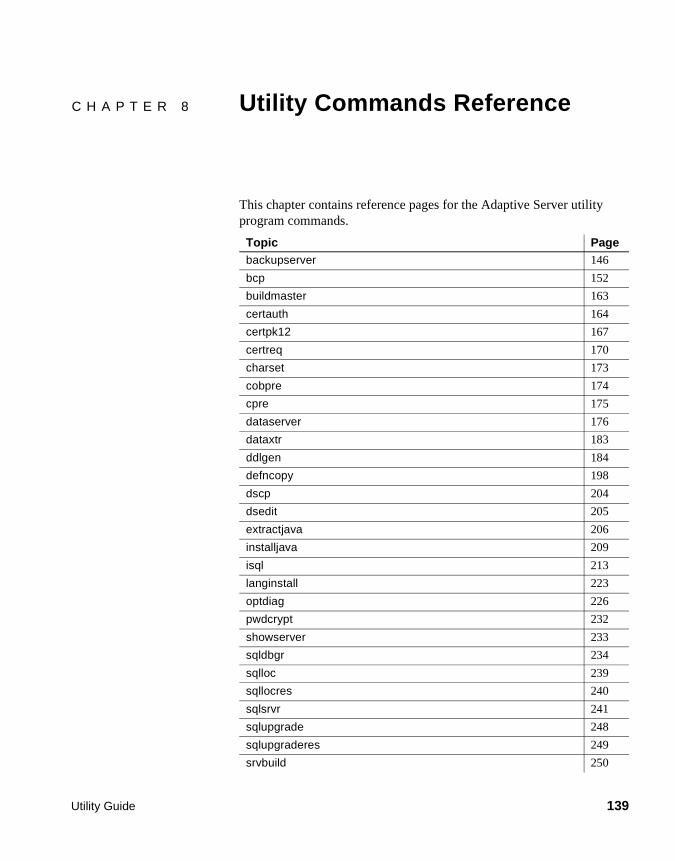
Utility Guide 139
C H A P T E R 8 Utility Commands Reference
This chapter contains reference pages for the Adaptive Server utility program commands.
Topic Pagebackupserver 146
bcp 152
buildmaster 163
certauth 164
certpk12 167
certreq 170
charset 173
cobpre 174
cpre 175
dataserver 176
dataxtr 183
ddlgen 184
defncopy 198
dscp 204
dsedit 205
extractjava 206
installjava 209
isql 213
langinstall 223
optdiag 226
pwdcrypt 232
showserver 233
sqldbgr 234
sqlloc 239
sqllocres 240
sqlsrvr 241
sqlupgrade 248
sqlupgraderes 249
srvbuild 250
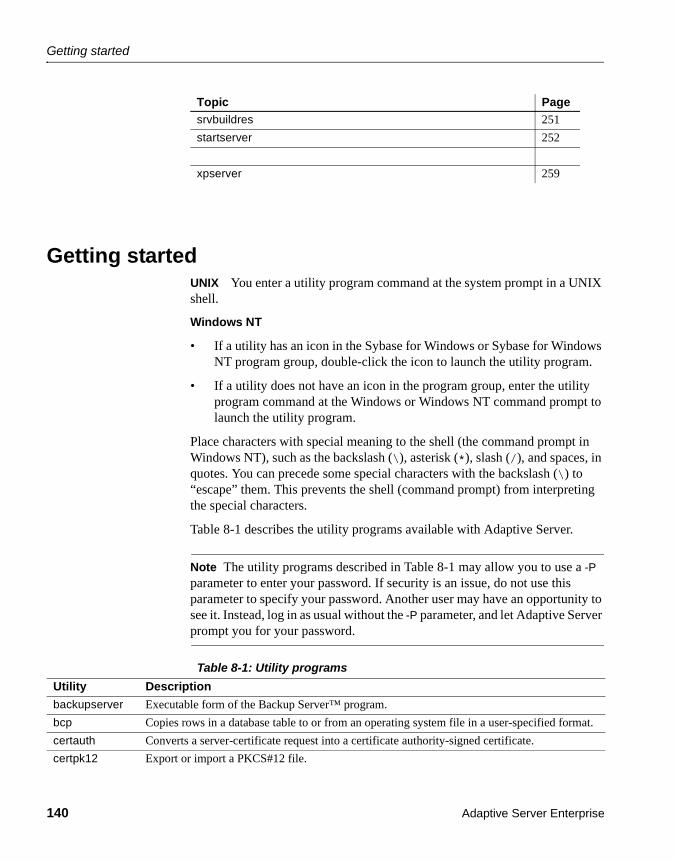
Getting started
140 Adaptive Server Enterprise
Getting startedUNIX You enter a utility program command at the system prompt in a UNIX shell.
Windows NT
• If a utility has an icon in the Sybase for Windows or Sybase for Windows NT program group, double-click the icon to launch the utility program.
• If a utility does not have an icon in the program group, enter the utility program command at the Windows or Windows NT command prompt to launch the utility program.
Place characters with special meaning to the shell (the command prompt in Windows NT), such as the backslash (\), asterisk (*), slash (/), and spaces, in quotes. You can precede some special characters with the backslash (\) to “escape” them. This prevents the shell (command prompt) from interpreting the special characters.
Table 8-1 describes the utility programs available with Adaptive Server.
Note The utility programs described in Table 8-1 may allow you to use a -P parameter to enter your password. If security is an issue, do not use this parameter to specify your password. Another user may have an opportunity to see it. Instead, log in as usual without the -P parameter, and let Adaptive Server prompt you for your password.
Table 8-1: Utility programs
srvbuildres 251
startserver 252
xpserver 259
Topic Page
Utility Description
backupserver Executable form of the Backup Server™ program.
bcp Copies rows in a database table to or from an operating system file in a user-specified format.
certauth Converts a server-certificate request into a certificate authority-signed certificate.
certpk12 Export or import a PKCS#12 file.

CHAPTER 8 Utility Commands Reference
Utility Guide 141
certreq Creates a server certificate request and corresponding private key in two ways:
charset Loads the character sets and sort order files.
cobpre Precompiler for COBOL.
cpre Precompiler for C.
dataserver Executable form of the Adaptive Server program.
dataxtr Data migration tool.
ddlgen Generates data definition language for server- and database-level objects in ASE.
defncopy Copies definitions for specified views, rules, defaults, triggers, procedures, or reports from a database to an operating system file or from an operating system file to a database.
dscp Allows you to view and edit server entries in the interfaces file in command-line mode.
dsedit Allows you to view and edit server entries in the interfaces file using a graphical user interface based on X11/Motif.
extractjava Copies a retained JAR from an Adaptive Server to a client file.
installjava Installs a JAR from a client file into an Adaptive Server.
isql Interactive SQL parser to Adaptive Server.
langinstall Installs a new language on the Adaptive Server.
optdiag Displays optimizer statistics or loads updated statistics into system tables.
pwdcrypt Creates and prints an encrypted LDAP password in the libtcl.cfg file.
showserver Shows Adaptive Servers and Backup Servers that are currently running on the local machine.
sqldbgr Debugs stored procedures and triggers.
sqlloc Installs and modifies languages, character sets, and sort order defaults for Adaptive Server in GUI mode.
sqllocres Installs and modifies languages, character sets, and sort order defaults for Adaptive Server in command-line mode.
sqlsrvr Executable form of the Adaptive Server program.
sqlupgrade Upgrades your currently installed release of Adaptive Server to the newest release in GUI mode.
sqlupgraderes Upgrades your currently installed release of Adaptive Server to the newest release in command-line mode.
srvbuild Creates a new Adaptive Server, Backup Server, Monitor Server, or XP Server in GUI mode with default or user-specified values for key configuration attributes.
srvbuildres Creates a new Adaptive Server, Backup Server, Monitor Server, or XP Server in command-line mode with default or user-specified values for key configuration attributes.
sqlsrvr Executable form of the Adaptive Server program.
startserver Starts an Adaptive Server or a Backup Server.
srvmgr Starts Adaptive Server and Backup Server as Windows NT services.
sybload Uploads Sybase products from the distribution media and builds the Sybase installation directory from the command line.
Utility Description

Utilities quick reference
142 Adaptive Server Enterprise
*_dce and *_r utilitiesSybase provides you with _dce versions of some of the utilities, indicated in the “Usage” portion of each utility section. You must use the _dce versions of the utilities if you use Distributed Computing Environment (DCE) directory or security services for Sybase client applications for the IBM RS/6000 platform.
Sybase also provides you with the _r versions of some of the utilities for use with threaded drivers.
The utilities in this manual that have _dce and _r versions are:
• bcp
• cobpre
• cpre
• defncopy
• dscp
• isql
Utilities quick referenceThis section provides a quick reference for the utilities, divided into the following categories:
• “Installation or configuration utilities” on page 143
• “Utilities for languages, character sets, and sort orders” on page 143
• “Utilities to start servers” on page 143
• “Database creation and manipulation utilities” on page 144
• “Utilities to gather information” on page 144
sybmigrate Enables you to migrate database from a server using 2K logical pages to a server using 4, 8, or 16K logical pages.
sybsetup Installs and configures Adaptive Server from a single location using a GUI interface.
xpserver Starts XP Server manually.
Utility Description

CHAPTER 8 Utility Commands Reference
Utility Guide 143
Installation or configuration utilitiesUse the following to install or configure databases:
dataserver Allows you to build a new Adaptive Server.
dscp Allows you to view and edit server entries in the interfaces file from the command line.
dsedit Allows you to view and edit server entries in the interfaces file using a GUI based on X11/Motif in UNIX platforms.
In Windows NT, allows you to create and modify network connection information in the interfaces file.
sqlupgrade Upgrades your currently installed release of Adaptive Server to the newest release using a GUI based on X11/Motif in UNIX platforms.
sqlupgraderes Upgrades your currently installed release of Adaptive Server to the newest release using resource files in UNIX platforms.
srvbuild Creates a new Adaptive Server, Backup Server, Monitor Server, or XP Server with default or user-specified values for key configuration attributes using a graphical user interface based on X11/Motif in UNIX platforms.
srvbuildres Creates a new Adaptive Server, Backup Server, Monitor Server, or XP Server, using resource files to specify values for key configuration attributes in UNIX platforms.
Utilities for languages, character sets, and sort ordersUse the following utilities to set languages, character sets and sort orders:
charset Loads the character sets and sort order files in Windows NT.
langinstall Installs a new language on an Adaptive Server.
sqlloc Installs and modifies languages, character sets, and sort order defaults for Adaptive Server, using a GUI based on X11/Motif in UNIX platforms.
sqllocres Installs and modifies languages, character sets, and sort order defaults for Adaptive Server, using a resource file in UNIX platforms.
Utilities to start serversUse the following utilities to start servers manually:
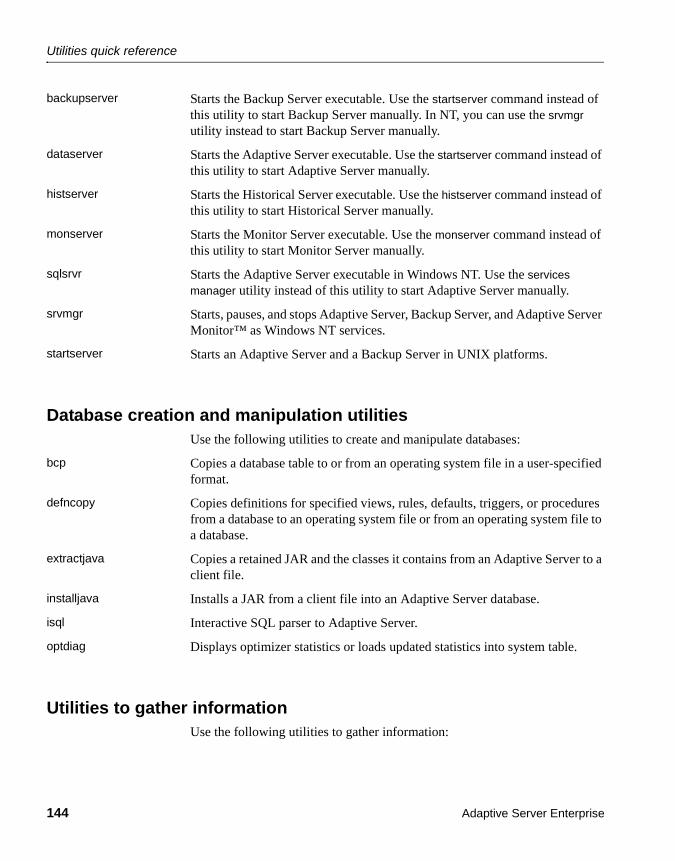
Utilities quick reference
144 Adaptive Server Enterprise
backupserver Starts the Backup Server executable. Use the startserver command instead of this utility to start Backup Server manually. In NT, you can use the srvmgr utility instead to start Backup Server manually.
dataserver Starts the Adaptive Server executable. Use the startserver command instead of this utility to start Adaptive Server manually.
histserver Starts the Historical Server executable. Use the histserver command instead of this utility to start Historical Server manually.
monserver Starts the Monitor Server executable. Use the monserver command instead of this utility to start Monitor Server manually.
sqlsrvr Starts the Adaptive Server executable in Windows NT. Use the services manager utility instead of this utility to start Adaptive Server manually.
srvmgr Starts, pauses, and stops Adaptive Server, Backup Server, and Adaptive Server Monitor™ as Windows NT services.
startserver Starts an Adaptive Server and a Backup Server in UNIX platforms.
Database creation and manipulation utilitiesUse the following utilities to create and manipulate databases:
bcp Copies a database table to or from an operating system file in a user-specified format.
defncopy Copies definitions for specified views, rules, defaults, triggers, or procedures from a database to an operating system file or from an operating system file to a database.
extractjava Copies a retained JAR and the classes it contains from an Adaptive Server to a client file.
installjava Installs a JAR from a client file into an Adaptive Server database.
isql Interactive SQL parser to Adaptive Server.
optdiag Displays optimizer statistics or loads updated statistics into system table.
Utilities to gather informationUse the following utilities to gather information:

CHAPTER 8 Utility Commands Reference
Utility Guide 145
showserver Shows the Adaptive Servers and Backup Servers that are currently running on the local machine in UNIX platforms.
wdllvers Provides information about the Sybase DLLs (dynamic link libraries) that are loaded into memory in Windows NT.
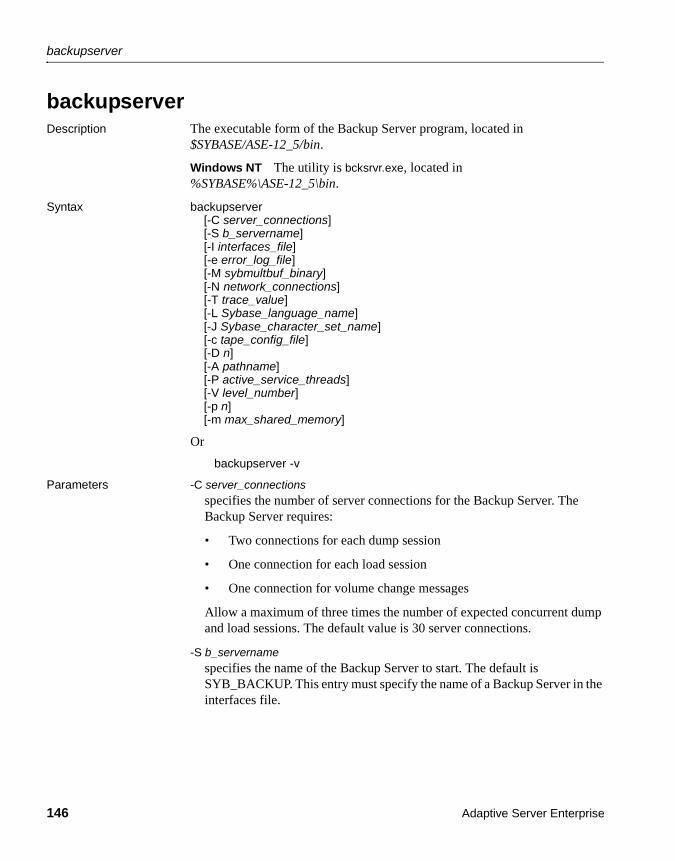
backupserver
146 Adaptive Server Enterprise
backupserverDescription The executable form of the Backup Server program, located in
$SYBASE/ASE-12_5/bin.
Windows NT The utility is bcksrvr.exe, located in %SYBASE%\ASE-12_5\bin.
Syntax backupserver[-C server_connections][-S b_servername][-I interfaces_file][-e error_log_file][-M sybmultbuf_binary][-N network_connections][-T trace_value][-L Sybase_language_name][-J Sybase_character_set_name][-c tape_config_file][-D n][-A pathname][-P active_service_threads][-V level_number][-p n][-m max_shared_memory]
Or
backupserver -v
Parameters -C server_connectionsspecifies the number of server connections for the Backup Server. The Backup Server requires:
• Two connections for each dump session
• One connection for each load session
• One connection for volume change messages
Allow a maximum of three times the number of expected concurrent dump and load sessions. The default value is 30 server connections.
-S b_servernamespecifies the name of the Backup Server to start. The default is SYB_BACKUP. This entry must specify the name of a Backup Server in the interfaces file.

CHAPTER 8 Utility Commands Reference
Utility Guide 147
-I interfaces_filespecifies the name and location of the interfaces file to search when connecting to Backup Server. If -I is omitted, backupserver looks for a file named interfaces in the directory pointed to by your SYBASE environment variable.
-vprints the version number and copyright message of the backupserver software and then exits.
-e error_log_filespecifies the name and location of the Backup Server error log file used to report Open Server internal errors, sybmultbuf errors, errors that halt the Backup Server, and errors for disconnected sessions. All other errors are sent to the notify destination specified in the dump database, dump transaction, load database, and load transaction commands.
-M sybmultbuf_binaryspecifies the full path name of the sybmultbuf executable. Use this parameter only when starting Backup Server from a directory other than the bin directory of the Sybase installation directory, or when using a diagnostic version of sybmultbuf.
-N network_connectionsspecifies the number of total network connections (DBPROCESSes) that the master Backup Server can originate. The default value is 25.
-T trace_valueinterprets trace_value as a bitmask (base-2 number). The 1 bits in trace_value correspond to Open Server Trace flags to turn on. If you specify more than one -T parameter on the command line, the final -T value overrides the values from earlier -T parameters. The trace_value must be a positive integer.
-L Sybase_language_namespecifies the default language for Backup Server. If not specified, Backup Server uses the locale specified by the LC_ALL or LANG environment variables. If these variables are not set, Backup Server searches for the “default” entry in locales.dat.
Note The -L parameter does not override the value set in the LANG environment variable.
-J Sybase_character_set_namespecifies the default character set for Backup Server.

backupserver
148 Adaptive Server Enterprise
-c tape_config_filespecifies the name and location of the tape configuration file to search for tape device configuration information before doing a dump database or a dump transaction. If you do not specify -c, the default path name for the tape configuration file is $SYBASE/backup_tape.cfg.
-D nspecifies the bitmap (base 10 number) of the diagnostic flags used within Backup Server.
-A pathnamespecifies the pathname to the directory of the Archive API dynamically loadable library.
-P active_service_threadsallows you to increase the number of stripes during multiple dump/load operations (with a maximum of 12286 stripes per single operation).
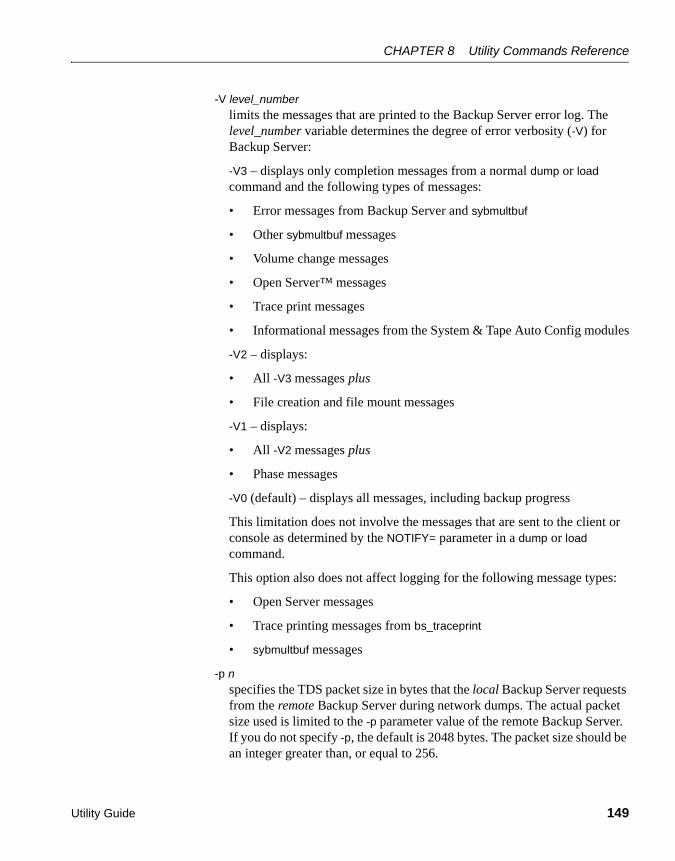
CHAPTER 8 Utility Commands Reference
Utility Guide 149
-V level_numberlimits the messages that are printed to the Backup Server error log. The level_number variable determines the degree of error verbosity (-V) for Backup Server:
-V3 – displays only completion messages from a normal dump or load command and the following types of messages:
• Error messages from Backup Server and sybmultbuf
• Other sybmultbuf messages
• Volume change messages
• Open Server™ messages
• Trace print messages
• Informational messages from the System & Tape Auto Config modules
-V2 – displays:
• All -V3 messages plus
• File creation and file mount messages
-V1 – displays:
• All -V2 messages plus
• Phase messages
-V0 (default) – displays all messages, including backup progress
This limitation does not involve the messages that are sent to the client or console as determined by the NOTIFY= parameter in a dump or load command.
This option also does not affect logging for the following message types:
• Open Server messages
• Trace printing messages from bs_traceprint
• sybmultbuf messages
-p nspecifies the TDS packet size in bytes that the local Backup Server requests from the remote Backup Server during network dumps. The actual packet size used is limited to the -p parameter value of the remote Backup Server. If you do not specify -p, the default is 2048 bytes. The packet size should be an integer greater than, or equal to 256.

backupserver
150 Adaptive Server Enterprise
-m max_shared_memoryspecifies the maximum amount of shared memory in megabytes that Backup Server can use for all of its dump or load sessions.
Usage • Start Backup Server with the startserver command rather than by directly executing the backupserver program.
• To change default values in UNIX, edit the RUN_servername file in your Sybase installation directory. See the startserver reference page for details.
• To change default values in Windows NT, use Server Config to change the command-line parameters of the Backup Server. See the Configuration Guide for details.
• Make sure that the device driver options you include with the dump command are accurate. Backupserver does not verify any device driver options you include during a dump command. For example, if you include a option that forces Backupserver to rewind a tape before use, it will always rewind the tape to the beginning instead of reading the tape from the point of the dump.
• If you do not specify a Backup Server name with the -S parameter, and you have not set the environment variable DSLISTEN, backupserver uses the default Backup Server name SYB_BACKUP in UNIX.
In Windows NT – bcksrvr uses the default Backup Server name server_name_BS. The value of the DSLISTEN environment variable overrides this default value, and the -S parameter overrides both the default and the value specified in DSLISTEN.
• Whenever possible, the Backup Server and any Adaptive Servers that dump or load directly through the Backup Server should share the same interfaces file (sql.ini in UNIX). The interfaces file that Backup Server uses must contain entries for:
• Backup Server
• Any other Backup Servers with which this Backup Server communicates
• Trace flags cause the Backup Server to print information regarding its operation while it is running, for debugging problems in the Backup Server. See the Open Server Server-Library/C Reference Manual for more details on trace flags. Backup Server does not support use of the Open Server-defined SRV_TR symbols for -T.
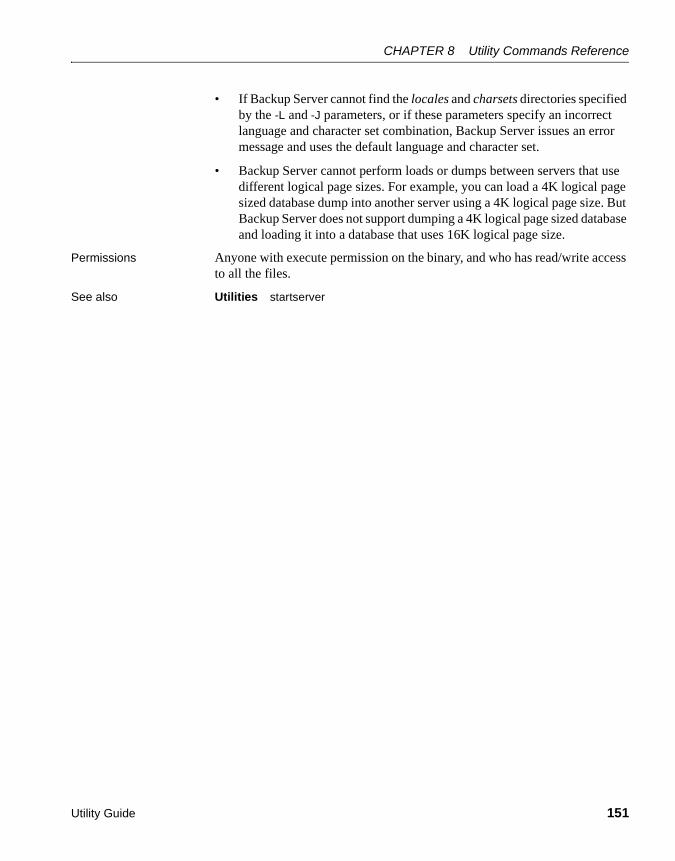
CHAPTER 8 Utility Commands Reference
Utility Guide 151
• If Backup Server cannot find the locales and charsets directories specified by the -L and -J parameters, or if these parameters specify an incorrect language and character set combination, Backup Server issues an error message and uses the default language and character set.
• Backup Server cannot perform loads or dumps between servers that use different logical page sizes. For example, you can load a 4K logical page sized database dump into another server using a 4K logical page size. But Backup Server does not support dumping a 4K logical page sized database and loading it into a database that uses 16K logical page size.
Permissions Anyone with execute permission on the binary, and who has read/write access to all the files.
See also Utilities startserver
bcp
152 Adaptive Server Enterprise
bcpDescription Copies a database table to or from an operating system file in a user-specified
format. bcp is located in $SYBASE/$SYBASE_OCS/bin.
Windows NT The utility is bcp.exe, and is located in %SYBASE%\%SYBASE_OCS%\bin.
Syntax bcp [[database_name.]owner.]table_name [:slice_number] {in | out} datafile [-m maxerrors][-f formatfile][-e errfile] [-F firstrow][-L lastrow][-b batchsize][-n][-c][-t field_terminator][-r row_terminator]-U username[-P password][-I interfaces_file][-S server][-a display_charset][-z language][-A packet_size][-J client_charset][-T text_or_image_size][-E][-g id_start_value][-N][-X][-K keytab_file][-R remote_server_principal][-V [security_options]][-Z security_mechanism][-Q][-Y]
Or
bcp -v
Parameters database_nameis optional if the table being copied is in your default database or in master. Otherwise, you must specify a database name.
CHAPTER 8 Utility Commands Reference
Utility Guide 153
owneris optional if you or the Database Owner owns the table being copied. If you do not specify an owner, bcp looks first for a table of that name that you own, and then looks for one owned by the Database Owner. If another user owns the table, you must specify the owner name or the command fails.
view_nameis the name of the view you are copying out.
table_nameis the name of the database table to copy. The table name cannot be a Transact-SQL reserved word.
Partition number partition_number does not exist in table table_name.
slice_numberis the number of the slice of the database table to copy.
partition_idis the identifier of the partition into which to copy.
in | outis the direction of the copy. in indicates a copy from a file into the database table; out indicates a copy to a file from the database table or view.
datafileis the full path name of an operating system file. The path name can be from 1 to 255 characters in length.
-m maxerrorsis the maximum number of nonfatal errors permitted before bcp aborts the copy. bcp discards each row that it cannot insert (due to a data conversion error, or an attempt to insert a null value into a column that does not allow them), counting each rejected row as one error. If you do not include this parameter, bcp uses a default value of 10.
-f formatfileis the full path name of a file with stored responses from a previous use of bcp on the same table. After you answer bcp’s format questions, it prompts you to save your answers in a format file. Creation of the format file is optional. The default file name is bcp.fmt. The bcp program can refer to a format file when you are copying data so that you do not have to duplicate your previous format responses interactively. Use the -f parameter only if you previously created a format file that you want to use now for a copy in or copy out. If you do not specify this parameter, bcp interactively queries you for format information.
bcp
154 Adaptive Server Enterprise
-e errfileis the full path name of an error file where bcp stores any rows that it was unable to transfer from the file to the database. Error messages from bcp appear on your terminal. bcp creates an error file only when you specify this parameter.
-F firstrowis the number of the first row to copy from an input file (default is the first row).
Avoid using the -F option when performing heavy-duty, multi-process copying, as it causes bcp to generally spend more effort to run, and does not provide you with a faster process. Instead, use -F for single-process, ad-hoc copying.
-L lastrowis the number of the last row to copy from an input file (default is the last row).
-b batchsizeis the number of rows per batch of data copied (the default is to copy all the rows in one batch). Batching applies only when you are bulk copying in; it has no effect on bulk copying out. The smallest number bcp accepts for batchsize is 1.
Note Setting the batch size to 1 causes Adaptive Server to allocate one data page to one row copied in. This option only applies to fast bcp, and is only useful in locating corrupt rows of data. Use -b1 with care — doing so causes a new page to be allocated for each row, and is a poor use of space.
CHAPTER 8 Utility Commands Reference
Utility Guide 155
-n performs the copy operation using native (operating system) formats. Specifying the -n parameter means bcp will not prompt for each field. Files in native data format are not human-readable.
Warning! Do not use bcp in native format for data recovery or salvage or to resolve an emergency situation. Do not use bcp in native format to transport data between different hardware platforms, different operating systems, or different major releases of Adaptive Server. Do not use field terminators (-t) or row terminators (-r) with bcp in native format. Results are unpredictable and data may become corrupted. Using bcp in native format can create flat files that cannot be reloaded into Adaptive Server and it may be impossible to recover the data. If you cannot rerun bcp in character format (for example, a table was truncated or dropped, hardware damage occurred, a database was dropped, and so on) the data is unrecoverable.
-cperforms the copy operation with char datatype as the default storage type of all columns in the data file. Use this format if you are sharing data between platforms. This parameter does not prompt for each field; it uses char as the default storage type, no prefixes, \t (tab) as the default field terminator, and \n (new line) as the default row terminator.
-t field_terminatorspecifies the default field terminator.
-r row_terminatorspecifies the row terminator.
Warning! Do not use -t or -r parameters with bcp in native format. Results are unpredictable and data may become corrupted.
When specifying terminators from the command line with the -t or -r parameter, you must escape characters that have special significance to the UNIX operating system (or the command prompt shell for Windows NT). See the examples for bcp for more information. Either place a backslash in front of the special character or enclose it in quotes. This is not necessary when bcp prompts you (interactive mode).
-U usernamespecifies an Adaptive Server login name.
bcp
156 Adaptive Server Enterprise
-P passwordspecifies an Adaptive Server password. If you do not specify -Ppassword, bcp prompts for a password. You can leave out the -P flag if your password is NULL.
-I interfaces_filespecifies the name and location of the interfaces file to search when connecting to Adaptive Server. If you do not specify -I, bcp looks for an interfaces file (sql.ini in Windows NT) located in the directory specified by the SYBASE environment variable (ini directory in Windows NT).
-S serverspecifies the name of the Adaptive Server to which to connect. If you specify -S with no argument, bcp uses the server specified by the DSQUERY environment variable.
-a display_charsetallows you to run bcp from a terminal where the character set differs from that of the machine on which bcp is running. Use -a in conjunction with -J to specify the character set translation file (.xlt file) required for the conversion. Use -a without -J only if the client character set is the same as the default character set.
The following error message appears if the character translation file(s) named with the -a parameter is missing, or you mistype the name(s):
Error in attempting to determine the size of a pair of translation tables.:'stat' utility failed.
-z languageis the official name of an alternate language the server uses to display bcp prompts and messages. Without the -z flag, bcp uses the server’s default language.
You can add languages to an Adaptive Server during installation or afterwards, using either the langinstall utility (or langinst in Windows NT) or the sp_addlanguage stored procedure.
The following error message appears if an incorrect or unrecognized language is named with the -z parameter:
Unrecognized localization object. Using default value 'us_english'.Starting copy...=> warning.
-vdisplays the version number of bcp and a copyright message and returns to the operating system.

CHAPTER 8 Utility Commands Reference
Utility Guide 157
-A packet_sizespecifies the network packet size to use for this bcp session. For example:
bcp pubs2..titles out table_out -A 2048
sets the packet size to 2048 bytes for this bcp session. packet_size must be between the values of the default network packet size and maximum network packet size configuration variables, and it must be a multiple of 512.
Use network packet sizes larger than the default to improve the performance of large bulk-copy operations.
-J client_charsetspecifies the character set to use on the client. bcp uses a filter to convert input between client_charset and the Adaptive Server character set.
-J client_charset requests that Adaptive Server convert to and from client_charset, the character set used on the client.
-J with no argument sets character set conversion to NULL. No conversion takes place. Use this if the client and server use the same character set.
Omitting -J sets the character set to a default for the platform, which may not necessarily be the character set that the client is using. Table 8-2 lists platform defaults.
Table 8-2: Default character sets for different platforms
The following error message appears if an incorrect or unrecognized character set is named with the -J parameter:
Unrecognized localization object. Using default value 'iso_1'.Starting copy...=> warning.
For more information about character sets and associated flags, see the System Administration Guide.
-T text_or_image_sizeallows you to specify, in bytes, the maximum length of text or image data that Adaptive Server sends. The default is 32K. If a text or an image field is larger than the value of -T or the default, bcp does not send the overflow.
Platform Default Character Set
Sun Solaris, Digital UNIX, NCR, RS/6000 iso_1
HP-UX roman8
OS/2, Novell NetWare 386 cp850
Macintosh mac

bcp
158 Adaptive Server Enterprise
-Eexplicitly specifies the value of a table’s IDENTITY column.
By default, when you bulk copy data into a table with an IDENTITY column, bcp assigns each row a temporary IDENTITY column value of 0. This is effective only when copying data into a table. bcp reads the value of the ID column from the data file, but does not send it to the server. Instead, as bcp inserts each row into the table, the server assigns the row a unique, sequential, IDENTITY column value, beginning with the value 1. If you specify the -E flag when copying data into a table, bcp reads the value from the data file and sends it to the server which inserts the value into the table. If the number of rows inserted exceeds the maximum possible IDENTITY column value, Adaptive Server returns an error.
The -E parameter has no effect when you are bulk copying data out. Adaptive Server copies the ID column to the data file, unless you use the -N parameter.
You cannot use the -E and -g flags together.
-g id_start_valuespecifies the value of the IDENTITY column to use as a starting point for copying data in.
You cannot use the -g and -E flags together.
-Nskips the IDENTITY column. Use this parameter when copying data in if your host data file does not include a placeholder for the IDENTITY column values, or when copying data out, if you do not want to include the IDENTITY column information in the host file.
You cannot use both -N and -E parameters when copying data in.
-Xspecifies that, in this connection to the server, the application initiates the login with client-side password encryption. bcp (the client) specifies to the server that password encryption is desired. The server sends back an encryption key, which bcp uses to encrypt your password, and the server uses the key to authenticate your password when it arrives.
If bcp crashes, the system creates a core file that contains your password. If you did not use the encryption option, the password appears in plain text in the file. If you used the encryption option, your password is not readable.
-K keytab_filespecifies the path to the keytab file used for authentication in DCE.
CHAPTER 8 Utility Commands Reference
Utility Guide 159
-R remote_server_principalspecifies the principal name for the server as defined to the security mechanism. By default, a server’s principal name matches the server’s network name (which is specified with the -S parameter or the DSQUERY environment variable). Use the -R parameter when the server’s principal name and network name are not the same.
-V security_optionsspecifies network-based user authentication. With this option, the user must log in to the network’s security system before running the utility. In this case, users must supply their network user name with the -U option; any password supplied with the -P option is ignored.
-V can be followed by a security_options string of key-letter options to enable additional security services. These key letters are:
• c – Enable data confidentiality service
• i – Enable data integrity service
• m – Enable mutual authentication for connection establishment
• o – Enable data origin stamping service
• r – Enable data replay detection
• q – Enable out-of-sequence detection
-Z security_mechanismspecifies the name of a security mechanism to use on the connection.
Security mechanism names are defined in the $SYBASE/install/libtcl.cfg configuration file. If no security_mechanism name is supplied, the default mechanism is used. For more information on security mechanism names, see the description of the libtcl.cfg file in the Open Client/Server Configuration Guide.
-Qprovides backward compatibility with bcp version 10.0.4 for copying operations involving nullable columns.
-Yspecifies that character-set conversion is disabled in the server, and is instead performed by bcp on the client side when using bcp IN.
Note All character-set conversion is done in the server during bcp OUT.

bcp
160 Adaptive Server Enterprise
Examples Example 1 Copies data out of the publishers table in character format (using char for all fields) using the -c parameter. The -t field_terminator parameter ends each field with a comma, and the -r row_terminator parameter ends each line with a Return. bcp prompts only for a password:
In UNIX platforms – The first backslash before the final “r” escapes the second so that only one backslash is printed:
bcp pubs2..publishers out pub_out -c -t , -r \\r
In Windows NT:
bcp pubs2..publishers out pub_out -c -t , -r \r
Example 2 Copies data from the publishers table to a file named pub_out for later reloading into Adaptive Server. Press Return to accept the defaults specified by the prompts. The same prompts appear when you copy data into the publishers table:
bcp pubs2..publishers out pub_outPassword:Enter the file storage type of field pub_id [char]:Enter prefix length of field pub_id [0]:Enter length of field pub_id [4]:Enter field terminator [none]:Enter the file storage type of field pub_name [char]:Enter prefix length of field pub_name [1]:Enter length of field pub_name [40]:Enter field terminator [none]:Enter the file storage type of field city [char]:Enter prefix length of field city [1]:Enter length of field city [20]:Enter field terminator [none]:Enter the file storage type of field state [char]:Enter prefix length of field state [1]:Enter length of field state [2]:Enter field terminator [none]:
In UNIX, you are then asked:
Do you want to save this format information in afile? [Y-n] y
Host filename [bcp.fmt]: pub_formStarting copy...3 rows copied. Clock Time (ms.): total = 1 Avg = 0 (3000.00 rows per sec.)
CHAPTER 8 Utility Commands Reference
Utility Guide 161
Example 3 Copies data back into Adaptive Server using the saved format file, pub_form:
bcp pubs2..publishers in pub_out -f pub_form
Example 4 Enter the single letter exactly as it appears below:
To see examples of datatypes, enter "?" at the prompt:
Enter the file storage type of field 'pub_id'['char']:?
Invalid column type. Valid types are: <cr>: same type as Adaptive Server column.
c : charT : texti : ints : smallintt : tinyintf : floatm : moneyb : bitd : datetimex : binaryI : imageD : smalldatetimer : realM : smallmoneyn : numerice : decimal
Example 5 Copies a data file created with a character set used on a VT200 terminal into the pubs2..publishers table. The -z flag displays bcp messages in French:
bcp pubs2..publishers in vt200_data -J iso_1 -z french
Example 6 UNIX platforms only – Specifies that you are using a Macintosh, running bcp on a workstation that is using roman8:
bcp pubs2..publishers in -a mac -J roman8
Example 7 Specifies that Adaptive Server send 40K of text or image data using a packet size of 4096 bytes:
bcp pubs2..publishers out -T 40960 -A 4096
Usage • Use this syntax for bcp_r if you are using threaded drivers.
• Use this syntax for bcp_dce if you are using threaded drivers in the IBM platform.

bcp
162 Adaptive Server Enterprise
• The current version of bcp ignores the -y sybase_directory parameter.
• You cannot use named pipes to copy files in or out.
• Error message format is different than earlier versions of bcp. If you have scripts that perform routines based on the values of these messages you may need to rewrite them, for example:
The display message that indicates the number of rows transferred has been changed. During a session, this version of bcp periodically reports a running total of rows transferred. This message replaces the "1000 rows transferred" message displayed by the previous bcp.
Permissions You must have an Adaptive Server account and the appropriate permissions on the database tables or views, as well as the operating system files to use in the transfer to use bcp.
• To copy data into a table, you must have insert permission on the table.
• To copy a table to an operating system file, you must have select permission on the following tables:
• the table to copy
• sysobjects
• syscolumns
• sysindexes
Tables used sysaudits_01 – sysaudits_08
See also See Chapter 3, “Using bcp to Transfer Data to and from Adaptive Server” for an in-depth discussion of bcp.
See the Performance and Tuning Guide for more information on how changing certain parameters can affect bcp for large batches.
Commands insert
Sytem procedures sp_audit, sp_dboption, sp_displayaudit

CHAPTER 8 Utility Commands Reference
Utility Guide 163
buildmasterDescription Adaptive Server version 12.5 does not use the buildmaster binary to build the
master device. Instead, Sybase has incorporated the buildmaster functionality in the dataserver binary. See Chapter 1, “Building Servers Using dataserver” for more information, and dataserver on page 176 for syntax.
Syntax None.
certauth
164 Adaptive Server Enterprise
certauthDescription Converts a server certificate request to a CA- (certificate authority) signed
certificate. Located in $SYBASE/ASE-12_5/bin.
Windows NT The utility is certauth.exe, and is located in %SYBASE%\ASE-12_5\bin.
Syntax certauth[-r][-C caCert_file][-Q request_filename][-K caKey_filename][-O SignedCert_filename][-P caPassword][-T valid_time]
Or
certauth -v
Parameters -rwhen specified, creates a self-signed root certificate for the test environment.
-C caCert_filespecifies the name of the CA’s certificate request file when -r is specified, or specifies the name of the CA’s root certificate.
-Q request_filenamespecifies the name of certificate request file.
-K caKey_filenamespecifies the name of the CA’s private key.
-O SignedCert_filenamespecifies the name to use for the output when creating a signed certificate file. If -r is specified, SignedCert_filename is the self-signed root certificate. If -r option is not used, SignedCert_filename is the certificate signed by the caCert_file.
-P caPasswordspecifies the CA’s password that is used to decrypt its private key.
-T valid_timespecifies the valid time range for a signed certificate. The valid time range is in units of days.
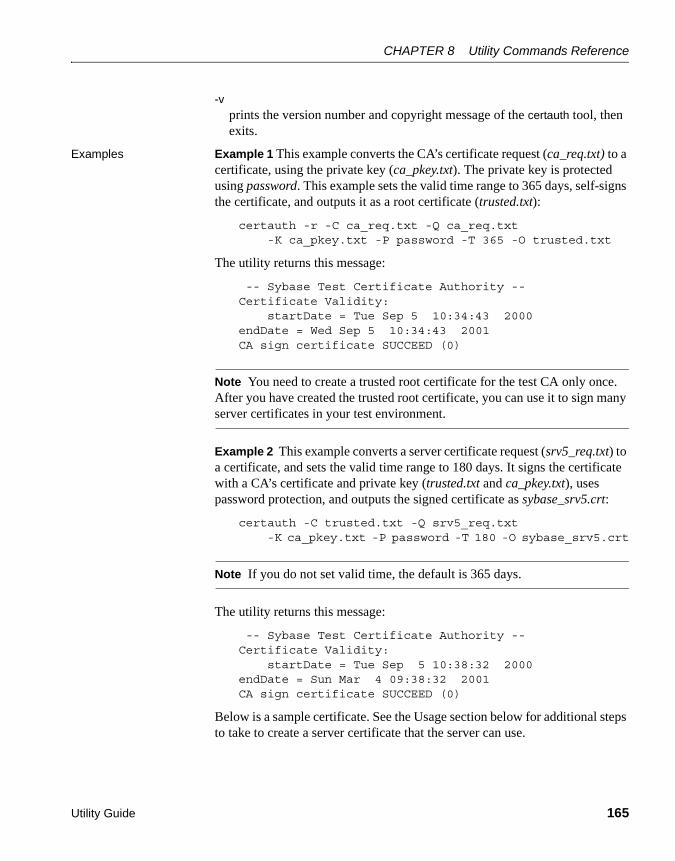
CHAPTER 8 Utility Commands Reference
Utility Guide 165
-vprints the version number and copyright message of the certauth tool, then exits.
Examples Example 1 This example converts the CA’s certificate request (ca_req.txt) to a certificate, using the private key (ca_pkey.txt). The private key is protected using password. This example sets the valid time range to 365 days, self-signs the certificate, and outputs it as a root certificate (trusted.txt):
certauth -r -C ca_req.txt -Q ca_req.txt-K ca_pkey.txt -P password -T 365 -O trusted.txt
The utility returns this message:
-- Sybase Test Certificate Authority --Certificate Validity:
startDate = Tue Sep 5 10:34:43 2000endDate = Wed Sep 5 10:34:43 2001CA sign certificate SUCCEED (0)
Note You need to create a trusted root certificate for the test CA only once. After you have created the trusted root certificate, you can use it to sign many server certificates in your test environment.
Example 2 This example converts a server certificate request (srv5_req.txt) to a certificate, and sets the valid time range to 180 days. It signs the certificate with a CA’s certificate and private key (trusted.txt and ca_pkey.txt), uses password protection, and outputs the signed certificate as sybase_srv5.crt:
certauth -C trusted.txt -Q srv5_req.txt -K ca_pkey.txt -P password -T 180 -O sybase_srv5.crt
Note If you do not set valid time, the default is 365 days.
The utility returns this message:
-- Sybase Test Certificate Authority --Certificate Validity:
startDate = Tue Sep 5 10:38:32 2000endDate = Sun Mar 4 09:38:32 2001CA sign certificate SUCCEED (0)
Below is a sample certificate. See the Usage section below for additional steps to take to create a server certificate that the server can use.
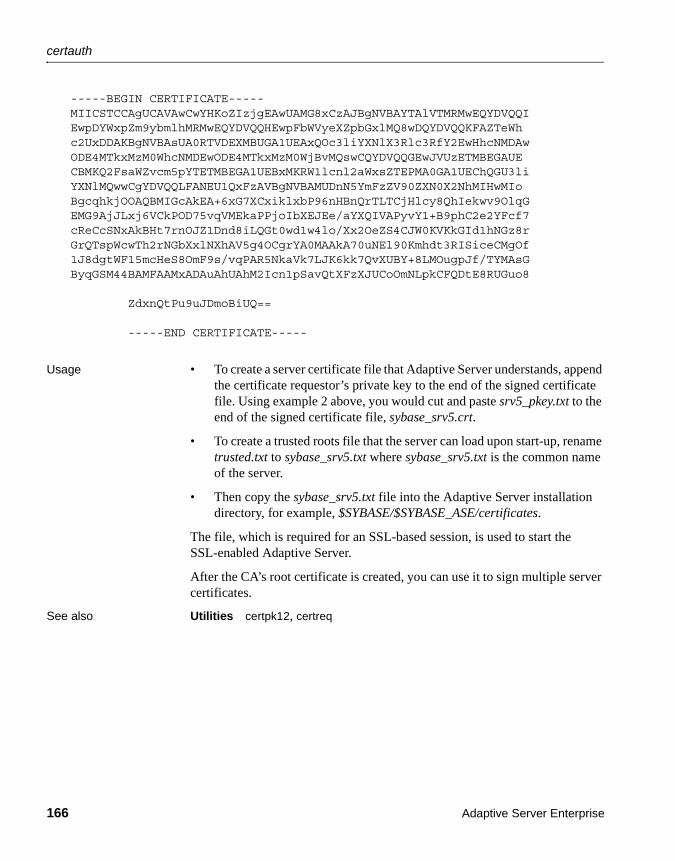
certauth
166 Adaptive Server Enterprise
-----BEGIN CERTIFICATE-----MIICSTCCAgUCAVAwCwYHKoZIzjgEAwUAMG8xCzAJBgNVBAYTAlVTMRMwEQYDVQQIEwpDYWxpZm9ybmlhMRMwEQYDVQQHEwpFbWVyeXZpbGxlMQ8wDQYDVQQKFAZTeWhc2UxDDAKBgNVBAsUA0RTVDEXMBUGA1UEAxQOc3liYXNlX3Rlc3RfY2EwHhcNMDAwODE4MTkxMzM0WhcNMDEwODE4MTkxMzM0WjBvMQswCQYDVQQGEwJVUzETMBEGAUECBMKQ2FsaWZvcm5pYTETMBEGA1UEBxMKRW1lcnl2aWxsZTEPMA0GA1UEChQGU3liYXNlMQwwCgYDVQQLFANEU1QxFzAVBgNVBAMUDnN5YmFzZV90ZXN0X2NhMIHwMIoBgcqhkjOOAQBMIGcAkEA+6xG7XCxiklxbP96nHBnQrTLTCjHlcy8QhIekwv9OlqGEMG9AjJLxj6VCkPOD75vqVMEkaPPjoIbXEJEe/aYXQIVAPyvY1+B9phC2e2YFcf7cReCcSNxAkBHt7rnOJZ1Dnd8iLQGt0wd1w4lo/Xx2OeZS4CJW0KVKkGId1hNGz8rGrQTspWcwTh2rNGbXxlNXhAV5g4OCgrYA0MAAkA70uNEl90Kmhdt3RISiceCMgOf1J8dgtWF15mcHeS8OmF9s/vqPAR5NkaVk7LJK6kk7QvXUBY+8LMOugpJf/TYMAsGByqGSM44BAMFAAMxADAuAhUAhM2Icn1pSavQtXFzXJUCoOmNLpkCFQDtE8RUGuo8
ZdxnQtPu9uJDmoBiUQ==
-----END CERTIFICATE-----
Usage • To create a server certificate file that Adaptive Server understands, append the certificate requestor’s private key to the end of the signed certificate file. Using example 2 above, you would cut and paste srv5_pkey.txt to the end of the signed certificate file, sybase_srv5.crt.
• To create a trusted roots file that the server can load upon start-up, rename trusted.txt to sybase_srv5.txt where sybase_srv5.txt is the common name of the server.
• Then copy the sybase_srv5.txt file into the Adaptive Server installation directory, for example, $SYBASE/$SYBASE_ASE/certificates.
The file, which is required for an SSL-based session, is used to start the SSL-enabled Adaptive Server.
After the CA’s root certificate is created, you can use it to sign multiple server certificates.
See also Utilities certpk12, certreq
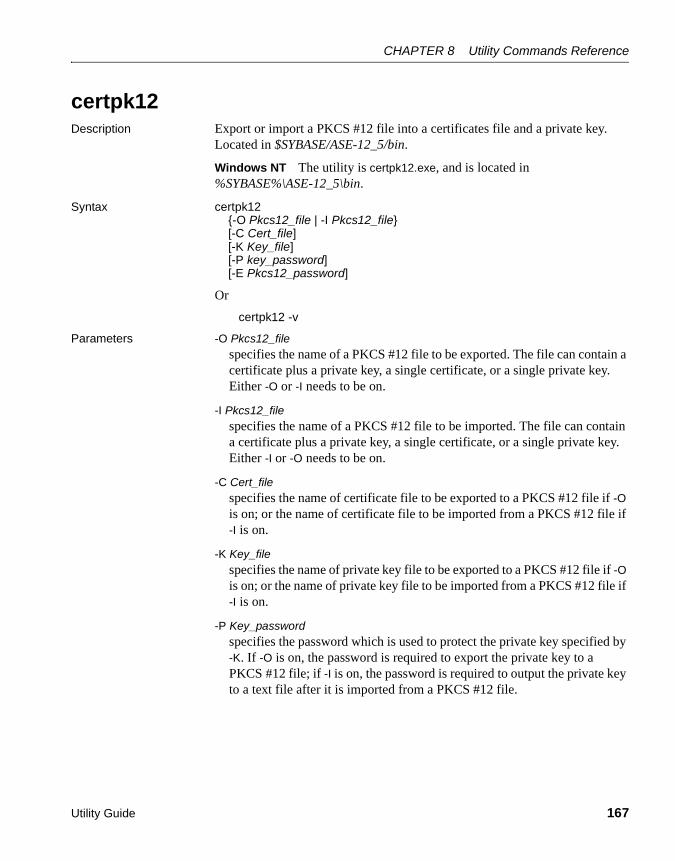
CHAPTER 8 Utility Commands Reference
Utility Guide 167
certpk12Description Export or import a PKCS #12 file into a certificates file and a private key.
Located in $SYBASE/ASE-12_5/bin.
Windows NT The utility is certpk12.exe, and is located in %SYBASE%\ASE-12_5\bin.
Syntax certpk12{-O Pkcs12_file | -I Pkcs12_file}[-C Cert_file][-K Key_file][-P key_password][-E Pkcs12_password]
Or
certpk12 -v
Parameters -O Pkcs12_filespecifies the name of a PKCS #12 file to be exported. The file can contain a certificate plus a private key, a single certificate, or a single private key. Either -O or -I needs to be on.
-I Pkcs12_filespecifies the name of a PKCS #12 file to be imported. The file can contain a certificate plus a private key, a single certificate, or a single private key. Either -I or -O needs to be on.
-C Cert_filespecifies the name of certificate file to be exported to a PKCS #12 file if -O is on; or the name of certificate file to be imported from a PKCS #12 file if -I is on.
-K Key_filespecifies the name of private key file to be exported to a PKCS #12 file if -O is on; or the name of private key file to be imported from a PKCS #12 file if -I is on.
-P Key_passwordspecifies the password which is used to protect the private key specified by -K. If -O is on, the password is required to export the private key to a PKCS #12 file; if -I is on, the password is required to output the private key to a text file after it is imported from a PKCS #12 file.

certpk12
168 Adaptive Server Enterprise
-E Pkcs12_passwordspecifies the password used to protect the PKCS #12 file. If -O is on, the password is used to encrypt the PKCS #12 file to be exported; if -I is on, the password is used to decrypt the PKCS #12 file to be imported. The password is also called “transport password.”
-vprints the version number and copyright message of the certpk12 tool and exits.
Examples Example 1 Exports caRSA.crt, the certificate file and caRSApkey.txt, the private key file, to a PKCS#12 file (caRSA.p12). password is the password used to decrypt caRSApkey.txt. pk12password is the password used to encrypt the final caRSA.p12:
certpk12 -O caRSA.p12 -C caRSA.crt -K caRSApkey.txt -P password -E pk12password
-- Sybase PKCS#12 Conversion Utility certpk12 Thu Nov 9 16:55:51 2000--
Example 2 Imports caRSA.p12, a PKCS #12 file that contains a certificate and a private key. Output the embedded certificate to a text file (caRSA_new.crt) and the embedded private key to a text file (caRSApkey_new.txt):
certpk12 -I caRSA.p12 -C caRSA_new.crt -K caRSApkey_new.txt -P new_password -E pk12password
-- Sybase PKCS#12 Conversion Utility certpk12 Thu Nov 9 16:55:51 2000--
new_password is used to protect caRSApkey_new.txt, and pk12password is required to decrypt caRSA.p12 file.
Note After you run examples 1 and 2, caRSA.crt and caRSA_new.crt are identical. caRSApkey.txt and caRSApkey_new.txt are different because they are encrypted randomly.
Example 3 Exports the certificate file (caRSA.crt) to a PKCS#12 file (caRSAcert.p12). pkcs12password is used to encrypt caRSAcert.p12.
certpk12 -O caRSAcert.p12 -C caRSA.crt -E pk12password
-- Sybase PKCS#12 Conversion Utility certpk12 Thu Nov 9 16:55:51 2000--
Example 4 Imports a PKCS#12 file (caRSAcert.p12) that contains a certificate. Output the embedded certificate to a text file (caRSAcert.txt).
certpk12 -I caRSAcert.p12 -C caRSAcert.txt -E pk12password
-- Sybase PKCS#12 Conversion Utility certpk12 Thu Nov 9 16:55:51 2000--
CHAPTER 8 Utility Commands Reference
Utility Guide 169
pk12password is required to decrypt caRSAcert.p12 file.
Note After you run Examples 3 and 4, the caRSA.crt and caRSAcert.txt, are identical.
Usage • certpk12 only supports triple-DES encrypted PKCS #12 file.
• Append certificate requestor’s private key to the end of its signed certificate file.
• Name the file servername.crt, where servername is the name of the server. Place it in the certificates directory under $SYBASE/$SYBASE_ASE (%SYBASE%\%SYBASE_ASE% on Windows).
This file is needed to start the SSL-enabled Adaptive Server.
See also Utilities certauth, certreq

certreq
170 Adaptive Server Enterprise
certreqDescription Creates a server certificate request and corresponding private key. This utility
can be used in interactive mode, or you can provide all optional parameters on the command line. Located in $SYBASE/ASE-12_5/bin.
Windows NT The utility is certreq.exe, and is located in %SYBASE%\ASE-12_5\bin.
Syntax certreq[-F input_file][-R request_filename][-K PK_filename][-P password]
Or
certreq -v
Parameters -F input_filespecifies the file name that contains attribute information to build a certificate request. If you do not specify an input_file name, the required information must be interactively entered by a user.
The input_file needs an entry for each of the following:
req_certtype={Server,Client}req_keytype={RSA,DSA}req_keylength={for RSA: 512-2048;
for DSA: 512,768,1024}req_country={string}req_state={string}req_locality={string}req_organization={string}req_orgunit={string}req_commonname={string}
Note The common name must be the same as the server name.
See Example 2 for a sample file called input_file.
-R request_filenamespecifies the name for the certificate-request file.
-K PK_filenamespecifies the name for the private-key file.
-P passwordspecifies the password used to protect the private key.

CHAPTER 8 Utility Commands Reference
Utility Guide 171
-vdisplays the version number and copyright message, then exits.
Examples Example 1 This example does not use the -F input_file parameter, and is therefore in interactive mode. To create a server certificate request (server_req.txt) and its private key (server_pkey.txt), enter:
certreq
Choose certificate request type:S – Server certificate requestC – Client certificate request (not supported)Q – Quit
Enter your request [Q] : s
Choose key type:
R – RSA key pairD – DSA/DHE key pairQ – Quit
Enter your request [Q] : r
Enter key length (512, 768, 1024 for DSA; 512-2048 for RSA) : 512
Country: US
State: california
Locality: emeryville
Organization: sybase
Organizational Unit: dst
Common Name: server
The utility returns the message:
Generating key pair (please wait) . . .
After the key pair is generated, the certreq utility prompts you for more information.
Enter password for private key : password
Enter file path to save request: server_req.txt
Enter file path to save private key : server_pkey.txt
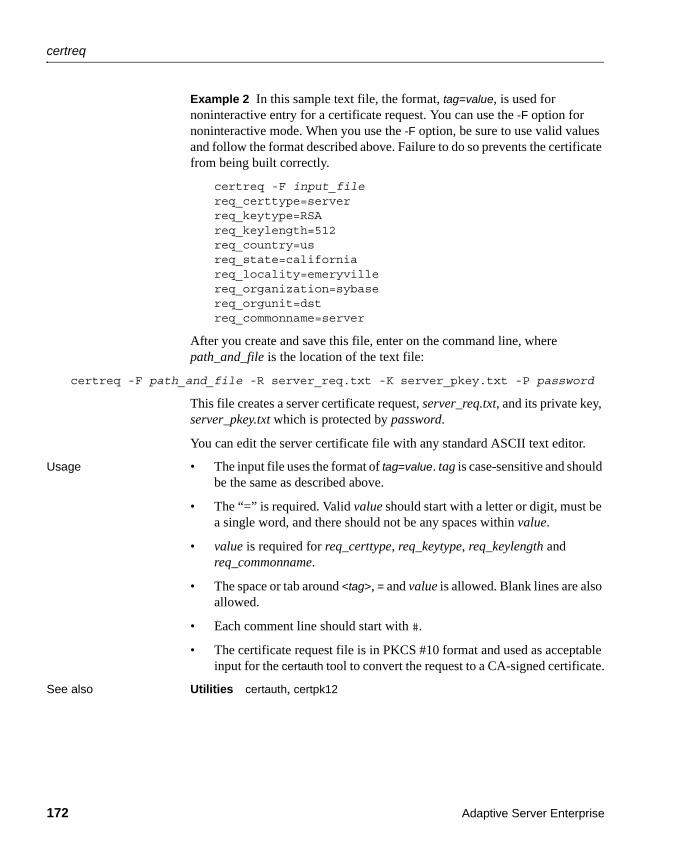
certreq
172 Adaptive Server Enterprise
Example 2 In this sample text file, the format, tag=value, is used for noninteractive entry for a certificate request. You can use the -F option for noninteractive mode. When you use the -F option, be sure to use valid values and follow the format described above. Failure to do so prevents the certificate from being built correctly.
certreq -F input_filereq_certtype=serverreq_keytype=RSAreq_keylength=512req_country=usreq_state=californiareq_locality=emeryvillereq_organization=sybasereq_orgunit=dstreq_commonname=server
After you create and save this file, enter on the command line, where path_and_file is the location of the text file:
certreq -F path_and_file -R server_req.txt -K server_pkey.txt -P password
This file creates a server certificate request, server_req.txt, and its private key, server_pkey.txt which is protected by password.
You can edit the server certificate file with any standard ASCII text editor.
Usage • The input file uses the format of tag=value. tag is case-sensitive and should be the same as described above.
• The “=” is required. Valid value should start with a letter or digit, must be a single word, and there should not be any spaces within value.
• value is required for req_certtype, req_keytype, req_keylength and req_commonname.
• The space or tab around <tag>, = and value is allowed. Blank lines are also allowed.
• Each comment line should start with #.
• The certificate request file is in PKCS #10 format and used as acceptable input for the certauth tool to convert the request to a CA-signed certificate.
See also Utilities certauth, certpk12

CHAPTER 8 Utility Commands Reference
Utility Guide 173
charsetDescription UNIX platforms only Loads the character sets and sort order files in
Adaptive Server. Located in $SYBASE/ASE-12_5/bin.
Syntax charset[-Ppassword][-Sserver][-Iinterface]sort_order[ charset ]
Or
charset -v
Parameters -P passwordspecifies your password. If you do not specify -P, charset prompts for your password.
-S serverspecifies the name of the server on which to change the character set and sort order.
-I interfacespecifies the network interface used by the server.
sort_orderspecifies the name of the sort order file Adaptive Server will use.
charsetspecifies the character set Adaptive Server will use.
-vdisplays the version number and copyright message for charset.
Usage Before using charset, you must set your SYBASE environment variable to point to the current release directory.
Permissions You must be a System Administrator to use charset.
See also Commands set
Utilities langinstall

cobpre
174 Adaptive Server Enterprise
cobpreDescription Precompiler for COBOL, located in $SYBASE/$SYBASE_OCS/bin
(%SYBASE%\%SYBASE_OCS%\bin in Windows NT). For a full description of cpre, see Appendix A of the Open Client/Server Programmer’s Supplement.
Syntax See above.

CHAPTER 8 Utility Commands Reference
Utility Guide 175
cpreDescription Precompiler for C, located in $SYBASE/$SYBASE_OCS/bin
(%SYBASE%\%SYBASE_OCS%\bin in Windows NT). For a full description of cpre, see Appendix A of the Open Client/Server Programmer’s Supplement.
Syntax See above.
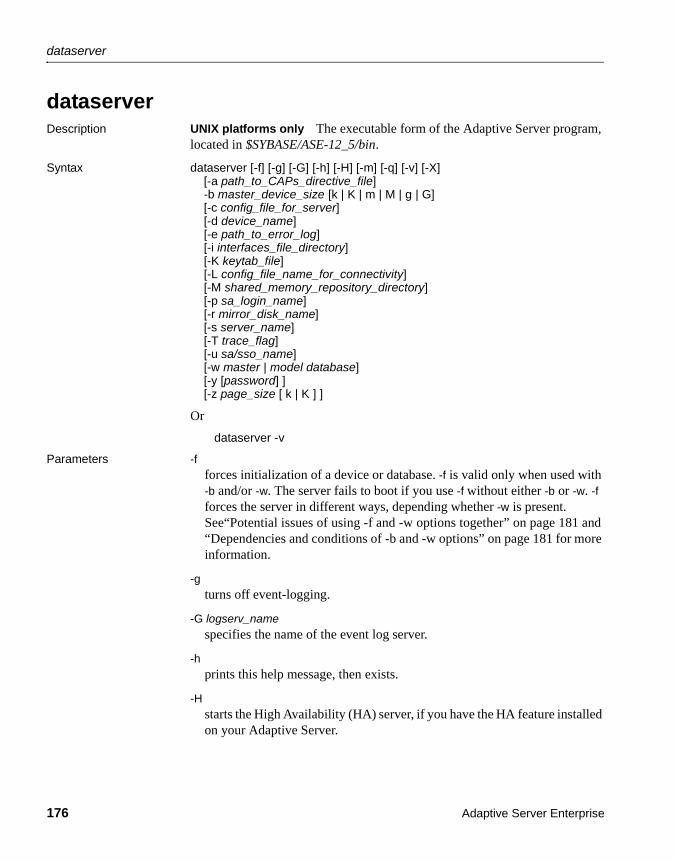
dataserver
176 Adaptive Server Enterprise
dataserverDescription UNIX platforms only The executable form of the Adaptive Server program,
located in $SYBASE/ASE-12_5/bin.
Syntax dataserver [-f] [-g] [-G] [-h] [-H] [-m] [-q] [-v] [-X][-a path_to_CAPs_directive_file]-b master_device_size [k | K | m | M | g | G][-c config_file_for_server][-d device_name][-e path_to_error_log][-i interfaces_file_directory][-K keytab_file][-L config_file_name_for_connectivity][-M shared_memory_repository_directory][-p sa_login_name][-r mirror_disk_name][-s server_name][-T trace_flag][-u sa/sso_name][-w master | model database][-y [password] ][-z page_size [ k | K ] ]
Or
dataserver -v
Parameters -fforces initialization of a device or database. -f is valid only when used with -b and/or -w. The server fails to boot if you use -f without either -b or -w. -f forces the server in different ways, depending whether -w is present. See“Potential issues of using -f and -w options together” on page 181 and “Dependencies and conditions of -b and -w options” on page 181 for more information.
-gturns off event-logging.
-G logserv_namespecifies the name of the event log server.
-hprints this help message, then exists.
-Hstarts the High Availability (HA) server, if you have the HA feature installed on your Adaptive Server.

CHAPTER 8 Utility Commands Reference
Utility Guide 177
-mstarts Adaptive Server in single-user mode.
-qtreats quiesced databases as “in recovery.”
-vprints the version number and copyright message for dataserver, then exits.
-Xstarts this server as sybmon, not dataserver.
-a path_to_CAPs_directive_filespecifies the path to the CAPs directive file.
-b master_device_size [ k | K | m | M | g | G ] specifies the size of the master device or database you want to build. The server calculates the sizes, so you can use “K”, “M”, and “G” instead of exact byte numbers.
-c config_file_for_serverspecifies the full path name of an Adaptive Server configuration file. Use this parameter to start Adaptive Server with the configuration values in the specified configuration file.
If you specify a configuration file with the dataserver -c parameter, make sure all the parameters in this configuration file are compatible before you boot the server. If some of the configuration parameters are incompatible, the server may not boot. To avoid this, do not specify a configuration file when you build the master device. The build phase uses all default settings when you do not specify a configuration file.
For more information, see the System Administration Guide.
-d device_nameis the full path name of the device for the master database. The master database device must be writable by the user who starts Adaptive Server. If you do not use the -d parameter, the default master database device name is d_master.
-e errorlogfileis the full path name of the error log file for Adaptive Server system-level error messages.
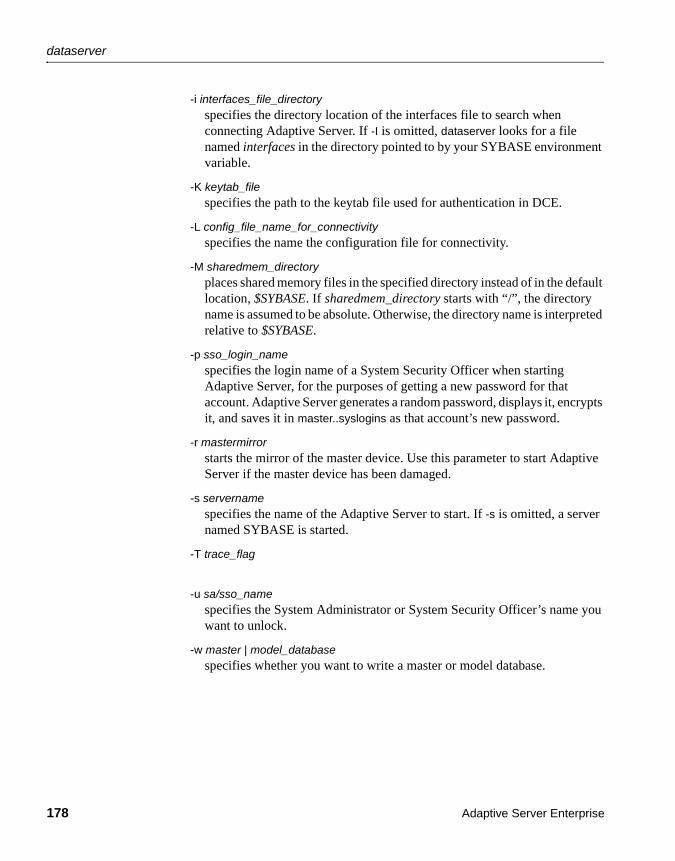
dataserver
178 Adaptive Server Enterprise
-i interfaces_file_directoryspecifies the directory location of the interfaces file to search when connecting Adaptive Server. If -I is omitted, dataserver looks for a file named interfaces in the directory pointed to by your SYBASE environment variable.
-K keytab_filespecifies the path to the keytab file used for authentication in DCE.
-L config_file_name_for_connectivityspecifies the name the configuration file for connectivity.
-M sharedmem_directoryplaces shared memory files in the specified directory instead of in the default location, $SYBASE. If sharedmem_directory starts with “/”, the directory name is assumed to be absolute. Otherwise, the directory name is interpreted relative to $SYBASE.
-p sso_login_namespecifies the login name of a System Security Officer when starting Adaptive Server, for the purposes of getting a new password for that account. Adaptive Server generates a random password, displays it, encrypts it, and saves it in master..syslogins as that account’s new password.
-r mastermirrorstarts the mirror of the master device. Use this parameter to start Adaptive Server if the master device has been damaged.
-s servernamespecifies the name of the Adaptive Server to start. If -s is omitted, a server named SYBASE is started.
-T trace_flag
-u sa/sso_namespecifies the System Administrator or System Security Officer’s name you want to unlock.
-w master | model_databasespecifies whether you want to write a master or model database.
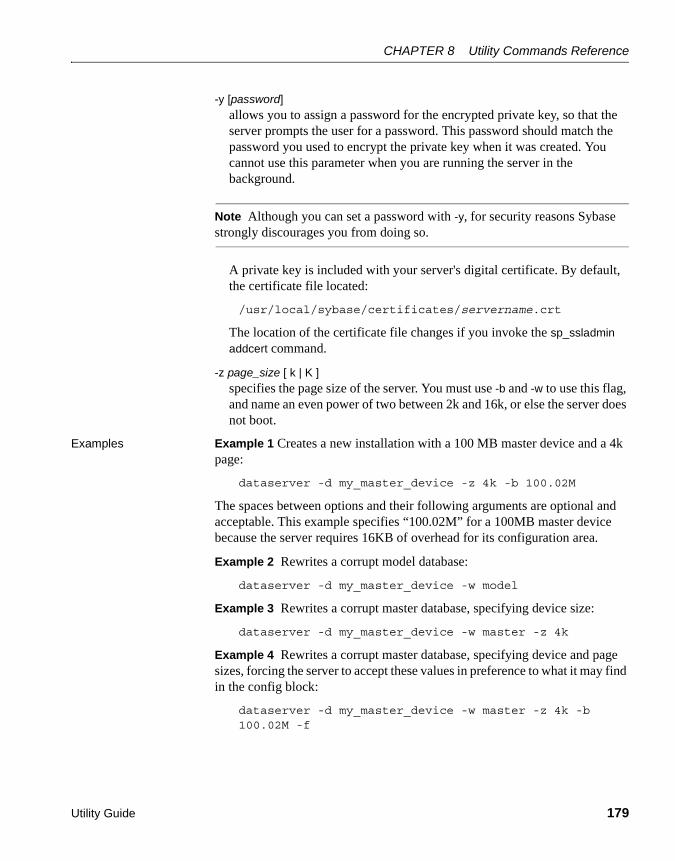
CHAPTER 8 Utility Commands Reference
Utility Guide 179
-y [password]allows you to assign a password for the encrypted private key, so that the server prompts the user for a password. This password should match the password you used to encrypt the private key when it was created. You cannot use this parameter when you are running the server in the background.
Note Although you can set a password with -y, for security reasons Sybase strongly discourages you from doing so.
A private key is included with your server's digital certificate. By default, the certificate file located:
/usr/local/sybase/certificates/servername.crt
The location of the certificate file changes if you invoke the sp_ssladmin addcert command.
-z page_size [ k | K ]specifies the page size of the server. You must use -b and -w to use this flag, and name an even power of two between 2k and 16k, or else the server does not boot.
Examples Example 1 Creates a new installation with a 100 MB master device and a 4k page:
dataserver -d my_master_device -z 4k -b 100.02M
The spaces between options and their following arguments are optional and acceptable. This example specifies “100.02M” for a 100MB master device because the server requires 16KB of overhead for its configuration area.
Example 2 Rewrites a corrupt model database:
dataserver -d my_master_device -w model
Example 3 Rewrites a corrupt master database, specifying device size:
dataserver -d my_master_device -w master -z 4k
Example 4 Rewrites a corrupt master database, specifying device and page sizes, forcing the server to accept these values in preference to what it may find in the config block:
dataserver -d my_master_device -w master -z 4k -b 100.02M -f

dataserver
180 Adaptive Server Enterprise
Example 5 Rewrites a corrupt master database, specifying a page size that does not match what the server finds in its config block. This produces a failure:
dataserver -d my_master_device -w master -z 8k00:00000:00000:2001/01/19 12:01:26.94 server The configured server page size does not match that specified on the command line. To use the configured size, omit the command line size; to use the command line size, specify 'force' (-f).
Example 6 Rewrites a corrupt master database, specifying an incorrect page size, even in a normal boot. This produces a failure:
dataserver -d my_master_device -z4000dataserver: the 'z' flag may not be used without 'b' or 'w'. dataserver: server will ignore the 'z' flag. dataserver: the 'z' flag contained an invalid page size. dataserver: the page size must be an even power of two between 2048 and 16384 bytes, inclusive.
Usage • dataserver allows you to create devices and databases that are up to 32Gb in size, depending on the limitation of your operating system. For more information on size limits, see the Installation Guide for your platform.
• Start Adaptive Server with the startserver command rather than by directly executing the dataserver program. If you need to change any of the default values, edit the RUN_servername file in your Sybase installation directory. See the startserver reference page for details.
• Because Adaptive Server passwords are encrypted, you cannot recover forgotten passwords. If all System Security Officers lose their passwords, the -p parameter generates a new password for a System Security Officer account. Start Adaptive Server with -p, immediately log in to Adaptive Server with the new random password, and execute sp_password to reset your password to a more secure one.
• After you have finished running the Adaptive Server installation program, set the file permissions on the dataserver executable to limit who can execute it.
• If you do not specify an Adaptive Server name with the -s parameter, and you have not set the DSLISTEN environment variable, dataserver uses the default Adaptive Server name SYBASE. The value of the DSLISTEN environment variable overrides this default value, and the -s parameter overrides both the default and the DSLISTEN environment variable.
CHAPTER 8 Utility Commands Reference
Utility Guide 181
• Automatic login lockouts can cause a site to end up in a situation in which all accounts capable of unlocking logins (System Administrators and System Security Officers) are locked. If this occurs, use the dataserver utility with the -u parameter to check the specified login for System Administrator or System Security Officer authorization, unlock the account, and reset the value of the current failed logins counter to zero.
Potential issues of using -f and -w options together
Be particularly careful when using the -f and -w options together. When rewriting master database using the -w option, the server requires that the configuration block page size and device size are correct. If you do not provide them on the command line they must agree. The server refits the master device, and puts master and all other included databases back in their proper places.
When you use the -f option force initialization, your page size and master device size overrides those in the configuration block. In addition, -f assigns all other unknown space—allocation blocks that are either unused or are corrup—to the master database.
Dependencies and conditions of -b and -w options
The effect of -b changes depending on whether -w is present:
• -b without -w creates a new master device as named by -d (the default is d_master) and with the page size as specified by -z (the default is 2048):
• If the named device already exists as an OS file, the attempt fails, and you see a message such as:
File already exists. You must remove the existing file before attempting to create a new one using the server's -b option.Unable to create master device.
• If the named device names an existing raw partition, the attempt fails unless you include the -f flag. This reinitializes the raw partition as a server master device.
• -b with -w master tells dataserver to use the size specified in -z for the master device when recreating the master database. It implies nothing about creating a new device.
-w may or may not require additional flags:
• If you use -w model, the -z and -b flags are accepted but ignored.
• If you use -w master for new installations, -z and -b are not required because the device size information is stored in the config_block.
dataserver
182 Adaptive Server Enterprise
• If you use -w master to upgrade older installations:
• The server requires -b and/or -z if the config_block does not contain a valid entry for the associated size(s). The command fails if it can't get valid data for the page size or device size.
• You may provide -b and/or -z when the config_block contains valid entries for the size(s) they represent. However if the sizes do not match what is in the config_block, you must add -f to force your new size preferences.
Permissions Anyone with execute permission on the binary, and who has read/write access to all the files.
See also Commands disk mirror, disk remirror, disk unmirror
System procedures sp_ssladmin addcert
Utilities startserver

CHAPTER 8 Utility Commands Reference
Utility Guide 183
dataxtrDescription The GUI data-migration tool to move data and database schema from pre-12.5
Adaptive Server databases into 12.5 databases. located in $SYBASE/ASE-12_5/bin (%SYBASE%\ASE-12_5\bin in Windows NT).
For instructions on how to use the dataxtr utility, see the Adaptive Server Enterprise version 12.5 release bulletin for your platform.
Syntax None

ddlgen
184 Adaptive Server Enterprise
ddlgenDescription A Java-based tool that generates definitions for server- and database-level
objects in Adaptive Server. ddlgen supports Adaptive Server version 12.0 and later.
The command-line version of ddlgen is located in $SYBASE/sybcent41 (%SYBASE%\sybcent41 in Windows NT).
Syntax ddlgen -Ulogin-Ppassword-Shost_name : port_number[-Tobject_type][-Nobject_name][-Ddbname][-Xextended_object_type][-Ooutput_file][-Eerror_file][-Lprogress_log_file][-Jclient_charset]-F[ % | SGM | GRP | USR | R | D | UDD | U | V | P | XP | I | RI | KC | TR]
Or
ddlgen -v
Parameters -U loginspecifies a login name, and is case-sensitive.
-P passwordspecifies your password.
-Shost_name : port_numberspecifies the host name or IP address of Adaptive Server, as well as its port number. Separate host_name and port_number with a colon, without spaces before or after it.
Note You must use the -S option because ddlgen does not connect to a default server.
-Tobject_typespecifies the type of object you are creating. If you do not use -T, ddlgen generates DDL for the default database of login. Table 8-3 lists object types for -T.
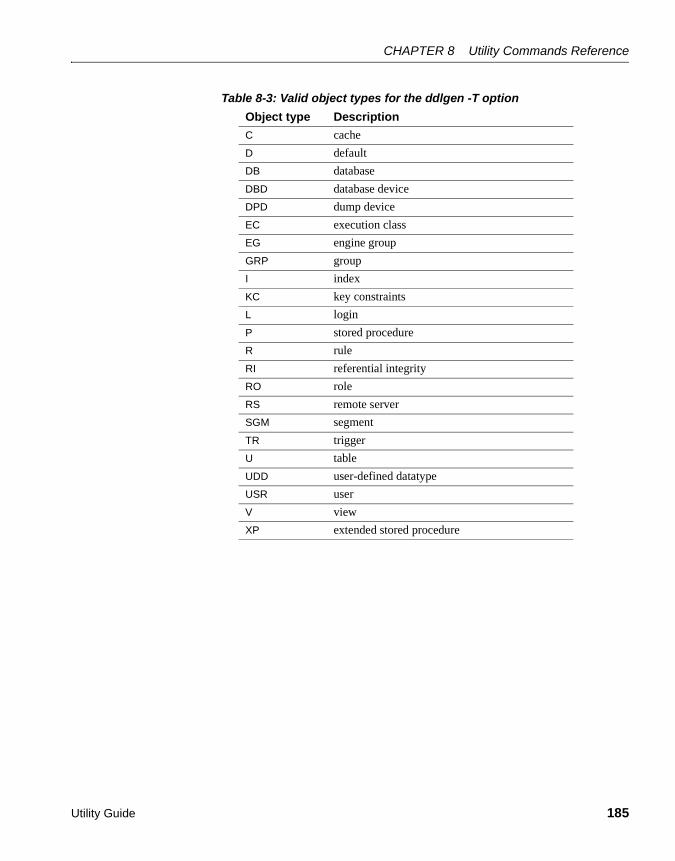
CHAPTER 8 Utility Commands Reference
Utility Guide 185
Table 8-3: Valid object types for the ddlgen -T option
Object type Description
C cache
D default
DB database
DBD database device
DPD dump device
EC execution class
EG engine group
GRP group
I index
KC key constraints
L login
P stored procedure
R rule
RI referential integrity
RO role
RS remote server
SGM segment
TR trigger
U table
UDD user-defined datatype
USR user
V view
XP extended stored procedure

ddlgen
186 Adaptive Server Enterprise
-Nobject_namespecifies the fully qualified name of the object you are creating, such as -Ndb_name.owner_name.table_name.object_name. The -N option:
• is required if you specify any object_type other than DB (database) in the -T parameter.
• accepts wildcards with the use of %.
• generates DDL for all items of a specific object type on your server.
• enforces strict order in which it parses the names in the -Ndb_name.owner_name.table_name.object_name format. If you only provide three arguments, ddlgen assumes they are owner_name, table_name, and object_name, in that order. Alternatively, you can also use -Nowner_name.table_name -Ddb_name. ddlgen does not impose this restriction if object_name is an index (I).
-Ddbnamespecifies the name of the database for the object you specify in the -N option. The default is the user’s default database.
-Xextended_object_typedifferentiates the following:
• user tables (OU) from proxy tables (OD) when you specify a table as your object type (-TU)
• temporary databases (OD) from non-temporary databases (OU) when you specify database as your object type (-TDB)
• SQLJ procedures (OD) from stored procedures (OU) when you specify procedure as your object type (-TP).
If object_type (-T) is U (table) and -X is not specified, ddlgen generates DDL for both user tables and proxy tables. To generate DDL only for:
• user tables – use the OU extended object type with the -X option.
• proxy tables – use the OD extended object type with the -X option.
Note ddlgen does not support system tables.
-Ooutput_filespecifies an output file for the generated DDL. If you do not specify -O, the DDL you create appears in a console window.
CHAPTER 8 Utility Commands Reference
Utility Guide 187
-Eerror_filespecifies a log file for recording errors. If you do not specify -E, the generated errors appear in a console window.
-Lprogress_log_filespecifies a log file for recording the progress of ddlgen. If you do not specify -L, the progress is not recorded.
-Jclient_charsetspecifies the character set to use on the client. -Jclient_charset requests that Adaptive Server convert to and from client_charset, the character set used on the client. A filter converts input between client_charset and the Adaptive Server character set.
Omitting -J sets the character set to a default for the platform. The default may not necessarily be the character set that the client is using.

ddlgen
188 Adaptive Server Enterprise
-Ffilters out indexes, triggers, and constraints out of table and database definitions in the DDL of table- and database-level objects. The valid filters are:
• For tables – [ % | I | RI | KC | TR]
• For databases – [ % | SGM | GRP | USR | R | D | UDD | U | V | P | XP | I | RI | KC | TR]
The filter options are:
• % – filters out everything, and retrieves the schema-only definition of a table.
• SGM – filters out segments
• GRP – filters out groups
• USR – filters out users
• R – filters out rules
• D – filters out defaults
• UDD – filters out user-defined datatypes
• U – filters out user tables
• V – filters out views
• P – filters out stored procedures
• XP – filters out extended stored procedures
• I – filters out indexes
• RI – filters out referential integrity constraints
• KC – filters out primary- and unique-key constraints
• TR – filters out triggers
-vdisplays the version and copyright message of ddlgen and returns to the operating system.
Examples Example 1 Caches – Generates DDL for a cache called default data cache on a machine named HARBOR using port 1955:
ddlgen -Uroy -Proy123 -SHARBOR:1955 -TC -N"default data cache"
To generate DDL for all caches:

CHAPTER 8 Utility Commands Reference
Utility Guide 189
ddlgen -Ulogin -Ppassword -Sserver:port -TC -N%
Example 2 Defaults – Generates DDL for a default called “phondflt” owned by jones in the pubs2 database on a machine named HARBOR using port 1955:
ddlgen -Uroy -Proy123 -SHARBOR:1955 -TD -Njones.phonedflt -Dpubs2
Alternatively, because ddlgen allows you to use a fully qualified name in the -N flag, you can omit the -Ddbname and include the database name in the -N option:
ddlgen -Ulogin -Ppassword -Sserver:port -TD -Ndbname.owner.defaultname
To generate DDL for all defaults in a database owned by “owner”:
ddlgen -Ulogin -Ppassword -Sserver:port -TD -Nowner.% -Ddbname
Example 3 Databases – Generates DDL for a database called pubs2 on a machine named HARBOR using port 1955:
ddlgen -Uroy -Proy123 -SHARBOR:1955 -TDB -Npubs2
If you do not specify a dbname, ddlgen generates DDL for the default database of login:
ddlgen -Ulogin -Ppassword -Sserver:port
If you do not use the -T parameter, ddlgen generates DDL for a default-type database:
ddlgen -Ulogin -Ppassword -Sserver:port -Ndbname
To generate DDL for all databases:
ddlgen -Ulogin -Ppassword -Sserver:port -TDB -N%
Example 4 Database device – Generates DDL for a database device called master running on a machine named HARBOR using port 1955:
ddlgen -Uroy -Proy123 -SHARBOR:1955 -TDBD -Nmaster
To generate DDL for all database devices:
ddlgen -Ulogin -Ppassword -Sserver:port -TDBD -N%
Example 5 Temporary databases – Generates DDL for all databases, including tempdbs:
ddlgen -Ulogin -Ppassword -Sserver:port -TDB -N%
To generate DDL for all temporary databases, use the OD extended database type:
ddlgen -Ulogin -Ppassword -Sserver:port -TDB -XOD -N%
ddlgen
190 Adaptive Server Enterprise
Although you can use the OD extended type in Adaptive Server versions 12.5.0.3 and later, versions earlier than 12.5.0.3 issue warning messages. You can safely ignore this message; ddlgen continues processing the command.
To generate DDL for all databases except temporary databases, use the OU extended type:
ddlgen -Ulogin -Ppassword -Sserver:port -TDB -XOU -N%
The following generates DDL for a temporary database named tempdb1:
ddlgen -Ulogin -Ppassword -Sserver:port -TDB -Ntempdb1
The output includes the following:
• A create temporary database statement
create temporary database tempdb1 on master = 4, asdas = 2
go
• An sp_tempdb bind statement where the isql application is bound to tempdb1:
sp_tempdb 'bind','ap', 'isql', 'DB', 'tempdb1'go
Note DDL for objects such as views, stored procedures, and tables is not generated along with DDL for a temporary database because these objects are temporary, and are re-created when the server restarts.
Example 6 Dump device – Generates DDL for a dump device called tapedump1 running on a machine named HARBOR using port 1955:
ddlgen -Uroy -Proy123 -SHARBOR:1955 -TDPD -Ntapedump1
To generate DDL for all dump devices:
ddlgen -Ulogin -Ppassword -Sserver:port -TDPD -N%
Example 7 Execution class – Generates DDL for an execution class called EC2 running on a machine named HARBOR using port 1955:
ddlgen -Uroy -Proy123 -SHARBOR:1955 -TEC -NEC2
To generate DDL for all execution classes:
ddlgen -Ulogin -Ppassword -Sserver:port -TEC -N%
Example 8 Engine groups – Generates DDL for an engine group called LASTONLINE running on a machine named HARBOR using port 1955:
CHAPTER 8 Utility Commands Reference
Utility Guide 191
ddlgen -Uroy -Proy123 -SHARBOR:1955 -TEG -NLASTONLINE
To generate DDL for all engine groups:
ddlgen -Ulogin -Ppassword -Sserver:port -TEG -N%
Example 9 Extended stored procedures – Generates DDL for the xp_cmdshell extended stored procedure in the pubs2 database, owned by Jones and running on a machine named HARBOR using port 1955, by using the fully qualified dbname.owner.extendedstoredprocedure format with the -N option:
ddlgen -Uroy -Proy123 -SHARBOR:1955 -TXP -Npubs2.jones.xp_cmdshell
Alternatively, you can use the -D option instead of using the fully qualified name:
ddlgen -Ulogin -Ppassword -Sserver:port -TXP -Nowner.extendedstoredprocedure -Ddbname
To generate DDL for all extended stored procedures:
ddlgen -Ulogin -Ppassword -Sserver:port -TXP -Ndbname.owner.%
Example 10 Groups – Generates DDL for a group called “public” in the pubs2 database, running on a machine named HARBOR using port 1955, by using the fully qualified dbname.groupname format in the -N option:
ddlgen -Uroy -Proy123 -SHARBOR:1955 -TGRP -Npubs2.public
Alternatively, you can use the -D option to specify the dbname:
ddlgen -Ulogin -Ppassword -Sserver:port -TGRP -Ngroupname -Ddbname
To generate DDL for all groups:
ddlgen -Ulogin -Ppassword -Sserver:port -TGRP -Ndbname.%
Example 11 Indexes – Generates DDL for an index called au_lname for the table authors owned by dbo, in the pubs2 database:
ddlgen -Uroy -Proy123 -SHARBOR:1955 -TI -Ndbo.authors.au_lname -Dpubs2
Alternatively, because ddlgen allows you to use a fully qualified name in the -N flag, you can omit the -Ddbname and include the database name in the -N option:
ddlgen -Ulogin -Ppassword -Sserver:port-TI -Ndbname.owner.tablename.indexname
If you use a fully qualified name, you may omit the -D option.
To generate DDL for all indexes:
ddlgen -Ulogin -Ppassword -Sserver:port -TI

ddlgen
192 Adaptive Server Enterprise
-Ndbname.owner.tablename.%
Example 12 Keys – Both of these generate DDL for the primary and unique keys of all the tables in a database that begin with “PK”:
ddlgen -Usa -P -TKC -Ndbname.%.%.PK%
Or:
ddlgen -Usa -P -TKC -N%.%.PK% -Ddbname
Note Although you can normally generate all indexes only for a table, the -T object type parameter with the RI and KC value allows you to generate foreign keys as well as primary and unique keys for an entire database.
Example 13 Logins – Generates DDL for all logins on a machine named HARBOR using port 1955:
ddlgen -Uroy -Proy123 -SHARBOR:1955 -TL -N%
Note The password in the DDL generated for all logins is “password”.
Alternatively, you can specify an individual login by using -Nusername instead of -N%:
ddlgen -Ulogin -Ppassword -Sserver:port -TL -Nusername
Example 14 Remote Servers – Generates DDL for a remote server called ORANGE on a machine named HARBOR using port 1955:
ddlgen -Uroy -Proy123 -SHARBOR:1955 -TRS -NORANGE
To generate DDL for all remote servers:
ddlgen -Ulogin -Ppassword -Sserver:port -TRS -N%
Example 15 Roles – Generates DDL for the sa_role on a machine named HARBOR using port 1955:
ddlgen -Uroy -Proy123 -SHARBOR:1955 -TRO -Nsa_role
To generate DDL for all roles:
ddlgen -Ulogin -Ppassword -Sserver:port -TRO -N%
Note The password in the DDL generated for all roles is “password”.
CHAPTER 8 Utility Commands Reference
Utility Guide 193
Example 16 Rules – Generates DDL for all rules associated with authors on a machine named HARBOR using port 1955:
ddlgen -Uroy -Proy123 -SHARBOR:1955 -TR -Nauthors.dbo.%
The % symbol tells DDLGen to create DDLs for all rules that exist on the server.
You can also give the fully qualified name of the rule:
ddlgen -Ulogin -Ppassword -Sserver:port -TR -Ndbname.owner.rulename
Alternatively, you can also use the -D parameter:
ddlgen -Ulogin -Ppassword -Sserver:port -TR -Nowner.rulename -Ddbname
Example 17 Segments – Generates DDL using the fully qualified dbname.segmentname format in the -N option for a segment called logsegment for the pubs2 database, on a machine named HARBOR using port 1955:
ddlgen -Uroy -Proy123 -SHARBOR:1955 -TSGM -Npubs2.logsegment
Alternatively, you can use specify the dbname using the -D option:
ddlgen -Ulogin -Ppassword -Sserver:port -TSGM -Nsegmentname -Ddbname
To generate DDL for all segments:
ddlgen -Ulogin -Ppassword -Sserver:port -TSGM -Ndbname.%
Example 18 SQLJ functions – Generates DDL for a SQLJ function named region_of owned by dbo in database master:
ddlgen -Uroy -Proy123 -SHARBOR:1955 -TDB –Nmaster.dbo.region_of
Alternatively you can also use the -D parameter:
ddlgen -Ulogin -Ppassword -Sserver:port -TDB –Ndbo.region_of –Dmaster
To generate DDL for all SQLJ functions in a database, use object type F:
ddlgen -Ulogin -Ppassword -Sserver:port -TF –Ndbname.owner.%
Example 19 SQLJ procedures – are a kind of stored procedure. You generate DDL for SQL procedures along with DDL for stored procedures. The following generates DDL for all stored procedures—including SQLJ procedures—owned by dbo in the master database:
ddlgen -Uroy -Proy123 -SHARBOR:1955 -TP –Nmaster.dbo.%
To generate DDL for all SQLJ procedures that are only owned by dbo in the master database, use the following, where the extended type OD refers to SQLJ procedures:
ddlgen -Ulogin -Ppassword-Sserver:port -TP –Nmaster.dbo.% -XOD

ddlgen
194 Adaptive Server Enterprise
To generate DDL for all procedures except SQLJ procedures owned by dbo in the master database, use the following, where the extended type OU refers to all stored procedures except SQLJ procedures:
ddlgen -Ulogin -Ppassword-Sserver:port -TP –Nmaster.dbo.% -XOU
Example 20 Stored procedures – Generates DDL for the sp_monitor stored procedure for the pubs2 database on a machine named HARBOR using port 1955, using the fully qualified dbname.owner.procedure_name format for the -N option:
ddlgen -Uroy -Proy123 -SHARBOR:1955 -TP -Npubs2.dbo.sp_monitor
Alternatively, you can use specify the dbname using the -D option:
DDLGen -Ulogin -Ppassword -Sserver:port -TP -Nowner.procedurename -Ddbname
To generate DDL for all stored procedures:
ddlgen -Ulogin -Ppassword -Sserver:port -TP -Ndbname.owner.%
Example 21 Tables – Generates DDL for all user tables in the pubs2 database owned by “dbo” and running on a machine named HARBOR using port 1955:
ddlgen -Uroy -Proy123 -SHARBOR:1955 -TU -Ndbo.% -Dpubs2
You can also use the -N parameter to give the fully qualified name of the table:
ddlgen -Ulogin -Ppassword -Sserver:port -TU-Ndbname.tableowner.tablename
Alternatively, you can also use the -D parameter to specify the database:
ddlgen -Ulogin -Ppassword -Sserver:port -TU-Ntableowner.tablename -Ddbname
To generate DDL for all proxy tables, which uses the value OD, use -XOD instead, where X is the extended type, and OD denotes proxy tables:
ddlgen -Ulogin -Ppassword -Sserver:port -TU -Ntableowner.% -Ddbname -XOD
To generate DDL for all user tables, which uses the value OU, use -XOU instead, where X is the extended type, and OU denotes user tables:
ddlgen -Ulogin -Ppassword -Sserver:port -TU -Ntableowner.% -Ddbname -XOU
To generate DDL for all tables, including user tables and proxy tables:
ddlgen -Ulogin -Ppassword -Sserver:port -TU -Ndbname.tableowner.%
CHAPTER 8 Utility Commands Reference
Utility Guide 195
Example 22 Triggers – Generates DDL for the trigger checksum for the pubs2 database on a machine named HARBOR using port 1955, using the fully qualified dbname.owner.trigger_name format for the -N option:
ddlgen -Uroy -Proy123 -SHARBOR:1955 -TTR -Npubs2.dbo.checksum
Alternatively, you can use specify the database_name using the -D option:
ddlgen -Ulogin -Ppassword -Sserver:port -TTR -Nowner.triggername -Ddbname
To generate DDL for all triggers:
ddlgen -Ulogin -Ppassword -Sserver:port -TTR -Ndbname.owner.%
Example 23 User-defined datatypes – Generates DDL for the user-defined datatype “Identype” for the pubs2 database on a machine named HARBOR using port 1955 using the fully qualified dbname.userdefined_datatype format for the -N option:
ddlgen -Uroy -Proy123 -SHARBOR:1955 -TUDD -Npubs2.Identype
Alternatively, you can use the -D option to specify the dbname:
ddlgen -Ulogin -Ppassword -Sserver:port -TUDD -Nuserdefined_datatype -Ddbname
To generate DDL for all user-defined datatypes:
ddlgen -Ulogin -Ppassword -Sserver:port -TUDD -Nbname.%
Example 24 Views – Generates DDL for a view named retail owned by Miller in the pubs2 database running on a machine named HARBOR using port 1955, by using the fully qualified dbname.owner.viewname format with the -N option:
ddlgen -Uroy -Proy123 -SHARBOR:1955 -TV -Npubs2.miller.retail
Alternatively, you can use the -D option instead of using the fully qualified name:
ddlgen -Ulogin -Ppassword -Sserver:port -TV -Nowner.viewname -Ddbname
To generate DDL for all views:
DDLGen -Ulogin -Ppassword -Sserver:port -TV -Ndbname.owner.%
Example 25 Users – Generates DDL for a user named Smith in the pubs2 database running on a machine named HARBOR using port 1955, by using a fully qualified dbname.username format with the -N option:
ddlgen -Uroy -Proy123 -SHARBOR:1955 -TUSR -Npubs2.smith

ddlgen
196 Adaptive Server Enterprise
Alternatively, you can use both the -N and -D options instead of using a fully qualified name in -N:
ddlgen -Ulogin -Ppassword -Shost_name:port -TUSR -Nusername -Ddbname
To generate DDL for all users:
ddlgen -Ulogin -Ppassword -Sserver:port -TUSR -Ndbname.%
Usage • ddlgen does not identify existing sequences within views, stored procedures or triggers. For this reason, when generating DDL for a database, you must first run ddlgen on those views, stored procedures and triggers that are independent, before running ddlgen on those with dependencies. For example, if view B depends on view A, you must first run ddlgen on view A, before running it on view B.
• The default information for ddlgen is:
• To invoke ddlgen from a command line, you must install JRE 1.1.8 or higher, and have DDLGen.jar in your classpath.
At the command line, invoke ddlgen using the DDLGen.sh file (DDLGen.bat for Windows NT), included in your Adaptive Server installation. The main class in DDLGen.jar is com.sybase.ddlgen.DDLGenerator.
Option Parameter Required Default
-U username Yes None
-P password Yes None
-S host_name:port_number Yes None
-T object_type
See Table 8-3 for a list of valid object types
No Database
-N object_name Yes, if object_type for -T is not DB (database)
Default database name of username, if -Tobject_type is db or if -T is not specified
-D database_name No Default database of username
-X extended_object_type
Options are OU for user tables, and OD for proxy tables
No; use only when the object_type for -T is U (user table), P (procedure), DB (database)
None
-O output_file_name No Standard out
-E error_file_name No Standard out
-L log_file_name No None
-V version_number of ddlgen No None
CHAPTER 8 Utility Commands Reference
Utility Guide 197
• To start ddlgen in the Sybase Central plug-in for Adaptive Server:
a Right-click on the object for which you want to generate DDL.
b Select Generate DDL.
• In the output DDL of create table, bind statements are generated as independent DLL instead of dependent DLL.
Filters
If you use an invalid filter paramter, ddlgen generates a warning, ignores that parameter, and continues with the rest of the valid parameters you specify.
If you specify % along with other filter parameters, ddlgen ignores all other filterable parameters, and only shows schema-only definitions. ddlgen then continues to evaluate the dependencies within the subset of the applied as the filterable parameters for the database.
Permissions Since ddlgen needs to obtain data from system catalogs, users must either be logged in as “dbo” or have select permissions on syscatalogs.

defncopy
198 Adaptive Server Enterprise
defncopyDescription Copies definitions for specified views, rules, defaults, triggers, or procedures
from a database to an operating-system file or from an operating-system file to a database. Located in $SYBASE/$SYBASE_OCS/bin.
Windows NT The utility is defncopy.exe and is located in %SYBASE%\%SYBASE_OCS%\bin.
Syntax defncopy[-X][-a display_charset][-I interfaces_file][-J [client_charset]][-K keytab_file][-P password][-R remote_server_principal][-S [server_name]][-U username][-V security_options][-Z security_mechanism][-z language]{ in file_name database_name |
out file_name database_name [owner.]object_name [[owner.]object_name...] }
Or
defncopy -v
Parameters -Xinitiates the login with client-side password encryption in this connection to the server. defncopy (the client) specifies to the server that password encryption is desired. The server sends back an encryption key, which defncopy uses to encrypt your password, and the server uses to authenticate your password when it arrives.
If defncopy crashes, the system creates a core file which contains your password. If you did not use the encryption option, the password appears in plain text in the file. If you used the encryption option, your password is not readable.

CHAPTER 8 Utility Commands Reference
Utility Guide 199
-a display_charsetruns defncopy from a terminal whose character set differs from that of the machine on which defncopy is running. Use -a in conjunction with -J to specify the character set translation file (.xlt file) required for the conversion. Use -a without -J only if the client character set is the same as the default character set.
Note The ascii_7 character set is compatible with all character sets. If either the Adaptive Server character set or the client character set is set to ascii_7, any 7-bit ASCII character can pass unaltered between client and server. Other characters produce conversion errors. See the System Administration Guide for more information on character set conversion.
-I interfaces_filespecifies the name and location of the interfaces file to search when connecting to Adaptive Server. If you do not specify -I, defncopy looks for a file named interfaces in the directory specified by the SYBASE environment variable in UNIX platforms, and sql.ini in the ini subdirectory for your Sybase release directory in Windows NT.
-J client_charsetspecifies the character set to use on the client. A filter converts input between client_charset and the Adaptive Server character set.
-J client_charset requests that Adaptive Server convert to and from client_charset, the client’s character set.
-J with no argument sets character set conversion to NULL. No conversion takes place. Use this if the client and server are using the same character set.
Omitting -J sets the character set to a default for the platform. The default may not be the character set that the client is using. For more information about character sets and their associated flags, see the System Administration Guide and Configuration Guide for your platform.
-K keytab_filespecifies the path to the keytab file used for authentication in DCE.
-P passwordspecifies your password. If you do not specify -P, defncopy prompts for your password.
defncopy
200 Adaptive Server Enterprise
-R remote_server_principalspecifies the principal name for the server. By default, a server’s principal name matches the server’s network name (which is specified with the -S parameter or the DSQUERY environment variable). Use the -R parameter when the server’s principal name and network name are not the same.
-S server_namespecifies the name of the Adaptive Server to which to connect. If you specify -S with no argument, defncopy looks for a server named SYBASE. If you do not specify -S, defncopy uses the server specified by your DSQUERY environment variable.
-U usernamespecifies a login name. Login names are case sensitive. If you do not specify username, defncopy uses the current user’s operating system login name.
-V security_optionsspecifies network-based user authentication. With this option, the user must log in to the network’s security system before running the utility. In this case, users must supply their network user name with the -U option; any password supplied with the -P option is ignored.
-V can be followed by a security_options string of key-letter options to enable additional security services. These key letters are:
• c – Enable data confidentiality service
• i – Enable data integrity service
• m – Enable mutual authentication for connection establishment
• o – Enable data origin stamping service
• r – Enable data replay detection
• q – Enable out-of-sequence detection
-Z security_mechanismspecifies the name of a security mechanism to use on the connection.
Security mechanism names are defined in the $SYBASE/install/libtcl.cfg configuration file. If no security_mechanism name is supplied, the default mechanism is used. For more information on security mechanism names, see the description of the libtcl.cfg file in the Open Client/Server Configuration Guide.
CHAPTER 8 Utility Commands Reference
Utility Guide 201
-z languageis the official name of an alternate language that the server uses to display defncopy prompts and messages. Without the -z flag, defncopy uses the server’s default language.
Add languages to an Adaptive Server at installation, or afterwards with the utility langinstall (langinst in Windows NT) or the stored procedure sp_addlanguage.
in | outspecifies the direction of definition copy.
file_namespecifies the name of the operating system file destination or source for the definition copy. The copy out overwrites any existing file.
database_namespecifies the name of the database to copy the definitions from or to.
owneris optional if you or the Database Owner own the table being copied. If you do not specify an owner, defncopy first looks for a table of that name that you own, and then looks for one owned by the Database Owner. If another user owns the table, you must specify the owner name or the command fails.
object_namespecifies name(s) of database object(s) for defncopy to copy out. Do not use objectname when copying definitions in.
-vdisplays the version and copyright message of defncopy and returns to the operating system.
Examples Example 1 Copies definitions from the file new_proc into the database stagedb on server MERCURY. The connection with MERCURY is established with a user of name “sa” and a NULL password:
defncopy -Usa -P -SMERCURY in new_proc stagedb
Example 2 Copies definitions for objects sp_calccomp and sp_vacation from the employees database on the SYBASE server to the file dc.out. Messages and prompts display in french. The user is prompted for a password:
defncopy -S -z french out dc.out employees sp_calccomp sp_vacation
Usage • Use this syntax for defncopy_r if you are using threaded drivers.
• Use this syntax for defncopy_dce if you are using threaded drivers in the IBM platform.
defncopy
202 Adaptive Server Enterprise
• You must set the SYBASE environment variable to the location of the current version of Adaptive Server before you can use defncopy.
• The defncopy utility cannot copy table definitions or reports created with Report Workbench™.
• Invoke the defncopy program directly from the operating system. defncopy provides a noninteractive way to copy out definitions (create statements) for views, rules, defaults, triggers, or procedures from a database to an operating system file. Alternatively, it copies in all the definitions from a specified file.
• The in filename or out filename and the database name are required and must be stated unambiguously. For copying out, use file names that reflect both the object’s name and its owner.
• defncopy ends each definition that it copies out with the comment:
/* ### DEFNCOPY: END OF DEFINITION */
Definitions created as text must end with this comment so that defncopy can copy them in successfully.
• Enclose values specified to defncopy in quotation marks, if they contain characters that could be significant to the shell.
Warning! Long comments of more than 100 characters that are placed before a create statement may cause defncopy to fail.
Permissions • You must have select permission on the sysobjects and syscomments tables to copy out definitions; you do not need permission on the object itself.

CHAPTER 8 Utility Commands Reference
Utility Guide 203
• You may not have select permission on the text column of the syscomments table if the System Security Officer has reset the allow select on syscomments.text column parameter with the system procedure sp_configure. This reset restricts select permission to the object owner and the System Administrator. This restriction is required in order to run Adaptive Server in the evaluated configuration, as described in the installation and configuration documentation for your platform. In this case, the object owner or a System Administrator must execute defncopy to copy out definitions.
Note If the text has been encrypted, it may be hidden from you even if you have all the required permissions. See “Verifying and Encrypting Source Text” in the Transact-SQL User’s Guide for more information.
• You must have the appropriate create permission for the type of object you are copying in. Objects copied in belong to the copier. A System Administrator copying in definitions on behalf of a user must log in as that user to give the user proper access to the reconstructed database objects.
Tables used syscomments, sysobjects
See also Commands create, select
System procedures sp_addlanguage, sp_checkreswords, sp_configure, sp_procqmode, sp_remap
Utilities langinstall

dscp
204 Adaptive Server Enterprise
dscpDescription UNIX platforms only Allows you to view and edit server entries in the
interfaces file from the command line in UNIX platforms. Located in $SYBASE/$SYBASE_OCS/bin.
Syntax dscp [-p]
or
dscp -v
To exit from dscp:
quit
or
exit
Parameters -psuppresses command-line prompts.
-vdisplays the version and copyright message of dscp and returns to the operating system.
Examples Opens the default interfaces file for editing and suppresses the command-line prompt:
dscp -p
Usage • Use this syntax for dscp_r if you are using threaded drivers.
• Use this syntax for dscp_dce if you are using threaded drivers in the IBM platform.
• You must set the SYBASE environment variable to the location of the current version of Adaptive Server before you can use dscp.
• The dscp utility program is a text-based utility.
• See Chapter 5, “Using dscp” for more information about the dscp utility program.
See also Utilities dsedit
CHAPTER 8 Utility Commands Reference
Utility Guide 205
dseditDescription UNIX platforms The dsedit utility allows you to view and edit server entries
in the interfaces file using a GUI based on X11/Motif in UNIX platforms. The utility is located in $SYBASE/$SYBASE_OCS/bin.
Windows NT The dsedit.exe utility creates and modifies network connection information in the interfaces file. The utility is located in %SYBASE%\%SYBASE_OCS%bin.
Syntax dsedit
or
dsedit -v
Parameters -vdisplays the version and copyright message of dsedit.
Usage • Use this syntax for dsedit_r if you are using threaded drivers.
• Use this syntax for dsedit_dce if you are using threaded drivers in the IBM platform.
• You must set the SYBASE environment variable to the location of the current version of Adaptive Server before you can use dsedit.
• You must set the DISPLAY environment variable before invoking dsedit, unless you are only using the -v parameter to display the version number.
• For more information about the dsedit utility program, see Chapter 4, “Using dsedit” Also see the Installation Guide, and the Configuration Guide for your platform.
See also Utilities dscp

extractjava
206 Adaptive Server Enterprise
extractjavaDescription Copies a retained JAR and the classes it contains from an Adaptive Server into
a client file. Located in $SYBASE/$SYBASE_OCS/bin.
In Windows NT The utility is extrjava.exe, and is located in %SYBASE%\%SYBASE_OCS%\bin.
Syntax extractjava (extrjava in Windows NT)-j jar_name-f file_name[-S server_name][-U user_name][-P password][-D database_name][-I interfaces_file][-a display_charset][-J client_charset][-z language][-t timeout][-v]
Or
extractjava -v
Parameters -j jar_namethe name assigned to the retained JAR in the database that is the source of the transfer.
-f file_namethe name of the client file that is the target of the transfer.
-S server_namethe name of the server.
-U user_namean Adaptive Server login name. If you omit the -U flag and parameter, or if you specify the -U flag with no parameter, Adaptive Server uses the current user’s operating system login name.
-P passwordan Adaptive Server password. If you omit the -P flag and parameter, extractjava prompts for a password. If you specify the -P flag with no password, the null password is used.
-D database_namethe name of the database in which to install the JAR. If you omit the -D flag, or if you specify the -D flag with no parameter, the user’s default database is used.
CHAPTER 8 Utility Commands Reference
Utility Guide 207
-I interfaces_filethe name and location of the interfaces file to search when connecting to Adaptive Server. If you omit the -I flag and parameter, or if you specify the -I flag with no parameter, the interfaces file in the directory designated by your SYBASE environment variable is used.
-a display_charsetallows you to use extractjava from a machine where the character set differs that of the server. Use -a in conjunction with -J to specify the character set translation file (.xlt file) required for the conversion. Use -a without -J only if the client character set is the same as the default character set.
-J client_charsetspecifies the character set to use on the client. extractjava uses a filter to convert input between client_charset and the Adaptive Server character set.
-J client_charset requests that Adaptive Server convert to and from client_charset, the character set used on the client.
-J with no argument disables character set conversion. Use this if the client and server use the same character set.
Omitting -J sets the character set to a default for the platform, which may not necessarily be the character set that the client is using. See the System Administration Guide for more information about character sets and associated flags.
-z languagethe name of an alternate language for displaying extractjava prompts and messages. Without the -z flag, extractjava uses the server’s default language. You can add languages to an Adaptive Server during installation or afterward, using the langinstall utility or the sp_addlanguage stored procedure.
-t timeoutspecifies the number of seconds before a SQL command times out. If you do not specify a timeout, the command runs indefinitely. This affects commands issued from within extractjava, not the connection time. The default timeout for logging into extractjava is 60 seconds.
-vprints the version number and copyright message for extractjava and then exits.
Examples Downloads the classes associated with the employees JAR to the client file newaddr.jar.
• UNIX:

extractjava
208 Adaptive Server Enterprise
extractjava -j employees -f '/home/usera/jars/addr.jar' -new
• Windows NT:
extrjava -j employees -f '\home\usera\jars\addr.jar' -new
Usage • You must set the SYBASE environment variable to the location of the current version of Adaptive Server before you can use extractjava.
• If the target client file already exists, extractjava overwrites its contents.
• The parameter flags -f, -j, -S, -U, -P, -D, and -I can be written with or without a space between the flag letter and the following parameter.
• When you execute extractjava, an exclusive lock is placed on sysxtypes.
• If -jar is specified, an exclusive table lock is placed on sysjars.
• See Java in Adaptive Server Enterprise for more information about how this utility is used when Java is enabled in the database.
Permissions You need to be a System Administrator or Database Owner to use extractjava.
Tables used sysjars, sysxtypes
See also Commands remove java
System procedures sp_helpjava
Utilities installjava
CHAPTER 8 Utility Commands Reference
Utility Guide 209
installjavaDescription Installs a JAR from a client file into an Adaptive Server. The utility is located
in $SYBASE/$SYBASE_OCS/bin.
Windows NT The utility is instjava.exe, located in %SYBASE%\%SYBASE_OCS%\bin.
Syntax installjava-f file_name[ -new | -update ][ -j jar_name ][ -S server_name ][ -U user_name ][ -P password ][ -D database_name ][ -I interfaces_file ][ -a display_charset ][ -J client_charset ][ -z language ][ -t timeout ][-v]
Or
installjava -v
Parameters -f file_namethe name of the source file containing the classes to be installed in the database.
-new | -updatespecifies whether the classes in the file already exist in the database.
If you specify the new parameter, you cannot install a class with the same name as an existing class.
If you specify the update parameter, you can install a class with the same name as an existing class, and the newly installed class replaces the existing class.
-j jar_namethe name of the JAR containing the classes to be installed in the database. Indicates that the JAR file should be saved in the database and associated with the classes it contains.
-S server_namethe name of the server.
installjava
210 Adaptive Server Enterprise
-U user_namean Adaptive Server login name. If you omit the -U flag and parameter, or if you specify the -U flag with no parameter, Adaptive Server uses the current user’s operating system login name.
-P passwordan Adaptive Server password. If you omit the -P flag and parameter, installjava prompts for a password. If you specify the -P flag with no password, the null password is used.
-D database_namethe name of the database in which to install the JAR. If you omit the -D flag, or if you specify the -D flag with no parameter, the user’s default database is used.
-I interfaces_filethe name and location of the interfaces file to search when connecting to Adaptive Server. If you omit the -I flag and parameter, or if you specify the -I flag with no parameter, the interfaces file in the directory designated by your SYBASE environment variable is used.
-a display_charsetallows you to use installjava from a machine where the character set differs that of the server. Use -a in conjunction with -J to specify the character set translation file (.xlt file) required for the conversion. Use -a without -J only if the client character set is the same as the default character set.
-J client_charsetspecifies the character set to use on the client. installjava uses a filter to convert input between client_charset and the Adaptive Server character set.
-J client_charset requests that Adaptive Server convert to and from client_charset, the character set used on the client.
-J with no argument disables character set conversion. Use this if the client and server use the same character set.
Omitting -J sets the character set to a default for the platform, which may not necessarily be the character set that the client is using. See the System Administration Guide for more information about character sets and associated flags.
CHAPTER 8 Utility Commands Reference
Utility Guide 211
-z languagethe name of an alternate language for displaying installjava prompts and messages. Without the -z flag, installjava uses the server’s default language. You can add languages to an Adaptive Server during installation or afterward, using the langinstall utility or the sp_addlanguage stored procedure.
-t timeoutspecifies the number of seconds before a SQL command times out. If you do not specify a timeout, the command runs indefinitely. This affects commands issued from within installjava, not the connection time. The default timeout for logging into installjava is 60 seconds.
-vprints the version number and copyright message for installjava and then exits.
Examples Example 1 Installs addr.jar and its classes, but does not retain the association between the JAR and classes:
installjava -f '/home/usera/jars/addr.jar' -new
In Windows NT:
instjava -f '\home\usera\jars\addr.jar' -new
Example 2 Reinstalls addr.jar and associates its classes with the employees JAR name:
installjava -f '/home/usera/jars/addr.jar' -update -j employees
In Windows NT:
instjava -f '\home\usera\jars\addr.jar' -update -j employees
Usage • You must set the SYBASE environment variable to the location of the current version of Adaptive Server before you can use installjava.
• Refer to Java in Adaptive Server Enterprise for more information about how this utility is used when Java is enabled in the database.
• Any user can reference installed classes.
• The parameter flags -f, -j, -S, -U, -P, -D, and -I can be written with or without a space between the flag letter and the following parameter.
Adding new JARs
• If you use new with the -jar option and a JAR of that name already exists in the database, an exception is raised.
installjava
212 Adaptive Server Enterprise
• If any classes of the same name as those in the source JAR already exist in the database, an exception is raised.
Updating JARs and classes
Warning! If you alter a class used as a column datatype by reinstalling a modified version of the class, you must make sure that the modified class can read and use existing objects (rows) in tables using that class as a datatype. Otherwise, you may be unable to access those objects without reinstalling the class.
• If you use -update with the -jar option:
• All classes in the database associated with the target JAR are deleted from the database and the classes in the source JAR file installed in their place.
• If a class in the source JAR file is already installed in the database but is not attached to a JAR, the class in the source JAR is installed in the database and the unattached class is deleted.
• If you use -update without the -jar option:
• Classes in the source JAR file replace unattached classes of the same name.
• Classes in the source JAR that do not correspond to an installed class are installed as unattached classes in the database.
• If you install a new JAR with a replacement for an installed class that is referenced by a SQLJ procedure or function, make sure that the newly installed class has a valid signature for the SQLJ routine. If the signature is invalid, an exception is raised when the SQLJ routine is invoked.
Locks
• When you execute installjava, an exclusive lock is placed on sysxtypes.
• If -jar is specified, an exclusive table lock is placed on sysjars.
Permissions You need to be a System Administrator or Database Owner to use installjava.
Tables used sysjars, sysxtypes
See also Commands remove java
System procedures sp_helpjava
Utilities extractjava
CHAPTER 8 Utility Commands Reference
Utility Guide 213
isqlDescription Interactive SQL parser to Adaptive Server. Located in
$SYBASE/ASE-12_5/bin.
Windows NT The utility is isql.exe, located in %SYBASE%\ASE-12_5\bin.
Syntax isql [-b] [-e] [-F] [-p] [-n] [-v] [-X] [-Y] [-Q][-a display_charset][-A packet_size][-c cmdend][-D database][-E editor][-h headers][-H hostname][-i inputfile][-I interfaces_file][-J client_charset][-K keytab_file][-l login_timeout][-m errorlevel][-o outputfile][-P password][-R remote_server_principal][-s colseparator][-S server_name][-t timeout]-U username[-V [security_options]][-w columnwidth][-z locale_name][-Z security_mechanism]
• To terminate a command:
go
• To clear the query buffer:
reset
• To call the default editor:
vi
• To execute an operating system command:
!! command
• To exit from isql:
quit
or
isql
214 Adaptive Server Enterprise
exit
Parameters -b disables the display of the table headers output.
-eechoes input.
-Fenables the FIPS flagger. When you specify the -F parameter, the server returns a message when it encounters a non-standard SQL command. This option does not disable SQL extensions. Processing completes when you issue the non-ANSI SQL command.
-pprints performance statistics.
-nremoves numbering and the prompt symbol (>) from the echoed input lines in the output file when used in conjunction with -e.
-vprints the version number and copyright message for isql and then exits.
-Xinitiates the login connection to the server with client-side password encryption. isql (the client) specifies to the server that password encryption is desired. The server sends back an encryption key, which isql uses to encrypt your password, and the server uses the key to authenticate your password when it arrives.
If isql crashes, the system creates a core file that contains your password. If you did not use the encryption option, the password appears in plain text in the file. If you used the encryption option, your password is not readable.
-Ytells the Adaptive Server to use chained transactions.
-Qprovides clients with failover property. See Using Sybase Failover in a High Availability System for more information.
CHAPTER 8 Utility Commands Reference
Utility Guide 215
-a display_charsetruns isql from a terminal whose character set differs from that of the machine on which isql is running. Use -a in conjunction with -J to specify the character set translation file (.xlt file) required for the conversion. Use -a without -J only if the client character set is the same as the default character set.
Note The ascii_7 character set is compatible with all character sets. If either the Adaptive Server character set or the client character set is set to ascii_7, any 7-bit ASCII character can pass unaltered between client and server. Other characters produce conversion errors. For more information on character set conversion, see the System Administration Guide.
-A packet_sizespecifies the network packet size to use for this isql session. For example, the following sets the packet size to 2048 bytes for this isql session:
isql -A 2048
• To check your network packet size, enter:
select * from sysprocesses
• The value is displayed under the network_pktsz heading.
• size must be between the values of the default network packet size and maximum network packet size configuration parameters, and must be a multiple of 512.
• Use larger-than-default packet sizes to perform I/O-intensive operations, such as readtext or writetext operations.
• Setting or changing Adaptive Server’s packet size does not affect the packet size of remote procedure calls.
-c cmdendchanges the command terminator. By default, you terminate commands and send them to by typing “go” on a line by itself. When you change the command terminator, do not use SQL reserved words or control characters.
-D databaseselects the database in which the isql session begins.
-E editorspecifies an editor other than the default editor vi.
isql
216 Adaptive Server Enterprise
-h headersspecifies the number of rows to print between column headings. The default prints headings only once for each set of query results.
-H hostnamesets the client host name.
-i inputfilespecifies the name of the operating system file to use for input to isql. The file must contain command terminators (“go” is the default).
• Specifying the parameter as follows is equivalent to < inputfile:
-i inputfile
• If you use -i and do not specify your password on the command line, isql prompts you for it.
• If you use < inputfile and do not specify your password on the command line, you must specify your password as the first line of the input file.
-I interfaces_filespecifies the name and location of the interfaces file to search when connecting to Adaptive Server. If you do not specify -I, isql looks for a file named interfaces in the directory specified by your SYBASE environment variable.
-J client_charsetspecifies the character set to use on the client. -J client_charset requests that Adaptive Server convert to and from client_charset, the character set used on the client. A filter converts input between client_charset and the Adaptive Server character set.
-J with no argument sets character set conversion to NULL. No conversion takes place. Use this if the client and server use the same character set.
Omitting -J sets the character set to a default for the platform. The default may not necessarily be the character set that the client is using. F or more information about character sets and the associated flags, see Chapter 20, “Configuring Client/Server Character Set Conversions,” in the System Administration Guide. The default character sets for different platforms are:
Platform Default character set
Sun Solaris, Digital UNIX, Pyramid, NCR, RS/6000 iso_1
HP-UX roman8
OS/2, Novell NetWare 386 cp850
Macintosh mac
CHAPTER 8 Utility Commands Reference
Utility Guide 217
-K keytab_filespecifies the path to the keytab file used for authentication in DCE.
-l login_timeoutspecifies the maximum timeout value allowed when connecting to Adaptive Server. The default is 60 seconds. This value affects only the time that isql waits for the server to respond to a login attempt. To specify a timeout period for command processing, use the -t timeout parameter.
-m errorlevelcustomizes the error message display. For errors of the severity level specified or higher, only the message number, state, and error level are displayed; no error text appears. For error levels lower than the specified level, nothing appears.
-o outputfilespecifies the name of an operating system file to store the output from isql. Specifying the parameter as -o outputfile is similar to > outputfile
-P passwordspecifies your Adaptive Server password. If you do not specify the -P flag, isql prompts for a password. If your password is NULL, use the -P flag without any password.
-R remote_server_principalspecifies the principal name for the server as defined to the security mechanism. By default, a server’s principal name matches the server’s network name (which is specified with the -S parameter or the DSQUERY environment variable). Use the -R parameter when the server’s principal name and network name are not the same.
-s colseparatorresets the column separator character, which is blank by default. To use characters that have special meaning to the operating system (for example, “|”, “;”, “&”, “<”, “>”), enclose them in quotes or precede them with a backslash.
-S server_namespecifies the name of the Adaptive Server to which to connect. isql looks this name up in the interfaces file. If you specify -S with no argument, isql looks for a server named SYBASE. If you do not specify -S, isql looks for the server specified by your DSQUERY environment variable.
isql
218 Adaptive Server Enterprise
-t timeoutspecifies the number of seconds before a SQL command times out. If you do not specify a timeout, the command runs indefinitely. This affects commands issued from within isql, not the connection time. The default timeout for logging into isql is 60 seconds.
-U usernamespecifies a login name. Login names are case sensitive.
-V security_optionsspecifies network-based user authentication. With this option, the user must log in to the network’s security system before running the utility. In this case, users must supply their network user name with the -U option; any password supplied with the -P option is ignored.
-V can be followed by a security_options string of key-letter options to enable additional security services. These key letters are:
• c – Enable data confidentiality service
• i – Enable data integrity service
• m – Enable mutual authentication for connection establishment
• o – Enable data origin stamping service
• q – Enable out-of-sequence detection
• r – Enable data replay detection
-w columnwidthsets the screen width for output. The default is 80 characters. When an output line reaches its maximum screen width, it breaks into multiple lines.
-z locale_nameis the official name of an alternate language to display isql prompts and messages. Without -z, isql uses the server’s default language. You can add languages to an Adaptive Server during installation or afterward, using the langinstall utility or the sp_addlanguage stored procedure.
-Z security_mechanismspecifies the name of a security mechanism to use on the connection.
Security mechanism names are defined in the libtcl.cfg configuration file located in the ini subdirectory below the Sybase installation directory. If no security_mechanism name is supplied, the default mechanism is used. For more information on security mechanism names, see the description of the libtcl.cfg file in the Open Client/Server Configuration Guide.

CHAPTER 8 Utility Commands Reference
Utility Guide 219
Examples Example 1 This example puts you in a text file where you can edit the query. When you write and save the file, you are returned to isql. The query appears; type “go” on a line by itself to execute it:
isql -Ujoe -Pabracadabra1> select *2> from authors3> where city = "Oakland"4> vi
Example 2 reset clears the query buffer. quit returns you to the operating system:
isql -UalmaPassword:1> select *2> from authors3> where city = "Oakland"4> reset1> quit
Example 3 Specifies that you are running isql from a Macintosh against a server that is using the roman8 character set:
isql -a mac -J roman8
Usage • Use this syntax for isql_r if you are using threaded drivers.
• Use this syntax for isql_dce if you are using threaded drivers in the IBM platform.
•Adaptive Server must successfully authenticate a user before they are able to access data in Adaptive Server. If the authentication attempt fails, Adaptive Server returns the following message and the network connection is terminated:
isql -U bob -P badpassMsg 4002, Level 14, State 1:Server 'ACCOUNTING'Login failed.CT-LIBRARY error:ct_connect(): protocol specific layer: external error: The attempt to connect to the server failed
This message is a generic login failure message that does not tell the connecting user whether the failure resulted from a bad user name or a bad password. This generic message guards against malicious attempts to gain access to Adaptive Server.
isql
220 Adaptive Server Enterprise
• You must set the SYBASE environment variable to the location of the current version of Adaptive Server before you can use isql.
• The 5701 (“changed database”) server message is no longer displayed after login or issuing a use database command.
• Error message format differs from earlier versions of isql. If you have scripts that perform routines based on the values of these messages you may need to rewrite them.
• To use isql interactively, give the command isql (and any of the optional parameters) at your operating system prompt. The isql program accepts SQL commands and sends them to Adaptive Server. The results are formatted and printed on standard output. Exit isql with quit or exit.
• Terminate a command by typing a line beginning with the default command terminator go or another command terminator, if the -c parameter is used. You can follow the command terminator with an integer to specify how many times to run the command. For example, to execute this command 100 times, type:
select x = 1go 100
The results display once at the end of execution.
• If you enter an option more than once on the command line, isql uses the last value. For example, if you enter the following command, “send”, the second value for -c, overrides “.”, the first value:
isql -c"." -csend
This enables you to override any aliases you set up.
• To call an editor on the current query buffer, enter its name as the first word on a line. Define your preferred callable editor by specifying it with the EDITOR environment variable. If EDITOR is not defined, the default is vi.
Execute operating system commands by starting a line with “!!” followed by the command. Call alternate editors this way, without defining EDITOR.
• To clear the existing query buffer, type reset on a line by itself. isql discards any pending input. You can also press Ctrl-c anywhere on a line to cancel the current query and return to the isql prompt.
• Read in an operating system file containing a query for execution by isql as follows:
isql -U alma -Ppassword < input_file

CHAPTER 8 Utility Commands Reference
Utility Guide 221
The file must include a command terminator. The results appear on your terminal. Read in an operating system file containing a query and direct the results to another file as follows:
isql -U alma -Ppassword < input_file > output_file
• Case is significant for the isql flags.
• isql displays only 6 digits of float or real data after the decimal point, rounding off the remainder.
• When you are using isql interactively, read an operating system file into the command buffer with the command:
:r filename
Do not include the command terminator in the file; once you have finished editing, enter the terminator interactively on a line by itself.
• You can include comments in a Transact-SQL statement submitted to Adaptive Server by isql. Open a comment with “/*”. Close it with “*/”, as shown in the following example:
select au_lname, au_fname/*retrieve authors’ last and first names*/from authors, titles, titleauthorwhere authors.au_id = titleauthor.au_idand titles.title_id = titleauthor.title_id/*this is a three-way join that links authors**to the books they have written.*/
If you want to comment out a go command, it should not be at the beginning of a line. For example, use the following to comment out the go command:
/***go*/
Do not use the following:
/*go*/
See also See Chapter 2, “Using the isql Utility” for details on isql.
See the Reference Manual for more information regarding default network packet size and maximum network packet size configuration parameters.
Commands create schema, set

isql
222 Adaptive Server Enterprise
Datatype exact numeric datatypes
System ESP xp_sendmail
System procedures sp_addlanguage, sp_addlogin, sp_addremotelogin, sp_add_resource_limit, sp_bindexeclass, sp_configure, sp_defaultlanguage, sp_droplanguage, sp_helplanguage, sp_processmail, sp_remoteoption, sp_serveroption, sp_showcontrolinfo, sp_unbindexeclass, sp_volchanged
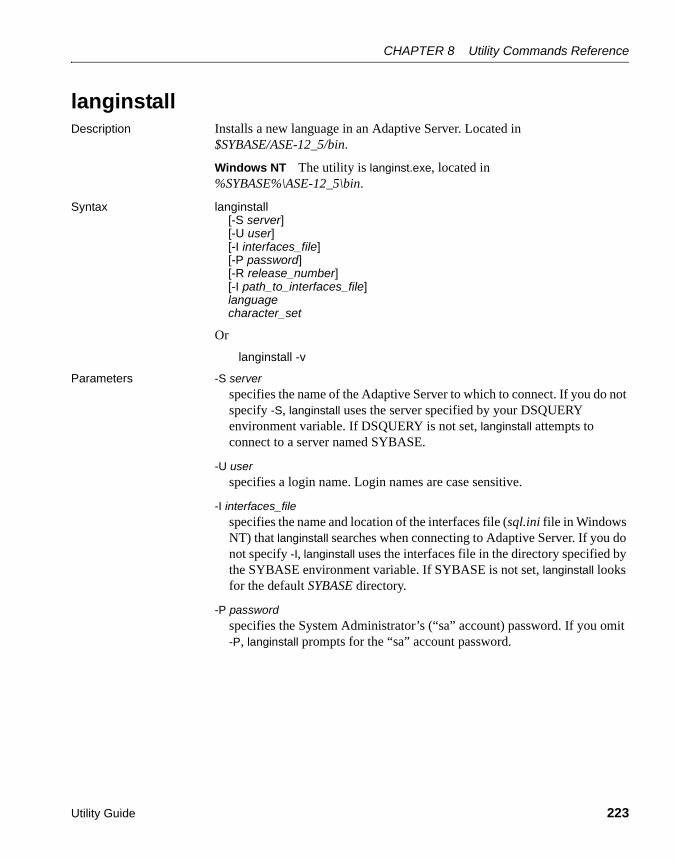
CHAPTER 8 Utility Commands Reference
Utility Guide 223
langinstallDescription Installs a new language in an Adaptive Server. Located in
$SYBASE/ASE-12_5/bin.
Windows NT The utility is langinst.exe, located in %SYBASE%\ASE-12_5\bin.
Syntax langinstall[-S server][-U user][-I interfaces_file][-P password][-R release_number][-I path_to_interfaces_file]languagecharacter_set
Or
langinstall -v
Parameters -S serverspecifies the name of the Adaptive Server to which to connect. If you do not specify -S, langinstall uses the server specified by your DSQUERY environment variable. If DSQUERY is not set, langinstall attempts to connect to a server named SYBASE.
-U userspecifies a login name. Login names are case sensitive.
-I interfaces_filespecifies the name and location of the interfaces file (sql.ini file in Windows NT) that langinstall searches when connecting to Adaptive Server. If you do not specify -I, langinstall uses the interfaces file in the directory specified by the SYBASE environment variable. If SYBASE is not set, langinstall looks for the default SYBASE directory.
-P passwordspecifies the System Administrator’s (“sa” account) password. If you omit -P, langinstall prompts for the “sa” account password.
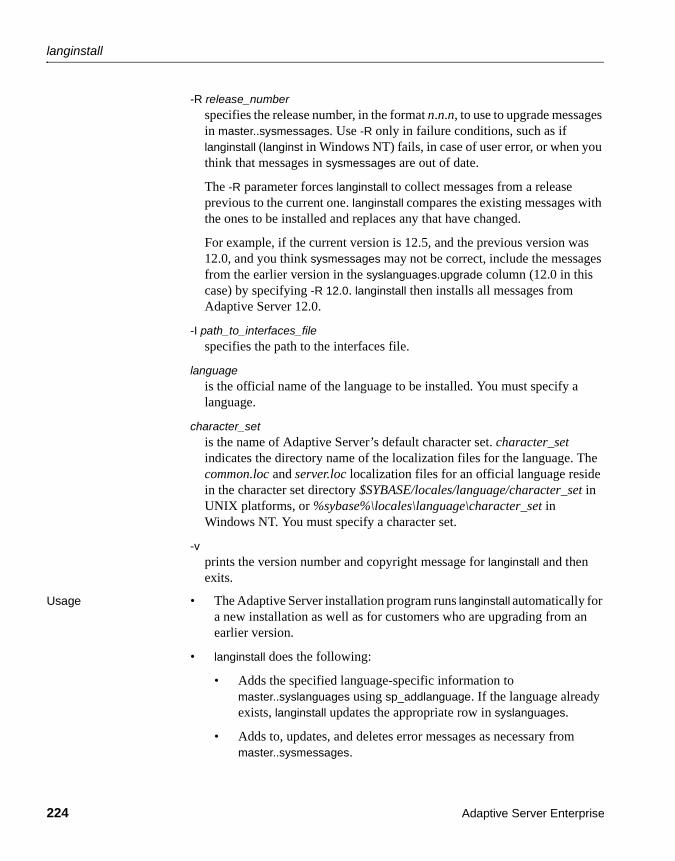
langinstall
224 Adaptive Server Enterprise
-R release_numberspecifies the release number, in the format n.n.n, to use to upgrade messages in master..sysmessages. Use -R only in failure conditions, such as if langinstall (langinst in Windows NT) fails, in case of user error, or when you think that messages in sysmessages are out of date.
The -R parameter forces langinstall to collect messages from a release previous to the current one. langinstall compares the existing messages with the ones to be installed and replaces any that have changed.
For example, if the current version is 12.5, and the previous version was 12.0, and you think sysmessages may not be correct, include the messages from the earlier version in the syslanguages.upgrade column (12.0 in this case) by specifying -R 12.0. langinstall then installs all messages from Adaptive Server 12.0.
-I path_to_interfaces_filespecifies the path to the interfaces file.
languageis the official name of the language to be installed. You must specify a language.
character_setis the name of Adaptive Server’s default character set. character_set indicates the directory name of the localization files for the language. The common.loc and server.loc localization files for an official language reside in the character set directory $SYBASE/locales/language/character_set in UNIX platforms, or %sybase%\locales\language\character_set in Windows NT. You must specify a character set.
-vprints the version number and copyright message for langinstall and then exits.
Usage • The Adaptive Server installation program runs langinstall automatically for a new installation as well as for customers who are upgrading from an earlier version.
• langinstall does the following:
• Adds the specified language-specific information to master..syslanguages using sp_addlanguage. If the language already exists, langinstall updates the appropriate row in syslanguages.
• Adds to, updates, and deletes error messages as necessary from master..sysmessages.

CHAPTER 8 Utility Commands Reference
Utility Guide 225
• Updates syslanguages.update, inserting the new release number.
• langinstall validates the entries in the localization file sections that it uses. If anything is missing, langinstall prints an error message and does not add the language to syslanguages.
• langinstall compares the version numbers of each localization file it uses, common.loc and server.loc. If they are not the same, it prints a warning message. syslanguages.upgrade is always set according to the version number in server.loc.
Permissions Only a System Administrator using the “sa” account can run langinstall.
Tables used master.dbo.syslanguages, master.dbo.sysmessages
See also System procedures sp_addlanguage, sp_addlogin, sp_configure, sp_defaultlanguage, sp_droplanguage, sp_helplanguage
Utilities defncopy, srvbuild
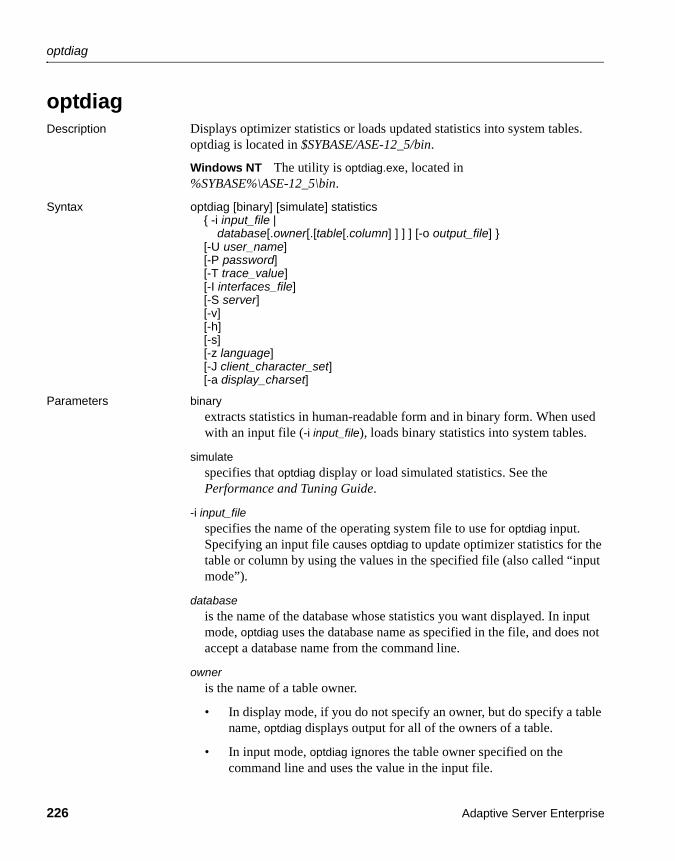
optdiag
226 Adaptive Server Enterprise
optdiagDescription Displays optimizer statistics or loads updated statistics into system tables.
optdiag is located in $SYBASE/ASE-12_5/bin.
Windows NT The utility is optdiag.exe, located in %SYBASE%\ASE-12_5\bin.
Syntax optdiag [binary] [simulate] statistics{ -i input_file |
database[.owner[.[table[.column] ] ] ] [-o output_file] }[-U user_name][-P password][-T trace_value][-I interfaces_file][-S server][-v][-h][-s][-z language][-J client_character_set][-a display_charset]
Parameters binaryextracts statistics in human-readable form and in binary form. When used with an input file (-i input_file), loads binary statistics into system tables.
simulatespecifies that optdiag display or load simulated statistics. See the Performance and Tuning Guide.
-i input_filespecifies the name of the operating system file to use for optdiag input. Specifying an input file causes optdiag to update optimizer statistics for the table or column by using the values in the specified file (also called “input mode”).
databaseis the name of the database whose statistics you want displayed. In input mode, optdiag uses the database name as specified in the file, and does not accept a database name from the command line.
owneris the name of a table owner.
• In display mode, if you do not specify an owner, but do specify a table name, optdiag displays output for all of the owners of a table.
• In input mode, optdiag ignores the table owner specified on the command line and uses the value in the input file.

CHAPTER 8 Utility Commands Reference
Utility Guide 227
tableis the name of the table to survey for statistics.
• If the command does not include an owner name or a table name, optdiag displays statistics for all tables in the database.
• If the command includes an owner name, but no table name, optdiag displays all of the tables that belong to the specified owner.
• In input mode, optdiag ignores the table name specified on the command line and uses the value from the input file.
columnis the name of the colum to survey.
• If the command does not include a column name, optdiag displays all statistics for a table.
• In input mode, optdiag ignores the column name on the command line and uses the values from the input file.
-o output_filespecifies the name of an operating system file to store the output from optdiag. If a file with the same name already exists, optdiag overwrites that file without warning.
-U user_namespecifies an Adaptive Server login name.
-P passwordspecifies your Adaptive Server password. If you do not specify the -P flag, optdiag prompts for a password.
-T trace_valuesets trace flags for the optdiag session. The optdiag trace flags are:
Flag value Meaning
1 Do not stop with a warning if the optdiag version of Adaptive Server in use does not match the Adaptive Server version in the input file.
2 Display status message “Next table is table_name” when in input mode.
4 Skip consistency checking for step numbers while loading histograms in input mode.
6 Display lines of input file during input mode. This flag has no effect in display mode.

optdiag
228 Adaptive Server Enterprise
-I interfaces_filespecifies the name and location of the interfaces file to use when connecting to Adaptive Server.
If you do not use -I and specify an interfaces file name, optdiag looks for the interfaces file (interfaces in UNIX), in the directory specified by the SYBASE environment variable. In Windows NT, optdiag looks for a file named sql.ini in the ini subdirectory in the Sybase installation directory (d:\sybase). Then, if SYBASE is not set, optdiag looks for the file in the default $SYBASE directory (%SYBASE% in Windows NT).
-S serverspecifies the name of the Adaptive Server to which to connect. optdiag looks for this name in the interfaces file (sql.ini in Windows NT).
• If you use -S without specifying a server name, optdiag looks for a server named SYBASE.
• When you do not use -S, optdiag looks for the server that your DSQUERY environment variable specifies.
-vdisplays the version number of and a copyright message for optdiag and exits.
-hdisplays the optdiag syntax help.
-sincludes system tables in optdiag output. By default, only user tables are included.
-vdisplays the version number of and a copyright message for optdiag and exits.
-hdisplays the optdiag syntax help.
-sincludes system tables in optdiag output. By default, only user tables are included.
CHAPTER 8 Utility Commands Reference
Utility Guide 229
-z languageis the official name of an alternate language that the server uses both for date formats and to display optdiag prompts and messages. Without the -z flag, optdiag uses the server’s default language.
You can add languages to Adaptive Server either during or after installation, After Adaptive Server installation, use either the langinstall utility or the sp_addlanguage stored procedure to add a language.
-J client_charsetspecifies the character set to use on the client. A filter converts input between client_charset and the Adaptive Server character set.
By using -J client_charset, you request that Adaptive Server convert data to and from client_charset, the client’s character set.
By using -J without a character set name, you specify character set conversion as NULL; no conversion takes place. Use this -J alone when the client and server are using the same character set.
By omitting -J, you set the character set to the default set for the platform. A filter converts input between the default set and the Adaptive Server character set. Keep in mind that the default may not necessarily be the character set that the client is using.
For more information about character sets and their associated flags, see the System Administration Guide.
-a display_charsetruns optdiag from a terminal with a character set that differs from that of the machine on which optdiag is running.
• Use -a in conjunction with -J to specify the character set translation (.xlt) file required for the conversion.
• Use -a without -J only if the client character set is the same as the default character set.
Note The ascii_7 character set is compatible with all character sets. If either the Adaptive Server character set or the client character set is set to ascii_7, any 7-bit ASCII character can pass unaltered between client and server. Any other characters produce conversion errors. For more information on character-set conversion, see the System Administration Guide.
Examples Example 1 Displays statistics for all user tables in the pubs2 database and places the output in the pubs2.opt file:
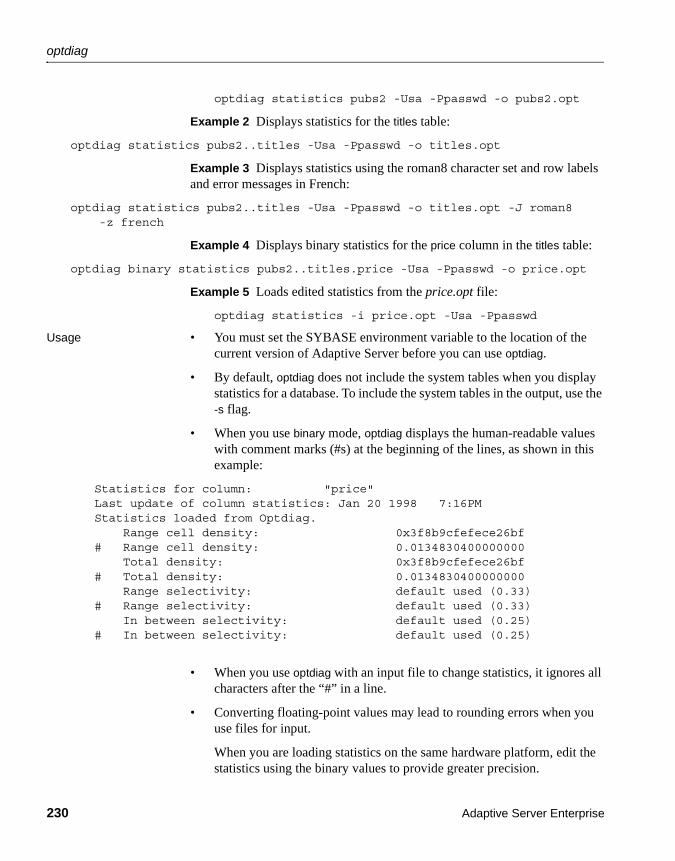
optdiag
230 Adaptive Server Enterprise
optdiag statistics pubs2 -Usa -Ppasswd -o pubs2.opt
Example 2 Displays statistics for the titles table:
optdiag statistics pubs2..titles -Usa -Ppasswd -o titles.opt
Example 3 Displays statistics using the roman8 character set and row labels and error messages in French:
optdiag statistics pubs2..titles -Usa -Ppasswd -o titles.opt -J roman8 -z french
Example 4 Displays binary statistics for the price column in the titles table:
optdiag binary statistics pubs2..titles.price -Usa -Ppasswd -o price.opt
Example 5 Loads edited statistics from the price.opt file:
optdiag statistics -i price.opt -Usa -Ppasswd
Usage • You must set the SYBASE environment variable to the location of the current version of Adaptive Server before you can use optdiag.
• By default, optdiag does not include the system tables when you display statistics for a database. To include the system tables in the output, use the -s flag.
• When you use binary mode, optdiag displays the human-readable values with comment marks (#s) at the beginning of the lines, as shown in this example:
Statistics for column: "price"Last update of column statistics: Jan 20 1998 7:16PMStatistics loaded from Optdiag.
Range cell density: 0x3f8b9cfefece26bf# Range cell density: 0.0134830400000000
Total density: 0x3f8b9cfefece26bf# Total density: 0.0134830400000000
Range selectivity: default used (0.33)# Range selectivity: default used (0.33)
In between selectivity: default used (0.25)# In between selectivity: default used (0.25)
• When you use optdiag with an input file to change statistics, it ignores all characters after the “#” in a line.
• Converting floating-point values may lead to rounding errors when you use files for input.
When you are loading statistics on the same hardware platform, edit the statistics using the binary values to provide greater precision.

CHAPTER 8 Utility Commands Reference
Utility Guide 231
Byte ordering and binary optdiag files
• Do not use the binary mode option to move statistics between Adaptive Servers on machines that use different byte ordering.
• On an incompatible architecture server, always comment out binary statistics and load the human-readable statistics.
• On a compatible architecture server, you can load either binary statistics or human-readable statistics.
Input mode
• When you use the -i input_file syntax, optdiag reads the file as named and updates statistics in sysstatistics.
• optdiag input mode changes the allow update to system tables configuration parameter by setting the parameter to 1 at the beginning of the session, and then to 0 at the end of the session.
• During histogram input, the process checks the following rules and displays error messages for any violated rules:
• The step numbers must increase monotonically, unless the command includes the -T4 trace flag.
• The column values for the steps must increase monotonically.
• The weight for each cell must be between 0.0 and 1.0.
• The total of weights for a column must be close to 1.0.
• The first cell represents null values, and it must be present, even in columns that do not allow null values. There must be only one cell to represent the null value.
• Two adjacent cells must not both use the < (less than) operator.
See also For more information about the optdiag command and an explanation of the optdiag output, see the Performance and Tuning Guide.
For more information on changing statistics using optdiag, see the Performance and Tuning Guide.
Commands create index, delete statistics, set, update statistics
System procedures sp_addlogin, sp_configure, sp_defaultlanguage, sp_droplanguage, sp_flushstats, sp_helplanguage
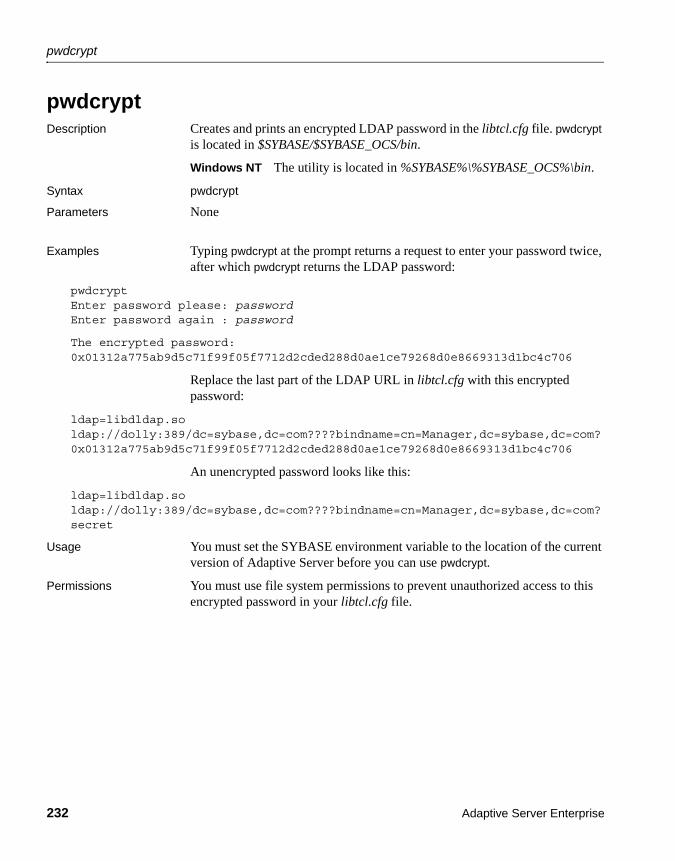
pwdcrypt
232 Adaptive Server Enterprise
pwdcryptDescription Creates and prints an encrypted LDAP password in the libtcl.cfg file. pwdcrypt
is located in $SYBASE/$SYBASE_OCS/bin.
Windows NT The utility is located in %SYBASE%\%SYBASE_OCS%\bin.
Syntax pwdcrypt
Parameters None
Examples Typing pwdcrypt at the prompt returns a request to enter your password twice, after which pwdcrypt returns the LDAP password:
pwdcryptEnter password please: passwordEnter password again : password
The encrypted password: 0x01312a775ab9d5c71f99f05f7712d2cded288d0ae1ce79268d0e8669313d1bc4c706
Replace the last part of the LDAP URL in libtcl.cfg with this encrypted password:
ldap=libdldap.soldap://dolly:389/dc=sybase,dc=com????bindname=cn=Manager,dc=sybase,dc=com?0x01312a775ab9d5c71f99f05f7712d2cded288d0ae1ce79268d0e8669313d1bc4c706
An unencrypted password looks like this:
ldap=libdldap.soldap://dolly:389/dc=sybase,dc=com????bindname=cn=Manager,dc=sybase,dc=com?secret
Usage You must set the SYBASE environment variable to the location of the current version of Adaptive Server before you can use pwdcrypt.
Permissions You must use file system permissions to prevent unauthorized access to this encrypted password in your libtcl.cfg file.
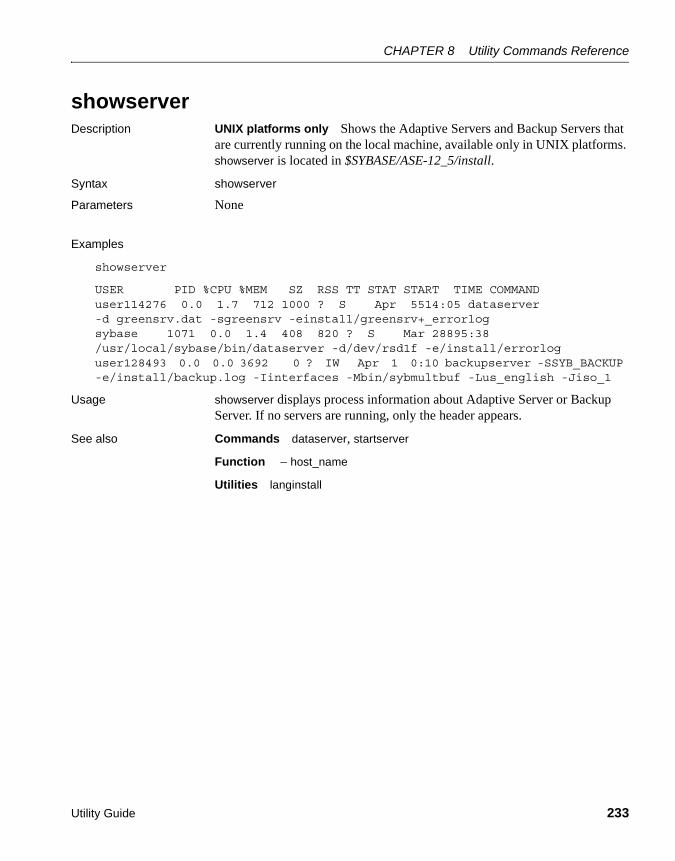
CHAPTER 8 Utility Commands Reference
Utility Guide 233
showserverDescription UNIX platforms only Shows the Adaptive Servers and Backup Servers that
are currently running on the local machine, available only in UNIX platforms. showserver is located in $SYBASE/ASE-12_5/install.
Syntax showserver
Parameters None
Examples
showserver
USER PID %CPU %MEM SZ RSS TT STAT START TIME COMMANDuser114276 0.0 1.7 712 1000 ? S Apr 5514:05 dataserver-d greensrv.dat -sgreensrv -einstall/greensrv+_errorlog sybase 1071 0.0 1.4 408 820 ? S Mar 28895:38 /usr/local/sybase/bin/dataserver -d/dev/rsd1f -e/install/errorloguser128493 0.0 0.0 3692 0 ? IW Apr 1 0:10 backupserver -SSYB_BACKUP -e/install/backup.log -Iinterfaces -Mbin/sybmultbuf -Lus_english -Jiso_1
Usage showserver displays process information about Adaptive Server or Backup Server. If no servers are running, only the header appears.
See also Commands dataserver, startserver
Function – host_name
Utilities langinstall

sqldbgr
234 Adaptive Server Enterprise
sqldbgrDescription sqldbgr is a command-line utility that debugs stored procedures and triggers.
As with many source-level debuggers, you can:
• attach sqldbgr to a task
• set, enable, and disable breakpoints
• step through a task one line at a time
• step into and out of procedures
• detach sqldbgr from stored procedures or triggers once the debugging is complete.
UNIX platforms sqldbgr is located in $SYBASE/ASE-12_5/bin.
Windows NT sqldbgr is located in %SYBASE%\ASE-12_5\bin.
Syntax sqldbgr-U username-P password-S host:port
Parameters -U usernamespecifies the user name. You must insert a space between -U and username.
-P passwordspecifies the user password. You must insert a space between -P and password.
-S host:portspecifies the machine name and the port number. You must insert a space between -S and host:port.
Examples Example 1 This example shows sqldbgr debugging stored procedures and triggers on host MERCURY:
$SYBASE/ASE-12_5/bin/sqldbgr -U sa -P -S MERCURY:16896
(sqldbg) stop in sp_whoBreakpoint moved to line 20(sqldbg) run sp_who(sp_who::20)if @@trancount = 0(sqldbg) next(sp_who::22) set chained off(sqldbg) contfid spid status loginame origname hostname blk_spid dbname cmd block_xloid0 2 sleeping NULL NULL 0 master NETWORK HANDLER 00 3 sleeping NULL NULL 0 master NETWORK HANDLER 0
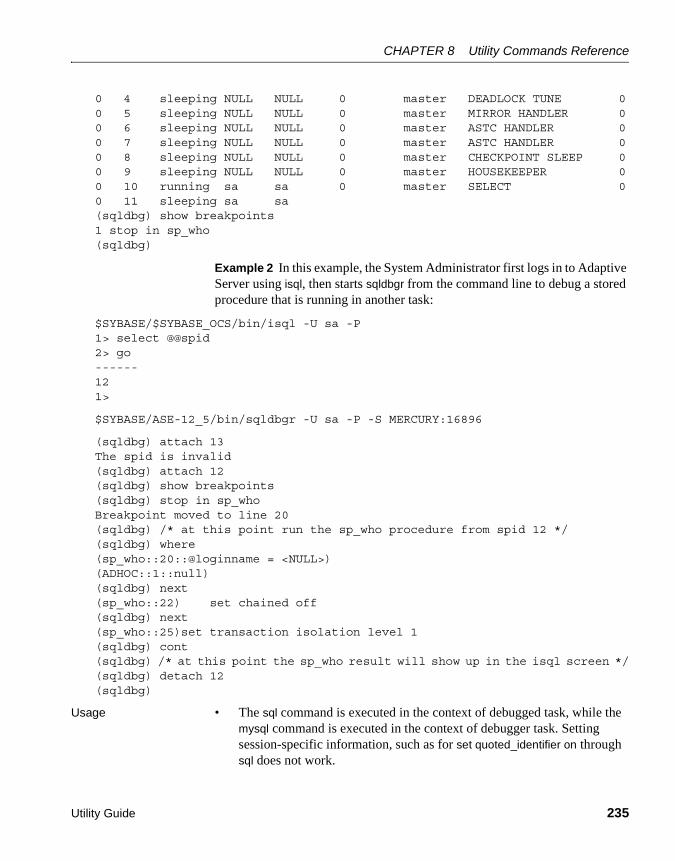
CHAPTER 8 Utility Commands Reference
Utility Guide 235
0 4 sleeping NULL NULL 0 master DEADLOCK TUNE 00 5 sleeping NULL NULL 0 master MIRROR HANDLER 00 6 sleeping NULL NULL 0 master ASTC HANDLER 00 7 sleeping NULL NULL 0 master ASTC HANDLER 00 8 sleeping NULL NULL 0 master CHECKPOINT SLEEP 00 9 sleeping NULL NULL 0 master HOUSEKEEPER 00 10 running sa sa 0 master SELECT 00 11 sleeping sa sa(sqldbg) show breakpoints1 stop in sp_who(sqldbg)
Example 2 In this example, the System Administrator first logs in to Adaptive Server using isql, then starts sqldbgr from the command line to debug a stored procedure that is running in another task:
$SYBASE/$SYBASE_OCS/bin/isql -U sa -P 1> select @@spid2> go------121>
$SYBASE/ASE-12_5/bin/sqldbgr -U sa -P -S MERCURY:16896
(sqldbg) attach 13The spid is invalid(sqldbg) attach 12(sqldbg) show breakpoints(sqldbg) stop in sp_whoBreakpoint moved to line 20(sqldbg) /* at this point run the sp_who procedure from spid 12 */(sqldbg) where(sp_who::20::@loginname = <NULL>)(ADHOC::1::null)(sqldbg) next(sp_who::22) set chained off(sqldbg) next(sp_who::25)set transaction isolation level 1(sqldbg) cont(sqldbg) /* at this point the sp_who result will show up in the isql screen */(sqldbg) detach 12(sqldbg)
Usage • The sql command is executed in the context of debugged task, while the mysql command is executed in the context of debugger task. Setting session-specific information, such as for set quoted_identifier on through sql does not work.
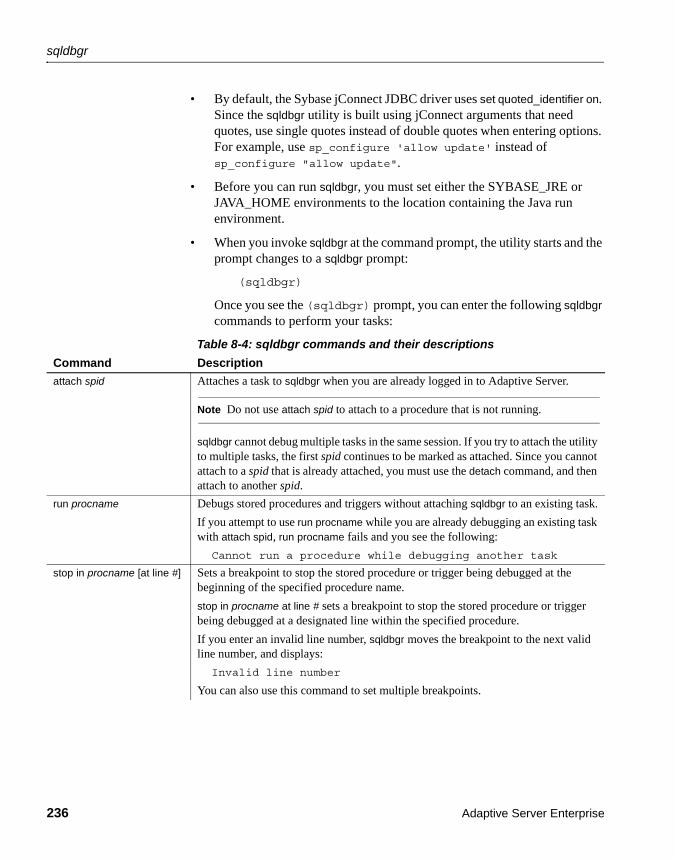
sqldbgr
236 Adaptive Server Enterprise
• By default, the Sybase jConnect JDBC driver uses set quoted_identifier on. Since the sqldbgr utility is built using jConnect arguments that need quotes, use single quotes instead of double quotes when entering options. For example, use sp_configure 'allow update' instead of sp_configure "allow update".
• Before you can run sqldbgr, you must set either the SYBASE_JRE or JAVA_HOME environments to the location containing the Java run environment.
• When you invoke sqldbgr at the command prompt, the utility starts and the prompt changes to a sqldbgr prompt:
(sqldbgr)
Once you see the (sqldbgr) prompt, you can enter the following sqldbgr commands to perform your tasks:
Table 8-4: sqldbgr commands and their descriptions
Command Description
attach spid Attaches a task to sqldbgr when you are already logged in to Adaptive Server.
Note Do not use attach spid to attach to a procedure that is not running.
sqldbgr cannot debug multiple tasks in the same session. If you try to attach the utility to multiple tasks, the first spid continues to be marked as attached. Since you cannot attach to a spid that is already attached, you must use the detach command, and then attach to another spid.
run procname Debugs stored procedures and triggers without attaching sqldbgr to an existing task.
If you attempt to use run procname while you are already debugging an existing task with attach spid, run procname fails and you see the following:
Cannot run a procedure while debugging another task
stop in procname [at line #] Sets a breakpoint to stop the stored procedure or trigger being debugged at the beginning of the specified procedure name.
stop in procname at line # sets a breakpoint to stop the stored procedure or trigger being debugged at a designated line within the specified procedure.
If you enter an invalid line number, sqldbgr moves the breakpoint to the next valid line number, and displays:
Invalid line number
You can also use this command to set multiple breakpoints.

CHAPTER 8 Utility Commands Reference
Utility Guide 237
show breakpoints Displays the breakpoint handle in the form of a unique number, as well as the breakpoint statements given by the user during the sqldbgr session.
If you specify a breakpoint line number that does not contain a valid SQL statement, Adaptive Server moves the breakpoint to the next valid line number. However, Adaptive Server does not change the command you entered. This is why show breakpoints can return a breakpoint handle and a breakpoint statement given during the sqldbgr session that can be different.
An asterisk (*) in the breakpoint line indicates that the breakpoint is set, but currently disabled.
use dbname Tells sqldbgr what database to use in order to debug that database’s stored procedures or triggers.
show variables [at level #]
show @varname [at level #]
show variables displays all the variables and their values in the current SQL stored procedure or trigger.
show variables at level # displays the variables and their values in the current SQL stored procedure or trigger at the specified level.
show @varname displays the indicated variable and its value in the current SQL stored procedure or trigger.
show @varname at level # displays the indicated variable and its value in the current SQL stored procedure or trigger at the specified level.
Note sqldbgr does not support Java variables.
show where Displays the call stack of the stored procedures and triggers that exist in the task being debugged.
step or next step or next instructs sqldbgr to move to the next statement in the current stored procedure or trigger.
step into Instructs sqldbgr to move into a procedure if the current statement is an execute statement. If the current statement is an update, delete, or insert statement, and if there are triggers in it, step into instructs sqldbgr to move into the update, delete, or insert triggers.
step out Instructs sqldbgr to move out of the current stored procedure or trigger, and to stop at the next line in the calling procedure.
set @varname = VALUE Sets the value of the indicated variable to the variable value declared in the command in the current stored procedure or trigger. The values for the variables set using set @varname = VALUE are valid only for the current session sqldbgr.
cont[inue] Instructs sqldbgr to continue debugging, and to stop at the next breakpoint (if any).
delete # Deletes the indicated breakpoint set in the current instance of sqldbgr.
enable # and disable # Enables the indicated breakpoints. disable # does the opposite.
sql any_sql_statement Executes ad hoc SQL statements. You can use this command to select and analyze data from temp tables created by the task being debugged.
sql any_sql_statement returns a result set and any errors that occurred.
Command Description
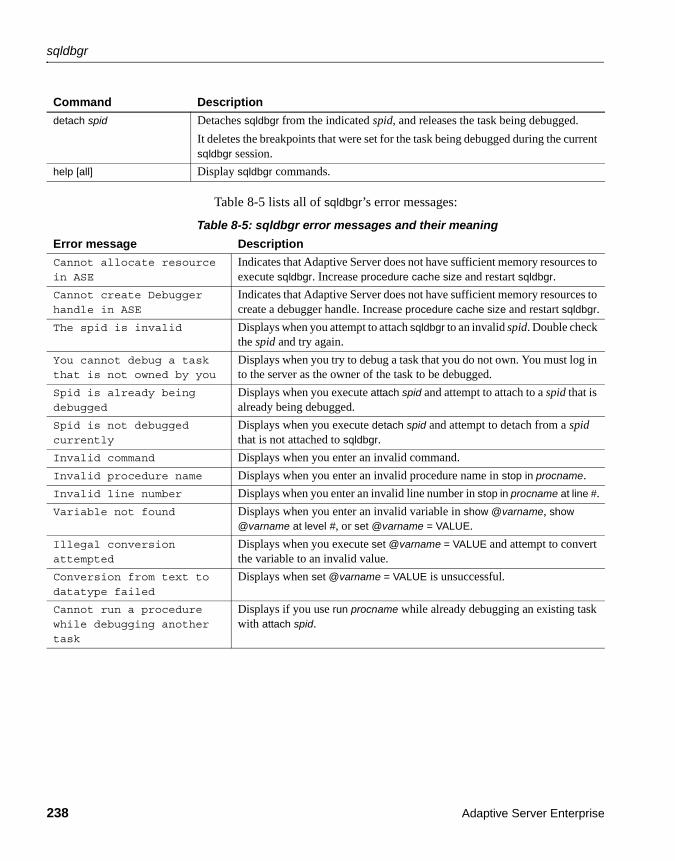
sqldbgr
238 Adaptive Server Enterprise
Table 8-5 lists all of sqldbgr’s error messages:
Table 8-5: sqldbgr error messages and their meaning
detach spid Detaches sqldbgr from the indicated spid, and releases the task being debugged.
It deletes the breakpoints that were set for the task being debugged during the current sqldbgr session.
help [all] Display sqldbgr commands.
Command Description
Error message Description
Cannot allocate resource in ASE
Indicates that Adaptive Server does not have sufficient memory resources to execute sqldbgr. Increase procedure cache size and restart sqldbgr.
Cannot create Debugger handle in ASE
Indicates that Adaptive Server does not have sufficient memory resources to create a debugger handle. Increase procedure cache size and restart sqldbgr.
The spid is invalid Displays when you attempt to attach sqldbgr to an invalid spid. Double check the spid and try again.
You cannot debug a task that is not owned by you
Displays when you try to debug a task that you do not own. You must log in to the server as the owner of the task to be debugged.
Spid is already being debugged
Displays when you execute attach spid and attempt to attach to a spid that is already being debugged.
Spid is not debugged currently
Displays when you execute detach spid and attempt to detach from a spid that is not attached to sqldbgr.
Invalid command Displays when you enter an invalid command.
Invalid procedure name Displays when you enter an invalid procedure name in stop in procname.
Invalid line number Displays when you enter an invalid line number in stop in procname at line #.
Variable not found Displays when you enter an invalid variable in show @varname, show @varname at level #, or set @varname = VALUE.
Illegal conversion attempted
Displays when you execute set @varname = VALUE and attempt to convert the variable to an invalid value.
Conversion from text to datatype failed
Displays when set @varname = VALUE is unsuccessful.
Cannot run a procedure while debugging another task
Displays if you use run procname while already debugging an existing task with attach spid.

CHAPTER 8 Utility Commands Reference
Utility Guide 239
sqllocDescription UNIX platforms only Installs and modifies languages, character sets, and
sort order defaults for Adaptive Server using a GUI based on X11/Motif. sqlloc is located in $SYBASE/ASE-12_5/bin.
Syntax sqlloc[-S Server][-U User][-P Password][-s Sybase Dir][-I Interfaces file][-r Resource file]
Or
sqlloc -v
Parameters -S Serverspecifies the name of the Adaptive Server to which to connect.
-U Userspecifies a login name. Logins are case sensitive.
-P Passwordspecifies the “sa” account password.
-s Sybase Dirspecifies the value to use for the SYBASE environment variable.
-I Interfaces filespecifies the name and location of the interfaces file to search when connecting to Adaptive Server.
-r Resource fileexecutes the specified resource file.
-vprints the version number and copyright message for sqlloc and then exits.
Usage • You must set the SYBASE environment variable to the location of the current version of Adaptive Server before you can use sqlloc.
• You must set the DISPLAY environment variable before invoking sqlloc, unless you are only using the -v parameter to display the version number.
Permissions You must be a Sybase System Administrator to use sqlloc.
See also See the Installation Guide for UNIX Platforms for more information about the sqlloc utility program.
Utilities – langinstall, sqllocres
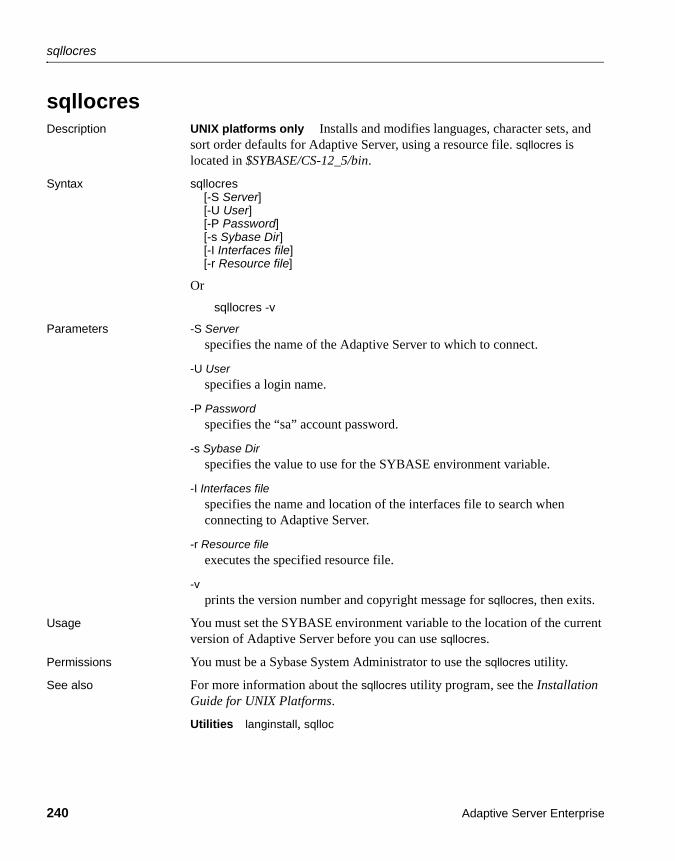
sqllocres
240 Adaptive Server Enterprise
sqllocresDescription UNIX platforms only Installs and modifies languages, character sets, and
sort order defaults for Adaptive Server, using a resource file. sqllocres is located in $SYBASE/CS-12_5/bin.
Syntax sqllocres[-S Server][-U User][-P Password][-s Sybase Dir][-I Interfaces file][-r Resource file]
Or
sqllocres -v
Parameters -S Serverspecifies the name of the Adaptive Server to which to connect.
-U Userspecifies a login name.
-P Passwordspecifies the “sa” account password.
-s Sybase Dirspecifies the value to use for the SYBASE environment variable.
-I Interfaces filespecifies the name and location of the interfaces file to search when connecting to Adaptive Server.
-r Resource fileexecutes the specified resource file.
-vprints the version number and copyright message for sqllocres, then exits.
Usage You must set the SYBASE environment variable to the location of the current version of Adaptive Server before you can use sqllocres.
Permissions You must be a Sybase System Administrator to use the sqllocres utility.
See also For more information about the sqllocres utility program, see the Installation Guide for UNIX Platforms.
Utilities langinstall, sqlloc

CHAPTER 8 Utility Commands Reference
Utility Guide 241
sqlsrvrDescription Windows platforms only The executable form of the Adaptive Server
program, this utility is located in %SYBASE%\ASE-12_5\bin.
Syntax sqlserver [-f] [-g] [-G] [-h] [-H] [-m] [-P] [-q] [-v] [-X][-a path_to_CAPs_directive_file][-b master_device_size][-c config_file_for_server][-d device_name][-e path_to_error_log][-i interfaces_file_directory][-K keytab_file][-L config_file_name_for_connectivity][-M shared_memory_repository_directory][-p sa_login_name][-r mirror_disk_name][-s server_name][-T trace_flag][-u sa/sso_name][-w master | model database][-y [password] ][-z page_size [ k | K ] ]
Parameters -fforces initialization of a device or database. You must use both -b and -w to use -f.
-gturns off event-logging.
-G specifies the name of the event log server.
-hprints this help message, then exists.
-Hstarts the High Availability (HA) server, if you have the HA feature installed on your Adaptive Server.
-mstarts Adaptive Server in single-user mode.
-qtreats quiesced databases as “in recovery.”
-vprints the version number and copyright message for sqlsrvr and then exits.

sqlsrvr
242 Adaptive Server Enterprise
-Xstarts this server as sybmon, not dataserver.
-a path_to_CAPs_directive_filespecifies the path to the CAPs directive file.
-b master_device_sizespecifies the size of the master device.
-c config_file_for_serverspecifies the full path name of an Adaptive Server configuration file. Use this parameter to start Adaptive Server with the configuration values in the specified configuration file.
If you specify a configuration file with the sqlsrvr -c parameter, make sure all the parameters in this configuration file are compatible before you boot the server. If some of the configuration parameters are incompatible, the server may not boot. To avoid this, do not specify a configuration file when you build the master device. The build phase uses all default settings when you do not specify a configuration file.
For more information, see the System Administration Guide.
-d device_nameis the full path name of the device for the master database. The master database device must be writable by the user who starts Adaptive Server. The default master database device name is d_master.
-e errorlogfileis the full path name of the error log file for Adaptive Server system-level error messages.
-i interfaces_file_directoryspecifies the directory location of the interfaces file to search when connecting Adaptive Server. If -I is omitted, sqlsrvr looks for a file named interfaces in the directory pointed to by your SYBASE environment variable.
-K keytab_filespecifies the path to the keytab file used for authentication in DCE.
-L config_file_name_for_connectivityspecifies the name the configuration file for connectivity.
CHAPTER 8 Utility Commands Reference
Utility Guide 243
-M sharedmem_directoryplaces shared memory files in the specified directory instead of in the default location, %SYBASE%. If sharedmem_directory starts with “\”, the directory name is assumed to be absolute. Otherwise, the directory name is interpreted relative to %SYBASE%.
-p sso_login_namespecifies the login name of a System Security Officer when starting Adaptive Server, for the purposes of getting a new password for that account. Adaptive Server generates a random password, displays it, encrypts it, and saves it in master..syslogins as that account’s new password.
-r mastermirrorstarts the mirror of the master device. Use this parameter to start Adaptive Server if the master device has been damaged.
-s servernamespecifies the name of the Adaptive Server to start. If -s is omitted, a server named SYBASE is started.
-T trace_flag
-u sa/sso_namespecifies the System Administrator or System Security Officer’s name you want to unlock.
-w master | model_databasespecifies whether you want to write a master or model database.
-y [password]allows you to assign a password for the encrypted private key, so that the server prompt the user for a password. This password should match the password you used to encrypt the private key when it was created. You cannot use this parameter when you are running the server in the background.
Note Although you can a password with -y, for security reasons Sybase strongly discourages you from doing so.
A private key is included with your server's digital certificate. By default, the certificate file located:
sqlsrvr
244 Adaptive Server Enterprise
%SYBASE%\%SYBASE_ASE%\certificates\servername.crt
The location of the certificate file changes if you invoke the sp_ssladmin addcert command.
-z page_sizespecifies the page size of the server. You must use -b and -w to use this flag, and name an even power of two between 2k and 16k, or else the server does not boot.
Examples Example 1 Creates a new installation with a 100 MB master device and a 4k page:
sqlsrvr -d d_master -z 4k -b 100.02M
The spaces between options and their following arguments are optional and acceptable. This example specifies “100.02M” for a 100MB master device because the server requires 16KB of overhead for its configuration area.
Example 2 Rewrites a corrupt model database:
sqlsrvr -d d_master -w model
Example 3 Rewrites a corrupt master database, specifying device size:
sqlsrvr -d d_master -w master -z 4k
Example 4 Rewrites a corrupt master database, specifying device and page sizes, forcing the server to accept these values in preference to what it may find in the config block:
sqlsrvr -d d_master -w master -z 4k -b 100.02M -f
Example 5 Rewrites a corrupt master database, specifying a page size that does not match what the server finds in its config block. This produces a failure:
sqlsrvr -d d_master -w master -z 8k00:00000:00000:2001/01/19 12:01:26.94 server The configured server page size does not match that specified on the command line. To use the configured size, omit the command line size; to use the command line size, specify 'force' (-f).
Example 6 Rewrites a corrupt master database, specifying an incorrect page size, even in a normal boot. This produces a failure:
sqlsrvr -d d_master -z4000sqlsrvr: the 'z' flag may not be used without 'b' or 'w'. sqlsrvr: server will ignore the 'z' flag. sqlsrvr: the 'z' flag contained an invalid page size. sqlsrvr:
CHAPTER 8 Utility Commands Reference
Utility Guide 245
the page size must be an even power of two between 2048 and 16384 bytes, inclusive.
Usage • The sqlsrvr utility is referred to as dataserver in other Sybase documents.
• Start Adaptive Server using the services manager utility rather than by executing the sqlsrvr program directly. If you need to change any of the default parameters, edit the Adaptive Server’s Registry keys. See the configuration guide for your platform for details.
• Adaptive Server derives its running environment from values in the sysconfigures system table. Run sp_configure to see the configuration values; use sp_configure and reconfigure to change the configuration.
• Because Adaptive Server passwords are encrypted, you cannot recover forgotten passwords. If all System Security Officers lose their passwords, the -p parameter generates a new password for a System Security Officer’s account. Start Adaptive Server with -p, immediately log in to Adaptive Server with the new random password, and execute sp_password to reset your password to a more secure one.
• By default, Adaptive Server logs error messages in both the local error log file and the local Windows NT event log. You can disable Windows NT event logging by including the -g parameter and specifying a different event-logging machine with -G machine_name. Use standard Windows NT conventions when entering the machine_name. For example, to designate a PC named “LOGSITE”, substitute “\\LOGSITE” for the machine_name. See the configuration guide for your platform for details on logging error messages.
• After you have finished running the installer, set the file permissions on the sqlsrvr executable to limit who can execute it.
• If you do not specify an Adaptive Server name with the -s parameter, and you have not set the DSLISTEN environment variable, sqlsrvr uses the default Adaptive Server name SYBASE. The value of the DSLISTEN environment variable overrides this default value, and the -s parameter overrides both the default and the DSLISTEN environment variable.
• Automatic login lockouts can cause a site to end up in a situation in which all accounts capable of unlocking logins (System Administrators and System Security Officers) are locked. If this occurs, use the sqlsrvr utility with the -u parameter to check the specified login for System Administrator or System Security Officer authorization, unlock the account, and reset the value of the current failed logins counter to zero.

sqlsrvr
246 Adaptive Server Enterprise
• -f is only valid when used with -b and/or -w. The server fails to boot if you use -f without either -b or -w. -f forces the server in different ways, depending whether -w is present. See -b and -w below.
Starting Adaptive Server
Use either of the following methods to start Adaptive Server with a specified configuration file:
• Use Server Config to configure the server to have the -c parameter. In the Configure Adaptive Server window, select the Command Line option, and in the Command Line Parameters window, enter:
-Cconfiguration_file_pathname
For example, entering “-chaze.cfg “ starts the server using the haze.cfg configuration file.
• Start Adaptive Server from the command line and provide the -c parameter.
Dependencies and conditions with -b and -w
The effect of -b changes depending on whether -w is present:
• -b without -w creates a new master device as named by -d (the default is d_master) and with the page size as specified by -z (the default is 2048):
• If the named device already exists as an OS file, the attempt fails, and you must remove the existing file and try again.
• If the named device names an existing raw partition, the attempt fails unless you include the -f flag. This reinitializes the raw partition as a server master device.
• -b with -w master tells dataserver to use the size specified in -z for the master device when recreating the master database. It implies nothing about creating a new device.
-w may or may not require additional flags:
• If you use -w model, the -z and -b flags are accepted but ignored.
• If you use -w master for new installations, -z and -b are not required because the device size information is stored in the config_block.
• If you use -w master to upgrade older installations:
• The server requires -b and/or -z if the config_block does not contain a valid entry for the associated size(s). The command fails if it can't get valid data for the page size or device size.
CHAPTER 8 Utility Commands Reference
Utility Guide 247
• You may provide -b and/or -z when the config_block contains valid entries for the size(s) they represent. However if the sizes do not match what is in the config_block, you must add -f to force your new size preferences.
• -f may appear without either -b or -z, because -f also instructs the server to accept damaged allocation pages as belonging to the master database. This is useful for restoring badly corrupted databases. If you specify -w master -f, the server assigns to the master database every allocation page on the named master device that does not belong to some other database than master.
Permissions Anyone with execute permission on the binary, and who has read/write access to all the files.
Tables used sysconfigures
See also Commands disk mirror, disk remirror, reconfigure
System procedures sp_configure, sp_password
Utilities startserver
sqlupgrade
248 Adaptive Server Enterprise
sqlupgradeDescription UNIX platforms only Upgrades your currently installed version of Adaptive
Server to the newest release using a GUI based on X11/Motif sqlupgrade is located in $SYBASE/ASE-12_5/bin.
Syntax sqlupgrade[-s Sybase Dir][-r Resource File]
Or
sqlupgrade -v
Parameters -s Sybase Dirspecifies the value to use for the SYBASE environment variable.
-r Resource Fileexecutes the specified resource file.
-vprints the version number and copyright message for sqlupgrade and then exits.
Usage • You must set the SYBASE environment variable to the location of the current version of Adaptive Server before you can use sqlupgrade.
• You must set the DISPLAY environment variable before invoking sqlupgrade, unless you are only using the -v parameter to display the version number.
Permissions You must be a Sybase System Administrator to use sqlupgrade.
See also For more information about the sqlupgrade utility program, see the Installation Guide for UNIX Platforms.
Utilities sqlupgraderes
CHAPTER 8 Utility Commands Reference
Utility Guide 249
sqlupgraderesDescription UNIX platforms only Upgrades your currently installed release of Adaptive
Server to the newest release using resource files. sqlupgraderes is located in $SYBASE/$SYBASE_OCS/bin.
Syntax sqlupgraderes[-s Sybase Dir][-r Resource File]
Or
sqlupgraderes -v
Parameters -s Sybase Dirspecifies the value to use for the SYBASE environment variable.
-r Resource Fileexecutes the specified resource file.
-vprints the version number and copyright message for sqlupgraderes and then exits.
Usage You must set the SYBASE environment variable to the location of the current version of Adaptive Server before you can use sqlupgraderes.
Permissions You must be a Sybase System Administrator to use sqlupgraderes.
See also See the Installation Guide for UNIX Platforms for more information about the sqlupgraderes utility program.
Utilities sqlupgrade

srvbuild
250 Adaptive Server Enterprise
srvbuildDescription UNIX platforms only Creates a new Adaptive Server, Backup Server,
Monitor Server, or XP Server with default or user-specified values for key configuration attributes using a GUI based on X11/Motif. srvbuild is located in $SYBASE/ASE-12_5/bin.
Syntax srvbuild[-s sybase_dir][-I interfaces_file][-r resource_file]
Or
srvbuild -v
Parameters -s sybase_dirspecifies the value to use for the SYBASE environment variable.
-I interfaces_filespecifies the name and location of the interfaces file to search when connecting to Adaptive Server.
-r resource_fileexecutes the specified resource file.
-vprints the version number and copyright message for srvbuild and then exits.
Usage You must set the SYBASE environment variable:
• To the location of the current version of Adaptive Server before you can use srvbuild.
• Before invoking srvbuild, unless you are only using the -v parameter to display the version number.
Permissions You must be a Sybase System Administrator to use srvbuild.
See also For more information about the srvbuild utility program, see the Installation Guide for UNIX Platforms.
Utilities srvbuildres
CHAPTER 8 Utility Commands Reference
Utility Guide 251
srvbuildresDescription UNIX platforms only Creates, using resource files, a new Adaptive Server,
Backup Server, Monitor Server, or XP Server with default or user-specified values for key configuration attributes. srvbuildres is located in $SYBASE/ASE-12_5/bin.
Syntax srvbuildres[-ssybase_dir][-Iinterfaces_file][-rresource_file]
Or
srvbuildres -v
Parameters -s sybase_dirspecifies the value to use for the SYBASE environment variable.
-I interfaces_filespecifies the name and location of the interfaces file to search when connecting to Adaptive Server.
-r resource_fileexecutes the specified resource file.
-vprints the version number and copyright message for srvbuildres and then exits.
Usage You must set the SYBASE environment variable to the location of the current version of Adaptive Server before you can use srvbuildres.
Permissions You must be a Sybase System Administrator to use srvbuildres.
See also See the Installation Guide for UNIX Platforms for more information about the srvbuildres utility program.
Utilities srvbuild
startserver
252 Adaptive Server Enterprise
startserverDescription UNIX platforms only Starts an Adaptive Server or a Backup Server.
startserver is located in $SYBASE/ASE-12_5/bin.
Syntax startserver [[-f runserverfile] [-m]] ...
Parameters -f runserverfilespecifies the relative path name of a runserver file, which is used as a reference each time you start an Adaptive Server or Backup Server. By default, the runserver file is in the current directory and is named RUN_servername. If you start a second Adaptive Server on the same machine, startserver creates a new runserver file named RUN_servername.
-mstarts Adaptive Server in single-user mode, allowing only one System Administrator to log in, and turns the allow updates to system tables configuration parameter on. Use this mode to restore the master database. The System Administrator can use the dbo use only parameter of sp_dboption for system administration activities that require more than one process, such as bulk copying or using the data dictionary. startserver normally starts up only one server per node.
The -m parameter creates an m_RUNSERVER file and overwrites any existing m_RUNSERVER file.
Examples Example 1 Starts an Adaptive Server named SYBASE from the runserver file named RUN_servername in the current directory:
startserver
Example 2 Starts an Adaptive Server named MYSERVER and a Backup Server named SYB_BACKUP:
startserver -f RUN_MYSERVER -f RUN_SYB_BACKUP
Example 3 Starts only the Backup Server SYB_BACKUP:
startserver -f RUN_SYB_BACKUP
Usage • startserver uses the information in the runserver file to start an Adaptive Server or Backup Server. The master device must be writable by the user who starts Adaptive Server.
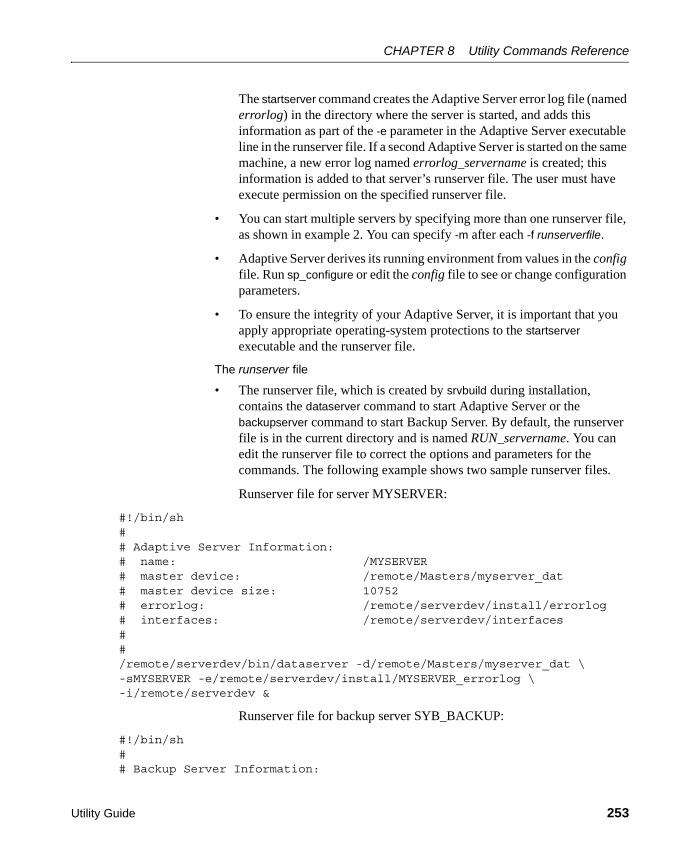
CHAPTER 8 Utility Commands Reference
Utility Guide 253
The startserver command creates the Adaptive Server error log file (named errorlog) in the directory where the server is started, and adds this information as part of the -e parameter in the Adaptive Server executable line in the runserver file. If a second Adaptive Server is started on the same machine, a new error log named errorlog_servername is created; this information is added to that server’s runserver file. The user must have execute permission on the specified runserver file.
• You can start multiple servers by specifying more than one runserver file, as shown in example 2. You can specify -m after each -f runserverfile.
• Adaptive Server derives its running environment from values in the config file. Run sp_configure or edit the config file to see or change configuration parameters.
• To ensure the integrity of your Adaptive Server, it is important that you apply appropriate operating-system protections to the startserver executable and the runserver file.
The runserver file
• The runserver file, which is created by srvbuild during installation, contains the dataserver command to start Adaptive Server or the backupserver command to start Backup Server. By default, the runserver file is in the current directory and is named RUN_servername. You can edit the runserver file to correct the options and parameters for the commands. The following example shows two sample runserver files.
Runserver file for server MYSERVER:
#!/bin/sh## Adaptive Server Information:# name: /MYSERVER# master device: /remote/Masters/myserver_dat# master device size: 10752# errorlog: /remote/serverdev/install/errorlog# interfaces: /remote/serverdev/interfaces##/remote/serverdev/bin/dataserver -d/remote/Masters/myserver_dat \ -sMYSERVER -e/remote/serverdev/install/MYSERVER_errorlog \-i/remote/serverdev &
Runserver file for backup server SYB_BACKUP:
#!/bin/sh## Backup Server Information:

startserver
254 Adaptive Server Enterprise
# name: SYB_BACKUP# errorlog: /remote/serverdev/install/backup.log# interfaces: /remote/serverdev/interfaces# location of multibuf: /remote/serverdev/bin/sybmultbuf# language: us_english# character set: iso_1# tape configuration file: /remote/serverdev/backup_tape.cfg##/remote/serverdev/bin/backupserver -SSYB_BACKUP \-e/remote/serverdev/install/backup.log \-I/remote/serverdev/interfaces \-M/remote/serverdev/bin/sybmultbuf -Lus_english -Jiso_1 \-c/remote/serverdev/backup_tape.cfg
See also Commands disk mirror, disk remirror, disk unmirror
Utilities backupserver, dataserver
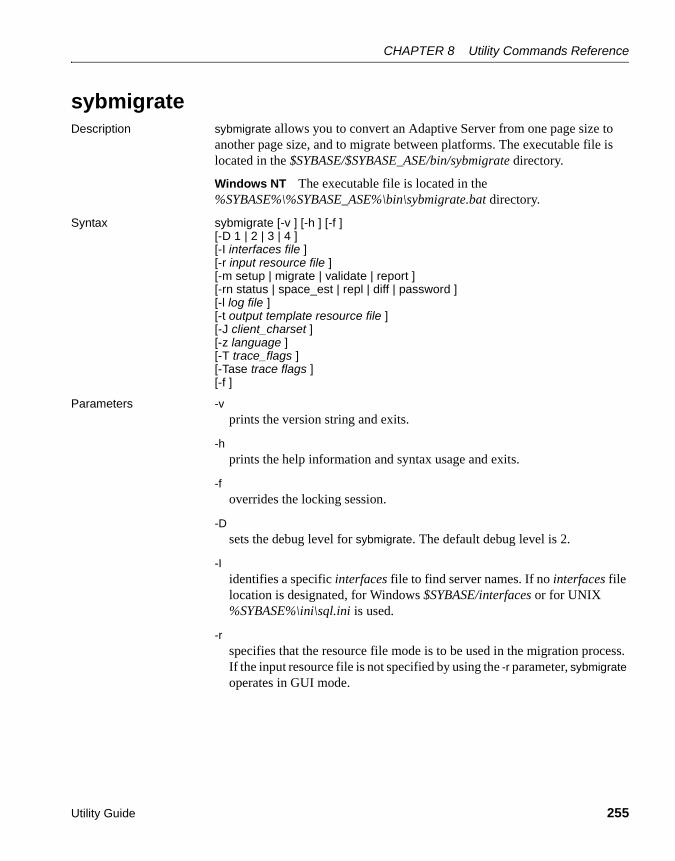
CHAPTER 8 Utility Commands Reference
Utility Guide 255
sybmigrateDescription sybmigrate allows you to convert an Adaptive Server from one page size to
another page size, and to migrate between platforms. The executable file is located in the $SYBASE/$SYBASE_ASE/bin/sybmigrate directory.
Windows NT The executable file is located in the %SYBASE%\%SYBASE_ASE%\bin\sybmigrate.bat directory.
Syntax sybmigrate [-v ] [-h ] [-f ][-D 1 | 2 | 3 | 4 ][-I interfaces file ][-r input resource file ][-m setup | migrate | validate | report ][-rn status | space_est | repl | diff | password ][-l log file ][-t output template resource file ][-J client_charset ][-z language ][-T trace_flags ][-Tase trace flags ][-f ]
Parameters -vprints the version string and exits.
-hprints the help information and syntax usage and exits.
-f overrides the locking session.
-Dsets the debug level for sybmigrate. The default debug level is 2.
-Iidentifies a specific interfaces file to find server names. If no interfaces file location is designated, for Windows $SYBASE/interfaces or for UNIX %SYBASE%\ini\sql.ini is used.
-rspecifies that the resource file mode is to be used in the migration process. If the input resource file is not specified by using the -r parameter, sybmigrate operates in GUI mode.

sybmigrate
256 Adaptive Server Enterprise
-m designates the types of operations that are performed:
• setup – to set up the repository and migration working database, and to migrate the server-wide data.
• migrate – to perform data and object migration.
• validate – to validate the migrated objects.
• report – to run any of the five reports. The reports can be run in the GUI and resource file mode. The available reports are:
• status – the migrate object status report gives information about objects that have been migrated.
• space_est – use the target database space estimation report to verify that you have sufficient resources allocated to your target database.
• repl – use the replication report to check any explicitly replicated objects that have been migrated, determine the type of replication system, and to produce SQL commands for users to execute on the target Adaptive Server and the Replication Server.
• diff – checks the objects between the source and target databases. The diff report provides the following information for the following object types:
• Server information
• Database information
• DDL objects
• User table data
• password – creates a file for the changed passwords.
-rnindicates what type of report to generate. If -rn is not specified, all five reports are run.
-lindicates a user-defined log file where the output of the migration process is stored. If -l is not used, the logs are stored in $SYBASE/$SYBASE_ASE/init/logs or the working directory.
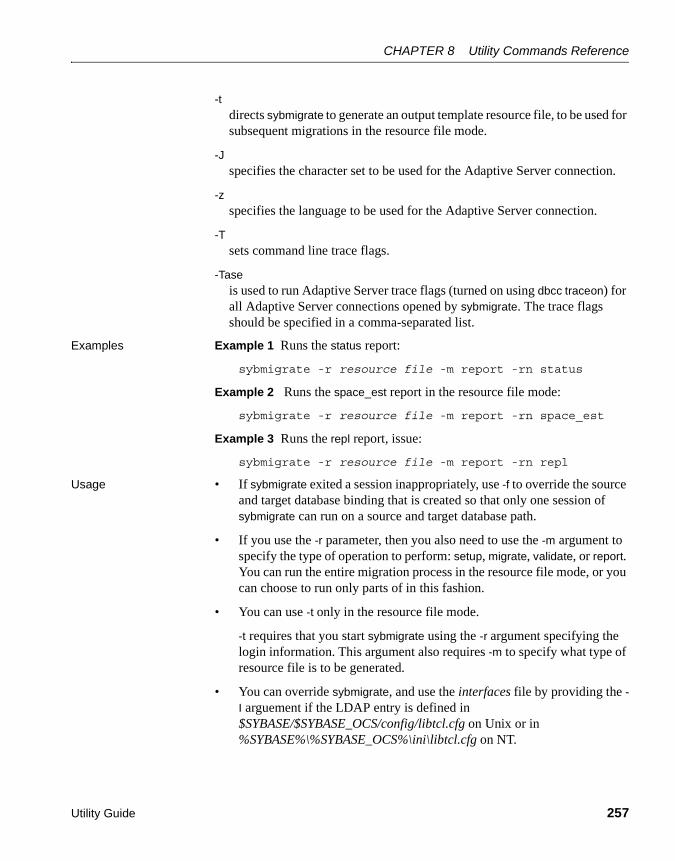
CHAPTER 8 Utility Commands Reference
Utility Guide 257
-tdirects sybmigrate to generate an output template resource file, to be used for subsequent migrations in the resource file mode.
-Jspecifies the character set to be used for the Adaptive Server connection.
-zspecifies the language to be used for the Adaptive Server connection.
-Tsets command line trace flags.
-Taseis used to run Adaptive Server trace flags (turned on using dbcc traceon) for all Adaptive Server connections opened by sybmigrate. The trace flags should be specified in a comma-separated list.
Examples Example 1 Runs the status report:
sybmigrate -r resource file -m report -rn status
Example 2 Runs the space_est report in the resource file mode:
sybmigrate -r resource file -m report -rn space_est
Example 3 Runs the repl report, issue:
sybmigrate -r resource file -m report -rn repl
Usage • If sybmigrate exited a session inappropriately, use -f to override the source and target database binding that is created so that only one session of sybmigrate can run on a source and target database path.
• If you use the -r parameter, then you also need to use the -m argument to specify the type of operation to perform: setup, migrate, validate, or report. You can run the entire migration process in the resource file mode, or you can choose to run only parts of in this fashion.
• You can use -t only in the resource file mode.
-t requires that you start sybmigrate using the -r argument specifying the login information. This argument also requires -m to specify what type of resource file is to be generated.
• You can override sybmigrate, and use the interfaces file by providing the -I arguement if the LDAP entry is defined in $SYBASE/$SYBASE_OCS/config/libtcl.cfg on Unix or in %SYBASE%\%SYBASE_OCS%\ini\libtcl.cfg on NT.

sybmigrate
258 Adaptive Server Enterprise
Reports
• status – the migrate object status report gives information about objects that have been migrated.
• space_est – use the target database space estimation report to verify that you have sufficient resources allocated to your target database.
• repl – use the replication report to check any explicitly replicated objects that have been migrated, determine the type of replication system, and to produce SQL commands for users to execute on the target Adaptive Server and the Replication Server.
• diff – checks the objects between the source and target databases. Users can run the report on individual objects, or the entire database, except for server and database information or metadata. You can run the diff report at any time. You do not need to run a setup session to run the diff report. The source and target database name do not need to be the same when running the diff report.
The diff report provides the following information for the following object types:
• Server information – compares the master database system catalogs row count between the source and target Adaptive Server. This task is similar to the validation session.
• Database information – compares the user database system catalogs row count between the source and target Adaptive Server. This task is similar to the validation session.
• DDL objects – the report displays whether the objects exist on the source or the target Adaptive Servers. If the objects exists in both databases, that object is not displayed in the report.
• User table data – compares the row count of the user tables in the source and target Adaptive Server. If the table only exists in the source or target databases, the table is not displayed in the report.
Permissions You must be a Sybase System Administrator or log in with the sa_role to use sybmigrate.
See also Chapter 6, “Migration Utility” for detailed information on the sybmigrate utility.

CHAPTER 8 Utility Commands Reference
Utility Guide 259
xpserverDescription Starts XP Server manually.
Syntax xpserver -S XP_Server
xpserver -SXP_Server
[-Iinterfaces_file][-ppriority][-sstack_size][-u][-v][-x]
Parameters -S XP_Serverspecifies the name of the XP Server to start. The format of the XP server name is SQLSERVERNAME_XP, where SQLSERVERNAME is the name of the Adaptive Server to which the XP Server is dedicated. For example, the XP Server for an Adaptive Server named SMOKE would be named SMOKE_XP. The XP Server name must be in uppercase.
-I interfaces_filespecifies the name and location of the directory containing the interfaces file (sql.ini) that Adaptive Server searches when connecting to XP Server. If you do not specify -I, xpserver uses the ini subdirectory of the %SYBASE% release directory.
-p priorityspecifies the priority of the Open Server process. Values between 0 (lowest) and 15 (highest) are valid. Overrides the esp execution priority configuration parameter. The default is 8.
-s stack_sizespecifies (in bytes) the stack size of the process used to execute an extended stored procedure (ESP). Overrides the esp execution stacksize configuration parameter if it is set. The default is 34816 bytes.
-uspecifies that the functions be automatically unloaded from XP Server memory after the ESP request terminates. Overrides the esp unload dll configuration parameter if it is set. The default is not to unload the function.
-vprints the version number and copyright message for XP Server and then exits.
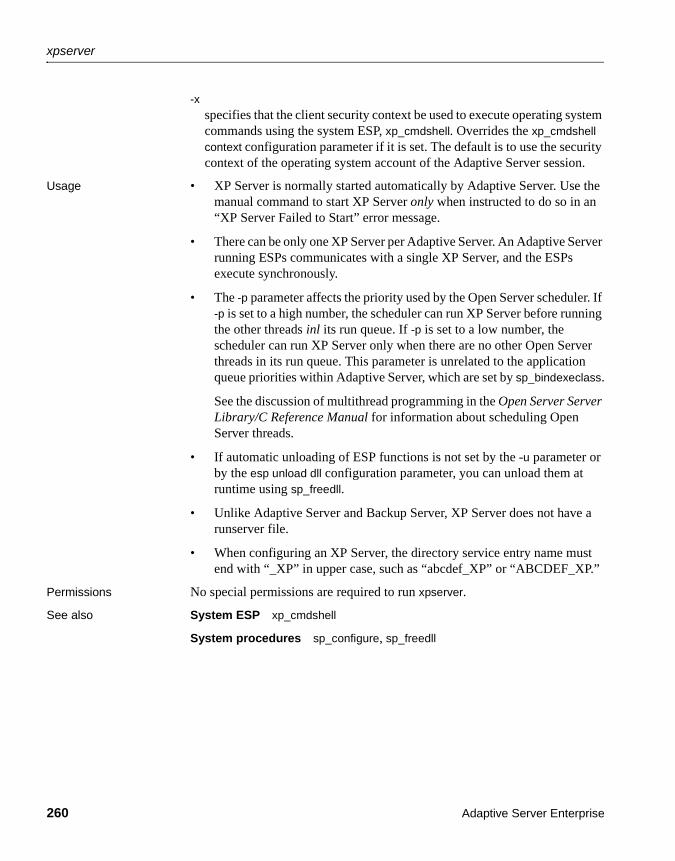
xpserver
260 Adaptive Server Enterprise
-xspecifies that the client security context be used to execute operating system commands using the system ESP, xp_cmdshell. Overrides the xp_cmdshell context configuration parameter if it is set. The default is to use the security context of the operating system account of the Adaptive Server session.
Usage • XP Server is normally started automatically by Adaptive Server. Use the manual command to start XP Server only when instructed to do so in an “XP Server Failed to Start” error message.
• There can be only one XP Server per Adaptive Server. An Adaptive Server running ESPs communicates with a single XP Server, and the ESPs execute synchronously.
• The -p parameter affects the priority used by the Open Server scheduler. If -p is set to a high number, the scheduler can run XP Server before running the other threads inl its run queue. If -p is set to a low number, the scheduler can run XP Server only when there are no other Open Server threads in its run queue. This parameter is unrelated to the application queue priorities within Adaptive Server, which are set by sp_bindexeclass.
See the discussion of multithread programming in the Open Server Server Library/C Reference Manual for information about scheduling Open Server threads.
• If automatic unloading of ESP functions is not set by the -u parameter or by the esp unload dll configuration parameter, you can unload them at runtime using sp_freedll.
• Unlike Adaptive Server and Backup Server, XP Server does not have a runserver file.
• When configuring an XP Server, the directory service entry name must end with “_XP” in upper case, such as “abcdef_XP” or “ABCDEF_XP.”
Permissions No special permissions are required to run xpserver.
See also System ESP xp_cmdshell
System procedures sp_configure, sp_freedll
Utility Guide 261
Symbols!! (exclamation points) operating system commands
prefix (isql) 220\ (backslash)
escaping special characters 140\ (backslash) data field terminator in interactive bcp
43\0 (null) character terminator in interactive bcp 43\gt (redirect out) in isql 16\isql 16“ ” (enclosing special characters) 140
AAdaptive Server
configuration of, for migration 100executing (dataserver) 176upgrading (sqlupgrade) 248upgrading with resource files (sqlupgraderes)
249adaptive Server
executing (sqlsrvr) 241rolling back processes 58upgrading (sqlupgrade) 248upgrading with resource files (sqlupgraderes)
249adding
network transport addresses in dsedit 73, 75server entries in dscp 82server entries in dsedit 70, 72
additional network memory parameter 98allow_dup_row option to create index, and bcp 62application programs, copying data from 50ASCII format, bcp and 34ascii_7 character set
defncopy and 199
Bbacking up, compared to bulk copying 64backslash (\›
escaping special characters 140terminator in interactive bcp 43
Backup ServerSee also backupserver utility command 146
backup Server 146backupserver utility command 146
character set, default 147defined 146error log file 147error messages in 150full path names, specifying 147interfaces file 150interfaces file, name and location of 146language, default 147LC_ALL environment variable 147permissions required for 151server connections, number of 146server names, specifying 146starting servers and 150trace flags 150
-bbatch_size parameter 58bcp for migration 90bcp utility command 64, 152
allow_dup_row option to create index 62ASCII format and 34batch operations in 58batch size settings 154-bbatch_size parameter 58binary format and 19character format 34character format files 34character format, default 35character formats accepted 19character set defaults 157configuration parameters 61copying data in 24, 27, 53, 57
Index
Index
262 Adaptive Server Enterprise
copying data out 50, 53, 60copying in batches of table rows 58data integrity 63data loss and dumping 23data storage size in 38data transfer, preparing for 20datatypes 43default values for data 63defaults for columns and datatypes 63defined 152described 18dump database and 64error files 61errors in data conversion 61examples for using 156fast version of 22fast version of, and data recoverability 22field lengths 34field terminators 35, 38file storage types in 37format files 46, 50IDENTITY columns and 32improving performance of operations 61improving recoverability when copying data in 59index creation 62indexes and triggers, dropping 24insert and 64interactive mode 36, 44languages, using alternate 57load database and 64load transaction and 64maximum speed, enabling 63native file format and 34native format option and 34non-character to character datatype default field lengths
41non-interactive 34non-iso_1 data files and 57other Adaptive Server utilities and 63page allocations, increasing for 27partitioned tables and 25, 33, 60password encryption in 158performance issues with 21, 32, 63permissions required for 19, 40prefix length 38prompts and responses. See Interactive bcp 36
prompts in 37rolling back processes 58row terminators 35rules and copying data 63select into/bulkcopy/pllsort and 24slow version and deadlocks on index pages 26slow version of 22sp_dboption 24space needed for data 24special characters, handling 155speed, and indexes and triggers 22speed, modes of 20storage types 43system data format (SDF) output in 51system differences, operating 35table defaults and copying data 63terminators used in 19transferring data between programs 18triggers and data copying 63triggers not fired on target table 22unique IDENTITY column values and 32using with row-level access rules 58warning about data recovery 155
binary databcp and 19default in interactive bcp 40
buffer, query 12buildmaster utility command. See dataserverbulk Copy Process 64bulk copy process
See also bcp utility command 152
Ccarriage-return data field terminator (\\r) in interactive
bcp 43char datatype, and bcp 34character formats
bcp 19default in bcp 34, 35terminators for 43
character setspecification for migration 105
character setsbackupserver, default in 147
Index
Utility Guide 263
bcp, defaults in 157converting from non-character data 41installing and modifying (sqllocres) 240installing and modifying, in GUI (sqlloc) 239loading, with charset 173platform default 57
charset utility command 173defined 173permissions required for 173settings for 173
CIS bulk insert array sizeconfiguration for migration 97, 101
CIS bulk insert batch size 101CIS packet size
configuration for migration 101for migration 98
closing a sessiondscp 80dsedit 68
column precision in numeric or decimal storage formats 50
column scale in numeric or decimal storage formats 50
columnsdatatype sizes and 41default values and bcp 63fixed- and variable-length 40null 61separator character (isql) 11
comma-delimited output 51, 52command terminator (isql) 10
statistics option interaction 14component directory for migration 95conventions, syntax xivcopy threads on sybmigrate 100copying
between sessions in dscp 84different sessions in dscp 84new entries with dscp 84server entries with dscp 83server entries with dsedit 72, 73, 74, 75
copying data inbatch operations in 58improving recoverability after rolling back 59parallel bcp, requirements for 27, 32partitioned tables 25
partitions, random use of 25steps, using fast version of bcp 24
copying data in with interactive bcp 53, 57compatibility of datatypes, and failure 56delimiters 56error files and 62field lengths 54
copying data out with interactive bcp 50, 53delimiters 52error files and 62fixed-length fields 51for other software 50text and image data 60
copying definitions 198create index command, bcp and duplicate rows 62creating
new servers (srvbuild) 250new servers using resource files (srvbuildres) 251
Ddata
changing with Adaptive Server commands 64conversion errors 61, 62importing and exporting with bcp 18moving with Adaptive Server commands 63padding with spaces in interactive bcp 40parsing. See Field terminators 35permission required to copy into tables 19, 162recoverability 22transferring from different programs using bcp 18
data limits filter mode, migration 121data transfer, default formats with bcp 34database data, migration of 91database management systems, other 50database objects
copying using bcp 152databases, copying with bcp 64dataserver utility command 176
defined 176passwords, generating new 180permissions required for 180, 245
datatypesbcp file storage types for 36, 39bcp format files for 46
Index
264 Adaptive Server Enterprise
bcp, used in 43char 34copying and compatibility 56default values and bcp 63field lengths in interactive bcp 38, 44implicit conversions of 38, 39non-character to character default field lengths in bcp
41storage (SYB) 48
ddlgen for migration 90debug level for sybmigrate 103debugging utility 234default network packet size configuration parameter 61defaults
bcp data conversion 41bcp prompts 36, 44character sets in backupserver 147character sets, in bcp 157copying into tables using data 63copying, with defncopy 198languages in backupserver 147prompts in interactive bcp 36, 44select into/bulkcopy/pllsort option settings in new
databases 24definitions
backupserver utility command 146bcp utility command 152charset utility command 173copying. See defncopy utility command 198dataserver utility command 176defncopy utility command 198dscp utility command 204dsedit utility command 205isql utility command 213optdiag utility command 226showserver utility command 233sqlloc utility command 239sqllocres utility command 240sqlsrvr utility command 241sqlupgrade utility command 248sqlupgraderes utility command 249srvbuild utility command 250srvbuildres utility command 251startserver utility command 252sybmigrate utility command 255xpserver utility command 259
defncopy utility command 198ascii_7 character set and 199defined 198encrypted text 203examples 201failure due to long comments 202passwords and crashing 198Report Workbench, incompatibility with 198
deletingserver entries (dscp) 85
delimiterscopying data in with 56copying data out with 52
directory servicesentries, adding 70entries, copying to 72, 74, 75entries, deleting 71entries, modifying 70entries, renaming 71opening to, with dsedit 67
DISPLAY environment variablesetting, in dsedit 66
dscp utility command 204commands, table of 86defined 79, 204entries, creating new, by copying 84examples of 204exit command 86help 79, 86permissions required for 204quit command 86server attributes 81server entries, adding 82server entries, copying 83server entries, deleting 85server entries, listing 84server entries, modifying 82server entry contents, viewing 85sessions, closing 80sessions, copying between 84sessions, copying to different 84sessions, listing 80sessions, opening 80starting 79
dsedit utility command 205about 65
Index
Utility Guide 265
command line arguments 65defined 205Directory Service Session screen 68DISPLAY environment variable and 66does not start 76libtcl.cfg file 67network transport addresses, adding 73, 75network transport addresses, editing 73opening with sql.ini 67permissions required for 66, 205remote machines, running from 66Select a Directory Service screen 66server attributes 69server entries, adding 70, 72server entries, cannot add, modify, or delete 76server entries, copying 72, 73, 74, 75server entries, deleting 71server entries, modifying 71, 72server entries, renaming 71sessions, closing 68sessions, opening 68starting 66starting from command prompt 65starting from Windows NT Explorer 65SYBASE environmental variable and locating
libtcl.cfg 67troubleshooting 65, 76xd2 Unable to open X displayxd3 error message
76DSLISTEN environment variable
backupserver and 150dump database command
bcp and 64dump transaction command
bcp and 64error message recommending use of dump database
22
Eecho input (isql) 15editing
interfaces files 66, 68interfaces files in GUI (dsedit) 205network transport addresses in dsedit 73
editing interfaces files in GUISee also dsedit utility command 205
enable unicode conversions for migration 99encrypted hidden text 203environment variables
DSLISTEN (backupserver) 150LANG (backupserver) 147LC_ALL (backupserver) 147release path, for sybmigrate 95SYBASE_ASE 95SYBASE_JRE environment variable 96
error filesbcp and 61, 62copying out and 62
error log filesfor backupserver 147
error messagesdsedit and X display 76dump database use over dump transaction 22in backupserver 150select into/bulkcopy/pllsort in fast bcp on tables with
no indexes or triggers 24error messages for migration 129errors
in data conversions 61, 62operations, saving during copy in 61operations, saving during copy out 62
examplesbcp utility command 156defncopy utility command 201dscp utility command 204isql utility command 214showserver utility command 233startserver utility command 252, 253
exclamation points (!!) operating system commands prefix (isql) 220
executing Adaptive Server 176, 241See also dataserver utility command 176See also sqlsrvr utility command 241
exit commandin dscp 86in isql 10
exporting data. See Copying data out with interactive bcp 50
Index
266 Adaptive Server Enterprise
Ffailure cleanup, sybmigrate 131fast version of bcp 22
copying data in 24data recoverability and 22
field lengthscopy in 54in interactive bcp 41, 42prefix length, integer value in 49
field terminators 35bcp 38interactive bcp 43, 44
filesSee also Format files in bcp 46default formats with bcp 34error (bcp) 61native format 34
fixed-length fields 51font conventions xivformat files in bcp 46, 50
column numbers 47column precision 50column scale 50elements used in 46format used for 46host file column order 48host file data length 50host file datatype storage formats (SYB) 48number of records in 47prefix length, integer value in 49saving 46server column names 50server column orders 50TDS version number in 47terminators 50
formatting isql output 11full path names, specifying
in Backup Server 147
GGUI mode
for migration 105
Hhelp command (dscp) 79, 86hidden encrypted text 203high availability
migration with 127host file
isql and reading 15host files
column order 48data length 50datatype storage formats (SYB) 48interactive bcp native format 41
IIDENTITY columns
bcp and 32parallel bcp and 32
ignore_dup_key option, create index, and bcp 62image datatype
interactive bcp and 40importing data. See Copying data in with interactive bcp
53index re-creation for migration 120index threads for sybmigrate 100indexes
bcp, dropping before using 24slowing down bcp 22
insert commandbulk copying, comparing 64
installingcharacter sets (sqllocres) 240character sets, in GUI (sqlloc) 239languages (sqllocres) 240languages, in GUI (sqlloc) 239languages, new (langinstall) 223, 225sort orders (sqllocres) 240sort orders, in GUI (sqlloc) 239
interactive bcp 36, 44backslash terminator (\› 43binary data, default 40carriage-return data field terminator (\\r) 43character format files, terminators for 43copying data for other software 36copying data in 53, 57

Index
Utility Guide 267
copying data out 50, 53defaults for prompts 36, 44field length 41, 42field terminators 43, 44fields, prefix length of 39, 41file storage types 36, 39image datatype, default for 40implicit conversion of datatypes 38, 39null or invisible character terminator (\0) 43null values and 40padding data with spaces 40row terminators 43, 44storage length 41, 42tab data field terminator (\) 43terminator for new lines (\\n) 43terminators for tabular data preparation 43terminators, field and row 42, 44text data copying,default for 40
interactive SQL parser 213See also isql utility command 213
interfaces filefor sybmigrate 103
interfaces filesbackupserver and 150backupserver, specifying names and locations of
146dscp sessions, opening 80dscp, viewing and editing with 204dsedit, editing with 68dsedit, viewing and editing in GUI with 205dsedit, viewing and editing with 205opening for editing 66
iso_1 character set 57isql utility command 213
\< (redirect in) symbol> 16\gt (redirect out) symbol 16column-separator character 11command terminator 10command terminator, changing 13command terminator, resetting 215correcting typing errors 12defined 213echo input 15examples of 214exit command 10host files, reading 15
line numbers, removing 11, 15maximum statement size 10network packet size, setting 15network packet size, specifying in 15output file 11output, formatting 11packet size, setting 15queries, editing 12query buffer, resetting 12quit command in 10reset command in 12statistics 14statistics option with command terminator 14Transact-SQL, using with 10
JJava columns for migration 99Java runtime environment migration 96JAVA_HOME environment variable
for migration 96
LLANG environment variable in backupserver 147langinstall utility command 223, 225
defined 223permissions required for 224
languagesalternate, with bcp 57for migration 99installing and modifying (sqllocres) 240installing and modifying, in GUI (sqlloc) 239installing new (langinstall) 223, 225specification for migration 105
LC_ALL environment variable in backupserver 147line numbers, removing in isql 11, 15load database command and bcp 64load transaction command
bcp and 64loading character sets 173
See also charset utility command 173locations of backupserver error log files 147locking sessions for migration 103
Index
268 Adaptive Server Enterprise
Mmanual migration, what is not migrated 92max memory,for migration 98max network packet size configuration parameter 61max network packet size,configuration for migration 101max packet size allowed, for sybmigrate 98max parallel degree, configuration for migration 101merging databases, during migration 130migrate session, for sybmigrate 97migrating
servers (sybmigrate) 255modifying
character sets (sqllocres) 240character sets, in GUI (sqlloc) 239languages (sqllocres) 240languages, in GUI (sqlloc) 239server entries (dscp) 82server entries with dsedit 71, 72sort orders (sqllocres) 240sort orders, in GUI (sqlloc) 239
multibyte character sets, for migration 99
Nnative file format
bcp and 34native format files 34network packet size
isql, specifying in 15network transport addresses
adding with dsedit 73, 75dsedit, editing with 73
network transports 68new servers, creating 250
See also srvbuild utility command 250new servers, creating, using resource files 251
See also srvbuildres utility command 251new-line terminator (\\n)
in bcp 35in interactive bcp 43
noncharacter datatypes, operating system format for 39non-printable characters, host file 41notes
ascii_7 character set compatibility 199batch size settings in bcp 154
defncopy and Report Workbench 198hidden encrypted text 203null terminator versus no terminator 44passwords, using 140security 140select into/bulkcopy/pllsort and copying out data in
bcp 24slow version of bcp and deadlocks 26special characters, handling in bcp 155system differences in bcp, operating 35triggers not fired by bcp in target table 22
null character terminator (\0) in interactive bcp 43null values 61
interactive bcp and 40number (quantity of)
server connections to backupserver 146number of sort buffers for migration 102number of user connections for migration 101number of worker processes for migration 101numbers
line, removing from isql 11, 15numeric datatypes
bcp conversion to character storage 41column precision 50column scale 50operating system format for 34
Oobject hierarchy for migrtion 96objects
failed migration of 129re-creating after migration 131
openingsessions in dscp 80sessions in dsedit 68
operating system filesnative format 34permission required for copying tables into 19,
162operating systems
commands prefix (!!) (isql) 220non-character datatype formatting 39numeric datatype formatting 34
optdiag utility command 226
Index
Utility Guide 269
defined 226permissions required for 231
output formats, data. See Copying data out with interactive bcp 50
Ppacket size, network
bcp, specifying with 60isql, specifying in 15specifying in isql 15
padding data and bcp 42parallel bcp
copying to a specific partition 27, 31different methods of using 30, 32IDENTITY columns and 32syntax 30
partitioned tables in bcp 25, 33copying data into randomly 25copying data into, methods for 25page allocations, increasing 27
passwordsbcp encryption 158defncopy and 198new, generating 180notes about using 140
performancebcp issues and 21, 32, 63bulk copy and packet size 61isql network packet size and 15
permissions required forbackupserver utility command 151bcp utility command 19, 40charset utility command 173dataserver utility command 180, 245dscp utility command 204dsedit utility command 205dsedit, required for 66langinstall utility command 224operating system file, copying tables into 19, 162optdiag utility command 231sqlloc utility command 239sqllocres utility command 240sqlupgrade utility command 248sqlupgraderes utility command 249
srvbuild utility command 250srvbuildres utility command 251tables, copying data into 19, 162xpserver utility command 260
post-migration activities, for sybmigrate 119prefix field lengths in interactive bcp 39, 41prefix length 49prefix lengths in bcp 38primary database, restoring after migration 122primary replicate database, migration of 122prompts
bcp. See Interactive bcp 36prompts in bcp utility command 37
Qquery buffer, resetting 12quick reference
dscp commands 86quit command
in dscp 86in isql 10
quotation marks (' ') for enclosing special characters 140
quotation marks (xd2 xd3 ) for enclosing special characters 140
Rredirect in symbol (\isql 16redirect out symbol (\gt) in isql 16release path, for sybmigrate 95remigrating a database 131remote machines 66remote machines, using dsedit utility on 66renaming server entries with dsedit 71replicate database
migration of 122restoring after migration 123
replicated databasespost-migration procedures 122
Replication Server, migrating replicated data to Adaptive Server 120
report Workbench, incompatibility with defncopy 198

Index
270 Adaptive Server Enterprise
reports for sybmigrate 104, 256reset command (isql) 12resource file mode, for migration 112roll-back processes 58row terminators
bcp, in 35interactive bcp, in 43, 44
row-level access rules and bcp 58rows in bcp, and erroneous table 62rows, table
bulk copying and failed 58length 30
RSSD databasemigration of 122restoring after migration 124
rulesdefncopy, copying with 198tables, copying data into 63
Ssaving
errors during copy in operations 61errors during copy out operations 62format files (bcp) 46
security Mechanism server attribute (dscp) 82security, notes about 140select a Directory Service screen 66select into command, compared to bulk copying 64select into/bulkcopy/pllsort database option
bcp and 24server column
names 50orders 50
server connectionsbackupserver, number of 146
server data, migration of 90server entries
adding, with dsedit 70contents, viewing with dscp 85copying, with dsedit 72, 73, 74, 75deleting, with dseditdsedit 71dscp, listing with 84modifying, with dsedit 71, 72renaming, with dsedit 71
server entries, adding 72server Entry Editor window 68server Name server attribute (dscp) 81server Object Version server attribute (dscp) 81server Service server attribute (dscp) 81server Status server attribute (dscp) 81servers
backupserver, specifying names in 146backupserver, starting in 150migrating 255modes of speed when using bcp 20startserver utility command 252startserver, starting in 252sybmigrate utility command 255
sessionslisting (dscp) 80
setup session, for sybmigrate 97sever attributes (dscp) 81show servers 233
See also showserver utility command 233showserver utility command 233
defined 233examples of 233
sizedata storage in bcp 38packet size 60text or image data 60
slow version of bcp 22deadlocks on index pages 26
sort ordersinstalling and modifying (sqllocres) 240installing and modifying, in GUI (sqlloc) 239
source Adaptive Server, for migration 89sp_dboption system procedure and bcp 24space requirements and bcp steps 24special characters
bcp, handling in 155utility commands, use in 140
specifying full path names in Backup Server 147specifying server names in backupserver 146SPX/IPX addresses for interfaces entries 74SQL parser utility. See isql utility command 213sql.ini file
dsedit sessions, opening with 67entries, adding 70entries, copying to 72, 74, 75

Index
Utility Guide 271
entries, deleting 71entries, modifying 70entries, renaming 71
sqldbgr utility 234sqlloc utility command 239
defined 239permissions required for 239
sqllocres utility command 240defined 240permissions required for 240
sqlsrvr utility command 241defined 241
sqlupgrade utility command 248defined 248permissions required for 248
sqlupgraderes utility command 249defined 249permissions required for 249
srvbuild utility command 250defined 250permissions required for 250
srvbuild, for sybmigrate 94srvbuildres utility command 251
defined 251permissions required for 251
startingdscp utility 79dsedit utility command 65, 66servers (startserver) 252XP Server manually (xpserver) 259, 260
startserver utility command 252backupserver and 150defined 252examples of 252runserver file examples 253
statisticsdisplaying (optdiag) 226isql 14loading updated (optdiag) 226
storage types used in bcp 43stored procedures
copying with defncopy 198SYBASE environment variable 95SYBASE environment variable in dsedit 67SYBASE_ASE environment variable 95SYBASE_JRE environment variable 96
sybmigrate Adaptive Server version level 89additional network memory parameter 98bcp 90character set conversion 99character set specification 105CIS bulk insert array size 101CIS bulk insert array size configuration 97CIS bulk insert batch size configuration 101CIS packet size configuration 98, 101command line trace flags 105component directory 95components for 93configuration and tuning 100copy threads 100cross-version migration 128data limits filter mode for replicated data 121ddlgen 90debug level 103dependencies for 94environment variables 95errors to avoid 102executable file 95GUI mode 105help information 103index re-creation 120index threads 100installation 94interfaces file 103Java columns 99Java runtime environment 96language specification 105languages 99lock session override 103max packet size allowed configuration 98max parallel degree configuration 101memory for the JVM 96merging two database 130migating a primary replicate database 122migrate session 97, 111migrating Replication Server data 120migration failure cleanup 131migration of a replicate database 122migration of an RSSD database 122migration of database data 91migration of server data 90

Index
272 Adaptive Server Enterprise
migration with high availability 127multibyte character sets 99multiple sessions 97number of sort buffers configuration 102number of user connections configuration 101number of worker processes configuration 101object hierarchy 96objects fail to migrate 129output template resource file 105permissions for 94platforms 95post-migration activities 119post-migration procedures for replicated databases
122pre-migration considerations 97re-creating an object 131release path 95remigrating a database 131reports 104, 256resource file mode 112restoring replicate databases 123restoring RSSD databases 124restoring the primary database 122setup session 97, 106source Adaptive Server 89source Adaptive Server configuration 100starting 102sybmigrate log 125syntax 102target Adaptive Server 89trouble shooting and error messages 129upgrade 94user-defined log file 105validate session 97, 112version string 103
sybmigrate ,max network packet size configuration 101sybmigrate utility command 255
defined 255sybmigrate,max memory configuration 98sybmigrate,what is not migrated 92SYBMIGRATE_MEMORY environment variable
for migration 96sybmultbuf, using to start Backup Server 147symbols, field terminator (bcp) 44syntax
for sybmigrate 102
syntax conventions xivsysconfig.exe for sybmigrate 94system data format (SDF) output in bcp 51system procedure (sp_dboption) 24
Ttab data field terminator (\) in interactive bcp 43table rows
copying in batches 58length 30
tablesbcp character set defaults 157bcp prompts in 37permission required for copying data into 19, 162permission required to copy into operating system
files 19, 162utility commands 140
tabular data, copying 44tabular output 51, 53target Adaptive Server, for migration 89TCP/IP addresses for interfaces entries 73terminators (bcp) 50
changing 35defined 19field and row, and 42, 44other programs, using for 43
text datatypeinteractive bcp and 40
trace flags and backupserver 150trace flags, for sybmigrate 105Transact-SQL
using with isql 10transferring data from programs using bcp 18transport Address server attribute (dscp) 81transport Type server attribute (dscp) 81triggers
bcp, dropping before using 24copying with defncopy 198slowing down bcp 22tables, copying data into 63
trouble shooting, for migration 129troubleshooting dsedit 76

Index
Utility Guide 273
Uunlogged transactions 22upgrading Adaptive Server 248
See also sqlupgrade utility command 248upgrading Adaptive Server using resource files 249
See also sqlupgraderes utility command 249utilities, other Adaptive Server, and bcp 63utility commands
special characters, using 140table of commands 140
Vvalidate session for sybmigrate 97version for Adaptive Server on sybmigrate 89viewing interfaces files in GUI 205
See also dsedit utility command 205views, copying, with defncopy 198
Wwarnings
bcp data loss 23bcp in data recovery 155defncopy failure due to long comments 202
Xxd2 xd3 (enclosing special characters) 140XP Server, starting manually 259, 260
See also xpserver utility command 259xpserver utility command 259, 260
defined 259permissions required for 260

Index
274 Adaptive Server Enterprise