Embed Size (px)
Citation preview

Video Production Workshop
Presented by David Kocol


The Idea!
Pre Production

The place to be!
• Will your video have strong visual elements?
• Will your video have strong audio elements?
• Is it something a busy person would want to see?
• Will it provide value to the viewer?
• Will your video be watched by enough people to be worth the effort?
If the answer to any of the above is no, think of another solution: An email, a Web page, an infographic, a PDF, etc.
Will it Work on Video?

Audience
The most important element in a video
more important than camerawork, editing,
resources, story,
or anything elseis your
audience.
Who is your audience?
Don't say "the public"—you need to be specific about who you want to watch your video.

Audience
•Who is your tribe?
•What are they interested in?
•What are their jobs?
•How much time do they spend on the Web?
•What level of education do they have?
Your idea may be interesting, but if it's not relevant or useful to your audience, your time and effort will be wasted.You need to think like a viewer.
The place to be!
Planning Your Video
Now that you’ve decided to make a video, you need to focus your ideas into a video plan.
Just like with any other project, the planning and scheduling phase of production is crucial to the success and timeliness of your video.
Remember—if your content isn’t good, no one will look at it, no matter how hard you worked.

Tip 1: Research your idea
Before you invest time and effort in a video, see if it already exists. See if anyone has produced similar videos by doing a quick Web search.
Are you “Reinventing the Wheel”
Or “Building a better mousetrap”?
Check it out before starting production.
Tip 2: Decide what you want to achieve
Before producing, think about the purpose for your video.
Will your video give your audience useful and actionable information? If it doesn’t, they’ll move on immediately.
Videos are usually interesting or valuable, rarely both.
Which is yours?
Is there an action step for your audience?

The place to be!
Tip 3: Create a Scope of Work (project plan)
Now that you’ve done some thinking, you should create a project plan called a Scope of Work
It is created by collecting your thoughts on the purpose of your video and what you’re trying to accomplish.
Figuring this out beforehand will save you untold headaches, help you focus and prevent production problems.

•Project Description—Limit it to one sentence
•Audience—Who is it? Be specific
•Purpose—What action do you want people to take after watching the video?
•Theme/Message—What is the information or message you want people to walk away with?
•Estimated Length—In seconds/minutes
•Delivery Media—Where will the finished video live? YouTube? Your Intranet?
Scope of Work

The place to be!
•Budget—If you're going to need help from others, now's the time to budget for it
•Time Frame/Deadlines—How long will it take to complete? Give yourself more time than you think you'll need—videos are rarely quick projects
•Action Items (If any)—Things you or other people need to do to make this video happen
•Outreach Methods—How are you going to get the word out—social media? Email?
Scope of Work

be!
First Fridays Video: Scope of Work 03/01/2013 Project Description: The project will create a short video demonstrating how easy and important it is to test the usability of a website. The video needs to show web managers and website teams how websites are tested, where to go to have their website tested, how to observe and participate in a test, and where to go to find more information about website improving how user-friendly a website is for the public. Audience: Managers and teams working on developing and updating websites Purpose: To announce increase interest in and awareness of the First Fridays program amongst our audience. Over-arching theme/message: Test your website, to make it more user-friendly for the public. Length: 1 minute Delivery Media: Vimeo, YouTube Budget: $Undetermined Time Frame/ Deadlines:Friday March 4- Meet to Discuss Initial StoryboardMarch 7 through March 11- Get Approval of Storyboard and meet to make any final edits and changesMarch 14 through March 18- Work on visual elements of story board. Creating any characters or graphics. Begin to shoot footage.March 21 through March 25- Finish any video shooting and begin editing the videoMarch 28 through April 1- Finish editing and receive final approval on finished productAfter April 1- Transcribe final cutAction Items:Outreach Methods: Youtube, Vimeo, mass email

to be!
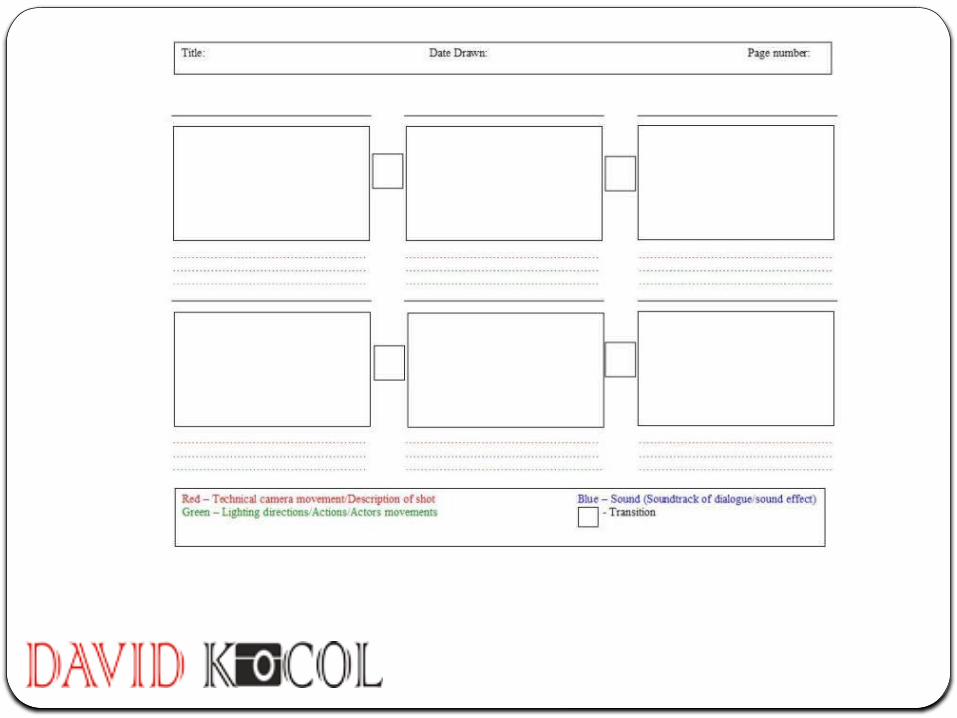
A storyboard is a powerful document that contains all the visual, audio and time components of your video. You can use pictures to describe the visual element, like this:

be!
Storyboards capture these three elements for every scene of your video:
Visual:Description—A quick, rough sketch—no need to be an artist!
Time—The length of this particular image, in seconds.
Audio—Narration/Music/SFX - Narration (people speaking), Music (background sound) or Sound Effect (SFX)—doors opening, car horns, birds calling, etc.
Storyboards can also skip the pictures and just describe the visual elements:


Identify your audience
Determine what's the story you're trying to tell
Define what will make the video a success and how you will measure success (online viewers? viewer feedback? etc.)
Choose where (and on what page) your video will be posted
Create a timeline for completion
If the entire project rests upon interviews that may be difficult to get, get parties to agree to interviews as early as possible
Video Checklist

Create storyboard / scriptALWAYS create a storyboard before turning on the camera
Get storyboard approval from appropriate partiesEnsure that everyone is in agreement about the goals and
requirements of the project.Consider running your idea by your Public Relations office. They
may have helpful resources, including equipment.
Reserve the resourcesReserve cameras and equipment, production staffDetermine your budget for this video projectPrepare interview questions (if needed)Set up interviews (if needed)Prepare video release statements
Video Checklist

Finalize location
Visit in person beforehand, if possible
Find out what approvals you need to film there
Show up around the same time of day you plan to do the video
Take note of the lighting, ambient noise and other surroundings.
Note anything special you will need to bring during the shoot
Verify that you have permission and permits, if necessary
Consider partnering with others if the video allows. Local schools may have kids that want to practice their video skills or a local TV station may have footage or equipment you could use.
Video Checklist

Video Equipment
• Digital Camera• Microphones • Tripod • Video Editing Software • External Hard Drive
The tools you use to create your video will impact your final product.
Use what you have, may have to adapt production to the equipment.
The most important rule is to practice. Make home movies, interview your colleagues, try everything out until it feels familiar.
NEVER use equipment for the first time at a shoot.

Check and pack your equipment
Do you have the appropriate audio and video cables? Are your camera batteries charged?
Do you have enough hard drive space on your camera to hold all the video you will shoot?
Video Checklist

.
Break Time
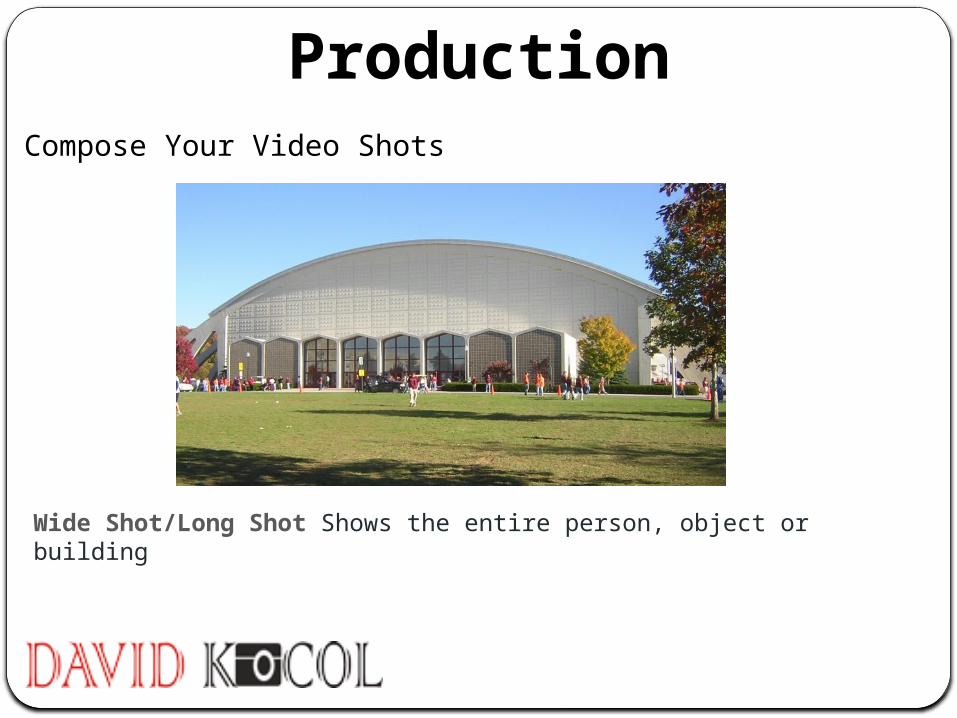
ProductionCompose Your Video Shots
Wide Shot/Long Shot Shows the entire person, object or building

Medium Shot Shows the subject from the waist up or shows half of an object or building.
Great for interviews, as the subject fills the screen.
Close–Up One element, such as a face, fills the screen, making the video more interesting and personal

The place to be!
Establishing Shot Usually an exterior shot of a building. It gives your audience a sense of location by highlighting the surrounding environment.

Use a Tripod
Tripods help you avoid shaky video. If you don't have a tripod, look for the natural tripods around you—a desk/table, rocks, low walls—to help steady your shot.
USE A TRIPOD!
Keep it Steady
Avoid panning (swiveling the camera from left to right) or moving the camera while filming. Instead, move physically closer to your subject to get the angles you want.

Remember the Rule of Thirds
Divide your image into nine equal parts with two equally–spaced horizontal lines and two equally-spaced vertical lines.
Place your subject at the four intersections (see the circled areas below), for a professional–looking video.


Lighting
Indirect Lighting Diffused light, like being outside on a cloudy day or the lighting in your office.
Indirect lighting illuminates the area around your subject, but may not be strong enough to light your subject.

Single–Source Lighting If you don’t have lighting equipment, the sun on a sunny day is the best single-source lighting.

ea
Two–Point Lighting Setup You can use one light and the sun to brighten your subject’s face and remove shadows.

Three–Point Lighting SetupProfessionals use a three–point lighting system:•Key Light— main source of light (if outside your key light is the sun).•Fill Light— lights the shadows or dark spaces.•Back Light—This light behind your subject provides separation between your subject and the background.
If you over-light it will create a silhouette effect—a very bright light in the background while your subject’s features are dark and covered with shadow.
Lighting Tips
•When outdoors, shoot either early in the morning or late in the afternoon. Noon light will create harsh shadows on your subject.
•Never film someone with their back to the sun—you won’t be able to see them through the shadows.
•Never use sunlight through venetian blinds—you’ll be able to see the shadow bars on your subject’s face.

Lighting Tips
•Use reflectors (mirrored or reflective sheets) to bounce light to an area that needs brightening, such as the side of someone’s face. Cheap reflectors include: poster boards, easels or even car sun reflectors.
•Avoid overly bright or dark spaces.
•Be sure to use the “white balance” feature to get the best results from your available light and to create realistic skin tones. There should be white balance information in your camera's manual.
•White backgrounds are the easiest for lighting.

Shooting the video
Show Up EarlyGive yourself time to set up, especially before a live event. Find an area where you have a good view of your subject, but is clear of foot traffic and noise (entrances and exits are notoriously loud).
Clear the SetBefore you shoot, look through your viewfinder and remove any extraneous or messy background items that may draw the viewer's eye away from the interviewee. For example, if you're filming in an office, clear the desk of books, knickknacks, and coffee cups.
Check Legal IssuesMake sure you have a video release for anyone appearing in your video.

Fill the FrameIf you get close to your subject when you shoot, the resulting footage will look better.
Avoid Busy and Harsh Backgrounds
• Are you planning on filming against a background with a lot of brown? Ask your interviewee to wear a complementary color.
• Are you shooting the interview outside? A white shirt might be too bright; suggest a darker color.
• Also, remind your interviewee to avoid small patterns or stripes—sometimes, even with the best cameras, these patterns can create unwanted “noise” in the image where the patterns or stripes blend together.

To Shoot or Not to Shoot?The traditional approach is that more footage is better. This method is recommended for beginners because you get more footage to work with, but you have to edit more.However, some videographers prefer to shoot only what they need. Shooting less footage means faster edits, but you have less material to work with. Choose the option that works best for you.
Shoot Plenty of B-roll B-roll is the secondary footage used to vary your visual elements and cover up edits.
Upload It After the event, upload the the footage to either a permanent location or an editing computer as soon as possible. This prevents it from being deleted, damaged or lost.

Stock footage, also known as "B–roll," can add visual interest to your video by showing the surrounding environment, or the interviewee in action.
You can work these elements into your storyboard ahead of time or look on–site for good B–roll. You can also save your B–roll for later. For example, shots of a building’s exterior can be used for years.One good B–roll method is to Pick 5 events you want to capture.

For example, if you are shooting someone in an office, events might be:• Walking into the office or down a hallway• Typing on a computer• Talking to people in a hallway• Reading reports on a desk• Giving a lecture/presentation
For each event, take 5 shots (10 seconds/shot) of the following items:• Hands• Face• Hands & face (wide shot)• Over the shoulder• Side

Assume All Material is Copyrighted
Nearly all the material on the Web is covered by intellectual property laws. If you produce content in your personal time, you automatically own the rights to it.
If you produce content at work, your employer likely owns it.
Videos, blog posts, and music (especially music videos) are all examples of works automatically protected by copyright. They don’t need to say “copyright” or have a “©” mark next to it, either–once it’s created, it’s copyrighted.
People must choose to actively relinquish their copyright for you to use their work, and the vast majority of people don’t do this or don’t know how.

Federal Government Works Likely Copyright Free
Any form of recorded or documented work created by federal employee, as part of that person's official duties is, according to Section 105 of the Copyright Act, a United States Government Work (USGW).
This means that all media created by federal employees are the property of the federal government and have no copyright restrictions within the United States.
Anyone in the U.S. may:
• Reproduce the work in print or digital form• Create derivative works (use portions of the original in another work)• Perform the work publicly• Display the work• Distribute copies or digitally transfer the work to the public by sale or other transfer of ownership, or by rental, lease, or lending.

You can use a photograph, a song or a video clip if you contact the owner and have them send you permission, by letter or email, to use their work. They might want $$$$.
Work labeled public domain (generally usable in the country it was created). See if the author included a Creative Commons or another attribution license indicating the item is free to use.
IMPORTANT: Licenses are complex, and not all Creative Commons, or other attribution licenses, are created equal. This means that a certain type of “CC” or other attribution logo might let you use an image or video, but you will need to give attribution or credit, usually in the credits or in the description.To ensure you don’t mistakenly use protected intellectual property from other websites, check with the sources who created that original material.

Remember:
•Inspect the copyright status of each and every file to ensure the author has given you free use
•If the file’s license asks you to give them credit or not to alter their product, follow those instructions
•Copy the URL of each file you find online so you can go back to it if needed
•Only music that gives you the right to attribution can be used in almost all situations without contacting the owner

Free Video Footage/B-rollMore people are uploading videos with licenses allowing use of footage by adding an attribution at the end. Some examples are: Public Domain, Open Source, and Community Video licenses. The Creative Commons Attribution License is the most common symbol that denotes a work is free and OK for use.
A few places to look for free stock footage online are:•YouTube—To search for Creative Commons or another type of attribution license, sign-in to YouTube, go to youtube.com/editor, click the “CC” icon and then search for videos.
•Wikimedia Commons—Images, sounds videos
•National Archives Community Video—Lots of footage, including old commercials and government videos
•35mm Stock Footage (also from the National Archives)

Free Music & AudioFind free soundtracks, speeches or even sound effects. It's helpful to know the type of music you're looking for first. •National Archives Community Audio•Audiofarm—Lots of music by genre•Wikimedia Commons—Images, sounds, videos•Incomptech—More music by genre•Observatory Online—Free music, hosted by the National Archives•Creative Commons—A list of free music sites•Garageband—The free music editor on Macs is preloaded with audio snippets and loops. You can also create your own.•Opsound—Sounds and music under "Creative Commons ShareAlike license"•CCMixster—A Creative Commons collectionFree Sound EffectsLook for realistic sounds, such as footsteps, to add drama to your piece.•Freesound.org—Collaborative database of Creative Commons–licensed sounds. Freesound does not have songs.

Free Photos & Images
Use images that illustrate a point or an emotion.
•Wikimedia Commons—Images, sounds videos
•Google Images—Pictures you can use in your videos
•Creative Commons Search Page—Choose from a variety of sites
•Flickr Creative Commons
•www.sxc.hu—Free stock images

Post Production
Editing (aka post-production) is when you piece together your video and audio clips to produce a final product. Your storyboard will give you a rough idea of how the final video will look.
Plan enough time to edit, who will help and where the footage will be stored. This process takes longer than filming and takes practice.

There are many ways to approach video editing; below is a three-step process:
•Combine: Select and move large parts of your footage into place. Can I organize my footage in an orderly way?
•Condense: Cut your video into smaller chunks. What non-essential
pieces of the story can I cut? •Correct: Make small fixes, frame by frame. Is there a person I need to cover up because they didn’t sign a release? Is there a strange break in an interview that needs B-roll placed over it?
This is often the most time-consuming phase.

Editing Tips
•Make a point—You're trying to tell a story with your footage, not just give information.
•Be intimate—Your best shot (often a close up of someone’s hands) should be one that leads off the video. It’s the attention-getter.
•Keep it short—For most videos, keep it to two minutes or less. Attention spans are short, especially on the web.
•Use fast edits—Use combinations of shots in 3– or 4–second segments.
•Keep transitions simple—Cross–dissolve or cross–fades work just fine.

Editing Tips
•Make video and audio work together—Avoid showing a literal interpretation of the script on–screen unless it’s absolutely necessary. By having the pictures complement what’s being said rather than just repeat it visually, you can give the viewer more information in a shorter period of time.
•Use one voice to tell the story—Let the narrator tell the story, but intersperse soundbytes from the subjects.
•Ensure audio is even—When editing multiple clips together, make sure the audio is at the same levels. Use audio transitions or raise or lower the volume to create a unified experience.
•Recycle clips—If you have a great clip or a soundbyte you can’t fit into your video, make another video! You can add it as an addendum, tweet as a separate video, or blog: “It didn't fit, but we think it's important." Or archive it with tags and labels so you can find it again.

Editing Video Checklist
□ Have all release forms signed and permission to use all content□ Upload, organize and label video assets (video, audio, graphics)□ Edit footage□ Check spellings for on-screen text and animations and graphics□ Run first draft by appropriate parties□ Edit footage□ Get final draft approval□ Export video final version□ Write metadata and description□ Post (YouTube)□ Test all video links to make sure they work□ Promote video using social media

Main Metadata Pieces
These elements are key to helping your video get found by search engines:
•Title—Your video’s name. Put subject keywords first, and your organizational branding at the end
Example: "Economic meeting with Indian Prime Minister“
•Tags—Labels or keywords about the subject of your video—space flight, transportation, recalls, etc.
•Description—A short summary of your video. Put the most compelling information first, and include keywords
•Thumbnail—An image that people will see in your video before they click "Play." High–resolution, clear and action–based images are the most compelling

Here is an example of Metadata on YouTube:

Social Sharing (Improve) Checklist Here's an at-a-glance list of actions you can take to improve your video content.
□ Add all pieces of metadata □ Embed/post video on your website □ Promote video via email □ Promote video via Facebook/Twitter □ Share the video with relevant communication partners □ Moderate audience comments on the video

Questions?
Slides and forms are availableFor download at my website
davidkocol.comGo to download page
Thank You for attending!
Our Next WorkshopFebruary 15th, 2014
How to Shoot Video of Yourself
$5.00 for SpeakTV Members$25.00 for Others