Embed Size (px)
Citation preview

Version 1.4 ExpressShipper User Guide January 2006
ExpressShipper Section 0 Page 1 of 1
ExpressShipper
Quick User Guide
January 2006

Version 1.4 ExpressShipper User Guide January 2006
ExpressShipper Section 1 Page 2 of 2
Section 1: Structure of the User Guide
In this section
This section contains the following topics:
Topic See Page
What is the purpose of this User Guide 3 How the ExpressShipper User Guide is organised 3

Version 1.4 ExpressShipper User Guide January 2006
ExpressShipper Section 1 Page 3 of 3
1.1: Structure of the User Guide (continued)
What is the purpose of this User Guide
The ExpressShipper User Guide has been developed as a point of reference for customers wishing to install TNT’s ExpressShipper product. It provides all the information necessary to both configure and install ExpressShipper.
How the Express Shipper User Guide is organised
The table below lists the sections that are included in the ExpressShipper User Guide and briefly describes what each one contains:
Section Description 1. Structure of the
User Guide Details the sections of the ExpressShipper User Guide.
2. Introduction Provides background information about ExpressShipper
3. Installation, Registration and Use
ExpressShipper set-up, installation and user information.

Version 1.4 ExpressShipper User Guide January 2006
ExpressShipper Section 1 Page 4 of 4
Section 2: Introduction
In this section
This section contains the following topics:
Topic See Page
Welcome to ExpressShipper 5 Why should I use ExpressShipper? 5 How do I Use this Guide? 6

Version 1.4 ExpressShipper User Guide January 2006
ExpressShipper Section 1 Page 5 of 5
2.1: Introduction (continued)
Welcome to Express Shipper
Welcome to ExpressShipper, part of the family of products from TNT. ExpressShipper is a shipping solution, for small to medium customers using TNT. It provides all the benefits of a standalone PC application as well as web interfaces for the most up to date collection, pricing and tracking. With ExpressShipper you can:
- Create your consignments to ship via TNT - Label and manifest them - Arrange collections - Track your packages - Check prices.
You can also: - Store your business contacts in an address book (or import
your addresses and contacts from Partnership Express) - Use the consignment templates to store - frequently used information - Modify your version of ExpressShipper to match local
settings and languages as advised by your local CIT coordinator.
Why should I use Express Shipper?
ExpressShipper is a software solution specifically designed by TNT for small to medium enterprises. If you have already used some of our web services and now wish to increase efficiency with any of the extra functionality mentioned above, then ExpressShipper could be for you. ExpressShipper is optimised for the small to medium customer shipping consignments via TNT. For further information contact your local TNT coordinator.
Continued on next page

Version 1.4 ExpressShipper User Guide January 2006
ExpressShipper Section 1 Page 6 of 6
2.1: Introduction (continued)
How do I Use this Guide?
Regardless of whether you are an existing user or a new user, this guide provides you with detailed information on how to:
- Install ExpressShipper - Register ExpressShipper - Use ExpressShipper - Upgrade ExpressShipper
Version 1.4 ExpressShipper User Guide January 2006
ExpressShipper Section 1 Page 7 of 7
Section 3: Installation, Registration and Use
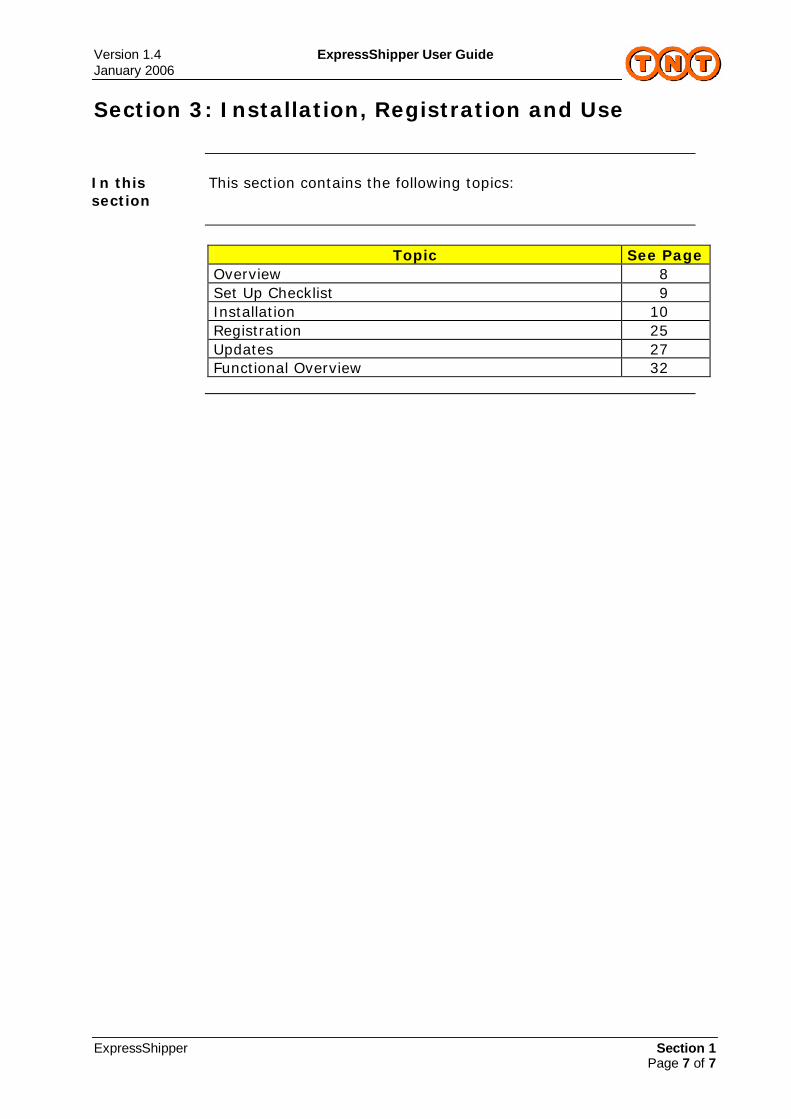
In this section
This section contains the following topics:
Topic See Page
Overview 8 Set Up Checklist 9 Installation 10 Registration 25 Updates 27 Functional Overview 32

Version 1.4 ExpressShipper User Guide January 2006
ExpressShipper Section 1 Page 8 of 8
3.1: Overview
Overview
This section details everything you need to know and to do before installing ExpressShipper. Installation can be either via the world wide web or by CD-Rom. The installation comprises a base version of ExpressShipper followed by a registration (either online or sent via email). Installation is a simple process. Everything you need for successful installation is contained in this Section. This section also contains a Functional overview of the system.

Version 1.4 ExpressShipper User Guide January 2006
ExpressShipper Section 1 Page 9 of 9
3.2: Set Up Checklist
Introduction
This section details the minimum specification required to run ExpressShipper. Anything smaller than the specification detailed below may lead to poor performance.
Set Up Checklist
Topic Description Operating System 32-bit Windows operating system
including: - Windows NT4 - Windows ME - Windows 2000 - Windows XP
Minimum Hardware Specification
- Pentium II 233 Mhz - 128 MB Ram
Free Hard Disk Space - 6Mb (for the base download)
Screen size - 800x600 minimum
- 1024x768 recommended
CD Player - Yes (if installing via CD ROM drive)
Printer Settings - Hewlett Packard Laser-jet
compatible
Administration rights - Local admin rights required for installation
Internet Explorer - IE4 or above (Recommended
IE6) Distributables - MSXML
- Proxyconfig
Helpdesk
If you require assistance, then call your local TNT Helpdesk.

Version 1.4 ExpressShipper User Guide January 2006
ExpressShipper Section 1 Page 10 of 10
3.3: Installation
CD install Follow the installation procedures:
Step Action
3 You can install Expressshipper by double clicking the executable
4 A screen will display preparing for setup.
Continued on next page

Version 1.4 ExpressShipper User Guide January 2006
ExpressShipper Section 1 Page 11 of 11
3.3: Installation (continued)
Setup (continued
Step Action 2 A screen will display prompting you to continue with the
setup. Select the Next button.
Continued on next page
Version 1.4 ExpressShipper User Guide January 2006
ExpressShipper Section 1 Page 12 of 12
3.3: Installation (continued)
Setup (continued)
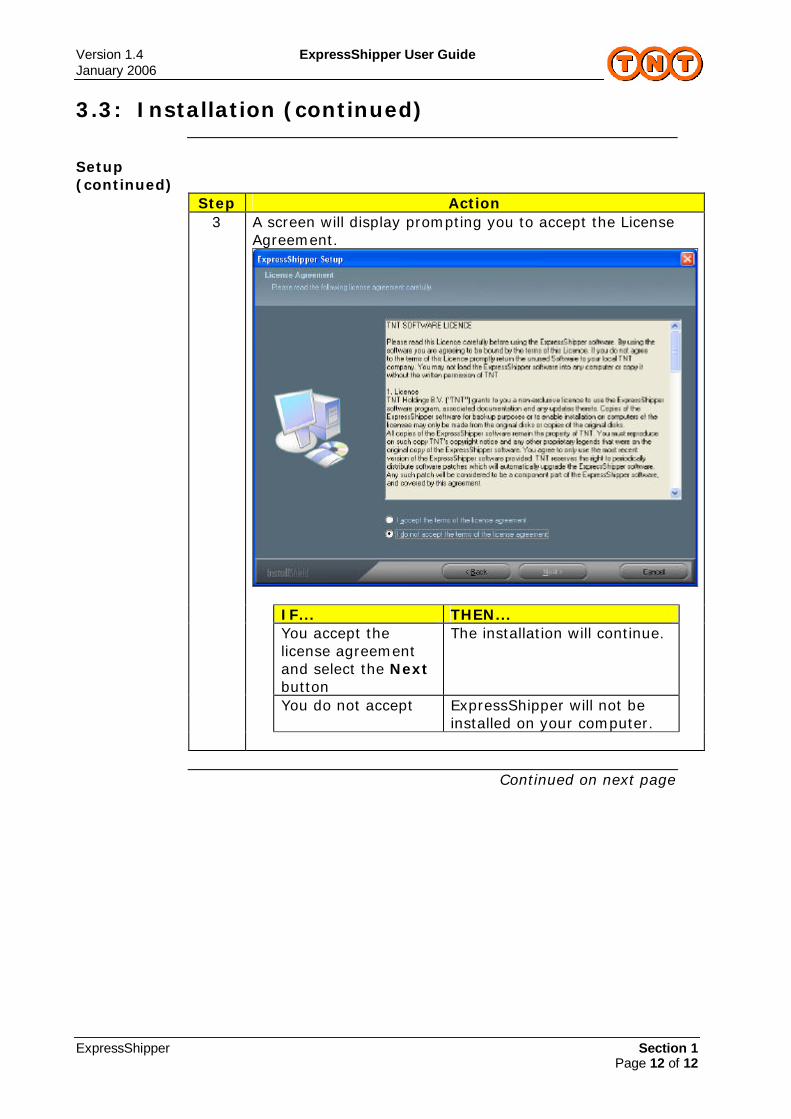
Step Action 3 A screen will display prompting you to accept the License
Agreement.
IF... THEN... You accept the
license agreement and select the Next button
The installation will continue.
You do not accept ExpressShipper will not be installed on your computer.
Continued on next page
Version 1.4 ExpressShipper User Guide January 2006
ExpressShipper Section 1 Page 13 of 13
3.3: Installation (continued)
Setup (continued)
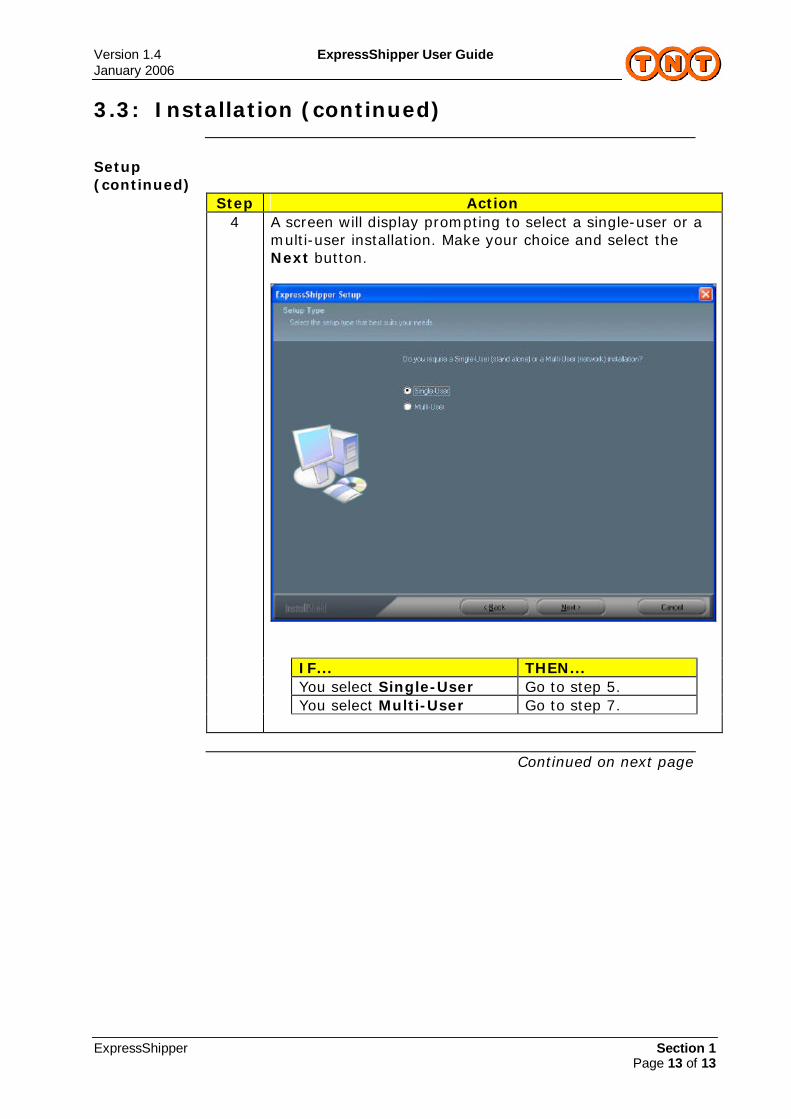
Step Action 4 A screen will display prompting to select a single-user or a
multi-user installation. Make your choice and select the Next button.
IF... THEN... You select Single-User Go to step 5. You select Multi-User Go to step 7.
Continued on next page

Version 1.4 ExpressShipper User Guide January 2006
ExpressShipper Section 1 Page 14 of 14
3.3: Installation (continued)
Setup (continued)
Step Action 5 A screen will display prompting to select a Standard or
Custom install. Make your choice and select the Next button.
IF... THEN... You select Standard Go to step 12. You select Custom Go to step 6.
Continued on next page

Version 1.4 ExpressShipper User Guide January 2006
ExpressShipper Section 1 Page 15 of 15
3.3: Installation (continued)
Setup (continued)
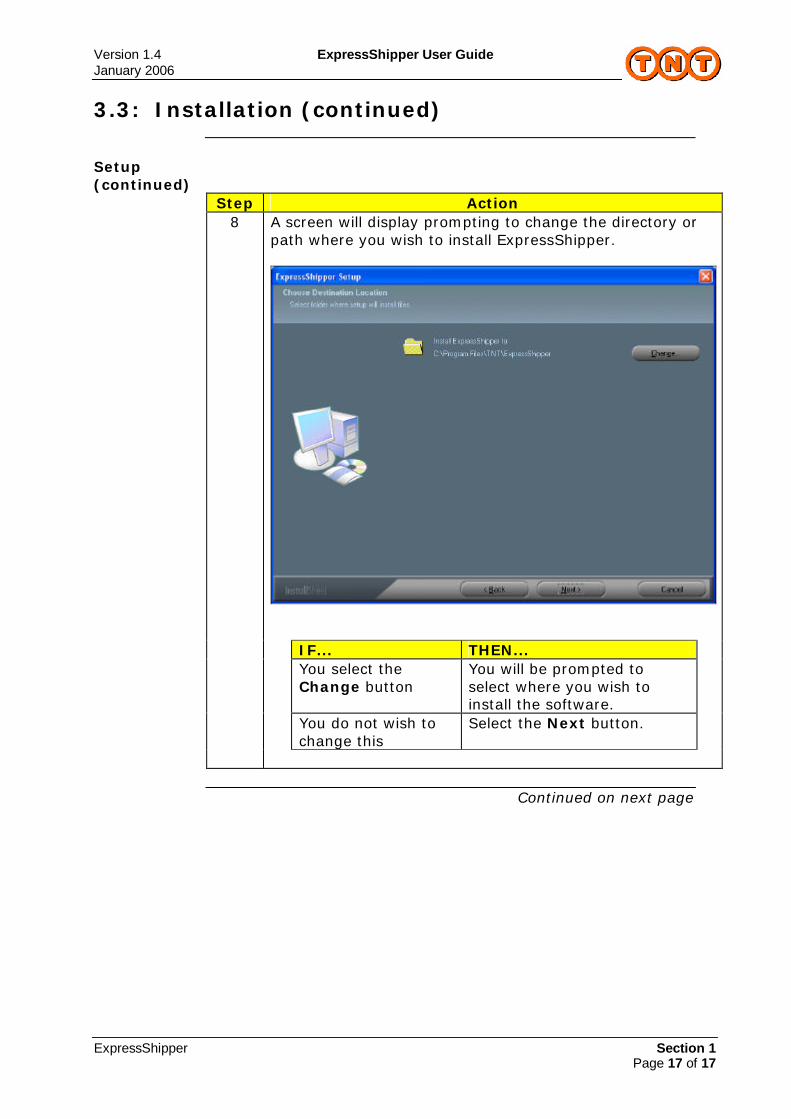
Step Action 6 A screen will display prompting to change the directory or
path where you wish to install ExpressShipper.
IF... THEN... You select the
Change button You will be prompted to select where you wish to install the software.
You do not wish to change this
Select the Next button.
You select Next Go to step 12.
Continued on next page
Version 1.4 ExpressShipper User Guide January 2006
ExpressShipper Section 1 Page 16 of 16
3.3: Installation (continued)
Setup (continued)
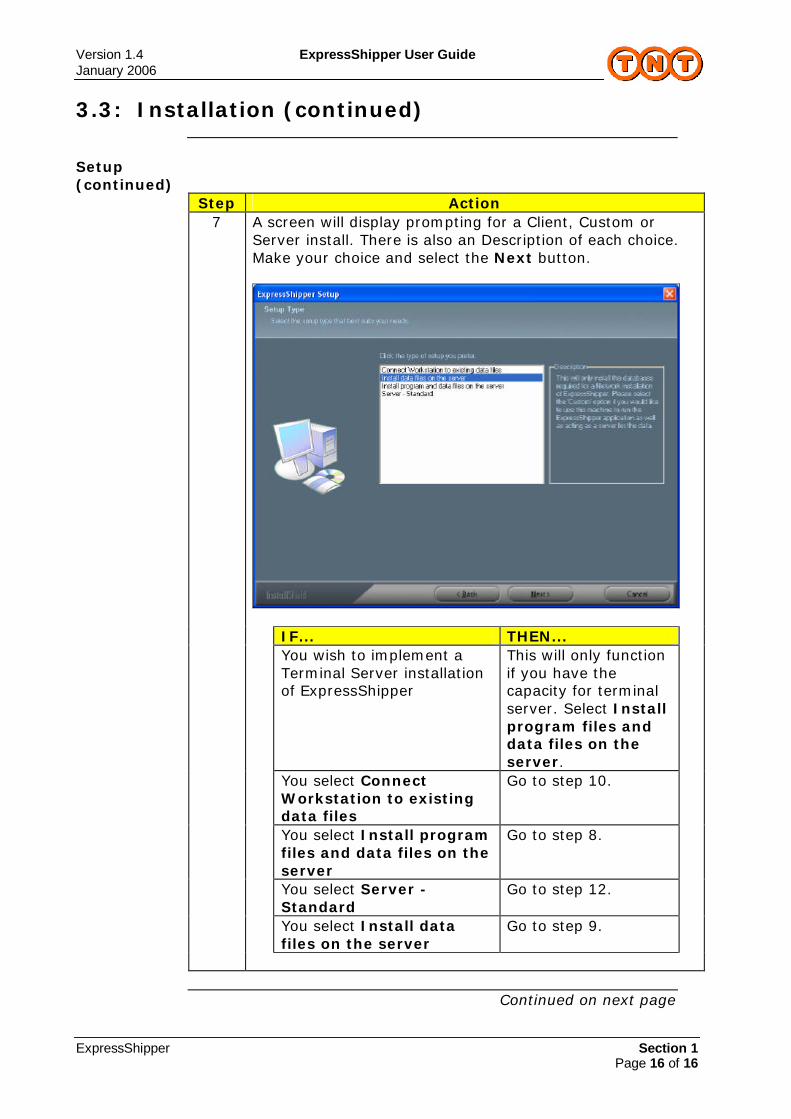
Step Action 7 A screen will display prompting for a Client, Custom or
Server install. There is also an Description of each choice. Make your choice and select the Next button.
IF... THEN... You wish to implement a
Terminal Server installation of ExpressShipper
This will only function if you have the capacity for terminal server. Select Install program files and data files on the server.
You select Connect Workstation to existing data files
Go to step 10.
You select Install program files and data files on the server
Go to step 8.
You select Server -Standard
Go to step 12.
You select Install data files on the server
Go to step 9.
Continued on next page
Version 1.4 ExpressShipper User Guide January 2006
ExpressShipper Section 1 Page 17 of 17
3.3: Installation (continued)
Setup (continued)
Step Action 8 A screen will display prompting to change the directory or
path where you wish to install ExpressShipper.
IF... THEN... You select the
Change button You will be prompted to select where you wish to install the software.
You do not wish to change this
Select the Next button.
Continued on next page

Version 1.4 ExpressShipper User Guide January 2006
ExpressShipper Section 1 Page 18 of 18
3.3: Installation (continued)
Setup (continued)
Step Action 9 A screen will display prompting to change the directory or
path where you wish to install ExpressShipper data files.
IF... THEN... You select the
Change button You will be prompted to select where you wish to install the data.
You are installing the data files as part of a network installation
Make sure that you install them to a shared folder or a directory on a network which is available to the other users on the system. They will also need administration rights to install a client system.
You do not wish to change this
Select the Next button.
You select Next Go to step 12.
Continued on next page

Version 1.4 ExpressShipper User Guide January 2006
ExpressShipper Section 1 Page 19 of 19
3.3: Installation (continued)
Setup (continued)
Step Action 10 A screen will display prompting to change the directory or
path where you wish to install ExpressShipper.
IF... THEN... You select the
Change button You will be prompted to select where you wish to install the software.
You do not wish to change this
Select the Next button.
Continued on next page

Version 1.4 ExpressShipper User Guide January 2006
ExpressShipper Section 1 Page 20 of 20
3.3: Installation (continued)
Setup (continued)
Step Action 11 A screen will display prompting to search for the
ExpressShipper data files. You can use this to connect to a set of shared data files on a server, or a networked machine. Once you have selected the data files select OK.
IF... THEN... No data files have
been installed You will not be able to complete the installation until the data provider has completed an installation. See step 6 for details.
You do not wish to change this
Select the Cancel button.
You select Next Go to step 12.
Continued on next page
Version 1.4 ExpressShipper User Guide January 2006
ExpressShipper Section 1 Page 21 of 21
3.3: Installation (continued)
Setup (continued)
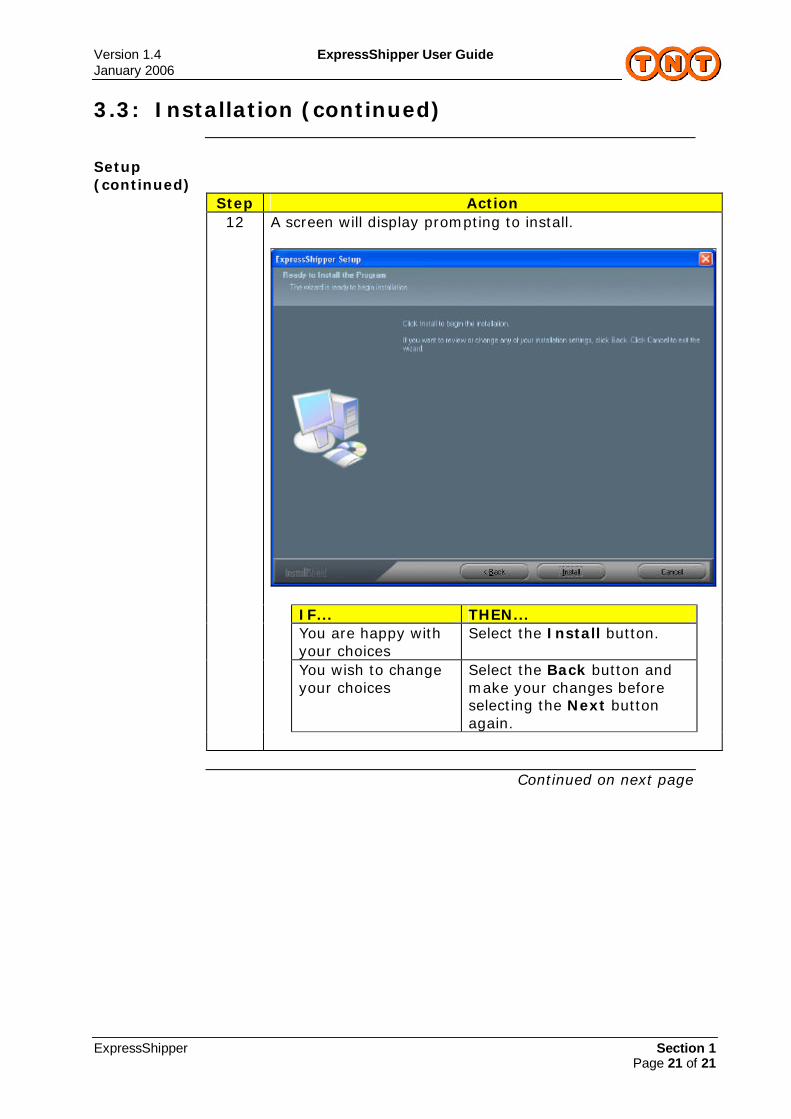
Step Action 12 A screen will display prompting to install.
IF... THEN... You are happy with
your choices Select the Install button.
You wish to change your choices
Select the Back button and make your changes before selecting the Next button again.
Continued on next page
Version 1.4 ExpressShipper User Guide January 2006
ExpressShipper Section 1 Page 22 of 22
3.3: Installation (continued)
Setup (continued)
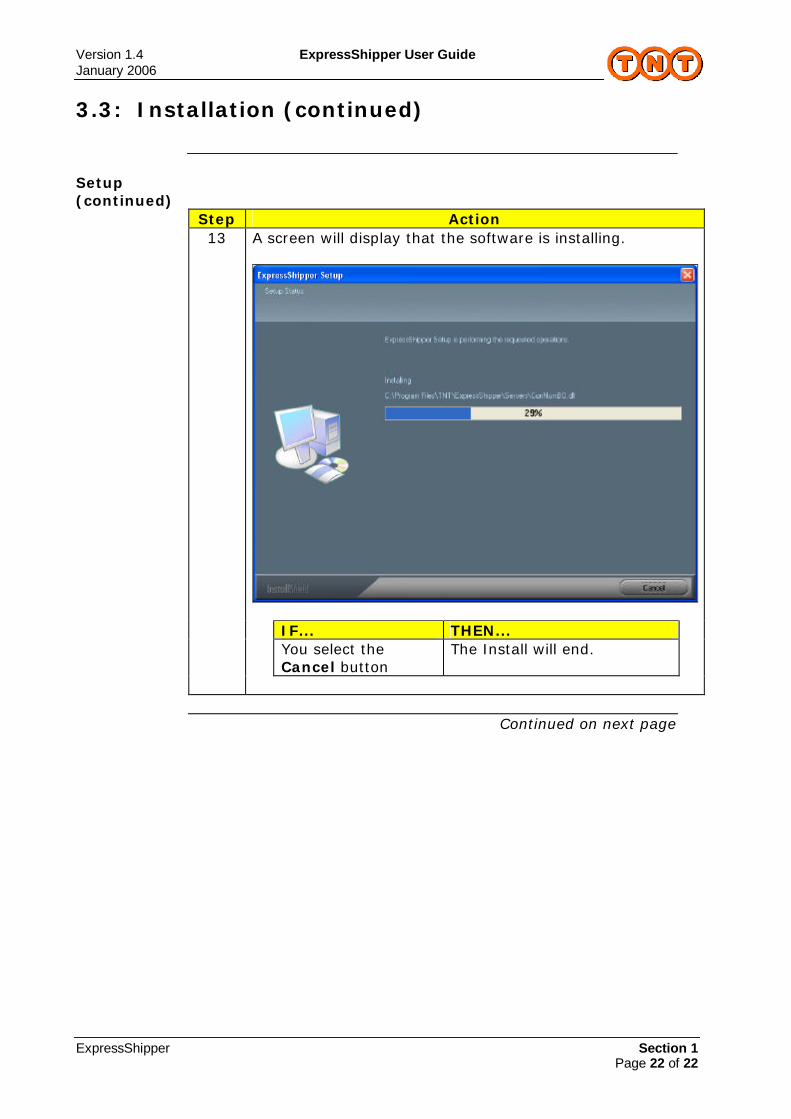
Step Action 13 A screen will display that the software is installing.
IF... THEN... You select the
Cancel button The Install will end.
Continued on next page
Version 1.4 ExpressShipper User Guide January 2006
ExpressShipper Section 1 Page 23 of 23
3.3: Installation (continued)
Setup (continued)
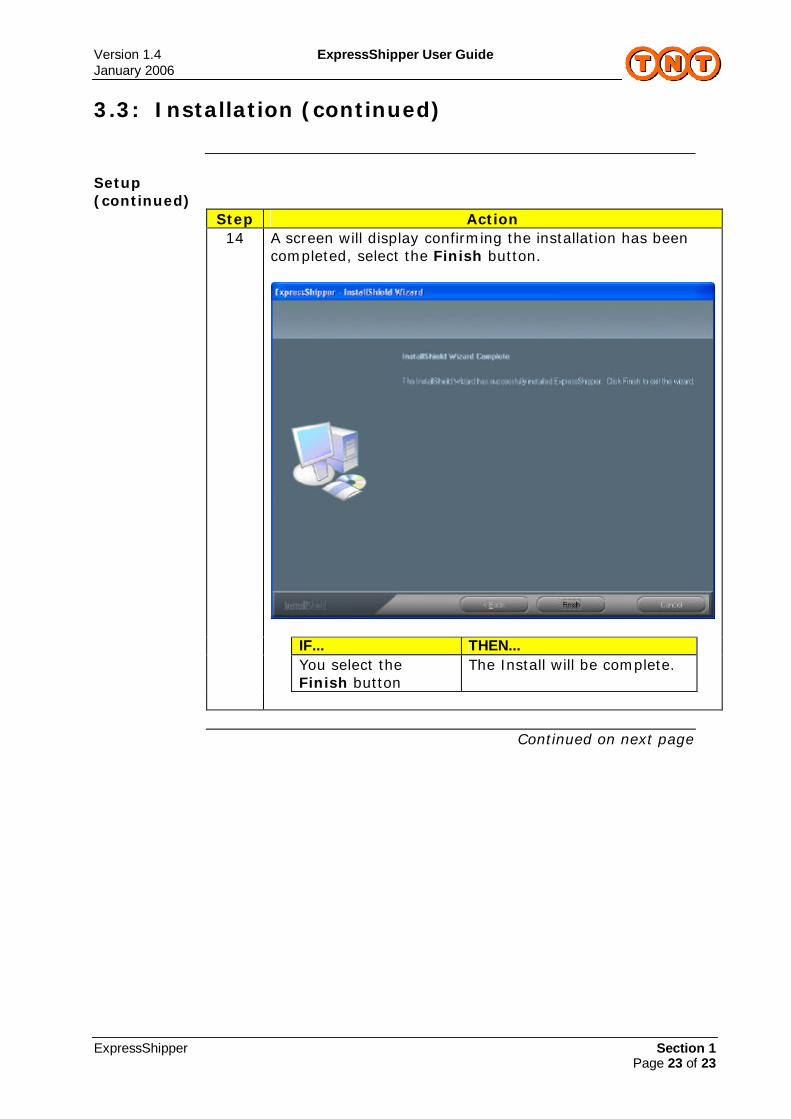
Step Action 14 A screen will display confirming the installation has been
completed, select the Finish button.
IF... THEN... You select the
Finish button The Install will be complete.
Continued on next page

Version 1.4 ExpressShipper User Guide January 2006
ExpressShipper Section 1 Page 24 of 24
3.3: Installation (continued)
Setup (continued)
Step Action 15 ExpressShipper can be opened from
Start>Programs>TNT>ExpressShipper or by clicking on the desktop icon. This screen will be displayed.
IF... THEN... You have not
registered This software will not function correctly. Follow the procedures in Section 3.4 (Registration).
Version 1.4 ExpressShipper User Guide January 2006
ExpressShipper Section 1 Page 25 of 25
3.4: Registration
Registration
Register ExpressShipper in order for it to function correctly.
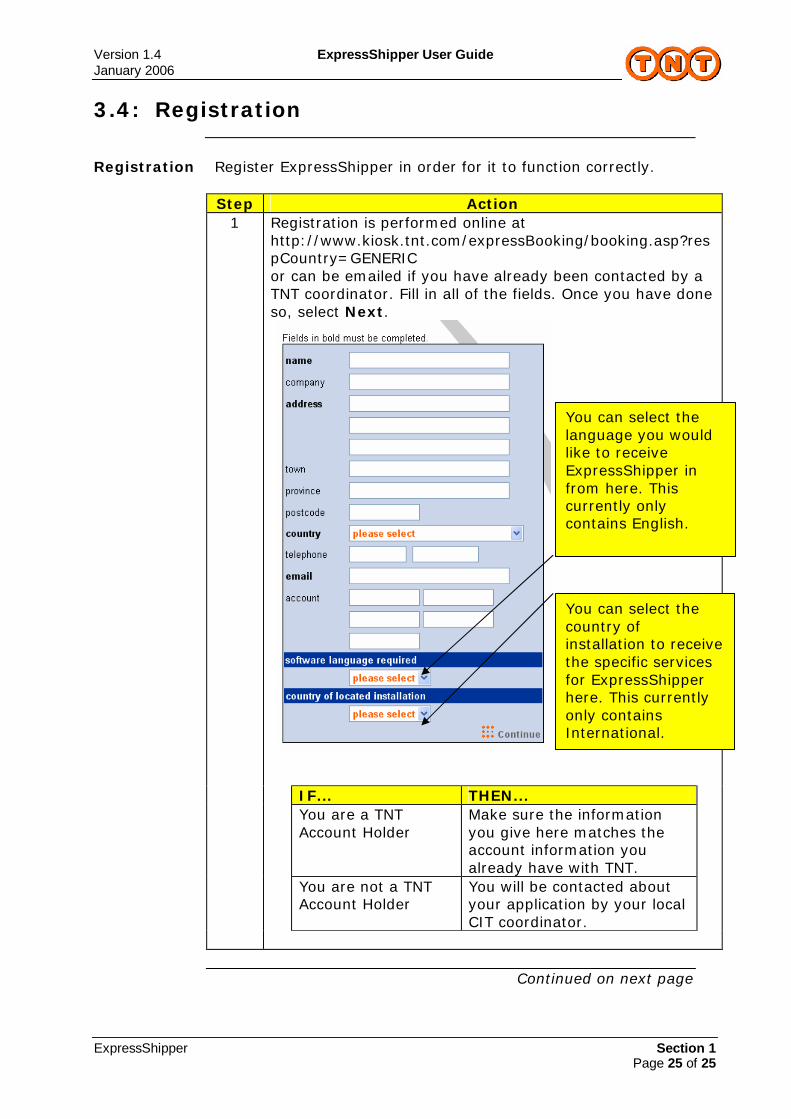
Step Action 1 Registration is performed online at
http://www.kiosk.tnt.com/expressBooking/booking.asp?respCountry=GENERIC or can be emailed if you have already been contacted by a TNT coordinator. Fill in all of the fields. Once you have done so, select Next.
IF... THEN... You are a TNT
Account Holder Make sure the information you give here matches the account information you already have with TNT.
You are not a TNT Account Holder
You will be contacted about your application by your local CIT coordinator.
Continued on next page
You can select the language you would like to receive ExpressShipper in from here. This currently only contains English.
You can select the country of installation to receive the specific services for ExpressShipper here. This currently only contains International.
Version 1.4 ExpressShipper User Guide January 2006
ExpressShipper Section 1 Page 26 of 26
3.4: Registration (continued)
Registration (Continued)
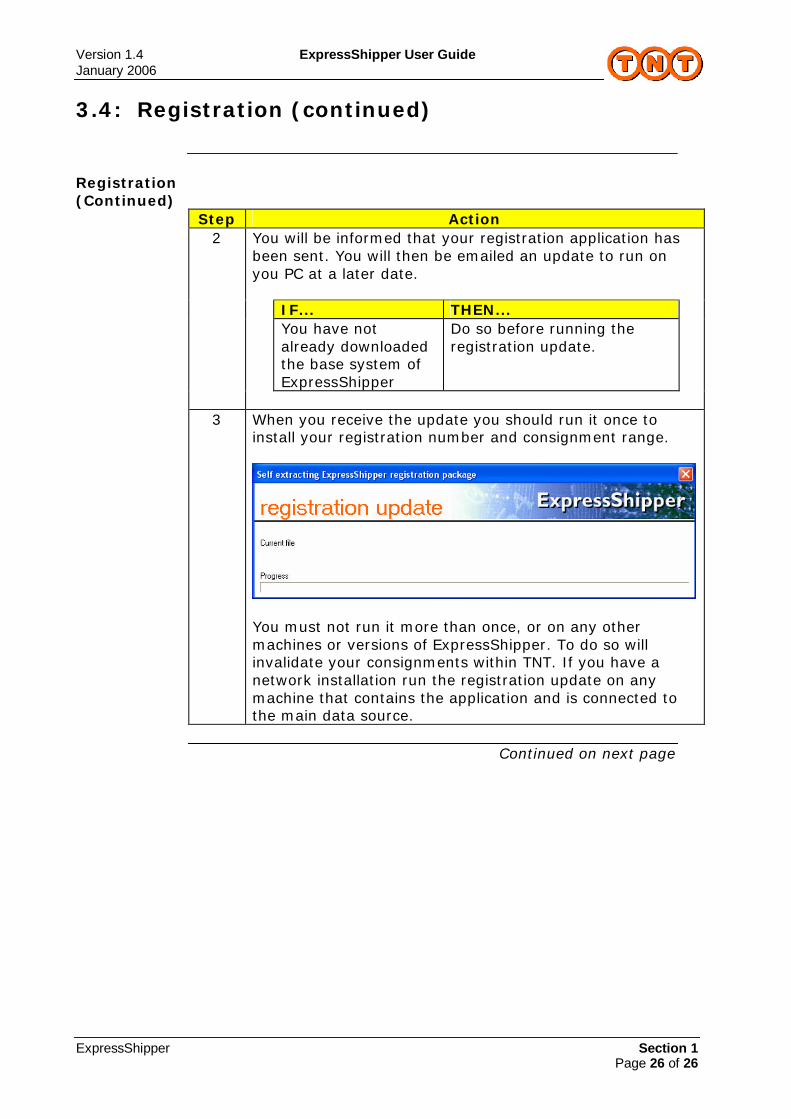
Step Action 2 You will be informed that your registration application has
been sent. You will then be emailed an update to run on you PC at a later date.
IF... THEN... You have not
already downloaded the base system of ExpressShipper
Do so before running the registration update.
3 When you receive the update you should run it once to
install your registration number and consignment range.
You must not run it more than once, or on any other machines or versions of ExpressShipper. To do so will invalidate your consignments within TNT. If you have a network installation run the registration update on any machine that contains the application and is connected to the main data source.
Continued on next page

Version 1.4 ExpressShipper User Guide January 2006
ExpressShipper Section 1 Page 27 of 27
3.5: Updates
Updates
Once you have a registered version of ExpressShipper, you can get updates via the web. Step Action
1 You can reach updates by selecting ExpressShipper Update from the menu. You are also prompted to check for updates during installation.
2 Your PC will connect to the web. You may need to enter a username and password for your internet account. A Welcome screen will display prompting you to Show Updates.
IF... THEN... You select Show Updates Go to step 3. You select About Update
Service Go to Step 5.
You select Help Go to Step 6.
Continued on next page

Version 1.4 ExpressShipper User Guide January 2006
ExpressShipper Section 1 Page 28 of 28
3.5: Updates (continued)
Updates (continued)
Step Action 3 A screen will display showing available updates. You will be
prompted to Get Update.
IF... THEN... You select Get Update Go to Step 4. You select About Update
Service Go to Step 5.
You select Help Go to Step 6.
Continued on next page

Version 1.4 ExpressShipper User Guide January 2006
ExpressShipper Section 1 Page 29 of 29
3.5: Updates (continued)
Updates (continued)
Step Action 4 A screen will display further information about the selected
update. You will be prompted to Install.
IF... THEN... You select Install Go to Step 7. You select About Update
Service Go to Step 5.
You select Help Go to Step 6.
Continued on next page
Version 1.4 ExpressShipper User Guide January 2006
ExpressShipper Section 1 Page 30 of 30
3.5: Updates (continued)
Updates (continued)
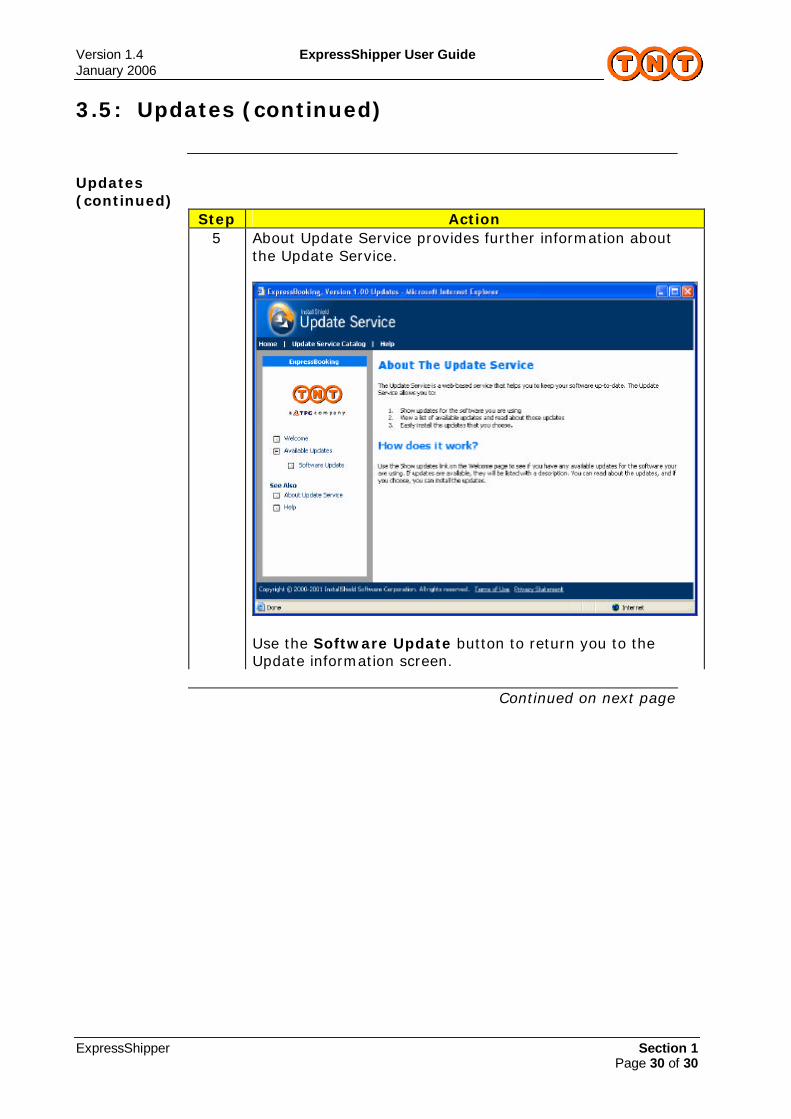
Step Action 5 About Update Service provides further information about
the Update Service.
Use the Software Update button to return you to the Update information screen.
Continued on next page

Version 1.4 ExpressShipper User Guide January 2006
ExpressShipper Section 1 Page 31 of 31
3.5: Updates (continued)
Updates (continued)
Step Action 6 If you select Help a pop-up help window will appear.
7 Following on from step 4, when you select the Install button it will prompt you to save the update to your PC or run from present location.

Version 1.4 ExpressShipper User Guide January 2006
ExpressShipper Section 1 Page 32 of 32
3.6: Functional Overview
Summary The Functional overview aims to list all screens and functions that
can be accessed by users with details on how to use them. The system is not restricted by any security, so if ExpressShipper is installed, all the screens below will be available to the user. You can navigate round ExpressShipper using mouse clicks, or by using the tab and return keys.
The consignment
The concept of a consignment is key to the process followed by ExpressShipper. A consignment should contain all the information required to send something from one place to another via TNT. It can be a document or non-document and should include details about any receiver, sender, collection or delivery addresses. A consignment should also note how many packages are being sent, who pays and the TNT account number used. Once all the details are entered for a consignment it is allocated a unique consignment number, which can be used for tracking.
Continued on next page

Version 1.4 ExpressShipper User Guide January 2006
ExpressShipper Section 1 Page 33 of 33
3.6: Functional Overview
Shipping Manager
Shipping Manager is the main screen of ExpressShipper. From here you can manage all of your shipping tasks. To help you to view your consignments, you can re-order them in the view panel by clicking on the column heading. You also have the ability to limit the list of consignments displayed by using the date range filter located in the top right hand corner of the screen. This filter applies to all consignments created, but does not apply to templates. The list of consignments can be further refined to only display consignments of a certain status. This is achieved using the check boxes located underneath the consignment list.
To search, highlight the column that contains the text to be found for example, Customer Reference. Then enter the text you wish to find and click Search or press Enter.
Continued on next page
Version 1.4 ExpressShipper User Guide January 2006
ExpressShipper Section 1 Page 34 of 34
3.6: Functional Overview (continued)
Summary The following options are available from within Shipping Manager.
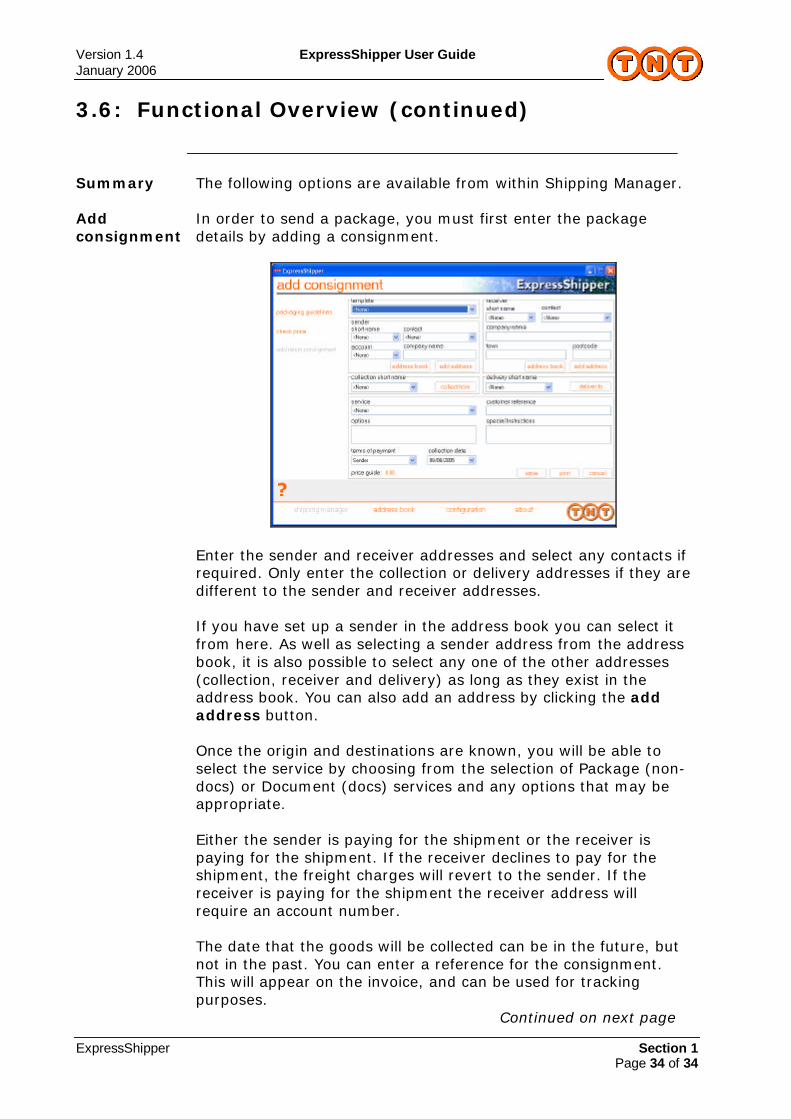
Add consignment
In order to send a package, you must first enter the package details by adding a consignment.
Enter the sender and receiver addresses and select any contacts if required. Only enter the collection or delivery addresses if they are different to the sender and receiver addresses. If you have set up a sender in the address book you can select it from here. As well as selecting a sender address from the address book, it is also possible to select any one of the other addresses (collection, receiver and delivery) as long as they exist in the address book. You can also add an address by clicking the add address button. Once the origin and destinations are known, you will be able to select the service by choosing from the selection of Package (non-docs) or Document (docs) services and any options that may be appropriate. Either the sender is paying for the shipment or the receiver is paying for the shipment. If the receiver declines to pay for the shipment, the freight charges will revert to the sender. If the receiver is paying for the shipment the receiver address will require an account number. The date that the goods will be collected can be in the future, but not in the past. You can enter a reference for the consignment. This will appear on the invoice, and can be used for tracking purposes.
Continued on next page
Version 1.4 ExpressShipper User Guide January 2006
ExpressShipper Section 1 Page 35 of 35
3.6: Functional Overview (continued)
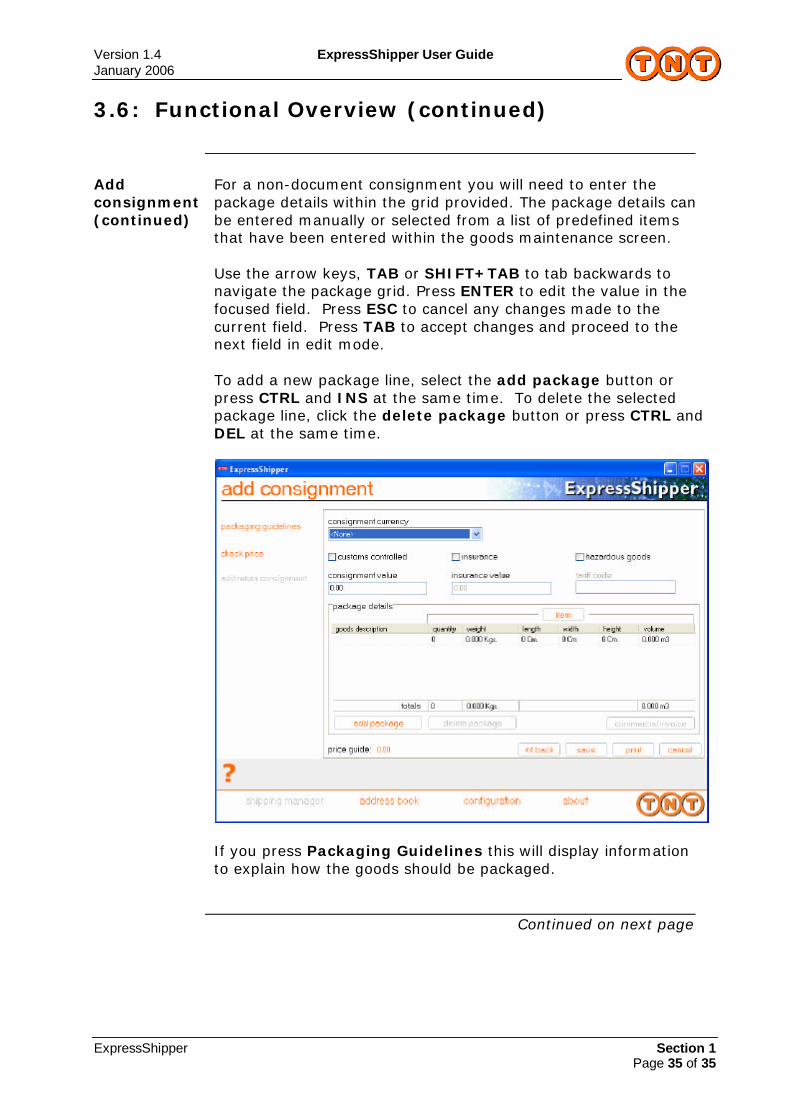
Add consignment (continued)
For a non-document consignment you will need to enter the package details within the grid provided. The package details can be entered manually or selected from a list of predefined items that have been entered within the goods maintenance screen. Use the arrow keys, TAB or SHIFT+TAB to tab backwards to navigate the package grid. Press ENTER to edit the value in the focused field. Press ESC to cancel any changes made to the current field. Press TAB to accept changes and proceed to the next field in edit mode. To add a new package line, select the add package button or press CTRL and INS at the same time. To delete the selected package line, click the delete package button or press CTRL and DEL at the same time.
If you press Packaging Guidelines this will display information to explain how the goods should be packaged.
Continued on next page

Version 1.4 ExpressShipper User Guide January 2006
ExpressShipper Section 1 Page 36 of 36
3.6: Functional Overview (continued)
Add consignment (continued)
Pressing the check price, once you have entered your consignment details will bring back your price based on your account details.
If your account details are not set up then the standard rates will apply.
Continued on next page

Version 1.4 ExpressShipper User Guide January 2006
ExpressShipper Section 1 Page 37 of 37
3.6: Functional Overview (continued)
Add consignment (continued)
By saving the consignment you will be allocated a consignment number and the consignment will appear on the Shipping Manager Screen. If the consignment requires a commercial invoice and your commercial invoice is enabled then you will see this message:
If you choose to prepare a commercial invoice then you will be taken to the commercial invoice screen as below. If you do not wish to prepare a commercial invoice then one will not be printed. Pressing commercial invoice will take you to the commercial invoice screen.
You will be invited to enter details regarding the invoice, including your article details, which are mandatory for some destinations. If articles are mandatory then one will have been defaulted for you based on the package details entered. You can edit this article if you wish the information to be different from that held against the package.
Continued on next page
Version 1.4 ExpressShipper User Guide January 2006
ExpressShipper Section 1 Page 38 of 38
3.6: Functional Overview (continued)
Add consignment (continued)
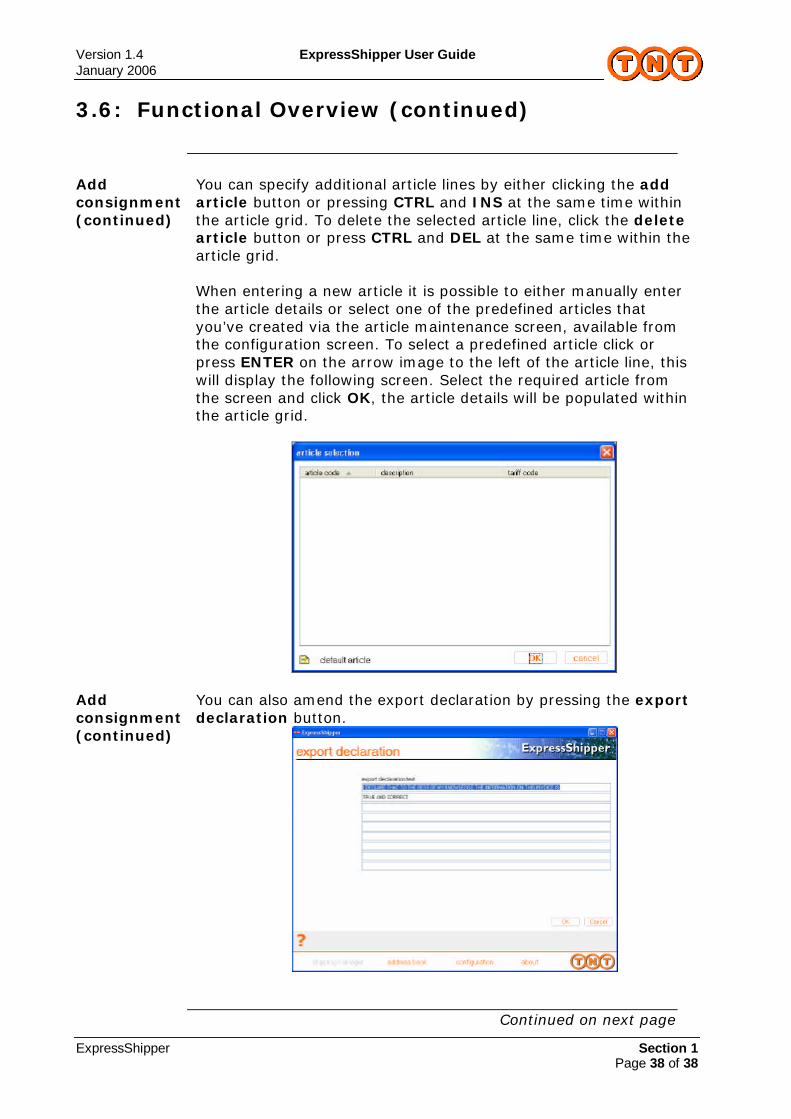
You can specify additional article lines by either clicking the add article button or pressing CTRL and INS at the same time within the article grid. To delete the selected article line, click the delete article button or press CTRL and DEL at the same time within the article grid. When entering a new article it is possible to either manually enter the article details or select one of the predefined articles that you’ve created via the article maintenance screen, available from the configuration screen. To select a predefined article click or press ENTER on the arrow image to the left of the article line, this will display the following screen. Select the required article from the screen and click OK, the article details will be populated within the article grid.
Add consignment (continued)
You can also amend the export declaration by pressing the export declaration button.
Continued on next page
Version 1.4 ExpressShipper User Guide January 2006
ExpressShipper Section 1 Page 39 of 39
3.6: Functional Overview (continued)
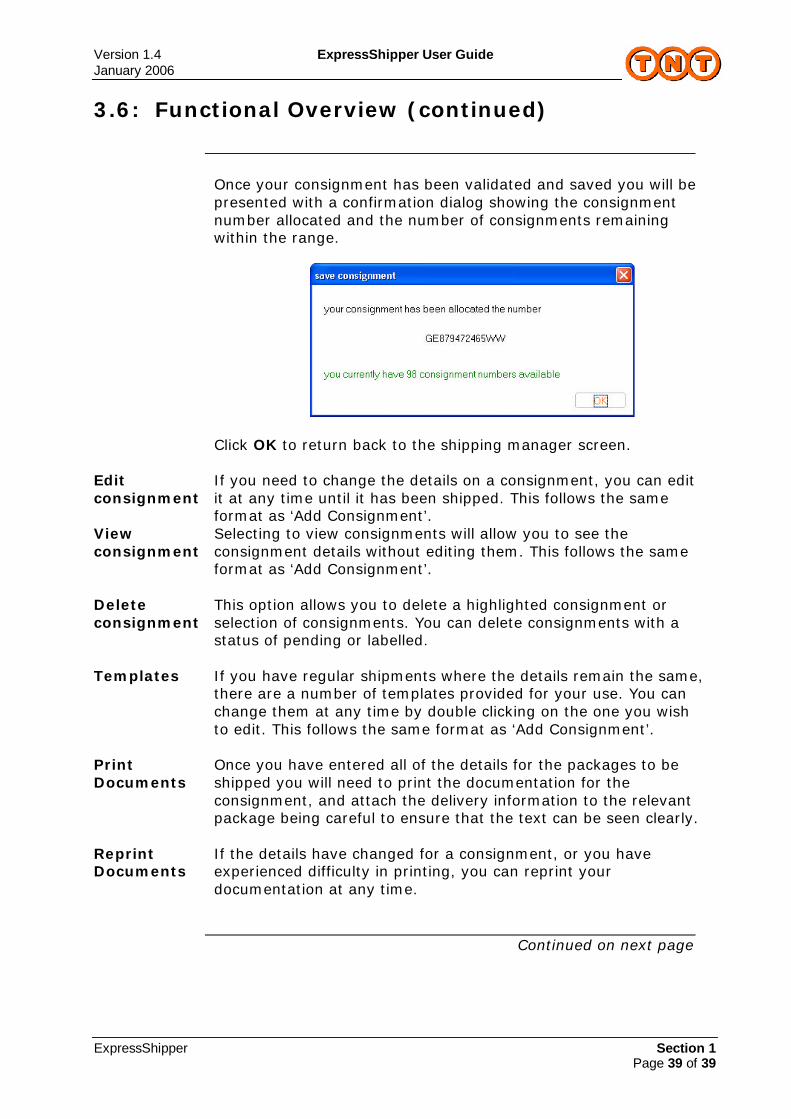
Once your consignment has been validated and saved you will be
presented with a confirmation dialog showing the consignment number allocated and the number of consignments remaining within the range.
Click OK to return back to the shipping manager screen.
Edit consignment
If you need to change the details on a consignment, you can edit it at any time until it has been shipped. This follows the same format as ‘Add Consignment’.
View consignment
Selecting to view consignments will allow you to see the consignment details without editing them. This follows the same format as ‘Add Consignment’.
Delete consignment
This option allows you to delete a highlighted consignment or selection of consignments. You can delete consignments with a status of pending or labelled.
Templates If you have regular shipments where the details remain the same, there are a number of templates provided for your use. You can change them at any time by double clicking on the one you wish to edit. This follows the same format as ‘Add Consignment’.
Print Documents
Once you have entered all of the details for the packages to be shipped you will need to print the documentation for the consignment, and attach the delivery information to the relevant package being careful to ensure that the text can be seen clearly.
Reprint Documents
If the details have changed for a consignment, or you have experienced difficulty in printing, you can reprint your documentation at any time.
Continued on next page
Version 1.4 ExpressShipper User Guide January 2006
ExpressShipper Section 1 Page 40 of 40
3.6: Functional Overview (continued)
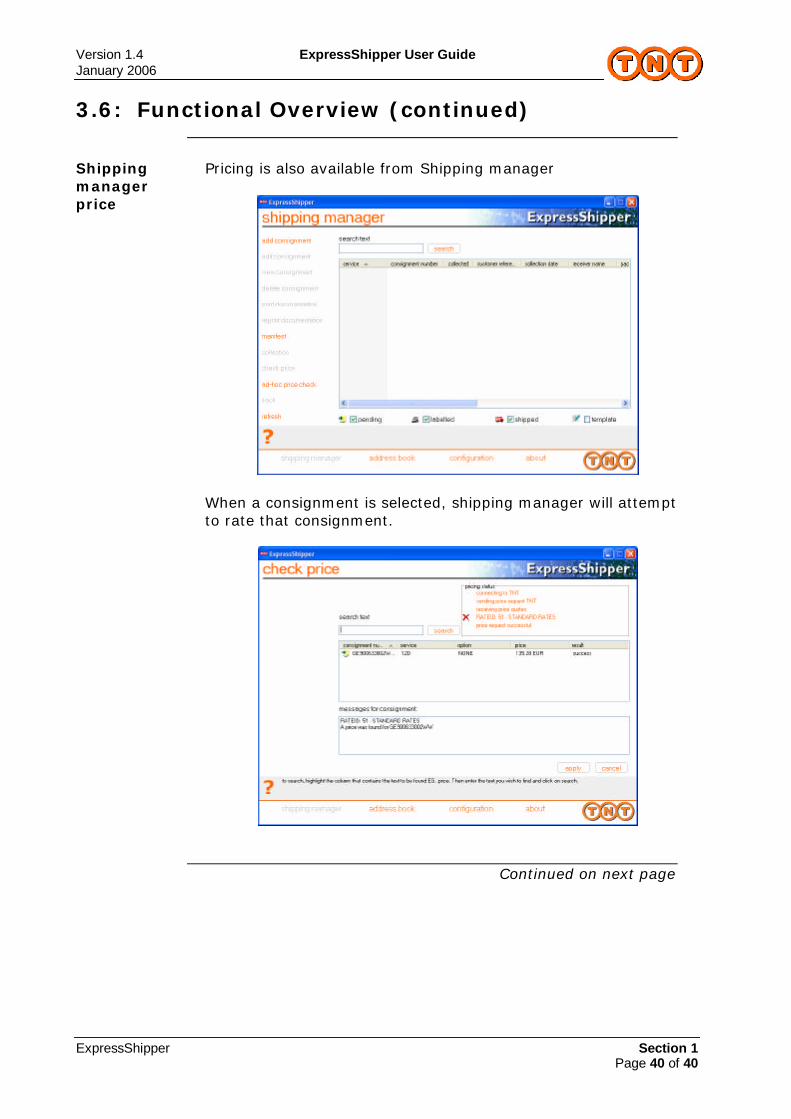
Shipping manager price
Pricing is also available from Shipping manager
When a consignment is selected, shipping manager will attempt to rate that consignment.
Continued on next page
Version 1.4 ExpressShipper User Guide January 2006
ExpressShipper Section 1 Page 41 of 41
3.6: Functional Overview (continued)
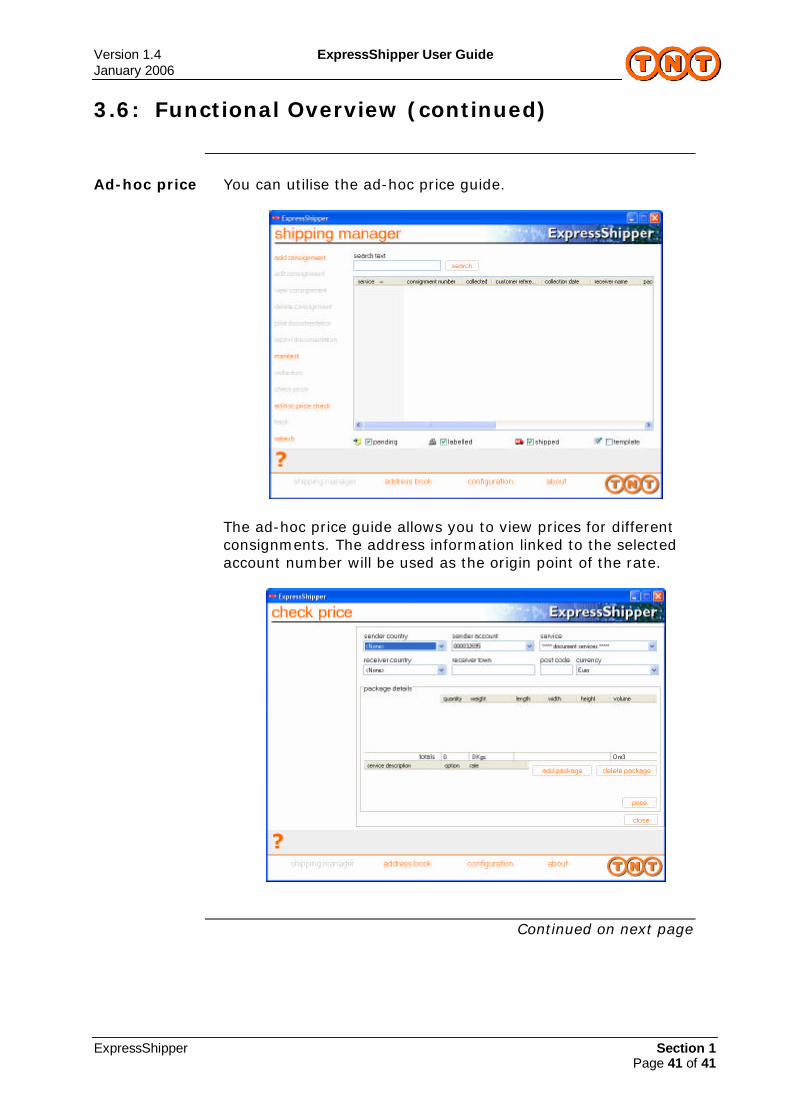
Ad-hoc price You can utilise the ad-hoc price guide.
The ad-hoc price guide allows you to view prices for different consignments. The address information linked to the selected account number will be used as the origin point of the rate.
Continued on next page

Version 1.4 ExpressShipper User Guide January 2006
ExpressShipper Section 1 Page 42 of 42
3.6: Functional Overview (continued)
Manifest Before the TNT driver arrives to collect your consignment, you will
need to print off the manifest, and hand it to the driver on their arrival. From the manifest screen, you now have the option to send data to TNT.
If this is selected, ExpressShipper will attempt to send data to TNT regarding the manifested consignments.
If you have the correct configuration, you will also be able to raise collections from this screen.
You now have the ability to specify collection instructions when requesting a pickup. A booking confirmation email will also be despatched if this option is selected within the connectivity configuration.
Continued on next page

Version 1.4 ExpressShipper User Guide January 2006
ExpressShipper Section 1 Page 43 of 43
3.6: Functional Overview (continued)
Add return consignment
If you are a customer authorised to operate the Returns Process, you can select (at the point of creating the original collection) a set of Returns documents to initiate a possible returning of the goods. You can edit these details if you need to, and can save or cancel any amendments you make. If you select the Add return consignment option this enables you to create a return consignment.
If the return consignment check box has previously been selected, the add return consignment option becomes the edit return consignment option. The edit returns screen shows the return consignment number associated with the return. If a return consignment request exists for a consignment and you no longer require it, you can select the delete return consignment from the edit consignment screen.
Continued on next page
Version 1.4 ExpressShipper User Guide January 2006
ExpressShipper Section 1 Page 44 of 44
3.6: Functional Overview (continued)
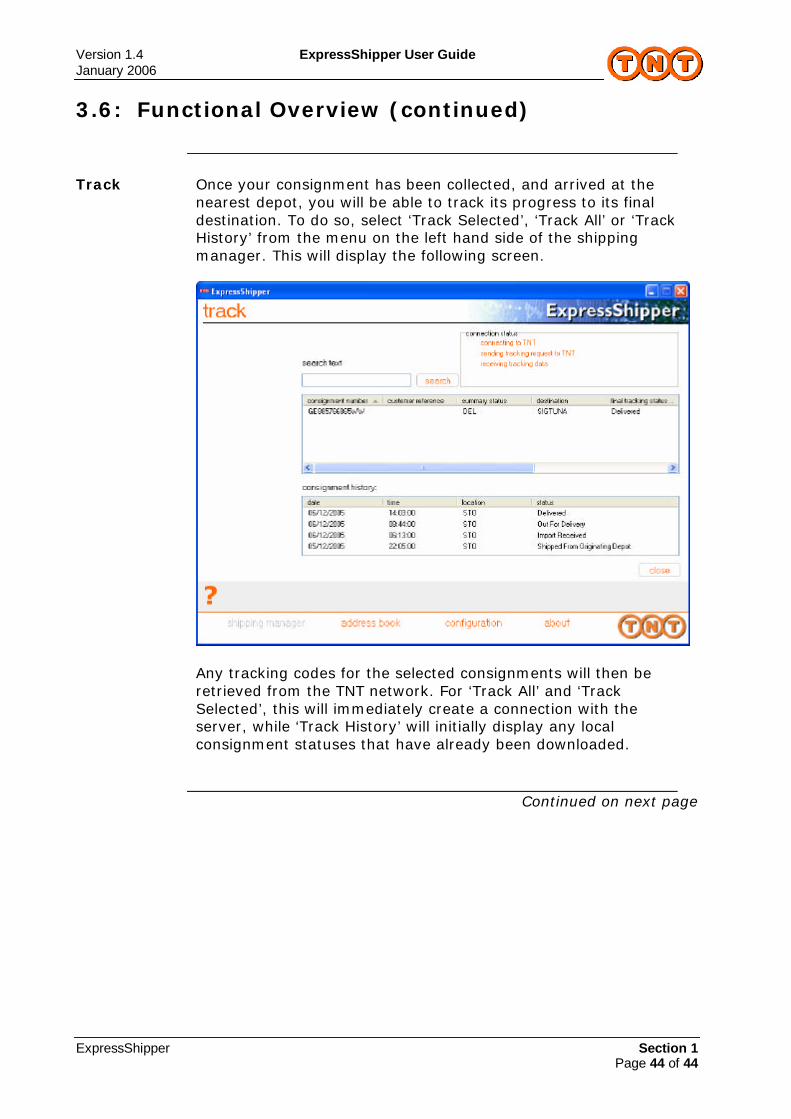
Track Once your consignment has been collected, and arrived at the
nearest depot, you will be able to track its progress to its final destination. To do so, select ‘Track Selected’, ‘Track All’ or ‘Track History’ from the menu on the left hand side of the shipping manager. This will display the following screen.
Any tracking codes for the selected consignments will then be retrieved from the TNT network. For ‘Track All’ and ‘Track Selected’, this will immediately create a connection with the server, while ‘Track History’ will initially display any local consignment statuses that have already been downloaded.
Continued on next page
Version 1.4 ExpressShipper User Guide January 2006
ExpressShipper Section 1 Page 45 of 45
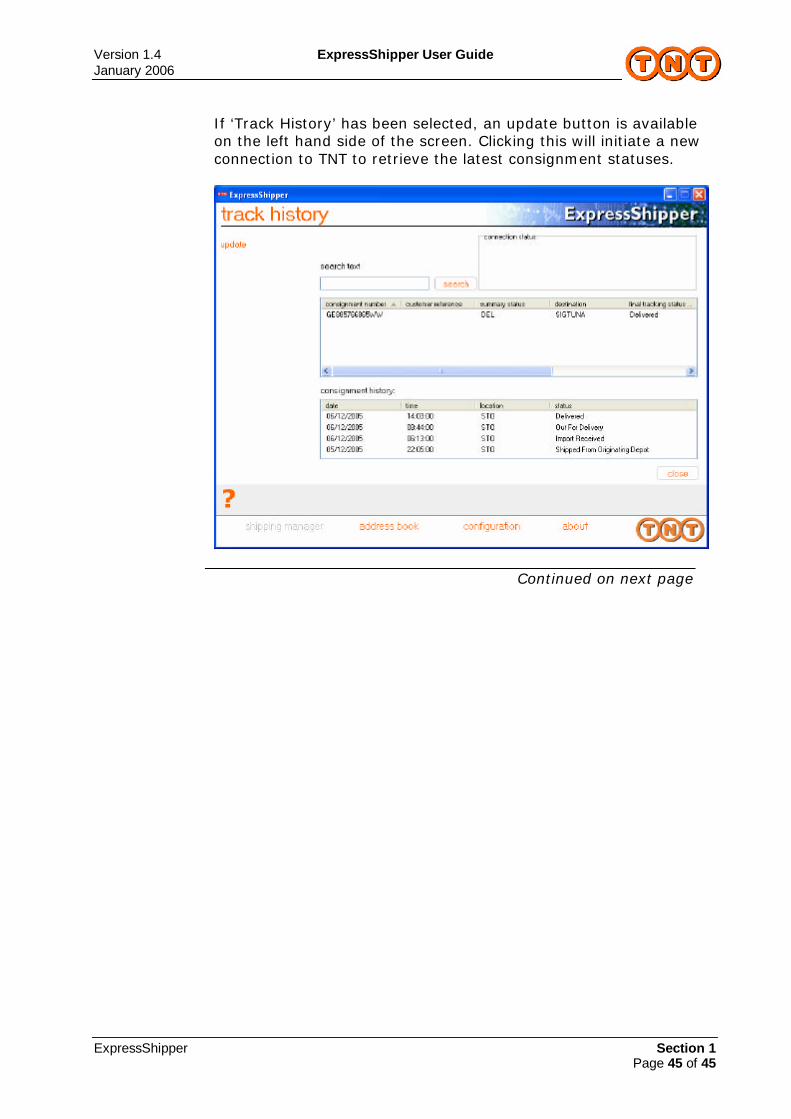
If ‘Track History’ has been selected, an update button is available
on the left hand side of the screen. Clicking this will initiate a new connection to TNT to retrieve the latest consignment statuses.
Continued on next page
Version 1.4 ExpressShipper User Guide January 2006
ExpressShipper Section 1 Page 46 of 46
3.6: Functional Overview (continued)
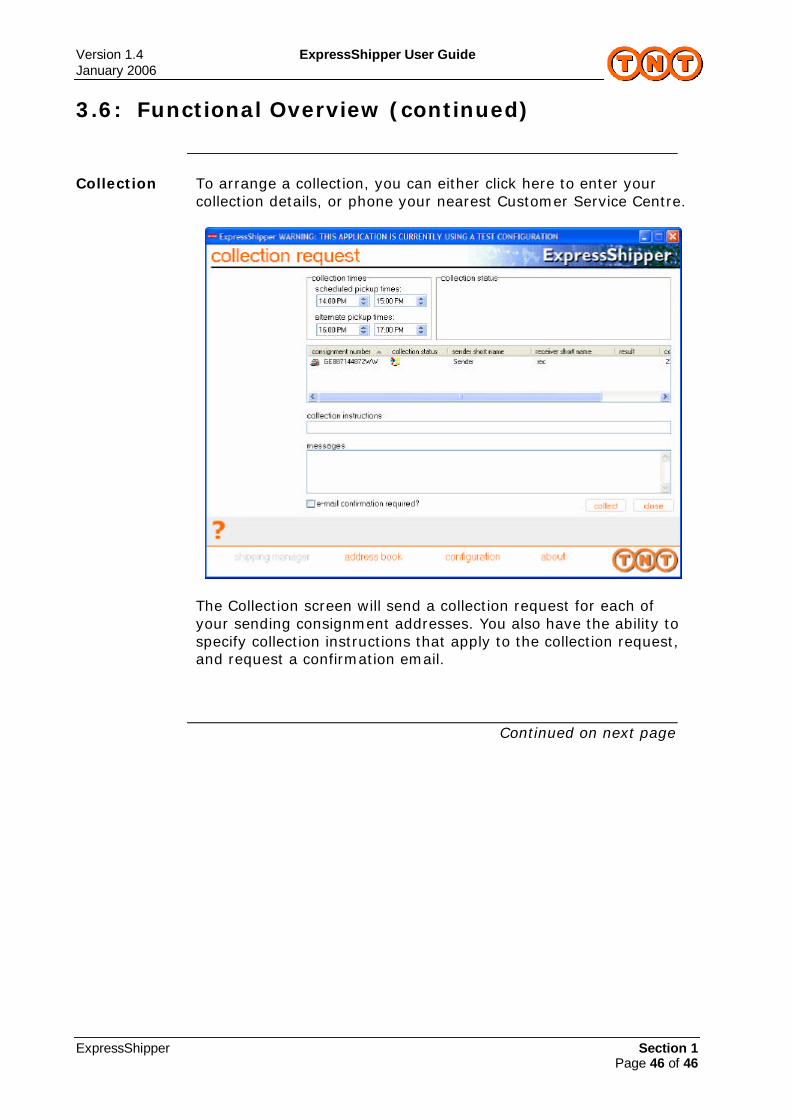
Collection To arrange a collection, you can either click here to enter your
collection details, or phone your nearest Customer Service Centre.
The Collection screen will send a collection request for each of your sending consignment addresses. You also have the ability to specify collection instructions that apply to the collection request, and request a confirmation email.
Continued on next page
Version 1.4 ExpressShipper User Guide January 2006
ExpressShipper Section 1 Page 47 of 47
3.6: Functional Overview (continued)
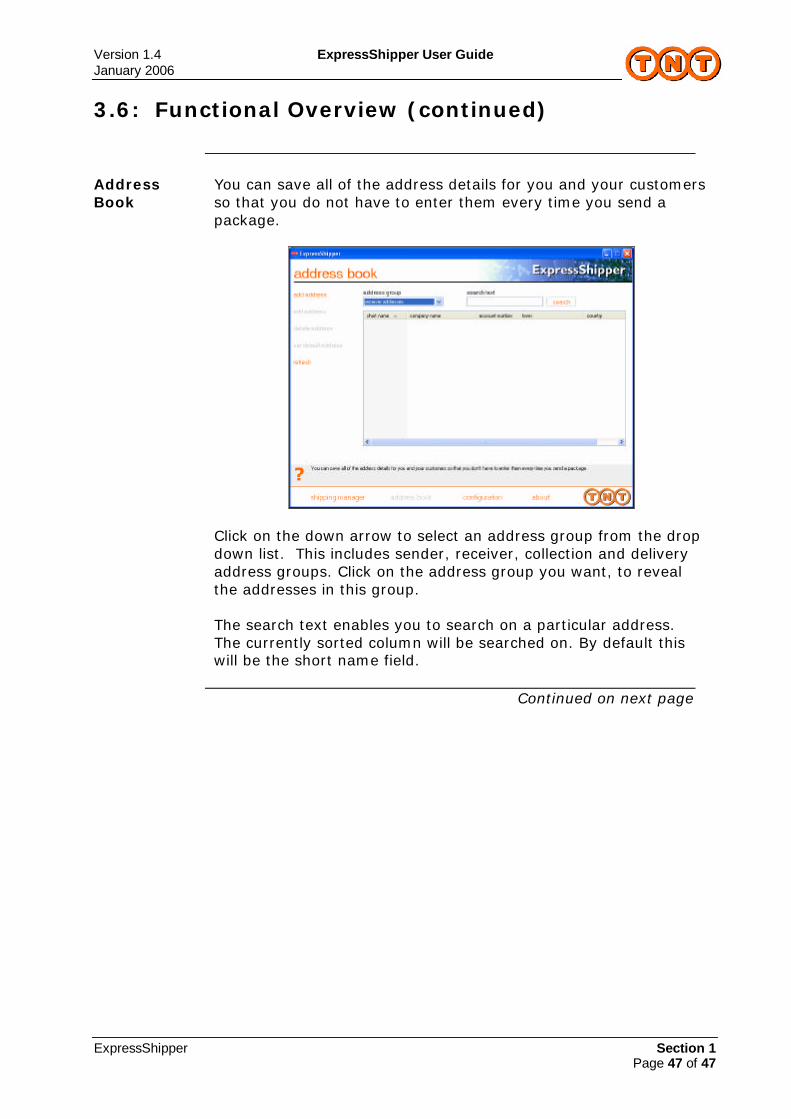
Address Book
You can save all of the address details for you and your customers so that you do not have to enter them every time you send a package.
Click on the down arrow to select an address group from the drop down list. This includes sender, receiver, collection and delivery address groups. Click on the address group you want, to reveal the addresses in this group. The search text enables you to search on a particular address. The currently sorted column will be searched on. By default this will be the short name field.
Continued on next page

Version 1.4 ExpressShipper User Guide January 2006
ExpressShipper Section 1 Page 48 of 48
3.6: Functional Overview (continued) Summary The following options are available from within the Address Book.
Add Address Select add address and this will take you to the add address
screen to add a new address to your address book. Highlighting an address group, will determine which address group the new address belongs to.
A short name is given by you to a record which can then be used as a quick method of locating the record. The short name can be an abbreviation, keyword or code that will uniquely identify the record. To define multiple contacts for an address click the manage contacts button to invoke the contact maintenance screen. You can set the default contact be selecting the appropriate entry in the contact name list. To cancel the adding of an address click cancel and this will return you to the address book. The address will not be added. Once the necessary fields have been completed, click OK to confirm and add the address.
Edit Address Highlight an address and click on edit and this will take you to the edit address screen which will enable you to change the address details of the selected address. This follows the same format as ‘Add Address’.
Delete Address
Highlight your address and click Delete to delete an address from your address book. To delete multiple addresses, depress the CTRL key and click on all the addresses you would like to delete. Once you have highlighted the addresses click Delete.
Continued on next page

Version 1.4 ExpressShipper User Guide January 2006
ExpressShipper Section 1 Page 49 of 49
3.6: Functional Overview (continued)
Default address
In the sender address group you can select one address to be your default sender. Also you can change your default sender by highlighting the address you would like to set as your default sender and then clicking on the set default sender option. If the highlighted sender address is the default the option displayed on the left hand side will change to unset default sender.
Manage contacts
This screen provides you with the ability to manage the contacts associated with an address. Each address can have multiple associated contacts.
The search text enables you to search on a particular contact. The currently sorted column will be searched on. By default this will be the contact name. The following options are available from within the manage contacts screen.
Continued on next page
Version 1.4 ExpressShipper User Guide January 2006
ExpressShipper Section 1 Page 50 of 50
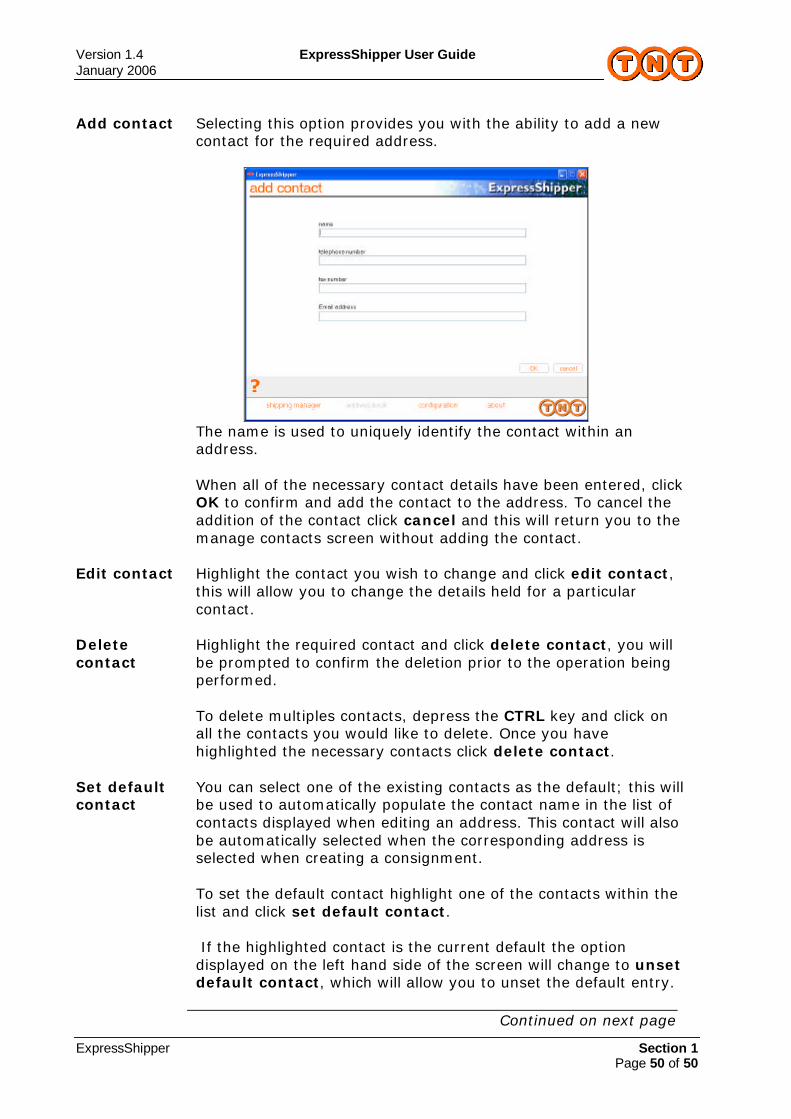
Add contact Selecting this option provides you with the ability to add a new
contact for the required address.
The name is used to uniquely identify the contact within an address. When all of the necessary contact details have been entered, click OK to confirm and add the contact to the address. To cancel the addition of the contact click cancel and this will return you to the manage contacts screen without adding the contact.
Edit contact Highlight the contact you wish to change and click edit contact, this will allow you to change the details held for a particular contact.
Delete contact
Highlight the required contact and click delete contact, you will be prompted to confirm the deletion prior to the operation being performed. To delete multiples contacts, depress the CTRL key and click on all the contacts you would like to delete. Once you have highlighted the necessary contacts click delete contact.
Set default contact
You can select one of the existing contacts as the default; this will be used to automatically populate the contact name in the list of contacts displayed when editing an address. This contact will also be automatically selected when the corresponding address is selected when creating a consignment. To set the default contact highlight one of the contacts within the list and click set default contact. If the highlighted contact is the current default the option displayed on the left hand side of the screen will change to unset default contact, which will allow you to unset the default entry.
Continued on next page

Version 1.4 ExpressShipper User Guide January 2006
ExpressShipper Section 1 Page 51 of 51
3.6: Functional Overview (continued)
Configure Express Shipper
All the details for configuring ExpressShipper are on the configuration screen.
Add consignment range
When you save a consignment, ExpressShipper will tell you how many of your allocated consignment numbers remain unused. You can enter new consignment ranges in Configuration.
To obtain a consignment range the customer must ring the local TNT helpdesk, who will then administrate the new consignment range on behalf of the customer.
Metric You can configure ExpressShipper to work with either metric weights and measures or imperial weights and measures.
(Click the words and the values will change)
Continued on next page

Version 1.4 ExpressShipper User Guide January 2006
ExpressShipper Section 1 Page 52 of 52
3.6: Functional Overview (continued)
Address Import
ExpressShipper offers the ability to import addresses. Firstly, selected the required import format, as detailed below:
- Partnership Express (CSV) – Provides the ability to import addresses which have been exported from Partnership Express in CSV format. This option should also be used for importing addresses that have been exported in re-importable format from a version of ExpressShipper prior to 1.3.
- CSV (Comma Delimited) – Provides the ability to import
addresses in CSV format that have been either generated or edited via an application such as Microsoft Excel.
- ExpressShipper (CSV) – Can be used to import addresses
which have been exported in re-importable format from another instance of ExpressShipper version 1.3 or later.
Continued on next page

Version 1.4 ExpressShipper User Guide January 2006
ExpressShipper Section 1 Page 53 of 53
3.6: Functional Overview (continued)
Browse for a .csv or .txt file by clicking the ‘… ’ button
Then click import and the progress will be displayed.
Continued on next page

Version 1.4 ExpressShipper User Guide January 2006
ExpressShipper Section 1 Page 54 of 54
3.6: Functional Overview (continued)
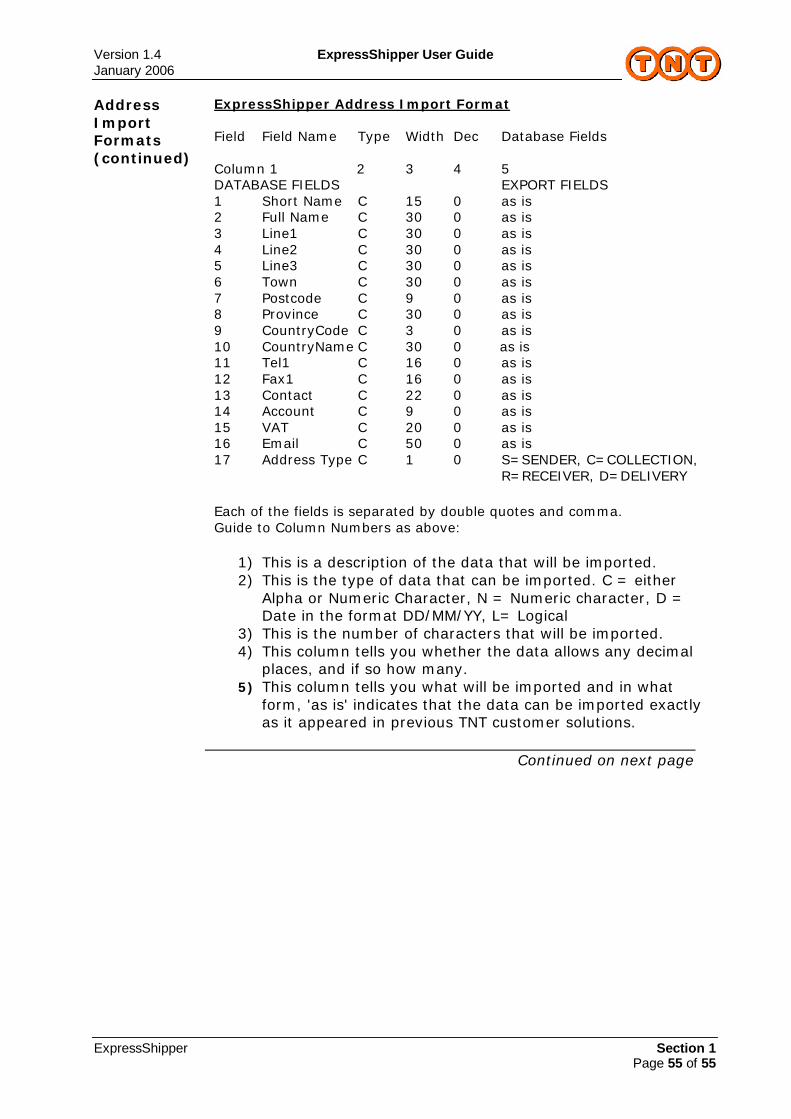
Address Import Formats
Partnership Express Address Import Format Field Field Name Type Width Dec Database Fields Column 1 2 3 4 5 DATABASE FIELDS EXPORT FIELDS 1 Short Name C 15 0 as is 2 Full Name C 30 0 as is 3 Line1 C 30 0 as is 4 Line2 C 30 0 as is 5 Town C 30 0 as is 6 Postcode C 9 0 as is 7 State C 30 0 as is 8 CountryCode C 3 0 as is 9 CountryName C 30 0 as is 10 Tel1 C 7 0 as is 11 Tel2 C 9 0 as is 12 Fax1 C 7 0 as is 13 Fax2 C 9 0 as is 14 Contact C 22 0 as is 15 Account C 9 0 as is 16 VAT C 20 0 as is 17 Address Type C 1 0 S=SENDER, C=COLLECTION,
R=RECEIVER, D=DELIVERY
CSV (Comma Delimited) Address Import Format Field Field Name Type Width Dec Database Fields Column 1 2 3 4 5 DATABASE FIELDS EXPORT FIELDS 1 Short Name C 15 0 as is 2 Full Name C 30 0 as is 3 Line1 C 30 0 as is 4 Line2 C 30 0 as is 5 Line3 C 30 0 as is 6 Town C 30 0 as is 7 Postcode C 9 0 as is 8 Province C 30 0 as is 9 CountryCode C 3 0 as is 10 CountryName C 30 0 as is 11 Tel1 C 16 0 as is 12 Fax1 C 16 0 as is 13 Contact C 22 0 as is 14 Account C 9 0 as is 15 VAT C 20 0 as is 16 Email C 50 0 as is 17 Address Type C 1 0 S=SENDER, C=COLLECTION,
R=RECEIVER, D=DELIVERY
A comma is used to separate each of the fields.
Version 1.4 ExpressShipper User Guide January 2006
ExpressShipper Section 1 Page 55 of 55
Address Import Formats (continued)
ExpressShipper Address Import Format Field Field Name Type Width Dec Database Fields Column 1 2 3 4 5 DATABASE FIELDS EXPORT FIELDS 1 Short Name C 15 0 as is 2 Full Name C 30 0 as is 3 Line1 C 30 0 as is 4 Line2 C 30 0 as is 5 Line3 C 30 0 as is 6 Town C 30 0 as is 7 Postcode C 9 0 as is 8 Province C 30 0 as is 9 CountryCode C 3 0 as is 10 CountryName C 30 0 as is 11 Tel1 C 16 0 as is 12 Fax1 C 16 0 as is 13 Contact C 22 0 as is 14 Account C 9 0 as is 15 VAT C 20 0 as is 16 Email C 50 0 as is 17 Address Type C 1 0 S=SENDER, C=COLLECTION,
R=RECEIVER, D=DELIVERY
Each of the fields is separated by double quotes and comma. Guide to Column Numbers as above:
1) This is a description of the data that will be imported. 2) This is the type of data that can be imported. C = either
Alpha or Numeric Character, N = Numeric character, D = Date in the format DD/MM/YY, L= Logical
3) This is the number of characters that will be imported. 4) This column tells you whether the data allows any decimal
places, and if so how many. 5) This column tells you what will be imported and in what
form, 'as is' indicates that the data can be imported exactly as it appeared in previous TNT customer solutions.
Continued on next page

Version 1.4 ExpressShipper User Guide January 2006
ExpressShipper Section 1 Page 56 of 56
3.6: Functional Overview (continued)
Document Print Set-up
ExpressShipper offers the ability to set up documents available to be printed. It is recommended this be done before using the system – especially if you have a network version. Double click on a document in the list or highlight the document and click edit document.
The document profile type allows you to select the document profile to edit. The setting of the document profile type will be used to determine the printer settings used when producing the consignment documentation within ExpressShipper.
If you are using a network installation and select generic you will be editing print profiles available across all installs. Do this as part of the initial install and all subsequent installs will pick up the settings as their default local settings. If you select local you will be editing print profiles just for your install. Finally, you now have the ability to specify personal where the settings are specific to the person logged onto the local PC.
Continued on next page

Version 1.4 ExpressShipper User Guide January 2006
ExpressShipper Section 1 Page 57 of 57
3.6: Functional Overview (continued)
Document Print Set-up
The screen ‘edit document printer’ will appear offering you the opportunity to change the orientation, printer and printer settings for that document.
By enabling margins you affect the position of the document on the A4 page. This may require different settings for different printers. ExpressShipper currently support HP LaserJet printers.
The check box print enabled controls whether the document will be printed. If it is unchecked the document will not be printed. This is useful if you have your own system for printing documents. However, if you are not printing invoices and one is required, you will still be required to fill in article information, as this is mandatory information for customs.
Continued on next page
Version 1.4 ExpressShipper User Guide January 2006
ExpressShipper Section 1 Page 58 of 58
3.6: Functional Overview (continued)
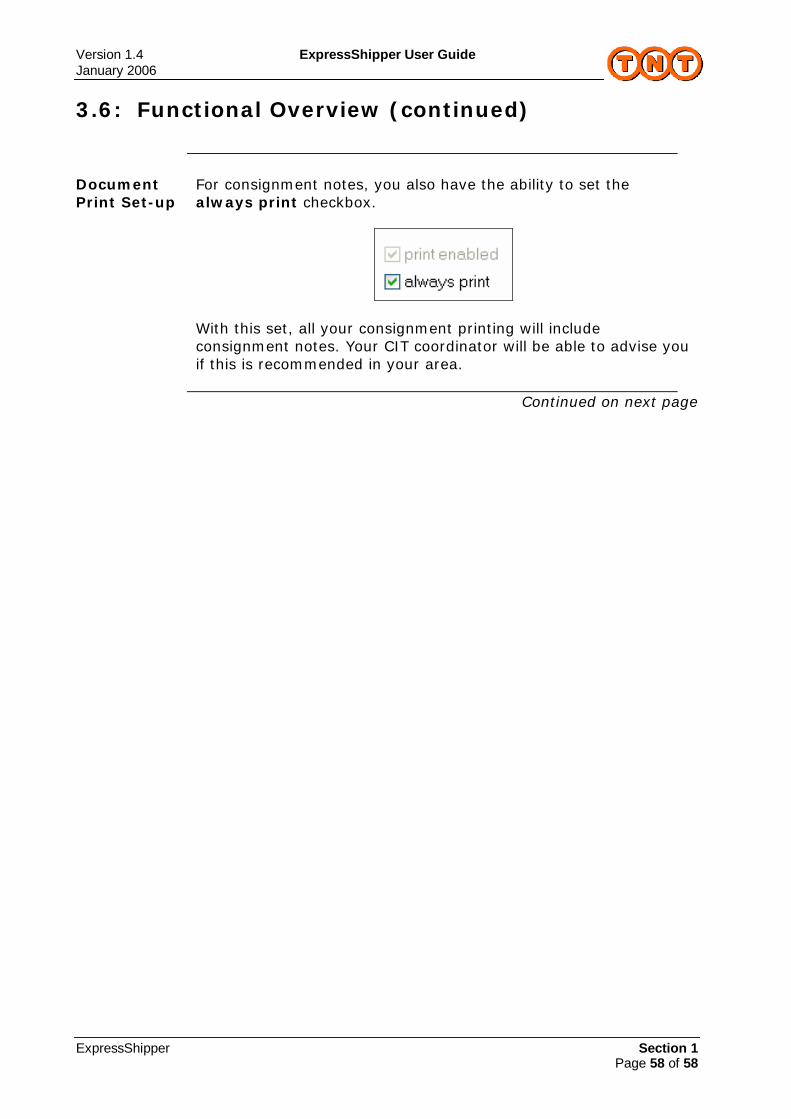
Document Print Set-up
For consignment notes, you also have the ability to set the always print checkbox.
With this set, all your consignment printing will include consignment notes. Your CIT coordinator will be able to advise you if this is recommended in your area.
Continued on next page

Version 1.4 ExpressShipper User Guide January 2006
ExpressShipper Section 1 Page 59 of 59
3.6: Functional Overview (continued)
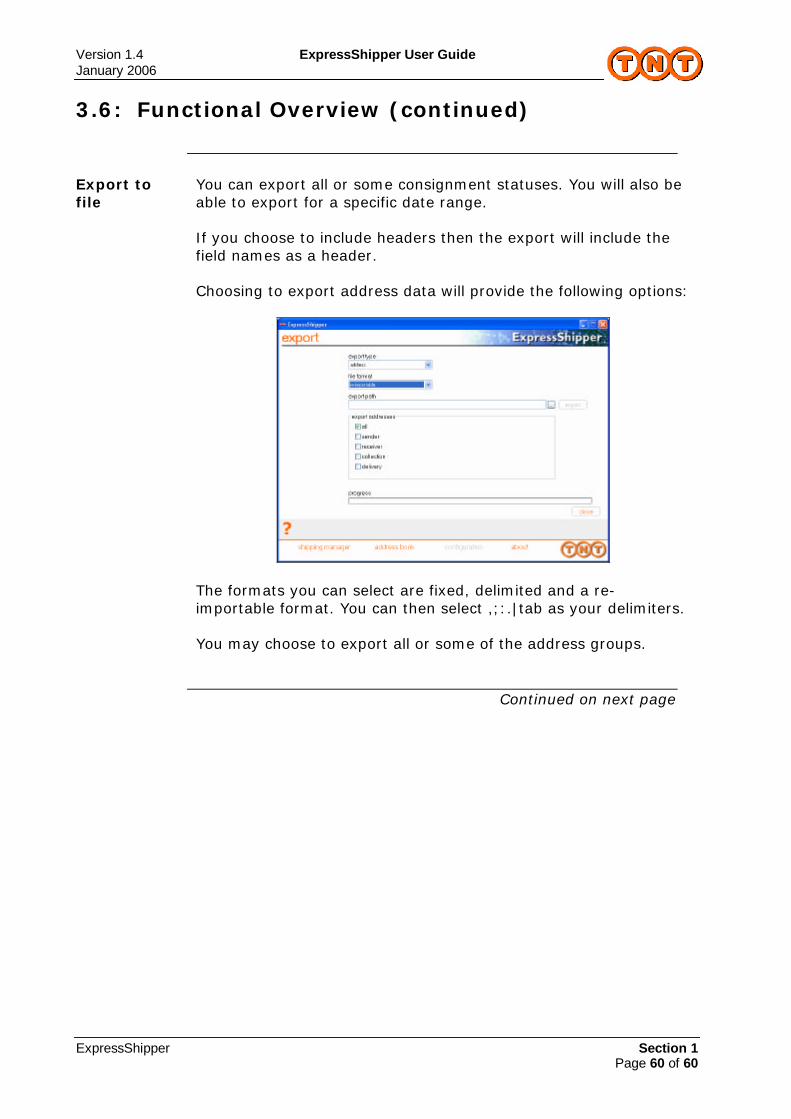
Export to file
ExpressShipper offers the ability to export consignment or address data to a variety of reportable formats, such as comma-separated variable (Microsoft Excel(c)).
From this screen you can choose where you wish the file to be exported. If you choose to export consignment data you will see the following options:
The formats you can select are fixed or delimited. You can then select ,;:.|tab as your delimiters.
Continued on next page
Version 1.4 ExpressShipper User Guide January 2006
ExpressShipper Section 1 Page 60 of 60
3.6: Functional Overview (continued)
Export to file
You can export all or some consignment statuses. You will also be able to export for a specific date range. If you choose to include headers then the export will include the field names as a header. Choosing to export address data will provide the following options:
The formats you can select are fixed, delimited and a re-importable format. You can then select ,;:.|tab as your delimiters. You may choose to export all or some of the address groups.
Continued on next page
Version 1.4 ExpressShipper User Guide January 2006
ExpressShipper Section 1 Page 61 of 61
3.6: Functional Overview (continued)
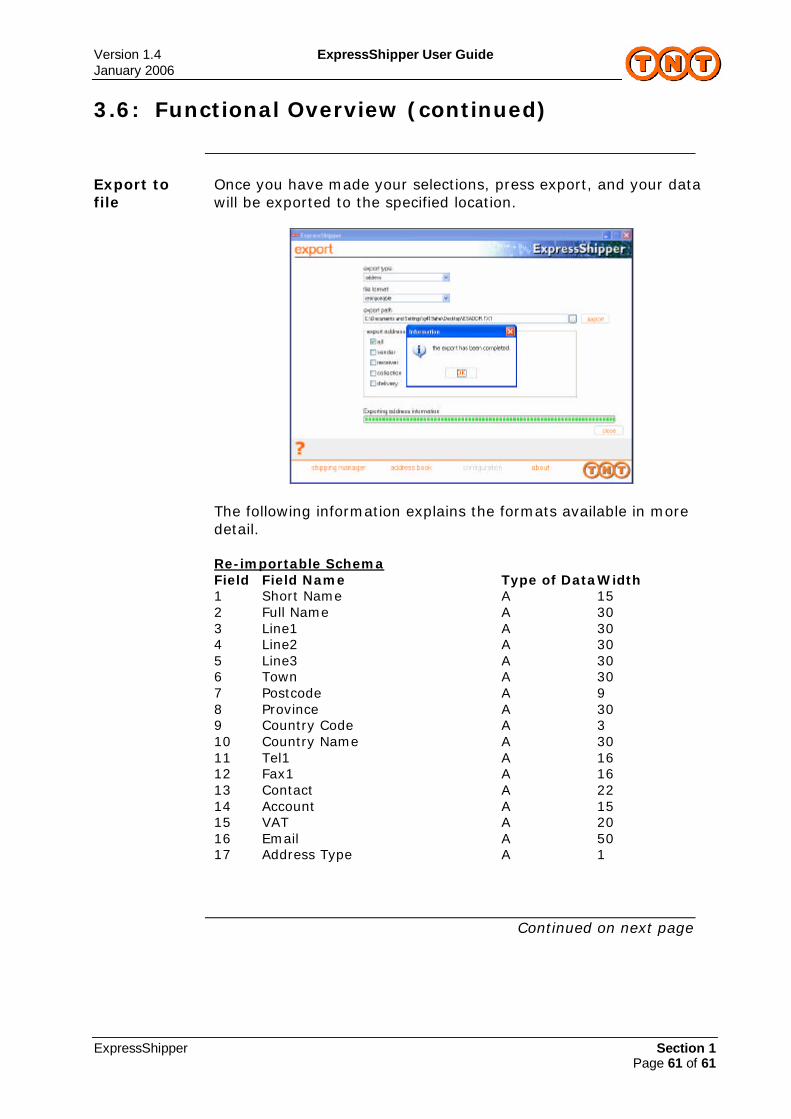
Export to file
Once you have made your selections, press export, and your data will be exported to the specified location.
The following information explains the formats available in more detail. Re-importable Schema Field Field Name Type of Data Width 1 Short Name A 15 2 Full Name A 30 3 Line1 A 30 4 Line2 A 30 5 Line3 A 30 6 Town A 30 7 Postcode A 9 8 Province A 30 9 Country Code A 3 10 Country Name A 30 11 Tel1 A 16 12 Fax1 A 16 13 Contact A 22 14 Account A 15 15 VAT A 20 16 Email A 50 17 Address Type A 1
Continued on next page
Version 1.4 ExpressShipper User Guide January 2006
ExpressShipper Section 1 Page 62 of 62
3.6: Functional Overview (continued)
Export to file
Fixed Width Address Export Schema Field Field Name Type of Data Width 1 Short Name A 15 2 Full Name A 30 3 Line1 A 30 4 Line2 A 30 5 Line3 A 30 6 Town A 30 7 Province A 30 8 Postcode A 9 9 Country Code A 3 10 Country Name A 30 11 Tel1 A 16 12 Fax1 A 16 13 Email A 50 14 Contact A 22 15 Account A 15 16 VAT A 20 17 Address Type A 1 Consignment Extract Schema
(Field lengths are given for fixed width export, otherwise the data will be delimiter separated)
1 Consignment Number A 15 2 Collection Date A 24 3 Customer Reference A 24 4 Consignment Status A 20 5 Total Weight N 11v3 6 Total Volume N 11v3 7 Value of Goods N 11v2 8 Currency Code A 3 9 Division A 3 10 Service Code A 30 11 Document Indicator A 20 12 Option Code 1 A 30 13 Option Code 2 A 30 14 Option Code 3 A 30 15 Option Code 4 A 30 16 Goods Description A 20 17 Special Instructions A 60 18 Terms of Payment A 20 19 Insurance Indicator A 1 20 Insurance Amount N 11v2 21 Customs Control Flag A 1 22 Manifest Number N 8 23 Total Number of Packages N 2
Continued on next page
Version 1.4 ExpressShipper User Guide January 2006
ExpressShipper Section 1 Page 63 of 63
3.6: Functional Overview (continued)
Export to file
24 Collection Status Indicator A 1 25 Consolidation Status Indicator A 1 26 Rated Currency Code A 3 27 Rated Currency Description A 30 28 Rated Service Code A 3 29 Rated Service Description A 30 30 Rated Option Code A 3 31 Rated Option Description A 30 32 Rate Retrieval Date A 24 33 Rate Retrieval Time A 24 34 Rate Value N 5v2 Sender 35 Country Code A 3 36 Address Line 1 A 30 37 Address Line 2 A 30 38 Address Line 3 A 30 39 City A 30 40 Email A 50 41 Fax Number A 16 42 Contact Name A 22 43 Telephone Number A 16 44 Company Name A 30 45 Postcode A 9 46 County A 30 47 Short Name A 15 48 Address Type N 1 49 VAT Code A 20 50 Account Number A 15
Continued on next page
Version 1.4 ExpressShipper User Guide January 2006
ExpressShipper Section 1 Page 64 of 64
3.6: Functional Overview (continued)
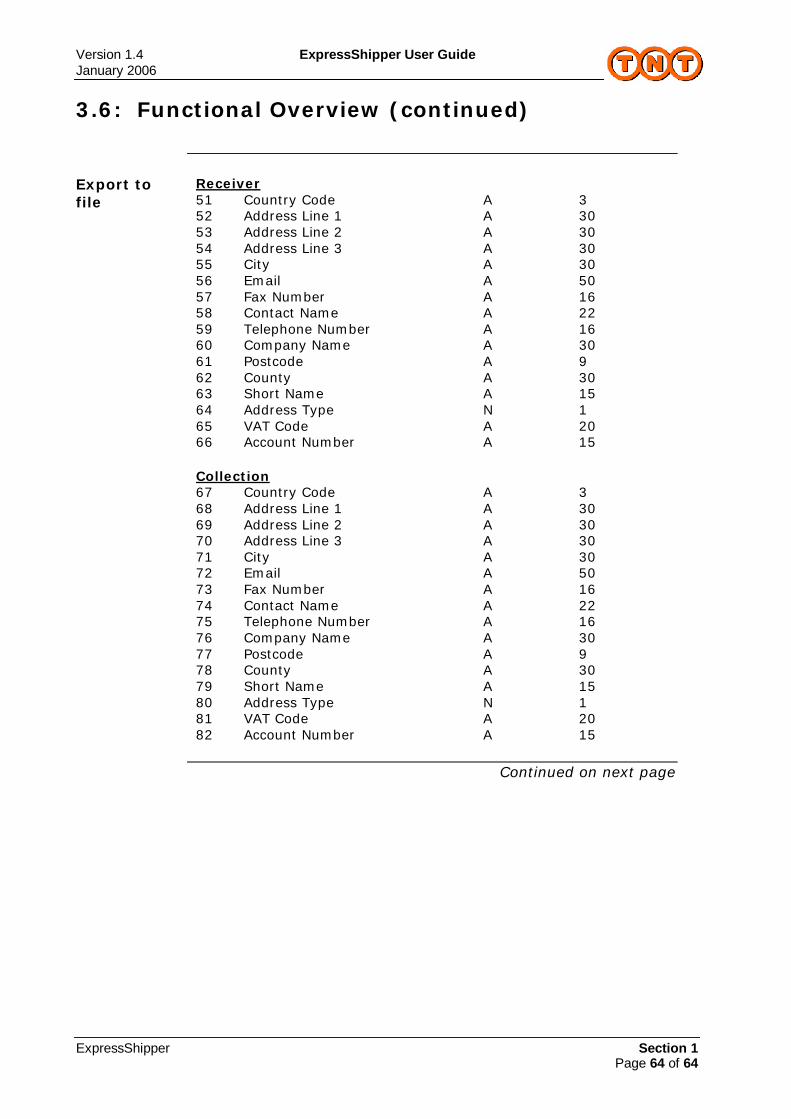
Export to file
Receiver 51 Country Code A 3 52 Address Line 1 A 30 53 Address Line 2 A 30 54 Address Line 3 A 30 55 City A 30 56 Email A 50 57 Fax Number A 16 58 Contact Name A 22 59 Telephone Number A 16 60 Company Name A 30 61 Postcode A 9 62 County A 30 63 Short Name A 15 64 Address Type N 1 65 VAT Code A 20 66 Account Number A 15 Collection 67 Country Code A 3 68 Address Line 1 A 30 69 Address Line 2 A 30 70 Address Line 3 A 30 71 City A 30 72 Email A 50 73 Fax Number A 16 74 Contact Name A 22 75 Telephone Number A 16 76 Company Name A 30 77 Postcode A 9 78 County A 30 79 Short Name A 15 80 Address Type N 1 81 VAT Code A 20 82 Account Number A 15
Continued on next page

Version 1.4 ExpressShipper User Guide January 2006
ExpressShipper Section 1 Page 65 of 65
3.6: Functional Overview (continued)
Export to file
Delivery 83 Country Code A 3 84 Address Line 1 A 30 85 Address Line 2 A 30 86 Address Line 3 A 30 87 City A 30 88 Email A 50 89 Fax Number A 16 90 Contact Name A 22 91 Telephone Number A 16 92 Company Name A 30 93 Postcode A 9 94 County A 30 95 Short Name A 15 96 Address Type N 1 97 VAT Code A 20 98 Account Number A 15
Continued on next page

Version 1.4 ExpressShipper User Guide January 2006
ExpressShipper Section 1 Page 66 of 66
3.6: Functional Overview (continued)
Back up and restore
ExpressShipper offers the ability to backup data from the data files and restore if necessary.
To back up, press backup. This will indicate where the backup will be saved. The backup will be defaulted with a name of ESBACKUP followed by the date and time. This can be changed.
Continued on next page

Version 1.4 ExpressShipper User Guide January 2006
ExpressShipper Section 1 Page 67 of 67
3.6: Functional Overview (continued)
Back up and restore
To restore the data from a backup at a later date use restore. This will prompt you to locate the backup file from which you wish to restore. To perform a restore, ExpressShipper must be closed.
If you find you have a problem with one of your data files, you can use the repair function. This will inform you if any tables need to be repaired and indicate when it is complete.
Continued on next page
Version 1.4 ExpressShipper User Guide January 2006
ExpressShipper Section 1 Page 68 of 68
3.6: Functional Overview (continued)
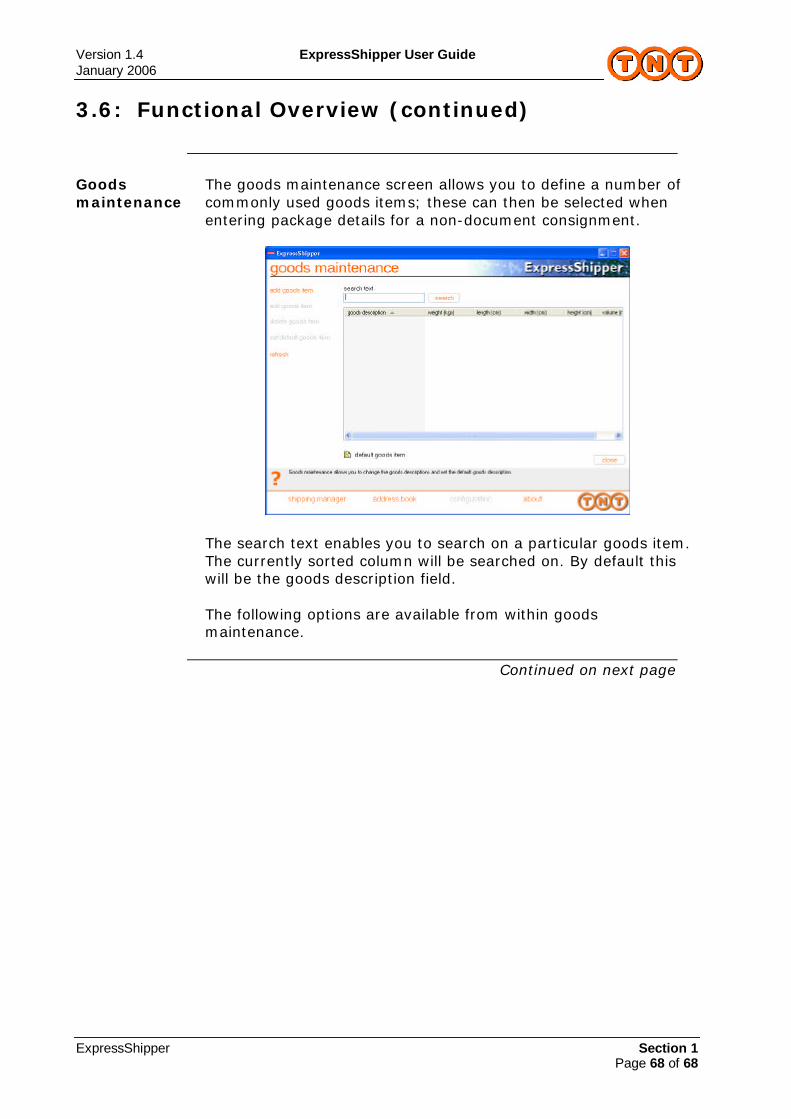
Goods maintenance
The goods maintenance screen allows you to define a number of commonly used goods items; these can then be selected when entering package details for a non-document consignment.
The search text enables you to search on a particular goods item. The currently sorted column will be searched on. By default this will be the goods description field.
The following options are available from within goods maintenance.
Continued on next page
Version 1.4 ExpressShipper User Guide January 2006
ExpressShipper Section 1 Page 69 of 69
3.6: Functional Overview (continued)
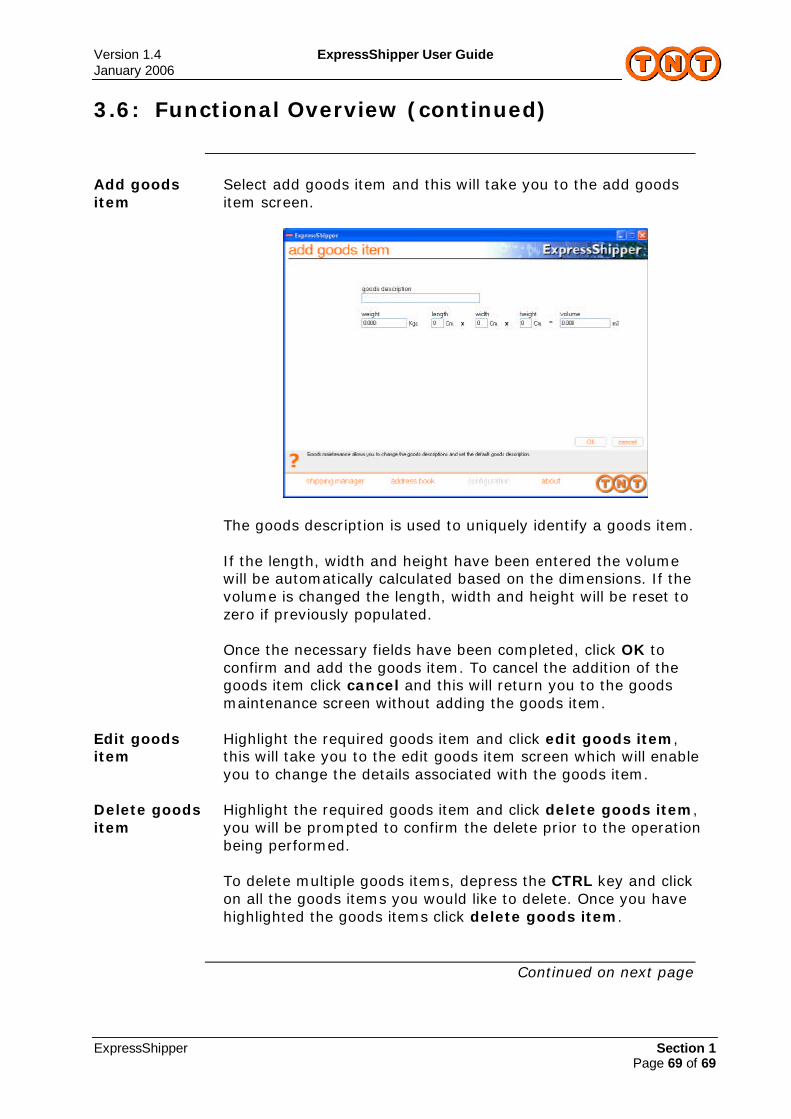
Add goods item
Select add goods item and this will take you to the add goods item screen.
The goods description is used to uniquely identify a goods item. If the length, width and height have been entered the volume will be automatically calculated based on the dimensions. If the volume is changed the length, width and height will be reset to zero if previously populated. Once the necessary fields have been completed, click OK to confirm and add the goods item. To cancel the addition of the goods item click cancel and this will return you to the goods maintenance screen without adding the goods item.
Edit goods item
Highlight the required goods item and click edit goods item, this will take you to the edit goods item screen which will enable you to change the details associated with the goods item.
Delete goods item
Highlight the required goods item and click delete goods item, you will be prompted to confirm the delete prior to the operation being performed. To delete multiple goods items, depress the CTRL key and click on all the goods items you would like to delete. Once you have highlighted the goods items click delete goods item.
Continued on next page

Version 1.4 ExpressShipper User Guide January 2006
ExpressShipper Section 1 Page 70 of 70
3.6: Functional Overview (continued)
Set default goods item
You can select one of the existing goods items as the default; this will be used to automatically populate the package details when adding a new package for a non-document consignment within consignment entry. To set the default goods item highlight one of the goods items within the list and click set default goods item. If the highlighted goods item is the current default the option displayed on the left hand side of the screen will change to unset default goods item, which will allow you to unset the default entry.
Article maintenance
The article maintenance screen allows you to define a number of commonly used articles; these can then be selected when entering article details for a non-document consignment via consignment entry.
The search text enables you to search on a particular goods item. The currently sorted column will be searched on. By default this will be the article code field. The following options are available from within article maintenance.
Continued on next page

Version 1.4 ExpressShipper User Guide January 2006
ExpressShipper Section 1 Page 71 of 71
3.6: Functional Overview (continued)
Add article Select add article and this will take you to the add article screen.
You give the article code to an article that can then be used as a quick method of locating the article. The article code can be an abbreviation, keyword or code that will uniquely identify the article. Once the necessary information has been entered, click OK to confirm and add the article. To cancel the addition of the article click cancel and this will return you to the article maintenance screen without adding the article.
Edit article Highlight the required article and click edit article, this will take you to the edit article screen which will enable you to change the details associated with the article.
Delete article Highlight the required article and click delete article, you will be prompted to confirm the delete prior to the operation being performed. To delete multiple articles, depress the CTRL key and click on all the articles you would like to delete. Once you have highlighted the necessary articles click delete article.
Continued on next page

Version 1.4 ExpressShipper User Guide January 2006
ExpressShipper Section 1 Page 72 of 72
3.6: Functional Overview (continued)
Set default article
You can select one of the existing articles as the default; this will be used to automatically populate the article details when adding a new article for a non-document consignment. To set the default article highlight one of the articles within the list and click set default article. If the highlighted article is the current default the option displayed on the left hand side of the screen will change to unset default article, which will allow you to unset the default entry.
Continued on next page

Version 1.4 ExpressShipper User Guide January 2006
ExpressShipper Section 1 Page 73 of 73
3.6: Functional Overview (continued)
Connection preferences
The connection preferences screen provides you with the ability to configure the links to external TNT applications; this screen is only available where the connectivity modules have been registered. The Pricing tab determines in what currency the prices will be returned when performing a price check within the application. Collection tab provides the ability to specify whether the option to arrange a collection is available from the manifest screen for end of day processing. You also have the ability to change the scheduled and alternate pickup times. The Shipping tab governs the usage of ASN and the acceptance of TNT’s terms and conditions. The Proxy tab is only applicable when using a proxy to obtain an external connection; this is used for performing collection, pricing and shipping requests via the connectivity modules. The list of proxies available is dependant on the entries created using the proxy maintenance screen.
Continued on next page
Version 1.4 ExpressShipper User Guide January 2006
ExpressShipper Section 1 Page 74 of 74
3.6: Functional Overview (continued)
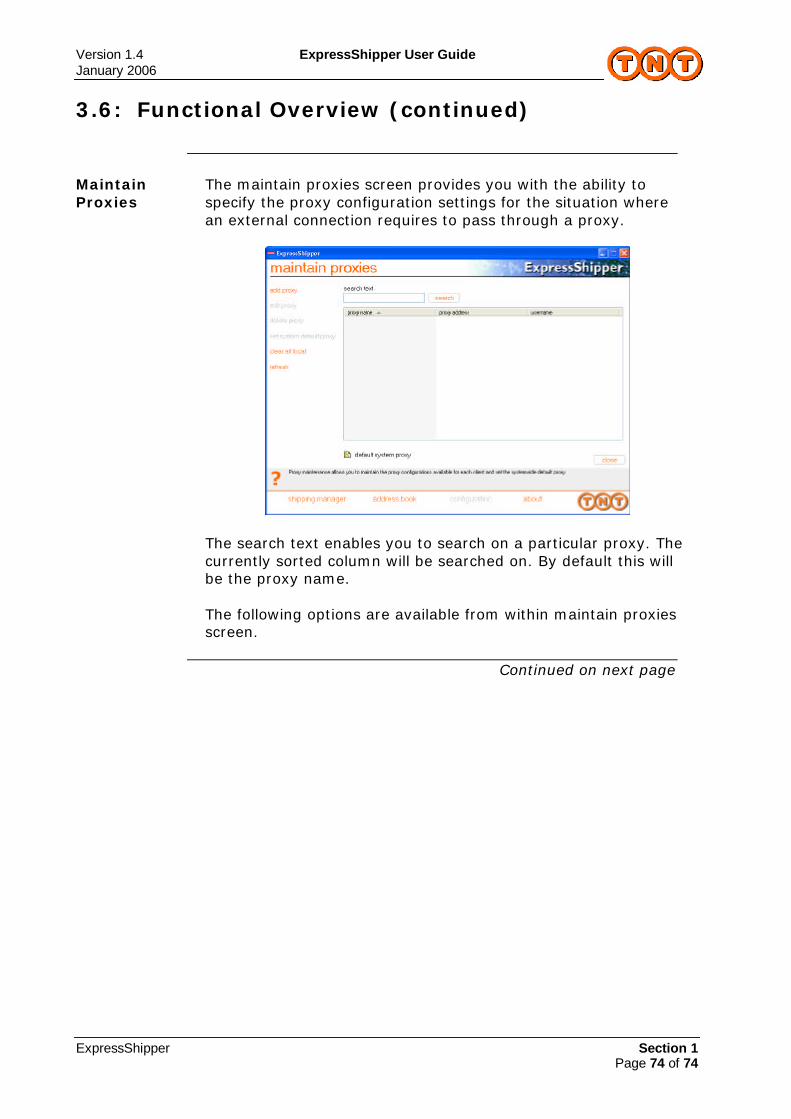
Maintain Proxies
The maintain proxies screen provides you with the ability to specify the proxy configuration settings for the situation where an external connection requires to pass through a proxy.
The search text enables you to search on a particular proxy. The currently sorted column will be searched on. By default this will be the proxy name. The following options are available from within maintain proxies screen.
Continued on next page

Version 1.4 ExpressShipper User Guide January 2006
ExpressShipper Section 1 Page 75 of 75
3.6: Functional Overview (continued)
Add Proxy Select add proxy and this will take you to the proxy entry screen.
The proxy name is used to identify the different proxies that have been specified, this is required to be unique. The proxy address is used to enter an IP address of the proxy used to establish a connection; the proxy port provides the ability to specify the port associated with the proxy. The username and password are provided for the situation where the proxy requires these details to establish a connection. Once the necessary information has been entered, click OK to confirm the addition of the proxy details. To cancel the addition of the proxy details click cancel and this will return you to the maintain proxies screen without adding the proxy.
Edit proxy Highlight the required proxy and click edit proxy, this will take you to the edit proxy screen which will provide you with the ability to change the details associated with the proxy.
Delete proxy Highlight the required proxy and click delete proxy, you will be prompted to confirm the deletion prior to the operation being performed. To delete multiples proxy entries, depress the CTRL key and click on all the proxies you would like to delete. Once you have highlighted the necessary proxies click delete proxy.
Continued on next page

Version 1.4 ExpressShipper User Guide January 2006
ExpressShipper Section 1 Page 76 of 76
3.6: Functional Overview (continued)
Set system default proxy
You can select one of the proxy entries as the system default; this will then be used when establishing an external connection via a proxy. To set the default highlight one of the proxy entries in the list and click set system default proxy. If the highlighted proxy is the current default the option displayed will change to unset system default proxy, which will allow you to unset the default proxy. This default can be overridden for an individual client instance of ExpressShipper by specifying a different proxy via the selected proxy field on the connection preferences screen.
Clear all local This option provides the ability to remove all individual ExpressShipper client proxy selections (specified on the connection preferences screen), so everyone will use the system default proxy if set.
Continued on next page
Version 1.4 ExpressShipper User Guide January 2006
ExpressShipper Section 1 Page 77 of 77
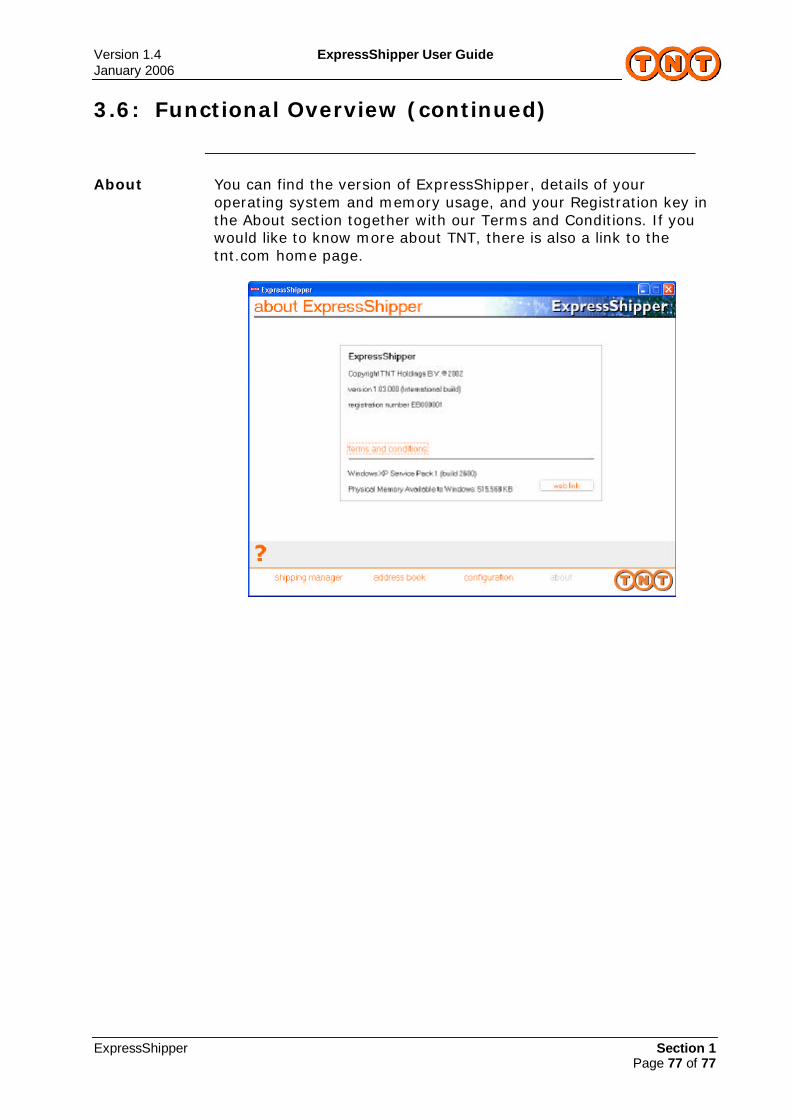
3.6: Functional Overview (continued)
About You can find the version of ExpressShipper, details of your
operating system and memory usage, and your Registration key in the About section together with our Terms and Conditions. If you would like to know more about TNT, there is also a link to the tnt.com home page.