Embed Size (px)
Citation preview

Using Master Artisan Stainless Steel Reversible Molds
1
These sturdy stainless steel molds are designed to be used either to slump or (by reversing) to drape. This allows you to have a long lasting multi-purpose mold that is especially suitable for making trays with matching stands. Mold Release To prevent glass from sticking to the mold, you will have to apply a mold release. You can use kiln paper, kiln wash, or boron nitride. Kiln Paper Any kind works. If you use Spectrum Papyros, it can be left on the mold and reused several times. Kiln Wash If you decide to coat your mold with kiln wash, you will have to sandblast or hand sand the metal first to create scratches that will provide “tooth” for the kiln wash to stick to the metal. Paint on at least 3 coats to ensure even coverage. A good “trick” to get kiln wash to stick is to heat the mold first. Place the mold on a piece of tinfoil or a cookie tray on your kiln lid when the kiln is firing. You’ll want something to catch drips from the kiln wash. The heat from the kiln will heat the metal mold. Kiln wash sticks much better to heated metal. Boron Nitride Spray on Boron Nitride will provide the smoothest finish and can be applied without presanding the
metal. Spray on from about 12” away in smooth even strokes. Avoid getting it on too thick or it will run and leave waves that will show in the glass. Start with a light coating, let dry, and apply another light coating. That’s all that’s needed. Too much does more harm than good. Once you have coated your mold, handle it carefully to avoid scratching or smudging the coating. You can fire it a dozen or more times without recoating if you don’t disturb the coating. If the coating starts to break down, just gently wipe it with a soft cloth and spray on another coat. CAUTION: Fumes are nasty. It’s a great idea to spray outside or to wear a respirator when spraying. Maybe both. Do NOT apply Boron Nitride over kiln wash. If you have kiln washed your mold and want to switch to using Boron Nitride, take care to remove all kiln wash. An SOS pad or steel wool is exceptionally good for scrubbing kiln wash off metal. Sizing The mold sizes are stated by the size of the metal before it was bent. For a draped project, you can do a project the full size of the metal but not for a slumped project. When the metal is bent, it will no longer hold a flat piece of glass that length. For example, an 8” mold will only accept a piece 7 3/4” and a 12” mold only accept a piece 11 1/4" long. To be certain your project does not reach off the side edges of the mold, it’s advisable to make it slightly smaller than the width. Better the glass be smaller than the mold than larger. Positioning To be certain your project is perfectly centered in the mold, it helps if you mark the center point of the

Using Master Artisan Stainless Steel Reversible Molds
2
mold and the center of the glass and take care to position the marks to line up.
The mark at center of the glass is lined up
with the mark at the center of the mold.
Attaching Tray to Base If you wish you could glue them together but it’s usually better not to. Just sit the tray on the base. You can line them up perpendicular or parallel. Whichever look you like.
Slumped tray is set parallel to the base.
Slumped tray set perpendicular to the base.
Separators Although you can just sit the tray on the base, it’s more stable if you apply glass nuggets and rubber or vinyl bumpers to center the tray and prevent it from sliding.
Blue glass tray alongside the base showing
the clear glass nuggets tack fused onto the base.
Using Master Artisan Stainless Steel Reversible Molds
3
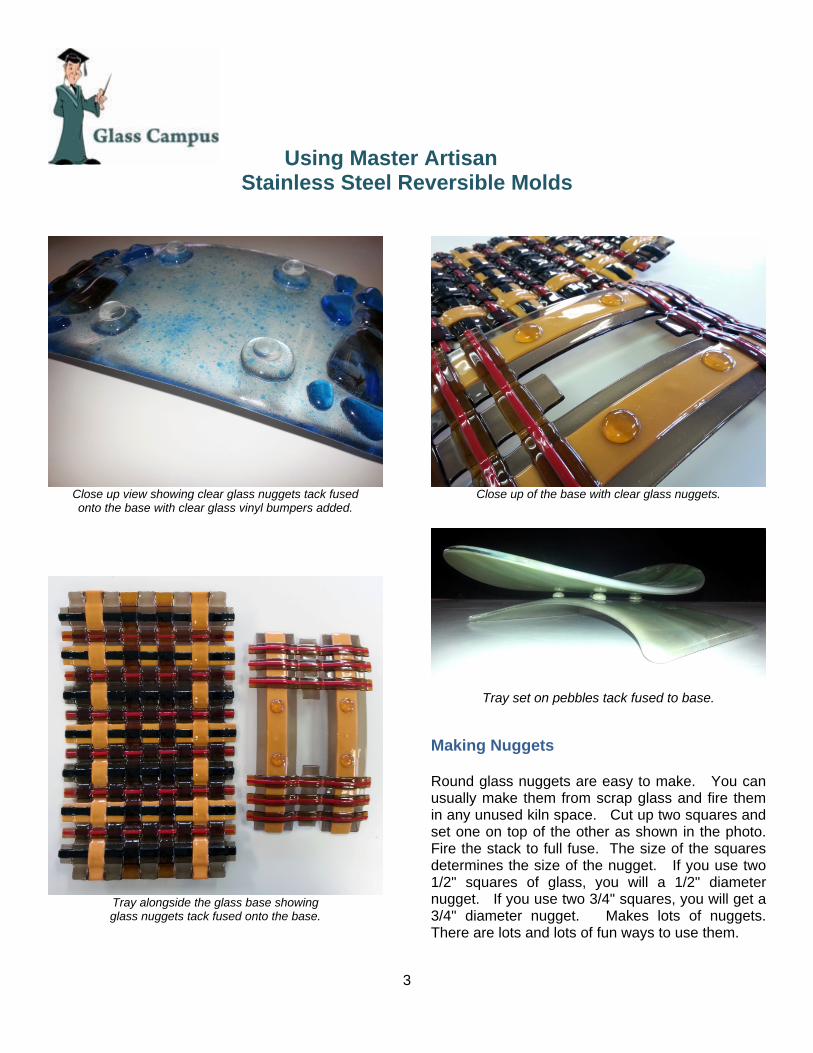
Close up view showing clear glass nuggets tack fused onto the base with clear glass vinyl bumpers added.
Tray alongside the glass base showing glass nuggets tack fused onto the base.
Close up of the base with clear glass nuggets.
Tray set on pebbles tack fused to base.
Making Nuggets Round glass nuggets are easy to make. You can usually make them from scrap glass and fire them in any unused kiln space. Cut up two squares and set one on top of the other as shown in the photo. Fire the stack to full fuse. The size of the squares determines the size of the nugget. If you use two 1/2" squares of glass, you will a 1/2" diameter nugget. If you use two 3/4" squares, you will get a 3/4" diameter nugget. Makes lots of nuggets. There are lots and lots of fun ways to use them.

Using Master Artisan Stainless Steel Reversible Molds
4
2 layers of 1/2 inch squares ready to fire.
1/2 inch diameter pebbles after firing. Some Other Base/Tray Sets