Embed Size (px)
Citation preview
Using LeJOS
LMICSE Workshop
August 11 - 14, 2006
Villanova University
Presentation Outline
LeJOS Overview An Example Program Controlling Motors Sleeping Using Sensors Generating Sounds Using Buttons Defining Listeners LeJOS Resources
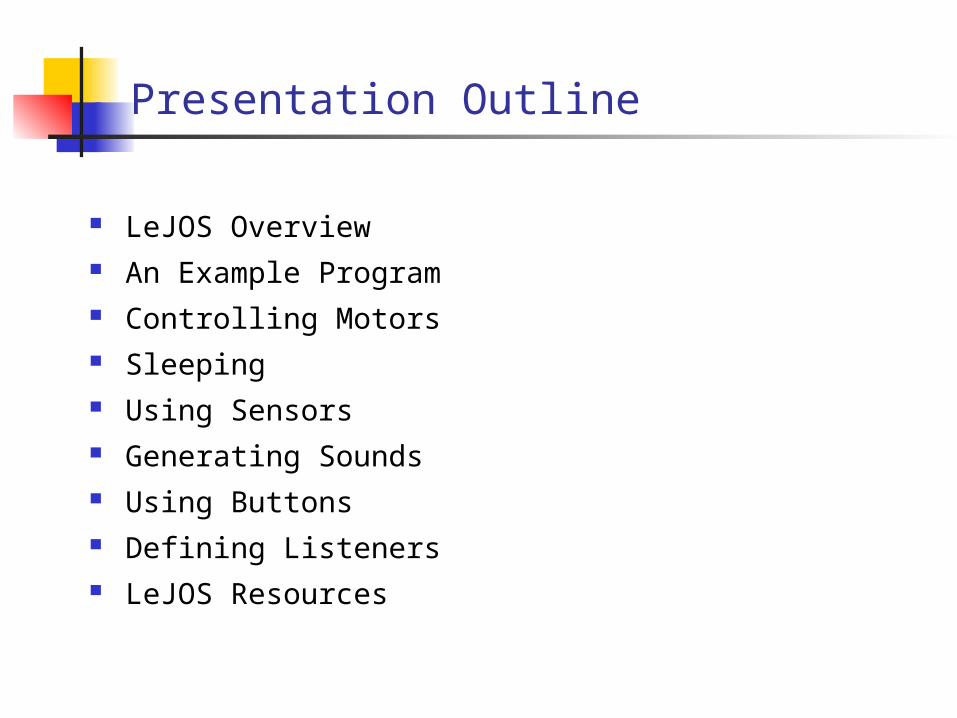
LeJOS Overview
LeJOS is an open source project is based on a subset of Java with extensions for the RCX
missing Java features hard to predict (i.e., no switch statement)
contains as well some advanced robotics libraries navigation (odometry) behaviors (subsumption architecture) image processing (vision)
is available at lejos.sourceforge.net
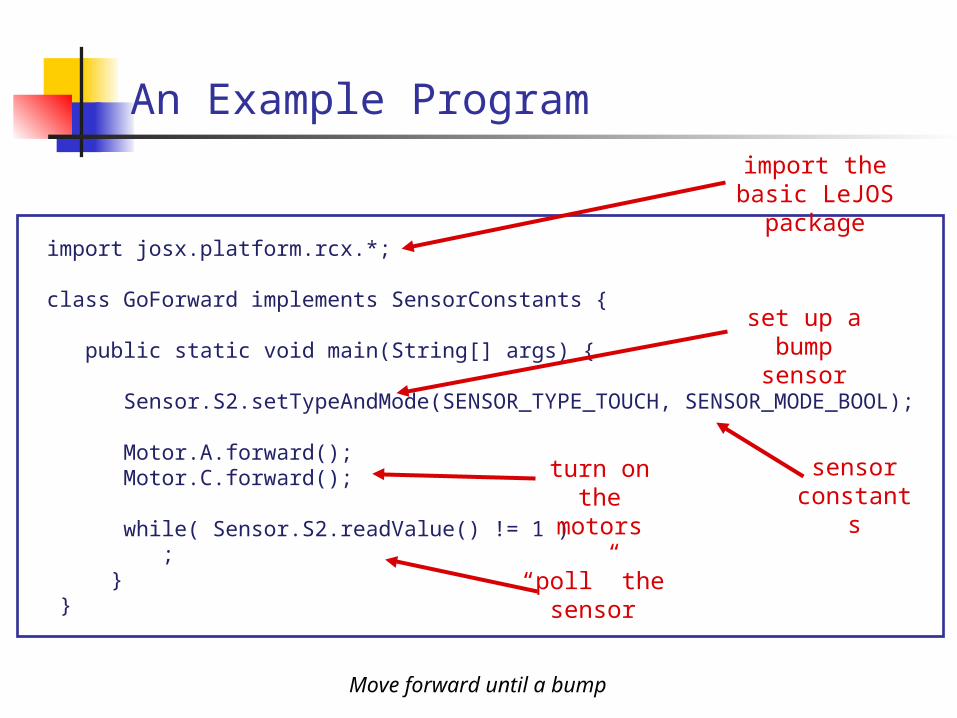
An Example Program
import josx.platform.rcx.*;
class GoForward implements SensorConstants {
public static void main(String[] args) {
Sensor.S2.setTypeAndMode(SENSOR_TYPE_TOUCH, SENSOR_MODE_BOOL);
Motor.A.forward(); Motor.C.forward();
while( Sensor.S2.readValue() != 1 ) ; } }
import the basic LeJOS package
set up a bump sensor
“poll” the sensor
turn on the motors
sensor constants
Move forward until a bump
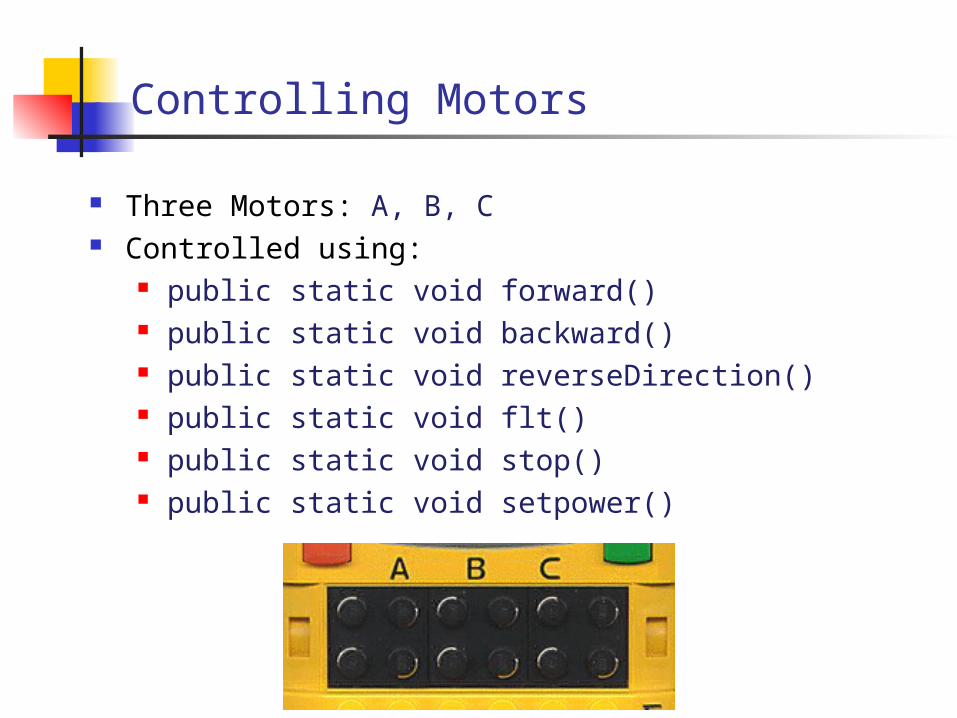
Controlling Motors
Three Motors: A, B, C Controlled using:
public static void forward() public static void backward() public static void reverseDirection() public static void flt() public static void stop() public static void setpower()
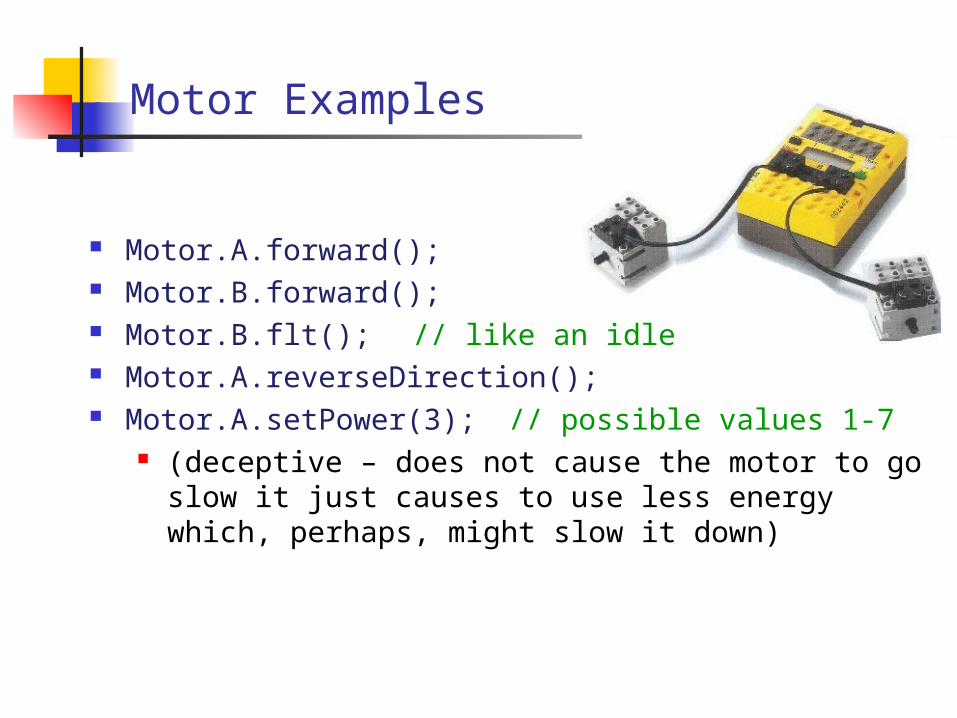
Motor Examples
Motor.A.forward(); Motor.B.forward(); Motor.B.flt(); // like an idle Motor.A.reverseDirection(); Motor.A.setPower(3); // possible values 1-7
(deceptive – does not cause the motor to go slow it just causes to use less energy which, perhaps, might slow it down)
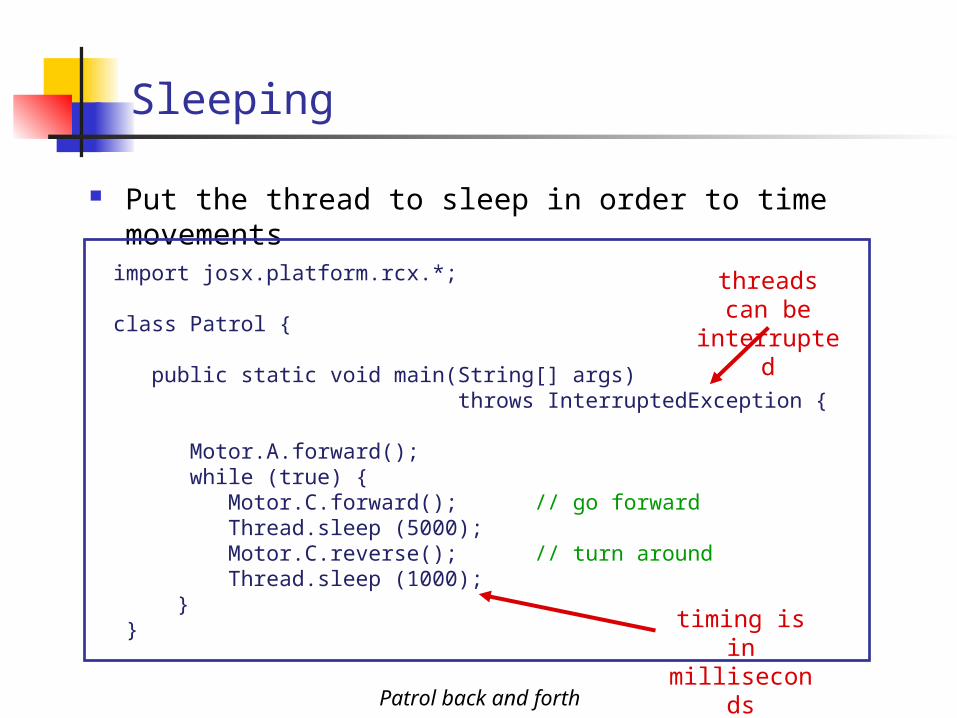
Sleeping
Put the thread to sleep in order to time movements
import josx.platform.rcx.*;
class Patrol {
public static void main(String[] args) throws InterruptedException { Motor.A.forward(); while (true) { Motor.C.forward(); // go forward Thread.sleep (5000); Motor.C.reverse(); // turn around Thread.sleep (1000); } }
Patrol back and forth
timing is in milliseconds
threads can be interrupted
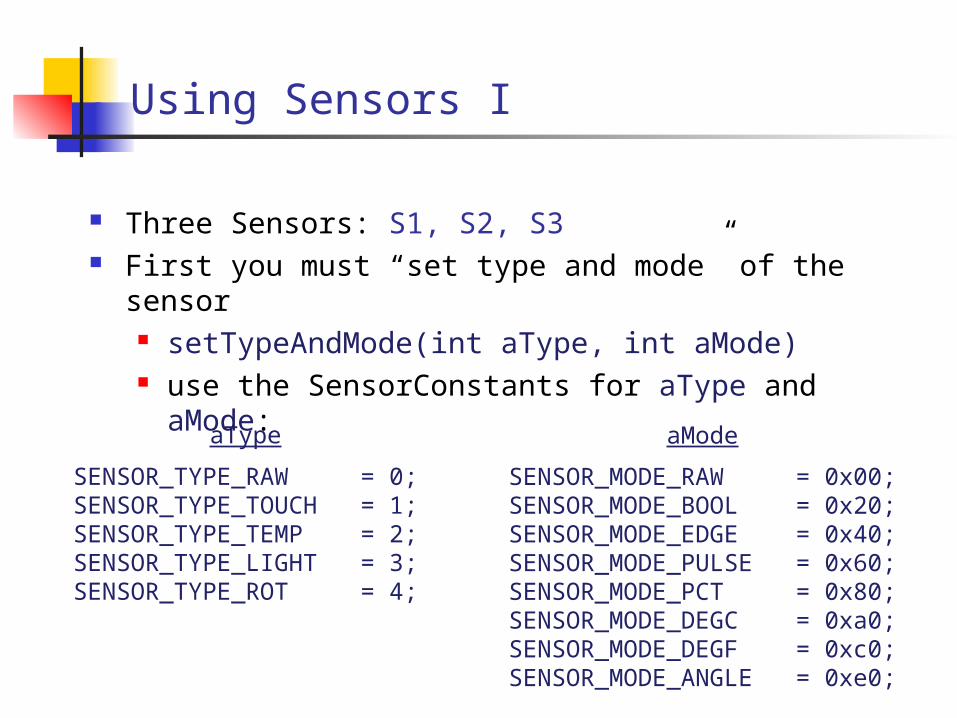
Using Sensors I
Three Sensors: S1, S2, S3 First you must “set type and mode” of the sensor
setTypeAndMode(int aType, int aMode) use the SensorConstants for aType and aMode:
aType
SENSOR_TYPE_RAW = 0;SENSOR_TYPE_TOUCH = 1;SENSOR_TYPE_TEMP = 2;SENSOR_TYPE_LIGHT = 3;SENSOR_TYPE_ROT = 4;
aMode
SENSOR_MODE_RAW = 0x00;SENSOR_MODE_BOOL = 0x20;SENSOR_MODE_EDGE = 0x40;SENSOR_MODE_PULSE = 0x60;SENSOR_MODE_PCT = 0x80;SENSOR_MODE_DEGC = 0xa0;SENSOR_MODE_DEGF = 0xc0;SENSOR_MODE_ANGLE = 0xe0;

Using Sensors II
Sensor.S1.activate(); // turns the sensor on Sensor.S1.passivate(); // turns the sensor off
- required for “active” sensors
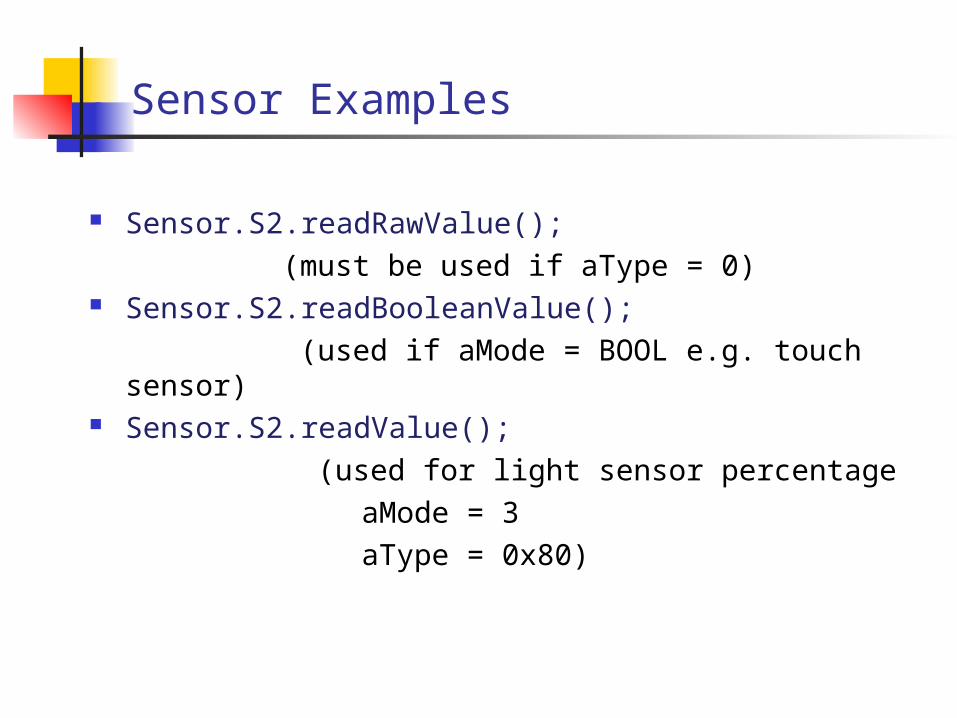
Sensor Examples
Sensor.S2.readRawValue();
(must be used if aType = 0) Sensor.S2.readBooleanValue();
(used if aMode = BOOL e.g. touch sensor) Sensor.S2.readValue();
(used for light sensor percentage
aMode = 3
aType = 0x80)
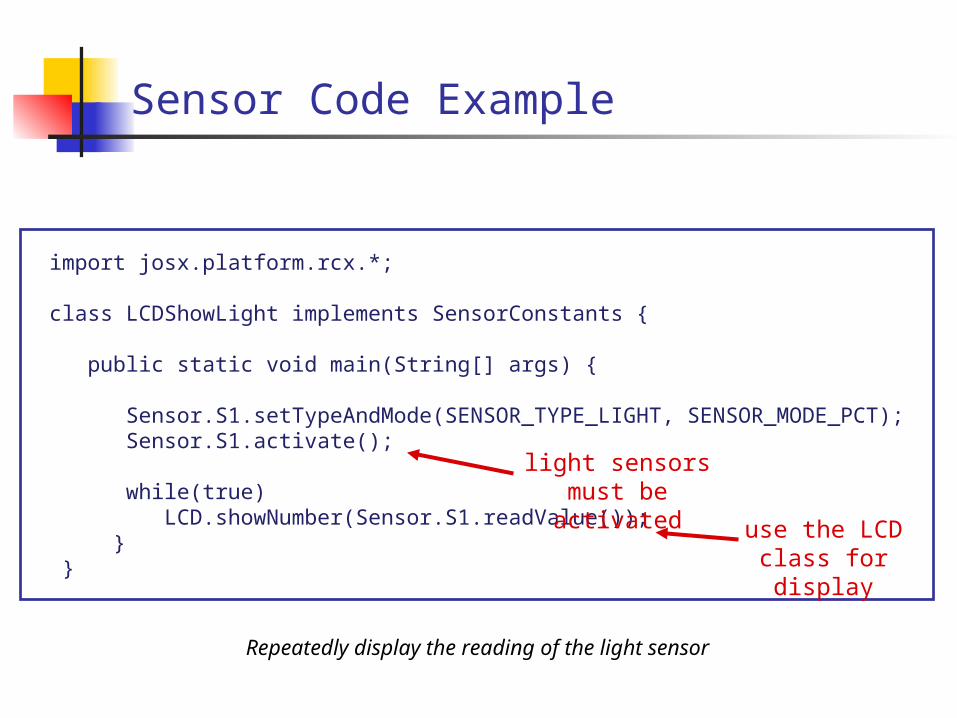
Sensor Code Example
import josx.platform.rcx.*;
class LCDShowLight implements SensorConstants {
public static void main(String[] args) {
Sensor.S1.setTypeAndMode(SENSOR_TYPE_LIGHT, SENSOR_MODE_PCT); Sensor.S1.activate();
while(true) LCD.showNumber(Sensor.S1.readValue()); } }
Repeatedly display the reading of the light sensor
light sensors must be activated
use the LCD class for display
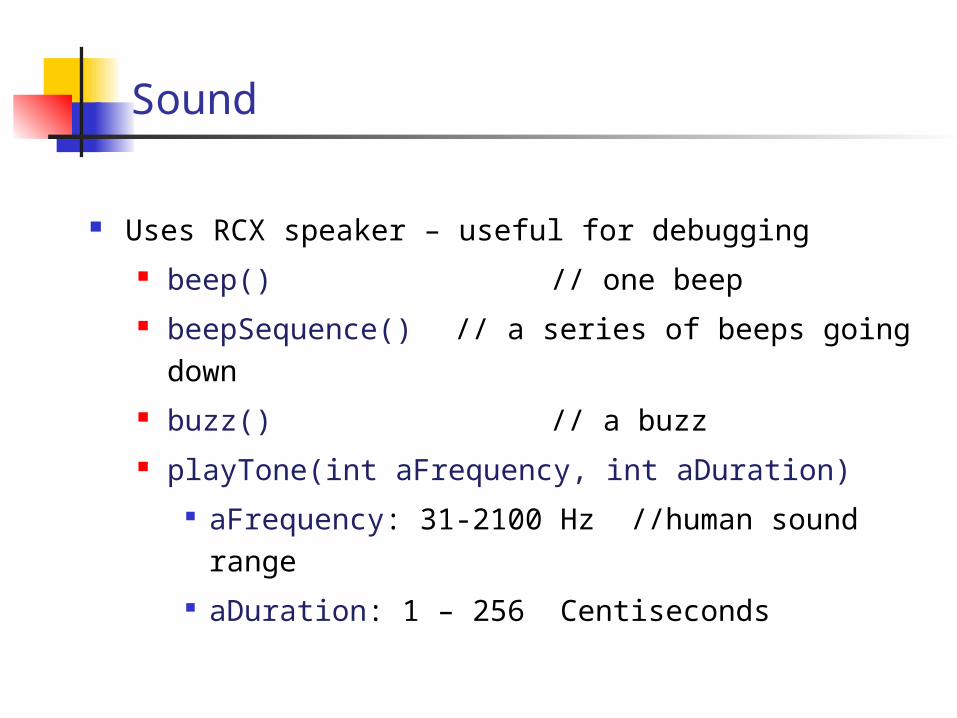
Sound
Uses RCX speaker – useful for debugging
beep() // one beep
beepSequence() // a series of beeps going down
buzz() // a buzz
playTone(int aFrequency, int aDuration)
aFrequency: 31-2100 Hz //human sound range
aDuration: 1 – 256 Centiseconds
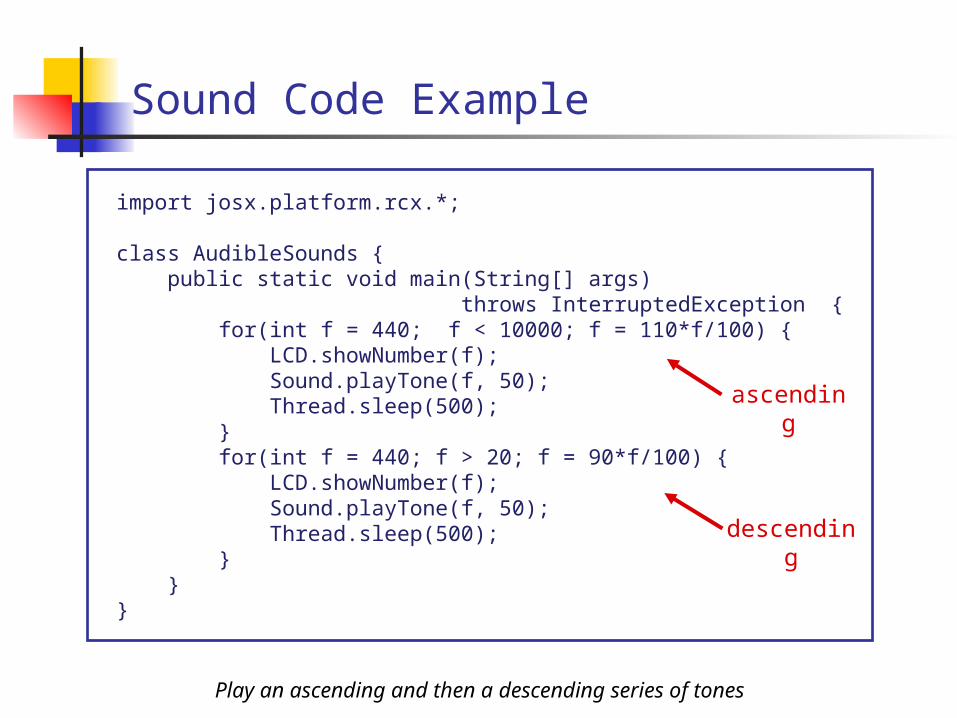
Sound Code Example
import josx.platform.rcx.*;
class AudibleSounds { public static void main(String[] args) throws InterruptedException { for(int f = 440; f < 10000; f = 110*f/100) { LCD.showNumber(f); Sound.playTone(f, 50); Thread.sleep(500); } for(int f = 440; f > 20; f = 90*f/100) { LCD.showNumber(f); Sound.playTone(f, 50); Thread.sleep(500); } }}
Play an ascending and then a descending series of tones
ascending
descending
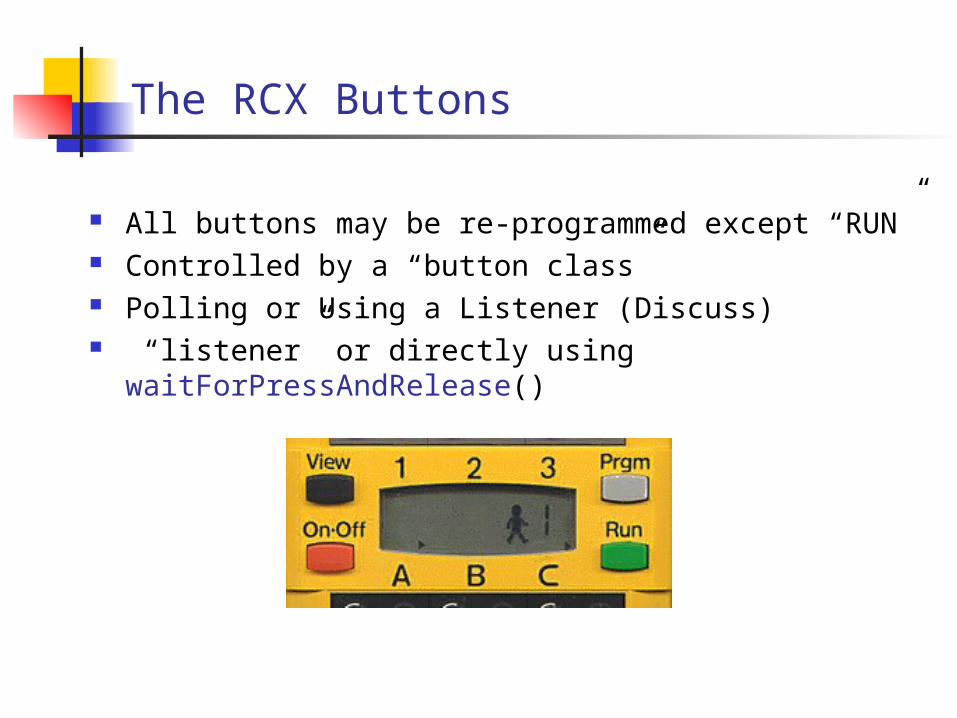
The RCX Buttons
All buttons may be re-programmed except “RUN” Controlled by a “button class” Polling or Using a Listener (Discuss) “listener” or directly using waitForPressAndRelease()
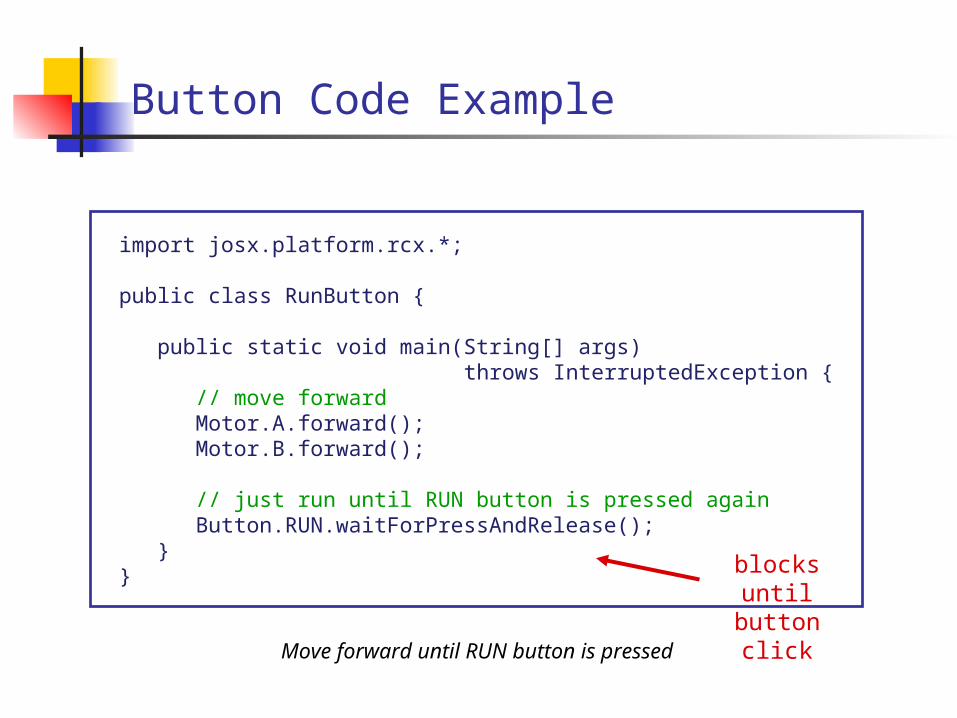
Button Code Example
import josx.platform.rcx.*;
public class RunButton {
public static void main(String[] args) throws InterruptedException { // move forward Motor.A.forward(); Motor.B.forward(); // just run until RUN button is pressed again Button.RUN.waitForPressAndRelease(); }}
Move forward until RUN button is pressed
blocks until button click
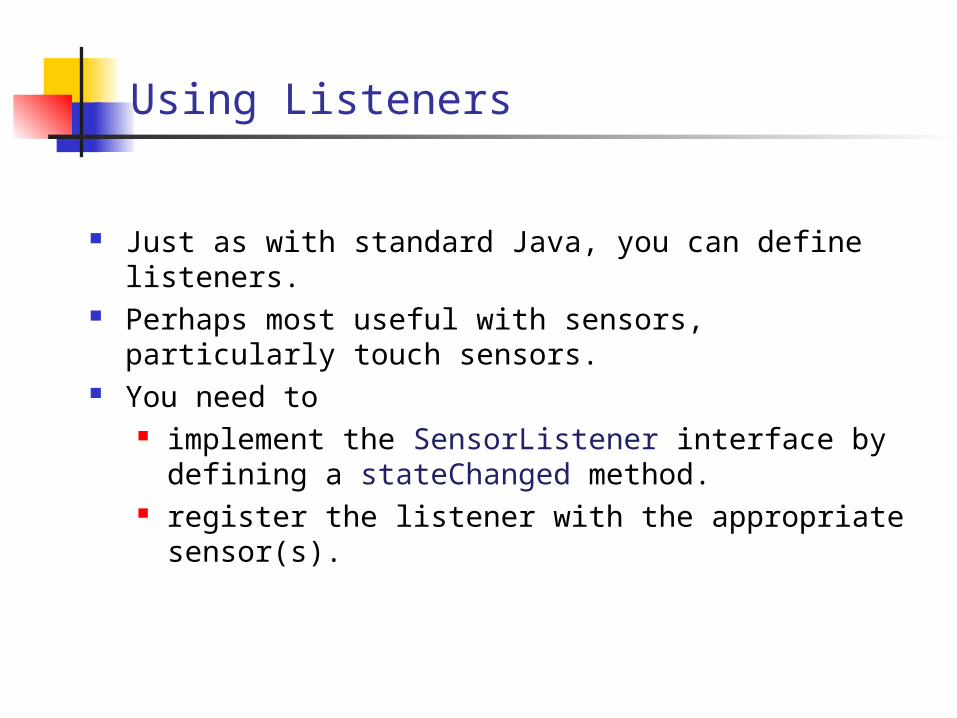
Using Listeners
Just as with standard Java, you can define listeners. Perhaps most useful with sensors, particularly touch
sensors. You need to
implement the SensorListener interface by defining a stateChanged method.
register the listener with the appropriate sensor(s).
Listener Example
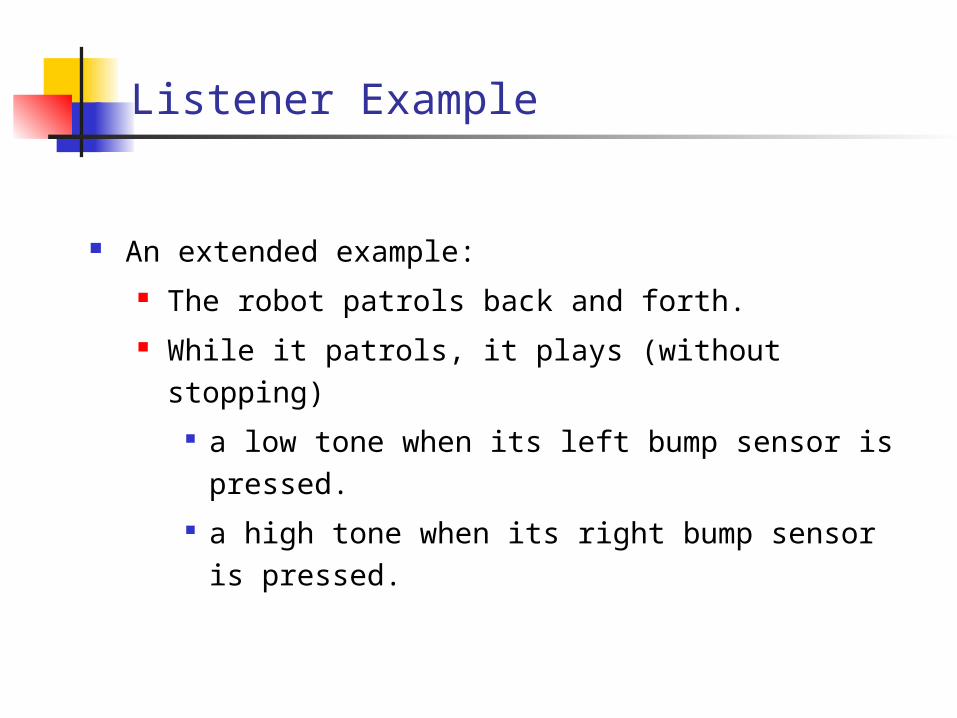
An extended example:
The robot patrols back and forth.
While it patrols, it plays (without stopping)
a low tone when its left bump sensor is pressed.
a high tone when its right bump sensor is pressed.
Listener Example Part 1
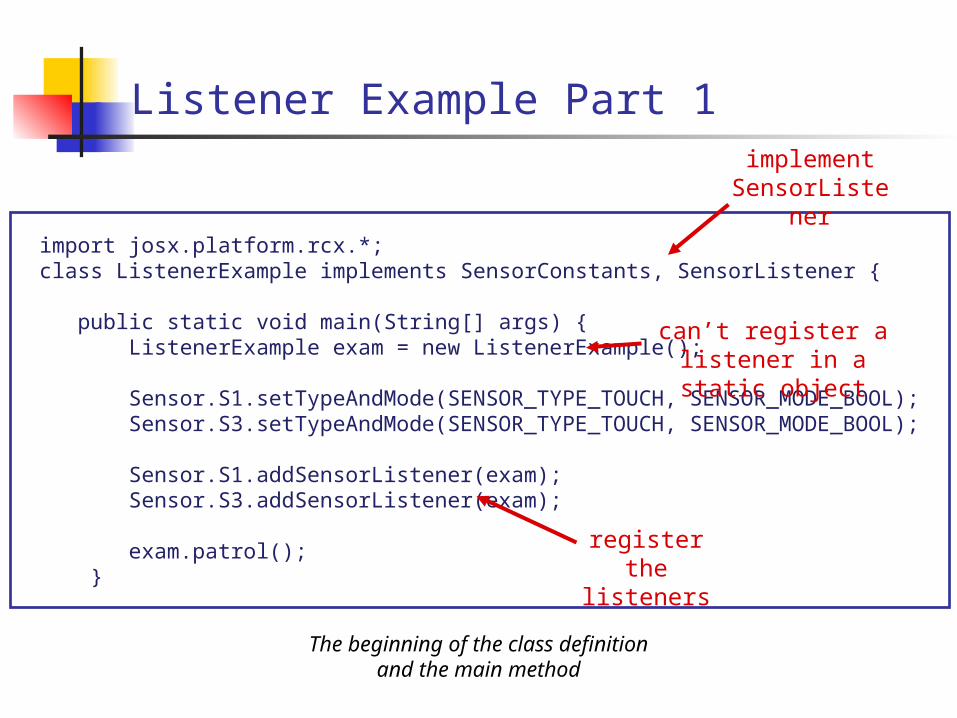
import josx.platform.rcx.*;class ListenerExample implements SensorConstants, SensorListener {
public static void main(String[] args) { ListenerExample exam = new ListenerExample(); Sensor.S1.setTypeAndMode(SENSOR_TYPE_TOUCH, SENSOR_MODE_BOOL); Sensor.S3.setTypeAndMode(SENSOR_TYPE_TOUCH, SENSOR_MODE_BOOL); Sensor.S1.addSensorListener(exam); Sensor.S3.addSensorListener(exam); exam.patrol(); }
The beginning of the class definitionand the main method
implement SensorListener
register the listeners
can’t register a listener in a static object
Listener Example Part 2
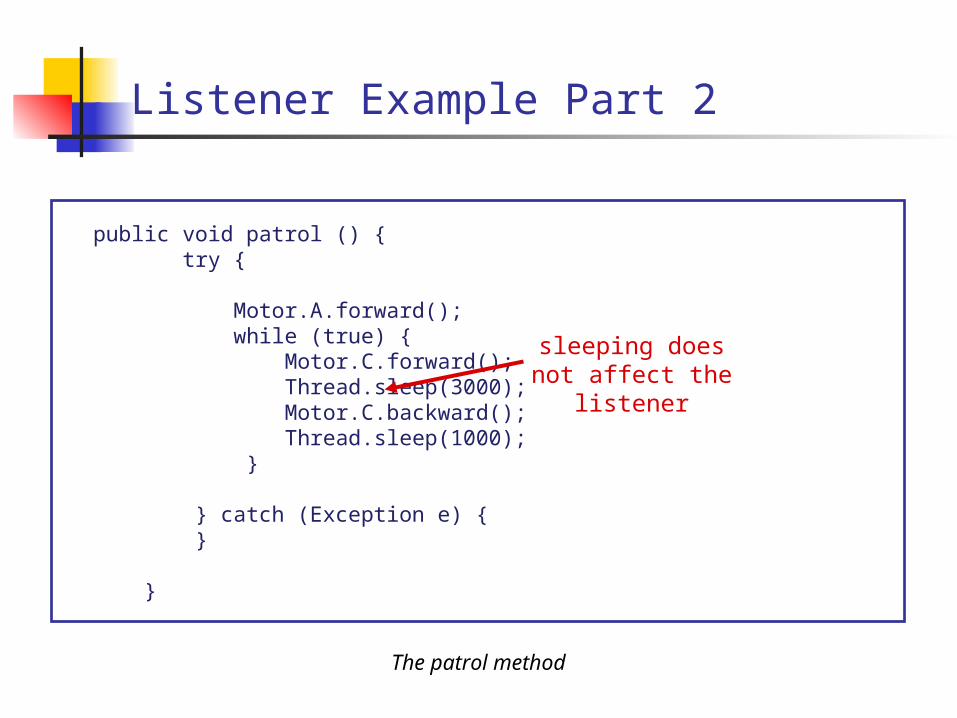
public void patrol () { try {
Motor.A.forward(); while (true) { Motor.C.forward(); Thread.sleep(3000); Motor.C.backward(); Thread.sleep(1000); }
} catch (Exception e) { }
}
The patrol method
sleeping does not affect the listener
Listener Example Part 3
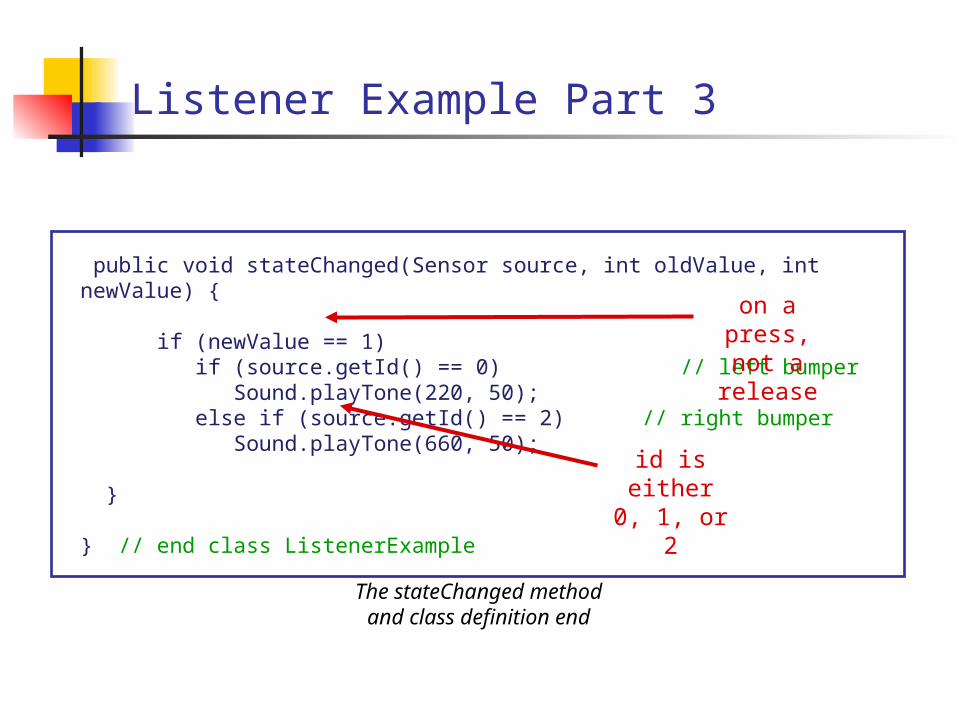
public void stateChanged(Sensor source, int oldValue, int newValue) {
if (newValue == 1) if (source.getId() == 0) // left bumper Sound.playTone(220, 50); else if (source.getId() == 2) // right bumper Sound.playTone(660, 50);
}
} // end class ListenerExample
The stateChanged methodand class definition end
on a press, not a release
id is either0, 1, or 2
Where to Learn More
The LeJOS Tutorial: an online resource which is part of the LeJOS project.
Books such as: Core Lego Mindstorms Programming, by Brian Bagnall
(Prentice-Hall, 2002), Programming Lego Mindstorms in Java, by Giulio Ferrari,
et al (Syngress, 2002), and many others.
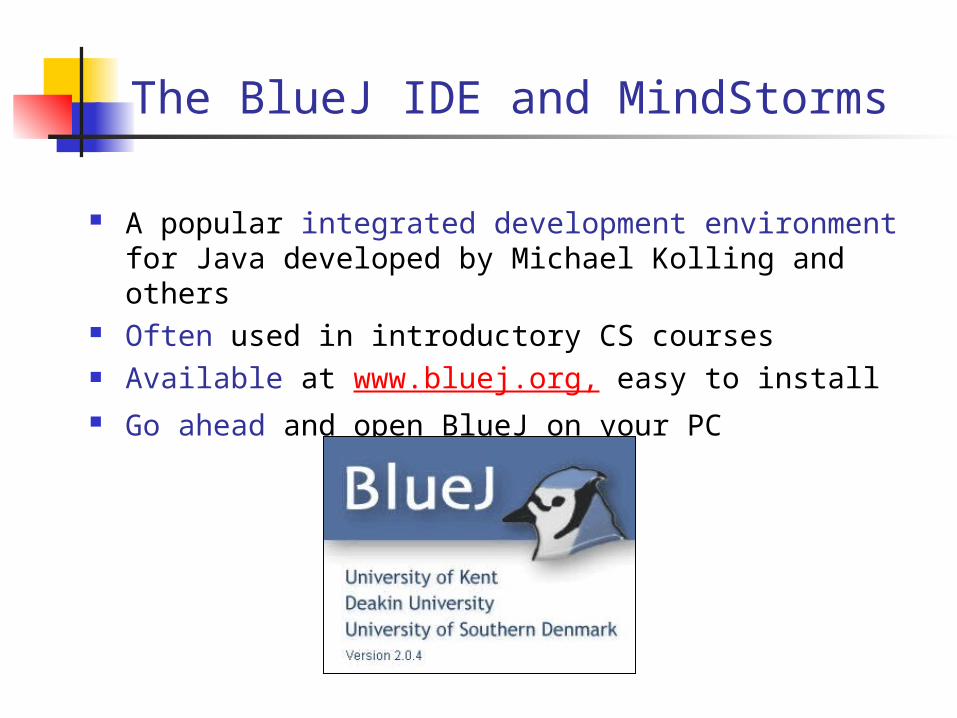
The BlueJ IDE and MindStorms
A popular integrated development environment for Java developed by Michael Kolling and others
Often used in introductory CS courses Available at www.bluej.org, easy to install Go ahead and open BlueJ on your PC
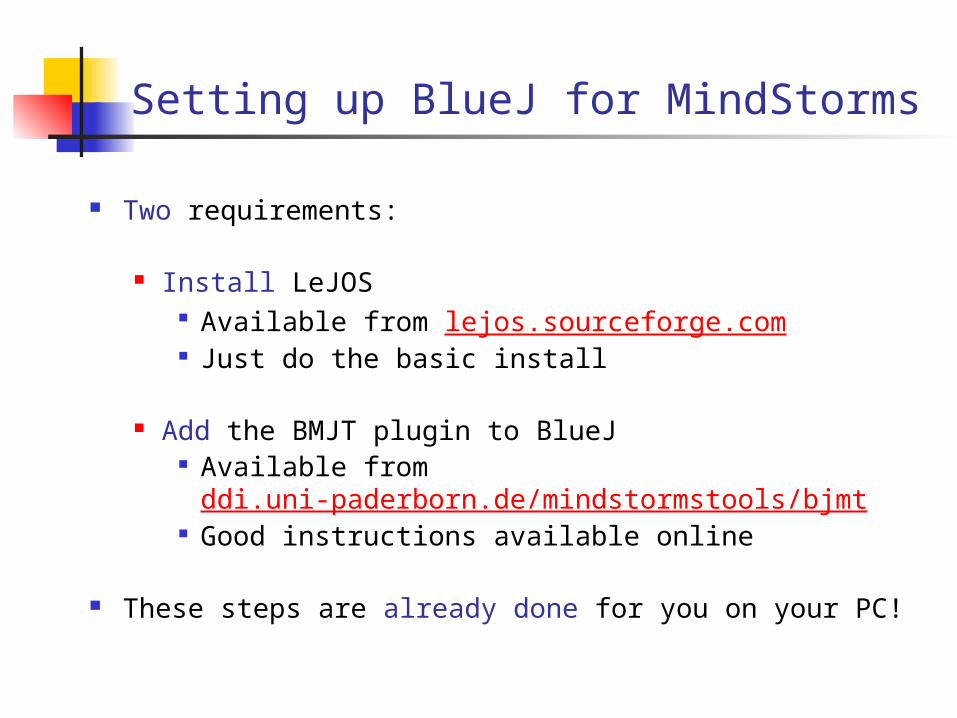
Setting up BlueJ for MindStorms
Two requirements:
Install LeJOS Available from lejos.sourceforge.com Just do the basic install
Add the BMJT plugin to BlueJ Available from
ddi.uni-paderborn.de/mindstormstools/bjmt Good instructions available online
These steps are already done for you on your PC!
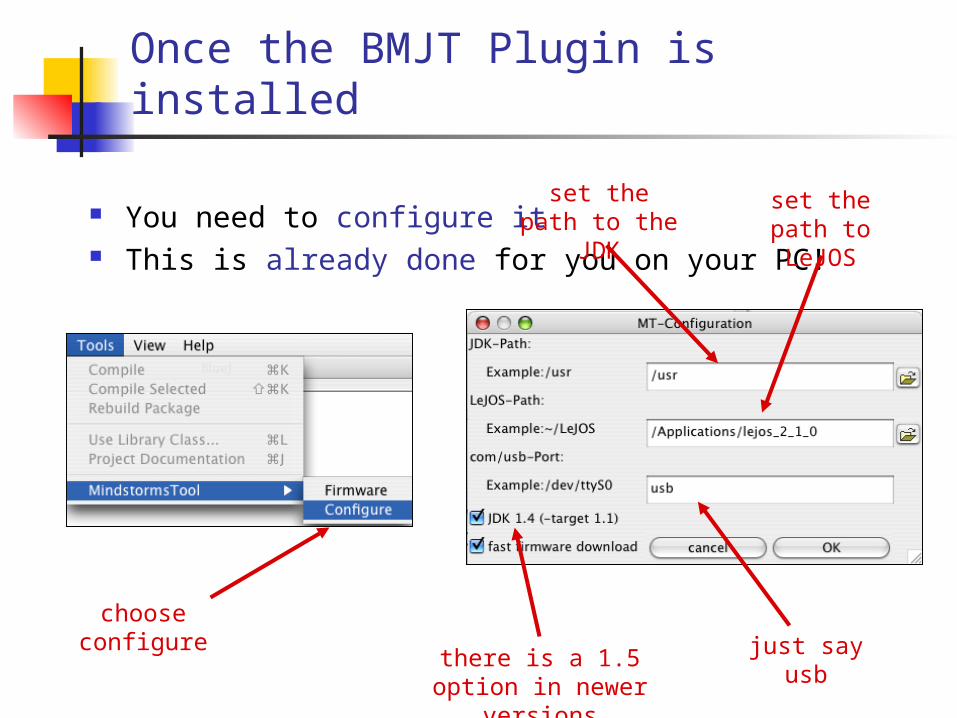
Once the BMJT Plugin is installed
You need to configure it This is already done for you on your PC!
set the path to the JDK
set the path to LeJOS
just say usbthere is a 1.5 option in newer versions
choose configure
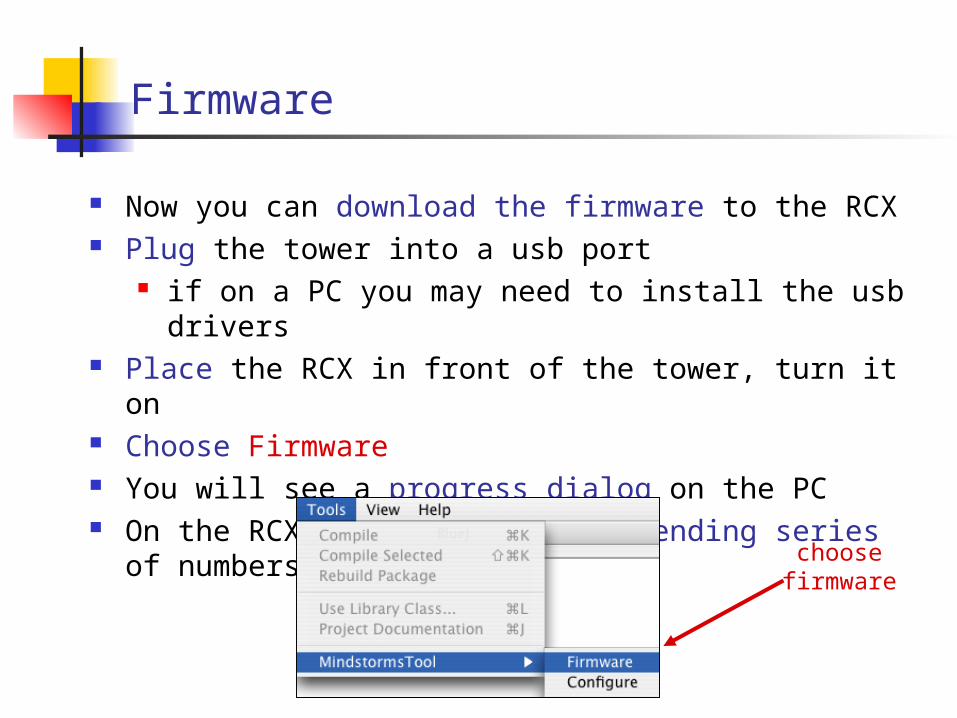
Firmware
Now you can download the firmware to the RCX Plug the tower into a usb port
if on a PC you may need to install the usb drivers Place the RCX in front of the tower, turn it on Choose Firmware You will see a progress dialog on the PC On the RCX you will see an ascending series of numbers
choose firmware
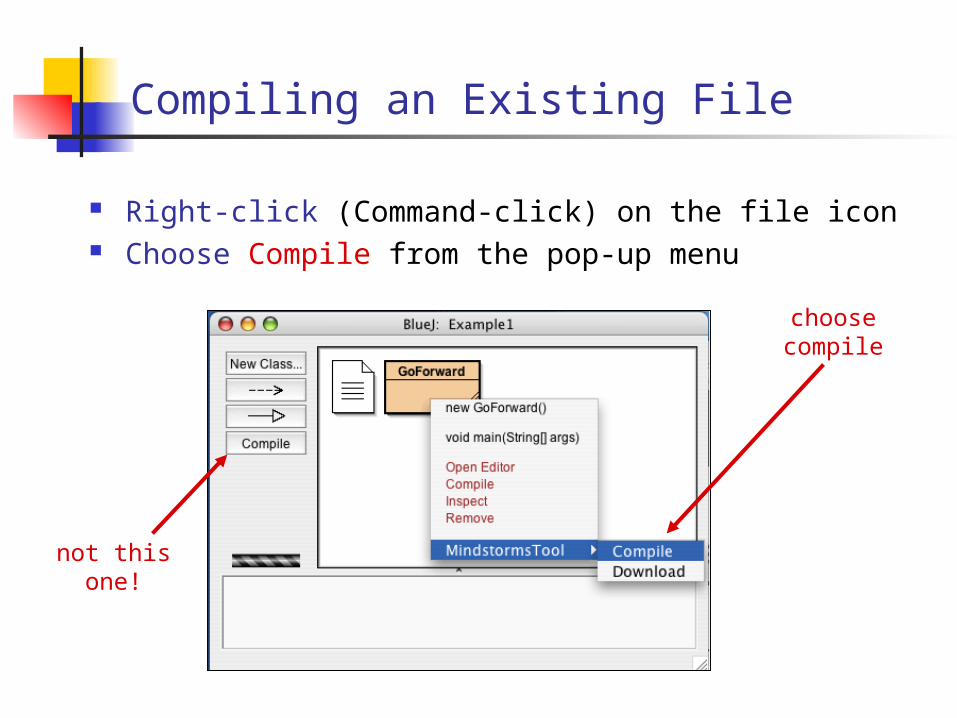
Compiling an Existing File
Right-click (Command-click) on the file icon Choose Compile from the pop-up menu
choose compile
not this one!
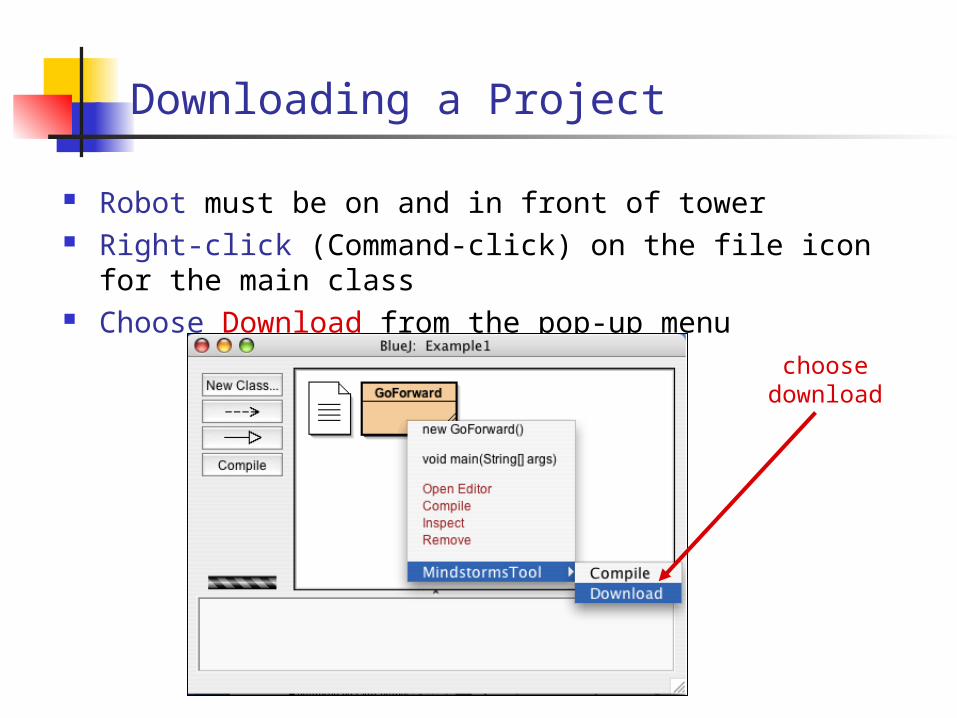
Downloading a Project
Robot must be on and in front of tower Right-click (Command-click) on the file icon for the main class Choose Download from the pop-up menu
choose download
Try it Out!
Place the robot in its play area.
Press run.
It should move forward until it hits an obstacle.