Embed Size (px)
Citation preview

USER’S MANUAL
MA30-02/A 27/02/2012
www.davicia.com
USER’S MANUAL
MA30-02/A
1
INDEX
Page
1.1.1.1. DESCRIPTIONDESCRIPTIONDESCRIPTIONDESCRIPTION
1.1. Part list
2
3
2.2.2.2. INSTALLATIONINSTALLATIONINSTALLATIONINSTALLATION
2.1. Startup
4
5
3.3.3.3. OPERATIONOPERATIONOPERATIONOPERATION
3.1. LCD symbol description
3.2. Key functions
3.3. Recommended location for measurement (Guide)
3.4. Analysis modes
3.5. Portrait
3.6. Moisture
3.7. Sebum
3.8. Evenness, Pores, Spots and Wrinkles
3.9. Results
3.10. Image transfer
6
6
7
7
8
8
9
9
9
10
10
4.4.4.4. SETUPSETUPSETUPSETUP
4.1. Programming
4.1.1. Date/Time setting
4.1.2. Language setting
4.1.3. Mode setting
4.1.4. Measurements setting
4.1.5. Bluetooth settings
4.1.6. Advanced settings
4.2. Connecting with PC
4.2.1. Connecting with cable
4.2.2. Connecting with Bluetooth
11
11
11
12
12
12
13
13
14
14
14
5.5.5.5. MAINTENANCE AND CLEANINGMAINTENANCE AND CLEANINGMAINTENANCE AND CLEANINGMAINTENANCE AND CLEANING
5.1. Instructions for installing batteries
5.2. Instructions for charge and connect
5.3. Environmental
5.4. Equipment disposal
15
15
15
16
16
6.6.6.6. TROUBLESHOOTINGTROUBLESHOOTINGTROUBLESHOOTINGTROUBLESHOOTING
17
7.7.7.7. TECHNITECHNITECHNITECHNICAL SPECIFICATIONSCAL SPECIFICATIONSCAL SPECIFICATIONSCAL SPECIFICATIONS
18
8.8.8.8. WARRANTY CERTIFICATEWARRANTY CERTIFICATEWARRANTY CERTIFICATEWARRANTY CERTIFICATE
19
9.9.9.9. CE DECLARATION OF CONFORMITYCE DECLARATION OF CONFORMITYCE DECLARATION OF CONFORMITYCE DECLARATION OF CONFORMITY 20

USER’S MANUAL
MA30-02/A
2
1. DESCRIPTION
(1) Swivel head*
(2) Moisture sensor
(3) Camera and lighting
(4) LED indicator
(5) On/Off button
(6) LCD screen
(7) Memory
(8) External adapter connexion
* The head rotates 90 degrees clockwise. Turning in any other way can cause damage to the equipment.
1
5
2
3
4
6
7 8

USER’S MANUAL
MA30-02/A
3
1111.1. .1. .1. .1. PART LISTPART LISTPART LISTPART LIST
dpsmartdpsmartdpsmartdpsmart
Batteries (x2) Charger (x1) USB cable (x1)
Hand strap (x1) Case (x1) User’s Manual
Cradle (x1) Cleaning cloth (x1)

USER’S MANUAL
MA30-02/A
4
2. INSTALLATION
Before putting the device into use, please read with care the information given in the Operating Instructions.
They contain important instructions for installation, proper use and maintenance of the device.
The manufacturer shall not be liable for damages arising out of failure to heed the following instructions:
o When using electrical components under increased safety requirements, always comply with the appropriate
regulations.
o Improper installation will render the warranty null and void.
o Ensure the voltage marked on the power supply unit, matches your main power supply.
o This device is designed for use indoors.
o Observe the permissible ambient temperatures for use.
Caution upon installation and usage
o HumidityHumidityHumidityHumidity: Do not install the product in the place with rain leakage or of high humidity. If the product is leaking,
it may cause damage or fire.
o Repair:Repair:Repair:Repair: Do not disassemble or remodel the product because it may cause danger such as an electric shock.
When a problem occurs, do not attempt to repair it. Instead, contact the seller.
o Electricity:Electricity:Electricity:Electricity: Do not use electricity except for what is prescribed here. Using improper electricity may cause an
electric shock or danger.
o Installation Environment:Installation Environment:Installation Environment:Installation Environment: Do not install the product in a too hot or cold place. (Recommended Temperature :
15ºC ~ 35ºC)
o Sunlight:Sunlight:Sunlight:Sunlight: Do not expose the camera of the product to the sun or a direct ray of light. It may cause product
damage.
o Shock or Vibration:Shock or Vibration:Shock or Vibration:Shock or Vibration: Do not drop the product or give it a strong shock or vibration.
o If the product does not work properlyIf the product does not work properlyIf the product does not work properlyIf the product does not work properly:::: If a problem occurs while using the product (unidentified noise, smell or
smoke), stop using it and turn the power off and contact the seller.
o Dirt on Lens:Dirt on Lens:Dirt on Lens:Dirt on Lens: Make sure to keep camera lenses clean and away from pollution. If polluted by finger print or
external dirt, cleanse it with cotton stick soacked with 70% Ethyl Alcohol solution or use air blower to remove
the dust.
o AfterAfterAfterAfter----Sales Service:Sales Service:Sales Service:Sales Service: When any of the following occurs, turn the power off and have the product repaired at
the place of purchase.
- Power Connector is damaged
- The product is leaking
- Liquid is spilt over the product or it has alien substance.
- Product does not work as indicated in this manual. (Attempting to operate the product against
manual may cause more serious damage.)
- Product is dropped to the floor and seriously damaged.
USER’S MANUAL
MA30-02/A
5
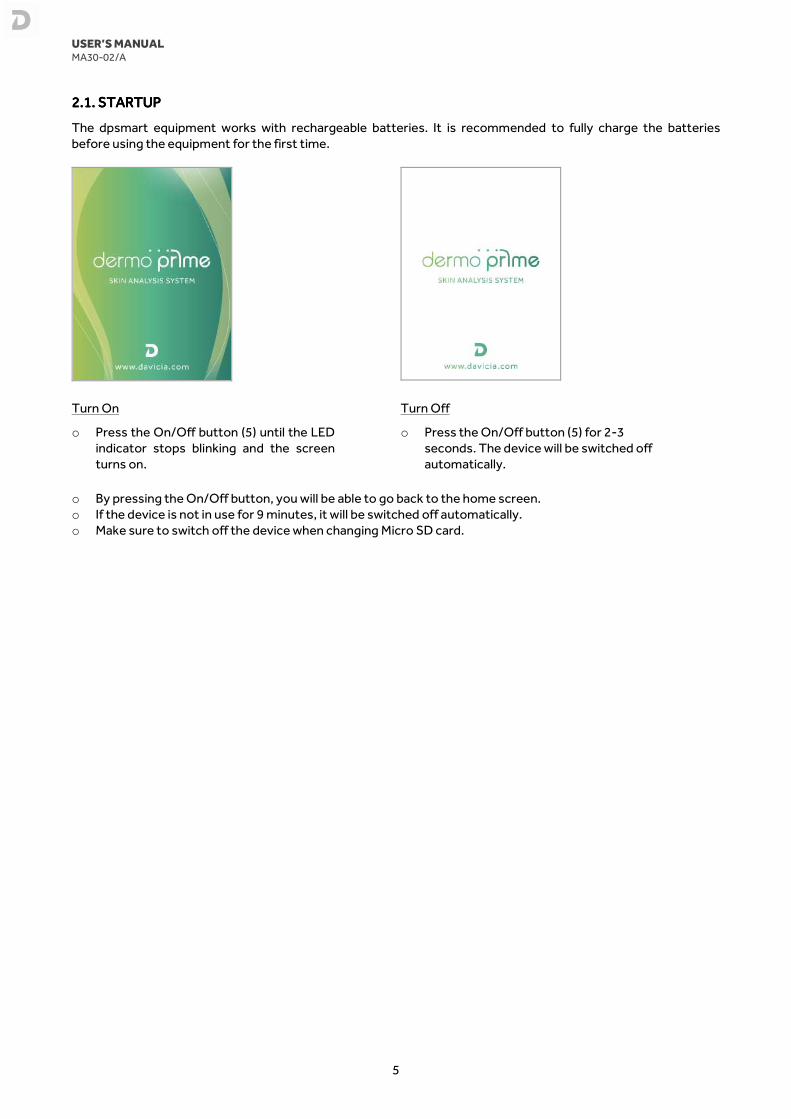
2.1. 2.1. 2.1. 2.1. STARTUPSTARTUPSTARTUPSTARTUP
The dpsmart equipment works with rechargeable batteries. It is recommended to fully charge the batteries
before using the equipment for the first time.
Turn On
o Press the On/Off button (5) until the LED
indicator stops blinking and the screen
turns on.
Turn Off
o Press the On/Off button (5) for 2-3
seconds. The device will be switched off
automatically.
o By pressing the On/Off button, you will be able to go back to the home screen.
o If the device is not in use for 9 minutes, it will be switched off automatically.
o Make sure to switch off the device when changing Micro SD card.

USER’S MANUAL
MA30-02/A
6
3. OPERATION
The analyzer dpsmart allows for capture and view images of the skin under high magnification and detail.
Following are the steps to perform a complete diagnosis.
3.13.13.13.1. . . . LCD SYMBOL DESCRIPTIONLCD SYMBOL DESCRIPTIONLCD SYMBOL DESCRIPTIONLCD SYMBOL DESCRIPTION
DisplayDisplayDisplayDisplay DescriptionDescriptionDescriptionDescription
Battery fully charged
Most of the battery charged
Half of the battery charged
Out of battery: Battery need to charge or replace.
Guide is enabled
Measurement Indicates the measurement mode which is enabled
Previous
Capture
Next
Measurement

USER’S MANUAL
MA30-02/A
7
3.23.23.23.2. . . . KEY FUNCTIONSKEY FUNCTIONSKEY FUNCTIONSKEY FUNCTIONS
DesignationDesignationDesignationDesignation Function Function Function Function
• On / Off
• Go to homescreen
• Enable / Disable the guide
• Left
• Right
• Homesceen: Press and hold to move to the Bluetooth
paring mode.
• Album: Exit image view
• Capture image
• Left
• Homescreen: Press and hold to go to the Album
• Diagnosis: Previous measurement
• End of diagnosis: Go to Bluetooth settings
• Confirm
• Diagnosis: Capture image
• Album: See the images
• Right
• Homescreen: Press and hold to go to the Configuration
• Album: Delete an image
• Diagnosis: Next measurement
3.33.33.33.3. . . . RECOMMENDED LOCATION FRECOMMENDED LOCATION FRECOMMENDED LOCATION FRECOMMENDED LOCATION FOR MEASUREMENT (GUIDE)OR MEASUREMENT (GUIDE)OR MEASUREMENT (GUIDE)OR MEASUREMENT (GUIDE)
The following guide is just orientative.
Moisture
Sebum T-zone Sebum U-zone
Uniformity Spots Wrinkles

USER’S MANUAL
MA30-02/A
8
3.4. 3.4. 3.4. 3.4. ANALYSIS MODESANALYSIS MODESANALYSIS MODESANALYSIS MODES
On the home screen you can select between four different modes of analysis:
Express:Express:Express:Express:
1. Moisture
2. Uniformity and spots
3. Sebum
4. Wrinkles
Simple:Simple:Simple:Simple:
1. Moisture
2. Sebum
Full:Full:Full:Full:
1. Moisture
2. Sebum
3. Uniformity
4. Wrinkles
5. Spots
The fourth mode is ViewViewViewView, which allows you to view and capture images with the
two polarizations of the device. Captures are not stored.
NOTE: The measures that have been disabled in the settings will not be
performed. The above lists correspond to the full set of measurements
considering that all of them are enabled.
3.3.3.3.5555. . . . CUSTOMER REGISTRATIONCUSTOMER REGISTRATIONCUSTOMER REGISTRATIONCUSTOMER REGISTRATION
The customer record is optional. At the beginning of each test (except Simple mode) we can register the client
so that the contents of the analysis are stored in the memory of dpsmart.
If you use the software dpsmart dermoprime, you must register the client to analyze the data later.If you use the software dpsmart dermoprime, you must register the client to analyze the data later.If you use the software dpsmart dermoprime, you must register the client to analyze the data later.If you use the software dpsmart dermoprime, you must register the client to analyze the data later.
Use the Up, Down,Use the Up, Down,Use the Up, Down,Use the Up, Down, Left and Right keys to enter customer data. Press Confirm to save your selection. Left and Right keys to enter customer data. Press Confirm to save your selection. Left and Right keys to enter customer data. Press Confirm to save your selection. Left and Right keys to enter customer data. Press Confirm to save your selection.
o Select first, the customer's age group.
o Then select the gender of the customer.
o To enter the customer's name, scroll through the keyboard and press the Confirm key to enter the selected
letter.
o After entering the name, press M.
o Press Confirm to start measuring.

USER’S MANUAL
MA30-02/A
9
3.3.3.3.6666. . . . MOISTUREMOISTUREMOISTUREMOISTURE
To take the moisture measurement correctly it is important that the sensor is not
in contact with the skin at the beginning of the measurement.
o When the device makes a “beep-beep” sound, place the moisture sensor in
contact with the skin
o The green bar on the display will start moving
o With the “diriring” sound the result of the measurement will appear on display
o Press Next button to move to the next measurement
3.3.3.3.7777. . . . SEBUMSEBUMSEBUMSEBUM
The sebum measurement of two differentiated areas of the face,
is meant to determine the skin type (dry, normal, mixed or oily).
This process must be repeated for both designated face areas (U-
zone and T-zone).
o Take one sample of sebum indicator
o Press the pink area of the sebum indicator on the skin for 3
seconds, in the T-zone
o Frame the pink area, impregnated with skin’s sebum, using
the camera
o Press Capture button
o Press Next button
o Repeat the previous steps for the U-zone, using a new sebum
indicator sample
o Press Next button when finished
3.3.3.3.8888. . . . EVENNESS, PORES, SPOTS AND WRINKLESEVENNESS, PORES, SPOTS AND WRINKLESEVENNESS, PORES, SPOTS AND WRINKLESEVENNESS, PORES, SPOTS AND WRINKLES
In order to diagnose further measurements, capture images of the recommended
areas
o Place the analyzer head in the recommended location according to the
measurement
o Press and hold the Capture button until the analyzer finishes the auto focus
and takes the picture
o Press Next button to go to the next measurement
USER’S MANUAL
MA30-02/A
10
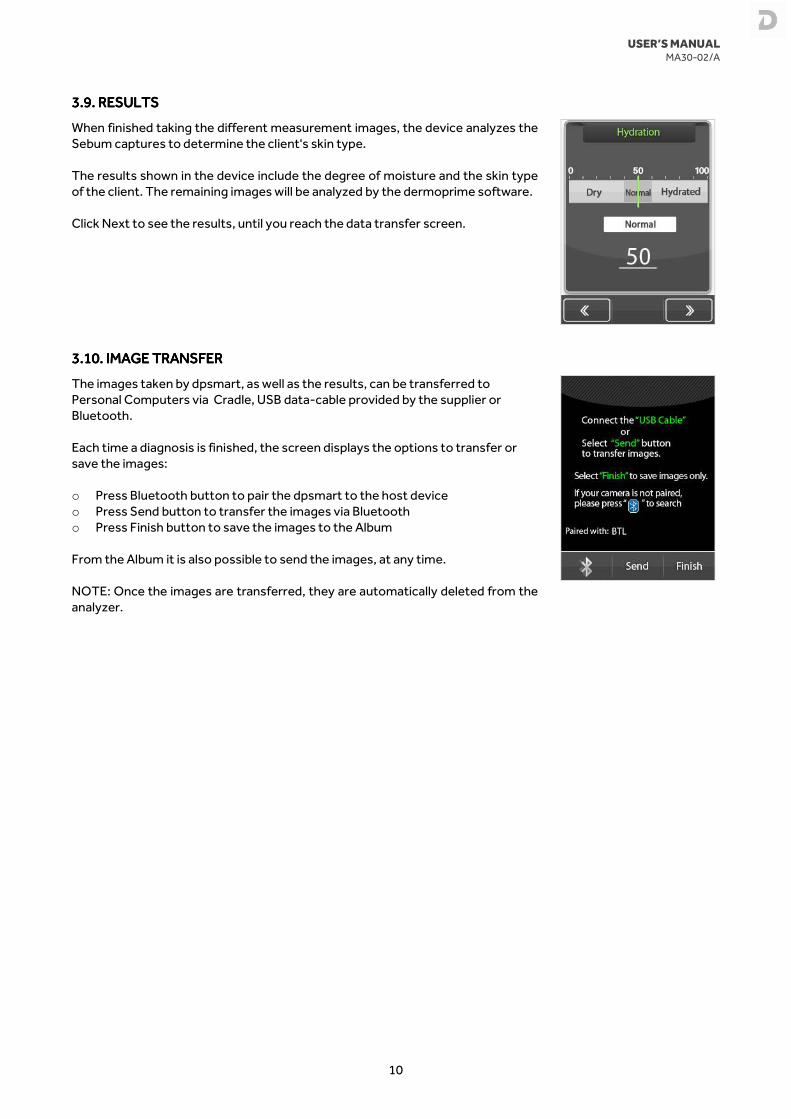
3.3.3.3.9999. . . . RESULTSRESULTSRESULTSRESULTS
When finished taking the different measurement images, the device analyzes the
Sebum captures to determine the client's skin type.
The results shown in the device include the degree of moisture and the skin type
of the client. The remaining images will be analyzed by the dermoprime software.
Click Next to see the results, until you reach the data transfer screen.
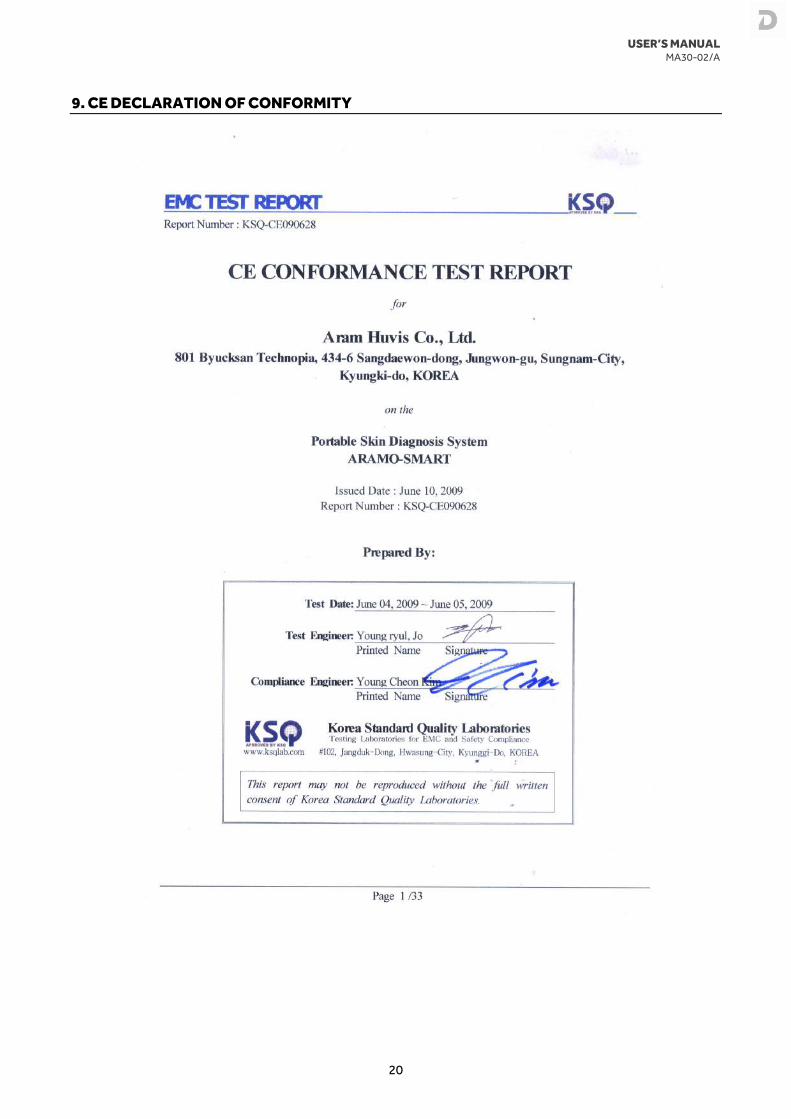
3.3.3.3.10101010. . . . IMAGE TRANSFERIMAGE TRANSFERIMAGE TRANSFERIMAGE TRANSFER
The images taken by dpsmart, as well as the results, can be transferred to
Personal Computers via Cradle, USB data-cable provided by the supplier or
Bluetooth.
Each time a diagnosis is finished, the screen displays the options to transfer or
save the images:
o Press Bluetooth button to pair the dpsmart to the host device
o Press Send button to transfer the images via Bluetooth
o Press Finish button to save the images to the Album
From the Album it is also possible to send the images, at any time.
NOTE: Once the images are transferred, they are automatically deleted from the
analyzer.

USER’S MANUAL
MA30-02/A
11
4. SETUP
4.14.14.14.1. . . . PROGRAMMINGPROGRAMMINGPROGRAMMINGPROGRAMMING
o Press and hold Setup button for 2-3 seconds to enter the setup menu.
o Press Left or Right keys to move left or right through the different menu options
o To confirm an option press the middle button
The options of the setup menu are:
Date / TimeDate / TimeDate / TimeDate / Time Modify date and time settings
LanguageLanguageLanguageLanguage Change the language of the software
ModeModeModeMode Set the diagnosis mode
MeasurementMeasurementMeasurementMeasurement Select the measurements you want to diagnose
BTBTBTBT Select the Bluetooth pairing device
WiWiWiWi----FiFiFiFi This option is permanently disabled
AdvanceAdvanceAdvanceAdvance Information related to the software version and contact details
o To exit the setup menu, press the On/Off button.
4.1.1. Date / Time setting4.1.1. Date / Time setting4.1.1. Date / Time setting4.1.1. Date / Time setting
If you select the Date / TimeDate / TimeDate / TimeDate / Time option, the display shows the following screen:
o Press Left or Right keys to move through the different values
o Press Up or Down keys to decrease or increase the selected value
o Press Confirm to set the current value and move to the next one
o Once the date and time are set, press the On/Off button to go back to the
setup menu

USER’S MANUAL
MA30-02/A
12
4.1.4.1.4.1.4.1.2222. . . . LanguageLanguageLanguageLanguage setting setting setting setting
If you select the LanguageLanguageLanguageLanguage option, the display shows the following screen:
o Press Left or Right keys to move down or up through the language options
o Press Confirm to set the language
o To go back to the setup menu, press the On/Off button
4.1.4.1.4.1.4.1.3333. . . . ModeModeModeMode setting setting setting setting
If you select the ModeModeModeMode option, the display shows the following screen:
o Press Left or Right keys to move down or up through the mode options (see
3.4. Analysis modes)
o To go back to the setup menu, press the On/Off button
4.1.4.1.4.1.4.1.4444. . . . MeasurementsMeasurementsMeasurementsMeasurements setting setting setting setting
If you select the MeasurementMeasurementMeasurementMeasurement option, the display shows the following screen:
o Press Left or Right keys to move down or up through the measurement
options
o Press Confirm key to enable/disable the selected measurement
o Green: measurement is enabled
o Gray: measurement is disabled
o To go back to the setup menu, press the On/Off button

USER’S MANUAL
MA30-02/A
13
4.1.4.1.4.1.4.1.5555. . . . BluetoothBluetoothBluetoothBluetooth settings settings settings settings
If you select the BTBTBTBT option, the display shows the following screen:
o The display will show all devices that are ready to connect via Bluetooth. Wait until the list is full and the
search is complete.
o Press the Left or Right keys to scroll through Bluetooth devices
o When the desired device is selected, press Connect.
o If the host device requires pairing code, enter "0" (number) in Bluetooth pairing settings.
o When the connection is completed, the analyzer screen will display "Bluetooth device connected"
4.1.4.1.4.1.4.1.6666. Advance. Advance. Advance. Advancedddd settings settings settings settings
If you select the AdvancedAdvancedAdvancedAdvanced option, the display shows the following screen:
o This screen includes the software version and the contact details
o To go back to the setup menu, press the On/Off button

USER’S MANUAL
MA30-02/A
14
4.4.4.4.2222. . . . CONNECTING WITH PCCONNECTING WITH PCCONNECTING WITH PCCONNECTING WITH PC
The images taken with the analyzer can be transferred to other devices either wirelessly or using a USB cable
provided by the supplier.
4.2.1. Connecting with cable4.2.1. Connecting with cable4.2.1. Connecting with cable4.2.1. Connecting with cable
o Plug the USB cable to the cradle and to the PC as indicated in the pictures below.
o Plug the device into the cradle. If you wish not to use the cradle, connect the USB cable directly to the device.
o On the display on the device will appear the message “USB connexion”. If the message doesn’t appear, turn
on the device.
o The PC will automatically recognise the device and will enable image browsing.
NOTE: Always use the USB data-cable provided by the supplier.
4.2.4.2.4.2.4.2.2222. Connecting with . Connecting with . Connecting with . Connecting with BluetoothBluetoothBluetoothBluetooth
o Place the Bluetooth device within 1 m (3 ft) from the analyzer.
o Press and hold “M” button, on the side of the analyzer.
o Follow the steps in the Bluetooth settings (see 4.1.5. Bluetooth settings)
PC
Cradle (back side)

USER’S MANUAL
MA30-02/A
15
5. MAINTENANCE AND CLEANING
The device does not require any routine maintenance. However, we recommend cleaning the screen and
moisture sensor at regular intervals. The regularity of these cleaning is dependent on the level of use and the
state of the equipment.
o We would recommend using smooth, slightly moistened wipes when cleaning the equipment.
o Please do not use large amounts of water when cleaning the equipment as this will cause damage to the
electronics, you should also refrain from using corrosive liquids.
o Clean only the exterior surface of the equipment, never the batteries or any other inner component.
5.15.15.15.1. . . . INSTRUCTIONS FOR INSTALLING BATTERIESINSTRUCTIONS FOR INSTALLING BATTERIESINSTRUCTIONS FOR INSTALLING BATTERIESINSTRUCTIONS FOR INSTALLING BATTERIES
1. Slide to open the battery
cover
2. Insert the battery 3. Close the battery cover
5.5.5.5.2222. INSTRUCTIONS FOR CHARGE AND CONNECT. INSTRUCTIONS FOR CHARGE AND CONNECT. INSTRUCTIONS FOR CHARGE AND CONNECT. INSTRUCTIONS FOR CHARGE AND CONNECT
Using charger
1. Connect the equipment to the power supply
2. The LED indicator (4) will turn on
o Orange: Battery is charging
o Blue: Battery is fully charged
3. When the LED indicator turns blue, unplug the
equipment.
Using cradle
1. Plug the charger into the cradle
2. Connect the device to the cradle.
3. The LED indicator (4) will turn on
o Orange: Battery is charging
o Blue: Battery is fully charged
4. When the LED indicator turns blue, unplug the
equipment.

USER’S MANUAL
MA30-02/A
16
Battery charging and operation time
BatteryBatteryBatteryBattery ChargingChargingChargingCharging Operation (Continuous use)Operation (Continuous use)Operation (Continuous use)Operation (Continuous use)
Standard (1150mAh) 180 minutes 100 minutes
o Battery charging hours are measured using the standard adaptor provided by the supplier.
o Charging and operation hours can be different depending on user circumstance.
o Battery operation hours can be different in various circumstances including operating mode, battery life time.
o Battery can be used even if the deice is on sleep or switched off.
o It is suggested to purchase new battery when the battery last less than half compare to its initial use.
5.35.35.35.3. . . . ENVIRONMENTALENVIRONMENTALENVIRONMENTALENVIRONMENTAL
All batteries contain toxic compounds; disposal of batteries should be delegated to a competent organization,
complying with the deposit of Poisonous Waste Regulation 1972.
Please do not incinerate batteries.
The optimum operating temperature for the device is -10ºC to +50ºC; although it will operate at higher and lower
temperatures the scale’s battery life will adversely be affected.
5.5.5.5.4444. EQUIPMENT DISPOSAL. EQUIPMENT DISPOSAL. EQUIPMENT DISPOSAL. EQUIPMENT DISPOSAL
All electrical and electronic products should be disposed of separately from the
municipal waste stream via designated collection facilities appointed by the
government or the local authorities.
This crossed-out wheeled bin symbol on the product means the product is covered
by the European Directive 2002/96/EC.
The correct disposal and separate collection of the equipment will help prevent
potential negative consequences for the environment and human health. It is a
precondition for reuse and recycling of used electrical and electronic equipment.

USER’S MANUAL
MA30-02/A
17
6. TROUBLESHOOTING
Symptoms Symptoms Symptoms Symptoms CorrectionCorrectionCorrectionCorrection
I cannot turn on the device. - The battery might be discharged. Please use it after charging fully.
I see that the charging lamp is
blinking.
The battery is not charging very
well.
- Please remove the battery from the device and put it on again.
- Please check the connection among a device, a battery, and a charger.
- A battery cannot be charged if there is an alien substance on the
charging port. In this case, please use the device after cleaning the
charging port of the device.
There are dust or an alien
substance on the device.
- Please use a smooth fabric to clean the device. Do not use benzene,
alcohol or a synthetic detergent in order to clean.
I cannot power on the device
even the battery is still full.
- The battery might be dislocated on the device. Please remove the
battery from the device and put it on, and then power on again.
The using time of the battery is
different from the manual.
- The battery using time will be shortened if you put the charged battery
in low or high temperature environments.
- The battery using time vary in service type, using environment, using
period of the battery.
- The battery is consumed without using the device, and the battery
using time will be shortened if you use additional functions of the
device, such as the Bluetooth.
The screen is frozen and the
keys not working when using the
device.
- Please remove the battery from the device and put it on again.
- If the device is still not working, please contact to the customer service
center.
I cannot transfer the
file by Bluetooth.
- Please check whether the paring is completed with the device which
you want to transfer.
No Bluetooth function on the
hosting device.
- Make sure to use the Bluetooth hosting devices that have Bluetooth
certified with the logo. You may need an external Bluetooth dongle for
those devices that do not have Bluetooth feature.
When pairing cannot be done. - Bring the device to closer with the Bluetooth hosting device.
- Make sure the pass code for connection is “0” (zero) for pairing.
- Refer to the pairing instruction from the manual.
- The analyzer needs to search for the hosting devices, not the other
way around. Check for the name of the hosting devices (PDA or PC)
before search.
I cannot find the images from the
album.
- Insert the SD card once more.
- Remove the SD card and insert firmly.
When PC cannot recognize the
device.
- Make sure the USB connection is firmly plugged (with pressure).
- Make sure the device has SD card plugged firmly on the right socket of
the bottom.
- Try on different USB ports in case the PC has faulty ports
- Make sure the PC OS is one of listed below : 98SE, 2000, XP, Vista, and
Windows 7 and USB supportive PC unit.
When date and time is wrong. - Change the date and time on the front screen.

USER’S MANUAL
MA30-02/A
18
7. TECHNICAL SPECIFICATIONS
Model: dpsmart
Manufacturer: Aram Huvis Co., Ltd. under licence from DAVI & CIA
Display: 2.2 inches TFT LCD
320 x 240 pixels QVGA – 40.2 x 55.66 mm
Weight: 127 g (with battery)
Maximum external
dimensions:
57 x 116 x 18 mm
Image sensor:
Type:
Maximize pixel:
Available pixel:
Capture mode:
1/2.7 Type CCD Image Sensor
1188(H) x 888(V) x 2 2,109,888 Pixel
1152(H) x 864(V) x 2 1,990,656 Pixel
X1, X30, X60
Bluetooth:
Version:
Frequency range:
Available distance:
Fully Qualified Bluetooth V2.0+EDR System
2402 ~ 2480MHz
Up to 10M / 1Mbps
Power supply:
Li-Ion Battery 4.2V 1150mA
AC Adaptor DC 5V / 1000mA
Memory card: Micro SD Ver2.0 (2GB)
In operation:
Temperature:
Humidity:
-10 ºC to +50 ºC
5 % to 85 %

USER’S MANUAL
MA30-02/A
19
8. WARRANTY CERTIFICATE
We provide a 1111----yearyearyearyear guarantee from the date of purchase. The guarantee covers manufacturing defects or
defects occurring as a result of normal use and operation.
It excludes all removable parts such as batteries, wires, power supply devices, etc. Faults falling within the
guarantee period shall be rectified free of charge upon presentation of the purchase receipt for the appliance. No
other rights can be taken into consideration.
Return shipment is at the customer's expense if the appliance is anywhere other than at the customer's
headquarters.
In the event of damage during shipment, guarantee rights will be granted only if the appliance is shipped in the
original packaging. You are therefore recommended to keep the original packaging.
Following expiry of the guarantee period, all services requested will be dealt with by our specialist technicians at
the user's expense.
USER’S MANUAL
MA30-02/A
20
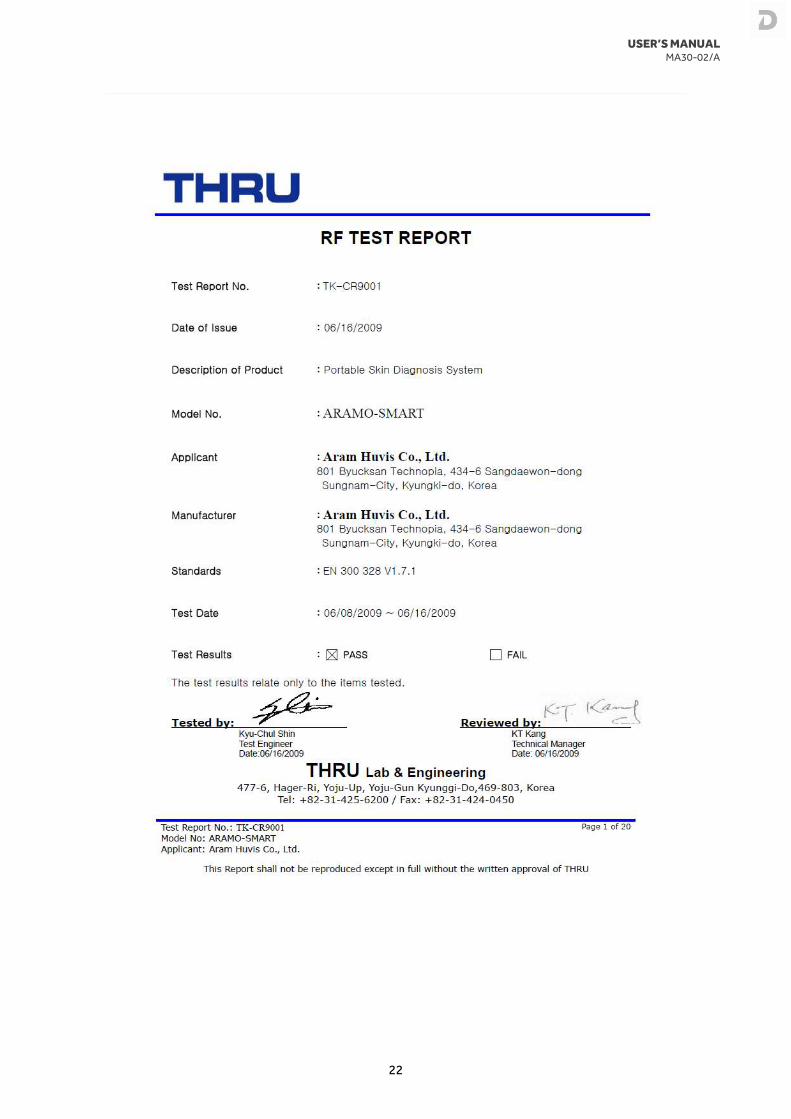
9. CE DECLARATION OF CONFORMITY

USER’S MANUAL
MA30-02/A
21
USER’S MANUAL
MA30-02/A
22

USER’S MANUAL
MA30-02/A
23
This manual and other support documents are available on the web
www.davicia.comwww.davicia.comwww.davicia.comwww.davicia.com
C/ Murcia, 35 Nave G Pol.industrial Can Calderón.
E 08830 Sant Boi de Llobregat. Barcelona. Spain
Tel. +34 93 654 32 32
Fax. +34 93 654 16 62
www.davicia.com