Embed Size (px)
Citation preview

User’s Guide
Command Line Utilityfor Internal RAID Storage

● 2
Copyright
©2006 Adaptec, Inc. All rights reserved. No part of this publication may be reproduced, stored in a retrieval system, or transmitted in any form or by any means, electronic, mechanical, photocopying, recording or otherwise, without the prior written consent of Adaptec, Inc., 691 South Milpitas Blvd., Milpitas, CA 95035.
Trademarks
Adaptec, the Adaptec logo, and Adaptec Storage Manager are trademarks of Adaptec, Inc., which may be registered in some jurisdictions.
Microsoft and Windows are trademarks of Microsoft Corporation in the US and other countries, used under license.
Red Hat is a trademark of Red Hat, Inc. in the US and other countries, used under license.
Novell and NetWare are trademarks of Novell, Inc. in the US and other countries, used under license.
All other trademarks are the property of their respective owners.
Changes
The material in this document is for information only and is subject to change without notice. While reasonable efforts have been made in the preparation of this document to assure its accuracy, Adaptec, Inc. assumes no liability resulting from errors or omissions in this document, or from the use of the information contained herein.
Adaptec reserves the right to make changes in the product design without reservation and without notification to its users.
Disclaimer
IF THIS PRODUCT DIRECTS YOU TO COPY MATERIALS, YOU MUST HAVE PERMISSION FROM THE COPYRIGHT OWNER OF THE MATERIALS TO AVOID VIOLATING THE LAW WHICH COULD RESULT IN DAMAGES OR OTHER REMEDIES.
● 3
Software License AgreementPLEASE READ CAREFULLY: THE USE OF THIS SOFTWARE IS SUBJECT TO THE SOFTWARE LICENSE TERMS OF ADAPTEC, INC. AND OTHER LICENSORS WHOSE SOFTWARE MAY BE BUNDLED WITH THIS PRODUCT.
BY YOUR USE OF THE SOFTWARE INCLUDED WITH THIS PRODUCT YOU AGREE TO THE LICENSE TERMS REQUIRED BY THE LICENSOR OF THAT SOFTWARE, AS SET FORTH DURING THE INSTALLATION PROCESS. IF YOU DO NOT AGREE TO THE LICENSE TERMS APPLICABLE TO THE SOFTWARE, YOU MAY RETURN THE ENTIRE UNUSED PRODUCT FOR A FULL REFUND.
In return for acquiring a license to use the Adaptec software, which may include software from third party licensors and patches made available by Adaptec (“Software”), and the related documentation, you agree to the following terms and conditions:
1. License. This Agreement grants you, the Licensee, a license to:
a. Use the Software on a single computer system, which is not intended for use by more than five (5) users; and:
b. Make one copy of the Software in machine readable form solely for back-up purposes, provided you reproduce Adaptec's copyright proprietary legends. Notwithstanding the foregoing, the Software may be used on the home, laptop or other secondary computer of the principal user of the Software, and an additional copy of the Software may be made to support such use. As used in this license, the Software is “in use” when it is either loaded into RAM or installed on a hard disk or other permanent memory device. The Software may be “in use” on only one computer at any given time. (Different license terms and fees are applicable for networked or multiple user applications.) As a specific condition of this license, you agree to use the Software in compliance with all applicable laws, including copyright laws, and that you will not copy, transmit, perform or distribute any audio or other content using the Software without obtaining all necessary licenses or permissions from the owner of the content.
2. Restrictions. You may not distribute copies of the Software to others or electronically transfer the Software from one computer to another over a network. You may not post or otherwise make available the Software, or any portion thereof, in any form, on the Internet. You may not use the Software in a computer service business, including in time sharing applications. The Software contains trade secrets and, in order to protect them, you may not decompile, reverse engineer, disassemble, or otherwise reduce the Software to a human-perceivable form. YOU MAY NOT MODIFY, ADAPT, TRANSLATE, RENT, LEASE, LOAN, RESELL FOR PROFIT, DISTRIBUTE, NETWORK OR CREATE DERIVATIVE WORKS BASED UPON THE SOFTWARE OR ANY PART THEREOF.
3. Ownership of Software. As Licensee, you own the media upon which the software is recorded or fixed, but Adaptec and its licensors retain title and ownership of the Software recorded on the original media and all subsequent copies of the Software, regardless of the form or media in which or on which the original and other copies may exist. This license is not a sale of the Software or any copy.
4. Confidentiality. You agree to maintain the Software in confidence and that you will not disclose the Software to any third party without the express written consent of Adaptec. You further agree to take all reasonable precautions to preclude access of unauthorized persons to the Software.
5. Term. This license is effective until January 1, 2045, unless terminated earlier. You may terminate the license at any time by destroying the Software (including the related documentation) together with all copies or modifications in any form. Adaptec will have the right to terminate our license immediately if you fail to comply with any term or condition of this Agreement. Upon any termination, including termination by you, you must destroy the Software (including the related documentation), together with all copies or modifications in any form.
6. Special Terms Applicable to Databases. Where a database is included with the Software, you acknowledge that it is licensed only in connection with the use of the Software to perform disc creation, and that the database and all data derived therefrom must be maintained in confidence in accordance with the provisions of Section 4. This license does not grant you any rights to distribute or disclose such database or data.
7. Limited Warranty. Adaptec and its Licensor warrant only that the media upon which the Software is furnished will be free from defects in material or workmanship under normal use and service for a period of thirty (30) days from the date of delivery to you. ADAPTEC AND ITS LICENSORS DO NOT AND CANNOT WARRANT THE PERFORMANCE OR RESULTS YOU MAY OBTAIN BY USING THE SOFTWARE OR DOCUMENTATION. THE FOREGOING STATES THE SOLE AND EXCLUSIVE REMEDIES ADAPTEC AND ITS LICENSORS WILL PROVIDE FOR BREACH OF WARRANTY. EXCEPT FOR THE FOREGOING LIMITED WARRANTY, ADAPTEC AND ITS LICENSORS MAKE NO WARRANTIES, EXPRESSED OR IMPLIED, INCLUDING, BUT NOT LIMITED, AS TO NON-INFRINGEMENT OF THIRD PARTY RIGHTS, MERCHANTABILITY OR FITNESS FOR A PARTICULAR PURPOSE. Some states do not allow the exclusion of implied warranties or limitations on how long an implied warranty may last, so the above limitations may not apply to you. This warranty gives you specific legal rights and you may also have other rights which vary from state to state.
8. The entire liability of Adaptec and its licensors, and your exclusive remedy for a breach of this warranty, shall be:
a. The replacement of any media not meeting the above limited warranty which is returned to Adaptec; or:
b. if Adaptec or its distributor is unable to deliver replacement media which is free from defects in materials or workmanship, you may terminate this Agreement by returning the Software and your money will be refunded.
9. Limitation of Liability. IN NO EVENT WILL ADAPTEC OR ITS LICENSORS BE LIABLE TO YOU FOR ANY INCIDENTAL, CONSEQUENTIAL OR INDIRECT DAMAGES, INCLUDING ANY LOST PROFITS, LOST SAVINGS, OR LOSS OF DATA, EVEN IF ADAPTEC OR A LICENSOR HAS BEEN ADVISED OF THE POSSIBILITY OF SUCH DAMAGES, OR FOR ANY CLAIM BY ANY OTHER PARTY. Some states do not allow the exclusion or limitation of special, incidental, or consequential damages, so the above limitation or exclusion may not apply to you.
10. Export. You acknowledge that the laws and regulations of the United States and other countries may restrict the export and re-export of the Software. You agree that you will not export or re-export the Software or documentation in any form in violation of applicable United States and foreign law.
11. Government Restricted Rights. The Software is subject to restricted rights as follows. If the Software is acquired under the terms of a GSA contract: use, reproduction or disclosure is subject to the restrictions set forth in the applicable ADP Schedule contract. If the Software is acquired under the terms of a DoD or civilian agency contract, use, duplication or disclosure by the Government is subject to the restrictions of this Agreement in accordance with 48 C.F.R. 12.212 of the Federal Acquisition Regulations and its successors and 49 C.F.R. 227.7202-1 of the DoD FAR Supplement and its successors.
12. General. You acknowledge that you have read this Agreement, understand it, and that by using the Software you agree to be bound by its terms and conditions. You further agree that it is the complete and exclusive statement of the agreement between Adaptec and you, and supersedes any proposal or prior agreement, oral or written, and any other communication between Adaptec and you relating to the subject matter of this Agreement. No additional or any different terms will be enforceable against Adaptec unless Adaptec gives its express consent, including an express waiver of the terms of this Agreement, in writing signed by an officer of Adaptec. You assume full responsibility for the use of the Software and agree to use the Software legally and responsibly. This Agreement shall be governed by California law, except as to copyright matters, which are covered by Federal law. This Agreement is deemed entered into at Milpitas, California by both parties. Should any provision of this Agreement be declared unenforceable in any jurisdiction, then such provision shall be deemed severable from this Agreement and shall not affect the remainder hereof. All rights in the Software not specifically granted in this Agreement are reserved by Adaptec.
Should you have any questions concerning this Agreement, you may contact Adaptec by writing to:
Adaptec, Inc.Legal Department691 South Milpitas BoulevardMilpitas, California 95035

Contents
Getting Started with the Command Line UtilityInstalling the Command Line Utility................................................................. 7
Installing on Windows.................................................................................. 7Installing on Linux........................................................................................ 7Installing on NetWare .................................................................................. 7Installing on OpenServer and UnixWare .................................................... 8Installing on Solaris ...................................................................................... 8
Starting the Command Line Utility ................................................................... 9
Using the Command Line UtilityARCCONF Commands .................................................................................... 11
arcconf copyback ........................................................................................ 11arcconf create .............................................................................................. 12arcconf delete .............................................................................................. 13arcconf driverupdate................................................................................... 13arcconf getconfig......................................................................................... 14arcconf getlogs............................................................................................. 15arcconf getstatus ......................................................................................... 15arcconf getversion....................................................................................... 16arcconf identify ........................................................................................... 16arcconf key .................................................................................................. 16arcconf modify ............................................................................................ 17arcconf rescan ............................................................................................. 18arcconf romupdate ..................................................................................... 18arcconf setalarm.......................................................................................... 19arcconf setcache .......................................................................................... 19arcconf setconfig ......................................................................................... 20arcconf setname .......................................................................................... 20arcconf setstate ............................................................................................ 21arcconf snapshot ......................................................................................... 21arcconf task ................................................................................................. 22

Contents ● 5
HRCONF Commands ...................................................................................... 23hrconf backup ............................................................................................. 23hrconf create ............................................................................................... 24hrconf delete................................................................................................ 24hrconf getconfig .......................................................................................... 25hrconf getstatus........................................................................................... 25hrconf getversion ........................................................................................ 25hrconf identify............................................................................................. 26hrconf rescan............................................................................................... 26hrconf restore.............................................................................................. 26hrconf romupdate....................................................................................... 27hrconf setboot ............................................................................................. 27hrconf setconfig .......................................................................................... 27hrconf setstate ............................................................................................. 28hrconf task................................................................................................... 28
1
Getting Started with the Command Line UtilityIn this chapter...
Installing the Command Line Utility ...................................................................................... 7
Starting the Command Line Utility ........................................................................................ 9
This chapter explains how your Adaptec product supports the use of one of these command line utilities:
● ARCCONF—for Adaptec RAID controllers
● HRCONF —for Adaptec HostRAID products
Each utility allows you to:
● Create and delete logical drives
● Display and modify a limited set of configuration settings
● Copy configurations from one computer to another
● Recover from a failed physical device and rebuild an affected logical drive
● Flashes new firmware and BIOS onto the controller
● Enables the controller to check the removal and connection of any disk drives
● Restores the controller configuration (HRCONF only)
● Automatically update Windows drivers (ARCCONF only)
● Provides access to the status and event logs of a controller (ARCCONF only)
● Isolate problems and determine their causes (ARCCONF only)

Chapter 1: Getting Started with the Command Line Utility ● 7
Installing the Command Line UtilityBoth command line utilities are provided on the Adaptec Storage Manager CD. The utility (ARCCONF or HRCONF) is automatically installed in the same directory as Adaptec Storage Manager and must remain there.
Installing on WindowsTo install ARCCONF or HRCONF on Windows systems:
1 Start the computer.
2 After Windows starts, insert the Adaptec Storage Manager CD.
3 When the installation program starts, follow the on-screen instructions.
Installing on LinuxTo install ARCCONF or HRCONF on Linux systems:
1 Start the computer.
2 After Linux starts, insert the Adaptec Storage Manager CD.
3 Mount the Adaptec Storage Manager CD:
Red Hat—mount /dev/cdrom /mnt/cdrom
SuSE—mount /dev/cdrom /media/cdrom
4 Change to the cdrom directory:
Red Hat—cd /mnt/cdrom/linux/manager
SuSE—cd /media/cdrom/linux/manager
5 Extract the RPM package and install it:
rpm --install ./StorMan*.rpm
6 Unmount the Adaptec Storage Manager CD:
Red Hat—umount /mnt/cdrom
SuSE—umount /media/cdrom
Installing on NetWareTo install ARCCONF or HRCONF on NetWare:
You need the latest Support Pack for your operating system so you can run the supported Java Virtual Machine (JVM). You need JVM version 1.3 or later. To check your JVM version, load JVM, type JAVA -VERSION.
Note: For the latest updates from Novell, visit www.novell.com.
1 Insert the Adaptec Storage Manager CD.

Chapter 1: Getting Started with the Command Line Utility ● 8
2 From the command prompt type load cdrom, then press Enter. From the command prompt, type:
xx_yy_zz:\netware\manager\install
where xx is the product CD, yy is the version number, and zz is the release number. For example:
adptcd_v2_01
The installation program starts.
3 Follow the on-screen instructions to complete the installation.
Installing on OpenServer and UnixWareTo install ARCCONF on OpenServer and UnixWare systems or HRCONF on OpenServer:
1 Insert the Adaptec Storage Manager installation CD in the CD drive.
2 Mount the Adaptec Storage Manager installation CD:
mount -r -F cdfs /dev/cdrom/cdromdevicefile /mnt
where cdromdevicefile is the device file, for example, c0b0t010, for the CD block device. To determine the actual filename, look in the /dev/cdrom directory.
3 Use pkgadd to install Adaptec Storage Manager:
pkgadd -d /mnt/unixware/manager/RaidMan.ds (for UnixWare)
pkgadd -d /mnt/openserv6/manager/RaidMan.ds (for OpenServer 6)
4 Follow the instructions on the screen to complete the installation.
5 Unmount the CD drive:
umount /mnt
Installing on SolarisNote: HRCONF is not supported by systems running Solaris.
To install ARCCONF on Solaris systems:
1 Insert the Adaptec Storage Manager Installation CD.
The CD mounts automatically. (If it doesn’t, manually mount the CD using a command similar to the one shown below. Refer to your operating system documentation for detailed instructions.)
mount -F hsfs -o ro/dev/dsk/c1t0d0s2/mnt
2 Install Adaptec Storage Manager:
pkgadd -d/<mount point>/solaris/manager/StorMan.ds
3 Follow the on-screen instructions to complete the installation.
Eject or unmount the Adaptec Storage Manager Installation CD. Refer to your operating system documentation for detailed instructions.

Chapter 1: Getting Started with the Command Line Utility ● 9
Starting the Command Line UtilityTo start ARCCONF or HRCONF, enter one of the following commands:
● Windows—c:\<install_dir*>\<name of utility>.exe
● Linux—/usr/<install_dir*>/<name of utility>
● NetWare—load <name of utility>
● UnixWare/OpenServer—/opt/RaidMan/<name of utility>
● Solaris—/usr/StorMan/<name of utility>
Install_dir* is the directory where the utility is installed and name of utility is ARCCONF or HRCONF.
To see a list of available commands, type ARCCONF or HRCONF at the prompt. The utility command functions are detailed in the next chapter, Using the Command Line Utility.

2
Using the Command Line UtilityIn this chapter...ARCCONF Commands ......................................................................................................... 11
HRCONF Commands............................................................................................................ 23
This chapter explains how to use the command line utility interactively or in batch mode. With interactive mode, enter commands at the prompt. In batch mode, create scripts and run the script in the appropriate shell. For example:
In either mode, if your command fails, you immediately see an error message of Command failed. Other script messages that you can get are Command completed successfully, or Command aborted.
With either utility, the return values for each command are the same. The return values are as follows:
0x00: SUCCESS
0x01: FAILURE - The requested command failed
0x02: ABORT - The command was aborted because parameters failed validation
0x03: INVALID_ARGUMENTS - The arguments are incorrect. (Displays COMMAND help)
Available commands are described on the following pages, in alphabetical order. To access a list of commands, type <name of utility> and press Enter.
To access the online help for a specific command, type <name of utility> <command>, then press Enter.
Environment Batch File Run Script
Windows .bat CMD.EXE
Linux/Unix .sh sh / bash

Chapter 2: Using the Command Line Utility ● 11
ARCCONF CommandsPerform the following functions from the command line:
Note: In the online command syntax, <> indicates a required parameter and [] indicates an optional parameter.
arcconf copybackEnables or disables the copyback feature, which attempts to keep drives in the original slot order after rebuilds.
SyntaxARCCONF COPYBACK <Controller#> <ON|OFF>
Parameters
Controller# is the controller number
On enables the copyback feature
Off disables the copyback feature
Example
ARCCONF COPYBACK 1 ON
ARCCONF COMMANDS
copyback getversion setcache
create identify setconfig
delete key setname
driverupdate modify setstate
getconfig rescan snapshot
getlogs romupdate task
getstatus setalarm

Chapter 2: Using the Command Line Utility ● 12
arcconf createCreates a new logical drive. You must provide the channel and device ID of the physical devices.
On redundant logical drives, ARCCONF performs autosynchronization.
SyntaxARCCONF CREATE <Controller#> LOGICALDRIVE [Options] <Size> <RAID#> <CHANNEL# DRIVE#> [CHANNEL# DRIVE#] ... [noprompt]
ARCCONF CREATE <Controller#> LOGICALDRIVE RVOLUME <LD#> <LD#> [LD#] ... [noprompt]
Parameters
Controller# is the controller number
Logical Drive indicates the logical drive stripe size with the following options:
● Stripesize <STRIPE>—Allows the logical drive stripe size to be built. Optional parameters for specifying a stripe size. STRIPE is specified in kilobytes 16, 32, 64, 128, 256, 512 and 1024 are supported.The default is 256KB.
● Legs <LEG>—Optional parameters for specifying number of legs. Value is an integer.
● LEG—Number of legs for RAID level x0.
● RAID 50/60—2 - 16 legs, 3 - 16 drives/leg, 48 drives max.
● Name <NAME>—Optional parameter for specifying the alias name of a logical device that is displayed in the utilities. Value is a string of up to 16 characters.
● Priority <PRIORITY>—Initialization Priority for logical drive to be created. Valid options are: HIGH, MED, or LOW.
● Method <METHOD>—Initialization method for the logical drive. Valid options include: BUILD, CLEAR, QUICK.
● Rcache—The parameter to set the logical drive read cache.
● RON - read cache on
● ROFF - reach cache off
● Wcache—The parameter to set the logical drive write cache.
● WT - write-through disabled
● WB - write-back enabled
● WBB - write-back enabled (when protected by a battery)
Size indicates the size of the logical drive in megabytes. Use MAX to set size to available space.
RAID# indicates the RAID level for the new logical drive. 0, 1, 1E, 10, 5, 5EE, 50, 6, 60, and volume are supported.
Channel# Drive# lists the space-delimited channel number and device number pairs for each device to add to the logical drive.
Rvolume is the RAID level for a RAID volume logical drive.
LD# is the logical drive numbers for two or more logical drives to be concatenated into the RAID volume.
Noprompt: No prompt for confirmation
Example
ARCCONF CREATE 1 LOGICALDRIVE STRIPESIZE 64 MAX 0 1 0 1 1 1 2 NOPROMPT

Chapter 2: Using the Command Line Utility ● 13
arcconf deleteDeletes a logical drive. All data stored on the logical drive will be lost. Spanned drives cannot be deleted with this function.
SyntaxARCCONF DELETE <Controller#> LOGICALDRIVE <LogicalDrive#> <LD#> <LD#> [noprompt]
ARCCONF DELETE <Controller#> LOGICALDRIVE ALL [noprompt]
Parameters
Controller# is the controller number
LogicalDrive# is the number of the logical drive to be deleted.
LogicalDrive ALL deletes all logical drives
Noprompt is an optional parameter that suppresses alert messages.
Example ARCCONF DELETE 1 LOGICALDRIVE 1 2 3
ARCCONF DELETE 1 LOGICALDRIVE ALL
arcconf driverupdateUpdates Windows device drivers. When given a directory name, it will attempt to update a driver to the version found in the given directory.
Note: This command is available only on Windows systems.
SyntaxARCCONF DRIVERUPDATE <DirName>
Parameters
Driverupdate <DirName> is the directory path containing the driver that you want to update.
Example
ARCCONF DRIVERUPDATE C:\WINDOWSALL

Chapter 2: Using the Command Line Utility ● 14
arcconf getconfigLists information about the controllers, logical drives, and physical devices. This information can include (but is not limited to) the following items:
● Controller type
● BIOS, boot block, device driver, and firmware versions
● Logical drive status, RAID level, and size
● Physical device type, device ID, presence of PFA
● Physical device state
● Enclosure information: fan, power supply, and temperature status
Syntax
ARCCONF CONFIG <Controller#> [AD/LD/PD/AL]
Parameters
Controller# is the controller number
AD/LD/PD/AL options:
● AD—Adapter information only
● LD—Logical drive information only
● PD—Physical device information only
● AL—All information (optional)
Example
ARCCONF GETCONFIG 1 AD

Chapter 2: Using the Command Line Utility ● 15
arcconf getlogsObtains controller log information.
Provides access to the status and event logs of a controller. You can retrieve three types of logs:
● DEVICE—A log of any device errors the controller has encountered.
● DEAD—A log that records any occurrences of defunct devices.
● EVENT—A log of special events that may have occurred (e.g., rebuilds, LDMs, etc.).
● CLEAR—Optional, clears the specified controller log.
Syntax
ARCCONF GETLOGS <Controller#> <Type> [clear]
Parameters
Controller# is the controller number
Type is one of the following types of log to retrieve:
● DEVICE
● DEAD
● EVENT
● CLEAR
Example ARCCONF GETLOGS 1 DEVICE
arcconf getstatusThe GETSTATUS function displays the status of any background command that is currently running. Including information about the most recent rebuild, synchronization, logical-drive migration, and compaction/expansion. The information includes the type of operation, status, logical drive number, logical drive size, and percentage of the operation completed.
Note:
1 GETSTATUS reports currently active operations for both ARCCONF commands and commands issued from the Adaptec Storage Manager.
2 GETSTATUS reports verify, clear, initialize, and secure erase operations on physical devices.
3 GETSTATUS only reports active operations. It does not display information if the operation is completed.
SyntaxARCCONF GETSTATUS <Controller#>
Parameters
Controller# is the controller number
Example ARCCONF GETSTATUS 1

Chapter 2: Using the Command Line Utility ● 16
arcconf getversionLists version information for all controllers or a specific controller’s software components, including information about the BIOS, driver, firmware currently running, and firmware that will run after a reboot.
Note: The firmware version that will run after a reboot is called the “staged” firmware.
SyntaxARCCONF GETVERSION (use this for information on all controllers)
ARCCONF GETVERSION <Controller#> (use this for information on a specific controller)
Parameters
Controller# is the controller number
Example ARCCONF GETVERSION
arcconf identifyIdentifies a physical or logical device by blinking its LEDs.
SyntaxARCCONF IDENTIFY <Controller#> LOGICALDRIVE <LogicalDrive#>
ARCCONF IDENTIFY <Controller#> DEVICE <Channel#> <ID>
Parameters
Controller# is the controller number
LogicalDrive# is the number of the logical drive to be identified
Channel# is the channel number for the device to be identified
Device# is the device number for the device to be identified
Example ARCCONF IDENTIFY 1 DEVICE 0 0
ARCCONF IDENTIFY 1 ALL
arcconf keyLoads a feature key onto an Adaptec controller.
SyntaxARCCONF KEY <Controller#> SET <Key#>
Parameters
Controller# is the controller number
Key# is the key number provided by Adaptec
Example ARCCONF KEY 1 SET ABCD EFGH IJKL MNOP QRST UVWX
Chapter 2: Using the Command Line Utility ● 17
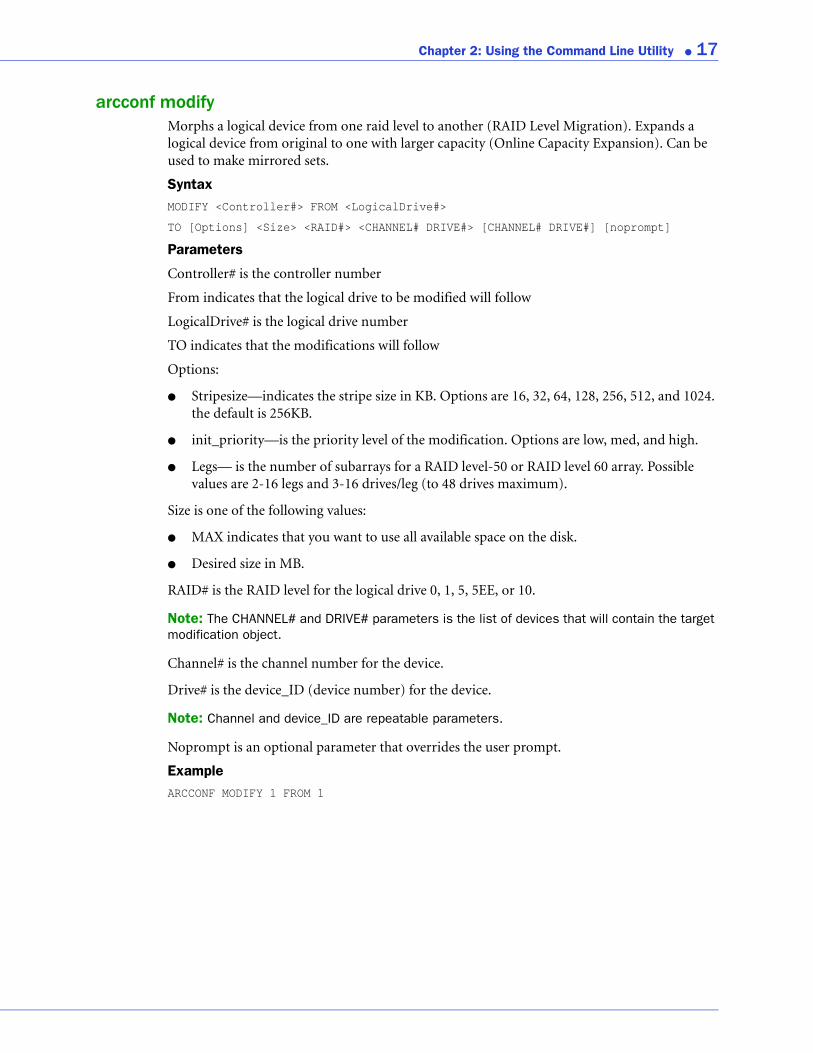
arcconf modifyMorphs a logical device from one raid level to another (RAID Level Migration). Expands a logical device from original to one with larger capacity (Online Capacity Expansion). Can be used to make mirrored sets.
SyntaxMODIFY <Controller#> FROM <LogicalDrive#>
TO [Options] <Size> <RAID#> <CHANNEL# DRIVE#> [CHANNEL# DRIVE#] [noprompt]
Parameters
Controller# is the controller number
From indicates that the logical drive to be modified will follow
LogicalDrive# is the logical drive number
TO indicates that the modifications will follow
Options:
● Stripesize—indicates the stripe size in KB. Options are 16, 32, 64, 128, 256, 512, and 1024. the default is 256KB.
● init_priority—is the priority level of the modification. Options are low, med, and high.
● Legs— is the number of subarrays for a RAID level-50 or RAID level 60 array. Possible values are 2-16 legs and 3-16 drives/leg (to 48 drives maximum).
Size is one of the following values:
● MAX indicates that you want to use all available space on the disk.
● Desired size in MB.
RAID# is the RAID level for the logical drive 0, 1, 5, 5EE, or 10.
Note: The CHANNEL# and DRIVE# parameters is the list of devices that will contain the target modification object.
Channel# is the channel number for the device.
Drive# is the device_ID (device number) for the device.
Note: Channel and device_ID are repeatable parameters.
Noprompt is an optional parameter that overrides the user prompt.
Example ARCCONF MODIFY 1 FROM 1

Chapter 2: Using the Command Line Utility ● 18
arcconf rescanEnables the controller to check for the removal of any disk drives in the ready state and to check for the connection of any new disk drives to the controller. The command returns when the rescan is complete.
SyntaxARCCONF RESCAN <Controller#>
Parameters
Controller# is the controller number
Example ARCCONF RESCAN 1
arcconf romupdateAllows new firmware and BIOS to be flashed to the controller. A reboot is required for the new firmware to take effect.
Note:
1 This function is only supported in Windows and Linux.2 Be sure to copy the *.UFI update files from the CD and not from the BIOS/Firmware
update diskettes.
SyntaxARCCONF ROMUPDATE <Controller#> <BaseName>
Parameters
Controller# is the controller number
BaseName is the name of the ROM image basename or the fully qualified name if you have a set of controller ROM images.
Note: All UFI files must be in the same directory prior to invoking ARCCONF. If you are copying UFI files from floppy images, be sure to check all images.
Example ARCCONF ROMUPDATE 1 AC2200
ARCCONF ROMUPDATE 1 AC220001.UFI

Chapter 2: Using the Command Line Utility ● 19
arcconf setalarmSets the state of the controller audible alarm, if present.
SyntaxARCCONF SETALARM <Controller#> <on|off|silence|test>
ParametersController# is the controller number
On enables the alarm
Off disables the alarm
Silence quiets the currently sounding alarm
Test triggers the alarm
Example ARCCONF SETALARM 1 TEST
ARCCONF SETALARM 1 SILENCE
arcconf setcacheChanges a logical drive’s cache mode.
SyntaxARCCONF SETCACHE <Controller#> LOGICALDRIVE <LogicalDrive#> <cache mode> [noprompt]
SETCACHE <Controller#> DEVICE <Channel> <ID> <cache mode>
Parameters
Controller# is the controller number
LogicalDrive# is the number of the logical drive whose cache will be altered
Logical drive cache modes:
● RON - read cache on
● ROFF - read cache off
● WT - write through disabled
● WB - write back enabled
● WBB - write back battery enabled (when protected by a battery)
Channel/ID lists the space-delimited channel number and device number pairs for each device to add to the logical drive.
Physical device cache modes:
● WT - write through disabled
● WB - write back enabled
Example ARCCONF SETCACHE LOGICALDRIVE 1 RON
ARCCONF SETCACHE DEVICE 0 0 WB

Chapter 2: Using the Command Line Utility ● 20
arcconf setconfigResets the controller's configuration. Logical drives are deleted, hard disks are reset to the READY state, and any controller settings are reset to default values.
SyntaxARCCONF SETCONFIG <Controller#> DEFAULT [noprompt]
Parameters
Controller# is the controller number
Default restores the controller ‘s default configuration.
Noprompt: No prompt for confirmation.
Example ARCCONF SETCONFIG 1 DEFAULT
arcconf setnameRenames a logical drive.
SyntaxARCCONF SETNAME <Controller#> LOGICALDRIVE <LogicalDrive#> <New Name>
Parameters
Controller# is the controller number
LogicalDrive# is the number of the logical drive to be renamed
New Name is the new name of the logical drive
Example ARCCONF SETNAME 1 LOGICALDRIVE 1 BACKUP_A

Chapter 2: Using the Command Line Utility ● 21
arcconf setstateChanges the state of a physical device from its current state to the designated state (Hot spare).
SyntaxARCCONF SETSTATE <Controller#> DEVICE <Channel#> <Device#> <State> [LOGICALDRIVE <LD#>[LD#] ... ]
Parameters
Controller# is the controller number
Channel# is the channel number for the drive
Device# is the device number for the device.
LD# parameters are used to create an assigned hot spare.
State:
● HSP—Create a hot spare from a ready drive
● RDY—Remove a hot spare designation
● DDD—Force a drive offline
Example ARCCONF SETSTATE 1 DEVICE 0 0 HSP LOGICALDRIVE 1 2 3
ARCCONF SETSTATE 1 DEVICE 0 0 RDY LOGICALDRIVE 2
arcconf snapshotCreate or manage a logical drive snapshot.
SyntaxARCCONF SNAPSHOT <Controller#> <COMMAND> ... [noprompt]
Parameters
Controller# is the controller number
Commands:
● map—display logical drives and any snapshot state.
● stop <Logicaldrive#>—Remove the snapshot associated with the given Logical drive.
● backup <source Logicaldrive#> <target Logicaldrive#>—Create a new snapshot, copying the full contents of the source to the target.
● nobackup <source Logicaldrive#> <target Logicaldrive#>—Create a new snapshot, copying only changes to the source to the target.
Noprompt: No prompt for confirmation.
Example ARCCONF SNAPSHOT 1 MAP

Chapter 2: Using the Command Line Utility ● 22
arcconf taskPerforms a task on a logical drive.
SyntaxARCCONF TASK
TASK START <Controller#> LOGICALDRIVE <LogicalDrive#> <options>[noprompt]
TASK STOP <Controller#> LOGICALDRIVE <LogicalDrive#>
TASK START <Controller#> DEVICE <Channel> <ID> <options>[noprompt]
TASK STOP <Controller#> DEVICE <Channel> <ID>
Parameters
Controller# is the controller number
LogicalDrive# is the number of the logical drive in which the task is to be performed
● Logical drive options:
● verify_fix (Verify with fix)—verifies the disk media and repairs the disk if bad data is found.
● verify—verifies the disk media.
● clear—removes all data from the drive.
● Physical device options:
● verify_fix—verifies the disk media and repairs the disk if bad data is found.
● verify—verifies the disk media.
● clear—removes all data from the drive.
● initialize—returns a drive to the READY state (erases the metadata).
● secureerase—removes all data from the drive in a secure fashion to prevent any possible recovery of the erased data.
Example ARCCONF TASK START 1 LOGICALDRIVE 1 VERIFY
ARCCONF TASK START 1 DEVICE 0 0 INITIALIZE

Chapter 2: Using the Command Line Utility ● 23
HRCONF CommandsPerform the following functions from the command line:
hrconf backupFor large-scale deployments, stores the current controller and disk drive configuration setting to a specific file. Stored files can be used with the RESTORE command to restore to another controller or disk drive. To restore, the controller or disk drive must have the same configuration as it did before the backup. For example: the same type of controller, same number and type of disk drives with same IDs and channels.
SyntaxHRCONF BACKUP <Controller#> <Filename>
Parameters
Controller# is the controller number
Filename is the relative or absolute path with filename
Example HRCONF BACKUP 1 C:\WINDOWS\HR2200
HRCONF Commands
backup getversion setboot
create identify setconfig
delete rescan setstate
getconfig restore task
getstatus romupdate

Chapter 2: Using the Command Line Utility ● 24
hrconf createCreates logical drives. You must provide the channel and device ID of the physical devices. On redundant logical drives, HRCONF performs autosynchronization.
SyntaxHRCONF CREATE <Controller#> LOGICALDRIVE [Options] <Size> <RAID#> <CHANNEL# DRIVE#> [CHANNEL# DRIVE#] ... [noprompt]
Parameters
Controller# is the controller number
Options indicates the logical drive with the following options:
● Stripesize—Optional parameters for specifying a stripe size. STRIPE is specified in kilobytes: 16, 32, and 64 are supported.
● Name—Optional parameter for specifying the name of the logical drive to be created.
● Init_Priority—Initialization Priority for logical drive to be created. Valid parameters are either HIGH, MED, or LOW.
● Init_Method—Initialization method for the logical drive. Valid options include: CLEAR, QUICK.
Size indicates the size of the logical drive. MAX is the only size option available.
RAID# indicates the RAID level for the logical drive (0, 1, 10 volume).
Channel# is the channel number for the device.
Drive# is the device number for the drive.
Noprompt: No prompt for confirmation.
Example
HRCONF CREATE 1 LOGICALDRIVE STRIPESIZE 64 MAX 0 1 0 1 1 1 2
hrconf deleteDeletes a logical drive. All data stored on the logical drive will be lost. Spanned drives cannot be deleted with this function.
SyntaxHRCONF DELETE <Controller#> LOGICALDRIVE <LogicalDrive#> <LD#> <LD#> [noprompt]
HRCONF DELETE <Controller#> LOGICALDRIVE ALL [noprompt]
Parameters
Controller# is the controller number
LogicalDrive# is the number of the logical drive to be deleted.
LogicalDrive ALL deletes all logical drives
Noprompt is an optional parameter that suppresses alert messages.
Example HRCONF DELETE 1 LOGICALDRIVE 1 2 3
HRCONF DELETE 1 LOGICALDRIVE ALL

Chapter 2: Using the Command Line Utility ● 25
hrconf getconfigLists information about the controllers, logical drives, and physical devices. This information can include (but is not limited to) the following items:
● Controller type
● Logical drive status, RAID level, and size
● Physical device type, device ID, presence of PFA
● Physical device state
SyntaxHRCONF GETCONFIG <Controller#> [AD/LD/PD/AL]
Parameters
Controller# is the controller number
AD/LD/PD/AL options:
● AD—Adapter information only
● LD—Logical drive information only
● PD—Physical device information only
● AL—All information (optional)
Example HRCONF GETCONFIG 1 AD
hrconf getstatusThe GETSTATUS function displays the status of any background command that is currently running.
SyntaxHRCONF GETSTATUS <Controller#>
Parameters
Controller# is the controller number
Example HRCONF GETSTATUS 1
hrconf getversionReturns the version information for all controllers or the optionally specified controller.
SyntaxHRCONF GETVERSION <Controller#>
Parameters
Controller# prints the version information for the specified controller
Example HRCONF GETVERSION

Chapter 2: Using the Command Line Utility ● 26
hrconf identifyBlinks the LEDs on a device(s) connected to a controller.
SyntaxHRCONF IDENTIFY <Controller#> LOGICALDRIVE <LogicalDrive#>
HRCONF IDENTIFY <Controller#> DEVICE <Channel#> <ID>
Parameters
Controller# is the controller number
LogicalDrive# is the number of the logical drive to be identified
Channel# is the channel number for the device
Device# is the device number for the drive.
Example HRCONF IDENTIFY 1 DEVICE 0 0
HRCONF IDENTIFY 1 ALL
hrconf rescanEnables the controller to check for the removal of any disk drives in the ready state, and to check for the connection of any new disk drives to the controller. The command returns when the rescan is complete.
SyntaxHRCONF RESCAN <Controller#>
Parameters
Controller# is the controller number
Example HRCONF RESCAN 1
hrconf restoreRestores the controller configuration by importing it’s configuration settings from a specified file. Deletes the current configuration. The file must have been saved through the BACKUP command from a controller of the same type, same number, and type of physical devices with same channels and device IDs. A reboot is required for the configuration change to take effect.
SyntaxHRCONF RESTORE <Controller#> <Filename> [noprompt]
Parameters
Controller# is the controller number
Filename is the name of the file to read the configuration from
Noprompt: No prompt for confirmation.
Example HRCONF RESTORE 1 C:\WINDOWS\HR2200 NOPROMPT
Chapter 2: Using the Command Line Utility ● 27
hrconf romupdateNote: This command is only available on systems running Windows or Linux.
Updates the controller or enclosure firmware. The ROM image file must be in the same directory prior to invoking hrconf.
SyntaxHRCONF ROMUPDATE <Controller#>[CONTROLLER] <Filename>
ParametersController# is the controller number
Filename is the relative or absolute path with filename
Channel# is the channel number for the device
Device# is the device number for the drive.
ExampleHRCONF ROMUPDATE 1 CONTROLLER AS4830.UFI
hrconf setbootMarks a logical device bootable.
SyntaxHRCONF SETBOOT 1 LOGICALDRIVE 1
Parameters
Controller# is the controller number
LogicalDrive# is the number of the logical drive to mark bootable.
Example HRCONF SETBOOT 1 LOGICALDRIVE 1
hrconf setconfigResets the controller's configuration.
SyntaxHRCONF SETCONFIG <Controller#> DEFAULT [noprompt]
Parameters
Controller# is the controller number
Default resets the controller's configuration. Logical drives are deleted, disk drives are reset to the ready state, and any controller settings are reset to default values.
Noprompt: (optional) Do not prompt for confirmation.
Example HRCONF SETCONFIG 1 DEFAULT NOPROMPT
Chapter 2: Using the Command Line Utility ● 28
hrconf setstateRedefines the state of a physical device from its current state to the designated state, or redefines a logical device state to force the logical drive online.
SyntaxHRCONF SETSTATE <Controller#> LOGICAL DRIVE <LogicalDrive#> <State> [noprompt]
HRCONF SETSTATE <Controller#> DEVICE <Channel#> <Device#> <State> [noprompt]
Parameters
LogicalDrive# is the logical drive whose state will be altered
Device state options:
● HSP—Create a hot spare from a ready drive
● RDY—Remove a hot spare designation
● RBL—Rebuild drive
Logical drive state options:
● OPTIMAL—Force a logical drive online
Example HRCONF SETSTATE 1 0 1 HSPHRCONF SETSTATE 1 0 2 RDYHRCONF SETSTATE 1 0 2 RBLHRCONF SETSTATE 1 LOGICALDRIVE 1 OPTIMAL
hrconf taskPerforms a task on a logical drive.
SyntaxHRCONF TASK START <Controller#> LOGICALDRIVE <LogicalDrive#> <Options>[noprompt]
HRCONF TASK STOP <Controller#> LOGICALDRIVE <LogicalDrive#>
Parameters
Controller# is the controller number.
LogicalDrive# is the number of the logical drive in which the task is to be performed.
Options indicates the logical drive with the following tasks to be started or performed.
● verify_fix (Verify with fix)
● verify
● clear
Noprompt: No prompt for confirmation
ExampleHRCONF TASK START 1 LOGICALDRIVE 1 VERIFY NOPROMPT
HRCONF TASK STOP 1 LOGICALDRIVE 1

Adaptec, Inc.691 South Milpitas BoulevardMilpitas, CA 95035 USA
©2006 Adaptec, Inc.All rights reserved. Adaptec and the Adaptec logo are trademarks of Adaptec, Inc. which may beregistered in some jurisdictions.
Part Number: CDP-00092-03-A Rev AJB 09/06