Embed Size (px)
Citation preview
User Manual
FOR
KYC Registration Agency
DECEMBER 2011

About KRA:
SEBI (Securities and Exchange Board of India) has formulated the KYC Registration Agency (KRA) Regulations, which have been notified vide notification no. LAD-NRO/GN/2011-12/29/36772 dated December 2, 2011. Purpose of KRA:
At present, if a client intends to open accounts with different intermediaries for the purpose of trading / investment in the securities market, he has to undergo the process of Know Your Client (KYC) again and again. Therefore, to avoid duplication of KYC process with every intermediary, a mechanism for centralization of the KYC records in the securities market has been developed.

Intermediary Login Intermediary logs in to the system using his login id and password and is directed to the home page of KRA system. Fig. (a) below depicts the home page for an intermediary login, Fig. (b) below depicts the login page
Fig (a) Home page of intermediary login.
Fig. (b) Login page of intermediary login.

Various menus in Admin login of POS are:
1. KYC
1.1. KYC Inquiry
1.2. New KYC
1.2.1. Individual KYC
1.2.2. Non - Individual KYC
1.3. Modify KYC
1.4. Fetch KYC
1.5. Courier KYC
1.6. File Download
1.7. KYC Bulk upload
2. Admin
2.1. Create POS branches
2.2. Create Users for POS Branches
3. Reports
3.1. User Details
4. Utilities
4.1. Change Password
4.2. File Structure
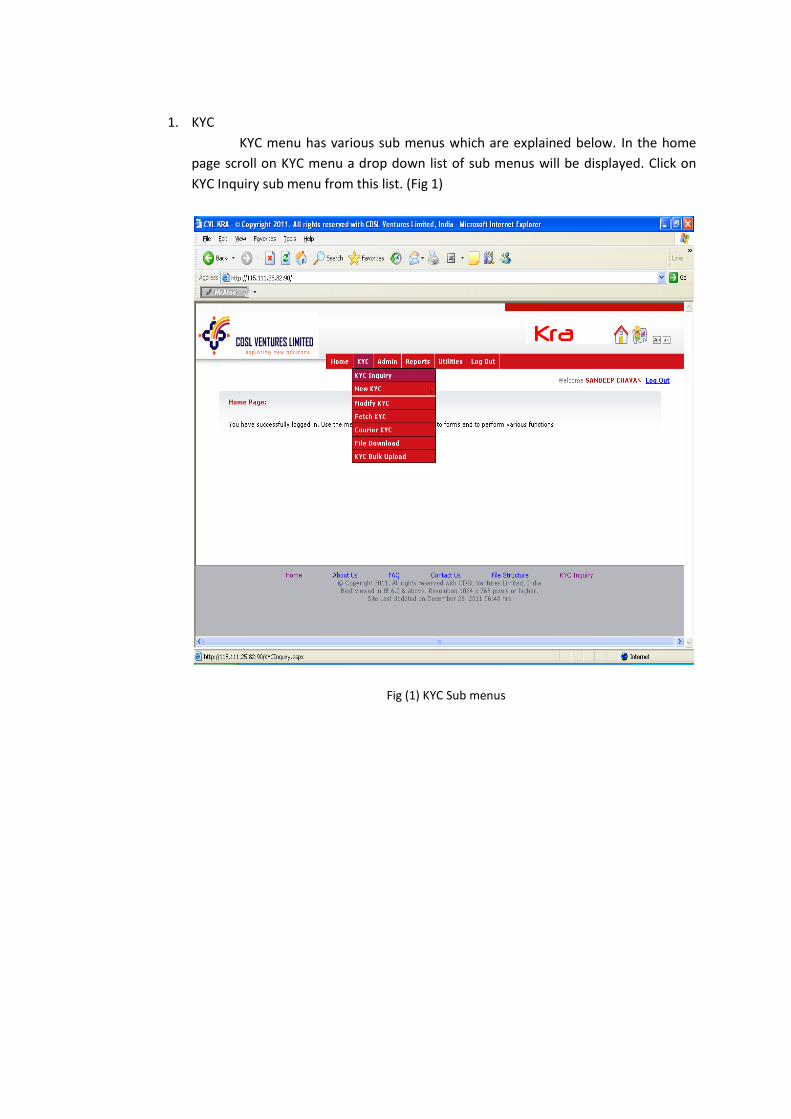
1. KYC
KYC menu has various sub menus which are explained below. In the home
page scroll on KYC menu a drop down list of sub menus will be displayed. Click on
KYC Inquiry sub menu from this list. (Fig 1)
Fig (1) KYC Sub menus
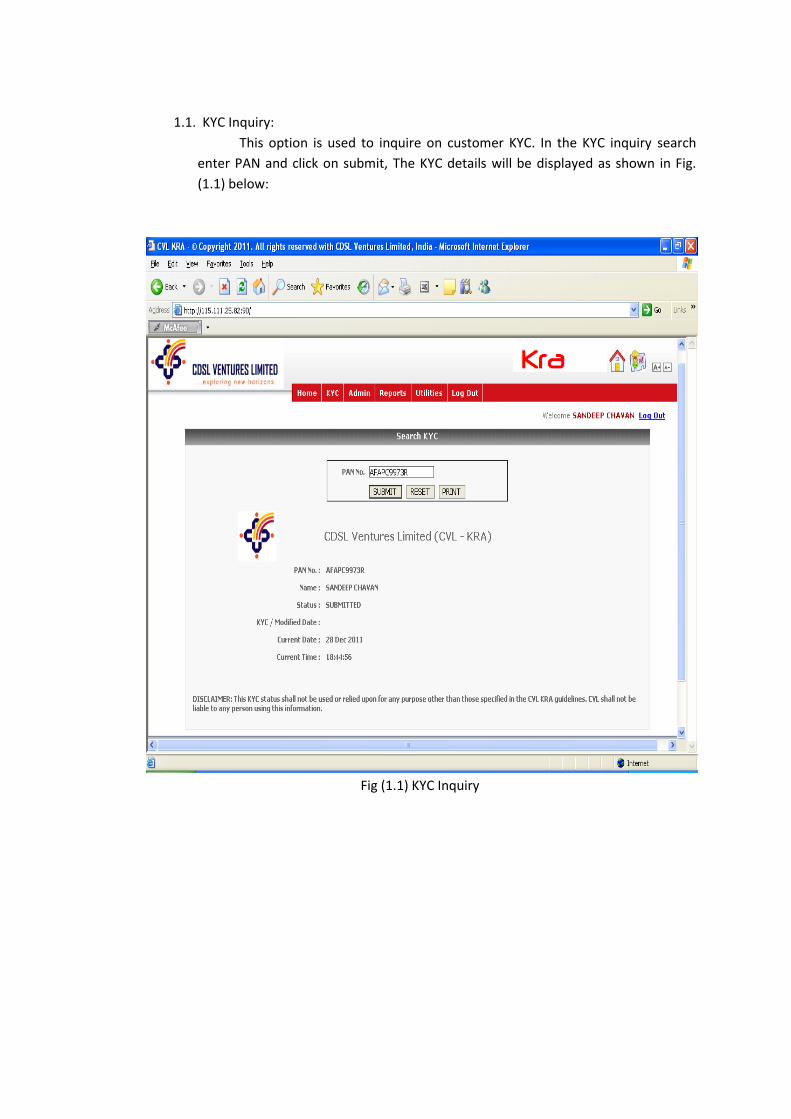
1.1. KYC Inquiry:
This option is used to inquire on customer KYC. In the KYC inquiry search
enter PAN and click on submit, The KYC details will be displayed as shown in Fig.
(1.1) below:
Fig (1.1) KYC Inquiry

1.2. New KYC
This menu is used to enter KYC details for Individual as well as Non- Individual
customers. To enter new KYC details scroll on KYC menu and select Individual KYC
under New KYC sub menu Fig (1.2)
Fig (1.2) Individual KYC menu selection
1.2.1. Individual KYC
This option is used to capture individual customer data in 4 tabs viz., Master,
Details, Contact information and others. Each tabs are explained below.
MASTER:
This tab is used to capture PAN details of the client. The various fields on this
form are as below:
Current status: Displays the current status of KYC. It will be “NEW” for a new KYC
registration.
Application number: The number which appears on the KYC application form.
Exempt type: This field is used to identify clients belonging to PAN exempted
category.

Exempt category: List of categories for which PAN is exempted. For e.g.
i) Sikkim Resident.
ii) Non Indian State Government Body.
iii) Non Indian Central Government Body.
PAN No: This field is used to capture PAN of the client. .
Application date, Exempt type, Exempt category and PAN number are the
mandatory fields. Enter these details and click on next to open the details tab.
Fig. (1.2.1 - Master)
DETAILS:
This tab is used to capture details of customer such as his name, Date of
Birth, Marital Status, Nationality etc. Enter details for mandatory fields, Gender,
Name, Marital Status, Father’s Name, Date of Birth, Nationality &Applicant status.
For Applicant Status other than “Resident Individual”, “Passport / PIO Card / OCI
Card No” field is mandatory. Enter the details and click on next to open the ‘Contact
Info’ tab.

Fig. (1.2.1 - Details)
CONTACT INFO:
This tab is used to capture contact details of the client. Enter the details in
correspondence address, phone number, select proof of address document, enter
proof no and the date of the document. If permanent address is same as
correspondence address click the check box permanent address same as above else
enter the details of permanent address and click on next button. It opens the
‘Others’ tab.
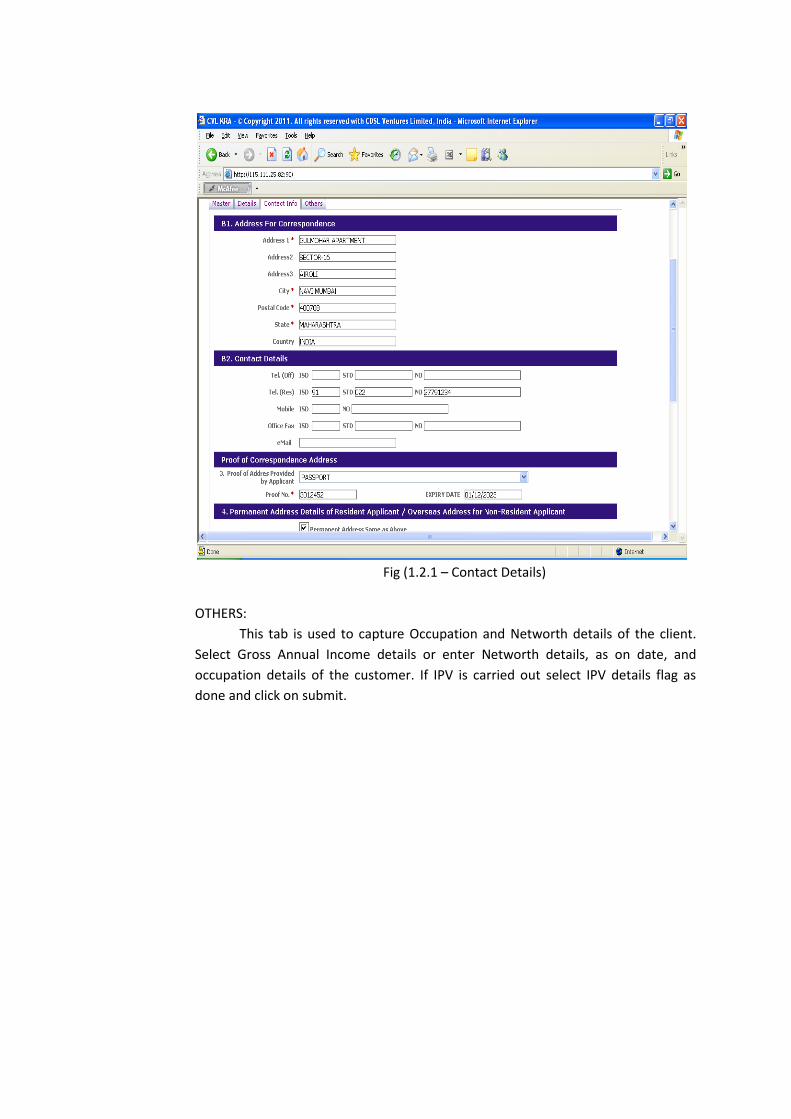
Fig (1.2.1 – Contact Details)
OTHERS:
This tab is used to capture Occupation and Networth details of the client.
Select Gross Annual Income details or enter Networth details, as on date, and
occupation details of the customer. If IPV is carried out select IPV details flag as
done and click on submit.
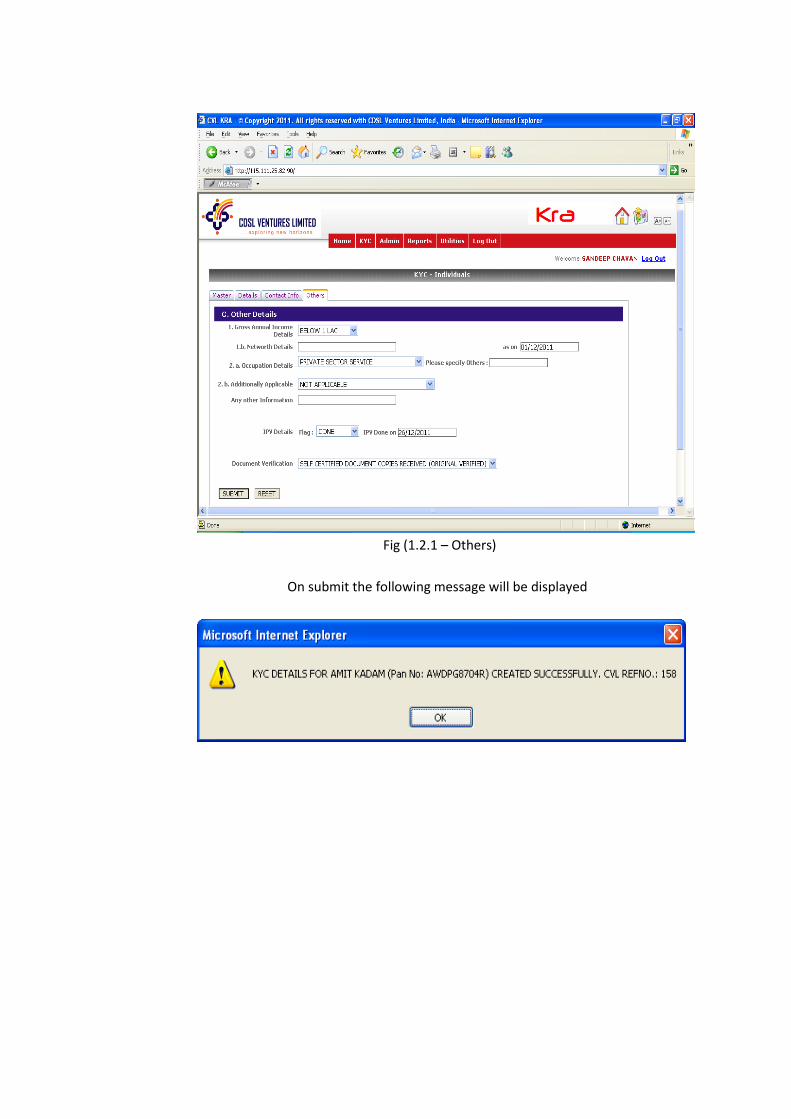
Fig (1.2.1 – Others)
On submit the following message will be displayed

1.2.2. NON INDIVIDUALS:
This option is used to capture data under 5 tabs viz., Master, Details,
Contact information, Director Information and others. To enter new KYC scroll
on KYC menu and then select Non - Individual KYC under New KYC sub menu.
MASTER:
This page is similar to Individual KYC page. Enter the mandatory details and
click on next button, it opens the ‘Details tab’
Fig (1.2.2 – Master)
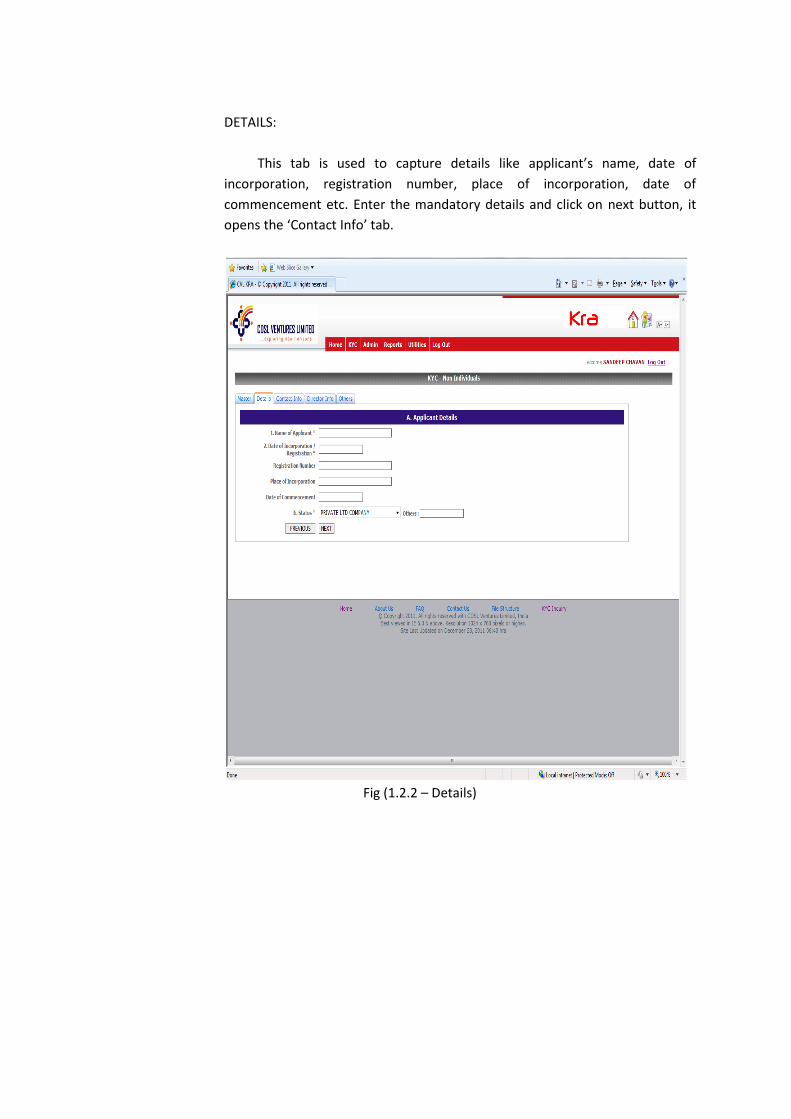
DETAILS:
This tab is used to capture details like applicant’s name, date of
incorporation, registration number, place of incorporation, date of
commencement etc. Enter the mandatory details and click on next button, it
opens the ‘Contact Info’ tab.
Fig (1.2.2 – Details)

CONTACT INFO:
This tab is used to capture contact details of the entity. Enter the
mandatory fields in correspondence address and permanent address and click
on next button. It opens the ‘Directors info’ tab.
Fig (1.2.2 – Contact Info)
DIRECTOR INFO:
This tab is used to capture director’s details such as director’s PAN, Name,
DIN No, relationship with company and political connection. Enter these details
for each of company’s directors and click on next button. It opens the ‘Others’
tab.
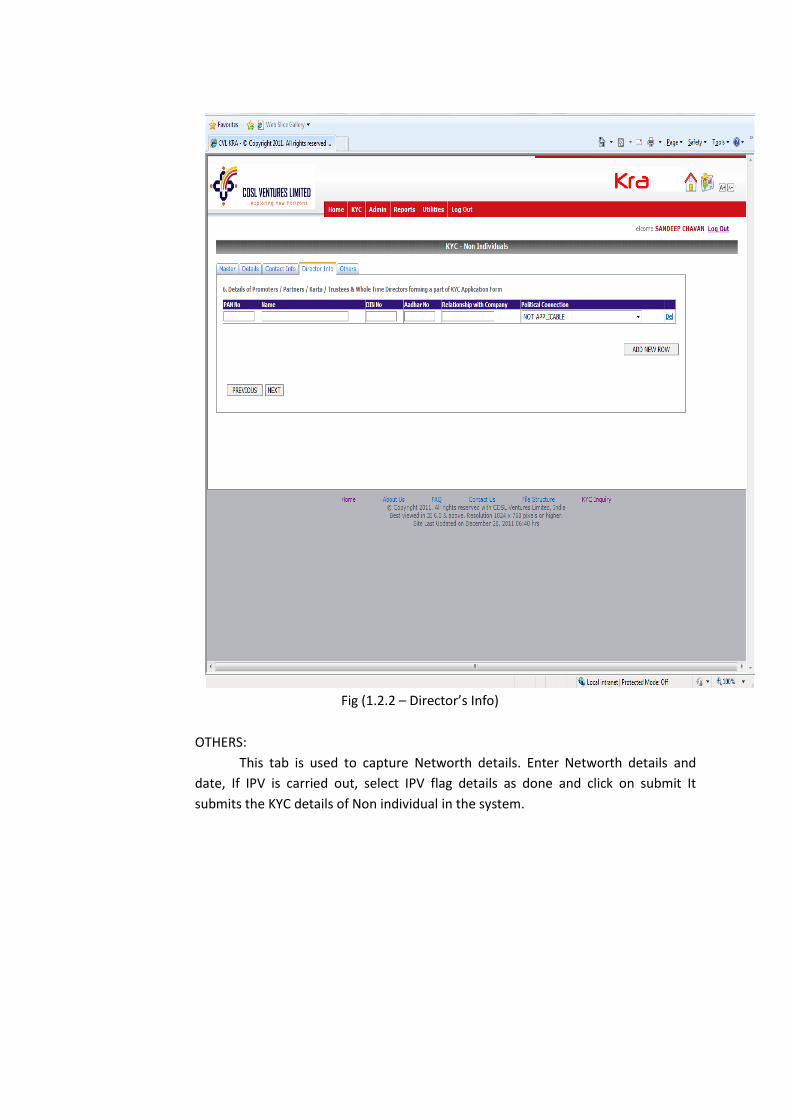
Fig (1.2.2 – Director’s Info)
OTHERS:
This tab is used to capture Networth details. Enter Networth details and
date, If IPV is carried out, select IPV flag details as done and click on submit It
submits the KYC details of Non individual in the system.

Fig (1.2.2 – Others)

1.3. MODIFY KYC
For modification move cursor to KYC menu, from the drop down list as
shown in Fig (1.3) below click on Modify KYC sub menu. This option is used to
modify any details of the customer submitted in original KYC details.
Fig (1.3) Modify KYC
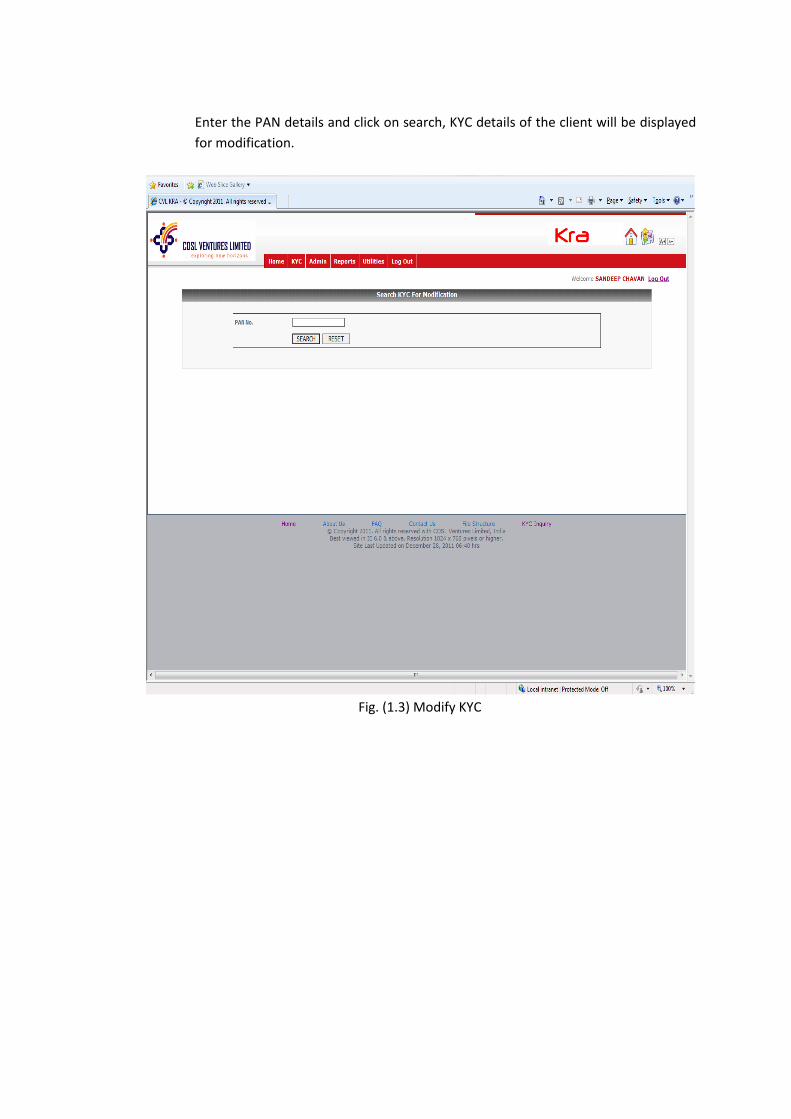
Enter the PAN details and click on search, KYC details of the client will be displayed
for modification.
Fig. (1.3) Modify KYC

1.4 FETCH KYC
In KYC menu, click on Fetch KYC sub menu from the drop down list. This
option is used to fetch the details of existing KYC from KRA. Fig (1.4)
Fig (1.4) Fetch KYC
1.5 COURIER KYC
In KYC menu, click on Courier KYC sub menu from the drop down list. This
option is used to enter courier details.
Select Courier company name, enter reference number, POD no, POD date,
select the record and click on “>” and then click on save. It displays the record in
grid as given below. Fig (1.5)

Fig (1.5) Courier details
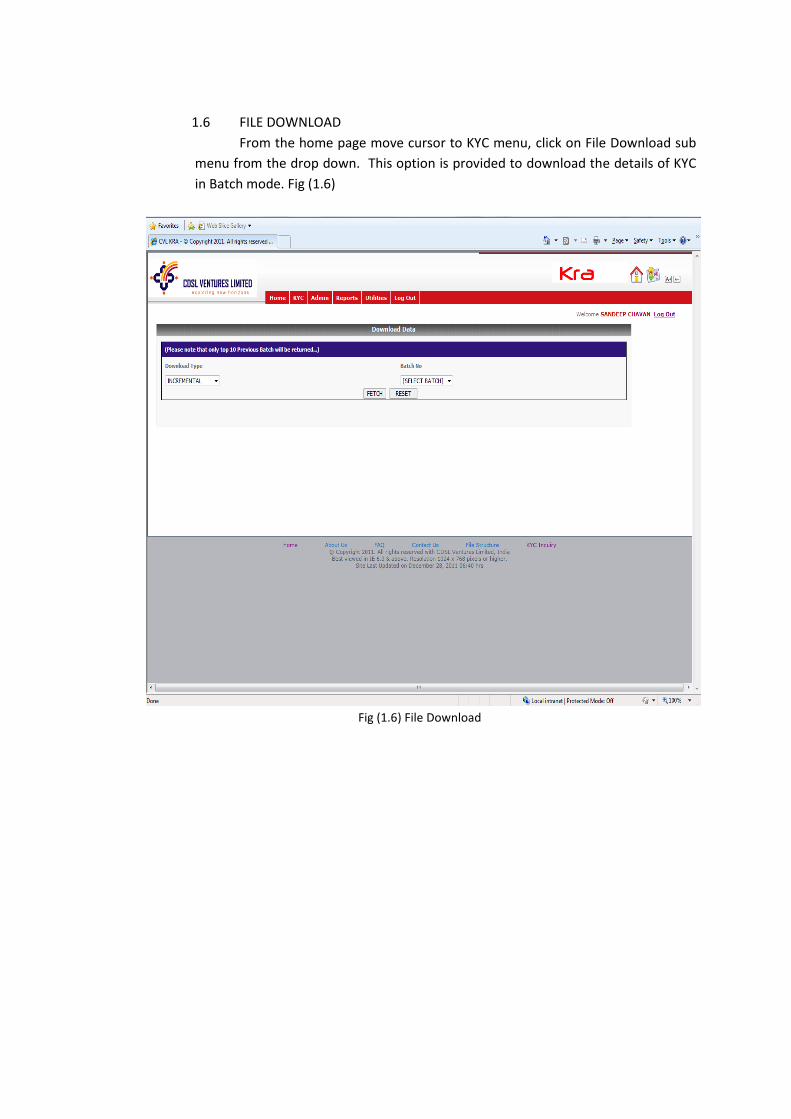
1.6 FILE DOWNLOAD
From the home page move cursor to KYC menu, click on File Download sub
menu from the drop down. This option is provided to download the details of KYC
in Batch mode. Fig (1.6)
Fig (1.6) File Download

1.7 KYC BULK UPLOAD
For KYC Upload, click on KYC Bulk Upload sub menu from the drop down list.
This option enables the intermediaries to upload multiple records into the system
instead making entry of each record. Fig (1.7)
Fig (1.7) Bulk Upload
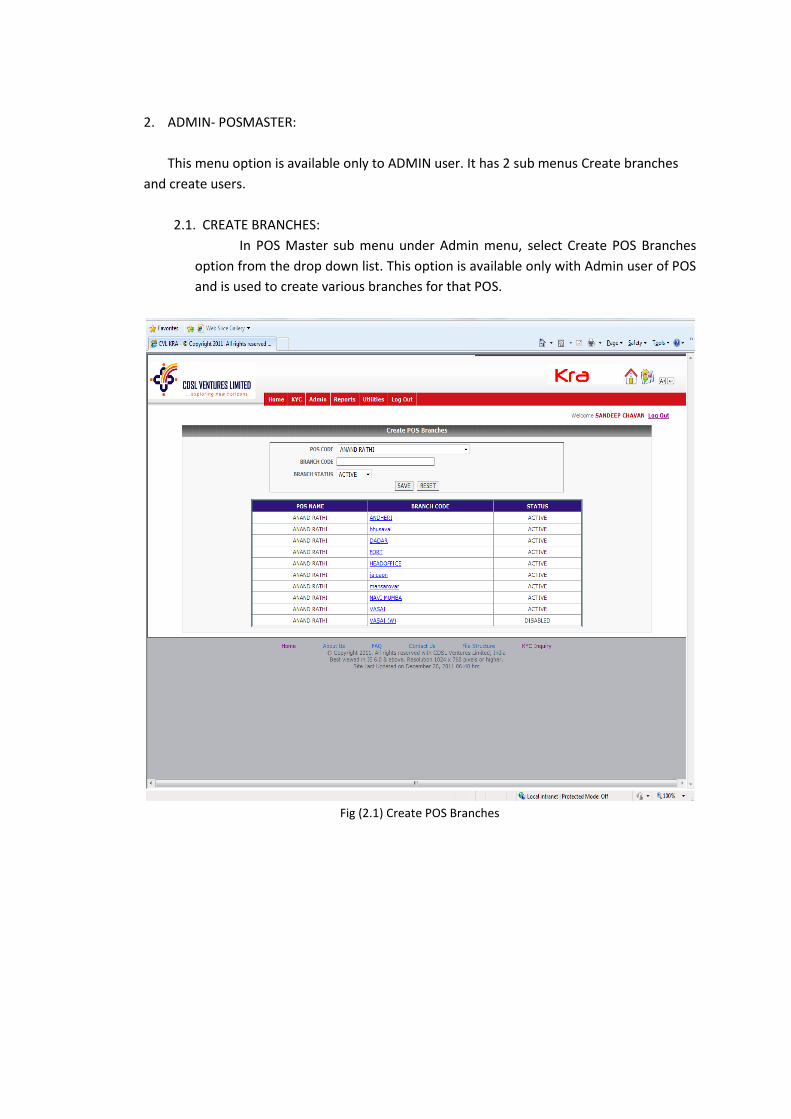
2. ADMIN- POSMASTER:
This menu option is available only to ADMIN user. It has 2 sub menus Create branches
and create users.
2.1. CREATE BRANCHES:
In POS Master sub menu under Admin menu, select Create POS Branches
option from the drop down list. This option is available only with Admin user of POS
and is used to create various branches for that POS.
Fig (2.1) Create POS Branches
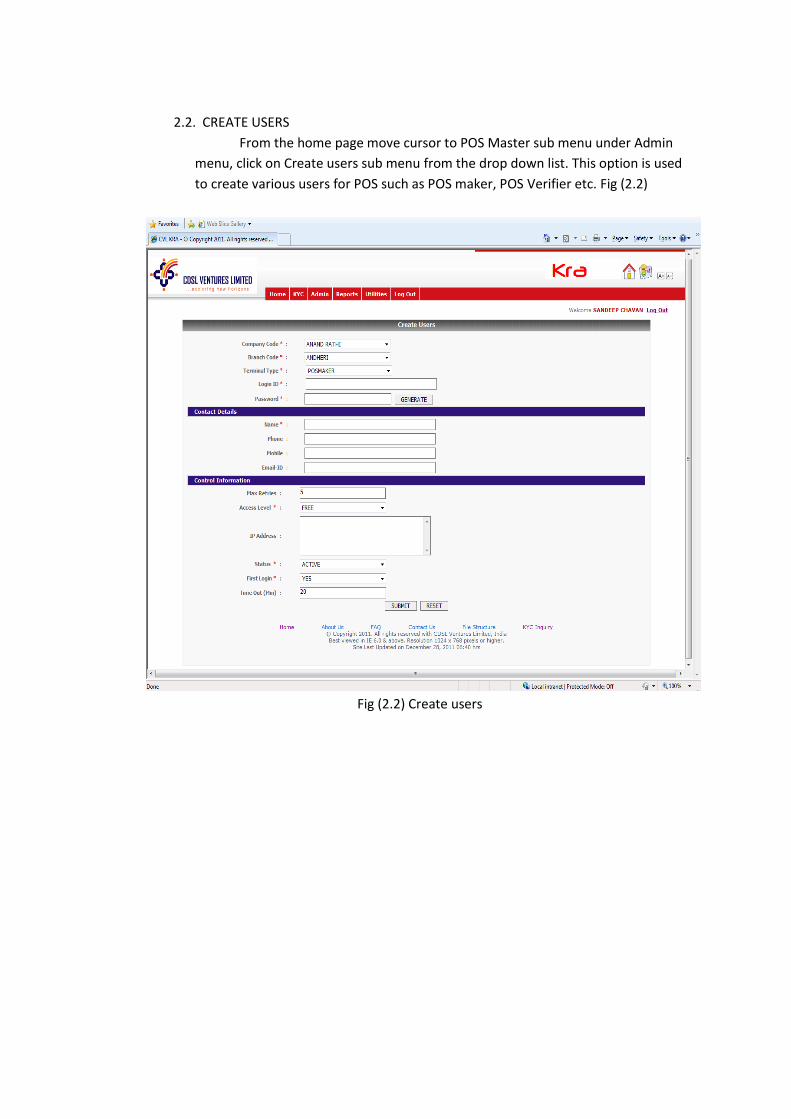
2.2. CREATE USERS
From the home page move cursor to POS Master sub menu under Admin
menu, click on Create users sub menu from the drop down list. This option is used
to create various users for POS such as POS maker, POS Verifier etc. Fig (2.2)
Fig (2.2) Create users

3. REPORTS-USER DETAILS
In the Reports menu, click on User Details sub menu from the drop down list. This
option is provided to POS admin and Branch admin user only
Admin can search users using his login id and Terminal type (user type). Fig (3.1)
Fig (3.1) User Details

4. Change Password
For password change click on Utilities menu, select Change password option from
the drop down to change the user’s password. Fig (4.1)
Fig (4.1) Change password
4.2 File Structure
Select Utilities menu, click on File Structure sub menu from the drop down list. It
displays a separate window containing file format for Bulk upload. Fig (4.2)
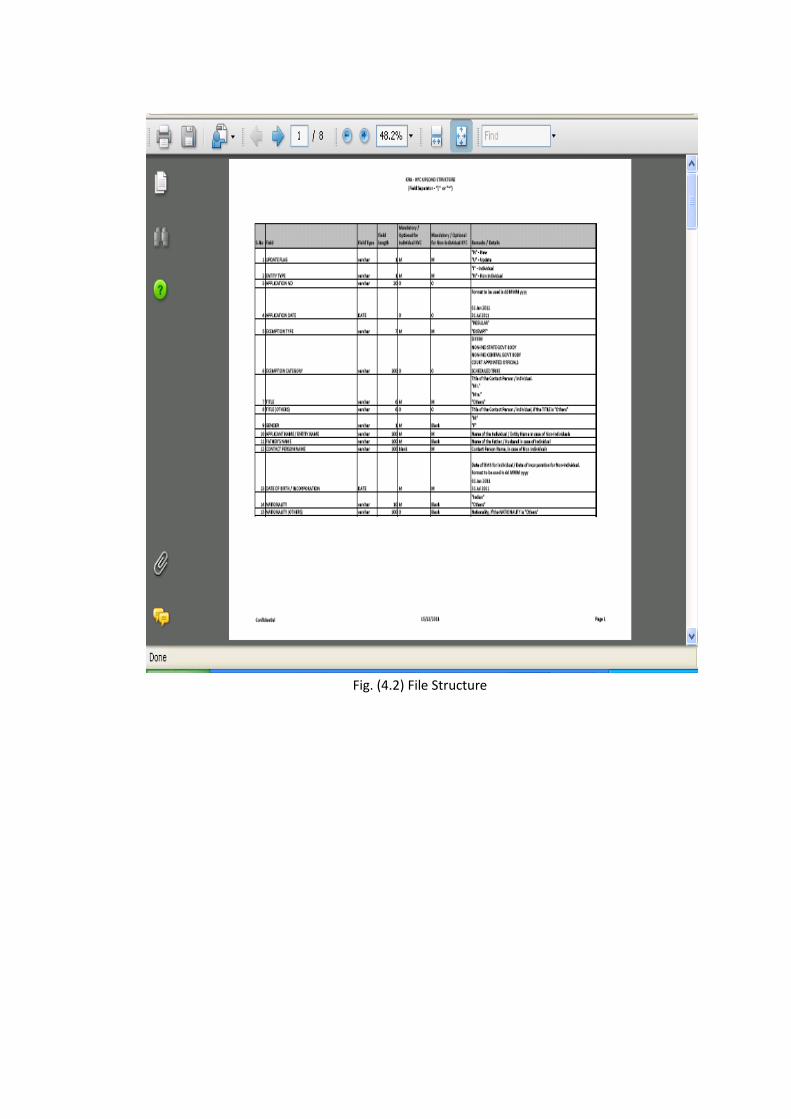
Fig. (4.2) File Structure