Embed Size (px)
Citation preview
Use SCCM to install Dynamics 365 for Outlook Applies To: Dynamics 365 (online), Dynamics 365 (on-premises), Dynamics CRM 2016, Dynamics CRM Online Organizations with large deployments of Dynamics 365 for Outlook should consider using System Center Configuration Manager (SCCM) to more efficiently and securely deploy and manage Dynamics 365 for Outlook installation. This document provides the process for deploying Dynamics 365 for Outlook using SCCM.
Note This topic is prerelease documentation and is subject to change in future releases.
Contents Prerequisites to be installed or downloaded ................................................................................................ 2
Prerequisites setup for installing SCCM ........................................................................................................ 2
SCCM Installation .......................................................................................................................................... 5
Post Installation Configuration ................................................................................................................... 19
First run: Configuration Manager Client Wizard ......................................................................................... 31
Second run: Configuration Manager Client Wizard .................................................................................... 37
Package Creation ........................................................................................................................................ 41
Copyright ..................................................................................................................................................... 54
Prerequisites to be installed or downloaded
1. SQL Server to be installed manually - pre-installation might cause SQL Collation error. 2. Download ADK Installer from http://www.microsoft.com/en-us/download/details.aspx?id=30652 3. Install Visual Studio 2010 Service Pack 1. 4. Get SCCM and copy it to a folder on your server (C:\SCCM).
Prerequisites setup for installing SCCM
1. Click on Add roles and Features in the Server Manager. 2. In the Installation Type select Role-Based or Feature-Based installation, and click Next. 3. Server Selection page will be displayed, by default server will be selected. Click Next. 4. Server Roles page will displayed. You need to enable IIS role.
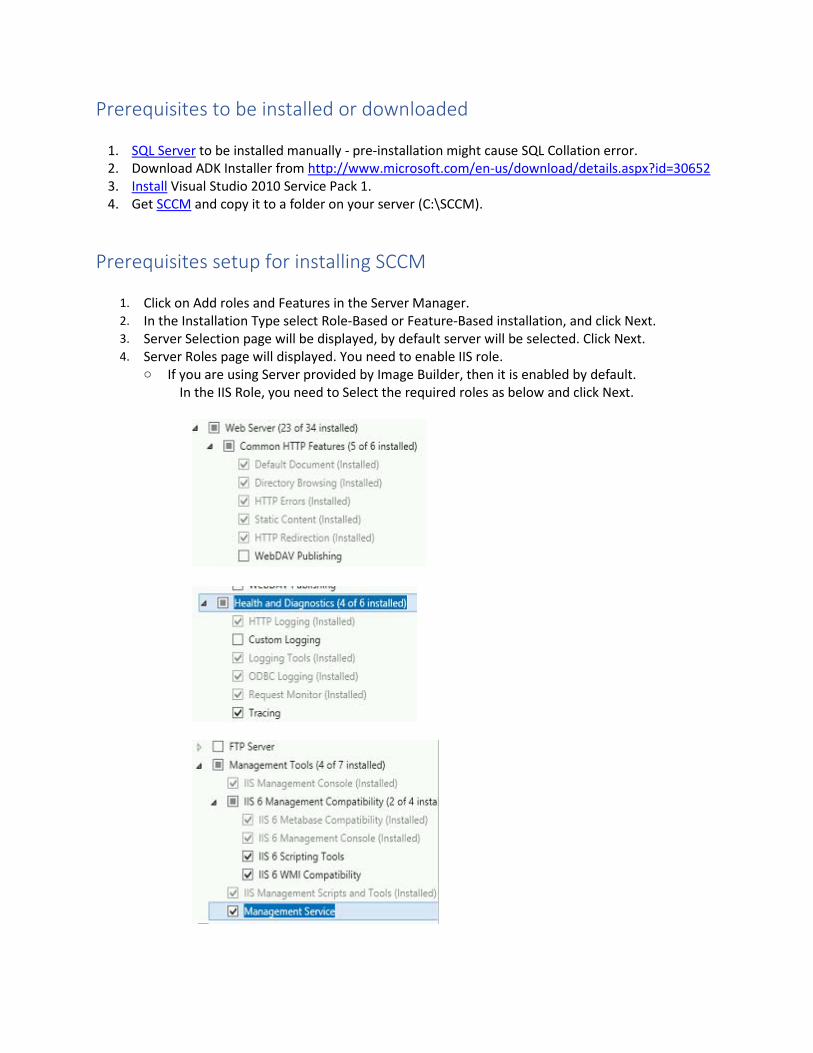
o If you are using Server provided by Image Builder, then it is enabled by default. In the IIS Role, you need to Select the required roles as below and click Next.
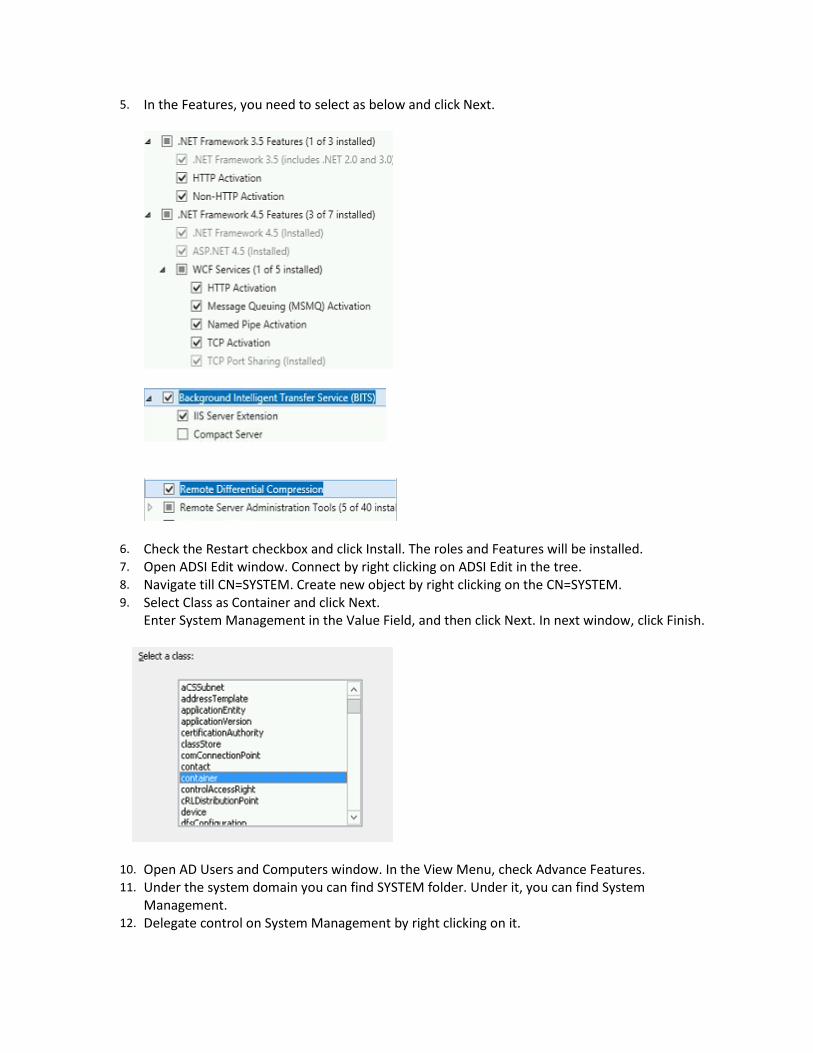
5. In the Features, you need to select as below and click Next.
6. Check the Restart checkbox and click Install. The roles and Features will be installed. 7. Open ADSI Edit window. Connect by right clicking on ADSI Edit in the tree. 8. Navigate till CN=SYSTEM. Create new object by right clicking on the CN=SYSTEM. 9. Select Class as Container and click Next.
Enter System Management in the Value Field, and then click Next. In next window, click Finish.
10. Open AD Users and Computers window. In the View Menu, check Advance Features. 11. Under the system domain you can find SYSTEM folder. Under it, you can find System
Management. 12. Delegate control on System Management by right clicking on it.
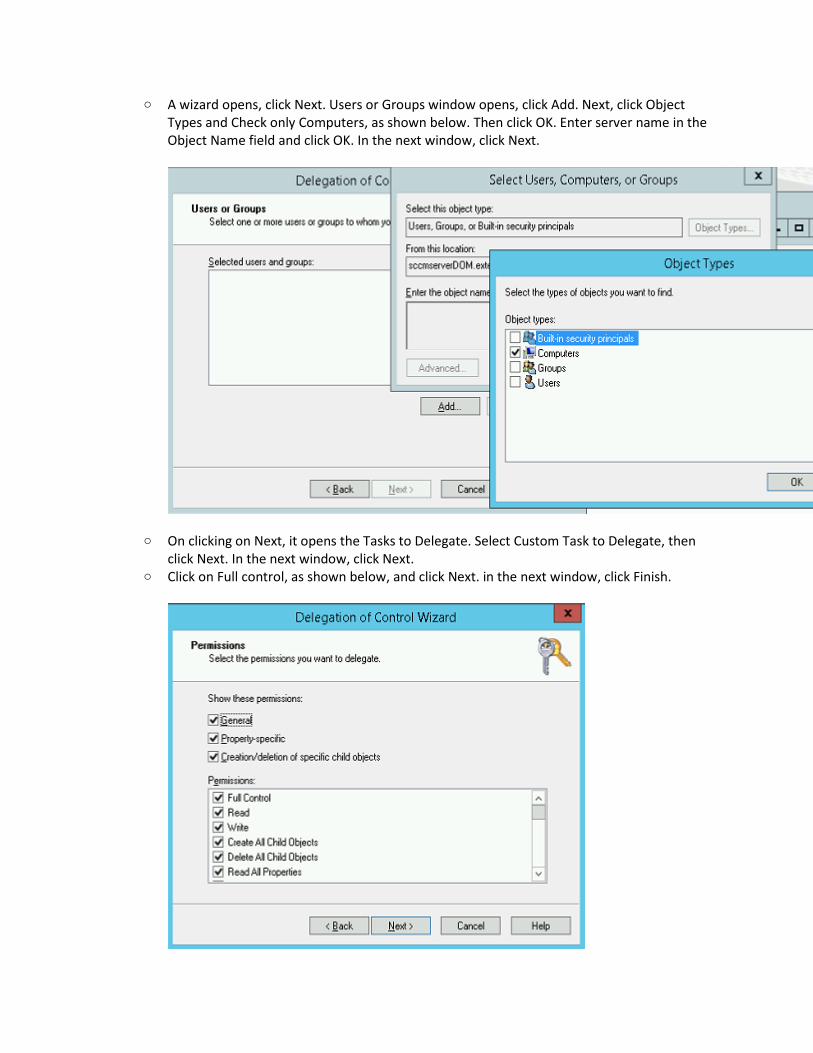
o A wizard opens, click Next. Users or Groups window opens, click Add. Next, click Object Types and Check only Computers, as shown below. Then click OK. Enter server name in the Object Name field and click OK. In the next window, click Next.
o On clicking on Next, it opens the Tasks to Delegate. Select Custom Task to Delegate, then click Next. In the next window, click Next.
o Click on Full control, as shown below, and click Next. in the next window, click Finish.
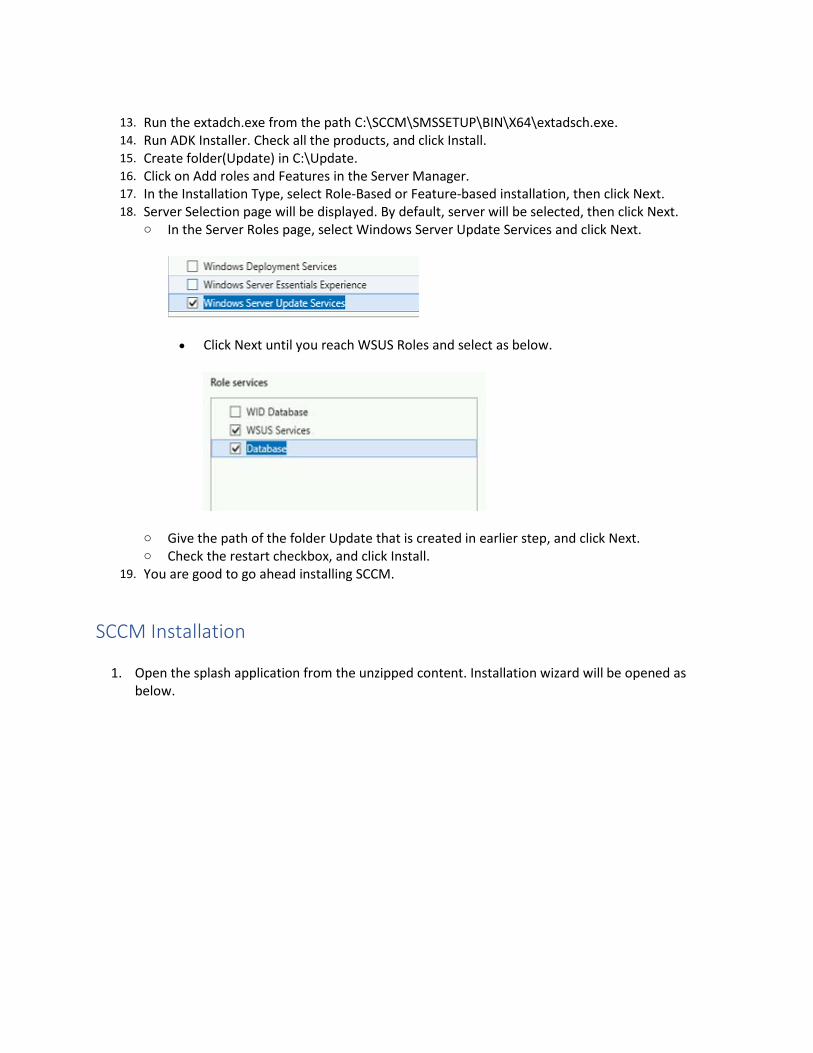
13. Run the extadch.exe from the path C:\SCCM\SMSSETUP\BIN\X64\extadsch.exe. 14. Run ADK Installer. Check all the products, and click Install. 15. Create folder(Update) in C:\Update. 16. Click on Add roles and Features in the Server Manager. 17. In the Installation Type, select Role-Based or Feature-based installation, then click Next. 18. Server Selection page will be displayed. By default, server will be selected, then click Next.
o In the Server Roles page, select Windows Server Update Services and click Next.
• Click Next until you reach WSUS Roles and select as below.
o Give the path of the folder Update that is created in earlier step, and click Next. o Check the restart checkbox, and click Install.
19. You are good to go ahead installing SCCM.
SCCM Installation
1. Open the splash application from the unzipped content. Installation wizard will be opened as below.
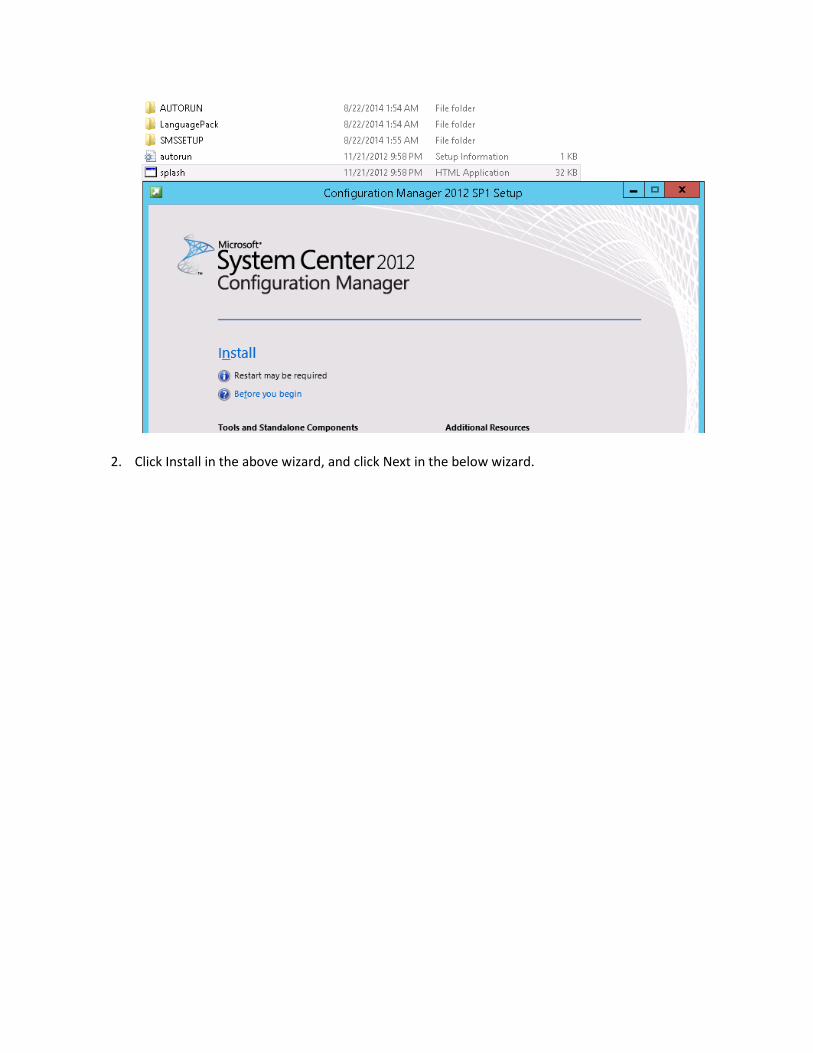
2. Click Install in the above wizard, and click Next in the below wizard.
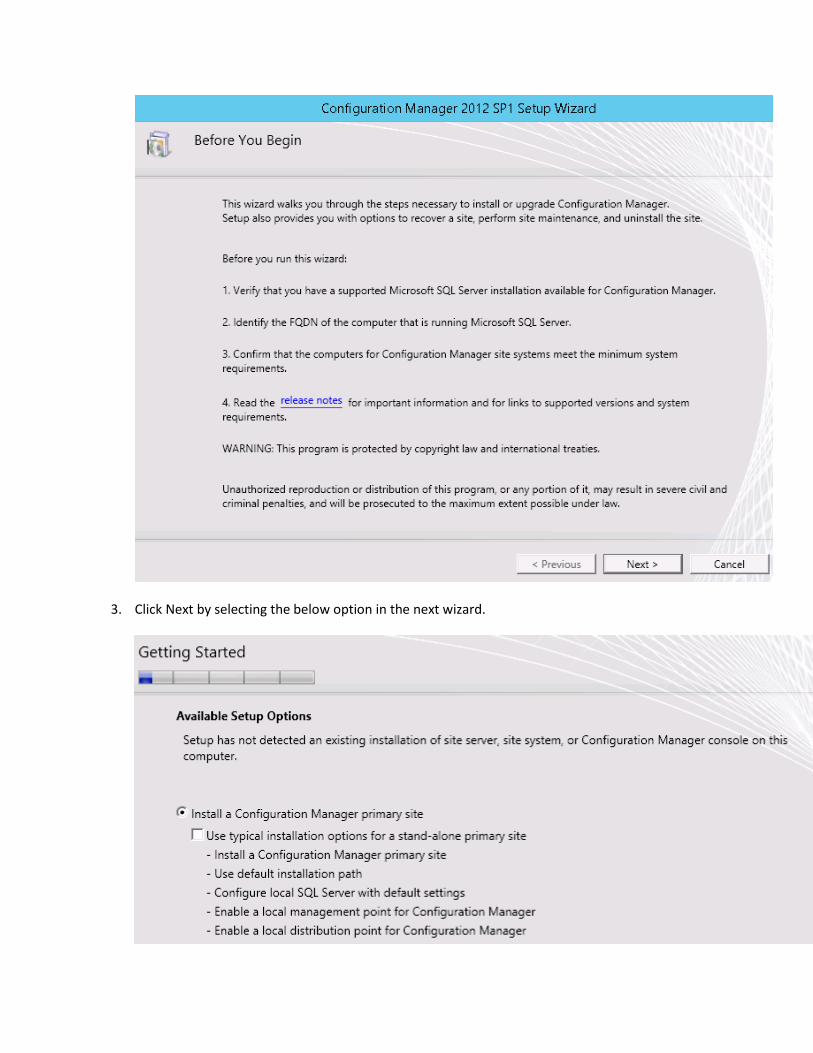
3. Click Next by selecting the below option in the next wizard.
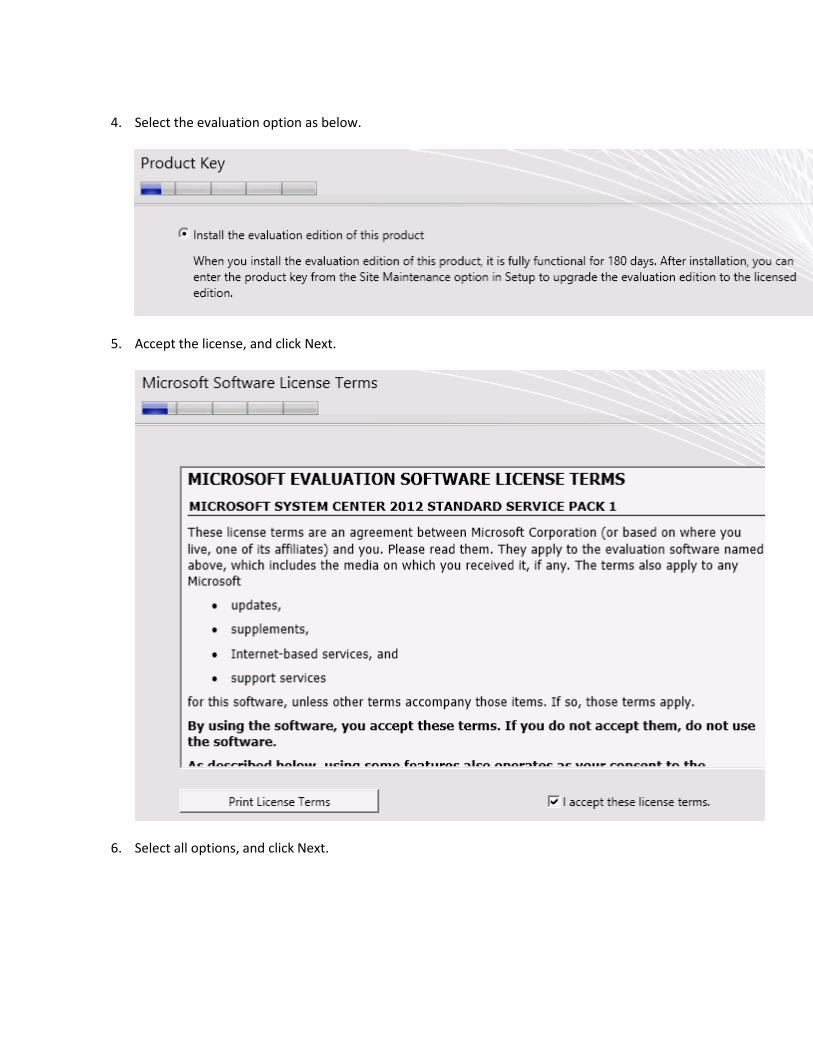
4. Select the evaluation option as below.
5. Accept the license, and click Next.
6. Select all options, and click Next.
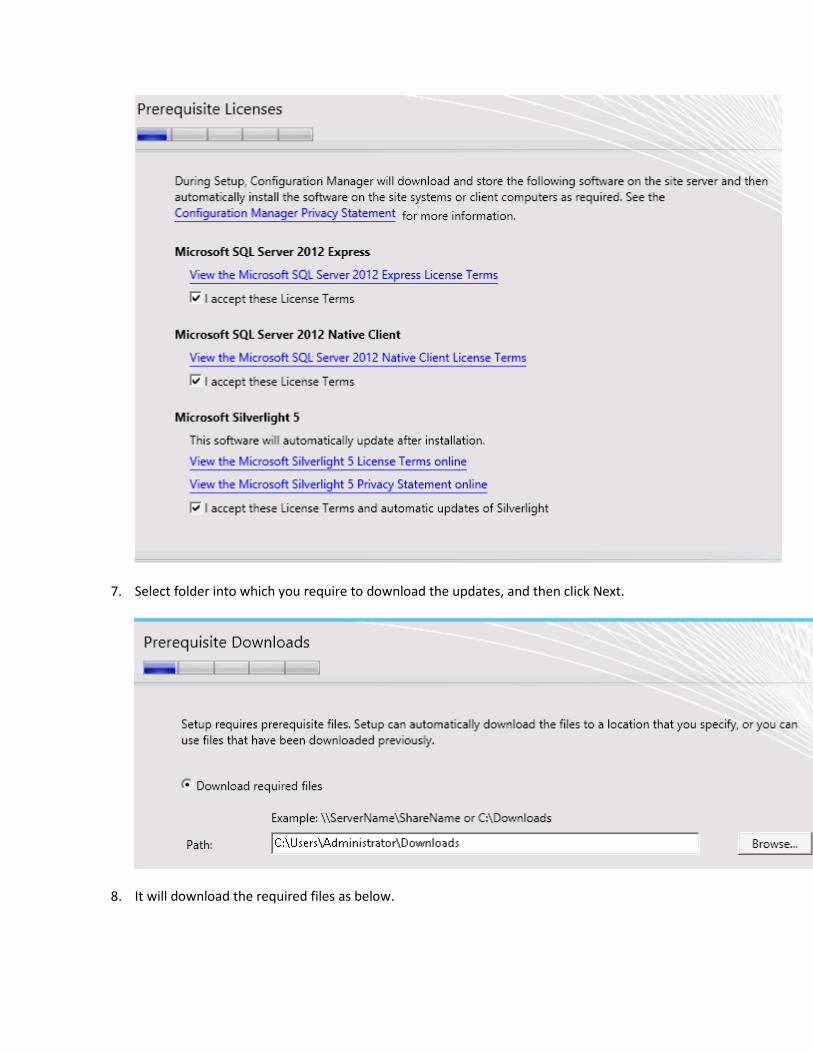
7. Select folder into which you require to download the updates, and then click Next.
8. It will download the required files as below.

9. Check English language for both Server and Client. Uncheck all other languages, and click Next.
10. Fill in the required details as below, and click Next.
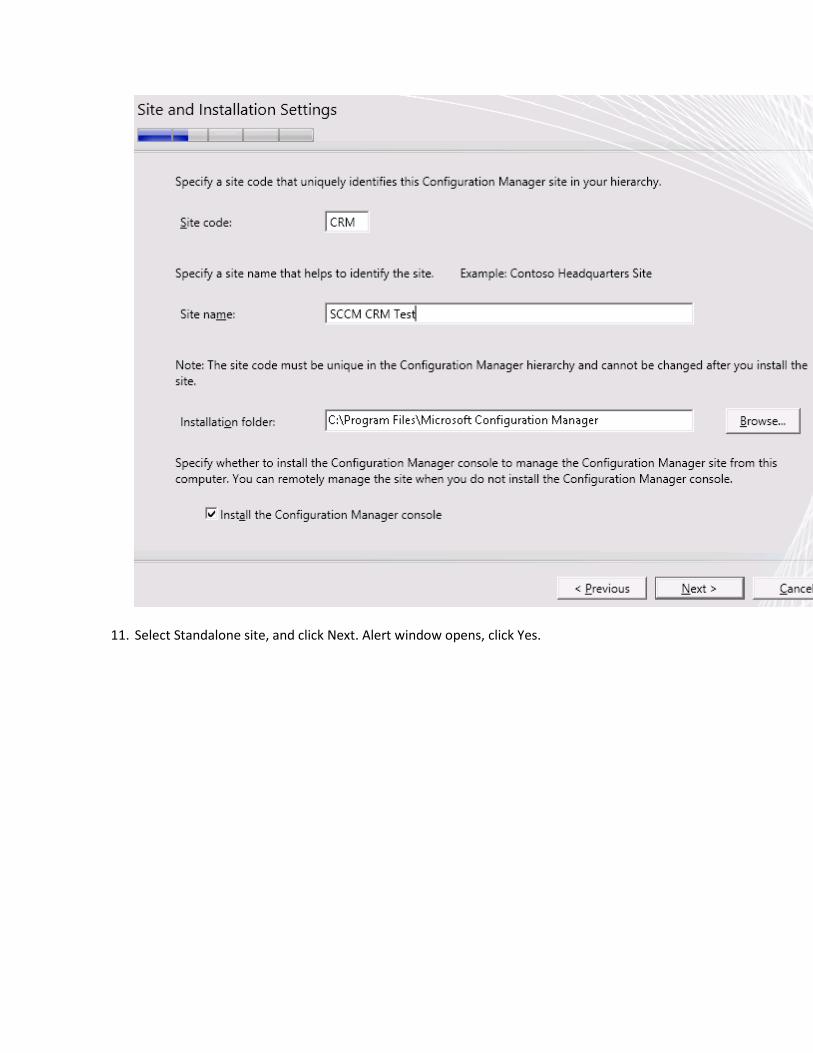
11. Select Standalone site, and click Next. Alert window opens, click Yes.
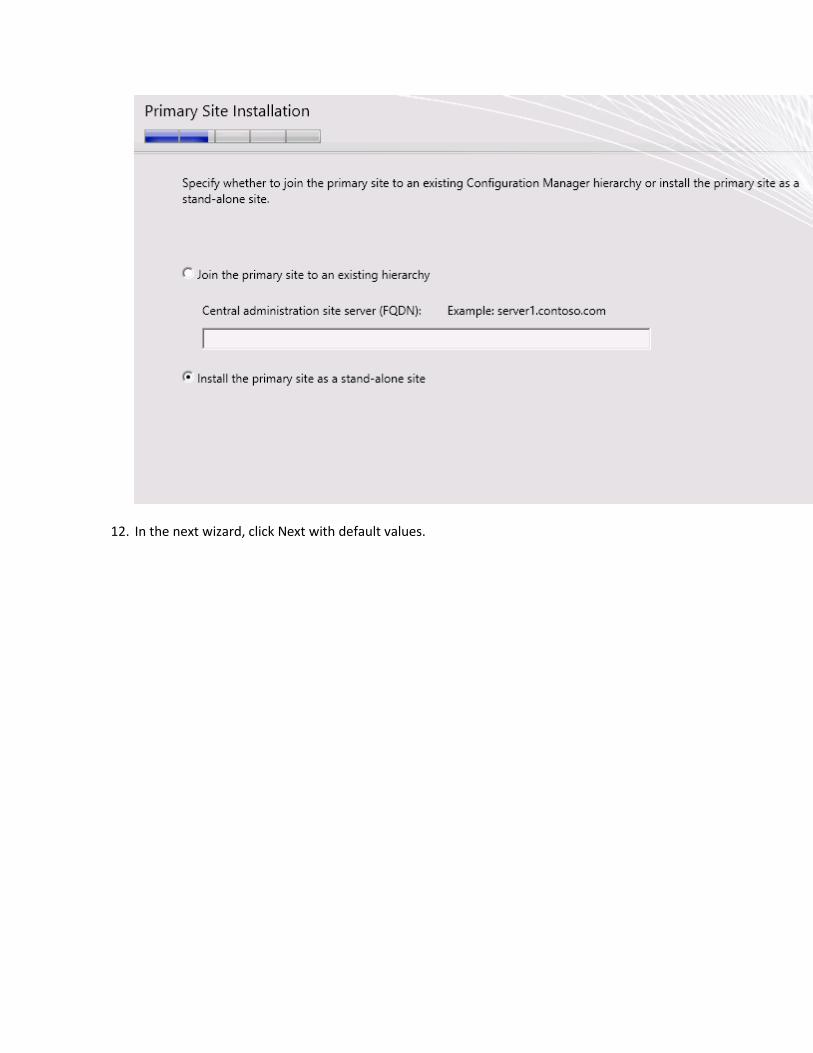
12. In the next wizard, click Next with default values.
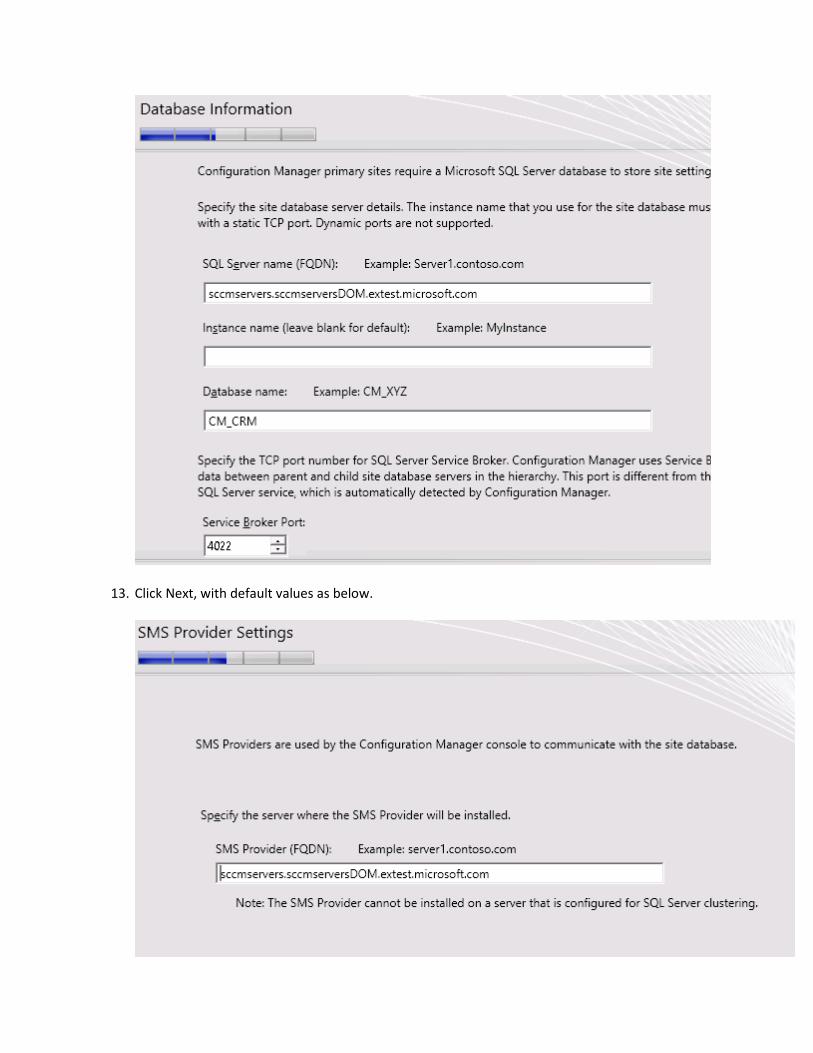
13. Click Next, with default values as below.
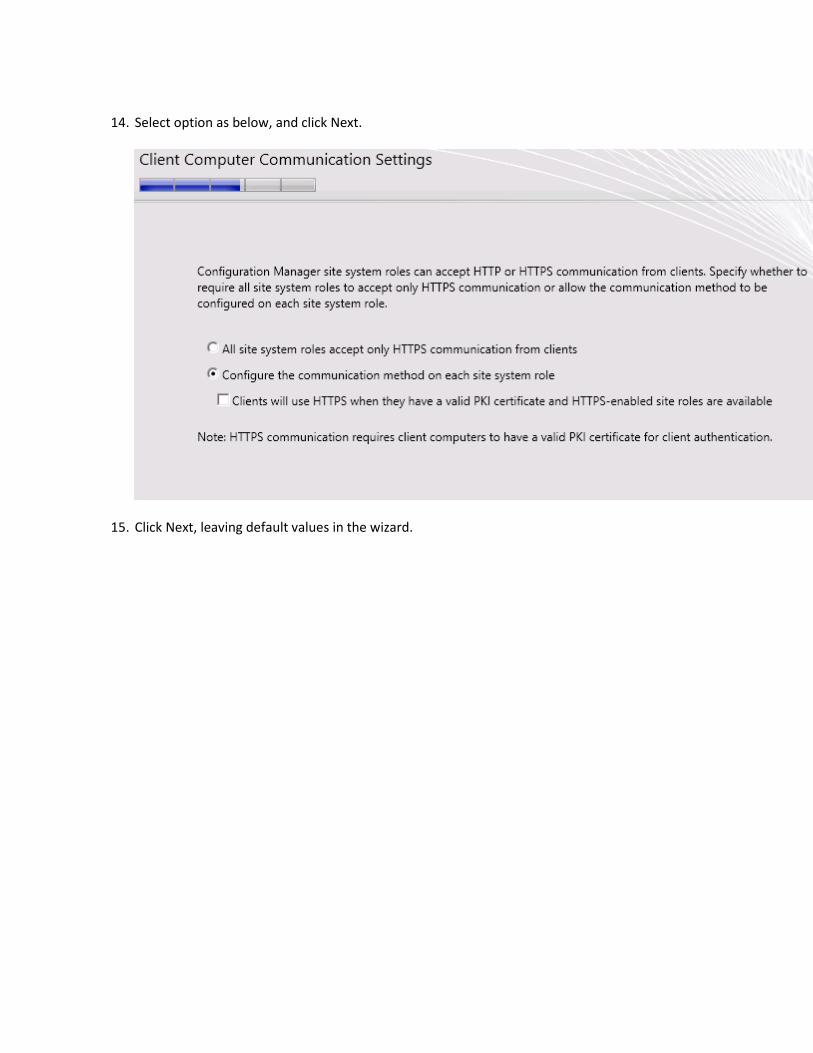
14. Select option as below, and click Next.
15. Click Next, leaving default values in the wizard.
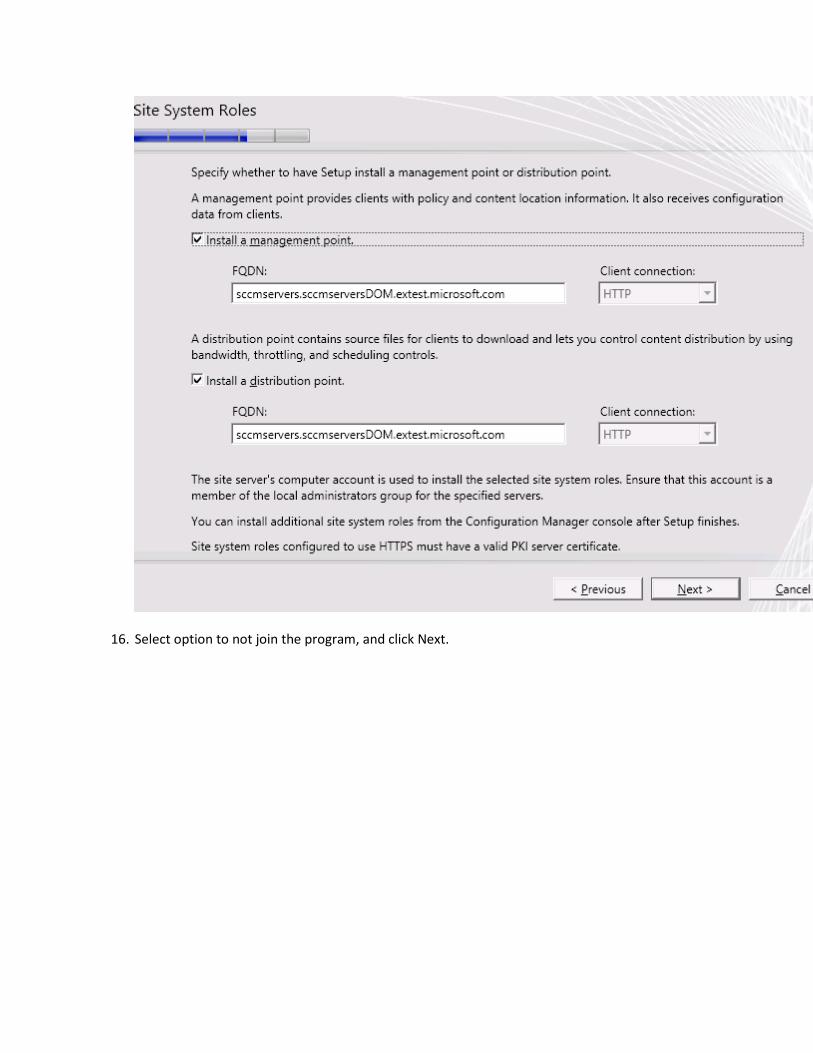
16. Select option to not join the program, and click Next.
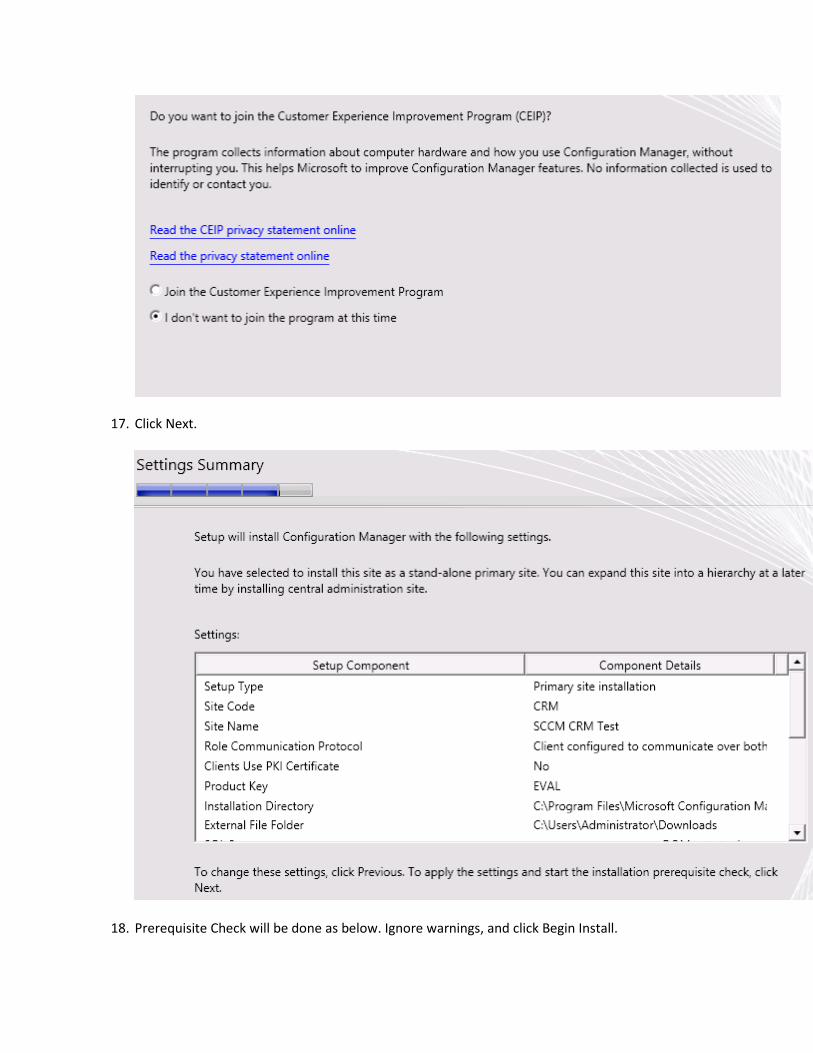
17. Click Next.
18. Prerequisite Check will be done as below. Ignore warnings, and click Begin Install.

19. Installation starts as below. This will take a minimum of 15 - 20 minutes.
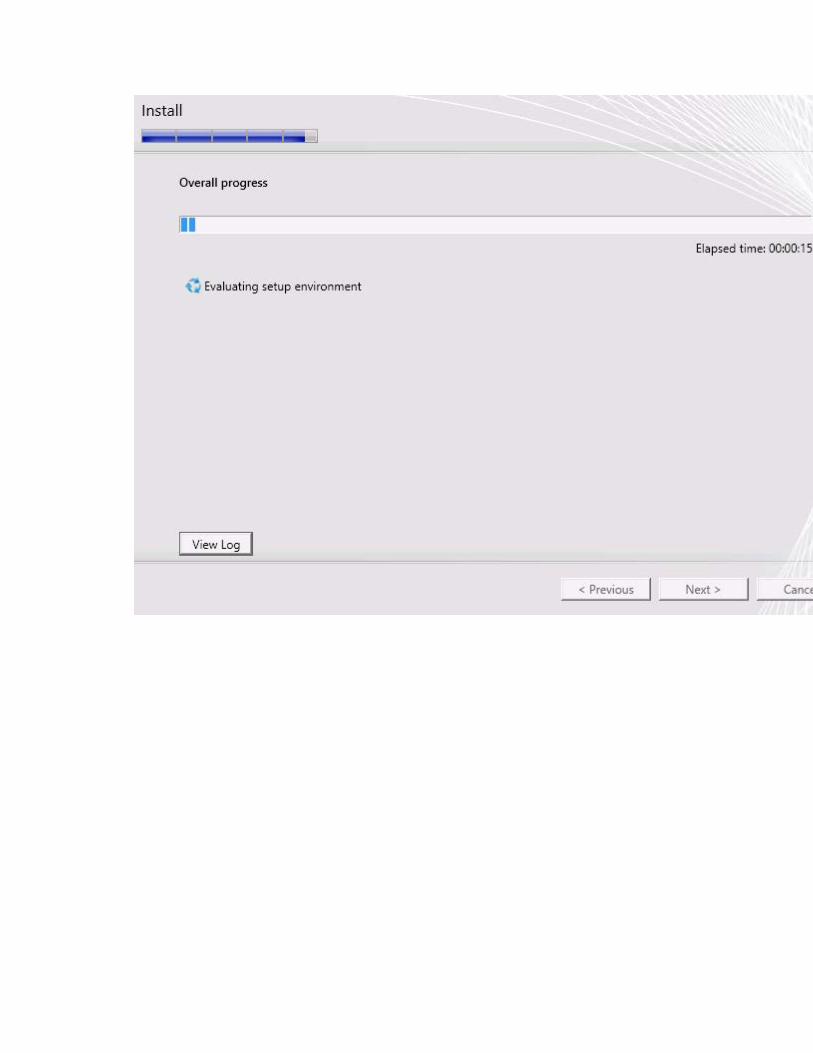
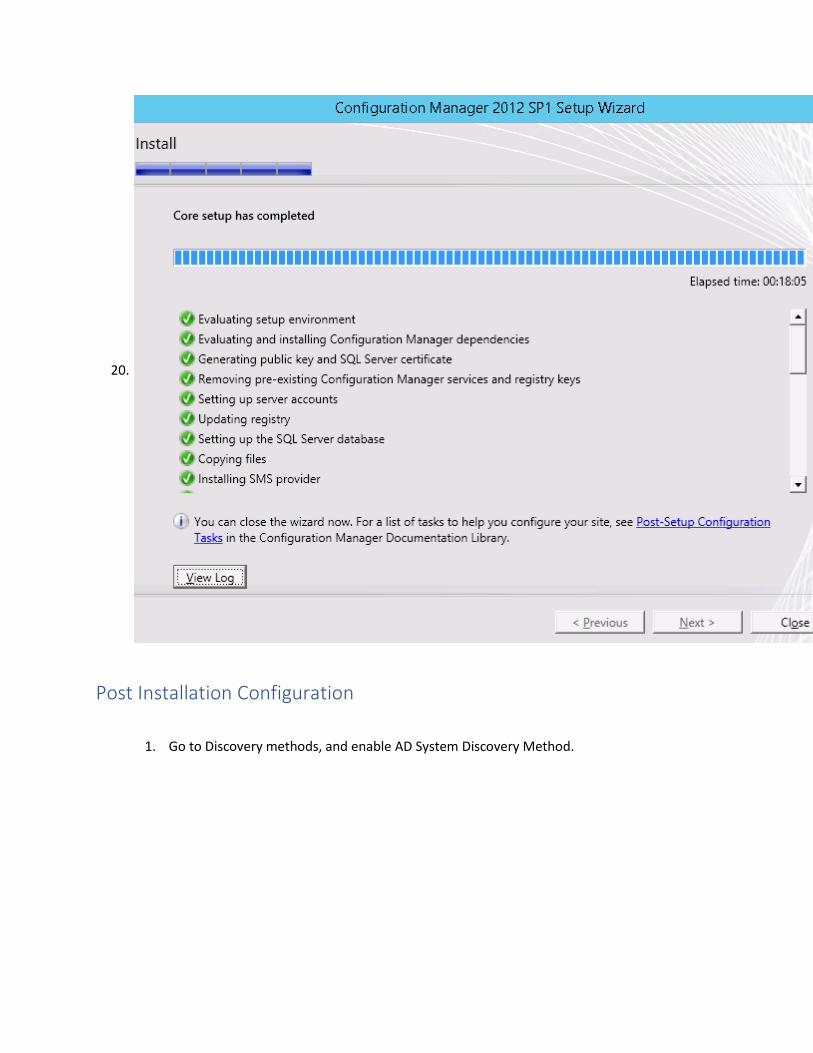
20.
Post Installation Configuration
1. Go to Discovery methods, and enable AD System Discovery Method.
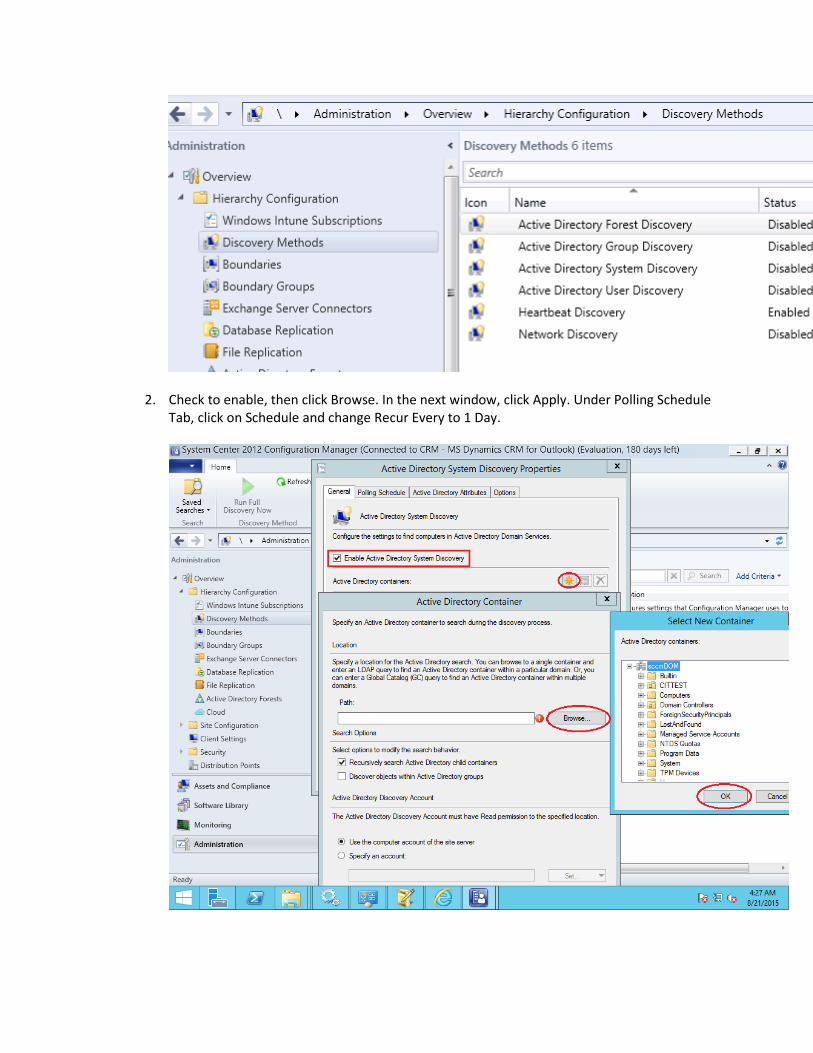
2. Check to enable, then click Browse. In the next window, click Apply. Under Polling Schedule Tab, click on Schedule and change Recur Every to 1 Day.
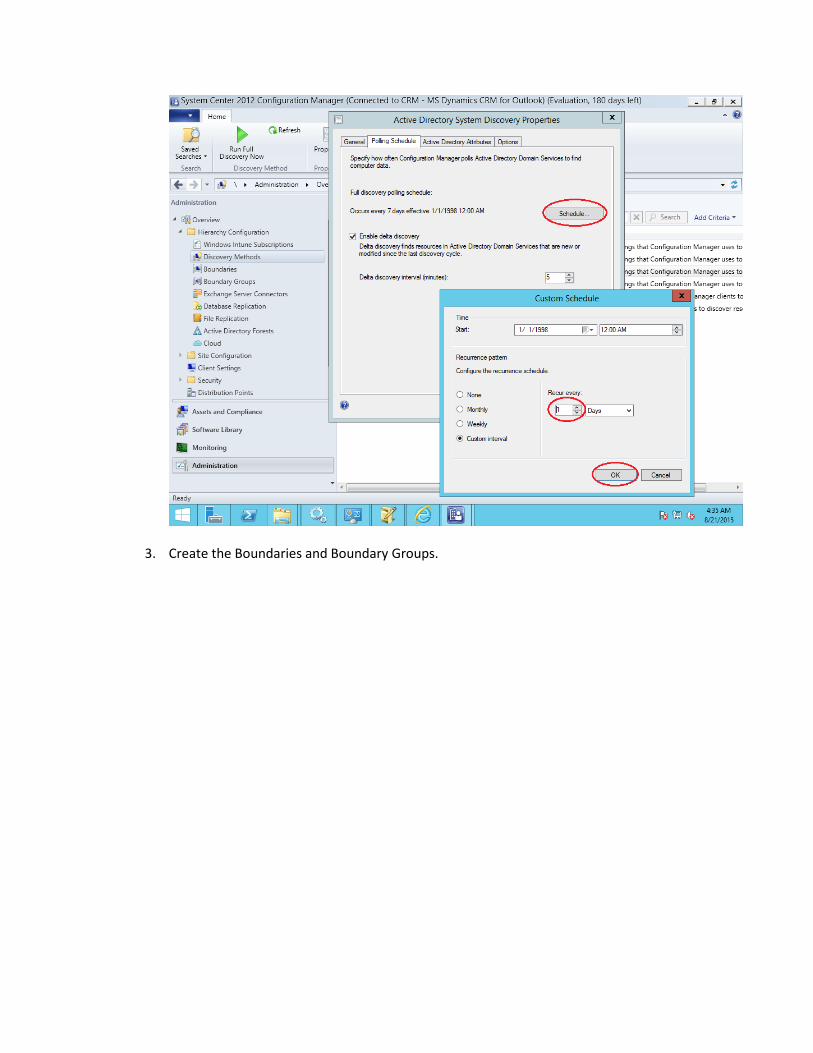
3. Create the Boundaries and Boundary Groups.
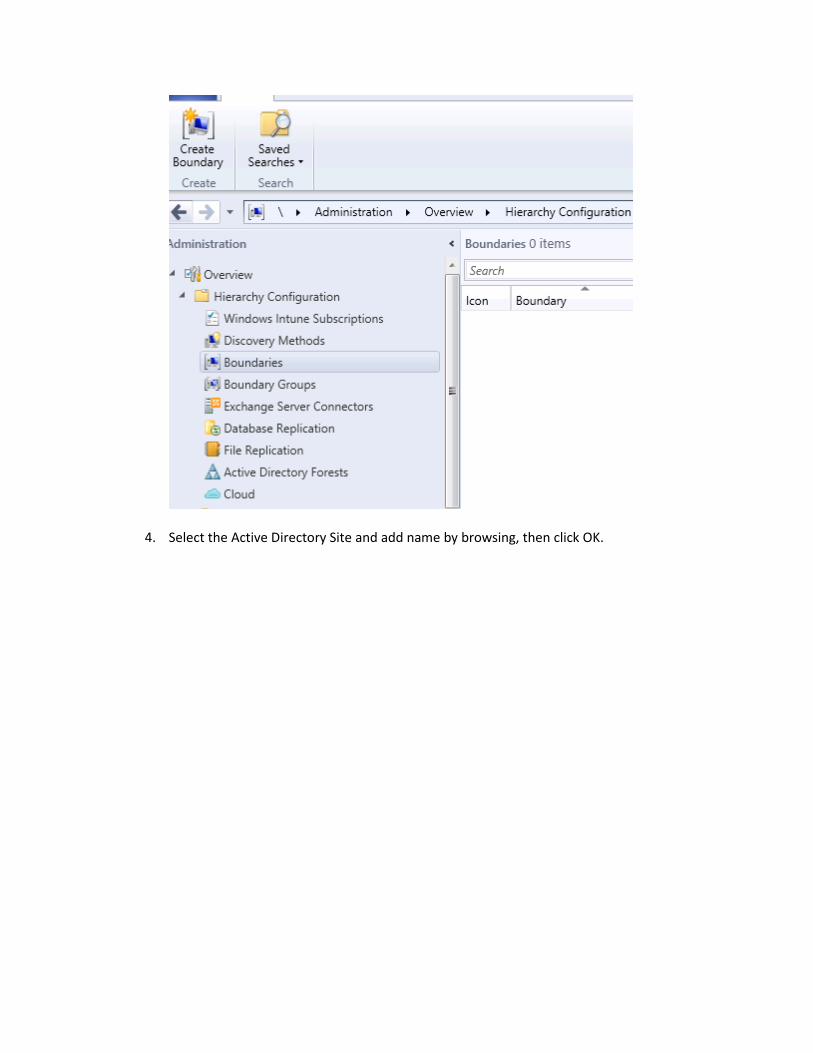
4. Select the Active Directory Site and add name by browsing, then click OK.
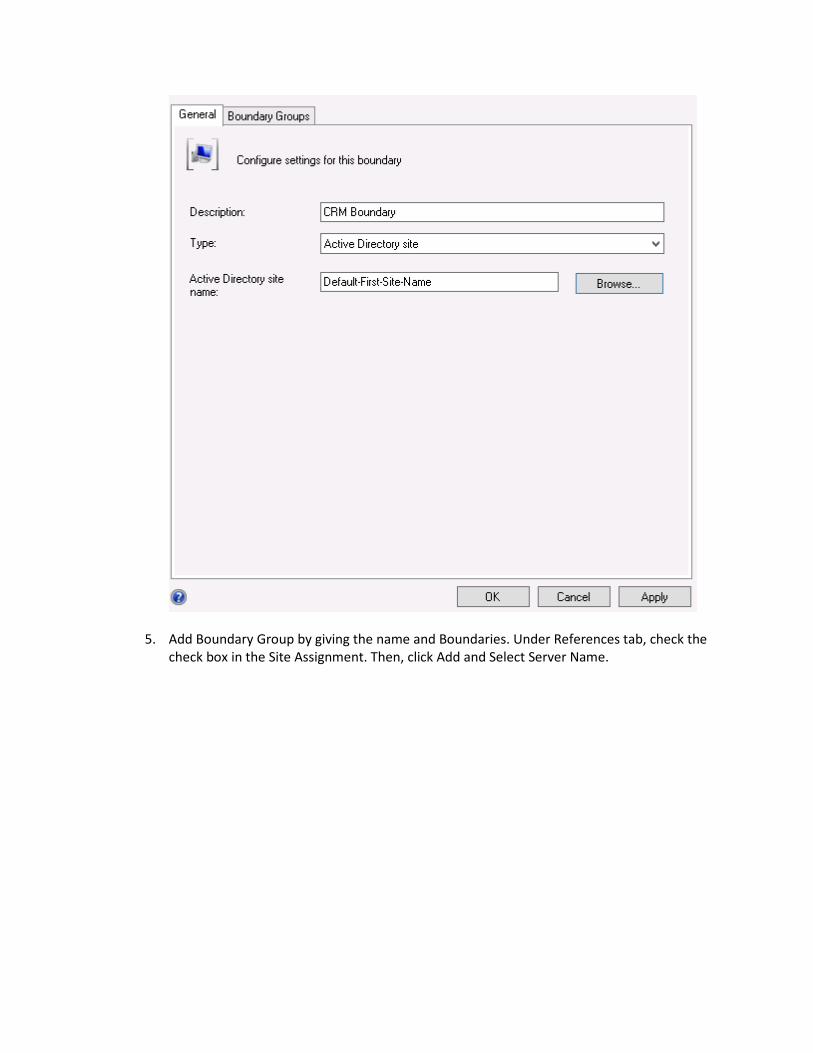
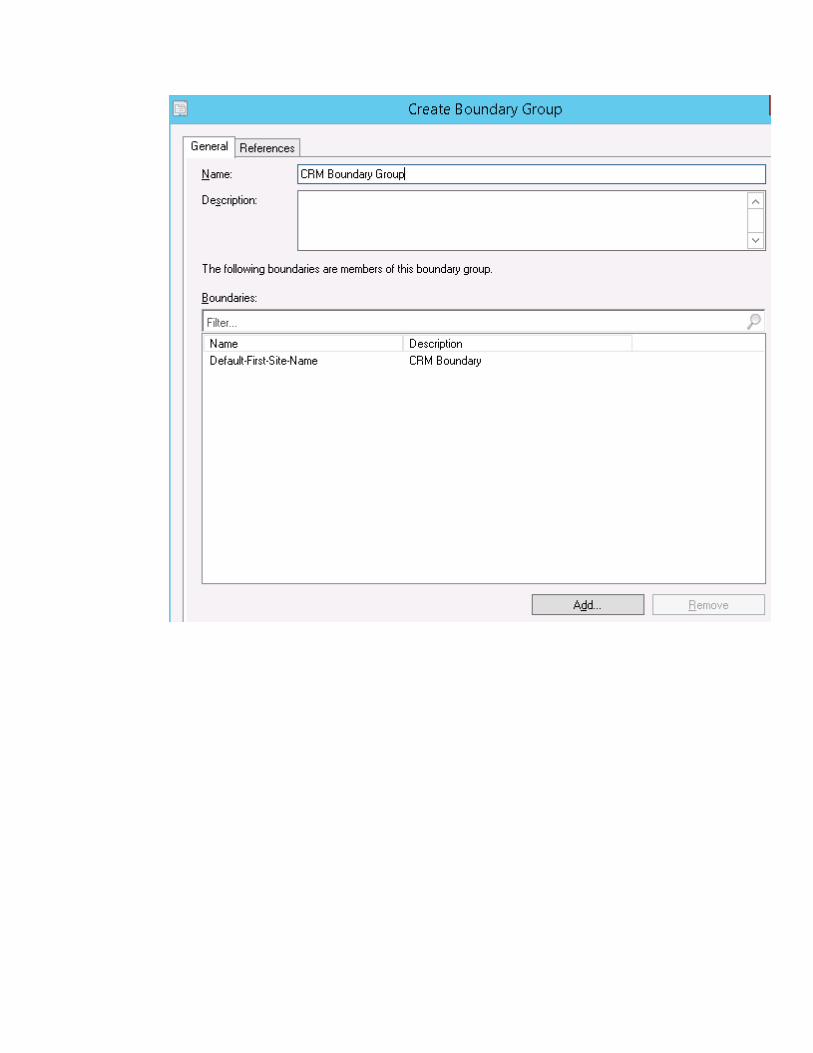
5. Add Boundary Group by giving the name and Boundaries. Under References tab, check the check box in the Site Assignment. Then, click Add and Select Server Name.
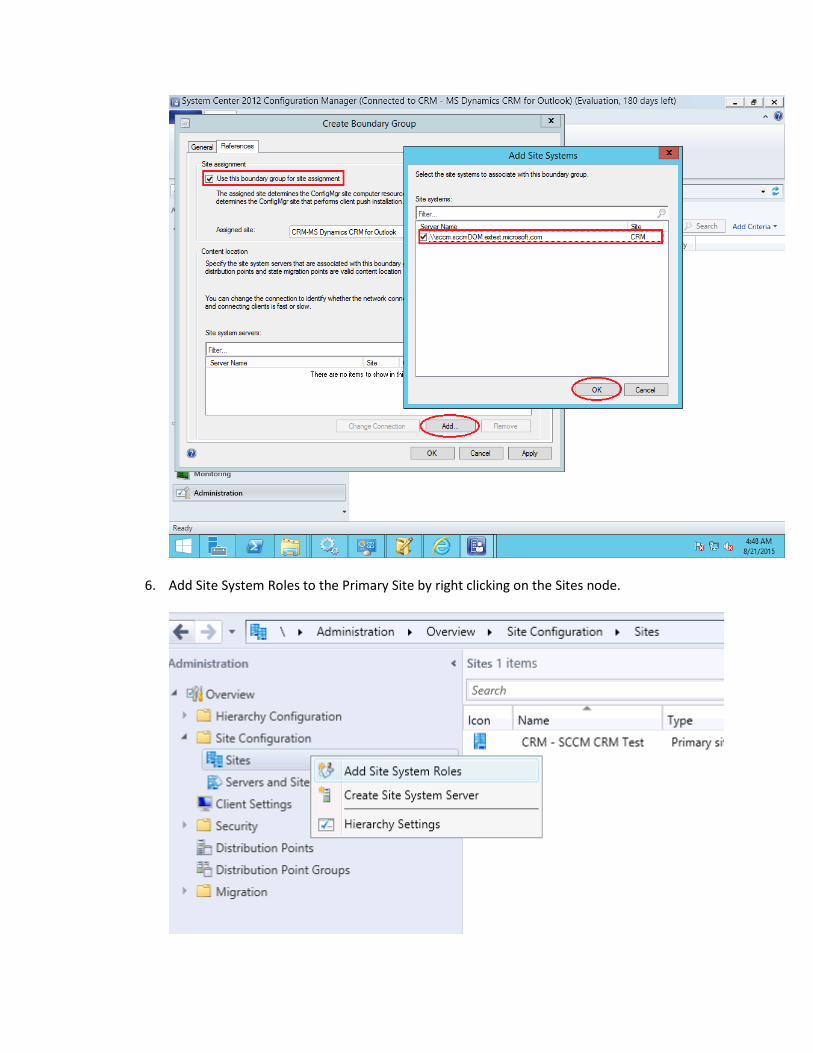
6. Add Site System Roles to the Primary Site by right clicking on the Sites node.
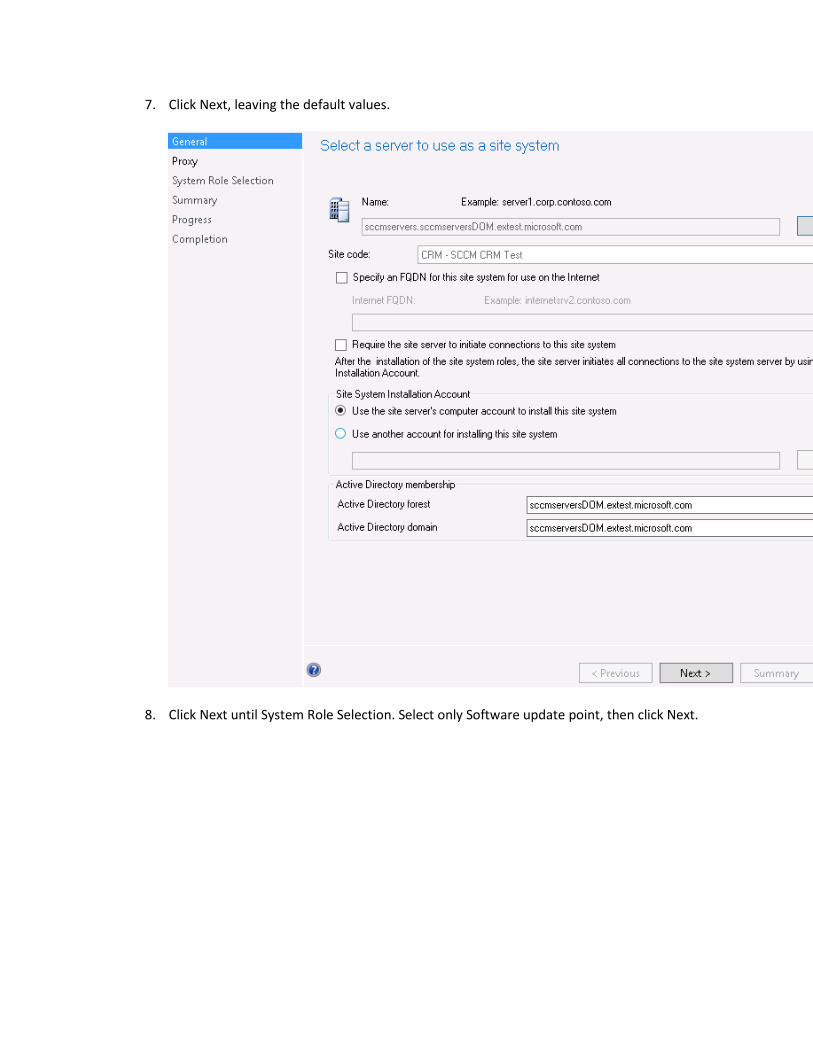
7. Click Next, leaving the default values.
8. Click Next until System Role Selection. Select only Software update point, then click Next.

9. Select the below options in the Software Update Point, then click Next.
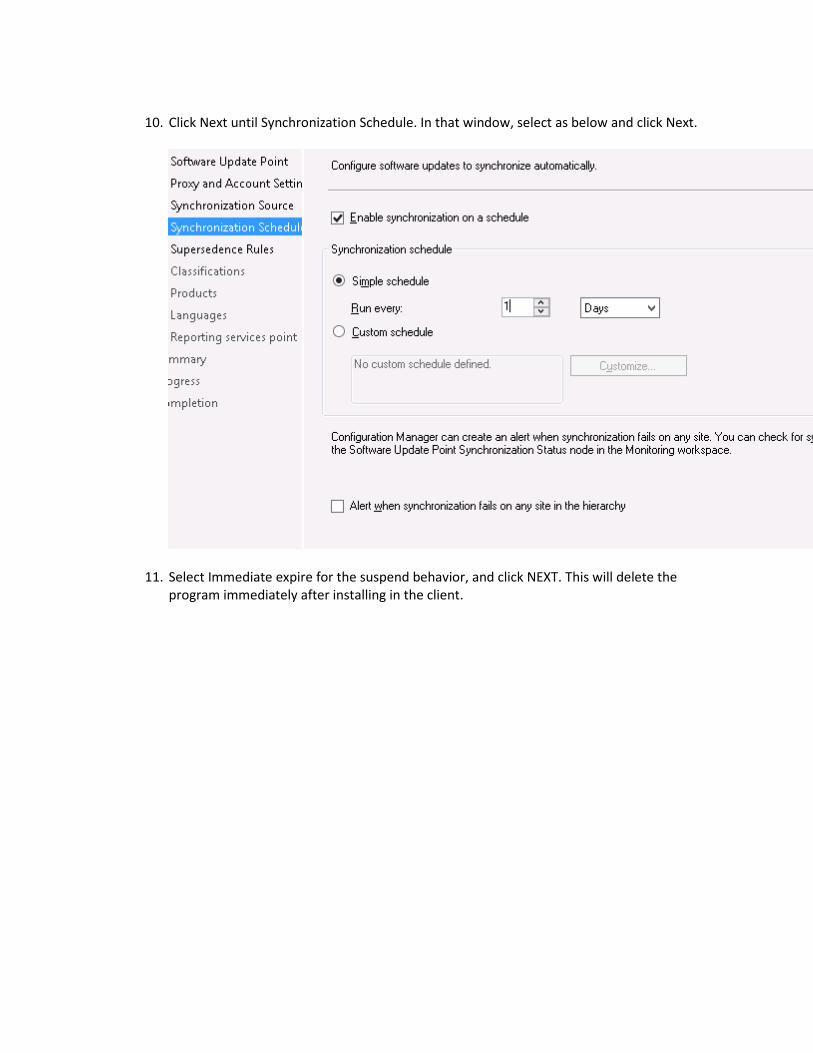
10. Click Next until Synchronization Schedule. In that window, select as below and click Next.
11. Select Immediate expire for the suspend behavior, and click NEXT. This will delete the program immediately after installing in the client.
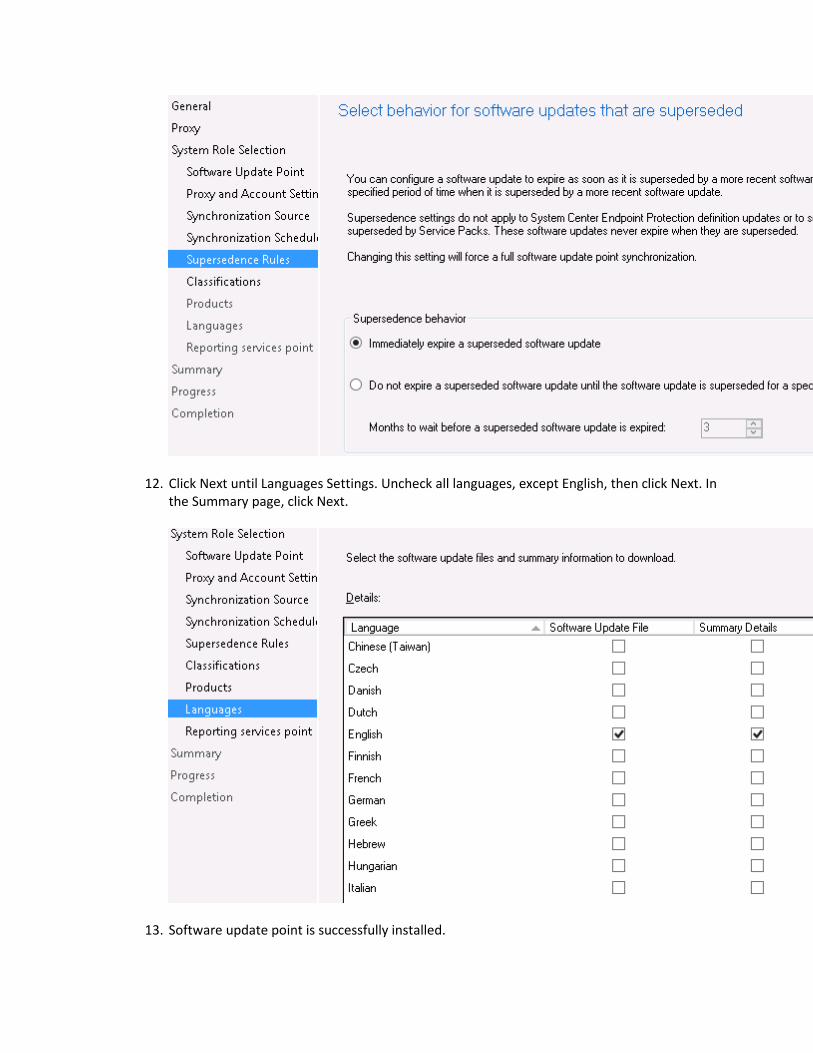
12. Click Next until Languages Settings. Uncheck all languages, except English, then click Next. In the Summary page, click Next.
13. Software update point is successfully installed.
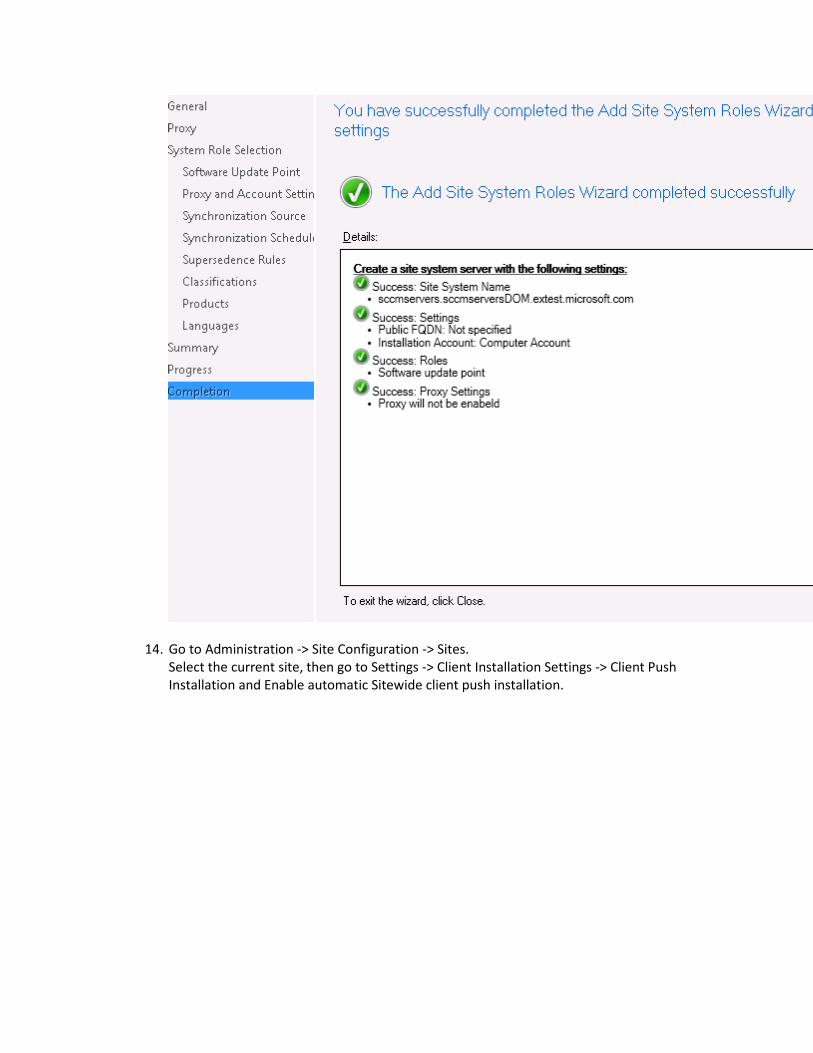
14. Go to Administration -> Site Configuration -> Sites. Select the current site, then go to Settings -> Client Installation Settings -> Client Push Installation and Enable automatic Sitewide client push installation.
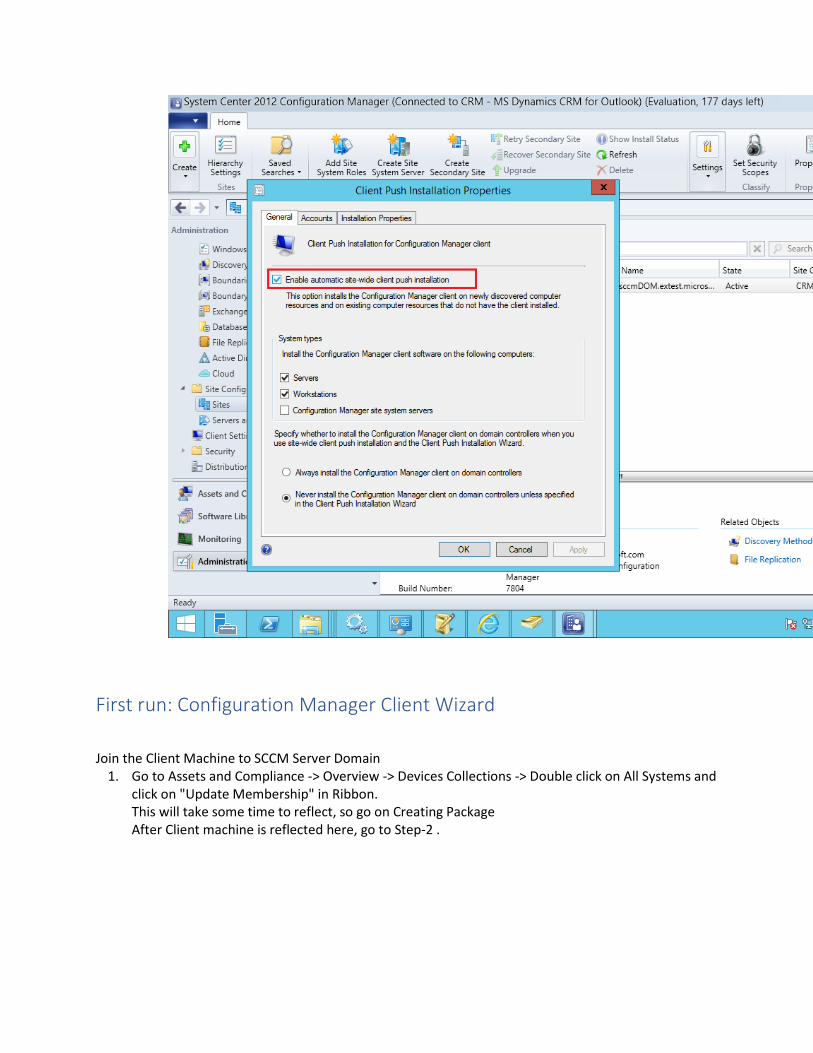
First run: Configuration Manager Client Wizard
Join the Client Machine to SCCM Server Domain 1. Go to Assets and Compliance -> Overview -> Devices Collections -> Double click on All Systems and
click on "Update Membership" in Ribbon. This will take some time to reflect, so go on Creating Package After Client machine is reflected here, go to Step-2 .
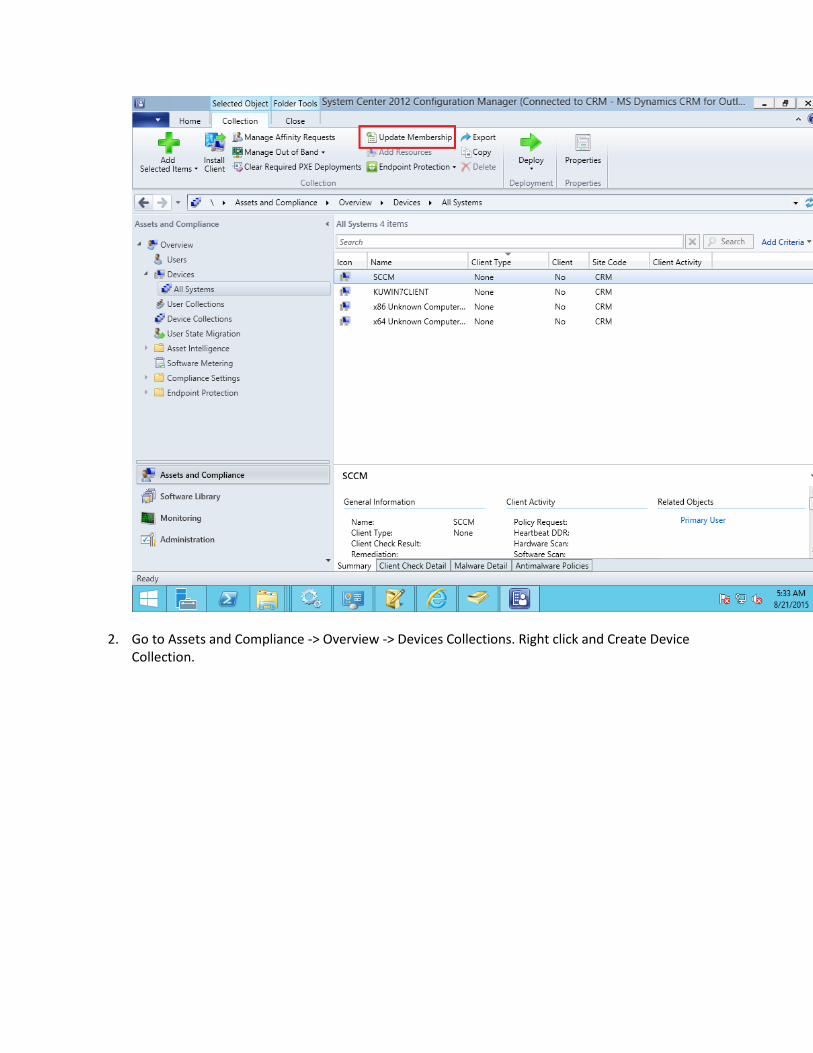
2. Go to Assets and Compliance -> Overview -> Devices Collections. Right click and Create Device Collection.
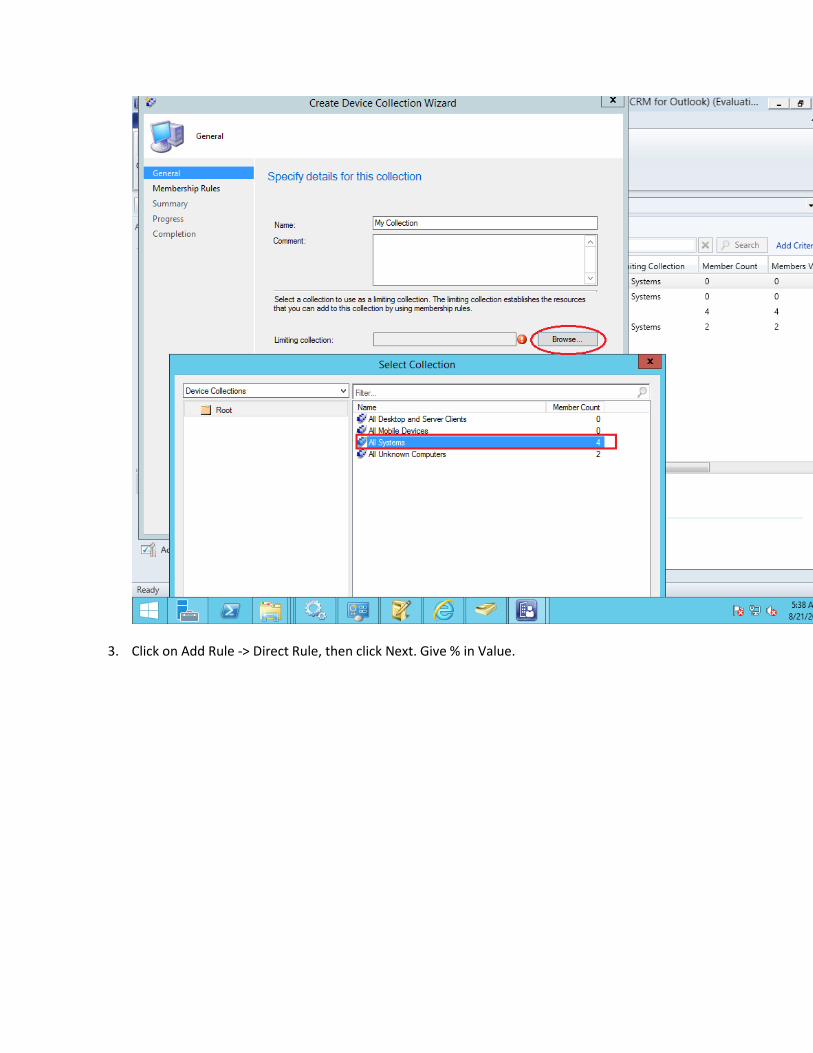
3. Click on Add Rule -> Direct Rule, then click Next. Give % in Value.
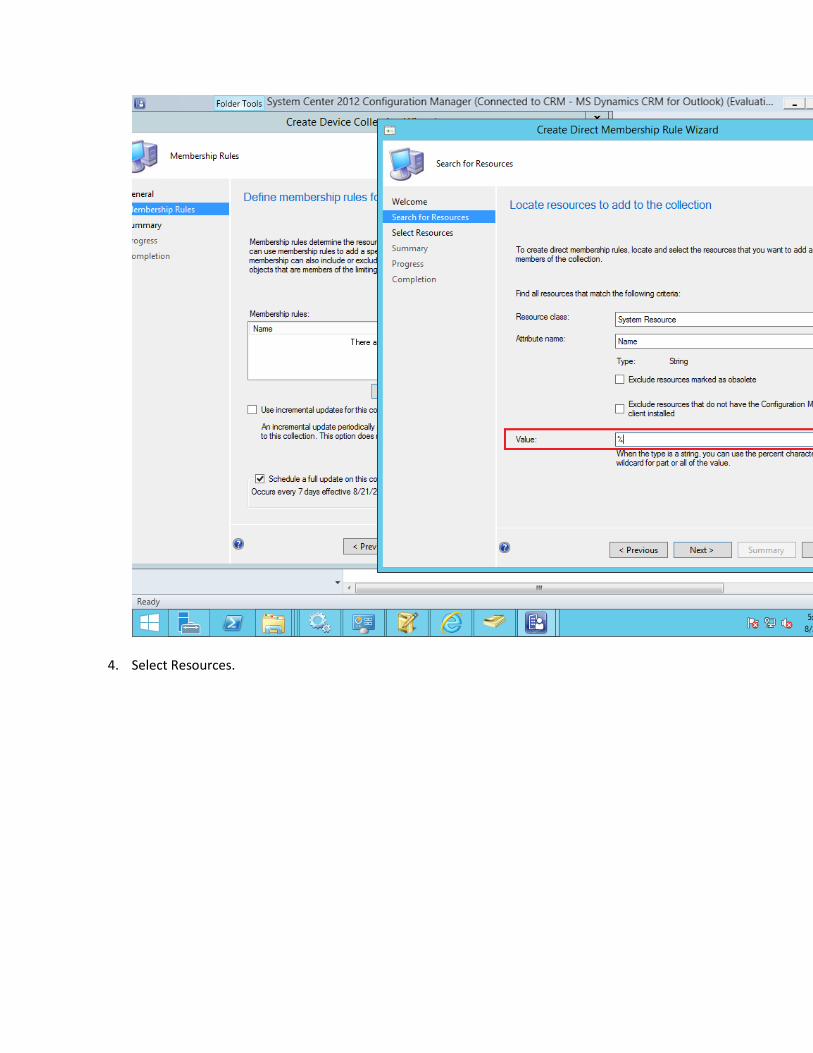
4. Select Resources.
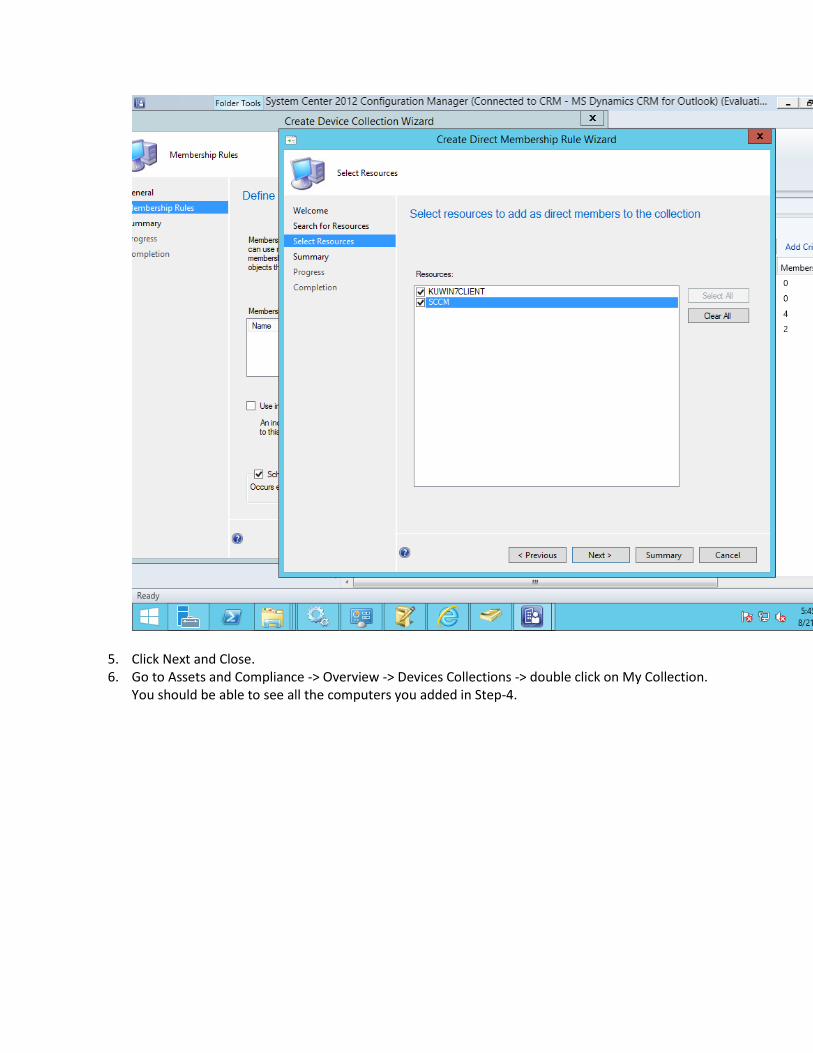
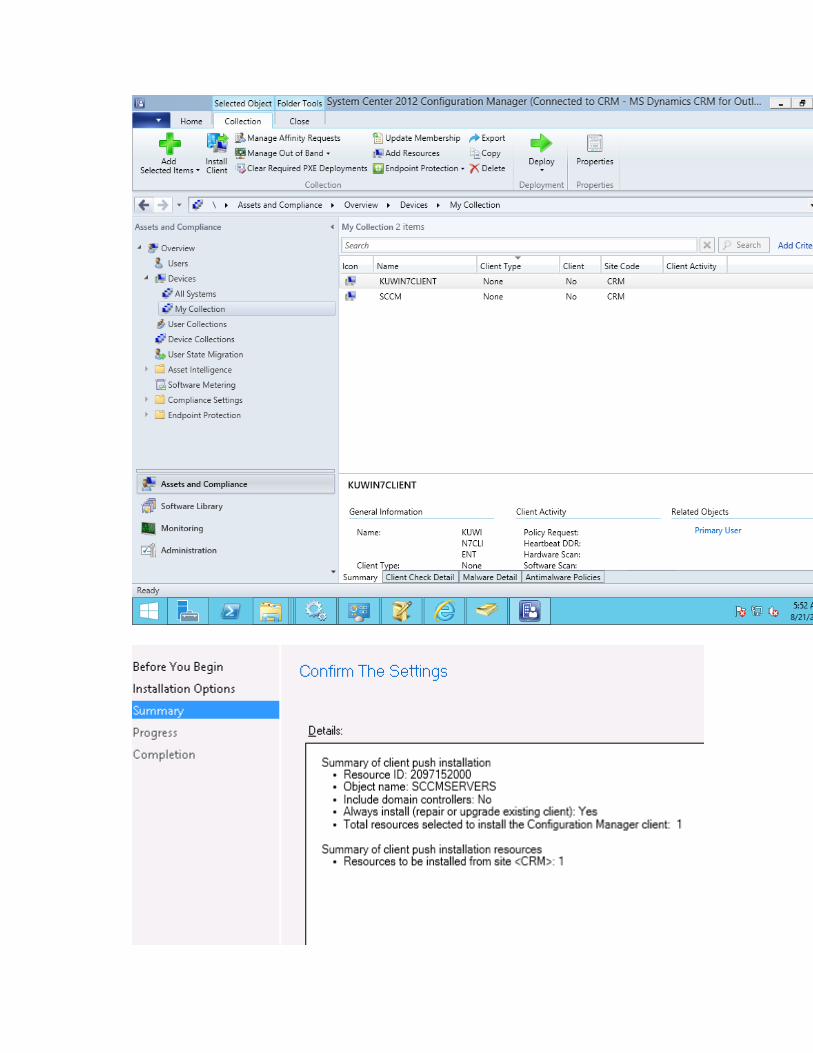
5. Click Next and Close. 6. Go to Assets and Compliance -> Overview -> Devices Collections -> double click on My Collection.
You should be able to see all the computers you added in Step-4.
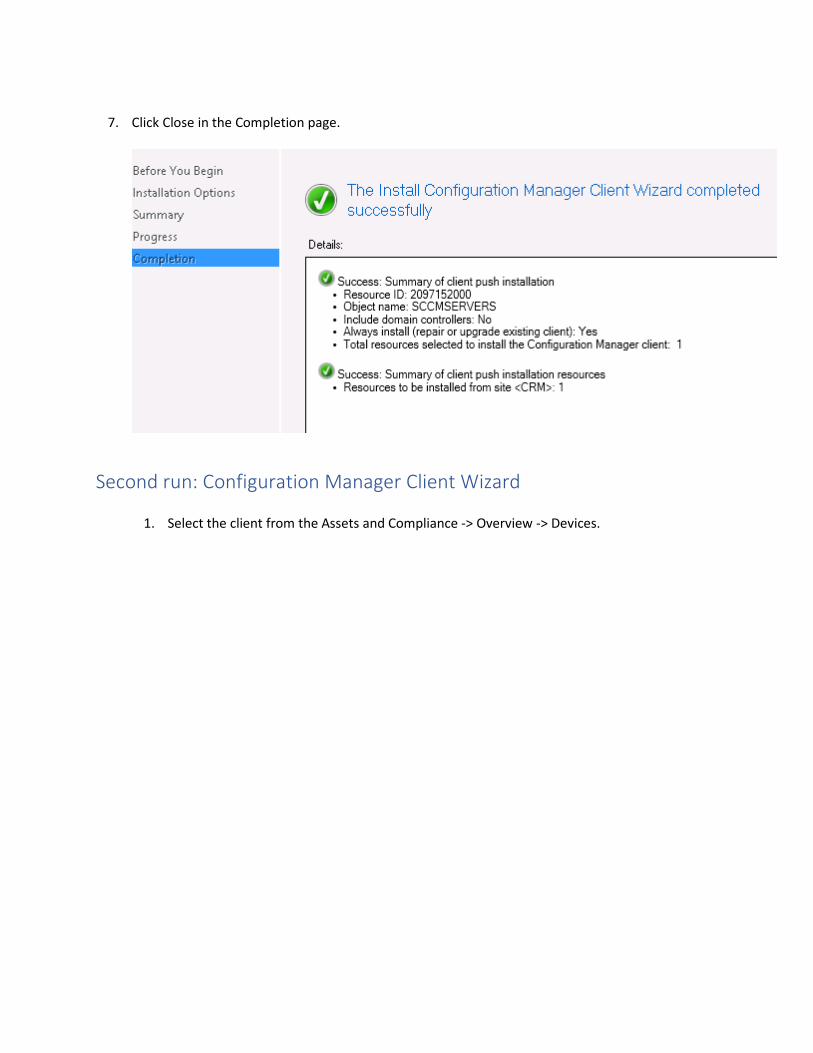
7. Click Close in the Completion page.
Second run: Configuration Manager Client Wizard
1. Select the client from the Assets and Compliance -> Overview -> Devices.
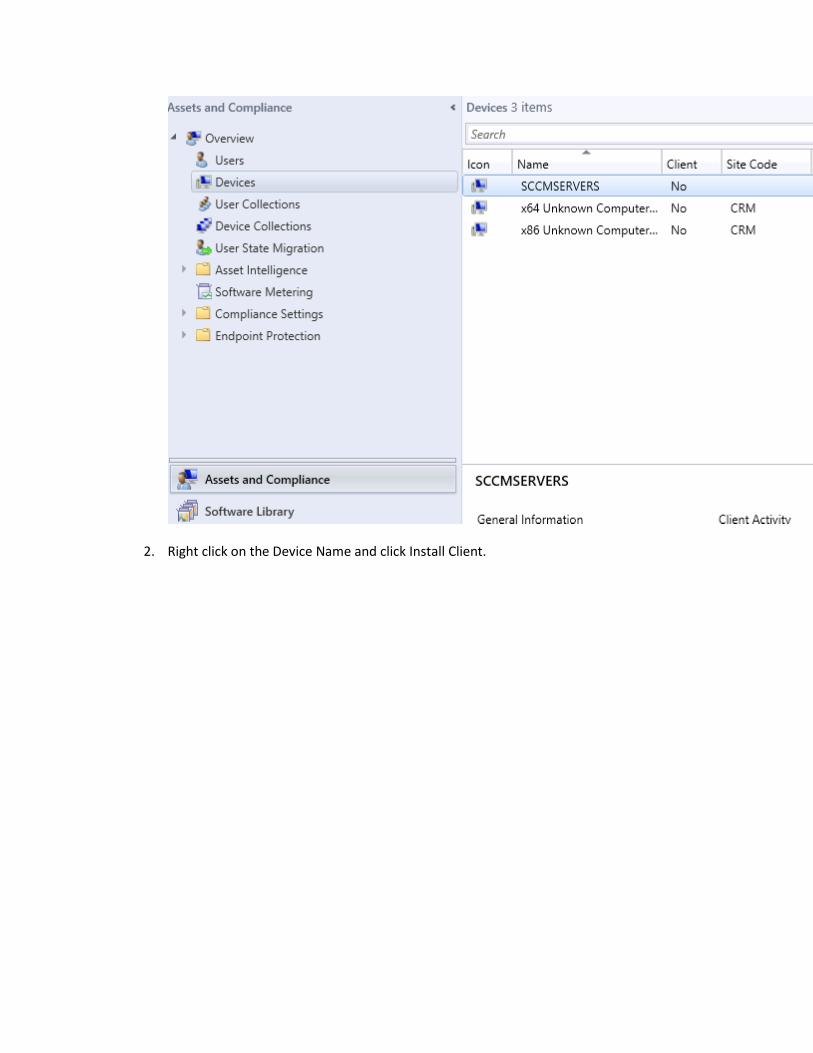
2. Right click on the Device Name and click Install Client.
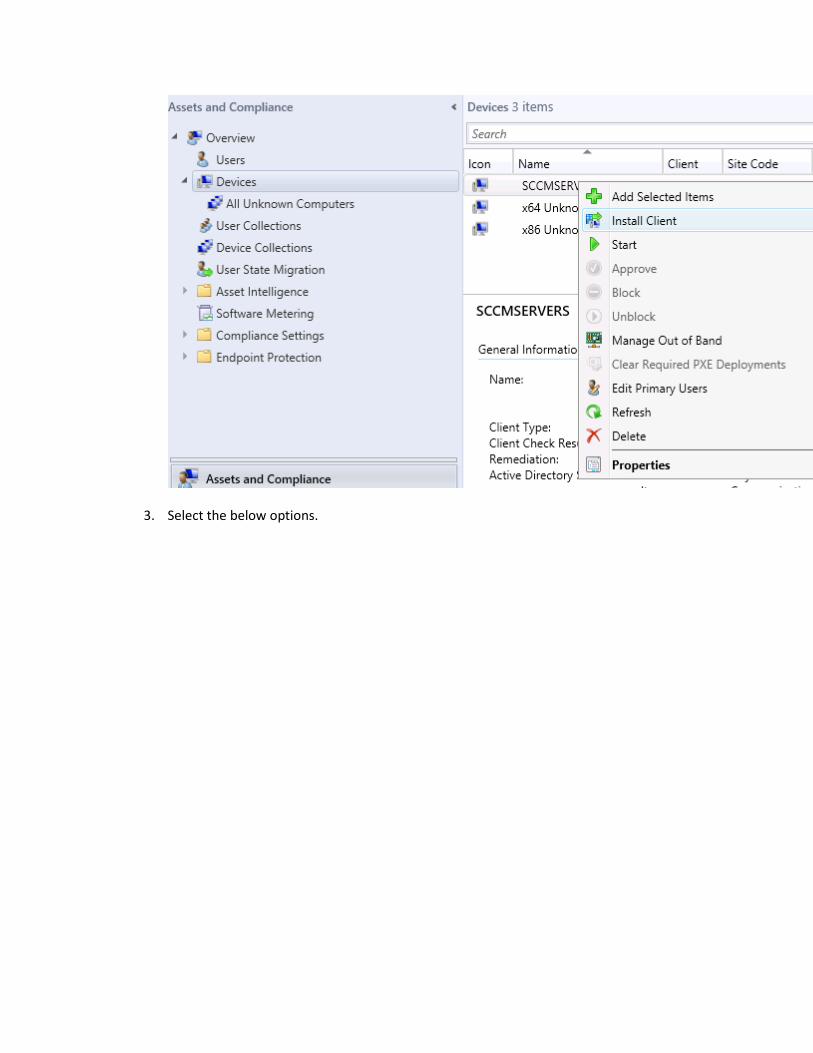
3. Select the below options.
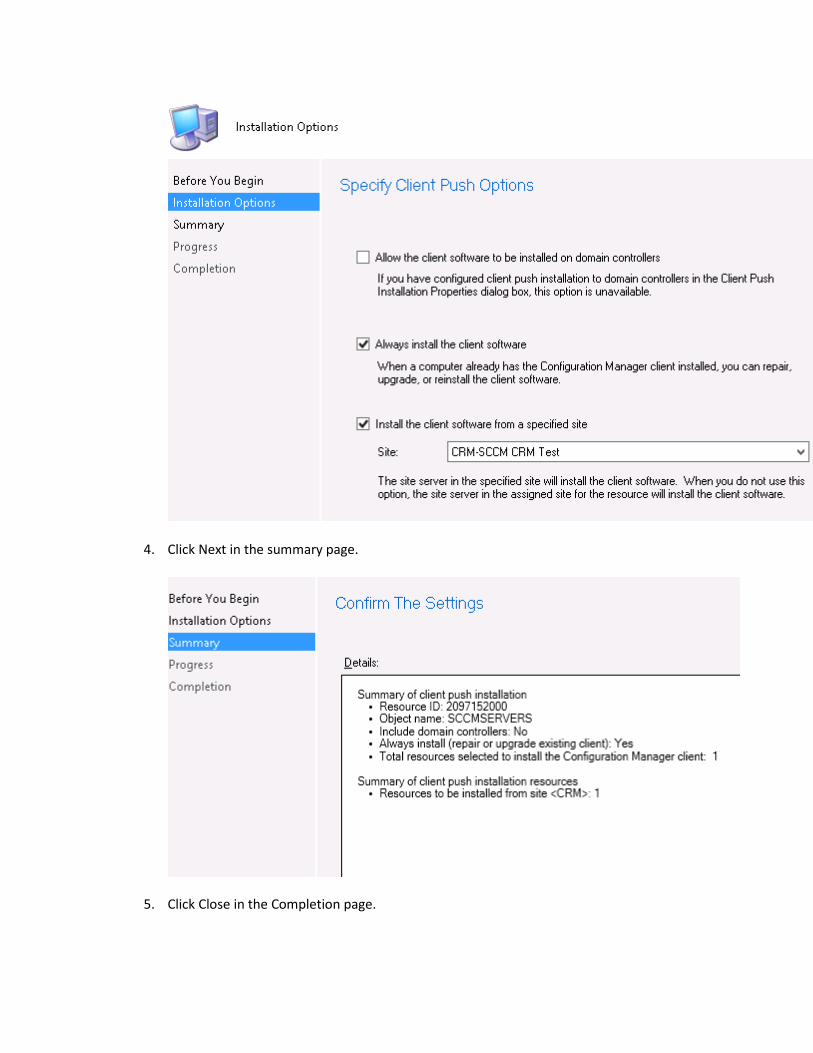
4. Click Next in the summary page.
5. Click Close in the Completion page.
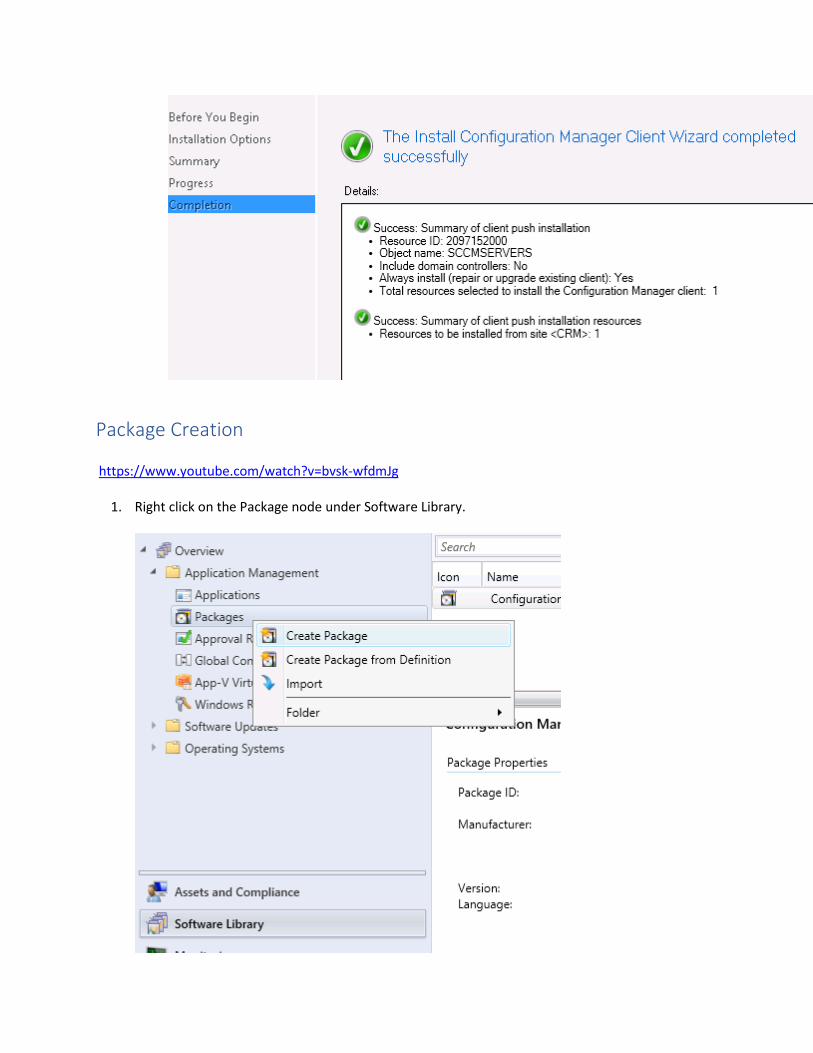
Package Creation https://www.youtube.com/watch?v=bvsk-wfdmJg
1. Right click on the Package node under Software Library.
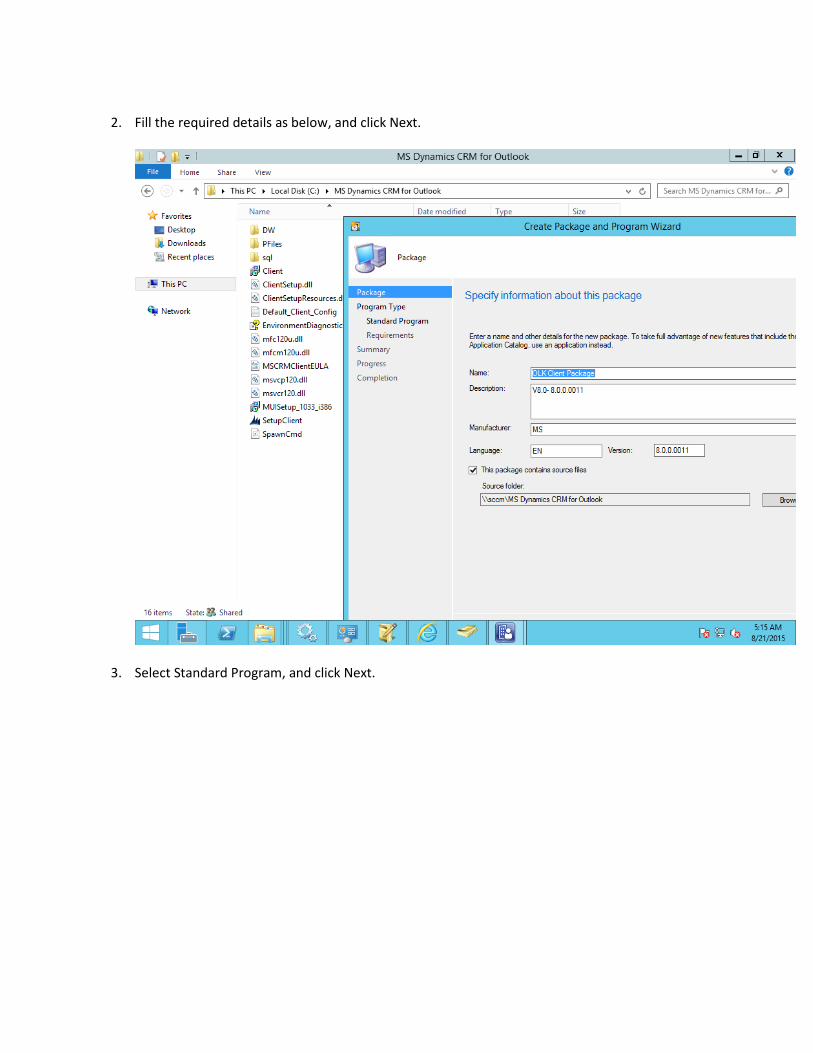
2. Fill the required details as below, and click Next.
3. Select Standard Program, and click Next.
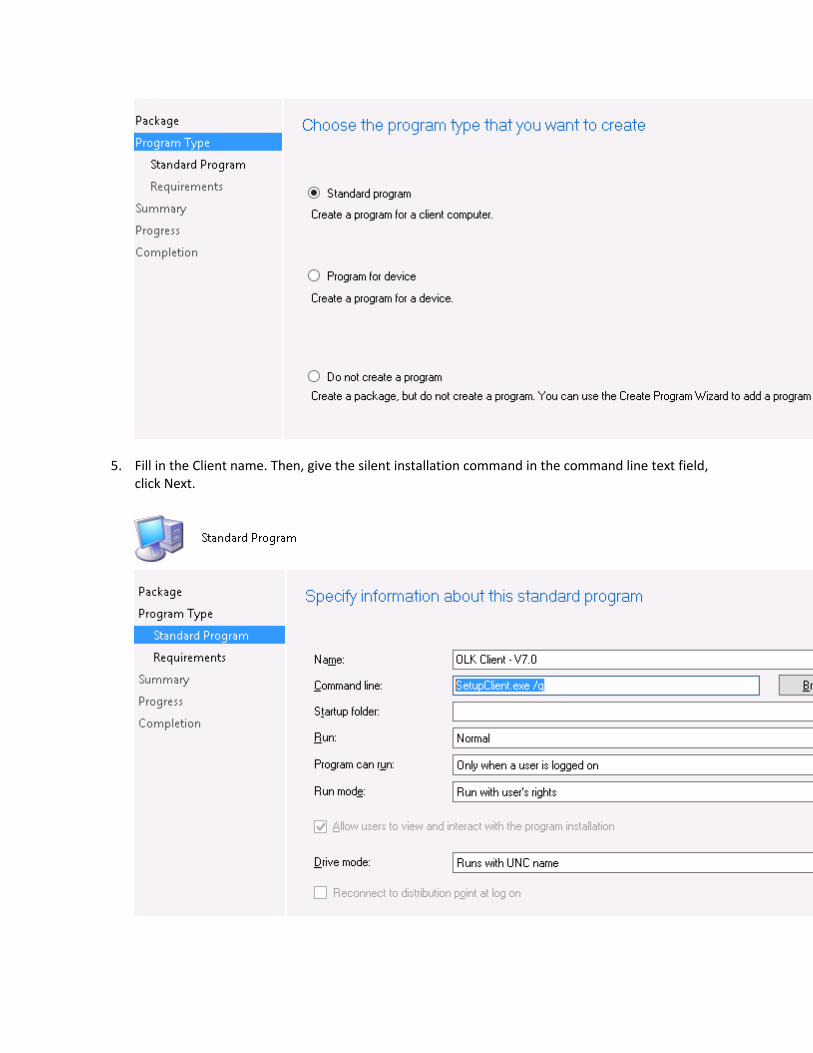
5. Fill in the Client name. Then, give the silent installation command in the command line text field, click Next.
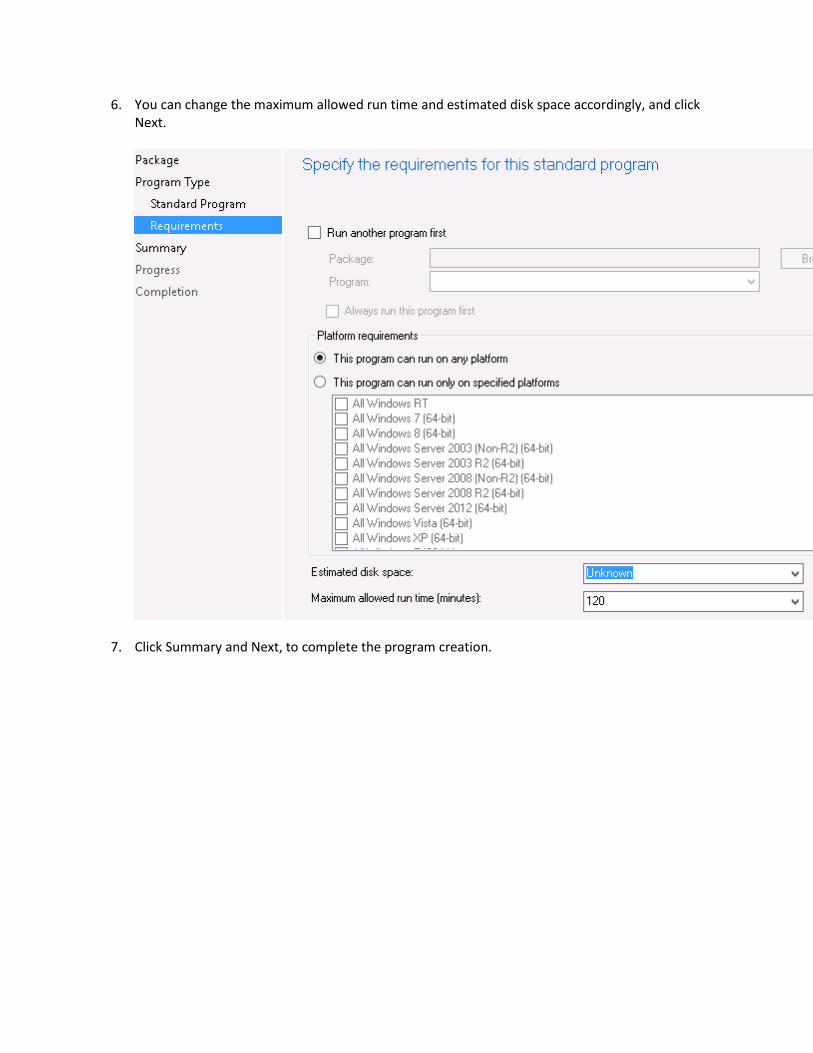
6. You can change the maximum allowed run time and estimated disk space accordingly, and click Next.
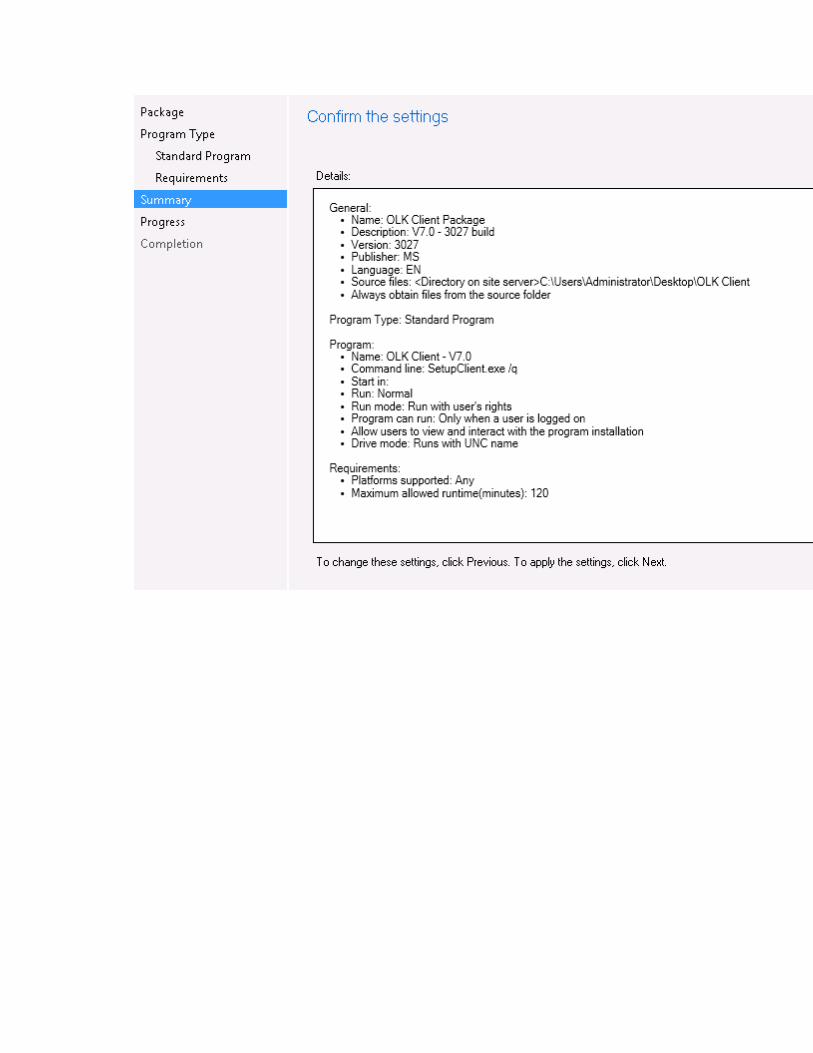
7. Click Summary and Next, to complete the program creation.
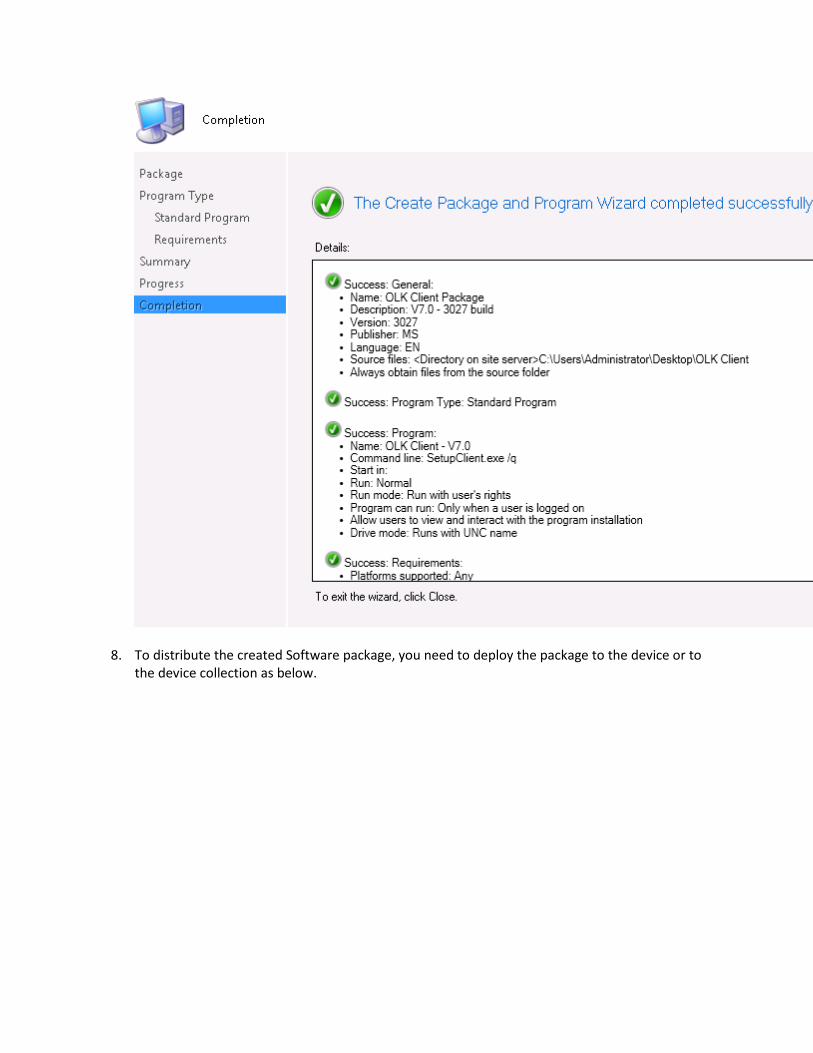
8. To distribute the created Software package, you need to deploy the package to the device or to the device collection as below.
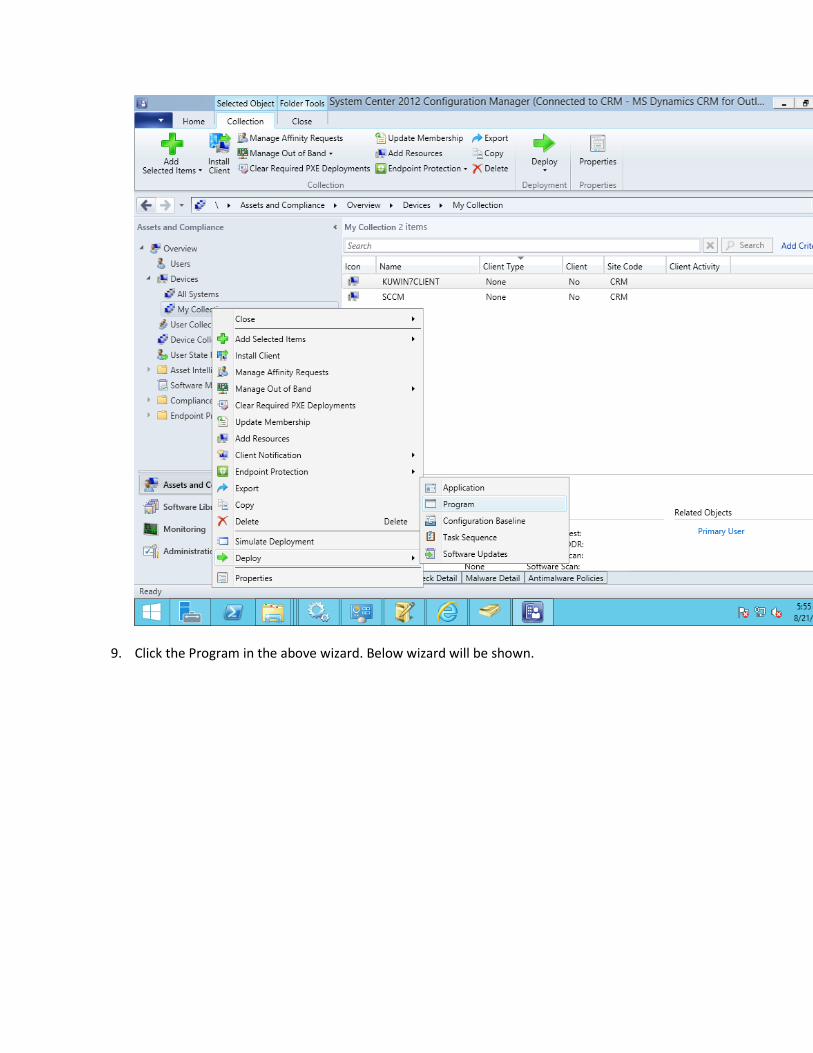
9. Click the Program in the above wizard. Below wizard will be shown.

10. In this wizard, you need to add the Distribution Point by clicking Add.
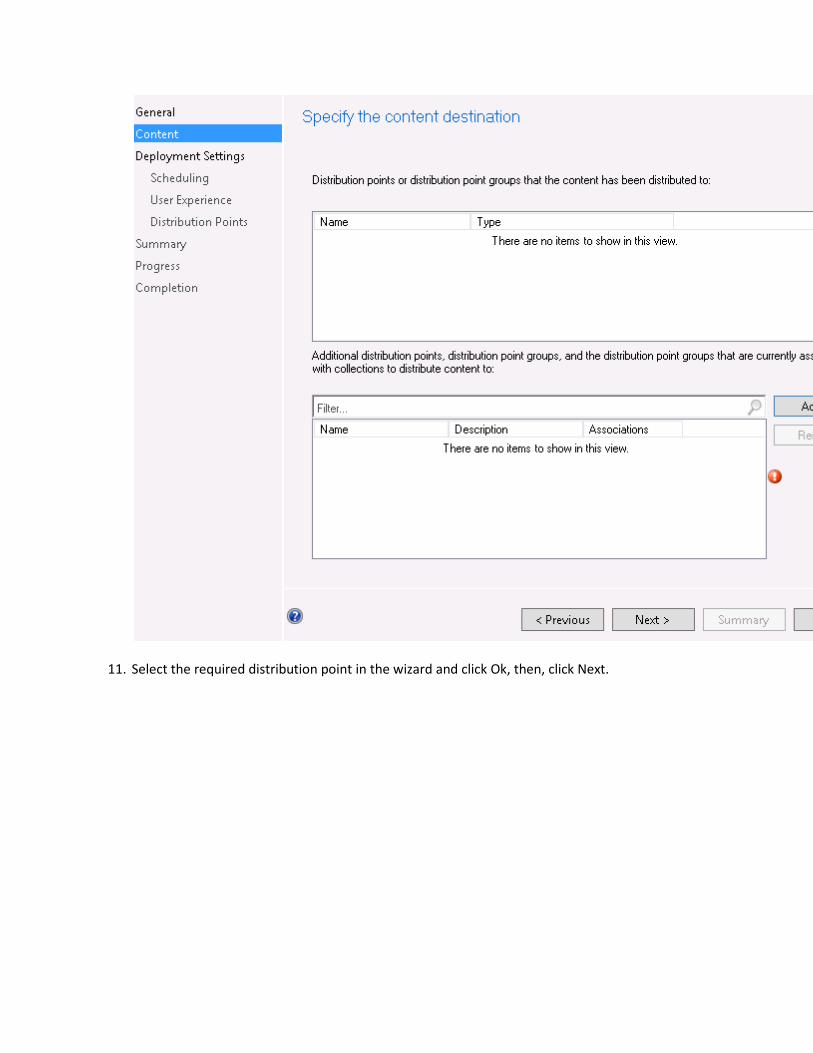
11. Select the required distribution point in the wizard and click Ok, then, click Next.
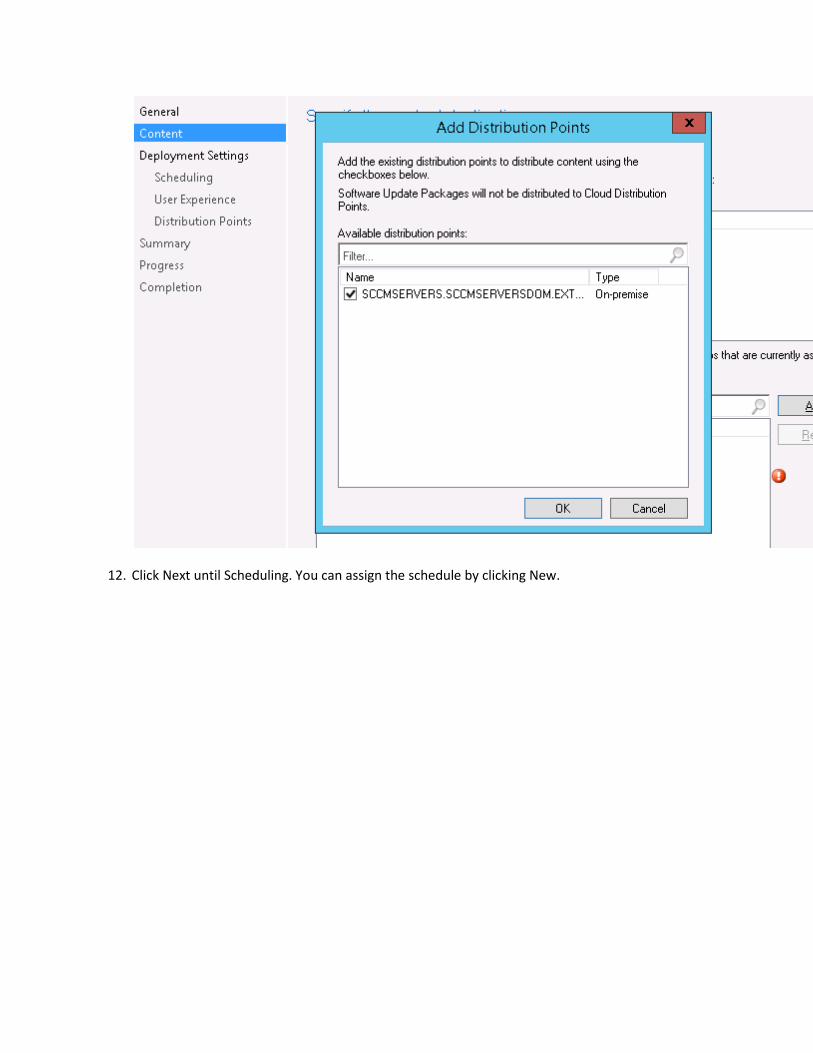
12. Click Next until Scheduling. You can assign the schedule by clicking New.
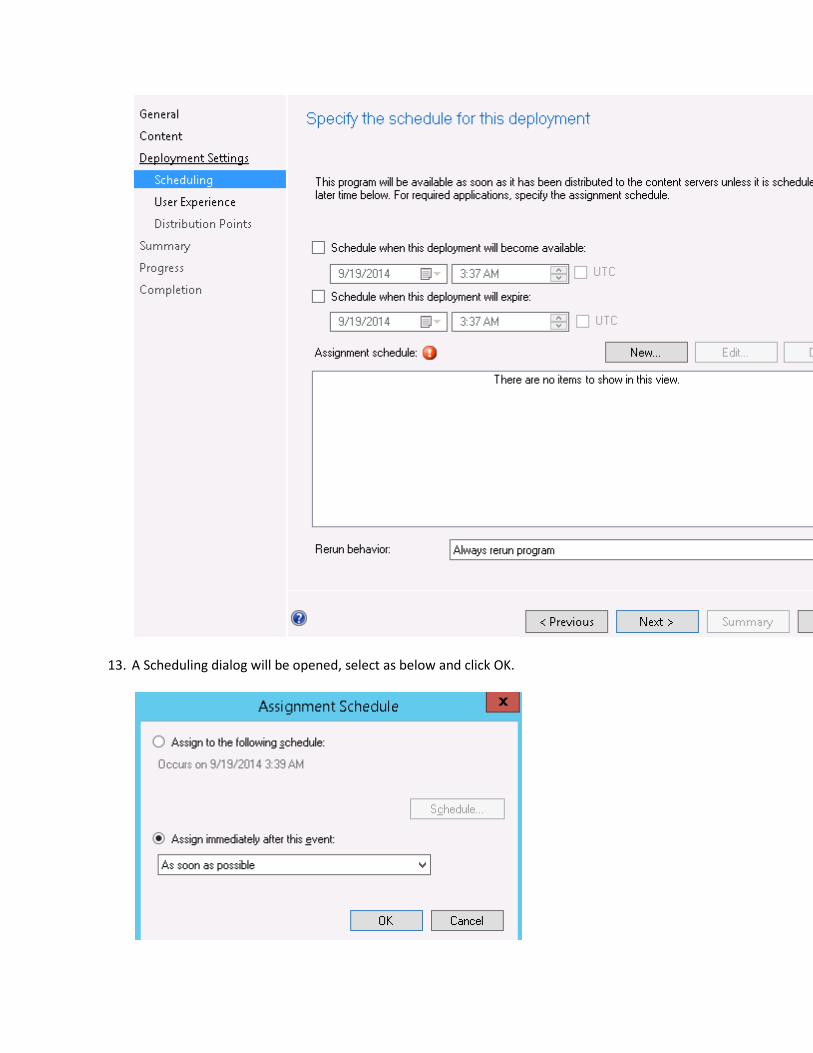
13. A Scheduling dialog will be opened, select as below and click OK.
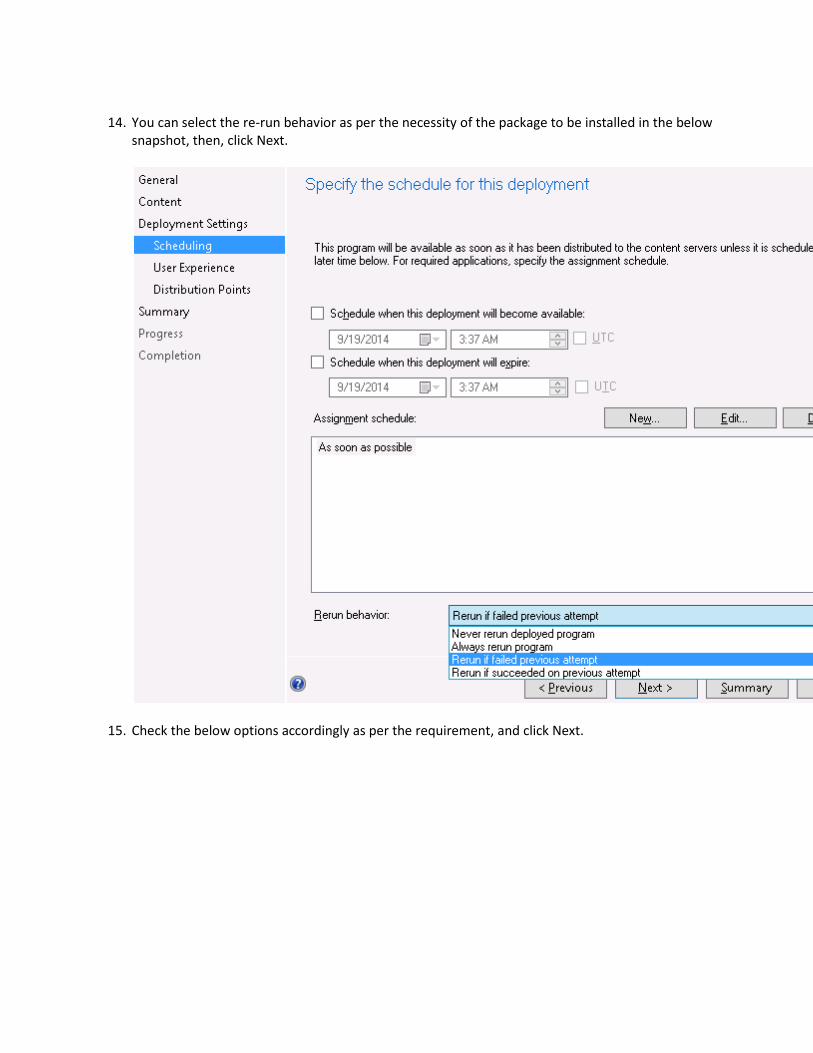
14. You can select the re-run behavior as per the necessity of the package to be installed in the below
snapshot, then, click Next.
15. Check the below options accordingly as per the requirement, and click Next.

16. Select the deployment options as per the LAN Speed and click Next button.
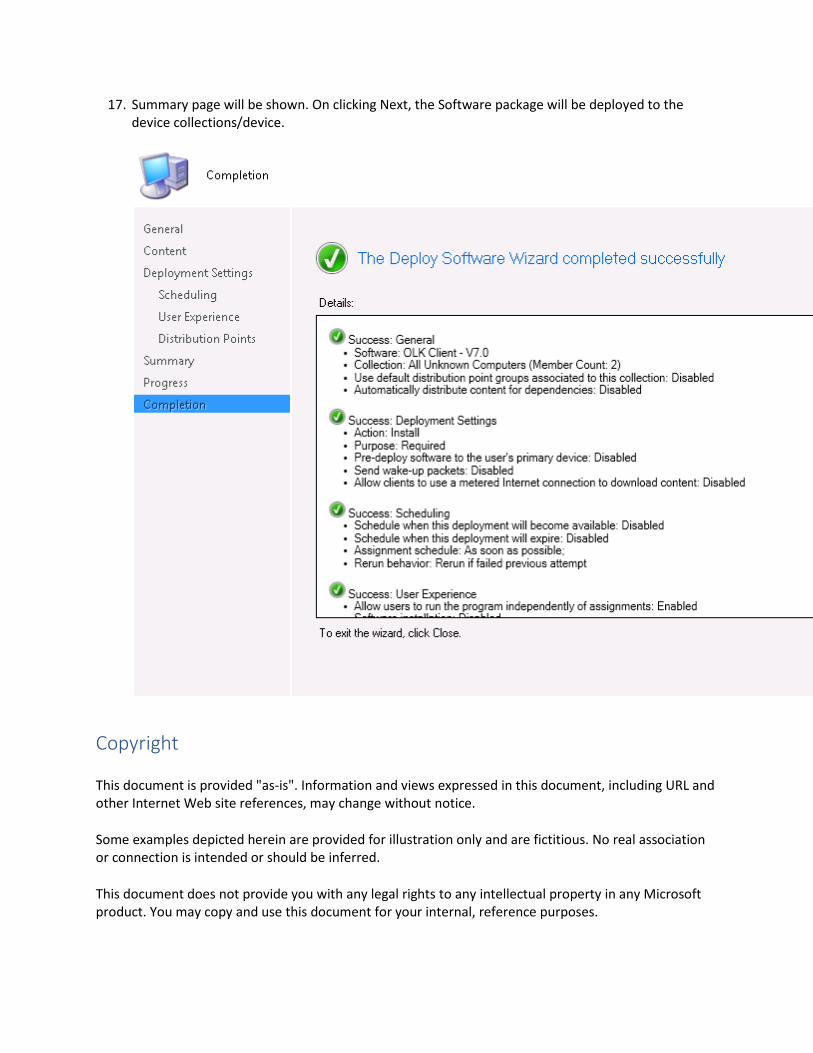
17. Summary page will be shown. On clicking Next, the Software package will be deployed to the device collections/device.
Copyright
This document is provided "as-is". Information and views expressed in this document, including URL and other Internet Web site references, may change without notice.
Some examples depicted herein are provided for illustration only and are fictitious. No real association or connection is intended or should be inferred.
This document does not provide you with any legal rights to any intellectual property in any Microsoft product. You may copy and use this document for your internal, reference purposes.

The videos and eBooks might be in English only. Also, if you click the links, you may be redirected to a U.S. website whose content is in English.
© 2017 Microsoft. All rights reserved.
Microsoft, Active Directory, Azure, Bing, Cortana, Delve, Dynamics, Excel, Hyper-V, Internet Explorer, Microsoft Dynamics, Microsoft Edge, Microsoft Intune, MSDN, Office 365, OneDrive, OneNote, Outlook, Power BI, PowerPoint, PowerShell, PowerApps, SharePoint, Skype, SQL Server, Visual C#, Visual Studio, Windows, Windows PowerShell, and Windows Server are trademarks of the Microsoft group of companies. All other trademarks are property of their respective owners.