Embed Size (px)
Citation preview

Upgrading vRealize CodeStream22 AUG 2017vRealize Code Stream 2.3

Upgrading vRealize Code Stream
VMware, Inc. 2
You can find the most up-to-date technical documentation on the VMware website at:
https://docs.vmware.com/
If you have comments about this documentation, submit your feedback to
Copyright © 2017 VMware, Inc. All rights reserved. Copyright and trademark information.
VMware, Inc.3401 Hillview Ave.Palo Alto, CA 94304www.vmware.com

Contents
Upgrading vRealize Code Stream 4
1 Considerations to Upgrade vRealize Code Stream 5
2 Prerequisites for Upgrading the Appliance 7
3 Migrate Artifacts and Configure Your External Artifactory Instance 8
4 Downloading vRealize Automation Appliance Updates 10
Download vRealize Automation Appliance Updates 10
Download Virtual Appliance Updates for Use with a CD-ROM Drive 11
5 Upgrading the vRealize Automation Appliance from 7.x to the Current Version 12
Install the Update on the 7.x vRealize Automation Appliance 12
6 Upgrading the vRealize Automation Appliance from 6.2.5 to the Current
Version 14Preparing to Upgrade the vRealize Automation Appliance 14
Checklist to Upgrade the 6.2.5 vRealize Automation Appliance Components 14
Backing Up and Saving Your Existing Environment 15
Installing Updates on the 6.2.5 vRealize Automation Appliance 17
7 vRealize Code Stream Post Upgrade 25
8 Troubleshooting the Upgrade 27
Retrieve Logs to Troubleshoot the vRealize Code Stream Upgrade 27
Migration of Identity Store Fails Because the Active Directory is not Synchronized 28
Migration of Identity Store Fails Because of Incorrect Credentials 28
Log In Fails After Upgrade 29
Upgrade Is Unsuccessful if Root Partition Does Not Provide Sufficient Free Space 29
VMware, Inc. 3

Upgrading vRealize Code Stream
These instructions show you how to upgrade your instance of vRealize Automation so that you canupgrade vRealize Code Stream to the current version.
Intended AudienceThis information is intended for system administrators who are experienced and familiar with virtualmachine technology and data center operations, and who install and upgrade instances ofvRealize Code Stream.
VMware Technical Publications GlossaryVMware Technical Publications provides a glossary of terms that might be unfamiliar to you. Fordefinitions of terms as they are used in VMware technical documentation, go to http://www.vmware.com/support/pubs.
VMware, Inc. 4

Considerations to UpgradevRealize Code Stream 1vRealize Code Stream and vRealize Automation are included in a single appliance. When you upgradevRealize Automation to the current version, you also upgrade vRealize Code Stream.
To support an upgrade of your vRealize Code Stream instance, you must first upgrade your instance ofvRealize Automation.
An in-place upgrade is a multi-step process. You perform procedures in a particular order to update thevarious components in your current environment. You must upgrade all product components to the sameversion. You can perform an in-place upgrade for the following upgrade paths.n vRealize Automation 7.2 to 7.3
n vRealize Automation 7.1 to 7.3
n vRealize Automation 6.2.5 to 7.3
Compatible supported upgrade paths for vRealize Automation and vRealize Code Stream include thefollowing versions.
vRealize Automation vRealize Code Stream
7.3 Current version
7.2 2.2
7.1 2.1
7.0.1 2.0
6.2.5 Current version
6.2.4 1.2
6.2.3 1.2
6.2.2 1.1
6.2.1 1.1
6.2.0 1.0
VMware, Inc. 5

Upgrading a 6.2.5 EnvironmentUpgrading a vRealize Automation 6.2.5 environment to the latest version of vRealize Automationintroduces functional changes. When you upgrade your vRealize Automation 6.2.5 environment to thelatest version, you use upgrade procedures specific to this environment.
See Chapter 6 Upgrading the vRealize Automation Appliance from 6.2.5 to the Current Version.
If you still need more information, see Upgrading vRealize Automation in the vRealize AutomationInformation Center.
Reapply Licenses After UpgradeAfter the upgrade, you must reenter your licenses in the vRealize Appliance. The upgrade removesexisting licenses for vCloud Suite and vRealize Code Stream.
Licensing vRealize Code Stream or thevRealize Code Stream Management Pack for IT DevOpsWhen you upgrade vRealize Code Stream, you can license vRealize Code Stream or thevRealize Code Stream Management Pack for IT DevOps.
Caution Before you license only vRealize Code Stream, verify that High Availability (HA) is not runningon the vRealize Automation appliance.
To enable vRealize Code Stream or the vRealize Code Stream Management Pack for IT DevOps, selectEnable Code Stream in the following locations:
n In the vRealize Code Stream installation wizard. See the vRealize Code Stream Installation andConfiguration Guide.
n In the vRealize Automation appliance, on the Licensing tab. See the vRealize Code StreamInstallation and Configuration Guide.
Important If you apply your license without enabling vRealize Code Stream, you can enablevRealize Code Stream later. Apply the license again, and select Enable vRealize Code Stream.
Upgrading Previous VersionsTo upgrade an installed version of vRealize Automation 6.2.4 and vRealize Code Stream 1.2, contactVMware support.
To upgrade vRealize Code Stream 1.0 or 1.1, upgrade those instances to vRealize Code Stream 1.2 or2.x. Then, upgrade to the current version.
If you customized a vRealize Automation 6.2.x deployment, contact VMware support for additionalinformation about upgrade considerations.
Upgrading vRealize Code Stream
VMware, Inc. 6

Prerequisites for Upgrading theAppliance 2Before you upgrade the appliance that includes vRealize Code Stream and vRealize Automation, reviewthe prerequisites.
General PrerequisitesBefore you begin the upgrade, verify that the following prerequisites are met.
n Before you upgrade, plan for downtime where no pipelines or workflows are running. If they arerunning when you upgrade, the upgrade might fail and pipelines will terminate abnormally.
n Before you upgrade, back up your artifacts. Then, you can migrate your artifacts. See Chapter 3Migrate Artifacts and Configure Your External Artifactory Instance.
n Verify that you have access to an Active Directory account with a username@domain format, andpermissions to bind to the directory.
Note When you upgrade from vRealize Automation 6.2.x versions, Identity Provider fromOpenLDAP is not migrated.
n Verify that you have access to an account in SAMaccountName format, and sufficient privileges to jointhe appliance to the domain by creating a new computer object dynamically. Or, verify that you havepermissions to join this appliance to a pre-created computer object.
n Ensure that users cannot access the appliance while you perform the upgrade.
n Verify that you disabled any applications that query vRealize Automation.
n If your site uses an external vRealize Orchestrator appliance, and your deployment uses an externalvRealize Orchestrator appliance that is connected to the Identity Appliance, you must upgradevRealize Orchestrator before you upgrade vRealize Automation.
VMware, Inc. 7
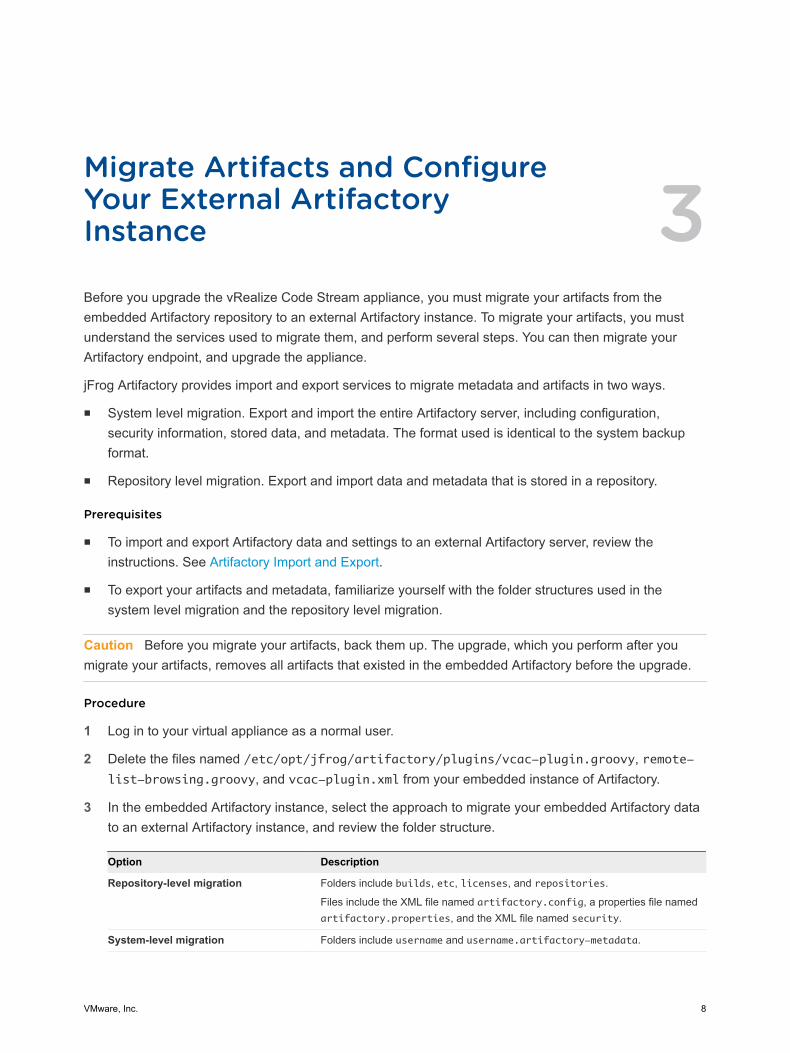
Migrate Artifacts and ConfigureYour External ArtifactoryInstance 3Before you upgrade the vRealize Code Stream appliance, you must migrate your artifacts from theembedded Artifactory repository to an external Artifactory instance. To migrate your artifacts, you mustunderstand the services used to migrate them, and perform several steps. You can then migrate yourArtifactory endpoint, and upgrade the appliance.
jFrog Artifactory provides import and export services to migrate metadata and artifacts in two ways.
n System level migration. Export and import the entire Artifactory server, including configuration,security information, stored data, and metadata. The format used is identical to the system backupformat.
n Repository level migration. Export and import data and metadata that is stored in a repository.
Prerequisites
n To import and export Artifactory data and settings to an external Artifactory server, review theinstructions. See Artifactory Import and Export.
n To export your artifacts and metadata, familiarize yourself with the folder structures used in thesystem level migration and the repository level migration.
Caution Before you migrate your artifacts, back them up. The upgrade, which you perform after youmigrate your artifacts, removes all artifacts that existed in the embedded Artifactory before the upgrade.
Procedure
1 Log in to your virtual appliance as a normal user.
2 Delete the files named /etc/opt/jfrog/artifactory/plugins/vcac-plugin.groovy, remote-list-browsing.groovy, and vcac-plugin.xml from your embedded instance of Artifactory.
3 In the embedded Artifactory instance, select the approach to migrate your embedded Artifactory datato an external Artifactory instance, and review the folder structure.
Option Description
Repository-level migration Folders include builds, etc, licenses, and repositories.
Files include the XML file named artifactory.config, a properties file namedartifactory.properties, and the XML file named security.
System-level migration Folders include username and username.artifactory-metadata.
VMware, Inc. 8

4 If vRealize Code Stream cannot export the data because the target destination does not have thecorrect permissions, run the following steps.
a Establish an SSH connection to the virtual appliance as a root user.
For example: ssh root@VRCS_APPLIANCE
b Create a folder on the vRealize Code Stream appliance.
For example: mkdir /var/temp/artifactory
c Assign ownership to the user named artifactory on the target folder.
For example: chown –r artifactory:artifactory /var/temp/artifactory
d In the Artifactory Import & Export tool, click Export, and enter the name of the folder that youcreated.
After the export, you can use ftp, winscp, or another tool to move the exported files to anotherinstance or to an external Artifactory server.
You have migrated your artifacts from the embedded Artifactory repository to an external Artifactoryinstance. For more information about the procedure to migrate your Artifactory data, see the jFrogdocumentation at https://www.jfrog.com.
What to do next
Prepare to upgrade your instance of vRealize Automation. See Chapter 4 Downloading vRealizeAutomation Appliance Updates.
Upgrading vRealize Code Stream
VMware, Inc. 9

DownloadingvRealize Automation ApplianceUpdates 4You can check for updates on your appliance management console, and download the updates using oneof the following methods.
For best upgrade performance, use the ISO file method.
n Download vRealize Automation Appliance Updates
You can download the update for your vRealize Appliance from a VMware public repository.
n Download Virtual Appliance Updates for Use with a CD-ROM Drive
You can update your virtual appliance from an ISO file that the appliance reads from a virtual CD-ROM drive.
Download vRealize Automation Appliance UpdatesYou can download the update for your vRealize Appliance from a VMware public repository.
Prerequisites
n Back up and save your environment.
n Ensure that your virtual appliance is powered on.
n Log in to https://my.vmware.com/group/vmware/details?downloadGroup=VRA-730&productId=650&rPId=16175, and download the ISO file.
Procedure
1 Go to the management console for your virtual appliance by using its fully qualified domain name,https://va-hostname.domain.name:5480.
2 Log in with the user name root and the password you entered when you deployed the appliance.
3 Click the Update tab.
4 Click Settings.
5 (Optional) In the Automatic Updates panel, set the frequency to check for updates.
6 In the Update Repository panel, select Use Default Repository.
7 Click Save Settings.
VMware, Inc. 10

Download Virtual Appliance Updates for Use with a CD-ROM DriveYou can update your virtual appliance from an ISO file that the appliance reads from a virtual CD-ROMdrive.
Prerequisites
n Shut down the machines in the existing environment.
n Ensure that all CD-ROM drives used for the upgrade are enabled before you update the vRealizeAppliance. See the vSphere documentation center for information about adding a CD-ROM drive to avirtual machine in the vSphere Client.
Procedure
1 Log in to https://my.vmware.com/group/vmware/details?downloadGroup=VRA-730&productId=650&rPId=16175, and download the ISO file.
2 Locate the downloaded file on your machine, and verify that the file size is the same as the ISO file.
3 Power on your virtual appliance.
4 Connect the CD-ROM drive for the virtual appliance you are updating to the ISO file you downloaded.
5 Go to the management console for your virtual appliance by using its fully qualified domain name,https://va-hostname.domain.name:5480.
6 Log in with the user name root and the password you entered when you deployed the appliance.
7 Click the Update tab.
8 Click Settings.
9 Under Update Repository, select Use CDROM Updates.
10 Click Save Settings.
Upgrading vRealize Code Stream
VMware, Inc. 11
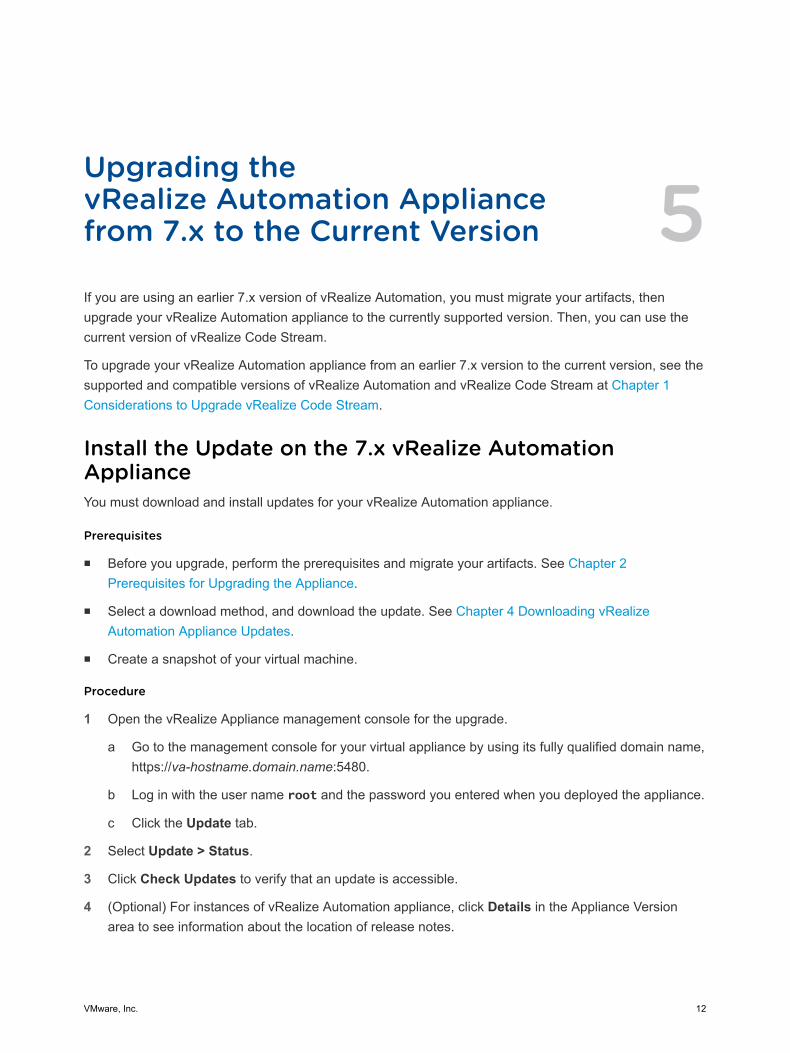
Upgrading thevRealize Automation Appliancefrom 7.x to the Current Version 5If you are using an earlier 7.x version of vRealize Automation, you must migrate your artifacts, thenupgrade your vRealize Automation appliance to the currently supported version. Then, you can use thecurrent version of vRealize Code Stream.
To upgrade your vRealize Automation appliance from an earlier 7.x version to the current version, see thesupported and compatible versions of vRealize Automation and vRealize Code Stream at Chapter 1Considerations to Upgrade vRealize Code Stream.
Install the Update on the 7.x vRealize AutomationApplianceYou must download and install updates for your vRealize Automation appliance.
Prerequisites
n Before you upgrade, perform the prerequisites and migrate your artifacts. See Chapter 2Prerequisites for Upgrading the Appliance.
n Select a download method, and download the update. See Chapter 4 Downloading vRealizeAutomation Appliance Updates.
n Create a snapshot of your virtual machine.
Procedure
1 Open the vRealize Appliance management console for the upgrade.
a Go to the management console for your virtual appliance by using its fully qualified domain name,https://va-hostname.domain.name:5480.
b Log in with the user name root and the password you entered when you deployed the appliance.
c Click the Update tab.
2 Select Update > Status.
3 Click Check Updates to verify that an update is accessible.
4 (Optional) For instances of vRealize Automation appliance, click Details in the Appliance Versionarea to see information about the location of release notes.
VMware, Inc. 12

5 Click the Services tab and verify that all services are listed as REGISTERED.
At least one vco service must be registered. If other vco services are registered, leave them as is.
6 Click Update > Install Updates.
7 Click Settings, and retain the default settings.
8 Select Status > Check Updates > Install Updates.
9 Click OK.
An informational message appears to indicate that the update is in progress.
10 After the update completes, reboot the machine.
Upgrading vRealize Code Stream
VMware, Inc. 13

Upgrading thevRealize Automation Appliancefrom 6.2.5 to the CurrentVersion 6You can upgrade your vRealize Automation appliance from 6.2.5 to the current version.
To prepare and upgrade your 6.2.5 instance of the vRealize Automation Appliance, you must perform theprerequisites and migrate your artifacts. See Chapter 2 Prerequisites for Upgrading the Appliance.
Then, you must perform the steps in Checklist to Upgrade the 6.2.5 vRealize Automation ApplianceComponents. Then, you can update your vRealize Automation appliance to the current version.
This chapter includes the following topics:
n Preparing to Upgrade the vRealize Automation Appliance
n Checklist to Upgrade the 6.2.5 vRealize Automation Appliance Components
n Backing Up and Saving Your Existing Environment
n Installing Updates on the 6.2.5 vRealize Automation Appliance
Preparing to Upgrade the vRealize Automation ApplianceYou must perform several tasks to prepare to upgrade your vRealize Automation appliance.
Perform the required tasks in the order given in the checklist. See Checklist to Upgrade the 6.2.5vRealize Automation Appliance Components.
Checklist to Upgrade the 6.2.5 vRealize AutomationAppliance ComponentsWhen you upgrade a 6.2.5 vRealize Automation appliance to the current release, you must update thevRealize Automation appliance components in a specific order. Use the tasks in the checklist to track yourwork.
Before you upgrade, you must perform the prerequisites and migrate your artifacts. See Chapter 2Prerequisites for Upgrading the Appliance.
Caution You must follow the prescribed order when you upgrade the components, and you mustupgrade all components. If you use a different order, the upgrade fails or behaves unexpectedly.
For information about supported upgrade paths, see Chapter 1 Considerations to Upgrade vRealize CodeStream.
VMware, Inc. 14

Table 6‑1. Checklist to Upgrade a Minimal vRealize Automation Appliance Deployment
Task Instructions
IMPORTANT: Back up your current installation.This step is critical to ensure that no loss of data occurs.
To back up and restore your system, see Backing Up and Saving YourExisting Environment.
For general information, see Configuring Backup and Restore by UsingSymantec Netbackup at http://www.vmware.com/pdf/vrealize-backup-and-restore-netbackup.pdf
Configure your hardware resources.Increase vRealize Automation Appliance Hardware Resources forUpgrade.
Download updates to the vRealize Automationappliance.
Chapter 4 Downloading vRealize Automation Appliance Updates.
Install the update on the vRealize Automationappliance.
Install the Update on the 6.2.5 vRealize Automation Appliance.
Update the Single-Sign On utility to the VMwareIdentity Manager utility.
Update Your Single Sign-On Password for VMware Identity Manager.
Update the license key.Update the License Key.
Migrate the Identity Store to the VMware IdentityManager
Migrate Identity Stores to VMware Identity Manager.
Backing Up and Saving Your Existing EnvironmentBefore you begin the upgrade, complete the prerequisites to back up and save your existing environment.
Prerequisites
n Verify that your source installation is fully installed and configured.
n For each instance of the appliance, back up the vRealize Appliance configuration files in the followingdirectories.
n /etc/vcac/
n /etc/vco/
n /etc/apache2/
n /etc/rabbitmq/
n Back up all databases.
n Create a snapshot of your tenant configuration and the users assigned.
n Create a snapshot of your virtual appliance.
n Adhere to regular guidelines to back up your entire system in case the vRealize Automation upgradefails. For more information, see Configuring vRealize Suite for Backup and Restore in thevRealize Suite documentation.
Upgrading vRealize Code Stream
VMware, Inc. 15
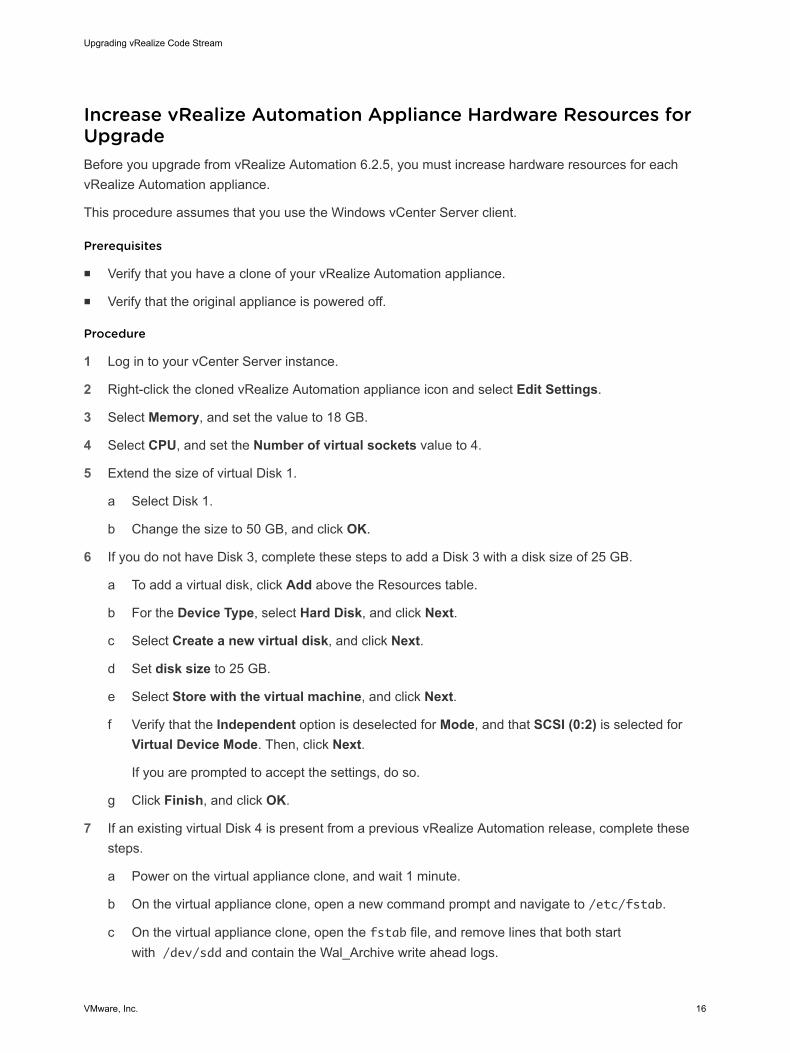
Increase vRealize Automation Appliance Hardware Resources forUpgradeBefore you upgrade from vRealize Automation 6.2.5, you must increase hardware resources for eachvRealize Automation appliance.
This procedure assumes that you use the Windows vCenter Server client.
Prerequisites
n Verify that you have a clone of your vRealize Automation appliance.
n Verify that the original appliance is powered off.
Procedure
1 Log in to your vCenter Server instance.
2 Right-click the cloned vRealize Automation appliance icon and select Edit Settings.
3 Select Memory, and set the value to 18 GB.
4 Select CPU, and set the Number of virtual sockets value to 4.
5 Extend the size of virtual Disk 1.
a Select Disk 1.
b Change the size to 50 GB, and click OK.
6 If you do not have Disk 3, complete these steps to add a Disk 3 with a disk size of 25 GB.
a To add a virtual disk, click Add above the Resources table.
b For the Device Type, select Hard Disk, and click Next.
c Select Create a new virtual disk, and click Next.
d Set disk size to 25 GB.
e Select Store with the virtual machine, and click Next.
f Verify that the Independent option is deselected for Mode, and that SCSI (0:2) is selected forVirtual Device Mode. Then, click Next.
If you are prompted to accept the settings, do so.
g Click Finish, and click OK.
7 If an existing virtual Disk 4 is present from a previous vRealize Automation release, complete thesesteps.
a Power on the virtual appliance clone, and wait 1 minute.
b On the virtual appliance clone, open a new command prompt and navigate to /etc/fstab.
c On the virtual appliance clone, open the fstab file, and remove lines that both startwith /dev/sdd and contain the Wal_Archive write ahead logs.
Upgrading vRealize Code Stream
VMware, Inc. 16

d On the virtual appliance clone, save the file.
e Power off the virtual appliance clone.
f Right-click the cloned vRealize Automation appliance icon and select Edit Settings.
g On the cloned virtual appliance machine, delete Disk 4.
8 Add Disk 4 to the cloned virtual appliance machine, and set the size to 50 GB.
a To add a virtual disk, click Add above the Resources table.
b For the Device Type, select Hard Disk, and click Next.
c Select Create a new virtual disk, and click Next.
d Set disk size to 50 GB.
e Select Store with the virtual machine, and click Next.
f Verify that the Independent option is deselected for Mode, and that SCSI (0:3) is selected forVirtual Device Mode. Then, click Next.
If you are prompted to accept the settings, do so.
g Click Finish, and click OK.
9 Create a snapshot of the cloned virtual appliance machine.
Power On the System ComponentsAfter you increase the hardware resources, you must power on the system before you upgrade thevRealize Appliance.
Procedure
1 Power on the vRealize Automation virtual appliance node.
2 Verify that the system is functional.
Installing Updates on the 6.2.5 vRealize AutomationApplianceTo update the vRealize Appliance after upgrade, you install the updates on the appliance, update yoursingle sign-on password, update the license key, and migrate identity stores.
After you install the updates, you perform the following actions in order:
n Reconfigure settings for the first vRealize Appliance node.
n Upgrade vRealize Orchestrator.
Install the Update on the 6.2.5 vRealize Automation ApplianceYou must install the vRealize Automation update on the vRealize Automation 6.2.5 appliance andconfigure appliance settings.
Upgrading vRealize Code Stream
VMware, Inc. 17

Support for an external PostgreSQL database is discontinued beginning with vRealize Automation 7.1.The upgrade process merges the data from an existing PostgreSQL external database with thePostgreSQL internal database that is part of the vRealize Appliance.
Details regarding the data collected through CEIP and the purposes for which it is used by VMware aregiven at the Trust & Assurance Center.
Do not close the management console while you install the update.
If you encounter any problems during the upgrade process, see Chapter 8 Troubleshooting the Upgrade.
Prerequisites
n Verify that you selected a download method and downloaded the update. See Chapter 4Downloading vRealize Automation Appliance Updates.
n If you have a Common Components Catalog component installed in your environment, uninstall thecomponent before you upgrade. For information, see the Common Components Catalog InstallationGuide. If this guide is unavailable, use the alternative procedure in Checklist to Upgrade the 6.2.5vRealize Automation Appliance Components.
n Verify that the jdbc:postgresql database connection points to the external IP address of the masterPostgreSQL node.
a On each vRealize Automation appliance, open a new command prompt.
b Navigate to /etc/vcac/server.xml, and back up server.xml.
c Open server.xml.
d If necessary, edit the server.xml file entry jdbc:posgresql that points to the Postgres database.Point it to the external IP address of the master PostgreSQL node for external PostgreSQL orprimary virtual appliance for embedded PostgreSQL.
For example: jdbc:postgresql://198.15.100.60:5432/vcac
n Verify that all saved and in-progress requests finish successfully before you upgrade.
Procedure
1 Open the vRealize Appliance management console.
a Go to the management console for your virtual appliance by using its fully qualified domain name,https://va-hostname.domain.name:5480.
b Log in with the user name root and the password you entered when you deployed the appliance.
2 Click Services, and verify that each service, except for iaas-service, is listed as REGISTERED.
3 Select Update > Settings.
4 Select one of the following:
n Use Default Repository.
n Use CDROM Updates.
Upgrading vRealize Code Stream
VMware, Inc. 18

5 Click Save Settings.
6 Select Status.
7 Click Check Updates to verify that an update is accessible.
8 (Optional) For instances of vRealize Automation appliance, click Details in the Appliance Versionarea to see information about the location of release notes.
9 Click Install Updates.
10 Click OK.
A message stating that the update is in progress appears.
11 (Optional) If you did not resize Disk 1 to 50 GB manually, perform the following steps.
a When the system prompts you to reboot the virtual appliance, click System and click Reboot.
During the reboot, the system adjusts the space required for the update.
b After the system restarts, log in to the vRealize Appliance management console again, verify thateach service, except iaas-service, is listed as REGISTERED, and select Update > Status.
c Click Check Updates and click Install Updates.
12 To view the progress of the update, open the following log files.
n /opt/vmware/var/log/vami/updatecli.log
n /opt/vmware/var/log/vami/vami.log
n /var/log/vmware/horizon/horizon.log
n /var/log/bootstrap/*.log
While the upgrade runs, if you log out and log back in, you can continue to follow its progress in thelog file. The file named updatecli.log might display information about the vRealize Automationversion that you are upgrading. This displayed version changes to the proper version later during theupgrade.
The time required for the update to finish varies according to your environment.
13 Read the note about participating in the Customer Experience Improvement Program and select tojoin or not join the program.
For information about the program, click Telemetry in the product management console.
Update Your Single Sign-On Password for VMware IdentityManagerAfter you install the updates, you must update your Single Sign-On (SSO) password forVMware Identity Manager.
VMware Identity Manager replaces the Identity Appliance and vSphere SSO components.
Upgrading vRealize Code Stream
VMware, Inc. 19

Procedure
1 Log out of the vRealize Appliance management console, and close your browser.
2 Open the browser again, and log back in.
3 Select vRA Settings > SSO.
4 Using a complex password, enter a new VMware Identity Manager password and click SaveSettings.
Do not use simple passwords. You can safely ignore the following error message: SSO server isnot connected. It can require several minutes to restart the services.
The vRealize Appliance management console accepts the password.
5 Reboot the virtual appliance.
a Click the System tab.
b Click Reboot and confirm your selection.
6 Verify that all services are running.
a Log in to the vRealize Automation appliance management console.
b Click the Services tab on the console.
c Click the Refresh tab to monitor the progress of service startup.
You should see a minimum of 35 services.
7 Verify that all services are registered except iaas-service.
The release-management service does not start without a vRealize Code Stream license key.
What to do next
Update the License Key.
Update the License KeyYou must upgrade your license key to use the latest version of the vRealize Appliance.
Procedure
1 Open a Web browser to the vRealize Automation appliance management interface URL.
2 Select vRA Settings > Licensing.
If the text box named New License Key is not available, perform the following steps, then select vRASettings > Licensing again.
a Log out of the management console.
b Clear your browser cache.
c Log in to the management console again.
Upgrading vRealize Code Stream
VMware, Inc. 20

3 Enter your new license key in the New License Key text box.
Endpoints and quotas are flagged according to your end-user license agreement (EULA).
From the Licensing tab, you can have the vRealize Automation appliance run vRealize Code Streamor the vRealize Code Stream Management Pack for IT DevOps.
To enable vRealize Code Stream or the vRealize Code Stream Management Pack for IT DevOps,see the vRealize Code Stream Installation Guide. Follow the steps to apply a vRealize Code Streamlicense to an appliance.
4 Select the Services tab, and verify that the services named artifact-management and release-management are registered.
What to do next
Migrate Identity Stores to VMware Identity Manager
Migrate Identity Stores to VMware Identity ManagerWhen you upgrade from vRealize Automation 6.2.5 to the current version, you must migrate the identitystores.
As required in the following procedures, refer to the snapshot of your 6.2.5 tenant configurationinformation.
Note After you migrate the identity stores, users of vRealize Code Stream must manually reassignvRealize Code Stream roles.
Procedure
1 Create a Local User Account for Your Tenants
When you migrate identity stores, you must set up a tenant with a local user account, and assigntenant administrator privileges to the local user account.
2 Synchronize Users and Groups for an Active Directory Link
To import your users and groups into vRealize Automation using the Directories Managementcapability, you must connect to your Active Directory link.
3 Delete and Restore Tenant Administrators from the vRealize Automation Source 6.2.x Environment
You must delete and restore the vRealize Automation 6.2.x tenant administrators in each tenant aftermigration.
Create a Local User Account for Your TenantsWhen you migrate identity stores, you must set up a tenant with a local user account, and assign tenantadministrator privileges to the local user account.
Prerequisites
Verify that you set a new VMware Identity Manager password. See Update Your Single Sign-OnPassword for VMware Identity Manager.
Upgrading vRealize Code Stream
VMware, Inc. 21

Procedure
1 Log in to the vRealize Automation console as the default system administrator user nameadministrator, and enter the password.
The console location is https://vra-appliance/vcac/.
2 Click your tenant.
For example, for the default tenant, click vsphere.local.
3 Select the Local Users tab, and click New.
4 Create a local user account to assign to the tenant administrator role, and click OK.
The local user name must be unique to the vsphere.local active directory.
5 Click the Administrators tab.
6 In the Tenant administrators search box, enter the local user name and click Enter.
7 Click Finish.
8 Repeat these steps for each of your tenants.
9 Log out of the console.
What to do next
Synchronize Users and Groups for an Active Directory Link
Synchronize Users and Groups for an Active Directory LinkTo import your users and groups into vRealize Automation using the Directories Management capability,you must connect to your Active Directory link.
Perform this procedure for each of your tenants.
Prerequisites
Verify that you have access privileges to the Active Directory.
Procedure
1 Log in to the vRealize Automation console at: https://vra-appliance/vcac/org/tenant_name.
2 Select Administration > Directories Management > Directories.
3 Click Add Directory and select Add Active Directory over LDAP/IWA.
4 Enter your Active Directory account settings.
u Non-Native Active Directories
Option Sample Input
Directory Name Enter a unique directory name.
Select Active Directory over LDAP when using non-Native Active Directory.
This Directory Supports DNS Services Deselect this option.
Upgrading vRealize Code Stream
VMware, Inc. 22

Option Sample Input
Base DN Enter the Distinguished Name (DN) of the starting point for directory serversearches.
For example, cn=users,dc=rainpole,dc=local.
Bind DN Enter the full distinguished name (DN), including common name (CN), of anActive Directory user account that has privileges to search for users.
For example, cn=config_admin infra,cn=users,dc=rainpole,dc=local.
Bind DN Password Enter the Active Directory password for the account that can search for users. u Native Active Directories
Option Sample Input
Directory Name Enter a unique directory name.
Select Active Directory (Integrated Windows Authentication) when using NativeActive Directory.
Domain Name Enter the name of the domain to join.
Domain Admin Username Enter the user name for the domain admin.
Domain Admin Password Enter the password for the domain admin account.
Bind User UPN Use the email address format to enter the name of the user who can authenticatethe domain.
Bind DN Password Enter the Active Directory bind account password for the account that can searchfor users.
5 Click Test Connection to test the connection to the configured directory.
6 Click Save & Next.
The Select the Domains page appears, and displays the list of domains.
7 Accept the default domain setting and click Next.
8 Verify that the attribute names are mapped to the correct Active Directory attributes, and click Next.
9 Select the groups and users to synchronize.
a Click the New icon.
b Enter the user domain and click Find Groups.
For example, enter dc=vcac,dc=local.
c To select the groups to synchronize, click Select and click Next.
d On the Select Users page, select the users to synchronize and click Next.
10 Review the users and groups are syncing to the directory, and click Sync Directory.
The directory synchronization takes some time and runs in the background.
Upgrading vRealize Code Stream
VMware, Inc. 23
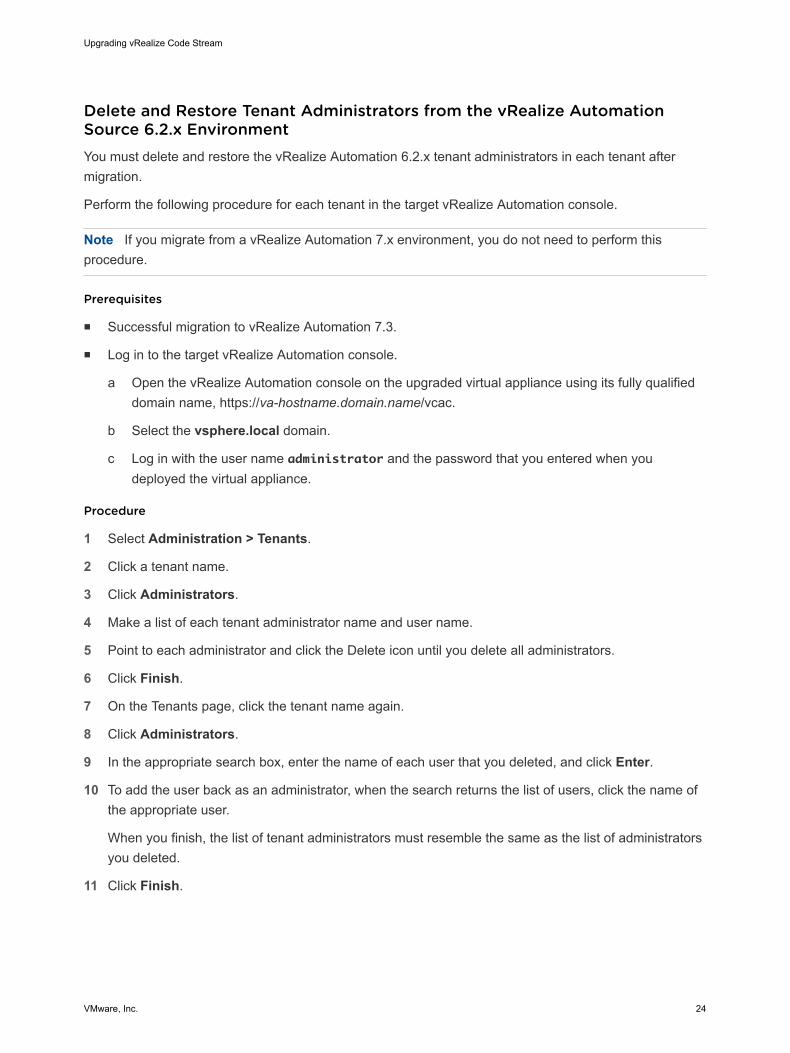
Delete and Restore Tenant Administrators from the vRealize AutomationSource 6.2.x EnvironmentYou must delete and restore the vRealize Automation 6.2.x tenant administrators in each tenant aftermigration.
Perform the following procedure for each tenant in the target vRealize Automation console.
Note If you migrate from a vRealize Automation 7.x environment, you do not need to perform thisprocedure.
Prerequisites
n Successful migration to vRealize Automation 7.3.
n Log in to the target vRealize Automation console.
a Open the vRealize Automation console on the upgraded virtual appliance using its fully qualifieddomain name, https://va-hostname.domain.name/vcac.
b Select the vsphere.local domain.
c Log in with the user name administrator and the password that you entered when youdeployed the virtual appliance.
Procedure
1 Select Administration > Tenants.
2 Click a tenant name.
3 Click Administrators.
4 Make a list of each tenant administrator name and user name.
5 Point to each administrator and click the Delete icon until you delete all administrators.
6 Click Finish.
7 On the Tenants page, click the tenant name again.
8 Click Administrators.
9 In the appropriate search box, enter the name of each user that you deleted, and click Enter.
10 To add the user back as an administrator, when the search returns the list of users, click the name ofthe appropriate user.
When you finish, the list of tenant administrators must resemble the same as the list of administratorsyou deleted.
11 Click Finish.
Upgrading vRealize Code Stream
VMware, Inc. 24

vRealize Code Stream PostUpgrade 7During an upgrade from vRealize Code Stream 1.0 to vRealize Code Stream 1.2, 2.1, 2.2, or the currentversion, existing endpoints are added to the appliance, and the format of the release pipeline variables isupdated.
Artifactory Endpoints and PipelineAfter the upgrade, you must add the external Artifactory details to the new default endpoint that youcreated. See Chapter 3 Migrate Artifacts and Configure Your External Artifactory Instance.
Before the upgrade, if you had pipelines that included an Artifactory task, those pipelines go into Draftstate after the upgrade. As a result, you must activate and run those pipelines.
Jenkins Server and vRealize Automation Server EndpointsvRealize Code Stream retrieves all the existing endpoints for Jenkins Server, vRealize AutomationServer, and Team Foundation Server (TFS) from vRealize Orchestrator, and adds them as new entries.The endpoints appear in vRealize Automation at Administration > vRealize OrchestratorConfiguration > Endpoints.
The names of the server endpoints are updated as follows:
n Jenkins server endpoint name is prefixed with Jenkins_EndpointName.
n vRealize Automation server endpoint name is prefixed with Vra_EndpointName.
Release Pipeline VariablesIn the current version, the property name format has changed.
During the upgrade to the current version, the format of the existing release pipeline properties areupdated. For example, $RP1 is updated to ${pipeline.RP1}, and $RP2 is updated to ${pipeline.RP2}.
Task Output VariablesDuring the upgrade, the format of the existing task output variable values such as$CustomScriptName_OUTPUT are updated to ${StageName.TaskName.outputConfig} in the releasepipeline.
VMware, Inc. 25
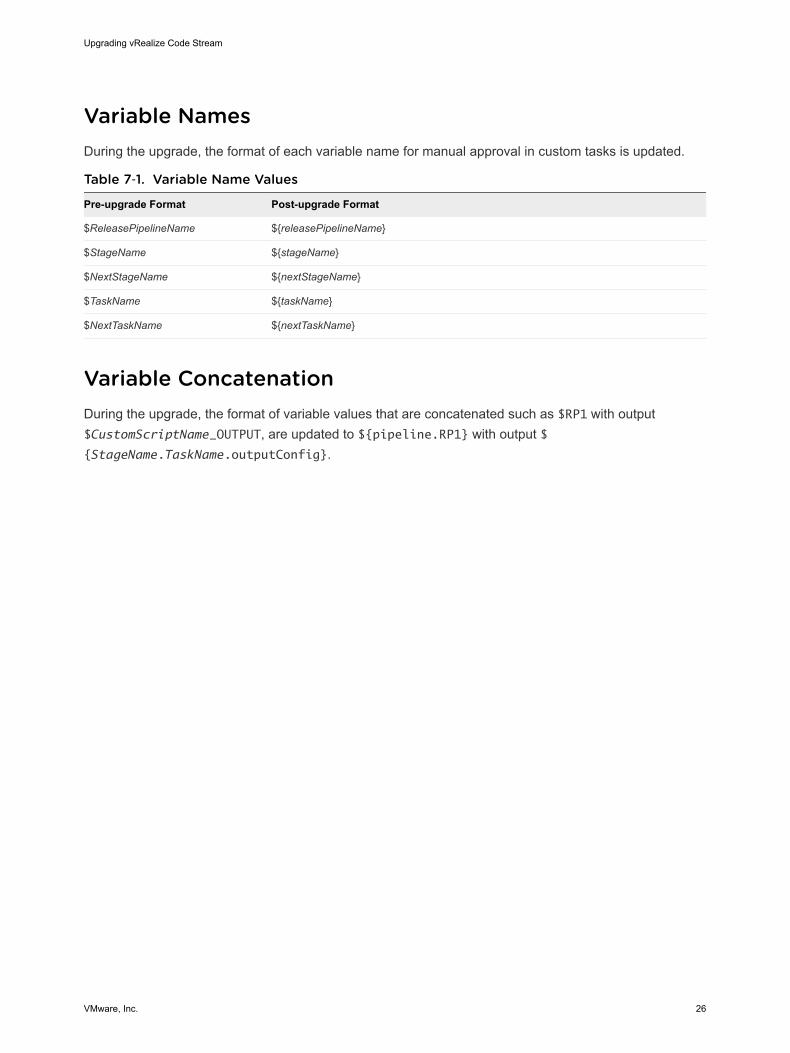
Variable NamesDuring the upgrade, the format of each variable name for manual approval in custom tasks is updated.
Table 7‑1. Variable Name Values
Pre-upgrade Format Post-upgrade Format
$ReleasePipelineName ${releasePipelineName}
$StageName ${stageName}
$NextStageName ${nextStageName}
$TaskName ${taskName}
$NextTaskName ${nextTaskName}
Variable ConcatenationDuring the upgrade, the format of variable values that are concatenated such as $RP1 with output$CustomScriptName_OUTPUT, are updated to ${pipeline.RP1} with output ${StageName.TaskName.outputConfig}.
Upgrading vRealize Code Stream
VMware, Inc. 26

Troubleshooting the Upgrade 8The upgrade troubleshooting topics provide solutions to problems that you might encounter whenupgrading vRealize Automation.
This chapter includes the following topics:
n Retrieve Logs to Troubleshoot the vRealize Code Stream Upgrade
n Migration of Identity Store Fails Because the Active Directory is not Synchronized
n Migration of Identity Store Fails Because of Incorrect Credentials
n Log In Fails After Upgrade
n Upgrade Is Unsuccessful if Root Partition Does Not Provide Sufficient Free Space
Retrieve Logs to Troubleshoot the vRealize Code StreamUpgradeYou can retrieve the logs from the catalina.out log file in the vRealize Automation appliance totroubleshoot the vRealize Code Stream upgrade.
Prerequisites
Verify that you have credentials for logging in to the Linux-based virtual machine with root privileges.
Procedure
1 Log in to the virtual machine.
2 Navigate to the /var/lib/vcac/server/logs directory.
3 Retrieve upgrade logs from the catalina.out log file.
grep -3n "vRCS Upgrade" catalina.out
4 Identify upgrade logs that have a vRCS Upgrade -> prefix.
The release pipelines that failed to migrate have an error description next to the pipeline name.
VMware, Inc. 27

Migration of Identity Store Fails Because the ActiveDirectory is not SynchronizedThe migration of identity store fails because a thousand plus groups in the Active Directory have not beensynchronized to the VMware Identity Manager utility directory.
Problem
The migration of identity store to the VMware Identity Manager utility fails.
Cause
The problem occurs because more than thousand groups in the group base search domain name thathave not been synchronized to the VMware Identity Manager utility directory.
Solution
1 Log in the vRealize Automation appliance as a system administrator.
2 Create a local user for the default tenant.
3 Assign the local user the Tenant Administrator privileges.
4 Log out of the vRealize Automation appliance.
5 Log in the tenant with the local user credentials.
6 Select Administration > Directories Management > Directories.
7 Open the failed Active Directory domain.
8 Click Sync Settings to open a dialog with synchronization options.
9 Click the + icon to add a new line for group DN definitions and enter the appropriate group DN thatneed to be synchronized.
10 Click Save & Sync to save your changes and synchronize to implement your updates immediately.
The VMware Identity Manager utility directory is synchronized to the thousand plus groups in the ActiveDirectory.
What to do next
Start the migration process.
Migration of Identity Store Fails Because of IncorrectCredentialsThe migration of the identity store fails because of incorrect Active Directory domain credentials or thelack of user permission.
Problem
The migration of identity store to the VMware Identity Manager utility fails.
Upgrading vRealize Code Stream
VMware, Inc. 28

Cause
The credentials of the Active Directory domain are incorrect. The problem also occurs when the user doesnot have the permission to join VMware Identity Manager to the Active Directory Domain.
Solution
1 Log in the vRealize Appliance as a system administrator.
2 Create a local user for the vsphere.local tenant.
3 Assign the local user the Tenant Administrator privileges.
4 Log out of the vRealize Appliance.
5 Log in the tenant with the local user credentials.
6 Select Administration > Directories Management > Connectors.
7 To join the connector to a specific Active Directory domain, click Join Domain.
The connector syncs user and group data between Active Directory and the Directories Managementservice.
8 Enter the domain, domain username, and password for the active directory domain.
9 Click Save.
The Join Domain page is refreshed and displays a message that you are currently joined to thedomain.
What to do next
Start the migration process.
Log In Fails After UpgradeYou must exit the browser and log in again after an upgrade for sessions that use unsynchronized useraccounts.
Problem
After you upgrade vRealize Automation, the system denies access to unsynchronized user accounts atlogin.
Solution
Exit the browser and relaunch vRealize Automation.
Upgrade Is Unsuccessful if Root Partition Does NotProvide Sufficient Free SpaceIf sufficient free space is unavailable on the root partition of the vRealize Automation appliance host,upgrade cannot proceed.
Upgrading vRealize Code Stream
VMware, Inc. 29

Solution
This procedure increases the free space on the Disk 1 root partition of the vRealize Automation appliancehost. In a distributed deployment, perform this procedure to increase the free space on each replica nodesequentially, and then increase the free space on the master node.
Note When you perform this procedure, you might see the following warning messages:
nWARNING: Re-reading the partition table failed with error 16:
Device or resource busy. The kernel still uses the old table. The
new table will be used at the next reboot or after you run
partprobe(8) or kpartx(8) Syncing disks.
nError: Partition(s) 1 on /dev/sda have been written, but we have been unable to inform the kernel
of the change, probably because it/they are in use. As a result, the old partition(s) will remain
in use. You should reboot now before making further changes.
Ignore the message You should reboot now before making further changes. If you reboot yoursystem before step 10, you corrupt the upgrade process.
Procedure
1 Power on the vRealize Automation appliance host virtual machine and log in as with a secureshell connection as the root user.
2 Run the following commands to stop services.
a service vcac-server stop
b service vco-server stop
c service vpostgres stop
3 Run the following command to unmount the swap partition.
swapoff -a
4 Run the following command to delete the existing Disk 1 partitions and create a 44-GB rootpartition and a 6-GB swap partition.
(echo d; echo 2; echo d; echo 1; echo n; echo p; echo ; echo ; echo '+44G';
echo n; echo p; echo ; echo ; echo ; echo w; echo p; echo q) | fdisk /dev/sda
5 Run the following command to change the swap partition type.
(echo t; echo 2; echo 82; echo w; echo p; echo q) | fdisk /dev/sda
6 Run the following command to set the Disk 1 bootable flag.
(echo a; echo 1; echo w; echo p; echo q) | fdisk /dev/sda
Upgrading vRealize Code Stream
VMware, Inc. 30

7 Run the following command to register the partition changes with the Linux kernel.
partprobe
If you see a message prompting you to reboot before you make further changes, ignore themessage. Rebooting the system before step 10 corrupts the upgrade process.
8 Run the following command to format the new swap partition.
mkswap /dev/sda2
9 Run the following command to mount the swap partition.
swapon -a
10 Reboot the vRealize Automation appliance.
11 After the appliance reboots, run the following command to resize the Disk 1 partition table.
resize2fs /dev/sda1
12 To verify that the disk expansion is successful, run df -h and check that the available disk spaceon /dev/sda1 is greater than 30 GB.
Upgrading vRealize Code Stream
VMware, Inc. 31