Embed Size (px)
Citation preview

UniS
CS297 Graphics with Java and OpenGL
Colour and Lighting

2
UniS
The Redbook
• Material from the Redbook is extensively used throughout these slides.
• Code has been translated from C++ to JOGL based on example from the book

3
UniS
Overview
• "Colour Perception" discusses how the eye perceives colour.
• "Computer Colour" describes the relationship between pixels on a computer monitor and their colours; it also defines the two display modes, RGBA and colour index.
• Understand how real-world lighting conditions are approximated by OpenGL
• Render illuminated objects by defining the desired light sources and lighting model
• Define the material properties of the objects being illuminated
• Manipulate the matrix stack to control the position of light sources

4
UniS
Colour Perception
• Physically, light is composed of photons - tiny particles of light, each traveling along its own path, and each vibrating at its own frequency (or wavelength, or energy - any one of frequency, wavelength, or energy determines the others). A photon is completely characterized by its position, direction, and frequency/wavelength/energy.

5
UniS
Colour Perception
• What your eye actually sees is a mixture of photons of different frequencies. Real light sources are characterized by the distribution of photon frequencies they emit. Ideal white light consists of an equal amount of light of all frequencies. The frequency distribution of light from most sources in your immediate environment is complicated.

6
UniS
Colour Perception
• The human eye perceives colour when certain cells in the retina (called cone cells, or just cones) become excited after being struck by photons.
• The three different kinds of cone cells respond best to three different wavelengths of light: one type of cone cell responds best to red light, one type to green, and the other to blue.
7
UniS
Colour Perception
• When a given mixture of photons enters the eye, the cone cells in the retina register different degrees of excitation depending on their types, and if a different mixture of photons comes in that happens to excite the three types of cone cells to the same degrees, its colour is indistinguishable from that of the first mixture.

8
UniS
Colour Perception
• A computer-graphics monitor emulates visible colours by lighting pixels with a combination of red, green, and blue light in proportions that excite the red-, green-, and blue-sensitive cones in the retina to match the excitation levels generated by the photon mix it's trying to emulate.
• To display a particular colour, the monitor sends the right amounts of red, green, and blue light to appropriately stimulate the different types of cone cells in your eye.
• A colour monitor can send different proportions of red, green, and blue to each of the pixels, and the eye sees a million or so pinpoints of light, each with its own colour.
9
UniS
Computer Colour
• On a colour computer screen, the hardware causes each pixel on the screen to emit different amounts of red, green, and blue light. These are called the R, G, and B values.
• They're often packed together OpenGL Programming Guide (sometimes with alpha, or A), and the packed value is called the RGB (or RGBA) value.
• The colour information at each pixel can be stored either in RGBA mode, in which the R, G, B, and possibly A values are kept for each pixel, or in colour-index mode, in which a single number (called the colour index) is stored for each pixel.
• Each colour index indicates an entry in a table that defines a particular set of R, G, and B values.
• Such a table is called a colour map.

10
UniS
Computer Colour
• There is a great deal of variation among the different graphics hardware platforms in both the size of the pixel array and the number of colours that can be displayed at each pixel.
• On any graphics system, each pixel has the same amount of memory for storing its colour, and all the memory for all the pixels is called the colour buffer.
• The size of a buffer is usually measured in bits, so an 8-bit buffer could store 8 bits of data (256 possible different colours) for each pixel. The size of the possible buffers varies from machine to machine.
• The R, G, and B values can range from 0.0 (none) to 1.0 (full intensity). For example, R = 0.0, G = 0.0, and B = 1.0 represents the brightest possible blue. If R, G, and B are all 0.0, the pixel is black; if all are 1.0, the pixel is drawn in the brightest white that can be displayed on the screen.

11
UniS
Lighting
• most objects don‘t look three-dimensional until they're lit.

12
UniS
Lighting
• With lighting

13
UniS
Hidden-Surface Removal
• It is important to draw the objects that are closer to our viewing position and to eliminate objects obscured by others nearer to the eye.
No depthtest

14
UniS
Hidden-Surface Removal
• One way to achieve hidden-surface removal is to use the depth buffer
• A depth buffer associats a depth, or distance, from the view plane with each pixel on the window.
• Initially, the depth values for all pixels are set to the largest possible distance using the glClear(GL_DEPTH_BUFFER_BIT). Then the objects in the scene are drawn in any order.

15
UniS
Hidden-Surface Removal
• Graphical calculations in hardware or software convert each surface that's drawn to a set of pixels on the window where the surface will appear if it isn't obscured by something else.
• The distance from the view plane is computed. • With depth buffering enabled, before each pixel is
drawn a comparison is done with the depth value already stored at the pixel.
• If the new pixel is closer than what's there, the new pixel's colour and depth values replace those that are currently written into the pixel.
• If the new pixel's depth is greater than what's currently there, the new pixel is obscured, and the colour and depth information for the incoming pixel is discarded.
16
UniS
Hidden-Surface Removal with JOGL
gl.glShadeModel(GL.GL_SMOOTH);
gl.glDepthFunc(GL.GL_LESS);
gl.glEnable(GL.GL_DEPTH_TEST);

17
UniS
Hidden-Surface Removal with JOGL
gl.glShadeModel(GL. GL_FLAT);
gl.glDepthFunc(GL.GL_LESS);
gl.glEnable(GL.GL_DEPTH_TEST);

18
UniS
Real-World and OpenGL Lighting
• The eye's perception of the colour depends on the distribution of photon energies that arrive and trigger the cone cells
• Different surfaces may have very different properties - some are shiny and preferentially reflect light in certain directions
• Others scatter incoming light equally in all directions

19
UniS
Real-World and OpenGL Lighting
• OpenGL approximates light and lighting as if light can be broken into red, green, and blue components.
• Thus, the colour of light sources is characterized by the amount of red, green, and blue light they emit, and the material of surfaces is characterized by the percentage of the incoming red, green, and blue components that is reflected in various directions.
• The OpenGL lighting equations are an approximation, but one that works fairly well and can be computed relatively quickly.

20
UniS
Real-World and OpenGL Lighting
• In the OpenGL lighting model, the light in a scene comes from several light sources that can be individually turned on and off.
• Some light comes from a particular direction or position, and some light is generally scattered about the scene.
• Bounced light (called ambient) is assumed to be so scattered that there is no way to tell its original direction, but it disappears if a particular light source is turned off.
• There might be a general ambient light in the scene that comes from no particular source, as if it had been scattered so many times that its original source is impossible to determine.

21
UniS
Real-World and OpenGL Lighting
• OpenGL lighting model considers the lighting to be divided into four independent components:– emissive, – ambient, – diffuse,– specular.
• The components are computed independently and then added.

22
UniS
Ambient Lighting
• Ambient illumination is light that's been scattered so much by the environment that its direction is impossible to determine - it seems to come from all directions.
• Backlighting in a room has a large ambient component, since most of the light that reaches your eye has first bounced off many surfaces.
• A spotlight outdoors has a tiny ambient component; most of the light travels in the same direction, and since you're outdoors, very little of the light reaches your eye after bouncing off other objects.
• When ambient light strikes a surface, it's scattered equally in all directions.

23
UniS
Diffuse Lighting
• Diffuse light comes from one direction, so it's brighter if it comes squarely down on a surface than if it barely glances off the surface.
• Once it hits a surface, however, it's scattered equally in all directions, so it appears equally bright, no matter where the eye is located.
• Any light coming from a particular position or direction probably has a diffuse component.

24
UniS
Specular Lighting
• Specular light comes from a particular direction, and it tends to bounce off the surface in a preferred direction.
• Shiny metal or plastic has a high specular component
• Chalk or carpet has almost no specular component.
• You can think of specularity as shininess.• OpenGL allows you to set the red, green, and
blue values for each lighting component independently.
• Different values for ambient, diffuse and specular lighting.

25
UniS
Material Colours
• The OpenGL lighting model approximates a material's color via the percentages of the incoming red, green, and blue light it reflects.
• E.g., a red ball reflects all the incoming red light and absorbs all the green and blue light that strikes it.
• If you view such a ball in white light, all the red is reflected, and you see a red ball.
• If the ball is viewed in pure red light, it also appears to be red.
• If the red ball is viewed in pure green light, it appears black.

26
UniS
Material Colours
• Materials have different ambient, diffuse, and specular reflectances.
• A material's ambient reflectance is combined with the ambient component of each incoming light source to determine the colour of an object,
• the diffuse reflectance with the light's diffuse component to determine the colour of an object,
• and similarly for the specular reflectance and component.

27
UniS
RGB Values for Lights and Materials
• The colour components specified for lights mean something different than for materials.
• For a light, the numbers correspond to a percentage of full intensity for each colour.
• If the R, G, and B values for a light's colour are all 1.0, the light is the brightest possible white.
• If the values are 0.5, the colour is still white, but only at half intensity, so it appears gray.
• If R=G=1 and B=0 (full red and green with no blue), the light appears yellow.

28
UniS
RGB Values for Lights and Materials
• For materials, the numbers correspond to the reflected proportions of those colors. So if R=1, G=0.5, and B=0 for a material, that material reflects all the incoming red light, half the incoming green, and none of the incoming blue light.
• If an OpenGL light has components (LR, LG, LB), and a material has corresponding components (MR, MG, MB), then, ignoring all other reflectivity effects, the light that arrives at the eye is given by (LR*MR, LG*MG, LB*MB).
• Similarly, if you have two lights that send (R1, G1, B1) and (R2, G2, B2) to the eye, OpenGL adds the components, giving (R1+R2, G1+G2, B1+B2).
• If any of the sums are greater than 1 the component is clamped to 1.

29
UniS
Steps to lighting a scene
1. Define normal vectors for each vertex of all the objects. These normals determine the orientation of the object relative to the light sources.
2. Create, select, and position one or more light sources.
3. Create and select a lighting model, which defines the level of global ambient light and the effective location of the viewpoint (for the purposes of lighting calculations).
4. Define material properties for the objects in the scene.
30
UniS
Material Values with JOGL
FloatBuffer mat_specular0= FloatBuffer.wrap (new float[] { 2.0f, 2.0f, 2.0f, 0.0f }); FloatBuffer mat_shininess = FloatBuffer.wrap(new float[]{40.0f });
FloatBuffer mat_ambient1 = FloatBuffer.wrap (new float[] { 0.35f, 0.0f, 0.0f, 1.0f });
31
UniS
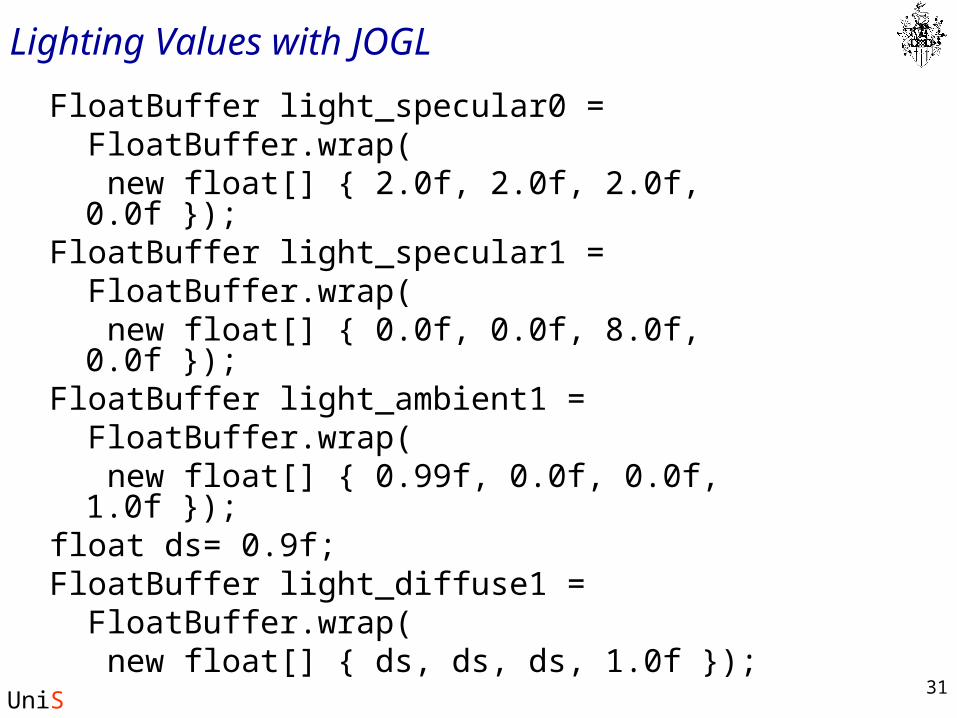
Lighting Values with JOGL
FloatBuffer light_specular0 = FloatBuffer.wrap( new float[] { 2.0f, 2.0f, 2.0f, 0.0f });
FloatBuffer light_specular1 = FloatBuffer.wrap( new float[] { 0.0f, 0.0f, 8.0f, 0.0f });
FloatBuffer light_ambient1 = FloatBuffer.wrap( new float[] { 0.99f, 0.0f, 0.0f, 1.0f });
float ds= 0.9f;FloatBuffer light_diffuse1 = FloatBuffer.wrap( new float[] { ds, ds, ds, 1.0f });

32
UniS
Applying Material Values
gl.glMaterialfv(GL.GL_FRONT, GL.GL_SPECULAR, mat_specular0);
gl.glMaterialfv(GL.GL_FRONT, GL.GL_SHININESS, mat_shininess);
gl.glMaterialfv(GL.GL_FRONT, GL.GL_DIFFUSE, light_diffuse1);
gl.glMaterialfv(GL.GL_FRONT, GL.GL_AMBIENT, mat_ambient1);

33
UniS
Applying Lighting Values
gl.glLightfv(GL.GL_LIGHT1, GL.GL_SPECULAR, light_specular1);
gl.glLightfv(GL.GL_LIGHT0, GL.GL_SPECULAR, light_specular0);
gl.glLightfv(GL.GL_LIGHT0, GL.GL_AMBIENT, light_ambient1);
gl.glLightfv(GL.GL_LIGHT0, GL.GL_DIFFUSE, light_diffuse1);
See the LightingTori NetBeans project on the course web site for complete code details.

34
UniS
Create, Position, and Enable Light Sources
FloatBuffer light_position1 = FloatBuffer.wrap( new float[] { 1.0f, 1.0f, 1.0f, 0.0f });
gl.glLightfv(GL.GL_LIGHT1, GL.GL_POSITION, light_position1); gl.glEnable(GL.GL_LIGHT1);

35
UniS
Global Ambient Light
There can be other ambient light that's not from any particular source
FloatBuffer global_ambient1 = FloatBuffer.wrap( new float[ ] { 1.0f, 1.0f, 1.0f, 0.0f });
gl.glLightModelfv( GL.GL_LIGHT_MODEL_AMBIENT, global_ambient1);

36
UniS
Local or Infinite Viewpoint
• viewpoint location affects calculations for highlights for specular reflectance.
• Intensity of highlight at vertex depends on – the normal at that vertex, – the direction from the vertex to the light source, – and the direction from the vertex to the viewpoint.
gl.glLightModeli( GL.GL_LIGHT_MODEL_LOCAL_VIEWER, GL.GL_TRUE);

37
UniS
Local or Infinite Viewpoint
• A local viewpoint tends to yield more realistic results, but since the direction has to be calculated for each vertex, overall performance is decreased with a local viewpoint.
• By default, an infinite viewpoint is assumed.
gl.glLightModeli( GL.GL_LIGHT_MODEL_LOCAL_VIEWER, GL.GL_TRUE);

38
UniS
Two-sided Lighting
• Lighting calculations are performed for all polygons, whether they're front-facing or back-facing.
• Back-facing polygons aren't guaranteed to be correctly illuminated unless you force OpenGL to calculate the lighting.
• Turn on two-sided lighting withgl.glLightModeli( GL.GL_LIGHT_MODEL_TWO_SIDE, GL.GL_TRUE);

39
UniS
Diffuse and Ambient Reflection
• GL.GL_DIFFUSE and GL.GL_AMBIENT set with gl.glMaterial*()
• Affect colour of diffuse and ambient light reflected.
• Diffuse reflectance most important in determining colour.
• It's affected by colour of incident diffuse light and angle of incident light relative to the normal.
• Position of viewpoint doesn't affect diffuse reflectance at all.
• Ambient reflectance affects overall color.
• Ambient reflectance is most noticeable where an object receives no direct illumination.
• Total ambient reflectance affected by global ambient light and ambient light from individual light sources.
• Ambient reflectance isn't affected by position of viewpoint.

40
UniS
Specular Reflection
• Specular reflection from an object produces highlights.
• Unlike ambient and diffuse reflection, the amount of specular reflection seen by a viewer does depend on the location of the viewpoint
• It's brightest along the direct angle of reflection.• Set effect material has on reflected light with
GL_SPECULAR• Control size and brightness with GL_SHININESS• You can assign a number in range [0.0, 128.0] to
GL_SHININESS - the higher the value, the smaller and brighter the highlight.

41
UniS
Emission
• By specifying an RGBA color for GL_EMISSION, you can make an object appear to be giving off light

42
UniS
Emission
gl.glPushMatrix();gl.glLightfv(GL.GL_LIGHT1, GL.GL_POSITION, position1, 0);FloatBuffer emission_vector = FloatBuffer.wrap( new float[] {0.0f,0.0f,1.0f,0.0f });gl.glMaterialfv(GL.GL_FRONT, GL.GL_EMISSION, emission_vector);glut.glutSolidTorus(0.275f, 0.85f, 20, 20);gl.glTranslatef(2.25f, 0.0f, 0.0f);emission_vector = FloatBuffer.wrap( new float[] {0.0f,0.0f,0.0f,0.0f });gl.glMaterialfv(GL.GL_FRONT, GL.GL_EMISSION, emission_vector);glut.glutSolidTorus(0.275f, 0.85f, 20, 20); gl.glTranslatef(-4.5f, 0.0f, 0.0f);glut.glutSolidTorus(0.275f, 0.85f, 20, 20); gl.glPopMatrix();