Embed Size (px)
DESCRIPTION
Ubuntu
Citation preview

UbuntuGuide Part2
From
Contents
1 Boot from a Live CD2 UEFI3 Coreboot4 Multiple OS Installation
4.1 Introduction4.1.1 Using Grub Legacy for the boot partition
4.2 Partition design4.3 Windows partitions
4.3.1 Changing Windows partition sizes4.3.1.1 Using Shrink Volume on Vista and Windows 74.3.1.2 Reinstalling Vista or Windows 7 on a new partition
4.3.1.2.1 Using Windows Recovery Disks4.3.1.3 Windows XP (or earlier)4.3.1.4 Windows bootloaders
4.4 Install your first Linux OS4.5 Copy boot files to the small Grub partition4.6 Reinstall Grub to MBR4.7 Install your second Linux OS4.8 Changing main Grub boot menu settings
4.8.1 Using UUIDs for the main Grub bootloader menu4.8.2 Add MacOSX entry
4.9 Re-installing Grub Legacy after Windows upgrade or re-installation4.10 Other chainloader options
4.10.1 Chainloading Grub2 from Grub Legacy4.11 The (hd0,9) problem4.12 Protecting Grub Legacy from cracking4.13 Manipulating partitions on the hard drive
5 Manipulating Partitions5.1 Use the (K)Ubuntu Desktop LiveCD5.2 Use GParted to manage partitions5.3 One linux-swap partition per computer5.4 Creating and "moving" free space5.5 Creating or resizing a partition5.6 Changing Grub Legacy in a boot partition5.7 Changing Grub2 in a changed partition
5.7.1 Booting (K)Ubuntu manually from Grub Legacy5.7.2 Discovering the current kernel files manually
5.8 Changing Grub Legacy in a changed partition6 Virtualbox in Windows
6.1 Install Virtualbox in Windows6.2 Install Ubuntu edition for virtual machines
6.2.1 Install a desktop6.2.2 Install Linux Guest Additions6.2.3 Creating shared folders
7 Android emulation7.1 Android-x86 in VirtualBox
7.1.1 Networking for Android-x867.1.1.1 Wired networking for Android-x86 RC 4.0RC1
7.1.2 Installing apps7.1.2.1 Modified apps
7.1.3 Usage tips7.2 Android SDK emulator
7.2.1 Networking for Android SDK7.2.2 Installing an app
UbuntuGuide Part2 - http://ubuntuguide.org/index.php?title=UbuntuGuide_Part2&...
1 of 177 08/10/2013 09:04 AM
7.2.2.1 Netflix Android App7.2.3 Other references
7.3 Other Android Virtual Machines7.4 Other Android Resources
8 Screencasts8.1 Creating screencasts (screencapture)
8.1.1 FFMPEG with x11grab8.1.1.1 Run FFMPEG with x11grab8.1.1.2 kX11grab8.1.1.3 Install the newest version of FFMPEG with x11grab
8.1.2 Add a webcam to a screencast8.1.3 Record microphone and speaker output simultaneously8.1.4 recordMyDesktop8.1.5 xvidcap with Audacity8.1.6 Using VNC to capture another computer's screen8.1.7 Troubleshooting tips8.1.8 Screencasts in Windows8.1.9 Examples
8.1.9.1 Exercise: Slideshow with audio track8.2 Conversion / Editing
9 Netflix9.1 Netflix in Wine app9.2 Netflix Android App
10 Streamripper10.1 Troubleshooting
11 Video Conversion11.1 Introduction11.2 Mencoder
11.2.1 MP4 with AAC audio to AVI with Xvid / MP311.2.2 Remove MKV subtitles and convert to AVI (XVID/MP3)11.2.3 DVD to AVI with Xvid / MP3
11.2.3.1 Using k9copy as a conversion front-end11.2.4 AVI to MPG11.2.5 Increase volume11.2.6 Add subtitles to video11.2.7 Trim a video11.2.8 Resize a video11.2.9 Cropping and Scaling11.2.10 Convert to .MP3 audio file11.2.11 Change audio track of video
11.3 FFMPEG11.3.1 Flash video (.flv) to MPG-2 using FFMPEG11.3.2 Convert to .MP3 audio file using FFMPEG
11.3.2.1 Convert Flash video audio to mp311.3.3 Edit/convert screencapture with FFMPEG11.3.4 WinFF (FFMPEG GUI)
11.4 VobSub2SRT (Convert subtitles from .sub/.idx to .srt)11.5 Join .MPG video segments11.6 Split a file into segments11.7 Create a commercial (.vob) format DVD11.8 MKV files
11.8.1 Extract .MKV subtitle file to .SRT subtitle file11.9 Recommended formats
12 EBook Conversion12.1 Calibre (eBook conversion)
12.1.1 Convert a web page to ePub format12.1.2 Create an eBook cover
13 Email with PGP13.1 Thunderbird with Enigmail
14 Mail Server setup14.1 Introduction14.2 Setting up MX records with a DNS registrar14.3 Install the Mail server14.4 Edit Postfix to reflect all variations of your domain name14.5 Open and forward appropriate ports14.6 Set up Dovecot to be used with Thunderbird14.7 Create a Dovecot-compatible Maildir directory skeleton
UbuntuGuide Part2 - http://ubuntuguide.org/index.php?title=UbuntuGuide_Part2&...
2 of 177 08/10/2013 09:04 AM

14.8 Single User Quick Setup14.9 Testing14.10 Create a user for virtual mail14.11 Configure Postfix with Dovecot for use with a vmail folder14.12 Install and set up a MySQL database14.13 Configure Postfix to be used with the MySQL database14.14 Configure Dovecot to be used with the MySQL database14.15 Adding virtual domains and users to a MySQL database14.16 Install and set up an LDAP server14.17 Set up Postfix with LDAP14.18 Set up Dovecot with LDAP14.19 Moving Maildir directories14.20 Other Resources
15 Tor15.1 Install Tor (Network privacy)15.2 Using Tor with Firefox15.3 Tor Browser Bundle
15.3.1 Torbutton (Firefox plug-in)15.4 Using Konversation with Tor15.5 Using proxies with Tor
15.5.1 usewithtor15.5.2 torify15.5.3 Privoxy15.5.4 Other proxies15.5.5 Ensuring applications use the proxy
15.5.5.1 Using specific applications with Tor15.6 Tor GUIs
15.6.1 Vidalia (Tor interface)15.6.2 Tork (KDE Tor interface)
15.6.2.1 Prevent autostart of proxies and Tor15.7 Firewall considerations
15.7.1 Single computer15.7.2 Proxy on LAN15.7.3 Blocking all non-Tor traffic using iptables15.7.4 Tor network initialization
15.8 Troubleshooting15.9 Other resources
16 Remastersys16.1 Install Remastersys16.2 Create a custom distribution16.3 Create a system backup
16.3.1 Using the Remastersys GUI16.4 Edit Remastersys configuration file16.5 Troubleshooting
17 Dynamic IP servers17.1 Single URL and a DynDNS-capable router17.2 Multiple URLs
17.2.1 ddclient17.2.1.1 Edit ddclient configuration
17.2.1.1.1 Run ddclient using cron17.2.1.2 Other DDNS services
17.2.2 Other Dynamic DNS updater clients17.3 Redirecting a URL
17.3.1 CNAME aliases17.3.2 URL forwarding17.3.3 Examples
17.3.3.1 Multiple domain name URLs, single Dynamic URL18 FTP tips
18.1 Vsftpd (FTP server)18.1.1 Using two separate user accounts for vsftpd18.1.2 Securing vsftpd18.1.3 Encrypting transfers with FTPS
18.1.3.1 Troubleshooting vsftpd18.2 Proftpd (FTP server)
18.2.1 Configure proFTPd users to be "jailed" (chrooted) into their home directories18.2.2 Configure the proFTPd Server to allow anonymous FTP users to only have "read only" access18.2.3 Configure the proFTPd Server to allow anonymous FTP users to have "read/write" access
UbuntuGuide Part2 - http://ubuntuguide.org/index.php?title=UbuntuGuide_Part2&...
3 of 177 08/10/2013 09:04 AM
18.2.4 Map the anonymous FTP user to a folder other than /home/ftp/18.2.5 Change the default port number for the proFTPd Server18.2.6 FTP to a remote (K)Ubuntu host from a Windows client18.2.7 FTP to a remote Windows host from a (K)Ubuntu client18.2.8 Configure the NAT/router/gateway/firewall for an FTP server
18.3 FTP troubleshooting18.4 Google Android FTP clients18.5 SFTP
18.5.1 SFTP clients18.6 SFTP server
19 Using SSH to Port Forward20 Limit OpenSSH users
20.1 How to limit the user accounts that can connect through ssh remotely21 OpenVPN server Karmic
21.1 OpenVPN21.1.1 Using a bridge interface21.1.2 OpenVPN Server Installation21.1.3 Server certificates21.1.4 Client Certificates21.1.5 Server Configuration21.1.6 Client Configuration21.1.7 Other resources
22 WebDAV22.1 WebDAV Server Installation
22.1.1 Install Apache webserver22.1.2 Open your firewall22.1.3 Enable the Apache2 WebDAV modules22.1.4 Create a folder for WebDAV use22.1.5 Create or edit the virtual host file22.1.6 Create password access for the WebDAV folders22.1.7 Testing WebDAV22.1.8 Set up Digest Authorization (encrypted passwords)22.1.9 Enable WebDAV lock
22.2 Multiple WebDAV servers on a LAN using a single IP address and router22.3 WebDAV with LDAP22.4 WebDAV Clients
22.4.1 Dolphin22.4.2 Nautilus22.4.3 Firefox22.4.4 Konqueror/Rekonq22.4.5 Cadaver22.4.6 Windows
22.4.6.1 Creating passwords for Windows clients22.4.7 Android
22.5 References23 Apache2 reverse proxies
23.1 Other resources24 MediaWiki tips
24.1 Install MediaWiki24.1.1 ReCaptcha
24.2 Editing the LocalSettings.php configuration file24.2.1 Increase PHP memory limits24.2.2 Increase PHP uploaded file size limits
24.3 Change the default logo24.4 Make backups
24.4.1 XML dump24.4.1.1 Import XML dump24.4.1.2 Export individual pages to XML
24.4.2 Full system backup24.4.3 Upgrading
24.5 Backup and restore the MySQL database24.5.1 Empty a database
24.6 Moving a MediaWiki installation to a new site24.7 Install multiple MediaWiki sites
24.7.1 Multiple wikis24.7.2 Multiple subwikis24.7.3 Troubleshooting
UbuntuGuide Part2 - http://ubuntuguide.org/index.php?title=UbuntuGuide_Part2&...
4 of 177 08/10/2013 09:04 AM

24.8 Build your site25 Mediawiki site building tips
25.1 Introduction25.1.1 Choose the Main Page
25.2 Add Spam filters25.2.1 Captcha
25.2.1.1 ConfirmEdit25.2.1.2 ReCaptcha
25.2.2 Spam blacklist25.2.3 Check Spambots25.2.4 Bad Behavior25.2.5 AkismetKlik25.2.6 ConfirmAccount
25.3 SideBar Donate25.4 Google AdSense
25.4.1 Google AdSense225.4.2 Google AdSense
25.5 ShareThis25.6 Facilitate printing to an eBook
25.6.1 Collections25.6.2 PdfBook
25.7 Add Quotations25.8 Add Random elements as advertisements25.9 Customise the Sidebar25.10 Change skins25.11 Change background colours25.12 Add icons25.13 Embed media into a document25.14 Embed a PDF document
25.14.1 Use an external PDF viewer25.14.2 Use Browser plugins
25.15 Use templates25.16 Add WebDAV storage25.17 Write a screenplay25.18 Add citations / footnotes25.19 Donation / Fundraising Interfaces25.20 Import (K)Ubuntuguide into your site25.21 Troubleshooting
25.21.1 Mediawiki 1.15 on Firefox and Google tablet browsers25.21.2 Adding extra white spaces25.21.3 Allow search engines to "follow" links
25.22 Collections25.22.1 mwlib
25.22.1.1 Easy installation25.22.1.2 Building latest version from source25.22.1.3 Test mwlib25.22.1.4 Start the mw server
25.22.2 Book Templates25.23 PdfBook
26 Drupal6 tips26.1 Drupal (Web content publishing)
26.1.1 Installation quirks26.1.1.1 Exim vs. Postfix26.1.1.2 Folder permissions
26.2 Browser installation26.2.1 Status report
26.2.1.1 Updates26.2.1.2 Cron
26.3 Multi-site Installation26.3.1 Copy modules and themes folders26.3.2 Update each site26.3.3 Multisite cron
26.4 Build your site27 Drupal site building tips
27.1 Introduction27.2 Initial user setup27.3 Create a Welcome page
UbuntuGuide Part2 - http://ubuntuguide.org/index.php?title=UbuntuGuide_Part2&...
5 of 177 08/10/2013 09:04 AM

27.4 Change your default logo27.5 Create a new menu in the left sidebar27.6 Increase PHP memory
27.6.1 Increase uploaded file size limits27.7 Install content creation kit (CCK) and other important modules27.8 Install Access Control modules
27.8.1 Enable permissions for added modules27.9 Create a Calendar content page
27.9.1 Using Date Tools to Create a Calendar27.10 Add Forums27.11 Add Images
27.11.1 Install required modules27.11.2 Configure settings
27.12 Embed a video27.13 Add WYSIWYG editor27.14 Update modules27.15 Perform backups
27.15.1 Backup and migrate module27.15.2 Backup and restore the MySQL database
27.15.2.1 Empty a database27.15.3 Moving a Drupal6 installation to a new site
27.16 Use an SMTP server for email functions27.16.1 Install PHPMailer
27.17 Add an online store to your website27.17.1 Set up PayPal Website Payments Standard27.17.2 Create a PayPal Donate button27.17.3 Install Ubercart on Drupal27.17.4 Setup PayPal with Ubercart27.17.5 Trigger functions based on payment27.17.6 Add realtime videochat to your website27.17.7 Add BigBlueButton API27.17.8 Add Kaltura video services
27.18 Upload and download files27.18.1 Public files / attachments
27.18.1.1 Increase uploaded file size limits27.19 Add a quotation module
27.19.1 Add the Fortune module to Drupal27.19.2 Add the Quotes modules to Drupal
28 Moodle tips28.1 Prepare your server28.2 Installation28.3 Set up a virtual server
28.3.1 Using Moodle with an existing URL28.4 Add a custom theme to Moodle28.5 Upgrading Moodle
29 Moodle Site Building29.1 Using BigBlueButton with Moodle29.2 Using Skype with Moodle
29.2.1 Add Skype Block29.3 Adding quotations to a block
29.3.1 Add a Quotation of the Day block30 Fortune
30.1 Fortunoid30.2 Adding categories of fortunes (fortune modules)30.3 Using Fortune in Drupal30.4 Using Fortune in MediaWiki
31 DAViCal Calendar Server 0.9.731.1 Introduction31.2 Preliminary Requirements31.3 Set up the PostgreSQL database31.4 Install the DaviCal package from repositories31.5 Set up DaviCal PostgreSQL users31.6 Setup the DaviCal database31.7 Test that your database creation was successful31.8 Set up Apache231.9 Create your configuration file31.10 Start up DaviCal
UbuntuGuide Part2 - http://ubuntuguide.org/index.php?title=UbuntuGuide_Part2&...
6 of 177 08/10/2013 09:04 AM
31.10.1 Create TestUser31.10.2 Administer users
31.10.2.1 Clarification of user types and relationships31.10.2.1.1 User roles31.10.2.1.2 Types of relationships
31.10.2.1.2.1 Example31.11 Clients
31.11.1 Mozilla Sunbird / Thunderbird with Lightning31.11.1.1 Idiosyncracies of Sunbird and Thunderbird Lightning
31.11.2 Kontact31.11.3 Evolution
32 DAViCal Calendar Server 0.9.832.1 Introduction32.2 Preliminary Requirements32.3 Set up the PostgreSQL database32.4 Install the DaviCal package from repositories32.5 Set up DaviCal PostgreSQL users32.6 Setup the DaviCal database32.7 Test that your database creation was successful32.8 Set up Apache232.9 Create your configuration file32.10 Start up DaviCal
32.10.1 Create TestUser32.10.2 Administer users
32.10.2.1 User roles32.10.2.1.1 Grants and Permissions Example
32.11 Clients32.11.1 Mozilla Sunbird / Thunderbird with Lightning
32.11.1.1 Idiosyncracies of Sunbird and Thunderbird Lightning32.11.2 Kontact32.11.3 Evolution
33 BigBlueButton33.1 Install Ubuntu server33.2 Sort out webserver conflicts
33.2.1 Changing the Apache listening port33.3 Install BigBlueButton
33.3.1 32-bit Jaunty (9.04)33.3.2 32-bit or 64-bit Lucid (10.04)
33.4 Ensure port availablility33.4.1 Check the server's current IP address
33.4.1.1 Set a static IP address33.4.2 Test BigBlueButton
33.4.2.1 Change the host location of the BigBlueButton server33.4.3 Changing the BBB listening port33.4.4 Change the virtual host configuration file of Nginx
33.5 Using BigBlueButton with Moodle33.5.1 Install BBB <-> Moodle API
33.6 Add BigBlueButton API to Drupal633.7 Changing the BBB security salt33.8 BBB - Standalone authentification with Apache2 web serving
34 Skulltag tips34.1 Install Skulltag34.2 Troubleshooting34.3 Sound
34.3.1 Timidity Sound34.3.2 FMOD Sound
34.4 Wad location34.5 Firewall and Doomseeker34.6 Hosting a Skulltag server
34.6.1 wlan0 vs. eth034.6.2 Storing your custom wads online
34.7 Doomseeker troubleshooting35 ZDoom and GZDoom36 MFC-7820N
36.1 Printer36.1.1 Other models
36.2 Scanner
UbuntuGuide Part2 - http://ubuntuguide.org/index.php?title=UbuntuGuide_Part2&...
7 of 177 08/10/2013 09:04 AM

36.2.1 Scanning utilities36.2.1.1 Xsane36.2.1.2 gscan2pdf36.2.1.3 Tesseract
36.3 Fax36.3.1 Sending Faxes
36.3.1.1 Associate brpcfax with Postscript files as an output option36.3.1.2 Sending faxes from Firefox36.3.1.3 Sending faxes from LibreOffice
36.4 Troubleshooting37 Ubuntuguide XML exports
37.1 Introduction37.2 Export Ubuntuguide wiki pages into an XML file37.3 Import the Ubuntuguide XML into a local wiki37.4 Can I do this?
38 Community portal38.1 Support38.2 Support sites38.3 Wisdom
39 About UbuntuGuide
Boot from a Live CDTo boot from any CD (Including LiveCDs), you must make sure that your BIOS bootup settings allow this. This is usually changed fromthe BIOS setup menu. The BIOS bootup menu is usually accessed during the first few seconds after powering on your computer.
The BIOS setup access key is often displayed on your screen (often it is the F2, Delete, or F10 key), depending on your BIOS. Further,most recent BIOS's allow a one-time choice of the bootup medium, so that either a CD or USB can be chosen as the bootup medium on aone-time basis (without changing the regular BIOS settings).
If the BIOS on your computer does not allow a one-time bootup-medium choice and you must change the regular BIOS settingstemporarily, then enter the BIOS setup menu and hunt around for the settings for Bootup device priority (sometimes in the AdvancedSetup menu). Make sure your CD/DVD optical drive is listed as the first boot device, before the hard drive.
If you intend to use a LiveUSB installation instead of a LiveCD, then set the boot order so that the USB drive is listed first, before thehard drive. (Obviously, your BIOS must allow booting from a USB drive for this option to be available.)
Once you have installed all your operating systems from the LiveCDs or LiveUSBs (or finished using other bootable LiveCDs orLiveUSBs such as GParted), you can reset the first bootup device to be the hard drive again.
After installation, most security experts then recommend restricting bootup to the hard drive only. A BIOS password should also becreated so that the BIOS bootup settings cannot be changed by a casual passerby. In this manner a casual passerby will not be able toboot their own LiveCD or LiveUSB onto your computer (and thereby potentially change your computer without your permission).
UEFIIf your computer, device, or hardware uses UEFI instead of a BIOS bootup system, then see this page.
CorebootIf your computer, device, or hardware uses Coreboot instead of a BIOS bootup system, then see this page.
Multiple OS InstallationThese instructions are for installing more than two operating systems on your hard drive. If you only need two operating systems(such as a Windows installation and a (K)ubuntu Linux installation), it is easiest to just use the (K)ubuntu installer to do it for you (asdetailed on the main page).
Warning: As of version 9.10 (Karmic Koala), the (K)Ubuntu Desktop edition LiveCD installer uses Grub2 (which is difficult to customize)and does not allow the specific steps needed in this tutorial. DO NOT USE the Karmic Koala Desktop edition LiveCD for installation ifyou have a dedicated boot partition, use more than 2 operating systems, or chainload bootloaders. The (K)ubuntu Desktop editionLiveCD installer will overwrite your Master Boot Record and you will then be forced to re-create it later. This is a flaw in the LiveCDinstaller of Karmic Koala. Install the Alternate CD edition instead, or even the Ubuntu Server edition (and then add the ubuntu-desktopafterwards).
UbuntuGuide Part2 - http://ubuntuguide.org/index.php?title=UbuntuGuide_Part2&...
8 of 177 08/10/2013 09:04 AM

Warning: During installation of 10.04 (Lucid Lynx) and later, there is an advanced option (Ready to install -> Summary -> Advanced) tochoose whether to install the GRUB2 bootloader into both the partition into which the (K)Ubuntu OS is installed as well as the MasterBoot Record MBR) or just to install it into the partition into which the (K)Ubuntu OS is installed (only). If your system uses a bootpartition, uses multiple OS (more than 2), or chainloads bootloaders then pay careful attention during this step. For systems with bootpartitions that have already been configured (and to which the Master Boot Record already refers to as the partition which containsthe initial bootloader), it is best not to overwrite the MBR during any OS installation.
Example, from the Desktop version GUI installer, a point in the installation will be reached:Ready to install -> Summary -> Advanced -> Device for boot loader installation: /dev/sda6
In this example, this setting will cause the GRUB2 bootloader to be installed into /dev/sda6 only (the partition into which the new(K)Ubuntu OS is being installed). The MBR (Master Boot Record) will not be changed. However, if the default setting of /dev/sda were tobe chosen, GRUB2 would not only be installed into partition /dev/sda6 (into which the (K)Ubuntu OS is installed) but also the MBR(designated as /dev/sda) would be changed. The copy of GRUB2 stored in /dev/sda6 wwould then be designated by the MBR as themaster bootloader for all Operating Systems on the entire computer. This is undesirable if you wish to use a master bootloader (such asGrub Legacy stored in the boot partition) instead of GRUB2.
Introduction
If your computer, device, or hardware uses UEFI instead of a BIOS bootup system, then also see this page.
If your computer, device, or hardware uses Coreboot instead of a BIOS bootup system, then also see this page.
The method described here involves creating a small boot partition in which to store a set of Grub bootloader configuration files.(These files will be created during the first Ubuntu Linux OS installation and then copied to the boot partition where they cansubsequently be edited.) The initial Grub menu will always be kept in this small boot partition. Each operating system will then keepits own set of bootloader configuration files within its own partition. The Grub menu residing in the boot partition will be only be usedto chainload (http://en.wikipedia.org/wiki/Chainload#Chain_loading_in_boot_manager_programs) the specific bootloader files stored inthe partition of whichever operating system is chosen from the menu (no matter whether the chosen operating system is a Windows,Mac, (K)ubuntu, or other Linux operating system).
Each operating system can therefore use the bootloader/configuration file that is peculiar to it, storing it in its own partition. If thekernel, filesystem, or even the bootloader files for that operating system changes (within its own partition) for any reason, it will notaffect the kernel, filesystem, or bootloader files of the operating systems stored in the other partitions. It will also not affect theprimary bootup menu (stored in the boot partition), and each operating system will be able keep its own independent bootup processintact.
This avoids a common problem with many operating system installers (including Ubuntu) which attempt to impose a single bootloader(http://en.wikipedia.org/wiki/Booting) on all the operating systems residing on a hard drive. The installer overwrites the Master BootRecord so that it only points to the bootloader installed with that operating system (within that operating system's partition). Whenthis happens, the bootloader files can only be edited while running that particular operating system and cannot be adjusted by anyother operating system. Further, after this happens several times (following multiple OS installations), it eventually becomes difficultto remember which partition has the bootloader configuration files that the Master Boot Record points to. With the chainloadingmethod, you don't have to worry about that, any longer. The Master Boot Record will be set to point to the bootloader configurationfiles stored in the boot partition at all times. Once this is set up, the Master Boot Record need never be changed.
Here is some info about this method:
Installing Multiple Linux Distributions on a Single Box (http://www.hentzenwerke.com/wp/installingmultiplelinuxdistributions_onasinglebox.pdf)Creating your Grub Partition (http://www.troubleshooters.com/linux/grub/grubpartition.htm#_Creating_Your_Grub_Partition)How to make a Grub partition (http://members.iinet.net.au/~herman546/p15.html#How_to_make_a_separate_Grub_Partition_)Ubuntu forums (http://ubuntuforums.org/showthread.php?t=724817)Ubuntu forums (http://ubuntuforums.org/archive/index.php/t-1045237.html)
Using Grub Legacy for the boot partition
This method uses Grub Legacy as the bootloader to be installed to the boot partition (because it is the easiest to customize). Startingwith Karmic Koala 9.10, however, Ubuntu/Kubuntu uses Grub 2 (instead of Grub Legacy) by default.
An easy and fast method is to use an Ubuntu Server edition 9.04 LiveCD (http://releases.ubuntu.com/9.04/) (which uses GrubLegacy) to install the first instance of Ubuntu Linux (and Grub Legacy). Use the minimal install (i.e. don't install any extrapackages), in the interest of speed. Proceed with the installation instructions that install Grub to the Master Boot Record, as wellas installing a second copy of Grub Legacy to the local partition. Then copy the Grub Legacy settings to the boot partition asdescribed. Edit the Grub Legacy menu settings stored in the boot partition so that chainloading to each planned partition isenabled.
Once this is finished, re-install a newer version of Ubuntu/Kubuntu to the same partition (overwriting the 9.04 server version).However, this time do not allow the new installation process to overwrite the Master Boot Record. (We want the Master BootRecord always to use Grub Legacy, not Grub2.) Install Grub2 (this time) to the local partition only. This method is described infurther detail below.
UbuntuGuide Part2 - http://ubuntuguide.org/index.php?title=UbuntuGuide_Part2&...
9 of 177 08/10/2013 09:04 AM

A second method involves installing (K)Ubuntu completely (using the LiveCD installer), then removing Grub2 from the (K)Ubuntupartition. Grub Legacy is then temporarily installed in its place and copied to the boot partition. The Master Boot Record is set torefer to this copy of Grub Legacy stored in the boot partition. After this has been done, Grub Legacy is then removed from the(K)Ubuntu installation (but left in place in the boot partition) and Grub2 re-installed in the (K)Ubuntu partition's /boot directoryonce again. This method is described in further detail here.
Now the Master Boot Record will always use Grub Legacy (stored in the boot partition) merely as a chainloader to eachsubsequent partition, where that chosen partition's particular bootloader will be run directly from within the partition (nomatter if it is a Windows partition's bootloader, a (K)Ubuntu partition's bootloader (e.g. Grub2), or a Mac partition's bootloader).
Partition design
Three primary partitions (http://en.wikipedia.org/wiki/Disk_partitioning#PC_partition_types) and one extended partition are allowedon your hard drive. The extended partition can be divided into a very large number of logical partitions. Each Windows installationwill need to be installed on a primary partition. All the Linux (including Ubuntu/Kubuntu) installations, though, can (and should) existin logical partitions, so you can have as many as you want. The swap partition, also, can (and should) live on a logical partition.
The easiest way to do this is to use the GParted Live CD as a partition manager, or using the GParted application directly from theUbuntu LiveCD (Menu -> System -> Administration -> GParted) or KDE Partition Manager from newer versions of the Kubuntu LiveCD.
At the minimum you will need:
one primary partition for each Windows OSan extra small primary partition (which can be resized later, in case is needed). If a Windows boot partition exists as asecond NTFS partition, it should be left alone. If there is a Windows recovery partition also installed, it can also be left aloneas long as there are only two NTFS partitions total on the hard drive (i.e. there is no NTFS boot partition as well). If there area total of 3 NTFS partitions on the hard drive, then the third Windows NTFS partition (the recovery partition) should beremoved after creating Recovery CDs from it (see here).one primary partition for the small boot partition (for storing a set of GRUB files)an extended partition for the Linux OSs (should be the last partition on the hard drive)
In general I make:
my Windows partition 20 - 30 Gb -- filesystem type NTFS (or can even be FAT32) and with the boot flag checkedmy "extra" partition 2 Gb -- which I tend to format as filesystem FAT32 (but can be anything, including ext3). If this is aWindows boot (or recovery) partition, it can be left unchanged.my Grub partition 50 - 100 Mb -- formatted to filesystem type ext3the extended partition is the remainder
At the end of the hard drive I usually leave a few Gb of free space (to allow for extra logical partition needs that I have notforeseen). This can't be done unless the extended partition is the last partition.
I then divide the extended partition into logical partitions:
a /swap logical partition that is 2 Gb -- filesystem type linux-swapa logical partition for the / (root) folder of each planned OS (at least 10 Gb each, but 20-50 Gb is better) -- formatted as ext3(or ext4 if you are planning to use a newer Linux OS)optionally, a logical partition for each specific use, such as for a groupware partition (like Kolab, for example). I make thisabout 20 Gb and format it as ext3, since most specific uses (like Kolab) will be comfortable with ext3. Another example iscreating a partition for the /home directory.
Note: If you are re-arranging (re-partitioning and re-formatting) your hard drive after already having a Grub bootloader installed, youwill not be able to boot into Windows (or anything else) until you re-install Grub as part of a Linux OS re-installation. Panic not. Justproceed in a calm and orderly fashion.
Windows partitions
It is easiest if your Windows partition is the first one installed. This is because the Windows bootloader looks for Windows in the firstpartition. Also, Windows installers are unpredictable and can overwrite anything that is already installed on the hard drive.
If you have a brand new computer with no OS pre-installed, partitioning and OS installation is much easier. Create all your partitionsbefore installing Windows. Make the first partition NTFS (or the less secure FAT32, if you wish), intending it for the Windowsinstallation. Then divide the remainder of the hard drive (using GParted) using the partitioning scheme outlined above.
Generally, a retail "boxed" version of Windows (instead of an OEM or "backup" copy) installs quite happily to the first pre-configured,pre-sized partition. Go ahead and install it there, then skip on ahead to installing the Linux OSs.
However, OEM and "backup" copies of Windows often have installation peculiarities (including pre-configured spamware, spyware,and specific hardware configurations) that will want to use the entire hard drive. Oh well, if you must, you must.
After doing so, you will then have to shrink the partition down to approximately 20-30 Gb (or your desired size).
UbuntuGuide Part2 - http://ubuntuguide.org/index.php?title=UbuntuGuide_Part2&...
10 of 177 08/10/2013 09:04 AM
Changing Windows partition sizes
Using Shrink Volume on Vista and Windows 7
Make sure you heed the warnings that you should change the size of Windows Vista and Windows 7 partitions from withinWindows only (using Settings -> Control Panel -> Administrative Tools -> Computer Management -> Storage -> Disk Management ->Shrink Volume), or using specific Windows tools (http://www.howtogeek.com/howto/windows-vista/working-around-windows-vistas-shrink-volume-inadequacy-problems/) made exclusively for this purpose.
Unlike Windows XP (and earlier Windows versions), Vista and Windows 7 does not allow you to move the MFT (Master File Table) thatcontrols the NTFS file structure. Inexplicably, Microsoft locates this near the middle (or end) of the partition, somewhat limiting theability to resize (shrink) the partition completely. You will be able to gain some hard drive from the "Shrink Volume" command (underSettings -> Control Panel -> Administrative Tools -> Computer Management -> Storage -> Disk Management), but not all of of the harddrive. I knew of no partition software that could move the MFT to a different place on the hard drive safely, but this tutorial(http://www.howtogeek.com/howto/windows-vista/working-around-windows-vistas-shrink-volume-inadequacy-problems/) suggestedthat Perfect Disk worked for this purpose. I therefore tried the trial version of Perfect Disk, and it seemed to work for me very nicely. Iwas able to shrink my Vista partition, using the steps in the tutorial (and Perfect Disk), from 300 Gb to 74 Gb. This was perfect for me.
You must then reboot those Windows OSs (once or twice) to allow them to adjust themselves to the partition size change (before usingGParted for any other tasks). I have ruined several Windows installations by using GParted to resize the partitions for Windows Vistaand Windows 7, or by forgetting to reboot Windows prior to using GParted. During these reboots, the Windows bootloader storesinformation about the changed partition size in its configuration file. If it doesn't have the chance to do this, the Windows bootloaderwill no longer work properly, and you will not be able to boot Windows.
Reinstalling Vista or Windows 7 on a new partition
A popular way to regain a significant amount of your hard drive with Vista/Windows 7 is to first re-format and re-partition the harddrive, and then re-install Vista/Windows 7 afterwards. When this works, you can reinstall Vista/Windows 7 in as little as 30 Gb.
Using Windows Recovery Disks
For a Windows re-installation, you will either need a retail version of Windows or a "Recovery" disk provided by your OEM (computer)manufacturer. The "Recovery" disk must allow Windows re-installation to a partition of any size. (Some recovery disks only allowre-installation to the entire hard drive).
My eMachines, Dell, and Toshiba Recovery disks, for example, allowed re-installation to any size partition, but my HP Recovery Disksdid not. The HP Recovery Disk erased the entire hard drive (and all the data on it) and re-created a single Windows partition. Allpartitions (and the data in them) were destroyed in the process. (I therefore do not recommend using HP Recovery disks for thismethod. For HP computers with a Recovery Disk, use the shrink volume method outlined above, instead).
Physical Recovery Disks are not always shipped with a new computer. For example, my eMachines box instead provided a utility(eMachines -> eMachines Recovery Management) to create (burn) a pair of Recovery DVDs using data stored on an image in a recoverypartition. If your OEM manufacturer gives you a similar option of burning Recovery disks (instead of supplying Recovery CD/DVDswith your computer), make sure you burn these disks prior to reformatting/repartitioning your hard drive. If your hard drive becomescorrupted during the re-partitioning process and you haven't created Recovery Disks, it will be too late.
Once the Recovery Disks are burned, it is no longer necessary to keep the recovery partition (and Windows can be re-installed withoutit).
As outlined in my partitioning scheme, I reserved the first primary partition for Windows. This can either be left as free space at thebeginning of the drive (to be formatted as NTFS by the Windows installer later), or it can be formatted (by GParted, for example) as anNTFS partition with the boot flag set. I left 60 Gb for this first primary partition area (although 40 Gb is probably more than enough,since my Vista re-install occupied only 22 Gb). The Windows Recovery disk was able to re-install Windows no matter which method Iused. Since this was really a "new" install, I didn't have to worry about the MFT table location problem, which was placed by theWindows installer within the new partition without any difficulty.
Obviously, to completely re-install an operating system if you have been using your computer a long time would entail an awful lot ofwork. You would have to back up all your data files first, re-install all your programs after re-installing the operating system, and thenrestore the data files you had backed up. I wouldn't want to do this on anything but a new computer.
Windows XP (or earlier)
You can use GParted to resize a Windows XP partition directly (without needing re-installation), but it is still best to reboot WindowsXP twice after resizing its partition (before taking any other steps with GParted). Review this tutorial (http://www.howtogeek.com/howto/windows-vista/working-around-windows-vistas-shrink-volume-inadequacy-problems/) 's section "Making Shrink VolumeWork." Although Windows XP does not have a shrink volume utility, to resize the partition using GParted, these steps must be takenanyway. Specifically:
Use the Disk Cleanup Wizard to remove unnecessary files.Uninstall "deadwood" programs and unneeded/unwanted Windows Components (using Control Panel -> Add/Remove programs).Disable System Restore (Control Panel -> System -> System Restore -> Turn off System Restore on all drives)
UbuntuGuide Part2 - http://ubuntuguide.org/index.php?title=UbuntuGuide_Part2&...
11 of 177 08/10/2013 09:04 AM

Disable the page file (Control Panel -> System -> Advanced -> Performance:Settings -> Advanced -> Virtual memory:Change -> Nopaging file (ticked) -> Set)Disable debugging (Control Panel -> System -> Advanced -> Startup and Recovery:Settings -> Write debugging information: (none))Disable Hibernation (Control panel -> Power Options -> Hibernate -> Enable hibernation (unticked) )
then reboot once (which will erase the C:\pagefile.sys file). Defragment the hard drive. Then log off Windows and start GParted. Nowyou will be able to shrink the XP partition.
After resizing the NTFS Windows partition, quit GParted and log into Windows again. Chkdsk will be run automatically and thecomputer will reboot. Login to a user account in Windows. It will prompt you to reinstall new hardware (the resized partition).Accept. Now turn back on the services turned off in the steps listed above, in reverse order. To be safe, log off Windows and log inone extra time. Now you are finished resizing the Windows XP partition and can proceed to other disk manipulations withGParted (or other activities such as installing (K)Ubuntu).
Windows bootloaders
The Windows bootloader stores information about how big the partitions on the hard drive are. If you change a partition size,Windows checks the new partition size at the very next reboot (using either chkdsk in XP or a new utility in Vista/Windows 7). It thenwrites that info to its bootloader configuration file. If you start mucking around with other partitions before it has a chance to recordthe changes and reset itself accordingly, the Windows bootloader will not be able to read the partition table properly (and will thenrefuse to boot entirely).
Since Grub boots Windows merely by chainloading the Windows bootloader, if the Windows bootloader doesn't work (i.e. doesn'trecognize its own changed partition), then you are sunk.
If you ignore these warnings, I almost guarantee you will fry your Windows partitioning scheme and be unable to boot up Windows.
Install your first Linux OS
Read Using Grub Legacy for the boot partition to see why I recommend using Ubuntu Server edition 9.04(http://releases.ubuntu.com/9.04/) for this step.
Reboot into the Ubuntu 9.04 LiveCD (in my example I use the Ubuntu 9.04 Server edition 9.04 (Jaunty) (http://releases.ubuntu.com/9.04/) LiveCD).
Install Ubuntu server -> (the usual pleasantries about language and mice and keyboards and stuff)
-> "Starting up the partitioner" -> Partition Disks: Manual
When you see the list of partitions, you will have to configure them manually.You should note the small (50-100 Mb) boot partition that was previously created for use as the partition for the Grubchainloader files. In my example it is /dev/sda3. Make a note of what yours is named.
Configure the swap partition.This shouldn't need configuring if you set it up properly with GParted.You can make sure that Use as: swap area is set.
Configure the root partition for the OS. Choose one of your logical partitions, which in my scheme is #6, is ext3, and hasabout 30 Gb.
Use as: Ext3 journaling file system.Format the partition: Yes, format itMount point: / - the root file systemBootable flag: off
Note: You should write down which device this / (root) partition is on. You will need this information later forGrub settings. On mine, it is /dev/sda6.
-> Finish partitioning and write changes to disk -> "Installing the base system" -> ... ->
->"Install the Grub boot loader to the master boot record?": YES -> Continue
In this step, Grub must be installed both on the MBR (master boot record) as well as locally on the partition being installed (in thisexample /dev/sda6). The local version will be chainloaded by the MBR version. Therefore, install Grub a second time:
-> Go Back -> Install the Grub boot loader on a hard disk -> "Install the Grub boot loader to the master boot record?": NO -> Device forboot loader installation: /dev/sda6 -> Continue
Copy boot files to the small Grub partition
Boot into your newly-installed Ubuntu 9.04 OS. Open a command-line terminal (if you have installed a desktop).
UbuntuGuide Part2 - http://ubuntuguide.org/index.php?title=UbuntuGuide_Part2&...
12 of 177 08/10/2013 09:04 AM
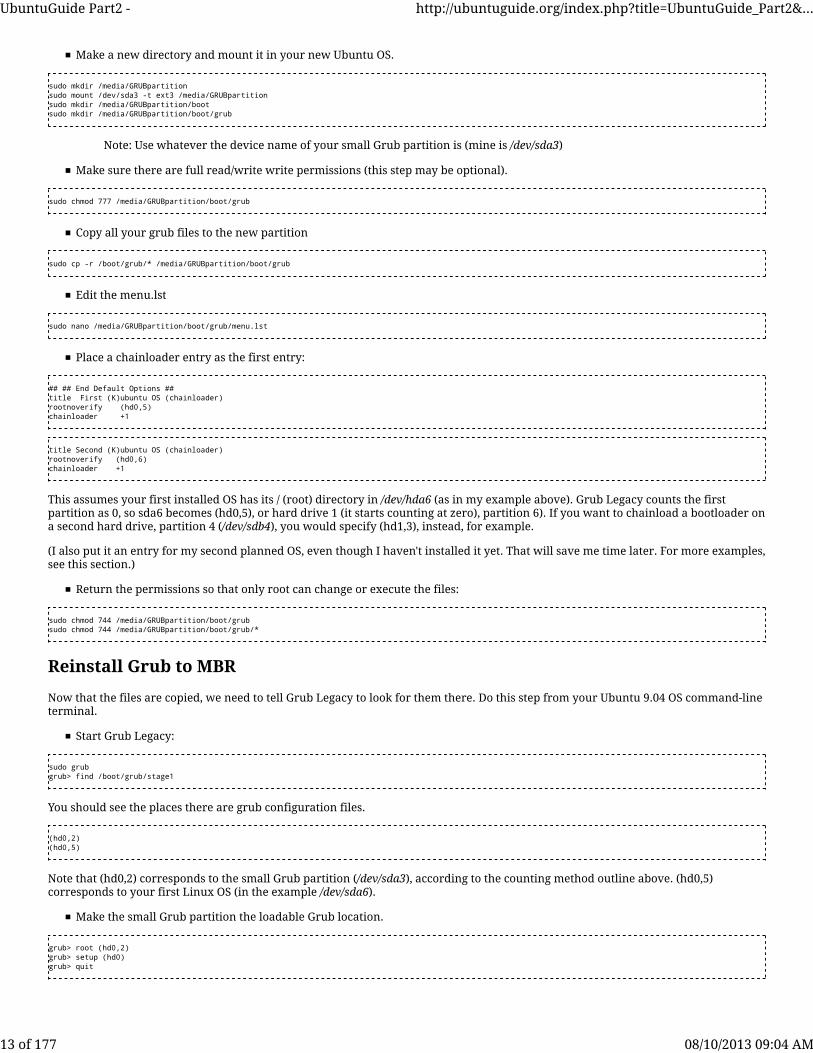
Make a new directory and mount it in your new Ubuntu OS.
sudo mkdir /media/GRUBpartitionsudo mount /dev/sda3 -t ext3 /media/GRUBpartitionsudo mkdir /media/GRUBpartition/bootsudo mkdir /media/GRUBpartition/boot/grub
Note: Use whatever the device name of your small Grub partition is (mine is /dev/sda3)
Make sure there are full read/write write permissions (this step may be optional).
sudo chmod 777 /media/GRUBpartition/boot/grub
Copy all your grub files to the new partition
sudo cp -r /boot/grub/* /media/GRUBpartition/boot/grub
Edit the menu.lst
sudo nano /media/GRUBpartition/boot/grub/menu.lst
Place a chainloader entry as the first entry:
## ## End Default Options ##title First (K)ubuntu OS (chainloader)rootnoverify (hd0,5)chainloader +1
title Second (K)ubuntu OS (chainloader)rootnoverify (hd0,6)chainloader +1
This assumes your first installed OS has its / (root) directory in /dev/hda6 (as in my example above). Grub Legacy counts the firstpartition as 0, so sda6 becomes (hd0,5), or hard drive 1 (it starts counting at zero), partition 6). If you want to chainload a bootloader ona second hard drive, partition 4 (/dev/sdb4), you would specify (hd1,3), instead, for example.
(I also put it an entry for my second planned OS, even though I haven't installed it yet. That will save me time later. For more examples,see this section.)
Return the permissions so that only root can change or execute the files:
sudo chmod 744 /media/GRUBpartition/boot/grubsudo chmod 744 /media/GRUBpartition/boot/grub/*
Reinstall Grub to MBR
Now that the files are copied, we need to tell Grub Legacy to look for them there. Do this step from your Ubuntu 9.04 OS command-lineterminal.
Start Grub Legacy:
sudo grubgrub> find /boot/grub/stage1
You should see the places there are grub configuration files.
(hd0,2)(hd0,5)
Note that (hd0,2) corresponds to the small Grub partition (/dev/sda3), according to the counting method outline above. (hd0,5)corresponds to your first Linux OS (in the example /dev/sda6).
Make the small Grub partition the loadable Grub location.
grub> root (hd0,2)grub> setup (hd0)grub> quit
UbuntuGuide Part2 - http://ubuntuguide.org/index.php?title=UbuntuGuide_Part2&...
13 of 177 08/10/2013 09:04 AM

Install your second Linux OS
Again I'm going to use (K)ubuntu for the example, although any OS can now be installed.
Reboot into an Ubuntu LiveCD (I recommend a Server or Alternate edition, because some Desktop editions overwrite the MasterBoot Record automatically, which is not at all desirable at this stage).
Install Ubuntu server -> (the usual pleasantries about language and mice and keyboards and stuff)
--> "Starting up the partitioner" -> Partition Disks: Manual
When you see the list of partitions, you will have to configure them manually.Configure the swap partition.
This shouldn't need configuring if you set it up properly with GParted.You can make sure that Use as: swap area is set.
Configure the root partition for the OS. Choose one of your logical partitions, which in my scheme is #7, is ext4, and hasabout 30 Gb.
Use as: Ext4 journaling file system.Format the partition: Yes, format itMount point: / - the root file systemBootable flag: off
Note: You should write down which device the / (root) partition is on. You will need this information later forGrub settings. On mine, it is /dev/sda7.
-> Finish partitioning and write changes to disk. (It is OK to format the swap and / (root) partitions.) -> "Installing the base system" -> ...->
"Installing Grub boot loader" ->
"Install the Grub boot loader to the master boot record?": NO
"Install the Grub boot loader on a hard disk": /dev/sda7
Use whichever device that corresponds to your / (root) directory for this OS, of course.This ensures that the Grub bootloader is installed to this OS's partition, as well.
Finish installation and reboot. This system ought to be selected as the Second Ubuntu OS, obviously.
Note: Once you have booted into this OS, you can now edit the chainloaded GRUB bootloader's local settings for this OS (at/boot/grub/menu.lst or /etc/default/grub) as usual, as you can for the first installed OS as well.
Changing main Grub boot menu settings
You can edit the local (chainloaded) Grub boot menu for each Linux OS that uses Grub Legacy (within the partition in which it isinstalled), if desired:
sudo nano /boot/grub/menu.lst
(kate can be used instead of nano as the text editor in Kubuntu, or gedit instead of nano in Ubuntu.)
You can edit the local (chainloaded) Grub boot menu for each Linux OS that uses Grub2 (within the partition in which it isinstalled), if desired (see these instructions):
sudo nano /etc/default/grubsudo grub-mkconfig --output=/boot/grub/grub.cfg
To change the main Grub boot menu, you will have to change the menu.lst found on the small Grub boot partition.
If you are doing this from a Linux OS other than the first one you installed, again make a new directory for mounting:
sudo mkdir /media/GRUBpartition
Mount the directory
sudo mount /dev/sda3 -t ext3 /media/GRUBpartition
Note: Use whatever the device name of your small Grub partition is (mine is /dev/sda3)
UbuntuGuide Part2 - http://ubuntuguide.org/index.php?title=UbuntuGuide_Part2&...
14 of 177 08/10/2013 09:04 AM
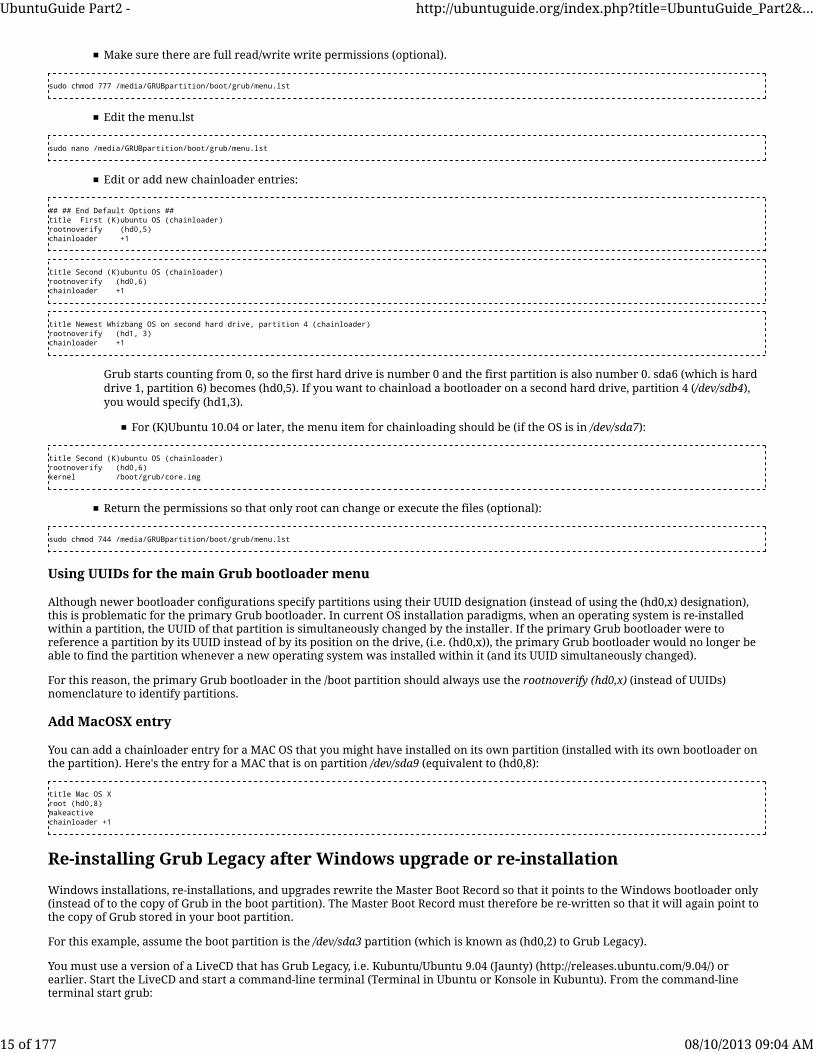
Make sure there are full read/write write permissions (optional).
sudo chmod 777 /media/GRUBpartition/boot/grub/menu.lst
Edit the menu.lst
sudo nano /media/GRUBpartition/boot/grub/menu.lst
Edit or add new chainloader entries:
## ## End Default Options ##title First (K)ubuntu OS (chainloader)rootnoverify (hd0,5)chainloader +1
title Second (K)ubuntu OS (chainloader)rootnoverify (hd0,6)chainloader +1
title Newest Whizbang OS on second hard drive, partition 4 (chainloader)rootnoverify (hd1, 3)chainloader +1
Grub starts counting from 0, so the first hard drive is number 0 and the first partition is also number 0. sda6 (which is harddrive 1, partition 6) becomes (hd0,5). If you want to chainload a bootloader on a second hard drive, partition 4 (/dev/sdb4),you would specify (hd1,3).
For (K)Ubuntu 10.04 or later, the menu item for chainloading should be (if the OS is in /dev/sda7):
title Second (K)ubuntu OS (chainloader)rootnoverify (hd0,6)kernel /boot/grub/core.img
Return the permissions so that only root can change or execute the files (optional):
sudo chmod 744 /media/GRUBpartition/boot/grub/menu.lst
Using UUIDs for the main Grub bootloader menu
Although newer bootloader configurations specify partitions using their UUID designation (instead of using the (hd0,x) designation),this is problematic for the primary Grub bootloader. In current OS installation paradigms, when an operating system is re-installedwithin a partition, the UUID of that partition is simultaneously changed by the installer. If the primary Grub bootloader were toreference a partition by its UUID instead of by its position on the drive, (i.e. (hd0,x)), the primary Grub bootloader would no longer beable to find the partition whenever a new operating system was installed within it (and its UUID simultaneously changed).
For this reason, the primary Grub bootloader in the /boot partition should always use the rootnoverify (hd0,x) (instead of UUIDs)nomenclature to identify partitions.
Add MacOSX entry
You can add a chainloader entry for a MAC OS that you might have installed on its own partition (installed with its own bootloader onthe partition). Here's the entry for a MAC that is on partition /dev/sda9 (equivalent to (hd0,8):
title Mac OS Xroot (hd0,8)makeactivechainloader +1
Re-installing Grub Legacy after Windows upgrade or re-installation
Windows installations, re-installations, and upgrades rewrite the Master Boot Record so that it points to the Windows bootloader only(instead of to the copy of Grub in the boot partition). The Master Boot Record must therefore be re-written so that it will again point tothe copy of Grub stored in your boot partition.
For this example, assume the boot partition is the /dev/sda3 partition (which is known as (hd0,2) to Grub Legacy).
You must use a version of a LiveCD that has Grub Legacy, i.e. Kubuntu/Ubuntu 9.04 (Jaunty) (http://releases.ubuntu.com/9.04/) orearlier. Start the LiveCD and start a command-line terminal (Terminal in Ubuntu or Konsole in Kubuntu). From the command-lineterminal start grub:
UbuntuGuide Part2 - http://ubuntuguide.org/index.php?title=UbuntuGuide_Part2&...
15 of 177 08/10/2013 09:04 AM

sudo grub
Then enter the commands to restore the Master Boot Record to point to the boot partition at /dev/sda3:
> root (hd0,2)> setup (hd0)> quit
Then reboot. Your previously created Grub bootup-menu options should again appear.
Other chainloader options
In Grub Legacy it is possible to specify the root of the partition to be chainloaded using a UUID instead of the hd(0,x) notation. If you donot know the UUID for the partition to be chainloaded, it can be discovered using:
sudo blkid
Replace the
root (hd0,6)
entry in the /boot/grub/menu.lst file (of the primary /boot partition)
with
uuid xxxxxxxx-xxxx-xxxx-xxxx-xxxxxxxxxxxx
where xxxxxxxx-xxxx-xxxx-xxxx-xxxxxxxxxxxx represents the actual UUID of the partition to be chainloaded.
Example:
Replace the lines (in the /boot/grub/menu.lst file)
root (hd0,9)chainloader +1
with the lines
uuid xxxxxxxx-xxxx-xxxx-xxxx-xxxxxxxxxxxxchainloader +1
This method works no matter which operating system is to be chainloaded. It will not work, however, for the operating system storedin (hd0,9) due to a quirk (see below).
Will it work for bootable devices (such as USB flashdrives) that have a UUID? I don't know -- I haven't tried it yet!
This next method will only work when the operating system in the chainloaded partition uses Grub Legacy (and has a local/boot/grub/menu.lst stored within the partition):
Replace the lines (in /boot/grub/menu.lst)
root (hd0,9)configfile /boot/grub/menu.lst
with the lines
uuid xxxxxxxx-xxxx-xxxx-xxxx-xxxxxxxxxxxxconfigfile /boot/grub/menu.lst
Chainloading Grub2 from Grub Legacy
Grub2 is erratic. I no longer chainload it. Instead, it is possible to bypass Grub2 entirely and load an OS directly using GrubLegacy (stored in a boot partition, for example) using an entry in menu.lst of the format:
title Kubuntu Oneiric OS (chainloader)rootnoverify (hd0,6)kernel /vmlinuz root=/dev/sda7 ro
UbuntuGuide Part2 - http://ubuntuguide.org/index.php?title=UbuntuGuide_Part2&...
16 of 177 08/10/2013 09:04 AM

initrd /initrd.img
My old method for chainloading Grub2 (installed in this example in the /dev/sda7 partition) from Grub Legacy used an entry inthe Grub Legacy configuration file (/boot/grub/menu.lst, stored in the standalone boot partition with the Grub Legacy files) withthis format:
title (K)Ubuntu Oneiric OS (chainloader)rootnoverify (hd0,6)kernel /boot/grub/core.img
The (hd0,9) problem
Grub Legacy has a quirk -- it does not like to chainload (hd0,9) using the command chainloader +1. (Something about 9 + 1 = 10requiring an extra digit, or something.)
Most people don't have more than 2 or 3 operating systems on their computer so it is usually not an issue. Here at Ubuntuguide,however, we chainload as many as 10 different OS on every machine (not including virtual machines).
If the operating system in a chainloaded partition happens to use Grub Legacy (and therefore uses /boot/grub/menu.lst locally), thealternative to
chainloader +1
is to use the command
configfile (hd0,9)/boot/grub/menu.lst
(This can be used for any partition in which the chainloaded operating system uses Grub Legacy, not just (hd0,9). It will not work,however, if the chainloaded operating system uses Grub2.)
This can alternatively be specified as
rootnoverify (hd0,9)/boot/grub/menu.lst
It is also possible to chainload by specifying the UUID for the chainloaded partition (hd0,9):
uuid xxxxx-xxxx-xxxx-xxxx-xxxxx/boot/grub/menu.lst
Of course, you must find out the UUID for (hd0,9) first:
sudo blkid
Protecting Grub Legacy from cracking
See this section of the Grub Manual (http://www.gnu.org/software/grub/manual/legacy/grub.html#Security) for importantinformation on securing Grub Legacy.
Manipulating partitions on the hard drive
Most users that have multiple operating systems eventually choose to delete, resize, or re-arrange the partitions containing theoperating systems. This can become an anxiety-producing task especially when it comes to ensuring subsequent bootup capabilities.
For techniques to accomplish this successfully (for systems that have been configured according to the guidelines above), see:
Manipulating Partitions
Manipulating PartitionsMost users that have multiple operating systems eventually choose to delete, resize, or re-arrange the partitions containing theoperating systems. This can become an anxiety-producing task especially when it comes to ensuring subsequent bootup capabilities.
Use the (K)Ubuntu Desktop LiveCD
UbuntuGuide Part2 - http://ubuntuguide.org/index.php?title=UbuntuGuide_Part2&...
17 of 177 08/10/2013 09:04 AM
There are several tools that are required to accomplish partition-manipulation tasks, including GParted, KDE Partition Manager fromnewer versions of the Kubuntu LiveCD, and several Linux commands accomplished from within a Linux command-line terminal. TheSystemRescueCD (http://www.sysresccd.org) (which has been a preferred tool for many years) has all the required tools (and more),but uses as its operating system Gentoo Linux instead of Ubuntu Linux (so it may be less familiar to many (K)Ubuntu users). TheUbuntu Desktop LiveCD (http://ubuntuguide.org/wiki/Ubuntu:All#Fresh_Installation) (32-bit regular version, Lucid 10.04LTS or later)can be used instead of SystemRescueCD for most hard disk manipulation tasks, and already has GParted included on it. (KubuntuLiveCDs, Natty 11.04 or later, have KDE Partition Manager (http://sourceforge.net/projects/partitionman) , which works almostidentically to GParted.)
Download and burn (http://ubuntuguide.org/wiki/Ubuntu:All#Fresh_Installation) onto CD/DVD a copy of the Ubuntu DesktopLiveCD (32-bit regular version, Lucid 10.04LTS or later) or Kubuntu Desktop LiveCD (Natty 11.04 or later).
Boot into the (K)Ubuntu Desktop LiveCD and start it with the "Try (K)Ubuntu" option (not the "Install" option).
Use GParted to manage partitions
(Note: These instructions can be accomplished in a similar fashion using the KDE Partition Manager from newer versions of theKubuntu LiveCD as well.)
Start GParted from the Ubuntu Desktop LiveCD:
Menu -> System -> Administration -> GParted
A graphical display of all the partitions on your hard disk will be shown. If you have two hard disks on your system, theygenerally are referenced as /dev/sda and /dev/sdb (or sometimes /dev/hda and /dev/hdb). GParted works with only one hard disk ata time. To select which hard disk to work with, choose:
GParted menu -> Devices
Working with GParted is relatively intuitive. However, it is very easy to irreparably damage your system by undertaking changeswithout a thorough knowledge of partitions. It is highly recommended to read this article about multiple operating systems for anoverview. Specifically heed the warnings about using GParted to change any NTFS partition on which a Windows OS systemsresides. Windows has quirks and peculiarities about its OS partition that is better managed with Windows-specific tools. (NTFSpartitions that do not have a Windows OS on them, however, can be managed with GParted.)
It is especially important to recognize that deleting or adding a partition will change the partition numbering scheme (and otherpartition characteristics) on the hard drive. This is the major consideration in reorganizing your hard drive. Bootloaders find andload operating systems based on their partition location, specified by the partition number on the disk or by a UUID associatedwith the partition, both of which can change when creating, changing, or deleting partitions.
GParted only allows changes to partitions that are subsequent to any locked partitions on a hard drive (locked partitionsare designated in GParted with a key icon.) For this reason, it is best to have any partitions that are rarely likely to changeand/or likely to be locked (e.g. boot partitions, the linux-swap partition, and Windows partitions that won't be manipulated)closer to the beginning of the hard drive and to locate Linux partitions that will be manipulated the most towards the end ofthe hard drive.
In general, the least problems occur when a test or temporary partition is the last one on the hard drive. Adding, deleting, orchanging the last partition on a hard disk does not affect any of the preceding partitions, so it is the least troublesome.Whenever possible, relegate a temporary or test partition (and its operating system) to be the last partition of thehard drive.
Write down the details of all the partitions displayed in GParted on some scratch paper, and note any changes that are made byGParted as they are made. In specific, when GParted changes the designation of a partition (from /dev/sda8 to /dev/sda7, forexample), note this carefully, as this information becomes critical later in changing bootloader settings.
One linux-swap partition per computer
Only one linux-swap partition is required for computers that will run only one operating system at a time. (This does not apply tothe special case of virtual machines, but virtual machines do not use conventional partitions anyway. Virtual machines are notviewed by a computer as independent operating systems but instead are viewed as applications running within the primaryoperating system). If already present on a hard drive, the linux-swap partition is used by the Ubuntu LiveCD and therefore lockedin GParted. If changes need to be made to the linux-swap partition itself, therefore, use the GParted LiveCD or SystemRescueCDinstead of the Ubuntu LiveCD (and run GParted from one of them).
When installing, updating, re-arranging, or otherwise any Linux operating system, it is not necessary to alter the linux-swappartition in any way. The linux-swap partition is used by all Linux operating systems and is not peculiar to any Linuxdistribution. There is no need to recreate it, reformat it, nor change it in any way (except perhaps its size, which is ideally 2 Gb).
Creating and "moving" free space
UbuntuGuide Part2 - http://ubuntuguide.org/index.php?title=UbuntuGuide_Part2&...
18 of 177 08/10/2013 09:04 AM

There are two places free space ("unallocated space") can exist: within the extended partition (assuming that one exists) and on thehard disk outside the extended partition. Moving the free space so that it is inside or outside the extended partition is a skill that mustbe mastered in order to successfully manage partitions.
When free space exists outside the extended partition, it can be used to create or increase the size of any primary partitionor the extended partition itself.
When free space exists within the extended partition, it can be used to create or increase the size of any logical partitionwithin the extended partition.
In addition, the position of free space determines how it can be used. Free space can only be added to an existing partition if it is nextto ("touching") that partition.
Free space can not itself be moved, however. Only partitions can be moved. "Moving free space" really means that partitionsthemselves must be moved in such a way that the free space "ends up" being in the desired location.
Free space can only be created by deleting or shrinking an existing partition. This is the critical decision in manipulatingpartitions. Which partition can be shrunk or deleted safely? (Again, be very careful not to shrink any partition with a WindowsOS on it using Gparted.)
Creating or resizing a partition
GParted can create many types of partitions, including ext4, ext3, NTFS, and FAT32, which is the majority of partition types that mostusers will create. It can resize any of these types of partitions as well. However, resizing an NTFS partition that contains a Windows OSwithin it may cause problems with the Windows OS itself. (All NTFS and FAT32 partitions should also be defragmented beforeresizing.)
The most important decision will be whether a new partition will be a primary partition (to be used for a Windows operatingsystem, for a Windows boot partition, or for a Grub Legacy boot partition), an extended partition (of which there can only be oneper hard drive), or a logical partition that resides within a pre-existing extended partition. All Linux partitions can be in logicalpartitions.
To create or increase the size of a logical partition within the extended partition, the extended partition itself must alreadybe big enough to accommodate the new logical partition or its new size. To increase the size of the extended partition itself,there must be free space available outside the extended partition and contiguous to it ("touching" it). This requiresmanipulating the exsting partitions (by moving them and/or shrinking them) until the free space is in the necessaryposition. Once the free space is contiguous with (and outside) the extended partition, the size of the extended partition canbe increased. This will have the effect of moving the free space into the extended partition.
Once the free space is within the extended partition, it can be used to create or increase the size of a logical partition. Toincrease the size of a logical partition, the free space must be contiguous to (i.e. "touching") that logical partition byrearranging the positions of the existing logical partitions within the extended partition.
Changing Grub Legacy in a boot partition
When partitions have been moved, added, or deleted, the position and designation of all partitions on a hard drive may change. Forexample, if the /dev/sda7 partition is deleted, a partition that previously was designated as /dev/sda8 will now become /dev/sda7.
Grub Legacy (sometimes used in a freestanding boot partition) often boots operating systems by referring to the partition (in which theOS is located) by its position on the hard drive. In Grub Legacy, the position /dev/sda7 is referred to as (hd0,6), for example, and/dev/sdb2 is referred to as (hd1,1).
After manipulating partitions on a hard disk, therefore, the main Grub Legacy menu.lst (that resides on the boot partition) needs to beedited. This can be done by starting a command-line terminal from the Ubuntu LiveCD:
Menu -> Applications -> Accessories -> Terminal
Then follow the instructions here.
Changing Grub2 in a changed partition
Note: This section is being edited.
The hardest thing to do is to change Grub or Grub Legacy that exists within a partition that has been changed or moved. If thatpartition uses Grub2, then the Grub2 bootloader within that partition can be reconstructed using the Ubuntu LiveCD and then storedwithin that partition once again.
For example, if a (K)Ubuntu operating system (Karmic 9.10 or later) has been moved from /dev/sda8 and now resides at /dev/sda7,Grub2 can be reinstalled on that partition for the (K)Ubuntu operating system there using the Ubuntu LiveCD. Open the command-lineterminal from the Ubuntu LiveCD:
UbuntuGuide Part2 - http://ubuntuguide.org/index.php?title=UbuntuGuide_Part2&...
19 of 177 08/10/2013 09:04 AM

Menu -> Applications -> Accessories -> Terminal
and use the command:
sudo grub-install /dev/sda7
Booting (K)Ubuntu manually from Grub Legacy
When a partition has been changed whose operating system contains a Grub2 bootloader, the Grub2 bootloader might no longerfunction. If, however, a Grub Legacy bootloader has been previously installed in its own boot partition on the system (as isrecommended here), the Grub Legacy bootloader can be used to manually boot the operating system. (Once the operating system hasbeen manually booted, Grub2 can then be reconstructed from within the running OS.)
Reboot the computer without using the Ubuntu LiveCD. When the Grub Legacy menu appears, enter the Grub Legacy commandline (using the command c ):
In newer versions of (K)Ubuntu there are symbolic links to the current kernel files, so the following commands can be entered at thegrub prompt (the example assumes the OS is in the partition at /dev/sda7):
grub> root (hd0,6)grub> kernel /vmlinuz root=/dev/sda7 rogrub> initrd /initrd.imggrub> boot
In newer versions of (K)Ubuntu, the following commands can also be used (if the core.img has not been changed during updates):
grub> root (hd0,6)grub> kernel /boot/grub/core.imggrub> boot
Once the OS has successfully booted, the Grub2 bootloader within it can be reconstructed using the instructions here.
Discovering the current kernel files manually
In older versions of (K)Ubuntu, symbolic links were not included to the current kernel files. For those versions, the kernel files must bediscovered and then entered into the Grub Legacy command line manually.
Discover the current kernel used by the OS. Using the Ubuntu LiveCD, open a command-line Terminal:
Menu -> Applications -> Accessories -> Terminal
If the designation of the partition is currently /dev/sda7, create a mount point for the partition. Use ext4 if the partition uses an ext4filesystem or ext3 if it uses an ext3 filesystem. If you are unsure about the partition's filesystem type or designation, use GParted fromthe Ubuntu LiveCD to find out.
sudo mkdir /media/sda7sudo mount -t ext4 /dev/sda7 /media/sda7cd /media/sda7/bootls
Write down the most recent vmlinuz and initrd files listed there. As an example, the latest files may be vmlinuz-2.6.32-21-generic andinitrd.img-2.6.32-21-generic
Reboot the system and at the Grub Legacy menu, enter the Grub Legacy command line (using the command c ). then enter thecommands at the grub prompt:
grub> root (hd0,6)grub> kernel /boot/vmlinuz-2.6.32-21-generic root=/dev/sda7 rogrub> initrd /boot/initrd.img-2.6.32-21-genericgrub> boot
Once the operating system has successfully booted, Grub2 can be reconfigured using the instructions here.
Changing Grub Legacy in a changed partition
Generally, only versions of (K)Ubuntu prior to Karmic use Grub Legacy by default. (Only Hardy and Dapper are still supported.) Thelocal Grub Legacy menu.lst of one of these versions must be edited manually, using the instructions here.
UbuntuGuide Part2 - http://ubuntuguide.org/index.php?title=UbuntuGuide_Part2&...
20 of 177 08/10/2013 09:04 AM

Virtualbox in WindowsVirtualbox (by Sun) has some advantages and disadvantages. There is a free proprietary edition as well as a subscription-basedenterprise edition. The free edition only allows usage of a 32-bit operating system (as the guest OS) whereas the subscription editionallows a 64-bit guest OS. (Both require registration.) There is also has a free open source edition, but this is not easy to install inWindows (unlike in Linux). Virtualbox is available for all operating system platforms, and therefore a virtual machine created in oneoperating system (Windows, Apple, Linux) can be used in another. Furthermore, it is possible to convert virtual machines created inVirtualbox to VMWare and vice versa.
I find both the installation process and the interface for Virtualbox quite user friendly (as I do VMWare). So far I have had fewdifficulties with Virtualbox and recommend it.
Install Virtualbox in Windows
Obtain and download a copy of the Virtualbox (binary) installer for your (Windows) operating system here(http://www.virtualbox.org/wiki/Downloads) .Install the program, following the prompts.Start Virtualbox
Start menu -> Programs -> Sun Virtualbox -> Virtualbox
(Optional: Of course, if you would like Virtualbox to start every time you run Windows, you can copy the Virtualbox shortcut into theStart menu -> Programs -> Startup folder.)
Create a new virtual machine:
Virtualbox -> New -> Next ->Name: UbuntuVirtualServerOperating System: LinuxVersion: Ubuntu
-> Next -> Memory: Base memory size: 1024 Mb
Note: Use the amount of RAM for the virtual machine that you can afford. Linux requires less memory to run than does Windows,but the amount of RAM that you dedicate to the virtual machine in this step will not be available to the Windows host. On mylaptop, I have 3 Gb RAM, so I dedicate 1024 Mb (1 Gb) to the virtual machine in this step and leave 2 Gb for Windows. You shouldalways leave at least 1 Gb RAM for Windows (or it will run painfully slowly). Linux is able to run with only 512 Mb in servermode or 1 Gb in desktop mode (perhaps even less).
-> Next -> Virtual Hard Disk ->Boot Hard Disk (Primary Master): (ticked)Create new hard disk: (ticked)-> Next -> Next -> Hard disk storage type:Dynamically expanding storage: (ticked)-> Next -> Virtual Disk Location and Size:
Location: UbuntuVirtualServerSize: 8.00 GB
Note: Use whatever size you can afford in Windows. This will take space from your hard drive (so make sure it is available to beginwith). A Linux server can easily run in 8 GB, but if you plan to run a GUI desktop in addition (the Ubuntu desktop or Kubuntu desktop,for example), you should consider making this between 10 -20 GB. However, because you have chosen the dynamically expandingstorage in the preceding step, the virtual machine will automatically expand storage later if you guess wrong here. (I usually justaccept 8 GB.)
-> Finish.
Now you will have a new virtual machine. You can create multiple virtual machines, in this fashion. If you desire, you can run eachnew virtual machine simultaneously (if you have enough RAM and hard drive resources).
Install Ubuntu edition for virtual machines
There is a version of the Ubuntu server that is optimised for usage within a virtual machine. It is provided on the Ubuntu Serveredition LiveCD. The LiveCD image (.iso) found here (http://www.ubuntu.com/getubuntu/download-server) can be downloaded ontoyour hard drive. It can then be installed directly into your virtual machine from the hard drive. Alternatively, you can also burn the.iso image onto a CD and install Ubuntu Server into the virtual machine from the CD. Both methods work identically during the UbuntuServer installation process.
The free version of Virtualbox only allows the use of a 32-bit operating system as a guest OS, so you should download the 32-bit Ubuntuserver (.iso) image.
Start the virtual machine you created in the previous step.
UbuntuGuide Part2 - http://ubuntuguide.org/index.php?title=UbuntuGuide_Part2&...
21 of 177 08/10/2013 09:04 AM

Virtualbox -> Ubuntu Virtual Server (highlighted) -> Start
The "First Run Wizard" will prompt for the location of the installation disk -> Next ->CD/DVD-ROM device (ticked) ->Media Source:
select the CD-ROM drive (if you burned the LiveCD (.iso) image onto a physical CD), orbrowse for the folder where you stored the (.iso) image onto your hard drive (if you did not burn it to a physical CD)
-> Next ->
Install Ubuntu server virtual machine edition:
The First Run Wizard will automatically start the LiveCD from the location you indicated, and you will see the Ubuntu Server LiveCDscreen.
Choose language: English ->Important: note this step carefully! Select the minimal virtual machine installation mode:* Click the F4 (modes) key -> Install a minimal virtual machine ->Install Ubuntu Server
Select your installation options. When asked about partitioning, use the guided partitioning method and use the entire disk. Thisuses the entire virtual machine disk (which is 8 GB or whatever size you created when creating the virtual machine), not theentire physical hard drive disk.
Finish the remainder of the Ubuntu server installation. At the conclusion the Ubuntu system will automatically reboot within thevirtual machine. When it restarts, you will then have a fully function Ubuntu Server within the virtual machine. Immediatelyupdate the operating system:
sudo apt-get updatesudo apt-get upgrade
Install a desktop
This is a decision that is difficult to make. Having an Ubuntu or Kubuntu GUI desktop is nice, but it also slows down the virtualmachine server considerably and takes a large chunk of the 8.00 GB virtual disk (which may need to be dynamically expanded andthereby occupy more space on your hard-drive).
If you intend to use many of the features of Ubuntu or Kubuntu, this is worthwhile. Install a desktop:
sudo apt-get install ubuntu-desktop
or
sudo apt-get install kubuntu-desktop
After all the packages are installed, restart the OS within the virtual machine and you should now boot into the GUI desktop.
Install Linux Guest Additions
If you have installed a (K)ubuntu desktop, you will definitely need this for functionality. There are quirks. A general introduction isfound at the VirtualBox Manual (http://www.virtualbox.org/manual/UserManual.html#id2507643) . The Guest Additions are containedwithin the VBoxGuestAdditions.iso CD image file contained within the VirtualBox installation folder (on my Windows system it is inthe C:\Program Files\Sun\VirtualBox folder). (If there are errors using this file, it must be copied to a neutral location (such theDocuments folder) and used from there.)
Mount the VBoxGuestAdditions.iso as a virtual CD-ROM device (for the virtual machine you have created in the preceding steps).(The virtual machine must be stopped while doing this).
VirtualBox -> Machine -> Settings -> Storage-> Add CD/DVD Device (CD icon with green + sign) -> Attributes -> CD/DVD Device: VBoxGuestAdditions.iso
Start the virtual machine.
From a command-line terminal (Terminal in Ubuntu or Konsole in Kubuntu), change to the CD-ROM/DVD directory:
cd /media/cdrom0
Install prerequisites:
UbuntuGuide Part2 - http://ubuntuguide.org/index.php?title=UbuntuGuide_Part2&...
22 of 177 08/10/2013 09:04 AM

sudo apt-get install dkms
Run the Guest Additions binary:
sudo ./VBoxGuestAdditions-Linux-x86.run
(If you are using a 64-bit edition of Ubuntu as a guest OS, see the VirtualBox Manual (http://www.virtualbox.org/manual/UserManual.html#id2507643) for additional instructions. Because this is not an option with free versions of VirtualBox, I will notdiscuss it here).
Once the installation is complete, you can unmount the VBoxGuestAdditions.iso as a virtual CD. (The virtual machine must bestopped while doing this).
VirtualBox -> Machine -> Settings -> Storage -> Storage Tree-> VBoxGuestAdditions.iso -> Removes the attachment highlighted in the Storage Tree (CD icon with green - sign) -> Remove
Creating shared folders
This is a folder on your Windows host that will be shared with the Ubuntu virtual machine. An extremely nice feature. TheGuestAdditions must be installed to use this feature. See the VirtualBox manual on Shared folders (http://www.virtualbox.org/manual/UserManual.html#sharedfolders) for more information.
With the virtual machine stopped, designate a shared folder. In my example I use a folder in Windows that is already commonlyshared (C:\Users\Public\Documents).
VirtualBox -> Machine -> Settings -> General -> Shared Folders-> Add Shared Folders (Ins) (Folder icon with a + symbol)
-> Folder Path: Other -> C:\Users\Public\Documents-> Folder Name: PublicDocuments
Start the virtual machine.
Create a folder that will be associated with the shared Windows folder:
sudo mkdir /media/windows-shared
Test that the Windows shared folder can be mounted:
sudo mount -t vboxsf PublicDocuments /media/windows-shared
If there are no errors, then ensure the shared folder is mounted at every bootup of the virtual machine. Edit the /etc/fstab file:
sudo nano /etc/fstab
(you can used gedit in Ubuntu or kate in Kubuntu instead of nano, if you'd like).
Add the line:
PublicDocuments /media/windows-shared vboxsf defaults 0 0
Reboot the virtual machine (sudo reboot).
Access /media/windows-shared just like any other folder (from Nautilus or Dolphin, for example) within the virtual machine.
Access C:\Users\Public\Documents just like any other folder in the Windows host.
Android emulation
Android-x86 in VirtualBox
The Android-x86 emulator is fast and efficient. It runs many apps (but not as many as the Android SDK emulator).
In Virtualbox (or QEMU, VMWare, or other virtual environment), install Android-x86 (http://www.android-x86.org/documents/installhowto) using the .iso downloaded to a hard drive (or, alternatively, burned to a CD or USB drive). Details:
From your favorite package manager (Muon, Synaptic, etc.) you can install the package virtualbox-qt, or from the command line:
UbuntuGuide Part2 - http://ubuntuguide.org/index.php?title=UbuntuGuide_Part2&...
23 of 177 08/10/2013 09:04 AM

sudo apt-get install virtualbox-qt
Both the proprietary binary for VirtualBox and the necessary dependency virtualbox-dkms will be installed at the same time.
Download a version of the Android-x86 image (.iso) from here (http://www.android-x86.org/download) . I used the latest versionfor ASUS (eee) Netbooks.
Start VirtualBox:
Menu -> Utilities -> VirtualBox
Create a new Virtual Machine for the Android x-86 OS:
VirtualBox -> New -> Next -> Name: Android -> OS Type: Operating System: Linux -> Version: Linux 2.6-> Next -> Base Memory Size: 512 MB -> Next -> Virtual hard disk: Create new hard disk -> Next-> File type: VDI -> Next -> Storage details: Dynamically allocated -> Next -> Location: Android-> Size: 8 GB -> Summary: Create
Note: The Android 2.2 and 2.3 versions run very efficiently with only 256 MB Base Memory and require little hard disk space. For theseversions I used only 2 GB for a virtual disk, of which 1 GB is used for the virtual ("fake") SDcard.
Tweak the VirtualBox Settings so that mouse capture is enabled for the newly created Android virtual machine. (Without this stepyou will not be able to use the mouse (or touchpad) in Android.):
Virtualbox -> Settings -> System -> Enable absolute pointing device (unticked)
The Android-x86 website says (http://www.android-x86.org/documents/virtualboxhowto) that only Soundblaster 16 works as aVirtualBox soundcard for Android, so change the Audio settings for VirtualBox:
VirtualBox -> Settings -> Audio -> Audio controller: Soundblaster 16
I use a wired Ethernet connection (with Android-x86 2.3). I therefore tweak the VirtualBox Settings to emulate a virtualPCnet-Fast III adapter, as recommended (http://www.android-x86.org/documents/virtualboxhowto) on the Android-x86 website.
VirtualBox -> Settings -> Network -> Enable Network Adapter (ticked) -> Attached to: NAT-> Advanced -> Adapter Type: PCnet-Fast III (Am79C973) -> Ok
It is also possible to use the Attached to: Bridged Adapter mode with Name: eth0
Choose the downloaded Android-x86 (.iso) as a virtual CD-ROM to be used by VirtualBox:
VirtualBox -> Settings -> Storage -> Storage Tree: CD icon (Empty)-> CD icon: Choose a virtual CD/DVD disk file ...-> (click on the name of the downloaded android-x86-4.0-eeepc.iso file) -> Ok
Start the installation of Android-x86 in the VirtualBox virtual machine:
VirtualBox -> Start --> Installation -- Install Android-x86 to hard disk-> Choose Partition: Create/Modify partitions -> Ok -> New -> Primary -> Size (in MB): 8588-> Bootable -> Write -> Are you sure you want to write the partition table to disk? (yes or no): yes -> <Enter>-> Quit -> Please select a partition to install Android-x86: sda1 LINUX VBOX HARDDISK -> OK ->-> Choose filesystem: ext3 -> OK -> Are you sure to format the partition sda1? -> Yes-> Do you want to install bootloader GRUB? -> Yes -> Do you want to install /system as read-write? yes
Note: the partition in this step is not on your physical hard drive but is entirely within the virtual hard drive created in the previousstep. You will not erase anything on your physical hard drive during this step; only the contents within the virtual hard drive are atstake (and to your physical hard drive, the virtual hard drive appears only as an 8 GB file). There is no danger of harming your harddrive no matter what you do here! During installation of the Android OS, it makes sense to use the entire space of the newly createdvirtual hard drive (8 GB if following the instructions outlined above) for the Android OS.
After installation completes, the "Congratulations! Android-x386 is installed successfully" message appears.
At this stage I like to optionally Create a Fake SDcard (although there are several other (http://www.android-x86.org/documents/sdcardhowto) options for SDcard emulation).
-> Create a fake SD card -> Please input the size of the sdcard.img in MB: 1024 -> Creating sdcard.img -> The fake SD card iscreated successfully.
I use half of the total partition space for my fake SDcard.img, so that if I created a 2 GB partition, I create a 1 GB fake SDcard.img. Aslong as plenty of space remains in the partition for the Android-x86 OS (I generally leave 1 GB for the OS), however, the size of thesdcard.img is unimportant and can be as large or small as desired.
UbuntuGuide Part2 - http://ubuntuguide.org/index.php?title=UbuntuGuide_Part2&...
24 of 177 08/10/2013 09:04 AM
After completing the initial Android setup (but before a "Reboot"), shutdown the Android virtual machine and tweak theVirtualBox settings so that the virtual CD-ROM no longer uses the Android-x86.iso virtual CD. (If you don't do this the virtual CDwill be loaded again at reboot.):
VirtualBox -> Machine -> Close -> Power off the machine-> Settings -> Storage -> CD-ROM icon (click) -> Host Drive DVD RW (select your physical CD/DVD drive, which should be listed) ->Passthrough ('ticked') -> OK
Restart the virtual machine and this time it should boot to the newly created virtual hard drive (with the newly installedAndroid-x86 OS on it). Whenever you Start the Android virtual machine in the future, it should boot straight into Android-x86.
During the first run, you can use the TAB button to navigate between options, or by clicking on the Android virtual machinewindow, you can "capture" the mouse (a blue pointer should appear) for use by the Android virtual machine. To return to the(K)Ubuntu normal (white) mouse pointer, use the <RIGHT-CTRL> button.
-> Start -> (setup initial options as desired)
Networking for Android-x86
By default the Android OS uses wireless networking. This can be linked to the (K)Ubuntu host's wireless adapter using either theNAT or Bridged networking modes of VirtualBox.
The Android 2.2 and 2.3 versions of Android-x86 also include wired Ethernet networking capabilities, which works well. BecauseI use Android-x86 in a wired environment, I mostly use Android-x86 2.3.
If your (K)Ubuntu host only has a wired ethernet connection, then you will use the eth0 connection within Android. In theVirtualBox Networking settings (Virtualbox -> Settings -> Network -> Attached to:) you can use NAT or Bridged Adapter (eth0) butif you intend to use any server functions from Android, you must use the Bridged Adapter (eth0). Start the Android virtualmachine after choosing the VirtualBox settings.
Wired networking for Android-x86 RC 4.0RC1
(Note: I could not get wired networking to function properly in the Android-x86 3.2 version.)
These instructions were tested using the android-x86-4.0-RC1-eeepc version of Android-x86 and were adapted from those givenhere (http://code.google.com/p/live-android/wiki/networkhowto) .
Make sure the host computer's firewall is off while testing connections.
Once the Android system has fully booted within the virtual machine, go to the root command-line using <ALT-F1>.
The command line can also be reached through the Terminal Emulator:Android -> Home icon -> App menu icon -> Terminal EmulatorYou may then need to become the superuser from the command-line: su
(This step may be optional and is suggested only if needed for troubleshooting. It is necessary if using the "route add"command in the next step.) From the command line, enable the wired networking port using ifconfig. Use an unused IPaddress on the main LAN:
ifconfig eth0 192.168.0.59
(This step may be optional and is suggested only if needed for troubleshooting.) For the eth0 connection set a route to thedefault gateway (this should be the IP address of your router / DHCP server on your LAN):
route add default gw 192.168.0.1 dev eth0
For some reason, my connection would not work unless a DHCP connection is enabled:
netcfg eth0 dhcp
Test to make sure traffic is reaching the router:
ping 192.168.0.1
Set a DNS provider (examples are 8.8.8.8 for Google, 8.26.56.26 for Comodo, and 206.67.222.222 for OpenDNS).
setprop net.dns1 8.8.8.8
UbuntuGuide Part2 - http://ubuntuguide.org/index.php?title=UbuntuGuide_Part2&...
25 of 177 08/10/2013 09:04 AM

Return to the Android environment using <ALT-F7>.
Following these steps, start the Browser. If you get a webpage, then the connection works. If not, make sure all firewalls are off(for your VirtualBox host) while testing your setup.
Installing apps
See Install an app in Android-x86 (http://www.android-x86.org/documents/apphowto) .
Use either the Android 2.2 or Android 2.3 version of Android-x86 for wired networking. Most (but not all) apps will work withwired connections.
The following apps work (both wirelessly and with wired connections):
FDroid (http://f-droid.org) open source app repository -- download the app directly through the Android browser: https://f-droid.org/FDroid.apk )Amazon Appstore (http://www.amazon.com/appstore) (requires free account at Amazon)Words with Friends free -- available through Amazon Appstore (http://www.amazon.com/Zynga-Game-Network-Words-Friends/dp/B0064X7B4A/ref=sr_1_1?ie=UTF8&qid=1338657141&sr=8-1)AndFTP (http://www.lysesoft.com/products/andftp/) (FTP client) -- download the app directly through the Android browser:http://www.lysesoft.com/products/andftp/AndFTP.apk
These apps do not work:
Netflix (stock app from Amazon Appstore (http://www.amazon.com/Netflix-Inc/dp/B005ZXWMUS/ref=sr_1_1?ie=UTF8&qid=1338657290&sr=8-1) or the modified XDA-developers' (http://forum.xda-developers.com/showthread.php?p=24720204)version). The Netflix app requires Android version 2.3 or later, in general, but I have not been able to get Netflix to workwith any Android-x86 version yet.
Modified apps
Note: These are for testing only.
For the Android-x86 4.0RC1 version with an imperfect wired connection, I needed to download from the command-line:
Go to the command line using <ALT-F1>.Change to the /sdcard directory and download the app using wget:
cd /sdcardwget http://ubuntuguide.org/images/Amazon_Appstore-release.apk
Return to the Android GUI environment (<ALT-F7>). Use the OpenManager file browser to navigate to the /sdcard directory,where the downloaded xxx.apk file should be found. Click on it to install it.
In other versions with working wired or wireless connections (i.e. Android 2.2 and 2.3), the apps can be downloaded directlyfrom the Android Browser.
Amazon_Appstore-release.apk for testing only (http://ubuntuguide.org/images/Amazon_Appstore-release.apk)Netflix XDA version for testing only (http://forum.xda-developers.com/attachment.php?attachmentid=1081513&d=1337878151)test sound file
Usage tips
In Android-x86 2.2 and 2.3, the "Back" function is the right mouse button or "ESC." To go to the "Home" screen, use the "Windows"button of the keyboard. A quick <double-click> with the captured mouse will alternately zoom in and zoom out (for many apps).The <PGUP>, <PGDN>, and arrow keys of the physical keyboard can be used to navigate the Android-x86 display.
To disable the pop-up Android keyboard, untick the "Android keyboard" in the Android -> Settings -> Language & keyboardsettings.
If you have created a VirtualBox virtual machine for your Android OS entitled Android, then it can be started using the command(which can be placed in a menu item):
VirtualBox -startvm "Android"
You can also start VirtualBox in fullscreen mode:
VirtualBox -fullscreen -startvm "Android"
UbuntuGuide Part2 - http://ubuntuguide.org/index.php?title=UbuntuGuide_Part2&...
26 of 177 08/10/2013 09:04 AM

However, for this to be beneficial, you would also have to change the display settings of the Android-x86 OS to be larger as well.For example, if using a 1024x768 screen, the UVESA_MODE=1024x768 option should be added to the Grub bootup settings. Thiscan be done by editing the Grub settings using the vi editor (http://www.cs.colostate.edu/helpdocs/vi.html) . Boot Android-x86 intothe "Debug mode" to enter the command-line environment, then edit /mnt/grub/menu.lst:
vi /mnt/grub/menu.lst
and add UVESA_MODE=1024x768 to an existing line or create an entirely new entry that includes the option. In vi use the i optionto start inserting text and ESC to stop. Save and quit the vi editor using :wq. Reboot the Android system for the changes to appear.
Portrait mode can be enabled by creating custom video modes for VirtualBox. Using the instructions here(http://www.virtualbox.org/manual/ch09.html#idp22540112) I create four custom video modes for the four portrait resolutionsthat I like: 320x480 (a size that approximates a smartphone size), 540x720 (which works well for me in fullscreen mode on my1024x768 monitor), 504x672 (which works well for me in windowed mode on my monitor), and 450x600 (which is easilymaneuvered in window mode). These modes are all 16-bit modes (24-bit modes don't work for me in these sizes). (As in the otherexamples, my virtual machine is named Android.)
VBoxManage setextradata "Android" "CustomVideoMode1" "320x480x16"VBoxManage setextradata "Android" "CustomVideoMode2" "540x720x16"VBoxManage setextradata "Android" "CustomVideoMode3" "504x672x16"VBoxManage setextradata "Android" "CustomVideoMode4" "450x600x16"
I then edit the Android Grub menu (as above) and add entries for my custom resolutions, using UVESA_MODE=320x480 DPI=160,UVESA_MODE=540x720 DPI=160, UVESA_MODE=504x672 DPI=160, and UVESA_MODE=450x600 DPI=160, each in a different Grubentry, to correspond to the custom video modes I created. When I start the Android virtual machine I can select my resolution andorientation by choosing from one of these newly created Grub menu entries. (Note that by setting a 16-bit resolution for theCustomVideoModes, the Android-x86 Grub settings must correspondingly be DPI=160 instead of DPI=240.)
An easy method to change the display size of Android-x86 is the "Scale" mode of VirtualBox. In this mode, the size of Android-x86will be scaled to whatever size the VirtualBox window is stretched. It is a menu item in VirtualBox, or can be reached from thehotkeys: <RIGHT-CTRL>-<HOME>.
Android SDK emulator
Android SDK for Linux (http://developer.android.com/sdk/index.html) is a 32-bit Android emulator/software development kit. Itincorporates a QEMU virtual machine framework as part of its installation. It provides a fully functional Android environment andapps can be installed from (and run within) the emulator. However, it is a very top-heavy and slow environment to use for emulationunless you have a very powerful computer with lots of RAM and processing power.
Install the pre-requisites:
sudo apt-get install ia32-libs default-jre
Note: ia32-libs is only needed on a 64-bit system. default-jre will also install open-jdk6-jre.
Download the Android SDK (e.g. android-skd_r18-linux.tgz from here (http://developer.android.com/sdk/index.html) and extract it(using Ark, for example) to its default folder ~/android-sdk-linux/ (i.e. /home/user/android-sdk-linux/):
wget http://dl.google.com/android/android-sdk_r18-linux.tgztar xvf android-sdk_r18-linux.tgz
Add the /home/user/android-sdk-linux/tools and /home/user/android-sdk-linux/platform-tools/ directories to the PATH for the user(or for the system) by editing /home/user/.profile (or /etc/profile for system-wide use):
sudo nano /home/user/.profile
and adding this line at the end:
export PATH=/home/user/android-sdk-linux/tools/:/home/user/android-sdk-linux/platform-tools/:$PATH
Save the file and then log out/log in (or reboot if changes were made to the system-wide config file).
Change to the /home/user/android-sdk-linux/tools directory and start the Android SDK Manager:
cd /home/user/android-sdk-linux/tools./android
UbuntuGuide Part2 - http://ubuntuguide.org/index.php?title=UbuntuGuide_Part2&...
27 of 177 08/10/2013 09:04 AM

Install the "Tools" by ticking the appropriate boxes -> Install Packages
Choose which Android version to emulate and install it.
Android SDK Manager -> Android 4.0.3 (API 15) (ticked) -> Install packages
Still within the Android SDK Manager, create a virtual machine ("AVD") with the desired Android system in it. The WXGA800 skingives a widescreen (tablet) appearance:
Android SDK Manager -> Tools -> Manage AVDs -> New-> Name: Android4 -> Target: Android 4.0.3 - API Level 15 -> Size (of virtual SDcard): 2 Gb -> Skin: Built-in: WXGA800 -> Hardware:Device ram size (in Mb): <click> on 1024 -> 512-> Create AVD
At the time of the creation of the virtual machine it is possible to adjust the amount of RAM dedicated to your device (I personallyonly dedicate 384 Mb) or leave it at the default of 1024 Mb if your system has plenty of RAM.
Close the Android SDK Manager. Now the new Android virtual machine can be started from the command line terminal. (Thiscommand can also be added to a menu item.)
emulator -avd Android4
where Android4 is the name of the virtual machine created in the previous step.
On less powerful computers, the startup of the emulator can be slow. Be patient.
Networking for Android SDK
Networking from the Android SDK virtual machine to my host computer's wired Ethernet connection was transparent uponinstallation. I required no additional configuration and all networking functions were operational.
Installing an app
Once the Android emulator SDK is installed, install an app using these ADB instructions (http://developer.android.com/guide/developing/tools/adb.html) or directly from within an app marketplace (including Amazon App marketplace(http://www.amazon.com/gp/feature.html?ie=UTF8&docId=1000626391&ref=mas_gs) or F-Droid (http://f-droid.org/repository/browse/) ). The apps I tested (such as Words with Fiends) work without problems.
Netflix Android App
A Netflix app for the Android market is available here (https://market.android.com/details?id=com.netflix.mediaclient) orthrough the Amazon Appstore (http://www.amazon.com/Netflix-Inc/dp/B005ZXWMUS/ref=sr_1_1?ie=UTF8&qid=1338657290&sr=8-1) . The Netflix app requires Android 2.3 or later. In my Android 4.0.3 emulator the stock Netflix app (from the AmazonAppstore) successfully downloads and installs and I am able to login to my account and hear audio when streaming content, butno video. I have not yet tried the XDA-developers' (http://forum.xda-developers.com/showthread.php?p=24720204) version.A better solution is to use the Netflix in Wine bundle, which runs the Windows version of Netflix in a modified Wineenvironment. This solution works well.
Other references
A graphical installation guide Softpedia (http://news.softpedia.com/news/How-to-Run-Android-Applications-on-Ubuntu-115152.shtml) (2009).
Other Android Virtual Machines
See this Android v4 VM (http://www.vmlite.com/index.php?option=com_kunena&Itemid=158&func=view&catid=9&id=8838) .
Other Android Resources
AOSP (http://source.android.com/) -- Android Open Source ProjectCyanogenMod (http://www.cyanogenmod.com/) -- creates custom ROMs for devices not supported by Google Android so that theopen source Android OS (AOSP) can run on them. Also see their wiki (http://wiki.cyanogenmod.com) .F-Droid (http://f-droid.org) is the repository for free and open source software (almost all of it ad-free) for the Google Androidplatform.
Screencasts
UbuntuGuide Part2 - http://ubuntuguide.org/index.php?title=UbuntuGuide_Part2&...
28 of 177 08/10/2013 09:04 AM
Creating screencasts (screencapture)
Several methods for creating screencasts in (K)Ubuntu Linux exist.
FFMPEG with x11grab
Recent versions of FFMPEG include x11grab, a module for screen capture. This method gives the best results for screencaptures and isone of the the most flexible methods, allowing a variety of audio inputs and audiovisual output formats.
Run FFMPEG with x11grab
The command for 2 channel audio recording using the ALSA input is:
ffmpeg -f alsa -ac 2 -ab 192k -i pulse -f x11grab -s 1024x768 -r 30 -i :0.0 -acodec pcm_s16le -vcodec libx264 -vpre lossless_ultrafast -threads 0 /home/user/capturedvideo.avi
The order of the options is important (since some options override others). -f alsa indicates the alsa audio input (an alternative is oss).-ac 2 indicates 2 channel recording (use -ac 1 for mono). -ab 192k means 192 kb/sec audio, which may be too high for your needs. (128kis average). -i pulse indicates to use Pulse Audio (assuming you have it set up) for audio input. -i :0.0 means to capture screen 0.0 (theprimary screen). -acodec pcm_s16le means to save with lossless 16-bit audio encoding (which gives a large file). You can use anotheraudio format (such as libmp3lame) here if you wish, or re-encode later when you do processing/convert to your final desired format.Also see the FFMPEG x11grab documentation (http://ffmpeg.mplayerhq.hu/ffmpeg.html#SEC18) for other options.
You can also capture to a video codec other than libx264 (although without the corresponding quality of H.264/X264). In a commandterminal, type ffmpeg -formats E to see which video codecs your version of FFMPEG supports. For example, to create an .avi file withan XVID video codec and an Mp3 audio codec, use the command:
ffmpeg -f alsa -ac 2 -ab 128k -i pulse -f x11grab -s 1024x768 -r 30 -i :0.0 -acodec libmp3lame -vcodec mpeg4 -vtag xvid /home/user/capturedvideo.avi
However, I find the quality to be far superior if the capture is done in H.264/X264 and then converted to the (much smaller and moreuniversal) XVID format in a separate step afterwards.
Of course, the command can be used as a Menu item. When creating a Menu item, make sure the "Advanced -> Run interminal" box is ticked.
To stop the recording, enter "CTRL-C" (or "q" in earlier versions) in the terminal window in which FFMPEG/x11grab isrunning.
If you have xwininfo installed (installed already in Debian/(K)Ubuntu), you can replace
-s 1024x768
with
-s $(xwininfo -root | awk '/geometry/ {print $2}')
in order to automatically capture whatever-sized screen you have. The command would then be:
ffmpeg -f alsa -ac 2 -ab 192k -i pulse -f x11grab -s $(xwininfo -root | awk '/geometry/ {print $2}') -r 30 -i :0.0 -acodec pcm_s16le -vcodec libx264 -vpre lossless_ultraf
A benefit of using Pulse Audio is that several inputs can be combined, allowing both microphone input and music input, forexample. The relative volumes can be controlled using Pulse Audio Volume Control (sudo apt-get install pavucontrol).
If you do not have Pulse Audio installed, you can capture from the primary audio input card by replacing
-i pulse
with
-i hw:0,0
or
-i /dev/dsp
It is possible to record only part of the screen by specifying an offset from the upper left corner of the screen. Use the option
UbuntuGuide Part2 - http://ubuntuguide.org/index.php?title=UbuntuGuide_Part2&...
29 of 177 08/10/2013 09:04 AM

:0.0+10,20 where 10 is an example of a x-offset from the left of the screen and 20 is an example of the Y offset from the top of thescreen. Also specify the size of the area to recorded, for example -s 320x240. A complete command might then be
ffmpeg -f alsa -ac 2 -ab 128k -i pulse -f x11grab -s 320x240 -r 30 -i :0.0+10,20 -acodec libmp3lame -vcodec mpeg4 -vtag xvid /home/user/capturedvideo.avi
After completing the screencapture, you can then edit and convert it to the desired final format, using FFMPEG (perhaps with theWinFF GUI), mencoder (with or without a front-end such as Avidemux), or a standalone video editor. Some examples ofconversion methods are here.
A video of this procedure is here on YouTube (https://www.youtube.com/watch?v=quqL_lAETdI) .
kX11grab
kX11grab is the KDE version of QtX11grab (http://qx11grab.hjcms.de/) , a frontend for FFMPEG/x11grab screengrabs. It is in alpha stageand does not yet work well.
Install kx11grab:
sudo apt-get install kx11grab
Start kX11grab:
K menu -> Utilities -> kx11grab
Install the newest version of FFMPEG with x11grab
Older repository-supplied versions of FFMPEG did not have X11grab nor X264 support in them. If you have a very old installation,you can install the newest version of FFMPEG and X264 using the instructions from this thread (http://ubuntuforums.org/showthread.php?t=1392026) .
Note: The current, updated versions of FFMPEG in Lucid, Maverick, and Natty are all compiled with x11grab and X264 capabilities. Onmy Lucid machine, X264 version 85 is already installed, and on Natty, version 106 is already installed. The newest version of X264 (asof 8-2011) is version 116.
If you want the most current version of FFMPEG and the H.264 / X264 video codec, however, then compile and install new versionsusing these instructions (http://ubuntuforums.org/showthread.php?t=786095) (recreated here).
Uninstall x264, libx264-dev, and ffmpeg:
sudo apt-get remove ffmpeg x264 libx264-dev
Install dependencies needed for retrieving, compiling, and running the new versions (you may need to ensure the Universeand Multiverse repositories are enabled):
sudo apt-get updatesudo apt-get install build-essential checkinstall git libfaac-dev libjack-jackd2-devsudo apt-get install libmp3lame-dev libopencore-amrnb-dev libopencore-amrwb-dev libsdl1.2-dev libtheora-devsudo apt-get install libva-dev libvdpau-dev libvorbis-dev libx11-dev libxfixes-dev libxvidcore-dev texi2htmlsudo apt-get install yasm zlib1g-dev
Retrieve, compile, and install a new version of the X264 video codec (http://www.videolan.org/developers/x264.html) fromVideoLAN (makers of VLC). (Note: Ubuntu normally installs x264 in /usr/bin/x264.):
cdgit clone git://git.videolan.org/x264cd x264./configure --enable-staticmakesudo checkinstall --pkgname=x264 --pkgversion="3:$(./version.sh|awk -F'[" ]' '/POINT/{print $4"+git"$5}')" --backup=no --deldoc=yes --fstrans=no --default
Note: Git uses port 9418 by default. Make sure the Git port is unblocked in your firewall. The last command will build a .debpackage named something similar to /home/user/x264/x264_0.116.2074+git2641b9e-1_i386.deb. The installed package can beremoved later, if desired, using dpkg -r x264.
Retrieve, compile, and install a recent version of FFMPEG. (Note: Ubuntu normally installs FFMPEG in /usr/bin/ffmpeg andrelated modules in /usr/bin/ffplay, /usr/bin/ffprobe, /usr/bin/ffserver, and /usr/bin/qt-faststart.):
cdgit clone git://git.videolan.org/ffmpegcd ffmpeg./configure --enable-gpl --enable-libfaac --enable-libmp3lame --enable-libopencore-amrnb --enable-libopencore-amrwb --enable-libtheora --enable-libvorbis --enable-libx264
UbuntuGuide Part2 - http://ubuntuguide.org/index.php?title=UbuntuGuide_Part2&...
30 of 177 08/10/2013 09:04 AM

makesudo checkinstall --pkgname=ffmpeg --pkgversion="5:$(date +%Y%m%d%H%M)-git" --backup=no --deldoc=yes --fstrans=no --defaulthash x264 ffmpeg ffplay ffprobe
Note: Git uses port 9418 by default. Make sure the Git port is unblocked in your firewall. The second-to-last command willbuild a .deb package named something similar to /home/user/ffmpeg/ffmpeg_201109031233-git-1_i386.deb. The installedpackage can be removed later, if desired, using dpkg -r ffmpeg.
Some programs may expect ffmpeg to be in /usr/bin, so create a symbolic link:
sudo ln -s /home/user/ffmpeg/ffmpeg /usr/bin/ffmpeg
Add a webcam to a screencast
To show your webcam in your screencast, install one of three webcam applications:
Cheese (http://projects.gnome.org/cheese/) (sudo apt-get install cheese) is a Gnome-based webcam application with manyoptions and a re-sizable window.Kamoso (http://kde-apps.org/content/show.php/Kamoso?content=111750) (sudo apt-get install kamoso) is a KDE-basedwebcam application.Xawtv (http://git.linuxtv.org/xawtv4.git) (sudo apt-get install xawtv) is a Gtk-based application. Because the Xawtv windowcan be arranged so that only the webcam image is shown, it is my favorite webcam display for screencasts. (Click on "X" inthe window bar -> Advanced -> No Border (ticked) .)
Any of these applications can be used in (K)Ubuntu.
Start the desired application until your webcam is showing. Position the webcam image on your desktop as desired. Now start yourscreencapture and the webcam window will be included.
Record microphone and speaker output simultaneously
This example assumes Pulse Audio is installed on the system. This was tested on Natty.
Make sure PulseAudio Volume Control is installed:
sudo apt-get install pavucontrol
Start FFMPEG/x11grab as above:
ffmpeg -f alsa -ac 2 -ab 192k -i pulse -f x11grab -s $(xwininfo -root | awk '/geometry/ {print $2}') -r 30 -i :0.0 -acodec pcm_s16le -vcodec libx264 -vpre lossless_ultraf
Start an audio application (such as Audacious, Amarok, Rhythmbox, etc.) so that some audio output is playing through thespeakers.
Start PulseAudio Volume Control:
Menu -> Multimedia -> PulseAudio Volume Control
Select as an input "Monitor of Internal Audio Analog Stereo":PulseAudio Volume Control -> Input Devices -> Show: All Input Devices-> Make sure Monitor of Internal Audio Analog Stereo is not muted (click on speaker icon)
Make sure your microphone is plugged in.
Select as an input "Internal Audio Analog Stereo: Analog Microphone":PulseAudio Volume Control -> Input Devices -> Show: All Input Devices-> Make sure "Monitor of Internal Audio Analog Stereo: Port: Analog Microphone " is not muted (click on speaker icon)
Make sure the "Internal Audio Analog Stereo" device is selected for the ALSA plug-in [ffmpeg] application:
PulseAudio Volume Control -> Recording -> ALSA plug-in [ffmpeg]: ALSA capture from: Internal Audio Analog Stereo
recordMyDesktop
gtk-recordMyDesktop -- a one-step solution. Audio can be captured as well, including through the microphone (whichever inputsare enabled in the mixer/pulse audio system will be captured). Even a virtual machine like VirtualBox can send its audio throughthe Pulse Audio system, so it can also be captured. The recorded .ogv file can then be converted to a Flash video (.flv) with:
mencoder -ovc lavc -ofps 30 -oac mp3lame -af volnorm=1:0.5 your_file.ogv -o your_file.flv
UbuntuGuide Part2 - http://ubuntuguide.org/index.php?title=UbuntuGuide_Part2&...
31 of 177 08/10/2013 09:04 AM

or to an .avi (for use with Avidemux, for example):
mencoder -ovc lavc -ofps 30 -oac mp3lame -af volnorm=1:0.5 your_file.ogv -o your_file.avi
If mencoder is not installed:
sudo apt-get install mencoder
xvidcap with Audacity
Screencasts in Ubuntu (http://screencasts.ubuntu.com/Creating_Screencasts) -- record video from a virtual (QEMU) desktop usingxvidcap, then record audio using Audacity, then put them together using Avidemux. Any virtual desktop (Virtualbox, VMWare)could be used instead of QEMU.
Using VNC to capture another computer's screen
Hybrid Linux/Windows method (http://www.youtube.com/watch?v=NwNZDeB1k8s) -- a YouTube video using two computersconnected by VNC.
Troubleshooting tips
A method that has worked for me in the past is the method described using Avidemux. I use either gtk-recordMyDesktop or xvidcap tocapture the video, as above (saving as an .avi). The problem for me is that Avidemux is rather particular about the audio formats it willaccept. I have found that it will not accept many mp3 files (depending on the codec originally used to create the mp3 file). However, Ihave found that if I import any mp3 file into Audacity and then re-export it as an mp3, Audacity will re-encode it with a codec(libmp3lame) that Avidemux likes.
I can therefore combine the .avi video with the .mp3 audio (created by Audacity) using Avidemux.
Screencasts in Windows
Some users will run (K)Ubuntu in a virtual machine (VirtualBox, VMWare, QEMU) in Windows. For those users who wish to record ascreencast, there are two good open source screen recording utilities:
CamStudio (http://camstudio.org/) -- works similarly to gtk-recordMyDesktop, with capabilities of converting to Flash videos (.flvand .swf). Records audio and video with options for annotation and other effects.
Wink (http://www.debugmode.com/wink/) -- essentially a screen capture, it is good for animations with each frame individuallyconstructed. It can output to a video file, including Flash videos.
Examples
Exercise: Slideshow with audio track
This may seem a bit cumbersome, but it works for me. If you have a better method please add it! (Note: I now use the FFMPEG withx11grab method at the top of this page. This method below was how I originally did it.)
Gwenview is installed by default in Kubuntu. I then install Avidemux, Audacity, gtk-recordMyDesktop, mencoder, ffmpeg, andkubuntu-restricted-extras.
Start gtk-recordMyDesktop but do not use the sound recording portion (leave the Sound Quality box unticked). I find thatgtk-recordMyDesktop audio recording is choppy and therefore less than desirable for me (even on my dual-core 64-bit systemwith 3 Gb RAM).
Start Gwenview and find the folder with your pics that will be made into a slideshow. Start gtk-recordMyDesktop recording andthe start the slideshow (Gwenview -> View - Start Slideshow). Record until all the slides have displayed. Then stopgtk-recordMyDesktop recording. The file will be saved as an .ogv file (such as MyRecordedFile.ogv).
Convert the .ogv file to an .avi file:
mencoder -ovc lavc -ofps 30 -oac mp3lame -af volnorm=1:0.5 MyRecordedFile.ogv -o MyRecordedFile.avi
Create your soundtrack from mp3's or recorded files using Audacity.
If you wish to join several mp3 files into a single mp3, you can concatenate them:
cat File1.mp3 File2.mp3 File3.mp3 > CombinedFile.mp3
UbuntuGuide Part2 - http://ubuntuguide.org/index.php?title=UbuntuGuide_Part2&...
32 of 177 08/10/2013 09:04 AM
Import the mp3 file into Audacity and edit as desired. Export the resulting edited file into a new mp3 file (such asMyAudacitySoundtrackFile.mp3). Even if you make no edits, you should re-export every mp3 using Audacity because Avidemux doesn'talways recognize the codecs originally used to create many mp3s (but it always recognizes the mp3s exported by Audacity).
Open Avidemux. Open your video file (Avidemux -> File -> Open -> MyRecordedFile.avi).
If you wish to trim the file, move the A and B markers to the beginning and end of the desired segment.
Add the soundtrack you created with Audacity. (Avidemux -> Audio -> Main Track ... -> Audio Source: External MP3 -> ExternalFile: MyAudacitySoundtrackFile.mp3)
Save the file with the new soundtrack. (Avidemux -> File -> Save -> Save Video... -> MyNewCombinedFile.avi)
This file can be uploaded directly to YouTub or other sites, or you can convert it into a Flash video:
mencoder -ovc lavc -ofps 30 -oac mp3lame -af volnorm=1:0.5 MyNewCombinedFile.avi -o MyNewCombinedFile.flv
Conversion / Editing
See Video conversion.
Netflix
Netflix in Wine app
A (Windows-based) Netflix app (32-bit version) has been modified and bundled to work in the Wine environment. It is available asa package from a private (non-approved) repository here (https://launchpad.net/~ehoover/+archive/compholio) .
To run the app will require a 32-bit operating system, which on a 64-bit system usually requires installing ia32-libs at theminimum (and possibly ia32-libs-multiarch):
sudo apt-get install ia32-libs ia32-libs-multiarch
Then install the Netflix-desktop:
sudo apt-add-repository ppa:ehoover/compholiosudo apt-get updatesudo apt-get install netflix-desktop
The package installs the Microsoft core fonts (ttf-mscorefonts-installer). During this part of the installation a prompt to accept theMicrosoft EULA will appear. Use the "TAB" key to maneuver to the "Ok" button and then press "Enter" to accept. The installationshould then continue to completion.
The package creates a menu item for the Netflix Desktop, or the app can be started from a terminal with the command:
netflix-desktop
The Netflix app starts in full screen mode. You can exit out of the app completely by pressing ALT+F4 or by using the pop-up "X."You can also press F11 to exit out of full screen mode.
I created and dedicated a new partition for the Netflix installation only. I installed a new 32-bit version of (K)Ubuntu into thispartition and then installed the Netflix / modified Wine bundle in this new partition's OS. In total, about 3.75 Gb of space wasused for this minimum combination. I made the entire partition 10 Gb (in order to allow for caching and other temp data thatmight be required). This barebones setup plays Netflix quite nicely. Netflix can then be made to start automatically at bootup ofthis partition's OS by adding the netflix-desktop to the Kubuntu autostart menu:
Settings -> System Settings -> Startup and Shutdown -> Autostart ->-> Add Program -> Multimedia -> Netflix Desktop
I also turn off the screensaver and prevent screen-dimming:Menu -> Settings -> System Settings -> Display and Monitor -> Screen Saver
->Start automatically after... (unticked) -> ApplyMenu -> Settings -> System Settings -> Power Management -> Energy Saving Settings
-> Dim Display (unticked) -> Screen Energy Saving (unticked) -> Apply
Netflix Android App
UbuntuGuide Part2 - http://ubuntuguide.org/index.php?title=UbuntuGuide_Part2&...
33 of 177 08/10/2013 09:04 AM

A Netflix app for the Android market is available here (https://market.android.com/details?id=com.netflix.mediaclient) . It must beinstalled in an Android environment but is not fully functional in the current Android emulators.
Streamripper
Streamripper (http://streamripper.sourceforge.net/) is a standalone command-line utility to record online audio streams(primarily from Shoutcast). Install:
sudo apt-get install streamripper
Read the instructions from the command line:
man streamripper
Find out the URL (e.g. http://208.85.242.52:8028) of the streaming broadcast you wish to record (either from Shoutcast(http://classic.shoutcast.com) or through Amarok, for example). Make sure your firewall is open for the relevant port (in theexample port 8028).
Start Streamripper, saving the files to your chosen directory (e.g. /home/user/recordedmusic):
streamripper URL -d /home/user/recordedmusic
or, in the example:
streamripper http://208.85.242.52:8028 -d /home/user/recordedmusic
The most common problem with captures is the break point between songs. It may be necessary to adjust the breakpoint.
Each of my songs contain about 2 seconds (2000 milliseconds) of the previous song. How can I fix this?
streamripper URL -d /home/user/recordedmusic --xs_offset=2000
Each of my songs contain about 2 seconds (2000 milliseconds) of the next song. How can I fix this?
streamripper URL -d /home/user/recordedmusic --xs_offset=-2000
Each of my songs contain between 5 and 10 seconds of the previous song, but it depends on the song. How can I include allof this zone within both songs, and edit them later?
streamripper URL -d /home/user/recordedmusic --xs_offset=7500 --xs_padding=2500:2500
Use Audacity to edit the ripped audio file.
Troubleshooting
Make sure to read all the instructions:
man streamripper
If a song occurs twice in a stream, the default behaviour is to write both songs, numbering the duplicates (the -o version option).If you wish to instead only keep the largest copy of a song (assuming the smaller copies are truncated in some way by the breakpoint algorithm), then use the -o larger option. This will overwrite the original copy of the song only if the new copy is larger.Example:
streamripper http://208.85.242.52:8028 -o larger -d /home/user/recordedmusic --xs_offset=2000 --xs_padding=3000:3000
Streampripper identifies itself as "Streamripper/1.x" in the http request. If you wish some privacy and to specify a different useragent, use the -u useragent option. For example:
streamripper URL -d /home/user/recordedmusic -u SimplePlayer/1.x -o larger --xs_offset=2000 --xs_padding=3000:3000
UbuntuGuide Part2 - http://ubuntuguide.org/index.php?title=UbuntuGuide_Part2&...
34 of 177 08/10/2013 09:04 AM

Video ConversionThis guide does not advocate the illegal duplication of copyrighted content. However, fewer and fewer devices use DVDs any longer,and a large amount of video content is distributed on DVDs. It becomes necessary to convert video content into formats that can beviewed on devices that no longer used DVDs. Furthermore, online content is often in a format that is not universally playable and thisalso requires conversion. Trying to select and encode a video into a format which your device accepts is not always a straightforwardtask.
Introduction
There are lots of video and audio codecs and lots of methods and preferences for converting between formats. These are only somebasic examples. A good deal of trial and error is often required for successful video conversion.
Mencoder and FFMPEG are the two packages that are the workhorses of video conversion. Of these, mencoder is faster andgenerally gives better results.
Handbrake uses a streaming algorithm and FFMPEG to "rip" DVDs and can work with many different encryption methods. It usesthe (superior, open source) .MKV (http://en.wikipedia.org/wiki/Matroska) container only, however (which is not supported bymany devices). It also does not support XVID (http://en.wikipedia.org/wiki/Xvid) (and uses either X264/H.264(http://en.wikipedia.org/wiki/X264) or MP4 (http://en.wikipedia.org/wiki/MPEG-4_Part_14) video codecs) and therefore its videooutput is also not universally accepted by a wide range of devices. As these standards become more widely accepted, however,this will be an invaluable encoding tool. On rare occasions I rip a video with Handbrake (to .MKV and H.264/MP3) and thenconvert it to .AVI (XVID/MP3) in a second step (using mencoder).
When I originally wrote these articles, .MKV was accommodated by only a handful of DVD players. A recent survey of new DVDplayers shows that most (including widely available inexpensive DVD players) will now play files in .MKV format. In fact, it isnow difficult to find DVD players that will still play .AVI with XVID / DivX video. However, over the years I have accumulated avery large collection of .AVI / XVID / MP3 videos. In 2013, the only DVD player I could find that would play them all was the PhilipsDVP3680/F7 DVD Player with HD Upconversion (which I found at Best Buy for $40). I highly recommend this player if you findyourself with a large collection of .AVI / XVID video files.
Mencoder
Mencoder (http://www.mplayerhq.hu/DOCS/HTML/en/mencoder.html) is part of the MPlayer (http://www.mplayerhq.hu/DOCS/HTML/en/index.html) set of libraries (that also uses several of the FFMPEG libraries) for audio/visual conversion. If it is not installed on yoursystem, install it:
sudo apt-get install mencoder
Usage instructions can be found from the command-line (man mencoder) or here (http://linux.die.net/man/1/mencoder) .
MP4 with AAC audio to AVI with Xvid / MP3
The AAC audio codec (http://en.wikipedia.org/wiki/Advanced_Audio_Coding#Licensing_and_patents) is not compatible with manyDVD players and devices due to licensing restrictions, whereas the MP3 audio codec is nearly universally accepted. Xvid is theopen source version of the DivX video codec and is accepted by a very large number of DVD players and other devices (even olderones, especially those displaying the DivX logo).
The .AVI (http://en.wikipedia.org/wiki/Audio_Video_Interleave) container only allows a constant bitrate (http://en.wikipedia.org/wiki/Constant_bitrate) , so the MP3 audio must be encoded at CBR. If the AAC is 5.1 (http://en.wikipedia.org/wiki/5.1_surround_sound) , it will be downcoded to stereo for MP3.
This example is a two-pass technique that allows the file size to be specified and quality optimized for that filesize (using theinformation generated in the first pass). In this example, a 700 MB file is desired (and is specified by the negative value).
mencoder <input.mp4> -ovc xvid -oac mp3lame -lameopts cbr:br=128 -xvidencopts pass=1 -o /dev/nullmencoder <input.mp4> -ovc xvid -oac mp3lame -lameopts cbr:br=128 -xvidencopts pass=2:bitrate=-700000 -o <output.avi>
Remove MKV subtitles and convert to AVI (XVID/MP3)
Mastroska container (.MKV (http://en.wikipedia.org/wiki/Matroska) ) video files can have multiple subtitles included. In the defaultconversion from an .MKV container format to an .AVI (http://en.wikipedia.org/wiki/Audio_Video_Interleave) container format, thedefault subtitle file of the .MKV container is automatically hardcoded into the converted .AVI file, which may be undesirable. Toovercome this behaviour (so that the converted .AVI has no subtitles), use the -sid 999 option:
mencoder <input.mkv> -sid 999 -ovc xvid -oac mp3lame -lameopts cbr:br=192 -xvidencopts pass=1 -o /dev/null
UbuntuGuide Part2 - http://ubuntuguide.org/index.php?title=UbuntuGuide_Part2&...
35 of 177 08/10/2013 09:04 AM

mencoder <input.mkv> -sid 999 -ovc xvid -oac mp3lame -lameopts cbr:br=192 -xvidencopts pass=2:bitrate=-1400000 -o <output.avi>
To hardcode one of the subtitle tracks onto the .AVI video from the .MKV video, choose the subtrack ID, such as -sid 0 or -sid 1.
If using NTFS and the error
> Too many audio packets in the buffer: (4096 in 837540 bytes).> Maybe you are playing a non-interleaved stream/file or the codec> failed? For AVI files, try to force non-interleaved mode with the> -ni option.
appears, then add these options:
-mc 0 -ofps 24000/1001 -noskip
DVD to AVI with Xvid / MP3
See the mencoder documentation (http://www.mplayerhq.hu/DOCS/HTML/en/menc-feat-dvd-mpeg4.html) .Extract a video (in the .vob format) from a DVD to a file with an .AVI (http://en.wikipedia.org/wiki/Audio_Video_Interleave)container and XVID (http://en.wikipedia.org/wiki/Xvid) /DivX video and .MP3 (http://en.wikipedia.org/wiki/LAME) audio using this(2-pass conversion) command:
mencoder dvd://1 -vobsub 999 -ovc xvid -oac mp3lame -lameopts cbr:br=128 -xvidencopts pass=1 -o /dev/nullmencoder dvd://1 -vobsub 999 -ovc xvid -oac mp3lame -lameopts cbr:br=128 -xvidencopts pass=2:bitrate=-700000 -o <output.avi>
where dvd://1 indicates the first track of the DVD.
If you are not sure which track contains the content you wish to extract to a file, one way to check this is to play the DVD with amedia player like VLC, examining the tracks on it:
VLC -> Media -> Open Disc... -> Play -> Playback -> Navigation
or from the command line install lsdvd (sudo apt-get install lsdvd) and use it:
lsdvd -v -t 1 /dev/dvd
This will show a list of the title numbers (for the content tracks) on the DVD (and information about them). Use the title number for thecontent to be extracted.
Conversion is much faster when done from from a hard drive than from a physical DVD. It is possible to copy the VIDEO_TS andAUDIO_TS folders from the physical DVD to a folder on the hard drive. Once you have copied the contents of the DVD to a folder,add the -dvd-device /path/to/dvd_folder option to specify it (with the same options as above in addition to the new one):
mencoder dvd://1 -dvd-device /path/to/dvd_folder
Note the -vobsub 999 option to prevent subtitles from being automatically added. (If you wish to hardcode subtitles, use thenumber of the subtitle track, such as -sid 0 or -vobsubid 0 for the default subtitle track or -sid 1 or -vobsubid 1 for the next subtitletrack.)
Other options for video cropping and scaling can be used. See these hints (http://www.axllent.org/docs/video/mencoder_dvd_to_mpeg4) and these tips (http://savvyadmin.com/tag/xvid/) , as well as this section.
When better audio quality is desired, an audio bitrate (http://en.wikipedia.org/wiki/Bit_rate) more than 128 kb/sec can be used(e.g. br=160 or br=192), but this will give a larger file (or will decrease video quality if the filesize remains constant). cbr (constantbitrate) is used for mp3lame encoding in .AVI; I generally increase the volume of the video by 30% using the vol=3 option, as well.My final audio command therefore usually ends up: -oac mp3lame -lameopts cbr:br=128:vol=3.
If there are multiple audio tracks, the audio track can be selected with the -aid 1 (or similar) option, specifying the number of thedesired audio track. (Note: check audio track numbering carefully.) The English default audio track is usually -aid 128. To showinformation about the audio tracks, use
lsdvd -a -t 1 /dev/dvd
Although the bitrate=-700000 option specifies a target file size of 700000 (approx. 700 MB), this actually results in a file size ofnearly 800 MB. Specify a target filesize about 15% less than actually desired, therefore. For a target 700 Mb file, for example, I usebitrate=-620000.
For XVID there is an option to allow video seeking (for fast forwarding or rewinding) in 1 second increments (instead of the
UbuntuGuide Part2 - http://ubuntuguide.org/index.php?title=UbuntuGuide_Part2&...
36 of 177 08/10/2013 09:04 AM

default 10 second increments): -xvidencopts max_key_interval=25 (seek every 25 frames instead of the default 250 frames). Thiswould be included as part of a more complex option string, such as -xvidencopts pass=2:max_key_interval=25:bitrate=-620000.
In order to play the converted .AVI file on my older DVD players and televisions (and avoid significant motion artifacts andpixelation), I find that I must use deinterlacing. Only two interlacing methods have worked well for me: -vf pp=lb or -vf yadif=0.There are many methods of deinterlacing for mencoder, however (see here (http://guru.multimedia.cx/deinterlacing-filters/) andhere (http://www.mplayerhq.hu/DOCS/HTML/en/menc-feat-telecine.html) , for example). Deinterlacing may not be necessary foryour needs (when used for archival purposes only, for example, or if viewing files with media players (such as VLC) that alreadyhave built-in deinterlacing capabilities). Often recommended when ripping NTSC-format movies (progressive or telecined) is toinclude the option -vf pullup,softskip,harddup, which must be used with a deinterlacing filter, such as -vfpullup,softskip,pp=lb,harddup (or -vf pullup,softskip,yadif=0,harddup). The order of the telecine/progressive option, thedeinterlacing option, and any cropping or scaling options is very specific -- read the mencoder documentation(http://www.mplayerhq.hu/DOCS/HTML/en/menc-feat-telecine.html#menc-feat-telecine-encode) carefully when mixing theseoptions. Specifically, cropping and scaling (when used) should be done after the telecine/progressive/deinterlacing options butbefore the frame duplication option, e.g. -vf pullup,softskip,pp=lb,crop=720:416:0:80,scale=704:304,harddup.
Note: You will need libdvdcss2 installed on your system to access DVD data. If your DVD has encryption that is not able to bedecrypted by libdvdcss, then consider using Handbrake, which uses a streaming algorithm to "rip" DVDs.
This is the 2-pass command I end up using most often (with 4:3 NTSC videos):
mencoder dvd://1 -dvd-device /path/to/dvd_folder -vf pullup,softskip,pp=lb,harddup -vobsub 999 -aid 128 -ovc xvid -oac mp3lame -lameopts cbr:br=128:vol=3 -xvidencopts pass=1 -o /mencoder dvd://1 -dvd-device /path/to/dvd_folder -vf pullup,softskip,pp=lb,harddup -vobsub 999 -aid 128 -ovc xvid -oac mp3lame -lameopts cbr:br=128:vol=3 -xvidencopts pass=2:max_
This is the 2-pass command I end up using most often (with 16:9 NTSC videos):
mencoder dvd://1 -dvd-device /path/to/dvd_folder -vf pullup,softskip,pp=lb,scale=648:364,harddup -vobsub 999 -aid 128 -ovc xvid -oac mp3lame -lameopts cbr:br=128:vol=3 -xvidencopmencoder dvd://1 -dvd-device /path/to/dvd_folder -vf pullup,softskip,pp=lb,scale=648:364,harddup -vobsub 999 -aid 128 -ovc xvid -oac mp3lame -lameopts cbr:br=128:vol=3 -xvidencop
The scale option is set so that I can play the video on analogue televisions with overscan (I still have a few of those). However, analternative is to use scale=720:406 for use on most widescreen TVs.
Using k9copy as a conversion front-end
k9copy is a good front-end for mencoder (as well as ffmpeg).To add an option to encode to XVID from an NTSC DVD (when using mencoder within k9copy), I add the necessary options to theVideo codecs section:
k9copy -> Configure k9copy -> Encoders -> mencoder -> Add -> label: XVID from NTSC -> first pass ->
-ovc xvid -xvidencopts bitrate=$VIDBR:turbo:pass=$PASS:aspect=$ASPECT -vf pullup,softskip,pp=lb,crop=$CROPWIDTH:$CROPHEIGHT:$CROPLEFT:$CROPTOP,scale=$WIDTH:$HEIGHT,dsize=
The same command is entered for the "second pass" option as well. For the "one pass" option enter:
-ovc xvid -xvidencopts bitrate=$VIDBR:aspect=$ASPECT -vf pullup,softskip,pp=lb,crop=$CROPWIDTH:$CROPHEIGHT:$CROPLEFT:$CROPTOP,scale=$WIDTH:$HEIGHT,dsize=$ASPECT,harddup
To then use this new Video codec option, make sure it is selected:
k9copy -> Configure k9copy -> MPEG-4 -> Video -> Codec -> XVID from NTSC -> 2 pass (ticked) -> Apply
At the same time, the MP3 (lame) Audio codec option can be selected:
k9copy -> Configure k9copy -> MPEG-4 -> Audio -> Codec -> mp3 (lame) -> OK
Now when the Output: MPEG-4 encoding is selected from the main screen, this "XVID from NTSC" Video encoding option will beused.
Note that the -vfpullup,softskip,pp=lb,crop=$CROPWIDTH:$CROPHEIGHT:$CROPLEFT:$CROPTOP,scale=$WIDTH:$HEIGHT,dsize=$ASPECT,harddupoption can be used with any Video codec, not just XVID.
AVI to MPG
The MPG format is sometimes useful for creating DVDs (using the MPEG-1 (http://en.wikipedia.org/wiki/MPEG-1) or MPEG-2(http://en.wikipedia.org/wiki/MPEG-2) video codec, which can be then used for vob files using QDVDAuthor or ToVid). If the audiocodec of the AVI file is already AC3 or MP3, it usually can be copied. This example is take from the MPlayer/Mencoderdocumentation (http://www.mplayerhq.hu/DOCS/HTML/en/menc-feat-mpeg.html) . Example:
UbuntuGuide Part2 - http://ubuntuguide.org/index.php?title=UbuntuGuide_Part2&...
37 of 177 08/10/2013 09:04 AM

mencoder <input.avi> -of mpeg -ovc lavc -lavcopts vcodec=mpeg1video -oac copy -o <output.mpg>
Increase volume
Use the -af volume=3:0 option, where the first number (3 in the example) is the number of decibels to increment the volume (a 3db increment doubles the volume), and the second number is 0 for hard-clipping and 1 to allow software-based clipping (toprevent oversaturation when the sound becomes too loud).
For example, if I want to double the sound volume of my .AVI video:
mencoder <input.avi> -ovc copy -oac mp3lame -lameopts cbr:br=128 -af volume=3:0 -o <output.avi>
This can also be done when encoding to the mp3lame audio codec by adding an option to the mp3lame options:
mencoder <input.avi> -ovc copy -oac mp3lame -lameopts cbr:br=128:vol=3 -o <output.avi>
where vol=3 can be set to any value between -10 and 10. I use vol=3 to increase the volume 30%. (This method works best for me.)
Add subtitles to video
.srt (http://en.wikipedia.org/wiki/SubRip) subtitle files are essentially text files with time stamps. They are meant to be used withdigital video files (such as .AVI files) and are different from the image-based .idx / .sub subtitle files (vobsub) used with the .vob(http://en.wikipedia.org/wiki/VOB) format found on commercial DVDs.
Using mencoder:
mencoder -ovc [codec] [codec opts] -oac copy -sub [sub file.srt] -subfont-text-scale [3 normally]
In the example above, this would be:
mencoder <input.mp4> -ovc xvid -oac mp3lame -lameopts cbr:br=128 -xvidencopts pass=2:bitrate=-700000 -sub <subtitles.srt> -subfont-text-scale 3 -o <output.avi>
If the subtitles are too low or too high on the screen, they can be positioned so that the top edge of the subtitles are at a differentposition using the -subpos 95 option, where the number specifies the percentage from the top of the screen where the subtitleswill be placed. For example, if using the value 95, the top of the subtitles will be placed 95% down the screen. The full commandwould then be, for example:
mencoder <input.mp4> -ovc xvid -oac mp3lame -lameopts cbr:br=128 -xvidencopts pass=2:bitrate=-700000 -sub <subtitles.srt> -subfont-text-scale 3 -subpos 95 -o <output.avi>
Full subtitle options can be found in the manual (available from the command-line terminal): man mencoder
Note: When adding subtitles to an .AVI video, you must transcode it completely. It is not sufficient to merely add the subtitle trackas listed above -- the entire video must be re-transcoded. So, for example:
mencoder <input.avi> -ovc xvid -oac mp3lame -lameopts cbr:br=128 -xvidencopts pass=1 -o /dev/nullmencoder <input.avi> -ovc xvid -oac mp3lame -lameopts cbr:br=128 -xvidencopts pass=2:bitrate=-1400000 -sub <subtitles.srt> -subfont-text-scale 3 -o <output.avi>
Trim a video
Using mencoder:
mencoder <input.avi> -ovc copy -oac mp3lame -ss 01:57:12 -endpos 00:04:08 -o <output.avi>
where -ss indicates the start position of the clip (hh:mm:ss) and -endpos indicates how long the clip should be. (I use mp3lame for theaudio codec because YouTube accepts that.)
Resize a video
Using mencoder:
mencoder <input.avi> -ovc xvid -vf scale=320:240 -oac mp3lame -lameopts cbr:br=128 -xvidencopts pass=2:bitrate=-1400000 -o <output.avi>
where -vf scale=320x240 indicates that the resulting video should be of that size. The position of the suboption in the command stringis important.
UbuntuGuide Part2 - http://ubuntuguide.org/index.php?title=UbuntuGuide_Part2&...
38 of 177 08/10/2013 09:04 AM
HDTV (http://en.wikipedia.org/wiki/High-definition_television) resolution is usually 1920 x 1080 ("1080p") or 1280 x 720 ("720p").A standard definition (http://en.wikipedia.org/wiki/Standard-definition_television) widescreen TV has a maximum height of"480p" (usually 853 x 480 but sometimes 720 x 406). The standard width:height aspect ratio (http://en.wikipedia.org/wiki/Aspect_ratio_%28image%29) for cinema is 1.85:1, whereas the average aspect ratio for widescreen movies distributed fordisplay on television is 16:9 (1.78:1). When resizing a video, it is good to know the original dimensions of the video and maintainthe width to height aspect ratio in the chosen scale.
Example: A video is distributed as 1280 x 692 (which has an aspect ratio of 1.85:1). The device (a low resolution television)on which it is to be displayed has a maximum width of 720. The desired resolution would then be 720 x 390 to keep theaspect ratio at approximately 1.85:1. The option would then be -vf scale=720:390. An analog television would require 10%overscan (http://en.wikipedia.org/wiki/Overscan) , making the maximum width 648. To keep an aspect ratio of 1.85:1 wouldrequire a resolution of 648 x 350, or a scale option of -vf scale=648:350.
Example: An HQ video is distributed as 1920 x 1080 (which has an aspect ratio of 16:9). It is desired to view the video on atelevision with a maximum width of 720p, which would require a final resolution of 720 x 406 to maintain an aspect ratio of16:9. The scale option would be -vf scale=720:406.
Example: An HQ video is distributed as 1920 x 1080 (which has an aspect ratio of 16:9). It is desired to view the video on ananalogue television with 10% overscan (http://en.wikipedia.org/wiki/Overscan) , which would require a final resolution of648 x 364 to maintain an aspect ratio of 16:9. The scale option would be -vf scale=648:364.
"Standard" definition (http://en.wikipedia.org/wiki/Standard-definition_television) analog television (http://en.wikipedia.org/wiki/Analog_television) has a 4:3 ratio, for which a scale of 640:480 (-vf scale=640:480) is generally preferable.
Cropping and Scaling
The -vf filters operate on the video in the order they are loaded. The crop filter uses width:height:x-offset:y-offset. (The defaultx-offset and y-offset is centered, so these are optional.) For example, to first crop the 688x464 region of the picture with upper-leftcorner at (x=12,y=4) and then scale the result down to 640x464, the following chain is used:
-vf crop=688:464:12:4,scale=640:464
If I want to remove subtitles (-sid 999), crop out black bars and extraneous noise at the top/bottom of an .mkv video, scale it, andconvert to an .avi format, an example command might be:
mencoder <input.mkv> -sid 999 -ovc xvid -oac mp3lame -oac mp3lame -lameopts cbr:br=128 -xvidencopts pass=1:bitrate=-625000 -vf crop=1280:688,scale=720:406 -o <output.avi>
Convert to .MP3 audio file
To use Mplayer to extract audio from an .avi file to an ,mp3 .wav file:
mencoder <input.avi> -of rawaudio -oac mp3lame -ovc copy -o <output.mp3>
This can be combined with start markers (-ss hh:mm:ss) and a length marker (-endpos hh:mm:ss) to extract only a segmentof audio from an .avi file. In the following example, only audio from starting position at 3 minutes 45 seconds with a lengthof 2 minutes 4 seconds will be extracted:
mencoder <input.avi> -ss 00:03:45 -endpos 00:02:04 -of rawaudio -oac mp3lame -ovc copy -o <output.mp3>
(Under construction) To use Mplayer to extract audio to a pcm .wav file:
mplayer <input.avi> -vc null -oa pcm -aofile -ss 1441.4 -endpos 260.1 <output.wav>
Then convert the .wav file to .mp3 with your favourite converter (such as Audacity or SoundConverter).
I often use FFMPEG and find it to be easier for this task.
Change audio track of video
In general, Avidemux is a good video editor for most needs, including muxing and demuxing video and audio.
For a quick method to change the audio for a video, I like to merely remove the audio from the original video file using the-nosound option, for example:
mencoder <input.avi> -ovc copy -nosound -o <outputnosound.avi>
UbuntuGuide Part2 - http://ubuntuguide.org/index.php?title=UbuntuGuide_Part2&...
39 of 177 08/10/2013 09:04 AM
Then, I add a new audio file as the audio track to the video using the -audiofile option. For example, if I now want to add an .mp3audio track named <newaudio.mp3>, I would use the command:
mencoder <outputnosound.avi> -ovc copy -oac mp3lame -audiofile <newaudio.mp3> -o <output.avi>
FFMPEG
FFMPEG (http://ffmpeg.org/) is the swiss-army knife of video and audio format conversion. It succeeds when no other program can. Itis free and open source. If it not yet installed on your system as part of another package (it is used by many video/audio editors), theninstall it:
sudo apt-get install ffmpeg
To convert many different formats, read the FFMPEG documentation (http://ffmpeg.mplayerhq.hu/ffmpeg-doc.html) . Also seethis tutorial (http://howto-pages.org/ffmpeg/) .
Flash video (.flv) to MPG-2 using FFMPEG
To convert a saved Flash video (.flv) to an MPEG-2 format playable on a DVD, convert:
ffmpeg -i samplevideo.flv -target ntsc-dvd samplevideo.mpg
Then use K3b (or Gnomebaker) to write the mpg file to a New DVD Data Project.
For PAL use -target pal-dvd. For widescreen, use -target film-dvd. For other conversion tips, see this forum(http://ubuntuforums.org/archive/index.php/t-1006250.html) . (Note: Most Flash video has very low resolution, with a screensize of 360x270, for example. You may see a slight diminishment in resolution if you wish to convert it to 720x480 (which isthe NTSC standard size) or other screen size. You can keep the original screen size and resolution by omitting the -targetparameter.) If your original file is 16:9 widescreen and you desire a 4:3 letterbox output for playing on an overscanned TV,you may need to pad the file so that the widescreen is not compressed (see this forum (http://ubuntuforums.org/showthread.php?t=1010648) ):
ffmpeg -i samplevideo.flv -target ntsc-dvd -s 648x364 -padleft 36 -padright 36 -padtop 58 -padbottom 58 samplevideo.mpg
You can also use the WinFF GUI and add the command (as above) as a "Preset," for subsequent use. For example:
Video converter (WinFF) -> Edit -> Presets ->Preset Name: Letterbox -> Preset Label: 16:9 Widescreen to 4:3 LetterboxPreset command: -target ntsc-dvd -s 648x364 -padleft 36 -padright 36 -padtop 58 -padbottom 58Ouput file extension: mpg -> Category: DVD
-> Add/Update -> Save
To convert to MPEG-4 (mp4) files, use
ffmpeg -i samplevideo.flv outputvideo.mp4
FFMPEG requires that multiple restricted extra codecs be installed. This can be done in a single easy step from the command-lineTerminal:
sudo apt-get install kubuntu-restricted-extras
or
sudo apt-get install ubuntu-restricted-extras
Convert to .MP3 audio file using FFMPEG
Convert Flash video audio to mp3
Once you have downloaded flash video content (.flv) from the Internet (using the Video Download Helper plug-in for Firefox, forexample), the audio component can be converted to an mp3 using this command (from the command line Terminal). (This willwork for any type of video file, not just Flash.)
ffmpeg -i nameofvideoclip.flv -ab 160k -ac 2 -ar 44100 -vn nameoffile.mp3
UbuntuGuide Part2 - http://ubuntuguide.org/index.php?title=UbuntuGuide_Part2&...
40 of 177 08/10/2013 09:04 AM
where -i indicates the input, -ab indicates the bit rate (in this example 160kb/sec), -vn means no video ouput, -ac 2 means 2channels, -ar 44100 indicates the sampling frequency. See FFMPEG docs (http://ffmpeg.mplayerhq.hu/ffmpeg-doc.html#SEC11) formore info.
If I only want a segment of the video to be converted, I can use the time markers:
ffmpeg -i nameofvideoclip.flv -ss 00:00:09 -t 00:03:00 -ab 160k -ac 2 -ar 44100 -vn nameoffile.mp3
where -ss 00:00:09 indicates the point in the video (hh:mm:ss) at which to start conversion and -t 00:03:00 indicates the amount oftime (from the start point) to convert.
As long as FFMPEG is already installed, the Video DownloadHelper plug-in for Firefox already has an option to automaticallyconvert an online video (such as those found at YouTube) into an .MP3 file. (Settings are adjustable.) From the DownloadHelpericon in Firefox, highlight the video to convert, then
DownloadHelper icon -> Download and Convert -> Converter options: MP3
Edit/convert screencapture with FFMPEG
Note: This section under construction.
Note: I now recommend using mencoder for all video conversion techniques. It uses some of the ffmpeg libraries but is faster andgives more reliable and high-quality results.
This is only one example of a wide variety of techniques. Once I have a captured video, I want to convert it to XVID video (whichis the format my older DVD player accepts) and MP3 audio (mp3lame), which I will place in an AVI container (which my DVDplayer also accepts).
ffmpeg -i Punchcast1.avi -vcodec mpeg4 -vtag xvid -acodec libmp3lame -ss 00:00:09 -t 00:03:00 Punchcast2.avi
I will start conversion (-ss) at second 9 (to eliminate unimportant things at the beginning) and convert 3 minutes (-t) of video (00:03:00).
I happen to watch my screencasts on my old-fashioned 4:3 television. To do that, I make a letterboxed video:
ffmpeg -i Punchcast1.avi -vcodec mpeg4 -vtag xvid -ss 00:00:09 -t 00:03:00 -s 648x364 -padleft 36 -padright 36 -padtop 58 -padbottom 58 -acodec libmp3lame Punchcast3.avi
My laptop screen is 1366x768, which I reduce to a size of 648x364. My TV wants 720x480, so I pad the sides and top/bottom. Why not awidth of 720 initially? My older television has 10% overscan, which cuts off 10% of the video. I therefore use (at least) 10% padding onthe edges.
In newer versions of FFMPEG, the padding (and many other) options have changed. The proper command is now:
ffmpeg -i Punchcast1.avi -vcodec mpeg4 -vtag xvid -ss 00:00:09 -t 00:03:00 -s 648x364 -vf pad 720:480:36:58 -acodec libmp3lame Punchcast3.avi
ffmpeg movie=Punchcast1.avi:seek_point=9 -vcodec copy -acodec libmp3lame Punchcast1f.avi
WinFF (FFMPEG GUI)
WinFF (http://winff.org) is a free, GPL-licensed open source GUI frontend for FFMPEG. Install:
sudo apt-get install winff xterm
Run:
Menu -> Applications -> Sound & Video -> WinFF
VobSub2SRT (Convert subtitles from .sub/.idx to .srt)
VobSub2SRT (https://github.com/ruediger/VobSub2SRT) is a simple (GPLv3-licensed) command-line program to convert theimage-based .idx / .sub subtitle files (used with the .vob (http://en.wikipedia.org/wiki/VOB) format found on commercial DVDs)into text-based .srt (http://en.wikipedia.org/wiki/SubRip) text subtitle files by using OCR. It is based on code from the MPlayerproject, Tesseract as OCR software, and libavutil (part of the FFmpeg project). Install the (K)Ubuntu/Debian (.deb) package from aPPA repository:
sudo add-apt-repository ppa:ruediger-c-plusplus/vobsub2srtsudo apt-get updatesudo apt-get install vobsub2srt
UbuntuGuide Part2 - http://ubuntuguide.org/index.php?title=UbuntuGuide_Part2&...
41 of 177 08/10/2013 09:04 AM

Alternatively, you can download and build a version from source code.
Install dependencies:
sudo apt-get install pkg-config build-essential cmake libavutil-dev libtesseract-dev
For (K)Ubuntu 12.10 (Quantal) also install:
sudo apt-get install libtiff5-dev tesseract-ocr-eng
For (K)Ubuntu 12.04LTS (Precise) also install:
sudo apt-get install libtiff4-dev tesseract-ocr tesseract-ocr-eng
If you will be converting subtitles in languages other than English, you must install tesseract for any or all of thoselanguages as well:
sudo apt-get install tesseract-ocr-vie tesseract-ocr-deu tesseract-ocr-fra tesseract-ocr-itasudo apt-get install tesseract-ocr-nld tesseract-ocr-spa tesseract-ocr-por tesseract-ocr-deu-f
where vie is for Vietnamese, deu is for German, fra is for French, ita is for Italian, nld is for Dutch, spa is for Spanish, por isfor Portugeuse, and deu-f is for German Fraktur script. If you don't you will get an error of the type: Unable to loadunicharset file /usr/share/tesseract-ocr/tessdata/xxx.unicharset.
Download and unzip the VobSub2SRT .zip file into its own directory:
mkdir vobsub2srtcd vobsub2srtwget -O vobsub2srt-current.zip https://github.com/ruediger/VobSub2SRT/zipball/ca53a18108eb08d6e2b853643d8c6838e2489823unzip vobsub2srt-current.ziprm vobsub2srt-current.zip
This will create a subdirectory with the current version. For example, my version is vobsub2srt/ruediger-VobSub2SRT-ca53a18. Change into that directory then compile and install the program.
cd ruediger-VobSub2SRT-ca53a18./configuremakesudo make install
This should install the program vobsub2srt to /usr/local/bin. You can uninstall vobsub2srt with sudo make uninstall. You canbuild a *.deb package (Debian/Ubuntu) with make package. The package is created in the build directory.
Convert the .sub / .idx pair of subtitle files (named Filename.sub and Filename.idx) into a .srt subtitle file (named Filename.srt):
vobsub2srt Filename
where Filename is the file name of the subtitle files WITHOUT the extension (.sub / .idx).
If there are multiple languages in the .sub / .idx pair of subtitle files, you can select which language to convert (using the 2-letterISO 639-1 (http://en.wikipedia.org/wiki/ISO_639-1) language code, e.g. en, fr, de, it, es, pt, etc.):
vobsub2srt --lang en Filename
Edit the .srt subtitle file for OCR mistakes (use the gedit text editor instead of kate if using Ubuntu instead of Kubuntu):
kate Filename.srt
Join .MPG video segments
Individual video segments (MPEG-2, for example) can easily be joined:
cat samplevideo1.mpg samplevideo2.mpg samplevideo3.mpg > samplevideo123.mpg
You can then write the resulting MPEG-2 file to a DVD and play it in most DVD players.
UbuntuGuide Part2 - http://ubuntuguide.org/index.php?title=UbuntuGuide_Part2&...
42 of 177 08/10/2013 09:04 AM

Split a file into segments
Any file can be split (http://en.wikipedia.org/wiki/Split_%28Unix%29) into segments using the Linux command:
split -b 1440k my_big_file
which will split my_big_file into equal segments of size 1440 kb.
Create a commercial (.vob) format DVD
The audiovideo container of commercial DVDs uses the .vob format (http://en.wikipedia.org/wiki/VOB) . This container requireseither MPEG-1 or MPEG-2 video (.mpg) and either AC3 or MPEG-2 (.mp2) audio. Therefore, the first step in creating a DVD-videoin this format is to convert all audiovisual files (to be included on it) to .mpg files (with one of those video and audio formats),usually with the MPEG-PS (A+V) container. This can be done from the command-line terminal (using mencoder or ffmpeg) orfrom a GUI utility (such as Avidemux).
The GUI utility Avidemux is a GUI utility that has standardised settings for file conversion. Here (http://avidemux.org/admWiki/doku.php?id=tutorial:converting_to_dvd) is the Avidemux tutorial for conversion to a DVD-video.
Open the file and allow the time map and Index to be rebuilt.It is best to convert a file (to be included on the DVD) to a format with MPEG-2 (avcodec) video, AC3 (lav) audio, and theMPEG-PS (A+V) container as an intermediate first. The MP2 audio format (the default for Avidemux in "Auto" mode)can also be used, and will result in a much smaller .mpg file then when using AC3 audio, but several of my very oldDVD players only recognise AC3 audio (so this has therefore become my personal preference).
The easiest method for doing this is to use the Avidemux Auto DVD wizard. (Avidemux -> Auto -> Optical Disc ->DVD). Select the appropriate souce and destination ratios. (My source videos are usually already in 16:9widescreen formats, and I want to make DVDs for my widescreen 16:9 TV. I therefore choose 16:9 for both the"Source Aspect Ratio" and the "Destination Aspect Ratio.") The Auto DVD Wizard uses MP2 audio by default, but Ipersonally like AC3 audio instead (the format usually used on "commercial" DVDs). I therefore change this usingthe Audio -> AC3 (lav) option.It is possible to customise (or initially set) the format options manually as well (see the Avidemux documentation).Select the Video (and make sure the aspect ratio is the one you desire in Video -> Configure -> Configuration: DVD-> Aspect Ratio: 16:9 ), Audio, and (container) Format options.
To be DVD compliant, the resolution must be352*480 or 720*480 or 704*480 for NTSC352*576 or 720*576 or 704*576 for PAL/SECAM
This is set automatically if using the Auto DVD wizard. If your original video does not already have the correctaspect ratio, you will have to use cropping, scaling, and/or black bar "Filter" options until one of the standardresolutions is achieved.
Save the file ( Avidemux -> File -> Save -> Save Video... -> myconvertedvideo.mpg ) to activate the conversion process. (Ifprompted whether to "Reuse the existing log file?" answer "No.")
Alternatively, mencoder can be used from the command-line to convert a file to the .mpg format.
Alternatively, FFMPEG can be used from the command-line to convert a file to the .mpg format. A simplified preset optionfor for conversion to both PAL and NTSC options is available.
Once all files to be included on the DVD-video have been converted to .mpg files, the utility dvdauthor can be used for conversionto .vob format (appropriate for writing to the DVD). While this utility can be used from the command-line, "authoring"(conversion) is more easily accomplished using one of several available GUI front-ends, which allow creation of menus for theDVD as well.
With Kubuntu I use KMediaFactory for simple projects. (QDVDAuthor, which is difficult to install in recent Kubuntuversions, is superior and more powerful. KMediaFactory, in contrast, is in the repositories and is adequate (and quick)for most purposes.
Rename the .mpg files (created with Avidemux or other method) carefully. The filename(s) becomes the Title(s)used by KMediaFactory for the video(s) on the DVD menu.Set up the DVD menu in KMediaFactory.
KMediaFactory -> Project -> Title -> MyDVDTitle (this will appear on the DVD Menu at the top)-> Type: DVD-NTSC -> Aspect: 16:9 -> Destination Folder /home/user/DVDs
Add the .mpg files to the DVD.KMediaFactory -> Media -> Add Video -> MyFirstVideofile.mpg -> VideoProperties: Aspect ratio: 16:9
-> Add Video -> MySecondVideofile.mpg -> VideoProperties: Aspect ratio: 16:9Choose the DVD Menu appearance.
KMediaFactory -> Template -> Preview 3Choose the output format. For this, I generally create a "DVD folder":
KMediaFactory -> Output -> DVD Folder
UbuntuGuide Part2 - http://ubuntuguide.org/index.php?title=UbuntuGuide_Part2&...
43 of 177 08/10/2013 09:04 AM

Start the conversion ("DVD authoring") process. If an error appears, the problem usually lies in a non-existent (orwrite-protected) folder having been specified when setting the "Title" options. Make sure the folder has beenspecified properly. KMediaFactory will then create the standard AUDIO_TS and VIDEO_TS folders in the folderspecified.
-> StartPrior to burning I check to make sure that my DVD looks the way I had intended using VLC (VLC -> Media -> OpenDisc... -> Browse... -> specified_folder -> Play)
In Kubuntu I then use K3b to burn the AUDIO_TS and VIDEO_TS folders to a blank DVD. This can be done in K3b usingthe "New Video DVD Project" (K3b -> More actions... -> New Video DVD Project) using the AUDIO_TS and VIDEO_TSfolders as the data. Edit the name of the DVD to reflect the desired DVD name. "Burn" the DVD. The result will beidentical to commercial DVDs. (Note: In recent versions of K3b I have had to "Burn" using the "growisofs" Writing appat 8x Speed and DAO (Disc-At-Once) Writing Mode in order to achieve reliable burns. See here for more details.)
MKV files
To manipulate .MKV files directly, install the mkvtoolnix (http://www.bunkus.org/videotools/mkvtoolnix/docs.html) utilities:
sudo apt-get install mkvtoolnix mkvtoolnix-gui
This toolset includes the mkvextract and mkvmerge tools. Instructions for mkvextract can be found from the command-lineterminal (man mkvextract) or here (http://www.bunkus.org/videotools/mkvtoolnix/doc/mkvextract.html) .
Extract .MKV subtitle file to .SRT subtitle file
Use mkvmerge to identify the tracks:
mkvmerge --identify <input.mkv>
If the subtitle file to be extracted is track 3, use
mkvextract tracks <input.mkv> 3:<output.srt>
For this to work, of course, the MKV subtitle track must already be in text (.srt) format, not image (.sub/.idx) format.
Recommended formats
There is only one format that works on all my devices (computer (both Linux and Windows), (Android) tablet, (Android) eBookreader, MP3 player, DVD player):
.AVI container with XVID/DivX video codec and MP3lame (MP3) audio codec
I use this for all my devices, and encode files to about 700 MB. This is a good size that gives good quality and allows me to fitmany videos on a single SDcard (which I use in my mobile devices). For most of my devices, a 128 kb MP3 encoding bitrate issufficient; I previously encoded at 192 kb for MP3lame (which is the default bitrate for AC3 sound), but I find this bitrate to beunnecessary. (The higher the encoding bitrate, the larger the encoded file, and I try to keep all my files around 700 MB.) The .AVIcontainer has several limitations: it does not allow more than stereo audio (i.e. no 5.1 surround sound), does not allow multiplesubtitle files, and requires a constant bitrate (CBR) audio channel. For advanced archival purposes it may not be suitable in thelong-term, but currently it is desirable for the wide range of devices that accept it. It is also one of the only containers guaranteedto be accepted by Windows computers (since the container is originally a Windows-based format).
I am also able to use an .MP4 container with X264/H.264 video codec and either the AAC audio codec or the MP3lame (MP3) audiocodec on many devices, but not all. Neither the X264/H.264 video nor the AAC audio will play on my DVD player or MP3 player,for example (though it plays on my computer and Android tablet devices).
The related .M4V container (the proprietary Apple Quicktime format) works on almost none of my devices, and,furthermore, is difficult to decode and re-encode to a different container. I shun this format like the plague.
The newer .MKV container, though open source and a superior container, is accepted by very few of my older devices. It does notplay on my (older) DVD player or MP3 player, for example (no matter which video and audio codecs are used).
Nevertheless, most newer DVD players seem to accept the .MKV format. In fact, it is now difficult to find DVD players that will stillplay .AVI with XVID / DivX video. Over the years, however, I have accumulated a very large collection of .AVI / XVID / MP3 videos.In 2013, the only DVD player I could find that would play them all was the Philips DVP3680/F7 DVD Player with HD Upconversion(which I found at Best Buy (http://www.bestbuy.com/site/Philips+-+DVD+Player+with+HD+Upconversion/4983625.p;jsessionid=436B03D27CA483A9AB8EC510D0B2B03C.bbolsp-app01-115?id=1218644449769&skuId=4983625&st=philips&cp=1&lp=15) for $40). I highly recommend this player, therefore, if you find yourself with a large collection of .AVI / XVID video
UbuntuGuide Part2 - http://ubuntuguide.org/index.php?title=UbuntuGuide_Part2&...
44 of 177 08/10/2013 09:04 AM

files. However, it does not play MP4 files, which is a drawback. (Note: I am told that this upconverting Philips DVD(http://www.amazon.com/Philips-Region-1080p-Upconverting-Player/dp/B004BI6MVS/ref=pd_cp_e_0#productDescription) playerwill play region-free, both PAL and NTSC formats, and both MP4 and DivX/XVID codecs.)
My Android (2.3) tablet devices will also not accept the AC3 audio codec (which is the standard audio used on commercial DVDs,for example), so most of the time I re-encode any files having AC3 audio with the MP3lame audio codec instead.
EBook Conversion
Calibre (eBook conversion)
Calibre (http://calibre-ebook.com/help) is an eBook reader, library manager, and tool for conversion between many eBook formats(including the .epub format). Install:
sudo apt-get install calibre
Convert a web page to ePub format
The ePub (.epub) format is the default format for many eBook readers. Its format is closely similar to HTML, CSS, and XML formattingof many web pages and, therefore, ePub conversion is, in fact, most successful from HTML documents.
Save a complete webpage in .htm format:
Firefox -> File -> Save Page As... -> Filter: Web page, complete -> webpage.htm
Edit the .htm file (using kate in Kubuntu or gedit in Ubuntu) and delete any elements of the page that you do not wish to beincluded in the eBook.
Start Calibre and add the downloaded/edited .htm file as a book to the Calibre library:
Calibre -> Add Books... -> webpage.htm
Convert the downloaded/edited .htm file:
Calibre -> (highlight webpage.htm) -> Convert E-books -> Convert individually
Choose your conversion options.
Calibre is able to convert into .mobi format and many other eBook formats as well (in a similar manner).
Create an eBook cover
Calibre allows the addition of a cover to an eBook. In general, a 525x700 px JPEG (.jpg) image is easiest to use as a cover. I superimposea 525x700 px cover image on a plain 590x750 px background in order to accommodate more eBook reader screens, but that is apersonal preference.
Using Gimp, create a new image that is 590x750:Gimp -> New... -> Image Size: 590x750
Then import the 525x700 image as a new layer:Gimp -> File -> Open as Layers... -> MyCoverImage.png
which I position so the bottom edge of the imported image is at the bottom of the blank area, and is, of course, centered.
Save the image as the new eBook cover. When prompted to either flatten the image or merge the layers, either option willsuffice.
The cover image can be selected (during the conversion process) in the Calibre -> Convert E-books -> Metadata settings.
Email with PGPHere are several methods for setting up encrypted e-mail using PGP. OpenPGP is installed by default in (K)Ubuntu using gpg/gpg2(GnuPG).
Thunderbird with Enigmail
Thunderbird with Enigmail is available on all major OS platforms (Linux, Mac, Windows) and is therefore the most widely available.Install:
UbuntuGuide Part2 - http://ubuntuguide.org/index.php?title=UbuntuGuide_Part2&...
45 of 177 08/10/2013 09:04 AM

sudo apt-get install thunderbird enigmail
Create a new e-mail account. Both Yahoo Mail (http://mail.yahoo.com) and Gmail (http://mail.google.com) have free e-mailaccounts available that can be used with IMAP (http://en.wikipedia.org/wiki/Internet_Message_Access_Protocol) (which can beused by Thunderbird).
Start Thunderbird:
Menu -> Internet -> Thunderbird
Set up your new e-mail account in Thunderbird to use IMAP. (In the example, Yahoo Mail is used, but the method is the same forGmail.) Make sure your firewall allows ports 993 (IMAP) and 465 (SMTP) and 11371 (HKP).
Thunderbird -> file -> New -> Mail Account... -> (Enter Your name, Email address, Password)-> IMAP: Access folders and messages from multiple computers (ticked) -> Create Account
Generate a new OpenPGP key pair:
Thunderbird -> OpenPGP -> Key Management -> Generate -> New Key Pair -> (fill in desired passpharase, if any, and details)-> Advanced -> Key Size: 1024 (should be sufficient) -> Key type: DSA & El Gamal (should be sufficient) -> Generate key-> "We highly recommend to generate a revocation certificate for your key..." -> Generate Certificate
This method will use pre-selected key servers stored in the default Thunderbird settings. If you wish to add selected key servers(such as keys.gnupg.net and keyserver.ubuntu.com):
Thunderbird -> OpenPGP -> Preferences -> Keyserver -> Specify you keyserver(s): -> keys.gnupg.net, keyserver.ubuntu.com -> OK
Turn off HTML in messages:
Thunderbird -> (Email Account ID) -> Composition & Addressing -> Compose messages in HTML format (unticked) -> OK
Send and sign encrypted email with your OpenPGP key.
Thunderbird -> Write -> (compose message) -> OpenPGP -> Sign Message (ticked) -> Encrypt Message (ticked) -> Send
Mail Server setup
Introduction
This setup uses the Postfix 2.7 (http://www.postfix.org/documentation.html) (SMTP Server/MTA) / Dovecot 1.2 (http://wiki.dovecot.org/)(Pop3/IMAP Server) combination that is installed as the Ubuntu/Debian mail server. It was tested on a Lucid (10.04.2) 64-bit server witha Kubuntu (KDE) desktop.
To use it, MX records with a DNS registrar must be set up in advance.
Setting up MX records with a DNS registrar
In this example, I have a domain named mydomain.org which is registered at MasterBlaster DNS Registrar. I will accept mail atmydomain.org and mx.mydomain.org, so that mail addressed either as [email protected] or [email protected] will bedirected to my mail server to the mail account of user1.
At MasterBlaster DNS Registrar, I create User MX records:
HOST MAILSERVER HOSTNAME MAIL TYPE MX PREF TTL
@ mx.mydomain.org MX 10 1800 mx mx.mydomain.org MX 10 1800
I then make sure there is an A record for mx.mydomain.org so that it is directed to the correct IP address. (I use LDAP, so I also includean A record for my LDAP server.)
HOST NAME IP ADDRESS/URL RECORD TYPE MX PREF TTL
mx 66.77.88.99 A (Address) n/a 1800 ldap 66.77.88.99 A (Address) n/a 1800
If the LAN on which the mail server's host computer is located uses Dynamic IP addresses and you wish to use CNAME aliasforwarding with your primary DNS Registrar then see this section. I have read elsewhere that only an A record is allowed as anMX DNS record type, but perhaps this is DNS Registrar-specific. My MasterBlaster DNS Registrar allows a CNAME alias as the MXrecord type, as well.
UbuntuGuide Part2 - http://ubuntuguide.org/index.php?title=UbuntuGuide_Part2&...
46 of 177 08/10/2013 09:04 AM

HOST NAME IP ADDRESS/URL RECORD TYPE MX PREF TTL
mx mydddomain.dyndns.org. CNAME (Alias) n/a 1800 ldap mydddomain.dyndns.org. CNAME (Alias) n/a 1800
In this example, I have a dynamic IP address registered at DynDNS.com as mydddomain.dyndns.org. (The registered dynamic DNS URLname does not have to have any relation to the primary domain's registered URL.) The same Dynamic DNS URL that is used as theCNAME alias for the record of other services can also be used as the CNAME alias for the MX mail record. My server then updates thedynamic IP address for the Dynamic DNS URL mydddomain.dyndns.org at DynDNS.com using ddclient.
Whenever address records are changed at a DNS Registrar, it can take as short as half-an-hour (or at least as long as the TTL (inseconds), anyway) or sometimes as long as several hours for the changes to propagate. (Dynamic IP addressing, however,generally uses a very short TTL and the IP address update itself (by ddclient) is nearly instantaneous). If you wish to know towhich IP address your email domain is currently being sent, try
telnet mx.mydomain.org 25
It should display a message with your current IP Address such as
"Trying 66.77.88.99..."
If it shows some other address, the changes have not yet propagated. Be patient.
Of course, until you have your Mail / SMTP server set up and all paths routed and firewalls opened (for port 25, at least), you will getthe message
"telnet: Unable to connect to remote host: Connection refused."
Install the Mail server
The integrated Mail server (Postfix 2.7 (http://www.postfix.org/documentation.html) with Dovecot 1.2 (http://wiki.dovecot.org/) )can be installed as a task which uses the Maildir (http://wiki.dovecot.org/MailboxFormat) (mail spooling) file system:
sudo apt-get install dovecot-postfix
(Alternatively you can use sudo tasksel install mail-server or sudo tasksel with the Mail server task, but the configuration files withthese methods use the mbox (http://wiki.dovecot.org/MailboxFormat) format by default instead.)
-> Postfix Configuration: General type of mail configuration: Internet site-> Postfix Configuration: System mail name: mydomain.org
If there are problems with dependencies, they can often be fixed:
sudo apt-get install -f
I also was forced to remove exim4 using apt-get on the command line because exim4 was blocking the installation of postfix:
sudo apt-get remove --purge exim4sudo apt-get install -f
I did not remove exim4 through a package manager because my package manager linked my drupal6 package to exim4;removing exim4 through a package manager removed my drupal6 package as well. This linked behavior didn't occur whenremoving exim4 through the command-line apt-get.
If the scripted Postfix installation fails, it can often be re-run:
sudo dpkg-reconfigure dovecot-postfix
or sometimes
sudo dpkg-reconfigure postfix
During installation, Postfix creates and uses a default (self-signed) security certificate, as specified in the /etc/postfix/main.cf file:
smtpd_tls_cert_file=/etc/ssl/certs/ssl-cert-snakeoil.pemsmtpd_tls_key_file=/etc/ssl/private/ssl-cert-snakeoil.key
UbuntuGuide Part2 - http://ubuntuguide.org/index.php?title=UbuntuGuide_Part2&...
47 of 177 08/10/2013 09:04 AM
Depending on the method of installation, these certificate files may already be symbolically linked to similarly-named files. If not,create the symbolic links now:
sudo ln -s /etc/ssl/certs/ssl-cert-snakeoil.pem /etc/ssl/certs/ssl-mail.pemsudo ln -s /etc/ssl/private/ssl-cert-snakeoil.key /etc/ssl/private/ssl-mail.key
I sometimes also use an additional symbolic link:
sudo ln -s /etc/ssl/certs/ssl-cert-snakeoil.pem /etc/ssl/certs/cacert.pem
During installation, a (self-signed) SSL certificate is also created by Dovecot for this domain. By default the certificate is created to/etc/ssl/certs/dovecot.pem and the private key file is created to /etc/ssl/private/dovecot.pem (and the certificate set to expire in 365days). If you wish to change this, see the Dovecot wiki (http://wiki.dovecot.org/SSL/CertificateCreation) .
It is easiest to stick with the snakeoil certificates when available, but to use the default certificate of Dovecot instead, edit the Dovecotconfiguration file (use the gedit text editor instead of kate if using Ubuntu instead of Kubuntu):
sudo kate /etc/dovecot/dovecot.conf
and uncomment (i.e. remove the # from) the lines:
ssl = yesssl_cert_file = /etc/ssl/certs/dovecot.pemssl_key_file = /etc/ssl/private/dovecot.pem
In versions of Dovecot installed with an integrated installer (such as dovecot-postfix), leave the lines (in /etc/dovecot/dovecot.conf)commented out and instead edit the appropriate configuration file in /etc/dovecot/conf.d. (Earlier versions used /etc/dovecot/dovecot-postfix.conf.) For example (use the gedit text editor instead of kate if using Ubuntu instead of Kubuntu):
sudo kate /etc/dovecot/conf.d/10-dovecot-postfix.conf
using the same certificate files created by Postfix (that are referenced by the symbolic links):
ssl = yesssl_cert_file = /etc/ssl/certs/ssl-mail.pemssl_key_file = /etc/ssl/private/ssl-mail.key
or if the snakeoil certificates are referenced directly, make no changes.
Restart Dovecot:
sudo /etc/init.d/dovecot restart
Optionally, install Mutt (http://en.wikipedia.org/wiki/Mutt_%28e-mail_client%29) for testing IMAP mail from the command-line(Mutt is usually installed with Postfix), and Roundcube (http://www.roundcube.net/) as a Java/AJAX-powered (browser-based)webmail service. (An alternative to Roundcube is the PHP-based Squirrelmail (http://www.squirrelmail.org/) ).
sudo apt-get install muttsudo apt-get install roundcube
I also like Thunderbird (https://www.mozilla.org/en-US/thunderbird/features) as my email client when using a GUI-desktop.
sudo apt-get install thunderbird
Edit Postfix to reflect all variations of your domain name
Edit the /etc/postfix/main.cf file (use the gedit text editor instead of kate if using Ubuntu instead of Kubuntu):
sudo kate /etc/postfix/main.cf
to reflect all possible variations of the email domain that will be used to send mail. For example, I get mail [email protected] and at [email protected]. I therefore include mydomain.org and mail.mydomain.org in theline:
mydestination = mydomain.org, mail.mydomain.org, MyServerHost.mydomain.org., localhost.mydomain.org., localhost
UbuntuGuide Part2 - http://ubuntuguide.org/index.php?title=UbuntuGuide_Part2&...
48 of 177 08/10/2013 09:04 AM

The dovecot-postfix installer edits the /etc/postfix/main.cf file so that it will be used with the Maildir (mail spool) folder system(and will use the Dovecot mail delivery system). You can verify that these lines are present:
home_mailbox = Maildir/mailbox_command = /usr/lib/dovecot/deliver -c /etc/dovecot/conf.d/01-dovecot-postfix.conf -n -m "${EXTENSION}"
For earlier versions, the commands were:
home_mailbox = Maildir/mailbox_command = /usr/lib/dovecot/deliver -c /etc/dovecot/dovecot-postfix.conf -n -m "${EXTENSION}"
Open and forward appropriate ports
Of course, in order for your router to forward ports to your mail server, your mail server must have a static IP address on yourLAN. In versions prior to Precise Pangolin I was not able to get Network Manager to accept my static IP address settings. For thoseversions I removed it and created a static IP address. (Alternatively, you can remove network manager and install Wicd, whichallows static IP addresses over wired or wireless connections.)
Your firewall also must not block the required incoming ports, and your router must forward them to your mail server.
IMAP/IMAPS: Ports 143 and 993Pop/Pops: Ports 110 and 995SMTP: Ports 25 and 587LDAP: Port 389
While troubleshooting, allow all these ports to remain unblocked by a firewall (both for inbound and outbound traffic).
Set up Dovecot to listen to the ports by editing either /etc/dovecot/dovecot.conf and/or /etc/dovecot/conf.d/10-dovecot-postfix.confand/or /etc/dovecot/dovecot-postfix.conf (depending on your setup, or both). (Use the gedit text editor instead of kate if usingUbuntu instead of Kubuntu.)
sudo kate /etc/dovecot/conf.d/10-dovecot-postfix.conf
protocol imap { listen = *:143 ssl_listen = *:993 ... imap_client_workarounds = tb-extra-mailbox-sep }
protocol pop3 { listen = *:110 ssl_listen = *:995 ... }
Note: I happen to use Thunderbird with IMAP, so I also add a workaround line that enables usage of the Maildir (mail spooling)folder system with Thunderbird.
Set up Dovecot to be used with Thunderbird
To use with Thunderbird, edit the file /etc/dovecot/dovecot.conf and/or /etc/dovecot/conf.d/10-dovecot-postfix.conf and/or/etc/dovecot/dovecot-postfix.conf (use the gedit text editor instead of kate if using Ubuntu instead of Kubuntu):
sudo kate /etc/dovecot/conf.d/10-dovecot-postfix.conf
and add the lines:
protocol imap { ...imap_client_workarounds = tb-extra-mailbox-sep}
In Thunderbird, under 'Server Settings' -> Advanced, uncheck "Show only subscribed folders". (This may be optional).
While searching for server settings, the email client computer should not have outgoing ports 25, 567, 143, 993, 110, 995, and/or465 blocked, or Thunderbird will not be able to connect automatically.
Create a Dovecot-compatible Maildir directory skeleton
UbuntuGuide Part2 - http://ubuntuguide.org/index.php?title=UbuntuGuide_Part2&...
49 of 177 08/10/2013 09:04 AM
This is a set of default folders that can later be copied for each user. Include the folders you think your users will use. (For additionaltips, see the community Ubuntu Dovecot page (https://help.ubuntu.com/community/Dovecot) .) Here is an example set:
sudo maildirmake.dovecot /etc/skel/Maildirsudo maildirmake.dovecot /etc/skel/Maildir/.Draftssudo maildirmake.dovecot /etc/skel/Maildir/.Sentsudo maildirmake.dovecot /etc/skel/Maildir/.Trashsudo maildirmake.dovecot /etc/skel/Maildir/.Templates
Single User Quick Setup
This method uses system user accounts for email accounts. It uses the same pamdb password file and authentication used forsystem users. It is useful (and quick and easy) if you only have one email domain and only a few users (for each of whom youdon't mind creating a system account). An advantage is that it is trivial later to copy (or move) the user's Maildir folder to anotherlocation for backup (or migration) purposes.
Create a new user whose username (e.g. emailusername) will be the one you will use for email.
K menu -> System -> System Settings -> Advanced -> User management -> User Accounts -> New...-> Details: Login Name: emailusername -> Ok -> Ok
I find it necessary to login once to the new user account for general housekeeping purposes such as ensuring the correctpassword. I make the password the same as the one I will use for the email account.
I then disable login for the new email user's account:K menu -> System -> System Settings -> Advanced -> Login manager -> Users -> Excluded users: emailusername
I also disable membership in all secondary groups:K menu -> System -> System Settings -> Advanced -> User management -> User accounts-> emailusername -> Modify -> Privileges and Groups -> (untick all privileges and all groups except emailusername)
I then logout and do the remaining steps from the primary system user's account.
Copy the Maildir skeleton to the new user's folder:
sudo cp -r /etc/skel/Maildir /home/emailusername/sudo chown -R emailusername:emailusername /home/emailusername/Maildirsudo chmod -R 770 /home/emailusername/Maildir
Edit the /etc/dovecot/dovecot.conf (and/or /etc/dovecot/conf.d/01-dovecot-postfix.conf and/or /etc/dovecot/dovecot-postfix.conf)file(s) so that the Maildir (mail spool) folder system is used on a per-user basis. Change the appropriate line to resemble:
mail_location = maildir:/home/%u/Maildir
Testing
Reload Dovecot and Postfix:
sudo /etc/init.d/dovecot restartsudo /etc/init.d/postfix restart
Test that Postfix SMTP is running:
telnet localhost 25
and
telnet mail.mydomain.org 25
then test that Dovecot IMAP is running:
telnet localhost imap2
and
UbuntuGuide Part2 - http://ubuntuguide.org/index.php?title=UbuntuGuide_Part2&...
50 of 177 08/10/2013 09:04 AM

telnet mail.mydomain.org imap2
(for older versions of Dovecot, use telnet localhost imap)
Login (through imap) with the text-based email client Mutt:
mutt -f imap://[email protected]
Use Thunderbird to create a new IMAP email account for [email protected]. Accept the self-signed certificates.(You may need to quit and restart Thunderbird again for the Maildir folders to register correctly.)
Before starting any troubleshooting efforts, try rebooting the entire system once. This will reload all configuration files.
This is all that is required for only a few users users on a small system. For multiple email domains and numerous users,however, managing authentication (passwords) and mailboxes will often require a method using virtual user files and/or adatabase solution such as PostgreSQL, MySQL, or LDAP.
Create a user for virtual mail
Note: this is only used with a virtual vmail account, as with LDAP or a database backend.These steps are adapted from this tutorial (http://workaround.org/ispmail/squeeze/setting-up-dovecot) .
Create a new user and group called vmail:
sudo groupadd -g 5000 vmailsudo useradd -g vmail -u 5000 vmail -d /var/vmail -m
Give the folders appropriate permissions:
sudo chown -R vmail:vmail /var/vmailsudo chmod u+w /var/vmail
Configure Postfix with Dovecot for use with a vmail folder
Note: this is only used with a virtual vmail account, as with LDAP or a database backend.These steps are adapted from this tutorial (http://workaround.org/ispmail/squeeze/postfix-dovecot) .
Edit /etc/postfix/master.cf (use the gedit text editor instead of kate if using Ubuntu instead of Kubuntu):
sudo kate /etc/postfix/master.cf
and add the lines to the end:
dovecot unix - n n - - pipe flags=DRhu user=vmail:vmail argv=/usr/lib/dovecot/deliver -f ${sender} -d ${recipient}
(Note: the second line has to be indented by spaces.)
Edit /etc/postfix/main.cf (use the gedit text editor instead of kate if using Ubuntu instead of Kubuntu):
sudo kate /etc/postfix/main.cf
and add the lines:
virtual_transport=dovecotdovecot_destination_recipient_limit=1
Restart Postfix:
sudo postfix reload
Install and set up a MySQL database
Note: Under construction (July 2007). Setting up a database backend is a big task and it is not working for me yet. Thissection is here as my personal reference only.
UbuntuGuide Part2 - http://ubuntuguide.org/index.php?title=UbuntuGuide_Part2&...
51 of 177 08/10/2013 09:04 AM

If you have not yet installed a LAMP (Linux, Apache, MySQL, PHP) server, do so now:
sudo tasksel install lamp-serversudo apt-get install dbconfig-common php5-cli
During the setup of the lamp-server, you will be prompted to establish a root superuser password for MySQL (e.g. rootmysqlpw). Thisis used many times (now and in the future), so it is important to record it in a handy place. When setting up dbconfig-common, forexample, this password is requested. Also, clearly, you should choose Apache2 during the dbconfig-common prompts.
Install phpMyAdmin:
sudo apt-get install phpmyadmin
Install the Postfix module for mysql:
sudo apt-get install postfix-mysql
If there are dependency issues or problems, fix them:
sudo apt-get install -f
Start phpMyAdmin:
Firefox -> http://localhost/phpmyadmin
(If using a remote system, substitute your domain name URL for localhost.)
-> Username: root -> Password: rootmysqlpw
Create a new mailserver MySQL database:
-> phpMyAdmin -> Create new database: mailserver -> Create
or merely from the command line:
sudo mysqladmin -p create mailserver
(You will often be prompted once for your sudo password and then once again for the root MySQL superuser's password (e.g.rootmysqlpw).)
If you make a mistake and wish to delete the database and start over, use phpMyAdmin or the command:
sudo mysqladmin -p DROP mailserver
(You will often be prompted once for your sudo password and then once again for the root MySQL superuser's password (e.g.rootmysqlpw).)
Further command-line options are presented here (http://workaround.org/ispmail/squeeze/database-setup) , but I will usephpMyAdmin in the remaining steps.
Create a less privileged user for use by the mailserver database.
phpMyAdmin -> Databases -> mailserver -> Privileges -> Add a new user -> User name: mailuser -> Host: Local-> Password / Re-type: mailusersecretpw -> Data: Select (ticked) -> Administration: Grant (ticked) -> Go
Create a table for the list of virtual domains:
phpMyAdmin -> Databases -> mailserver -> Create a new table on database mailserver: Name: virtual_domains-> Number of fields: 2 -> Go
-> Field: id -> Type: INT -> Length/Value: 11 -> Collation: utf8_unicode_ci-> Index: PRIMARY -> AUTO_INCREMENT (ticked)
-> Field: name -> Type: VARCHAR -> Length/Value: 50 -> Collation: utf8_unicode_ci-> Storage Engine: InnoDB -> Collation: utf8_unicode_ci -> Save
Create a table for the user accounts:
phpMyAdmin -> Databases -> mailserver -> Create a new table on database mailserver: Name: virtual_users-> Number of fields: 4 -> Go
-> Field: id -> Type: INT -> Length/Value: 11 -> Collation: utf8_unicode_ci
UbuntuGuide Part2 - http://ubuntuguide.org/index.php?title=UbuntuGuide_Part2&...
52 of 177 08/10/2013 09:04 AM

-> Index: PRIMARY -> AUTO_INCREMENT (ticked)-> Field: domain_id -> Type: INT -> Length/Value: 11 -> Collation: utf8_unicode_ci-> Field: password -> Type: VARCHAR -> Length/Value: 32 -> Collation: utf8_unicode_ci-> Field: email -> Type: VARCHAR -> Length/Value: 100 -> Collation: utf8_unicode_ci
-> Index: UNIQUE-> Storage Engine: InnoDB -> Collation: utf8_unicode_ci -> Save-> domain_id: (ticked) -> Action: Index (Icon) -> Relation view -> domain_id: FOREIGN KEY (INNODB): mailserver.virtual_domains.id
-> ON DELETE: CASCADE
Create a table for the aliases 9for forwarding emails from one account to the other):
phpMyAdmin -> Databases -> mailserver -> Create a new table on database mailserver: Name: virtual_aliases-> Number of fields: 4 -> Go
-> Field: id -> Type: INT -> Length/Value: 11 -> Collation: utf8_unicode_ci-> Index: PRIMARY -> AUTO_INCREMENT (ticked)
-> Field: domain_id -> Type: INT -> Length/Value: 11 -> Collation: utf8_unicode_ci-> Field: source -> Type: VARCHAR -> Length/Value: 100 -> Collation: utf8_unicode_ci-> Field: destination -> Type: VARCHAR -> Length/Value: 100 -> Collation: utf8_unicode_ci-> Storage Engine: InnoDB -> Collation: utf8_unicode_ci -> Save-> domain_id: (ticked) -> Action: Index (Icon) -> Relation view -> domain_id: FOREIGN KEY (INNODB): mailserver.virtual_domains.id
-> ON DELETE: CASCADE
(Optional) Populate the database with test data, to be used later for testing purposes.
sudo mysql -p
then enter your root superuser MySQL password (e.g. rootmysqlpw).
INSERT INTO `mailserver`.`virtual_domains` ( `id` , `name` ) VALUES ( '1', 'example.org' );
INSERT INTO `mailserver`.`virtual_users` ( `id` , `domain_id` , `password` , `email` ) VALUES ( '1', '1', MD5( 'summersun' ) , '[email protected]' );
INSERT INTO `mailserver`.`virtual_aliases` ( `id`, `domain_id`, `source`, `destination` ) VALUES ( '1', '1', '[email protected]', '[email protected]' );
quit
Configure Postfix to be used with the MySQL database
Note: Under construction (July 2007). Setting up a database backend is a big task and it is not working for me yet. Thissection is here as my personal reference only.These steps are adapted from this tutorial (http://workaround.org/ispmail/squeeze/postfix-database-configuration) . More optionsare there.
Create a file /etc/postfix/mysql-virtual-mailbox-domains.cf (use the gedit text editor instead of kate if using Ubuntu instead ofKubuntu):
sudo kate /etc/postfix/mysql-virtual-mailbox-domains.cf
and add the lines (to match those created in the previous section):
user = mailuser
UbuntuGuide Part2 - http://ubuntuguide.org/index.php?title=UbuntuGuide_Part2&...
53 of 177 08/10/2013 09:04 AM
password = mailusersecretpwhosts = 127.0.0.1dbname = mailserverquery = SELECT 1 FROM virtual_domains WHERE name='%s'
Add the virtual_mailbox_domains configuration file to Postfix:
sudo postconf -e virtual_mailbox_domains=mysql:/etc/postfix/mysql-virtual-mailbox-domains.cf
Test the query (assuming you added the sample in the preceding section):
postmap -q example.org mysql:/etc/postfix/mysql-virtual-mailbox-domains.cf
The value "1" should be returned.
Create a file /etc/postfix/mysql-virtual-mailbox-maps.cf (use the gedit text editor instead of kate if using Ubuntu instead ofKubuntu):
sudo kate /etc/postfix/mysql-virtual-mailbox-maps.cf
and add the lines (to match those created in the previous section):
user = mailuserpassword = mailusersecretpwhosts = 127.0.0.1dbname = mailserverquery = SELECT 1 FROM virtual_users WHERE email='%s'
Add the virtual_mailbox_domains configuration file to Postfix:
sudo postconf -e virtual_mailbox_maps=mysql:/etc/postfix/mysql-virtual-mailbox-maps.cf
Test the query (assuming you added the sample in the preceding section):
postmap -q [email protected] mysql:/etc/postfix/mysql-virtual-mailbox-maps.cf
The value "1" should be returned.
Create a file /etc/postfix/mysql-virtual-alias-maps.cf (use the gedit text editor instead of kate if using Ubuntu instead of Kubuntu):
sudo kate /etc/postfix/mysql-virtual-alias-maps.cf
and add the lines (to match those created in the previous section):
user = mailuserpassword = mailusersecretpwhosts = 127.0.0.1dbname = mailserverquery = SELECT destination FROM virtual_aliases WHERE source='%s'
Add the virtual_mailbox_domains configuration file to Postfix:
sudo postconf -e virtual_alias_maps=mysql:/etc/postfix/mysql-virtual-alias-maps.cf
Test the query (assuming you added the sample in the preceding section):
postmap -q [email protected] mysql:/etc/postfix/mysql-virtual-alias-maps.cf
The value "[email protected]" should be returned.
Configure Dovecot to be used with the MySQL database
Note: Under construction (July 2007). Setting up a database backend is a big task and it is not working for me yet. Thissection is here as my personal reference only.These steps are adapted from this tutorial (http://workaround.org/ispmail/squeeze/setting-up-dovecot) .Edit the Dovecot configuration file (use the gedit text editor instead of kate if using Ubuntu instead of Kubuntu):
UbuntuGuide Part2 - http://ubuntuguide.org/index.php?title=UbuntuGuide_Part2&...
54 of 177 08/10/2013 09:04 AM

sudo kate /etc/dovecot/dovecot.conf
Comment (add a # to) the lines:
passdb pam {}
Uncomment (remove the # from) the lines:
passdb sql { args = /etc/dovecot/dovecot-sql.conf}
which tells Dovecot that the passwords are stored in an SQL database and add:
userdb static { args = uid=5000 gid=5000 home=/var/vmail/%d/%n/Maildir allow_all_users=yes}
to tell Dovecot where the mailboxes are located.
Change the socket listen section to resemble:
socket listen { master { path = /var/run/dovecot/auth-master mode = 0600 user = vmail }
client { path = /var/spool/postfix/private/auth mode = 0660 user = postfix group = postfix }}
Change the protocol lda section to resemble:
protocol lda { auth_socket_path = /var/run/dovecot/auth-master postmaster_address = [email protected] mail_plugins = sieve log_path =}
Edit the /etc/dovecot/dovecot-sql.conf file (use the gedit text editor instead of kate if using Ubuntu instead of Kubuntu):
sudo kate /etc/dovecot/dovecot-sql.conf
and change these settings:
driver = mysqlconnect = host=127.0.0.1 dbname=mailserver user=mailuser password=mailusersecretpwdefault_pass_scheme = PLAIN-MD5password_query = SELECT email as user, password FROM virtual_users WHERE email='%u';
Restart Dovecot.
sudo /etc/init.d/dovecot restart
Adding virtual domains and users to a MySQL database
Note: Under construction (July 2007). Setting up a database backend is a big task and it is not working for me yet. Thissection is here as my personal reference only.(Optional) Populate the database with test data, to be used later for testing purposes.
sudo mysql -p
then enter your root superuser MySQL password (e.g. rootmysqlpw).
UbuntuGuide Part2 - http://ubuntuguide.org/index.php?title=UbuntuGuide_Part2&...
55 of 177 08/10/2013 09:04 AM

INSERT INTO `mailserver`.`virtual_domains` ( `id` , `name` ) VALUES ( '1', 'example.org' );
INSERT INTO `mailserver`.`virtual_users` ( `id` , `domain_id` , `password` , `email` ) VALUES ( '1', '1', MD5( 'summersun' ) , '[email protected]' );
INSERT INTO `mailserver`.`virtual_aliases` ( `id`, `domain_id`, `source`, `destination` ) VALUES ( '1', '1', '[email protected]', '[email protected]' );
quit
Install and set up an LDAP server
Note: Under construction (July 2007). Setting up LDAP is a big task and it is not working for me yet. This section is here asmy personal reference only.For an introduction to LDAP see the Ubuntu Server 10.04 OpenLDAP (https://help.ubuntu.com/10.04/serverguide/C/openldap-server.html) section and the community Ubuntu OpenLDAP (https://help.ubuntu.com/community/OpenLDAPServer) section.
Install the OpenLDAP server:
sudo apt-get install slapd ldap-utils
Install additional modules:
sudo ldapadd -Y EXTERNAL -H ldapi:/// -f /etc/ldap/schema/cosine.ldifsudo ldapadd -Y EXTERNAL -H ldapi:/// -f /etc/ldap/schema/nis.ldifsudo ldapadd -Y EXTERNAL -H ldapi:/// -f /etc/ldap/schema/inetorgperson.ldif
Create a backend LDIF file by copying the following example LDIF file, naming it backend.mydomain.org.ldif, somewhere on yoursystem (e.g. to the /etc/ldap folder) (use the gedit text editor instead of kate if using Ubuntu instead of Kubuntu):
sudo kate /etc/ldap/backend.mydomain.org.ldif
# Load dynamic backend modulesdn: cn=module,cn=configobjectClass: olcModuleListcn: moduleolcModulepath: /usr/lib/ldapolcModuleload: back_hdb
# Database settingsdn: olcDatabase=hdb,cn=configobjectClass: olcDatabaseConfigobjectClass: olcHdbConfigolcDatabase: {1}hdbolcSuffix: dc=mydomain,dc=orgolcDbDirectory: /var/lib/ldapolcRootDN: cn=admin,dc=mydomain,dc=orgolcRootPW: secretldapadminpwolcDbConfig: set_cachesize 0 2097152 0olcDbConfig: set_lk_max_objects 1500olcDbConfig: set_lk_max_locks 1500olcDbConfig: set_lk_max_lockers 1500olcDbIndex: objectClass eqolcLastMod: TRUEolcDbCheckpoint: 512 30olcAccess: to attrs=userPassword by dn="cn=admin,dc=mydomain,dc=org" write by anonymous auth by self write by * noneolcAccess: to attrs=shadowLastChange by self write by * readolcAccess: to dn.base="" by * readolcAccess: to * by dn="cn=admin,dc=mydomain,dc=org" write by * read
Note: Change olcRootPW: secretldapadminpw to a password of your choosing, and of course, mydomain and org to match your own
UbuntuGuide Part2 - http://ubuntuguide.org/index.php?title=UbuntuGuide_Part2&...
56 of 177 08/10/2013 09:04 AM

domain name. There must be a blank line after "olcModuleload: back_hdb".
Add the backend file to the directory:
sudo ldapadd -Y EXTERNAL -H ldapi:/// -f /etc/ldap/backend.mydomain.org.ldif
Create a frontend LDIF file by copying the following example LDIF file, naming it frontend.mydomain.org.ldif, somewhere onyour system (e.g. to the /etc/ldap folder) (use the gedit text editor instead of kate if using Ubuntu instead of Kubuntu):
sudo kate /etc/ldap/frontend.mydomain.org.ldif
# Create top-level object in domaindn: dc=mydomain,dc=orgobjectClass: topobjectClass: dcObjectobjectclass: organizationo: Mydomain Organizationdc: Mydomaindescription: LDAP Mydomain
# Admin user.dn: cn=admin,dc=mydomain,dc=orgobjectClass: simpleSecurityObjectobjectClass: organizationalRolecn: admindescription: LDAP administratoruserPassword: secretldapadminpw
dn: ou=people,dc=mydomain,dc=orgobjectClass: organizationalUnitou: people
dn: ou=groups,dc=mydomain,dc=orgobjectClass: organizationalUnitou: groups
dn: uid=john,ou=people,dc=mydomain,dc=orgobjectClass: inetOrgPersonobjectClass: posixAccountobjectClass: shadowAccountuid: johnsn: DoegivenName: Johncn: John DoedisplayName: John DoeuidNumber: 1000gidNumber: 10000userPassword: jd_userpasswordgecos: John DoeloginShell: /bin/bashhomeDirectory: /home/johnshadowExpire: -1shadowFlag: 0shadowWarning: 7shadowMin: 8shadowMax: 999999shadowLastChange: 10877mail: [email protected]: 31000l: Toulouseo: Mydomainmobile: +33 (0)6 xx xx xx xxhomePhone: +33 (0)5 xx xx xx xxtitle: System AdministratorpostalAddress: initials: JD
dn: cn=mydomain,ou=groups,dc=mydomain,dc=orgobjectClass: posixGroupcn: mydomaingidNumber: 10000
Note: Change userPassword: secretldapadminpw and userPassword: jd_userpassword to passwords of your choosing, and of course,mydomain and org to match your own domain name. Maintain the blank lines.
Add the frontend file to the directory:
sudo ldapadd -x -D cn=admin,dc=mydomain,dc=org -W -f /etc/ldap/frontend.mydomain.org.ldif
Set up Postfix with LDAP
Note: Under construction (July 2007). Setting up LDAP is a big task and it is not working for me yet. This section is here asmy personal reference only.You can use many different methods for user authentication, including MySQL and PostgreSQL databases. Using LDAP is only oneof the methods available.
UbuntuGuide Part2 - http://ubuntuguide.org/index.php?title=UbuntuGuide_Part2&...
57 of 177 08/10/2013 09:04 AM
Install the postfix-ldap package:
sudo apt-get install postfix-ldap
Set up Dovecot with LDAP
Note: Under construction (July 2007). Setting up LDAP is a big task and it is not working for me yet. This section is here asmy personal reference only.Also see these community Ubuntu tips (https://help.ubuntu.com/community/DovecotLDAP) .
Make sure your LDAP (http://en.wikipedia.org/wiki/LDAP) server host (e.g. ldap.mydomain.org) is registered with yourMasterBlaster DNS registrar.
Edit the etc/dovecot/dovecot-ldap.conf configuration file (use the gedit text editor instead of kate if using Ubuntu instead ofKubuntu):
sudo kate etc/dovecot/dovecot-ldap.conf
Set the host(s) of the LDAP server(s) (port 389 is the LDAP default and can be omitted):
hosts = ldap.mydomain.org:389
Set TLS to yes:
tls = yes
Set the LDAP version:
ldap_version = 3
Moving Maildir directories
Maildir directories can be moved from one server to another, but it is tricky. The subfolders are designated as hidden files andhidden files must be moved separately (they are not included in routine copies).
/Maildir/.Drafts/Maildir/.Sent/Maildir/.Trash/Maildir/.Templates
Therefore, to copy a Maildir directory requires 2 commands:
sudo cp -pr /oldpath/Maildir/* /newpath/Maildir/sudo cp -pr /oldpath/Maildir/.* /newpath/Maildir/
In this the -p designates to maintain permissions, and -r means recursive copying.
The problem is that the permissions from one server to the next may not match, and it may become necessary to open all thepermissions:
sudo chmod 777 -R newpath/Maildir/*sudo chmod 777 -R newpath/Maildir/.*
If you can sort out the permissions required by your server (which may require root permissions, postfix permissions, userpermissions, or vmail virtual user permissions depending on your setup) then do so, but until you are certain that everything elseworks, it is easiest to open all permissions initially and then tighten them secondarily.
Once I determined the correct user (e.g. emailuser, root, postfix, or vmail, depending on the system) I then changed the owner to thecorrect owner (chown user:user) and chmod to 700 for all the Maildir directories.
Also be aware that most USB/Flash/Thumb drives are formatted as FAT32 and will not maintain file permissions. Using them ascopying media will not work (unless they are re-formatted to ext3 or ext4). It is also tricky to maintain file permissions when using NFSor SMB networked folders, since root permissions (root squashing) are disabled by default and recent protocols do not easily permitthe "no_root_squash" function. It is easiest to use direct (or rsync) copying, or to copy to a (non-formatted) CD/DVD as an intermediatemedium.
UbuntuGuide Part2 - http://ubuntuguide.org/index.php?title=UbuntuGuide_Part2&...
58 of 177 08/10/2013 09:04 AM

Also, email files in Maildir folders are designated with the name of the original server. When moving to a new server, it may benecessary to include the name of the old server as a destination in the Postfix main.cf configuration file:
mydestination = oldserver.oldomain.org, newserver.newdomain.org
Other Resources
Community Ubuntu Dovecot tutorial (https://help.ubuntu.com/community/Dovecot) .Workaround.org (http://workaround.org/ispmail/squeeze) 's widely referenced mail server tutorial using a MySQL database forauthentication.A method using virtual files (https://help.ubuntu.com/community/PostfixVirtualMailBoxClamSmtpHowto) for authentication(soemwhat simpler but similar to the database method).
TorTor (http://www.torproject.org/) is a project to allow privacy while using the Internet and to limit usage tracking. It routes your trafficthrough several anonymous nodes, so that your usage appears to come from an IP other than your own. (There are always risks whenusing the Internet that even Tor can not help with, though. Read this (http://www.torproject.org/download.html.en#Warning) .) UsingTor can slow down your Internet usage significantly, depending on how much traffic is being passed through the Tor network (routinefile-sharing or large downloads will also significantly reduce performance of the Tor network.)
Tor network speed improves when there are more volunteers (https://www.torproject.org/getinvolved/volunteer.html.en) to runrelays (https://www.torproject.org/docs/tor-doc-relay.html.en) (and relays have better anonymity), bridges, and exit nodes. Pleaseconsider being a relay or bridge node if your ISP does not filter Tor and you have good bandwidth. Additonally please considerconfiguring your relay as an exit node (https://www.torproject.org/docs/faq.html.en#ExitPolicies) (if you are in a favorablenetwork and don't mind a little bit of potential hassle (https://blog.torproject.org/blog/tips-running-exit-node-minimal-harassment) for being an exit node).
Install Tor (Network privacy)
Install Tor by following the instructions here (https://www.torproject.org/docs/debian) . Note that the instructions require port11371 on your firewall to be open to use the gpg keyserver (and download the key for the debian package). Then see the Torinstallation guide (http://www.torproject.org/docs/tor-doc-unix.html) for details. In general:
sudo apt-get install tor
Tor can be run in its default configuration from the command-line (or from a menu item with the "Advanced -> Run in terminal"box ticked):
tor
A separate menu item can be created to reliably shut down Tor:
sudo killall tor
By default Tor listens for Socks5 traffic on port 9050. (Socks5 proxies are able to tunnel both UDP and HTTP traffic through them.)In general, applications (including other daisy-chained proxies) should be configured to use Tor as a Socks5 proxy on port 9050.
I don't like Tor to automatically start at boot, so I edit the /etc/tor/torrc configuration file (use the gedit text editor instead of kate ifusing Ubuntu instead of Kubuntu):
sudo kate /etc/tor/torrc
and change the line so it looks like:
#RunAsDaemon 1RunAsDaemon 0
then restart Tor:
sudo /etc/init.d/tor restart
Using Tor with Firefox
UbuntuGuide Part2 - http://ubuntuguide.org/index.php?title=UbuntuGuide_Part2&...
59 of 177 08/10/2013 09:04 AM

Tor acts as a Socks5 proxy (https://en.wikipedia.org/wiki/SOCKS) on port 9050. Recent versions of Firefox allow direction of alltraffic, including DNS resolution, through a Socks5 proxy. To enable this behaviour (after starting and running a previously installedversion of Tor):
Firefox -> Edit -> Preferences -> Advanced -> Network -> Connection:Settings -> Manual proxy configuration (ticked) -> SOCKSHost: 127.0.0.1 (or localhost) -> Port: 9050 -> SOCKSv5 (ticked) -> No Proxy for: 127.0.0.1 (or localhost)
To return to using Firefox without a proxy (such as Tor), choose "No proxy" in the Firefox Network settings:
Firefox -> Edit -> Preferences -> Advanced -> Network -> Connection:Settings -> No proxy (ticked)
Tor Browser Bundle
The Tor Browser Bundle (https://www.torproject.org/projects/torbrowser.html) (Tor, Vidalia GUI, a modified version of Firefox, andTorbutton) provides greater functionality and security than the stock Firefox version with the standalone Torbutton. Install from here(https://www.torproject.org/projects/torbrowser.html) the version for your language and unpack it. For example:
wget https://www.torproject.org/dist/torbrowser/linux/tor-browser-gnu-linux-x86_64-2.2.35-12-dev-en-US.tar.gztar -xvzf tor-browser-gnu-linux-x86_64-2.2.35-12-dev-en-US.tar.gz
Then change to the extracted directory and start the Tor Browser Bundle:
cd tor-browser_en-US./start-tor-browser
A menu item can also be created with the command to start it.
Torbutton (Firefox plug-in)
Once the Tor Browser Bundle is installed and Tor is running properly, Torbutton (https://www.torproject.org/torbutton/) allows you tochoose whether to use Firefox through the Tor anonymizing network or not. Updates to Torbutton can be installed using the .xpiextension found directly from the website (https://www.torproject.org/torbutton/) .
As of 2012, Torbutton only works with modified versions of Firefox found in the Tor Project's Tor Browser Bundle(https://www.torproject.org/projects/torbrowser.html) (Tor, Vidalia GUI, a modified version of Firefox, and Torbutton) or withsome older (non-updated) versions of Firefox.
Newer versions of Firefox may refuse to start when Torbutton is installed. If this occurs, Firefox must be started in safe mode:
firefox -safe-mode
Be sure to select "Start in Safe Mode" instead of "Reset Firefox" (unless you want to erase all your configuration settings and eraseall your extensions/add-ons/plug-ins). Once in Safe Mode, the Torbutton extension can be disabled or removed (Firefox -> Tools ->Add-ons -> Extensions -> Torbutton -> Remove) and Firefox set to use "No proxy" in the Firefox Network settings:
Firefox -> Edit -> Preferences -> Advanced -> Network -> Connection:Settings -> No proxy (ticked)
The standalone Torbutton add-on for Firefox disables many functions of Firefox (when used with older unmodified versions ofFirefox), such as the Drag and Drop function. It must therefore be disabled (Firefox -> Tools -> Add-ons -> Extensions -> Torbutton-> Disable) while using many of these Firefox functions.
Using Konversation with Tor
Konversation is an Internet Relay Chat client similar to mIRC. Unfortunately, your IP address is easily determined while using an IRCclient. Konversation directly allows the use of a Socks proxy, however. If running Tor on port 9050, configure Konversation to use theSocks5 proxy on port 9050:
Konversation -> Settings -> Configure Konversation... -> Behavior: Connection -> Proxy (ticked) -> Type: Socks v5 -> Address:127.0.0.1 (or localhost) -> Port: 9050
Using proxies with Tor
usewithtor
If you installed a recent version of Tor from the repositories, you will have installed the "usewithtor (http://code.google.com/p/torsocks/) " package. A number of applications can be automatically redirected to the Torsocks proxy (torsocks(http://code.google.com/p/torsocks/) ) with this utility:
UbuntuGuide Part2 - http://ubuntuguide.org/index.php?title=UbuntuGuide_Part2&...
60 of 177 08/10/2013 09:04 AM
usewithtor myapplication
A menu item with such a command can then be created.
By using torsocks, usewithtor will also block an application from sending UDP traffic (which is not anonymized by the Tornetwork).
Applications that you wish to "usewithtor" (with torsocks) or "torify" (with tsocks) should use port 8118 for the http proxy portand port 9050 for the socks port.
torify
Another method is to "torify (https://trac.torproject.org/projects/tor/wiki/doc/TorifyHOWTO) " an application with a different torsocks proxy (tsocks (http://tsocks.sourceforge.net/) ) if tsocks has been configured (edit /etc/tor/tor-tsocks.conf).
torify myapplication
tsocks does not explictly block UDP traffic, so if it is desirable to allow UDP traffic while anonymizing fttp traffic, use this method.
Privoxy
I use the Privoxy proxy to tunnel http traffic through Tor. Install the Privoxy http proxy:
sudo apt-get install privoxy
Applications can be set to send their http traffic to Privoxy over port 8118; Privoxy will then in turn forward the http traffic to Torover port 9050. (Use an IP address other than 127.0.0.1 if Privoxy and/or Tor are not on the local machine. Use localhost instead of127.0.0.1 if using IPv6 addressing on your systems).
Note: For some older versions of Privoxy, users have reported better success designating the address of the host computer as 127.0.0.1instead of localhost in the configuration settings.
Edit configuration files.
In the configuration file Privoxy is configured by default to listen on port 127.0.0.1:8118. See Firewall considerations. Editthe Privoxy configuration file (use the gedit text editor instead of kate if using Ubuntu instead of Kubuntu):
sudo kate /etc/privoxy/config
Add the lines
forward-socks5 / 127.0.0.1:9050 .forward-socks4a / 127.0.0.1:9050 .
Note: socks5 allows more authentication choices, UDP for external DNS resolution, and accommodates IPv6. (By including both lines,socks4a is used as a fallback if a program does not support socks5.)
Restart Privoxy:
sudo /etc/init.d/privoxy restart
Other proxies
Other proxies such as socat (http://www.dest-unreach.org/socat/doc/socat.html) , Polipo (http://www.pps.jussieu.fr/~jch/software/polipo/) can also be used with Tor instead or Privoxy. Squid (http://www.squid-cache.org/) can also be daisy-chained to one of theproxies.
Ensuring applications use the proxy
See this advice (https://trac.torproject.org/projects/tor/wiki/doc/TorifyHOWTO/Misc#UnixandLinuxConfiguration) . (Note: this islabeled as "old advice.") In (K)Ubuntu, the bash configuration files are at ~/.profile (i.e. /home/user/.profile) for the current user orat /etc/profile for system-wide usage. Using this advice, edit one of those two files and add the lines at the end of the file:
http_proxy=http://127.0.0.1:8118/HTTP_PROXY=$http_proxyexport http_proxy HTTP_PROXY
UbuntuGuide Part2 - http://ubuntuguide.org/index.php?title=UbuntuGuide_Part2&...
61 of 177 08/10/2013 09:04 AM

Using specific applications with Tor
Web Browsers (https://trac.torproject.org/projects/tor/wiki/doc/TorifyHOWTO/WebBrowsers)E-mail (https://trac.torproject.org/projects/tor/wiki/doc/TorifyHOWTO/EMail)IRC/SILC (https://trac.torproject.org/projects/tor/wiki/doc/TorifyHOWTO/IrcSilc)FTP (https://trac.torproject.org/projects/tor/wiki/doc/TorifyHOWTO/TorifyHOWTO/FTP)Misc (https://trac.torproject.org/projects/tor/wiki/doc/TorifyHOWTO/Misc)Instant Messaging (https://trac.torproject.org/projects/tor/wiki/doc/TorifyHOWTO/InstantMessaging)
Torchat can be used for IM through Tor. Install:
sudo apt-get install torchat
Other applications may allow for the http proxy and the chainloaded socks services of Tor to be used independently (in parallel).Once Tor (and the relevant proxy or proxies) are running, the http proxy 127.0.0.1:8118 and the socks proxy 127.0.0.1:9050 can bespecified in the configuration settings of an application that allows for this.
Tor GUIs
It is not necessary to use a GUI with Tor.
If you will use Tor with a GUI interface (such as Vidalia or TorK), however, edit the Tor configuration file (use the gedit text editorinstead of kate if using Ubuntu instead of Kubuntu):
sudo kate /etc/tor/torrc
Add the line so that the GUI interface can control Tor over port 9051:
ControlPort 9051
Note: There is some concern that allowing control of Tor over port 9051 is not secure. If you will not be using a GUI, this step isnot advised.
Vidalia (Tor interface)
Vidalia (https://www.torproject.org/projects/vidalia.html) is the recommended Qt4-based GUI frontend for Tor. If not installed with Tor,install:
sudo apt-get install vidalia
Tork (KDE Tor interface)
TorK (http://sourceforge.net/projects/tork/) is a KDE interface for Tor that relied on the older Qt3 platform. It is no longer included inthe (K)Ubuntu repositories (as of Natty 11.04). However, if desired it can still be installed (along with the required older Qt3 libraries)by adding the Maverick repository (http://packages.ubuntu.com/maverick/amd64/tork/download) (directly or using a packagemanager):
deb http://ubuntu.mirror.cambrium.nl/ubuntu/ maverick main universe
Installing TorK also will install privoxy and unless you have also added the Tor repository directly, will also install an olderversion of Tor from the Ubuntu universe repositories. See these installation tips (http://ubuntuforums.org/archive/index.php/t-800115.html) . Install:
sudo apt-get install tork privoxy
Run TorK (K menu -> Internet -> TorK Anonymity Manager) for the first time using the First Run Wizard (TorK -> Tools -> FirstRun Wizard).
"No, tor is going to run on this PC" then "I have to start Tor manually" then "Run A Tor client with default settings" then "Iwant to use Privoxy..." then "Privoxy starts in the background when my computer boots up" then go through the remainingoptions.I then start ("Play") TorK as a Client. I happen to like Konqueror for Anonymous browsing, since it worked the first time forme without a problem. I keep Firefox for non-Tor browsing (so I don't have to change any of its settings) or install Torbutton(see below). You may have to fiddle with your Network proxy settings in Konqueror or Firefox (if things don't work the wayyou expect them to).
UbuntuGuide Part2 - http://ubuntuguide.org/index.php?title=UbuntuGuide_Part2&...
62 of 177 08/10/2013 09:04 AM

Allow the Firewall (like Firestarter) to allow ports 8118, 9050, 9051, or just turn off the firewall completely, until everything isworking. Then turn the firewall back on. (You should monitor your firewall carefully. TorK has settings to automatically turn itoff, if you aren't careful.) No ports are required to be left open in the firewall for Tor to work, as all traffic will be directedthrough the socks port 9050 (which avoids the firewall).Applications that you wish to "torify" (with tsocks) or "usewithtor" (with torsocks) should use port 8118 (i.e. 127.0.0.1:8118) for thehttp proxy and port 9050 (127.0.0.1:9050) for the socks port.
Once configured as a client successfully, if you have the bandwidth and a stable environment please enable the client/relay modeand/or server mode so that the Tor bandwidth is increased.
Note: Tork constantly monitors the network (both Tor and non-Tor traffic). This can cause slowing of the Tor traffic from yourcomputer and even cause intermittent interruptions. (Tor runs in the background and does not require Tork to be running as acontrol module.) If Tor is running in a stable mode, it will be faster (and less problematic) to stop Tork (sudo killall tork) andallow Tor to run in the background.
Note: Traffic that is routed through Privoxy (and then presumably to Tor from Privoxy if configured correctly) will be logged as"non-Tor" traffic by Tork. As long as Privoxy is working correctly, however, this traffic is being forwarded through the Tor socket.
Tork does not start Privoxy properly. Privoxy must be started (prior to starting Tork) as a startup program (e.g. using the Bootup-Manager) or manually with the command:
sudo /etc/init.d/privoxy start
Prevent autostart of proxies and Tor
Whenever I stopped the TorK GUI and then later wanted to start it again, I had to manually kill the Privoxy and Tor processesfirst.
sudo killall privoxysudo killall tor
Further, Tor, Privoxy, and Polipo install themselves as automatically started services at bootup. Preventing automatic startup (atboot) of Tor and Privoxy (and/or Polipo) can be accomplished by one of the methods in this Ubuntu Forums thread(http://ubuntuforums.org/showthread.php?t=1277224) . Personally, I like using Bootup-Manager:
sudo apt-get install bum
but another option is:
sudo update-rc.d tor disablesudo update-rc.d privoxy disablesudo update-rc.d polipo disable
which will also stop updates from re-installing the applications as startup services when updates are made.
If Privoxy is stopped, it must be re-started with the Bootup-Manager or using the command:
sudo /etc/init.d/privoxy start
Firewall considerations
Single computer
If you have the Tor client, the proxy client (Privoxy, Polipo, or socat), and the browser client (or other application) on the samecomputer, you do not need to have any open ports in order to use Tor. In such a circumstance it is safest to block all ports that connectto the Internet. The socks proxy bypasses the firewall entirely (so there is no need to leave any ports open in order for it tocommunicate).
By closing all ports (using a firewall), applications will be prevented from bypassing Tor (accidentally or unknowingly). Later, if youwish to have some of your traffic directed through Tor and some of your traffic traffic routed outside of Tor, you can open the ports forthe traffic that will not go through Tor.
Proxy on LAN
If the proxy (Privoxy, Polipo, socat, etc.) on your LAN is on a computer different from the computer(s) that have the end-user clientapplications, it is best to open the port (e.g. 8118) for communication only between computers on the LAN (with the end-applicationclients on them) and the computer on the LAN with the proxy on it. Port 8118 should then not be open to the Internet but only to the
UbuntuGuide Part2 - http://ubuntuguide.org/index.php?title=UbuntuGuide_Part2&...
63 of 177 08/10/2013 09:04 AM

computers on the LAN that will use the proxy.
If the Proxy and Tor client are on different computers as well, port 9050 should be open (on the LAN, not on the Internet) between thecomputer with the Proxy and the computer with the Tor client only, so that the Proxy can forward traffic to the Tor client (but not tothe Internet). (Obviously, if the Proxy and the Tor client are on the same computer, there is no need to open the 9050 port at all.)
Blocking all non-Tor traffic using iptables
To ensure that no unprotected traffic "leaks" from applications without your knowledge, it is possible to configure your firewalliptables to prevent all traffic except that which is transmitted through Tor.
See this page (https://trac.torproject.org/projects/tor/wiki/doc/BlockNonTorTrafficDebian) .
Tor network initialization
It may be necessary to open port 443 (or less desirably port 80) to allow resolution of the nodes of the Tor network. Consider using DNSprivacy methods.
Troubleshooting
Some routers (including a certain version of the Linksys WRT54G) slow down when the incoming/outgoing connection log (cache)becomes full (which can happen with many Tor or P2P connections). Disable the Log if this problem occurs.
Although applicable to p2p traffic, this information (http://ktorrent.org/wiki/index.php/FAQ#Problem_solving) is genericallyapplicable to Tor as well.
Other resources
Tor documentation (http://www.torproject.org/docs/documentation.html)Obfsproxy (https://www.torproject.org/projects/obfsproxy.html.en) is a proxy to transform data between a client and a Bridgenode into innocent looking data, in order to circumvent Deep Packet Inspection (DPI) censorship.Anonymous email tips -- setting up web-based email anonymously through the Tor network
OnionCat (http://www.cypherpunk.at/onioncat/) transmits IP-based data transparently through the Tor network on a locationhidden basis. (Also see this info (http://www.abenteuerland.at/onioncat/) ).
Similar networks:
I2P (http://www.i2p2.de) is another anonymizing network similar to Tor. (See instructions (http://www.i2p2.de/debian) andUbuntu community help (https://help.ubuntu.com/community/I2P) .)Freenet (http://freenetproject.org/) is another anonymizing network similar to Tor.Gnunet (https://gnunet.org/) is another anonymizing network similar to Tor.List of similar networks at Wikipedia (https://secure.wikimedia.org/wikipedia/en/wiki/Anonymous_P2P#List_of_anonymous_P2P_networks_and_clients)
RemastersysNote: As of 10-2011 the developer of Remastersys has stopped development and no longer distributes this software. These instructions arefor reference of legacy users of Remastersys only.
Install Remastersys
Remastersys is available from Sourceforge (http://sourceforge.net/projects/remastersys/files/) . (If using a repository installation fromanother source (not recommended), note that the (Launchpad) repositories have versions that are different for Jaunty (and earlier)than the ones used for Karmic and later.)
Obtain the .deb file from Sourceforge and install:
wget http://sourceforge.net/projects/remastersys/files/remastersys-ubuntu-karmic-lucid-maverick/remastersys_2.0.18-1_all.debsudo dpkg -i remastersys_2.0.18-1_all.deb
Create a custom distribution
Remastersys copies all your settings exactly as they are set up in your system, except for proprietary display drivers (and otherproprietary hardware drivers). Therefore, customize your distribution to your liking first, using a single user. (It is recommendedto keep an installation to less than 2 GB if you wish the remastered distro to fit on a CD. If you intend to use DVDs, it can belarger.)
UbuntuGuide Part2 - http://ubuntuguide.org/index.php?title=UbuntuGuide_Part2&...
64 of 177 08/10/2013 09:04 AM

The custom distribution (dist) option does not retain any files in the /home directory (nor even any users). A new user must be createdupon installation from the custom disc. Therefore, do not include any critical files or functions that require a user to be retained. (Ifyou do, use the backup option instead).
Once it is perfected, write the distribution to an .iso (for burning onto a distributable CD (or DVD)):
sudo remastersys dist
Burn the .iso to a disk (https://help.ubuntu.com/community/BurningIsoHowto) . Insert a blank CD or DVD (if the .iso file is morethan 700 Mb, a DVD must be used).
Menu -> Multimedia -> K3b CD & DVD Burning -> Tools -> Burn DVD ISO Image...-> Image to Burn: /home/resmastersys/remastersys/customdist.iso-> Start -> Default Settings
Note: an MD5 sum will be calculated and displayed, which can be recorded (on the disk, for example) for later verification.
Clean the temporary files (if the disc burned and works correctly):
sudo remasterys clean
Create a system backup
This method allows you to backup a multiple-user system using any privileged user, and retains the user files and settings.
sudo remastersys backup
Using the Remastersys GUI
A GUI is available (after installation of the Remastersys package):
Menu -> System -> Remastersys Backup
Edit Remastersys configuration file
Choose the settings for the custom distro:
sudo nano /etc/remastersys.conf
Troubleshooting
See this page (http://klikit.pbworks.com/Remastersys+-+Limitations+of+remastering) regarding Remastersys limitations. Forexample, no single file can be 4 Gb or larger in size; only gdm or kdm can be used as login managers; and all included packagesmust be available in the Ubuntu repositories.
Dynamic IP serversI used to like the DynDNS service because they are one of the oldest (and in the past had completely free services available). Althoughthese examples use this service, there are other services that can be used with similar setups (and some are still completely free).(Although DynDNS no longer offers free anonymous accounts, it is still possible to get a free account using a credit card. See this info.(http://www.dyncommunity.com/questions/21580/from-dyn-what-happened-to-free-accounts.html) Create an account, sign up for afree trial (with the credit card), then cancel the free trial. They will then give you the option to continue with a free URL. To maintainthe free account requires a monthly login to their website, which can be accomplished with a Python script such as the one outlinedhere (http://www.zyztematik.org/?p=62) .)
Single URL and a DynDNS-capable router
My router happens to have a built-in updater for DynDNS (and for TZO). In the DDNS section of the router configuration, I can set thename of a single URL I have registered with DynDNS (or TZO), along with the username and password I have previously set up atDynDNS.com (http://www.dyndns.com/services/dns/dyndns/) . The router does the rest automatically for me. If you are using a singleURL and have a similar router capability, then this will be the easiest setup by far. First register for a username (with password) atDynDNS (or TZO) and set the URL name there that the server on your host will use. Then input the information into your router'sconfiguration page. The router will do the rest.
UbuntuGuide Part2 - http://ubuntuguide.org/index.php?title=UbuntuGuide_Part2&...
65 of 177 08/10/2013 09:04 AM

Multiple URLs
I use multiple URLs because I run multiple webservers from my host computer. However, the router I currently use only allows me toupdate one of the URLs. I therefore need an updater program in order to update all of the URLs at the same time.
ddclient
ddclient (http://sourceforge.net/p/ddclient/wiki/Home/) is a perl-based client that updates the DynDNS (or other dynamic IP DNSservice) database to keep track of your host computer's changing dynamic IP address. DynDNS is a public DNS (http://en.wikipedia.org/wiki/Domain_Name_System) server, and will match your URL name to whichever (current) dynamic IP address that the ddclient sendsto DynDNS. Setup will be easiest if you register for a username/password at DynDNS.com (or other dynamic IP DNS service) and set upyour desired URLs there, first. Then install the updater client program:
sudo apt-get install ddclient
If this is the first time you have installed ddclient, you will be prompted for the URL(s) you registered with DynDNS.com(http://www.dyndns.com/services/dns/dyndns/) (or other dynamic IP DNS service). You will also be prompted for theusername/password your registered with DynDNS.com. Lastly, you will be asked which ethernet port your primarily use toconnect to the Internet (eth0 for wired, wlan0 for wireless, usually).
The system will function with no further setup if you input the variables correctly. See this DynDNS page (http://www.dyndns.com/support/kb/using_ddclient_with_dyndns_services.html) for instructions on additional customizations available for use with DynDNS.
Edit ddclient configuration
Edit the ddclient configuration file (use kate instead of nano in Kubuntu, or gedit instead of nano in Ubuntu):
sudo nano /etc/ddclient.conf
To set the number of seconds between updates, I add the line
daemon=3600
My dynamic IP only changes rarely, so I only check it hourly (3600 seconds in an hour).
To use secure SSL communications, I add the line
ssl=yes
To use the DynDNS checkip service (which will autodetect your current IP address), I add the line
use=web, web=checkip.dyndns.com/, web-skip='IP Address'
My configuration file now looks like:
# Configuration file for ddclient generated by debconf## /etc/ddclient.conf## Check the current IP address. Either check the eth0 port for its current IP address (can't be used on a LAN),# or use the DynDNS IP checking service.daemon=3600pid=/var/run/ddclient.pid#use=if, if=eth0use=web, web=checkip.dyndns.com/, web-skip='IP Address'## Login and change the values at the DynDNS site, using SSL.protocol=dyndns2ssl=yesserver=members.dyndns.orglogin=myDynDNSusernamepassword=' myDynDNSuserpassword 'mysite_1.dynds.org,mysite_2.dyndns.org,mysite_3.dyndns.org
Note that the password must be enclosed in quotation marks, e.g 'myDynDNSuserpassword' for DynDNS.
Ensure that the configuration is working:
sudo ddclient -daemon=0 -debug -verbose -noquiet
Note that you can add additional services and/or domain names to be updated simply by adding an additional block to the
UbuntuGuide Part2 - http://ubuntuguide.org/index.php?title=UbuntuGuide_Part2&...
66 of 177 08/10/2013 09:04 AM
configuration file (appropriate for the service). Here is an example (see below for references to additional examples).
protocol=otherDDNSserviceserver=whatever.ddnsservice.orglogin=MyOtherDDNSserviceusernamepassword=MyOtherDDNSservicepasswordmysite4.dnsservice.org, mysite5.dnsservice.org
Run ddclient using cron
Cron (http://pubs.opengroup.org/onlinepubs/9699919799/utilities/crontab.html) is the automatic task scheduler for Linux systems.Although ddclient runs as a daemon, for various reasons I have found it necessary to force an update at least once a day. This can bedone as a daily scheduled task, using cron. See here (http://pubs.opengroup.org/onlinepubs/9699919799/utilities/crontab.html) for a fulldescription of cron and its options or Ubuntu Community Help (https://help.ubuntu.com/community/CronHowto) .
Edit the crontab with administrative (root) privileges:
sudo crontab -e
Add the line:
45 04 * * * /etc/init.d/ddclient --force
This will run ddclient and force an update daily at 0400 (actually at 04:45).
I also happen to like to reboot the machine weekly on Tuesday (day 2 of the week) nights at 1:30 am, so I add the line:
30 01 * * 2 reboot
Clearly this is a personal preference and is optional.
Other DDNS services
The ddclient wiki (http://sourceforge.net/p/ddclient/wiki/protocols/) lists some configurations for other services (NameCheap(http://namecheap.simplekb.com/kb.show?show=article&articleid=583&categoryid=11) , DNSPark (http://www.dnspark.com/services/dynamicDNS.php) , DSLReports (http://www.dslreports.com/faq/240) , EasyDNS (http://www.easydns.com/dynamicdns.php3) , ZoneEdit (http://www.zoneedit.com/doc/dynamic.html#faq1) ), also.
More info can be found on the ddclient forums (http://sourceforge.net/projects/ddclient/forums/forum/399428) .
A list of DDNS providers is at DMOZ (http://www.dmoz.org/Computers/Internet/Protocols/DNS/Service_Providers/Dynamic_DNS/)and Dynamic DNS (http://dnslookup.me/dynamic-dns/) .
Choose a Dynamic DNS Registrar that is reputable and whom you trust. A Dynamic DNS provider is able to redirect yourserver traffic to an anonymous IP address by using a type of "man-in-the-middle" (http://en.wikipedia.org/wiki/Man-in-the-middle_attack) redirection (and thereby potentially could intercept your communications). This can be an obvious securityrisk. Always use SSL/TLS and/or SASL authentication with security certificates, and be sure to encrypt any email that hasconfidential information in it.
Other Dynamic DNS updater clients
IPcheck (http://ipcheck.sourceforge.net/) is a Python-based client/script to update a dynamic IP address with a DynamicDNS-capable registrar. Install:
sudo apt-get install ipcheck
Inadyn (http://inatech.eu/inadyn/readme.html) is a client/script to update a dynamic IP address with several DynamicDNS-capable registrars. Install:
sudo apt-get install inadyn
EZ-IPUpdate (http://packages.debian.org/en/squeeze/ez-ipupdate) is a client/script to update a dynamic IP address with severalDynamic DNS-capable registrars. (The website (http://www.ez-ipupdate.com) for this package may or may not be functional.)Install:
sudo apt-get install ez-ipupdate
UbuntuGuide Part2 - http://ubuntuguide.org/index.php?title=UbuntuGuide_Part2&...
67 of 177 08/10/2013 09:04 AM

DynDns (http://cpan.netnitco.net/authors/id/J/JA/JARIAALTO/dyndns-2001.1217.pl) is another perl-based client/script to update adynamic IP address with a Dynamic DNS-capable registrar. Install:
sudo apt-get install dyndns
Zoneclient (http://zoneclient.sourceforge.net/) is another Python-based script to update a dynamic IP address with a DynamicDNS-capable registrar.
Redirecting a URL
Most free Dynamic DNS providers allow only 1 or 2 free URLs, and they usually include the domain name of the provider itself. Forexample, DynDNS domains are often of the format mydomain.dyndns.org or something similar.
If you have registered a URL with a different DNS registrar, it can be forwarded to the free URL created at the dynamic DNS provider.(The Dynamic DNS providers (e.g. DynDNS) hope that you will register your URL with them, of course, so that they can make money.)
The dynamic domain URL (e.g. mydomain.dyndns.org) points to the numeric IP address of your location (router/computer). Whentraffic is routed to this dynamic domain URL, it is then re-rerouted to the correct numeric IP address. This can be a transparent processand, if desired, it is not necessary to reference the dynamic URL except in the forwarding rules from the original DNS registrar to theDynamic DNS registrar (e.g. DynDNS).
Using forwarding rules, an infinite number of URLs can be forwarded to a single dynamic URL. The primary host that resides at thedestination IP address must then resolve the forwarded URLs (using virtual host or .htaccess files) and direct them to the appropriateserver on the computer (or LAN).
CNAME aliases
Different DNS registrars have different methods of forwarding a URL, but in general there is one method common to all of them:CNAME aliases.
If you have a URL registered with a DNS registrar, go to the DNS settings for your domain name. Delete any A records (or other entries)and use only CNAME entries.
For example, let's say my free Dynamic DNS URL is mydomain.dyndns.org (at DynDNS.com). My domain URL is mydomain.me,registered at SuperDuper DNS Registrar.
Logging into SuperDuper DNS Registrar, I edit the DNS settings for mydomain.me (which in my control panel is found under ManageDNS). I make sure I have these entries:
Name Type Content@ CNAME mydomain.dyndns.org.www CNAME mydomain.dyndns.org.
The period ("full stop") at the end of the URL is important to designate that the CNAME is a FQDN (fully qualified domain name). ACNAME should not have "http://" in it. The @ symbol indicates a URL name without the first segment, e.g. the URL mydomain.me byitself.
Using CNAME aliasing, the original URL is retained in the browser. It is up to you (using virtual host files or Rewrite rules in the.htaccess files of Apache, for example) if you wish to massage the URL at your server (to change it to a canonical name) or redirect it.
URL forwarding
Some domain name registrars have a URL forwarding option. The method of implementation varies from provider to provider,however, and (depending on the DNS registrar) is often not as reliable as CNAME aliases. URL forwarding may be enabled using a DNSsetting (similar to a CNAME alias) such as "URL redirect" or it may be in the form of a "Web forwarding" service. Check with your DNSregistrar for specific instructions.
Examples
Multiple domain name URLs, single Dynamic URL
I have 3 servers on my host, each using a different domain name:
mysite_1.mydomain.org is registered at MasterBlaster DNS Registrar.mysite_2.mydomain.org is registered at MasterBlaster DNS Registrar.mysite_3.myotherdomain.me is registered at Felix DNS Registrar. This site can also be accessed as myotherdomain.me andwww.myotherdomain.me.
I registered a free Dynamic URL at DynDNS and using ddclient make sure it is forwarded to my dynamic IP address (using theinstructions above):
UbuntuGuide Part2 - http://ubuntuguide.org/index.php?title=UbuntuGuide_Part2&...
68 of 177 08/10/2013 09:04 AM
bagoftricks.dyndns.org
At MasterBlaster DNS Registrar I set up CNAME forwarding for mydomain.org:
Name Type Contentmysite_1 CNAME bagoftricks.dyndns.org.mysite_2 CNAME bagoftricks.dyndns.org.
At Felix DNS Registrar I set up CNAME forwarding for myotherdomain.me:
Name Type Content@ CNAME bagoftricks.dyndns.org.www CNAME bagoftricks.dyndns.org.mysite_3 CNAME bagoftricks.dyndns.org.
On the host computer on my LAN to which incoming port 80 and 443 traffic is initially directed (by the router), I use Apache virtualhost files for each of the incoming URLs.
For example, mysite_3.myotherdomain.me is a MediaWiki website stored at /etc/mediawiki/mysite_3. There is a symbolic link from/var/www/MySite_3 to /etc/mediawiki/mysite_3, which was created:
sudo ln -s /etc/mediawiki/mysite_3 /var/www/MySite_3
A virtual host configuration file named MySite3 was then created in /etc/apache2/sites-available (use gedit instead of kate in Ubuntu):
sudo kate /etc/apache2/sites-available/MySite3
and the settings created:
<VirtualHost *:80>#UseCanonicalName off#DocumentRoot /var/www/MySite_3DirectoryIndex index.php index.html#ServerName mysite3.myotherdomain.me## We want to be able to access the web site using foobar1.dyndns.org or www.foobar1.dyndns.orgServerAlias www.myotherdomain.me myotherdomain.me ServerAdmin webmaster@localhost#RewriteEngine On#<Directory /var/www/MySite_3> Options Indexes FollowSymLinks MultiViews Options FollowSymLinks MultiViews # AllowOverride None Order allow,deny allow from all</Directory>#</VirtualHost>
The virtual host file was made active and Apache restarted:
sudo ln -s /etc/apache2/sites-available/MySite3 /etc/apache2/sites-enabled/MySite3sudo /etc/init.d/apache2 restart
Mysite_1 is a Drupal6 website stored at /etc/drupal/6/sites/mysite_1.mydomain.org. There is a symbolic link from /etc/drupal/6/sites/mysite_1.mydomain.org to /var/www/MySite_1, which was created:
sudo ln -s /etc/drupal/6/sites/mysite_1.mydomain.org /var/www/MySite_1
A virtual host configuration file named MySite1 was then created in /etc/apache2/sites-available (use gedit instead of kate in Ubuntu):
sudo kate /etc/apache2/sites-available/MySite1
and the settings created:
<VirtualHost *:80>#UseCanonicalName off#DocumentRoot /var/www/MySite_1DirectoryIndex index.php index.html#
UbuntuGuide Part2 - http://ubuntuguide.org/index.php?title=UbuntuGuide_Part2&...
69 of 177 08/10/2013 09:04 AM
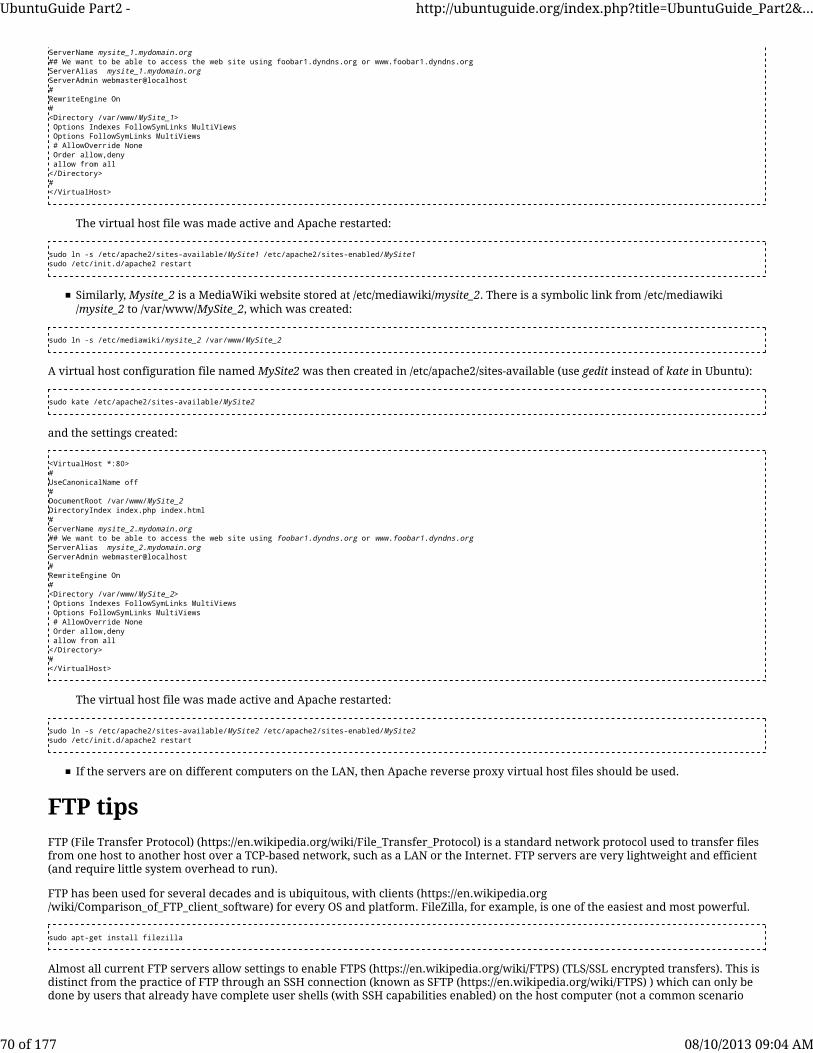
ServerName mysite_1.mydomain.org## We want to be able to access the web site using foobar1.dyndns.org or www.foobar1.dyndns.orgServerAlias mysite_1.mydomain.org ServerAdmin webmaster@localhost#RewriteEngine On#<Directory /var/www/MySite_1> Options Indexes FollowSymLinks MultiViews Options FollowSymLinks MultiViews # AllowOverride None Order allow,deny allow from all</Directory>#</VirtualHost>
The virtual host file was made active and Apache restarted:
sudo ln -s /etc/apache2/sites-available/MySite1 /etc/apache2/sites-enabled/MySite1sudo /etc/init.d/apache2 restart
Similarly, Mysite_2 is a MediaWiki website stored at /etc/mediawiki/mysite_2. There is a symbolic link from /etc/mediawiki/mysite_2 to /var/www/MySite_2, which was created:
sudo ln -s /etc/mediawiki/mysite_2 /var/www/MySite_2
A virtual host configuration file named MySite2 was then created in /etc/apache2/sites-available (use gedit instead of kate in Ubuntu):
sudo kate /etc/apache2/sites-available/MySite2
and the settings created:
<VirtualHost *:80>#UseCanonicalName off#DocumentRoot /var/www/MySite_2DirectoryIndex index.php index.html#ServerName mysite_2.mydomain.org## We want to be able to access the web site using foobar1.dyndns.org or www.foobar1.dyndns.orgServerAlias mysite_2.mydomain.org ServerAdmin webmaster@localhost#RewriteEngine On#<Directory /var/www/MySite_2> Options Indexes FollowSymLinks MultiViews Options FollowSymLinks MultiViews # AllowOverride None Order allow,deny allow from all</Directory>#</VirtualHost>
The virtual host file was made active and Apache restarted:
sudo ln -s /etc/apache2/sites-available/MySite2 /etc/apache2/sites-enabled/MySite2sudo /etc/init.d/apache2 restart
If the servers are on different computers on the LAN, then Apache reverse proxy virtual host files should be used.
FTP tipsFTP (File Transfer Protocol) (https://en.wikipedia.org/wiki/File_Transfer_Protocol) is a standard network protocol used to transfer filesfrom one host to another host over a TCP-based network, such as a LAN or the Internet. FTP servers are very lightweight and efficient(and require little system overhead to run).
FTP has been used for several decades and is ubiquitous, with clients (https://en.wikipedia.org/wiki/Comparison_of_FTP_client_software) for every OS and platform. FileZilla, for example, is one of the easiest and most powerful.
sudo apt-get install filezilla
Almost all current FTP servers allow settings to enable FTPS (https://en.wikipedia.org/wiki/FTPS) (TLS/SSL encrypted transfers). This isdistinct from the practice of FTP through an SSH connection (known as SFTP (https://en.wikipedia.org/wiki/FTPS) ) which can only bedone by users that already have complete user shells (with SSH capabilities enabled) on the host computer (not a common scenario
UbuntuGuide Part2 - http://ubuntuguide.org/index.php?title=UbuntuGuide_Part2&...
70 of 177 08/10/2013 09:04 AM

with shared web host servers, for security reasons). The FileZilla client is compatible with all of the available securityimplementations.
Vsftpd (FTP server)
vsftpd (http://vsftpd.beasts.org/) is an FTP server available in (K)Ubuntu. For configuration information, see the official Ubuntudocumentation (https://help.ubuntu.com/12.04/serverguide/ftp-server.html) . Install:
sudo apt-get install vsftpd
Edit the configuration file /etc/vsftpd.conf (use gedit instead of kate if using Ubuntu instead of Kubuntu):
sudo kate /etc/vsftpd.conf
After changing the desired configuration settings, restart vsftpd:
sudo /etc/init.d/vsftpd restart
Using two separate user accounts for vsftpd
This is an example setup in which two authenticated user accounts (each with its own password) are used for FTP files. One useraccount (ftprestricted) will be used for restricted files, and one user account (ftpguest) will be used for less restricted files. The rationalefor such a setup is so that the two password-protected accounts will be created with folders in the /home folder, with relative privilegeseparation from each other and from the rest of the system. (In one commonly used setup, the /home folder is kept is own isolatedpartition, thereby easing and securing file maintenance during system upgrades (and other transitions). This example methodmaintains a FTP structure that is in keeping with such a setup).
While logged in as a system administrator, create two news user accounts named ftprestricted and ftpuser.
Menu -> System -> System Settings -> Advanced: User Management -> User Accounts-> New... -> Details -> Status: Enabled -> Login Name: ftprestricted -> Privileges and Groups
-> Privileges: (untick all) -> Groups: (untick all) -> Password/Security -> Password: Valid Until: Always (ticked) -> OK-> New... -> Details -> Status: Enabled -> Login Name: ftpguest -> Privileges and Groups
-> Privileges: (untick all) -> Groups: (untick all) -> Password/Security -> Password: Valid Until: Always (ticked) -> OK
Log out, then log in once as ftprestricted. When prompted, enter a password (such as ftpsecretpw) that will be used for allftprestricted functions (including FTP access). This will set up a complete shell / folder structure for ftprestricted. Log out, then login once as ftpguest. When prompted, enter a password (such as ftpopenpw) that will be used for all ftpguest functions (includingFTP access). This will set up a complete shell/folder structure for ftpguest. finally, logout and then log in once again as a systemadministrator.
Disable the ability of the two new user accounts (ftprestricted and ftpguest) to log into the system:
Menu -> System -> System Settings -> Advanced: Login Manager -> Users -> Excluded users: ftprestricted (ticked) -> ftpguest(tocked) -> OK
Using a File Manager with root-level privileges (sudo dolphin or sudo nautilus), delete any undesirable folders (such as /Desktop,/Templates, /Maildir, etc.) from the /home/ftprestricted and /home/ftpguest folders. (This will create a cleaner FTP folder structure.)
Edit the vsftpd configuration file to allow authenticated access (but not anonymous access). Allow read/write privileges (but notfor anonymous users). (Use gedit instead of kate if using Ubuntu instead of Kubuntu.) :
sudo kate /etc/vsftpd.conf
and make sure the following settings are included:
##anonymous_enable=YESanonymous_enable=NO##local_enable=NO local_enable=YES#write_enable=YES##anon_upload_enable=YESanon_upload_enable=NO#
Also set any other desired parameters. (With this setup, it is not necessary to chroot "jail" a user nor to use a separate "ftpsecure"
UbuntuGuide Part2 - http://ubuntuguide.org/index.php?title=UbuntuGuide_Part2&...
71 of 177 08/10/2013 09:04 AM

account.)
Save then restart vsftpd:
sudo /etc/init.d/vsftpd restart
Now there will be two FTP accounts that can be used with the FTP server, each with its own password and its own isolated set offolders (in the /home/ftprestricted and /home/ftpguest directories). Naturally, any number of user accounts used strictly for FTPcould be created in a similar manner. An FTP client could then connect to the server using Logontype: Normal and either theUser: ftprestricted with Password: ftpsecretpw or the User: ftpguest with Password: ftpopenpw.
Securing vsftpd
User account password sniffing and cracking is all too easy and common these days. For greater security I only allow specific useraccounts, set up strictly for FTP, to be accessed through FTP. There is a big security risk, IMO, in allowing regular user accounts tobe accessed by FTP. I therefore add all regular user accounts to the "no FTP" list found at /etc/ftpusers (which, in a namingparadox, is a list of system user accounts forbidden from using FTP).
sudo kate /etc/ftpusers
To this list I add all user accounts, except those designated solely for FTP (e.g. ftprestricted and ftpguest created in the example of thepreceding section).
Another method of restricting FTP user accounts is detailed in the official Ubuntu documentation (https://help.ubuntu.com/12.04/serverguide/ftp-server.html) .
Encrypting transfers with FTPS
FTP can be encrypted using FTPS (https://en.wikipedia.org/wiki/FTPS) , which is FTP over Secure Socket Layer (TLS/SSL). Thediscussion below is for explicit FTPS (FTPES).
To configure FTPS, edit /etc/vsftpd.conf (use gedit instead of kate if using Ubuntu instead of Kubuntu):
sudo kate /etc/vsftpd.conf
and at the bottom add:
ssl_enable=Yes
It is also possible to add the "pseudo-" certificate and key that are often pre-installed (or can be installed using the ssl-cert package --sudo apt-get install ssl-cert) on a (K)Ubuntu system by adding the lines:
#rsa_cert_file=/etc/ssl/certs/vsftpd.pemrsa_cert_file=/etc/ssl/certs/ssl-cert-snakeoil.pemrsa_private_key_file=/etc/ssl/private/ssl-cert-snakeoil.key
In a production environment, however, these should be replaced with a certificate and key generated for the specific host. For moreinformation on certificates see the official Ubuntu documentation (https://help.ubuntu.com/12.04/serverguide/certificates-and-security.html) .
Restart vsftpd, and non-anonymous users will be forced to use explicit FTPS:
sudo /etc/init.d/vsftpd restart
When connecting (using the FileZilla client, for example), now use Servertype: FTP over explicit TLS/SSL. A prompt will appear toaccept the (snakeoil) certificate.
Troubleshooting vsftpd
When using regular FTP behind a firewall, vsftpd uses port 21 as the control port and port 20 as the data port (in both active andpassive mode). Make sure ports 20-21 are open in the outgoing firewall of the FTP client, the incoming firewall of the vsftpdserver, and that the router forwards ports 20-21 to the LAN IP address used by the computer with the vsftpd server.
When using explicit FTPES behind a firewall, port 21 is still used as the control port, but a port range (other than port 20) to beused for data (in both passive and active modes) must be designated in the /etc/vsftpd.conf file, and opened/forwardedaccordingly. For example, edit /etc/vsftpd.conf (use gedit instead of kate if using Ubuntu instead of Kubuntu):
UbuntuGuide Part2 - http://ubuntuguide.org/index.php?title=UbuntuGuide_Part2&...
72 of 177 08/10/2013 09:04 AM
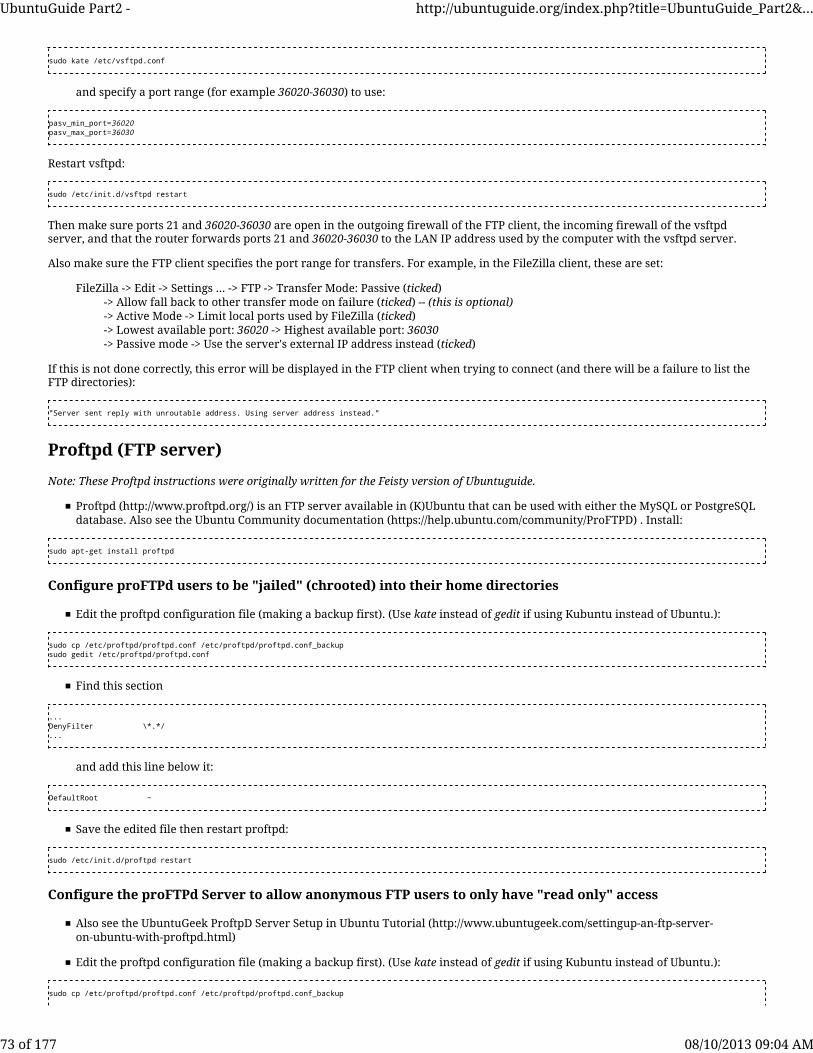
sudo kate /etc/vsftpd.conf
and specify a port range (for example 36020-36030) to use:
pasv_min_port=36020pasv_max_port=36030
Restart vsftpd:
sudo /etc/init.d/vsftpd restart
Then make sure ports 21 and 36020-36030 are open in the outgoing firewall of the FTP client, the incoming firewall of the vsftpdserver, and that the router forwards ports 21 and 36020-36030 to the LAN IP address used by the computer with the vsftpd server.
Also make sure the FTP client specifies the port range for transfers. For example, in the FileZilla client, these are set:
FileZilla -> Edit -> Settings ... -> FTP -> Transfer Mode: Passive (ticked)-> Allow fall back to other transfer mode on failure (ticked) -- (this is optional)-> Active Mode -> Limit local ports used by FileZilla (ticked)-> Lowest available port: 36020 -> Highest available port: 36030-> Passive mode -> Use the server's external IP address instead (ticked)
If this is not done correctly, this error will be displayed in the FTP client when trying to connect (and there will be a failure to list theFTP directories):
"Server sent reply with unroutable address. Using server address instead."
Proftpd (FTP server)
Note: These Proftpd instructions were originally written for the Feisty version of Ubuntuguide.
Proftpd (http://www.proftpd.org/) is an FTP server available in (K)Ubuntu that can be used with either the MySQL or PostgreSQLdatabase. Also see the Ubuntu Community documentation (https://help.ubuntu.com/community/ProFTPD) . Install:
sudo apt-get install proftpd
Configure proFTPd users to be "jailed" (chrooted) into their home directories
Edit the proftpd configuration file (making a backup first). (Use kate instead of gedit if using Kubuntu instead of Ubuntu.):
sudo cp /etc/proftpd/proftpd.conf /etc/proftpd/proftpd.conf_backupsudo gedit /etc/proftpd/proftpd.conf
Find this section
...DenyFilter \*.*/...
and add this line below it:
DefaultRoot ~
Save the edited file then restart proftpd:
sudo /etc/init.d/proftpd restart
Configure the proFTPd Server to allow anonymous FTP users to only have "read only" access
Also see the UbuntuGeek ProftpD Server Setup in Ubuntu Tutorial (http://www.ubuntugeek.com/settingup-an-ftp-server-on-ubuntu-with-proftpd.html)
Edit the proftpd configuration file (making a backup first). (Use kate instead of gedit if using Kubuntu instead of Ubuntu.):
sudo cp /etc/proftpd/proftpd.conf /etc/proftpd/proftpd.conf_backup
UbuntuGuide Part2 - http://ubuntuguide.org/index.php?title=UbuntuGuide_Part2&...
73 of 177 08/10/2013 09:04 AM

sudo gedit /etc/proftpd/proftpd.conf
Append the following lines at the end of file
<Anonymous ~ftp> User ftp Group nogroup UserAlias anonymous ftp DirFakeUser on ftp DirFakeGroup on ftp RequireValidShell off MaxClients 10 DisplayLogin welcome.msg DisplayFirstChdir .message <Directory *> <Limit WRITE> DenyAll </Limit> </Directory></Anonymous>
Save the edited file then restart proftpd:
sudo /etc/init.d/proftpd restart
Configure the proFTPd Server to allow anonymous FTP users to have "read/write" access
Edit the proftpd configuration file (making a backup first). (Use kate instead of gedit if using Kubuntu instead of Ubuntu.):
sudo cp /etc/proftpd/proftpd.conf /etc/proftpd/proftpd.conf_backupsudo gedit /etc/proftpd/proftpd.conf
Append the following lines at the end of file
<Anonymous ~ftp> User ftp Group nogroup UserAlias anonymous ftp DirFakeUser on ftp DirFakeGroup on ftp RequireValidShell off MaxClients 10 DisplayLogin welcome.msg DisplayFirstChdir .message</Anonymous>
Save the edited file then restart proftpd:
sudo /etc/init.d/proftpd restart
Map the anonymous FTP user to a folder other than /home/ftp/
Edit the proftpd configuration file (making a backup first). (Use kate instead of gedit if using Kubuntu instead of Ubuntu.):
sudo cp /etc/proftpd/proftpd.conf /etc/proftpd/proftpd.conf_backupsudo gedit /etc/proftpd/proftpd.conf
Append the following lines at the end of file
<Anonymous /location_of_folder/> User ftp Group nogroup UserAlias anonymous ftp DirFakeUser on ftp DirFakeGroup on ftp RequireValidShell off MaxClients 10 DisplayLogin welcome.msg DisplayFirstChdir .message <Directory *> <Limit WRITE> DenyAll </Limit> </Directory></Anonymous>
Save the edited file then restart proftpd:
UbuntuGuide Part2 - http://ubuntuguide.org/index.php?title=UbuntuGuide_Part2&...
74 of 177 08/10/2013 09:04 AM

sudo /etc/init.d/proftpd restart
Change the default port number for the proFTPd Server
For this example the new port number will be 77. Edit the proftpd configuration file (making a backup first). (Use kate instead ofgedit if using Kubuntu instead of Ubuntu.):
sudo cp /etc/proftpd/proftpd.conf /etc/proftpd/proftpd.conf_backupsudo gedit /etc/proftpd/proftpd.conf
Find this line:
Port 21
Replace with the following line:
Port 77
Restart the FTP server:
sudo /etc/init.d/proftpd restart
FTP to a remote (K)Ubuntu host from a Windows client
Warning: An unsecured FTP server is a security risk. FTP servers should be used either within a firewall-protected LAN only orover the Internet in conjunction with TLS/SSL (FTPS), SSH (SFTP), or using a VPN connection.The remote (K)Ubuntu host machine must have an FTP Server service running.
Download and install FileZilla for Windows here (http://prdownloads.sourceforge.net/filezilla/FileZilla_2_2_18_setup.exe?download) .
FTP addresses take the form:
ftp://[username]:[password]@[hostname].[domain].[tld]:[portnumber]/[directory]/
Note: The username and password are optional. If they are not given (and the server is not configured for anonymous access) they willbe requested.
FTP to a remote Windows host from a (K)Ubuntu client
Warning: An unsecured FTP server is a security risk. FTP servers should be used either within a firewall-protected LAN only orover the Internet in conjunction with TLS/SSL (FTPS), SSH (SFTP), or using a VPN connection.
Install an FTP Server on your main file host. You can use FileZilla Server for Windows (http://sourceforge.net/project/showfiles.php?group_id=21558) or CrossFTP Server (http://www.crossftp.com/crossftpserver.htm) (which requires Java) for allplatforms (see this CrossFTP Server tutorial (http://www.crossftp.com/tutorials/tutorial_server_setup_demo/tutorial_server_setup_demo.htm) ).
Install an FTP client on your local client machine. Again, you can use FileZilla (http://sourceforge.net/project/showfiles.php?group_id=21558) or CrossFTP (http://www.crossftp.com/) .
FileZilla is available as a package:
sudo apt-get install filezilla
The FTP address normally has the form:
ftp://[username]:[password]@[hostname]:[port]
Configure the NAT/router/gateway/firewall for an FTP server
The host machine must be running an FTP Server.
Configure your FTP server with a limited passive port range so that the same limited TCP port range can be opened in the"incoming" firewall settings.
UbuntuGuide Part2 - http://ubuntuguide.org/index.php?title=UbuntuGuide_Part2&...
75 of 177 08/10/2013 09:04 AM
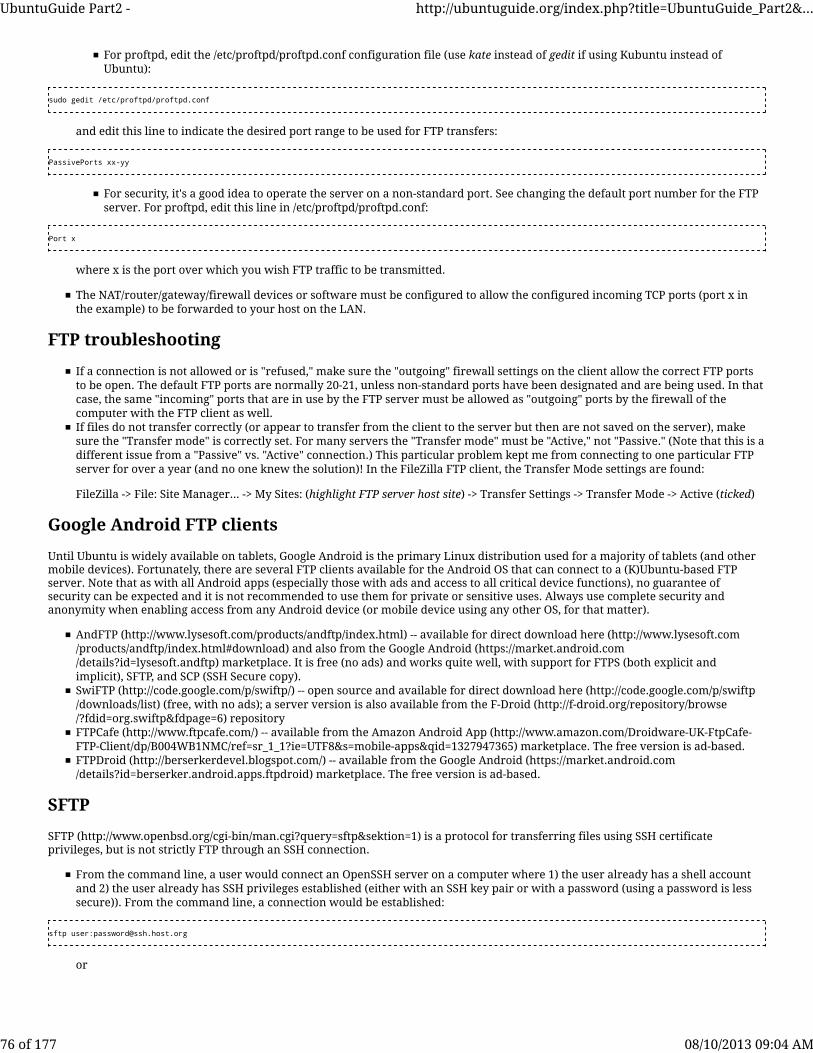
For proftpd, edit the /etc/proftpd/proftpd.conf configuration file (use kate instead of gedit if using Kubuntu instead ofUbuntu):
sudo gedit /etc/proftpd/proftpd.conf
and edit this line to indicate the desired port range to be used for FTP transfers:
PassivePorts xx-yy
For security, it's a good idea to operate the server on a non-standard port. See changing the default port number for the FTPserver. For proftpd, edit this line in /etc/proftpd/proftpd.conf:
Port x
where x is the port over which you wish FTP traffic to be transmitted.
The NAT/router/gateway/firewall devices or software must be configured to allow the configured incoming TCP ports (port x inthe example) to be forwarded to your host on the LAN.
FTP troubleshooting
If a connection is not allowed or is "refused," make sure the "outgoing" firewall settings on the client allow the correct FTP portsto be open. The default FTP ports are normally 20-21, unless non-standard ports have been designated and are being used. In thatcase, the same "incoming" ports that are in use by the FTP server must be allowed as "outgoing" ports by the firewall of thecomputer with the FTP client as well.If files do not transfer correctly (or appear to transfer from the client to the server but then are not saved on the server), makesure the "Transfer mode" is correctly set. For many servers the "Transfer mode" must be "Active," not "Passive." (Note that this is adifferent issue from a "Passive" vs. "Active" connection.) This particular problem kept me from connecting to one particular FTPserver for over a year (and no one knew the solution)! In the FileZilla FTP client, the Transfer Mode settings are found:
FileZilla -> File: Site Manager... -> My Sites: (highlight FTP server host site) -> Transfer Settings -> Transfer Mode -> Active (ticked)
Google Android FTP clients
Until Ubuntu is widely available on tablets, Google Android is the primary Linux distribution used for a majority of tablets (and othermobile devices). Fortunately, there are several FTP clients available for the Android OS that can connect to a (K)Ubuntu-based FTPserver. Note that as with all Android apps (especially those with ads and access to all critical device functions), no guarantee ofsecurity can be expected and it is not recommended to use them for private or sensitive uses. Always use complete security andanonymity when enabling access from any Android device (or mobile device using any other OS, for that matter).
AndFTP (http://www.lysesoft.com/products/andftp/index.html) -- available for direct download here (http://www.lysesoft.com/products/andftp/index.html#download) and also from the Google Android (https://market.android.com/details?id=lysesoft.andftp) marketplace. It is free (no ads) and works quite well, with support for FTPS (both explicit andimplicit), SFTP, and SCP (SSH Secure copy).SwiFTP (http://code.google.com/p/swiftp/) -- open source and available for direct download here (http://code.google.com/p/swiftp/downloads/list) (free, with no ads); a server version is also available from the F-Droid (http://f-droid.org/repository/browse/?fdid=org.swiftp&fdpage=6) repositoryFTPCafe (http://www.ftpcafe.com/) -- available from the Amazon Android App (http://www.amazon.com/Droidware-UK-FtpCafe-FTP-Client/dp/B004WB1NMC/ref=sr_1_1?ie=UTF8&s=mobile-apps&qid=1327947365) marketplace. The free version is ad-based.FTPDroid (http://berserkerdevel.blogspot.com/) -- available from the Google Android (https://market.android.com/details?id=berserker.android.apps.ftpdroid) marketplace. The free version is ad-based.
SFTP
SFTP (http://www.openbsd.org/cgi-bin/man.cgi?query=sftp&sektion=1) is a protocol for transferring files using SSH certificateprivileges, but is not strictly FTP through an SSH connection.
From the command line, a user would connect an OpenSSH server on a computer where 1) the user already has a shell accountand 2) the user already has SSH privileges established (either with an SSH key pair or with a password (using a password is lesssecure)). From the command line, a connection would be established:
sftp user:[email protected]
or
UbuntuGuide Part2 - http://ubuntuguide.org/index.php?title=UbuntuGuide_Part2&...
76 of 177 08/10/2013 09:04 AM
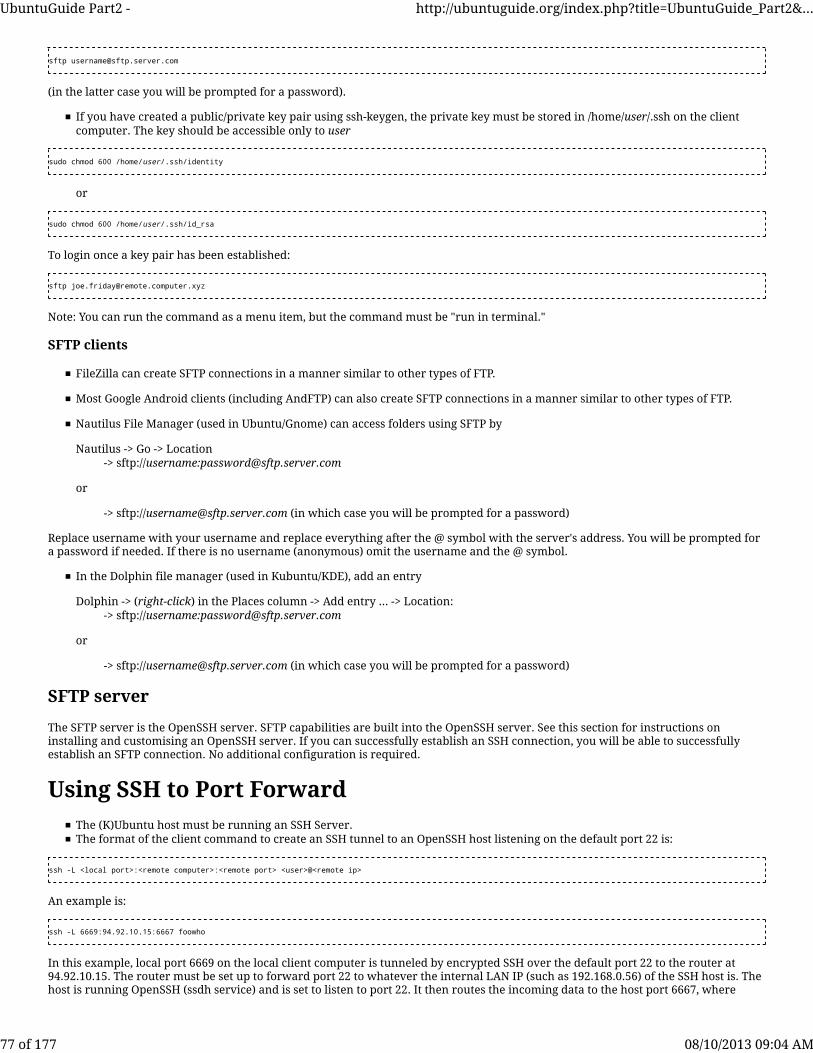
sftp [email protected]
(in the latter case you will be prompted for a password).
If you have created a public/private key pair using ssh-keygen, the private key must be stored in /home/user/.ssh on the clientcomputer. The key should be accessible only to user
sudo chmod 600 /home/user/.ssh/identity
or
sudo chmod 600 /home/user/.ssh/id_rsa
To login once a key pair has been established:
sftp [email protected]
Note: You can run the command as a menu item, but the command must be "run in terminal."
SFTP clients
FileZilla can create SFTP connections in a manner similar to other types of FTP.
Most Google Android clients (including AndFTP) can also create SFTP connections in a manner similar to other types of FTP.
Nautilus File Manager (used in Ubuntu/Gnome) can access folders using SFTP by
Nautilus -> Go -> Location-> sftp://username:[email protected]
or
-> sftp://[email protected] (in which case you will be prompted for a password)
Replace username with your username and replace everything after the @ symbol with the server's address. You will be prompted fora password if needed. If there is no username (anonymous) omit the username and the @ symbol.
In the Dolphin file manager (used in Kubuntu/KDE), add an entry
Dolphin -> (right-click) in the Places column -> Add entry ... -> Location:-> sftp://username:[email protected]
or
-> sftp://[email protected] (in which case you will be prompted for a password)
SFTP server
The SFTP server is the OpenSSH server. SFTP capabilities are built into the OpenSSH server. See this section for instructions oninstalling and customising an OpenSSH server. If you can successfully establish an SSH connection, you will be able to successfullyestablish an SFTP connection. No additional configuration is required.
Using SSH to Port ForwardThe (K)Ubuntu host must be running an SSH Server.The format of the client command to create an SSH tunnel to an OpenSSH host listening on the default port 22 is:
ssh -L <local port>:<remote computer>:<remote port> <user>@<remote ip>
An example is:
ssh -L 6669:94.92.10.15:6667 foowho
In this example, local port 6669 on the local client computer is tunneled by encrypted SSH over the default port 22 to the router at94.92.10.15. The router must be set up to forward port 22 to whatever the internal LAN IP (such as 192.168.0.56) of the SSH host is. Thehost is running OpenSSH (ssdh service) and is set to listen to port 22. It then routes the incoming data to the host port 6667, where
UbuntuGuide Part2 - http://ubuntuguide.org/index.php?title=UbuntuGuide_Part2&...
77 of 177 08/10/2013 09:04 AM

presumably some other program is waiting for data. foowho has an account on the host running the OpenSSH server.
SSH tunnels can also be established using URLs and even alternate ports. An example is:
ssh -L 5900:foobar.dyndns.org:5900 foowho -p 11022
In this example, local port 5900 on the client is forwarded through an SSH tunnel on port 11022 to foobar.dyndns.org. The DNS servicetranslates foobar.dyndns.org into the appropriate WAN (Internet) IP address, where the router is listening. The router is set up toforward port 11022 to the LAN machine hosting the OpenSSH server, which is listening on port 11022. It then sends the data towhatever program is running on port 5900 on the host.
You can forward a local port to a different port on the remote host.
Example: Make port 80 (web server/browser) on the remote host at 10.0.2.10 available locally as port 81
ssh -L 81:10.0.2.10:80 [email protected]
You can create secure SSH tunnels to multiple hosts using multiple ports.
ssh -L 81:10.0.2.10:80 -L 82:10.0.2.20:80 -L 83:10.0.2.30:80 [email protected]
Now, local port 81 locally forwards to port 80 on the host at 10.0.2.10, local port 82 forwards to port 80 on the host at 10.0.2.20 and localport 83 forwards to port 80 on the host at 10.0.2.30. In this example, user has an account on all three host machines at 10.0.2.10,10.0.2.20, and 10.0.2.30.
Once port forwarding is set up by ssh, an application is directed to the SSH tunnel for port usage by using the loopback as thedestination.
Example 1:
ssh -L 81:10.0.2.10:80 [email protected]
http://localhost:81 or http://127.0.0.1/:81
will direct a web browser to use port 81 locally, which is being redirected by SSH to port 80 on the remote host at 10.0.2.10.
Example 2:
ssh -L 5900:foobar.dyndns.org:5900 foowhovncviewer 127.0.0.1 or vncviewer localhost
will direct vncviewer (which uses port 5900 by default) to direct its traffic through the ssh tunnel to the host at foobar.dyndns.org,where, presumably, a VNC server is listening on port 5900.
Limit OpenSSH users
How to limit the user accounts that can connect through ssh remotely
Note: When you initially enable the SSH server, any user with a valid account can connect remotely. This can lead to securityrisks because password cracking tools exist that try common username/password pairs. This method helps restrict login access.
Keep a backup of the ssh server configuration file:
sudo cp /etc/ssh/sshd_config /etc/ssh/sshd_config.ORIGINAL
Edit the configuration file (use the gedit text editor instead of kate if using Ubuntu instead of Kubuntu):
sudo kate /etc/ssh/sshd_config
Change the parameter:
PermitRootLogin no
This disallows the root user from connecting through SSH remotely.
UbuntuGuide Part2 - http://ubuntuguide.org/index.php?title=UbuntuGuide_Part2&...
78 of 177 08/10/2013 09:04 AM
Add the parameter:
AllowUsers <user1> <user2> ...
and specify the usernames (space separated) that can connect remotely.
NOTE: This will allow ONLY the users specified to connect. You may use wildcards here (example: j* will allow jsmith to connect butnot fsmith).
You can also use:
DenyUsers <user1> <User2> ...
and specify, again using wildcards, users restricted from using SSH.
If you enable the OpenSSH server and you do not wish to enable any remote connections, you may add:
AllowUsers nosuchuserhere
OpenVPN server Karmic
OpenVPN
One computer on a LAN can be designated as a VPN (http://en.wikipedia.org/wiki/Virtual_private_network) server to allow encryptedtraffic to pass between remote clients and the computers on the LAN (through the VPN server portal). OpenVPN (http://openvpn.net/)uses Public Key Infrastructure (PKI) (http://en.wikipedia.org/wiki/Public_key_infrastructure) certificates when establishing anencrypted VPN (http://en.wikipedia.org/wiki/Virtual_private_network) tunnel between two nodes (the server and the client).
This hardware requirements of a dedicated VPN server depend on the number of simultaneous communication tunnels that areanticipated. A very modest computer can fulfill the needs of a VPN server if less than 10 VPN connections are anticipated. A VPNserver with dozens of tunnels may benefit from greater RAM and CPU speed. Of course, the speed of the ethernet connection is thelimiting factor, so robust networking cards are very important (Gigabit speeds are desirable, at least).
Using a bridge interface
An OpenVPN server often uses a bridge interface. One network connection (an ethernet card, for example) connects to the WAN(Internet) through which the VPN connection is made, and a second network connection (a second ethernet card, for example)connects to the LAN. The traffic between these two connections is "bridged." See Network Interface Bridging for more details.
OpenVPN Server Installation
Install OpenVPN:
sudo apt-get install openvpn
Server certificates
Create the OpenVPN server certificates.
Copy the easy-rsa directory to /etc/openvpn. This will ensure that any changes to the scripts will not be lost when thepackage is updated.
sudo mkdir /etc/openvpn/easy-rsa/sudo cp -r /usr/share/doc/openvpn/examples/easy-rsa/2.0/ /etc/openvpn/
Edit /etc/openvpn/easy-rsa/vars and adjust the variables for your environment:
export KEY_COUNTRY="US"export KEY_PROVINCE="CA"export KEY_CITY="MyCity"export KEY_ORG="MyCompany"export KEY_EMAIL="[email protected]"
Run the scripts to create the server certificates:
cd /etc/openvpn/easy-rsa/easy-rsa
UbuntuGuide Part2 - http://ubuntuguide.org/index.php?title=UbuntuGuide_Part2&...
79 of 177 08/10/2013 09:04 AM
source vars./clean-all./build-dh./pkitool --initca./pkitool --server servercd keysopenvpn --genkey --secret ta.keysudo cp server.crt server.key ca.crt dh1024.pem ta.key /etc/openvpn/
Client Certificates
A VPN clients requires a certificate in order to authenticate itself to the VPN server.Create the certificate:
cd /etc/openvpn/easy-rsa/source vars./pkitool hostname
Note: Replace hostname with the actual hostname of the client machine that will be connecting to the VPN.
Copy the certificate files that have been created to the client:
/etc/openvpn/easy-rsa/hostname.ovpn/etc/openvpn/easy-rsa/ca.crt/etc/openvpn/easy-rsa/hostname.crt/etc/openvpn/easy-rsa/hostname.key/etc/openvpn/easy-rsa/ta.key
Note: Use the files that correspond to your client machine's hostname.
Server Configuration
On the OpenVPN server, modify /etc/openvpn/server.conf from the example file:
sudo cp /usr/share/doc/openvpn/examples/sample-config-files/server.conf.gz /etc/openvpn/sudo gzip -d /etc/openvpn/server.conf.gz
Edit etc/openvpn/server.conf:
sudo nano /etc/openvpn/server.conf
Changing the following options to resemble:
local 172.18.100.101dev tap0server-bridge 172.18.100.101 255.255.255.0 172.18.100.105 172.18.100.200push "route 172.18.100.1 255.255.255.0"push "dhcp-option DNS 172.18.100.20"push "dhcp-option DOMAIN example.com"tls-auth ta.key 0 # This file is secretuser nobodygroup nogroup
Notes:local: is the IP address of the bridge interface.server-bridge: needed when the configuration uses bridging. The 172.18.100.101 255.255.255.0 portion is the bridgeinterface and mask. The IP range 172.18.100.105 172.18.100.200 is the range of IP addresses that will be assigned to clients.push: directives to add networking options for clients.user and group: configure which user and group the openvpn daemon executes as.Replace all IP addresses and domain names above with those of your network.
Create helper scripts to add the tap interface to the bridge.
Create /etc/openvpn/up.sh:
sudo nano /etc/openvpn/up.sh
Add the lines:
#!/bin/sh#BR=$1DEV=$2
UbuntuGuide Part2 - http://ubuntuguide.org/index.php?title=UbuntuGuide_Part2&...
80 of 177 08/10/2013 09:04 AM

MTU=$3/sbin/ifconfig $DEV mtu $MTU promisc up/usr/sbin/brctl addif $BR $DEV
Create /etc/openvpn/down.sh:
sudo nano /etc/openvpn/down.sh
Add the lines:
#!/bin/sh#BR=$1DEV=$2#/usr/sbin/brctl delif $BR $DEV/sbin/ifconfig $DEV down
Make the scripts executable:
sudo chmod 755 /etc/openvpn/down.shsudo chmod 755 /etc/openvpn/up.sh
Restart OpenVpn:
sudo /etc/init.d/openvpn restart
Client Configuration
Copy the example client configuration file:
sudo cp /usr/share/doc/openvpn/examples/sample-config-files/client.conf /etc/openvpn
Edit the client configuration file:
sudo nano /etc/openvpn/client.conf
Change it to resemble:
dev tapremote vpn.mycompany.com 1194cert hostname.crtkey hostname.keytls-auth ta.key 1
Note: Replace vpn.mycompany.com with the hostname of your VPN server, and hostname.* with the actual certificate and keyfilenames that correspond to the client.
Restart OpenVpn:
sudo /etc/init.d/openvpn restart
Connect the VPN client to the remote LAN through the OpenVPN server.
Other resources
Ubuntu 9.10 Server Guide (Karmic Koala) -- OpenVPN server (https://help.ubuntu.com/9.10/serverguide/C/openvpn.html)
WebDAVWebDAV (http://en.wikipedia.org/wiki/WebDAV) is a method for allowing remote access to local folders via an HTTP-based webbrowser. In other words, an HTTP-based file server is created (using the Apache2 server platform in these examples, since the Apache2webserver has a built-in WebDAV module (http://httpd.apache.org/docs/2.2/mod/mod_dav.html) ).
This can be combined with user authentication (using LDAP or a number of other password mechanisms).
WebDAV Server Installation
UbuntuGuide Part2 - http://ubuntuguide.org/index.php?title=UbuntuGuide_Part2&...
81 of 177 08/10/2013 09:04 AM
Install Apache webserver
Apache2 must be installed, either alone or as part of a LAMP server.
sudo apt-get install apache2
or
sudo apt-get install taskselsudo tasksel install lamp-server
Open your firewall
Remember, WebDAV is an HTTP server. The incoming default HTTP and/or HTTPS ports (80 and/or 443) should be open to the server. Itis, of course, also possible to use custom ports by changing the allowed incoming ports in the firewall, the virtual host configurationfile, and, of course, the URL used to reach the WebDAV server.
Enable the Apache2 WebDAV modules
Enable the dav and dav_fs modules:
sudo a2enmod dav_fs
Restart Apache2:
sudo /etc/init.d/apache2 restart
Create a folder for WebDAV use
There are two options:
Create a WebDAV directory in the /var/www folder:
sudo mkdir /var/www/WebDAV1
or
Create a WebDAV directory in the /home/user/ (also known as ~/) folder and create a symbolic link:
mkdir ~/WebDAV1sudo ln -s ~/WebDAV1 /var/www/
Create a subdirectory for files:
mkdir /var/www/WebDAV1/files
Note: In the next several steps, file/folder ownership and permissions can also be adjusted from a File Manager (such as Dolphin inKubuntu or Nautilus in Ubuntu) as root:
sudo dolphin
or
sudo nautilus
Make sure the owner of whichever WebDAV folder was created (and its subfolders, using the -R recursive switch) is www-data(the user ID for Apache2) and the group is that of your user ID (or, alternatively, root):
sudo chown -R www-data:user /var/www/WebDAV1
or
sudo chown -R www-data:user ~/WebDAV1
UbuntuGuide Part2 - http://ubuntuguide.org/index.php?title=UbuntuGuide_Part2&...
82 of 177 08/10/2013 09:04 AM

Alternatively you could create a webdav user group so that some group of local users could access the files locally (instead of throughWebDAV). Add the individual users to that group and use webdav as the group instead of a single user (or root), for example:
sudo chown -R www-data:webdav /var/www/WebDAV1
To allow files in the WebDAV folder (and its subfolders, using the -R recursive switch) to be Read/Write but not eXecutable (whichmay be a security risk on some servers):
sudo chmod 664 -R /var/www/WebDAV1
or
sudo chmod 664 -R ~/WebDAV1
Create or edit the virtual host file
Edit the virtual host (vhost) file used for the URL through which WebDAV will be accessed (use the gedit text editor instead of kateif using Ubuntu instead of Kubuntu):
sudo kate /etc/apache2/sites-available/mydomainhost
where mydomainhost is the name of the virtual host configuration file used for your URL. If you are using the default virtual host file,edit that one.
Add the line
Alias /webdav1 /var/www/WebDAV1/files
so that accessing the WebDAV folder using the URL
http://myhost.mydomain.org/webdav1
will forward to the correct folder (/var/www/WebDAV1) on the computer.
The final virtual host file ought to resemble:
<VirtualHost *>## UseCanonicalName off# ServerName webdav1.mydomain.org ServerName myhost.mydomain.org ServerAlias 192.168.0.155 webdav1.mydomain.org# ServerAdmin root@localhost DocumentRoot /var/www/# Alias /webdav1 /var/www/WebDAV1/files# <Directory /var/www/WebDAV1/> Options Indexes MultiViews AllowOverride None Order allow,deny allow from all </Directory></VirtualHost>
In this example, the WebDAV server is on the primary server, so the URL is the same as that of the primary server (and would beaccessed from http://myhost.mydomain.org/webdav1). The primary server's IP address on the LAN (in this example) is 192.168.0.155, soto access it from the LAN, this address could also be used: http://192.168.0.155/webdav1.
Enable the virtual host (vhost):
sudo ln -s /etc/apache2/sites-available/mydomainhost /etc/apache2/sites-enabled/
Restart Apache2:
sudo /etc/init.d/apache2 restart
Test that the folders are reachable through Apache2 using:
http://localhost/webdav1
UbuntuGuide Part2 - http://ubuntuguide.org/index.php?title=UbuntuGuide_Part2&...
83 of 177 08/10/2013 09:04 AM

or
http://192.168.0.155/webdav1
Create password access for the WebDAV folders
Note: This method uses HTTP Basic Authentication as outlined in the Apache documentation (http://httpd.apache.org/docs/2.0/mod/mod_dav.html) . However, this same documentation recommends against routine use of HTTP Basic Authentication (whichtransmits unencrypted passwords, inviting password sniffing) and instead recommends HTTP Digest Authentication(http://httpd.apache.org/docs/2.0/mod/mod_auth_digest.html) (or at least HTTP Basic Authentication over SSL(http://httpd.apache.org/docs/2.0/mod/mod_ssl.html) ). Refer to the Apache documentation for more details.
Create the WebDAV password file /var/www/WebDAV1/passwd.dav with the user testuser. For more info see here(http://httpd.apache.org/docs/2.0/howto/auth.html) . (The -c switch creates the file if it does not exist.):
sudo htpasswd -c /var/www/WebDAV1/passwd.dav testuser
Type in a password for the user testuser.
We will later use this userID when connecting to the WebDAV URL:
http://myhost.mydomain.org/webdav1
Add other users (e.g. testuser2, testuser3, etc.) as needed. (Omit the -c switch because the password file already exists.)
sudo htpasswd /var/www/WebDAV1/passwd.dav testuser2
Note: See below for adding a password for users accessing WebDAV folders from Windows clients.
Change the permissions of the /var/www/WebDAV1/passwd.dav file so that only www-data (as owner) and user (or, alternatively,root) as the group can access it:
sudo chown www-data:user /var/www/WebDAV1/passwd.davsudo chmod 660 /var/www/WebDAV1/passwd.dav
Note: I personally use chmod 460, which does not allow the www-data owner to write to the file (only read permissions areallowed). Only members of the local group user can read/write to the file using this chmod 460 setting.
Edit the virtual host (vhost) file /etc/apache2/sites-available/mydomainhost (use the gedit text editor instead of kate if usingUbuntu instead of Kubuntu):
sudo kate /etc/apache2/sites-available/mydomainhost
and add the following lines to it:
# <Location /webdav1> DAV On AuthType Basic AuthName "webdav1" AuthUserFile /var/www/WebDAV1/passwd.dav Require valid-user </Location>
The final virtual host (vhost) file should resemble:
<VirtualHost *>## UseCanonicalName off# ServerName webdav1.mydomain.org ServerName myhost.mydomain.org ServerAlias 192.168.0.155 webdav1.mydomain.org# ServerAdmin root@localhost DocumentRoot /var/www/# Alias /webdav1 /var/www/WebDAV1/files# <Directory /var/www/WebDAV1/> Options Indexes MultiViews AllowOverride None Order allow,deny allow from all </Directory>#
UbuntuGuide Part2 - http://ubuntuguide.org/index.php?title=UbuntuGuide_Part2&...
84 of 177 08/10/2013 09:04 AM

<Location /webdav1> DAV On AuthType Basic AuthName "webdav1" AuthUserFile /var/www/WebDAV1/passwd.dav Require valid-user </Location></VirtualHost>
Reload Apache:
/etc/init.d/apache2 reload
Testing WebDAV
Install cadaver, a command-line WebDAV client:
sudo apt-get install cadaver
Test if WebDAV works:
cadaver http://localhost/webdav1/
You should be prompted for a user name. Type in testuser and then the password for testuser. If all goes well, you should be grantedaccess which means WebDAV is working ok. To leave the WebDAV shell, type quit:
server1:~# cadaver http://localhost/webdav1/Authentication required for test on server `localhost':Username: testuserPassword: *******dav:/webdav1/> quitConnection to `localhost' closed.server1:~#
Set up Digest Authorization (encrypted passwords)
Enable the HTTP Digest Authentication (http://httpd.apache.org/docs/2.0/mod/mod_auth_digest.html) module:
sudo a2enmod auth_digest
Create a digest authorization password file:
sudo htdigest -c /var/www/WebDAV1/digestpasswd.dav webdav1digest testuser
Add other users (e.g. testuser2, testuser3, etc.) as needed. (Omit the -c switch because the password file already exists.)
sudo htdigest /var/www/WebDAV1/digestpasswd.dav webdav1digest testuser2
Note: See below for adding a password for users accessing WebDAV folders from Windows clients.
Change the permissions of the /var/www/WebDAV1/digestpasswd.dav file so that only www-data (as owner) and user (or,alternatively, root) as the group can access it:
sudo chown www-data:user /var/www/WebDAV1/digestpasswd.davsudo chmod 660 /var/www/WebDAV1/digestpasswd.dav
Note: I personally use chmod 460, which does not allow the www-data owner to write to the file (only read permissions areallowed). Only members of the local group user can read/write to the file using this chmod 460 setting.
Edit the virtual host (vhost) file /etc/apache2/sites-available/mydomainhost (use the gedit text editor instead of kate if usingUbuntu instead of Kubuntu):
sudo kate /etc/apache2/sites-available/mydomainhost
and this time add the following lines to it:
# <Location /webdav1>
UbuntuGuide Part2 - http://ubuntuguide.org/index.php?title=UbuntuGuide_Part2&...
85 of 177 08/10/2013 09:04 AM

DAV On AuthType Digest AuthName "webdav1digest" AuthUserFile /var/www/WebDAV1/digestpasswd.dav Require valid-user </Location>
so that the final file resembles:
<VirtualHost *>## UseCanonicalName off# ServerName webdav1.mydomain.org ServerName myhost.mydomain.org ServerAlias 192.168.0.155 webdav1.mydomain.org# ServerAdmin root@localhost DocumentRoot /var/www/# Alias /webdav1 /var/www/WebDAV1/files#<Directory /var/www/WebDAV1/> Options Indexes MultiViews AllowOverride None Order allow,deny allow from all </Directory>## <Location /webdav1># DAV On# AuthType Basic# AuthName "webdav1"# AuthUserFile /var/www/WebDAV1/passwd.dav# Require valid-user# </Location># <Location /webdav1> DAV On AuthType Digest AuthName "webdav1digest" AuthUserFile /var/www/WebDAV1/digestpasswd.dav Require valid-user </Location></VirtualHost>
Enable WebDAV lock
Although optional, the lock database prevents multiple users from overwriting the same file simultaneously.
Create a global Apache2 configuration file (use the gedit text editor instead of kate if using Ubuntu instead of Kubuntu):
sudo kate /etc/apache2/conf.d/webdav
and add the single line:
DavLockDB /var/lock/apache2/DAVLock
It may be necessary to also add this line to the dav_fs configuration file:
sudo kate /etc/apache2/mods-available/dav_fs.conf
This directive indicates that the locking database files will be named DAVLock by the dav_lock module. These database files will bestored by Apache in the /var/lock/apache2 folder.
By default, Apache2 allows a WebDAV client to set the file lock time. Many WebDAV clients, for example, impose a file lock time of2 minutes. A longer lock time can optionally be imposed by the WebDAV server by adding an additional line:
DAVMinTimeout 5
where in this example the minimum file lock time is set to 5 minutes for all clients. (The default is DAVMinTimeout 0, whichindicates that no minimum file lock time is imposed by the server and it is left up to the individual WebDAV clients).
Enable the Apache2 dav_lock module:
sudo a2enmod dav_lock
Restart Apache2:
UbuntuGuide Part2 - http://ubuntuguide.org/index.php?title=UbuntuGuide_Part2&...
86 of 177 08/10/2013 09:04 AM

sudo /etc/init.d/apache2 restart
Multiple WebDAV servers on a LAN using a single IP address and router
Note: This section is undergoing editing.
To run multiple servers (including WebDAV servers) on multiple computers on a LAN using only a single IP address and router,see this solution using reverse proxies in Apache.
Each server should have a unique WebDAV folder name. Instead of using WebDAV1 and webdav1, different names, such asWebDAV2 and webdav2, WebDAV3 and webdav3, WebDAV4 and webdav4, etc., should be used on each of the individualcomputers.
Each computer's WebDAV folder would then be reached by its own unique label, e.g.
http://myhost.mydomain.org/webdav1
or
http://myhost.mydomain.org/webdav2
or
http://myhost.mydomain.org/webdav3
Alternatively, if each computer has its own unique URL, the unique URL can be used. Adjust the reverse proxy virtual host file (on theprimary server that acts as the proxy/reverse proxy to the other servers) accordingly in order to enable this.
This does not always work and a lot of troubleshooting and trial and error is needed to perfect rewrite rules. Sometimes a morerelaible method is to just use the RedirectMatch rule with the actual LAN IP address of the second server.
Here is a detailed example, although there are many ways to accomplish this.
On the primary server of the LAN (the one to which the router initially directs port 80 traffic), make sure the proxy/reverse proxymodules of Apache2 are enabled and then restart Apache:
sudo a2enmod proxysudo a2enmod proxy_httpsudo /etc/init.d/apache2 restart
Also makes sure the rewrite module is on:
sudo a2enmod rewrite
This example assumes the primary server has its own set of WebDAV folders (as in the steps outlined above), labeledwebdav1/WebDAV1.
Duplicate the steps for the second server, substituting webdav2 and WebDAV2 in each step.
On the primary server, edit the virtual host file for the primary URL (e.g. /etc/apache2/sites-available/mydomainhost) by which theLAN is reached (use the gedit text editor instead of kate if using Ubuntu instead of Kubuntu):
sudo kate /etc/apache2/sites-available/mydomainhost
Near the beginning of the file add the lines:
# UseCanonicalName off# RewriteEngine On RedirectMatch (.*)/webdav2 http://192.168.0.156/webdav2
This example assumes, of course, that the second server is located on the LAN at IP address 192.168.0.156. This ensures that the newlytransformed URL gets sent to the correct IP address on the LAN. This is the proxy function of the first server. (It also specifies thereverse process.)
The file should now resemble:
<VirtualHost *>#
UbuntuGuide Part2 - http://ubuntuguide.org/index.php?title=UbuntuGuide_Part2&...
87 of 177 08/10/2013 09:04 AM

UseCanonicalName off# RewriteEngine On RedirectMatch (.*)/webdav2 http://192.168.0.156/webdav2# # ServerName webdav1.mydomain.org ServerName myhost.mydomain.org ServerAlias 192.168.0.155 webdav1.mydomain.org# ServerAdmin root@localhost DocumentRoot /var/www/# Alias /webdav1 /var/www/WebDAV1/files#<Directory /var/www/WebDAV1/> Options Indexes MultiViews AllowOverride None Order allow,deny allow from all </Directory>## <Location /webdav1># DAV On# AuthType Basic# AuthName "webdav1"# AuthUserFile /var/www/WebDAV1/passwd.dav# Require valid-user# </Location># <Location /webdav1> DAV On AuthType Digest AuthName "webdav1digest" AuthUserFile /var/www/WebDAV1/digestpasswd.dav Require valid-user </Location></VirtualHost>
While this method is not required, it allows the second WebDAV server to be accessed from another computer on the LAN either byhttp://myhost.mydomain.org/webdav2 or by http://webdav2.mydomain.org. Using this method, by editing only the virtual host file on theprimary server (that acts as proxy), access to the secondary WebDAV server can be selectively restricted to the LAN only or can beenabled for complete access from the Internet at large.
WebDAV with LDAP
Note: This section is undergoing editing.
If an LDAP server exists already, you can use the Apache2 mod_authnz_ldap (http://httpd.apache.org/docs/2.2/mod/mod_authnz_ldap.html) module.
Do you intend to place each person's website in a separate directory below the common DAV root? If so, you'll probably want to limitaccess to each directory to its specific user for security. An .htpasswd file in each directory is the easiest solution, but it's safer to put allthe access rules in the global WebDAV configuration file located in the /etc/apache2/sites-enabled folder.
WebDAV Clients
Dolphin
The Dolphin File Manager used in the KDE desktop of Kubuntu has built-in WebDAV support. A folder on a WebDAV server can beaccessed directly by entering its location in the location bar. Examples:
webdav://localhost/webdav1
or
webdav://myhost.mydomain.org/webdav1
Note that a location can be made a permanent folder in Dolphin by right-clicking on the leftmost Places panel --> Add entry... ->Location: webdav://localhost/webdav1
Nautilus
The Nautilus File Manager used in the Gnome desktop of Ubuntu has built-in WebDAV support. A folder on a WebDAV server can beaccessed directly.
Nautilus -> File -> Connect to Server -> Service Type: WebDAV (HTTP) -> Server: localhost/webdav1or
Nautilus -> File -> Connect to Server -> Service Type: WebDAV (HTTP) -> Server: myhost.mydomain.org/webdav1
UbuntuGuide Part2 - http://ubuntuguide.org/index.php?title=UbuntuGuide_Part2&...
88 of 177 08/10/2013 09:04 AM

Firefox
The Firefox web browser natively recognizes WebDAV folders. Merely enter the URL of the WebDAV folder in the location bar:
http://myhost.mydomain.org/webdav1
Konqueror/Rekonq
The Konqueror (now Rekonq) web browser of the KDE desktop in Kubuntu natively recognizes WebDAV folders. Merely enter the URLof the WebDAV folder in the location bar:
http://myhost.mydomain.org/webdav1
Cadaver
Cadaver is a command-line interface for WebDAV. It can be useful for automated and script-based command-line functions, such aremote copying. Install:
sudo apt-get install cadaver
Windows
Windows Explorer in Windows has built-in WebDAV support. Map the WebDAV folder to a lettered drive:
Windows Explorer -> Tools -> Map network drive... -> Folder: http://myhost.mydomain.org/webdav1
Creating passwords for Windows clients
Some Windows clients (including Windows Explorer in XP) append the URL of the WebDAV folder to the user name. For example,when a WebDAV request is made by testuser3 to the WebDAV server at http://myhost.mydomain.org/webdav1, Windows will send arequest for access as myhost.mydomain.org\testuser3. To accommodate this behavior, additional user accounts in the Windows formatmust be added to the password file on the WebDAV server. Note the extra \ .
If using Basic Authentication, add the user to the password file:
sudo htpasswd /var/www/WebDAV1/passwd.dav myhost.mydomain.org\\testuser
If using Digest Authentication, add the user to the password file:
sudo htdigest /var/www/WebDAV1/digestpasswd.dav webdav1digest myhost.mydomain.org\\testuser
Note: There is a bug in the Windows WebDAV redirector when used with Digest Authentication. (See this tutorial(http://barracudaserver.com/products/BarracudaDrive/tutorials/mapping_windows_drive.lsp) for more details.) Aworkaround entails mapping the WebDAV folder to a drive letter using the command line. This can only be done in aWindows computer that has just been booted.
Mount the WebDAV folder to a Windows drive letter with the Net use (http://www.microsoft.com/resources/documentation/windows/xp/all/proddocs/en-us/net_use.mspx) command. Enter the following into the Windows Startmenu -> Run... command line:
net use * "http://myhost.mydomain.org/webdav1/" testuserpassword /user:myhost.mydomain.org\testuser
A specific drive letter (such as W:) can be used instead of the *. The * option specifies to mount the resource to thenext available Windows drive letter.
To make the mapping permanent, add the option /persistent:yes
A (.bat) batch file can be created that contains this net use command. A Windows shortcut to this batch file canthen be placed in the Windows Start menu -> Programs -> Start folder. This will run the net use command (fromthe batch file) at every bootup (following the start of all basic services). The batch file may need to address the netcommand by its absolute folder location:
C:\WINDOWS\system32\net use * "http://myhost.mydomain.org/webdav1/" testuserpassword /user:myhost.mydomain.org\testuser
To disconnect a web folder (either from the Start menu -> Run... dialog box or from a batch file, where X: is
UbuntuGuide Part2 - http://ubuntuguide.org/index.php?title=UbuntuGuide_Part2&...
89 of 177 08/10/2013 09:04 AM

mounted Windows drive letter:
net use X: /delete
Android
The Android web browser natively recognizes WebDAV folders. Merely enter the URL of the WebDAV folder in the location bar:
http://myhost.mydomain.org/webdav1
References
Simple WebDAV setup (https://wiki.archlinux.org/index.php/Simple_WebDav_Setup) and WebDAV authentication(https://wiki.archlinux.org/index.php/WebDAV_authentication) (from the ArchLinux wiki)Debian Administration article on WebDAV (http://www.debian-administration.org/articles/285)Tutorial (http://barracudaserver.com/products/BarracudaDrive/tutorials/mapping_windows_drive.lsp) for using a Windows clientto access a WebDAV folder.WebDAV in Apache (http://www.webdav.org/mod_dav/install.html#apache)
Apache2 reverse proxiesThis solution solves the problem of having multiple servers on a LAN which has a single router connected to the Internet. The routerforwards all port 80 traffic to a single primary server. That server will then be required to act as a proxy for the other servers on theLAN, redirecting incoming traffic addressed to the URLs of those other servers to their respective LAN IP addresses.
This increases the amount of traffic passing through the primary server, so is not a recommended solution for high volume situationsunless the primary server is a dedicated gateway/proxy server. (For high volume situations, a load balancer such as Pound should beused.)
This method uses Apache2 virtual host configuration files on the primary server (to which the router sends port 80 traffic).
On the primary server (which will act as the proxy), create a symbolic link to enable the proxy modules in Apache2, then restartApache2:
sudo ln -s /etc/apache2/mods-available/proxy.load /etc/apache2/mods-enabledsudo ln -s /etc/apache2/mods-available/proxy_http.load /etc/apache2/mods-enabledsudo /etc/init.d/apache2 restart
Edit a virtual host file for all secondary servers (use the gedit text editor instead of kate if using Ubuntu instead of Kubuntu):
sudo kate /etc/apache2/sites-available/proxiedhosts
and edit the file so that it resembles:
<VirtualHost *:80>#ServerName internalserver2.mydomain.org# ProxyPreserveHost On ProxyRequests off ProxyPass / http://192.168.1.192/ ProxyPassReverse / http://192.168.1.192/#</VirtualHost>##<VirtualHost *:80>##ServerName internalserver3.mydomain.org## ProxyPreserveHost On# ProxyRequests off# ProxyPass / http://192.168.1.193/# ProxyPassReverse / http://192.168.1.193/##</VirtualHost>##<VirtualHost *:80>##ServerName internalserver4.mydomain.org## ProxyPreserveHost On# ProxyRequests off# ProxyPass / http://192.168.1.194/# ProxyPassReverse / http://192.168.1.194/#
UbuntuGuide Part2 - http://ubuntuguide.org/index.php?title=UbuntuGuide_Part2&...
90 of 177 08/10/2013 09:04 AM

#</VirtualHost>
Make sure that each URL for each server has an entry (and obviously remove the hashmarks for each one that is active).
Activate the virtual host file by making a symbolic link to the Apache2 sites-enabled folder then restarting Apache2:
sudo ln -s /etc/apache2/sites-available/proxiedhosts /etc/apache2/sites-enabledsudo /etc/init.d/apache2 restart
Other resources
The information for this page was synthesized from these sources:
Configuring Apache virtual hosts for NAT (http://jeffbaier.com/articles/configuring-apache-virtual-hosts-for-nat/) -- blog tutorialfor Apache ProxyPassReverse proxy of virtual hosts with apache 2 (http://www.raskas.be/blog/2006/04/21/reverse-proxy-of-virtual-hosts-with-apache-2/)Apache2 mod_proxy instructions (http://httpd.apache.org/docs/2.2/mod/mod_proxy.html#proxypass)
MediaWiki tipsMediaWiki (http://www.mediawiki.org) is the free, open source server software that Wikipedia uses. It is scalable to very large uses. Itruns on the LAMP server stack (which uses the MySQL database and is available as an installation option with the (K)ubuntu server),or it can be used with a PostgreSQL database. (Other instructions are also available here (http://www.mediawiki.org/wiki/Manual:Running_MediaWiki_on_Ubuntu) .)
Install MediaWiki
Install from the repositories:
sudo apt-get install mediawiki
Edit the configuration file so it recognizes MediaWiki (use the gedit text editor instead of kate if using Ubuntu instead ofKubuntu):
sudo kate /etc/mediawiki/apache.conf
Uncomment (remove the #) the line:
Alias /mediawiki /var/lib/mediawiki
Restart Apache:
sudo /etc/init.d/apache2 restart
Run/install MediaWiki by logging into:
http://localhost/mediawiki
You will be prompted for configuration variables to be set. You can accept the default database name to be created (wikidb) andthe default user for the database (wikiuser). Choose a unique password for this wiki database. (You don't need to remember thispassword for anything later, and, unfortunately, it isn't saved in an encrypted manner, so don't use a sensitive password that youuse anywhere else). The trickiest part is the MySQL superuser name/ superuser password. Hopefully you remember your MySQLsuperuser that you set at the time of LAMP (or MySQL) installation.
Copy your local settings configuration file to /etc/mediawiki (and make a backup of the original):
sudo cp /var/lib/mediawiki/config/LocalSettings.php /etc/mediawikisudo mv /var/lib/mediawiki/config/LocalSettings.php /var/lib/mediawiki/config/LocalSettings_at_install.php
Edit your configuration variables there (use the gedit text editor instead of kate if using Ubuntu instead of Kubuntu):
sudo kate /etc/mediawiki/LocalSettings.php
If you are using a virtual host server, make a symbolic link (named in this example mywiki) from your /usr/share/mediawiki
UbuntuGuide Part2 - http://ubuntuguide.org/index.php?title=UbuntuGuide_Part2&...
91 of 177 08/10/2013 09:04 AM

installation folder to your /var/www folder:
sudo ln -s /usr/share/mediawiki /var/www/mywiki
Then make sure you have an Apache virtual hosts configuration file (in /etc/apache2/sites-available) that points to /var/www/mywiki asthe DocumentRoot. Make a symbolic link from your virtual host configuration file in /etc/apache2/sites-available to /etc/apache2/sites-enabled to enable it. Restart Apache 2 after enabling the sites. (Warning: MediaWiki is not secure at installation and can be easilyhacked by new users. Do not publish your wiki to the Internet before reading all the instructions and changing the configuration file(LocalSettings.php) so that it is more secure.) You would then access the database at:
http://my.virtualwikihost.org
ReCaptcha
I strongly recommend installing a Captcha mechanism immediately upon installation. See this section.
Editing the LocalSettings.php configuration file
There are lots of configuration settings that can be set in this file. (See the MediaWiki manual (http://www.mediawiki.org/wiki/Manual:Configuration_settings) .)
But during the time you are learning how to administer MediaWiki, you ought to take some basic security steps. Otherwise you will behacked within a few minutes of publishing your wiki to the web. I suggest taking a gander at how to prevent access(http://www.mediawiki.org/wiki/Manual:Preventing_access) before you start. Shut down everything and then remove restrictions oneby one once you are comfortable that you have taken reasonable security precautions. (I have seen a lot of hacked wikis on the weblately).
Disallow user creation by anyone other than the sysop. (There are a lot of clever hackers out there who can change the settingsfaster than you can, if you let them create an account.) Add these lines somewhere to LocalSettings.php:
#User restrictions#Account creation by anonymous users$wgGroupPermissions['*']['createaccount'] = false;#Account creation by registered users$wgGroupPermissions['user']['createaccount'] = false;#Account creation by sysops$wgGroupPermissions['sysop']['createaccount'] = true;
Note: * stands for anonymous users, user stands for confirmed users, and sysop obviously stands for sysops.
Disallow page editing, page creation, or talk page creation by anonymous users. Add the lines:
#Anonymous user permissions$wgGroupPermissions['*']['edit'] = false;$wgGroupPermissions['*']['createpage'] = false;$wgGroupPermissions['*']['createtalk'] = false;
Determine uploads privileges. Initially, I restrict allowed file uploads to .jpg, .gif, and .png images. My first day I found .xls,extensions, and others stuff uploaded by hackers, before I figured out how to stop this. I further restricted uploads by anonymoususers.
#Uploads rules## To enable image uploads, make sure the 'images' directory## is writable, then set this to true:#$wgEnableUploads = false;$wgEnableUploads = true;#Only allow restricted uploads$wgCheckFileExtensions = true;$wgStrictFileExtensions = true;$wgFileExtensions = array('png', 'gif', 'jpg'); #Permissions for uploads#Not for Anonymous$wgGroupPermissions['*']['upload'] = false;$wgGroupPermissions['*']['reupload'] = false;$wgGroupPermissions['*']['reupload-shared'] = false;#Uploads (but not re-uploads) for Users$wgGroupPermissions['user']['upload'] = true;$wgGroupPermissions['user']['reupload'] = false;$wgGroupPermissions['user']['reupload-shared'] = false;#Sysops$wgGroupPermissions['sysop']['upload'] = true;$wgGroupPermissions['sysop']['reupload'] = true;$wgGroupPermissions['sysop']['reupload-shared'] = true;
As a further precaution, I made a separate images folder ( /etc/mediawiki/images ) that I use for my uploads. I then make an Aliasto this folder in /etc/mediawiki/apache.conf:
UbuntuGuide Part2 - http://ubuntuguide.org/index.php?title=UbuntuGuide_Part2&...
92 of 177 08/10/2013 09:04 AM

sudo nano /etc/mediawiki/apache.conf
and adding the line:
Alias /images /etc/mediawiki/images
Lastly, I add a configuration file into the 'images' folder that prevents any scripts that (somehow) get uploaded from executing:
cd /etc/mediawiki/imagessudo nano .htaccess
and adding the lines:
Options -Indexes# No php execution in the upload areaphp_admin_flag engine off
Note: If you are using multiple wikis (as outline below), images are accessed through a script. Using thephp_admin_flag engine off option will disable this ability. Therefore, do not use this line in .htaccess when creatingmultiple wikis. (For security options when using a multiple wiki farm, read about img_ath.php(http://www.mediawiki.org/wiki/Manual:Image_Authorisation#How_Does_img_auth.php_Work.3F) .)
See this section (http://www.mediawiki.org/wiki/Manual:Image_Authorization#Another_Scenario.2C_Security_Motivated) to see why Ihave taken these steps. It might seem paranoid, but I was hacked within one hour of installing MediaWiki the first time I installed it.Now that I've learned some basics about security, I've not been hacked again (to my knowledge!)
Increase PHP memory limits
If insufficient memory is allocated for PHP to process the wiki, an error ("memory exhausted") will result. This line inLocalSettings.php is pretty important, therefore, and should be near the beginning:
# If PHP's memory limit is very low, some operations may fail.ini_set( 'memory_limit', '96M' );
Increase PHP uploaded file size limits
The default for filesize uploads in MediaWiki is only 2 Mb, which is entirely insufficient for most purposes. Add these lines toLocalSettings.php to increase the maximum filesize for uploads:
# Increase the maximum allowed filesize for uploads (in Mb)ini_set( 'post_max_size', '50M' );ini_set( 'upload_max_filesize', '50M' );
In addition, the global maximum file sizes allowed in PHP5 for Apache 2 must be increased as well. The PHP scripting language isused for uploads. Absolute upload limits for the Apache webserver are set in a PHP configuration file and must be changed there.
Your uploads are probably larger than the default upload limits of PHP (set at 2 Mb, or "2M", by default), so we will need toincrease those. In the example below, I will change the upload limit to 100 Mb ("100M"). Two parameters must be changed inthe php.ini configuration file in /etc/php5/apache2 (use the gedit text editor instead of kate if using Ubuntu instead ofKubuntu):
cd /etc/php5/apache2sudo kate php.ini
Change:
post_max_size = 8M
to
post_max_size = 100M
Change:
upload_max_filesize = 2M
UbuntuGuide Part2 - http://ubuntuguide.org/index.php?title=UbuntuGuide_Part2&...
93 of 177 08/10/2013 09:04 AM

to
upload_max_filesize = 100M
Save the file and restart Apache:
sudo /etc/init.d/apache2 restart
Change the default logo
I tried to use the $wglogo (http://www.mediawiki.org/wiki/Manual:$wgLogo) setting in the LocalSettings.php file, but in someversions this did not work for me. Instead, I backed up the original logo file and replaced it with the file (135x135 image) I want touse as the logo image (in this example WikiLogo.png):
sudo mv /usr/share/mediawiki/skins/common/images/wiki.png /usr/share/mediawiki/skins/common/images/wikioriginal.pngsudo cp /home/user/WikiLogo.png /usr/share/mediawiki/skins/common/images/wiki.png
A transparent background for the logo image is desirable. (You can use Gimp to create an alpha transparency layer for any photo. Seethese instructions.) You can use Gimp or Gwenview to resize the image. Note that .jpg images do not accept background transparency,but .png images do.
To change the link to which the site-logo image points (when clicked), see this Mediawiki FAQ (http://www.mediawiki.org/wiki/Manual:FAQ#How_do_I_customize_the_link-URL_of_the_site-logo_in_the_top_left_corner_of_all_pages_that_activates_when_the_site-logo_is_clicked_upon.3F) .
At the same time I set the "Favicon" (the small icon (16x16 image) that appears in a browser's address bar or bookmark list) usingthe $wgFavicon (http://www.mediawiki.org/wiki/Manual:$wgFavicon) setting in the LocalSettings.php file. (While a .png imagewill work, it will not display in all browsers (i.e. Internet Explorer), so I converted it (using Gimp) to an .ico image namedfavicon.ico and placed it in the root Mediawiki folder.)
Make backups
MediaWiki saves its content files in whichever database you are using as a backend (MySQL or PostgreSQL). For a full backup, youwould have to backup the MediaWiki database.
XML dump
It is easiest, however, to backup content with an XML dump, which can then be imported to future (or even past) versions ofMediaWiki. See these instructions (http://www.mediawiki.org/wiki/Manual:Backing_up_a_wiki#XML_dump) . In brief:
If you do not have a backup folder, make one now:
sudo mkdir /etc/mediawiki/backupssudo chmod -R 777 /etc/mediawiki/backups
Edit your LocalSettings.php file:
sudo nano /etc/mediawiki/LocalSettings.php
and add the lines:
##Database administrative user/password$wgDBadminuser = $wgDBuser;$wgDBadminpassword = $wgDBpassword;
then run the XML dump script from a command-line terminal:
sudo php /usr/share/mediawiki/maintenance/dumpBackup.php --current > /etc/mediawiki/backups/MediaWikiBackup_DateToday
Note: I usually specify today's date in place of DateToday.
Note: To use this, php5-cli must already have been installed:
sudo apt-get install php5-cli
If you wish to protect this backup folder, you can change the permissions.
UbuntuGuide Part2 - http://ubuntuguide.org/index.php?title=UbuntuGuide_Part2&...
94 of 177 08/10/2013 09:04 AM

sudo chmod -R 444 /etc/mediawiki/backups
Import XML dump
To import the XML dump you made:
sudo php /usr/share/mediawiki/maintenance/importDump.php /etc/mediawiki/backups/MediaWikiBackup_DateToday
Note that when you import XML dumps, it maintains revision dates. if you have pages that are more recent than the imported pages,then the more recent pages will be retained. If you want to promote an imported page to the most recent page, you must do this in thepage history section (like usual).
This drove me nuts until I figured this out, because, of course, when you upgrade or reinstall a wiki, the newly created Main Page willbe the most recent (not the old Main Page from the imported wiki). The imported Main Page does not show up unless you promote theold version from the history file.
Export individual pages to XML
If you have sufficient privileges, you can export a page (or multiple pages) from within the wiki. For example, to exportUbuntuguide:Precise :
Wiki -> toolbox -> Special pages -> Page tools -> Export pages ->Large text box: Ubuntu:PreciseInclude only the current revision, not the full history: (ticked)Include templates: (ticked)Save as file: (ticked)
The saved XML file can then be imported into another MediaWiki wiki using
Wiki -> toolbox -> Special pages -> Page tools -> Import pages -> saved_export.xml
What I often do is look at the list of Special:AllPages and either copy the entire list or just the pages I want to back up into theSpecial:Export list.
Full system backup
To backup images, user settings, and other settings, you would also back up the file system (contained variably in the folders/etc/mediawiki, /var/lib/mediawiki, and usr/share/mediawiki). See the MediaWiki backup instructions (http://www.mediawiki.org/wiki/Manual:Backing_up_a_wiki) .
Upgrading
See Upgrading MediaWiki (http://www.mediawiki.org/wiki/Manual:Upgrading) .
The primary installation folder is at /usr/share/mediawiki, but user files are also stored in /etc/mediawiki and /var/lib/mediawiki.
Backup and restore the MySQL database
This is an alternative that is necessary if you wish to backup during a migration of your wiki. The best way is to backup theoriginal database with a MySQL dump:
mysqldump -u user -p databasename > wikidatabasebackupfile.sql
or, if on a remote host:
mysqldump -h hostname -u username -p databasename > wikidatabasebackupfile.sql
Note that the username and password should be the username and password that were used to create the specific database (notthe MySQL root username/password). (If you can't remember what they were, check the LocalSettings.php file for the$wgDBname, $wgDBuser, and $wgDBpassword values).
The database should be restored to an empty database in the new site, because if you re-install a new database in the new siteand then attempt to restore your old backed-up database on top of it, there is likely to be incompatibilities between the two. Herethe username and password are those for the new empty database just created. (It probably is best to make them the same asthose of the imported database.)
mysql -u username -p databasename < wikidatabasebackupfile.sql
UbuntuGuide Part2 - http://ubuntuguide.org/index.php?title=UbuntuGuide_Part2&...
95 of 177 08/10/2013 09:04 AM

Notes: This was successful for me only if backing up and restoring to exactly the same version of MediaWiki. I could not back upthe database from one version of MediaWiki then restore to an upgraded version of MediaWiki, because the scripts of theupgraded version of MediaWiki did not access the database in the same manner. I therefore performed upgrades only aftermoving the database.
Empty a database
I hesitate to put these instructions here. Be careful. This erases your database. Use it only if you are confident that you have made goodbackups. I use this only if I have created a database by accident (during the MediaWiki installation process) and wish to erase/empty it.
mysql -u root -pmysql> DROP DATABASE mysqlexampledatabase;mysql> quit
If your MySQL superuser name is something other than root, then use that, of course. Don't forget the semicolon ( ; ) at the end of eachMySQL command.
Of course, once you erase the database, you must re-create a blank one for use with MediaWiki.
sudo dpkg-reconfigure mediawiki
Then you can restore the backup (as created above with mysqldump) into the newly recreated (but still empty) database.
mysql -u username -p databasename < wikidatabasebackupfile.sql
Moving a MediaWiki installation to a new site
Backup up the database from the old site as detailed above.
Install mediawiki on the new site (sudo apt-get install mediawiki). When creating the database, use the same values as used onthe old site. If you can't remember what they were, look at the /etc/mediawiki/LocalSettings.php (or similar) file for the old site(which contains the values for the old site).
On the new site, rename the newly created folders
/etc/mediawiki/usr/share/mediawiki/var/lib/mediawiki
to/etc/mediawiki.bak/usr/share/mediawiki.bak/var/lib/mediawiki.bak
Copy the /etc/mediawiki , /usr/share/mediawiki , and /var/lib/mediawiki folders from the old site to the new site. (This needs to bedone as the root user, which can be done with sudo dolphin).
Copy the database dumpfile from the old site to the new site.
Restore the database dumpfile on the new site.
Check the LocalSettings.php file (and other folder) permissions to make sure they match the permissions of the original system.(Sometimes during the copy process the ownership of all files and folders will be set to root.)
Notes: I have never been successful in performing an upgrade in the middle of this process. I recommend moving the site exactly, andthen performing any upgrades after it is moved.
Install multiple MediaWiki sites
Multiple wikis
This method allows the installation of more than one wiki using different databases (on a single server using the same source code).This setup is transparent to users and is reasonably secure in terms of the images/files directory. This method also allows nestedsubwikis. Similar methods can be found at the Mediawiki wiki (http://www.mediawiki.org/wiki/Wiki_farm#Scenario_3:_Drupal-style_sites) .
Install MediaWiki from packages as usual (if not already done). MediaWiki is installed by default to /usr/share/mediawiki. (If youwish to upgrade to a more recent version (http://www.mediawiki.org/wiki/Download) , extract the latest MediaWiki tar.gz archiveinto this folder.) A directory /etc/mediawiki is also created when installing from the package.
UbuntuGuide Part2 - http://ubuntuguide.org/index.php?title=UbuntuGuide_Part2&...
96 of 177 08/10/2013 09:04 AM

In this method, it is not necessary (nor recommended) to edit the /etc/mediawiki/apache.conf file (as is done in the single wikiinstallation).Create a folder for each wiki (in this example named mywiki_1 and mywiki_2).
sudo mkdir /etc/mediawiki/mywiki_1sudo mkdir /etc/mediawiki/mywiki_2
Create an upload folder for images/files in each wiki folder:
sudo mkdir /etc/mediawiki/mywiki_1/imagessudo mkdir /etc/mediawiki/mywiki_2/images
You can add an .htaccess file to each images folder (as described above) for better security.
The images folders should belong to the group www-data (the Apache 2 group), and the group should have "Can View & ModifyContent" permissions.
sudo chown root:www-data /etc/mediawiki/mywiki_1/imagessudo chown root:www-data /etc/mediawiki/mywiki_2/imagessudo chmod 664 /etc/mediawiki/mywiki_1/imagessudo chmod 664 /etc/mediawiki/mywiki_2/images
Copy each 135x135 image that you wish to use as a wiki logo (in the upper left corner) into the /etc/mediawiki/mywiki_x/imagesfolder of each of the wikis. Rename it WikiLogo.png in that folder.
Copy the LocalSettings.php configuration file for any existing wiki (if you have already created one) as a backup (just in casesomething goes wrong):
sudo cp /etc/mediawiki/LocalSettings.php LocalSettings_backup.php
Note that you can also use this LocalSettings.php file for one of the wikis by copying it into one of the wiki subfolders and thenediting the appropriate lines in the LocalSettings.php file once it is copied there (see below).
Rename the LocalSettings.php file in the original installation configuration folder to a backup, as well:
sudo mv /var/lib/mediawiki/config/LocalSettings.php LocalSettings_original.php
Edit the configuration file so it recognizes MediaWiki:
sudo nano /etc/mediawiki/apache.conf
Uncomment (remove the #) the line:
Alias /mediawiki /var/lib/mediawiki
Restart Apache:
sudo /etc/init.d/apache2 restart
Give the /var/lib/mediawiki/config folder read/write permissions during installation:
sudo chmod 777 /var/lib/mediawiki/config
Run/install MediaWiki from the (Konqueror/Firefox) web browser by logging into:
http://localhost/mediawiki
Wiki name: My Wiki 1Contact e-mail: [email protected] username: wiki1_admin -> Password: wiki1_admin_pwObject caching: No cachingE-mail features (all): disabled (optional)Database configuration: MySQL -> Database host: localhost -> Database name: wiki1db -> DB username: wiki1user -> DBpassword: wiki1pw -> Superuser account: Use superuser account (ticked) -> Superuser name: root -> Superuser password:root_mysql_pw -> Database table prefix: wiki1_
UbuntuGuide Part2 - http://ubuntuguide.org/index.php?title=UbuntuGuide_Part2&...
97 of 177 08/10/2013 09:04 AM

Copy your LocalSettings.php configuration file to /etc/mediawiki/mywiki_1 (and make a backup of the original):
sudo cp /var/lib/mediawiki/config/LocalSettings.php /etc/mediawiki/mywiki_1sudo mv /var/lib/mediawiki/config/LocalSettings.php /var/lib/mediawiki/config/LocalSettings_wiki1_install.php
Repeat the MediaWiki installation from the (Konqueror/Firefox) web browser by again logging into:
http://localhost/mediawiki
Wiki name: My Wiki 2Contact e-mail: [email protected] username: wiki2_admin -> Password: wiki2_admin_pwObject caching: No cachingE-mail features (all): disabled (optional)Database configuration: MySQL -> Database host: localhost -> Database name: wiki2db -> DB username: wiki2user -> DBpassword: wiki2pw -> Superuser account: Use superuser account (ticked) -> Superuser name: root -> Superuser password:root_mysql_pw -> Database table prefix: wiki2_
Copy your LocalSettings.php configuration file to /etc/mediawiki/mywiki_2 (and make a backup of the original):
sudo cp /var/lib/mediawiki/config/LocalSettings.php /etc/mediawiki/mywiki_2sudo mv /var/lib/mediawiki/config/LocalSettings.php /var/lib/mediawiki/config/LocalSettings_wiki2_install.php
You can repeat this multiple times if you want more wikis.
Re-edit the configuration file:
sudo nano /etc/mediawiki/apache.conf
Re-comment (add the #) the line:
#Alias /mediawiki /var/lib/mediawiki
Restart Apache:
sudo /etc/init.d/apache2 restart
Edit your LocalSettings.php configuration file for each wiki (use the gedit text editor instead of kate if using Ubuntu instead ofKubuntu):
sudo kate /etc/mediawiki/mywiki_1/LocalSettings.phpsudo kate /etc/mediawiki/mywiki_2/LocalSettings.php
Make sure the following lines are included in the LocalSettings.php file, replacing similar lines that already exist in the file andsubstituting mywiki_1 or mywiki_2 where appropriate:
# If PHP's memory limit is very low, some operations may fail.ini_set( 'memory_limit', '96M' );##$wgScriptPath = "/mediawiki";$wgScriptPath = "/mywiki_1";$wgLogo = "$wgScriptPath/images/WikiLogo.png";#$wgUploadDirectory = $_SERVER['DOCUMENT_ROOT'].'/mywiki_1/images';$wgUploadPath = "$wgScriptPath/images";##Database administrative user/password$wgDBadminuser = $wgDBuser;$wgDBadminpassword = $wgDBpassword;##These are set for initial maximum security. They can be changed later.##User restrictions#Account creation by anonymous users$wgGroupPermissions['*']['createaccount'] = false;#Account creation by registered users$wgGroupPermissions['user']['createaccount'] = false;#Account creation by sysops$wgGroupPermissions['sysop']['createaccount'] = true;##Anonymous user permissions$wgGroupPermissions['*']['edit'] = false;$wgGroupPermissions['*']['createpage'] = false;$wgGroupPermissions['*']['createtalk'] = false;#
UbuntuGuide Part2 - http://ubuntuguide.org/index.php?title=UbuntuGuide_Part2&...
98 of 177 08/10/2013 09:04 AM

#Uploads rules## To enable image uploads, make sure the 'images' directory## is writable, then set this to true:#$wgEnableUploads = false;$wgEnableUploads = true;#Only allow restricted uploads$wgCheckFileExtensions = true;$wgStrictFileExtensions = true;$wgFileExtensions = array('png', 'gif', 'jpg'); #Permissions for uploads#Not for Anonymous$wgGroupPermissions['*']['upload'] = false;$wgGroupPermissions['*']['reupload'] = false;$wgGroupPermissions['*']['reupload-shared'] = false;#Uploads (but not re-uploads) for Users$wgGroupPermissions['user']['upload'] = true;$wgGroupPermissions['user']['reupload'] = false;$wgGroupPermissions['user']['reupload-shared'] = false;#Sysops$wgGroupPermissions['sysop']['upload'] = true;$wgGroupPermissions['sysop']['reupload'] = true;$wgGroupPermissions['sysop']['reupload-shared'] = true;##For ReCaptcha -- this requires installing the Recaptcha extension##require_once( "$IP/extensions/recaptcha/ReCaptcha.php" );# Sign up for these at http://recaptcha.net/api/getkey#$recaptcha_public_key = ' xyxyxyxyxyxyxyxyx ';#$recaptcha_private_key = ' ababababababababa ';##The clears the cache daily, which I use to change rotating content (pictures, fortunes, etc.) daily.#require("includes/GlobalFunctions.php");$wgCacheEpoch = wfTimestamp( TS_MW, time() - 86400 ); # 60*60*24 = 1 day
In addition, a private wiki page should only be able to be read by registered users, so add these lines to LocalSettings.php for anyprivate wiki:
#This example will disable viewing of all pages not listed in $wgWhitelistRead, then re-enable for registered users only:$wgGroupPermissions['*']['read'] = false;# The following line is not actually necessary, since it's in the defaults. Setting# '*' to false doesn't disable rights for groups that have the right separately set# to true!$wgGroupPermissions['user']['read'] = true;
Link the files from your installation directory to each wiki folder:
sudo ln -s /usr/share/mediawiki/* /etc/mediawiki/mywiki_1/.sudo ln -s /usr/share/mediawiki/* /etc/mediawiki/mywiki_2/.
For each wiki, create a subfolder in the Apache 2 folder /var/www.
sudo mkdir /var/www/Mywiki_1sudo mkdir /var/www/MyWiki_2
For each wiki, create a symbolic link from the Apache 2 subfolder to the main wiki folder:
sudo ln -s /etc/mediawiki/mywiki_1 /var/www/MyWiki_1/mywiki_1sudo ln -s /etc/mediawiki/mywiki_2 /var/www/MyWiki_2/mywiki_2
Note: It is possible to create nested subwikis for each of the primary wikis. See the next section.
For each wiki, create and edit a virtual host (vhost) Apache 2 configuration file (for example, /etc/apache2/sites-available/mywiki_1vhost). (Use the gedit text editor instead of kate if using Ubuntu instead of Kubuntu.):
sudo kate /etc/apache2/sites-available/mywiki_1vhost
so that the lines are similar to:
<VirtualHost *:80>UseCanonicalName off#DocumentRoot /var/www/MyWiki_1DirectoryIndex index.php index.html#ServerName mywiki_1.mydomain.orgServerAlias *.mywiki_1.mydomain.org# RewriteEngine OnRewriteCond %{REQUEST_URI} !^subwiki1*RewriteCond %{REQUEST_URI} !^subwiki2*RewriteRule ^/(/.*|)$ /mywiki_1/$1 [R]#<Directory /var/www/MyWiki_1>
UbuntuGuide Part2 - http://ubuntuguide.org/index.php?title=UbuntuGuide_Part2&...
99 of 177 08/10/2013 09:04 AM

Options Indexes FollowSymLinks MultiViewsOptions FollowSymLinks MultiViews#AllowOverride NoneOrder allow,denyallow from all</Directory># </VirtualHost>
Create a virtual host file for mywiki_2 as well.
Pay attention to the rewrite rule:
RewriteEngine OnRewriteCond %{REQUEST_URI} !^subwiki1*RewriteCond %{REQUEST_URI} !^subwiki2*RewriteRule ^/(/.*|)$ /mywiki_1/$1 [R]
This is a complex rule that means that as long as the REQUEST_URI (which is the part after the server name, i.e.http://mywiki_x.mydomain.org/REQUEST_URI) does not match subwiki1 or subwiki2 (the symbol ! means not), then use mywiki_1 as thedefault directory. This rule allows the use not only of a primary wiki but also subwikis (see the next section) for each of the primarywikis.
Remember that your virtual host configuration files won't be active until you make symbolic links:
sudo ln -s /etc/apache2/sites-available/mywiki_1vhost /etc/apache2/sites-enabledsudo ln -s /etc/apache2/sites-available/mywiki_2vhost /etc/apache2/sites-enabled
Make sure the rewrite engine is enabled:
sudo a2enmod rewrite
Restart Apache:
sudo /etc/init.d/apache2 restart
The two separate wiki sites will now be available:
http://mywiki_1.mydomain.organd
http://mywiki_2.mydomain.org
Multiple subwikis
MediaWiki is a very powerful system, but you must choose whether to make it completely public or completely private (it does not yethave fine-grained per-page access controls). One solution is to create one subwiki for private usage and another subwiki for publicdisplay.
Below is outlined a method for creating multiple subwikis. Each subwiki will have its own database and its own LocalSettings.phpconfiguration file as well as Images (/Files) directory. However, all the subwikis will share the underlying MediaWiki code (stored inthe installation directory). When it is time to upgrade, the files in the installation directory can be upgraded without risking the loss ofthe files in each subwiki folder.
I have adapted information originally posted here (http://booleandreams.wordpress.com/2007/06/12/running-multiple-instance-of-mediawiki-on-the-same-server-using-the-same-source-code/#comment-18433) and here (http://www.mediawiki.org/wiki/Manual:Wiki_family) . (None of the independent instructions on those sites worked for me, however, so I used a combination ofall of them.)
The instructions below worked for me on (K)Ubuntu 9.04 (Jaunty), 9.10 (Karmic), and 10.04 (Lucid) using MediaWiki 1.13 and 1.15 andPHP5.
Install MediaWiki from packages as usual (if not already done). MediaWiki is installed by default to /usr/share/mediawiki. (If youwish to upgrade to a more recent version (http://www.mediawiki.org/wiki/Download) , extract the latest MediaWiki tar.gz archiveinto this folder.) A directory /etc/mediawiki is also created when installing from the package.
In this method, it is not necessary (nor recommended) to edit the /etc/mediawiki/apache.conf file (as is done in the single wikiinstallation).
Create a folder for each subsite (in this example named subwiki1 and subwiki2).
sudo mkdir /etc/mediawiki/subwiki1sudo mkdir /etc/mediawiki/subwiki2
UbuntuGuide Part2 - http://ubuntuguide.org/index.php?title=UbuntuGuide_Part2&...
100 of 177 08/10/2013 09:04 AM

Create an upload folder for images/files in each subwiki folder:
sudo mkdir /etc/mediawiki/subwiki1/imagessudo mkdir /etc/mediawiki/subwiki2/images
You can add an .htaccess file to each images folder (as described above) for better security.
The images folders should belong to the group www-data (the Apache2 group), and the group should have "Can View & ModifyContent" permissions.
sudo chown root:www-data /etc/mediawiki/subwiki1/imagessudo chown root:www-data /etc/mediawiki/subwiki2/imagessudo chmod 664 /etc/mediawiki/subwiki1/imagessudo chmod 664 /etc/mediawiki/subwiki2/images
Copy each 135x135 image that you wish to use as a wiki logo (in the upper left corner) into the /etc/mediawiki/subwikix/imagesfolder of each of the subwikis. Rename it WikiLogo.png in that folder.
Copy the LocalSettings.php configuration file for any existing wiki (if you have already created one) as a backup (just in casesomething goes wrong):
sudo cp /etc/mediawiki/LocalSettings.php LocalSettings_backup.php
Note that you can also use this LocalSettings.php file for one of the subwikis by copying it into a subwiki folder and then changingthe appropriate lines in the LocalSettings.php file once it is copied there (see below).
Rename the LocalSettings.php file in the original installation config folder to a backup, as well:
sudo mv /var/lib/mediawiki/config/LocalSettings.php LocalSettings_original.php
Run/install MediaWiki from the (Konqueror/Firefox) web browser by logging into:
http://localhost/mediawiki
Wiki name: My Subwiki 1Contact e-mail: [email protected] username: wiki1_admin -> Password: wiki1_admin_pwObject caching: No cachingE-mail features (all): disabled (optional)Database config: MySQL -> Database host: localhost -> Database name: subwiki1db -> DB username: subwiki1user -> DBpassword: subwiki1pw -> Superuser account: Use superuser account (ticked) -> Superuser name: root -> Superuser password:root_mysql_pw -> Database table prefix: subwiki1_
Copy your LocalSettings.php configuration file to /etc/mediawiki/subwiki1 (and make a backup of the original):
sudo cp /var/lib/mediawiki/config/LocalSettings.php /etc/mediawiki/subwiki1sudo mv /var/lib/mediawiki/config/LocalSettings.php /var/lib/mediawiki/config/LocalSettings_subwiki1_install.php
Repeat the MediaWiki installation from the (Konqueror/Firefox) web browser by again logging into:
http://localhost/mediawiki
Wiki name: My Subwiki 2Contact e-mail: [email protected] username: wiki2_admin -> Password: wiki2_admin_pwObject caching: No cachingE-mail features (all): disabled (optional)Database config: MySQL -> Database host: localhost -> Database name: subwiki2db -> DB username: subwiki2user -> DBpassword: subwiki2pw -> Superuser account: Use superuser account (ticked) -> Superuser name: root -> Superuser password:root_mysql_pw -> Database table prefix: subwiki2_
Copy your LocalSettings.php configuration file to /etc/mediawiki/subwiki2 (and make a backup of the original):
sudo cp /var/lib/mediawiki/config/LocalSettings.php /etc/mediawiki/subwiki2sudo mv /var/lib/mediawiki/config/LocalSettings.php /var/lib/mediawiki/config/LocalSettings_subwiki2_install.php
You can repeat this multiple times if you want more wikis.
UbuntuGuide Part2 - http://ubuntuguide.org/index.php?title=UbuntuGuide_Part2&...
101 of 177 08/10/2013 09:04 AM

The LocalSettings.php configuration file for each wiki must be edited. See this tutorial. There are many security settings that mustbe changed before going live, or the site will certainly be hacked.
Edit your LocalSettings.php configuration file for each subwiki (use the gedit text editor instead of kate if using Ubuntu instead ofKubuntu):
sudo kate /etc/mediawiki/subwiki1/LocalSettings.phpsudo kate /etc/mediawiki/subwiki2/LocalSettings.php
Make sure the following lines are included in the LocalSettings.php file, replacing similar lines that already exist in the file andsubstituting subwiki1 or subwiki2 where appropriate:
# If PHP's memory limit is very low, some operations may fail.ini_set( 'memory_limit', '96M' );##$wgScriptPath = "/mediawiki";$wgScriptPath = "/subwiki1";$wgLogo = "$wgScriptPath/images/WikiLogo.png";#$wgUploadDirectory = $_SERVER['DOCUMENT_ROOT'].'/subwiki1/images';$wgUploadPath = "$wgScriptPath/images";##Database administrative user/password$wgDBadminuser = $wgDBuser;$wgDBadminpassword = $wgDBpassword;##These are set for initial maximum security. They can be changed later.##User restrictions#Account creation by anonymous users$wgGroupPermissions['*']['createaccount'] = false;#Account creation by registered users$wgGroupPermissions['user']['createaccount'] = false;#Account creation by sysops$wgGroupPermissions['sysop']['createaccount'] = true;##Anonymous user permissions$wgGroupPermissions['*']['edit'] = false;$wgGroupPermissions['*']['createpage'] = false;$wgGroupPermissions['*']['createtalk'] = false;##Uploads rules## To enable image uploads, make sure the 'images' directory## is writable, then set this to true:#$wgEnableUploads = false;$wgEnableUploads = true;#Only allow restricted uploads$wgCheckFileExtensions = true;$wgStrictFileExtensions = true;$wgFileExtensions = array('png', 'gif', 'jpg'); #Permissions for uploads#Not for Anonymous$wgGroupPermissions['*']['upload'] = false;$wgGroupPermissions['*']['reupload'] = false;$wgGroupPermissions['*']['reupload-shared'] = false;#Uploads (but not re-uploads) for Users$wgGroupPermissions['user']['upload'] = true;$wgGroupPermissions['user']['reupload'] = false;$wgGroupPermissions['user']['reupload-shared'] = false;#Sysops$wgGroupPermissions['sysop']['upload'] = true;$wgGroupPermissions['sysop']['reupload'] = true;$wgGroupPermissions['sysop']['reupload-shared'] = true;##For ReCaptcha -- this requires installing the Recaptcha extension##require_once( "$IP/extensions/recaptcha/ReCaptcha.php" );# Sign up for these at http://recaptcha.net/api/getkey#$recaptcha_public_key = ' xyxyxyxyxyxyxyxyx ';#$recaptcha_private_key = ' ababababababababa ';##The clears the cache daily, which I use to change rotating content (pictures, fortunes, etc.) daily.#require("includes/GlobalFunctions.php");$wgCacheEpoch = wfTimestamp( TS_MW, time() - 86400 ); # 60*60*24 = 1 day
In addition, a private wiki page should only be able to be read by registered users, so add these lines to LocalSettings.php for anyprivate subwiki:
#This example will disable viewing of all pages not listed in $wgWhitelistRead, then re-enable for registered users only:$wgGroupPermissions['*']['read'] = false;# The following line is not actually necessary, since it's in the defaults. Setting# '*' to false doesn't disable rights for groups that have the right separately set# to true!$wgGroupPermissions['user']['read'] = true;
Create a subfolder in the Apache folder /var/www.
sudo mkdir /var/www/Mywiki
UbuntuGuide Part2 - http://ubuntuguide.org/index.php?title=UbuntuGuide_Part2&...
102 of 177 08/10/2013 09:04 AM

Note: It is possible to create multiple primary wikis, each with several subwikis. Each primary wiki should have its ownsubfolder in the Apache folder /var/www. See this section.
Create symbolic links from the Apache subfolder to the subwiki folders:
sudo mkdir /var/www/MyWikisudo ln -s /etc/mediawiki/subwiki1 /var/www/MyWiki/subwiki1sudo ln -s /etc/mediawiki/subwiki2 /var/www/MyWiki/subwiki2
Link the files from your installation directory to each subwiki folder:
sudo ln -s /usr/share/mediawiki/* /etc/mediawiki/subwiki1/.sudo ln -s /usr/share/mediawiki/* /etc/mediawiki/subwiki2/.
Create and edit a virtual host (vhost) Apache configuration file (for example, /etc/apache2/sites-available/mywikivhost). (Use thegedit text editor instead of kate if using Ubuntu instead of Kubuntu.):
sudo kate /etc/apache2/sites-available/mywikivhost
so that the lines are similar to:
<VirtualHost *:80>UseCanonicalName off#DocumentRoot /var/www/MyWikiDirectoryIndex index.php index.html#ServerName mywiki.mydomain.orgServerAlias *.mywiki.mydomain.org# RewriteEngine OnRewriteCond %{REQUEST_URI} !^subwiki1*RewriteCond %{REQUEST_URI} !^subwiki2*RewriteRule ^/(/.*|)$ /subwiki1/$1 [R]#<Directory /var/www/MyWiki>Options Indexes FollowSymLinks MultiViewsOptions FollowSymLinks MultiViews#AllowOverride NoneOrder allow,denyallow from all</Directory># </VirtualHost>
Pay attention to the rewrite rule:
RewriteEngine OnRewriteCond %{REQUEST_URI} !^subwiki1*RewriteCond %{REQUEST_URI} !^subwiki2*RewriteRule ^/(/.*|)$ /subwiki1/$1 [R]
This is a complex rule that means that as long as the REQUEST_URI (which is the part after the server name, i.e.http://mywiki.mydomain.org/REQUEST_URI) does not match subwiki1 or subwiki2 (the symbol ! means not), then use subwiki1 as thedefault directory.
Remember that your virtual host configuration file won't be active until you make a symbolic link:
sudo ln -s /etc/apache2/sites-available/mywikivhost /etc/apache2/sites-enabled
Make sure the rewrite engine is enabled:
sudo a2enmod rewrite
Restart Apache:
sudo /etc/init.d/apache2 restart
The two separate wiki sites will now be available:
http://mywiki.mydomain.org or http://mywiki.mydomain.org/subwiki1and
http://mywiki.mydomain.org/subwiki2
UbuntuGuide Part2 - http://ubuntuguide.org/index.php?title=UbuntuGuide_Part2&...
103 of 177 08/10/2013 09:04 AM

Troubleshooting
If you are trying to add more subsites to an existing multi-site installation, then you must have only one Apache virtual hostconfiguration file pointing to MediaWiki. That virtual host configuration file must point to the main installation files (/usr/share/mediawiki) as if you were installing a single user for the first time. (This is necessary for the installation scripts to create the newdatabase properly.)
This is most easily done by deleting the links in the /etc/apache2/sites-enabled folder that correspond to the already existingsubsite virtual hosts configuration files located in the /etc/apache2/sites-available folder. (You can leave the files in the/etc/apache2/sites-available folder alone). Then restart Apache ( sudo /etc/init.d/apache2 restart).
Then make sure that you have a single virtual host file that points to /usr/share/mediawiki in the /etc/apache2/sites-availablefolder, as well as a link to it in the /etc/apache2/sites-enabled folder. Then restart Apache (sudo /etc/init.d/apache2 restart) again.
After you have finished an additional installation, you can re-enable the specific subsite virtual host configuration files in the/etc/apache2/sites-available folder by again making links from them into the /etc/apache2/sites-enabled folder (and, of course,restarting Apache).
Pay close attention to the variable in LocalSettings.php:
$wgScriptPath = "/mediawiki";
If using multiple wikis, this should be changed.
If your virtual hosts and /var/www symbolic links point the URL directly to the folder in which the subwiki resides, then thevariable should be:
$wgScriptPath = "";
For example, if subwiki_1 is located at /etc/mediawiki/subwiki_1 and the virtual host file points the URL to the directory/var/www/subwiki_1, which is symbolically linked to /etc/mediawiki/subwiki_1 using
sudo ln -s /etc/mediawiki/subwiki_1 /var/www/subwiki_1
then in LocalSettings.php the $wgScriptPath variable should be:
$wgScriptPath = "";
If you are using multiple subwikis of the format www.mydomain.org/Subwiki_2 and www.mydomain.org/Subwiki_3, andthere is a folder /var/www/Wikis with symbolic links to the various subwikis:
sudo ln -s sudo ln -s /etc/mediawiki/subwiki_2 /var/www/Wikis/subwiki_2sudo ln -s sudo ln -s /etc/mediawiki/subwiki_3 /var/www/Wikis/subwiki_3
and the virtual host file for www.mydomain.org points only to the directory /var/www/Wikis, then in LocalSettings.php the$wgScriptPath variables should be:
$wgScriptPath = "/subwiki_2";
or
$wgScriptPath = "/subwiki_3";
Build your site
You should be ready to go. Start building your site.
Mediawiki site building tips
Introduction
MediaWiki (http://www.mediawiki.org) is one of the most widely used wiki servers in the world. It is the software used by Wikipedia(http://en.wikipedia.org/wiki/MediaWiki) . It is free and open source and can be customised to many different uses by installingadditional modules. This page is a cookbook of how I set up a MediaWiki site and may be helpful for getting an initial site customized. I
UbuntuGuide Part2 - http://ubuntuguide.org/index.php?title=UbuntuGuide_Part2&...
104 of 177 08/10/2013 09:04 AM

am assuming you have one (or multiple) MediaWiki installations running using these instructions.
If you are interested in the list of Mediawiki extensions used by Wikipedia then see this list (http://en.wikipedia.org/wiki/Special:Version) .
Choose the Main Page
Edit the page " Mediawiki:Mainpage " from within your wiki and as content enter the name of the page you wish to designate as yourmain page. For more info, see this section (http://www.mediawiki.org/wiki/Manual:FAQ#How_do_I_change_which_page_is_the_main_page.3F) of the Mediawiki FAQ (http://www.mediawiki.org/wiki/Manual:FAQ) .
Add Spam filters
See this article (http://www.umasswiki.com/wiki/UMassWiki:Blocking_Spam_In_Mediawiki) for several effective methods for stoppingMediaWiki spam.
Captcha
ConfirmEdit
The ConfirmEdit (http://www.mediawiki.org/wiki/Extension:ConfirmEdit) extension is a way to combat automated (spam) edits using asimple text, pictorial, math, or question-based Captcha (http://en.wikipedia.org/wiki/CAPTCHA) mechanism. Install:
sudo wget http://upload.wikimedia.org/ext-dist/ConfirmEdit-MW1.16-r62678.tar.gzsudo tar -xzf ConfirmEdit-MW1.16-r62678.tar.gz -C /var/lib/mediawiki/extensionssudo rm ConfirmEdit-MW1.16-r62678.tar.gz
Add the following line near the end of LocalSettings.php:
require_once( "$IP/extensions/ConfirmEdit/ConfirmEdit.php" );
There are several modules available for ConfirmEdit that allow different types of Captchas. For example, QuestyCaptcha(http://www.mediawiki.org/wiki/Extension:QuestyCaptcha) allows custom questions/answers to be presented as the challenge.
ReCaptcha
ReCaptcha (http://recaptcha.net/learnmore.html) is a webservice Captcha (http://en.wikipedia.org/wiki/CAPTCHA) module to present atext challenge for user-input that is unreadable by computer bots, lessening the chance of automated input (spam and vandalism). Thiscan be used for wikis and for other uses. A ReCaptcha extension (http://www.mediawiki.org/wiki/Extension:ReCAPTCHA) forMediaWiki is available.
Download and install:
cd /var/lib/mediawiki/extensionssudo wget -O currentrecaptcha.zip http://recaptcha.googlecode.com/files/recaptcha-mediawiki-1.7.zipsudo unzip currentrecaptcha.zipsudo rm currentrecaptcha.zip
Sign up for a private/public key pair from the Google ReCaptcha (https://www.google.com/recaptcha/admin/create?app%3Dmediawiki) website.
Edit the Mediawiki LocalSettings.php file (assuming you put it in /etc/mediwiki). (Use the gedit text editor instead of kate if usingUbuntu instead of Kubuntu.):
sudo kate /etc/mediawiki/LocalSettings.php
and add the following lines:
#For ReCaptcharequire_once( "$IP/extensions/recaptcha/ReCaptcha.php" );# Sign up for these at http://recaptcha.net/api/getkey$recaptcha_public_key = ' xyxyxyxyxyxyxyxyx ';$recaptcha_private_key = ' ababababababababa ';
where xyxyxyxyxyxyxyxyx is the public key obtained in the previous step and ababababababababa is the private key.
Now ReCaptcha should appear automatically for new user sign-ups, anonymous edits that contain new external links, and brute-forcepassword cracking attempts. Captcha behavior can be modified by adding lines to LocalSettings.php:
UbuntuGuide Part2 - http://ubuntuguide.org/index.php?title=UbuntuGuide_Part2&...
105 of 177 08/10/2013 09:04 AM
// Fix the default captcha behaviour$wgGroupPermissions['*' ]['skipcaptcha'] = false;$wgGroupPermissions['user' ]['skipcaptcha'] = true;$wgGroupPermissions['autoconfirmed']['skipcaptcha'] = true;$wgGroupPermissions['bot' ]['skipcaptcha'] = true; // registered bots$wgGroupPermissions['sysop' ]['skipcaptcha'] = true;#$wgCaptchaTriggers['edit'] = true;$wgCaptchaTriggers['create'] = true;$wgCaptchaTriggers['createaccount'] = true;
Spam blacklist
SpamBlacklist (http://www.mediawiki.org/wiki/Extension:SpamBlacklist) is an extension that prevents edits that include one of theURLs in a spam list. The default blacklist is the one used by Wikimedia (http://meta.wikimedia.org/wiki/Spam_blacklist) . Install:
sudo mkdir /var/lib/mediawiki/extensions/SpamBlacklistcd /var/lib/mediawiki/extensions/SpamBlacklistsudo wget http://svn.wikimedia.org/svnroot/mediawiki/trunk/extensions/SpamBlacklist/SpamBlacklist.phpsudo wget http://svn.wikimedia.org/svnroot/mediawiki/trunk/extensions/SpamBlacklist/SpamBlacklist_body.phpsudo wget http://svn.wikimedia.org/svnroot/mediawiki/trunk/extensions/SpamBlacklist/SpamBlacklist.i18n.phpsudo wget http://svn.wikimedia.org/svnroot/mediawiki/trunk/extensions/SpamBlacklist/cleanup.phpsudo wget http://svn.wikimedia.org/svnroot/mediawiki/trunk/extensions/SpamBlacklist/README
Add to the end of your LocalSettings.php file:
## This is the SpamBlacklist from Wikimedia:require_once( "$IP/extensions/SpamBlacklist/SpamBlacklist.php" );#$wgSpamBlacklistFiles = array("http://meta.wikimedia.org/wiki/Spam_blacklist");#
Alternatively, you could download the Wikimedia blacklist from http://meta.wikimedia.org/wiki/Spam_blacklist into a file namedwikimedia_blacklist that is stored in the /var/lib/mediawiki/extensions/SpamBlacklist folder. Then in LocalSettings.php use thevariable:
$wgSpamBlacklistFiles = array("$IP/extensions/SpamBlacklist/wikimedia_blacklist");
Add specific websites (or rules) to the pages:
MediaWiki:Spam-blacklistandMediaWiki:Spam-whitelist
Note: I advise putting an administrator lock on MediaWiki:Spam-whitelist.
Check Spambots
Check Spambots (http://www.mediawiki.org/wiki/Extension:Check_Spambots) is an automated script that may be configured to querythe one of several spambot or open-proxy-IP-address databases prior to allowing a user to perform a function. (APIs are required forseveral of these databases.) Install:
sudo mkdir /var/lib/mediawiki/extensions/CheckSpambotscd /var/lib/mediawiki/extensions/CheckSpambots
Copy the CheckSpambots.php script from this location (http://www.mediawiki.org/wiki/Extension:Check_Spambots) and save it as/var/lib/mediawiki/extensions/CheckSpambots/CheckSpambots.php (use the gedit text editor instead of kate if using Ubuntuinstead of Kubuntu):
sudo kate /var/lib/mediawiki/extensions/CheckSpambots/CheckSpambots.php
Also download and save into the /var/lib/mediawiki/extensions/CheckSpambots folder the files (use the gedit text editor instead of kateif using Ubuntu instead of Kubuntu):
check_spammers_plain.php (http://www.mediawiki.org/wiki/Extension:Check_Spambots/check_spammers_plain.php) :
sudo kate /var/lib/mediawiki/extensions/CheckSpambots/check_spammers_plain.php
en.php (http://www.mediawiki.org/wiki/Extension:Check_Spambots/en.php) :
sudo kate /var/lib/mediawiki/extensions/CheckSpambots/en.php
UbuntuGuide Part2 - http://ubuntuguide.org/index.php?title=UbuntuGuide_Part2&...
106 of 177 08/10/2013 09:04 AM

functions.php (http://www.mediawiki.org/wiki/Extension:Check_Spambots/functions.php) :
sudo kate /var/lib/mediawiki/extensions/CheckSpambots/functions.php
config.php (http://www.mediawiki.org/wiki/Extension:Check_Spambots/config.php) :
sudo kate /var/lib/mediawiki/extensions/CheckSpambots/config.php
Edit the config.php to choose which databases to check, where to log results, and other variables.
Add to the end of your LocalSettings.php file these lines:
## CheckSpambots #require_once("extensions/CheckSpambots/CheckSpambots.php");#$wgEnableSorbs = false;#
Note: The $wgEnableSorbs variable is not required with/after MediaWiki 1.16.
Bad Behavior
Bad Behavior (http://www.mediawiki.org/wiki/Extension:Bad_Behavior) is an extension (created for Wordpress blogs) which blockse-mail harvesters, spambots, and other malicious intent. See the configuration (http://bad-behavior.ioerror.us/documentation/configuration/) settings. Install:
cd /var/lib/mediawiki/extensionssudo wget http://downloads.wordpress.org/plugin/bad-behavior.2.0.41.zipsudo unzip bad-behavior.2.0.41.zipsudo rm bad-behavior.2.0.41.zip
Towards the end of your LocalSettings.php file add the lines:
## the Bad Behavior extension#include_once( "$IP/includes/DatabaseFunctions.php" );include( "$IP/extensions/bad-behavior/bad-behavior-mediawiki.php" );#
Bad-behavior logs to a database, which doesn't work for me. Turn this off by editing the bad-behavior-mediawiki.php file (use thegedit text editor instead of kate if using Ubuntu instead of Kubuntu):
sudo kate /var/lib/mediawiki/extensions/bad-behavior/bad-behavior-mediawiki.php
and change the line:
'logging' => true,
to
'logging' => false,
AkismetKlik
AkismetKlik (http://www.mediawiki.org/wiki/Extension:AkismetKlik) uses the Akismet engine (created for Wordpress blogs) to filtercomment spammers.
ConfirmAccount
The Confirm Account (http://www.mediawiki.org/wiki/Extension:ConfirmAccount) extension disables direct account creation andrequires the approval of new accounts by a bureaucrat. (As spam becomes increasingly prevalent, this maneuver often becomesnecessary).
SideBar Donate
This SideBarDonateBox (http://www.mediawiki.org/wiki/Extension:SidebarDonateBox) extension adds a PayPal donate button
UbuntuGuide Part2 - http://ubuntuguide.org/index.php?title=UbuntuGuide_Part2&...
107 of 177 08/10/2013 09:04 AM

(https://www.paypal.com/us/cgi-bin/?cmd=_donate-intro-outside) to the Sidebar. (Sign up with PayPal donate (https://www.paypal.com/us/cgi-bin/?cmd=_donate-intro-outside) and generate the code for a Donate button first.) Install:
sudo mkdir /var/lib/mediawiki/extensions/SidebarDonateBoxcd /var/lib/mediawiki/extensions/SidebarDonateBoxsudo wget http://svn.wikimedia.org/svnroot/mediawiki/trunk/extensions/SidebarDonateBox/SidebarDonateBox.php
Add to the LocalSettings.php file code similar to this:
# This is for the Sidebar PayPal button#require_once("$IP/extensions/SidebarDonateBox/SidebarDonateBox.php");##$egSidebarDonateBoxContent = 'PayPal code';#$egSidebarDonateBoxContent = '<form action="https://www.paypal.com/cgi-bin/webscr" method="post"><input type="hidden" name="cmd" value="_s-xclick"><input type="hidden" name="hosted_button_id" value="12345678"><input type="image" src="https://www.paypal.com/en_US/i/btn/btn_donateCC_LG.gif" border="0" name="submit" alt="PayPal - The safer, easier way to pay online!"><img alt="" border="0" src="https://www.paypal.com/en_US/i/scr/pixel.gif" width="1" height="1"></form>';#
Replace the value 12345678 with the value for the PayPal Donate button generated for your account.
There are other alternative Donation / Fundraising interfaces which are more comprehensive (and complex). See this section.
Google AdSense
Few websites make money from placing ads, anymore, simply because there are so many websites. (Over the course of several years Ihave made only a few dollars.) Still, Google Adsense is one of the few ways to easily place ads on your site. (Google is selective about itspartners these days, so make sure your website is mature and fully functional before signing up with Google AdSense.)
Sign up for Google AdSense (https://www.google.com/adsense/apply) and wait for a confirmation e-mail (usually takes 2 days).Create an ad unit as instructed in the confirmation e-mail.
Google AdSense -> AdSense Setup -> AdSense for Content-> Ad unit - Choose if you just want images, text or both -> Continue-> Format: 124 x 240 Vertical Banner-> Colors: Graphite (or your preference)-> Other desired settings -> Submit and get code
Save the generated code to a text file.
Use either the Google Adsense2 or Google Adsense Mediawiki extension (below) for maximum flexibility.
A direct method of using the code in the Monobook skin (of Mediawiki) can be accomplished using this advice(https://discussion.dreamhost.com/thread-29149.html) (which is the method this wiki uses):
Create an adsense subfolder in your Mediawiki directory.Create a file (e.g. adsense_horizontal.php and/or adsense_vertical.php) in the adsense folder that contains the code generatedwhen signing up for Google Adsense.Place an "include" within the /skins/Monobook.php file that refers to the /adsense/adsense_horizontal.php file. The position ofthese "include" lines in Monobook.php will determine the position of the ad on the page. (Note that in these lines areexclusions for pages that are "administrative" pages, on which the Google Adsense rules do not allow ads to be placed.)
<?php if(!strstr($_SERVER['REQUEST_URI'], "Special:") && !strstr($_SERVER['REQUEST_URI'], "User:") && !strstr($_SERVER['REQUEST_URI'], "User_talk:") && !strstr($_SERVER['REQUEST_URI'], "Image:") && !strstr($_SERVER['REQUEST_URI'], "action=submit") && !strstr($_SERVER['REQUEST_URI'], "action=edit") && !strstr($_SERVER['REQUEST_URI'], "Template:")) { include("adsense/adsense_horizontal.php"); } ?>
Google AdSense2
The MediaWiki Google AdSense 2 (http://www.mediawiki.org/wiki/Extension:Google_AdSense_2) extension places an AdSense box inthe MediaWiki sidebar. This has the advantage of being visible on every page. You must create a 124 x 240 Vertical Banner ad unit touse with it.
Download and install :
UbuntuGuide Part2 - http://ubuntuguide.org/index.php?title=UbuntuGuide_Part2&...
108 of 177 08/10/2013 09:04 AM

sudo wget http://upload.wikimedia.org/ext-dist/GoogleAdSense-MW1.16-r61946.tar.gzsudo tar -xzf GoogleAdSense-MW1.16-r61946.tar.gz -C /var/lib/mediawiki/extensions
Using the settings found in the generated code, edit your LocalSettings.php file, adding the lines:
## This section is for Google AdSense#require_once( "$IP/extensions/GoogleAdSense/GoogleAdSense.php" );$wgGoogleAdSenseClient = 'replace this with the client name';$wgGoogleAdSenseSlot = 'replace this with the slot name';$wgGoogleAdSenseID = 'replace this with your ID';// Width of the AdSense box, specified in your AdSense account$wgGoogleAdSenseWidth = 120;// Height of the AdSense box, specified in your AdSense account$wgGoogleAdSenseHeight = 240;// Source URL of the AdSense script$wgGoogleAdSenseSrc = "http://pagead2.googlesyndication.com/pagead/show_ads.js";// Show the AdSense box only for anonymous users$wgGoogleAdSenseAnonOnly = false;#
While logged into your MediaWiki site as an administrator, edit the page Mediawiki:Common.css and add the lines:
/* Pad Google AdSense box in portlet in sidebar */#p-googleadsense .pBody { padding-top: 5px; text-align: center;}
Google AdSense will now appear in the sidebar. Obviously, users who block scripts (using NoScript, for example) or block ads(using Adblock Plus, for example) will not be able to view the ads. To test whether the ads display correctly, make sure your ownscript and ad blockers (if any) are turned off, as well.
Google AdSense
The original Google AdSense (http://www.mediawiki.org/wiki/Extension:GoogleAdSense) Mediawiki extension uses tags to place ads.Both this extension and the AdSense2 extension (for the sidebar) can be used simultaneously (as long as they are stored indifferently-named extensions folders).
Download and extract:
sudo wget -O GoogleAdSense.zip http://www.paulgu.com/files/getfile/getfile.php?id=10sudo unzip GoogleAdSense.zipsudo rm GoogleAdSense.zip
This will give you a folder named GoogleAdSense. However, this is the same folder name as the folder for Google AdSense2, sorename the folder while moving it to the extensions folder:
sudo mv GoogleAdSense /var/lib/mediawiki/extensions/GoogleAdSense30
Generate a content ad unit in the Google AdSense account. Long horizontal ads can be created as 728 x 90. Copy the generatedcode into a file and save it for reference.
Edit the GoogleAdSense.php file (use the gedit text editor instead of kate if using Ubuntu instead of Kubuntu):
sudo kate /var/lib/mediawiki/extensions/GoogleAdSense30/GoogleAdSense.php
Find the line:
$PUBLISHER_ID = "pub-xxxxxxxxxxxxxxxx";
and replace pub-xxxxxxxxxxxxxxxx with the publisher ID (aka google_ad_client) that was generated during your ad unit codegeneration.
Find the line:
'C01' => array('unitID' => 'xxx', 'width' => '728', 'height' => '90', 'position' => 'none'),
and replace xxx with the google_ad_slot number (such as 1234567890) that corresponds to the ad unit you wish to use. Note the C01.This will be the uid that corresponds to this ad unit. The width and height should correspond to those of the ad unit being used.
UbuntuGuide Part2 - http://ubuntuguide.org/index.php?title=UbuntuGuide_Part2&...
109 of 177 08/10/2013 09:04 AM

Edit your LocalSettings.php file and add the lines:
## Google Adsense. Edit /var/lib/mediawiki/extensions/GoogleAdSense30/GoogleAdSense.php.# Use tags such as <google uid="C01" position="none"></google>#include_once( "$IP/extensions/GoogleAdSense30/GoogleAdSense.php" );#
Then you can place your ad on any page by placing a tag such as
<google uid="C01" position="none"></google>
ShareThis
The ShareThis (http://www.mediawiki.org/wiki/Extension:ShareThis) extension provides links to popular social bookmarking andnews sources. It works without modification for the Monobook skin.
Install:
sudo mkdir /var/lib/mediawiki/extensions/ShareThiscd /var/lib/mediawiki/extensions/ShareThis
Copy the ShareThis script (http://jimbojw.com/wiki/index.php?title=ShareThis) into a text file:
sudo kate /var/lib/mediawiki/extensions/ShareThis/ShareThis.php
This is a PHP script, so make sure the first line is:
<?php
Install the associated icons:
cd /usr/share/mediawiki/skins/common/imagessudo wget http://jimbojw.com/download/sharethis-icons.zipsudo unzip sharethis-icons.zipsudo rm sharethis-icons.zip
Edit your LocalSettings.php file and add the lines:
## Add ShareThis to the sidebarrequire_once( "$IP/extensions/ShareThis/ShareThis.php" );$wgShowShareThisSidebar = true;#
Facilitate printing to an eBook
Collections
The Collection (http://www.mediawiki.org/wiki/Extension:Collection) extension facilitates grouping pages for export to PDF or otherformat. (See Wikieducator (http://wikieducator.org/Help:Collections) for an example). This is the system Wikipedia uses to createeBooks. It can be used with MediaWiki 1.14 or later. For more information see this article.
PdfBook
Some wiki users like to print out part or all of the wiki into an ebook (PDF format). This can be facilitated with the PdfBook(http://www.mediawiki.org/wiki/Extension:PdfBook) extension. For more information see this article.
Add Quotations
Bashfr (http://www.mediawiki.org/wiki/Extension:Bashfr) is an extension that uses a text file in the Fortune (http://en.wikipedia.org/wiki/Fortune_%28Unix%29) format and displays one random quote from that file.
Create a folder named bashfr in the extensions folder of your site. In a multi-site wiki, this will be at /etc/mediawiki/sites/subsite_x/extensions. Otherwise the default location is at /var/lib/mediawiki/extensions.
UbuntuGuide Part2 - http://ubuntuguide.org/index.php?title=UbuntuGuide_Part2&...
110 of 177 08/10/2013 09:04 AM
sudo mkdir /var/lib/mediawiki/extensions/bashfr
Create a text file named bashfr.php in this directory into which you will copy the PHP code found here(http://www.mediawiki.org/wiki/Extension:Bashfr#Code) (use the gedit text editor instead of kate if using Ubuntu instead ofKubuntu).
sudo kate /var/lib/mediawiki/extensions/bashfr/bashfr.php
Edit the LocalSettings.php file for your wiki and add these lines (towards the end of the file):
# For the Bashfr quotations module#require_once("$IP/extensions/bashfr/bashfr.php");#
Copy (or create) a text file in the Fortune format with a list of the quotations in it. It should look like:
I reject your reality and substitute my own...%This is one of those "What the hell am I doing?" moments, over!%We got a robot in the water, he's stuffed with tuna and it's just another day here at Mythbusters.
It is possible to include a URL as the text in a quotation. (Most browsers will then automatically change the text into anactual link.) In this way, a list of random URL links can also be displayed through the Fortune display.
My reality comes from http://ubuntuguide.org%When I wonder "What the hell I am doing?" I go to Kubuntuguide at http://ubuntuguide.org/wiki/Kubuntuguide%MediaWiki is the premier wiki. Visit their website: http://www.mediawiki.org/wiki/MediaWiki
Copy this file to the /var/lib/mediawiki/extensions/bashfr folder (or to your subsite's particular extensions folder) and rename it tobashfr_fortunes .
Wherever you want to place a random quotation from this file, place this tag on your MediaWiki page:
<bashfr />
Add or edit quotations merely by editing the bashfr_fortunes text file. Be sure to maintain the format of a Fortune file (i.e. witha % symbol between each quotation).
Add these lines to the LocalSettings.php file so that a new quote appears every day (or more frequently by using a numbersmaller than 86400, which is the interval in seconds in which to clear the cache).
# This clears the cache daily, which I use to change rotating content (pictures, fortunes, etc.) daily.#require("includes/GlobalFunctions.php");$wgCacheEpoch = wfTimestamp( TS_MW, time() - 86400 ); # 60*60*24 = 1 day
Add Random elements as advertisements
Random (http://www.mediawiki.org/wiki/Extension:Random) is an extension that allows one (or more) of a selection of items (or wikielements) in a list to be presented randomly. This extension allows wiki tags (and elements) so that a combination of images, text, andURL links can be presented together (which together would constitute a typical ad). This is useful for displaying advertisementsspecific to (and stored within) the wiki.
Create a folder named Random in the extensions folder of your site. In a multi-site wiki, this will be at /etc/mediawiki/sites/subsite_x/extensions. Otherwise the default location is at /var/lib/mediawiki/extensions.
sudo mkdir /var/lib/mediawiki/extensions/Random
Create a text file named Random.php in this directory into which you will copy the PHP code found here(http://www.mediawiki.org/wiki/Extension:Random#Code) (use the gedit text editor instead of kate if using Ubuntu instead ofKubuntu).
sudo kate /var/lib/mediawiki/extensions/Random/Random.php
UbuntuGuide Part2 - http://ubuntuguide.org/index.php?title=UbuntuGuide_Part2&...
111 of 177 08/10/2013 09:04 AM

Edit the LocalSettings.php file for your wiki and add these lines (towards the end of the file):
# For the Random extension, used to randomly select an item from a list#require_once("$IP/extensions/Random/Random.php");#
An example use of this tag would resemble:
<random> <format>Visit our sponsor: [%ITEM%]</format> <item>http://ubuntuguide.org UbuntuGuide</item> <item>http://ubuntuguide.org/wiki/KubuntuGuide Kubuntuguide</item> <item>http://www.mediawiki.org MediaWiki</item> </random>
In this example, one of the three items in the list would be randomly selected to replace %ITEM%, yielding an external wiki link in thisformat: [http://ubuntuguide.org UbuntuGuide], which would appear on a wiki page:
Visit our sponsor: UbuntuGuide (http://ubuntuguide.org)
Tip: If it is desirable for an item to appear more often in the rotation, then include the item in the list more than once.
To create ads with images (that can be the size, shape, and format of an ad banner, for example), use this type of tag (note that thecaption portion of the tag is only functional in MediaWiki 1.17 or later):
<center><random><format>Visit our sponsor:<br>[[%ITEM%]]</format><item>File:Tech_tux.png|48px|center|link=http://ubuntuguide.org UbuntuGuide|Visit our sponsor: UbuntuGuide</item><item>File:ExampleAdPic2.png|55px|center|link=http://ubuntuguide.org/wiki/Kubuntuguide|Visit our sponsor: KubuntuGuide</item><item>File:ExampleAdPic3.jpg|center|link=http://exampleexternaldomain.info|caption</item></random></center>
yielding an external wiki link in this format: [[File:Tech_tux.png|48px|center|link=http://ubuntuguide.org|Visit our sponsor:UbuntuGuide]] which would appear (in versions prior to MediaWiki 1.17) on the wiki page:
Visit our sponsor:
The most robust method of creating ads would be to create a series of templates (each with an ad contained within the template).The Random extension would then be used to rotate the ad templates:
<random> <format>{{%ITEM%}}</format> <item>AdTemplate1</item> <item>AdTemplate2</item> <item>AdTemplate3</item> </random>
where AdTemplate1 would represent the wiki page at Template:AdTemplate1, AdTemplate2 would represent the wiki page atTemplate:AdTemplate2, and AdTemplate3 would represent the wiki page at Template:AdTemplate3. (In general it is best that anadministator protect (http://www.mediawiki.org/wiki/Help:Protecting_and_unprotecting_pages) the Template:AdTemplateX pages.)If Template:AdTemplate1 were to contain code such as:
[[File:Tech_tux.png|48px|center|link=http://ubuntuguide.org|Visit our sponsor: UbuntuGuide]] <center>Visit our sponsor: [http://ubuntuguide.org UbuntuGuide]</center>
then the Random extension would yield {{AdTemplate1}} which (in versions prior to MediaWiki 1.17) would appear on a wiki page:
Visit our sponsor: UbuntuGuide (http://ubuntuguide.org)
If desired, the tag code (with the list to be randomly rotated) can be placed in a template (e.g. Template:MyWikiSponsors ) andthen just the corresponding template tag (e.g. {{MyWikiSponsors}} ) could be placed within a wiki page. (It is then highlyrecommended that a wiki administrator protect (http://www.mediawiki.org/wiki/Help:Protecting_and_unprotecting_pages)the template so it cannot be changed by casual wiki users.)
The {{MyWikiSponsors}} tag could then also be placed in a custom block in the Sidebar to enable a rotation of random "ad"presentations in the sidebar.
UbuntuGuide Part2 - http://ubuntuguide.org/index.php?title=UbuntuGuide_Part2&...
112 of 177 08/10/2013 09:04 AM
Add these lines to the LocalSettings.php file so that a new ad appears every day (or more frequently by using a number smallerthan 86400, which is the interval in seconds in which to clear the cache).
# This clears the cache daily, which I use to change rotating content (pictures, fortunes, etc.) daily.#require("includes/GlobalFunctions.php");$wgCacheEpoch = wfTimestamp( TS_MW, time() - 86400 ); # 60*60*24 = 1 day
Customise the Sidebar
Normally, minor changes to the default Sidebar can be made by editing the wiki page " MediaWiki:Sidebar " (http://www.mediawiki.org/wiki/Manual:Interface/Sidebar) . However, greater customisation can be achieved using extensions.
CustomNavBlocks (http://www.mediawiki.org/wiki/Extension:CustomNavBlocks) is an extension that allows regular MediaWiki wikipages to be used in the Sidebar. This allows extensive customisation of the sidebar, including the addition of any kind of element suchas images, numbered lists, and nested lists.
Create a folder named CustomNavBlocks in the extensions folder of your site. In a multi-site wiki, this will be at /etc/mediawiki/sites/subsite_x/extensions. Otherwise the default location is at /var/lib/mediawiki/extensions.
sudo mkdir /var/lib/mediawiki/extensions/CustomNavBlocks
Create a text file named CustomNavBlocks.php in this directory into which you will copy the PHP code found here(http://git.fsinf.at/mediawiki/customnavblocks/blobs/master/CustomNavBlocks.php) (use the gedit text editor instead of kate ifusing Ubuntu instead of Kubuntu).
sudo kate /var/lib/mediawiki/extensions/CustomNavBlocks/CustomNavBlocks.php
Alternatively, download and install the code directly into the extension folder (recommended):
sudo mkdir /var/lib/mediawiki/extensions/CustomNavBlockscd /var/lib/mediawiki/extensions/CustomNavBlockssudo wget http://git.fsinf.at/mediawiki/customnavblocks/blobs/raw/master/CustomNavBlocks.php
Edit the LocalSettings.php file for your wiki and add these lines (toward the end of the file):
# Installs the CustomNavBlocks extension, used to customise the MediaWiki Sidebar#require_once( "$IP/extensions/CustomNavBlocks/CustomNavBlocks.php" );$wgCustomNavBlocksEnable = true;#
Create a wiki page named MediaWiki:CustomNavBlocks. This stores the names of the individual wiki pages, each of which willcomprise a custom Sidebar block. Edit the content to resemble:
CustomBlockUbuntu|UbuntuCustomBlockKubuntu|KubuntuSEARCHCustomBlockRecLinks|Recommended LinksCustomBlockSidebarAd|SponsorCustomBlock5|Title of Block 5DONATE
Note that several special reserved words such as SEARCH and DONATE (if using the Sidebar Donate extension) can be used bythemselves.
Create the individual wiki pages MediaWiki:CustomBlockUbuntu, MediaWiki:CustomBlockKubuntu,MediaWiki:CustomBlockRecLinks, MediaWiki:CustomBlockSidebarAd, MediaWiki:CustomBlock5, etc.
Edit each page to reflect the content you wish to appear in each block. It is possible to use regular wiki tags in these pages. Adjust thecontent and formatting of each page so that it appears in the Sidebar as desired.
Randomised content (including images) using the Random extension (as described above) can also be placed in aMediaWiki:CustomBlock page as a type of Sidebar Ad (with random ad rotation).
Each wiki page (used for the sidebar) should be protected (http://www.mediawiki.org/wiki/Help:Protecting_and_unprotecting_pages) by an administrator to prevent a casual wiki user from changing it. (Note: Allwiki pages with the Mediawiki: prefix are automatically protected already, and can only be edited by administrators anyway (andtherefore do not require additional protection.))
Change skins
UbuntuGuide Part2 - http://ubuntuguide.org/index.php?title=UbuntuGuide_Part2&...
113 of 177 08/10/2013 09:04 AM

Skins in MediaWiki are stored in /usr/share/mediawiki/skins and are particular to the version of MediaWiki in use. In MediaWiki 1.16,the 'vector' skin (the new default for Wikimedia and for MediaWiki 1.17 or later) can be chosen by editing the LocalSettings.php fileand changing:
$wgDefaultSkin = 'monobook';
to
$wgDefaultSkin = 'vector';
Change background colours
The background colours are set in the CSS code for the skin being used. For example, if the Monobook skin is being used, the variablesare found in /skins/monobook/main.css. There are background colours for many different areas of the wiki; each must be changedseparately. Background colours are specified using certain words (such as white, grey, red, blue, green, yellow) or using hex-codes,examples of which are shown here (http://www.theodora.com/html_colors.html) . For example, the main body background colour is setto #f9f9f9 in /skins/monobook/main.css:
body {font: x-small sans-serif;background: #f9f9f9 url(headbg.jpg) 0 0 no-repeat;color: black;margin: 0;padding: 0;}
or the content background colour set:
#content {background: white;color: black;border: 1px solid #aaa;border-right: none;line-height: 1.5em;}
Add icons
A wide variety of GPL (and some LGPL) icons are available at Wikimedia Commons (http://commons.wikimedia.org/wiki/Nuvola/apps). There is also a large number of icons available in the OpenClipArt Library.
Icons on a page are best displayed at a size of 48 px. Small icons in a regular line of text are often displayed at 16 px. Icon filesthat have been saved as an image File in the wiki can then be displayed (see the MediaWiki Help:Images(http://www.mediawiki.org/wiki/Help:Images#Rendering_a_single_image) section for more info) using a tag in the generic format:
[[File:filename.extension|options|altlabel|caption]]
where the |options|, |altlabel|, and |caption| sections are optional. (Note: the |caption| option only works in MediaWiki 1.17 andlater, and then only displays if an |altlabel| is also designated.) For example:
[[File:Prefapp1.png|center|link=http://ubuntuguide.org|16 px|Preferred app 1]]
where the |link=http://ubuntuguide.org| is an optional link for the icon, and can be the name of another internal wiki page (butwithout [[ ]] tags) or an external link (when preceded by http://). An "alt" label (which is displayed when the mouse is rolled over theicon) is included in this example but no caption. The |center| option is also optional, as is the display size |16px|.
Embed media into a document
If media files (such as .mp3 audio files) are to be uploaded directly into the wiki, make sure the upload of the media filetype isallowed by editing the $wgFileExtensions variable in LocalSettings.php so that it includes it. For example, to allow .mp3 files:
$wgFileExtensions = array('pdf', 'png', 'gif', 'jpg', 'flv', 'swf', 'mp3');
Media files can be used as a link for any text using this type of tag:
[[Media:MyMediaFile.mp3|any text you wish]]
UbuntuGuide Part2 - http://ubuntuguide.org/index.php?title=UbuntuGuide_Part2&...
114 of 177 08/10/2013 09:04 AM

As an example, this text has an audio file linked to it:
You Haven't ?
Embed a PDF document
If PDF files are to be uploaded directly into the wiki, make sure the upload of PDF files are allowed by editing the$wgFileExtensions variable in LocalSettings.php so that it includes pdf. For example:
$wgFileExtensions = array('pdf', 'png', 'gif', 'jpg', 'flv', 'swf');
Use an external PDF viewer
This method is the easiest and most universal.
A PDF document is uploaded as a file into MediaWiki. A link placed in a wiki page of this format:
[[Media:uploadedpdffile.pdf|Description of this PDF File]]
will access the uploaded file for display in an external PDF viewer (such as Okular, Evince, or Acrobat Reader).
Use Browser plugins
A PDF file can be displayed on a wiki page (using tags), but each user must have their browser configured to handle PDF files (with anappropriate plugin or a setting that directs the browser to an external viewer). An advantage of this method is that a PDF file can beviewed on the wiki page at the same time as additional text on the wiki page (that is not part of the PDF file). Not all browsers have aPDF-viewing plugin (such as this one for Firefox) available, however, so the desired result may not be displayed in every browser.
To display the PDF files within wiki pages, install the EmbedPDF (http://www.mediawiki.org/wiki/Extension:EmbedPDF) plugin:
Create a folder for the extension:
sudo mkdir /var/lib/mediawiki/extensions/embedpdf
Copy the EmbedPDF.php script from this location (http://www.mediawiki.org/wiki/Extension:EmbedPDF) and save it as /var/lib/mediawiki/extensions/embedpdf/EmbedPDF.php (use the gedit text editor instead of kate if using Ubuntu instead of Kubuntu):
sudo kate /var/lib/mediawiki/extensions/embedpdf/EmbedPDF.php
Edit the LocalSettings.php file for your wiki and add these lines (towards the end of the file):
## This section is for EmbedPDF tagsrequire_once("$IP/extensions/embedpdf/EmbedPDF.php");#
Display an uploaded PDF file by using the tags on a wiki page similar to:
<pdf>http://some.site.com/with/a/document.pdf</pdf>
or
<pdf>Your_uploaded_document.pdf</pdf>
Use templates
This took me a long time to appreciate. I have now converted my wiki(s) so that all content is stored in templates, not on the actualwiki pages themselves. When content is stored in templates in this manner, the display of any wiki page can be changed merely byre-arranging the order of the templates (which contain the actual content) within it.
A template is designated by tags similar to {{MycontentTemplate1}} and {{MycontentTemplate2}} and content is then entereddirectly into the wiki pages that correspond to them: Template:MycontentTemplate1 and Template:MycontentTemplate2.
A wiki page that displays one way can then be created using
{{MycontentTemplate1}}
UbuntuGuide Part2 - http://ubuntuguide.org/index.php?title=UbuntuGuide_Part2&...
115 of 177 08/10/2013 09:04 AM

{{MycontentTemplate2}}
or can be re-arranged to display differently merely by changing the order of the template tags:
{{MycontentTemplate2}}{{MycontentTemplate1}}
While this method of wiki creation takes extra steps to implement, in the long run it provides the greatest flexibility. If you intend tocreate a complex wiki, a plan that includes the liberal usage of templates (from the outset) will save a lot of time later on.
Add WebDAV storage
WebDAV (http://en.wikipedia.org/wiki/WebDAV) is a method for online storage and versioning of documents with access control. It issometimes useful to use WebDAV in conjunction with MediaWiki in order to store documents with different levels of security. WebDAVserver functions are provided by the WebDAV module of the Apache2 server (http://httpd.apache.org/docs/2.2/mod/mod_dav.html) (onwhich MediaWiki also runs). See these WebDAV instructions,
Write a screenplay
Ok, this is a pretty esoteric use. I happen to use MediaWiki to write books and screenplays. The ScreenPlay (http://www.mediawiki.org/wiki/Extension:ScreenPlay) extension allows me to format the text in the format required for screenplays.
Create a folder for the extension:
sudo mkdir /var/lib/mediawiki/extensions/screenplay
Download and extract the extension:
wget -O ScreenPlay.zip http://siege.org/pub/mwspe/ScreenPlay-0.5.php.zipsudo unzip ScreenPlay.zipsudo rm ScreenPlay.zip
Move the script into the extensions folder:
sudo mv ScreenPlay*.php /var/lib/mediawiki/extensions/screenplay/ScreenPlay.php
Edit the LocalSettings.php file for your wiki and add these lines (towards the end of the file):
## This section is for ScreenPlay tagsrequire_once("$IP/extensions/screenplay/ScreenPlay.php");#
An example of the usage of this extension is at this Congo Kitabu (http://zebraworldcup.dyndns.org/CongoKitabuTeaser)screenplay site.
Add citations / footnotes
Cite (http://www.mediawiki.org/wiki/Extension:Cite/Cite.php) is the Mediawiki extension used by Wikipedia to create citations andfootnotes (references) using the <ref> and </ref> tags. Install (choose the version appropriate for your version of Mediawiki):
sudo wget http://upload.wikimedia.org/ext-dist/Cite-MW1.15-48711.tar.gzsudo tar -xzf Cite-MW1.15-48711.tar.gz -C /var/lib/mediawiki/extensionssudo rm Cite-MW1.15-48711.tar.gz
Add the following line near the end of LocalSettings.php:
## This Cite extension is for citations/references/footnotes#require_once( "$IP/extensions/Cite/Cite.php" );#$wgCiteEnablePopups = true;
If you are using a newer version of the Cite extension and wish to enable citation popups, uncomment the$wgCiteEnablePopups option.
At the bottom of the wiki page should be placed the <references /> tag (i.e. wherever the <references /> tag is placed is where thefootnotes will be displayed).
UbuntuGuide Part2 - http://ubuntuguide.org/index.php?title=UbuntuGuide_Part2&...
116 of 177 08/10/2013 09:04 AM

Each reference should be placed between the <ref> and </ref> tags within the text of the wiki page, for example: <ref>text offootnote for reference 1</ref>. A reference that is to be used more than once can be named, for example: <refname="refname2">text of footnote for reference 2</ref> and each subsequent usage of that reference can merely be tagged: <refname="refname2" />. For more complex uses, see the Cite extension instructions (http://www.mediawiki.org/wiki/Extension:Cite/Cite.php) .
Donation / Fundraising Interfaces
The DonationInterface (http://www.mediawiki.org/wiki/Extension:DonationInterface) extension provides mechanisms forcollecting and tracking payments through various payment gateways. It is the extension used by the Wikimedia foundation.The InputBox (http://www.mediawiki.org/wiki/Extension:InputBox) extension can serve as a frontend for the PayPal Donate code(or other donation mechanism code -- in fact, for any HTML code, for that matter).The Sidebar Donate method for adding a PayPal Donate button is one of the easiest methods.It is possible to add HTML code (such as the code generated for a PayPal Donate button) directly on a wiki page. However, thisalso allows HTML code to be added to every page throughout the wiki and therefore entails a certain amount of risk(http://www.mediawiki.org/wiki/Manual:$wgRawHtml) (as malicious HTML code could then be added to any wiki page that is notprotected). To enable direct HTML code on all wiki pages, add to the LocalSettings.php file:
# Set $wgRawHtml = true; to allow raw HTML code on wiki pages between <html> </html> tags# Otherwise, leave this line commented out (or set to false)#$wgRawHtml = true;#
Then add to the desired wiki page the code for the PayPal Donate button between <html> </html> tags. (Obviously, replace the value12345678 with the value for the PayPal Donate button generated for your account.) For example:
<html><form action="https://www.paypal.com/cgi-bin/webscr" method="post"><input type="hidden" name="cmd" value="_s-xclick"><input type="hidden" name="hosted_button_id" value="12345678"><input type="image" src="https://www.paypal.com/en_US/i/btn/btn_donateCC_LG.gif" border="0" name="submit" alt="PayPal - The safer, easier way to pay online!"><img alt="" border="0" src="https://www.paypal.com/en_US/i/scr/pixel.gif" width="1" height="1"></form></html>
It is very important to protect (http://www.mediawiki.org/wiki/Help:Protecting_and_unprotecting_pages) the wiki page with thecode on it, so that a casual wiki user won't be able to edit the page and substitute the hosted_button_id value of someone else's PayPalbutton!
A somewhat safer method is to leave $wgRawHtml = false; and to install the addHTML (http://www.mediawiki.org/wiki/Extension:AddHTML) extension according to the instructions listed. This extension only allows HTML code to be executedfrom protected (http://www.mediawiki.org/wiki/Help:Protecting_and_unprotecting_pages) pages (and not from unprotectedpages). To such a protected page, add the code (for example):
<addhtml><html><form action="https://www.paypal.com/cgi-bin/webscr" method="post"><input type="hidden" name="cmd" value="_s-xclick"><input type="hidden" name="hosted_button_id" value="12345678"><input type="image" src="https://www.paypal.com/en_US/i/btn/btn_donateCC_LG.gif" border="0" name="submit" alt="PayPal - The safer, easier way to pay online!"><img alt="" border="0" src="https://www.paypal.com/en_US/i/scr/pixel.gif" width="1" height="1"></form></html></addhtml>
Import (K)Ubuntuguide into your site
How do I import a copy of (K)Ubuntuguide into my own wiki?
See this page for Ubuntuguide or this page for Kubuntuguide.
Troubleshooting
Mediawiki 1.15 on Firefox and Google tablet browsers
MediaWiki 1.15 does not display correctly in Google and Firefox browsers on tablets and mobile devices. To correct this, use thesolution found here (http://svn.wikimedia.org/viewvc/mediawiki/trunk/phase3/skins/common/wikibits.js?r1=53141&r2=53140&pathrev=53141) :
Edit /skins/common/wikibits.js with your text editor.Comment (using // at the beginning of the relevant lines):
UbuntuGuide Part2 - http://ubuntuguide.org/index.php?title=UbuntuGuide_Part2&...
117 of 177 08/10/2013 09:04 AM
var is_khtml = navigator.vendor == 'KDE' || ( document.childNodes && !document.all && !navigator.taintEnabled );
and
} else if (is_khtml) { importStylesheetURI(stylepath+'/'+skin+'/KHTMLFixes.css');
Adding extra white spaces
MediaWiki is set up to remove extraneous white space. However, sometimes it is desirable to insert extra spaces (for formatting orother purposes). For each extra desired (non-breaking) space, insert . To insert three spaces, for example, insert .
Allow search engines to "follow" links
By default, MediaWiki sites add a "nofollow" tag to links contained within the wiki. This is done to limit the usefulness of a wiki inpromoting spam links, and to protect internal links from being listed on search engines (such as Google) when a wiki is meantonly for the internal use of a private organization. In general it is best to leave the default settings in place.
However, for a fully cross-referenced, publicly available wiki, it may be desirable to make the links within a wiki able to be"followed" by a search engine's indexing spider. To enable this, in the MediaWiki LocalSettings.php add the following lines:
# for all external links, turn off nofollow tag$wgNoFollowLinks=false;#
It is possible to allow only certain links (or domain names) to be "followed," retaining the "nofollow" tag for all other links. Forthis type of fine-grained control, see the summary (http://www.mediawiki.org/wiki/Manual:Combating_spam#rel.3D.22nofollow.22) and the MediaWiki manual (http://www.mediawiki.org/wiki/Manual:$wgNoFollowLinks) .
Collections
The Collection (http://www.mediawiki.org/wiki/Extension:Collection) extension facilitates grouping pages for export to PDF or otherformat. (See Wikieducator (http://wikieducator.org/Help:Collections) for an example). This is the system Wikipedia uses to createeBooks. It can be used with MediaWiki 1.14 or later. See this extensive tutorial (http://edutechwiki.unige.ch/en/Mediawiki_collection_extension_installation#Collection_extension_installation) . Also see instructions for using this extension as aBook tool (http://meta.wikimedia.org/wiki/Book_tool) .
Install cURL for Php5:
sudo apt-get install php5-curl
Download (http://www.mediawiki.org/wiki/Special:ExtensionDistributor/Collection) the Collection extension and install:
wget http://upload.wikimedia.org/ext-dist/Collection-MW1.16-r66255.tar.gzsudo tar -xzf Collection-MW1.16-r66255.tar.gz -C /var/lib/mediawiki/extensionssudo rm Collection-MW1.16-r66255.tar.gz
Edit LocalSettings.php and add the lines (for details on settings see this README (http://svn.wikimedia.org/svnroot/mediawiki/trunk/extensions/Collection/README.txt) ):
## Add the Collections modules and settings:#require_once("$IP/extensions/Collection/Collection.php");##$wgCollectionMWServeURL = "(string)"; // URL of a render server (default "http://tools.pediapress.com/mw-serve/")#$wgCollectionMWServeCert = "(string)"; // (string) = SSL certificate filename, PEM format, for mw-serve render server.# Needed for self-signed certificates, otherwise cURL will throw an error. The default is null, i.e. no certificate.#$wgCollectionMWServeCredentials = "(string)"; // "USERNAME:PASSWORD" (or "USERNAME:PASSWORD:DOMAIN" if you're using LDAP)# Needed only if the MediaWiki requires to be logged in to view articles#$wgCollectionFormats = array('rl' => 'PDF',) // Array of supported formats. Example: $wgCollectionFormats = array('rl' => 'PDF', 'odf' => 'ODT',);#$wgCollectionArticleNamespaces = (array);# List of namespace numbers for pages which can be added to a collection.# Category pages (NS_CATEGORY) are always an exception (all articles in a# category are added, not the category page itself). Default is::# array(NS_MAIN, NS_TALK, NS_USER, NS_USER_TALK, NS_PROJECT, NS_PROJECT_TALK, NS_MEDIAWIKI, NS_MEDIAWIKI_TALK,# 100, 101, 102, 103, 104, 105, 106, 107, 108, 109, 110, 111,);#$wgCommunityCollectionNamespace = (integer); // Namespace for community (non-personal) collections (Default = ``NS_PROJECT``)# Needed only if the system message Coll-community_book_prefix has not been set.#$wgCollectionMaxArticles = (integer); // Maximum number of articles allowed in a collection (Default 500)
UbuntuGuide Part2 - http://ubuntuguide.org/index.php?title=UbuntuGuide_Part2&...
118 of 177 08/10/2013 09:04 AM

#$wgCollectionLicenseName = "(string)"; // License name for articles in this MediaWiki (Default null)# If set to ``null`` the localized version of the word "License" is used.#$wgCollectionLicenseURL = "(string)"; // URL of an article containing the full license (Default null)#$wgEnableWriteAPI = true; // Enables saving a collection as a wiki (Default = true)#$wgGroupPermissions['user']['collectionsaveasuserpage'] = true;#$wgGroupPermissions['autoconfirmed']['collectionsaveascommunitypage'] = true;
Edit the Template:Saved_book page and copy lines similar to those found here (http://en.wikipedia.org/wiki/Template:Saved_book) .
mwlib
The default for the Collections extension is to use the online renderer found at Pediapress. However, a local Python-based renderingserver can be installed (mwlib) using these instructions (http://code.pediapress.com/wiki/wiki/mwlib-install) .
Easy installation
Install pre-requisites:
sudo apt-get install g++ perl python python-dev python-setuptools python-imaging
Note: python-setuptools >= 0.6c11 is required, but is not included in (K)Ubuntu Lucid or earlier. Download and install (using sudo dpkg-i) a newer python-setuptools (http://packages.debian.org/sid/python-setuptools) .deb package from the Debian (unstable) repositories.Also required is a newer python-pkg-resources (http://packages.debian.org/sid/python-pkg-resources) .deb package.
Download and install program files:
sudo easy_install mwlib
Download and install the rendering library for PDF (ReportLab):
sudo easy_install mwlib.rl
Building latest version from source
Install pre-requisites:
sudo apt-get install make g++ perl python python-dev python-setuptools python-imaging re2c
Download the code:
sudo git clone git://code.pediapress.com/mwlib
Build from the downloaded source:
cd mwlibsudo make
Install:
sudo python setup.py build install
Test mwlib
Check installed renderers:
mw-render --list-writers
Check help:
mw-render --help
Render a test page, first from Wikipedia then from your own wiki:
mw-render -w rl -o test.pdf -c http://en.wikipedia.org/w 'World Economic Forum'
UbuntuGuide Part2 - http://ubuntuguide.org/index.php?title=UbuntuGuide_Part2&...
119 of 177 08/10/2013 09:04 AM
and
mw-render -w rl -o test.pdf -c http://mywiki.mydomain.org ' Sample Article '
Start the mw server
For detailed usage instructions see here (http://code.pediapress.com/wiki/wiki/Examples) .
Start the server.
sudo mw-serve --protocol=http --port=8899 --interface=127.0.0.1 -d
or, simply
sudo mw-serve -d
These settings are the default, except for -d. The -d switch indicates to run as a daemon. Although the default port is 8899, this can bechanged. (Don't forget to open necessary firewalls and to forward ports on your router if the rendering server is to be publiclyaccessible.)
This command can be added as a startup command. For example, copy the command to a startup script (use the gedit text editorinstead of kate if using Ubuntu instead of Kubuntu):
sudo kate ~/.kde/Autostart/mwserver.sh
The command can also be added as a menu item.
The script or the menu item (as a Program) can also be added to the Autostart menu:
K menu -> System -> System Settings -> Advanced -> Autostart -> Add Script... (or Add program...)
Edit the LocalSettings.php file so that the variable now reads:
$wgCollectionMWServeURL = "http://127.0.0.1:8899";
Book Templates
Copy the contents from the Wikipedia Template:Saved_book (http://en.wikipedia.org/wiki/Template:Saved_book) to yourTemplate:Saved_book page and edit it as desired.
PdfBook
(This method is complex and difficult to implement (but robust once accomplished). Compare to the Collections method thatWikipedia uses. This page is undergoing construction.)
Some wiki users like to print out part or all of the wiki into an ebook (PDF format). This can be facilitated with the PdfBook(http://www.mediawiki.org/wiki/Extension:PdfBook) extension. For more information see this article.
Install the htmldoc module in your OS:
sudo apt-get install htmldoc
Download (http://www.mediawiki.org/wiki/Special:ExtensionDistributor/PdfBook) and install:
wget http://upload.wikimedia.org/ext-dist/PdfBook-MW1.16-r60653.tar.gzsudo tar -xzf PdfBook-MW1.16-r60653.tar.gz -C /var/lib/mediawiki/extensionssudo rm PdfBook-MW1.16-r60653.tar.gz
Edit the LocalSettings.php file and add the lines:
## PdfBook settings#require_once( "$IP/extensions/PdfBook/PdfBook.php" );##$wgPdfBookLeftMargin // 1cm Default Left page margin#$wgPdfBookRightMargin // 1cm Default Right page margin
UbuntuGuide Part2 - http://ubuntuguide.org/index.php?title=UbuntuGuide_Part2&...
120 of 177 08/10/2013 09:04 AM
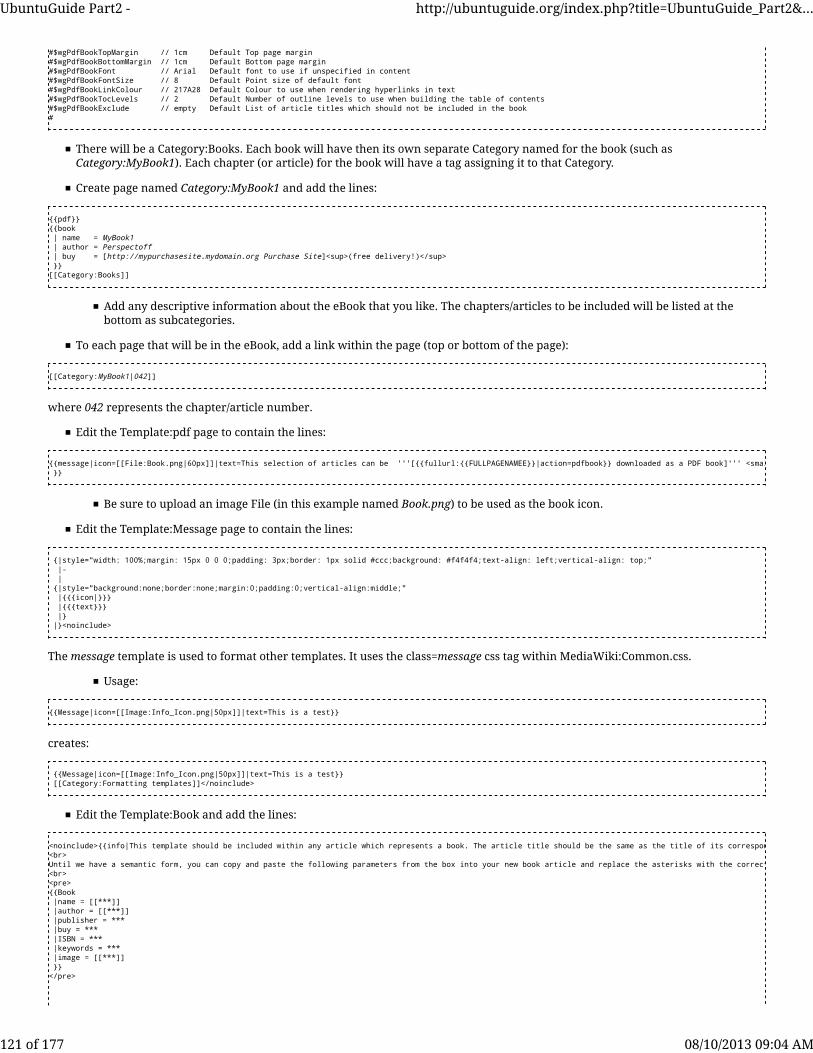
#$wgPdfBookTopMargin // 1cm Default Top page margin#$wgPdfBookBottomMargin // 1cm Default Bottom page margin#$wgPdfBookFont // Arial Default font to use if unspecified in content#$wgPdfBookFontSize // 8 Default Point size of default font#$wgPdfBookLinkColour // 217A28 Default Colour to use when rendering hyperlinks in text#$wgPdfBookTocLevels // 2 Default Number of outline levels to use when building the table of contents#$wgPdfBookExclude // empty Default List of article titles which should not be included in the book#
There will be a Category:Books. Each book will have then its own separate Category named for the book (such asCategory:MyBook1). Each chapter (or article) for the book will have a tag assigning it to that Category.
Create page named Category:MyBook1 and add the lines:
{{pdf}}{{book | name = MyBook1 | author = Perspectoff | buy = [http://mypurchasesite.mydomain.org Purchase Site]<sup>(free delivery!)</sup> }}[[Category:Books]]
Add any descriptive information about the eBook that you like. The chapters/articles to be included will be listed at thebottom as subcategories.
To each page that will be in the eBook, add a link within the page (top or bottom of the page):
[[Category:MyBook1|042]]
where 042 represents the chapter/article number.
Edit the Template:pdf page to contain the lines:
{{message|icon=[[File:Book.png|60px]]|text=This selection of articles can be '''[{{fullurl:{{FULLPAGENAMEE}}|action=pdfbook}} downloaded as a PDF book]''' <small>(or as }}
Be sure to upload an image File (in this example named Book.png) to be used as the book icon.
Edit the Template:Message page to contain the lines:
{|style="width: 100%;margin: 15px 0 0 0;padding: 3px;border: 1px solid #ccc;background: #f4f4f4;text-align: left;vertical-align: top;" |- | {|style="background:none;border:none;margin:0;padding:0;vertical-align:middle;" |{{{icon|}}} |{{{text}}} |} |}<noinclude>
The message template is used to format other templates. It uses the class=message css tag within MediaWiki:Common.css.
Usage:
{{Message|icon=[[Image:Info_Icon.png|50px]]|text=This is a test}}
creates:
{{Message|icon=[[Image:Info_Icon.png|50px]]|text=This is a test}} [[Category:Formatting templates]]</noinclude>
Edit the Template:Book and add the lines:
<noinclude>{{info|This template should be included within any article which represents a book. The article title should be the same as the title of its corresponding book<br>Until we have a semantic form, you can copy and paste the following parameters from the box into your new book article and replace the asterisks with the correct values<br><pre>{{Book |name = [[***]] |author = [[***]] |publisher = *** |buy = *** |ISBN = *** |keywords = *** |image = [[***]] }}</pre>
UbuntuGuide Part2 - http://ubuntuguide.org/index.php?title=UbuntuGuide_Part2&...
121 of 177 08/10/2013 09:04 AM

Once you have saved the new article with information about the book, an entry for that book will appear in the [[:Category:Books|books category]] which will look like the[[Category:Required semantic forms]]</noinclude>
{{Wbox|name=Book: {{{name}}}|content={{sbo}}{{!}}cellspacing=0 cellpadding=5 border=0{{!}}-{{!}}'''Author'''{{!!}}{{{author}}}{{!}}rowspan=5 valign=top{{!}}{{#if:{{{image|}}}|[[Image:{{{image}}}|100px|right]]}}{{!}}-{{!}}'''Publisher'''{{!!}}{{{publisher}}}{{!}}-{{!}}'''Buy from'''{{!!}}{{{buy}}}{{!}}-{{!}}'''ISBN'''{{!!}}{{{ISBN}}}{{!}}-{{!}}'''Keywords'''{{!!}}{{{keywords}}}{{!}}{{sbc}}{{edit this form|Book}}}}<includeonly>[[Category:Books]]</includeonly><noinclude>[[Category:Records]][[Category:Organisational templates|{{PAGENAME}}]]</noinclude>
Edit the Template:Info page and add the lines:
{{message|icon=[[File:Info256.png|40px]]|text={{{1}}}}}
<noinclude>[[Category:Formatting templates]]</noinclude>
Don't forget to upload an Info256.png image as an icon.
Edit the Template:Wbox page and add the lines:
<includeonly>{| align={{{align|right}}} style="border-spacing:8px; margin:8px;"{{#switch: {{{colour|purple}}} |green={{!}} class="MainPageBG" style="width:{{{width|55}}}%; border:1px solid #cef2e0; background:#f5fffa; vertical-align:top; color:#000;"{{!}} |blue={{!}} class="MainPageBG" style="width:{{{width|55}}}%; border:1px solid #cedff2; background:#f5faff; vertical-align:top"{{!}}|purple={{!}} class="MainPageBG" style="width:{{{width|100}}}%; border:1px solid #ddcef2; background:#faf5ff; vertical-align:top; color:#000;"{{!}}}}{|width="100%" cellpadding="2" cellspacing="5" style="vertical-align:top; background:{#switch: {{{colour|purple}}}|green=#f5fffa;|#faf5ff; color:#000}};"! <div style="margin:0; background:{{#switch: {{{colour|purple}}}|green=#cef2e0|blue=#cedff2|#ddcef2}}; font-size:120%; font-weight:bold; border:1px solid {{#switch: {{{c|-|style="color:#000;"| {{#if: {{{content|}}} | {{{content}}} | {{:{{{name}}}}} }}|-|}|}</includeonly>
<noinclude>==Usage==*name = article name, name used in box, if {{{contents}}} is omitted, then the name is a link, and {{{name}}} is transcluded under the box *contents = optional, if supplied the wikitext is placed under the box*colour = green|blue|purple (default)*align = left|center|right (default)*width = pixel number (300 default)
=== Examples ===Wikitext content;<pre>{{Wbox|name=Foo|content=Fodda|colour=purple|align=center|width=100}}{{Wbox|name=Foo|content=Fodda|colour=green|align=center|width=100}}{{Wbox|name=Foo|content=Fodda|colour=blue|align=center|width=100}}</pre>Renders;{| =|- align="center" valign="top"| {{Wbox|name=Foo|content=Fodda|colour=purple|align=center|width=100}}| {{Wbox|name=Foo|content=Fodda|colour=green|align=center|width=100}}| {{Wbox|name=Foo|content=Fodda|colour=blue|align=center|width=100}}|}
</noinclude>
Drupal6 tips
Drupal (Web content publishing)
Drupal (http://drupal.org/) is the leading open-source package for website creation and content collaboration. A modular approach towebsite building, from simple out-of-the-box websites to complex sites, is possible with a short learning curve. Get more info on how toget started (http://drupal.org/getting-started) . Drupal requires an installation of a LAMP server stack; if you have not already installedLAMP, it will be installed along with Drupal 6. I have found it easier to use the MySQL (http://en.wikipedia.org/wiki/MySQL) database(the "M" in LAMP), but Drupal6 can also integrate with PostgreSQL (http://en.wikipedia.org/wiki/Postgresql) if you have it installed.Drupal is available as a package, or from the command-line terminal:
sudo apt-get install drupal6
After everything is installed (and the problems below sorted out), make sure the apache2 rewrite engine module is enabled, then
UbuntuGuide Part2 - http://ubuntuguide.org/index.php?title=UbuntuGuide_Part2&...
122 of 177 08/10/2013 09:04 AM

restart the apache2 server:
sudo a2enmod rewritesudo /etc/init.d/apache2 restart
Finish installation through your browser:
http://localhost/drupal6/install.php
Installation quirks
Exim vs. Postfix
Exim (http://www.exim.org/) and Postfix (http://www.postfix.org/) are mail handlers. I had installed Postfix at the time I installed myUbuntu server (but was not using it). But Drupal uses Exim and therefore removes Postfix at installation and installs Exim instead.Therefore, it is better not to use Drupal on a mail server that uses Postfix.
Folder permissions
The files folder must belong to the www-data group, and the group must have "Can View & Modify Content" permissions.
The dbconfig.php file must belong to the www-data group, and the group must have "Can read" permissions.
Prior to the initial installation through the browser, make sure the settings.php file initially has "Can View & Modify Content"permissions set for Owner, Group, and Others. If it doesn't, an installation error will be generated. (As part of the installation process,the permissions will subsequently be adjusted to their final desired settings automatically.)
Browser installation
Status report
Updates
You may get the message that you need to update. The message won't go away. It's less easy once you've set up your site, so you shoulddo it now.
Download the recommended update to your /etc/drupal folder and extract it. For example:
cd /etc/drupalsudo wget -O drupal-current.tar.gz http://ftp.drupal.org/files/projects/drupal-6.16.tar.gzsudo tar zxvf drupal-current.tar.gz
Read the UPGRADE.txt file that was extracted. It has complete details how to upgrade. The following instructions are for first timeinstallation only, since I am not backing up the databases (which is a step you should not skip if you have already been usingDrupal):
Go offline:http://localhost/drupal6/?q=admin/settings/site-maintenance -> Offline
orDrupal -> Administer -> Site configuration -> Site maintenance -> off-line -> Save configuration
Copy all the files that were extracted into the installation directory (which is /usr/share/drupal6):
sudo cp -rf /etc/drupal/drupal-6.16/* /usr/share/drupal6
Note: the option -f forces the old files to be overwritten.Update the core database tables using the provided script:http://localhost/drupal6/update.phpGo back online:http://localhost/drupal6/?q=admin/settings/site-maintenance -> Online
There are lots of other steps to take if you are already using Drupal, so read the UPGRADE.txt file carefully.
If you are upgrading a multi-site version, it is trickier. If the core modules and themes were originally copied to the /etc/drupal/6/sites/all folder, the newly-updated core modules and themes should again be copied there. (Be careful, though, not to overwriteyour own customized themes if you have already created some or modified the originals.)
sudo cp -rf /etc/drupal/drupal-6.16/modules/* /etc/drupal/6/sites/all/modules
UbuntuGuide Part2 - http://ubuntuguide.org/index.php?title=UbuntuGuide_Part2&...
123 of 177 08/10/2013 09:04 AM

sudo cp -rf /etc/drupal/drupal-6.16/themes/* /etc/drupal/6/sites/all/themes
Each of the multiple sites must then be updated individually.
Note: Many users do not use customized themes and prefer to have the core modules and themes always updated along with their coreDrupal updates. For these users, it is best not to copy the core modules and themes into the /etc/drupal/6/sites/all folder. (Whenever thecore installation is then updated, therefore, the modules and themes in the core installation directory (i.e. /usr/share/drupal6) will besimultaneously updated.) These users will only install add-on modules and customized themes into their /etc/drupal/6/sites/all or/etc/drupal/6/sites/mysite_x folders.
Cron
The documentation for this task is here (http://drupal.org/cron) . My site is small, so my cron task is daily and simple (and can be runby hand using):
http://localhost/drupal6/cron.php
I can add the task to my cron list:
sudo crontab -e
And add the line (with the nano editor, or the one you prefer):
45 18 * * * /usr/bin/wget -O - -q -t 1 http://localhost/drupal6/cron.php
this will run the script at 45 minutes after 1800 every day.
If you want it to run every hour on the hour, then use:
0 * * * * /usr/bin/wget -O - -q -t 1 http://localhost/drupal6/cron.php
Multi-site Installation
If you intend to run multiple websites, using a single Drupal6 installation, then follow these instructions (http://drupal.org/node/138889) carefully. I could only get this to work if each site had its own domain name, e.g mysite_1.mydomain.org andmysite_2.mydomain.org. (I could not get it to work for mysite.mydomain.org/subsite_1 and mysite.mydomain.org/subsite_2).
Install Drupal6 and the first website (mysite_1.mydomain.org).
sudo apt-get install drupal6
Configure database for drupal6 with dbconfig-common? YesDatabase type to be used by Drupal6: mysqlPassword of your database's administrative user: mysqlrootpasswordMySQL application password for drupal6: mysqldrupal6password
Copy the /etc/drupal/6/sites/default folder to the first subsite (in this example named mysite_1.mydomain.org).
sudo cp -r /etc/drupal/6/sites/default /etc/drupal/6/sites/mysite_1.mydomain.org
Remove the symbolic link and create a new files folder. The files folder should belong to the group www-data, and the groupshould have "Can View & Modify Content" permissions.:
sudo rm /etc/drupal/6/sites/mysite_1.mydomain.org/filessudo mkdir /etc/drupal/6/sites/mysite_1.mydomain.org/filessudo chown -R root:www-data /etc/drupal/6/sites/mysite_1.mydomain.org/filessudo chmod 764 /etc/drupal/6/sites/mysite_1.mydomain.org/files
Copy a 135x135 image that you wish to use as a logo (in the upper left corner) into the /etc/drupal/6/sites/mysite_1.mydomain.org/files folder. Rename it WebLogo.png in that folder.
Create a virtual host file for the new sites:
sudo nano /etc/apache2/sites-available/drupal6virtualhost
Add the lines:
#
UbuntuGuide Part2 - http://ubuntuguide.org/index.php?title=UbuntuGuide_Part2&...
124 of 177 08/10/2013 09:04 AM

# Virtual hosting configuration for Drupal6##<VirtualHost *:80>ServerAdmin webmaster@mysite_1.mydomain.org#DocumentRoot /usr/share/drupal6/ServerName mysite_1.mydomain.orgServerAlias *.mysite_1.mydomain.org mysite_1.mydomain.orgRewriteEngine OnRewriteOptions inherit</VirtualHost>#<VirtualHost *:80>ServerAdmin webmaster@mysite_2.mydomain.org#DocumentRoot /usr/share/drupal6/ServerName mysite_2.mydomain.orgServerAlias *.mysite_2.mydomain.org mysite_2.mydomain.orgRewriteEngine OnRewriteOptions inherit</VirtualHost>
Remember that your virtual host configuration file won't be active until you make a symbolic link:
sudo ln -s /etc/apache2/sites-available/drupal6virtualhost /etc/apache2/sites-enabled
Restart Apache:
sudo /etc/init.d/apache2 restart
Install the first website through the (Konqueror/Firefox) browser:
http://mysite_1.mydomain.org/install.php
Site Name: My Website 1Site e-mail address: webmaster@mysite_1.mydomain.orgAdministrator Account Username: webmaster -> Password: mywebmasterpasswordClean URLs: Enabled
Makes sure only administrators can create new accounts initially, or you will have lots of new guest within the first 30 minutes ofbeing live.
Drupal -> Administer -> User management -> User settings -> Only site administrators can create new accounts
Now you will re-install a new database for each planned subsite.:
sudo dpkg-reconfigure drupal6
Re-install database for drupal6? YesDatabase type to be used by drupal6: mysqlConnection method for MySQL database of drupal6: unix socketName of your database's administrative user: rootPassword of your database's administrative user: mysqlrootpasswordusername for drupal6: drupal6bdatabase name for drupal6: drupal6b
Copy the /etc/drupal/6/sites/default folder to the second subsite (in this example named mysite_2.mydomain.org).
sudo cp -r /etc/drupal/6/sites/default /etc/drupal/6/sites/mysite_2.mydomain.org
Remove the symbolic link and create a new files folder. The files folder should belong to the group www-data, and the groupshould have "Can View & Modify Content" permissions.:
sudo rm /etc/drupal/6/sites/mysite_2.mydomain.org/filessudo mkdir /etc/drupal/6/sites/mysite_2.mydomain.org/filessudo chown -R root:www-data /etc/drupal/6/sites/mysite_2.mydomain.org/filessudo chmod 764 /etc/drupal/6/sites/mysite_2.mydomain.org/files
Sometimes the permissions of the settings.php and dbconfig.php must be unrestricted during installation:
sudo chmod 777 /etc/drupal/6/sites/mysite_2.mydomain.org/settings.phpsudo chmod 777 /etc/drupal/6/sites/mysite_2.mydomain.org/dbconfig.php
Install the second website through the (Konqueror/Firefox) browser:
UbuntuGuide Part2 - http://ubuntuguide.org/index.php?title=UbuntuGuide_Part2&...
125 of 177 08/10/2013 09:04 AM

http://mysite_2.mydomain.org/install.php
Site Name: My Website 2Site e-mail address: webmaster@mysite_2.mydomain.orgAdministrator Account Username: webmaster -> Password: mywebmasterpasswordClean URLs: Enabled
Makes sure only administrators can create new accounts initially, or you will have lots of new guest within the first 30 minutes ofbeing live.
Drupal -> Administer -> User management -> User settings -> Only site administrators can create new accounts
This process can be repeated if desired (if enough URLs are available).
The two websites will be available:
http://mysite_1.mydomain.organd
http://mysite_2.mydomain.org
Now you have two separate sites. When it is time to upgrade, you will only have to upgrade the core Drupal installation.
Copy modules and themes folders
Files, themes, and modules to be shared by all subsites should go in the "all" subsite. (This is an optional step, but if you don't,then the core installation modules and themes folders will be used for common files. If you modify any of the core installationmodules or themes, they will be overwritten at the time of an upgrade). Copy the code folders:
sudo cp -a /usr/share/drupal6/modules/ /etc/drupal/6/sites/allsudo cp -a /usr/share/drupal6/themes /etc/drupal/6/sites/all
and (optionally) make a directory for shared files:
sudo mkdir /etc/drupal/6/sites/all/filessudo chmod 777 /etc/drupal/6/sites/all/files
(Optionally), copy the themes and modules from the core installation folder to your subsite folder, so you can customize themwithout changing the core installation:
cp -a /usr/share/drupal6/modules/ /etc/drupal/6/sites/mysite_x.mydomain.orgcp -a /usr/share/drupal6/themes /etc/drupal/6/sites/mysite_x.mydomain.org
Note: If you do these steps before installing each subsite, Drupal will get confused and will display an error. Therefore, do this steponly after completing the installation (install.php) script. During installation, Drupal only likes to find one modules folder (i.e. the onein /usr/share/drupal6). If you are adding subsites after having already used Drupal for a while, then temporarily rename the modules(and themes) folders in the /etc/drupal/6/sites/all folder to something else (such as modules.bak and themes.bak). Make sure there areno modules or themes folders in the subsite folder (i.e. in the /etc/drupal/6/sites/mysite_x.mydomain.org folder) until after installationhas been completed. Then you can complete the steps above (or merely rename modules.bak and themes.bak to modules and themesagain). You may need to run the update.php script for each subsite again, after doing this.
Note: Many users do not use customized themes and prefer to have the core modules and themes updated along with their core Drupalupdates. For these users, it is best not to copy the core modules and themes into the /etc/drupal/6/sites/all folder. (Whenever the coreinstallation is then updated, therefore, the modules and themes in the core installation directory (i.e. /usr/share/drupal6) will besimultaneously updated.) These users will only install add-on modules and customized themes into their /etc/drupal/6/sites/all or/etc/drupal/6/sites/mysite_x folders.
Update each site
There are a variety of error messages that may occur when using a multi-site installation (from initially using shared configurationfiles). Many can be cured just by updating each subsite individually. This will update configuration files and store them in your subsitefolder(s). You must be logged in as the original user of the subsite to run the update script.
http://mysite_x.mydomain.org/update.php
Multisite cron
Refer to these instructions (http://drupal.org/node/246091) . I can add the task(s) to my cron list:
sudo crontab -e
UbuntuGuide Part2 - http://ubuntuguide.org/index.php?title=UbuntuGuide_Part2&...
126 of 177 08/10/2013 09:04 AM

And add the lines (with the nano editor, or the one you prefer):
45 18 * * * /usr/bin/wget -O - -q -t 1 http://mysite_1.mydomain.org/cron.php45 19 * * * /usr/bin/wget -O - -q -t 1 http://mysite_2.mydomain.org/cron.php45 20 * * * /usr/bin/wget -O - -q -t 1 http://mysite_3.mydomain.org/cron.php
this will run the scripts separately, at 45 minutes after the 1800 hour, the 1900 hour, and the 2000 hour every day (each siteat a different hour).
If you want all the cron scripts to run every hour, then stagger them:
0 * * * * /usr/bin/wget -O - -q -t 1 http://mysite_1.mydomain.org/cron.php20 * * * * /usr/bin/wget -O - -q -t 1 http://mysite_2.mydomain.org/cron.php40 * * * * /usr/bin/wget -O - -q -t 1 http://mysite_3.mydomain.org/cron.php
this runs one script on the hour (0), one script at 20 minutes past the hour, and one script at 40 minutes past the hour.
Build your site
You should be ready to go. Start building your site.
Drupal site building tipsThese tips were written for Drupal6 and have not yet been edited for Drupal7 and therefore may not be accurate; this section is underconstruction.
Introduction
Drupal (http://drupal.org/) is one of the most widely used website servers in the world. It is even used by the US White House(http://drupal.org/whitehouse-gov-launches-on-drupal-engages-community) . It is free and open source and can be customised to manydifferent uses by installing additional modules. This page is a cookbook of how I set up a Drupal site and may be helpful for getting aninitial site customized. I am assuming you have one (or multiple) Drupal installations running using these Drupal7 instructions orthese Drupal6 instructions.
Initial user setup
It is not a good idea to give anonymous users access to the site or create accounts until you have the site completely set up and areready to publish. There are people trolling the web looking for new setups, who will create an account and start installingmodules faster than you can. Turn off anonymous user accounts:
Drupal -> Administer -> User management -> User settings -> Only site administrators can create new user accounts.
Create an administrator user role:
Drupal -> Administer -> User management -> Roles -> Add role -> administrator -> edit permissions -> check all
Create a new user who will be an administrator
Drupal -> Administer -> User management -> Users -> Add user -> Adminuser -> roles -> administratorUse this user as your everyday administrator, saving the user you created at installation as the superuser
Create a Welcome page
Create a Welcome page:
Drupal -> Create content -> Page
You can choose where the display will end by adding the tag at the end:
<!--break-->
Note: If you don't put this tag at the end, the display of the page (known as the "teaser") will be truncated to 300 characters bydefault. This behavior can be changed:Drupal -> Administer -> Content management -> Post Settings -> Length of trimmed posts: Unlimited
Change your default logo
UbuntuGuide Part2 - http://ubuntuguide.org/index.php?title=UbuntuGuide_Part2&...
127 of 177 08/10/2013 09:04 AM

The ideal size for a logo is about 110 x 100 pixels. A transparent background for the logo is desirable. (You can use Gimp to createan alpha transparency layer for any photo. See these instructions (http://www.fabiovisentin.com/tutorial/GIMP_transparent_image/gimp_how_to_make_transparent_image.asp) .) You can use Gimp or Gwenview to resize the image.The default logo is specific to the Theme you are using. If you are using the default Garland theme, for example, change the logo:
Drupal -> Administer -> Themes -> Garland -> configure -> Logo image settings -> Use the default logo: unticked ->Upload logo image: your_own_customised_logo.png
Create a new menu in the left sidebar
When most users create new content (such as a Page or Story), they place it in the Primary Links or Secondary Links menus. Atinstallation, Primary Links and Secondary Links appear at the top of the page, which looks nice. But what if you want a new menu,that appears (for example) only on the left sidebar?
Create a new menu:
Drupal -> Administer -> Site building -> Menus -> Add menu ->Menu name: mynewmenu -> Title: My New Menu -> Description: This is a custom menu I created. ->
Place the new menu in the left sidebar:
Drupal -> Administer -> Site building -> Blocks -> Disabled ->My New Menu -> Left sidebar -> Save blocks
Add items to the menu (these can be external links or links to internal pages):
Drupal -> Administer -> Site building -> Menus ->My New Menu -> Add item
Note that you can also create new content and add it to this new menu at any time.
Increase PHP memory
Increase PHP memory (or you will get a "memory exhausted" error). (Use the gedit text editor instead of kate if using Ubuntuinstead of Kubuntu.):
sudo kate /etc/drupal/6/sites/mysite_x/settings.php
Add this line at the end:
ini_set('memory_limit', '96M');
I used to use 32M, but 96M helps with graphics.
Increase uploaded file size limits
The PHP scripting language is used for uploads. Absolute upload limits for the Apache webserver are set in a PHP configuration fileand must be changed there.
Your uploads are probably larger than the default upload limits of PHP (set at 2 Mb, or "2M", by default), so we will need toincrease those. In the example below, I will change the upload limit to 100 Mb ("100M"). Two parameters must be changed inthe php.ini configuration file in /etc/php5/apache2 (use the gedit text editor instead of kate if using Ubuntu instead ofKubuntu):
cd /etc/php5/apache2sudo kate php.ini
Change:
post_max_size = 8M
to
post_max_size = 100M
Change:
UbuntuGuide Part2 - http://ubuntuguide.org/index.php?title=UbuntuGuide_Part2&...
128 of 177 08/10/2013 09:04 AM

upload_max_filesize = 2M
to
upload_max_filesize = 100M
Save the file and restart apache2:
sudo /etc/init.d/apache2 restart
Install content creation kit (CCK) and other important modules
If you have a multi-site installation, create modules and themes folders within the /etc/drupal/6/sites/mysite_x folder, which willbe specific to that site. If you wish to use modules and themes for all your subsites, then create modules and themes folders in the/etc/drupal/6/sites/all folder.
If you install your custom modules and themes in the root installation directory (/usr/share/drupal6), then they will be overwrittenevery time you do an upgrade, (which may or may not be desirable to you).
Although the recommended procedure is to install each module one-by-one (updating and setting the functions for each installedmodule individually), you may be able to install them all, update once, then set the functions for all the module simultaneously.This will only work if you have increased the PHP memory (as detailed in the previous step).
Install the CCK (http://drupal.org/project/cck) module:
cd /etc/drupal/6/sites/all/modulessudo wget http://ftp.drupal.org/files/projects/cck-6.x-2.6.tar.gzsudo tar zxvf cck-6.x-2.6.tar.gzsudo rm cck-6.x-2.6.tar.gz
Note: If you wish this module to be available to only one subsite, then install it instead into the /etc/drupal/6/sites/mysite_x/modules folder.
Note: You must update and adjust permissions after module installation.Drupal -> Administer -> Modules -> CCK -> select CCK module functions to enable
Install the Views (http://drupal.org/project/views) module:
cd /etc/drupal/6/sites/all/modulessudo wget http://ftp.drupal.org/files/projects/views-6.x-2.10.tar.gzsudo tar zxvf views-6.x-2.10.tar.gzsudo rm views-6.x-2.10.tar.gz
Note: If you wish this module to be available to only one subsite, then install it instead into the /etc/drupal/6/sites/mysite_x/modules folder.
Note: You must update and adjust permissions after module installation.Drupal -> Administer -> Modules -> Views -> select Views module functions to enable
When you wish to configure the Views properties of a content node, go to:
Drupal -> Administer -> Site Building -> Views -> Enable and Edit the node Views you wish to use
Install the Date (http://drupal.org/project/date) module:
cd /etc/drupal/6/sites/all/modulessudo wget http://ftp.drupal.org/files/projects/date-6.x-2.4.tar.gzsudo tar zxvf date-6.x-2.4.tar.gzsudo rm date-6.x-2.4.tar.gz
Note: If you wish this module to be available to only one subsite, then install it instead into the /etc/drupal/6/sites/mysite_x/modules folder.
Note: You must update and adjust permissions after module installation.Drupal -> Administer -> Modules -> Date/Time -> select Date/Time module functions to enable
Install the jQuery UI (http://drupal.org/project/jquery_ui) module:
cd /etc/drupal/6/sites/all/modules
UbuntuGuide Part2 - http://ubuntuguide.org/index.php?title=UbuntuGuide_Part2&...
129 of 177 08/10/2013 09:04 AM

sudo wget http://ftp.drupal.org/files/projects/jquery_ui-6.x-1.3.tar.gzsudo tar zxvf jquery_ui-6.x-1.3.tar.gzsudo rm jquery_ui-6.x-1.3.tar.gz
cd /etc/drupal/6/sites/all/modules/jquery_uisudo wget http://jquery-ui.googlecode.com/files/jquery.ui-1.6.zipsudo unzip jquery.ui-1.6.zipsudo rm jquery.ui-1.6.zipsudo cp -r jquery.ui-1.6 jquery.ui
Note: If you wish this module to be available to only one subsite, then install it instead into the /etc/drupal/6/sites/mysite_x/modules folder.
Note: You must update and adjust permissions after module installation.Drupal -> Administer -> Modules -> User interface -> select jQuery UI module functions to enable
Install the Event (http://drupal.org/project/event) module:
cd /etc/drupal/6/sites/all/modulessudo wget http://ftp.drupal.org/files/projects/event-6.x-2.x-dev.tar.gzsudo tar zxvf event-6.x-2.x-dev.tar.gzsudo rm event-6.x-2.x-dev.tar.gz
Install a few miscellaneous Event:Datepicker modules (see this thread (http://drupal.org/node/619084) ):
cd /etc/drupal/6/sites/all/modules/event/contrib/datepickersudo wget http://www.kelvinluck.com/assets/jquery/datePicker/v2/demo/styles/datePicker.csssudo wget http://www.kelvinluck.com/assets/jquery/datePicker/v2/demo/scripts/jquery.datePicker.jssudo wget http://www.kelvinluck.com/assets/jquery/datePicker/v2/demo/scripts/date.js
Note: If you wish this module to be available to only one subsite, then install it instead into the /etc/drupal/6/sites/mysite_x/modules folder.
Note: You must update and adjust permissions after module installation.Drupal -> Administer -> Modules -> Event -> select Date Picker module functions to enable
Install the Signup (http://drupal.org/project/signup) and Calendar (http://drupal.org/project/calendar) modules:
cd /etc/drupal/6/sites/all/modulessudo wget http://ftp.drupal.org/files/projects/signup-6.x-1.0-rc6.tar.gzsudo tar zxvf signup-6.x-1.0-rc6.tar.gzsudo rm signup-6.x-1.0-rc6.tar.gz
cd /etc/drupal/6/sites/all/modulessudo wget http://ftp.drupal.org/files/projects/calendar-6.x-2.2.tar.gzsudo tar zxvf calendar-6.x-2.2.tar.gzsudo rm calendar-6.x-2.2.tar.gz
Note: If you wish this module to be available to only one subsite, then install it instead into the /etc/drupal/6/sites/mysite_x/modules folder.
Note: You must update and adjust permissions after module installation.Drupal -> Administer -> Modules -> Date/Time -> select Calendar module functions to enable
Install the Advanced Help (http://drupal.org/project/advanced_help) module:
cd /etc/drupal/6/sites/all/modulessudo wget http://ftp.drupal.org/files/projects/advanced_help-6.x-1.2.tar.gzsudo tar zxvf advanced_help-6.x-1.2.tar.gzsudo rm advanced_help-6.x-1.2.tar.gz
Note: If you wish this module to be available to only one subsite, then install it instead into the /etc/drupal/6/sites/mysite_x/modules folder.
Note: You must update and adjust permissions after module installation.Drupal -> Administer -> Modules -> Other -> select Advanced Help module functions to enable
Install the FeedAPI (http://drupal.org/project/feedapi) module (allows iCal feeds into Drupal):
cd /etc/drupal/6/sites/all/modulessudo wget http://ftp.drupal.org/files/projects/feedapi-6.x-1.8.tar.gzsudo tar zxvf feedapi-6.x-1.8.tar.gzsudo rm feedapi-6.x-1.8.tar.gz
UbuntuGuide Part2 - http://ubuntuguide.org/index.php?title=UbuntuGuide_Part2&...
130 of 177 08/10/2013 09:04 AM
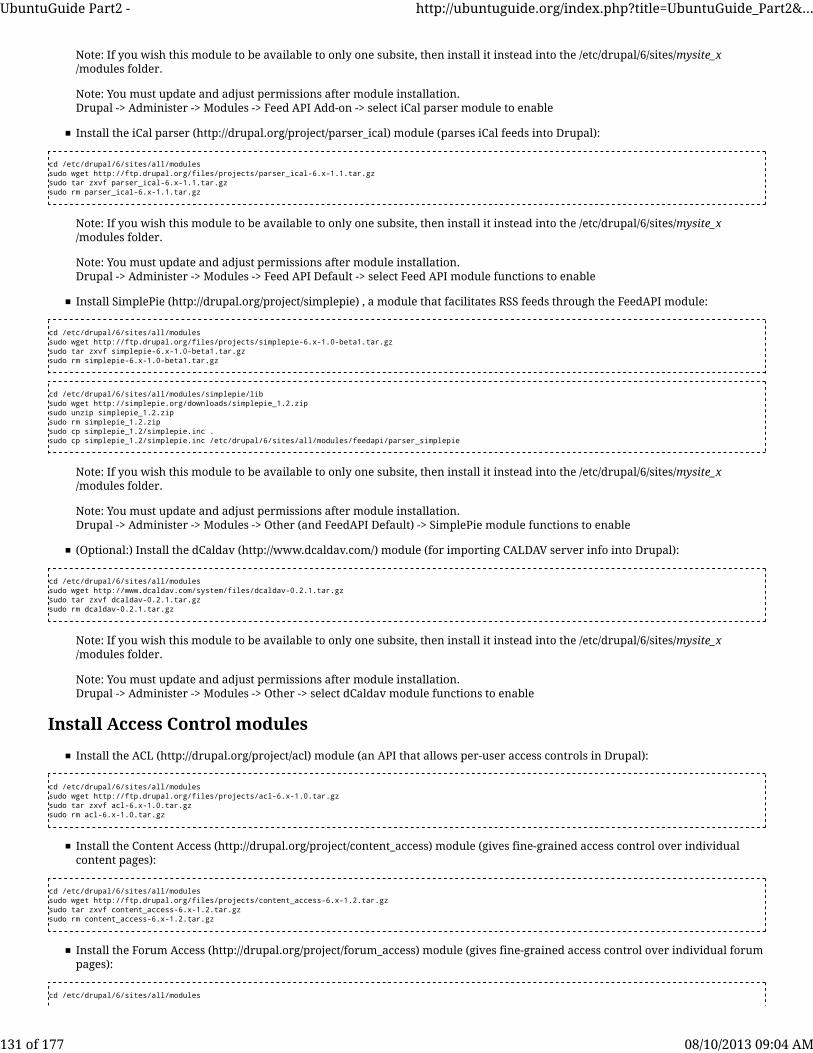
Note: If you wish this module to be available to only one subsite, then install it instead into the /etc/drupal/6/sites/mysite_x/modules folder.
Note: You must update and adjust permissions after module installation.Drupal -> Administer -> Modules -> Feed API Add-on -> select iCal parser module to enable
Install the iCal parser (http://drupal.org/project/parser_ical) module (parses iCal feeds into Drupal):
cd /etc/drupal/6/sites/all/modulessudo wget http://ftp.drupal.org/files/projects/parser_ical-6.x-1.1.tar.gzsudo tar zxvf parser_ical-6.x-1.1.tar.gzsudo rm parser_ical-6.x-1.1.tar.gz
Note: If you wish this module to be available to only one subsite, then install it instead into the /etc/drupal/6/sites/mysite_x/modules folder.
Note: You must update and adjust permissions after module installation.Drupal -> Administer -> Modules -> Feed API Default -> select Feed API module functions to enable
Install SimplePie (http://drupal.org/project/simplepie) , a module that facilitates RSS feeds through the FeedAPI module:
cd /etc/drupal/6/sites/all/modulessudo wget http://ftp.drupal.org/files/projects/simplepie-6.x-1.0-beta1.tar.gzsudo tar zxvf simplepie-6.x-1.0-beta1.tar.gzsudo rm simplepie-6.x-1.0-beta1.tar.gz
cd /etc/drupal/6/sites/all/modules/simplepie/libsudo wget http://simplepie.org/downloads/simplepie_1.2.zipsudo unzip simplepie_1.2.zipsudo rm simplepie_1.2.zipsudo cp simplepie_1.2/simplepie.inc .sudo cp simplepie_1.2/simplepie.inc /etc/drupal/6/sites/all/modules/feedapi/parser_simplepie
Note: If you wish this module to be available to only one subsite, then install it instead into the /etc/drupal/6/sites/mysite_x/modules folder.
Note: You must update and adjust permissions after module installation.Drupal -> Administer -> Modules -> Other (and FeedAPI Default) -> SimplePie module functions to enable
(Optional:) Install the dCaldav (http://www.dcaldav.com/) module (for importing CALDAV server info into Drupal):
cd /etc/drupal/6/sites/all/modulessudo wget http://www.dcaldav.com/system/files/dcaldav-0.2.1.tar.gzsudo tar zxvf dcaldav-0.2.1.tar.gzsudo rm dcaldav-0.2.1.tar.gz
Note: If you wish this module to be available to only one subsite, then install it instead into the /etc/drupal/6/sites/mysite_x/modules folder.
Note: You must update and adjust permissions after module installation.Drupal -> Administer -> Modules -> Other -> select dCaldav module functions to enable
Install Access Control modules
Install the ACL (http://drupal.org/project/acl) module (an API that allows per-user access controls in Drupal):
cd /etc/drupal/6/sites/all/modulessudo wget http://ftp.drupal.org/files/projects/acl-6.x-1.0.tar.gzsudo tar zxvf acl-6.x-1.0.tar.gzsudo rm acl-6.x-1.0.tar.gz
Install the Content Access (http://drupal.org/project/content_access) module (gives fine-grained access control over individualcontent pages):
cd /etc/drupal/6/sites/all/modulessudo wget http://ftp.drupal.org/files/projects/content_access-6.x-1.2.tar.gzsudo tar zxvf content_access-6.x-1.2.tar.gzsudo rm content_access-6.x-1.2.tar.gz
Install the Forum Access (http://drupal.org/project/forum_access) module (gives fine-grained access control over individual forumpages):
cd /etc/drupal/6/sites/all/modules
UbuntuGuide Part2 - http://ubuntuguide.org/index.php?title=UbuntuGuide_Part2&...
131 of 177 08/10/2013 09:04 AM

sudo wget http://ftp.drupal.org/files/projects/forum_access-6.x-1.0.tar.gzsudo tar zxvf forum_access-6.x-1.0.tar.gzsudo rm forum_access-6.x-1.0.tar.gz
Note: If you wish these modules to be available to only one subsite, then install them instead into the /etc/drupal/6/sites/mysite_x/modules folder.
Note: You must update and adjust permissions after module installation.
Drupal -> Administer -> Modules -> Forum Access -> select ACL, Content Access, and Forum Access module functions toenable -> Rebuild Permissions (follow the prompts)
You must enable Access Control for each Content Type:
Drupal -> Administer -> Content Management -> Content types -> Page -> Edit -> Access Control -> Enable per content node accesscontrol settings: ticked
Enable permissions for added modules
Any time a new module is installed or the configuration of the module is changed, the database must be updated. This isespecially important if you are running multiple sites, since configuration files must be created for each subsite. Updates can onlybe done by an administrator with suitable privileges for that site (usually the original user for the site or subsite):
http://mysite_x.mydomain.org/update.php
By default, permissions are turned off for any new modules that you have installed. After installing a new module, go to thepermissions page and select permissions for each user role that will be able to access the functions of the new module(s):
Drupal -> Administer -> User management -> Permissions
and tick or un-tick the features that should be available to each class of user.
Create a Calendar content page
Using Date Tools to Create a Calendar
Create a custom Date and Time format which will display only the time (to be used later for the display fields):
Drupal -> Administer -> Site configuration -> Date and Time -> Locale:Default Time Zone:Choose your timezone -> Saveconfiguration
Drupal -> Administer -> Site Configuration -> Date and Time -> Formats -> Add Format ->->Format string: H:i
(This adds a format type to the drop-down selection which only displays hours and minutes.)
Drupal -> Administer -> Site Configuration -> Date and Time -> Formats -> Add format type ->->Name: Time only -> Type: timeonly -> Save configuration
Drupal -> Administer -> Site Configuration -> Date and Time -> Formats -> Configure ->->Time only Date format: (the dropdown box should now show your recently created time format, so select it) -> Saveconfiguration
Note: You must update after creating this content type.
The Date Tools Wizard simplifies setting up a Date content type to be used with a Calendar display.
Drupal -> Administer -> Content Management -> Date Tools -> Date Wizard -> Save
Drupal -> Administer -> Site Building -> Views -> calendar_date -> Fields: Content: Date - From date -> Edit -> Format: Time only ->Update
Drupal -> Administer -> Content Management -> Content Type -> Date -> Manage Fields -> Label:Date: Configure -> Default valuefor To date: Same as From date -> Input format: Your preference -> Global Settings: Required (ticked) -> To Date: Optional -> DefaultDisplay: Long -> Save
Drupal -> Administer -> Site Building -> Views -> calendar -> Enable
Create some (event) content:
Drupal -> Create content -> Date -> create an event
UbuntuGuide Part2 - http://ubuntuguide.org/index.php?title=UbuntuGuide_Part2&...
132 of 177 08/10/2013 09:04 AM
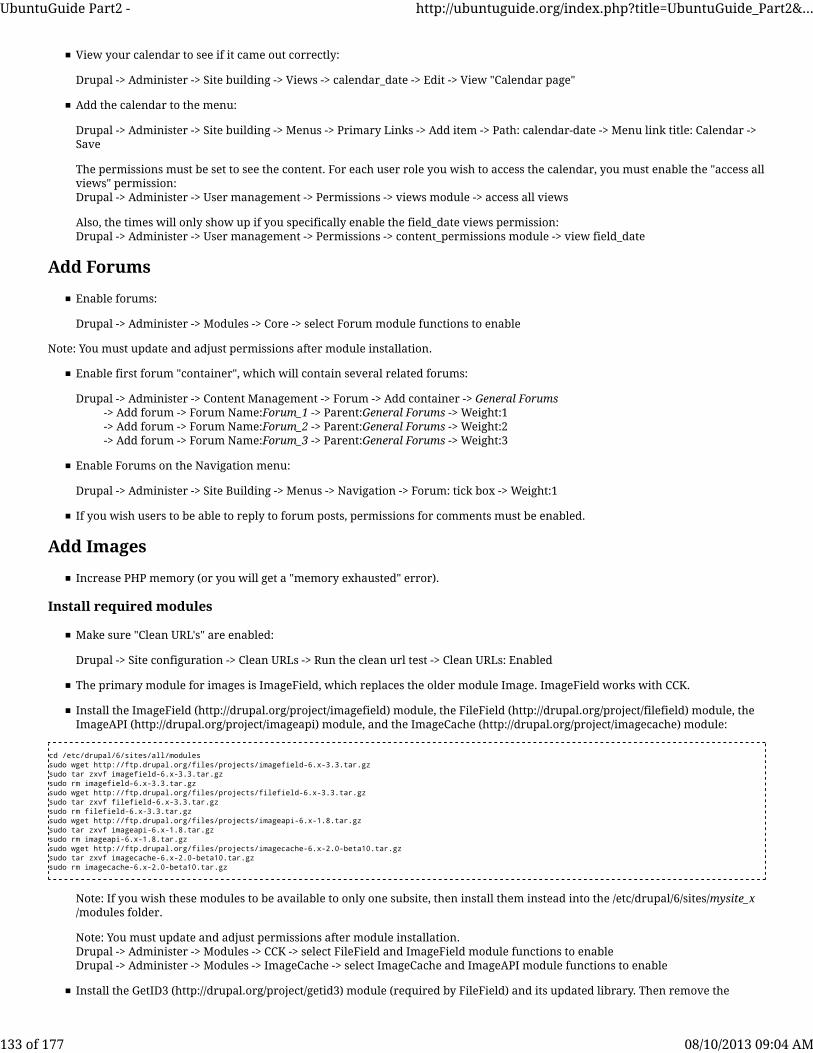
View your calendar to see if it came out correctly:
Drupal -> Administer -> Site building -> Views -> calendar_date -> Edit -> View "Calendar page"
Add the calendar to the menu:
Drupal -> Administer -> Site building -> Menus -> Primary Links -> Add item -> Path: calendar-date -> Menu link title: Calendar ->Save
The permissions must be set to see the content. For each user role you wish to access the calendar, you must enable the "access allviews" permission:Drupal -> Administer -> User management -> Permissions -> views module -> access all views
Also, the times will only show up if you specifically enable the field_date views permission:Drupal -> Administer -> User management -> Permissions -> content_permissions module -> view field_date
Add Forums
Enable forums:
Drupal -> Administer -> Modules -> Core -> select Forum module functions to enable
Note: You must update and adjust permissions after module installation.
Enable first forum "container", which will contain several related forums:
Drupal -> Administer -> Content Management -> Forum -> Add container -> General Forums-> Add forum -> Forum Name:Forum_1 -> Parent:General Forums -> Weight:1-> Add forum -> Forum Name:Forum_2 -> Parent:General Forums -> Weight:2-> Add forum -> Forum Name:Forum_3 -> Parent:General Forums -> Weight:3
Enable Forums on the Navigation menu:
Drupal -> Administer -> Site Building -> Menus -> Navigation -> Forum: tick box -> Weight:1
If you wish users to be able to reply to forum posts, permissions for comments must be enabled.
Add Images
Increase PHP memory (or you will get a "memory exhausted" error).
Install required modules
Make sure "Clean URL's" are enabled:
Drupal -> Site configuration -> Clean URLs -> Run the clean url test -> Clean URLs: Enabled
The primary module for images is ImageField, which replaces the older module Image. ImageField works with CCK.
Install the ImageField (http://drupal.org/project/imagefield) module, the FileField (http://drupal.org/project/filefield) module, theImageAPI (http://drupal.org/project/imageapi) module, and the ImageCache (http://drupal.org/project/imagecache) module:
cd /etc/drupal/6/sites/all/modulessudo wget http://ftp.drupal.org/files/projects/imagefield-6.x-3.3.tar.gzsudo tar zxvf imagefield-6.x-3.3.tar.gzsudo rm imagefield-6.x-3.3.tar.gzsudo wget http://ftp.drupal.org/files/projects/filefield-6.x-3.3.tar.gzsudo tar zxvf filefield-6.x-3.3.tar.gzsudo rm filefield-6.x-3.3.tar.gzsudo wget http://ftp.drupal.org/files/projects/imageapi-6.x-1.8.tar.gzsudo tar zxvf imageapi-6.x-1.8.tar.gzsudo rm imageapi-6.x-1.8.tar.gzsudo wget http://ftp.drupal.org/files/projects/imagecache-6.x-2.0-beta10.tar.gzsudo tar zxvf imagecache-6.x-2.0-beta10.tar.gzsudo rm imagecache-6.x-2.0-beta10.tar.gz
Note: If you wish these modules to be available to only one subsite, then install them instead into the /etc/drupal/6/sites/mysite_x/modules folder.
Note: You must update and adjust permissions after module installation.Drupal -> Administer -> Modules -> CCK -> select FileField and ImageField module functions to enableDrupal -> Administer -> Modules -> ImageCache -> select ImageCache and ImageAPI module functions to enable
Install the GetID3 (http://drupal.org/project/getid3) module (required by FileField) and its updated library. Then remove the
UbuntuGuide Part2 - http://ubuntuguide.org/index.php?title=UbuntuGuide_Part2&...
133 of 177 08/10/2013 09:04 AM

security-risk demos folder:
cd /etc/drupal/6/sites/all/modules sudo wget http://ftp.drupal.org/files/projects/getid3-6.x-1.3.tar.gzsudo tar zxvf getid3-6.x-1.3.tar.gzsudo rm getid3-6.x-1.3.tar.gzcd getid3 sudo wget -O getid3-6.x-1.7.9.zip http://sourceforge.net/projects/getid3/files/getID3%28%29%201.x/1.7.9/getid3-1.7.9.zip/downloadsudo unzip getid3-6.x-1.7.9.zipsudo rm getid3-6.x-1.7.9.zipcd demossudo rm *cd ..sudo rmdir demos
Note: If you wish these modules to be available to only one subsite, then install them instead into the /etc/drupal/6/sites/mysite_x/modules folder.
Note: You must update and adjust permissions after module installation.
Drupal -> Administer -> Site Configuration -> GetID3 -> Path: sites/all/modules/getid3/getid3-1.7.9/getid3 -> Save configurationDrupal -> Administer -> Modules -> Other -> select GetID3 module function to enable
Install the Token (http://drupal.org/project/token) module, the Views Gallery (http://drupal.org/project/views_gallery) module,Node Reference URL (http://drupal.org/project/nodereference_url) module, and the Views Attach (http://drupal.org/project/views_attach) module:
cd /etc/drupal/6/sites/all/modulessudo wget http://ftp.drupal.org/files/projects/token-6.x-1.12.tar.gzsudo tar zxvf token-6.x-1.12.tar.gzsudo rm token-6.x-1.12.tar.gzsudo wget http://ftp.drupal.org/files/projects/views_gallery-6.x-1.2.tar.gzsudo tar zxvf views_gallery-6.x-1.2.tar.gzsudo rm views_gallery-6.x-1.2.tar.gzsudo wget http://ftp.drupal.org/files/projects/nodereference_url-6.x-1.6.tar.gzsudo tar zxvf nodereference_url-6.x-1.6.tar.gzsudo rm nodereference_url-6.x-1.6.tar.gzsudo wget http://ftp.drupal.org/files/projects/views_attach-6.x-2.2.tar.gzsudo tar zxvf views_attach-6.x-2.2.tar.gzsudo rm views_attach-6.x-2.2.tar.gz
Note: If you wish these modules to be available to only one subsite, then install them instead into the /etc/drupal/6/sites/mysite_x/modules folder.
Note: You must update and adjust permissions after module installation.
Drupal -> Administer -> Site Configuration -> GetID3 -> Path: sites/all/modules/getid3/getid3-1.7.9/getid3 -> Save configuration
Install the Thickbox (http://drupal.org/project/thickbox) module (used to overlay images on web pages (http://drupal.org/node/266126) ):
cd /etc/drupal/6/sites/all/modulessudo wget http://ftp.drupal.org/files/projects/thickbox-6.x-1.6.tar.gzsudo tar zxvf thickbox-6.x-1.6.tar.gzsudo rm thickbox-6.x-1.6.tar.gz
Note: If you wish this module to be available to only one subsite, then install it instead into the /etc/drupal/6/sites/mysite_x/modules folder.
Note: You must update and adjust permissions after module installation.Drupal -> Administer -> Modules -> Other -> select Thickbox module functions to enable
Configure settings
Configure ImageCache:
Drupal -> Administer -> Site building -> ImageCache -> Add new Preset ->-> thumbnail -> Save preset -> Actions -> Add scale and crop -> Width: 150 Height: 150 -> Create Action
Drupal -> Administer -> Site building -> ImageCache -> Add new Preset ->-> fullsize -> Save preset -> Actions -> Add scale -> Width: 500 Height: (blank) -> Allow upscaling: ticked -> Create Action
Note: You must update and adjust permissions after module installation.
Create a Photo content type:
Drupal -> Administer -> Content management -> Content type -> Add content type -> Name : Photo -> Type: photo -> Description: Apost that includes a nicely formatted image -> Save content type -> Photo -> Manage fields -> Add field -> Name: photofield ->
UbuntuGuide Part2 - http://ubuntuguide.org/index.php?title=UbuntuGuide_Part2&...
134 of 177 08/10/2013 09:04 AM

field_photofield -> Select a field type: File -> Select a widget: Image -> Save -> photofield customization fields: (fill in desiredsettings) -> Save field settings -> Save-> Display fields -> Label: (hidden) -> Teaser: thumbnail image linked to node -> Fullnode: fullsize image -> Save
Note: You must update and adjust permissions after module installation.
Create an image (Photo content):
Drupal -> Create content -> Photo -> Name: Photoexample_1 -> photofield: photo_filename_1.png -> Upload -> Save
Embed a video
You can easily embed a flash video from YouTube on any page. When creating a web page, make sure "Full HTML" is enabled asan input format:
Drupal -> Create content -> Page (or any content type) -> Input format -> Full HTML
For any YouTube video, the code which allows a video to be embedded on your website is found on the YouTube page in the upperright corner in the "Embed" box. Copy this code snippet.
In the "Body:" section of your Drupal Page (or other content), paste the code snippet and save. The video is now embedded on thatpage.
Add WYSIWYG editor
Apparently the choices here are FCKEditor, BUEditor, and TinyMCE editor. All require IMCE for image handling.
Install IMCE (http://drupal.org/project/imce) .
cd /etc/drupal/6/sites/all/modulessudo wget http://ftp.drupal.org/files/projects/imce-6.x-1.3.tar.gzsudo tar zxvf imce-6.x-1.3.tar.gzsudo rm imce-6.x-1.3.tar.gz
Install one of the editors, such as BUEditor (http://drupal.org/project/bueditor) :
cd /etc/drupal/6/sites/all/modulessudo wget http://ftp.drupal.org/files/projects/bueditor-6.x-2.1.tar.gzsudo tar zxvf bueditor-6.x-2.1.tar.gzsudo rm bueditor-6.x-2.1.tar.gz
Note: If you wish these modules to be available to only one subsite, then install them instead into the /etc/drupal/6/sites/mysite_x/modules folder.
Drupal -> Administer -> Modules -> Other -> select IMCE and BUEditor module functions to enable
Note: You must update and adjust permissions after module installation.
Update modules
Periodically, added modules are updated for security and functionality reasons. As always, backups are routinely advised beforeupdating. In Drupal, most module updates are accomplished by overwriting old code with new code, not by patches. Therefore, if youhave a highly customised installation, perform updates with care.
In this example, I will update Ubercart. Updating a module is essentially the re-installation of the new update, overwriting the oldupdate.
Install the new update for Ubercart (http://drupal.org/project/ubercart) :
cd /etc/drupal/6/sites/all/modulessudo wget http://ftp.drupal.org/files/projects/ubercart-6.x-2.2.tar.gzsudo tar zxvf ubercart-6.x-2.2.tar.gzsudo rm ubercart-6.x-2.2.tar.gz
Note: If a module is available to only one subsite, install the update instead into the /etc/drupal/6/sites/mysite_x/modules folder.
Note: You must update after module re-installation.
Perform backups
Yeah, you need to do it. See the Drupal 6 backup instructions (http://drupal.org/upgrade/backing-up-the-db) . Also see this module for
UbuntuGuide Part2 - http://ubuntuguide.org/index.php?title=UbuntuGuide_Part2&...
135 of 177 08/10/2013 09:04 AM
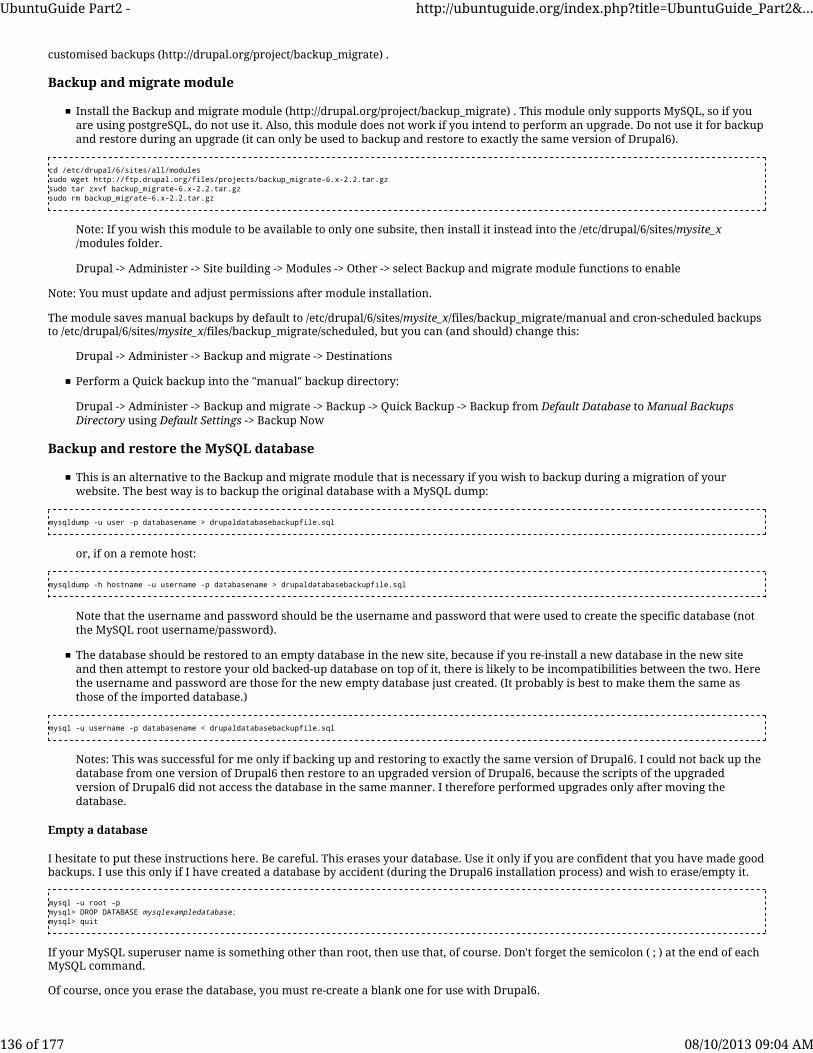
customised backups (http://drupal.org/project/backup_migrate) .
Backup and migrate module
Install the Backup and migrate module (http://drupal.org/project/backup_migrate) . This module only supports MySQL, so if youare using postgreSQL, do not use it. Also, this module does not work if you intend to perform an upgrade. Do not use it for backupand restore during an upgrade (it can only be used to backup and restore to exactly the same version of Drupal6).
cd /etc/drupal/6/sites/all/modulessudo wget http://ftp.drupal.org/files/projects/backup_migrate-6.x-2.2.tar.gzsudo tar zxvf backup_migrate-6.x-2.2.tar.gzsudo rm backup_migrate-6.x-2.2.tar.gz
Note: If you wish this module to be available to only one subsite, then install it instead into the /etc/drupal/6/sites/mysite_x/modules folder.
Drupal -> Administer -> Site building -> Modules -> Other -> select Backup and migrate module functions to enable
Note: You must update and adjust permissions after module installation.
The module saves manual backups by default to /etc/drupal/6/sites/mysite_x/files/backup_migrate/manual and cron-scheduled backupsto /etc/drupal/6/sites/mysite_x/files/backup_migrate/scheduled, but you can (and should) change this:
Drupal -> Administer -> Backup and migrate -> Destinations
Perform a Quick backup into the "manual" backup directory:
Drupal -> Administer -> Backup and migrate -> Backup -> Quick Backup -> Backup from Default Database to Manual BackupsDirectory using Default Settings -> Backup Now
Backup and restore the MySQL database
This is an alternative to the Backup and migrate module that is necessary if you wish to backup during a migration of yourwebsite. The best way is to backup the original database with a MySQL dump:
mysqldump -u user -p databasename > drupaldatabasebackupfile.sql
or, if on a remote host:
mysqldump -h hostname -u username -p databasename > drupaldatabasebackupfile.sql
Note that the username and password should be the username and password that were used to create the specific database (notthe MySQL root username/password).
The database should be restored to an empty database in the new site, because if you re-install a new database in the new siteand then attempt to restore your old backed-up database on top of it, there is likely to be incompatibilities between the two. Herethe username and password are those for the new empty database just created. (It probably is best to make them the same asthose of the imported database.)
mysql -u username -p databasename < drupaldatabasebackupfile.sql
Notes: This was successful for me only if backing up and restoring to exactly the same version of Drupal6. I could not back up thedatabase from one version of Drupal6 then restore to an upgraded version of Drupal6, because the scripts of the upgradedversion of Drupal6 did not access the database in the same manner. I therefore performed upgrades only after moving thedatabase.
Empty a database
I hesitate to put these instructions here. Be careful. This erases your database. Use it only if you are confident that you have made goodbackups. I use this only if I have created a database by accident (during the Drupal6 installation process) and wish to erase/empty it.
mysql -u root -pmysql> DROP DATABASE mysqlexampledatabase;mysql> quit
If your MySQL superuser name is something other than root, then use that, of course. Don't forget the semicolon ( ; ) at the end of eachMySQL command.
Of course, once you erase the database, you must re-create a blank one for use with Drupal6.
UbuntuGuide Part2 - http://ubuntuguide.org/index.php?title=UbuntuGuide_Part2&...
136 of 177 08/10/2013 09:04 AM
sudo dpkg-reconfigure drupal6
Then you can restore the backup (as created above with mysqldump) into the newly recreated (but still empty) database.
mysql -u username -p databasename < drupaldatabasebackupfile.sql
Moving a Drupal6 installation to a new site
Backup up the database from the old site as detailed above.
Install drupal6 on the new site (sudo apt-get install drupal6). When creating the database, use the same values as used on the oldsite. If you can't remember what they were, look at the /etc/drupal/6/sites/default/dbconfig.php (or similar) file for the old site(which contains the values for the old site).
On the new site, rename the newly created folders
/etc/drupal/6/usr/share/drupal6/var/lib/drupal6
to/etc/drupal/6.bak/usr/share/drupal6.bak/var/lib/drupal6.bak
Copy the /etc/drupal/6, /usr/share/drupal6, and /var/lib/drupal6 folders from the old site to the new site. (This needs to be done asthe root user, which can be done with sudo dolphin).
Copy the database dumpfile from the old site to the new site.
Restore the database dumpfile on the new site.
Check the settings.php, dbconfig.php, files and other folder permissions to make sure they match the permissions of the originalsystem. (Sometimes during the copy process the ownership of all files and folders will be set to root.) In particular, make sure thatdbconfig.php belongs to the www-data group.
Notes: I have never been successful in performing an upgrade in the middle of this process. I recommend moving the site exactly, andthen performing any upgrades after it is moved.
Use an SMTP server for email functions
I don't have a mail server on my system. Instead, I use an offsite mail handler that accepts the SMTP/POP3 protocols. Drupal can beconfigured to route its mail through SMTP/POP3 as well. If you are using SMTP, make sure outbound port 25 is open. If using secureSMTP (i.e. through SSL), then make sure outbound port 465 is open.
Install PHPMailer
Install the PHPMailer libraries on Ubuntu:
sudo apt-get install libphp-phpmailer
Install PHPMailer (http://drupal.org/project/phpmailer) into Drupal:
cd /etc/drupal/6/sites/all/modulessudo wget http://ftp.drupal.org/files/projects/phpmailer-6.x-2.1.tar.gzsudo tar zxvf phpmailer-6.x-2.1.tar.gzsudo rm phpmailer-6.x-2.1.tar.gz
Copy the necessary files from the libphp-phpmailer Ubuntu package into the module directory:
sudo mkdir /etc/drupal/6/sites/all/modules/phpmailer/librariessudo cp /usr/share/php/libphp-phpmailer/class* /etc/drupal/6/sites/all/libraries/phpmailer
Note: If you wish these modules to be available to only one subsite, then install them instead into the /etc/drupal/6/sites/mysite_x/modules folder.
Note: You must update after module installation.
Drupal -> Administer -> Modules -> Mail -> select PHPMailer module functions to enable
UbuntuGuide Part2 - http://ubuntuguide.org/index.php?title=UbuntuGuide_Part2&...
137 of 177 08/10/2013 09:04 AM
Enter your SMTP settings:
Drupal -> Administer -> Site configuration -> PHPMailer
Add an online store to your website
Drupal6 has a completely free and powerful online store called Ubercart (http://www.ubercart.org/) . Other solutions include Zen Cart(http://www.zen-cart.com/) and osCommerce (http://www.oscommerce.com/) . For Drupal7, a complete Drupal Commerce (see theintroduction video (http://drupalize.me/videos/introduction-drupal-commerce-basics) ) storefront framework is available as CommerceKickstart (http://drupal.org/project/commerce_kickstart) .
Set up PayPal Website Payments Standard
Establish a bank account at your financial institution to be used exclusively with PayPal. Do not use your regular bank accounts,as PayPal will have access to both deposits and withdrawals from this account. (You can use a savings account, as all transactionsbetween PayPal and the account will be electronic.)There are basically two types of payment schemes for PayPal:
Website Payments Standard (https://www.paypal.com/us/cgi-bin/webscr?cmd=_wp-standard-overview-outside&nav=2.0.0) --no monthly fee. 2.9% + $0.30 per (attempted) transaction. The customer goes to the PayPal site for payment then returns tothe website.Website Payments Pro (http://www.ubercart.org/paypal) -- $30 monthly fee. 2.9% + $0.30 per (attempted) transaction (less ifsignificant volume). All transactions are performed through a gateway, without leaving the website.In addition, there is Express Checkout (https://www.paypal.com/us/cgi-bin/webscr?cmd=xpt/Merchant/merchant/ExpressCheckoutIntro-outside) for PayPal registered customers. The customer goes to the PayPal site then returns.
Until your needs are greater, Website Payments Standard is the least expensive solution to use. Create a PayPal(http://www.paypal.com) Premier account. (The Premier account allows you to both buy and sell items.) Verify your emailaddress and bank account. To verify your bank account, use the "Confirm deposits" method. (The instant verification methodinvolves giving your secure online banking information (regarding your bank account) to PayPal, which is strongly advisedagainst.) Verification of your bank account is a 4 day process, in general.
Create a PayPal Donate button
While logged in to the PayPal site, create your button(s) for donations (or payment or checkout) through the PayPal website.
PayPal -> Merchant Services -> Create Buttons -> Donate
Customise your button(s) as desired. When you "Create button" or "Save changes," the code for the button will be displayed. Copythe PayPal button code.
On your Drupal website, create a new block in which to display the newly created button. In this example I will place this newblock in the right sidebar.
Drupal -> Administer -> Site building -> Blocks -> Add block ->Block description: PayPal blockBlock title: DonationsBlock body: Paste the code from your PayPal button hereInput format: Full HTMLCustomize other settings as desired -> Save block
Place the newly created block into the right sidebar:
Drupal -> Administer -> Site building -> Blocks -> PayPal block -> Disabled -> Dropdown: Right sidebar -> Save blocks
Install Ubercart on Drupal
Ubercart (http://www.ubercart.org/) is the premier online store for use with Drupal6. Install Token (http://drupal.org/project/token) and Ubercart (http://drupal.org/project/ubercart) :
cd /etc/drupal/6/sites/all/modulessudo wget http://ftp.drupal.org/files/projects/token-6.x-1.12.tar.gzsudo tar zxvf token-6.x-1.12.tar.gzsudo rm token-6.x-1.12.tar.gz
cd /etc/drupal/6/sites/all/modulessudo wget http://ftp.drupal.org/files/projects/ubercart-6.x-2.0.tar.gzsudo tar zxvf ubercart-6.x-2.0.tar.gzsudo rm ubercart-6.x-2.0.tar.gz
UbuntuGuide Part2 - http://ubuntuguide.org/index.php?title=UbuntuGuide_Part2&...
138 of 177 08/10/2013 09:04 AM

Note: If you wish these modules to be available to only one subsite, then install them instead into the /etc/drupal/6/sites/mysite_x/modules folder.
Note: You must update and adjust permissions after module installation.Drupal -> Administer -> Modules -> Ubercart -> select the Ubercart module functions you intend to use
PayPal requires cURL. Install the curl-php library in Ubuntu/Kubuntu (see this link (http://drupal.org/node/511064) for more info):
sudo apt-get install php5-curlsudo /etc/init.d/apache2 restart
Read the Ubercart documentation (http://www.ubercart.org/docs/user/8386/configuring_your_store) to set up your onlinestore/services. Run:
Drupal -> Administer -> Store administration
Setup PayPal with Ubercart
Undergoing revisions.Check that a payment has been processed:
Drupal -> Administer -> Store Administration -> Orders -> View by status: Payment received
Trigger functions based on payment
The benefit of using Ubercart in Drupal is that access to website functions can be triggered based on a payment regimen. For example,access to webcam modules (such as videochat or webcams) can be enabled (using the ContentAccess (http://drupal.org/project/content_access) module) after payment is processed by Ubercart through Paypal. This allows consumer-based telemedicine, a verydesirable service for physicians.
Ubercart allows actions to be triggered (http://www.ubercart.org/docs/user/7657/configuring_conditional_actions) , predicated onconditions being met (such as a PayPal payment notification being received). This can include the startup of other modules.
Drupal -> Administer -> Store administration -> Conditional actions
Add realtime videochat to your website
(This section under construction).
The following modules add videochat to Drupal:
SkypeSupport (http://drupal.org/project/skypesupport) (also see Skype Status (http://drupal.org/project/skype_status) )DimDim videoconferencing support (http://drupal.org/project/dimdim)Red5 Flash Server (http://drupal.org/project/red5flashserver)Webcams (http://drupal.org/project/webcams)
Add BigBlueButton API
BigBlueButton is a standalone videoconferencing server. Install the BigBlueButton API (http://drupal.org/project/bbb) that is ableto call the BBB server from within Drupal:
cd /etc/drupal/6/sites/all/modulessudo wget http://ftp.drupal.org/files/projects/bbb-6.x-1.x-dev.tar.gzsudo tar zxvf bbb-6.x-1.x-dev.tar.gzsudo rm bbb-6.x-1.x-dev.tar.gz
Note: If you wish this module to be available to only one subsite, then install it instead into the /etc/drupal/6/sites/mysite_x/modules folder.
Note: You must update and adjust permissions after module installation.Drupal -> Administer -> Modules -> Big Blue Button -> select the Big Blue Button module functions you intend to use
Test the BigBlueButton settings:
Drupal -> Site administration -> BigBlueButton Conferencing -> Test connection.
Change the URL to the address of your BBB server (e.g. http://mybbbsite.dyndns.org:81/bigbluebutton/) and the Security Salt (foundin bigbluebutton.properties on the BBB server in the
/var/lib/tomcat6/webapps/bigbluebutton/WEB-INF/classes/bigbluebutton.properties
UbuntuGuide Part2 - http://ubuntuguide.org/index.php?title=UbuntuGuide_Part2&...
139 of 177 08/10/2013 09:04 AM

configuration file, in the setting:
beans.dynamicConferenceService.securitySalt=your_security_salt_number_here
Create a new content type named Teleconference:
Drupal -> Administer -> Content management -> Content types -> Add content type
-> Name: Teleconference -> Type: teleconference -> Big Blue Button settings -> Treat this node type as conference: (ticked) -> Show linksto join / start a meeting beneath the node: (ticked) -> Display meeting status on node: (ticked) -> Save content type
Create a new node of content type Teleconference:
Drupal -> Create content -> Teleconference -> Conference settings -> ...
Add Kaltura video services
See these instructions (http://www.kaltura.org/drupal-kaltura-module-all-one-video-module) for adding the API for thecommunity edition of Kaltura (http://www.kaltura.org/) , a video editor and manager for your website.
Upload and download files
Whether a file is available for private or public download depends, of course, whether the page to which it is attached is availableprivately or publicly. In addition, there are methods for maintaining private download folders (for FTP or other access).
Public files / attachments
In general, files are "attached" to a page. See Uploading files with Drupal (http://drupal.org/handbook/modules/upload) for informationabout changing permissions.
Attach a file to an existing page (examplepage):
Drupal -> Administer -> Content Management -> Content -> examplepage -> edit-> File attachments -> Attach new file: your file to upload -> Attach -> Save
Increase uploaded file size limits
Increase the uploaded file size limit for PHP.
Add a quotation module
Add the Fortune module to Drupal
Fortune is a *nix utility to display quotations from preselected files. Drupal has a plugin (http://drupal.org/project/fortune) to displaythese quotations from within a webpage. Although a nice module, a disadvantage is that it uses monospace font and currently does nothave options to adjust the font type and size. See here for installation details.
Add the Quotes modules to Drupal
Download the Quotes (http://drupal.org/project/quotes) module:
cd /etc/drupal/6/all/sites/modulessudo wget http://ftp.drupal.org/files/projects/quotes-6.x-1.40.tar.gzsudo tar zxvf quotes-6.x-1.40.tar.gzsudo rm quotes-6.x-1.40.tar.gz
Note: If you wish this module to be available to only one subsite, then install it instead into the /etc/drupal/6/sites/mysite_x/modules folder.
Note: You must update and adjust permissions after module installation.Drupal -> Administer -> Site building -> Modules -> Other -> Quotes (ticked) -> Save configuration
Create a Quotes content and import your quotations. You can create a quotation one by one, or a large number of Quotations allat once (from a file, for example). Each quotation is created as an individual content item. The "display in Quote blocks" optiondetermines whether a Quotes block (created in the next step to display a rotation of the quotations) will include the particularquotation(s) created in this step.
Drupal -> Create content -> Quotes->Name: Quote%id -> Display in quote blocks: (ticked)
UbuntuGuide Part2 - http://ubuntuguide.org/index.php?title=UbuntuGuide_Part2&...
140 of 177 08/10/2013 09:04 AM

I use quotations from the Fortune (http://en.wikipedia.org/wiki/Fortune_%28Unix%29) program, which are in a particular text fileformat that looks like:
I reject your reality and substitute my own...%This is one of those "What the hell am I doing?" moments, over!%We got a robot in the water, he's stuffed with tuna and it's just another day here at Mythbusters.
I copy the contents of the text file into the input box.
-> Format: Import Fortune file -> Comment settings: Disabled -> Save
This will create as many content items as are in the Fortune file. If there are hundreds of quotes, you will have hundreds of Quotecontent items.
Configure the Quotes settings so that Quotes can appear as a block:
Drupal -> Administer -> Site configuration -> Quotes-> Configure blocks -> Name: Quotes -> Add block -> Configure block
-> Update options -> Update every 6 seconds-> Show block on specific pages -> Show on only the listed pages: choose the pages to display on-> Save block
Add the Quotes Block on your site:
Drupal -> Administer -> Site building -> Blocks -> Quotes:Quotes -> Location
Moodle tips
Prepare your server
Moodle is meant to be run on a server. It requires Apache2, the PHP scripting language, and a database (either MySQL orpostgreSQL). While many users feel postgreSQL is a better database, MySQL is more widely used and is easier for first time users(since there are many integrated packages that use it). A LAMP server (Linux, Apache2, MySQL, PHP) can easily be installed:
sudo apt-get install taskselsudo tasksel install lamp-server
When installing the LAMP server, note the MySQL root password carefully. This will be required during Moodle installation.
Moodle must know where the server is located. (You must also have a way for other users to reach it.) The FQDN (Fully QualifiedDomain Name) refers to the location of the server on which the Moodle database is located. In general, there are two options:localhost (meaning the database will be located on the same computer on which Moodle will be installed) or a URL. (Of course,the URL could still refer to the same computer).
Don't worry, whichever option you choose can be changed later. For initial installation, it is easiest to use localhost as the FQDN (andalso wherever it is available as an installation option).
Installation
Moodle (http://moodle.org/) is a free open source platform for hosting online learning courses. It can be integrated with webinarsoftware. A LAMP server installation is required (sudo tasksel install lamp-server). Also find free Moodle themes here(http://moodle.org/mod/data/view.php?id=6552) . Install:
sudo apt-get install moodle
Database server software for Moodle: mysql-server -> follow remainder of instructions. Assuming the database is hosted on thesame computer as the one Moodle is being installed upon, accept localhost for the options when prompted.
Edit Moodle configuration options (if needed). (Use the gedit text editor instead of kate if using Ubuntu instead of Kubuntu.):
sudo kate /etc/moodle/config.php
Edit Moodle apache2 configuration file (if needed). (Use the gedit text editor instead of kate if using Ubuntu instead of Kubuntu.):
UbuntuGuide Part2 - http://ubuntuguide.org/index.php?title=UbuntuGuide_Part2&...
141 of 177 08/10/2013 09:04 AM
sudo kate /etc/moodle/apache.conf
Finish installation through the browser. (I recommend the "unattended" installation.)
http://localhost/moodle/admin
Set up a virtual server
The whole point of Moodle is that users can access it over a network. The easiest way is to set up a URL for your server so that userscan reach Moodle using the URL. Several steps are necessary.
Make sure the server on which Moodle is running has a static IP address on the LAN.
If you have a router on your network, forward incoming traffic on ports 80 and 443 (http and https) from the router to the (static)LAN IP address of the server hosting Moodle.
The firewall on the Moodle server should allow all incoming traffic on ports 80 and 443.
A URL for your Moodle site should have been established with a DNS name server on the Internet. It is possible to use a DynamicDNS server, as well. An example URL is mymoodleserver.dyndns.org.
A virtual host file in /etc/apache2/sites-available must be created for Moodle.
cd /etc/apache2/sites-availablesudo cp default moodlevirtualhost
It should be edited (sudo gedit /etc/apache2/sites-available/moodlevirtualhost) to look like
<VirtualHost *:80>ServerAdmin [email protected]#DocumentRoot /usr/share/moodle/ServerName mymoodleserver.dyndns.orgServerAlias www.mymoodleserver.dyndns.org mymoodleserver.dyndns.org#RewriteEngine On#RewriteOptions inherit</VirtualHost>
Notes: The Rewrite options are listed here only for forward compatibility with Apache rewrite rules. They are only used for multi-siteinstallations and can, in general, remain commented out (with the #).
The virtual host file should be linked to /etc/apache2/sites-enabled and apache2 restarted (sudo etc/init.d/apache2 restart).
sudo ln -s /etc/apache2/sites-available/moodlevirtualhost /etc/apache2/sites-enabled
Edit the /etc/moodle/config.php file (sudo gedit /etc/moodle/config.php) so that the FQDN (in this case the URL) is correctly noted.
$CFG->wwwroot = 'http://mymoodleserver.dyndns.org/moodle';
Login to the Moodle server:
http://mymoodleserver.dyndns.org
Using Moodle with an existing URL
It is possible to use Moodle with an existing URL. If, for example, you already have a server at myserver.dyndns.org, it is possible to useMoodle at the URL myserver.dyndns.org/moodle.
In such a situation, no additional virtual host file needs to be created for Moodle; the virtual host file for the existingmyserver.dyndns.org server is sufficient.
This is possible because the /etc/moodle/apache.conf file contains the line
Alias /moodle /usr/share/moodle/
and traffic to the host server will therefore be forwarded accordingly.
Edit the /etc/moodle/config.php file (sudo kate /etc/moodle/config.php) so that the FQDN (in this case the URL) is correctly noted.
UbuntuGuide Part2 - http://ubuntuguide.org/index.php?title=UbuntuGuide_Part2&...
142 of 177 08/10/2013 09:04 AM

$CFG->wwwroot = 'http://myserver.dyndns.org/moodle';
Login to the Moodle server:
http://myserver.dyndns.org/moodle
Add a custom theme to Moodle
Find free Moodle themes here (http://moodle.org/mod/data/view.php?id=6552) . Also check out this theme tip (http://moodle.org/mod/data/view.php?d=26&rid=1567) .
Download one. Extract the zip file (by clicking on the filename in Nautilus, for example).
Copy the extracted folder to /usr/share/moodle/theme
From Moodle, install the new theme:
Moodle -> Appearance -> Themes -> Theme Selector
Copy a custom footer logo (ideal size 55px x 55px) to /etc/moodle and name it moodlelogo55.png. Link this file to the Moodle pixfolder:
sudo ln -s /etc/moodle/moodlelogo55.png /usr/share/moodle/pix
The front page footer logo can then be changed by editing:
sudo nano /usr/share/moodle/lib/weblib.php
and editing the $homelink values from
$homelink = '<div class="sitelink">'. '<a title="Moodle '. $CFG->release .'" href="http://moodle.org/">'. '<img style="width:100px;height:30px" src="pix/moodlelogo.gif" alt="moodlelogo" /></a></div>';
to
$homelink = '<div class="sitelink">'. '<a title="My Home Page" href="http://myhomepage.org/">'. '<img style="width:55px;height:55px" src="pix/moodlelogo55.png" alt="mylogoname" /></a></div>';
where My Home Page, http://myhomepage.org, moodlelogo55.png, and mylogoname are examples, of course.
Upgrading Moodle
See this Moodle Upgrade instruction page (http://docs.moodle.org/en/Upgrading) for introductory details.
Copy the Moodle software directory as a backup:
sudo cp -r /usr/share/moodle /usr/share/moodle_bak
Copy the Moodle data directory as a backup:
sudo cp -r /var/lib/moodle /var/lib/moodle_bak
Copy the local Moodle configuration directory as a backup:
sudo cp -r /etc/moodle /etc/moodle_bak
Dump your MySQL database content:
mysqldump -u username -p -C -Q -e --create-options moodle > moodle-backup-2010-04-01.sql
where username is the database MySQL user account name used to create the Moodle database during Moodle installation. Thecorresponding Moodle database password will be requested. (If you have forgotten these, they are recorded in the /etc/moodle/config.php file as $CFG->$dbuser and $CFG->$dbpass).
UbuntuGuide Part2 - http://ubuntuguide.org/index.php?title=UbuntuGuide_Part2&...
143 of 177 08/10/2013 09:04 AM
Download and unzip the current Moodle package:
sudo wget http://download.moodle.org/download.php/direct/stable19/moodle-weekly-19.zipsudo unzip moodle-weekly-19.zipsudo rm moodle-weekly-19.zip
Copy the new, extracted /moodle folder contents into the original /usr/share/moodle folder, overwriting the files there.
yes | sudo cp -r moodle/* /usr/share/moodle
Note: This method ensures that any files you have previously added, but for which no updates are available, remain in the /usr/share/moodle folder.
Make sure there is a symbolic link from your original config.php file in /etc/moodle to /usr/share/moodle. If not, create one:
sudo ln -s /etc/moodle/config.php /usr/share/moodle
There is a minor error in the version.php module numbering scheme from one version to the next. Edit the version.php file:
sudo nano /etc/moodle/version.php
Change the line
$version = 2007101571.04;
to
$version = 2007101597.04;
Note: The new version number specified in $version must at least be greater than the $version number found in the version.php filelocated in the backup folder for the previous moodle installation (now presumably at /user/share/moodle_bak/version.php).
Login to your Moodle site (as an administrator) and load the new system:
Moodle -> Site Administration -> Notifications (Make sure to click on Notifications)
Moodle Site Building
Using BigBlueButton with Moodle
See this section.
Using Skype with Moodle
Add Skype Block
Adding quotations to a block
Add a Quotation of the Day block
See this Moodle forum thread (http://moodle.org/mod/forum/discuss.php?d=41547) .
Fortune
Fortunoid
Fortunoid is a Plasma Widget that serves as a frontend GUI for the fortune (http://linux.die.net/man/6/fortune) package.
Installing the Fortunoid widget package (in Kubuntu/KDE) by
UbuntuGuide Part2 - http://ubuntuguide.org/index.php?title=UbuntuGuide_Part2&...
144 of 177 08/10/2013 09:04 AM

sudo apt-get install plasma-widget-fortunoid
will also install the fortune package. If only the fortune package is desired (which can be run in a command-line terminal), it can beinstalled by itself:
sudo apt-get install fortune
or
sudo apt-get install fortune-mod
The fortune module can be customized.
The quotations themselves are stored in the /usr/share/games/fortunes folders.
There are multiple categories of quotations, and the file for each category can be edited directly.
When using the command-line, categories of quotations can be selected merely by specifying them. Example:
fortune zippy science
There are many options for the command-line fortune utility (see here (http://linux.die.net/man/6/fortune) ). Any or all of thesecommand-line options can be entered as an argument in the Fortunoid widget.
Adding categories of fortunes (fortune modules)
See this list (http://fortunes.pbworks.com/) of the original fortune modules (categories).Other modules can often be found by a Google search for fortune-mod.Wikiquotes (http://en.wikiquote.org) is an online repository for quotations. A webpage can easily be copied to a text file, forconversion into a fortune data file (see below). An example page is Wikiquotes -- Zen proverbs (http://en.wikiquote.org/wiki/Zen_proverbs) .See this brief tutorial (http://www.jason.mock.ws/wordpress/2007/07/10/creating-fortune-files) .
Make sure fortune-mod is installed:
sudo apt-get install fortune-mod
Change to the fortune directory:
cd /usr/share/games/fortunes
Edit a category text file with quotations separated by % symbols:
I reject your reality and substitute my own...%This is one of those "What the hell am I doing?" moments, over!%We got a robot in the water, he's stuffed with tuna and it's just another day here at Mythbusters.
Then, for example, save this text file as newcategory1.
It is also possible to include a URL as the text in a quotation. (Most browsers will then automatically change the text into anactual link.) In this way, a list of random URL links can be displayed through the Fortune module.
My reality comes from http://ubuntuguide.org%When I wonder "What the hell I am doing?" I go to Kubuntuguide at http://ubuntuguide.org/wiki/Kubuntuguide%MediaWiki is the premier wiki. Vist their website: http://www.mediawiki.org/wiki/MediaWiki
There is also a UTF-8 file which is merely a symbolic link to the text file:
sudo ln -s newcategory1 newcategory1.u8
Convert the text file into a data file for use by fortune.
UbuntuGuide Part2 - http://ubuntuguide.org/index.php?title=UbuntuGuide_Part2&...
145 of 177 08/10/2013 09:04 AM

sudo strfile newcategory1 newcategory1.dat
Select newcategory1 as a command-line option or as an argument in Fortunoid.
Using Fortune in Drupal
A Drupal plugin for Fortune (http://drupal.org/project/fortune) is available. While this is a nice module, the disadvantage of it isthat it displays the quotations in Monotext; there is no ability to select font size and type.
On a server with Drupal installed, download the module:
cd /etc/drupal/6/all/sites/modulessudo wget http://ftp.drupal.org/files/projects/fortune-6.x-1.0.tar.gzsudo tar zxvf fortune-6.x-1.0.tar.gzsudo rm fortune-6.x-1.0.tar.gz
Note: The module can also be placed in a particular subsite's module folder (if there are multiple Drupal subsites on the server),instead of in the sites/all/modules folder.
Enable the module:
Drupal -> Administer -> Site building -> Modules -> Other -> Fortune (ticked) -> Save configuration
Load the module (update) and set permissions in Drupal as usual.
Configure the Fortune settings:
Drupal -> Administer -> Site configuration -> Fortune-> Select the categories of quotations desired -> Submit
Add the Fortune Block on your site:
Drupal -> Administer -> Site building -> Blocks -> Fortune -> Configure-> Show block on only the listed pages (ticked): list of pages you wish Fortune block shown on -> Save
Using Fortune in MediaWiki
See this section.
DAViCal Calendar Server 0.9.7Note: The repositories contain DAViCal 0.9.7 and these instructions are for that version. If you wish instructions for a more recentversion, see the DAViCal 0.9.8 tips page or consult the DAViCal site (http://wiki.davical.org/w/Release_Notes/0.9.9.2#Debian_.2F_Ubuntu) for instructions on adding the DAViCal repository and installing the most recent version directly.
DAViCal (http://wiki.davical.org/w/Main_Page) is a CalDAV (http://en.wikipedia.org/wiki/CalDAV) , postgreSQL, Apache andphp-based shared Calendar server that works with Mozilla Thunderbird/Lightning/Sunbird, Evolution, and other calendar clients.
Install:
sudo apt-get install davical
The following detailed instructions are duplicated and updated on the DAViCal website (http://wiki.davical.org/w/Ubuntu_Jaunty) .
Introduction
DaviCal (http://wiki.davical.org/w/Release_Notes) has been included in the Ubuntu repositories as a .deb package.
The instructions below are for a new user with a new Ubuntu Server installation. (Obviously, if you are already using the UbuntuServer, you will probably have done many of the steps already.)
Preliminary Requirements
It is possible to select the PostgreSQL database task and the LAMP (Linux, Apache2, MySQL, PHP) tasks at the time of the serverinstallation, or at any later time using:
sudo tasksel install lamp-server
UbuntuGuide Part2 - http://ubuntuguide.org/index.php?title=UbuntuGuide_Part2&...
146 of 177 08/10/2013 09:04 AM

sudo tasksel install postgresql-server
At a minimum, you will need PostgreSQL (https://help.ubuntu.com/10.04/serverguide/C/postgresql.html) (see below), Apache2(https://help.ubuntu.com/10.04/serverguide/C/httpd.html) (see below), and PHP (https://help.ubuntu.com/10.04/serverguide/C/php5.html) . You can install PHP separately (i.e. not part of the integrated LAMP stack), if you wish, following these Ubuntuinstructions (https://help.ubuntu.com/10.04/serverguide/C/php5.html) .
Note that in later versions of (K)Ubuntu, PostgreSQL 8.4 will be installed instead of PostgreSQL 8.3. Installation steps must take thisinto account.
Set up the PostgreSQL database
See these Ubuntu instructions (https://help.ubuntu.com/community/PostgreSQL) . Use the Hardy Installation instructions (forPostgreSQL 8.3) as well as the Basic Server Setup instructions for Gutsy/Hardy. In short, install (if you already haven't):
sudo apt-get install postgresql
Basic Server Setup:
sudo -u postgres psql postgres
Set a password for the postgres superuser:
\password postgres
(You may need to quit using \q when you are done).
Create the first database:
sudo -u postgres createdb mydb
Install the DaviCal package from repositories
sudo apt-get install davical
Set up DaviCal PostgreSQL users
Create the DaviCal users (first becoming the the system root superuser, using sudo su, then becoming the database superuser,postgres):
sudo susu postgres -c "createuser davical_app"exit
You will get asked about superusers, roles and databases, but just say "No" to all questions. This functional ID needs only minimumrights. Repeat the process to create one more user, "davical_dba":
sudo susu postgres -c "createuser davical_dba"exit
Note: In the (older) main DAViCAL site installation page, the user created at this step is "general." This account name is for olderversions. You do not need to create a user named "general" any longer.
Edit the configuration file pg_hba.conf:
sudo nano /etc/postgresql/8.3/main/pg_hba.conf
(Use 8.4 instead of 8.3 if Postgresql 8.4 was installed on your system.)
Add the following 4 lines near (or at) the top;
local all all trustlocal davical davical_dba trustlocal davical davical_app trust
UbuntuGuide Part2 - http://ubuntuguide.org/index.php?title=UbuntuGuide_Part2&...
147 of 177 08/10/2013 09:04 AM

host davical davical_app 127.0.0.1/32 trust
(The last line is for accessing the database over TCP/IP, assuming the database and the Apache2 server are on the same computer. Seehere (http://rscds.sourceforge.net/installation.php) under "Connecting to the Database" for more details.)
Restart the postgreSQL server:
sudo /etc/init.d/postgresql-8.3 restart
(Use 8.4 instead of 8.3 if Postgresql 8.4 was installed on your system.)
Setup the DaviCal database
Run the database creation/installation script:
sudo susu postgres -c /usr/share/davical/dba/create-database.shexit
Write down the admin password when it is displayed. You will need it later.
Once the creation script has run correctly, again edit the pg_hba.conf file:
sudo nano /etc/postgresql/8.3/main/pg_hba.conf
(Use 8.4 instead of 8.3 if Postgresql 8.4 was installed on your system.)
and remove the line
local all all trust
(This step is not strictly necessary for the installation, but do you really want anybody with a local account to have free access to all thedatabases?)
Restart the database daemon:
sudo /etc/init.d/postgresql-8.3 restart
(Use 8.4 instead of 8.3 if Postgresql 8.4 was installed on your system.)
Test that your database creation was successful
sudo susu postgrespsql davicaldavical=# \zdavical=# \qexitexit
You should see a table with a list of access permissions to "davical_dba". (Typing "\q" exits pqsl.)
Set up Apache2
Install Apache2, if you have not done so already. See the Ubuntu documentation (https://help.ubuntu.com/9.10/serverguide/C/httpd.html) for help.
sudo apt-get install apache2
In your router settings (assuming you have one), set your port forwarding so that your port 80 (http) and 443 (https) is forwarded toyour server. Make sure your server firewall (if you have one) allows incoming ports 80 and 443.
I set up a dynamicDNS URL name (at DynDNS.org) called mydavicalsite.dyndns.org, which gets forwarded to my router's IP address byDynDNS.org. (My router happens to keep the DynDNS settings updated.) I want this to be forwarded to the server on my LAN.
I therefore created a virtual host setup in the Apache2 schema by copying the default virtualhost settings file to a new virtualhostsettings file for mydavicalsite:
UbuntuGuide Part2 - http://ubuntuguide.org/index.php?title=UbuntuGuide_Part2&...
148 of 177 08/10/2013 09:04 AM

sudo cp /etc/apache2/sites-available/default /etc/apache2/sites-available/mydavicalsite
I edited the virtualhost config file:
sudo nano /etc/apache2/sites-available/mydavicalsite
so that these lines were used (instead of the original ones):
## Virtual Host def for Debian package DAViCal<VirtualHost *:80> DocumentRoot /usr/share/davical/htdocs DirectoryIndex index.php index.html ServerName mydavicalsite.dyndns.org ServerAlias calendar.mydavicalsite.dyndns.org Alias /images/ /usr/share/davical/htdocs/images/ <Directory /usr/share/davical/htdocs/> AllowOverride None Order allow,deny Allow from all </Directory> php_value include_path /usr/share/awl/inc php_value magic_quotes_gpc 0 php_value register_globals 0 php_value error_reporting "E_ALL & ~E_NOTICE" php_value default_charset "utf-8"</VirtualHost>
To then make the virtualhost file active, I made a symbolic link from the virtualhost configuration file in the apache2 "sites-available"folder to the apache2 "sites-enabled" folder:
sudo ln -s /etc/apache2/sites-available/mydavicalsite /etc/apache2/sites-enabled/mydavicalsite
Then restart apache2:
sudo /etc/init.d/apache2 restart
Create your configuration file
Edit your own configuration file in /etc/davical. (Use your own domain name instead of the one in the example, of course.):
sudo nano /etc/davical/mydavicalsite.dyndns.org-conf.php
You can merely include the following lines.
<?php// $c->domain_name = "mydavicalsite.dyndns.org";// $c->sysabbr = 'rscds'; $c->admin_email = '[email protected]'; $c->system_name = "Really Simple CalDAV Store";// $c->collections_always_exist = true;// $c->enable_row_linking = true; $c->default_locale = en_US.UTF-8; $c->pg_connect[] = 'dbname=davical port=5432 user=davical_app';?>
(Beware not to include any empty lines after the '?>'.)
Start up DaviCal
From your browser, go to
http://mydavicalsite.dyndns.org
or
http://mydavicalsite.dyndns.org/cal
Use admin as your initial login, and the password assigned to you at installation (you did write it down, didn't you?)
(See here (http://wiki.davical.org/w/Installation_Experiences/Feb_2008:_Ubuntu_6.10#If_you_forgot_the_Admin_Password) if you forgotyour password. In brief:
UbuntuGuide Part2 - http://ubuntuguide.org/index.php?title=UbuntuGuide_Part2&...
149 of 177 08/10/2013 09:04 AM

>sudo su>su postgres>psql davical -c 'select username, password from usr;'
Only the initial "admin" password is stored in plain text. All subsequent users have their password stored in an encrypted state. If youchange the admin password through the web interface it will also be encrypted from that point forward.)
Optionally copy a configuration file for testing on the localhost server (this did not work correctly for me, though):
sudo ln -s /etc/davical/mydavicalsite.dyndns.org-conf.php /etc/davical/localhost-conf.phpsudo ln -s /usr/share/davical/htdocs /var/www/davical
Then you can also log through localhost using your browser:
http://localhost/davical
Create TestUser
I created a testuser (that was not an administrator) using the admin login (above), and gave it a password davtest. I created a calendar,using the default location /testuser/home
I then installed both Sunbird
sudo apt-get install sunbird
and Thunderbird with Lightning:
sudo apt-get install thunderbird lightning-extension
Making sure that my firewall wasn't blocking any ports (while testing), or at least allowed 80 and 443 through, I created a new networkcalendar in both Sunbird and Thunderbird.
Sunbird -> File -> New Calendar... -> On the Network -> CalDAV ->Location: http://mydavicalsite.dyndns.org/caldav.php/testuser/home ->Name: testuser
Thunderbird -> Calendar -> Calendar -> New Calendar... -> On the Network -> CalDAV ->Location: http://mydavicalsite.dyndns.org/caldav.php/testuser/homeName: testuser
I then entered a calendar entry in Sunbird. I then reloaded the remote calendar:
Sunbird -> File -> Reload Remote Calendars
and when I did the same in Thunderbird Calendar
Thunderbird -> Calendar -> Reload button
then the two calendars were synchronized and both showed the same events.
Voila! Shared calendars.
Administer users
If I made an error in a user setup (from the DaviCAL web interface as the admin user), to correct it I had to make the user inactive andthen activate him/her again, at which time I could change the settings.
I had to make a user Public if I wanted to view his/her calendar. The "relationships" are discussed on other pages(http://rscds.sourceforge.net/administration.php) .
Clarification of user types and relationships
Note: These instructions are peculiar to version 0.9.7. Newer versions have been revised and use a different permissions structure.
The official documentation on this site is very confusing to me. Here's what I worked out:
User roles
A "user" is really a type of account. There are four types of "user" roles in DAViCal. Not all of them represent individual users.
UbuntuGuide Part2 - http://ubuntuguide.org/index.php?title=UbuntuGuide_Part2&...
150 of 177 08/10/2013 09:04 AM

Admin: This type of user does not have a calendar (or calendar folder). This type of user account administers the DAViCaldatabase by logging into the administration web interface (only). It is the only type of user that can create new users and changetheir status (e.g. "active" vs. "inactive", "language", relationships to other types of user accounts, etc.).
Public: This is an individual user (as in "John Q. Public," I guess. Don't ask me why it is called a Public account). Every individualuser who wants to have an individual calendar must have a Public account. Each individual user (with a Public account) can alsobelong to (i.e. have a "relationship" with) a group and/or (group calendar) resource.
Group: This type of account is meant as a placeholder for several Public users to belong to (have a "relationship" with). It acts as auser in some ways, but it is not an individual user's account.
Resource: This is an account for a group calendar, basically. A group (or an individual Public user) must have a "relationship"with the resource to administer the group calendar associated with it. A Public user should not simultaneously have both anindividual relationship with a resource as well as a relationship with a group that has a relationship with the same resource.
Types of relationships
A "relationship" defines the types of privileges one user account has in relation to another user account.
Administers: This means that this user can change the settings of another user account through the web administration interface.It does not mean that this user can access or change the calendar of another user account (which must be done as an "Assistantto...").
is Assistant to: This means the user can directly read and change the calendar of another Public user or Resource (using a clientprogram). Also, if a Public user is defined with the relationship that it "Administers" a Group user account, and the Group useraccount is an "Assistant to" a Resource (calendar) account, then the Public user will also be able to directly read and change thecalendar of the Resource account (using a client program), as well.
Can read from: This means the user can directly read (but not change) the calendar of another Public user or Resource (using aclient program). Also, if a Public user is defined with the relationship that it "Administers" a Group user account, and the Groupuser account is given the relationship privilege "Can read from" a Resource (calendar) account, then the Public user will also beable to directly read (but not change) the calendar of the Resource account (using a client program), as well.
Can see free/busy time of: The free/busy time setting hides the details of events. This is useful when sensitive details are on acalendar that not every shared user ought to be able to see. When this privilege is given, only that events are scheduled (and nottheir details) are revealed to the Public user that has this relationship (or to all the Public users that belong to a Group with thistype of relationship).
Example
(Other examples are given here (http://rscds.sourceforge.net/administration.php) ).
I have a sensitive PowWow group calendar which I want to share with different users.
Using the web administration interface and the initial "admin" account (see above), I first create a new administrator user (account)named BigChief (user role "Admin"). He does not have his own calendar.
There are seven new "Public" users (each with their own calendar by default) that I then create through the web interface (using eithermy admin or BigChief user account). The seven Public users are Chief1, Chief 2, Indian1, Indian2, Squaw1, Squaw2, and Janitor. I wantto ensure that each can be administered by the BigChief administrator account, so I define the "relationships to" each user to includethat the BigChief user "Administers" each account.
Again through the administration web interface, I then set up a new Group user account (with the user role "Group"), with a usernameof "Braves". I define the relationships to this group: for each Public user (found in the dropdown box), Indian1 and Indian2, I select"Administers" (which confers full rights to each member (Indian1 and Indian2) in the Group to do whatever the Group Braves can do).
I then set up a second Group user account with a username of "Squaws." Again I give each user (in the dropdown box) full privilegesfor (i.e. "Administers") this group.
Once more through the administration web interface, I finally set up a new user account with the user role of "Resource", which willbe the account which contains the actual group calendar. I name this user "PowWowCalendar" (which is what I want to call the groupcalendar).
For PowWowCalendar, I want BigChief to administer it. In the "Relationship to this user" section, therefore, I select (from thedropdown menu) that the user BigChief "Administers" this (group calendar) resource. I want Chief1 and Chief2 to read and change thePowWowCalendar directly. I therefore select each individually in the dropdown section and defines each with "Is Assistant to..."relationship privileges.
I then want all the Indians in the Braves group to also be able to read and change this group calendar resource, so I then select that the(group) user Braves "is Assistant to" this (group calendar) resource. I want all the squaws to be able to read the calendar only, so Iselect that the (group) user Squaws "Can read from" this (group calendar) resource.
UbuntuGuide Part2 - http://ubuntuguide.org/index.php?title=UbuntuGuide_Part2&...
151 of 177 08/10/2013 09:04 AM

Lastly, I don't want the Janitor to see the actual details of the calendar, so I select that the Janitor user "Can see free/busy time of" this(group calendar) resource.
Now I have to set up the clients.
Each Public user (Chief1, Chief 2, Indian1, Indian2, Squaw1, Squaw2, and Janitor) will set their own user/password combination intheir own calendar client. Then each will create a new CalDAV calendar "on the network" (see above for Sunbird/Thunderbird/Lightning instructions) with the location
http://mydavicalsite.dyndns.org/caldav.php/PowWowCalendar/home
Each user should then be able to see the resource calendar with the privileges assigned above.
(Note that BigChief will not be able to access the calendar as an administrator. I think this is a bug in the system. If you wish BigChiefto read and change the events in the calendar, he must be "Assistant to..." the (calendar) resource user).
Clients
Multiple Email/Calendar/PIM clients work with DAViCal. See this list (http://wiki.davical.org/w/CalDAV_Clients) , although almost allCALDAV-compatible clients will work.
Mozilla Sunbird / Thunderbird with Lightning
Mozilla Sunbird is a standalone calendar application, while Lightning is a plugin for the email program Thunderbird which is made towork almost identically to Sunbird (but from within Thunderbird, of course).
Idiosyncracies of Sunbird and Thunderbird Lightning
There are two ways to use Sunbird (or the Lightning Extension for Thunderbird): without a saved user name / password combination,or with one. The first is to leave the user name / password unsaved. This will require that you enter the user name / password eachtime you log in (which can be tiresome, eventually). If using a computer with many users, this is desirable. When prompted to enterthe user name and password, merely do not tick the box prompting whether to save the user name /password.
The second method involves saving the user name / password when prompted. However, Sunbird only likes one saved user name. Ifthere are more than one, it will not know which user name to use when logging in to the server. Therefore, do not attempt to savemore than one user name / password.
When a user has subscribed to many calendars, that user can view one or many calendars (for which the user has privileges) at thesame time by individually checking or unchecking the boxe next to each calendar name.
However, changes made from the calendar screen itself will only apply to the calendar which is highlighted (in the calendar list),whether or not that calendar's box is actually checked.
To view the calendar (and the changes), however, the calendar must also be checked. It is therefore possible to add/change events to ahighlighted calendar but not be able to see the changes (if you have that calendar's name highlighted but not checked).
This point can't be stressed enough -- changes to the calendar are applied to whichever calendar is highlighted, but to see the changes,the calendar must also be checked.
Kontact
Kontact is the personal information manager for KDE (used in Kubuntu). There are some instructions on the DAViCal website(http://wiki.davical.org/w/CalDAV_Clients/Kontact) , but despite the warnings there, the calendar functions of the current version ofKontact work very nicely with DAViCal. In brief:
Add a new calendar:
Kontact -> <Right Click> Calendar -> Add... -> Calendar in remote file(in French: "Calendrier dans un fichier distant")Use the same URL for "Download from" and "Upload to"Example: http://calendar.example.com/caldav.php/user/home
The calendar must exist in order to use it, of course, or Kontact will send an error (such as "file http://calendar.example.com/caldav.php/user/home does not exist"). You must create the calendar using the DAViCal web-based administration interface.
These instructions apply to both Kontact and Korganizer.
Evolution
See the DAViCal website (http://wiki.davical.org/w/CalDAV_Clients/Evolution) for some details. I haven't used Evolution with DAViCal,so if you have, please add your experience here (as well as on the DAViCal website).
UbuntuGuide Part2 - http://ubuntuguide.org/index.php?title=UbuntuGuide_Part2&...
152 of 177 08/10/2013 09:04 AM
DAViCal Calendar Server 0.9.8These instructions are for DAViCal ver. 0.9.8, which is a major rewrite of DAViCal. (This new version is not yet available in therepositories.) If you wish instructions for a more recent version, consult the DAViCal site (http://wiki.davical.org/w/Release_Notes/0.9.9.2#Debian_.2F_Ubuntu) for instructions on adding the DAViCal repository and installing the most recent version directly.
The instructions for ver. 0.9.7 (from the repositories) are here. DAViCal (http://wiki.davical.org/w/Main_Page) is a CalDAV(http://en.wikipedia.org/wiki/CalDAV) , postgreSQL, Apache and php-based shared Calendar server that works with MozillaThunderbird/Lightning/Sunbird, Evolution, and other calendar clients.
If you wish to use the the older version (0.9.7) from the Ubuntu repositories:
sudo apt-get install davical
Install the newest version (> 0.9.8) from the DAViCal repositories:
sudo apt-key advanced --keyserver pgp.net.nz --recv-keys F6E0FA5CF0307507BB23A512EAFCFEBF8FEB8EBFecho "deb http://debian.mcmillan.net.nz/debian lenny awm " | sudo tee /etc/apt/sources.list.d/davical.listsudo apt-get update sudo apt-get install davical
Note: Port 11371 must be open in the firewall to allow the keyserver.
The following detailed instructions are duplicated and updated on the DAViCal website (http://wiki.davical.org/w/Ubuntu_Karmic) .
Introduction
DaviCal (http://wiki.davical.org/w/Release_Notes) has been included in the Ubuntu repositories as a .deb package.
The instructions below are for a new user with a new Ubuntu Server installation. (Obviously, if you are already using the UbuntuServer, you will probably have done many of the steps already.)
Preliminary Requirements
It is possible to select the PostgreSQL database task and the LAMP (Linux, Apache2, MySQL, PHP) tasks at the time of the serverinstallation, or at any later time using:
sudo tasksel install lamp-serversudo tasksel install postgresql-server
At a minimum, you will need PostgreSQL (https://help.ubuntu.com/10.04/serverguide/C/postgresql.html) (see below), Apache2(https://help.ubuntu.com/10.04/serverguide/C/httpd.html) (see below), and PHP (https://help.ubuntu.com/10.04/serverguide/C/php5.html) . You can install PHP separately (i.e. not part of the integrated LAMP stack), if you wish, following these Ubuntuinstructions (https://help.ubuntu.com/10.04/serverguide/C/php5.html) .
Note that in later versions of (K)Ubuntu, PostgreSQL 8.4 will be installed instead of PostgreSQL 8.3. Installation steps must take thisinto account.
Set up the PostgreSQL database
See these Ubuntu instructions (https://help.ubuntu.com/community/PostgreSQL) . Use the Hardy Installation instructions (forPostgreSQL 8.3) as well as the Basic Server Setup instructions for Gutsy/Hardy. In short, install (if you already haven't):
sudo apt-get install postgresql
Basic Server Setup:
sudo -u postgres psql postgres
Set a password for the postgres superuser:
\password postgres
(You may need to quit using \q when you are done).
Create the first database:
UbuntuGuide Part2 - http://ubuntuguide.org/index.php?title=UbuntuGuide_Part2&...
153 of 177 08/10/2013 09:04 AM
sudo -u postgres createdb mydb
Install the DaviCal package from repositories
sudo apt-get install davical
Set up DaviCal PostgreSQL users
Create the DaviCal users (first becoming the the system root superuser, using sudo su, then becoming the database superuser,postgres):
sudo susu postgres -c "createuser davical_app"exit
You will get asked about superusers, roles and databases, but just say "No" to all questions. This functional ID needs only minimumrights. Repeat the process to create one more user, "davical_dba":
sudo susu postgres -c "createuser davical_dba"exit
Note: In the (older) main DAViCAL site installation page, the user created at this step is "general." This account name is for olderversions. You do not need to create a user named "general" any longer.
Edit the configuration file pg_hba.conf:
sudo nano /etc/postgresql/8.4/main/pg_hba.conf
Add the following 4 lines near (or at) the top;
local all all trustlocal davical davical_dba trustlocal davical davical_app trusthost davical davical_app 127.0.0.1/32 trust
(The last line is for accessing the database over TCP/IP, assuming the database and the apache2 server are on the same computer. Seehere (http://rscds.sourceforge.net/installation.php) under "Connecting to the Database" for more details.)
Restart the postgreSQL server:
sudo /etc/init.d/postgresql-8.4 restart
Setup the DaviCal database
Run the database creation/installation script:
sudo susu postgres -c /usr/share/davical/dba/create-database.shexit
Write down the admin password when it is displayed. You will need it later.
Once the creation script has run correctly, again edit the pg_hba.conf file:
sudo nano /etc/postgresql/8.4/main/pg_hba.conf
and remove the line
local all all trust
(This step is not strictly necessary for the installation, but do you really want anybody with a local account to have free access to all thedatabases?)
Restart the database daemon:
UbuntuGuide Part2 - http://ubuntuguide.org/index.php?title=UbuntuGuide_Part2&...
154 of 177 08/10/2013 09:04 AM

sudo /etc/init.d/postgresql-8.4 restart
Test that your database creation was successful
sudo susu postgrespsql davicaldavical=# \zdavical=# \qexitexit
You should see a table with a list of access permissions to "davical_dba". (Typing "\q" exits pqsl.)
Set up Apache2
Install the Apache2 webserver, if you have not done so already. See the Ubuntu documentation (https://help.ubuntu.com/9.10/serverguide/C/httpd.html) for help.
sudo apt-get install apache2
In your router settings (assuming you have one), set your port forwarding so that your port 80 (http) and 443 (https) is forwarded toyour server. Make sure your server firewall (if you have one) allows incoming ports 80 and 443.
I set up a dynamicDNS URL name at DynDNS.org called mydavicalsite.dyndns.org, which gets forwarded to my router's IP address byDynDNS.org. (My router happens to keep the DynDNS settings updated.) I want this to be forwarded to the server on my LAN.
I therefore created a virtual host setup in the Apache2 schema by copying the default virtualhost settings file to a new virtualhostsettings file for mydavicalsite:
sudo cp /etc/apache2/sites-available/default /etc/apache2/sites-available/mydavicalsite
I edited the virtualhost config file:
sudo gedit /etc/apache2/sites-available/mydavicalsite
so that these lines were used (instead of the original ones):
## Virtual Host def for Debian package DAViCal<VirtualHost *:80> DocumentRoot /usr/share/davical/htdocs DirectoryIndex index.php index.html ServerName mydavicalsite.dyndns.org ServerAlias calendar.mydavicalsite.dyndns.org Alias /images/ /usr/share/davical/htdocs/images/ <Directory /usr/share/davical/htdocs/> AllowOverride None Order allow,deny Allow from all </Directory> php_value include_path /usr/share/awl/inc php_value magic_quotes_gpc 0 php_value register_globals 0 php_value open_basedir 1 php_value error_reporting "E_ALL & ~E_NOTICE" php_value default_charset "utf-8"</VirtualHost>
To then make the virtualhost file active, I made a symbolic link from the virtualhost configuration file in the apache2 "sites-available"folder to the apache2 "sites-enabled" folder:
sudo ln -s /etc/apache2/sites-available/mydavicalsite /etc/apache2/sites-enabled/mydavicalsite
Then restart apache2:
sudo /etc/init.d/apache2 restart
Create your configuration file
Edit your own configuration file in /etc/davical. (Use your own domain name instead of the one in the example, of course.):
UbuntuGuide Part2 - http://ubuntuguide.org/index.php?title=UbuntuGuide_Part2&...
155 of 177 08/10/2013 09:04 AM

sudo gedit /etc/davical/mydavicalsite.dyndns.org-conf.php
You can merely include the following lines:
<?php// $c->domain_name = "mydavicalsite.dyndns.org";// $c->sysabbr = 'rscds'; $c->admin_email = '[email protected]'; $c->system_name = "Really Simple CalDAV Store";// $c->collections_always_exist = true;// $c->enable_row_linking = true; $c->default_locale = en_US.UTF-8; $c->pg_connect[] = 'dbname=davical port=5432 user=davical_app';
Start up DaviCal
From your browser, go to
http://mydavicalsite.dyndns.org
or
http://mydavicalsite.dyndns.org/cal
Use admin as your initial login, and the password assigned to you at installation (you did write it down, didn't you?)
(See here (http://wiki.davical.org/w/Installation_Experiences/Feb_2008:_Ubuntu_6.10#If_you_forgot_the_Admin_Password) if you forgotyour password. In brief:
>sudo su>su postgres>psql davical -c 'select username, password from usr;'
Only the initial "admin" password is stored in plain text. All subsequent users have their password stored in an encrypted state. If youchange the admin password through the web interface it will also be encrypted from that point forward.)
Optionally copy a configuration file for testing on the localhost server (this did not work correctly for me, though):
sudo ln -s /etc/davical/mydavicalsite.dyndns.org-conf.php /etc/davical/localhost-conf.phpsudo ln -s /usr/share/davical/htdocs /var/www/davical
Then you can also log through localhost using your browser:
http://localhost/davical
Create TestUser
I created a testuser (that was not an administrator) using the admin login (above), and gave it a password davtest. I created a calendar,using the default location /testuser/home
I then installed both Sunbird
sudo apt-get install sunbird
and Thunderbird with Lightning:
sudo apt-get install thunderbird lightning-extension
Making sure that my firewall wasn't blocking any ports (while testing), or at least allowed 80 and 443 through, I created a new networkcalendar in both Sunbird and Thunderbird.
Sunbird -> File -> New Calendar... -> On the Network -> CalDAV ->Location: http://mydavicalsite.dyndns.org/caldav.php/testuser/home ->Name: testuser
Thunderbird -> Calendar -> Calendar -> New Calendar... -> On the Network -> CalDAV ->Location: http://mydavicalsite.dyndns.org/caldav.php/testuser/homeName: testuser
UbuntuGuide Part2 - http://ubuntuguide.org/index.php?title=UbuntuGuide_Part2&...
156 of 177 08/10/2013 09:04 AM

I then entered a calendar entry in Sunbird. I then reloaded the remote calendar:
Sunbird -> File -> Reload Remote Calendars
and when I did the same in Thunderbird Calendar
Thunderbird -> Calendar -> Reload button
then the two calendars were synchronized and both showed the same events.
Voila! Shared calendars.
Administer users
If I made an error in a user setup (from the DaviCAL web interface as the admin user), to correct it I had to make the user inactive andthen activate him/her again, at which time I could change the settings.
I had to make a user Public if I wanted to view his/her calendar. The "relationships" are discussed on other pages(http://rscds.sourceforge.net/administration.php) .
User roles
In DAViCal 0.9.8 onwards, users are referred to as 'Principals'. A "user" is really a type of account. There are three types of "Principal"in DAViCal. Not all of them represent individual users.
Person: This is an individual user. Every individual user who wants to have an individual calendar must have a Person account.
Group: This type of account is meant as a placeholder for mediating access. It acts as a user in some ways, but it is not intended tobe an individual user's account. Privileges will usually be granted to a group, in order that the group can grant privileges on tomany individuals.
Resource: This is an account for a shared calendar, such as for booking a meeting room, or an office vehicle. Various resourceswill usually grant privileges to a Group (or directly to a Person) must have a "relationship" with the resource to administer thegroup calendar associated with it.
Additionally, a user may be set as an 'Administrator'. These users administer the DAViCal database by logging into the administrationweb interface. It is the only type of user that can create new users and change their status (e.g. "active" vs. "inactive"). Users who areset to 'inactive' can no longer log into DAViCal.
Grants and Permissions Example
More information is at the DAViCal website (http://wiki.davical.org/w/Permissions) .
I have a sensitive PowWow group calendar which I want to share with different users.
Using the web administration interface and the initial "admin" account (see above), I first create a new Person (account) namedBigChief. He does not have his own calendar.
There are seven new "Public" users (each with their own calendar by default) that I then create through the web interface (using eithermy original admin or new 'BigChief' admin account). The seven Public users are Chief1, Chief 2, Indian1, Indian2, Squaw1, Squaw2,and Janitor.
Again through the administration web interface, I then set up a new 'Group' account, with a username of "Braves". In this account Igrant ALL privileges to each of the members (Indian1 and Indian2) which confers full rights to each member (Indian1 and Indian2) inthe Group to do whatever the Group Braves can do.
I then set up a second Group user account with a username of "Squaws." Again I create a grant of ALL privileges to each user (i.e.Squaw1 & Squaw2).
Once more through the administration web interface, I set up a new 'Resource' account, which will contains the actual group calendar.I name this user "PowWowCalendar" (which is what I want to call the group calendar).
For PowWowCalendar, I want BigChief to administer it, so I create a grant, giving ALL privileges to BigChief. I want Chief1 and Chief2to read and change the PowWowCalendar directly. I therefore add another grant to each individually, giving them write, read andfree/busy privileges. Since these Chiefs can also send/respond to meeting invitations on behalf of the group in general I also give thechiefs schedule privileges, although DAViCal will not support that feature until 0.9.9 is released.
I then want all the Indians in the Braves group to also be able to read and change this group calendar resource, so I create two moregrants, to the 'Braves' and 'Squaws' groups, conferring write, read and free/busy privileges also.
Lastly, I don't want the Janitor to see the actual details of the calendar, but I do want him to know when the meetings are happening.And in fact I don't mind if anyone else in the organisation can see when the meetings are, so I set the Default Privileges to 'Free/Busy'.
UbuntuGuide Part2 - http://ubuntuguide.org/index.php?title=UbuntuGuide_Part2&...
157 of 177 08/10/2013 09:04 AM

Now I have to set up the clients.
Each real user (Chief1, Chief 2, Indian1, Indian2, Squaw1, Squaw2, and Janitor) will set their own user/password combination in theirown calendar client. Then each will create a new CalDAV calendar "on the network" (see above for Sunbird/Thunderbird/Lightninginstructions) with the location
http://mydavicalsite.dyndns.org/caldav.php/PowWowCalendar/home
Each user should then be able to see the resource calendar with the privileges assigned above.
Clients
Multiple Email/Calendar/PIM clients work with DAViCal. See this list (http://wiki.davical.org/w/CalDAV_Clients) , although almost allCALDAV-compatible clients will work.
Mozilla Sunbird / Thunderbird with Lightning
Mozilla Sunbird is a standalone calendar application, while Lightning is a plugin for the email program Thunderbird which is made towork almost identically to Sunbird (but from within Thunderbird, of course).
Idiosyncracies of Sunbird and Thunderbird Lightning
There are two ways to use Sunbird (or the Lightning Extension for Thunderbird): without a saved user name / password combination,or with one. The first is to leave the user name / password unsaved. This will require that you enter the user name / password eachtime you log in (which can be tiresome, eventually). If using a computer with many users, this is desirable. When prompted to enterthe user name and password, merely do not tick the box prompting whether to save the user name /password.
The second method involves saving the user name / password when prompted. However, Sunbird only likes one saved user name. Ifthere are more than one, it will not know which user name to use when logging in to the server. Therefore, do not attempt to savemore than one user name / password.
When a user has subscribed to many calendars, that user can view one or many calendars (for which the user has privileges) at thesame time by individually checking or unchecking the boxe next to each calendar name.
However, changes made from the calendar screen itself will only apply to the calendar which is highlighted (in the calendar list),whether or not that calendar's box is actually checked.
To view the calendar (and the changes), however, the calendar must also be checked. It is therefore possible to add/change events to ahighlighted calendar but not be able to see the changes (if you have that calendar's name highlighted but not checked).
This point can't be stressed enough -- changes to the calendar are applied to whichever calendar is highlighted, but to see the changes,the calendar must also be checked.
Kontact
Kontact is the personal information manager for KDE (used in Kubuntu). There are some instructions on the DAViCal website(http://wiki.davical.org/w/CalDAV_Clients/Kontact) , but despite the warnings there, the calendar functions of the current version ofKontact work very nicely with DAViCal. In brief:
Add a new calendar:
Kontact -> <Right Click> Calendar -> Add... -> Calendar in remote file(in French: "Calendrier dans un fichier distant")Use the same URL for "Download from" and "Upload to"Example: http://calendar.example.com/caldav.php/user/home
The calendar must exist in order to use it, of course, or Kontact will send an error (such as "file http://calendar.example.com/caldav.php/user/home does not exist"). You must create the calendar using the DAViCal web-based administration interface.
These instructions apply to both Kontact and Korganizer.
Evolution
See the DAViCal website (http://wiki.davical.org/w/CalDAV_Clients/Evolution) for some details. I haven't used Evolution with DAViCal,so if you have, please add your experience here (as well as on the DAViCal website).
BigBlueButtonBigBlueButton (http://bigbluebutton.org/) is a web conferencing server that takes advantage of several other open source servers(http://bigbluebutton.org/components) . It is a complex package that I prefer to run on its own Ubuntu server (either on a standalone
UbuntuGuide Part2 - http://ubuntuguide.org/index.php?title=UbuntuGuide_Part2&...
158 of 177 08/10/2013 09:04 AM

machine, in a separate partition, or within a virtual machine). This is necessary partly because BigBlueButton runs either on a 32-bitUbuntu Jaunty 9.04 OS or on a 32-bit or 64-bit Lucid 10.04 OS currently, and I use a more recent edition of the (K)Ubuntu OS foreverything else.
Also, the default configuration of BigBlueButton uses ports for its components that might occasionally conflict with other servers.Rather than reconfigure all the other servers (to avoid the possibility of port conflicts with BigBlueButton), it is easier to install (andeasier to maintain) BigBlueButton if it is in a self-contained environment.
If BigBlueButton is to be used only for a webinar once-in-a-while, it might be easiest to set it up in its own partition. (A full BBBinstallation uses 2 Gb hard disk space, so a 4 Gb partition ought to be sufficient. If plenty of hard disk space is available, use 8 Gb forthe partition.) Install the Ubuntu server (or desktop) OS within that partition first. (See this section for details on a method toaccomplish this.) Then install BigBlueButton.
Installing in a virtual machine (such as VirtualBox, VMWare, QEMU, or Xen) makes sense if the computer host has lots of computingcapacity (3 Gb of RAM or greater and a powerful CPU) and a large hard drive. (BigBlueButton recommends dedicating at least 1 GbRAM to it on a 2 GHz dual-core processor. A full installation requires 2 Gb, so a 4 Gb virtual hard drive ought to be sufficient. If plentyof hard disk space is available, use 8 Gb for the virtual hard drive.) Installation in a virtual machine can be accomplished using theinstallation method outlined below (after installing an Ubuntu OS within the virtual machine), or a VMWare appliance(http://code.google.com/p/bigbluebutton/wiki/BigBlueButtonVM) can be used (for those who have installed a VMWare Player).
If a spare computer is available and frequent usage is anticipated, installing on a standalone computer (as the server) would be mosteconomical (and easiest to maintain) in the long run.
As always, I recommend a test system and a production system. These can be parallel installations on separate partitions (or withinseparate virtual machines), for example, of which only one at a time is running.
The following instructions are for a new installation, including the Ubuntu server OS, within one of these three environments.
Install Ubuntu server
I recommend installing the Ubuntu server and then later adding an Ubuntu or Kubuntu desktop if desired (although it is notnecessary to have a desktop, and I don't use one).
BigBlueButton provides packages for the 32-bit Jaunty (9.04) edition or for the 32-bit or 64-bit Lucid (10.04) editions. Install yourdesired server version (Ubuntu server 9.04 (http://releases.ubuntu.com/9.04/) or Ubuntu server 10.04 (http://releases.ubuntu.com/10.04/) ). (Jaunty uses the ext3 filesystem by default, so I would probably stick with that if using that version.) I do not recommendinstalling any additional packages. BigBlueButton will install all the additional packages that it needs (through its own installationscript) itself.
Update and upgrade the basic server:
sudo apt-get updatesudo apt-get upgrade
To speed bootup, edit the Grub timeout to be one second (Note: Jaunty 9.04 uses Grub Legacy, not Grub2).
sudo nano /boot/grub/menu.lst
Change to
timeout 1
instead of the 10 second (timeout 10) that is the default.
Sort out webserver conflicts
BigBlueButton uses Nginx (http://wiki.nginx.org/) as a webserver instead of Apache2. (Nginx is used by many high-volume server sitessuch as Sourceforge, Hulu, Github, Wordpress, and TorrentReactor).
If installing Ubuntu server for the first time, do not install the full LAMP (Linux, Apache2, MySQL, PHP) stack as an option, sinceApache installation is not needed. BigBlueButton will install the individual MySQL and PHP components during its owninstallation.
If you are installing BigBlueButton on an Ubuntu server that is already running Apache, you must decide on a port scheme so thatthe two webservers do not conflict.
Changing the Apache listening port
The Nginx webserver (used by BigBlueButton) is installed so that it uses the standard webserver port 80. Apache2, if installed, also uses
UbuntuGuide Part2 - http://ubuntuguide.org/index.php?title=UbuntuGuide_Part2&...
159 of 177 08/10/2013 09:04 AM

this standard webserver port by default. It is possible to edit an Apache2 configuration file, however, so that it listens on anon-standard port:
sudo nano /etc/apache2/ports.conf
and the port number 80 changed to a different port number (such as 82). Then reload Apache2:
sudo /etc/init.d/apache2 restart
This avoids conflicts while installing and testing BigBlueButton. (Of course, for the most part, any servers using Apache2 will benon-functional unless all corresponding virtual host settings are also changed.)
Later, I usually prefer to set the BigBlueButton listening port to 81 and return the Apache2 listening port to 80.
Install BigBlueButton
32-bit Jaunty (9.04)
Retrieve and add the BigBlueButton repository key:
wget http://archive.bigbluebutton.org/bigbluebutton.asc sudo apt-key add bigbluebutton.asc
Add the BigBlueButton Repositories to your repository list:
echo "deb http://archive.bigbluebutton.org/ bigbluebutton main" | sudo tee /etc/apt/sources.list.d/bigbluebutton.listsudo apt-get update
Install BigBlueButton:
sudo apt-get install bigbluebutton
Install desktop sharing:
sudo apt-get install bbb-apps-deskshare
32-bit or 64-bit Lucid (10.04)
Retrieve and add the BigBlueButton repository key:
wget http://archive.bigbluebutton.org/bigbluebutton.asc sudo apt-key add bigbluebutton.asc
Add the BigBlueButton Repositories to your repository list:
echo "deb http://archive.bigbluebutton.org/lucid bigbluebutton-lucid main" | sudo tee /etc/apt/sources.list.d/bigbluebutton.list
Ensure the multiverse is in the souces list (needed for msttcorefonts):
echo "deb http://us.archive.ubuntu.com/ubuntu/ lucid multiverse" | sudo tee -a /etc/apt/sources.list
Update the software lists:
sudo apt-get update
Install asterisk (you can hit enter for the prompt for dialing prefix):
sudo apt-get install asterisk
Install BigBlueButton
sudo apt-get install bigbluebutton
UbuntuGuide Part2 - http://ubuntuguide.org/index.php?title=UbuntuGuide_Part2&...
160 of 177 08/10/2013 09:04 AM

Restart BigBlueButton:
sudo bbb-conf --restart sudo bbb-conf --check
Ensure port availablility
BigBlueButton components use port 1935 for RTMP (streaming video), 9123 for desktop sharing (with Xuggler (http://www.xuggle.com/xuggler/) ), and port 80 for the Nginx webserver.
Internally, the Red5 Flash server uses port 5080, the Tomcat6 java server uses port 8080, Asterisk uses UDP port 5060 for the SIPinterface (plus SIP ports 6079-6099 and RTP ports 3000-3029). The Asterisk Management Interface uses port 5038.
For this reason, during installation and troubleshooting, it is best not to use a firewall with BigBlueButton, and it should be placed in aDMZ. (The UFW firewall installed with Ubuntu Jaunty 9.04 is not enabled by default, so this is not problematic initially.)
A server in the DMZ is at increased risk of hacking, so this is another significant reason to keep BigBlueButton quarantined within itsown dedicated server environment (machine/partition/virtual machine).
Once installation is complete and tested, a firewall is probably a good idea, especially if you are hosting BBB on the same machine asother servers.
Check the server's current IP address
Usually this will be the IP address of the server on the LAN. To display:
ifconfig
Set a static IP address
The Ubuntu server(/desktop) on which BigBlueButton is installed should have a static IP address so that it can reliably be located onthe network. If on a LAN, this will be a static LAN IP address (such as 192.168.0.55), to which the router must forward the appropriateports.
See How to set a static IP address.
Test BigBlueButton
If the LAN IP address of the BigBlueButton server is shown by ifconfig to be, for example, 192.168.0.55, then access the server fromanother computer on the LAN by logging in from any web browser to:
http://192.168.0.55
Big Blue Button should now be fully functional.
Change the host location of the BigBlueButton server
A utility exists to quickly change the server_name of the Nginx (and other BigBlueButton) configuration files. The server_name can bean IP address (such as 68.67.66.65) or a URL (such as bigbluebutton.mydomain.org).
sudo bbb-conf --setip bigbluebutton.mydomain.org
If it doesn't seem to work, try a clean restart of the BigBlueButton system:
sudo bbb-conf --clean
Changing the BBB listening port
If BBB is working satisfactorily using the default settings, it is then possible to change the listening port as well as the hostname/IPaddress at which it will be located.
If the port listening port has been changed to 81 (see above), then use the command:
sudo bbb-conf --setip bigbluebutton.mydomain.org:81
Also change the Nginx webserver listening port (see below).
UbuntuGuide Part2 - http://ubuntuguide.org/index.php?title=UbuntuGuide_Part2&...
161 of 177 08/10/2013 09:04 AM
Reboot the server.
Now the BigBlueButton server can be accessed:
http://bigbluebutton.mydomain.org:81
Change the virtual host configuration file of Nginx
Nginx (http://wiki.nginx.org/) is the web server used by BigBlueButton. It is similar to Apache in many ways. Virtual host configurationfiles are stored in /etc/nginx/sites-available (and the virtual host configuration file made active by linking it into the /etc/nginx/sites-enabled folder).
BigBlueButton uses an Nginx virtual host configuration folder at /etc/nginx/sites-available/bigbluebutton (which is already linked intothe sites-enabled folder). This can be edited (and must be edited if the "bbb-conf --setip" utility in the previous section is used to changethe BBB listening port).
sudo nano /etc/nginx/sites-available/bigbluebutton
To change the listening port, edit the line
listen 80;
to the port that should be listened on (in my example 81). Do not use 8080, since it is already used.
listen 81;
If you intend to use Apache2 on this server (and will always use Nginx on port 81), then also edit the default Nginx configurationfile:
sudo nano /etc/nginx/sites-available/default
so that it also listens on port 81:
listen 81;
Restart Nginx:
sudo /etc/init.d/nginx restart
Check the changed settings:
bbb-conf --check
Reboot the server.
I then usually like to return the Apache2 listening port to 80.
Using BigBlueButton with Moodle
If Moodle and BigBlueButton are hosted within the same LAN (or on the same physical machine), then the webservers (that they use)ought to be on different listening ports. Moodle uses Apache2, and I find it easiest to leave this at port 80; I assign port 81 to Nginx (andBigBlueButton).
In my set up, I use the same URL for both Moodle and BigBlueButton:
http://smartestowl.mydomain.org
for Moodle and
http://smartestowl.mydomain.org:81
for BigBlueButton.
Install BBB <-> Moodle API
UbuntuGuide Part2 - http://ubuntuguide.org/index.php?title=UbuntuGuide_Part2&...
162 of 177 08/10/2013 09:04 AM

A troubleshooting forum (http://groups.google.com/group/bigbluebutton-dev/browse_thread/thread/9a12c2500bf34af5/056839210335ab31?lnk=gst&q=moodle#056839210335ab31) for this API exists. Refer to it for problems.
Download the API from DualCode into the /usr/share/moodle/mod folder and unzip:
sudo wget http://www.dualcode.com/bigbluebutton/bigbluebutton.zipsudo unzip bigbluebutton.zip
Copy the bigbluebutton/mod/bigbluebutton folder (and its contents) into the /usr/share/moodle/mod folder:
sudo mkdir /usr/share/moodle/mod/bigbluebuttonsudo cp -r bigbluebutton/mod/bigbluebutton/* /usr/share/moodle/mod/bigbluebutton/
Copy the bigbluebutton/lang folder contents into the /usr/share/moodle/lang folder:
sudo cp -r bigbluebutton/lang/* /usr/share/moodle/lang/
Remove the original files:
sudo rm bigbluebutton.zipsudo rm -r bigbluebutton/*sudo rmdir bigbluebutton
Login to the Moodle site (as an administrator) and load the module:
Moodle -> Site Administration -> Notifications (Make sure to click on Notifications)-> Activities -> Manage Activities -> BigBlueButton -> Settings
-> Input the IP address/URL of your BigBlueButton server. Do not enter the leading http:// .
-> Input the Security Salt from your BigBlueButton server. This is in a file called “bigbluebutton.properties” on the BigBlueButtonserver. On my Ubuntu server I found it at
/var/lib/tomcat6/webapps/bigbluebutton/WEB-INF/classes/bigbluebutton.properties
The security salt string can be found:
beans.dynamicConferenceService.securitySalt=your_number_here
Input that long string of numbers and letters to the field in Moodle.
-> Put a star in the Meeting IDs field. That will allow an unlimited number of rooms to be created. You can also put any numberhere to restrict how many rooms on your BigBlueButton server you want running at any one time. (This can eventually becomeimportant for performance reasons.)
In the (Course) Weekly Outline:
-> Add an activity... -> BigBlueButton ->
and set the desired passwords for the meeting, etc.
Add BigBlueButton API to Drupal6
BigBlueButton is a standalone videoconferencing server. Install the BigBlueButton API (http://drupal.org/project/bbb) that is ableto call the BBB server from within Drupal:
cd /etc/drupal/6/sites/all/modulessudo wget http://ftp.drupal.org/files/projects/bbb-6.x-1.x-dev.tar.gzsudo tar zxvf bbb-6.x-1.x-dev.tar.gzsudo rm bbb-6.x-1.x-dev.tar.gz
Note: If you wish this module to be available to only one subsite, then install it instead into the /etc/drupal/6/sites/mysite_x/modules folder.
Note: You must update and adjust permissions after module installation.Drupal -> Administer -> Modules -> Big Blue Button -> select the Big Blue Button module functions you intend to use
Test the BigBlueButton settings:
UbuntuGuide Part2 - http://ubuntuguide.org/index.php?title=UbuntuGuide_Part2&...
163 of 177 08/10/2013 09:04 AM

Drupal -> Site administration -> BigBlueButton Conferencing -> Test connection.
Change the URL to the address of your BBB server (e.g. http://mybbbsite.dyndns.org:81/bigbluebutton/) and the Security Salt (foundin bigbluebutton.properties on the BBB server in the
/var/lib/tomcat6/webapps/bigbluebutton/WEB-INF/classes/bigbluebutton.properties
configuration file, in the setting:
beans.dynamicConferenceService.securitySalt=your_security_salt_number_here
Create a new content type named Teleconference:
Drupal -> Administer -> Content management -> Content types -> Add content type
-> Name: Teleconference -> Type: teleconference -> Big Blue Button settings -> Treat this node type as conference: (ticked) -> Show linksto join / start a meeting beneath the node: (ticked) -> Display meeting status on node: (ticked) -> Save content type
Create a new node of content type Teleconference:
Drupal -> Create content -> Teleconference -> Conference settings -> ...
Changing the BBB security salt
In general this is not necessary. However, if you think your BigBlueButton system may have been compromised in some way, thesecurity salt (which keeps passwords and communications safe) can be changed.
Generate a new Universal Unique ID (UUID), which is basically a long string of random numbers with dashes. This randomnumber will serve as the security salt key:
uuidgen
Copy the string (including dashes) several places, replacing the existing security salt (if any) at each location:
/var/lib/tomcat6/webapps/bigbluebutton/demo/bbb_api_conf.jsp
sudo gedit /var/lib/tomcat6/webapps/bigbluebutton/demo/bbb_api_conf.jsp
/var/lib/tomcat6/webapps/bigbluebutton/WEB-INF/classes/bigbluebutton.properties
sudo gedit /var/lib/tomcat6/webapps/bigbluebutton/WEB-INF/classes/bigbluebutton.properties
the Settings of the BigBlueButton plugin for Moodle (while logged into Moodle as an administrator)
the Settings of the BigBlueButton plugin for Drupal (while logged into Drupal as an administrator)
Do a clean restart of the BigBlueButton server:
sudo bbb-conf --clean
BBB - Standalone authentification with Apache2 web serving
Follow this tutorial http://code.google.com/p/bigbluebutton/wiki/InstallationUbuntuChange BBB port 80 to port 81
bbb-conf - setip bbb_url.com:81
In the file /etc/nginx/sites-enabled/default
Change port 80 to port 81
Install apache2
apt-get install apache2
UbuntuGuide Part2 - http://ubuntuguide.org/index.php?title=UbuntuGuide_Part2&...
164 of 177 08/10/2013 09:04 AM

Create this file:
/etc/apache2/sites-available/bbb-redirect
Add the following line to this file : /etc/apache2/sites-available/bbb-redirect
Redirect / http://bbb_url.com:81/bigbluebutton/conference
Restart apache2
/etc/init.d/apache2 restart
Copy /var/lib/tomcat6/webapps/bigbluebutton/demo to /var/lib/tomcat6/webapps/bigbluebutton/conference
cp -R /var/lib/tomcat6/webapps/bigbluebutton/demo /var/lib/tomcat6/webapps/bigbluebutton/conference
In this folder /var/lib/tomcat6/webapps/bigbluebutton/conferenceCopy demo3.jsp to index.jsp
cp demo3.jsp index.jsp
Customize index.jsp as you wish. (you need basic knowledge with java and html)Restart tomcat6
/etc/init.d/tomcat6 restart
Attempt to access the server's URL: http://bbb_url.com.
Voila!, the BBB server should be accessible with authentication.
Skulltag tipsNote: Zandronum with Doomseeker-zandronum works well on Precise Pangolin 12.04 LTS or later.
Install Skulltag
Skulltag (http://skulltag.net/wiki/Installation_for_Ubuntu) is an updated version of ZDoom (http://zdoom.org/wiki/Compile_ZDoom_on_Linux) that includes network play. It is now known as Zandronum (http://wiki.zandronum.com) . See theZandronum wiki (http://wiki.zandronum.com/Install_Zandronum_on_Ubuntu) for simple (K)Ubuntu installation instructions. (You canuse the Freedoom Iwad (http://www.nongnu.org/freedoom/download.html) (see below) if you don't have an original Doom2.wad.)Note: Most of the modules require dependencies from the Universe repositories. Make sure you have the Universe repositoriesenabled (Package Manager -> Settings -> Configure Software Sources -> Community-maintained free and open-source software(universe) -> (ticked)).
Add the skulltag repositories, update, and install Zandronum and DoomSeeker (the Zandronum online server utility):
echo "deb http://debian.drdteam.org/ stable multiverse" | sudo tee /etc/apt/sources.list.d/zandronum.listsudo apt-get updatesudo apt-get install zandronum doomseeker-zandronum
If you don't have a doom2.wad, tnt.wad, or plutonia.wad already, you can copy the freedoom.wad (http://www.nongnu.org/freedoom/download.html) to your ~/wads folder:
mkdir ~/wadscd ~/wadswget http://savannah.nongnu.org/download/freedoom/freedoom-iwad/freedoom-iwad-latest.zipunzip freedoom-iwad-latest.zipcp freedoom*/doom2.wad .rm freedoom-iwad-latest.zip
Configure Doomseeker to use the ~/wads directory for IWADS and PWADS.
If you wish to use Midi for sound (optional), install some prerequisites :
sudo apt-get install timidity timidity-interfaces-extra
UbuntuGuide Part2 - http://ubuntuguide.org/index.php?title=UbuntuGuide_Part2&...
165 of 177 08/10/2013 09:04 AM

Troubleshooting
When upgrading from Skulltag to Zandronum, I could not get anything to work with the original Doomseeker configuration filesfrom Skulltag. I therefore erased the original Doomseeker folder (~/.doomseeker) prior to installing Zandronum and Doomseeker-zandronum. A new Doomseeker configuration file was then installed and everything worked without problems.
If you receive this error (I did not) when running for the first time :
skulltag: error while loading shared libraries: libsnes_spc.so: cannot open shared object file: No such file or directory
then copy libsnes_spc.so from the skulltag directory to /usr/lib/ :
sudo cp libsnes_spc.so /usr/lib
Sound
Zandronum/Skulltag MIDI sound options can be set to OPL Synth Emulation (recommended), Timidity, or FMOD. (I have never beenable to get FMOD to work.) On my (K)Ubuntu system, OPL Synth Emulation is already installed. Select the sound server:
Zandronum/Skulltag -> ESC -> Options -> Sound Options -> MIDI Device -> OPL Synth Emulation
Timidity Sound
If you wish to use the Timidity (MIDI) sound system instead, then prior to starting Zandronum/Skulltag (and selecting the soundoptions), install:
sudo apt-get install timidity timidity-interfaces-extra
FMOD Sound
FMOD (http://www.fmod.org/) is not installed by default in (K)Ubuntu. If you wish to use FMOD for MIDI, then download theappropriate version for your Linux OS here (http://www.fmod.org/index.php/download) and install the latest version (example isfor a 64-bit OS):
wget http://www.fmod.org/index.php/release/version/fmodapi44000linux64.tar.gztar -xvzf fmodapi44000linux64.tar.gzsudo cp fmodapi40000linux64/api/lib/libfmodex64-4.40.00.so /usr/lib/libfmodex64-4.40.00.sosudo ln -s /usr/lib/libfmodex64-4.40.00.so /usr/lib/libfmodex64.so
(Obviously, use the 32-bit version if you have a 32-bit OS.)
Set the sound options while running Zandronum/Skulltag to select your sound interface.
Alternate instructions: If you receive the error
skulltag: error while loading shared libraries: libfmodex32-4.24.16.so: cannot open shared object file: No such file or directory
or
skulltag: error while loading shared libraries: libfmodex64-4.24.16.so: cannot open shared object file: No such file or directory
this means that you need to download and install FMOD manually. From my experience, Skulltag just ignores the .so files provided inthe skulltag directory. It's easy to fix.
Download one of these:
32 bit linux: http://www.fmod.org/index.php/release/version/fmodapi42416linux.tar.gz
or
64 bit linux: http://www.fmod.org/index.php/release/version/fmodapi42416linux64.tar.gz
Extract to a directory somewhere, and in a command-line terminal navigate to that directory (using cd), where there shouldbe a file named "makefile," and "make" the package:
sudo make install
UbuntuGuide Part2 - http://ubuntuguide.org/index.php?title=UbuntuGuide_Part2&...
166 of 177 08/10/2013 09:04 AM

This installs FMOD to /usr/local/lib.
Change to the directory (within the extracted file) /api/lib/
Skulltag will only work on ubuntu if libfmodex-4.24.16.so (libfmodex64-4.24.16.so for 64 bit linux) is in /usr/lib/:
sudo cp /usr/local/lib/libfmodex64-4.24.16.so /usr/lib/
or
sudo cp /usr/local/lib/libfmodex-4.24.16.so /usr/lib/
Then link the specific files to the generic file:
sudo ln -s /usr/lib/libfmodex64-4.24.16.so /usr/lib/libfmodex64.sosudo ln -s /usr/local/lib/libfmodex64-4.24.16.so /usr/local/lib/libfmodex64.so
If you receive an error about LibSDL, then be sure it is installed:
sudo apt-get install libsdl-image1.2
Wad location
Longtime Doom players may already have a collection of wads. If you have all your wads in a single directory (like I do), you must setDoomseeker to look in that directory for wads. For example, my wads are in /home/mainuser/wads, so I set Doomseeker:
Doomseeker -> Options -> Configure -> File paths -> Add -> /home/mainuser/wads -> Ok
I also like any new wads that are downloaded by Doomseeker (Wadseeker) to be stored in the same directory:
Doomseeker -> Options -> Configure -> Wadseeker -> General -> Directory where Wadseeker will place the wads into: ->/home/mainuser/wads -> Ok
I happen to have stored my original doom2.wad, tnt.wad, and plutonia.wad in that directory already. The Freedoom wad could becopied (as doom2.wad) into this directory as well, if one of the original commercial wads are not available.
Firewall and Doomseeker
Doomseeker is the GUI that helps with online play. Skulltag has a centralized master website that keeps track of every hosted Skulltagserver online. This master website uses port 15300, so this port must be open for outbound traffic in order to access the list.
I use Firestarter to control my firewall (iptables). To open the outgoing Doomseeker port 15300 in the firewall:
Firestarter -> Policy -> Editing: Outbound traffic policy -> Allow service: right-click -> Add rule -> Allow service: Port: 15300 ->When the source is: Firewall host -> Comment: Doomseeker master server comm port -> Add
When Doomseeker is now started, a list of servers will be displayed. However, the servers may all be using different ports for Skulltag,and the details will not appear. This is where a decision has to be made. If you want to be able to communicate with all the serverslisted, you must open up all your outgoing ports, or at least a wide range of ports. If you want to communicate with only a select fewservers, you can open only the ports they are using. Although Doomseeker servers generally use ports 10666 - 10800, there are manySkulltag servers that don't use Doomseeker, and they may use ports numbering anywhere from 7000 to 21000.
Opening your firewall is a security risk, of course, and the user must make the decision whether to open a wide range of ports or not.To open all outgoing ports (which is really the only way to easily access all the Skulltag servers) using Firestarter, change the outgoingpolicy to "permissive":
Firestarter -> Policy -> Editing: Outbound traffic policy -> Permissive by default, blacklist traffic: (ticked)
This is effect opens up your system to all outgoing traffic, which is a security risk, somewhat. (Trojans and backdoor channels, ifpresent on your computer for some reason, will then be free to communicate). Therefore, don't do this on a work computer or on acomputer where sensitive data compromise might be a concern.
If you plan to only play on a few select servers (of friends, for example) and you know that their servers are hosted on, say, ports 10666- 10700, then leave the policy set to "restrictive by default" and just open those ports, :
Firestarter -> Policy -> Editing: Outbound traffic policy -> Restrictive by default, whitelist traffic: (ticked) -> Allow service:right-click -> Add rule -> Allow service: Port: 10666-10700 -> When the source is: Firewall host -> Comment: Skulltag servers -> Add
Hosting a Skulltag server
UbuntuGuide Part2 - http://ubuntuguide.org/index.php?title=UbuntuGuide_Part2&...
167 of 177 08/10/2013 09:04 AM

Installation of Skulltag includes installation of the server module, skulltag-server. Doomseeker provides a GUI interface that starts upskulltag-server, which is very convenient (Doomseeker -> File -> Create server).
Using Doomseeker's Create server option (http://skulltag.net/wiki/Creating_a_personal_Server_with_Doomseeker) , all the settingsfor your server can be set. The information will be sent to the Skulltag master server (over port 15300) and your server will thenbe listed there. When you refresh the Doomseeker server list, you should be able to find your server. You can then connect to ityourself and become a player.
By default, Doomseeker creates your Skulltag server on port 10666. If you might be creating two servers, the second will becreated on port 10667. Therefore, if you are on a LAN, you must forward these ports to your computer's LAN IP address (fromyour router). You must have access to your router to do this (and each router is different), so consult your router's guide.
You can find out the local LAN IP address of your computer from a command-line interface terminal (such as Terminalin Ubuntu or Konsole) in Kubuntu) using the command:
ifconfig
Set your router to forward ports 10666-10667 to your computer's local LAN IP address.
Of course, your firewall must also allow incoming traffic on these ports. I use Firestarter to control my firewall (iptables). To openthe incoming Skulltag server ports in the firewall:
Firestarter -> Policy -> Editing: Inbound traffic policy -> Allow service: right-click -> Add rule -> Allow service: Port:10666-10667 -> When the source is: Anyone -> Comment: Skulltag servers -> Add
wlan0 vs. eth0
Note: In the newest versions of Skulltag I no longer need to do interface bridging as described below.
When I set up my Skulltag server using version 0.98c, the skulltag-server module often tried to use eth0 (the wired NIC) as the primarycommunications port, even though I only connected to the LAN/internet over the wireless wlan0 port. This was unpredictable, assometimes it attempted to use wlan0 and sometimes eth0, even though only wlan0 (the wireless port) was connected (eth0 was notconnected, i.e. no wired connection).
The only way I found to work around this behavior was to bridge eth0 to wlan0, so that any traffic to eth0 was then sent over wlan0.
To enable bridging, install bridge-utils:
sudo apt-get install bridge-utils
Edit the network interfaces configuration file (use the gedit text editor instead of kate if using Ubuntu instead of Kubuntu):
sudo kate /etc/network/interfaces
so that it resembles:
# The loopback network interfaceauto loiface lo inet loopback#auto wlan0iface wlan0 inet dhcp#bridge_ports wlan0 eth0
Then I restarted the networking (or rebooted):
sudo /etc/init.d/networking restart
This successfully bridged the eth0 port to the wlan0 port. Now when the Skulltag server started, it thinks it is hosting through the eth0port but it is now actually hosted through the wlan0 port.
Storing your custom wads online
Ok, you have to be a Doom fanatic to build your own wads. But one of the advantages of Skulltag is that you can host a server usingyour own wads (for Deathmatch, Cooperative, or other team play). There are a few websites that will store your wads for you, andkeep a large variety of wads available to be used for your own server. An easy one to use is FatHax (http://wadhost.fathax.com/) . If youuse FatHax (or any other wad site) for your wads, be sure to list it as the "URL" in your server, so that players attempting to play will bedirected to that location to download wads.
UbuntuGuide Part2 - http://ubuntuguide.org/index.php?title=UbuntuGuide_Part2&...
168 of 177 08/10/2013 09:04 AM

Doomseeker troubleshooting
The current package of Doomseeker (0.8.1) available from the skulltag.net repository works fine for me.
These instructions remain for reference only; they should not longer be needed. I was not able to get the Debian/Ubuntu packageof Doomseeker 0.7-beta to work properly (even though Doomseeker 0.6 worked fine). (Multiple errors were returned that pluginswere "not available" when using the package-installed binary at /usr/bin/doomseeker.)
I therefore installed the newest Subversion package of Doomseeker and compiled it manually instead, using the instructions here(http://www.skulltag.net/doomseeker/svn.php) . This version of Doomseeker worked for me without problem.
Updated specific instructions 3-1-2012:
I downloaded the Doomseeker 0.8.1b + Wadseeker 0.7.1 tarball (doomseeker-0.8.1b_src.tar.bz2) from here(http://doomseeker.drdteam.org/download.php) and unpacked it.
wget http://doomseeker.drdteam.org/files/doomseeker-0.8.1b_src.tar.bz2tar -xvjf doomseeker-0.8.1b_src.tar.bz2
This extracted this version to the folder ~/doomseeker-0.8.1b_src.
I then compiled it by hand using these instructions (http://www.skulltag.net/doomseeker/svn.php) , specifically:
sudo apt-get install g++ cmake libqt4-dev mercurial zlib1g-dev libbz2-devcd doomseeker-0.8.1b_srcmkdir buildcd buildcmake ..makesudo make install
It installs to the /usr/local/share/doomseeker folder with the binary at /usr/local/bin/doomseeker so that a menu item must becreated with the command:
/usr/local/bin/doomseeker
ZDoom and GZDoomBoth ZDoom and GZDoom (the OpenGL version of ZDoom) can be downloaded as packages from the Skulltag repository as well. Afterinstalling the Skulltag repository:
sudo apt-get install zdoom doomseeker doomseeker-zdaemon python-zdaemon
or
sudo apt-get install gzdoom doomseeker doomseeker-zdaemon python-zdaemon
Midi sound is most easily enabled using OPL Synth Emulation:
ZDoom -> ESC -> Options -> Sound -> Midi Device: OPL Synth Emulation
MFC-7820NI have about a dozen of this Brother MFC-7820N multifunction printer/scanner/fax machine on my networks. Other Brother MFCmodels are similar to set up, so the steps in this article are probably similar to those needed for other models as well. For additionaldrivers and instructions see the Brother help site (http://welcome.solutions.brother.com/bsc/public_s/id/linux/en/index.html) .
Printer
The BR-Script3 and Foomatic/Postscript PPD files that are supplied automatically do not work well with graphics (theFoomatic/Postscript PPD often doesn't work at all). Printing graphics can take longer than 4 minutes, or can freeze altogether.Install the Brother CUPS drivers instead:
sudo apt-get install brother-lpr-drivers-laser brother-cups-wrapper-laser
These CUPS driver packages also work for these Brother laser models: DCP-7010 DCP-7020 DCP-7025 DCP-8060 DCP-8065DN FAX-2820
UbuntuGuide Part2 - http://ubuntuguide.org/index.php?title=UbuntuGuide_Part2&...
169 of 177 08/10/2013 09:04 AM

FAX-2920 HL-2030 HL-2040 HL-2070N HL-5240 HL-5250DN HL-5270DN HL-5280DW MFC-7220 MFC-7225N MFC-7420 MFC-7820NMFC-8460N MFC-8660DN MFC-8860DN MFC-8870DW.
My printer is on a network (at LAN IP address 192.168.0.125 which is set manually from the printer console). (K)Ubuntu will findthe printer on the network automatically (assuming all firewalls are turned off) and install the correct drivers.
Menu -> System -> System Settings -> Printer configuration -> New Printer -> New Network Printer
At this stage my printer was automatically recognized and the device URI filled in for me as
socket://192.168.0.125:9100
I was able to name the printer and select the printer driver:
->Brother -> MFC-7820N for CUPS
Avoid the "MFC-7820N -> BR-Script3" and the "MFC-7820N -> Foomatic/Postscript" options (see above).
In my firewall, I allowed all traffic to/from 192.168.0.125. On networks where I have multiple Brother printers, I opened port9100 (in and out) for the entire subnet 192.168.0.1/24 (i.e. 192.168.0.1 - 192.168.0.255).
Other models
My 7820N model is installed by (K)Ubuntu automatically, but other models may need the installation of the LPR and cupswrapperdrivers individually.
Search the package manager for a package that corresponds to your model first. If none is available, then .deb packages for the driversfor each model can each be downloaded from the Brother website (http://welcome.solutions.brother.com/bsc/public_s/id/linux/en/download_prn.html) . Then install them (this example uses the MFC-7340 drivers):
sudo apt-get install ia32-libssudo dpkg -i --force-all brmfc7340lpr-2.0.2-1.i386.debsudo dpkg -i --force-all cupswrapperMFC7340-2.0.2-1.i386.deb
Scanner
These instructions are for a networked scanner/printer. There are other instructions (http://welcome.solutions.brother.com/bsc/public_s/id/linux/en/instruction_scn1.html) for a USB-connected scanner/printer.
Install pre-requisites (if not already installed):
sudo apt-get install sane-utils
The 7820N uses a brscan2 driver, as listed here (http://welcome.solutions.brother.com/bsc/public_s/id/linux/en/download_scn.html) . Download the .deb package for the drivers for the printer (use the appropriate 64-bit or 32-bit version --replace amd64 with i386 if needed) and install (http://welcome.solutions.brother.com/bsc/public_s/id/linux/en/instruction_scn1.html) them:
sudo wget -O brscan_driver.deb http://www.brother.com/pub/bsc/linux/dlf/brscan2-0.2.5-1.amd64.debsudo dpkg -i brscan_driver.deb
If you would like to use the Scan key on the scanner/printer itself, then also install the scankeytool(http://welcome.solutions.brother.com/bsc/public_s/id/linux/en/instruction_scn3.html) :
sudo wget -O brscan_scankeytool.deb http://www.brother.com/pub/bsc/linux/dlf/brscan-skey-0.2.1-3.amd64.debsudo dpkg -i brscan_scankeytool.deb
Check to see if the driver is installed:
sudo dpkg -l | grep Brother
Add a network scanner entry for your model. (brsaneconfig2 is the command for the brscan2 driver.)
brsaneconfig2 -a name=SCANNER model=MFC-7820N ip=192.168.0.125
Check to see if the network scanner is recognized:
UbuntuGuide Part2 - http://ubuntuguide.org/index.php?title=UbuntuGuide_Part2&...
170 of 177 08/10/2013 09:04 AM

brsaneconfig2 -q | grep SCANNER
(These instructions are per this FAQ for (K)Ubuntu 11.10 or greater (http://welcome.solutions.brother.com/bsc/public_s/id/linux/en/faq_scn.html#f00101) ):
Copy brscan2 files from /usr/lib64 to /usr/lib:
sudo cp /usr/lib64/libbrscandec2.so.1.0.0 /usr/libsudo cp /usr/lib64/sane/libsane-brother2.so.1.0.7 /usr/lib/sanesudo cp /usr/lib64/sane/libsane-brother2.so.1 /usr/lib/sanesudo cp /usr/lib64/sane/libsane-brother2.so /usr/lib/sanesudo cp /usr/lib64/libbrcolm2.so.1.0.1 /usr/libsudo cp /usr/lib64/libbrcolm2.so /usr/libsudo cp /usr/lib64/libbrscandec2.so.1 /usr/libsudo cp /usr/lib64/libbrscandec2.so /usr/libsudo cp /usr/lib64/libbrcolm2.so.1 /usr/lib
(As of Precise Pangolin 12.04 LTS my scanner is working using these steps.)
(These instructions are per this FAQ for (K)Ubuntu 9.10 to 11.04 (http://welcome.solutions.brother.com/bsc/public_s/id/linux/en/instruction_scn1c.html#u9.10) ):
Edit /lib/udev/rules.d/40-libsane.rules:
sudo kate /lib/udev/rules.d/40-libsane.rules
and add either (the second one is for the MFC-7820N specifically, which I used, whereas the first one is generic for all Brotherscanners):
# Brother scannersATTRS{idVendor}=="04f9", ENV{libsane_matched}="yes"
or
# Brother 7820N scannerATTRS{idVendor}=="04f9", ATTRS{idProduct}=="0181", ENV{libsane_matched}="yes"
then reboot.
Install a scanning utility, such as Xsane:
sudo apt-get install xsane
then start it:Menu -> Applications -> Graphics -> Xsane Image Scanner
Scan a sample image using the Scan button. If it works then setup is complete.
Scanning utilities
There are many utilities for use with scanning.
Xsane
Xsane is the standard scanning utility for Linux. Install:
sudo apt-get install xsane
gscan2pdf
Gscan2pdf scans directly to a PDF document. Install:
sudo apt-get install gscan2pdf
Tesseract
Tesseract is a command-line OCR. Install:
UbuntuGuide Part2 - http://ubuntuguide.org/index.php?title=UbuntuGuide_Part2&...
171 of 177 08/10/2013 09:04 AM
sudo apt-get install tesseract-ocr
Fax
If using a firewall, make sure traffic to the IP address of the scanner/printer (in my example 192.168.0.125) is enabled.
Note: The next several steps may be accomplished in recent versions of (K)Ubuntu using the single step:
sudo apt-get install brother-lpr-drivers-laser brother-cups-wrapper-laser
Install pre-requisites if using a 64-bit OS:
sudo apt-get install ia32-libs
Create spool directory and Cups directory if they do not exist:
sudo mkdir /var/spool/lpdsudo mkdir /usr/share/cups/model
Download drivers and install them.
sudo wget -O brfax_lpddriver.deb http://www.brother.com/pub/bsc/linux/dlf/brmfcfaxlpd-1.0.0-1.i386.debsudo wget -O brfax_cupsdriver.deb http://www.brother.com/pub/bsc/linux/dlf/brmfcfaxcups-1.0.0-1.i386.debsudo dpkg -i --force-all brfax_lpddriver.debsudo dpkg -i --force-all brfax_cupsdriver.deb
Check to see if the driver is installed:
sudo dpkg -l | grep Brother
Copy the PPD files:
sudo cp /usr/share/cups/model/brfax_cups.ppd /usr/share/ppdsudo /etc/init.d/cups restart
Secure the brfax CUPS filter file:
sudo chmod 755 /usr/lib/cups/filter/brfaxfiltersudo /etc/init.d/cups restart
Check the CUPS settings to see if the BRFAX shows up as a listed printer (usually with the Device URI of usb:/dev/usb/lp0). If it does,then you are done. If not, use the next step to complete configuration.
Configure the Fax options through a web-browser interface:
http://localhost:631/printers
-> BRFAX -> Modify Printer -> Other network printers: LPD/LPR Host or Printer (ticked) -> Continue-> Connection: lpd://192.168.0.125/binary_p1 -> Continue-> Description: BRFAX -> Location: Home network -> Continue-> Make: Brother -> Continue -> Model: Current Driver - BRMFCFAX for CUPS -> Modify Printer
Send a test fax to make sure the driver is functioning correctly:
brpcfax -o fax-number=(fax-number) (filename)
(Note: You will need Java installed to use brpcfax. The easiest way to install Java is to install kubuntu-restricted-extras, which alsoinstalls other programs, or install openjdk-6-jre alone:)
sudo apt-get install kubuntu-restricted-extras
or, alternatively
sudo apt-get install openjdk-6-jre
UbuntuGuide Part2 - http://ubuntuguide.org/index.php?title=UbuntuGuide_Part2&...
172 of 177 08/10/2013 09:04 AM

Sending Faxes
The brpcfax utility only will send files in Postscript (.ps) format. The easiest way to accomplish faxing is to create a Kubuntu menuitem (in the Office submenu, for example) entitled Send Fax with the Command: brpcfax sendfax.ps
Any program can then print to a file named sendfax.ps.
Starting the menu item will then invoke the brpcfax utility to send the file.
Associate brpcfax with Postscript files as an output option
This method entails associating Postscript files with the brpcfax utility.
K menu -> System -> System Settings -> Advanced -> File Associations -> Configure file associations
-> application -> postscript -> Application preference order: Add-> Select the program for the file type: brpcfax -P BRFAX -o PAPER=A4 -> Ok -> Apply
Now any document saved as a Postscript (.ps) file can be faxed from the Dolphin (or Nautilus) file manager. Right-click on the savedPostscript file and use the "Open With -> brpcfax" option.
Sending faxes from Firefox
Print as a Postscript file.
Using the "Open With -> brpcfax" method as described in the preceding section, fax the saved file from Dolphin (or Nautilus).
Sending faxes from LibreOffice
Run spadmin doing from the command-line interface terminal:
/usr/lib/libreoffice/program/spadmin
-> New Printer -> Connect a fax device -> Next -> Use the following driver for this fax connection: A specific driver, to adapt theformat to another printer (ticked) ->
->Please select a suitable driver: Generic Printer (ticked) -> Please enter a command line appropriate for this device:
/usr/bin/brpcfax -o fax-number=(PHONE)
-> Next -> Please enter a name for the fax connection: Fax printer -> Finish
Troubleshooting
ia32-libs allows 32-bit drivers to be used on 64-bit systems. Some printer drivers are only available in 32-bit versions. If so, installia32-libs first:
sudo apt-get install ia32-libs
This is useful if your printer only has a 32-bit driver available (designated by i386 in the name. 64-bit drivers are designated withamd64 or x86_64 in the name).
If you don't know whether your system is a 32-bit or 64-bit system:
uname -a
You should see either i386 or x86_64 somewhere in the result.
Ubuntuguide XML exports
Introduction
Ubuntuguide, like Wikipedia and many other websites, uses MediaWiki. It is easy to export pages in XML format and then import theminto another wiki.
While the XML files may also be able to be imported to other wikis such as Moin Moin and Twiki, I have not tried it. (I have editedrecent versions of Ubuntuguide to be as consistent as possible with both MediaWiki and Moin Moin formatting, but there are subtle
UbuntuGuide Part2 - http://ubuntuguide.org/index.php?title=UbuntuGuide_Part2&...
173 of 177 08/10/2013 09:04 AM

differences between the two so that I cannot guarantee compatibility with Moin Moin).
Export Ubuntuguide wiki pages into an XML file
Examine the list of wiki pages available at Ubuntuguide:
Ubuntuguide -> Toolbox: Special Pages -> Lists of pages: All pages
Many of these pages will not be necessary for your private copy. Copy only the names of the wiki pages files you wish to export. Therecommended list is below.
Export the desired pages from Ubuntuguide as an XML export:
Ubuntuguide wiki -> Toolbox: Special Pages -> Page tools: Export pages
(Note: This list of (English-language) wiki pages was accurate for the recent Precise version. You may want to check all pages to see ifsomething you want is missing from this list.)
Ubuntu:AllBoot from a Live CDMultiple OS InstallationMultiple OS Installation JauntyLucid Multiple OS InstallationManipulating PartitionsVirtualbox in WindowsAndroid emulationEmail with PGPTorAnonymous emailMail Server setupScreencastsNetflixVideo ConversionVideo ripping tipsStreamripperEBook ConversionTransparent Image BackgroundsWink 64bitRemastersysDynamic IP serversFTP tipsUsing SSH to Port ForwardLimit the user accounts that can connect through OpenSSH remotelyOpenVPN serverWebDAVUltimate Server JauntyUltimate Server Jaunty with OpenVistA EHRUltimate Server Jaunty CustomizationUltimate Server Jaunty Customization_OVUltimate Server LucidUltimate Server Lucid with OpenVistA EHRUltimate Server Lucid CustomizationUltimate Server Lucid Customization_OVApache2 reverse proxiesMediaWiki tipsMediawiki site building tipsCollections tipsPdfBook tipsDrupal6 tipsDrupal site building tipsOld Drupal6 tipsMoodle tipsFortuneDAViCal tipsDAViCal current versionBigBlueButtonWebHuddle tipsOpenVistA EHRWorldVistA_EHRWorldVistA tipsSkulltag tipsMFC-7820NUpgradesUbuntuguide XML exportsUbuntuguide page listsMalicious commands to avoidDefaultApplicationsMain PageTemplate:U All/IntroductionTemplate:Ubuntuguide core wikipagesTemplate:Ubuntuguide Jaunty wikipagesTemplate:Ubuntuguide Jauntycore wikipagesTemplate:Ubuntuguide Karmic wikipagesTemplate:Ubuntuguide Karmiccore wikipagesTemplate:Ubuntuguide Lucid wikipagesTemplate:Ubuntuguide Lucidcore wikipagesTemplate:Ubuntuguide LucidLanguagesTemplate:Ubuntuguide Natty wikipagesTemplate:Ubuntuguide Nattycore wikipagesTemplate:Ubuntuguide NattyLanguagesTemplate:Ubuntuguide Oneiric wikipagesTemplate:Ubuntuguide Oneiriccore wikipagesTemplate:Ubuntuguide OneiricLanguagesTemplate:Ubuntuguide Precise wikipages
UbuntuGuide Part2 - http://ubuntuguide.org/index.php?title=UbuntuGuide_Part2&...
174 of 177 08/10/2013 09:04 AM

Template:Ubuntuguide Precisecore wikipagesTemplate:Ubuntuguide PreciseLanguagesTemplate:Ultimate Server Jaunty CoreTemplate:USJ Customize CoreTemplate:USJ Customize NewUserTemplate:USJ Customize OVTemplate:USJ Adjust SSHTemplate:USJ New SSH UsersTemplate:USJ networkingTemplate:Ultimate Server Lucid CoreTemplate:USL Customize CoreTemplate:USL Customize NewUserTemplate:USL Customize OVTemplate:USL Adjust SSHTemplate:USL New SSH UsersTemplate:USL networkingTemplate:OpenVistA EHRTemplate:OpenVistA Server functionsTemplate:WorldVistATemplate:LicensesTemplate:Android emulationTemplate:Drupal BBBTemplate:Moodle installationTemplate:StreamripperTemplate:PartitionDesignTemplate:WindowsPartitionsTemplate:NetflixTemplate:U RegisterHeaderVirtualServersUbuntu:PreciseTemplate:U Precise/AdministrationTemplate:U Precise/IntroductionTemplate:U Precise/GeneralTemplate:U Precise/OtherVersionsTemplate:U Precise/OtherResourcesTemplate:U Precise/InstallationTemplate:U Precise/RepositoriesTemplate:U Precise/PackagesTemplate:U Precise/DesktopAddonsTemplate:U Precise/RequestsTemplate:Precise/VirtualizationTemplate:U Precise/EdutainmentIntroTemplate:Precise/EdutainmentTemplate:Precise/GamesTemplate:U Precise/InternetTemplate:Precise/VideoconferencingTemplate:U Precise/PrivacyTemplate:U Precise/ProprietaryExtrasTemplate:U Precise/TroubleshootingTemplate:Precise/GraphicsTemplate:Precise/ScreencaptureTemplate:Precise/VideoTemplate:Precise/AudioTemplate:Precise/AudioVideoConversionTemplate:U Precise/CD DVDTemplate:U Precise/MusicTemplate:Precise/MediaCentersTemplate:Precise/HomeAutomationTemplate:Precise/OfficeTemplate:Precise/FinancialTemplate:Precise/GroupwareTemplate:Precise/WikiTemplate:Precise/WebPublishingTemplate:Precise/MapsTemplate:Precise/DevelopmentTemplate:Precise/ScienceTemplate:Precise/MiscAppsTemplate:Precise/Utilities Template:Precise/BackupTemplate:Precise/HardwareTemplate:Precise/NetworkingTemplate:Precise/NetworkAdminTemplate:Precise/Servers
-> Include only the current revision, not the full history (ticked) -> Offer to save as a file: (ticked) -> Export -> Save file-> Ubuntuguide-xxxxx.xml
Here is a list of the primary wiki pages for several different editions of Ubuntuguide.
Import the Ubuntuguide XML into a local wiki
Import the Ubuntuguide XML export file into the local wiki:
Local wiki -> log in -> Username: wikiadmin -> Password: wikiadminpassword -> Log in-> Special Pages -> Page Tools -> Import pages -> Browse -> Ubuntuguide-xxxxx.xml -> Open -> Upload file
Edit the Main Page of the wiki and add a link to the online Ubuntuguide as well as the imported copy:
*[[Ubuntu_Precise|Ubuntuguide Precise (local copy for editing)]]*[http://ubuntuguide.org Ubuntuguide (online)]
The idea is to edit the locally stored Ubuntuguide as you customize your system. It can also serve as a template and an example of how
UbuntuGuide Part2 - http://ubuntuguide.org/index.php?title=UbuntuGuide_Part2&...
175 of 177 08/10/2013 09:04 AM

to use the MediaWiki wiki.
Edit the local copy of Ubuntuguide to hide irrelevant links. In MediaWiki, use the <!---> and <---> tags to comment out instructionsor text that should not be displayed. Example:
Ubuntuguide Precise (local copy for editing) -> edit ->
<!--->{{PrecisePangolinLanguageBar|languages=Languages:|InProgress=In progress:}}<--->
Can I do this?
Sure. Knock yourself out. This site is licensed under the Creative Commons Attribution-NonCommercial-ShareAlike License(http://creativecommons.org/licenses/by-nc-sa/3.0/) , so you can take whatever you want, except for the name (which is and has beenreserved to this site for many years). Improve the site, if you can. Add pictures, videos, or whatever.
If your wiki is (or will be) accessible publicly or from the Internet, just be sure to name the site something other than Ubuntuguide orUbuntu Guide (or anything indistinguishable). Those are legally protected names specific to this site (and trademarks are not openunder the license).
Community portal
Want a turn-key system with many of the free solutions featured in this guide installed for your office, clinic, or small business?
Need customization, support, training, document integration, and integration with existing computer systems?
We'll hold your hand.
Support
Let's face it. You can sometimes spend a lot of money on professional support and still not get things fixed properly. That's true forevery technology. The old adage "you get what you pay for" isn't at all true in the era of the Internet, where knowledge and supportgroups (usually more extensive than the knowledgebase of most technicians) are only a click or two away. This is especially true forKubuntu, Ubuntu, and Debian Linux.
No one can give perfect advice every time, but the most number of up-to-date support opinions (and people willing to give free advice)can be found at
Kubuntu Forums (http://www.kubuntuforums.net)Ubuntu Forums (http://ubuntuforums.org/)Debian Forums (http://forums.debian.net/) .
Support sites
These sites/organisations have sponsored Ubuntuguide/Kubuntuguide in one way or the other. If you would like to be a sponsor andadvertise here, contact an administrator.
UbuntuGuide Part2 - http://ubuntuguide.org/index.php?title=UbuntuGuide_Part2&...
176 of 177 08/10/2013 09:04 AM

Check out our support site at Bidwell Healthcare Consulting (http://ubuntudoctorsguild.dyndns.org/moodle) (demo Moodle site).
Wisdom
Of course, you could also do it yourself by installing your own Ultimate Server.
A battle won is a battle which we will not acknowledge to be lost.
About UbuntuGuide
This is the original UbuntuGuide. It is a straightforward guide for Ubuntu, the Unity and Gnome desktop versions of Ubuntu. It wasstarted in December 2005, just after the release of Ubuntu Breezy Badger (in October 2005). As of 2013 there have been more than 43million page views.
KubuntuGuide was started in June 2007 (and was maintained independently as Kubuntuguide.org and then as Kubuntuguide.info).The content and design of KubuntuGuide was brought to UbuntuGuide in early 2012. (Between 2007 and 2012 the editor ofKubuntuGuide was also the editor of UbuntuGuide.)
Parts of UbuntuGuide (http://ubuntuguide.org) (and KubuntuGuide (http://ubuntuguide.org/wiki/Kubuntuguide) ) have been used inother Ubuntu / Kubuntu documentation. It has long been edited by the user community, is updated frequently, and has tips that areoften tailored to each release of Ubuntu. There are many poor imitations (including some who have copied the names UbuntuGuideand KubuntuGuide), but none come close to the clarity and breadth of this guide.
(K)Ubuntuguide was forged by John Henry, was edited (for many years) by Perspectoff with the help of Mediocre Fred, and maintainsitself with the help of the Borg. Much of our philosophy comes from Buckaroo Banzai, although there have been whispered rumoursthat followers of Captain GnuBeard may lurk amongst our contributors.
(There are other sources of current information such as the official Ubuntu documentation (https://help.ubuntu.com/) and otherreference guides (http://www.dmoz.org/Computers/Software/Operating_Systems/Linux/Distributions/Ubuntu/FAQs,_Help,_and_Tutorials/) as well.)
It has been hosted at the Linux Center (http://translate.google.com/translate?hl=en&ie=UTF-8&sl=auto&tl=en&u=http://linux.edu.lv/&prev=_t) of the University of Latvia (http://www.lu.lv/eng/) for the past several years. Krampo is the administrator.
There is no primary author of the site, though, as it is a collaborative wiki.
Please register and contribute!
Retrieved from "http://ubuntuguide.org/wiki/UbuntuGuide_Part2"
This page was last modified on 8 February 2012, at 01:04.Content is available under Creative Commons Attribution-NonCommercial-ShareAlike License.
UbuntuGuide Part2 - http://ubuntuguide.org/index.php?title=UbuntuGuide_Part2&...
177 of 177 08/10/2013 09:04 AM


