Embed Size (px)
Citation preview
title goes here{CREAT IVE INSP IRAT IONS FROM HOBBY LOBBY®}free
Cross My Heart{CREAT IVE INSP IRAT IONS FROM HOBBY LOBBY®}free
Turn OurBare Wood Crosses
into BeautifulExpressions of
WE’LLGET YOUSTARTED
WITH
INSPIRING PROJECT
IDEAS
Faith
13
GOLDSTANDARD (From the cover) Ahh-inspiring is what we call this gorgeously gilded design. It began with blue paint and dramatic gold foil. And it finished with lux gold trims and lengths of faux pearl cup chain. Customize your look with a mix of pretty baubles—things like metal ribbon, sparkling gemstones, and ornate jewelry components.
SAY ITMOSAICIf “breathtaking” is your goal, a beautiful mosaic design is a giant leap in the right direction.Step one: paint cross as desired, and let dry.Step two: glue glass pieces to cross with tile adhesive.Step three: apply grout. We sell everything you’ll need in the Crafts Department. Just be sure to follow all manufacturers’ instructions.
2

1
2
3
METAL MESSAGETake an ornate approach to your crosses with a mix of metal embellishments. We used metal ribbon from the Floral Department—you can paint it any color you want—and a flower knob from the Home Accents Department. The little metal studs are sold in the Wearables Department, and yep, we painted them to match.
COMING UP ROSETTESWe twisted strips of bright fabric into rosettes to create this positively joyful design. The blooms were just the thing to set off happy polka dot fabric and a simple whitewash (white paint, diluted with water, and applied with a wide brush).
BURLAP BLESSINGSWant to quickly transform your cross? Paint only the sides. When the paint is dry, place the cross on fabric (bottom cross) or scrapbook paper (middle cross) and trace around it with a pencil. Then cut out the shape, and adhere it with découpage medium. Top cross: distressed acrylic paint, diluted brown paint, paper flower.
1
2
3
3
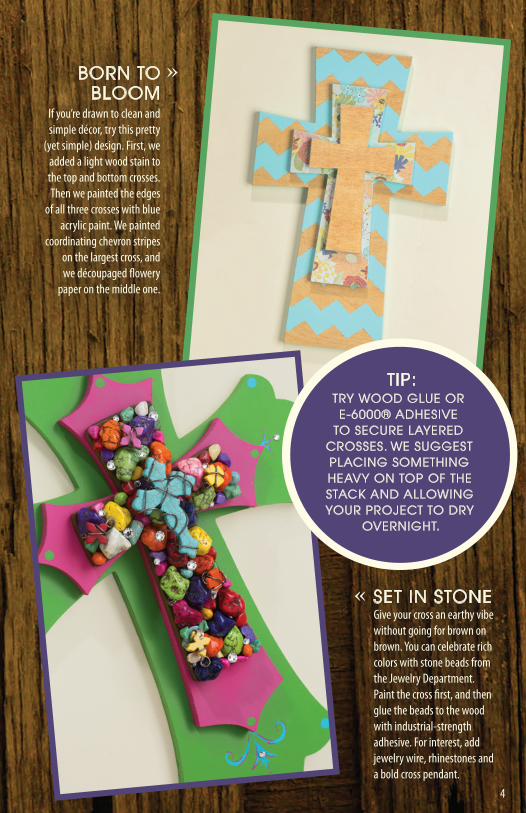
BORN TOBLOOM
If you’re drawn to clean and simple décor, try this pretty
(yet simple) design. First, we added a light wood stain to the top and bottom crosses. Then we painted the edges
of all three crosses with blue acrylic paint. We painted
coordinating chevron stripes on the largest cross, and we découpaged flowery
paper on the middle one.
SET IN STONEGive your cross an earthy vibe without going for brown on brown. You can celebrate rich colors with stone beads from the Jewelry Department. Paint the cross first, and then glue the beads to the wood with industrial-strength adhesive. For interest, add jewelry wire, rhinestones and a bold cross pendant.
4
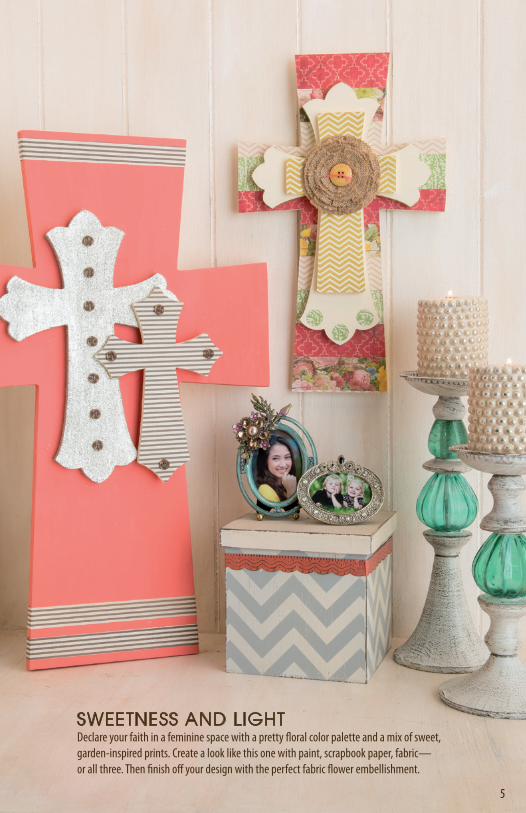
SWEETNESS AND LIGHTDeclare your faith in a feminine space with a pretty floral color palette and a mix of sweet, garden-inspired prints. Create a look like this one with paint, scrapbook paper, fabric—or all three. Then finish off your design with the perfect fabric flower embellishment.
5
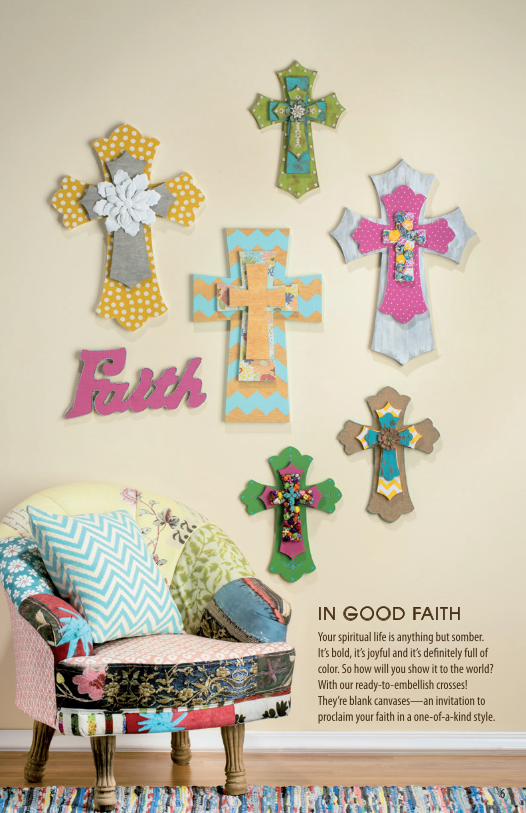
IN GOOD FAITH Your spiritual life is anything but somber. It’s bold, it’s joyful and it’s definitely full of color. So how will you show it to the world? With our ready-to-embellish crosses! They’re blank canvases—an invitation to proclaim your faith in a one-of-a-kind style.
6
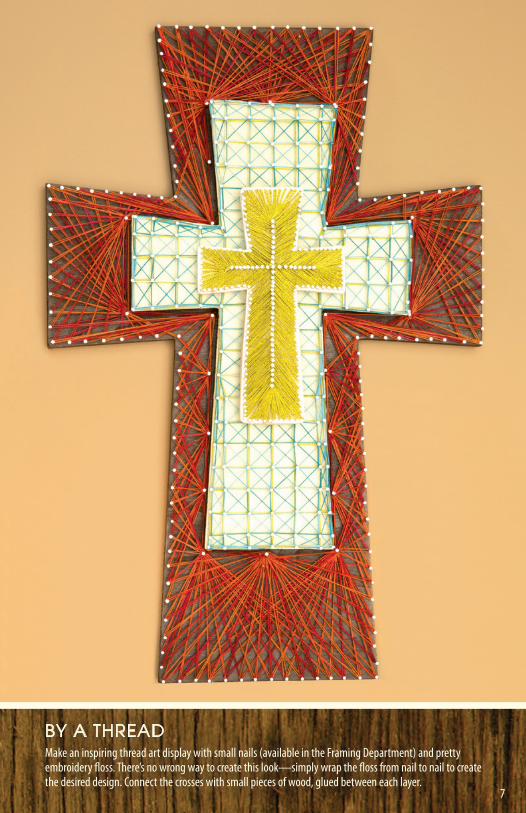
BY A THREADMake an inspiring thread art display with small nails (available in the Framing Department) and pretty embroidery floss. There’s no wrong way to create this look—simply wrap the floss from nail to nail to create the desired design. Connect the crosses with small pieces of wood, glued between each layer.
7
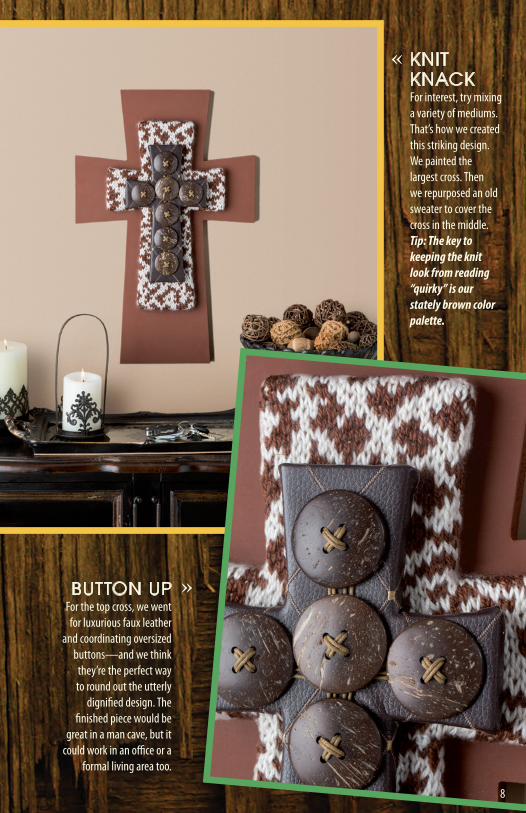
BUTTON UPFor the top cross, we went for luxurious faux leather
and coordinating oversized buttons—and we think
they’re the perfect way to round out the utterly
dignified design. The finished piece would be
great in a man cave, but it could work in an office or a
formal living area too.
KNIT KNACKFor interest, try mixing a variety of mediums. That’s how we created this striking design. We painted the largest cross. Then we repurposed an old sweater to cover the cross in the middle.Tip: The key to keeping the knit look from reading “quirky” is our stately brown color palette.
8
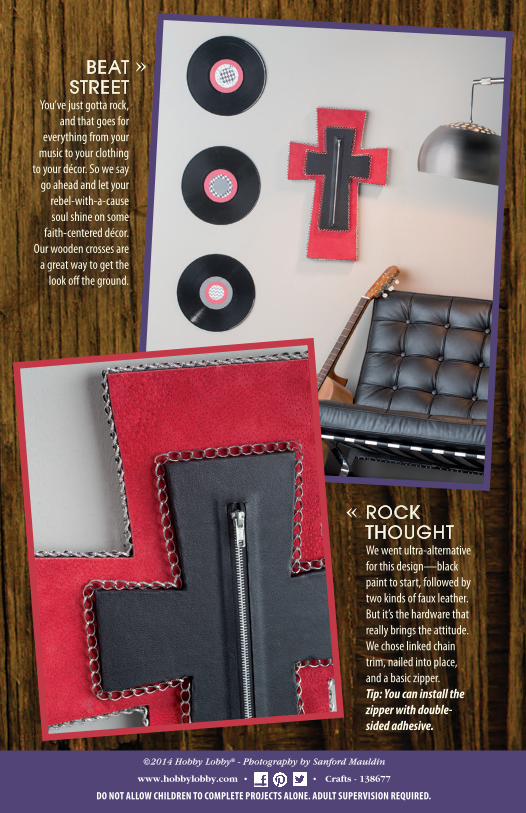
BEAT STREET
You’ve just gotta rock, and that goes for
everything from your music to your clothing
to your décor. So we say go ahead and let your
rebel-with-a-cause soul shine on some
faith-centered décor. Our wooden crosses are
a great way to get the look off the ground.
ROCK THOUGHTWe went ultra-alternative for this design—black paint to start, followed by two kinds of faux leather. But it’s the hardware that really brings the attitude. We chose linked chain trim, nailed into place,and a basic zipper.Tip: You can install the zipper with double-sided adhesive.
©2014 Hobby Lobby® - Photography by Sanford Mauldin
DO NOT ALLOW CHILDREN TO COMPLETE PROJECTS ALONE. ADULT SUPERVISION REQUIRED.
www.hobbylobby.com • • Crafts - 138677