Embed Size (px)
Citation preview

Manual
Charge-LED (illuminated while charging battery)
Connector for Sensor
Connector for data cable
Connector for charger
Device On/Off-switch
Connector for external microphone
Opening for inbuilt microphone
TUNING SET CTS-32-L
Actual Special Function Value Note
Escape Shift Enter
autoauto
-12.8 cent Partial 1 Pitch 442.61 a-1 <--(----+ ) |----->
Connector for active box


The user levels of Tuning Set CTS-32
<1> Main selectionAdjustment and data transfer functions for the whole device
<3> Work selectionSelection of one of the following functions:
Tune intrument Store the tuning of instrument Edit the name of instrument program Change parameters of the instrument program Transmit data of the intrument program Copy data of the instrument program
<2> Instrument selectionSelection of instrument (instrument program)
<4> Selected functionality
En
ter
Esc
ape

Operating scheme for Tuning Set CTS-32
<3>
W
ork
sel
ecti
on
<2>
Inst
rum
ent-
Sel
ecti
on
mor
e in
stru
men
ten
prog
ram
s
ST
ILL_
EM
PT
Y__
____
_ [79]
PIA
NO
_ST
RE
TC
H_2
[2]
PIA
NO
_ST
RE
TC
H_1
[1]
ST
AN
DA
RT
[0]
<4> Tuning program
Esc
ape
Ent
er
PIA
NO
_ST
RE
TC
H_3
[3]
HA
RP
SIC
OR
D__
____
[4]
Tun
e
Cha
nge
nam
e
Cha
nge
para
met
er
<1>
M
ain
sel
ecti
on
Sel
ectio
n of
intr
umen
t pro
gram
Act
ual
Onl
y at
his
toric
al In
stru
men
ts:
Sel
ctio
n of
tem
pera
men
t, ce
nt r
elat
ion
and
tran
spos
er
Ent
erE
nter
Esc
ape
Ent
er
Esc
ape
Edi
tor
for
hist
oric
alte
mpe
ram
ents
Tra
nsm
issi
onof
all
data
Dat
a tr
ansm
issi
on o
f all
inst
rum
ent
prog
ram
s
Dat
a tr
ansm
issi
onof
all
hist
oric
alte
mpe
ram
ents
Dat
a tr
ansm
issi
onof
dev
ice
adju
stm
ent
Cal
ibra
tion
Fre
quen
cy a
ndT
herm
osen
sor
After device
switched on
"Ent
er"
=
s
tep
in"E
scap
e"
=
ste
p ou
t
Sto
re
Tra
nsm
it
Cop
y
Enter
Escape
Actual
Function
Ent
erin
gof
tone
sequ
ence
s

--------- c - 5
------------ g# - 6
--------- c - 4
--------- c - 3
--------- c - 2
--------- c - 1
--------- c
--------- C
--------- C - 1
--------- E - 2
--------- a - 1 (Kammerton)
--------- C
--------- D
--------- A
--------- G
--------- F
--------- E
--------- B
---- C#
---- Bb
---- G#
---- F#
---- D#
Display of tones on CTS-32-L
--------- c - 6

Page 1
Operation Guide Tuning Set CTS-32-L (1.0803) 1 Start-up of the tuning device ............................................................................... 3
1.1 Power supply .................................................................................................... 3 1.2 The recording.................................................................................................... 3
2 Operation of the device ........................................................................................ 3 2.1 Illumination........................................................................................................ 4 2.2 The tuning program........................................................................................... 4
2.2.1 Bar display for pitch of note ....................................................................... 5 2.2.2 Bar display for loudness.............................................................................. 5 2.2.3 Strobo display ............................................................................................. 5 2.2.4 Numerical display for pitch ......................................................................... 6 2.2.5 Tone adjustment ......................................................................................... 6 2.2.6 Adjustment of partial tone ........................................................................... 6 2.2.7 The functions of tuning program ................................................................. 7
2.2.7.1 PITCH (concert pitch)............................................................................ 7 2.2.7.2 CENTS (cent mode):............................................................................. 7 2.2.7.3 BEAT (beats): ....................................................................................... 7 2.2.7.4 INTVL (Interval):.................................................................................... 7 2.2.7.5 AMPL (Amplification):............................................................................ 7 2.2.7.6 RESOL (resolution): .............................................................................. 8 2.2.7.7 GATE (gate time): ................................................................................. 8
2.2.8 The audible tone: ........................................................................................ 8 2.2.9 Switching further in pre-defined semitone steps ......................................... 8
2.3 The instrument programs.................................................................................. 8 2.3.1 Using the installed instrument programs..................................................... 9
2.3.1.1 Piano..................................................................................................... 9 2.3.1.2 Harpsichord......................................................................................... 10 2.3.1.3 Klavichord ........................................................................................... 11 2.3.1.4 Production........................................................................................... 11
2.4 Creating an individual instrument program ..................................................... 11 2.4.1 Copying an existing instrument program................................................... 11 2.4.2 Changing the name of an instrument program.......................................... 12 2.4.3 Changing the parameter of an instrument program .................................. 14
2.4.3.1 Concert pitch....................................................................................... 15 2.4.3.2 First note ............................................................................................. 15 2.4.3.3 Historical temperament ....................................................................... 15 2.4.3.4 Historical cent reference ..................................................................... 15 2.4.3.5 Historical cent transposer.................................................................... 15 2.4.3.6 Resolution ........................................................................................... 15 2.4.3.7 Gate time ............................................................................................ 15 2.4.3.8 Level measurement ............................................................................ 15 2.4.3.9 Amplification........................................................................................ 16 2.4.3.10 Cent adjustment.................................................................................. 16 2.4.3.11 Special-Keys (Function of the two Special-Keys)................................ 16 2.4.3.12 Level recording field ............................................................................ 16 2.4.3.13 Thermosensor rate.............................................................................. 17 2.4.3.14 Thermosensor reference..................................................................... 17

Page 2
2.4.3.15 Measuring range ................................................................................. 17 2.4.3.16 Serial Interface.................................................................................... 17 2.4.3.17 Bar display .......................................................................................... 18 2.4.3.18 Semitone steps ................................................................................... 18 2.4.3.19 Length reference................................................................................. 18 2.4.3.20 Write protection................................................................................... 18
2.4.4 Storage of a particular stretching of an already tuned instrument............. 18 2.4.5 Sending data of an instrument program over the serial interface.............. 19
2.5 The main selection.......................................................................................... 20 2.5.1 Editing of historical temperaments ............................................................ 20 2.5.2 Data transfer of all data to PC................................................................... 21 2.5.3 The data profile of one instrument program............................................. 21 2.5.4 The profile of an historical temperament data........................................... 22 2.5.5 The profile of device adjustment data ....................................................... 22 2.5.6 Receiving data .......................................................................................... 22 2.5.7 Program Update........................................................................................ 22 2.5.8 Calibration (only for service) ..................................................................... 22
2.5.8.1 Calibration of Target-Frequency ......................................................... 23 2.5.8.2 Calibration of thermosensor input ....................................................... 23
2.5.9 Entering of tone sequences ..................................................................... 23 2.6 The profile of the serial interface..................................................................... 24 2.7 Data format of tuning program events ............................................................ 24 2.8 Remote control from PC ................................................................................. 25
3 Fundamentals...................................................................................................... 26 3.1 Equal temperament......................................................................................... 26 3.2 The „Cent“ measure........................................................................................ 26 3.3 Target frequency............................................................................................. 27 3.4 Cent adjustment of historical temperaments................................................... 27 3.5 Cent reference function................................................................................... 27 3.6 Transposer...................................................................................................... 27 3.7 The stretchings ............................................................................................... 28 3.8 Correction of organ pipe length automatically................................................. 28
4 Technical data ..................................................................................................... 28
5 Connectors .......................................................................................................... 30

Page 3
1 Start-up of the tuning device 1.1 Power supply
The Tuning Set CTS-32-L is equipped with 4 chargeable NiMH battery (1.2 Volt 1600 mAh). The operating period with one battery charge lasts approx. 8 hours. Once the batteries are low, the stroke "LOW BAT" appears in the LC-display. In order to avoid a deep discharging of the chargeable battery, the device automatically shuts off. The battery is recharged with the help of the supplied plug-in transformer. The battery is fully replenished after approx. 14 hours. During the charging period, the small lamp for charge control turns red. The instrument can be operated without risk during the re-charging process. Should the operating period with one battery charge decrease at some point to much less than 6 operating hours, this may occur for the following reasons. 1. The battery is defect. Measure to be taken: Install new battery. When replacing the batteries, it is important to pay attention to the correct polarity. 2. Either the charger or the tuning instrument is defect. Measure to be taken: Charger and tuning set should be sent in for maintenance.
1.2 The recording...
... occurs by means of a built-in condenser microphone on the right side of the instru-ment. For measurements for which the volume of the tone of the instrument plays a role, it is recommended to use a special microphone for measurements. The micro-phone plug (3.5mm jack) can be plugged into the jack which is also found on the right-hand side of the instrument.
2 Operation of the device The device is started up through the shift switch on the right-hand side. For approx. 1 second, the program version appears in the display, followed by the below image: <2> INSTRUMENT SELECTION , then <Enter> ���STANDARD_______ [ 0] Actual The inscription of the buttons on the front panel is designated to the actual tuning of instrument and is not immediately related to the operation process. At this point, the operating system is in the state of the instrument selection. The signs: „���“ in the display symbolize that it is now possible to make changes with the underlying pair of buttons. With the button pair “Actual” one can select a tuning program for a particular music instrument. The program then automatically effects all application settings that are essential to your tuning task.

Page 4
In order to become familiar with the tuning device, you may test the button functions without any risk. Misoperation can do no actual harm to the unit. Now please refer to the supplied “Operating scheme for CTS 32-L”. You may see this operating scheme as a type of “road map”. You are currently situated right after “in-strument selection”, at the point where the slanted arrow is shown. In the following operating examples, do not attempt to try to learn the button sequences by heart, but simply follow the individual steps of the operating scheme. This will allow you to rec-ognize the logic behind the operation of the Tuning Set CTS-32-L. If you have not yet pressed the button “Actual”, the instrument program STANDARD______[0] is still selected. From this position you can directly access the tuning program by pressing “Enter”. The following indicator appears:
+---> |->3.2 cent PARTL 1 PITCH 440.00 a-1
After pressing the „Escape“ button the following indicator appears: EXIT TUNE PROGRAM ?JES <Escape> NO <Enter> With „Escape“ you return to the instrument selection mode. With „Enter“ the tuning program is reactivated. For all other instrument programs (except „STANDARD____[0]“) the tuning program cannot be accessed directly from the instrument selection mode. For these programs several functions must first be adjusted. The operating details for this will follow in the chapter 2.3.1 Using the installed instrument programs
2.1 Illumination ...turned on: Press the Shift button and while keeping it pressed, enter „Escape“. ...turned off: repeat the same action.
2.2 The tuning program ... serves for the actual tuning of the music instrument previously selected in the in-strument selection.
Page 5
The indicator for this is set up as follows: bar display for pitch of note bar display for loudness
+---> |-> [ ]_3.2 cent PARTL 1 PITCH 440.00 a-1
adjustment of note numerical value of the function (above: concert pitch) function (above: concert pitch for example) display for the adjustment of partial tone numerical display for pitch strobo display The individual elements of the indicator are described below.
2.2.1 Bar display for pitch of note
( +----)---->
The arrow points to the right if the tone played is to high and to the left if it is too low. The resolution of the bar display can be adjusted as described in chapter 2.2.7.6 .
2.2.2 Bar display for loudness
|------->
The more the loudness increases, the further the arrow points to the right accordingly.
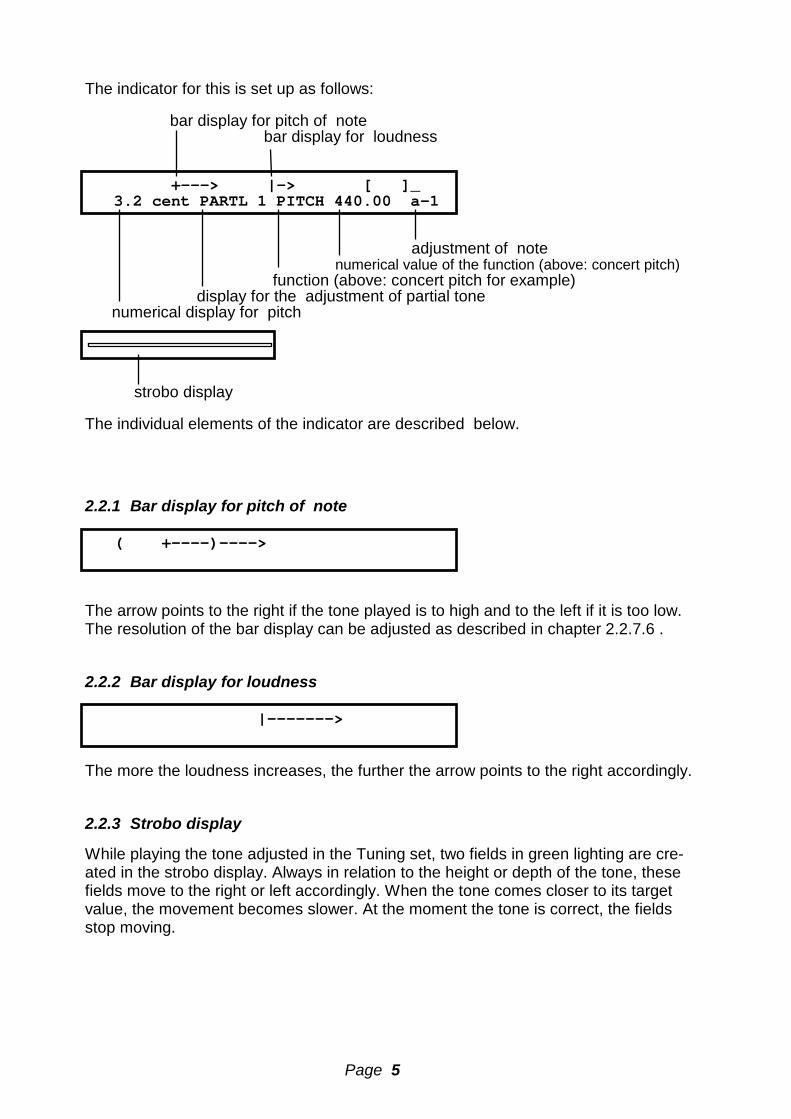
2.2.3 Strobo display
While playing the tone adjusted in the Tuning set, two fields in green lighting are cre-ated in the strobo display. Always in relation to the height or depth of the tone, these fields move to the right or left accordingly. When the tone comes closer to its target value, the movement becomes slower. At the moment the tone is correct, the fields stop moving.
Page 6
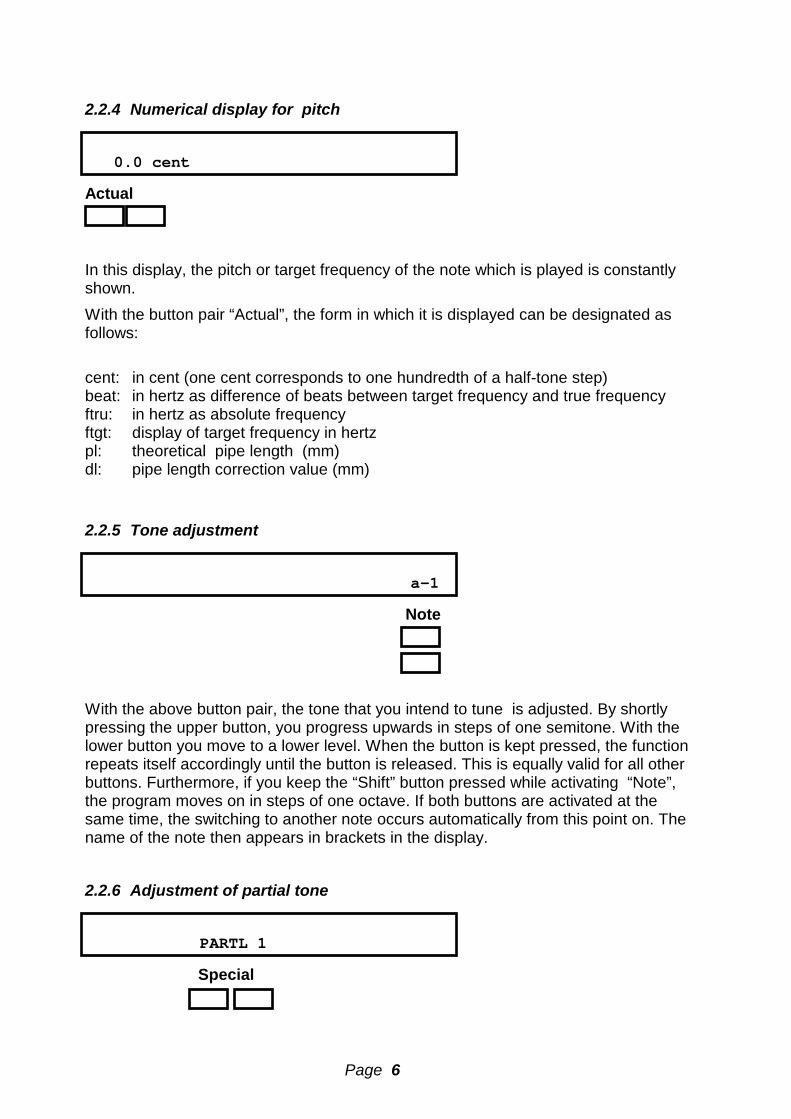
2.2.4 Numerical display for pitch
0.0 cent Actual In this display, the pitch or target frequency of the note which is played is constantly shown. With the button pair “Actual”, the form in which it is displayed can be designated as follows: cent: in cent (one cent corresponds to one hundredth of a half-tone step) beat: in hertz as difference of beats between target frequency and true frequency ftru: in hertz as absolute frequency ftgt: display of target frequency in hertz pl: theoretical pipe length (mm) dl: pipe length correction value (mm)
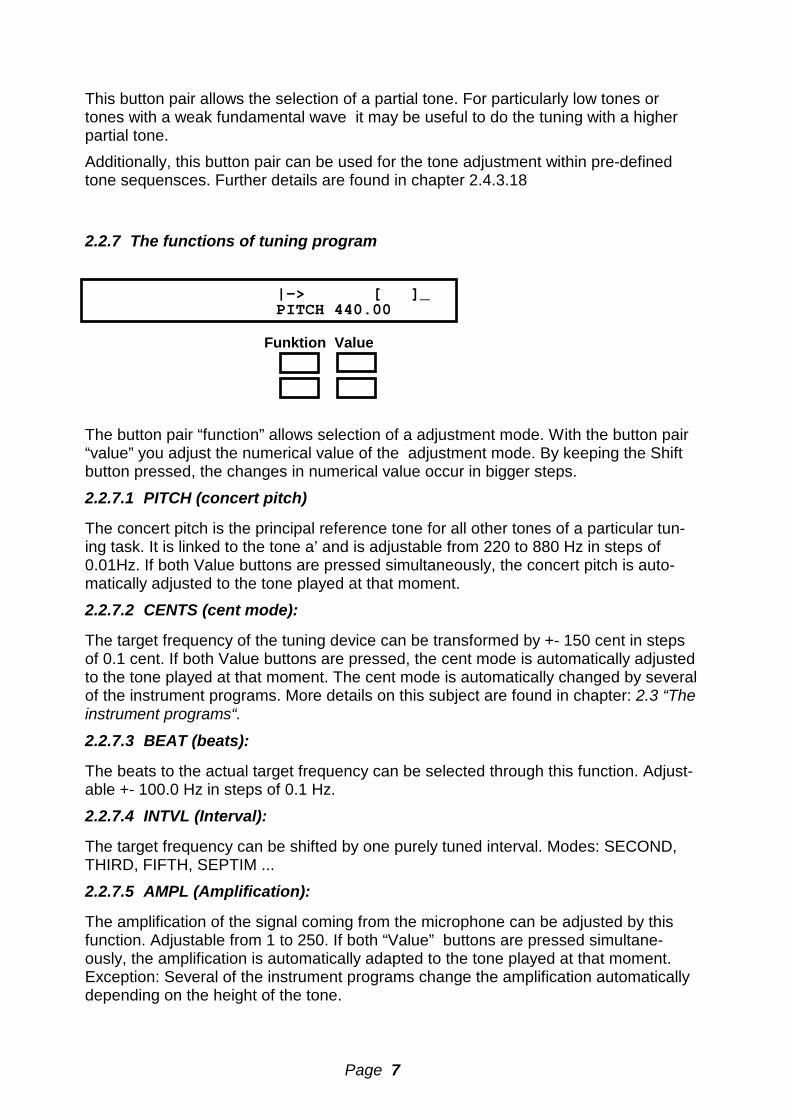
2.2.5 Tone adjustment
a-1 Note With the above button pair, the tone that you intend to tune is adjusted. By shortly pressing the upper button, you progress upwards in steps of one semitone. With the lower button you move to a lower level. When the button is kept pressed, the function repeats itself accordingly until the button is released. This is equally valid for all other buttons. Furthermore, if you keep the “Shift” button pressed while activating “Note”, the program moves on in steps of one octave. If both buttons are activated at the same time, the switching to another note occurs automatically from this point on. The name of the note then appears in brackets in the display.
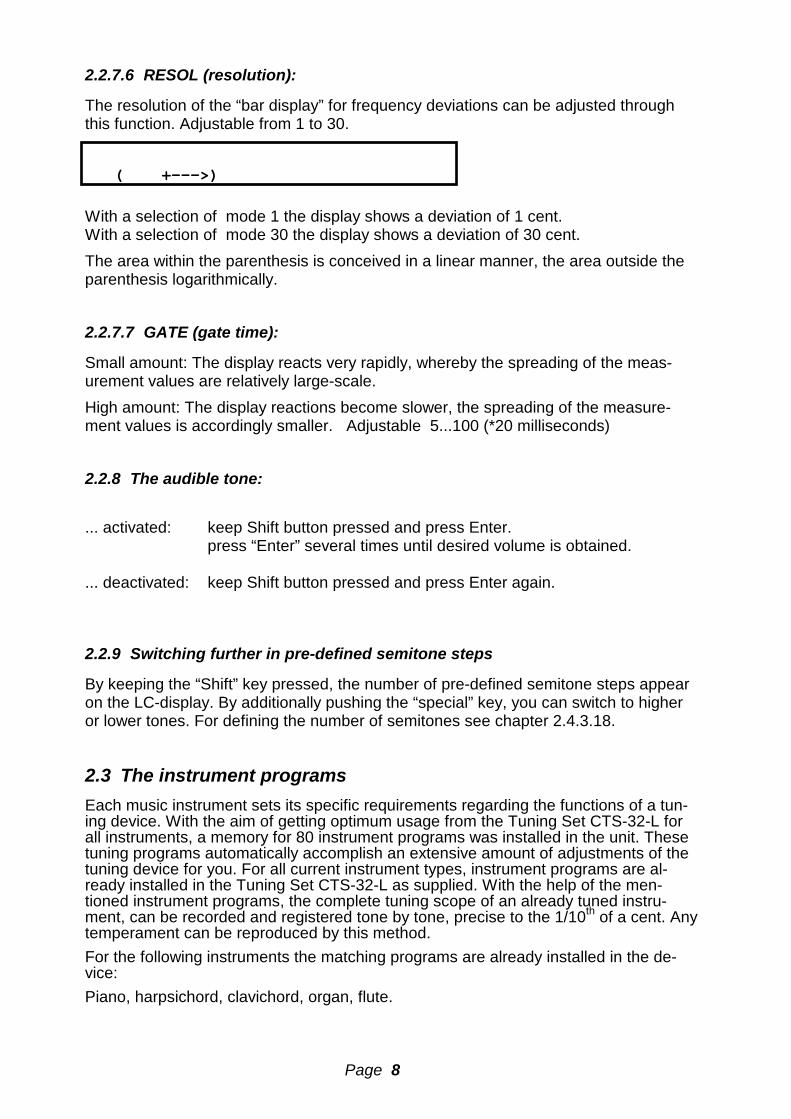
2.2.6 Adjustment of partial tone
PARTL 1 Special
Page 7
This button pair allows the selection of a partial tone. For particularly low tones or tones with a weak fundamental wave it may be useful to do the tuning with a higher partial tone. Additionally, this button pair can be used for the tone adjustment within pre-defined tone sequensces. Further details are found in chapter 2.4.3.18
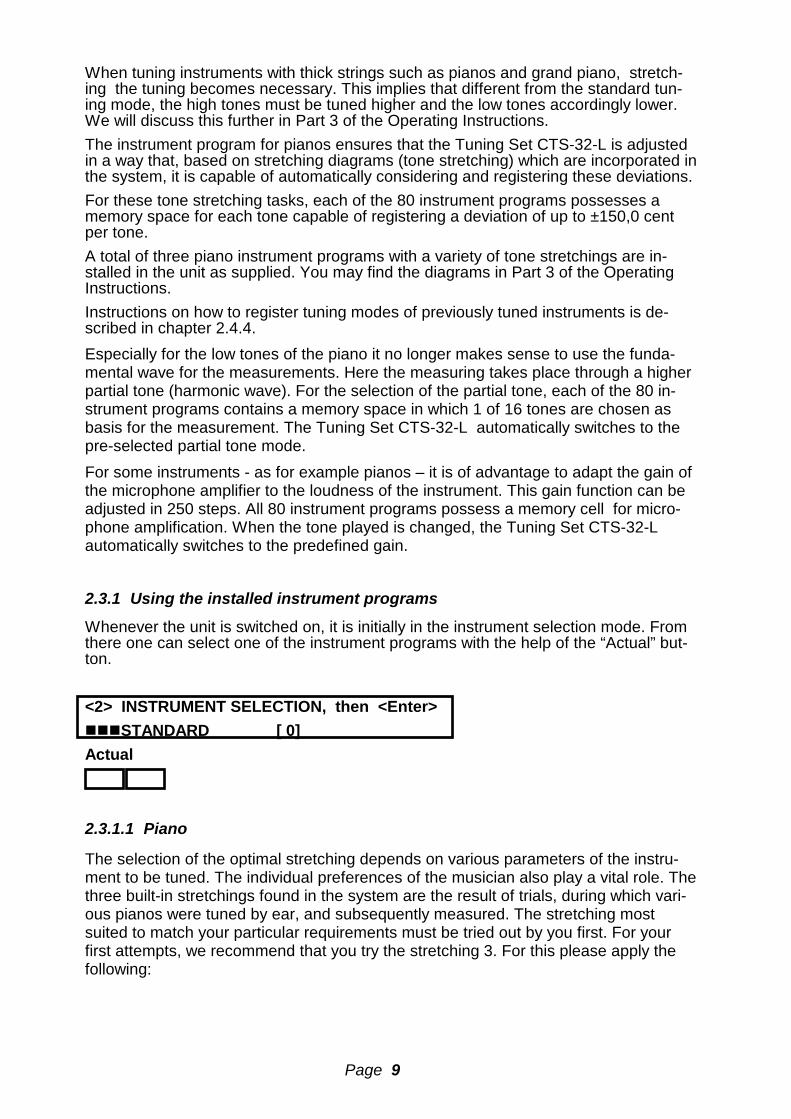
2.2.7 The functions of tuning program
|-> [ ]_PITCH 440.00
Funktion Value The button pair “function” allows selection of a adjustment mode. With the button pair “value” you adjust the numerical value of the adjustment mode. By keeping the Shift button pressed, the changes in numerical value occur in bigger steps.
2.2.7.1 PITCH (concert pitch)
The concert pitch is the principal reference tone for all other tones of a particular tun-ing task. It is linked to the tone a’ and is adjustable from 220 to 880 Hz in steps of 0.01Hz. If both Value buttons are pressed simultaneously, the concert pitch is auto-matically adjusted to the tone played at that moment.
2.2.7.2 CENTS (cent mode):
The target frequency of the tuning device can be transformed by +- 150 cent in steps of 0.1 cent. If both Value buttons are pressed, the cent mode is automatically adjusted to the tone played at that moment. The cent mode is automatically changed by several of the instrument programs. More details on this subject are found in chapter: 2.3 “The instrument programs“.
2.2.7.3 BEAT (beats):
The beats to the actual target frequency can be selected through this function. Adjust-able +- 100.0 Hz in steps of 0.1 Hz.
2.2.7.4 INTVL (Interval):
The target frequency can be shifted by one purely tuned interval. Modes: SECOND, THIRD, FIFTH, SEPTIM ...
2.2.7.5 AMPL (Amplification):
The amplification of the signal coming from the microphone can be adjusted by this function. Adjustable from 1 to 250. If both “Value” buttons are pressed simultane-ously, the amplification is automatically adapted to the tone played at that moment. Exception: Several of the instrument programs change the amplification automatically depending on the height of the tone.
Page 8
2.2.7.6 RESOL (resolution):
The resolution of the “bar display” for frequency deviations can be adjusted through this function. Adjustable from 1 to 30.
( +--->)
With a selection of mode 1 the display shows a deviation of 1 cent. With a selection of mode 30 the display shows a deviation of 30 cent. The area within the parenthesis is conceived in a linear manner, the area outside the parenthesis logarithmically.
2.2.7.7 GATE (gate time):
Small amount: The display reacts very rapidly, whereby the spreading of the meas-urement values are relatively large-scale. High amount: The display reactions become slower, the spreading of the measure-ment values is accordingly smaller. Adjustable 5...100 (*20 milliseconds)
2.2.8 The audible tone:
... activated: keep Shift button pressed and press Enter. press “Enter” several times until desired volume is obtained. ... deactivated: keep Shift button pressed and press Enter again.
2.2.9 Switching further in pre-defined semitone steps
By keeping the “Shift” key pressed, the number of pre-defined semitone steps appear on the LC-display. By additionally pushing the “special” key, you can switch to higher or lower tones. For defining the number of semitones see chapter 2.4.3.18.
2.3 The instrument programs Each music instrument sets its specific requirements regarding the functions of a tun-ing device. With the aim of getting optimum usage from the Tuning Set CTS-32-L for all instruments, a memory for 80 instrument programs was installed in the unit. These tuning programs automatically accomplish an extensive amount of adjustments of the tuning device for you. For all current instrument types, instrument programs are al-ready installed in the Tuning Set CTS-32-L as supplied. With the help of the men-tioned instrument programs, the complete tuning scope of an already tuned instru-ment, can be recorded and registered tone by tone, precise to the 1/10th of a cent. Any temperament can be reproduced by this method. For the following instruments the matching programs are already installed in the de-vice: Piano, harpsichord, clavichord, organ, flute.
Page 9
When tuning instruments with thick strings such as pianos and grand piano, stretch-ing the tuning becomes necessary. This implies that different from the standard tun-ing mode, the high tones must be tuned higher and the low tones accordingly lower. We will discuss this further in Part 3 of the Operating Instructions. The instrument program for pianos ensures that the Tuning Set CTS-32-L is adjusted in a way that, based on stretching diagrams (tone stretching) which are incorporated in the system, it is capable of automatically considering and registering these deviations. For these tone stretching tasks, each of the 80 instrument programs possesses a memory space for each tone capable of registering a deviation of up to ±150,0 cent per tone. A total of three piano instrument programs with a variety of tone stretchings are in-stalled in the unit as supplied. You may find the diagrams in Part 3 of the Operating Instructions. Instructions on how to register tuning modes of previously tuned instruments is de-scribed in chapter 2.4.4. Especially for the low tones of the piano it no longer makes sense to use the funda-mental wave for the measurements. Here the measuring takes place through a higher partial tone (harmonic wave). For the selection of the partial tone, each of the 80 in-strument programs contains a memory space in which 1 of 16 tones are chosen as basis for the measurement. The Tuning Set CTS-32-L automatically switches to the pre-selected partial tone mode. For some instruments - as for example pianos – it is of advantage to adapt the gain of the microphone amplifier to the loudness of the instrument. This gain function can be adjusted in 250 steps. All 80 instrument programs possess a memory cell for micro-phone amplification. When the tone played is changed, the Tuning Set CTS-32-L automatically switches to the predefined gain.
2.3.1 Using the installed instrument programs
Whenever the unit is switched on, it is initially in the instrument selection mode. From there one can select one of the instrument programs with the help of the “Actual” but-ton. <2> INSTRUMENT SELECTION, then <Enter> ���STANDARD_______ [ 0] Actual 2.3.1.1 Piano
The selection of the optimal stretching depends on various parameters of the instru-ment to be tuned. The individual preferences of the musician also play a vital role. The three built-in stretchings found in the system are the result of trials, during which vari-ous pianos were tuned by ear, and subsequently measured. The stretching most suited to match your particular requirements must be tried out by you first. For your first attempts, we recommend that you try the stretching 3. For this please apply the following:

Page 10
1. Select the instrument program Piano_strech_3 with “Actual” button and confirm with “Enter”: >3> WORK - SELECTION, then <Enter> PIANO_STRETCH_3_ ��� tuning Press “Enter” once more and the unit will switch to the desired tuning program.
+ |->0.0 cent PARTL 1 PITCH 440.00 a-1
Value First it is useful to define the current concert pitch of the instrument. For this purpose shortly press both “Value” buttons simultaneously. The display now shows the concert pitch in brackets. If you were now to play the note ‘a’, the program’s concert pitch is automatically adjusted to the note played. By pressing both buttons once more, the aligning operation is accomplished. If you chose to measure the concert pitch very precisely, you can bring the strobo display to a halt by repeatedly pressing the “Value” button. The concert pitch now can be read and thereafter adjusted. When applying this function, the current concert pitch should be not more than 10 Hz higher than the previously selected one, in order to avoid warping the instrument or tearing strings during the tuning task. Once the concert pitch is adjusted, push the upper “function” button to activate the cent display. The following characters will appear in the display:
+ |->0.0 cent PARTL 1 CENTS 0.0 a-1
Function You may now begin with the actual tuning by starting with the tone a–1 and aligning all 3 strings of the chorus. Next follows g#–1, g1, f#–1, etc. The deviation from the standard tuning caused by tone stretching is shown in cent above the „Value“-button. For the two lowest octaves, the partial tone mode changes to the second or the fourth partial tone. For this reason, it is important that the tuning set always has the correct octave setting. The best way to avoid inaccurate settings is to progress in steps of semitones while tuning the instrument. After finishing the tuning of the bass, the discant is tuned by starting with b-1. By switching the partial tone with the buttons, the level and the tone heights of the in-dividual partial tones can be compared.
2.3.1.2 Harpsichord The desired historical temperament, the <cent-reference> (see chapter 2.4.3.4) and the <transposer> (see chapter 2.4.3.5) can be adjusted before selecting the tuning
Page 11
program. In the lowest octave, the tuning is done on the basis of the fourth partial tone and in the second lowest octave, through the second partial tone. Here, tone stretch-ing was not preprogrammed, as the inharmonicity is comparably unnoticeable due to the relatively thin, long strings of the instrument. The adjustment of the gain of the mi-crophone amplifier occurs automatically.
2.3.1.3 Klavichord The same setting is employed as for the cembalo with the exception of the following distinction: In view of the short and soft sounding tones of the instrument, the gate time was decreased. The cent values are extracted from the memory bank. However, these are set at zero as the stretchings strongly vary from instrument to instrument. Therefore this program can only serve as a model for ones own individual programs. See chapter 2.3 “Creating your own instrument programs”.
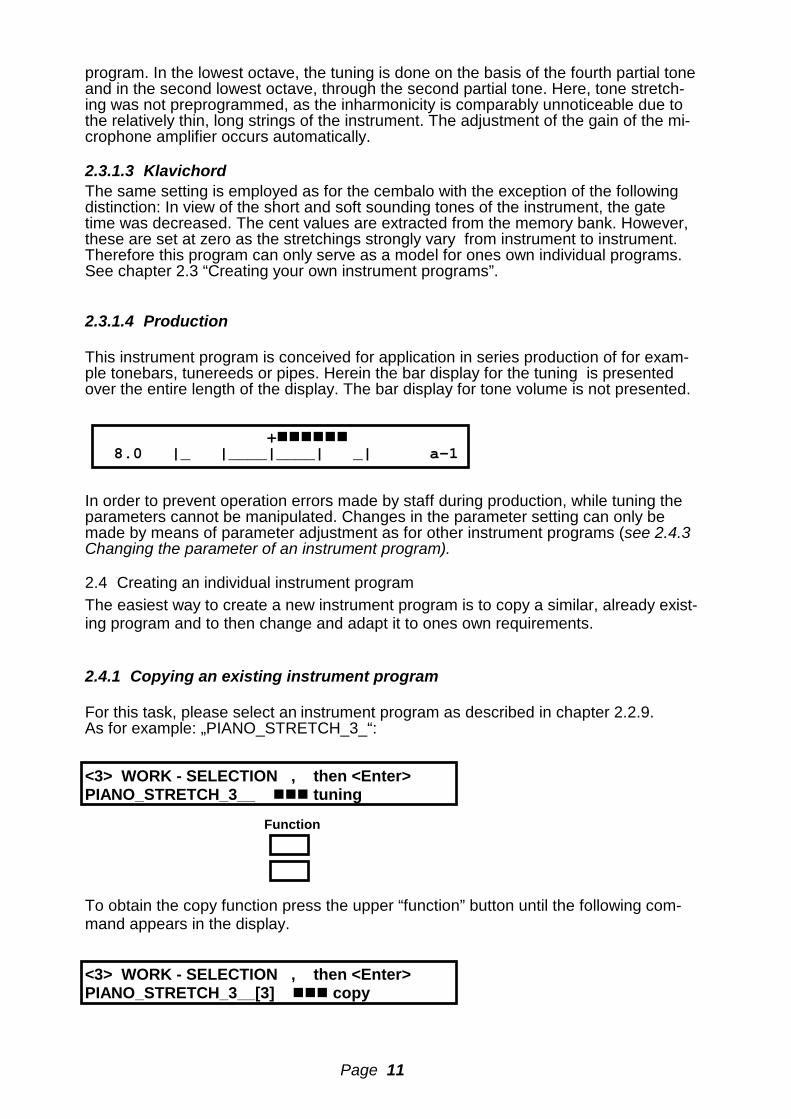
2.3.1.4 Production This instrument program is conceived for application in series production of for exam-ple tonebars, tunereeds or pipes. Herein the bar display for the tuning is presented over the entire length of the display. The bar display for tone volume is not presented.
+������8.0 |_ |____|____| _| a-1
In order to prevent operation errors made by staff during production, while tuning the parameters cannot be manipulated. Changes in the parameter setting can only be made by means of parameter adjustment as for other instrument programs (see 2.4.3 Changing the parameter of an instrument program).
2.4 Creating an individual instrument program The easiest way to create a new instrument program is to copy a similar, already exist-ing program and to then change and adapt it to ones own requirements.
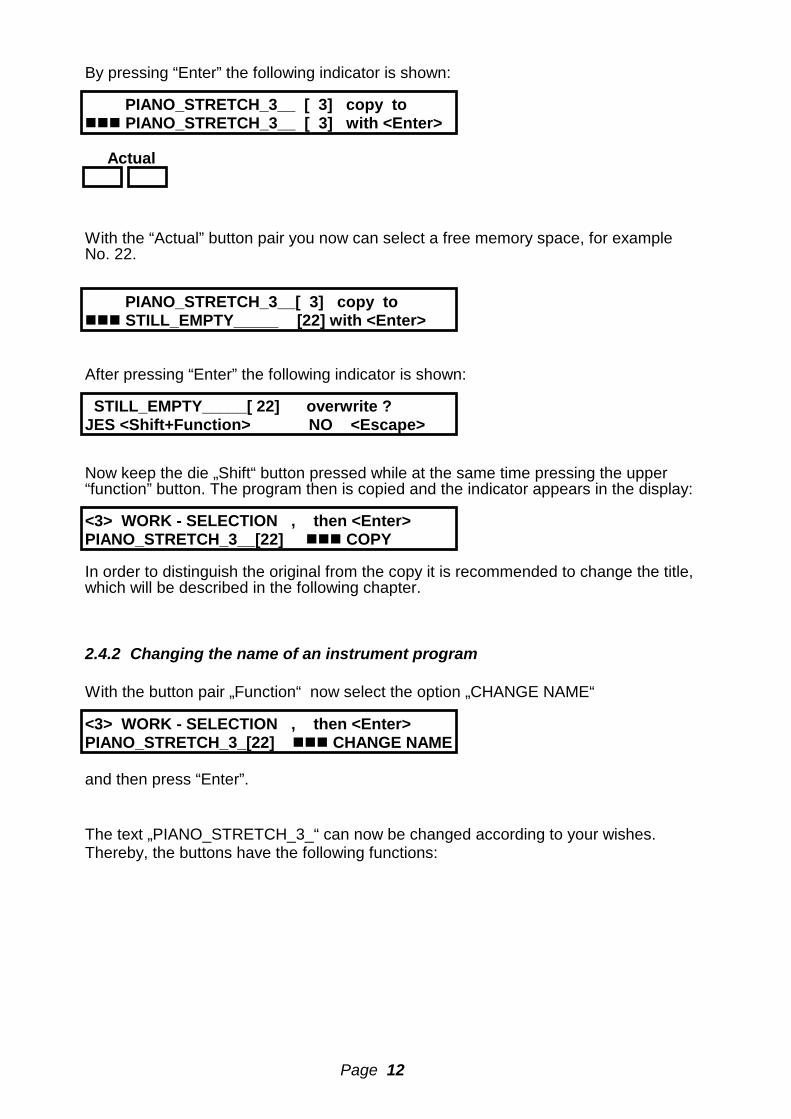
2.4.1 Copying an existing instrument program For this task, please select an instrument program as described in chapter 2.2.9. As for example: „PIANO_STRETCH_3_“: <3> WORK - SELECTION , then <Enter> PIANO_STRETCH_3__ ��� tuning Function To obtain the copy function press the upper “function” button until the following com-mand appears in the display. <3> WORK - SELECTION , then <Enter> PIANO_STRETCH_3__[3] ��� copy
Page 12
By pressing “Enter” the following indicator is shown: PIANO_STRETCH_3__ [ 3] copy to ��� PIANO_STRETCH_3__ [ 3] with <Enter> Actual With the “Actual” button pair you now can select a free memory space, for example No. 22. PIANO_STRETCH_3__[ 3] copy to ��� STILL_EMPTY_____ [22] with <Enter> After pressing “Enter” the following indicator is shown: STILL_EMPTY_____[ 22] overwrite ? JES <Shift+Function> NO <Escape> Now keep the die „Shift“ button pressed while at the same time pressing the upper “function” button. The program then is copied and the indicator appears in the display: <3> WORK - SELECTION , then <Enter> PIANO_STRETCH_3__[22] ��� COPY In order to distinguish the original from the copy it is recommended to change the title, which will be described in the following chapter.
2.4.2 Changing the name of an instrument program With the button pair „Function“ now select the option „CHANGE NAME“ <3> WORK - SELECTION , then <Enter> PIANO_STRETCH_3_[22] ��� CHANGE NAME and then press “Enter”. The text „PIANO_STRETCH_3_“ can now be changed according to your wishes. Thereby, the buttons have the following functions:
Page 13
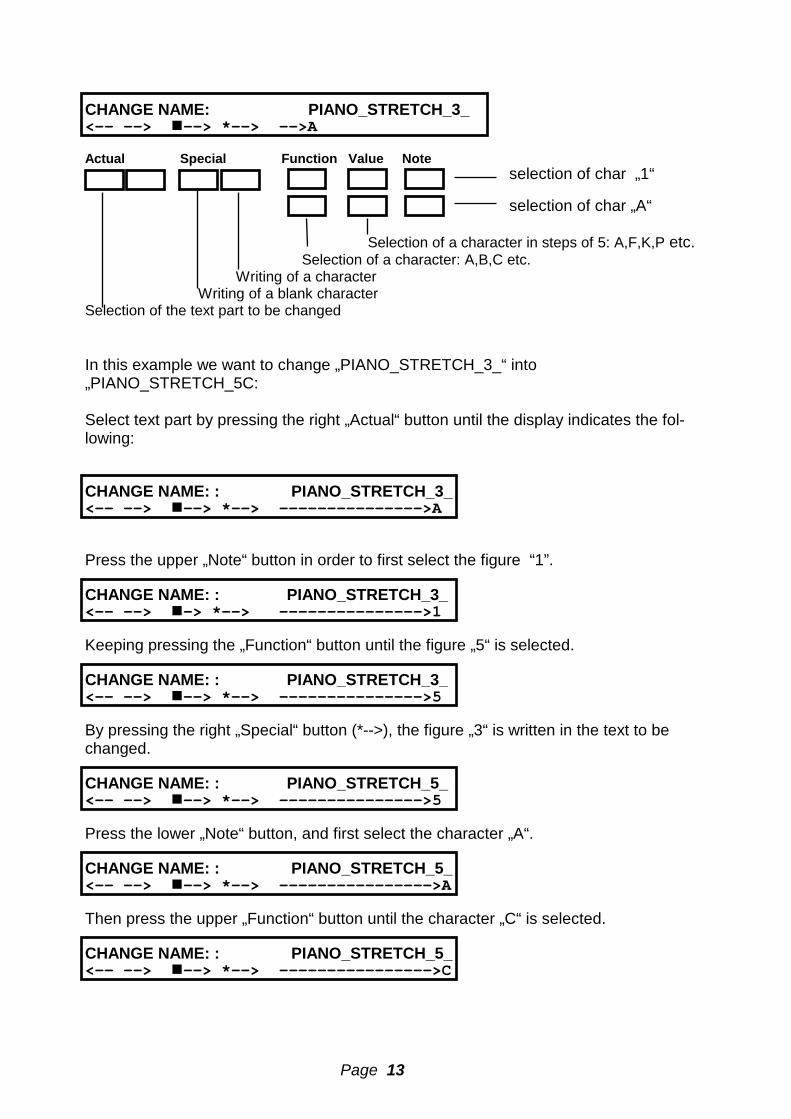
CHANGE NAME: PIANO_STRETCH_3_ <-- --> �--> *--> -->A
Actual Special Function Value Note selection of char „1“ selection of char „A“ Selection of a character in steps of 5: A,F,K,P etc. Selection of a character: A,B,C etc. Writing of a character Writing of a blank character Selection of the text part to be changed In this example we want to change „PIANO_STRETCH_3_“ into „PIANO_STRETCH_5C: Select text part by pressing the right „Actual“ button until the display indicates the fol-lowing: CHANGE NAME: : PIANO_STRETCH_3_ <-- --> �--> *--> --------------->A Press the upper „Note“ button in order to first select the figure “1”. CHANGE NAME: : PIANO_STRETCH_3_ <-- --> �-> *--> --------------->1 Keeping pressing the „Function“ button until the figure „5“ is selected. CHANGE NAME: : PIANO_STRETCH_3_ <-- --> �--> *--> --------------->5 By pressing the right „Special“ button (*-->), the figure „3“ is written in the text to be changed. CHANGE NAME: : PIANO_STRETCH_5_ <-- --> �--> *--> --------------->5 Press the lower „Note“ button, and first select the character „A“. CHANGE NAME: : PIANO_STRETCH_5_ <-- --> �--> *--> ---------------->A Then press the upper „Function“ button until the character „C“ is selected. CHANGE NAME: : PIANO_STRETCH_5_ <-- --> �--> *--> ---------------->C
Page 14
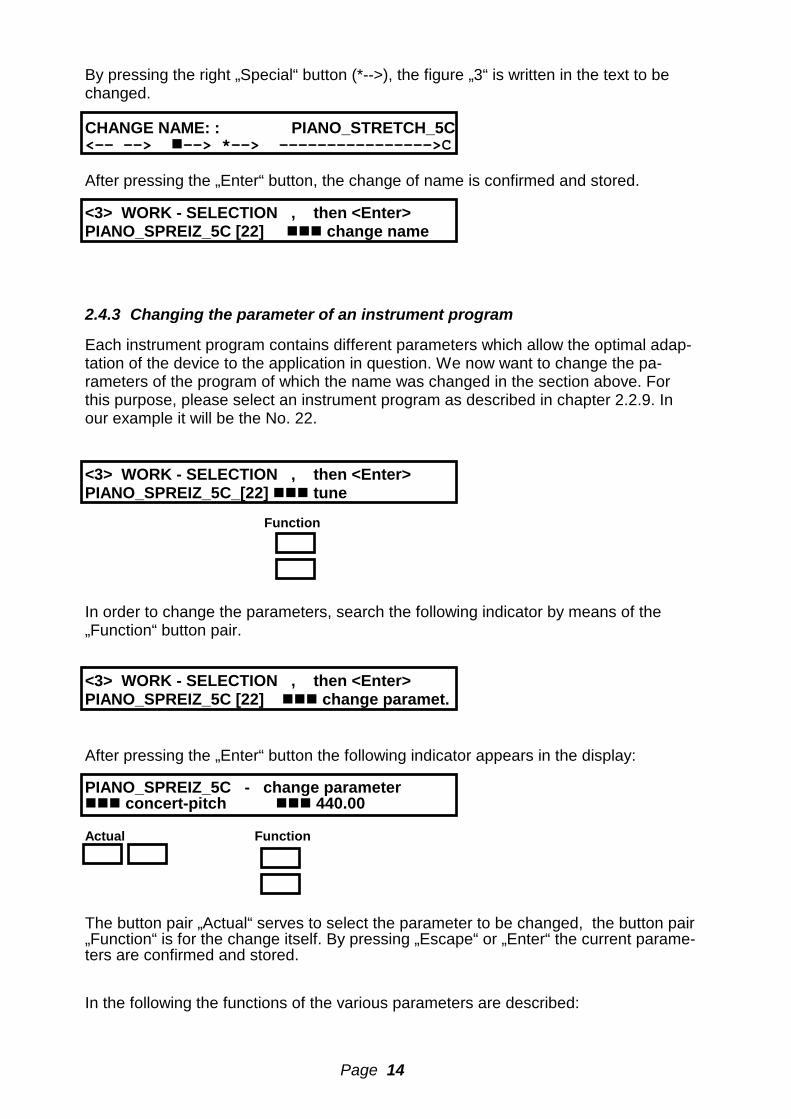
By pressing the right „Special“ button (*-->), the figure „3“ is written in the text to be changed. CHANGE NAME: : PIANO_STRETCH_5C <-- --> �--> *--> ---------------->C After pressing the „Enter“ button, the change of name is confirmed and stored. <3> WORK - SELECTION , then <Enter> PIANO_SPREIZ_5C [22] ��� change name 2.4.3 Changing the parameter of an instrument program
Each instrument program contains different parameters which allow the optimal adap-tation of the device to the application in question. We now want to change the pa-rameters of the program of which the name was changed in the section above. For this purpose, please select an instrument program as described in chapter 2.2.9. In our example it will be the No. 22. <3> WORK - SELECTION , then <Enter> PIANO_SPREIZ_5C_[22] ��� tune Function In order to change the parameters, search the following indicator by means of the „Function“ button pair. <3> WORK - SELECTION , then <Enter> PIANO_SPREIZ_5C [22] ��� change paramet. After pressing the „Enter“ button the following indicator appears in the display: PIANO_SPREIZ_5C - change parameter ��� concert-pitch ��� 440.00 Actual Function The button pair „Actual“ serves to select the parameter to be changed, the button pair „Function“ is for the change itself. By pressing „Escape“ or „Enter“ the current parame-ters are confirmed and stored. In the following the functions of the various parameters are described:

Page 15
2.4.3.1 Concert pitch
The concert pitch which is adjusted at the beginning of the tuning program. Adjust-able: 220.00...880 .00 Hertz. The concert pitch can also be changed directly in the tuning program. 2.4.3.2 First note
The tone selected in the beginning of the tuning program. Adjustable C-2 ... g#6. 2.4.3.3 Historical temperament
Adjustment of a historical temperament for the instrument program in question. When „--“ is adjusted, the temperament is equal temperament when calling a tuning program, no other temperament can be adjusted. For all other settings, a tempera-ment can be selected before calling the tuning program. Adjustable: 80 different tem-peraments. 2.4.3.4 Historical cent reference
The adjustment of the cent reference of the temperament for the instrument program in question. When „--“ is adjusted, the cent reference is: = „A“. When calling the tuning program, no other cent reference can be adjusted. For all other settings, the cent reference can be selected before calling the tuning program. Adjustable: A...G#. The description of the function of cent reference is found in chapter 3.5. 2.4.3.5 Historical cent transposer
The adjustment of the transposer of a temperament for the instrument program in question. When „--“ is adjusted, the transposer is: = „A --> A“. When calling the tuning program, no other transposer can be adjusted. For all other settings, the cent transposer can be selected before calling the tuning program. Adjustable: A...G#. The description of the function of cent transposer is found in chapter: 3.6 2.4.3.6 Resolution
The resolution of the bar display which is adjusted at the beginning of the tuning pro-gram. The resolution may also be changed within the tuning program. See chapter: 2.2.7.6 „RESOL (resolution): 2.4.3.7 Gate time
The gate time for the measurement of frequency which is adjusted at the beginning of the tuning program. See chapter: 2.2.7.7 2.4.3.8 Level measurement
Herein one can adjust in which mode the measurement of the <level> (right bar dis-play indicator within the tuning program) is to occur.
Page 16
Adjustment: „off“: - no level display „Input level“ - level display in front of bandpass filter. „Output level“ - level display behind the bandpass filter. When „filter level“ is adjusted, a partial tone analysis can be effected by switching the partial tone with help of the “Partial” button. 2.4.3.9 Amplification
Herein one can adjust in which way the amplification of the incoming microphone sig-nals can be controlled. Settings: „memory“ - the amplification is controlled tone by tone from the memory bank. See
chapter: 2.4.3.19 „how to “memory” an Instrument” „button“ - the adjustment of the amplification is effected by means of the button.
See chapter: 2.2.7.5 „AMPL (Amplification):” „automatic“ - the adjustment of the amplification occurs automatically
2.4.3.10 Cent adjustment Herein one can adjust in which mode the cent adjustments should occur. Settings: „memory“: cent adjustment is controlled tone by tone via the memory. „button“ cent adjustment occurs directly by means of the button.
2.4.3.11 Special-Keys (Function of the two Special-Keys) Herein one can adjust in which mode the partial tone adjustments should occur. Set-tings: „partial-memory“: partial tone adjustment is controlled tone by tone via the Memory.
„special-button“ partial tone adjustment occurs only by means of the button.
“sequence 1...15” The partial tone adjustment occurs tone by tone via the memory bank. The button pair „special“ is used for the adjustment of tones according to a specific sequence of notes. See chapter 2.5.9.
„Off“ The partial tone adjustment occurs tone by tone via the memory bank and cannot be changed with the button pair „special“
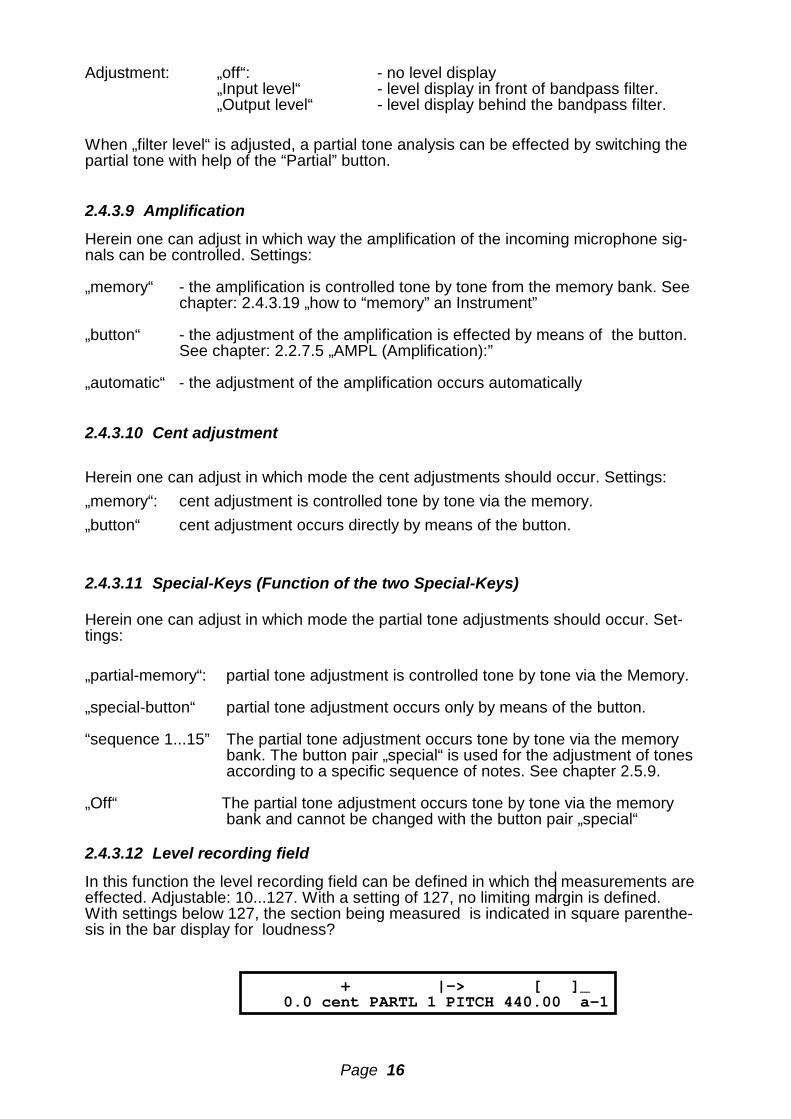
2.4.3.12 Level recording field
In this function the level recording field can be defined in which the measurements are effected. Adjustable: 10...127. With a setting of 127, no limiting margin is defined. With settings below 127, the section being measured is indicated in square parenthe-sis in the bar display for loudness?
+ |-> [ ]_0.0 cent PARTL 1 PITCH 440.00 a-1
Page 17
2.4.3.13 Thermosensor rate
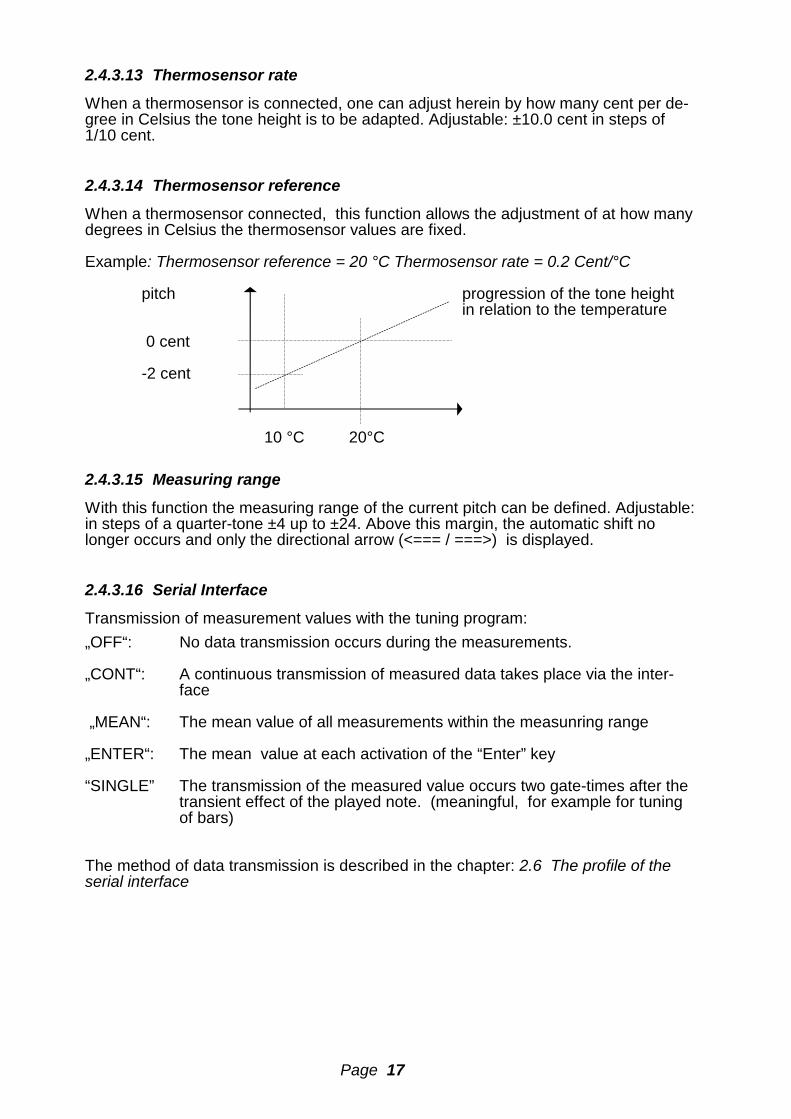
When a thermosensor is connected, one can adjust herein by how many cent per de-gree in Celsius the tone height is to be adapted. Adjustable: ±10.0 cent in steps of 1/10 cent. 2.4.3.14 Thermosensor reference
When a thermosensor connected, this function allows the adjustment of at how many degrees in Celsius the thermosensor values are fixed. Example: Thermosensor reference = 20 °C Thermosensor rate = 0.2 Cent/°C pitch progression of the tone height in relation to the temperature 0 cent -2 cent 10 °C 20°C 2.4.3.15 Measuring range
With this function the measuring range of the current pitch can be defined. Adjustable: in steps of a quarter-tone ±4 up to ±24. Above this margin, the automatic shift no longer occurs and only the directional arrow (<=== / ===>) is displayed. 2.4.3.16 Serial Interface
Transmission of measurement values with the tuning program: „OFF“: No data transmission occurs during the measurements.
„CONT“: A continuous transmission of measured data takes place via the inter-face
„MEAN“: The mean value of all measurements within the measunring range
„ENTER“: The mean value at each activation of the “Enter” key
“SINGLE” The transmission of the measured value occurs two gate-times after the transient effect of the played note. (meaningful, for example for tuning of bars)
The method of data transmission is described in the chapter: 2.6 The profile of the serial interface
Page 18
2.4.3.17 Bar display „normal“: Normal indication of the bar display as formerly described. „full“: Indication of the bar graph over the entire length of the display The bar display for tone volume is not presented. The functions for displaying and altering parameters during the tuning task are locked. See also chapter: 2.3.1.4 “Instrument program production”
2.4.3.18 Semitone steps Herein one can enter the number of semitone steps which will be switched by keeping the Shift button pressed while activating “Special”. See chapter 2.2.6.
2.4.3.19 Length reference Herein one can enter the reference length for the calculation ogran pipe corrections. See also chapter 3.8
2.4.3.20 Write protection „ON“: The stored instrument programs cannot be overwritten. „OFF“: No write protection function
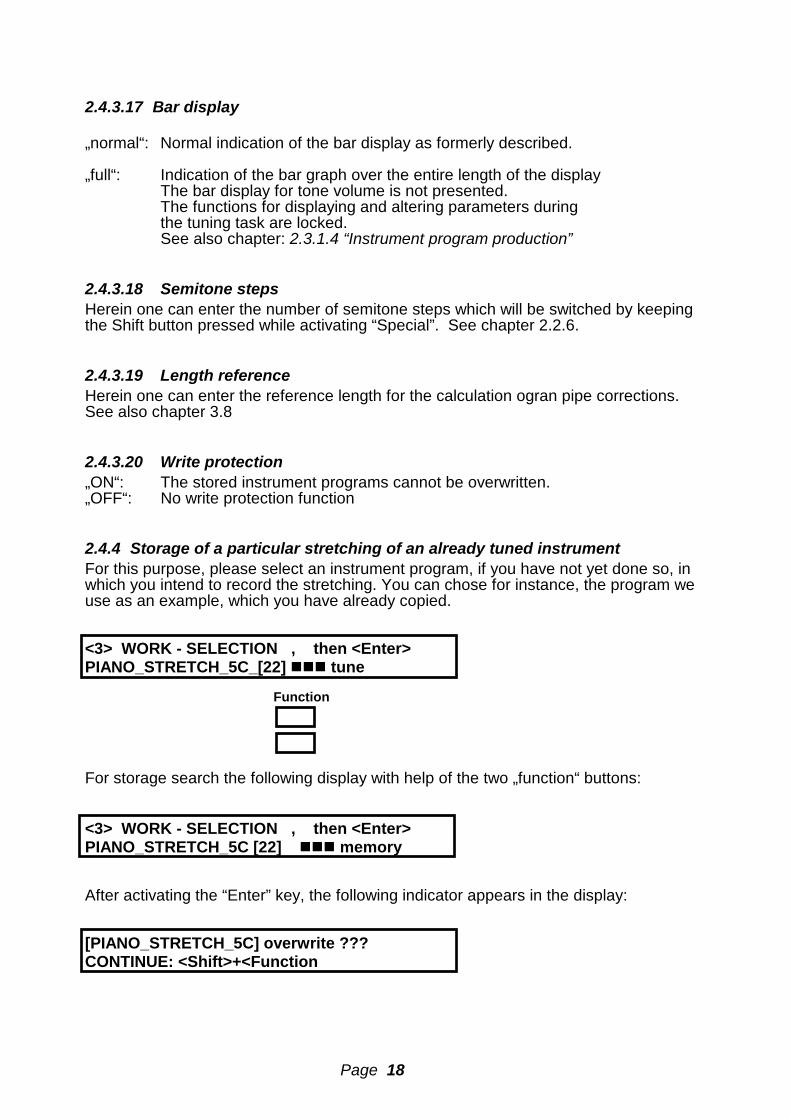
2.4.4 Storage of a particular stretching of an already tuned instrument For this purpose, please select an instrument program, if you have not yet done so, in which you intend to record the stretching. You can chose for instance, the program we use as an example, which you have already copied. <3> WORK - SELECTION , then <Enter> PIANO_STRETCH_5C_[22] ��� tune Function For storage search the following display with help of the two „function“ buttons: <3> WORK - SELECTION , then <Enter> PIANO_STRETCH_5C [22] ��� memory After activating the “Enter” key, the following indicator appears in the display: [PIANO_STRETCH_5C] overwrite ??? CONTINUE: <Shift>+<Function

Page 19
Now press the „Shift“ + „Function“ buttons. You will now be requested to align the tun-ing device to the concert pitch a1 of the instrument to be stored. Next you will receive the following indication in the display:
+ |->0.0 cent PARTL 1 PITCH 440.00 a-1
Now align the concert pitch of the tuning device to your instrument by playing the tone indicated (in this example a’) and then changing the concert pitch via the “Value” but-tons, to the effect that the strobo display is balanced. For this the automatic function is very helpful, which can be activated by pressing both “Value” buttons simultaneously (also see 2.2.7.1). Next please press the “Enter” key and observe the following dis-play:
+ |->0.0 cent PARTL 1 CENTS 0.0 a-1
Now adjust the tone setting with help of the „Note“ buttons to the lowest tone of your instrument, for instance this would be C-1 for a piano. Now play this note. With the „Special“ button, you then select the partial tone which presents the clearest indicator on the strobo display. Via the „Value“ buttons you then adapt the tuning device to the tone played. For this task also, the automatic function, which is activated by pressing both “Value” buttons simultaneously, can be very helpful. Once the tuning device is adapted (which implies that the strobo display is balanced), the necessary cents correspond to those dis-played above the “Value” buttons. Now press the “Enter” key. The current setting of the device for that particular tone is now stored. The unit then automatically switches to the next tone. You may now re-peat this procedure as described until all notes of your instrument are stored. If so re-quired during this procedure, you may switch to „AMPL“ with help of the „Function“ buttons. This allows you to alter the microphone amplification in order to achieve a better display quality. The microphone amplification is also stored tone by tone.
2.4.5 Sending data of an instrument program over the serial interface For this purpose, please select the instrument program in question. For example: <3> WORK - SELECTION , then <Enter> PIANO_STRETCH_5C_[22] ��� tune Function For transmission, search the following indicator with the two “Function” buttons: <3> WORK - SELECTION , then <Enter> PIANO_STRETCH_5C [22] ��� transmit

Page 20
Then press the “Enter” button to obtain the following indicator: CONNECT PC, START TERMINAL PROGRAM then <Enter> After pressing “Enter”, the instrument program data is transmitted through the inter-face in form of a text file. You operate your PC as described in the chapter: 2.5.2 Data transfer of all data to PC. Once the task has been completed, the following indi-cator appears: READY! Continue <Escape>
2.5 The main selection When the device is first started up, it is in the instrument selection mode. If at this point you press the “ESC” key, the main selection is activated. You will obtain the fol-lowing indicator: <1> MAIN SELECTION, then <Enter> ��� INTRUMENT-PROGRAMS Actual With the two „Actual“ buttons you now can select one of the options described below.
2.5.1 Editing of historical temperaments After pressing “Enter” the following indicator appears in the display: TEMP HIST. SELECTION, then <Enter> ��� KIRNBERGER______[ 2] Actual With the „Actual“ button, you search one of the available 80 memory records, for ex-ample: TEMP HIST. SELECTION, then <Enter> ��� STILL_EMPTY______[45] After pressing “Enter” you can define the name under which you intend to store your temperament for later use, i.e. „HENRY_MILLER1998“ as described in the chapter: 2.4.2 „Changing the name of an instrument program”. After confirming with the “Enter” key, the following indicator appears in the display:
Page 21
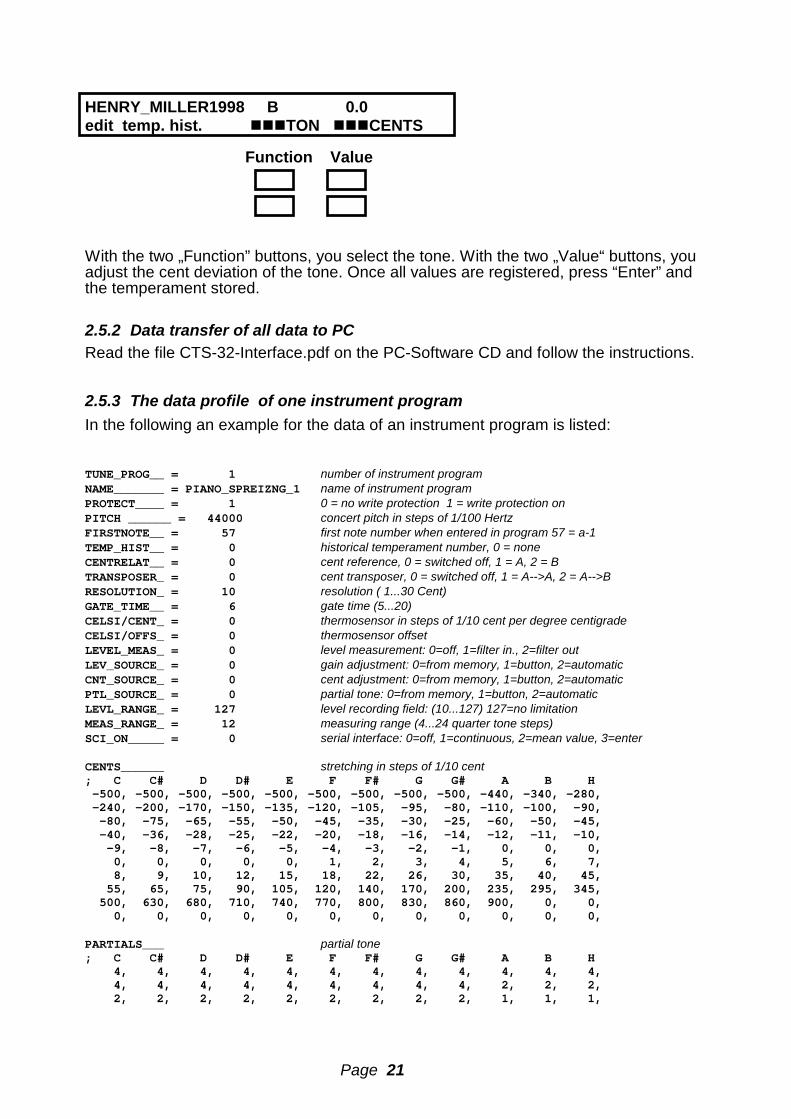
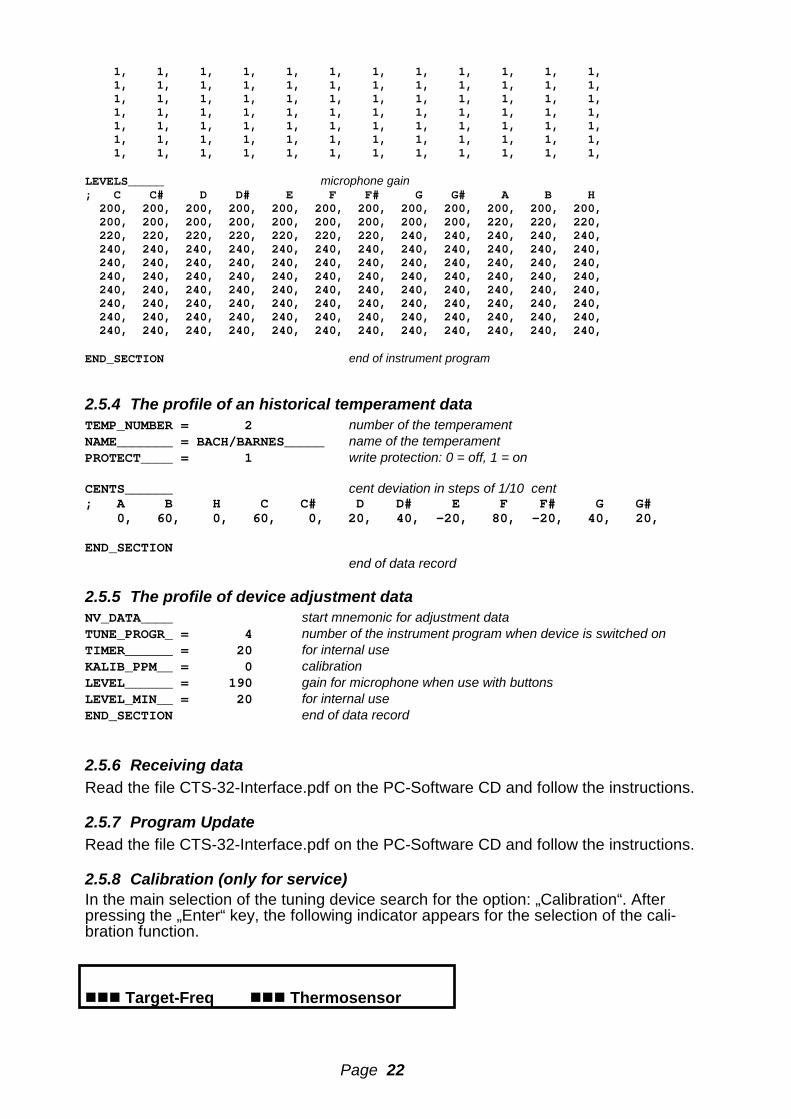
HENRY_MILLER1998 B 0.0 edit temp. hist. ���TON ���CENTS Function Value With the two „Function” buttons, you select the tone. With the two „Value“ buttons, you adjust the cent deviation of the tone. Once all values are registered, press “Enter” and the temperament stored. 2.5.2 Data transfer of all data to PC Read the file CTS-32-Interface.pdf on the PC-Software CD and follow the instructions. 2.5.3 The data profile of one instrument program In the following an example for the data of an instrument program is listed: TUNE_PROG__ = 1 number of instrument programNAME_______ = PIANO_SPREIZNG_1 name of instrument programPROTECT____ = 1 0 = no write protection 1 = write protection onPITCH ______ = 44000 concert pitch in steps of 1/100 HertzFIRSTNOTE__ = 57 first note number when entered in program 57 = a-1TEMP_HIST__ = 0 historical temperament number, 0 = noneCENTRELAT__ = 0 cent reference, 0 = switched off, 1 = A, 2 = BTRANSPOSER_ = 0 cent transposer, 0 = switched off, 1 = A-->A, 2 = A-->B RESOLUTION_ = 10 resolution ( 1...30 Cent)GATE_TIME__ = 6 gate time (5...20)CELSI/CENT_ = 0 thermosensor in steps of 1/10 cent per degree centigradeCELSI/OFFS_ = 0 thermosensor offsetLEVEL_MEAS_ = 0 level measurement: 0=off, 1=filter in., 2=filter out LEV_SOURCE_ = 0 gain adjustment: 0=from memory, 1=button, 2=automaticCNT_SOURCE_ = 0 cent adjustment: 0=from memory, 1=button, 2=automaticPTL_SOURCE_ = 0 partial tone: 0=from memory, 1=button, 2=automaticLEVL_RANGE_ = 127 level recording field: (10...127) 127=no limitationMEAS_RANGE_ = 12 measuring range (4...24 quarter tone steps)SCI_ON_____ = 0 serial interface: 0=off, 1=continuous, 2=mean value, 3=enter
CENTS______ stretching in steps of 1/10 cent ; C C# D D# E F F# G G# A B H-500, -500, -500, -500, -500, -500, -500, -500, -500, -440, -340, -280,-240, -200, -170, -150, -135, -120, -105, -95, -80, -110, -100, -90,-80, -75, -65, -55, -50, -45, -35, -30, -25, -60, -50, -45,-40, -36, -28, -25, -22, -20, -18, -16, -14, -12, -11, -10,-9, -8, -7, -6, -5, -4, -3, -2, -1, 0, 0, 0,0, 0, 0, 0, 0, 1, 2, 3, 4, 5, 6, 7,8, 9, 10, 12, 15, 18, 22, 26, 30, 35, 40, 45,
55, 65, 75, 90, 105, 120, 140, 170, 200, 235, 295, 345,500, 630, 680, 710, 740, 770, 800, 830, 860, 900, 0, 0,
0, 0, 0, 0, 0, 0, 0, 0, 0, 0, 0, 0,
PARTIALS___ partial tone; C C# D D# E F F# G G# A B H
4, 4, 4, 4, 4, 4, 4, 4, 4, 4, 4, 4,4, 4, 4, 4, 4, 4, 4, 4, 4, 2, 2, 2,2, 2, 2, 2, 2, 2, 2, 2, 2, 1, 1, 1,
Page 22
1, 1, 1, 1, 1, 1, 1, 1, 1, 1, 1, 1,1, 1, 1, 1, 1, 1, 1, 1, 1, 1, 1, 1,1, 1, 1, 1, 1, 1, 1, 1, 1, 1, 1, 1,1, 1, 1, 1, 1, 1, 1, 1, 1, 1, 1, 1,1, 1, 1, 1, 1, 1, 1, 1, 1, 1, 1, 1,1, 1, 1, 1, 1, 1, 1, 1, 1, 1, 1, 1,1, 1, 1, 1, 1, 1, 1, 1, 1, 1, 1, 1,
LEVELS_____ microphone gain; C C# D D# E F F# G G# A B H
200, 200, 200, 200, 200, 200, 200, 200, 200, 200, 200, 200,200, 200, 200, 200, 200, 200, 200, 200, 200, 220, 220, 220,220, 220, 220, 220, 220, 220, 220, 240, 240, 240, 240, 240,240, 240, 240, 240, 240, 240, 240, 240, 240, 240, 240, 240,240, 240, 240, 240, 240, 240, 240, 240, 240, 240, 240, 240,240, 240, 240, 240, 240, 240, 240, 240, 240, 240, 240, 240,240, 240, 240, 240, 240, 240, 240, 240, 240, 240, 240, 240,240, 240, 240, 240, 240, 240, 240, 240, 240, 240, 240, 240,240, 240, 240, 240, 240, 240, 240, 240, 240, 240, 240, 240,240, 240, 240, 240, 240, 240, 240, 240, 240, 240, 240, 240,
END_SECTION end of instrument program
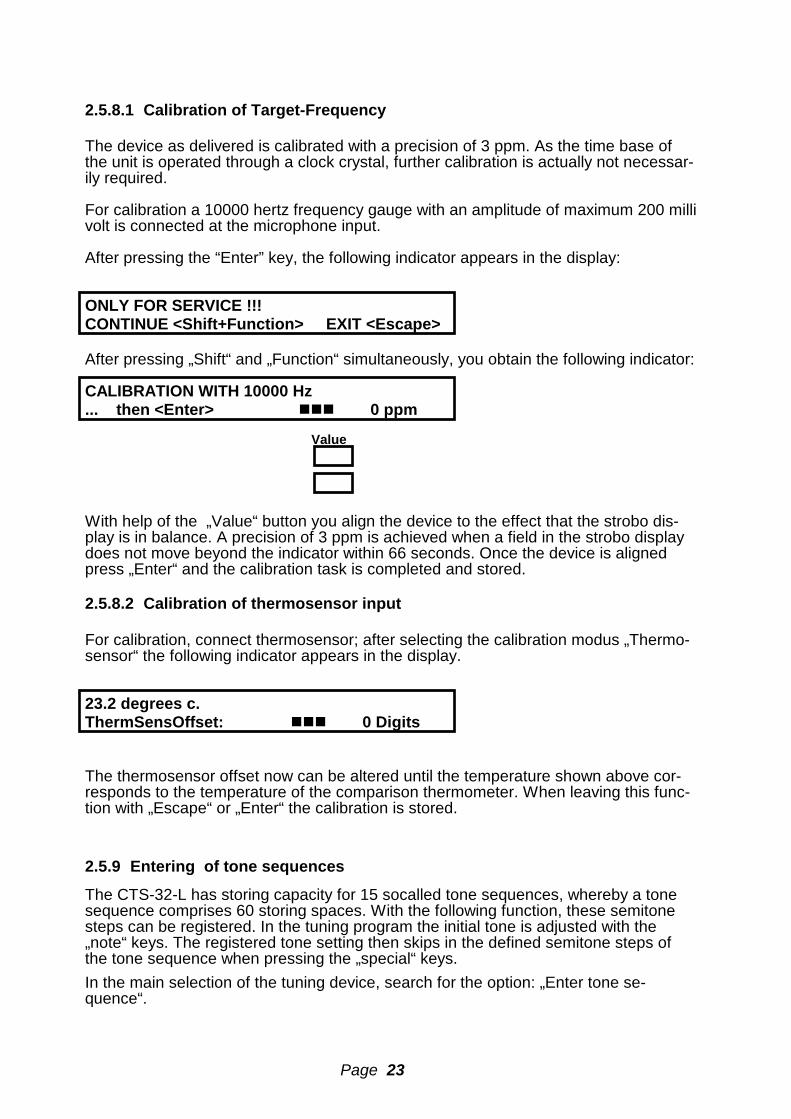
2.5.4 The profile of an historical temperament data TEMP_NUMBER = 2 number of the temperamentNAME_______ = BACH/BARNES_____ name of the temperamentPROTECT____ = 1 write protection: 0 = off, 1 = on
CENTS______ cent deviation in steps of 1/10 cent; A B H C C# D D# E F F# G G#
0, 60, 0, 60, 0, 20, 40, -20, 80, -20, 40, 20,
END_SECTIONend of data record
2.5.5 The profile of device adjustment data NV_DATA____ start mnemonic for adjustment dataTUNE_PROGR_ = 4 number of the instrument program when device is switched on TIMER______ = 20 for internal useKALIB_PPM__ = 0 calibrationLEVEL______ = 190 gain for microphone when use with buttonsLEVEL_MIN__ = 20 for internal useEND_SECTION end of data record
2.5.6 Receiving data Read the file CTS-32-Interface.pdf on the PC-Software CD and follow the instructions.
2.5.7 Program Update Read the file CTS-32-Interface.pdf on the PC-Software CD and follow the instructions.
2.5.8 Calibration (only for service) In the main selection of the tuning device search for the option: „Calibration“. After pressing the „Enter“ key, the following indicator appears for the selection of the cali-bration function. ��� Target-Freq ��� Thermosensor
Page 23
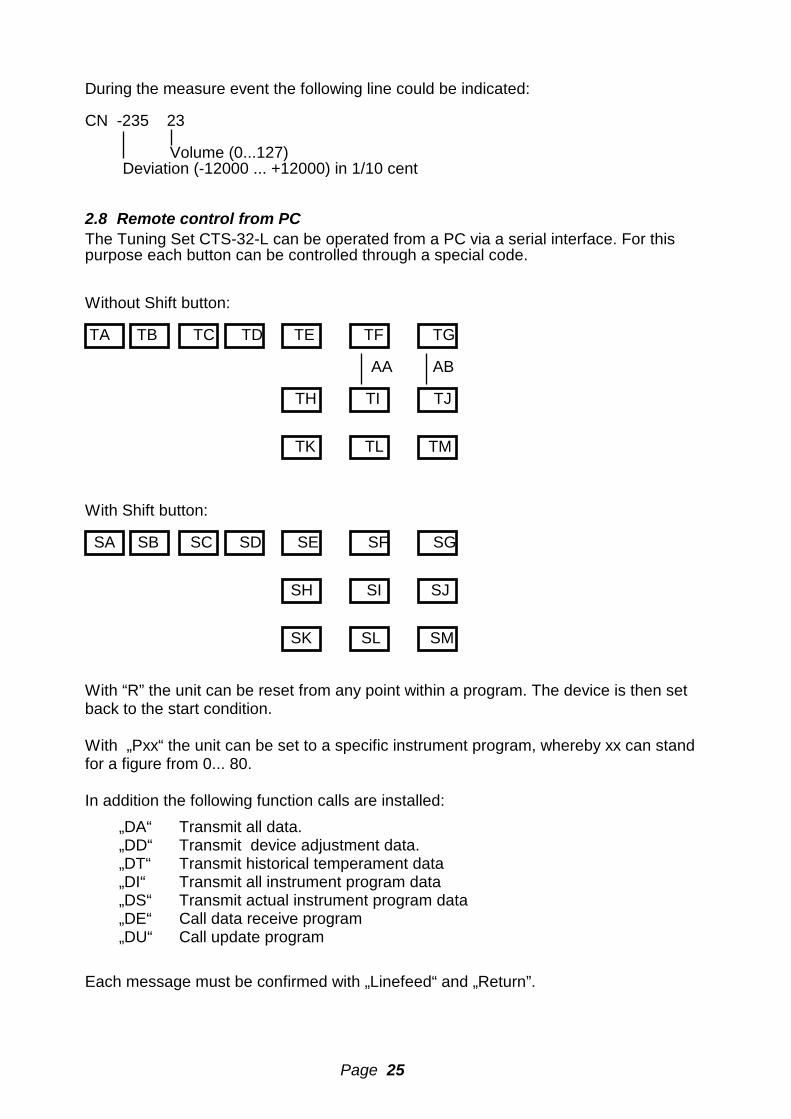
2.5.8.1 Calibration of Target-Frequency The device as delivered is calibrated with a precision of 3 ppm. As the time base of the unit is operated through a clock crystal, further calibration is actually not necessar-ily required. For calibration a 10000 hertz frequency gauge with an amplitude of maximum 200 milli volt is connected at the microphone input. After pressing the “Enter” key, the following indicator appears in the display: ONLY FOR SERVICE !!! CONTINUE <Shift+Function> EXIT <Escape> After pressing „Shift“ and „Function“ simultaneously, you obtain the following indicator: CALIBRATION WITH 10000 Hz ... then <Enter> ��� 0 ppm Value With help of the „Value“ button you align the device to the effect that the strobo dis-play is in balance. A precision of 3 ppm is achieved when a field in the strobo display does not move beyond the indicator within 66 seconds. Once the device is aligned press „Enter“ and the calibration task is completed and stored.
2.5.8.2 Calibration of thermosensor input For calibration, connect thermosensor; after selecting the calibration modus „Thermo-sensor“ the following indicator appears in the display. 23.2 degrees c. ThermSensOffset: ��� 0 Digits The thermosensor offset now can be altered until the temperature shown above cor-responds to the temperature of the comparison thermometer. When leaving this func-tion with „Escape“ or „Enter“ the calibration is stored. 2.5.9 Entering of tone sequences
The CTS-32-L has storing capacity for 15 socalled tone sequences, whereby a tone sequence comprises 60 storing spaces. With the following function, these semitone steps can be registered. In the tuning program the initial tone is adjusted with the „note“ keys. The registered tone setting then skips in the defined semitone steps of the tone sequence when pressing the „special“ keys. In the main selection of the tuning device, search for the option: „Enter tone se-quence“.

Page 24
After pressing the „Enter“ key the following indicator appears in the display: ��� Sequence [1] You now may select one of 15 tone sequences. After selection press “Enter”. The fol-lowing indicator appears on the display: ��� Step [01] ��� Semitones 0 Now enter the semitone steps, beginning with step 01. By entering a “0”, the sequence will be finished. To use the sequence in one of the instrument-programs, you have to adjust the func-tion of the “special-keys” to the desired seqence. See chapter 2.4.3.18.
2.6 The profile of the serial interface
Baud rate: 19200, databits: 7, parity: odd, stopbit: 1, profile: XON/XOFF. 2.7 Data format of tuning program events
If the interface is activated (see chapter 2.4.3.16), the following protocol is sent during the tuning program. When changing a note, concert pitch, cents, gain etc., a different line is indicated showing the status of the device, as for example: ST 57 44000 11 250 0 0 0 Interval (0=none, 1=second, 2=terce, 3=quint, 4=sept Beats (0...1000) in 1/10 Fundamental wave (0...15) Amplification 0...250 (250 = maximum) Cents (planned cents -1500 ... +1500) in 1/10 cent Concert pitch (22000 ... 88000) in 1/100 hertz Tone number (1...120) 57 = a-1
Page 25
During the measure event the following line could be indicated: CN -235 23 Volume (0...127) Deviation (-12000 ... +12000) in 1/10 cent
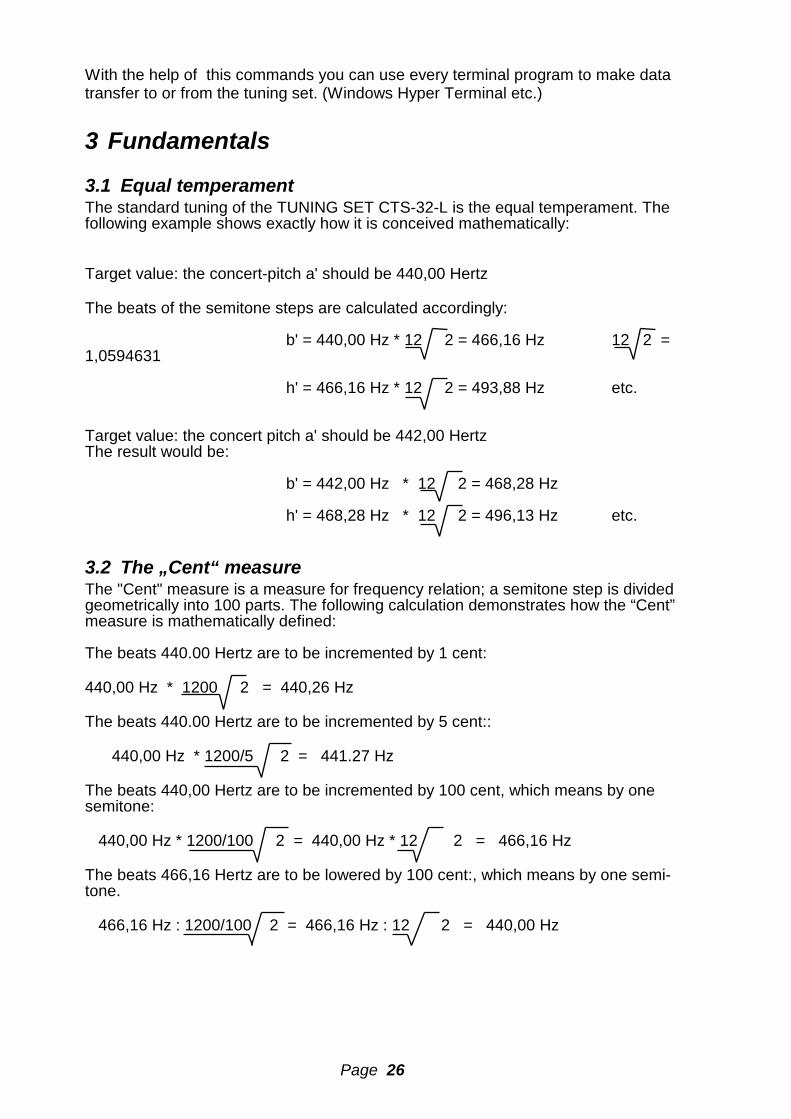
2.8 Remote control from PC The Tuning Set CTS-32-L can be operated from a PC via a serial interface. For this purpose each button can be controlled through a special code. Without Shift button:
TA TB TC TD TE TF TG AA AB
TH TI TJ
TK TL TM With Shift button:
SA SB SC SD SE SF SG
SH SI SJ
SK SL SM With “R” the unit can be reset from any point within a program. The device is then set back to the start condition. With „Pxx“ the unit can be set to a specific instrument program, whereby xx can stand for a figure from 0... 80. In addition the following function calls are installed:
„DA“ Transmit all data. „DD“ Transmit device adjustment data. „DT“ Transmit historical temperament data „DI“ Transmit all instrument program data „DS“ Transmit actual instrument program data „DE“ Call data receive program „DU“ Call update program
Each message must be confirmed with „Linefeed“ and „Return”.
Page 26
With the help of this commands you can use every terminal program to make data transfer to or from the tuning set. (Windows Hyper Terminal etc.)
3 Fundamentals
3.1 Equal temperament The standard tuning of the TUNING SET CTS-32-L is the equal temperament. The following example shows exactly how it is conceived mathematically: Target value: the concert-pitch a' should be 440,00 Hertz The beats of the semitone steps are calculated accordingly: b' = 440,00 Hz * 12 2 = 466,16 Hz 12 2 = 1,0594631 h' = 466,16 Hz * 12 2 = 493,88 Hz etc. Target value: the concert pitch a' should be 442,00 Hertz The result would be: b' = 442,00 Hz * 12 2 = 468,28 Hz h' = 468,28 Hz * 12 2 = 496,13 Hz etc.
3.2 The „Cent“ measure The "Cent" measure is a measure for frequency relation; a semitone step is divided geometrically into 100 parts. The following calculation demonstrates how the “Cent” measure is mathematically defined: The beats 440.00 Hertz are to be incremented by 1 cent: 440,00 Hz * 1200 2 = 440,26 Hz The beats 440.00 Hertz are to be incremented by 5 cent:: 440,00 Hz * 1200/5 2 = 441.27 Hz The beats 440,00 Hertz are to be incremented by 100 cent, which means by one semitone: 440,00 Hz * 1200/100 2 = 440,00 Hz * 12 2 = 466,16 Hz The beats 466,16 Hertz are to be lowered by 100 cent:, which means by one semi-tone. 466,16 Hz : 1200/100 2 = 466,16 Hz : 12 2 = 440,00 Hz

Page 27
3.3 Target frequency The microprocessor installed in the TUNING SET CTS 5 creates the target frequency as shown in the following equation : Wherein: f. Target frequency n c c: Cent adjustment o + + n: Note number (a = 0, b = 1...gis = 11) k 12 1200 k: Concert pitch setting (220 Hz... 880 Hz) f = * 2 o: Octave (1 = A-2(27,5 Hz)...9= a-5(7040 Hz) 16
3.4 Cent adjustment of historical temperaments Please refer the information as listed in the attached tabloid.
3.5 Cent reference function All temperament tables pre-programmed in the tuning device are conceived to the ef-fect that for the tone “a” the cent reference equals zero. The cent reference is also "a". In some cases it is recommendable to adapt this cent reference to a tone other than “a”. If now a different tone defined as cent reference for the tuning device, the cent values in the temperament tables are also incremented or lowered by the same amount for each tone, with the result that the cent reference for the particular tone equals zero. Example: cent deviations of the "Kirnberger III" temperament with the cent reference setting = "a" (standard case): a b h c c# d d# e f f# g g# 0 +6,5 -1,5 +10,5 +0,5 +3,5 +4,5 -3,5 +8,5 +0,5 +7,0 +2,5 For the cent reference setting = "c" 10,5 cent is subtracted from all amounts: a b h c c# d d# e f f# g g# -10,5 -4,0 -12,0 0 -10,0 -7,0 -6,0 -14,0 -2,0 -10,0 -3,5 -8,0
3.6 Transposer The transposer allows the transmission of all temperament tables into another key system. If for example the command transpose “a” to "c" ( A --> C) is entered, the cent values of the cent tables are transferred 3 semitones to the right. Hereby one should note that the cent reference function also is in effect and the cent values of the tables are recalculated, so that the note of cent reference of the cent value is = 0. Example: cent reference = “a” , transpose “a” to “c”:
Original table of the Kirnberger-III temperament: a b h c c# d d# e f f# g g# 0 +6,5 -1,5 +10,5 +0,5 +3,5 +4,5 -3,5 +8,5 +0,5 +7,0 +2,5 First the table is transposed by 3 semitone steps to the right: a b h c c# d d# e f f# g g# 0,5 +7,0 +2,5 0 +6,5 -1,5 +10,5 +0,5 +3,5 +4,5 -3,5 +8,5 and then it is recalculated to match the cent reference = “a” (-0,5 cent):
Page 28
a b h c c# d d# e f f# g g# 0 +6,5 +2,0 -0,5 +6,0 -2,0 +10,0 0 +3,0 +4,0 -4,0 +8,0
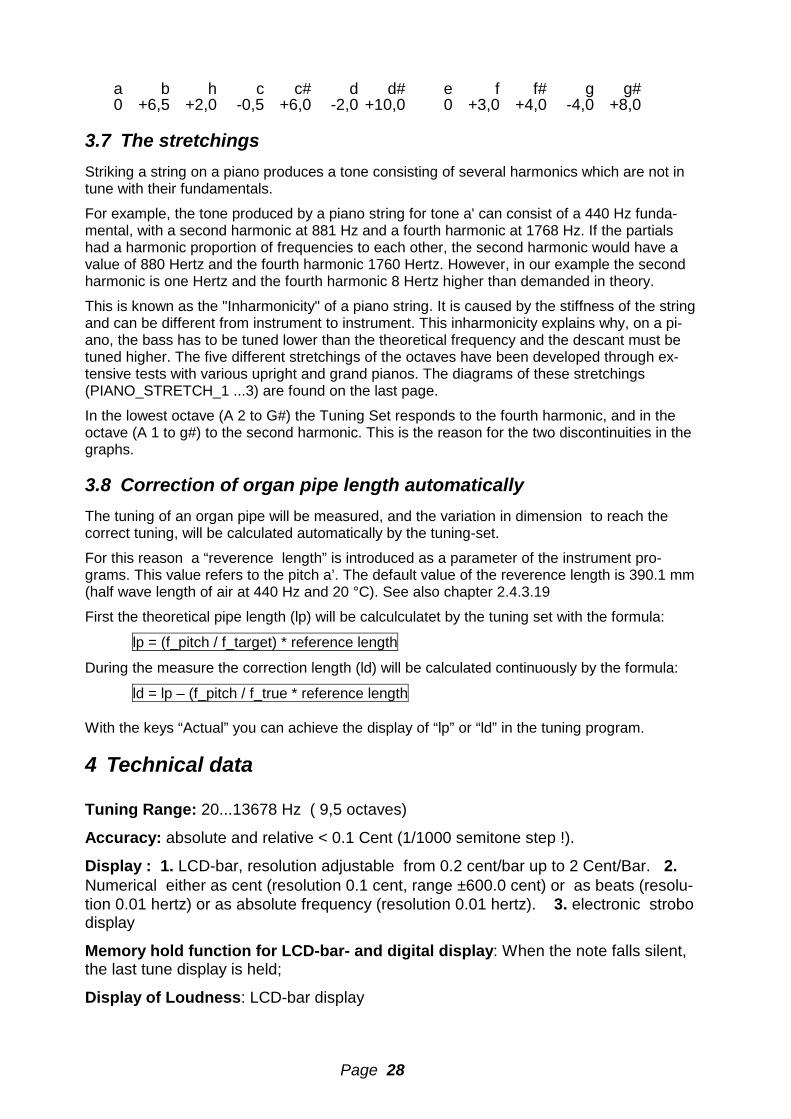
3.7 The stretchings Striking a string on a piano produces a tone consisting of several harmonics which are not in tune with their fundamentals.
For example, the tone produced by a piano string for tone a' can consist of a 440 Hz funda-mental, with a second harmonic at 881 Hz and a fourth harmonic at 1768 Hz. If the partials had a harmonic proportion of frequencies to each other, the second harmonic would have a value of 880 Hertz and the fourth harmonic 1760 Hertz. However, in our example the second harmonic is one Hertz and the fourth harmonic 8 Hertz higher than demanded in theory.
This is known as the "Inharmonicity" of a piano string. It is caused by the stiffness of the string and can be different from instrument to instrument. This inharmonicity explains why, on a pi-ano, the bass has to be tuned lower than the theoretical frequency and the descant must be tuned higher. The five different stretchings of the octaves have been developed through ex-tensive tests with various upright and grand pianos. The diagrams of these stretchings (PIANO_STRETCH_1 ...3) are found on the last page.
In the lowest octave (A 2 to G#) the Tuning Set responds to the fourth harmonic, and in the octave (A 1 to g#) to the second harmonic. This is the reason for the two discontinuities in the graphs.
3.8 Correction of organ pipe length automatically The tuning of an organ pipe will be measured, and the variation in dimension to reach the correct tuning, will be calculated automatically by the tuning-set.
For this reason a “reverence length” is introduced as a parameter of the instrument pro-grams. This value refers to the pitch a’. The default value of the reverence length is 390.1 mm (half wave length of air at 440 Hz and 20 °C). See also chapter 2.4.3.19
First the theoretical pipe length (lp) will be calculculatet by the tuning set with the formula:
lp = (f_pitch / f_target) * reference length
During the measure the correction length (ld) will be calculated continuously by the formula:
ld = lp – (f_pitch / f_true * reference length With the keys “Actual” you can achieve the display of “lp” or “ld” in the tuning program.
4 Technical data Tuning Range: 20...13678 Hz ( 9,5 octaves)
Accuracy: absolute and relative < 0.1 Cent (1/1000 semitone step !).
Display : 1. LCD-bar, resolution adjustable from 0.2 cent/bar up to 2 Cent/Bar. 2. Numerical either as cent (resolution 0.1 cent, range ±600.0 cent) or as beats (resolu-tion 0.01 hertz) or as absolute frequency (resolution 0.01 hertz). 3. electronic strobo display
Memory hold function for LCD-bar- and digital display: When the note falls silent, the last tune display is held;
Display of Loudness: LCD-bar display

Page 29
Concert-Pitch: Adjustable 220.00...880.00 Hertz in steps of 0.01 hertz with button or by automatic search function.
Adjustment of cents: With button ± 150.0 cent in steps of 0.1 cent or with automatic search function or through instrument program.
Adjustment of beats: ±50.0 hertz in steps of 0.1 hertz.
Purely Tuned Intervals: Second, third, fifth, seventh
Partials: From fundamental to 16. harmonic wave
Adjustment of microphone gain: Automatically, manually or through instrument pro-gram.
Display: Contrasted LC-display (super twist) with LED-background illumination. Microphone: Built-in condenser microphone and socket for external microphone 200...600 Ohm.
Audible tone: Aviable in the tuning programs. Adjustable in two volume steps.
Sensor input: Prepared for thermosensor. The cent rate for this is adjustable in steps of 0.1 cent per degree centigrade. The absolute reference is adjustable in steps of 1 degree centigrade.
Serial Interface: 19200 baud; 7 databit; 1 stop-bit; parity: odd; protocol: Xon Xoff.
Historical Temperaments: Memory for 80 temperaments. All temperaments can be programmed by the user himself and supplied with a 16-character name. All standard temperaments are pre-installed at delivery of the unit.
Instrument programs: Memory space for 80 instrument programs. Instrument pro-grams for all standard instruments are already pre-installed at delivery. Each instru-ment program contains the following adjustment data: Name of instrument program
Memory for one of each note in every instrument program (80x120 memory cells) • Cent memory ±150.0 cent to store stretchings, for example for piano.
• Memory for harmonics. To select the harmonics for the measuring of each note.
• Memory for microphone gain. To select the microphone gain for the measuring of each note.
Instrument program parameter: • Concert pitch • Firs note after calling a instrument program. • Historical temperament • Cent reference for the historical temperament • Transposer for the historical temperament • Resolution of bar display • Gate time for measuring frequency • Mode for measuring loudness (Level-measure: Off, input-level, filter-level)
Page 30
• Mode for adjustment of microphone gain (memory, button, automatic) • Mode for cent adjustment (memory, button) • Mode for special-keys (memory, button, sequence, Off) • Range of loudness to measure (recording range) • Thermosensor cent rate • Thermosensor reference • Maximum range to measure (in quartertone steps) • Mode of data transfer with serial interface (off, continuous, mean value, “Enter” but-
ton) • Write protection (On/Off)
Filter circuit: 64 dB per octave
Electricity supply: 4 * Mignon NiMH battery 1.2 volt /1600 mAh. Service life span: approximately 8 hours with one charge. Time needed for recharge: 14 hours with plug-in transformer. Plug-in transformer: 9V/500mA DC smoothed and not stabilized
Dimensions and weight: 197 x 82 x 45 mm / 810g
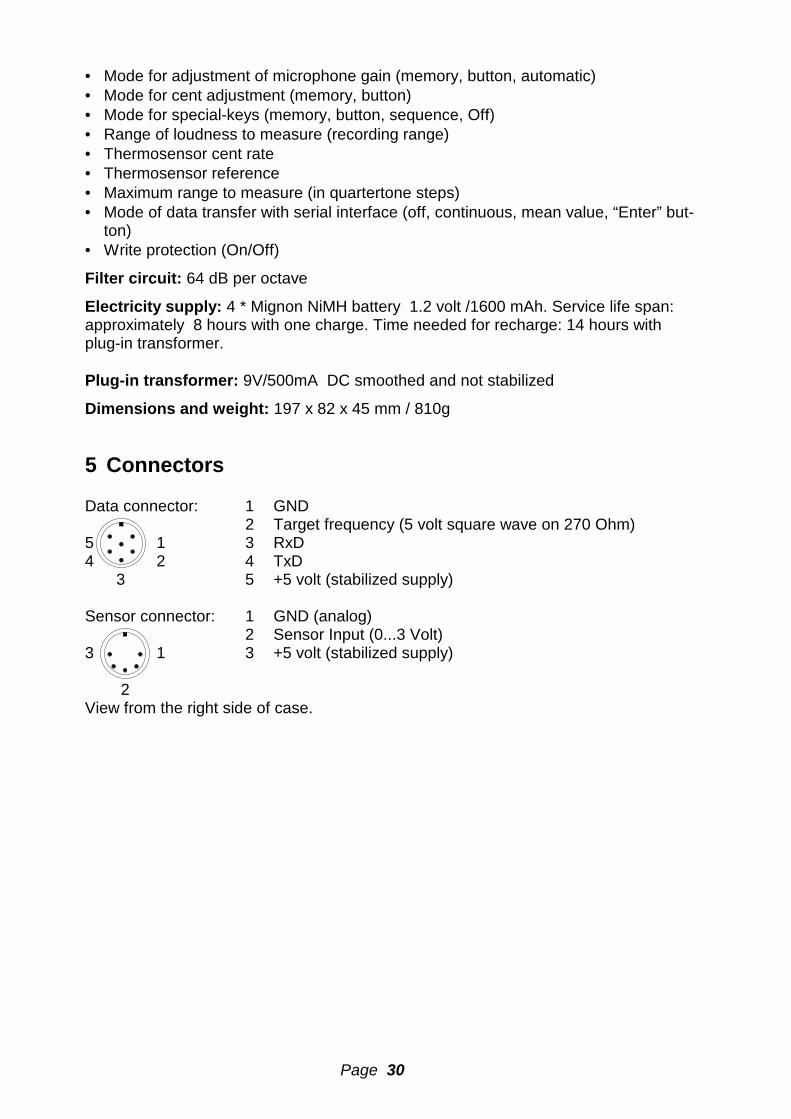
5 Connectors Data connector: 1 GND 2 Target frequency (5 volt square wave on 270 Ohm) 5 1 3 RxD 4 2 4 TxD 3 5 +5 volt (stabilized supply) Sensor connector: 1 GND (analog) 2 Sensor Input (0...3 Volt) 3 1 3 +5 volt (stabilized supply) 2 View from the right side of case.

Th
e ce
nt
valu
es o
f h
isto
rica
l tem
per
amen
ts s
tore
d in
CT
S-3
2 in
ste
ps
of
1/10
cen
t
A Bb B C C# D D# E F F# G G#
2 BACH/BARNES
0, 60, 0, 60, 0, 20, 40, -20, 80, -20, 40, 20,
3 BACH/KELLNER____ 0, 40, -10, 80, -15, 25, 25, -25, 60, -35, 55, 5,
4 BACH/SCHUBIGER__ 0, 29, -49, 49, -29, 49, 10, -49, 49, -49, 49, -10,
5 BRUDER/P.VIER___ 0, 10, -50, 30, -20, 50, 0, -60, 20, -35, 45, -10,
6 KIRNBERGER_I____ 0, 117, 39, 156, 59, 196, 98, 20, 137, 59, 176, 78,
7 KIRNBERGER_II___ 0, 10, -68, 49, -49, 88, -10, -88, 29, -49, 69, -29,
8 KIRNBERGER_III__ 0, 64, -14, 103, 5, 34, 44, -34, 83, -15, 69, 24,
9 LAMBERT/SCHUGK__ 0, 36, -28, 42, -23, 14, 17, -14, 56, -42, 28, -3,
10 LAMBERT_CHAUMONT 0, 78, -78, 117, -156, 39, 0, -39, 156, -117, 78, -196,
11 NEIDHARD_(1724)_ 0, 60, 20, 60, 20, 20, 40, 0, 60, 20, 40, 20,
12 NEIDHARD_(1729)_ 0, 39, 20, 59, 20, 20, 39, 0, 39, 20, 39, 20,
13 MEANTONE________ 0, 171, -68, 103, -137, 35, 206, -34, 137, -102, 69, -171,
14 PYTHAGORAEISCH__ 0, -98, 39, -59, 78, -20, -117, 20, -78, 59, -39, 98,
15 RAMEAU/SCHUGK___ 0, 80, -80, 115, -40, 40, 0, -40, 155, -60, -80, -20,
16 RAMEAU/SCHUBIGER 0, 196, -78, 117, -39, 39, 78, -39, 156, -59, 78, -20,
17 SCHLICK_I_______ 0, 78, -39, 59, -39, 20, 78, -20, 78, -39, 39, 20,
18 SCHLICK/BILLETER 0, 101, -40, 81, -62, 30, 102, -19, 99, -48, 61, 60,
19 SCHLICK/VOGEL___ 0, 90, -55, 80, -65, 25, 25, -30, 110, -80, 55, -45,
20 SILBERM./P.VIER_ 0, 60, -40, 60, -40, 20, 0, -20, 80, -60, 40, -20,
21 SILBERMANN_I____ 0, 108, -39, 68, -78, 29, 127, -20, 88, -59, 49, -98,
22 SILBERMANN_II___ 0, 81, -29, 49, -62, 19, 102, -9, 71, -48, 30, -79,
23 SILBERM/BILLETER 0, 108, -47, 49, -79, 50, 130, -50, 82, -48, 51, -110,
24 VALOTTI_________ 0, 58, -39, 58, -2, 20, 39, -19, 78, -19, 39, 19,
25 WERCKMEISTER_III 0, 80, 40, 120, 20, 40, 60, 20, 100, 0, 80, 40,
26 WERCKMEISTER_IV_ 0, 136, -39, 97, -78, 58, 38, 20, 77, -19, 38, -59,
27 WERCKMEISTER_V__ 0, 19, -19, -1, -38, 39, -1, -39, 39, 1, 19, -78,

The stretchings of the piano programs
50
1015
-25-20-15-10
-505
202530354045
cent50
1015
-25-20-15-10
-505
202530354045
cent
50
1015
-25-20-15-10
-505
202530354045
cent
a3 a4a2a1aAA1A2 a5 a3 a4a2a1aAA1A2
a3 a4a2a1aAA1A2 a5
Piano-Stretch 3.
Piano-Stretch 2.Piano-Stretch 1.