Embed Size (px)
Citation preview
TSplus Remote Support Documentation
Quick StartJust installed TSplus Remote Support? Get Started!See TSplus Remote Support Changelog.
Documentation
Planning and Managing TSplus Remote Support
Pre-requisitesInstallationActivating your licenseUpdating TSplus Remote Support
Using TSplus Remote Support
Product OverviewAdministrator Web ConsoleAgent Web ConsoleEnd-User Web ConsoleEnd User InterfaceAgent Interface
Settings
Administrator Settings - ServerAdministrator Settings - CustomizationAdministrator Settings - Advanced
!Frequently Asked Questions Frequently Asked Questions
Administrator Password Lost
TSplus Remote Support - Documentation
©TSplus Remote Support - tsplus-remotesupport.com
Get Started with TSplus Remote Support
Step 1: Installing TSplus Remote Support on your computer
Installation is straightforward.
Just run Setup-TSplus-RemoteSupport.exe on the Windows machine you've chosen to use as the Remote Support Server.
Files are decompressed and copied into the folder: "C:\Program Files\RemoteSupport".
The Remote Support trial is a fully featured version limited to 15 days with 5 Agents.
After the installation, there will be a new icon on your Desktop:
Step 2: Using TSplus Remote Support
The TSplus Remote Support interface is now ready to launch and configure.
Start by configuring your Administrator password.Then, create additional Agents accounts on the Web Console.You might want to customize the product to fit your corporate branding.
Don't forget to activate your license and to update to the latest version! TSplus provides regular updates and feature additions for all theirproducts.
TSplus Remote Support - Documentation
©TSplus Remote Support - tsplus-remotesupport.com
Pre-requisites
Hardware Requirements
TSplus Remote Support Client runs on both 32 and 64-bit editions of Windows computers.
TSplus Remote Support Server may only be installed on 64-bits editions of Windows computers.
Operating System
TSplus Remote Support is compatible with the following OS:
Windows 7 Service Pack 1Windows 8/8.1Windows 10 ProWindows 11 ProWindows Server 2008 SP2/Small Business Server SP2 or 2008 R2 SP1Windows Server 2012 or 2012 R2Windows Server 2016Windows Server 2019Windows Server 2022
Dependencies
TSplus Remote Support requires .NET Framework to be installed on the computer.
The minimum version supported is .NET Framework 4.5.2.
If the .NET Framework is not installed on the computer, TSplus Remote Support setup program will try to download and install it.
TSplus Remote Support - Documentation
©TSplus Remote Support - tsplus-remotesupport.com
InstallationInstallation is straightforward. Just run the TSplus Remote Support setup program on the Windows machine you've chosen to use as the RemoteSupport Server.
Please note that you must run this Setup as an Administrator. But don't worry, Windows will notify you and ask for your agreement.
Welcome
Please close any other running programs and click Next.
License Agreement
Click on "Next" to agree to the license.
Port Configuration
By default, the Remote Support Server listens on port 443, which is the standard HTTPS secured web port.
We recommend to keep using this port.
By default, the Remote Support web server is configured to use the standard HTTPS port number (443). However, if another web server isalready active on this system (IIS for example) the TSplus built-in web server will experience a port number conflict.
The easy solution is to change these default values (4430 for example) during setup in this case.
Domain Configuration
You can skip this step if you plan on using TSplus Remote Support without any domain name.
We recommend setting a domain name or subdomain name which resolves to the computer you are installing TSplus Remote Support on. Pleasecontact your System Administrator / IT Department if you need help on configuring this domain name - you can test TSplus Remote Supportright now by using "localhost" as the domain.
To configure TSplus Remote Support for access using an internet domain name, enter the domain name here and choose which kind of SecurityCertificate you would like to use, a free certificate generated within Remote Support, or a paid Certificate purchased from a Certificate Authority.
You may also configure your Domain after installation from the Remote Support Web Console.
Install with Free Certificate
Free Certificate is provided by Let's Encrypt and requires port 80 to be open and available to validate your domain ownership.
TSplus Remote Support - Documentation
©TSplus Remote Support - tsplus-remotesupport.com

Ready to install
Confirm your settings and click Install to continue.
Congratulations!
Your TSplus Remote Support Server installation is complete.
Click Finish to open the Remote Support Web Console and start creating Agent accounts!
The free trial version is fully featured for 15 days with 5 Agents.
Administrator Account Setup
Launch TSplus Remote Support by clicking on the shortcut created on your desktop.
The next step is to configure your Remote Support Administrator account.
Enter your Administrator information and click 'Register'.
You're now ready to confirm or adjust your server configuration, them jump in and start setting up agent accounts and sharingWindows sessions.
Uninstall TSplus Remote SupportIn order to completely uninstall TSplus Remote Support, go to "C:\Program Files\RemoteSupport" and run the "unins000" application.
Click on yes on the next window to completely remove TSplus Remote Support and all of its components.
The software will be completely uninstalled from your machine.
TSplus Remote Support - Documentation
©TSplus Remote Support - tsplus-remotesupport.com
Activating your licenseOpen the TSplus Remote Support interface and click on the License tab.Then, click on the "Activate your License" button:
In order to get your Activation Key, connect to our Licensing Portal and enter your Email Address and your Order Number:
Download the Customer Portal User Guide for more information about how to use it.
Your activation key will be displayed at the top of the dashboard:
You can then enter this activation key and click on “Next” .
Check one or more items and click on the “Next” button. Please note that you can activate several products at the same time by checking severalproducts/support!
All your products/support are now activated (in this example, both TSplus with support and TSplus Remote Support have been activated at once).
Refresh your License Data by clicking on the corresponding button, it will synchronize information with our Licensing Portal:
Thank you for choosing TSplus Remote Support!
TSplus Remote Support - Documentation
©TSplus Remote Support - tsplus-remotesupport.com
Updating TSplus Remote SupportUpdating TSplus Remote Support is easy and can be done by clicking on the corresponding tile on the Home Dashboard of the Licensingprogram:
TSplus Remote Support automatically downloads and applies its update program when requested.
The update program is designed to continuously improve all TSplus Remote Support functionalities and keep your current TSplus Remote Supportsettings safe.
TSplus Remote Support - Documentation
©TSplus Remote Support - tsplus-remotesupport.com
Product Overview
TSplus Remote Support in one sentence
TSplus Remote Support enables easy Windows Desktop Session Sharing for Support Agents to provide fast, effective support to their End-Users, no matter where they are!
Terminology and Architecture
The TSplus Remote Support Server can be installed on any modern Windows PC or Server.
The TSplus Remote Support Server is both your Web Console and Connection Relay.
It creates web-based Windows Desktop Session Sharing connections, with both Support Agents and End-Users participating via theirpreferred web browser, seamlessly using the Remote Support Client.
Network
The Remote Support Server is usually installed near your ISP’s Router.
A NAT (Network Address Translation) rule redirects the HTTPS ports (default value is port 443) from the external IP to the LAN IP of yourRemote Support Server.
In this configuration, your Remote Support Server is the only system exposed to Internet.
Remote Support also supports Public DNS (Domain Name Services) and CA or Self-Signed SSL/TLS Certificates.
TSplus Remote Support - Documentation
©TSplus Remote Support - tsplus-remotesupport.com
Administrator Web Console
Overview
Once logged in, the Administrator is greeted by a simple set of menus that gives them full control over the support environment.
Administrator Settings
The first menu item is Admin Settings, these settings are detailled in the Settings > Administrator Settings chapters of this documentation.
Agent Accounts
The second menu item is Agent Accounts.
From this screen, the administrator can add, delete or edit agent accounts.
Let's click on Add New Agent to set the first one up.
Simply fill in the agent information and click 'Add'.
Your new agent is now ready to go.
Remote Computers
The third menu item is Remote Computers.
This page is also available to Support Agents and is detailled in the Agent Interface chapter of this documentation.
TSplus Remote Support - Documentation
©TSplus Remote Support - tsplus-remotesupport.com
Agent Web Console
OverviewOnce logged in, Agents are greeted by a list of available Remote Sessions with End-Users, as well as an easy way to create a custom link and invite End-Users to share their Remote Computer.
Agents can also customize their own account settings from the 'Hello, Agent Name' button then 'Settings' menu item on the top right corner of the page.
Remote Sessions
Send a link
Each Support Agent has a custom link that is sent to the end user.
Customize the link
Information such as support ticket number and end-user name can be quickly embedded in the link.
Agent can also shorten the URL if needed using the 'Shorten' button.
Sending options
Agent can send the link via email or simply copy it using the buttons of the section below.
Send a connection ID
Agent can also send a connection ID instead to the end user.
Connection ID is a 6 digits code to be entered by the end user after having manually started the Remote Support client.
To generate a connection ID, the agent will need to go to the 'Share a connection ID' section by clicking on the button with the same name.
Available ConnectionsWhen the End User has clicked on the link and is ready for connection, their information will appear in the support Agent's interface.
Simply click 'Connect' to begin the Remote Support session.
Remote ComputersEach agent has access to the list of available unattended computers.
Three actions are available on computers: connect, open a command prompt and remove.
Unattended computers can be organized using groups and quickly find using the search bar.
Access the unattended machine
When a machine is available, this icon will be used.
When a machine is unavailable, this icon will be used.
Send command line
The agent will also be able to send CLI commands through the web command prompt linked to the machine by clicking on the 'Open a Command Prompt' button.
Note: Depending on the browser you are using, you may be limited to a certain number of command prompts open at the same time. If you need to go over this limitation, you will need to open a different browser.
Known limitations:
Chrome version 92: 5Firefox version 91: 5Edge (chromium) version 92: 5
Remove a computer
The agent can delete a computer from the unattended computer list, and make it unavailable as well, by clicking on the 'Remove' button Note: To see the machine again, the agent will need to enable unattended access again using thesetup process in the web-console or end-user link.
Organise the unattended computers
TSplus Remote Support - Documentation
©TSplus Remote Support - tsplus-remotesupport.com
Support agent can create groups to organize configured unattended computers.
Computer and groups can be simply moved from one group to another using drag and drop.
Add a new group
To add a new group, click on 'Add new group', then give the created group a name and press 'Enter'.
Rename an existing group
To rename an existing, select the group by clicking on it, then click on 'Rename'.
Delete an existing group
To delete an existing, select the group by clicking on it, then click on 'Remove'.
Search groups or computers
To search for groups or computers, a search bar is available.
Matching results will dynamically appear as you type.
Add Unattended Computers
The agent can add a computer to the unattended computer list in multiple ways.
Add this computer
The agent can add the computer he is currently using to the unattended computer list and make it available by clicking on the 'Add this computer' button. The agent will be prompted to run the Remote Support setup.
Add an End-User Computer
A URL specific to each agent is available to make Unattended Access configuration easy and user-friendly using a simple web page.
The agent will be able to copy the link using the Copy button next to the URL displayed.
Note: this URL expires after 48 hours. After that another URL should be displayed and used by the agent.
Once the URL has been clicked and the page displayed, the customer will be able to enable unattended access by clicking on the 'Allow' button.
Note: enabling unattended access requires admin privileges. A privilege elevation prompt will display if the current user does not have these.
Add a computer using command line
If you need to enable unattended access on multiple computers, this can be done using the command line interface.
The Remote Support Client Setup file,'RemoteSupport.exe' can be found here.
The arguments to use are the following (arguments must be separated by a space):
/createcomputer
/username [supportagentusername]For example: /username "rodney"
/password [supportagentpassword]For example: /password "myoverlynotcomplicatedbutverylongpasswordsothatnoonefindit"
/relayurlFor example: /relayurl "remotesupport.mycompany.com"
/relayportFor example: /relayport "443"
A complete example: to register the current machine as unattended to the server remotesupport.mycompany.com you may use:
RemoteSupport.exe /createcomputer /username "rodney" /password "myoverlynotcomplicatedbutlongpasswordsothatnoonefindit" /relayurl "remotesupport.mycompany.com" relayport "443"
Remove a computer
The agent can delete a computer from the unattended computer list, and make it unavailable as well, by clicking on the "Remove" button.
Note: To see the machine again, the agent will need to enable unattended access again using the setup process in the web-console or end-user link.
Change the visibility of a computer
The visility of a computer can be changed from the agent only to everyone using the button 'Change visibility to everyone'. By default, when the computer is added, the visibility of a computer is restricted to its owner. The owner of thecomputer refers to the agent who shared his custom URL, which has been used to add the computer to the unattended computer list.
Note: only the owner of the computer can change its visibility.
TSplus Remote Support - Documentation
©TSplus Remote Support - tsplus-remotesupport.com

Session LogsOnce Remote Support Sessions end, they are automatically recorded in the 'Session Logs' section.
The table can be exported to csv using the button 'Export to csv'.
Agent Account SettingsAgents can customize their own account settings by clicking on the 'Hello, Agent Name' button on the top right corner of the page and then clicking on the 'Settings' menu item.
Profile
Agents can edit their name, email and title from a simple account management page.
Password
Agents can change their password from a standard password management page.
TSplus Remote Support - Documentation
©TSplus Remote Support - tsplus-remotesupport.com
End-User Interface
Overview
An End-User will receive a custom link from a Support Agent.
Receive a link
After clicking on the link, the End-User will be prompted to install the TSplus Remote Support Client.
End-User connection screen
Once the End-User has installed the TSplus Remote Support Client and agreed to allow the connection, they will see the Support Agent chat boxappear on their screen.
The chat box enables text communication and file sharing between the Agent and End-User.
Please note that closing the chat box will end the Remote Support Session.
TSplus Remote Support - Documentation
©TSplus Remote Support - tsplus-remotesupport.com
Agent Interface
Overview
Once the End-User has installed the TSplus Remote Support Client and agreed to allow the connection, the Support Agent can connect to thisRemote Support Session from his Agent Web Console
Agent Connection Screen
After clicking on the 'Connect' button, the TSplus Remote Support Client will run.
The Support Agent is now connected to the End-User's desktop session.
The Agent can take control and troubleshoot independently or collaboratively: multiple Agents can connect to the same Remote Computer.
Agent Chat Box
The Agent Chat Box is more than just a way to communicate with the End-User.
It contains vital information and functionality the Support Agent needs, listed below from top to bottom:
Settings
Give the Support Agent the ability to change settings such as the current Remote Support client language.
Send Command
Enables the Support Agent to send the ctrl+alt+del keyboard command or start Task Manager on the Remote Computer.
Change Monitor Displayed
Scrolls through available displays if the Remote Computer uses a multi-monitor configuration.
Enable/Disable Clipboard Synchronization
Controls the Remote Agent's ability enable or disable clipboard functionality between the Agent and End-User PCs.
Remote Computer Information
Displays OS, Hardware and User Account data from the Remote PC, as configured in Advanced Administrator Settings
Participants
Show the participant list of the current session.
TSplus Remote Support - Documentation
©TSplus Remote Support - tsplus-remotesupport.com
Upload File
Allows the Support Agent to move files from his support environment to the Remote PC for troubleshooting or repairs.
Show Chat
Brings the Chat Box back to the main chat window.
TSplus Remote Support - Documentation
©TSplus Remote Support - tsplus-remotesupport.com
Administrator Settings - Server
Overview
Once logged in, the Administrator is greeted by a simple set of menus that gives them full control over the support environment.
The first menu item is Admin Settings. Here, Administrators will find 4 sections - Email, Server, Customization and Advanced.
Server
If you did not configure a Domain when installing Remote Support, you can do so now, using an SSL/TLS Certificate from a Certificate Authority,or using the TSplus SSL Generator.
Certificate Generation
This feature uses Let's Encrypt to provide a free and secure SSL certificate for your HTTPS connections.
Please make sure the following requirements are met:
Your server's domain name must be accessible from the public Internet.Your server's HTTP (80) port must be open and available for Remote Support.
TSplus Remote Support - Documentation
©TSplus Remote Support - tsplus-remotesupport.com
Administrator Settings - Customization
Overview
Once logged in, the Administrator is greeted by a simple set of menus that gives them full control over the support environment.
The first menu item is Admin Settings. Here, Administrators will find 4 sections - Email, Server, Customization and Advanced.
Customization
Customize the logo or banner displayed to the end-user during support sessions.
TSplus Remote Support - Documentation
©TSplus Remote Support - tsplus-remotesupport.com
Administrator Settings - Advanced
Overview
Once logged in, the Administrator is greeted by a simple set of menus that gives them full control over the support environment.
The first menu item is Admin Settings. Here, Administrators will find 4 sections - Email, Server, Customization and Advanced.
Advanced
The Advanced section provides a customizable template for TSplus Remote Support to gather critical Hardware, OS and Software data from theRemote Computer.
For experienced users only. If you are unsure of how to customize the template, please use the comprehensive default template provided.
TSplus Remote Support - Documentation
©TSplus Remote Support - tsplus-remotesupport.com
Administrator Password Lost
Issue
After installing and configuring TSplus Remote Support, administrator cannot remember his account username and/or password.
No other user having the administrator role, global settings cannot be changed and agents account cannot be managed anymore.
Fix Overview
You can create a new administrator account by editing a record in TSplus Remote Support internal database, thus forcing the product to gothrough its post setup configuration step and asking for details in order to create a (new) administrator account.
Please understand that after the record has been changed in the database, any visitor browsing to TSplus Remote Support Web Portal will havethe opportunity to create an administrator account. Only the first visitor validating the form will create an administrator account.
We highly recommend you disable public access to your TSplus Remote Support portal before following the steps below, for instance by enablinga firewall.
Resetting to post-install step
Download and install an SQLite database editor, for instance SQLite Studio.
Run the SQLite database editor and open TSplus Remote Support internal database, usually located at this location: "C:\ProgramFiles\RemoteSupport\webportal\remotesupport.db".
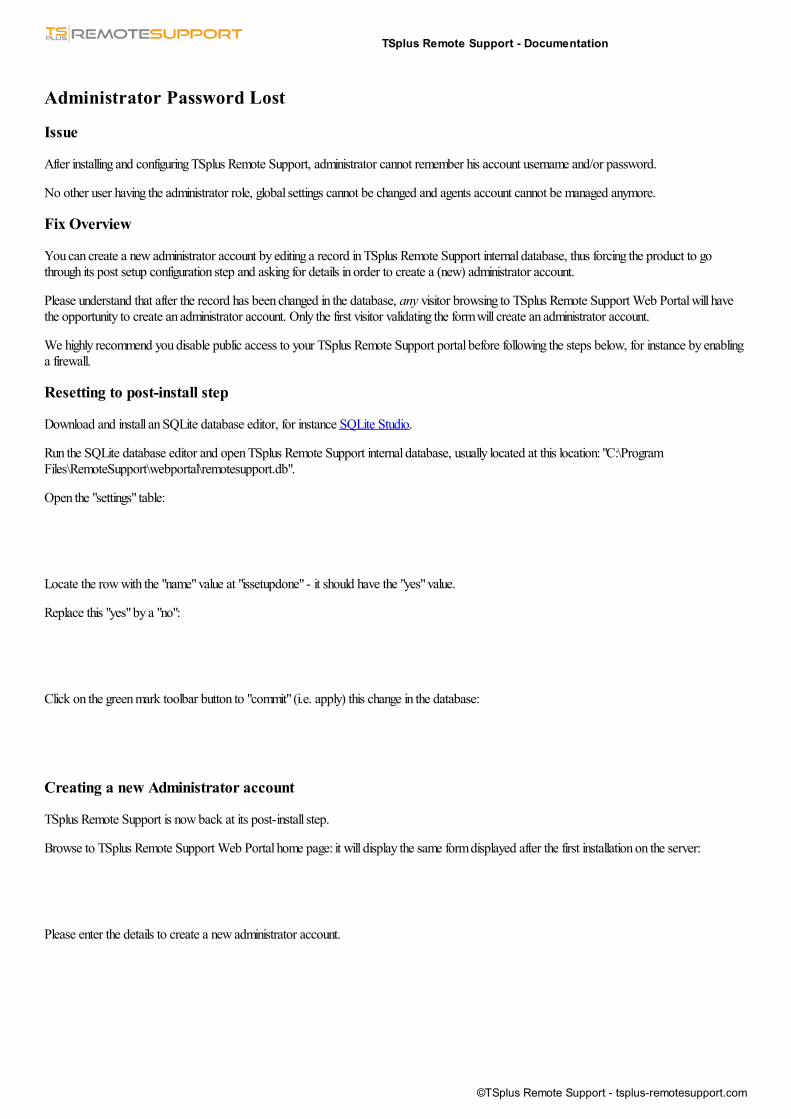
Open the "settings" table:
Locate the row with the "name" value at "issetupdone" - it should have the "yes" value.
Replace this "yes" by a "no":
Click on the green mark toolbar button to "commit" (i.e. apply) this change in the database:
Creating a new Administrator account
TSplus Remote Support is now back at its post-install step.
Browse to TSplus Remote Support Web Portal home page: it will display the same form displayed after the first installation on the server:
Please enter the details to create a new administrator account.
TSplus Remote Support - Documentation
©TSplus Remote Support - tsplus-remotesupport.com
Change your Administrator passwordYou can change your Administrator password directly by clicking on the corresponding tile on the Home Dashboard of the Administrationprogram:
Updating TSplus Remote Support is easy and can be done by clicking on the corresponding tile on the Home Dashboard of the Licensingprogram:
Once clicked, the web console will open. Simply fill in the password field with a new password and confirm your password, then click on "Save".
TSplus Remote Support - Documentation
©TSplus Remote Support - tsplus-remotesupport.com
Administrator Settings - Email
Overview
Once logged in, the Administrator is greeted by a simple set of menus that gives them full control over the support environment.
The first menu item is Admin Settings. Here, Administrators will find 4 sections - Email, Server, Customization and Advanced.
Configure the SMTP Client and customize the email content sent to the end-user.
TSplus Remote Support - Documentation
©TSplus Remote Support - tsplus-remotesupport.com


![[MS-RAP]: Remote Administration Protocol... · [MS-RAP]: Remote Administration Protocol Intellectual Property Rights Notice for Open Specifications Documentation](https://img.dokumen.tips/doc/110x75/5fc269c9d39f283fa628d2e6/ms-rap-remote-administration-protocol-ms-rap-remote-administration-protocol.jpg)


![Introduction · Web view[MS-PSRDP]: PowerShell Remote Debugging Protocol Intellectual Property Rights Notice for Open Specifications Documentation Technical Documentation. Microsoft](https://img.dokumen.tips/doc/110x75/5ae2a4747f8b9ad47c8d5668/introduction-viewms-psrdp-powershell-remote-debugging-protocol-intellectual-property.jpg)
![[MS-RAA]: Remote Authorization API Protocol€¦ · [MS-RAA]: Remote Authorization API Protocol Intellectual Property Rights Notice for Open Specifications Documentation](https://img.dokumen.tips/doc/110x75/5f8639135a180f40b773e343/ms-raa-remote-authorization-api-protocol-ms-raa-remote-authorization-api-protocol.jpg)


![MicrosoftMS-R… · Web view[MS-RDSOD]: Remote Desktop Services Protocols Overview. Intellectual Property Rights Notice for Open Specifications Documentation. Technical Documentation](https://img.dokumen.tips/doc/110x75/5fd1166d6694fb19841ba3e7/microsoft-ms-r-web-view-ms-rdsod-remote-desktop-services-protocols-overview.jpg)


![winprotocoldoc.blob.core.windows.net · Web view[MS-SRVS]: Server Service Remote Protocol. Intellectual Property Rights Notice for Open Specifications Documentation. Technical Documentation](https://img.dokumen.tips/doc/110x75/608d9b16bc1c8b58ae18a700/web-view-ms-srvs-server-service-remote-protocol-intellectual-property-rights.jpg)

![[MS-WMI-Diff]: Windows Management Instrumentation Remote … · Windows Management Instrumentation Remote Protocol Intellectual Property Rights Notice for Open Specifications Documentation](https://img.dokumen.tips/doc/110x75/60291c3639ef867b0724c197/ms-wmi-diff-windows-management-instrumentation-remote-windows-management-instrumentation.jpg)


![Microsoft - IntroductionMS-W… · Web view[MS-WKST]: Workstation Service Remote Protocol Intellectual Property Rights Notice for Open Specifications Documentation Technical Documentation](https://img.dokumen.tips/doc/110x75/5eca372ab279fe3bd041be3b/microsoft-introduction-ms-w-web-view-ms-wkst-workstation-service-remote-protocol.jpg)


