Embed Size (px)
Citation preview

TriMark CorporationWindchill 10.1 Migration TrainingWindchill 10.1 Migration TrainingSeptember – October 2013
The following information outlines the training offer. The offer consists of these courses:
1. Windchill upgrade training for Viewers2. Windchill upgrade training for Document Creators3. Windchill upgrade training for CAD Document Creators4. Windchill upgrade training for Project Managers5. Windchill upgrade training for Change Managers
The intent of the training is to minimize the productivity losses that the company will see and the frustration levels of the employees while offering training appropriate to the needs of the employee.
The expectations are that all Windchill and Pro/E users will be trained in the use of the Windchill 10.1 software appropriate to their needs.
1

2

3

4

If you have Microsoft Office 2007 or 2010 you can install a Windchill extension to make working with documents easier.working with documents easier.
Go to Quick Links in the upper right corner of the page.
Click and select Software Downloads
Select Windchill Desktop Integration.Windows 7 machines should be 64-bit
Select run on the pop-up and follow the instructions to install. (default selections should not need to be changed)
There are three new video tutorials on how to install, configure and use the new Desktop integration with Windchill 10.1. If you are interested in learning how to use this new capability, click on the links below.
Installation of Desktop Integration: http://info.trimarkcorp.com/engsys/video/20130919-wc10_di_installation/20130919-wc10_di_installation.htmlConfiguration of Desktop Integration: How to use Desktop Integration
5

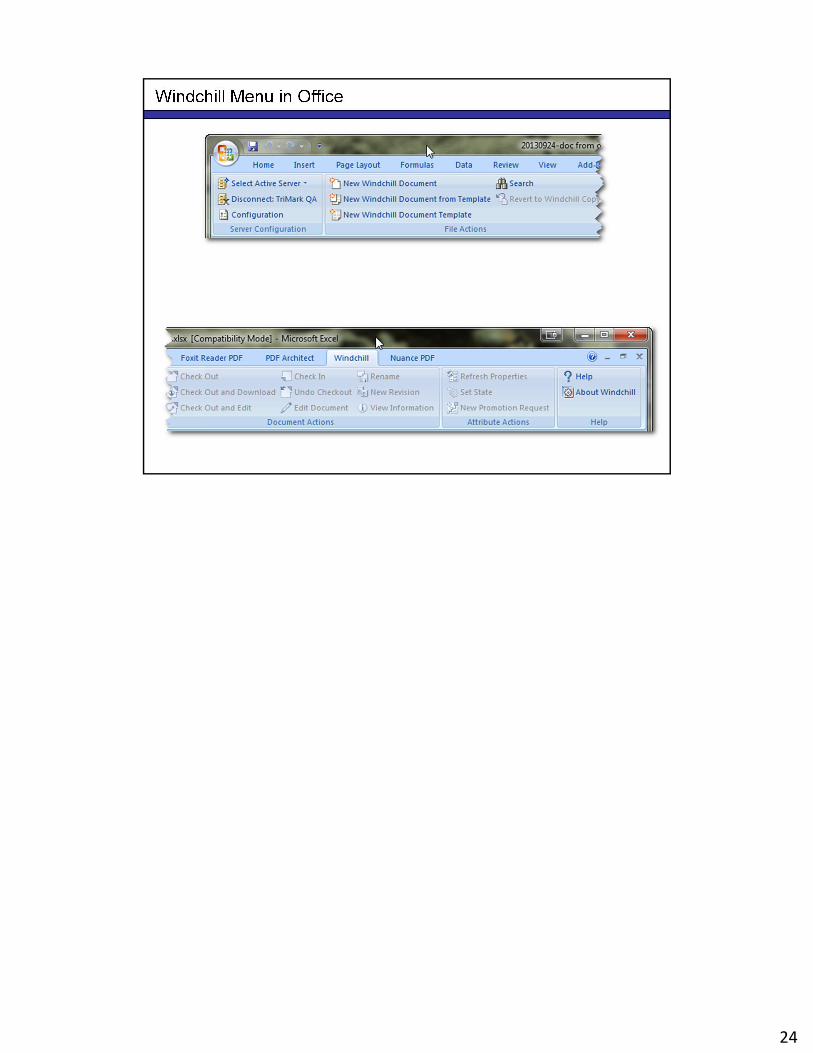
Go to the Windchill Tab
Click configuration to set up the server
Windchill Production Server Address: https://www.netideasplm.com/TriMark-Windchill/Windchill Production Server Alias: TriMark Windchill
Enter the URL and the alias for the server and click Add and then OK
6

After configuring the server you will need to activate it.
Click on Select Active Server and then select the name of the server you created.
You will be prompted to log into the server.Use your normal Windchill username and password.
Once you are logged in the Windchill ribbon will look like bottom picture.
7

8

Document Capabilities
Windchill documents are used to store and manage files, URLs, or externally stored content.
• A document has attributes, including the document name and document creator.
• A document can have primary content, such as an electronic file or URL. You can also add additional files as attachments.
• A document can have relationships with other Windchill objects. Relationships can be created automatically as part of another activity. For example, when a document is checked out a link is created between the working copy and the public copy. Relationships can also be created explicitly. For example, a document may be contained within a baseline configuration.
9

New Document: Set Attributes (Primary Content)
The New Document Wizard enables you to specify the source of the primary content. A number of options are available from the Primary Content Source drop-down menu.
• The No Content selection enables you to create a document object without any primary content. Typically, a document object without content is used as a placeholder to which content is added at a later time.
• The Local File selection enables you to select and upload a file from your local system. You can populate the Local File Path field by clicking the Browse button to browse to the file on your computer or you can click the Drag and Drop icon to drag a file from your desktop to the New Document utility.
• The Drag and Drop icon only appears if you have selected the Use Java applet preference available by clicking Attachments > File Upload Mechanism. If you use basic browser functionality, you cannot drag and drop files into Windchill.
• The URL Link selection enables you to define a URL as the document's content. This creates a document that is similar to an advanced link. It links to a URL but it can also have attachments, iterations, and attributes that link objects do not have.
• The External Storage selection enables you to designate a path to a file stored in another server. This is useful for managing large files, which can be maintained on a local server without requiring the file to be uploaded and stored in the PDMLink Oracle database.
10

Understanding Document Relationships
Similar to other objects in Windchill, documents are associated to numerous other Windchill objects.
Some of these relationships are created automatically as part of another activity. For example: • When a document is checked out, a link between the working copy and public copy is
created.• When a document has content files, a link to each content item is created.• When a document is published for viewing in Creo Elements/View, a link to the
viewable representation is created.• When a dynamic document is published, it creates a document which is linked to the
dynamic document.• When a document is created, modified, or checked out, a link to the user who
performed the action is created.• When a document is created or moved, its relationship to the containing folder is
affected.
These links are crucial to the functioning of Windchill, and are also convenient for users. For example, if a document is locked by checkout and you need to modify it, the link between the document and the user who checked it out enables you to identify the user you need to contact to unlock the document.
Other relationships are created explicitly by users: • A document may be the target of a change object.• A document may be contained within a baseline or a configuration specification.• You may create a document reference to other documents.• Documents may describe parts.• You may create structured documents, such as chapters of a book.
11

12

Creating Documents and Links
There are four methods for creating documents:• Create a single document – This option provides the most flexibility in creation, as you
have control over all attributes, attachments, and files. However, it is also the most labor-intensive option.
• Create documents from a template – This option is available when creating single documents. The template may provide default attributes and/or content files. For example, a specifications document template may automatically contain a Microsoft Word document with header and footer information as primary content.
• Create multiple documents – This option enables you to select several files and create a separate document for each. This can save significant time as opposed to creating several single documents, but some flexibility is lost. For example, you can only add primary content and cannot add attachments.
• Upload files in bulk – This option enables you to upload multiple documents within a zip or jar file. These documents are then extracted by Windchill into the folder location. Additionally, if you capture subfolders within the zip file, you can set Windchill to create these subfolders in the folder location.
If the document in a zip file already exists, you have the option to make no changes to the existing document or to iterate the existing document if you have the proper access permissions. This option is only available when you are uploading files in bulk.
You can create documents by clicking the New Document icon at the top of the Folder Contents table. You can also create documents, multiple documents, and links from the Actions drop-down menu of a specific folder. When you create an object from the Actions drop-down menu, the folder is preselected for you in the Create Wizard so you do not have to set it manually.
Lastly, some documents are created automatically. Arbortext dynamic documents automatically generate a standard document when published. Bulk loading processes also create documents automatically.
13

The first step of the New Document Wizard requires you to specify the type of document you are creating. The type you select may determine unique attributes and administration you are creating. The type you select may determine unique attributes and administration for the document object. The two out-of-the-box document types are Document and Reference Document. Other document types may exist if they have been created by your administrator.
Out-of-the-box, PDMLink does not define any unique attributes or administration for the two default document types. Your administrator uses these types to generate the document types and corresponding administration specific to your implementation.
Some document types may have additional attributes. For example, a minutes document may have a meeting date attribute, while a reference document may not. In addition, you can search for specific document types. For example, you can search for a plan document while omitting agenda documents from your search. The New Document Wizard also enables you to specify a document template at this point. This is an optional step. If you do not need to specify a template, you can proceed to the next step in the document creation process.
14

New Document: Set Attachments
The second page of the New Document Wizard enables you to specify the source of additional files that you want to store as attachments. Attachments can be any combination of three types:
• A local file can be added as an attachment by clicking the New local file attachment icon and browsing to the file. A local file can also be added by clicking the Drag and Drop icon, which enables you to drag a local file from your desktop to the Attachments table if your preferences specify to use the Java upload mechanism.
• A URL link can be added as an attachment by clicking the New URL link attachment icon.
• An external storage file can be added by clicking the New external storage attachment icon.
15

New Multiple Documents
You can create new multiple documents using the New Multiple Documents Wizard. This process is simpler and quicker than creating several single documents. However, the process only enables you to add primary content for each new document; you cannot add attachments when creating multiple documents.
16

Structured Documents:
A document structure allows you to define parent-child relationships between documents. These relationships are reflected in a hierarchical table in which each document uses the documents that appear below it. Use the document structure browser located under the Structure tab on document information pages to create, view, and manage document structures.
Note this example uses the 3-Pane Display setting. By default, the document structure browser is divided into two panes. You can alternate between two and three panes from the right-click actions menu or under the Display menu. The Structure tab is divided into two main sections:
1. Actions ToolbarPerform actions on one or more documents selected in the document structure tree.
2. Document Structure PanesManage lower-level documents in the document structure. A. Document Structure TreeA hierarchical view of the documents used by the document you are viewing. Use this table to arrange and modify the document structure. B. Attributes PaneProvides attribute information about the document selected in the document structure tree. C. Uses PaneDisplays documents directly used by the document selected in the document structure tree. Use this pane to add, remove, and manage documents used by another child document without navigating to its information page.
17

18

19

20

21

22

23
24

25

26

27

Routing Documents:
Routing documents can only be done in a Windchill project. Documents in PDM would need to be checked out to the project to be able to route them.
We route documents to collaborate with our immediate, internal, and external team members.
28
Routing
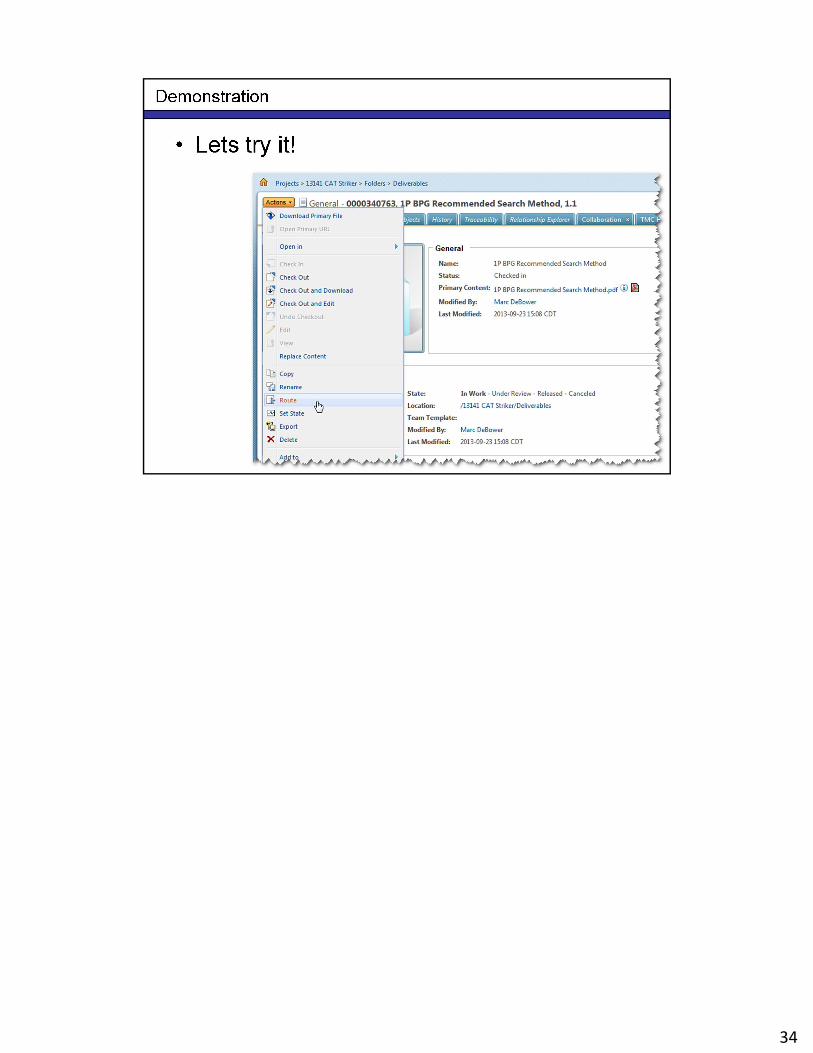
If you have an object that needs to be reviewed or approved by other team members, or you simply want to let other team members know that the object exists, you can route it.
Note: You must have access to modify an object in order to route it.
Windchill sends an automatic email notification to each team member assigned a routing task. As the user who initiated the route, you are assigned a task that allows you to track the route. Tasks appear in the My Tasks table available on your Home page.
As the routed object progresses, Windchill captures the details of the routing process and reflects the current status. On the information page of the routed object, you can view the route status, route history, comments, and assignments. You can also edit or terminate the route.
To view a graphical representation of a route, select Open Process Monitor from the right-click actions menu of a routing process in the Routing/Process History table.
29

Routing Types:
Approval RoutingAssign team members to review and approve the routed object. Once all approvers have indicated their approval, the object is set to the Approved state.
Notify RoutingSend an email notification to a group of team members letting them know that the routed object exists in the project or program. Once the notification is sent, the object is set to the Completed state.
Release RoutingAssign team members to approve the routed object so that it can be released. Once all approvers have indicated their approval, Windchill sets the object state to Released.
Review RoutingAssign tasks to team members to review the routed object so that you can gather their input to complete your work. Once all required reviewers have completed their review tasks, the object is set to the Completed state.
Two Level Approval RoutingAssign two sets of team members to approve the routed object in sequential approval routings. Once all first-level approvers have indicated their approval, the object moves to the Under Review state and the second approval routing begins. Once all second-level approvers have indicated their approval, the object is set to the Approved state.
30

Distribution List
Roles Groups:To route to a group of people, choose the Role as participant. A role may contain one person or a whole number of people. You may want to check on the role membership to make sure that you are sending it to the intended parties.
A Project Manager can create a role specifically for routing documents to, when a number of routings need to be sent out. This simplifies selecting the right participants, and is easier and faster than choosing individuals time after time.
Members:If an individual isn’t listed in the Participant column, then a Project Manager will need to add them to an appropriate role before they can participate as an individual in a routing.
31

Instructions:
The instructions created in this step will appear in the Windchill assignment and the email notification that is sent. Clear concise instructions go a long way in making sure everyone is on the same page for the routing.
32

33
34

35

36
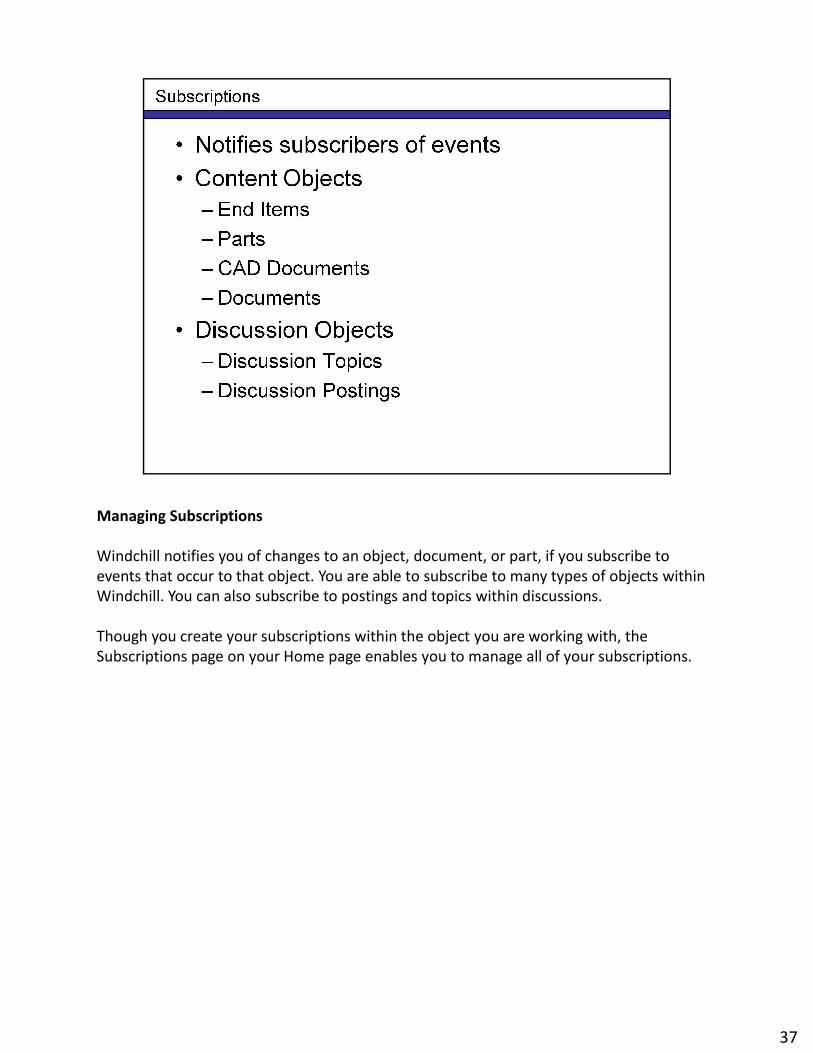
Managing Subscriptions
Windchill notifies you of changes to an object, document, or part, if you subscribe to events that occur to that object. You are able to subscribe to many types of objects within Windchill. You can also subscribe to postings and topics within discussions.
Though you create your subscriptions within the object you are working with, the Subscriptions page on your Home page enables you to manage all of your subscriptions.
37

Creating Subscriptions
To create a subscription, you must complete a three-step process.
1. Specify the subscription name – You can accept the default name, which is also the object's name you are about to monitor. Next, select which events to send as notifications, such as a check in or a state change. When the selected events occur, you are notified by E-mail. Most events are self-explanatory, and for details of the events you can access Windchill Help.
2. Select the subscribers – Subscribers are the people who receive the notifications. By default, your name is listed as the only subscriber. However, you can add other individuals or team members to the list.
3. Define the E-mail notification you receive – This includes defining the subject and body of the E-mail. If you leave the subject field blank, the subject is automatically completed by Windchill. You can type a Description that is the content of the E-mail. This informs the notification recipients why they are receiving the E-mail, and if there are any actions they are expected to take. You can then set the expiration date of the subscription, but you can also leave the expiration date field blank if you do not want it to expire.
38

39

40

41

Holding Discussions
Discussion forums are message boards that enable you to collaborate with team members. There are two different types of discussion forums:
• A context forum is not specific to an object, but to a context, such as a product or project. The context forum is available from the Discussions page of the context.
• An object forum is associated with a specific Windchill object, such as a CAD document. This discussion can be accessed several ways:
• Create a custom tab for the details page, adding the Collaboration > Discussions table.
• Access an existing discussion using the Discussions icon for that object on the Folders page.
• If you are a participant in the discussion, you can access it from the Discussions table of your home page. You may need to add the Discussions table to your home page by clicking the Customize button.
A discussion forum has a specific structure.
The top-level structure is the forum. The forum is specific to a context or object, and may contain several discussion topics.
A discussion topic is meant for several users to discuss a single subject, such as a product issue. The discussion topic may have users as participants. A participant in the topic has the topic listed on the My Discussions table of their home page. Each topic may contain several discussion comments.
A discussion comment is where the bulk of the discussion information is. In a comment, you type the content of the discussion. In addition, you may attach files and links to a discussion comment.
You may subscribe to discussion topics or comments, getting an e-mail notification when a reply is posted.
42

43

44

45

46

Document Lifecycles
All documents have a life cycle.Most documents will not need to progress past In Work.
Why worry about the lifecycle?• Greater control. Not everyone can edit a released document.• Greater change management.• Some roles like Released Viewer can’t see it if it isn't released.
47

48

49

50

51

52

53

54

55