Embed Size (px)
Citation preview

Graphic Artist Alexandra HenryPERMISSION IS GIVEN TO REPRODUCE FOR PERSONAL USE ONLY ©2013 - PCP Group, LLC
Fabrics Needed Gray solid or tonal for board background, backing, and pocket 1/2 yardBright stripe for Xs One fat quarterBright geometric for Os One fat quarterBright print for binding 1/4 yard
Materials Needed Pellon® 72F Peltex® II Ultra-Firm Stabilizer Two 3-3/4” x 15“ rectangles Legacy™ by Pellon® Natural Blend Batting One 14” squareLarge rick rack Four 13” lengthsFabric marking penContrasting threadCoordinating thread
Tools NeededSewing machine and related suppliesRotary cutter and related supplies
http://www.pellonprojects.com
Designed ByLisa RubleSewn By
Lisa Ruble
www.lovetocolormyworld.blogspot.com
Who needs paper and pen for tic tac toe when you can make your own fabric version! Choose fun prints for the Xs and Os, and use a coordinating rick rack on the quilted ‘board’. Use the handy pocket on the back to store the X and O game pieces.
Tic Tac Toe Skill Level: Beginner

Graphic Artist Alexandra HenryPERMISSION IS GIVEN TO REPRODUCE FOR PERSONAL USE ONLY ©2013 - PCP Group, LLC
http://www.pellonprojects.com
Tic Tac Toe Page 2
Cut one 13” square from the gray solid/tonal background.Cut one 12-1/2” x 16” rectangle from the gray solid/tonal background.Cut one 12-1/2” square from the gray solid/tonal background.Cut two 2-1/4” x 42” strips from the bright print for the binding.Cut two 4” x 15” rectangles each from the bright stripe and the bright geometric.
Cutting and Assembly Instructions
Center the 13” gray square right side up on the 14” batting square and pin in place for machine quilting. Using a ruler and fabric marking pen, mark a straight line down the center of the square for the �rst quilting line.
Using a walking foot, stitch along the marked line. Continue stitching straight lines approximately 1/2” apart across the square using the edge of the walking foot as a guide.
Trim the square to measure 12-1/2”.
Measure 4-1/4” in from the left edge and mark a line. Mark a second line 4-1/4” in from the right edge. Turn the square 90° and repeat to draw two more lines.
Cut four 13” lengths of rick rack and pin two in place along the �rst two lines. Stitch down the center of the rick rack to secure.

Graphic Artist Alexandra HenryPERMISSION IS GIVEN TO REPRODUCE FOR PERSONAL USE ONLY ©2013 - PCP Group, LLC
http://www.pellonprojects.com
Tic Tac Toe Page 3
Add the remaining two pieces of rick rack on the other two drawn lines in the same manner.
Fold the 12-1/2” x 15” gray rectangle in half widthwise to measure 12-1/2” x 7-1/2”. Position this folded piece so the raw edges match on the 12-1/2” gray square, right side up. Measure to �nd the center point on the folded edge (6-1/4” from the edge) and draw a line to divide the pocket in two. Stitch down this line.
Place the backing with pocket side down and position the quilted square on top, matching raw edge. Pin in place to secure both backing and pocket.
Place the two 2-1/4” x 42” bright print strips as shown. Stitch diagonally on the corner to make one long binding strip.
Graphic Artist Alexandra HenryPERMISSION IS GIVEN TO REPRODUCE FOR PERSONAL USE ONLY ©2013 - PCP Group, LLC
http://www.pellonprojects.com
Tic Tac Toe Page 4
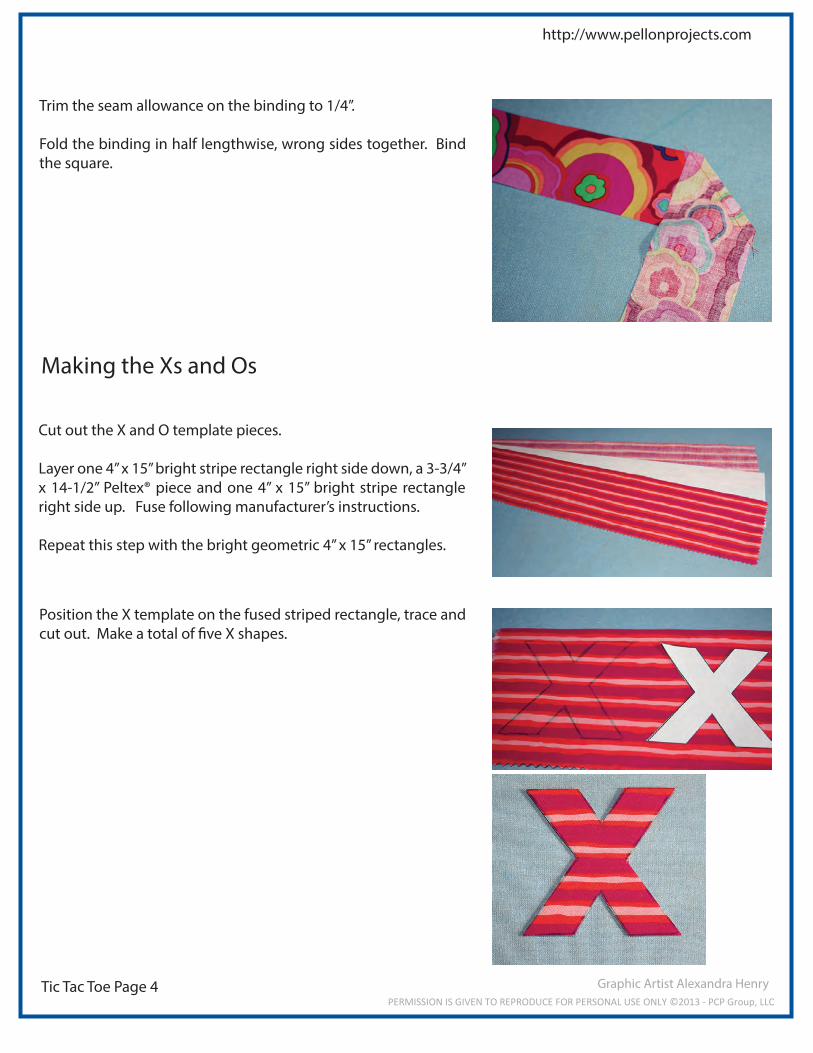
Trim the seam allowance on the binding to 1/4”.
Fold the binding in half lengthwise, wrong sides together. Bind the square.
Cut out the X and O template pieces.
Layer one 4” x 15” bright stripe rectangle right side down, a 3-3/4” x 14-1/2” Peltex® piece and one 4” x 15” bright stripe rectangle right side up. Fuse following manufacturer’s instructions.
Repeat this step with the bright geometric 4” x 15” rectangles.
Position the X template on the fused striped rectangle, trace and cut out. Make a total of �ve X shapes.
Making the Xs and Os

Graphic Artist Alexandra HenryPERMISSION IS GIVEN TO REPRODUCE FOR PERSONAL USE ONLY ©2013 - PCP Group, LLC
http://www.pellonprojects.com
Tic Tac Toe Page 5
Using a contrasting thread, stitch with a dense zigzag stitch around all edges of each X shape.
Cut out the Os.
To remove the center of the O shape, fold the O in half and cut carefully to create a slit. Unfold the shape, insert the scissors in the slit, and cut on the marked line.
Using a contrasting thread, stitch with a dense zigzag stitch around all edges of each O shape.
Position the O template on the fused geometric rectangle. Trace a total of �ve Os.

1”Gauge
Tic Tac Toe Templates
Set printer to 100%. Check gauge.See page 2 for instructions.
Graphic Artist Alexandra HenryPERMISSION IS GIVEN TO REPRODUCE FOR PERSONAL USE ONLY ©2013 - PCP Group, LLC
http://www.pellonprojects.com