Embed Size (px)
DESCRIPTION
Thebestof Free
Citation preview

Page 1

Page 2
This book is a 75-page free sample containing select designs from Books
1-4 of Thomas Scarborough’s electronics series at
http://stores.lulu.com/
thomasscarborough
Besides providing free samples, it contains the Contents pages of all four books in the series. Books 1-3 contain 6-component designs (and less). Book
4 is for the mature hobbyist.
This book is exclusive to Circuit Exchange International.
It is dedicated to Andy Collinson.

Page 3
THE BEST OF
THOMAS
SCARBOROUGH
BOOK 1
___________________________________ Printed by Lulu Press 860 Aviation Parkway Morrisville, NC 27560 United States of America www.lulu.com Publisher ID: 785519 http://books.lulu.com/content/785519 Copyright: © 2007 by Thomas Scarborough Edition: Second Edition License: All Rights Reserved. No part of this publication may be reproduced, stored in a retrieval system, or transmitted in any form or by any means, electronic, mechanical, recording or otherwise, without the prior written permission of the author. Printed: 123 pages, 4.25" x 6.875" (Pocket), perfect bound, 60# cream interior paper, black and white interior ink , 100# white exterior paper, full-colour exterior ink.

Page 4
CONTENTS __________________________
FOREWORD . . . . . . . . . . . . . . . . . . . . . . . . . . v
DEDICATION . . . . . . . . . . . . . . . . . . . . . . . . . . vi
INTRODUCTION . . . . . . . . . . . . . . . . . . . . . . 1
AUDIO CIRCUITS . . . . . . . . . . . . . . . . . . . . . . 7
SHORT-RANGE SONAR . . . . . . . . . . . . . . 7
INTERCOM . . . . . . . . . . . . . . . . . . . . . . . . . 13
STEREO 3RD CHANNEL . . . . . . . . . . . . . 21
THEREMIN . . . . . . . . . . . . . . . . . . . . . . . . 27
SUPER-SENSITIVE MIC . . . . . . . . . . . . 37
DOUBLE DOORBELL . . . . . . . . . . . . . . . 45
LED CIRCUITS . . . . . . . . . . . . . . . . . . . . . . . . 51
THOUSAND-YEAR FLASHER . . . . . . . . . 51
FREE ENERGY FLASHER . . . . . . . . . . . . 57
BATTERY LED . . . . . . . . . . . . . . . . . . . . . . 67
LED TORCH/FLASHLIGHT . . . . . . . . . . 73
CONJURING TRICK . . . . . . . . . . . . . . . . . 79
OPTICAL ILLUSION . . . . . . . . . . . . . . . . 87

Page 5
ESSENTIAL CIRCUITS . . . . . . . . . . . . . . . . . 93
DIODE PUMP . . . . . . . . . . . . . . . . . . . . . . . 93
POWER SWITCH . . . . . . . . . . . . . . . . . . 101
AUTO POWER-DOWN . . . . . . . . . . . . . . 109
CIRCUIT SYMBOLS . . . . . . . . . . . . . . . . . . . viii
RESISTOR COLOUR CODES . . . . . . . . . . . . . 6
ABBREVIATIONS . . . . . . . . . . . . . . . . . . . . . . 36
BASIC FORMULAE . . . . . . . . . . . . . . . . . . . . 86
PLUS: 32 FURTHER IDEAS
VIEW THE WHOLE SERIES AT
http://stores.lulu.com/ thomasscarborough
PRINTED COPIES $8.95 DOWNLOADS $2.95

Page 6
SHORT-RANGE SONAR No. of Components: 5
_____________________________
SONAR stands for SOund NAvigation Ranging, and is a technique for determining the distance and direction of objects by acous-tic means. Although SONAR is usually associ-ated with navigation ranging under water, it may also be used to good effect in air -- for instance, to detect boats in a fog.
SONAR may be divided into three cate-gories. Active SONAR projects a sound wave and waits for the echo, which these days can be analysed with great sophistication; passive SONAR projects no sound, but analyses in-coming sound, e.g. to identify a passing sub-marine; and a third category of SONAR trans-mits and receives messages across an “acous-tic path”.
SONAR was first proposed as a means of detecting icebergs, and the first operational active SONAR system was revealed in 1918, having been developed by British and US sci-entists.

Page 7
The SONAR described here is an active system, with the most basic functionality -- it simply reports the existence of an object with-in a 1 metre (1 yard) range. In fact, with just five components, this has to be the simplest SONAR in the world!
What can be done with such a modest range? The answer is: Plenty. A simple ex-ample would be guidance for a vehicle which is reversing in a garage. This circuit would shriek when the back of the vehicle came within about a metre (a yard) of the wall. Several other suggestions are to be found un-der FURTHER IDEAS ...
CIRCUIT THEORY
The SONAR described here relies on acoustic feedback, which “kicks in” when so-und bounces off an object -- e.g. the vehicle approaching a wall.
IC1 is a very sensitive amplifier, with piezo sounder X2 continually emitting amp-lified sounds, either created by the circuit’s in-ternal noise, or picked up from the environ-ment.
Ordinarily, the sound emitted by X2 dissipates in the air; it does not return to mic-

Page 8
rophone X1 with sufficient strength to create a feedback loop. When, however, a barrier ap-pears before X1 and X2, sufficient sound bou-nces back to create feedback. This naturally chooses the resonant frequency of X1 and X2, producing a loud signal.
Both X1 and X2 are piezo sounders without in-ternal electronics. A typical example is shown on the right.
Ideally, X1 and X2 will be identical, since this will encourage feedback at their res-onant frequency.
C1 determines gain (amplification) thr-
ough positive feedback, while C2 is necessary to limit output current. Without C2, the cir-cuit would overheat.
Positive feedback, as is used here (that is, feedback from an output to a non-inverting input) reinforces a signal, while negative feed-back (from an output to an inverting input) reduces gain. Negative feedback is the most common of the two, and is best known for its use in amplifiers.
IC1 is a veteran amplifier IC which has suitably biased inputs and a balanced output. These two characteristics make it useful for a great many things. In particular, notice how

Page 9
no additional biasing components are require-ed at the inputs.
This is explained in greater detail when I introduce the INTERCOM, which follows.
GETTING GOING
Ordinarily, this circuit will have a range of about 1 metre (1 yard), although I obtained a range of 2 metres (2 yards) by replacing the piezo sounders with piezo cone tweeters, and by tweaking the value of C1.
Using the 470p value for C1 as shown, the circuit is quite sensitive, and X1 and X2

Page 10
may need to be mounted more than a metre (a yard) apart, on the same surface (e.g. the same garage wall).
If C1 is omitted, then the circuit is far less sensitive, and X1 and X2 need be moved only a few centimetres (a few inches) apart. When an object (e.g. a car bumper) moves within about 10 cm (4”) of X1 and X2, X2 screeches. The value of C1 may also be red-uced to less than 470p, for reduced sensitivity, so that sensitivity may be adjusted as desired.
Note that since the LM380N's current consumption is not the most modest (about 12mA in this application), this circuit would ideally be run off a 12V DC plugpack power supply.
FURTHER IDEAS ...
OPEN DOOR ALARM. X1 and X2 may be mounted on opposite sides of a closed door. In this case, feedback is blocked until the door is opened. Thus the circuit could be used as a simple alarm, or as a reminder to close the door. With 470p for C1, the circuit will be particularly sensitive. Of course, a window or a cupboard door would work just as well.
ANTI-PILFER ALARM. Alternatively,
Page 11
X1 could be placed underneath an item, to give warning if someone picks it up. For in-stance, if one were to place a wallet on top of X1, X2 would squeal loudly if the wallet were stolen. This would serve as an excellent anti-pilfer alarm at e.g. a hospital bedside.
BLIND GUIDE. The circuit could con-ceivably be used as a guide for the blind, to warn them of objects in front of them, or of steps going up. Regrettably, it would not in-form them of steps going down!
COMPONENTS
C1 . . . . . . . . . . 470p ceramic capacitor
C2 . . . . . . . . . . 220µ 16V electrolytic
capacitor
IC1 . . . . . . . . LM380N amplifier IC
X1, X2 . . . . . . Piezo sounders (without
integral electronics), or
try piezo cone tweeters
S1 . . . . . . . . . . On-off switch
B1 . . . . . . . . . . 12V battery or battery pack
Battery clip to suit battery or battery pack
Suitable plastic case
Connecting wire
Solder
Page 12
THOUSAND-YEAR FLASHER
No. of Components: 5
____________________________
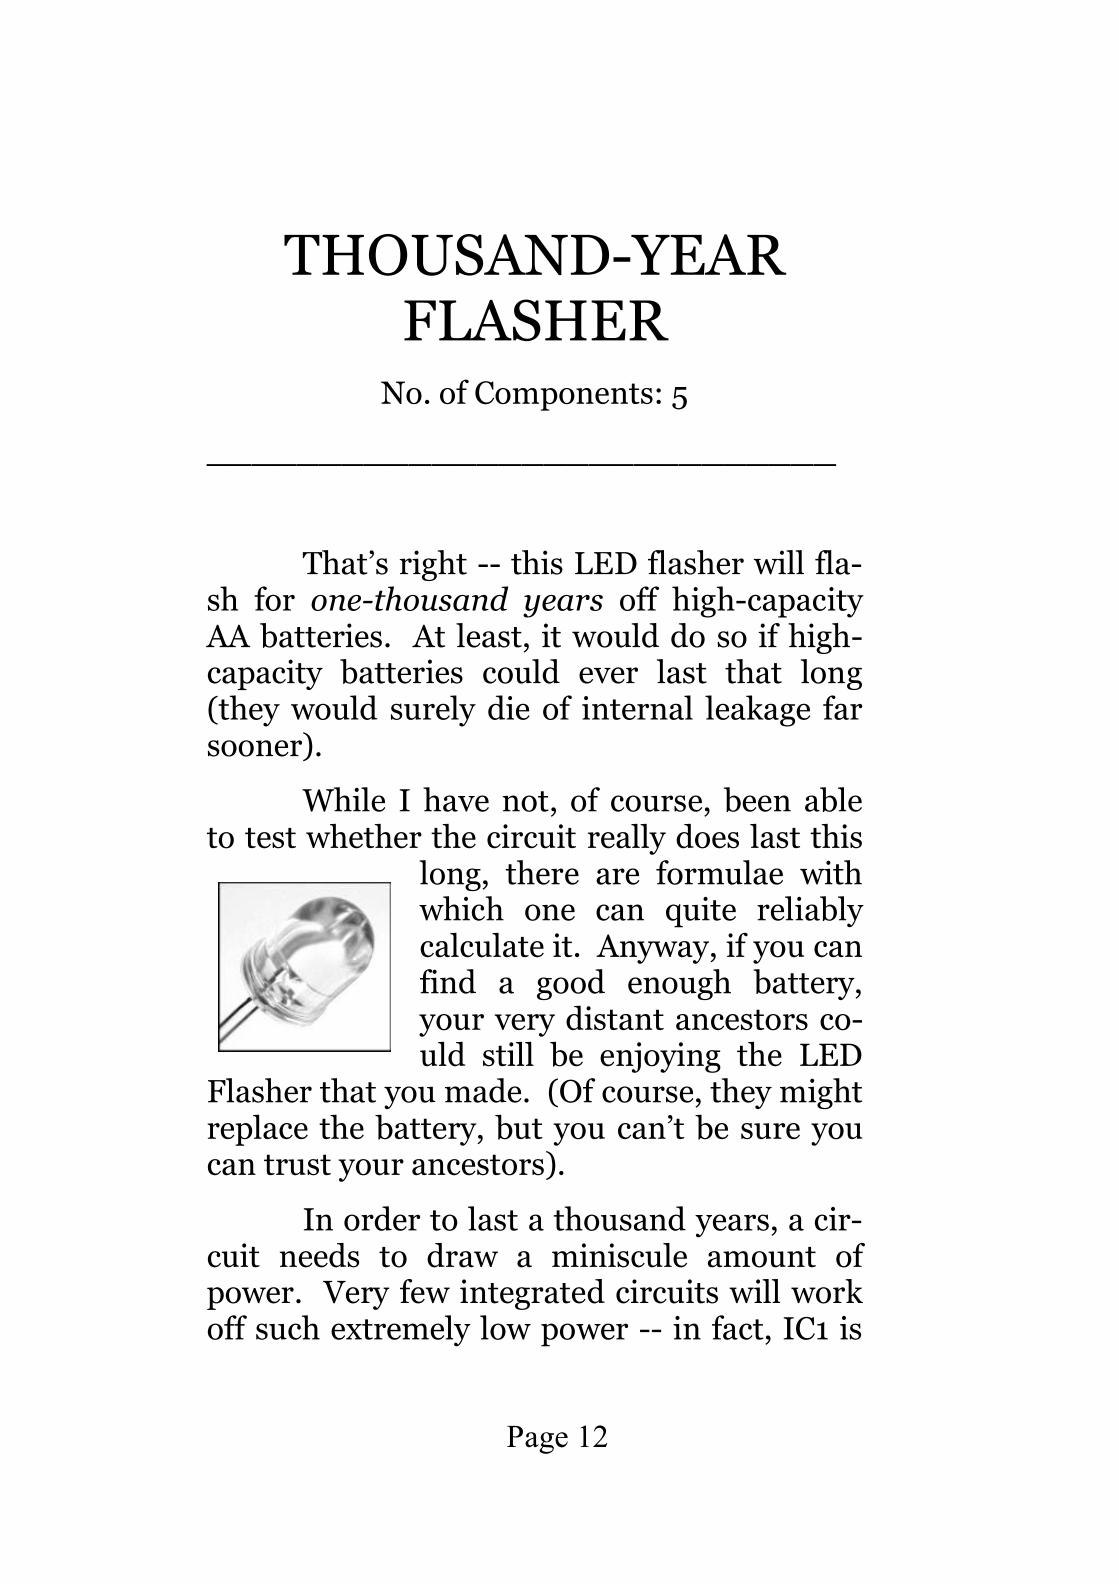
That’s right -- this LED flasher will fla-sh for one-thousand years off high-capacity AA batteries. At least, it would do so if high-capacity batteries could ever last that long (they would surely die of internal leakage far sooner).
While I have not, of course, been able to test whether the circuit really does last this
long, there are formulae with which one can quite reliably calculate it. Anyway, if you can find a good enough battery, your very distant ancestors co-uld still be enjoying the LED
Flasher that you made. (Of course, they might replace the battery, but you can’t be sure you can trust your ancestors).
In order to last a thousand years, a cir-cuit needs to draw a miniscule amount of power. Very few integrated circuits will work off such extremely low power -- in fact, IC1 is

Page 13
one such integrated circuit which ordinarily will not. Ordinarily it draws more than 500 µA at 9 Volts. However -- it may be persuaded to use as little as 0.3 µA.
Also, part of what makes this circuit possible is major advances in LED technology. While in the 1970s one could obtain only small, dull red LEDs, many LEDs, by now, come with warnings that they could pose a risk to one’s eyesight.
Not only this, but every conceivable co-lour is available -- including infrared and ul-traviolet -- as well as various shapes and view-ing angles. A narrow viewing angle usually translates into greater intensity.
CIRCUIT THEORY
IC1 can be persuaded to use much less power than it normally would, simply by rest-ricting the current flow through R1. The res-ulting flash is not too bright to be sure, yet it will be clearly visible at night.
This circuit is unorthodox, in that IC1 requires a minimum 3V to operate -- yet when LED D1 flashes, the voltage across IC1 drops to 2V.
At this point, the circuit is theoretically

Page 14

Page 15
non-functional -- yet it does permit C1 to re charge through R1 and R2. As the voltage across IC1 again approaches 3V, so IC1 kicks into life again, and the discharge of C1 is again permitted, through D1. Unused gates are “tied high” to conserve power.
This circuit is what is commonly called a relaxation oscillator, or a clock generator. As input pins 1 and 2 go “high”, so output pin 3 goes “low”, and vice versa. “High” means two-thirds of supply voltage, while “low” me-ans one-third of supply voltage. With this in mind, see if you can work out how the THOU-SAND-YEAR FLASHER flashes. The IC is called a “Schmitt” device because its gates switch very decisively. The circuit will flash at about 0.5 Hz.
I used the Motorola version of IC1 (the MC14093 BCP). While other CMOS 4093 ICs should work in this position, this has not been tested. D1 should be an ultrabright red LED only. C1 should be a quality, low-leakage co-mponent.
With the component values shown in the table on the right, this circuit will flash much more brightly at 0.5Hz for -- alas -- a mere twenty years, drawing 12 µA off six high capacity AA batteries. Even so, this could make a very nice gift that “keeps on giving”. For instance, encapsulate it in polyester resin

Page 16
and give it to a young child, and it could still be flashing when they enter college one day!
CONSTRUCTIONAL NOTES
IC1 is a CMOS component, which means that it is sensitive to static. Immedi-ately before handling IC1, touch your body to earth -- e.g. by touching a metal tap, or the
metal frame of your PC. Note that ultrabright LEDs may also, sometimes, be sensitive to static.
Ultrabright LEDs can be confusing with their polarity. The best way to judge this is by the “flat” on the side of the plastic encapsulation as shown. This is the cathode (k).
FURTHER IDEAS ...
MINIATURISATION. Since current consumption is very small, this circuit would last for a long time off a very small battery. Thus the circuit could be miniaturised.
MICROPOWER PENDULUM. For the patient experimenter, this circuit could be us-

Page 17
ed to swing a small magnet on a pendulum for a very, very long time. In this case, an electro-magnet would need to be wired in series with ultrabright LED D1 -- or could replace D1. A hand-wound, coreless electromagnet might work best here.
The rate of flash (controlled by R1, R2, and C1) would need to be matched perfectly to the period of the pendulum, and this could require patience. To aid this task, R2 could be replaced with a preset potentiometer for easy adjustment.
COMPONENTS LIST
R1 . . . . . . . . . 3M3 ¼ Watt resistor
R2 . . . . . . . . . 470k ¼ Watt resistor
C1 . . . . . . . . . 1µ high grade electrolytic
(e.g. tantalum) capacitor
D1 . . . . . . . . . Ultrabright red LED only
IC1 . . . . . . . . MC14093BCP Schmitt
quad NAND IC
B1 . . . . . . . . . 9V battery or battery pack
Battery clip to suit battery or battery pack
Suitable plastic case
Connecting wire
Solder

Page 18
THE BEST OF
THOMAS
SCARBOROUGH
BOOK 2
___________________________________ Printed by Lulu Press 860 Aviation Parkway Morrisville, NC 27560 United States of America www.lulu.com Publisher ID: 785564 http://books.lulu.com/content/785564 Copyright: © 2007 by Thomas Scarborough Edition: Second Edition License: All Rights Reserved. No part of this publication may be reproduced, stored in a retrieval system, or transmitted in any form or by any means, electronic, mechanical, recording or otherwise, without the prior written permission of the author. Printed: 138 pages, 4.25" x 6.875" (Pocket), perfect bound, 60# cream interior paper, black and white interior ink , 100# white exterior paper, full-colour exterior ink.

Page 19
CONTENTS __________________________
FOREWORD . . . . . . . . . . . . . . . . . . . . . . . . . . v
DEDICATION . . . . . . . . . . . . . . . . . . . . . . . . . . vi
INTRODUCTION . . . . . . . . . . . . . . . . . . . . . . 1
DETECTION CIRCUITS . . . . . . . . . . . . . . . . . . 7
BFO METAL DETECTOR . . . . . . . . . . . . . . 7
BB METAL DETECTOR . . . . . . . . . . . . . . . 19
THUNDERSTORM MONITOR . . . . . . . . . 31
CRYSTAL AMP RADIO . . . . . . . . . . . . . . . 41
DAY-NIGHT SWITCH . . . . . . . . . . . . . . . . 51
HELIX THERMOSTAT . . . . . . . . . . . . . . . 60
SECURITY CIRCUITS . . . . . . . . . . . . . . . . . . . 68
SUPER VIBRATION SWITCH . . . . . . . . . 68
SUPER STATIC SNOOP . . . . . . . . . . . . . . . 79
MAGNETIC KEY . . . . . . . . . . . . . . . . . . . . 84
CODE LOCK . . . . . . . . . . . . . . . . . . . . . . . . 95
PRESSURE PAD SWITCH . . . . . . . . . . . . 101
BIRD SCARER . . . . . . . . . . . . . . . . . . . . . . 107

Page 20
ESSENTIAL CIRCUITS . . . . . . . . . . . . . . . . . 113
LATCHING CIRCUIT . . . . . . . . . . . . . . . . 113
SIMPLE TIMER . . . . . . . . . . . . . . . . . . . . 119
SENSITIVE SWITCH . . . . . . . . . . . . . . . . 123
CIRCUIT SYMBOLS . . . . . . . . . . . . . . . . . . . viii
RESISTOR COLOUR CODE . . . . . . . . . . . . . . 6
ABBREVIATIONS . . . . . . . . . . . . . . . . . . . . . . 18
BASIC FORMULAE . . . . . . . . . . . . . . . . . . . . 59
PLUS: 33 FURTHER IDEAS
VIEW THE WHOLE SERIES AT
http://stores.lulu.com/ thomasscarborough
PRINTED COPIES $8.95 DOWNLOADS $2.95

Page 21
BFO METAL DETECTOR No. of Components: 2
_____________________________
Beat frequency operation (BFO) metal detectors were very popular in the 60s and 70s, soon after the advent of the first commer-cial transistors. Some models sold thousands of times over. But these quickly went out of fashion as superior induction balance (IB) and pulse induction (PI) designs appeared on the market.
This having been said, BFO metal det-ectors still have significant advantages in the areas of cost and ease of construction. They may also be better suited to certain applicati-ons, such as pipe-finding or probing. Also, they are particularly well suited to miniatur-isation.
This BFO metal detector surely has to be the simplest in the world. Not only this, but by BFO standards, it is particularly sen-sitive and stable, and equals the performance of some commercial models of the 60s and 70s! It will potentially pick up a 25 mm (1")
Page 22
diameter coin at 90 mm (3½").
It suffers hardly any drift, as many budget designs do, and this makes it particu-larly pleasant to use. This is not strictly a self-contained design, however -- it requires a Medium Wave (MW) radio to operate.
CIRCUIT THEORY
A BFO metal detector usually incorpo-rates two oscillators -- a search oscillator and a reference oscillator. These run at almost the same frequency. When the search oscillator "beats against" the reference oscillator, this produces an audible heterodyne or beat freq-uency.
Recently, in the USA, this same prin-ciple was used to project two ultrasonic (in-audible) beams towards a person, over several metres (yards), so that an audible beat frequ-ency was heard only by the intended recipient. I tried to reproduce this myself, and it worked -- yet I discovered that standard ultrasonic transmitters are too weak to transmit an aud-ible signal over any useful distance.
This circuit only has a search oscillator, with the reference oscillator being provided by the MW radio. The difference frequency is

Page 23
then heard in the radio speaker. Although a MW radio's frequency (about 500-1600 kHz) is much higher than that of the search oscil-lator (about 200 kHz), it will clearly pick up harmonics of this frequency.
The design is based on a simple inver-ter oscillator. In fact, I might well be the inve-ntor of this oscillator.
Since an inductor resists rapid changes in voltage (called reactance), any change in the logic level at IC1 output pin 6 is delayed during transfer to inverting input pin 2. Also, there is a propagation delay within the IC its-elf. This sets up a rapid oscillation, which is fed to the aerial of a MW radio. The opposite end of the search coil is wired to non-inverting

Page 24
input pin 3, which stabilises operation.
Since the presence of metal changes the inductance of L1, this brings about a change in the oscillator frequency when metal is detect-ed. This in turn shifts the difference frequ-ency which is heard in the MW radio speaker.
CONSTRUCTIONAL NOTES
The sear-ch coil is 70 tur-ns of 30 swg (22 awg) enamelled copper wire on a 120 mm (4¾") diameter former. A former which was used for a
smaller coil is shown on the left. Winding the coil is not critical -- nor is the wire gauge. This design is very forgiving.
Wind the coil around the former, and temporarily hold it together by passing stubs of insulating tape under it and pressing them together over the top. Then bind it tightly with insulating tape all round. Scrape the en-amel off the ends of the coil's enamelled cop-per wires.

Page 25
A Faraday electrostatic shield is essen-tial in this circuit, for stability. This prevents capacitive coupling and ground effect. To put it simply, without the Faraday shield, the BFO DETECTOR would pick up both your body and the ground as though these contained metal.
With the Faraday shield in mind, prepare some long, thin strips of alumini-um- or tin-foil. Twist a 100 mm (4") length of bare wire around
the coil, over the insulating tape. This wire provides electrical contact with the foil (see photo).
Wind the foil around the circumference of the coil -- beginning at the base of the bare wire -- yet the foil should not quite complete a full 360°. Leave a small gap (see over the page), so that the foil does not meet up after having done most of the round. Now tightly bind the whole Faraday shield with insulating tape.
Attach the coil to IC1 by means of ba-lanced (figure-8) microphone cable. Each of the cable’s two cores has a screen, and both of

Page 26
these screens are soldered to the coil’s Fara-day shield at the one end, and to -6V (negative) at the other. The scraped ends of the enamelled copper wire are soldered to the two microphone cable cores, which are taken
to IC1 as shown in the circuit diag-ram. If balanced microphone cable cannot be found, use two separate screened micro-phone cables.
The coil may be mounted on a rigid plate, and a suit-able handle attached. A lazy person’s solution for the handle is to saw the end off a length of PVC piping at a slight angle, and to drill holes as required to bind the pipe to the plate with a cable tie (see the BB METAL DETECTOR in this book for more detail).
Attach an ae-rial wire for the MW radio. This is ideally a length of screened microphone cable, with the screen being wired to -6V. The core may terminate with a small crocodile clip, as shown in the photo.

Page 27

Page 28
GETTING GOING
Clip the aerial wire to the aerial of a MW radio, switch on both the metal detector and the radio. Now tune the radio until a clear heterodyne (a whistle) is heard in the radio speaker. Some heterodynes will work better than others.
You will notice that there is a "band of silence" at the centre of most heterodynes -- that is, a zero beat frequency. Depending which side of this zero beat frequency is tuned in, the metal detector's tone will either rise or fall at the presence of metal.
You will find that the detector will discriminate between small ferrous and non-ferrous items (e.g. coins) by giving an opposite reaction in the difference frequency. This is particularly useful for distinguishing useless iron from noble metals during treasure hunting.
FURTHER IDEAS ...
1. COIL SIZE. A question I am quite often asked is whether the size of a metal detector’s coil may be changed. Usually the

Page 29
answer is yes -- as is the case here. In fact, the coil in this circuit may be replaced with e.g. a tiny 100 µH inductor. The calculations are complex -- however, as a rule of thumb, if the coil’s diameter is halved, the number of turns needs to be doubled, and vice versa.
2. SIGNALLING. Since metal detectors will work e.g. through walls, this circuit could be used to signal through walls. If a MW rad-io is suitably tuned -- that is, to just one side of a beat frequency -- and if the search coil is mounted on one side of a wall, then this would produce a tone in the MW radio speaker when a larger piece of metal is held to the other side of the wall.
3. PINPOINTER. A pinpointer can be a very useful device for metal detecting enthusi-asts. One might have made a small find, and dug up a pile of earth -- yet where exactly is “it”? A pinpointer helps one to “snuffle out” the ob-ject in question. For this purpose, one would reduce the size of the search coil, as described above, and mount it on the end of a shaft, so that one can poke at the soil or sand without needing to bend over. I built such a pinpointer (see the photo) by

Page 30
placing a coil inside a large nylon end plug, and binding this to a PVC shaft with clear epoxy resin.
COMPONENTS LIST
IC1 . . . . . . . . . LF351N j-fet op-amp IC
(or TL071CN)
S1 . . . . . . . . . . On-off switch
B1 . . . . . . . . . . 6V battery or battery pack
L1 . . . . . . . . . . 30 yds (30 m) 22awg
(30 swg) enamelled copper
wire for the search coil
Battery clip to suit battery or battery pack
1.5m (1½ yds) balanced figure-8 screened
microphone cable to attach search coil
1 m (1 yd) single-core screened microphone
cable to connect to a MW radio aerial
100 mm (4") bare wire to twist under the
Faraday shield
Aluminium- or tin-foil for the Faraday shield
Search plate to which to fix coil and handle

Page 31
Cable ties to tie coil and handle to search
plate
MW radio (any should work -- even LW/SW)
Suitable plastic case
PVC shaft for handle
Connecting wire
Insulating tape
Solder
Page 32
SUPER
VIBRATION SWITCH No. of Components: 6
_____________________________
The old-fashioned vibration switch is well known. This consists of a flexible lever, fixed at one end, with a small weight attached to the other. When there is vibration, the weight "bobs" slightly, knocking a terminal beneath it. Electrical contact is made, and an alarm is triggered.
This type of switch usually has an adj-ustment screw, to adjust the gap between the weight and the terminal, thus adjusting its sensitivity. This project simulates this old-fashioned vibration switch. As with the old switch, it also has an adjustment screw (VR1).
The real difference, however, lies in the SUPER VIBRATION SWITCH’s sensitivity. As simple as it is, it may justifiably be described as being "super-sensitive". While the old-fashioned vibration switch is best suited to detecting noticeable motion, such as a bicycle being disturbed, or valuables being lifted, the

Page 33
SUPER VIBRATION SWITCH is capable of picking up very subtle vibrations indeed.
It will easily pick up a person walking across a wooden floor at virtually any distance (e.g. at the far side of a hall). My prototype was capable of picking up a pin striking a wooden floor at 2 metres' (2 yards’) distance, or the vibration of the neighbours' car doors closing at 20 metres (20 yards).
Having said this, however, the circuit may be adjusted to whatever level of sensitiv-ity would best suit your purposes.
MECHANICAL
The circuit’s principle of operation is well known. It uses a cheap, standard piezo

Page 34
element which flexes slightly in response to vi-brations, thus creating a minute electrical out-put. In short, it converts mechanical energy to electrical energy.
Bi-morph elements are also available for this purpose - however, these are more costly, and are not as robust as the piezo element used here. Such bi-morph elements may by all means be tried in this circuit.
To mount the piezo elem-ent, I carefully drilled a 3 mm hole at one edge of the element. I soldered a wash-er to this hole to reinforce it, then inserted a 25 mm (1”) long 3 mm diameter bolt
through the hole, and mounted the whole “contraption” on a base as shown. An arran-gement I once used for a similar circuit is shown above left.
The "far end" of the piezo element, which is suspended in the air, ideally needs to be weighted in such a way that most of the element will be free to flex. A weight of a few grams would be suitable, and this may be

Page 35
glued, clipped, or screwed to the edge of the piezo element. A greater weight is likely to in-crease sensitivity a little.
CIRCUIT THEORY
IC1 is wired as a standard monostable timer. It is based on the very well known 555 timer IC -- but note that this is a more sensitive CMOS version of the IC, the 7555.
The trigger input, pin 2, is biased close to triggering through the adjustment of VR1. R1 and C1 are timing components, and switch TR1 for a period determined by the following formula:
t = 0.69 × R × C
where R is Ohms, C is Farads, and the result (t) is given in seconds. With the component values shown, the circuit will switch for 6.9 seconds.
TR1 is an n-channel power MOSFET. I use these transistors throughout this series. Since they are voltage controlled, they are easer to use than bipolar transistors -- at least for switching applications. They generally require fewer “peripheral” components (in this case none), and have an extremely low

Page 36
Page 37
“on” resistance (typically much less than 1 Ohm). This MOSFET easily conducts 10 Wat-ts, or up to 43 Watts with a suitable heat sink. The voltage of the load will of course need to match the supply voltage.
GETTING GOING
Switching S1 may of course cause the circuit to vibrate. To give you time to “get clear”, you may wire a 100k ¼ Watt resistor between reset pin 4 and +12V, and a 100µ 16V electrolytic capacitor between pin 4 and 0V (the negative terminal of the capacitor is taken to 0V). This will let the circuit settle down after it is switched on, then it will quietly activate.
Carefully adjust VR1 to the point where TR1 just switches, then adjust further for the desired sensitivity.
The SUPER VIBRATION SWITCH is well suited to battery operation, as it uses a mere 1.5 mA on standby. Thus AA batteries should power it for more than a month -- if it is not triggered too often. However, for more sensitive applications it would make sense to use a regulated power supply, since this will keep the voltage steady.

Page 38
FURTHER IDEAS ...
STANDARD TIMER. This circuit is based of course on a “classic” timer circuit. When IC1 trigger pin 2 goes “low” (below about one-third of the supply voltage, the timer begins to time. The formula for calculating the timing period s given on the previous page.
So, for instance, one might take trigger pin 2 “high” (to +12V, or positive) by means of a 10k resistor, and “low” (to 0V, or negative) by means of a push-to-make (PTM) push-button switch. Now, on pressing the button, TR1 conducts for a timed period.
BICYCLE ALARM. The circuit may be used as a very sensitive bicycle or motorbike alarm. No one will be able to move your “wheels” in the slightest without triggering the circuit.
However, you will need to provide a switch whereby, on returning to your bicycle or motorbike, you can instantly switch off the SUPER VIBRATION SENSOR, or you yourself will trigger the circuit.
While there are ways of delaying trig-gering, this requires more than six com-ponents. See the SIMPLE TIMER elsewhere
Page 39
in this book.
PORTABLE ITEM ALARM. The circuit may also be secured to an item such as a com-puter, so that it will trigger as soon as the item is picked up.
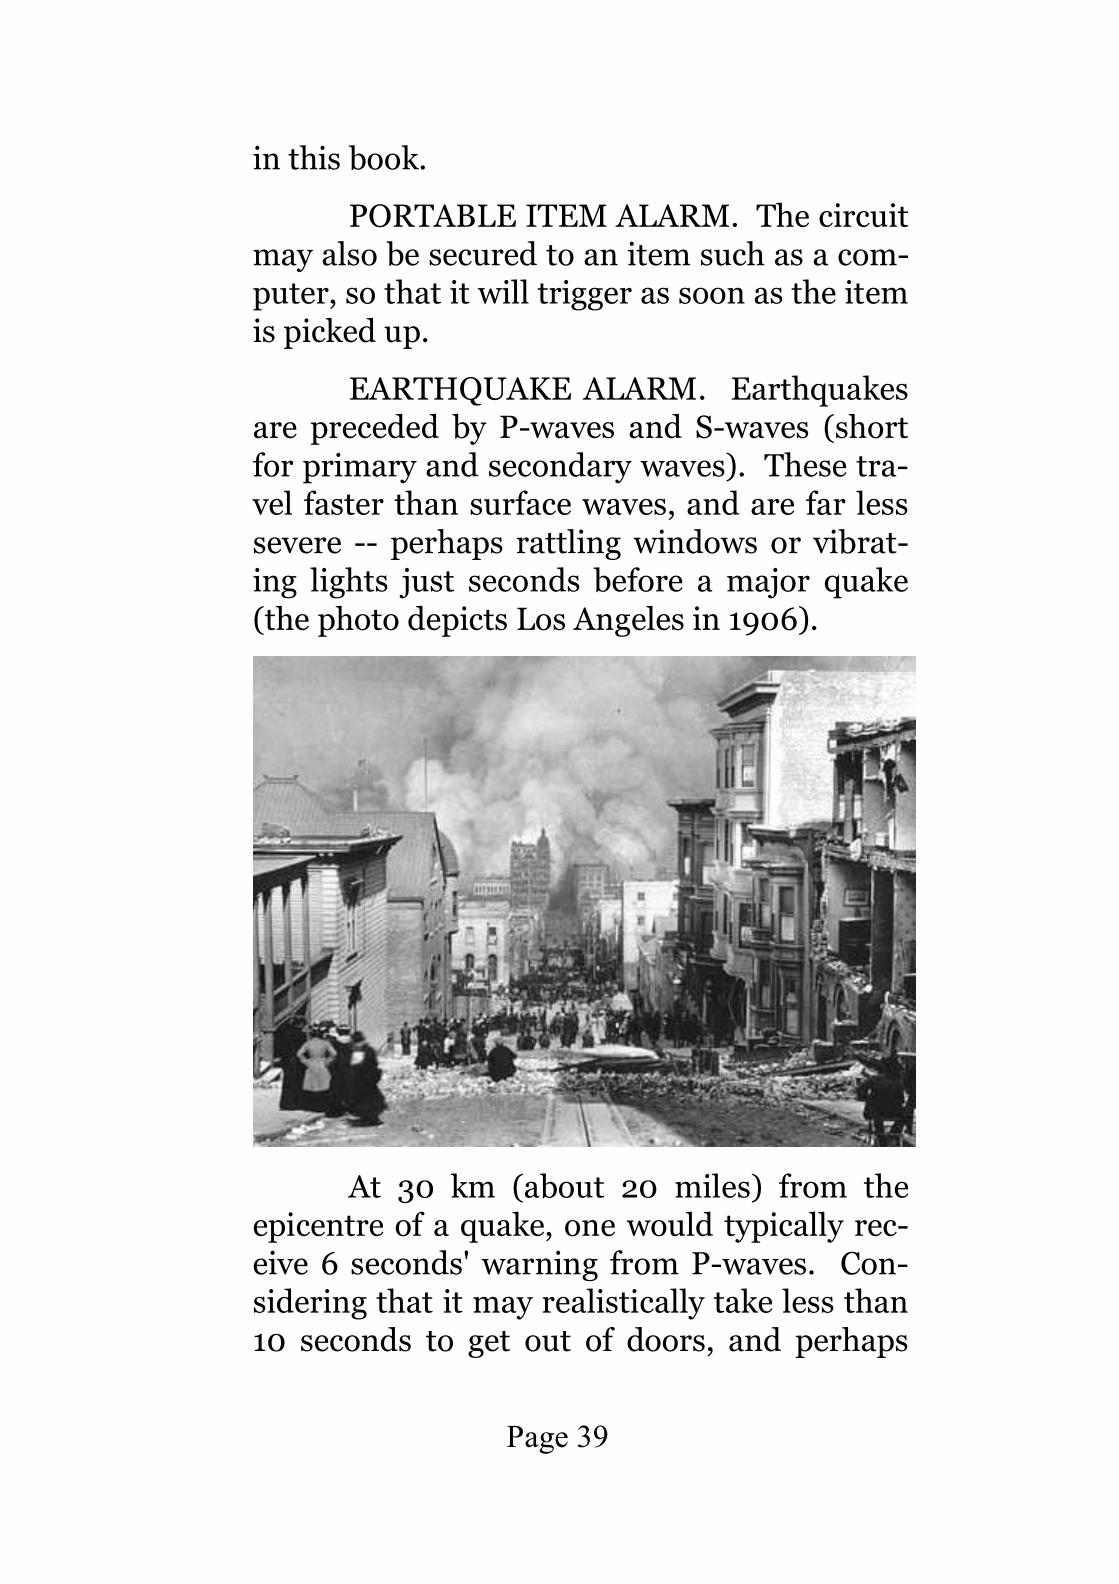
EARTHQUAKE ALARM. Earthquakes are preceded by P-waves and S-waves (short for primary and secondary waves). These tra-vel faster than surface waves, and are far less severe -- perhaps rattling windows or vibrat-ing lights just seconds before a major quake (the photo depicts Los Angeles in 1906).
At 30 km (about 20 miles) from the epicentre of a quake, one would typically rec-eive 6 seconds' warning from P-waves. Con-sidering that it may realistically take less than 10 seconds to get out of doors, and perhaps

Page 40
only 3 seconds to get under a table or other stable structure, this could be a life-saving warning.
The SUPER VIBRATION SENSOR is entirely capable of picking up even fairly small P-waves and S-waves.
AIR PRESSURE ALARM. If e.g. e piece of stiff card is glued to piezo element X1, then the circuit will pick up relatively gentle puffs of wind -- even a door or a window opening at several metres’ (yards’) distance.
MAGNETIC SWITCH. If the weight which is fixed to X1 is a small neodymium magnet, the circuit will pick up another, moving magnet in the vicinity. In this case, the circuit will need to be mounted so that it will not pick up vibrations from other sources, e.g. a floor or a door.
In some situations, this may offer a good alternative to a Hall effect sensor, and outperform it significantly.
Hall effect sensors typically have a maximum range less than 10 cm (4”), while this circuit should be capable of responding at twice this distance.

Page 41
COMPONENTS
R1 . . . . . . . . . . 100k ¼-Watt resistor
VR1 . . . . . . . . 1M multi-turn preset
potentiometer
C1 . . . . . . . . . . 100µ 16V electrolytic
capacitor
TR1 . . . . . . . . IRF510 n-channel power
MOSFET (or equivalent)
IC1 . . . . . . . . . ICM7555IPA timer (not the
NE555N) IC
X1 . . . . . . . . . Large piezo element, approx.
30 mm (1”) dia.
S1 . . . . . . . . . . On-off switch
B1 . . . . . . . . . . 12V battery or battery pack
Battery clip to suit battery or battery pack
25mm (1”) long 3 mm bolt, 3 nuts, 1 washer
Suitable plastic case
Connecting wire
Solder

Page 42
THE BEST OF
THOMAS
SCARBOROUGH
BOOK 3
___________________________________ Printed by Lulu Press 860 Aviation Parkway Morrisville, NC 27560 United States of America www.lulu.com Publisher ID: 786843 http://books.lulu.com/content/786843 Copyright: © 2007 by Thomas Scarborough Edition: Second Edition License: All Rights Reserved. No part of this publication may be reproduced, stored in a retrieval system, or transmitted in any form or by any means, electronic, mechanical, recording or otherwise, without the prior written permission of the author. Printed: 127 pages, 4.25" x 6.875" (Pocket), perfect bound, 60# cream interior paper, black and white interior ink , 100# white exterior paper, full-colour exterior ink.

Page 43
CONTENTS __________________________
FOREWORD . . . . . . . . . . . . . . . . . . . . . . . . . . v
DEDICATION . . . . . . . . . . . . . . . . . . . . . . . . . . vi
INTRODUCTION . . . . . . . . . . . . . . . . . . . . . . . 1
NOVELTY CIRCUITS . . . . . . . . . . . . . . . . . . . . 7
ELECTRIC SHOCK MACHINE! . . . . . . . . 7
JUMPING SPIDER . . . . . . . . . . . . . . . . . . 13
CHRISTMAS CHEEKS . . . . . . . . . . . . . . . 25
NOVEL ANEMOMETER . . . . . . . . . . . . . . 31
ROBOTIC VOICE . . . . . . . . . . . . . . . . . . . . 37
POT-PLANT POWER . . . . . . . . . . . . . . . . 43
SPECIAL CIRCUITS . . . . . . . . . . . . . . . . . . . . 49
TENS UNIT . . . . . . . . . . . . . . . . . . . . . . . . 49
WART REMOVER . . . . . . . . . . . . . . . . . . . 55
CAT/DOG SCARER . . . . . . . . . . . . . . . . . . 63
CCO METAL DETECTOR . . . . . . . . . . . . . 69
HAND GENERATOR . . . . . . . . . . . . . . . . 83
VERSATILE TIMER . . . . . . . . . . . . . . . . . 91

Page 44
ESSENTIAL CIRCUITS . . . . . . . . . . . . . . . . . 97
LEADING EDGE TRIGGER . . . . . . . . . . . 97
TRAILING EDGE TRIGGER . . . . . . . . . 105
REGULATED SUPPLY . . . . . . . . . . . . . . 113
CIRCUIT SYMBOLS . . . . . . . . . . . . . . . . . . . viii
RESISTOR COLOUR CODE . . . . . . . . . . . . . . 6
ABBREVIATIONS . . . . . . . . . . . . . . . . . . . . . . 12
BASIC FORMULAE . . . . . . . . . . . . . . . . . . . . 90
PLUS: 24 FURTHER IDEAS
VIEW THE WHOLE SERIES AT
http://stores.lulu.com/ thomasscarborough
PRINTED COPIES $9.95 DOWNLOADS $2.95
Page 45
ELECTRIC
SHOCK MACHINE! No. of Components: 1
_____________________________
I cannot claim any originality for this idea. It has been around for decades in ex-actly this form. However, it is a fun design to include, and represents perhaps the most exciting thing one can do with a single com-ponent! It may generate a voltage of around 100V, yet it is a miniscule current -- giving anything from a light tingle to a sharp bite when the probes are touched.
The circuit is basically harmless. The skin, even when moist, will have a resistance of around 200k, so that the body will typically conduct no more than about half a milliamp at 100V.
This having been said, even small currents can do strange things to the body, so that this circuit should on no account be used by anyone who suffers epilepsy or uses a pace-maker. Also, do not use anything larger than AA batteries for this circuit, and on no acco-

Page 46
unt use a mains-to-DC plugpack power supply -- this may not be safe.
CIRCUIT THEORY
An inductor (a coil) generates back-EMF when the power is removed. That is, it gives a “kickback” voltage. Depending on the size of the coil, this may be fairly high -- in this case 100V or so. I myself once received
an impressive shock when I removed a mere 9V PP3 battery from a large coil. The coil is shown at left (I was experim-enting with electro-magnets, not elec-tro-shocks)!
The contacts of relay RLA1 are normally closed, so that when power is applied, the relay’s coil is acti-vated, and the closed contacts open. How-ever, as soon as the contacts open, the coil is deactivated. This means that the relay con-tacts close once again -- and so on.
In the process, power is repeatedly ap-plied to, and removed from, the relay coil, and

Page 47
continual back-EMF is generated. In fact, this is the basic principle which is used for step-ping up a voltage.
Note that a relay with an internal diode (for suppressing back-EMF) is not suitable in this design -- it is precisely the back-EMF which is required here.
CONSTRUCTIONAL NOTES
The grips may be any metal items which may be held in the hands, e.g. 15 cm (6”) stubs of copper piping.
It could be awkward trying to solder leads to the two metal grips. However, one

Page 48
could solder the leads to tags, and screw the tags to holes in the metal grips with small nuts and bolts.
GETTING GOING
Turn on the power -- the circuit will buzz -- and hold the grips. If the effect is slight, or cannot be felt at all, wet your hands and try again. Or try another relay, since the characteristics of relays may differ consider-ably.
FURTHER IDEAS ...
SHARED SHOCK. Special pleasures are there to be shared. Ask someone else to hold one grip with their left hand. Hold the other grip with your own left hand. Switch on the circuit -- then shake hands!
NEON LIGHT. Since the voltage gene-rated is likely to be above 80V, this circuit will illuminate a small neon indicator (this is a small glass tube with two metal rods inside) -- or even (depending on the relay) a larger tube, say a 100mm (4”) tube.

Page 49
PARTY TRICK. If the grips are dipped in a saline solution (water with some salt ad-ded) this may cause a tingling sensation if one dips one’s hand into the water. The effect-iveness of this trick will again depend on the relay used. Now add coins to the water, and invite someone to retrieve them ...
COMPONENTS
S1 . . . . . . . . . . On-off switch
RLA1 . . . . . . . 12V single-pole-double-throw
(SPDT) relay
B1 . . . . . . . . . . 12V battery or battery pack
(not a DC plugpack power
supply)
Metal grips
Small metal tags and nuts and bolts to suit
Battery clip to suit battery or battery pack
Suitable plastic case
Connecting wire
Solder

Page 50
TENS UNIT No. of Components: 6
_____________________________
TENS stands for Transcutaneous Ele-ctrical Nerve Stimulation. TENS units, in many cases, are extraordinarily effective in controlling pain. This is not to say that a TENS unit will always have the desired effect -- however, they have been shown to have a significant effect in 70% of cases.
Interestingly, TENS units have be-come popular for, shall we say, stimulation of other kinds. For this reason, a major maga-zine recently “pulled” their TENS unit, to overcome a run on their website!
As with all TENS units, this one com-es with a caution. While it should be perfectly safe to use, it is strongly advised that a med-ical doctor's advice should first be obtained. Its use is advised against during pregnancy, or where a patient has a heart condition, or any history of epilepsy.
TENS units may ordinarily be quite expensive. However, all that is required for
Page 51
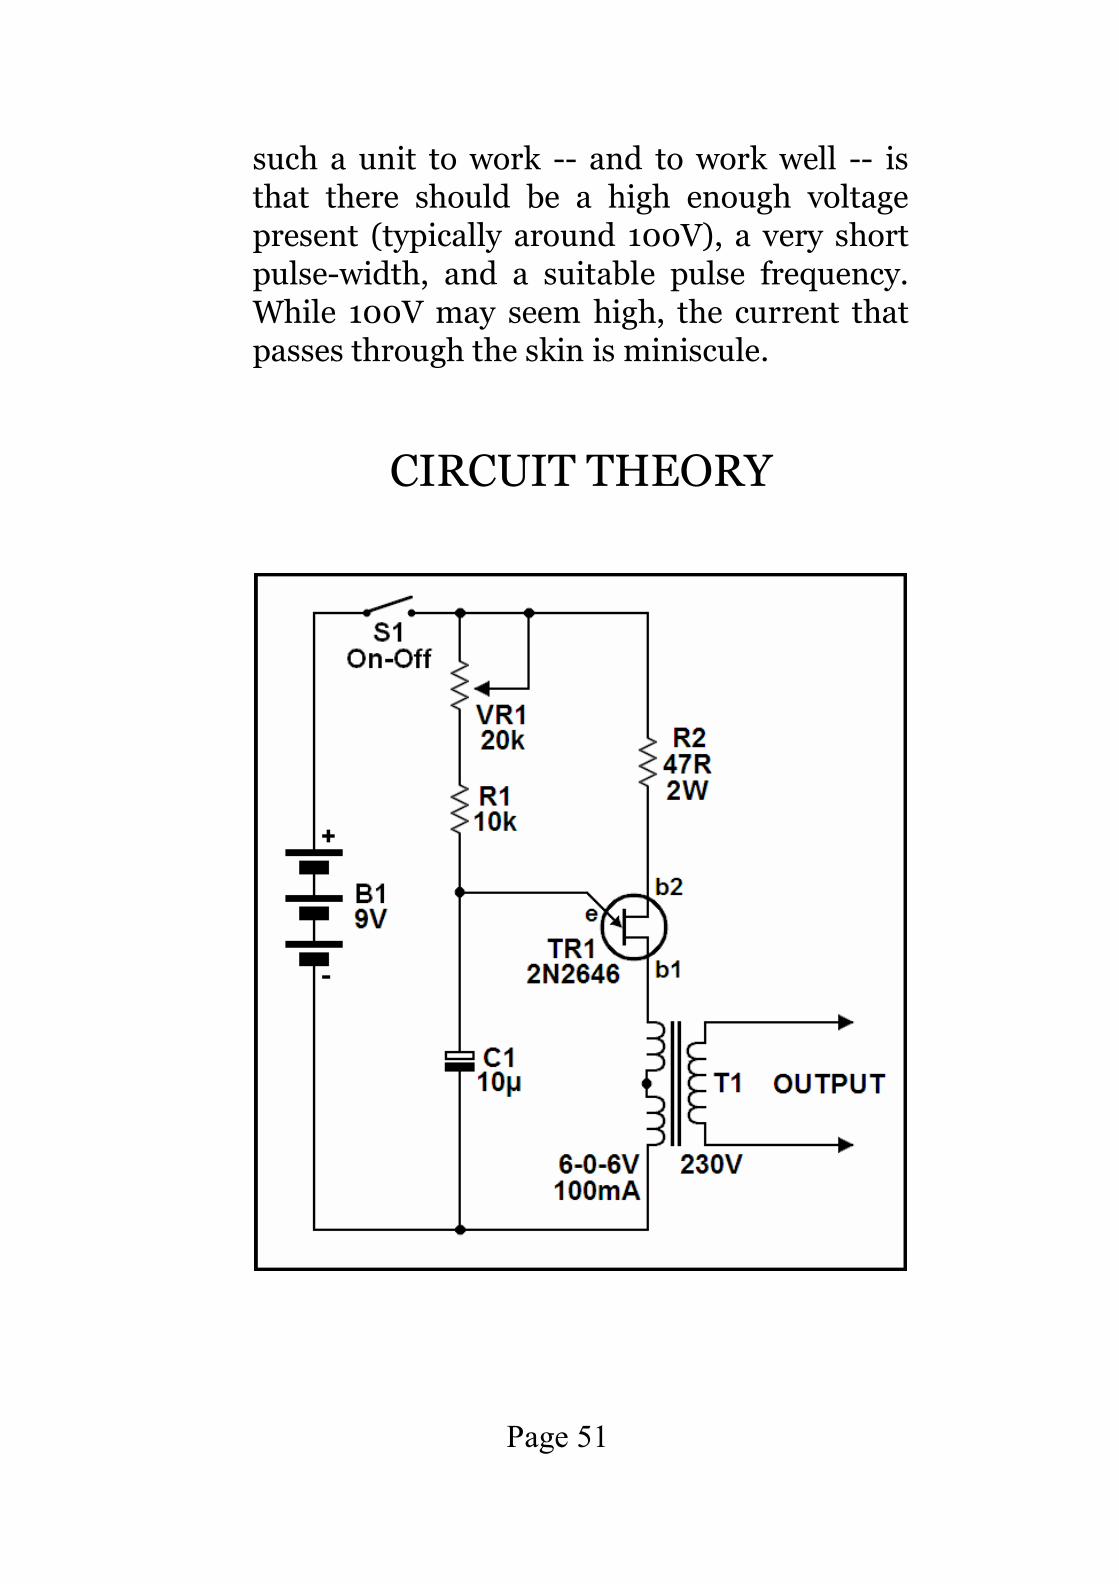
such a unit to work -- and to work well -- is that there should be a high enough voltage present (typically around 100V), a very short pulse-width, and a suitable pulse frequency. While 100V may seem high, the current that passes through the skin is miniscule.
CIRCUIT THEORY
Page 52
The required pulse width is provided in this case by a unijunction transistor (UJT), wired as a relaxation oscillator. When emitter potential reaches the UJT’s “peak point”. an avalanche effect is created, so that it conducts simultaneously across its emitter to base 1 junction, and across bases 1 and 2, shooting very short pulses through transformer T1.
With T1 being a mains to 6-0-6V tra-nsformer wired in reverse, the voltage is step-ped up to the required level.
The unit allows some adjustment of the pulse frequency through VR1, for experim-entation.
Ordinarily, the current which the TE-NS unit pulses through the body is hardly discernible. One might be tempted to ask whether anything is happening at all -- but try this experiment: if two fingers of one hand are pressed onto the two separate electrodes for half a minute, one may feel an enduring tingling sensation afterwards -- proof that something significant is happening.
The TENS unit should give about one month of all-night service before the battery needs replacing. For safety reasons, the unit should always be run off AA batteries. It should not under any circumstances be pow-ered off a mains transformer.

Page 53
CONSTRUCTIONAL NOTES
The two output leads may be soldered to large metal washers, to serve as electrodes. These are then thinly coated with moisturising cream and taped to each side of the painful area.
Better still, purpose-made electrodes may be used. Although these items are some-what hard to obtain, they are routinely used in hospitals, and are indeed to be found. One often sees them used, for instance, with ECG apparatus.
FURTHER IDEAS ...
INCREASED “BITE”. If the pulse is thought to be disappointing (but it probably need not be more), you may increase battery voltage to 12V.
Also, the value of R2 may be reduced to as little as 10 Ohms, and the transformer’s secondary voltage may be reduced to 3-0-3V. If all of these recommendations are followed together, you could be in for a shock!
A pushbutton and miniature neon in-dicator may be wired across T1’s 230V prim-
Page 54
ary coil -- these two components being wired in series. This would serve to test the func-tioning of the unit, pulsing the indicator if it is working. A neon indicator requires in excess of 70-90V to illuminate at all, therefore this is "proof of the pudding" that the unit is func-tional.
BATTERY STATE INDICATOR. The above would serve as a rough and ready bat-tery state indicator -- and not only for the TENS UNIT itself. With suitable adjustment of R2, the circuit could test any 9V or 12V bat-tery.
NEON TORCH/FLASHLIGHT. Be-fore White LEDs became available, I designed a torch/flashlight (which I used in the Pacific), which flashed a “green fluorescent glow lamp” -- a small fluorescent tube, smaller than the tip of one’s little finger. A torch/flashlight reflector is required to focus the light. The light was soft, but power consumption was excellent, and the bulb was virtually indest-ructible.
NOVEL FLASHER. Flashing LEDs today are ubiquitous. So why not be different, and use a flashing neon indicator instead? Also, one may substitute electroluminescent sheets, and these can be quite impressive.
METRONOME. T1’s 6-0-6V second-ary coils could be replaced with virtually any

Page 55
inductor, e.g. a suitably rated loudspeaker. In this way the circuit could serve as a metro-nome. The tempo could be slowed by inc-reasing the value of C1, as well as, of course, adjusting potentiometer VR2.
COMPONENTS
R1 . . . . . . . . . 10k ¼-Watt resistor
R2 . . . . . . . . . 47R 2-Watt resistor
VR1 . . . . . . . . 20k carbon track
potentiometer
C1 . . . . . . . . . . 10µ 16V radial electrolytic
capacitor
TR1 . . . . . . . . 2N2646 unijunction
transistor (UJT)
S1 . . . . . . . . . On-off switch
T1 . . . . . . . . . 230V to 6-0-6V 100mA mains
transformer
B1 . . . . . . . . . . 9V battery or battery pack
Battery clip to suit battery or battery pack
Twin-flex wire to take to the electrodes
Large washers for purpose-made electrodes
Suitable plastic case
Connecting wire
Solder

Page 56
THE BEST OF
THOMAS
SCARBOROUGH
BOOK 4
FOR THE MATURE HOBBYIST
___________________________________ Printed by Lulu Press 860 Aviation Parkway Morrisville, NC 27560 United States of America www.lulu.com Publisher ID: 878436 http://books.lulu.com/content/878436 Copyright: © 2007 by Thomas Scarborough Edition: Second Edition License: All Rights Reserved. No part of this publication may be reproduced, stored in a retrieval system, or transmitted in any form or by any means, electronic, mechanical, recording or otherwise, without the prior written permission of the author. Printed: : 267 pages, 6" x 9", perfect bound, 60# cream interior paper, black and white interior ink , 100# white exterior paper, full-colour exterior ink.

Page 57
CONTENTS ____________________________________
INTRODUCTION . . . . . . . . . . . . . . . . . . . . . . . . . . . . . . . . 7
CIRCUIT SYMBOLS . . . . . . . . . . . . . . . . . . . . . . . . . . . . . 265
RESISTOR COLOUR CODE . . . . . . . . . . . . . . . . . . . . . . 266
ABBREVIATIONS & BASIC FORMUAE . . . . . . . . . . . . 267
SIMPLE RANDOM DOORBELL . . . . . . . . . . . . . . . . . . . . . 9
SUPERIOR RANDOM DOORBELL . . . . . . . . . . . . . . . . . 12
THEREMIN DOORBELL . . . . . . . . . . . . . . . . . . . . . . . . . . 16
DING-DONG DOORBELL . . . . . . . . . . . . . . . . . . . . . . . . . 19
MOSQUITO EMULATOR . . . . . . . . . . . . . . . . . . . . . . . . . 23
AUDIO ILLUSION . . . . . . . . . . . . . . . . . . . . . . . . . . . . . . 25
BAT DETECTOR . . . . . . . . . . . . . . . . . . . . . . . . . . . . . . . . 27
ESP CONJURING TRICK . . . . . . . . . . . . . . . . . . . . . . . . . 30
SEQUENCE CONJURING TRICK . . . . . . . . . . . . . . . . . . 33
TACTILE CONJURING TRICK . . . . . . . . . . . . . . . . . . . . . 36

Page 58
LIGHT BULBS CONJURING TRICK . . . . . . . . . . . . . . . . 41
MAGIC WAND CONJURING TRICK . . . . . . . . . . . . . . . . 44
GYM AGILITY CIRCUIT . . . . . . . . . . . . . . . . . . . . . . . . . . 47
DAY-NIGHT SWITCH . . . . . . . . . . . . . . . . . . . . . . . . . . . . 50
BODY DETECTOR . . . . . . . . . . . . . . . . . . . . . . . . . . . . . . . 52
SQUASH SWITCH . . . . . . . . . . . . . . . . . . . . . . . . . . . . . . . 62
OMNIDIRECTIONAL PENDULUM . . . . . . . . . . . . . . . . . 66
EVERYTHING THAT MOVES ALARM . . . . . . . . . . . . . . 70
FLUID FINDER . . . . . . . . . . . . . . . . . . . . . . . . . . . . . . . . . 73
FREQUENCY SWITCH . . . . . . . . . . . . . . . . . . . . . . . . . . . 76
JAZZY HEART . . . . . . . . . . . . . . . . . . . . . . . . . . . . . . . . . . 79
64-LED SEQUENCER . . . . . . . . . . . . . . . . . . . . . . . . . . . . 85
SHOESTRING RADIO . . . . . . . . . . . . . . . . . . . . . . . . . . . . 88
LOOP AERIAL RADIO . . . . . . . . . . . . . . . . . . . . . . . . . . . . 90
LM380N RADIO . . . . . . . . . . . . . . . . . . . . . . . . . . . . . . . . 94
MICRO RADIO . . . . . . . . . . . . . . . . . . . . . . . . . . . . . . . . . . 96
TRANSISTOR CCO METAL DETECTOR . . . . . . . . . . . . 102
INTEGRATED CIRCUIT CCO METAL DETECTOR . . . 105
TRI-COIL METAL DETECTOR . . . . . . . . . . . . . . . . . . . . 109
MATCHLESS METAL LOCATOR . . . . . . . . . . . . . . . . . . 113
555 BFO METAL DETECTOR . . . . . . . . . . . . . . . . . . . . . 123

Page 59
PIPEFINDER . . . . . . . . . . . . . . . . . . . . . . . . . . . . . . . . . . . 125
BB METAL DETECTOR . . . . . . . . . . . . . . . . . . . . . . . . . 127
MINIMAL METAL DETECTOR . . . . . . . . . . . . . . . . . . . 130
£2 METAL DETECTOR . . . . . . . . . . . . . . . . . . . . . . . . . . 132
MIRJAM’S ROOM RECORDER . . . . . . . . . . . . . . . . . . . . 134
SEEING EYE . . . . . . . . . . . . . . . . . . . . . . . . . . . . . . . . . . . 136
DOG YAP INHIBITER . . . . . . . . . . . . . . . . . . . . . . . . . . . 140
FREQUENCY METER . . . . . . . . . . . . . . . . . . . . . . . . . . . 142
SIMPLE SIREN . . . . . . . . . . . . . . . . . . . . . . . . . . . . . . . . . 145
STEPPER MOTOR DRIVER . . . . . . . . . . . . . . . . . . . . . . 147
MAGNETOMETER-SEISMOMETER . . . . . . . . . . . . . . . 149
SIMPLE STYLOPHONE . . . . . . . . . . . . . . . . . . . . . . . . . . 158
VISUAL CAPACITANCE GAUGE . . . . . . . . . . . . . . . . . . 160
4060 YES-NO INDICATOR . . . . . . . . . . . . . . . . . . . . . . . 162
4047 YES-NO INDICATOR . . . . . . . . . . . . . . . . . . . . . . . 164
SUPERIOR HEADS-TAILS INDICATOR . . . . . . . . . . . . 166
60p DPDT RELAY . . . . . . . . . . . . . . . . . . . . . . . . . . . . . . . 168
MAGNETIC GUN . . . . . . . . . . . . . . . . . . . . . . . . . . . . . . . 170
INTERCOM/BABY LISTENER . . . . . . . . . . . . . . . . . . . . 173
DUMMY BOMB . . . . . . . . . . . . . . . . . . . . . . . . . . . . . . . . . 175
DISCO LIGHT . . . . . . . . . . . . . . . . . . . . . . . . . . . . . . . . . . 179

Page 60
ELECTROMAGNETIC LOCK . . . . . . . . . . .. . . . . . . . . . . 182
PATTERN FLASHER . . . . . . . . . . . . . . . . . . . . . . . . . . . . 184
SPACE CASE ALARM . . . . . . . . . . . . . . . . . . . . . . . . . . . . 186
MODEL TRAIN DETECTOR . . . . . . . . . . . . . . . . . . . . . . 188
NEON TORCH . . . . . . . . . . . . . . . . . . . . . . . . . . . . . . . . . . 190
LED TORCH . . . . . . . . . . . . . . . . . . . . . . . . . . . . . . . . . . . . 192
NEON DESKLAMP . . . . .. . . . . . . . . . . . . . . . . . . . . . . . . 194
WORLD LAMP . . . . . . . . . . . . . . . . . . . . . . . . . . . . . . . . . 196
LED TOUCH LIGHT . . . . . . . . . . . . . . . . . . . . . . . . . . . . 207
MULTI-LEVEL LOCK . . . . . . . . . . . . . . . . . . . . . . . . . . . 209
ONE-WAY BROKEN BEAM ALARM . . . . . . . . . . . . . . . 213
PLUG-PACK CHECKER . . . . . . . . . . . . . . . . . . . . . . . . . . 216
MULTI-LEVEL LOCK . . . . . . . . . . . . . . . . . . . . . . . . . . . 224
LINE-O-LIGHT . . . . . . . . . . . . . . . . . . . . . . . . . . . . . . . . . 228
WART ELIMINATOR . . . . . . . . . . . . . . . . . . . . . . . . . . . . 230
PROGRAMMABLE ROBOT . . . . . . . . . . . . . . . . . . . . . . . 241
SHORT-RANGE RADIO CONTROL . . . . . . . . . . . . . . . 257
ALTERNATE LED FLASHER . . . . . . . . . . . . . . . . . . . . . 260
INTRUDER DELUDER . . . . . . . . . . . . . . . . . . . . . . . . . . 262

Page 61
FLUID FINDER
__________________________
RETROSPECTIVE COMMENTS: 1. This circuit’s sensitivity was compromised a little by frequency lock. It is hard to see how this could be “worked out of the system” without significant re-design. 2. This circuit won me a valuable prize -- a dual trace storage oscilloscope.
__________________________
The circuit of Fig.1 is capable of distinguishing between different liquids, or, alternatively, of determining their purity. It may also be used to measure the level of highly corrosive liquids in a tank where these would devour an ordinary probe. With slight modification it would distinguish certain solids, e.g. one sheet of paper as opposed to two.
A critical element of the formula used to determine the capacitance of a parallel-plate capacitor is the relative permittivity of
the dielectric, or the dielectric constant (εr). Relative permittivity is defined as

Page 62
"capacitance with material as dielectric" over "capacitance with air as dielectric". Although the circuit is relatively crude, it will determine relative permittivity to within a fraction of one percent. This means that the Fluid Finder of Fig.1 distinguishes unfailingly between e.g. distilled water, tap water, and milk, and reveals vast differences between fluids such as water, alcohol, and oil.
At the heart of the circuit is custom-built parallel-plate capacitor C1, whose plates are sealed in epoxy resin, and separated by an air space. This capacitor is dipped into a liquid to determine its relative permittivity, which in turn is deduced from the capacitance measured by means of VR1.
The frequency of RC oscillator IC1a-IC1b is fed to digital bandpass filter IC2a-IC2b, then VR1 is adjusted until l.e.d. D4 illuminates. The relative permittivity of distilled water (which we shall designate x) is measured as 100,000-VR1 in Ohms, then the relative permittivity of any other fluid is calculated as (100,000-VR1 in Ohms) * ( 78 / x ) -- assuming that the relative permittivity of distilled water is 78. Needless to say, a quantity of distilled water is first required to determine the value of x. This should be available from most garages.
The digital filter IC2 goes either "high" or "low" at ouput pin 9 until the desired

Page 63
frequency (about 100kHz) is presented at the input. In this case a square wave at output pin 9 is detected by means of simple diode pump D2-D3 and C4-C5. When C5 charges, the input of IC1c goes "high", and l.e.d. D4 illuminates. L.E.D. D1 is included for easier adjustment, as this shows whether the output is "high or "low". S1 is provided so that IC1 and IC2 are not overdriven in the absence of a liquid. With IC1a-IC1b typically oscillating at around 100kHz, this would be multiplied by 78 if distilled water were replaced with air, which has a relative permittivity of about 1.
Custom-built capacitor C1 was made from two plates of copper-clad board measuring 30mm x 40mm, with the plates facing inwards. These were soldered to wires, then sandwiched in 80gsm paper, which was coated twice with epoxy resin. The prepared plates were mounted 7mm apart with nylon spacers.
The accuracy of the Fluid Finder is determined by R4. This may be decreased for
greater accuracy, and vice versa. 220Ω was found to be a practical value here. Use a multimeter to ensure that the values of R2-R4 are the actual values used. Note that capacitor C1 is affected by body capacitance, therefore needs to be kept a few centimetres away from any part of the body for an accurate reading.

Page 64

Page 65
THEREMIN DOORBELL _____________________________
Install a doorbell with a difference. The Theremin Doorbell shown in Fig.1 uses a metal sensor for the "doorbell", playing a Theremin as a hand approaches. Therefore, a slight tremolo effect might indicate the presence of Aunt Agatha, while a more authoritative swoop in pitch might indicate the presence of Brother Joe.
Not only this, but the sensor plate may be placed at the foot of a doorway instead, to report people walking in and out. This would make an interesting alternative to the more usual broken beam.
The range of the Theremin Doorbell is up to 20cm. That is, a hand will induce a shift in frequency of one tone at a maximum 20cm. For everyday use, however, this lies more realistically around 8cm. This is still sufficient to play e.g. Happy Birthday with careful control of one's hand.
Relaxation oscillator IC1a employs a very small value for C1, so that the presence of a human body at the sensor plate increases its effective capacitance. This in turn decreases

Page 66
the frequency of oscillator IC1a. As the number of pulses generated at IC1b output pin 4 decreases, so the charge on capacitor C2 falls. If the rate of discharge of capacitor C2 is critically adjusted through VR1, a small variation of the voltage across C2 causes a large variation of potential at power MOSFET TR1's drain. This is used in turn to control the frequency of a voltage controlled oscillator (v.c.o.) IC2. TR1 may be virtually any power MOSFET.
The v.c.o. selected for this task is surely the simplest and most versatile available. Strictly, it is a phase-locked loop i.c., of which only the oscillator section is put to use. It has the great advantage of falling completely silent as the voltage at control pin 9 falls to about 1V, as well as having an easily adjustable top frequency limit, which is determined by R6. Thus the Theremin Doorbell is silent until a hand approaches, and will not exceed a specified frequency even when a hand touches the sensor plate directly.
The Theremin Doorbell draws just over 3mA current on standby. A regulated power supply is recommended for stability. Initially try a metal plate or sheet of tin foil measuring about 20cm by 20cm for the sensor, connected firmly to the circuit. To set up the Doorbell, turn preset potentiometer VR1 across its range until the critical point is reached where frequency varies vastly over a

Page 67
few turns. Then adjust for silence, so that a hand at about 8cm begins to cause a crackle in piezo sounder WD1.
The picture shows inventor Leon Theremin with his musical instrument.

Page 68

Page 69
SEEING EYE _____________________________
RETROSPECTIVE COMMENTS: The
Seeing Eye went into production as a kit in South Africa, and has been very successful. It is the “kid brother” of my Super Motion Sensor of May 2003 (EPE magazine).
_____________________________
The Seeing Eye responds to minute
fluctuations in light level, auto-adjusting over the range of about 200 lux to 10,000 lux (a modestly lit room to bright shade). Since virtually every motion around us causes such fluctuations (except when it is dark), it has a very wide range of possibilities. It will respond, for instance, to a car entering a driveway, a person moving in a room, or wind rustling the leaves of a tree. It has a high level of rejection of natural light variations, such as sunrise, sunset, or the movement of clouds.
While this is a "passive" system, it may also be used as an "active" system - that is, in conjunction with a light beam. Its great advantage here is that, since it responds to fluctuations in light level, rather than the crossing of a specific light threshold, it is much more flexible than a typical "active"

Page 70
system. It may be placed within the line-of-sight of almost any light source, including vague ambient light, and simply switched on without any adjustment.
In daylight, the Seeing Eye will typically detect a single finger moving at a distance of 2 metres - without the use of any lenses. It will detect a person crossing a path at 10 metres' distance - without lenses. Under AC lighting, as an "active" system, it will typically detect a person walking in front of an ordinary light source at more than 10 metres - without the use of lenses. This range is achieved by sliding a a black tube over the light dependent resistor (LDR) as shown in Figure 2.
The LDR is so wired in conjunction with R1 to R3 that, between darkness and full sunlight, it offers a potential at point X of between roughly one-quarter and three-quarters of supply voltage. The present circuit differs from the more usual "passive" light sensor in that it uses the offset-adjust feature of comparator IC1 to balance the inputs instead of a potential divider. This makes for a more sensitive and reliable circuit. A wide variety of sensors may be used in place of the specified LDR, including photo-transistors, photo-diodes, and infra-red and ultra-violet devices.
The potential at point X is presented simultaneously, through R4 and R5, to the

Page 71
inputs of comparator IC1. As the potential fluctuates at point X, changes in potential are delayed at the comparator's non-inverting input through C2. Thus an imbalance occurs, causing the output of the comparator goes "low". Thus monostable timer IC2 is triggered, switching relay RLA. IC2 may be adjusted by means of VR2, to hold the relay closed between about three and thirty seconds.
As with all such circuits, the Seeing Eye may not work as well under AC lighting as opposed to natural lighting. If AC lighting should prove to be particularly problematic, a capacitor (say 1µ 16VW) may be added between point X and 0V, to smooth the potential presented to comparator IC1's inputs, and holes are provided on the printed circuit board (PCB) for this purpose.
Because the circuit is very sensitive, a special problem presents itself in the form of relay RLA, which carries a relatively heavy current when switched by monostable IC2. This would ordinarily upset the circuit and reduce its sensitivity. Besides the use of supply decoupling, this problem is overcome by "blanking" the relay's action through TR1, which disables the trigger input of timer IC2, thus allowing the circuit to settle after relay RLA has disengaged. The "blanking" also makes it possible to run external circuits off the same power supply as the Seeing Eye. Current consumption is nearly 20mA on standby, so that unless the circuit is run off a

Page 72
car battery, a 12V "plugpack" adapter is recommended.

Page 73
Switch on, and wait for the circuit to settle and come to life (C5 first needs to charge). Adjust VR1 for good sensitivity. The Seeing Eye will work best in situations of good contrast (e.g. shadows on a white wall). It would be best to adjust it to less than its maximum sensitivity, to exclude any unwanted triggering. With some experimentation, it may be set to transition seamlessly from natural to AC lighting - but this, unfortunately, will not occur at maximum sensitivity for both. If maximum sensitivity under natural lighting triggers the circuit under AC, then adjust for maximum sensitivity under AC - and vice versa.
VR1 should be adjusted so that the LED just extinguishes. Relay RLA may be wired up to switch external circuits.

Page 74

Page 75