Embed Size (px)
Citation preview

1

Disclaimer The material herein is accurate to the best of the author’s knowledge. However, the author’s opinions may
change. The reader is encouraged to verify the status of those opinions.
This publication is designed to provide accurate and authoritative information in regard to the subject matter
covered. It is sold with the understanding that the publisher is not engaged in rendering legal, accounting, or
other professional service. If legal advice or other expert assistance is required, the services of a competent
professional person should be sought.
In no event shall Freedom Writers Publishing, Rama Marketing LLC, and/or its agents and affiliates be liable
to any party for direct, indirect, special, incidental, or consequential damages of any kind whatsoever arising
out of the use of the information contained herein. Freedom Writers Publishing, Rama Marketing LLC and/or
its agents and affiliates specifically disclaim any guarantees, including, but not limited to, stated or implied
potential profits or rates of return or investment timelines.
The information contained in this kit/book/course and its several complementary guides, is meant to serve as
a comprehensive collection of time-tested and proven strategies that the author(s) have deemed successful to
meet the intended results. Summaries, strategies, tips and tricks are only recommendations by the authors,
and reading this kit does not guarantee that one’s results will exactly mirror our own results. The authors
have made all reasonable efforts to provide current and accurate information for the readers of this product.
The authors will not be held liable for any unintentional consequences, errors, or omissions that may be
found.
The material in this book may include information, products, or services by third parties. Third Party
materials comprise of the products and opinions expressed by their owners. As such, the authors of this guide
do not assume responsibility or liability for any Third Party Material or opinions.
The publication of such Third Party materials does not constitute the authors’ guarantee of any information,
instruction, opinion, products or service contained within the Third Party Material. Use of recommended
Third Party Material does not guarantee that your results will mirror our own. Publication of such Third Party
Material is simply a recommendation and expression of the authors’ own opinion of that material.
Whether because of the general evolution of the Internet, or the unforeseen changes in company policy and
editorial submission guidelines, what is stated as fact at the time of this writing, may become outdated or
simply inapplicable at a later date. This may apply to this product, our affiliated website platforms, as well
as, the various similar companies that we have referenced in this kit, and our several complementary guides.
Great effort has been exerted to safeguard the accuracy of this writing. Opinions regarding similar website
platforms have been formulated as a result of both personal experience, as well as the well-documented
experiences of others.
No part of this publication shall be reproduced, transmitted or resold in whole or in part in any form, without
the prior written consent of the authors. All trademarks and registered trademarks appearing in this kit are the
property of their respective owners.

3
Introduction 4
Budget 6
How Much Food and Water Do You Need? 8
Food Rule—You can NEVER have too much food! 8
Food Storage Basics 10
Securing the Shelves 12
Anchors 12
Shelf Guards 13
Keeping Out Pests 13
Where to Store Your Survival Cache 16
Hiding Your Stores 16
Hiding in Plain Sight 16
Under the Bed 17
False Bottoms 17
Furniture 17
Mylar Bags 18
Basements 19
Root Cellars 20
Bunkers 20
Pantry 20
What Food Should You Store 22
Grains 23
Dairy 23
Vegetables 24
Fruits 24
Meats 25
Legumes 25
Spices 26
Baking 26
Ready-To-Eat 27
Luxuries 27
Special Items 28
Personal Items 29
The Little Things of Food Storage 30
Freeze-Dried, Canned or Dehydrated? 31
Freeze-Dried 31
Dehydrated 32
Canned 32
Home-Made Survival Foods 34
Canning Instructions 34
Dehydrating 36
Jerkying 37
Drying Spices 38
Heirloom Seeds 39
Food Storage Tips and Tricks 42
What to Eat First? 43
Conclusion 44

4
Introduction
Knowing you need to store food and water in case of an emergency is one thing,
but knowing how to store it is a entirely new ballgame. It isn't quite as simple as
buying a couple cans of canned food and a case of bottled water and throwing it
on the shelf in the basement. There is actually a right way and a wrong way to
store food and water. In this book, you will discover some key rules to food and
water storage as well as learn some tricks other preppers have come up with to
help maximize space, money and most importantly, energy. There is no need to
reinvent the wheel. Learn from other people's mistakes and make your food and
water storage the best it can be.
The reasons for building up an adequate food storage vary from person to person.
You don’t have to be a “prepper” to want to create a backup plan for your family. In
fact, the government has asked each person to have a 3-day supply of food on
hand in the event of an emergency. While we know there is aid available and help
is usually just a phone call away, there are times when emergency services are

5
overwhelmed. If there has been a hurricane, tornado or earthquake, roads may be
impassable and help will be delayed. We have seen what happens when
emergency services are delayed and people haven’t prepared. One of the prime
examples of what can happen when we don’t prepare is Hurricane Katrina. That
one episode in history was a wakeup call not only for regular folks, but for the
government as well.
When disaster strikes, you may have to hunker down in your home for days. That
isn’t so bad when you have food and water. If you don’t have food and water, your
life is in jeopardy. Don't feel like you are being paranoid (even if you are) because
you want to build up a supply of food that will keep your family alive. Quite frankly,
it is pretty crazy NOT to have a backup plan.

6
Budget
One of the biggest hesitations many people have about creating an emergency
food storage is the cost. If you have traveled down the aisle in your grocery store
where all those freeze-dried cans of food are, you may have been put off by the
idea of building up a food supply that would last you several months or even a
year. You may have decided you will take your chances or give up.
You don't have to take out a second
mortgage. Unless you have thousands
of dollars sitting around just waiting to be
spent, you don’t want to buy everything
you need in a single day or even a single
week or month. It is all about taking baby
steps. Rome wasn’t built in a day and
your food storage isn’t going to be either.
You would be doing yourself a major disservice if you tried to buy a 30-day supply
of food in one grocery shopping trip. You can build up your storage by spending
$20 to $50 a month on extra food. When you go to the store, buy 4 cans of soup
instead of the 2 you normally buy. You would put 2 in your daily use pantry and 2
in storage. When you need to make a big purchase, like a 50-pound bag of flour or
rice, then that is your budget for the month.
Beware of buying those 365-day packages of emergency food for a couple
thousand dollars. These are all over the internet and while it may seem like a
really great deal in theory, it isn’t going to be tailored to your family’s specific
preferences. 700 packs of freeze-dried meals isn’t really an ideal food storage.
You are going to be forced to eat what somebody else has chosen for you.
Wouldn’t you rather pick your own food?
Always be on the lookout for really good deals. Buying in bulk is almost always
cheaper.

7
However, do not buy commercial use cans and other products. Can your family
really eat a 10-pound can of chili in a single setting? You will not have refrigeration
and it isn’t a good idea to eat food that hasn’t been stored properly. Those giant
jars of peanut butter may seem like a good idea in theory, but if you can’t eat the
entire jar within a 30-day period, it will be wasted. Buying bulk dried foods is
different. You can open the bag and store it in a bucket to use as needed.
Look for case sales. This is an excellent way to get canned foods at really steep
discounts. Your grocery store may hold one of these sales every couple of
months. Save your money for a few months to put towards one of these case
sales. Do the math before you start buying cases of food. Often times, places like
Costco and Sam’s Club sell cases of product that are actually more expensive
than buying individual items. Don’t get fooled by the idea of buying bulk is always
cheaper. It isn’t.
Coupons are another way to build up your food supply without spending a lot of
cash. When you find those buy one get one free offers, take advantage of it. You
may not want to go as far as some of the extreme coupon folks, but hey, they get
some pretty awesome deals and are on the right track. Don’t be afraid to take
advantage of price match guarantees. If you can save the money—do it. You can
put it towards buying more food or survival gear.
If you are simply not seeing room in your existing food budget to start putting a few
things aside for your emergency food supply, then you need to take a good hard
look at your budget. Try cutting out meals out and put the money saved towards
your food supply budget. You only need to save about $5 to $10 a week to start
building up those emergency stores. Don’t get caught up in the big picture. Slow
and steady wins the race!

8
How Much Food and Water Do You Need?
Food Rule—You can NEVER have too much food!
There is a formula you will want to use to calculate how much food and water you
need to store for your family. The amount of food and water is going to vary from
family to family based on the number of people in the family as well as the ages
and other special needs. There is often a
misconception about eating during a
survival situation. Many assume that
because things are dire, you must live in a
state of near starvation. This is a
dangerous assumption! Quite frankly it is
an unpleasant situation that if you don’t
have to put yourself in, why would you.
Sure you can technically live weeks without eating, but that doesn’t mean you will
be healthy or very happy.
Survival is hard work. You are going to need more calories than normal just to
keep your muscles in good shape as well as give your body the energy it needs to
keep going. You cannot afford to get sick in a survival situation. A body that has
gone days or weeks without food is going to be frail and prone to injury and illness.
Let’s talk food first. Now, this number is going to depend on the number of days
you are attempting to store for. For the purpose of this exercise, we are going to
go with 30 days. Assume each person in your family needs 2,000 calories to
survive. Men, who are out there chopping wood and walking miles back and forth
to retrieve water or hunt, are going to need more to really keep their body going.
Women can usually get away with fewer calories, but storing a little extra food isn’t
going to hurt you. Children are okay around the 1,500 calorie mark, but kids
appreciate snacks and several small meals throughout the day. For the sake of

9
argument and ease, let’s say 2,000 calories per day.
A family of 4 will need 8,000 calories a day. One of the cans of freeze-dried food
meals has a label that indicates each serving has 500 calories. Your family of four
needs 8000 calories. In this particular can, there are 16 servings. 16 x 500=8000.
If your family was to only eat that one particular food on a given day, you would
need the entire can to provide the necessary calories for your family. Pretend you
are only going to eat freeze-dried food for 30 days and you can deduce you would
need at least 30 cans.
That is one way to figure your food needs. You could also use the old-fashioned,
non-technical method of calculating 3 meals a day for 30 days for each member of
the family. Sometimes, that is easier than trying to count calories. However, you
want to make sure you are storing foods that are high in calories. Although most of
us are always worried about counting calories to make sure we don’t eat too
many, in a survival situation the rules change. You want every calorie you can get.
Water--the all important water. You have to have it to survive. The bare minimum
you want to store is 1 gallon of water for each family member per day. That is only
enough water to keep the person hydrated, rehydrate food and maybe use a bit to
brush their teeth. That is not enough water to bathe, wash dishes or wash clothes.
Water is bulky and takes up a lot of space, but you have to find a way to store it or
at least have access to a steady supply of water.
Now that you have an idea of how much food and water you need, you can start
planning where you will store your food supply and how much you will store
depending on the length of time you plan on surviving off your emergency stores.
Don’t set out with a goal of storing enough food to last your family a year. Start out
with a goal of 30 days. Once you reach that, aim for 3 months and stair step it up.
There isn’t a cap. Once you reach a year’s worth of food, just keep going.

10
Food Storage Basics
There are some basic rules to food storage that you need to know. These are
rules that will ensure your food is stored safely and will not rot before you ever get
the chance to eat it. Although you may see freeze-dried foods with labels that
indicate the food is good for a whopping 20 years; that is not always the case. The
food is only good for that long when it is stored in optimal conditions. So what are
optimal conditions and can you create those conditions in your home?
Ideally your food storage area should meet the following guidelines;
• No exposure to direct sunlight
• Not damp
• Ventilated properly to control humidity
• Temperature does not get above 80 degrees
• Temperature does not get below 50 degrees
• Food should not be stored near heat source i.e. heater vent, lights, windows
• Food should not be stored on the floor—blocks air circulation
Do you have a room in your house that meets all these requirements? You
probably have a pretty good idea of where you want to store your food. If not, no
worries, we will discuss some of the areas in your home that will make good food
storage places.
Before we talk about where you are going to store your food, you need to pick a
place that is easily accessible by you. If you can’t get to your food storage easily,
you are probably going to ignore or skip this next bit. A major part of your food
storage is proper rotation.
The golden rule is FIFO. First In, First, Out. When you are stocking your food

11
storage, you do not want to pack the new items in the front. Take the time to pull
the older items forward and place the newer items in the back. Each time you add
new food to your storage, spend a few minutes checking labels. Now, some will
tell you a “use by” date is just a guideline. That isn’t entirely accurate. The words
“best by” tell you the food will taste best by a certain date, but it is still edible
beyond that date. A “use by” date is telling you the food has expired and it should
not be eaten. Some hardcore preppers will ignore all dates. It is personal
preference, but if you notice any signs of spoilage, it is not worth the risk of
developing food poisoning.
If you are storing canned food, it is absolutely crucial you check for signs the food
has gone bad. Canned food can develop botulism. The following warning signs are
indicators you should throw out a can of food.
• Swollen lid. It is pushed out rather than sucked in.
• Dented cans are risky. The dent creates rust, which can leech into the food
inside the can.
• Any liquid seeping from the can is a warning sign.
• Upon opening the can a foul odor emits.
• Liquid is abnormally cloudy.
• Food is mushy and looks bad in general.
Many people like to can their own food from the garden to save some money. This
is a great idea. However, home-canned food holds its own set of risks. Only use
food that you yourself prepared or from somebody you trust. There are too many
variables when it comes to eating home-canned foods from somebody you don’t
know. You don’t know if they followed the proper procedures, if they washed the
food beforehand and if they processed it correctly.
Additional warning signs that indicate food has spoiled are as follows.

12
• Lid doesn’t “pop” when opened
• Lid bounces when pushed on the top
• Air bubbles can be seen rising to the top of the jar
• Mold can be seen on the food
• Discolored liquid
Typically, dried food will not spoil and become unsafe to eat. It may taste stale, but
it doesn’t pose any risks. However, if the food has somehow been exposed to
moisture, there is the chance it will grow mold. If you open a package of anything
and see mold, don’t eat it. The rule of thumb is this; When in doubt, throw it out!
Securing the Shelves
You are going to need shelves for your food and water storage. That is a fact you
cannot get away from. Your shelves are going to be loaded with items that will
keep your family alive in the event of some catastrophic event. You need to do
whatever you can to ensure those shelves are secure and are not going to topple
over potentially hurting you or a family member and destroying your food and
water.
You have a couple of different options to securing your shelves to ensure they
don’t tip forward in the event of a natural disaster like an earthquake or from the
blast of a bomb going off nearby.
Anchors
Even if you don’t think either one of the above scenarios will ever happen, if you
have kids, you need to anchor your shelves to a wall. There are specially designed
screws you can buy at your local hardware store to drill through the wall and into a
beam that will hold a shelf in place. It absolutely must be anchored to a beam. If
you have cement walls, there are screws for that as well.

13
Shelf Guards
Once you have anchored your shelf to the
wall, you want to make sure your food isn’t
going to topple off of the shelves. There are a
number of different ways you can go about
doing this. You can use a thin piece of wood,
like a 1x6 or whatever the width of your
shelving. Place the wood about one to two
inches high across the shelf. This acts as a
guard rail of sorts and will keep cans and
bottles from rolling off the shelf if it does
happen to move.
You can also use rope, thick wire or netting in front of the shelves. A falling can of
chili can be fatal if you are crouched below. It doesn’t take much to cause a can to
fall from a shelf. A minor earthquake is all it takes to shake things up. You can buy
netting at your local hardware store for a few dollars a roll. Hook the netting to the
top of the shelf and roll it out to the bottom. Secure it in a way that you can remove
it as needed to add more food or remove food.
Some metal shelves are designed with a small lip on the underside of the shelf.
Technically, when you assemble the shelves, the edge is supposed to be facing
the bottom, but if you assemble the shelves upside down, you have a nice little lip
to help keep your items from sliding forward.
Keeping Out Pests
Your food storage is going to be very enticing for some pests. Mice love food and
their sharp little teeth allow them to get through cardboard and plastic very easily.
They are a nuisance and can destroy a food storage in a matter of weeks. You

14
need to take some precautions to keep mice and other pests out of your food.
Although some people don’t mind picking around the part that was munched on, it
isn’t sanitary and can actually cause you to get sick.
Obviously mice can’t get through cans and jars. They also cannot get through
sealed 5-gallon containers. If you are storing boxes of noodles, bags of beans and
other items that are at risk of being chewed on by mice, you will want to invest in
some food-grade buckets with lids that seal. Store the items in the buckets and
make sure the lid is on tight!
You can also help deter mice and other things like spiders and ants by adding
some bay leaves to the bottom of your bucket. They don’t like the smell and will
avoid the food. You are probably going to be storing flour and flour-based products
like pasta noodles. Flour is prone to weevils. The eggs are laid in the flour and with
a little warmth and time, they hatch. The clear little carcasses and bugs can be
seen in flour products. Again, some people are okay picking them out and if you
were desperate, so be it, but if you could keep the eggs from hatching, wouldn’t
you rather do that?
Before adding any flour-based product, including flour, to your food storage, put it
in the freezer for a couple of weeks. This will kill off those eggs and you can store
your flour products without worrying about icky little bugs making it their home.
Another trick that has been proven to work is to use essential oils as pest
deterrents. The strong scent of peppermint or orange oil is too much for mice and
other pests. They will avoid the area. Buy a bottle of the essential oil of your
choice and put a couple of drops on an old t-shirt that has been torn into shreds.
Tie the material on the shelves to keep pests away. You will want to refresh the oil
every week or two. It works and it makes your food storage smell fantastic!

15
You can also set out traps to reduce the pests. Ant-bait, mouse traps and some
chemicals around the perimeter are all viable options. Do regular inspections of
your food storage to look for signs of an infestation. It only takes a day or two for
bugs to get in there and wreak havoc. If the infestation has become a serious
problem, it is worth the cost of a professional pest control company to come in and
help you take care of the problem. You are going to be investing hundreds of
dollars into your food storage and it is unthinkable to let it all be destroyed by
some pesky critters. Once a single mouse or ant finds your food, it becomes a
problem.

16
Where to Store Your Survival Cache
We have talked about a few places you can store your food around the house, but
let’s talk about keeping it all in one place. If you have the room, this is the ideal
option. This makes it easy for you to inventory, add stock and rotate. You already
know where you don’t want to store your food, so let’s discuss some places that
will help you extend those shelf lives.
Hiding Your Stores
Okay, you know you have seen the shows and read the blogs about preppers
going to great lengths to hide their food stores. Do you really need to do that? The
short answer is yes. You don’t want to advertise the fact you have a mini grocery
store in your basement or pantry. When it hits the fan, your house is going to be
the first place people flock to, to ask for hand outs or attempt to take it. If you live
in a crowded neighborhood, you should probably take the time to conceal your
food storage. This isn’t to say you need to build a bunker, but you will want to keep
the majority of your food hidden from view if your home does happen to get raided.
You probably don’t want to tell every person you pass on the street what you have
in your home. While it is important to talk about creating an emergency supply of
food and water, you don’t want to tell the world what you personally have.
Hiding in Plain Sight
You can hide your food in plain sight, which is one of the easiest ways for those
who don’t have the time, inclination or funds to dig a fancy bunker. Stroll out to
your garage. Do you have a bunch of boxes labeled “baby clothes” or maybe
“Christmas decorations?” Would anybody really notice if you added a few more
rubber totes with the same labels? No! You can put food in the totes, throw a
strand of lights and garland on the top and put it on the shelf. Thieves and would-
be looters are not going to waste their time digging through your old decorations
and clothes. They are there to find food and useful gear for survival. They likely
won’t spend a lot of time going through every single box. Leave a few things in the
pantry and cupboards. This will tell them they found all they were going to and
they will move on.

17
You could also use this method in the basement, attic or in your closets. Just don’t
forget where you have the goods stored. You will still need to check them for
spoilage and ensure they are properly rotated from time to time. Don’t hide your
food so well that you forget where you have put it!
Under the Bed
While thieves do tend to look under the beds, they may not do so if their intent is to
find food. There are plenty of rubber totes that are flat and designed to slide under
the bed. Get dark-colored totes or tape white paper along the sides if you can only
find the clear kind. If somebody happens to peer under the bed, all they will see is
last year’s winter clothes. You could also skip the cloaking methods and simply
use the space under the bed as a canned food storage. You can get a hundred or
more cans under the bed. Organize them so that the oldest cans are all facing one
side and the new cans are placed on the opposite. This gives you rotation and
hiding all in one. Don’t forget to put a bed skirt on the bed to at least block your
canned food from immediate view.
False Bottoms
You can create false bottoms in your closets with buckets of food or a layer of
canned food. You could even use rubber totes here as well. Fill the bucket or tub
with food, seal the lid and place a piece of particle board over the top. Cover the
board with your shoes, suitcases, purses or whatever. This gives you storage
space as well as a secret hiding place. You can do this in each of your closets to
truly maximize the space in your home.
Furniture
Make an end table or coffee table out of a bucket and a piece of wood draped with
Real Prepper Stories:
“Installing a 6″ wide shelf ABOVE the door inside the closet/s is often overlooked and valuable storage space is missed.”
R Carpe, (8/2013)

18
a pretty cloth. Fill the bucket with some of your food supply. If you are handy with
wood, you could make a couple pieces of furniture that are hollow for you to store
some of your food. Don’t forget to maximize the space under the couch!
These ideas may seem a little extreme or ridiculous, but they work. There are
plenty of preppers who simply don’t have the room to devote to one beautiful food
and water storage area. They have to get creative. If you take a look around your
house, you are sure to find more places that can hold a few cans of freeze-dried
food without being too obvious. It isn’t only about concealing the food, but taking
advantage of every nook and cranny you have. If you are going to distribute your
food throughout the home, it helps if you devote each room to something specific.
Your son’s room may hold all the pasta, while your daughter’s room holds the fruit
and your room holds the bulk rice and beans. This makes it easier for you to
remember what goes where without wasting time and energy trying to shove a can
into your box of pasta.
Mylar Bags
If you have read any blogs or talked with others who are storing food for
emergency, the term Mylar bags has probably come up a time or two. Mylar bags
vary in thickness and size. You can expect to pay anywhere from $1 to $4 per bag.
Yes, they are a bit costly, but you can reuse them time and again. Buying by the
case is always more cost effective. If you don't need 100 bags, consider selling the
remaining to recoup some of your investment. They are very useful to food storage
because they keep out oxygen when sealed. Oxygen is one of the enemies of food
that will cause it to spoil. By eliminating oxygen, you are reducing the moisture
exposure. The bags also keep out sunlight.
Some folks will try and convince you these bags are rodent proof. They are not!
Mice are determined and a foil bag isn't going to keep them from getting the
goods. Mylar bags are definitely a good idea for long term food storage, but they
just need to be used properly. The best way to take advantage of the bags is by

19
placing them inside sealed 5-gallon buckets. You can add some of those little
oxygen-absorber packets to soak up any moisture that may be trapped in the bag.
This is the one way you can really stretch the shelf life on your food storage.
The bags are heat sealed. You can use a special tool that is similar to a foodsaver
to do this or a standard clothes iron. Once you have packed the food in the bag,
flatten it and then seal. Put the bags inside a bucket and you can easily store
grains for 20 years this way.
Basements
If everybody had a nice, roomy
basement free of leaks and mold, the
world would be a better place.
Storing food would be a breeze and
we wouldn’t have to worry about
people coming to take what we have.
But, this is the real world and not
everybody has a basement. If you
do, you are in luck. Basements are
excellent food storage places. They
are simply one of the best options for
storing food and water. The cool temperatures and lack of windows eliminate two
of the biggest enemies of food. Install a fan to keep the ventilation optimal and
make sure you do your part to control pests and you have an ideal food storage
space. For a little added security, you could build a room in your basement
specifically for storing your food. Adding a few 2x4s and sheetrock is really very
simple. You could install a door with a lock to keep out prying eyes.
Real Prepper Stories: “In the back of the basement pantry, I noticed several jars of tomatoes and meat that were canned in 1984 by my mother who passed away in 1999. I opened them, smelled, and tasted. All was good.”
Mark B. (5-28-13)

20
Root Cellars
Root cellars have kind of gone away in the last few decades as people lean more
on processed food rather than trying to store fresh fruits and vegetables from their
gardens. However, if you happen to have one in the backyard, take advantage of
it. You could also have one built. The root cellar is a lot like a basement. You don’t
have to worry about temperature control or the sun’s rays speeding up the decay
of your food. You can store fresh fruits and vegetables for several months in a root
cellar. Build some shelves and add your other food. As with a basement, you will
want to make sure the cellar is ventilated, especially during the wet season. A root
cellar does not need a floor. Ideally, a dirt floor will ensure the food stays cool.
Root crops like onions, carrots and potatoes should be left unwashed and placed
in the cellar. Apples should be stored so that air can circulate between the fruit.
Avoid piling a bunch of food in a gunnysack. This will cause decay because of the
lack of air flow between the fruits and vegetables.
Bunkers
Another prepper dream is an underground bunker that will hide them and their
food storage from the world. While these are ideal for some, they are not feasible
for those who don’t own their own property. Bunkers will have to have some kind
of ventilation system, which makes them a pretty good place to store food and
water. You won’t have to worry about sunlight and extreme heat either. Space
could be an issue if you have a small bunker. One of the latest trends is to
purchase old railroad cars and bury them in the ground. This will work as long as
you seal the car. You will need to store the food as if it were in the basement. Use
oxygen-absorbers to extend your shelf lives.
Pantry
The good old pantry. Everybody has a pantry. If you don’t have one, they are fairly
easy to construct. You could even transform a spare bedroom into your food
storage pantry. You will need to pay attention to things like sunlight and the
temperature of a room. Ventilation is typically already taken care of with the

21
construction of the home. Put some blackout curtains on the window if you are
using a spare room and you can cut down on the heat and sunlight streaming
through the window and threatening to destroy your food storage. If you are using
a pantry space, do your best to keep your emergency food stores separated from
your daily food use. While you can always “borrow” from your emergency supplies,
you don’t want to make it a habit. When things go sideways, you don’t want to be
left with a depleted food storage because of excessive borrowing and a “I’ll replace
it later” mindset.
Real Prepper Stories: “The oldest canned food I have eaten was in 1982 in basic training, WE got 1 case of 1945 C-rations. We all had to try it ,it was just fine no1 could tell the difference." Cryptkeeper, 3-28-14

22
What Food Should You Store
One of the toughest questions preppers face, is what food should you store? The
answer is pretty simple. Store what you eat today. If your family loves peanut
butter and jelly, load up on the stuff. Of course in order to enjoy peanut butter and
jelly, you are going to have to find a way to make bread. That means you are
going to need the ingredients for that. This is how you build up a food supply that
your family will actually enjoy eating. Take a look at what your typical menu is for a
given week. If you are ambitious, look at 2 weeks’ worth of meals. Write down
what meals you typically serve. Write down the snacks the kids eat as well. This is
where you start to build up your food storage from.
Once you have made a list of the meals, you need to start looking at each of the
ingredients necessary to make those meals. Remember, there isn’t going to be a
store for you to run to and grab a gallon of milk or a loaf of bread. In a survival
situation, you are thrown back a hundred years and will be forced to do things the
old-fashioned way. This is why those freeze-dried meals are so handy! Add a bit of
water and voila! You have an entire meal ready to go without a lot of mixing and
attempting to cook over an open fire.
The following lists are some of the standard fare you will find in most food
storages. With these items, you can prepare a variety of meals for your family that
will keep them full and essentially happy with what is on the table. Keep in mind;
cooking from scratch is something that takes a little training. You will want to read
through recipes before it hits the fan and familiarize yourself with how to cook from
scratch. It would be a good idea to print out recipes that use the items in your food
storage. If you have never made bread without yeast, hunt down a recipe and add
it to a binder with other recipes that will use your dehydrated dairy products and
dried grains.

23
Grains
Grains are going to be a staple in the survival food diet. Think back to the pioneer
days or how the Native Americans survived. Flat breads give the body food and
require very little preparation. You can make all kinds of meals with grains. You
absolutely must focus a great deal of your time and money into creating a healthy
supply of grains in your food storage. Your best bet would be to store a variety of
grains. It can get pretty tiresome eating wheat day and day out. Not to mention,
most people's digestive systems would revolt to eating freshly ground wheat
several times a day, every single day.
• Hard winter wheat—best for making breads, lasts for 30+ years, high in
protein
• Soft wheat-better for pastas
• Rolled oats-Desserts, breakfast,
granola bars, thickener for stews
and soups
• Cornmeal-Breading for fried items,
hushpuppies, bread
• Brown and White rice-meals, pudding and thickening agent
• White flour-breads, cakes, gravies
Dairy
Children need calcium as do adults. While dairy products are next to impossible to
actually include in a long-term food storage pantry, these powdered varieties can
replace the daily dairy needs in the diet. Plus, they make food taste a little better!
• Powdered butter—additional flavor
• Powdered cheese—pastas, potatoes
• Instant milk-tastes most like “real” milk, great for drinking
• Powdered milk-best for cooking

24
• Powdered eggs-eating for breakfast or used in recipes
****Beware of storing canned milk. The shelf life is limited. You can expect 6
months at the very most for canned milk.*****
Vegetables
Veggies may not be at the top of you or your kids' list of favorite foods, but we
need them. They give us valuable vitamins and minerals our bodies need to stay
healthy. Without veggies, our muscles get weak and you will experience cramps.
Cramps are ten times worse when you HAVE to walk to get water or to find wood
for your fire. They are essential to promoting a healthy immune system as well.
• Canned veggies are great for eating alone
• Freeze-dried vegetables are great for cooking
• Dehydrated vegetables best used in soups and stews
Fruits
Choose fruits that your family eats today. Fresh fruit will likely be in short supply
after a major disaster. Our bodies need fruit and children will appreciate the burst
of natural sugars. Fruits like blueberries and raspberries can also help keep your
immune system strong, which is extremely important in a survival situation. The
natural fiber in fruit is also important.
• Canned fruits are high in sugar
• Freeze dried fruits are best reconstituted in a salad
Real Prepper Stories: “Actually, I have dried fruits and vegetables and then charged them with a vacuum sealer. It has lasted up to 18 years for me. Possibly longer I just had to open them to find out how they tasted. My life experience.”
Terry B., Ohio (9/01/2013)

25
• Dehydrated fruits can be eaten as is for a quick snack
Meats
You may think you are some great hunter, but hunting takes a lot of work and you
probably won’t have a freezer to
store all the meat in. Having a nice
supply of canned meats on hand will
satisfy that carnivorous craving while
giving you something to add
substance to your daily meals.
• Tuna—sandwiches or
casseroles
• Sardines, salmon and other
fish
• Chicken—plain, in sandwiches, in casseroles
• Beef—used to make hash, sandwiches
Legumes
Meat will likely be in short supply in a survival situation. Hunting requires a great
deal of energy and there is no guarantee you will be successful. You need a
backup plan. Our bodies need protein and beans are one of the best ways to get
it. Dried beans can store for 20+ years and are extremely affordable. They are
filling and pack a lot of nutrients.
• Red beans-excellent addition to soups and stews
• Pinto beans—eaten with biscuits, baked or refried and rolled into tortillas
• Navy beans-soups

26
Spices
You may not think a little salt is all that important when you are really hungry, but
some of the freeze-dried foods are extremely bland. Salt is extremely cheap so
why not store it if you can make your life a little easier when everything else is
falling apart? The other spices can help add flavor to a plain bean soup or stew.
• Salt
• Pepper
• Italian seasoning or
individual; oregano, cilantro,
parsley
• Garlic
• Steak seasoning
• Bay leaves
• Paprika
Baking
Baking is going to be a pretty common practice when you have to make everything
from the ingredients in your pantry. You probably won’t have an oven, but if you
have planned ahead and have a solar oven or a gas stove, you can make some
pretty tasty dishes—if you have the right ingredients.
• Baking soda
• Baking powder
• Yeast—will only store for a year in prime conditions
• Cooking oil
• Lard/shortening

27
Ready-To-Eat
The next list includes foods that are ready-to-eat and can be stored for a year or
two in your food storage. While they may not have the extensive shelf life of the
above raw ingredients, they are just as important to any food storage.
• Peanut butter
• Sugar
• Energy bars
• Granola bars
• Nuts
• Cereal
• Crackers
• Canned soups
• Canned chili
• Pastas
Luxuries
The next list covers the little luxuries in life that we take for granted every day. It is
almost incomprehensible to imagine life without stores and readily available food
products that we depend on. There are plenty of us out there with some addictions
to let’s say coffee or chocolate. That
will send a shiver of fear down
anybody’s spine. A life without
caffeine?! When you look at this list,
you will discover the items are
actually fairly inexpensive. Stock up
on these items! They will become
very valuable when stores are no
longer an option. You can use a bottle of alcohol or a can of coffee to barter for
something else you need. Bartering will be the new tender. Those who have plenty

28
of items to barter will be elevated to the richest members of the new society.
• Chocolate; powder, bars and syrup, it stores for years
• Coffee
• Tea
• Hard candy
• Alcohol
• Powdered juice mixes
• Honey
• Pudding mixes
• Popcorn
Special Items
There are some other items you may use today because of a family member has
an allergy or has a restricted diet. You will need to consider these needs in a
survival situation. If you are planning on harboring your aging parents or your
sister and her young family, it is best to take steps today to prepare for their
needs. You will also need to consider your pet if you plan on keeping him around.
• Baby formula
• Baby food
• Dog food
Real Prepper Stories: “Last night I dug out one - not sure when it was made, but from the design of the MH printing on the pouch and the price (still on the label), I would say it is at least 20 years old, maybe 30. It was a pouch of beef stroganoff. I opened it up, put some really hot water in it, and ten minutes later I ate for my dinner. It was just fine.” Cryptkeeper, 3-28-14

29
• Cat food
• Sugar substitute
Personal Items
Your food storage will also include some of those other vitally important details
that we really love. Things like toilet paper will be some of the first to fly off the
shelves after a disaster. While it isn't necessarily a requirement to survive, it is
certainly something we have really come to appreciate. While you are building up
your food storage, do your best to build up a nice supply of the following as well.
• Toilet paper
• Toothpaste
• Toothbrushes-with no dentists, dental hygiene will be very important
• Feminine hygiene products
• Soap
• Shampoo
• Laundry soap---you can also learn to make your own for a huge cost
savings
• Dishsoap—sanitation is important
• Razors
• Hand sanitizer
Don't forget to create a well-stocked
first aid kit as well. If you have the
space, keep it with your emergency
food stores. This makes sure
everything is kept together. If you
have to bug out, you can do so quickly without ransacking the house trying to grab
this and that from your food stores.

30
The Little Things of Food Storage
Having a plentiful stock of canned foods or hard grains means nothing if you can’t
use them. There are a lot of little things in the kitchen right now that you don’t even
think twice about. When you are creating a food storage, you have to analyze
every little detail. This list will help you stock the tools you need to make your food
stores usable.
• Hand grain mill—grinding wheat to turn into flour.
• Manual can opener
• Sharpening stone to keep knives sharp
• Campstove and fuel
• Hand crank blender
• Hand beater
• Plastic bucket opener—some of the buckets are extremely difficult to open
• Solar stove
31
Freeze-Dried, Canned or Dehydrated?
Should you store freeze-dried, canned or dehydrated foods? Is one better than the
rest? You are going to discover everybody has an opinion on this topic. What it
boils down to is what works best for you and your family’s needs. There are pros
and cons to each and we are going to discuss those here. Ideally, a nice mixture
of freeze-dried and canned foods is ideal with a handful of dehydrated foods to
take along on expeditions to find food and water.
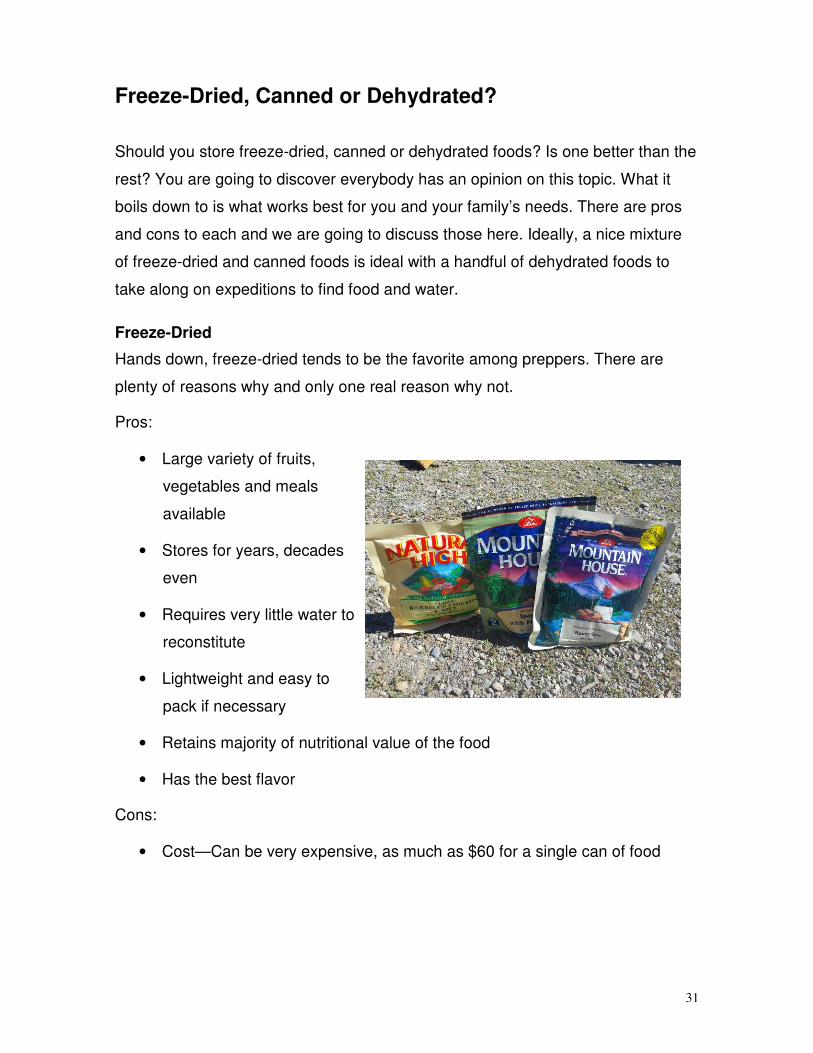
Freeze-Dried
Hands down, freeze-dried tends to be the favorite among preppers. There are
plenty of reasons why and only one real reason why not.
Pros:
• Large variety of fruits,
vegetables and meals
available
• Stores for years, decades
even
• Requires very little water to
reconstitute
• Lightweight and easy to
pack if necessary
• Retains majority of nutritional value of the food
• Has the best flavor
Cons:
• Cost—Can be very expensive, as much as $60 for a single can of food

32
Dehydrated
Dehydration is another option for storing a variety of foods. It is something that has
been around for centuries and can even be used when there is no electricity.
Drying food with the sun’s solar energy is an efficient way to preserve food even in
a post-apocalyptic situation. Let’s look at the pros and cons to storing dehydrated
foods.
Pros:
• Can be done at home with food from the garden
• Fairly inexpensive
• Lightweight and easy to carry in backpacks
• Can be eaten as is, without reconstituting
• Can be stored for years
Cons:
• Dehydration removes all the water from a food, which leaves it lacking in
nutritional value
• Takes a long time to reconstitute
• Taste is not as good as freeze-dried or canned foods
Canned
Canned foods tend to be another favorite among those building up a food storage
supply.
Pros:
• Widely available at local grocery stores
Real Prepper Stories: “I think some of it may depend on how you made the jerky. I cut really thin slices and hang it up to dry- that's it. I had some I forgot about because of a move and ate it 10 years later- still okay ☺.”
Crockett, 10-4-09

33
• Inexpensive and available in bulk for further cost savings
• No water necessary to make food edible
• No heating or cooking necessary
• Stores for a couple of years
• Lots of flavor
Cons:
• Heavy and not ideal for carrying in bags
• High in sodium, which can be dangerous when water is sparse
• Risk of food poisoning from old or improperly stored food
Now that you see all of the pros and cons to each type of food, you can make a
more informed decision. While you may not feel taste is going to be an important
factor when it comes to surviving, it truly is. Food that tastes good gives us a
sense of comfort. When things are chaotic, sitting down and eating something that
tastes good and reminds us of the way things were can go a long way to settling
the mind and giving you a little peace. Do your best to create a varied supply of
food that will afford you the luxury of changing things up from time to time. Eating
canned beans for 30 days straight will not only wreak havoc on your digestive
system, but you will never want to see another bean for as long as you live.
Convincing your children that they have to eat canned spinach to survive isn’t
going to be easy either.
Real Prepper Stories: “We just had chicken home canned in 2/09 in last night’s chicken and dumplings. I'm still here doing just fine. Going to eat it again for lunch. And that is bone in home canned chicken. Five years and we still have half a dozen more from that year. We ate another quart jar last week with 2009 rice stored in a juice bottle under the bed.”
Nutty Old Geezer, Texas (2-9-14)

34
Home-Made Survival Foods
One of the main goals of most preppers is to be self-sufficient. That is a skill that
takes years to hone. Because of this, many preppers practice their gardening skills
and food preservation skills way in advance of an actual shutdown. With all of that
practice, you are going to likely have a plethora of fruits, veggies and meat if you
are getting into the hunting thing. You can save hundreds, possibly thousands of
dollars on commercial food by doing the preservation yourself. Even if you don't
grow your own food, you can take advantage of farmer's markets and neighbor's
generosity. Buying fresh produce in bulk is often much cheaper than buying the
same foods canned or dehydrated.
Raising your own animals as a food source is another way you can be self-
sufficient. The meat you get from harvesting chickens, cows or pigs can be used to
round out your emergency food storage. The possibilities are endless. When you
set your mind to it, you can make anything you would typically buy in the
supermarket. Welcome to the pioneer days!
Canning Instructions
You can home-can nearly anything! Often times, you will discover that the
strawberry jam you prepared in your kitchen often tastes ten times better than the
stuff you buy in the store. What's even better is you know exactly what is in the
jam. You don't have to worry about various preservatives and what not being
thrown in for extra flavor. It is sweet, natural goodness prepared with love.
By far, fruit is the easiest and safest to can in your kitchen. You don't have to worry
so much about the fruit spoiling and becoming unsafe to eat. You don't need a
pressure canner either. A water bath will process the fruit and seal the jars making
them safe to eat for years to come. Of course, you will need to follow the
guidelines established by the government. They are there to keep you safe.

35
Vegetables require a little more care in canning. You will need a pressure cooker
to properly can all vegetables. Process times are not to be fooled around with. You
need to follow them to the letter to avoid the vegetables from spoiling. Certain
veggies, like tomatoes, require
special handling. However,
once you have done your
research, you can do a lot of
great things with the excess
tomatoes from your garden.
Spaghetti sauce, tomato
sauce and tomato paste are
all very useful items to have in
your food storage. Potatoes
are extremely difficult to can and because of their low-acidity, they are simply not
safe to can.
Meat can certainly be canned, but it is one of those items you will have to handle
carefully. There are plenty of risks to canning meat, but it can be done. Don't
experiment and bend the rules. It simply isn't worth the risk.
Home-canned food is good for about 1 to 2 years in optimal circumstances.
However, there are plenty of people who eat their home-canned food for years. It
is one of the personal preference things. Just look for signs of spoilage. If it looks
good and smells good, it is probably fine.
There are many stories from folks who have opened canned food that was over 25
years. Our grandmas were master canners and it isn’t unheard of to go into old
woman’s basement and find canned peaches and beans from the 1980s.

36
Dehydrating
Dehydration is an excellent way to preserve fruits and vegetables. And, quite
frankly, it is a lot easier than canning. You will need a dehydrator. There are
varying sizes and styles for you to choose from. Buy one that includes a pan for
making fruit leather. You know those fruit roll-ups your children love? You can
make your own in a dehydrator. It is important the food you dehydrate is
thoroughly dried before storing. You can store your food in a Mylar bag, a mason
jar with a lid or a vacuum sealed plastic bag. Keep a close eye on the dehydrated
food. Look for signs of moisture inside the container. Any condensation is a
warning sign. Mold growth is another major clue. You can add oxygen absorbers
into the containers to help keep the food fresh and dry.
Fruits contain more moisture than veggies. Because of this, dehydrated fruit will
have a shorter shelf life than vegetables. Many preppers preserve food from the
gardens to last them until the harvest next year. A year is the ideal shelf life, but if
it is completely dry and stored correctly, you can push that to two years.
Real Prepper Stories: “Chesapeake Boy says: I can tell you that when my grandmother died in 2005, we opened some of the best canned carrots and green beans that I have ever eaten... they were canned in 1976.”
Chesapeake Boy, Maryland (8-27-2011)
Real Prepper Stories: “I have dehydrated veggies for over 17 years now. Have chowed down on Mason Jar, vacuum-packed veggies that were over 15 years old. Tasted great and as most university research says, plenty more nutrition than canning.”
Jack, Alaska (8-27-2011)

37
With that said, there are always those pioneers who have hands-on knowledge.
This person blows away the idea that dehydrated food is no good after a year:
Check out this chart from the USDA about long term storage of canned and
dehydrated foods. This proves why where you store is extremely important!
The USDA states: "Each 5.6 C. (10.08 F) drop in temperature doubles the storage life of the seeds."
Temperature Years
37.6 40
48.4 30
59.2 20
70.0 10
80.8 5
91.6 2.5
102.4 1.25
Jerkying
If you have a meat source that can
get you some great prices on meats
or you hunt, you can make jerky.
Jerky is delicious and full of the
protein you need. You can basically
make jerky out of most meat. Take
the time to learn about which cuts
work best to make jerky. Experiment
with different seasonings to create
one that suits your personal tastes.
You can buy a smoker or make one out of an old refrigerator. You will find different
types of wood chips like applewood or mesquite that give your smoked meat a
different flavor. As with dehydrating food, it is crucial you completely dry the meat
to avoid it spoiling. Jerky will be one of those luxuries that people crave when
things are in chaos.

38
Jerky is great, but it is not one of those things that stores long term very well. If it
isn’t dry enough, it will spoil, if it is too dry, you will rip your teeth out trying to eat.
You have to walk a fine line. However, if you have made up a batch of jerky, store
it in a sealed mason jar. Depending on the thickness of the meat and how dry the
meat is, you can stretch the shelf life for a couple of years. The trick is to remove
as much of the fat as possible. Don’t put it in the freezer. This adds moisture to the
jerky that you do not want.
Crockett says: 10-4-09)
Drying Spices
If you are practicing your garden skills, you have probably tried growing fresh
herbs. In fact, you don’t even have to have a garden to grow herbs. You can grow
them in a windowsill or on a sunny patio. Herbs are prolific! They are extremely
easy to grow and require very little attention. Even the worst gardener can enjoy
fresh herbs all year round. When you grow more than you can use, which is very
common, you can start drying them. Drying spices is a cost-effective way to supply
your food stores. It is incredibly easy to dry them and during the drying process,
your home will smell fantastic!
To dry herbs like cilantro, oregano, dill and others, harvest shoots from the main
plant. Tie a string around the bottom and hang the bunch upside down in your
pantry or other dry, dark spot. It takes about 2 weeks for the herbs to dry
completely. Once they have dried, remove the string and crumble the plants into
Ziploc bags or jars. Seal and store! You can also use your dehydrator to dry your
herbs overnight.
Real Prepper Stories: “We've made some of our own (jerky) that has lasted better than five years, probably closer to six, and I think it could have gone longer.”
Gallo Pazzesco, California (4/25/10)

39
Many of your herbs, like dill and oregano, will produce seed heads that are just as
valuable to the flavoring of food. When the plant produces flowers, leave them on
until they dry out and create seed heads. Dill seed is an excellent addition to
soups, stews and potato dishes. Oregano seeds are referred to as coriander.
Coriander is used in a variety of recipes.
These seed heads can also be used to plant more herbs for a continuous cycle of
fresh herbs without ever having to buy new seeds. If you are growing herbs in the
garden, you will discover they can become a little overwhelming. Some herbs, like
chives, can overtake a small space in very little time.
Heirloom Seeds
A food storage is not complete without a way to replenish it. It isn't always feasible
to store enough food to last your family for a year or more. There are some
scenarios that could leave the world in a state of complete and total disruption for
several years. It may take months and years for commerce to be restored. During
that time, people will have to know how to get their own food. Hunting game will
only satisfy a small portion of your daily diet. You have to know how to garden and
you have to have seeds with which to plant fruits and vegetables. From the fruits
and vegetables you do grow, you need to be able to propagate the seeds to plant
more food. It is the only way survival can truly work.
Before you run out and buy hundreds of packets of those inexpensive seeds at
your local hardware store, you need to understand they are not what you need.
You need to pay a little extra and buy what are known as heirloom seeds.
Heirloom seeds are the only kind that will produce fruits and vegetables with seeds
that can be used to plant more producing plants. The inexpensive seed packs you
tend to see on store shelves are not heirloom. The seeds in the vegetables that
are produced will not go on to produce more food. You may certainly get a plant
from the seed, but the plant will not produce edible fruits and vegetables.
Growing a garden from heirloom seeds will give you fresh new seeds every year.

40
You will soon have more seeds that you can use. These extra seeds can be sold
or traded to your neighbors. They will prove invaluable in a post-disaster world.
Sprouting Seeds
You will also want a nice
supply of sprouting seeds to
supplement your daily diet.
Things like alfalfa and broccoli
sprout seeds should be stored
along with your heirloom
seeds. Sprouts are incredibly
easy to cultivate and provide a
great deal of nutrition. All it takes is a little water and about 10 days for the tiny
seeds to sprout into an edible food. Use the sprouts in salads or eat plain.
The seeds are sold in bulk and a spoonful of the seeds can fill a bowl with sprouts.
Eating sprouts is one way to get vital vitamins, minerals and nutrients while you
are waiting for your broccoli and beans to grow. During the winter months,
sprouting seeds ensures you are still getting enough dietary fiber and that all
important dose of vegetables on a daily basis.
The following chart shows the approximate shelf life of various foods when they
are stored properly. These shelf lives only apply to food that is not exposed to
moisture, sunlight or extreme heat.
Dried Beans 8 to 10 years
Hard grains i.e. wheat and corn 15 to 20 years
White Rice 8 to 10 years
Brown Rice 1 to 2 years
Soft Grains i.e. oats, rye, barley 8 years
Dehydrated Fruits 10 to 15 years

41
Dehydrated Vegetables 8 to 10 years
Flour and other ground wheat, cornmeal, wheat flour 5 years
Pasta 10 to 15 years
Dried Dairy 5 to 10 years
Sprouting Seeds (alfalfa have an 8 year shelf life) 2 to 3 years
Heirloom Seeds 2 to 3 years
As you can see, you can spend years building a food storage without worrying
about it going bad. This is how people manage to accumulate a year's worth of
food. Buying in bulk and spending a little extra time creating an ideal storage place
is the key to making your emergency survival storage last for years to come.
Ultimately, spending a few dollars investing in the right equipment and tools will
save you money in the long run.
Tools for Preparing Emergency Food at Home
• Mylar Bags—Cases are available in 1-gallon and 5-gallon sizes
• Oxygen absorbers—silica bags
• Excalibur Dehyhdrator—a little more expensive but well worth the money!
• Presto Pressure Canner—Best value for the money
• Mason Jars—quart and pint
• Canning lids and bands—large-mouth and small-mouth depending on size
of jars
• Jar remover for canning
• Funnel, strainer, corer, ladle
• Food preservers i.e. pectin, vinegar
• Foodsaver
• Smoker for making jerky without a dehydrator
• Foodsaver wide-mouth jar sealer
• 5-gallon food grade buckets

42
Food Storage Tips and Tricks
Every person you talk to who has been working diligently towards an adequate
food storage will likely tell you a special trick they use or one of their secrets to
making food storage a little easier. You can learn a lot from other people and
make your own food storage that much better. Pick and choose what works for
you and tweak these tips to suit your family's needs.
*To reduce the amount of oxygen in a bucket in which you will be storing food,
drop in a small chunk of dry ice. As the dry ice evaporates, it basically eats up all
of the oxygen in the bucket. No oxygen means no moisture to damage your stored
food. The Co2 that evaporates displaces the oxygen. You can use this trick in
Mylar bags as well.
*Dry canning is one of the latest and greatest tricks for preppers. It involves using
Mason jars, preferably the quart jars and using them to store flour, oatmeal, rice
and beans. Put the bags of product in the freezer overnight. Pull the food out and
allow it to reach room temperature. Fill the quart jars close to the top. Turn on the
oven to 275. Put the jars in the oven for an hour without the lids. Remove the jars
and put new lids and clean bands on the jars. Allow the jars to sit on the counter
until you hear the tell tale “pop” that indicates the lid has sealed. Store the jars in
your food storage.
*Avoid “food fatigue” by storing a variety of foods. Eating the same food day in and
day out will have you wishing you would have stocked more toilet paper. Your
body was not meant to live on the same food every single day.

43
What to Eat First?
You have all that lovely food just sitting there waiting for a disaster. When disaster
strikes, should you rip into your freeze-dried instant meals or go for some canned
beans? The answer is neither. You want to eat the food in your refrigerator and
freezer first. There are plenty of foods that you keep in the fridge, like fresh fruits
and veggies, that don't technically need refrigeration. Eat those before you dig into
the canned stuff. Any meat you have in the freezer can be cooked up or if you
have done your homework and you know how to preserve meat with nothing more
than the sun's rays—go for it. Only do that if you know what you are doing.
Once you have exhausted your refrigerator and freezer, go for the boxes of food
that have short shelf lives. You probably have food in your pantry that you
expected to eat before things went sideways. Eat anything that will not last for a
while.
Then and only then, do you want to start digging into your emergency food stores.
Home-canned foods should be eaten before commercially canned foods.
However, that isn't to say you live off of homemade strawberry jam and ignore the
canned beans and chili. You want to have a well-rounded diet. The idea is to
consume the foods that won't last for years and save the stuff that will be good for
several decades.

44
Conclusion
As you get going on your own food and water storage, you are probably going to
discover there are even more ways to make your system a little easier and
suitable for your family. Don’t put off storing food and water for an emergency. You
just never know when disaster may strike. It may be in the form of Mother Nature,
an act of terrorism or financial collapse. Nobody can plan or predict these things.
When you are prepared to whether the storm, you feel better and don’t have to
worry about feeding your family. In a world of chaos, that can bring you a great
deal of peace and comfort. It gives you the time and energy to focus on more
important things like securing your shelter and enjoying the moments you do have.
Storing food and water isn’t crazy. In this day and age, job loss or a major medical
issue can send your family into survival mode. When your family’s finances take a
major hit, you will be able to survive on the food you have stored. When people
talk about preppers preparing for an event that is unlikely to happen, they are not
seeing the big picture. Nothing in this life is guaranteed. Knowing you have a
backup plan that ensures your family has the basic necessities of life is a lot like
having a million dollar insurance policy.
Don’t delay a minute longer. Sit down and start planning how you will create an
emergency food storage. Start working it into the budget today. Work on clearing a
space in your home and making the shelves needed to hold your food stores. Plan
on dedicating at least an hour a week to developing your emergency food and
water storage so you are prepared for whatever the future may hold.