Embed Size (px)
Citation preview

The Rust ProgrammingLanguage

The Rust ProgrammingLanguage
The Rust Project Developpers

The Rust Programming Language, © The Rust Project Developpers.

Contents
I Introduction 7
1 The Rust Programming Language 9
II Getting Started 11
1 Getting Started 13
2 Installing Rust 15
3 Hello, world! 17
4 Hello, Cargo! 21
5 Closing Thoughts 27
III Tutorial: Guessing Games 29
1 Guessing Game 31
2 Set up 33
3 Processing a Guess 35
4 Generating a secret number 41
5 Comparing guesses 47
6 Looping 53
7 Complete! 61

6
IV Syntax and Semantics 63
1 Syntax and Semantics 65
V Effective Rust 245
1 Effective Rust 247
VI Appendix 393
1 Glossary 395
2 Syntax Index 399
3 Bibliography 409

Part I
Introduction


Chapter 1
The Rust ProgrammingLanguage
Welcome! This book will teach you about the Rust Programming Lan-guage. Rust is a systems programming language focused on three goals:safety, speed, and concurrency. It maintains these goals without hav-ing a garbage collector, making it a useful language for a number of usecases other languages aren’t good at: embedding in other languages,programs with specific space and time requirements, and writing low-level code, like device drivers and operating systems. It improves oncurrent languages targeting this space by having a number of compile-time safety checks that produce no runtime overhead, while eliminat-ing all data races. Rust also aims to achieve ‘zero-cost abstractions’even though some of these abstractions feel like those of a high-levellanguage. Even then, Rust still allows precise control like a low-levellanguage would.
“The Rust Programming Language” is split into chapters. Thisintroduction is the first. After this:
• Getting started - Set up your computer for Rust development.
• Tutorial: Guessing Game - Learn some Rust with a small project.
• Syntax and Semantics - Each bit of Rust, broken down into smallchunks.
• Effective Rust - Higher-level concepts for writing excellent Rustcode.
10
• Glossary - A reference of terms used in the book.
• Bibliography - Background on Rust’s influences, papers aboutRust.
ContributingThe source files from which this book is generated can be found onGitHub.
Second edition of this bookThere are two editions of “The Rust Programming Language”, thisbeing the first edition.
The second edition is a complete re-write. It is still under construc-tion, though it is far enough along to learn most of Rust. We suggestreading the second edition and then checking out the first edition laterto pick up some of the more esoteric parts of the language.

Part II
Getting Started


Chapter 1
Getting Started
This first chapter of the book will get us going with Rust and its tool-ing. First, we’ll install Rust. Then, the classic ‘Hello World’ program.Finally, we’ll talk about Cargo, Rust’s build system and package man-ager.
We’ll be showing off a number of commands using a terminal, andthose lines all start with $. You don’t need to type in the $s, theyare there to indicate the start of each command. We’ll see many tuto-rials and examples around the web that follow this convention: $ forcommands run as our regular user, and # for commands we should berunning as an administrator.

14

Chapter 2
Installing Rust
The first step to using Rust is to install it. Generally speaking, you’llneed an Internet connection to run the commands in this section, aswe’ll be downloading Rust from the Internet.
The Rust compiler runs on, and compiles to, a great number ofplatforms, but is best supported on Linux, Mac, and Windows, on thex86 and x86-64 CPU architecture. There are official builds of the Rustcompiler and standard library for these platforms and more. For fulldetails on Rust platform support see the website.
Installing RustAll you need to do on Unix systems like Linux and macOS is open aterminal and type this:
$ curl https://sh.rustup.rs -sSf | sh
It will download a script, and start the installation. If everything goeswell, you’ll see this appear:
Rust is installed now. Great!
Installing on Windows is nearly as easy: download and run rustup-init.exe. It will start the installation in a console and present the abovemessage on success.
For other installation options and information, visit the install pageof the Rust website.

16
UninstallingUninstalling Rust is as easy as installing it:
$ rustup self uninstall
TroubleshootingIf we’ve got Rust installed, we can open up a shell, and type this:
$ rustc --version
You should see the version number, commit hash, and commit date.If you do, Rust has been installed successfully! Congrats!If you don’t, that probably means that the PATH environment vari-
able doesn’t include Cargo’s binary directory, ~/.cargo/bin on Unix,or %USERPROFILE%\.cargo\bin on Windows. This is the directorywhere Rust development tools live, and most Rust developers keep it intheir PATH environment variable, which makes it possible to run rustcon the command line. Due to differences in operating systems, com-mand shells, and bugs in installation, you may need to restart yourshell, log out of the system, or configure PATH manually as appropriatefor your operating environment.
Rust does not do its own linking, and so you’ll need to have a linkerinstalled. Doing so will depend on your specific system. For Linux-based systems, Rust will attempt to call cc for linking. On windows-msvc (Rust built on Windows with Microsoft Visual Studio), this de-pends on having Microsoft Visual C++ Build Tools installed. Thesedo not need to be in %PATH% as rustc will find them automatically. Ingeneral, if you have your linker in a non-traditional location you cancall rustc linker=/path/to/cc, where /path/to/cc should point toyour linker path.
If you are still stuck, there are a number of places where we can gethelp. The easiest is the #rust-beginners IRC channel on irc.mozilla.organd for general discussion the #rust IRC channel on irc.mozilla.org,which we can access through Mibbit. Then we’ll be chatting with otherRustaceans (a silly nickname we call ourselves) who can help us out.Other great resources include the user’s forum and Stack Overflow.
This installer also installs a copy of the documentation locally, sowe can read it offline. It’s only a rustup doc away!

Chapter 3
Hello, world!
Now that you have Rust installed, we’ll help you write your first Rustprogram. It’s traditional when learning a new language to write a littleprogram to print the text “Hello, world!” to the screen, and in thissection, we’ll follow that tradition.
The nice thing about starting with such a simple program is thatyou can quickly verify that your compiler is installed, and that it’sworking properly. Printing information to the screen is also a prettycommon thing to do, so practicing it early on is good.
Note: This book assumes basic familiarity with the com-mand line. Rust itself makes no specific demands about yourediting, tooling, or where your code lives, so if you prefer anIDE to the command line, that’s an option. You may wantto check out SolidOak, which was built specifically with Rustin mind. There are a number of extensions in developmentby the community, and the Rust team ships plugins for var-ious editors. Configuring your editor or IDE is out of thescope of this tutorial, so check the documentation for yourspecific setup.
Creating a Project FileFirst, make a file to put your Rust code in. Rust doesn’t care whereyour code lives, but for this book, I suggest making a projects directoryin your home directory, and keeping all your projects there. Open a

18
terminal and enter the following commands to make a directory for thisparticular project:
$ mkdir ~/projects$ cd ~/projects$ mkdir hello_world$ cd hello_world
Note: If you’re on Windows and not using PowerShell,the ~ may not work. Consult the documentation for yourshell for more details.
Writing and Running a Rust ProgramWe need to create a source file for our Rust program. Rust files alwaysend in a .rs extension. If you are using more than one word in yourfilename, use an underscore to separate them; for example, you woulduse my_program.rs rather than myprogram.rs.
Now, make a new file and call it main.rs. Open the file and typethe following code:
fn main() println!("Hello, world!");
Save the file, and go back to your terminal window. On Linux ormacOS, enter the following commands:
$ rustc main.rs$ ./mainHello, world!
In Windows, replace main with main.exe. Regardless of your oper-ating system, you should see the string Hello, world! print to theterminal. If you did, then congratulations! You’ve officially written aRust program. That makes you a Rust programmer! Welcome.
Anatomy of a Rust ProgramNow, let’s go over what just happened in your “Hello, world!” programin detail. Here’s the first piece of the puzzle:

19
fn main()
These lines define a function in Rust. The main function is special: it’sthe beginning of every Rust program. The first line says, “I’m declaringa function named main that takes no arguments and returns nothing.”If there were arguments, they would go inside the parentheses (( and )), and because we aren’t returning anything from this function, we canomit the return type entirely.
Also note that the function body is wrapped in curly braces ( and). Rust requires these around all function bodies. It’s considered goodstyle to put the opening curly brace on the same line as the functiondeclaration, with one space in between.
Inside the main() function:
println!("Hello, world!");
This line does all of the work in this little program: it prints text tothe screen. There are a number of details that are important here. Thefirst is that it’s indented with four spaces, not tabs.
The second important part is the println!() line. This is calling aRust macro, which is how metaprogramming is done in Rust. If it werecalling a function instead, it would look like this: println() (withoutthe !). We’ll discuss Rust macros in more detail later, but for now youonly need to know that when you see a ! that means that you’re callinga macro instead of a normal function.
Next is “Hello, world!” which is a string. Strings are a surpris-ingly complicated topic in a systems programming language, and thisis a statically allocated string. We pass this string as an argument toprintln!, which prints the string to the screen. Easy enough!
The line ends with a semicolon (;). Rust is an expression-orientedlanguage, which means that most things are expressions, rather thanstatements. The ; indicates that this expression is over, and the nextone is ready to begin. Most lines of Rust code end with a ;.
Compiling and Running Are Separate StepsIn “Writing and Running a Rust Program”, we showed you how to runa newly created program. We’ll break that process down and examineeach step now.

20
Before running a Rust program, you have to compile it. You canuse the Rust compiler by entering the rustc command and passing itthe name of your source file, like this:
$ rustc main.rs
If you come from a C or C++ background, you’ll notice that this issimilar to gcc or clang. After compiling successfully, Rust shouldoutput a binary executable, which you can see on Linux or macOS byentering the ls command in your shell as follows:
$ lsmain main.rs
On Windows, you’d enter:
$ dirmain.exemain.rs
This shows we have two files: the source code, with an .rs extension,and the executable (main.exe on Windows, main everywhere else). Allthat’s left to do from here is run the main or main.exe file, like this:
$ ./main # or .\main.exe on Windows
If main.rs were your “Hello, world!” program, this would print Hello,world! to your terminal.
If you come from a dynamic language like Ruby, Python, or JavaScript,you may not be used to compiling and running a program being sep-arate steps. Rust is an ahead-of-time compiled language, which meansthat you can compile a program, give it to someone else, and they canrun it even without Rust installed. If you give someone a .rb or .pyor .js file, on the other hand, they need to have a Ruby, Python, orJavaScript implementation installed (respectively), but you only needone command to both compile and run your program. Everything is atradeoff in language design.
Just compiling with rustc is fine for simple programs, but as yourproject grows, you’ll want to be able to manage all of the options yourproject has, and make it easy to share your code with other people andprojects. Next, I’ll introduce you to a tool called Cargo, which will helpyou write real-world Rust programs.

Chapter 4
Hello, Cargo!
Cargo is Rust’s build system and package manager, and Rustaceansuse Cargo to manage their Rust projects. Cargo manages three things:building your code, downloading the libraries your code depends on,and building those libraries. We call libraries your code needs ‘depen-dencies’ since your code depends on them.
The simplest Rust programs don’t have any dependencies, so rightnow, you’d only use the first part of its functionality. As you writemore complex Rust programs, you’ll want to add dependencies, and ifyou start off using Cargo, that will be a lot easier to do.
As the vast, vast majority of Rust projects use Cargo, we will assumethat you’re using it for the rest of the book. Cargo comes installedwith Rust itself, if you used the official installers. If you installed Rustthrough some other means, you can check if you have Cargo installedby typing:
$ cargo --version
Into a terminal. If you see a version number, great! If you see an errorlike ‘command not found’, then you should look at the documentationfor the system in which you installed Rust, to determine if Cargo isseparate.
Converting to CargoLet’s convert the Hello World program to Cargo. To Cargo-fy a project,you need to do three things:
22
1. Put your source file in the right directory.
2. Get rid of the old executable (main.exe on Windows, main ev-erywhere else).
3. Make a Cargo configuration file.
Let’s get started!
Creating a Source Directory and Removing the OldExecutableFirst, go back to your terminal, move to your hello_world directory,and enter the following commands:
$ mkdir src$ mv main.rs src/main.rs # or 'move main.rs src/main.rs'on Windows$ rm main # or 'del main.exe' on Windows
Cargo expects your source files to live inside a src directory, so dothat first. This leaves the top-level project directory (in this case,hello_world) for READMEs, license information, and anything elsenot related to your code. In this way, using Cargo helps you keep yourprojects nice and tidy. There’s a place for everything, and everythingis in its place.
Now, move main.rs into the src directory, and delete the compiledfile you created with rustc. As usual, replace main with main.exe ifyou’re on Windows.
This example retains main.rs as the source filename because it’screating an executable. If you wanted to make a library instead, you’dname the file lib.rs. This convention is used by Cargo to successfullycompile your projects, but it can be overridden if you wish.
Creating a Configuration FileNext, create a new file inside your hello_world directory, and call itCargo.toml.
Make sure to capitalize the C in Cargo.toml, or Cargo won’t knowwhat to do with the configuration file.
This file is in the TOML (Tom’s Obvious, Minimal Language) for-mat. TOML is similar to INI, but has some extra goodies, and is usedas Cargo’s configuration format.
Inside this file, type the following information:

23
[package]
name = "hello_world"version = "0.0.1"authors = [ "Your name <[email protected]>" ]
The first line, [package], indicates that the following statements areconfiguring a package. As we add more information to this file, we’lladd other sections, but for now, we only have the package configuration.
The other three lines set the three bits of configuration that Cargoneeds to know to compile your program: its name, what version it is,and who wrote it.
Once you’ve added this information to the Cargo.toml file, save itto finish creating the configuration file.
Building and Running a Cargo ProjectWith your Cargo.toml file in place in your project’s root directory, youshould be ready to build and run your Hello World program! To do so,enter the following commands:
$ cargo buildCompiling hello_world v0.0.1 (file:///home/yourname/
projects/hello_world)$ ./target/debug/hello_worldHello, world!
Bam! If all goes well, Hello, world! should print to the terminalonce more.
You just built a project with cargo build and ran it with ./target/debug/hello_world, but you can actually do both in one stepwith cargo run as follows:
$ cargo runRunning `target/debug/hello_world`
Hello, world!
The run command comes in handy when you need to rapidly iterateon a project.
Notice that this example didn’t re-build the project. Cargo figuredout that the file hasn’t changed, and so it just ran the binary. If you’dmodified your source code, Cargo would have rebuilt the project beforerunning it, and you would have seen something like this:

24
$ cargo runCompiling hello_world v0.0.1 (file:///home/yourname/
projects/hello_world)Running `target/debug/hello_world`
Hello, world!
Cargo checks to see if any of your project’s files have been modified,and only rebuilds your project if they’ve changed since the last timeyou built it.
With simple projects, Cargo doesn’t bring a whole lot over justusing rustc, but it will become useful in the future. This is especiallytrue when you start using crates; these are synonymous with a ‘library’or ‘package’ in other programming languages. For complex projectscomposed of multiple crates, it’s much easier to let Cargo coordinatethe build. Using Cargo, you can run cargo build, and it should workthe right way.
Building for ReleaseWhen your project is ready for release, you can use cargo build --release to compile your project with optimizations. These optimiza-tions make your Rust code run faster, but turning them on makes yourprogram take longer to compile. This is why there are two differentprofiles, one for development, and one for building the final programyou’ll give to a user.
What Is That Cargo.lock?Running cargo build also causes Cargo to create a new file calledCargo.lock, which looks like this:
[root]name = "hello_world"version = "0.0.1"
Cargo uses the Cargo.lock file to keep track of dependencies in your ap-plication. This is the Hello World project’s Cargo.lock file. This projectdoesn’t have dependencies, so the file is a bit sparse. Realistically, youwon’t ever need to touch this file yourself; just let Cargo handle it.
That’s it! If you’ve been following along, you should have success-fully built hello_world with Cargo.
Even though the project is simple, it now uses much of the realtooling you’ll use for the rest of your Rust career. In fact, you can

25
expect to start virtually all Rust projects with some variation on thefollowing commands:
$ git clone someurl.com/foo$ cd foo$ cargo build
Making A New Cargo Project the Easy WayYou don’t have to go through that previous process every time youwant to start a new project! Cargo can quickly make a bare-bonesproject directory that you can start developing in right away.
To start a new project with Cargo, enter cargo new at the commandline:
$ cargo new hello_world --bin
This command passes --bin because the goal is to get straight to mak-ing an executable application, as opposed to a library. Executables areoften called binaries (as in /usr/bin, if you’re on a Unix system).
Cargo has generated two files and one directory for us: a Cargo.toml and a src directory with a main.rs file inside. These should lookfamiliar, they’re exactly what we created by hand, above.
This output is all you need to get started. First, open Cargo.toml.It should look something like this:
[package]
name = "hello_world"version = "0.1.0"authors = ["Your Name <[email protected]>"]
[dependencies]
Do not worry about the [dependencies] line, we will come back to itlater.
Cargo has populated Cargo.toml with reasonable defaults based onthe arguments you gave it and your git global configuration. You maynotice that Cargo has also initialized the hello_world directory as agit repository.
Here’s what should be in src/main.rs:

26
fn main() println!("Hello, world!");
Cargo has generated a “Hello World!” for you, and you’re ready tostart coding!
Note: If you want to look at Cargo in more detail, checkout the official Cargo guide, which covers all of its features.
Chapter 5
Closing Thoughts
This chapter covered the basics that will serve you well through therest of this book, and the rest of your time with Rust. Now that you’vegot the tools down, we’ll cover more about the Rust language itself.
You have two options: Dive into a project with ‘Tutorial: GuessingGame’, or start from the bottom and work your way up with ‘Syntaxand Semantics’. More experienced systems programmers will proba-bly prefer ‘Tutorial: Guessing Game’, while those from dynamic back-grounds may enjoy either. Different people learn differently! Choosewhatever’s right for you.

28

Part III
Tutorial: GuessingGames


Chapter 1
Guessing Game
Let’s learn some Rust! For our first project, we’ll implement a classicbeginner programming problem: the guessing game. Here’s how itworks: Our program will generate a random integer between one anda hundred. It will then prompt us to enter a guess. Upon enteringour guess, it will tell us if we’re too low or too high. Once we guesscorrectly, it will congratulate us. Sounds good?
Along the way, we’ll learn a little bit about Rust. The next chapter,‘Syntax and Semantics’, will dive deeper into each part.

32

Chapter 2
Set up
Let’s set up a new project. Go to your projects directory. Rememberhow we had to create our directory structure and a Cargo.toml forhello_world? Cargo has a command that does that for us. Let’s giveit a shot:
$ cd ~/projects$ cargo new guessing_game --bin
Created binary (application) `guessing_game` project$ cd guessing_game
We pass the name of our project to cargo new, and then the --binflag, since we’re making a binary, rather than a library.
Check out the generated Cargo.toml:
[package]
name = "guessing_game"version = "0.1.0"authors = ["Your Name <[email protected]>"]
Cargo gets this information from your environment. If it’s not correct,go ahead and fix that.
Finally, Cargo generated a ‘Hello, world!’ for us. Check out src/main.rs:
fn main()

34
println!("Hello, world!");
Let’s try compiling what Cargo gave us:
$ cargo buildCompiling guessing_game v0.1.0 (file:///home/you/projects/
guessing_game)Finished debug [unoptimized + debuginfo] target(s)
in 0.53 secs
Excellent! Open up your src/main.rs again. We’ll be writing all ofour code in this file.
Remember the run command from last chapter? Try it out againhere:
$ cargo runCompiling guessing_game v0.1.0 (file:///home/you/projects/
guessing_game)Finished debug [unoptimized + debuginfo] target(s)
in 0.0 secsRunning `target/debug/guessing_game`
Hello, world!
Great! Our game is just the kind of project run is good for: we needto quickly test each iteration before moving on to the next one.

Chapter 3
Processing a Guess
Let’s get to it! The first thing we need to do for our guessing game isallow our player to input a guess. Put this in your src/main.rs:
use std::io;
fn main() println!("Guess the number!");
println!("Please input your guess.");
let mut guess = String::new();
io::stdin().read_line(&mut guess).expect("Failed to read line");
println!("You guessed: ", guess);
There’s a lot here! Let’s go over it, bit by bit.
use std::io;
We’ll need to take user input, and then print the result as output.As such, we need the io library from the standard library. Rust onlyimports a few things by default into every program, the ‘prelude’. Ifit’s not in the prelude, you’ll have to use it directly. There is also asecond ‘prelude’, the io prelude, which serves a similar function: youimport it, and it imports a number of useful, io-related things.

36
fn main()
As you’ve seen before, the main() function is the entry point into yourprogram. The fn syntax declares a new function, the ()s indicate thatthere are no arguments, and starts the body of the function. Becausewe didn’t include a return type, it’s assumed to be (), an empty tuple.
println!("Guess the number!");
println!("Please input your guess.");
We previously learned that println!() is a macro that prints a stringto the screen.
let mut guess = String::new();
Now we’re getting interesting! There’s a lot going on in this little line.The first thing to notice is that this is a let statement, which is usedto create ‘variable bindings’. They take this form:
let foo = bar;
This will create a new binding named foo, and bind it to the valuebar. In many languages, this is called a ‘variable’, but Rust’s variablebindings have a few tricks up their sleeves.
For example, they’re immutable by default. That’s why our exampleuses mut: it makes a binding mutable, rather than immutable. letdoesn’t take a name on the left hand side of the assignment, it actuallyaccepts a ‘pattern’. We’ll use patterns later. It’s easy enough to use fornow:
let foo = 5; // `foo` is immutable.let mut bar = 5; // `bar` is mutable.
Oh, and // will start a comment, until the end of the line. Rust ignoreseverything in comments.
So now we know that let mut guess will introduce a mutablebinding named guess, but we have to look at the other side of the =for what it’s bound to: String::new().
String is a string type, provided by the standard library. A Stringis a growable, UTF-8 encoded bit of text.
The ::new() syntax uses :: because this is an ‘associated function’of a particular type. That is to say, it’s associated with String itself,

37
rather than a particular instance of a String. Some languages call thisa ‘static method’.
This function is named new(), because it creates a new, emptyString. You’ll find a new() function on many types, as it’s a commonname for making a new value of some kind.
Let’s move forward:
io::stdin().read_line(&mut guess).expect("Failed to read line");
That’s a lot more! Let’s go bit-by-bit. The first line has two parts.Here’s the first:
io::stdin()
Remember how we used std::io on the first line of the program?We’re now calling an associated function on it. If we didn’t use std::io, we could have written this line as std::io::stdin().
This particular function returns a handle to the standard input foryour terminal. More specifically, a std::io::Stdin.
The next part will use this handle to get input from the user:
.read_line(&mut guess)
Here, we call the read_line method on our handle. Methods are likeassociated functions, but are only available on a particular instance ofa type, rather than the type itself. We’re also passing one argument toread_line(): &mut guess.
Remember how we bound guess above? We said it was mutable.However, read_line doesn’t take a String as an argument: it takes a&mut String. Rust has a feature called ‘references’, which allows you tohave multiple references to one piece of data, which can reduce copying.References are a complex feature, as one of Rust’s major selling pointsis how safe and easy it is to use references. We don’t need to know alot of those details to finish our program right now, though. For now,all we need to know is that like let bindings, references are immutableby default. Hence, we need to write &mut guess, rather than &guess.
Why does read_line() take a mutable reference to a string? Itsjob is to take what the user types into standard input, and place thatinto a string. So it takes that string as an argument, and in order toadd the input, it needs to be mutable.
But we’re not quite done with this line of code, though. While it’sa single line of text, it’s only the first part of the single logical line ofcode:
38
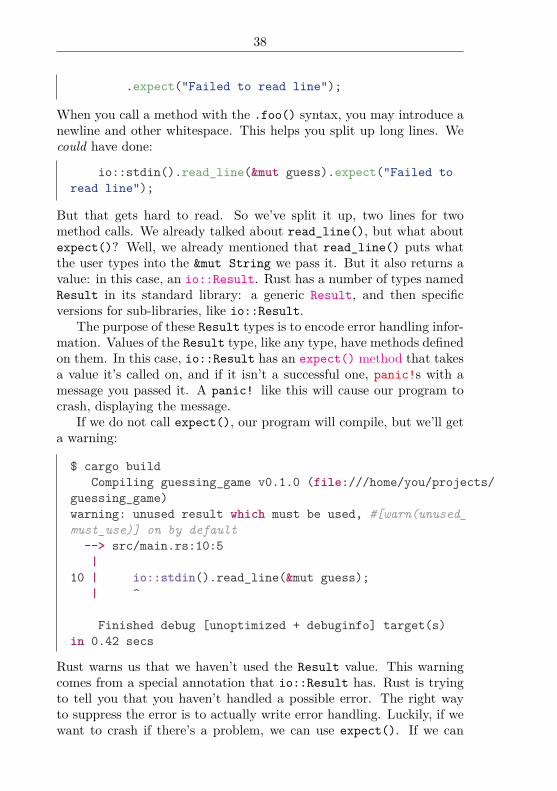
.expect("Failed to read line");
When you call a method with the .foo() syntax, you may introduce anewline and other whitespace. This helps you split up long lines. Wecould have done:
io::stdin().read_line(&mut guess).expect("Failed toread line");
But that gets hard to read. So we’ve split it up, two lines for twomethod calls. We already talked about read_line(), but what aboutexpect()? Well, we already mentioned that read_line() puts whatthe user types into the &mut String we pass it. But it also returns avalue: in this case, an io::Result. Rust has a number of types namedResult in its standard library: a generic Result, and then specificversions for sub-libraries, like io::Result.
The purpose of these Result types is to encode error handling infor-mation. Values of the Result type, like any type, have methods definedon them. In this case, io::Result has an expect() method that takesa value it’s called on, and if it isn’t a successful one, panic!s with amessage you passed it. A panic! like this will cause our program tocrash, displaying the message.
If we do not call expect(), our program will compile, but we’ll geta warning:
$ cargo buildCompiling guessing_game v0.1.0 (file:///home/you/projects/
guessing_game)warning: unused result which must be used, #[warn(unused_must_use)] on by default--> src/main.rs:10:5|
10 | io::stdin().read_line(&mut guess);| ^
Finished debug [unoptimized + debuginfo] target(s)in 0.42 secs
Rust warns us that we haven’t used the Result value. This warningcomes from a special annotation that io::Result has. Rust is tryingto tell you that you haven’t handled a possible error. The right wayto suppress the error is to actually write error handling. Luckily, if wewant to crash if there’s a problem, we can use expect(). If we can

39
recover from the error somehow, we’d do something else, but we’ll savethat for a future project.
There’s only one line of this first example left:
println!("You guessed: ", guess);
This prints out the string we saved our input in. The s are a place-holder, and so we pass it guess as an argument. If we had multiples, we would pass multiple arguments:
let x = 5;let y = 10;
println!("x and y: and ", x, y);
Easy.Anyway, that’s the tour. We can run what we have with cargo run:
$ cargo runCompiling guessing_game v0.1.0 (file:///home/you/projects/
guessing_game)Finished debug [unoptimized + debuginfo] target(s)
in 0.44 secsRunning `target/debug/guessing_game`
Guess the number!Please input your guess.6You guessed: 6
All right! Our first part is done: we can get input from the keyboard,and then print it back out.

40

Chapter 4
Generating a secretnumber
Next, we need to generate a secret number. Rust does not yet includerandom number functionality in its standard library. The Rust teamdoes, however, provide a rand crate. A ‘crate’ is a package of Rust code.We’ve been building a ‘binary crate’, which is an executable. rand isa ‘library crate’, which contains code that’s intended to be used withother programs.
Using external crates is where Cargo really shines. Before we canwrite the code using rand, we need to modify our Cargo.toml. Openit up, and add these few lines at the bottom:
[dependencies]
rand = "0.3.0"
The [dependencies] section of Cargo.toml is like the [package] sec-tion: everything that follows it is part of it, until the next sectionstarts. Cargo uses the dependencies section to know what dependen-cies on external crates you have, and what versions you require. Inthis case, we’ve specified version 0.3.0, which Cargo understands tobe any release that’s compatible with this specific version. Cargo un-derstands Semantic Versioning, which is a standard for writing versionnumbers. A bare number like above is actually shorthand for ^0.3.0,meaning “anything compatible with 0.3.0”. If we wanted to use only 0.3.0 exactly, we could say rand = “=0.3.0” (note the two equal signs).We could also use a range of versions. Cargo’s documentation contains

42
more details.Now, without changing any of our code, let’s build our project:
$ cargo buildUpdating registry `https://github.com/rust-lang/crates.
io-index`Downloading rand v0.3.14Downloading libc v0.2.17Compiling libc v0.2.17Compiling rand v0.3.14Compiling guessing_game v0.1.0 (file:///home/you/projects/
guessing_game)Finished debug [unoptimized + debuginfo] target(s)
in 5.88 secs
(You may see different versions, of course.)Lots of new output! Now that we have an external dependency,
Cargo fetches the latest versions of everything from the registry, whichis a copy of data from Crates.io. Crates.io is where people in the Rustecosystem post their open source Rust projects for others to use.
After updating the registry, Cargo checks our [dependencies] anddownloads any we don’t have yet. In this case, while we only said wewanted to depend on rand, we’ve also grabbed a copy of libc. Thisis because rand depends on libc to work. After downloading them, itcompiles them, and then compiles our project.
If we run cargo build again, we’ll get different output:
$ cargo buildFinished debug [unoptimized + debuginfo] target(s)
in 0.0 secs
That’s right, nothing was done! Cargo knows that our project has beenbuilt, and that all of its dependencies are built, and so there’s no reasonto do all that stuff. With nothing to do, it simply exits. If we openup src/main.rs again, make a trivial change, and then save it again,we’ll only see two lines:
$ cargo buildCompiling guessing_game v0.1.0 (file:///home/you/projects/
guessing_game)Finished debug [unoptimized + debuginfo] target(s)
in 0.45 secs

43
So, we told Cargo we wanted any 0.3.x version of rand, and so itfetched the latest version at the time this was written, v0.3.14. Butwhat happens when next week, version v0.3.15 comes out, with animportant bugfix? While getting bugfixes is important, what if 0.3.15 contains a regression that breaks our code?
The answer to this problem is the Cargo.lock file you’ll now findin your project directory. When you build your project for the firsttime, Cargo figures out all of the versions that fit your criteria, andthen writes them to the Cargo.lock file. When you build your projectin the future, Cargo will see that the Cargo.lock file exists, and thenuse that specific version rather than do all the work of figuring outversions again. This lets you have a repeatable build automatically. Inother words, we’ll stay at 0.3.14 until we explicitly upgrade, and sowill anyone who we share our code with, thanks to the lock file.
What about when we do want to use v0.3.15? Cargo has anothercommand, update, which says ‘ignore the lock, figure out all the latestversions that fit what we’ve specified. If that works, write those versionsout to the lock file’. But, by default, Cargo will only look for versionslarger than 0.3.0 and smaller than 0.4.0. If we want to move to 0.4.x, we’d have to update the Cargo.toml directly. When we do, the nexttime we cargo build, Cargo will update the index and re-evaluate ourrand requirements.
There’s a lot more to say about Cargo and its ecosystem, but fornow, that’s all we need to know. Cargo makes it really easy to re-uselibraries, and so Rustaceans tend to write smaller projects which areassembled out of a number of sub-packages.
Let’s get on to actually using rand. Here’s our next step:
extern crate rand;
use std::io;use rand::Rng;
fn main() println!("Guess the number!");
let secret_number = rand::thread_rng().gen_range(1,101);
println!("The secret number is: ", secret_number);

44
println!("Please input your guess.");
let mut guess = String::new();
io::stdin().read_line(&mut guess).expect("Failed to read line");
println!("You guessed: ", guess);
The first thing we’ve done is change the first line. It now says externcrate rand. Because we declared rand in our [dependencies], wecan use extern crate to let Rust know we’ll be making use of it. Thisalso does the equivalent of a use rand; as well, so we can make use ofanything in the rand crate by prefixing it with rand::.
Next, we added another use line: use rand::Rng. We’re going touse a method in a moment, and it requires that Rng be in scope towork. The basic idea is this: methods are defined on something called‘traits’, and for the method to work, it needs the trait to be in scope.For more about the details, read the traits section.
There are two other lines we added, in the middle:
let secret_number = rand::thread_rng().gen_range(1,101);
println!("The secret number is: ", secret_number);
We use the rand::thread_rng() function to get a copy of the randomnumber generator, which is local to the particular thread of executionwe’re in. Because we use rand::Rng’d above, it has a gen_range()method available. This method takes two arguments, and generates anumber between them. It’s inclusive on the lower bound, but exclusiveon the upper bound, so we need 1 and 101 to get a number rangingfrom one to a hundred.
The second line prints out the secret number. This is useful whilewe’re developing our program, so we can easily test it out. But we’llbe deleting it for the final version. It’s not much of a game if it printsout the answer when you start it up!
Try running our new program a few times:

45
$ cargo runCompiling guessing_game v0.1.0 (file:///home/you/projects/
guessing_game)Finished debug [unoptimized + debuginfo] target(s)
in 0.55 secsRunning `target/debug/guessing_game`
Guess the number!The secret number is: 7Please input your guess.4You guessed: 4$ cargo run
Finished debug [unoptimized + debuginfo] target(s)in 0.0 secs
Running `target/debug/guessing_game`Guess the number!The secret number is: 83Please input your guess.5You guessed: 5
Great! Next up: comparing our guess to the secret number.

46

Chapter 5
Comparing guesses
Now that we’ve got user input, let’s compare our guess to the secretnumber. Here’s our next step, though it doesn’t quite compile yet:
extern crate rand;
use std::io;use std::cmp::Ordering;use rand::Rng;
fn main() println!("Guess the number!");
let secret_number = rand::thread_rng().gen_range(1,101);
println!("The secret number is: ", secret_number);
println!("Please input your guess.");
let mut guess = String::new();
io::stdin().read_line(&mut guess).expect("Failed to read line");
println!("You guessed: ", guess);

48
match guess.cmp(&secret_number) Ordering::Less => println!("Too small!"),Ordering::Greater => println!("Too big!"),Ordering::Equal => println!("You win!"),
A few new bits here. The first is another use. We bring a type calledstd::cmp::Ordering into scope. Then, five new lines at the bottomthat use it:
match guess.cmp(&secret_number) Ordering::Less => println!("Too small!"),Ordering::Greater => println!("Too big!"),Ordering::Equal => println!("You win!"),
The cmp() method can be called on anything that can be compared,and it takes a reference to the thing you want to compare it to. Itreturns the Ordering type we used earlier. We use a match statementto determine exactly what kind of Ordering it is. Ordering is an enum,short for ‘enumeration’, which looks like this:
enum Foo Bar,Baz,
With this definition, anything of type Foo can be either a Foo::Bar ora Foo::Baz. We use the :: to indicate the namespace for a particularenum variant.
The Ordering enum has three possible variants: Less, Equal, andGreater. The match statement takes a value of a type, and lets youcreate an ‘arm’ for each possible value. Since we have three types ofOrdering, we have three arms:
match guess.cmp(&secret_number) Ordering::Less => println!("Too small!"),Ordering::Greater => println!("Too big!"),Ordering::Equal => println!("You win!"),

49
If it’s Less, we print Too small!, if it’s Greater, Too big!, and ifEqual, You win!. match is really useful, and is used often in Rust.
I did mention that this won’t quite compile yet, though. Let’s tryit:$ cargo build
Compiling guessing_game v0.1.0 (file:///home/you/projects/guessing_game)error[E0308]: mismatched types
--> src/main.rs:23:21|
23 | match guess.cmp(&secret_number) | ^^^^^^^^^^^^^^ expected struct
`std::string::String`, found integral variable|= note: expected type `&std::string::String`= note: found type `&integer`
error: aborting due to previous error
error: Could not compile `guessing_game`.
To learn more, run the command again with --verbose.
Whew! This is a big error. The core of it is that we have ‘mismatchedtypes’. Rust has a strong, static type system. However, it also has typeinference. When we wrote let guess = String::new(), Rust wasable to infer that guess should be a String, and so it doesn’t make uswrite out the type. And with our secret_number, there are a numberof types which can have a value between one and a hundred: i32, athirty-two-bit number, or u32, an unsigned thirty-two-bit number, ori64, a sixty-four-bit number or others. So far, that hasn’t mattered,and so Rust defaults to an i32. However, here, Rust doesn’t knowhow to compare the guess and the secret_number. They need to bethe same type. Ultimately, we want to convert the String we read asinput into a real number type, for comparison. We can do that withtwo more lines. Here’s our new program:
extern crate rand;
use std::io;use std::cmp::Ordering;

50
use rand::Rng;
fn main() println!("Guess the number!");
let secret_number = rand::thread_rng().gen_range(1,101);
println!("The secret number is: ", secret_number);
println!("Please input your guess.");
let mut guess = String::new();
io::stdin().read_line(&mut guess).expect("Failed to read line");
let guess: u32 = guess.trim().parse().expect("Please type a number!");
println!("You guessed: ", guess);
match guess.cmp(&secret_number) Ordering::Less => println!("Too small!"),Ordering::Greater => println!("Too big!"),Ordering::Equal => println!("You win!"),
The new two lines:let guess: u32 = guess.trim().parse()
.expect("Please type a number!");
Wait a minute, I thought we already had a guess? We do, but Rustallows us to ‘shadow’ the previous guess with a new one. This is oftenused in this exact situation, where guess starts as a String, but wewant to convert it to an u32. Shadowing lets us re-use the guess name,rather than forcing us to come up with two unique names like guess_str and guess, or something else.
We bind guess to an expression that looks like something we wroteearlier:

51
guess.trim().parse()
Here, guess refers to the old guess, the one that was a String withour input in it. The trim() method on Strings will eliminate anywhite space at the beginning and end of our string. This is important,as we had to press the ‘return’ key to satisfy read_line(). This meansthat if we type 5 and hit return, guess looks like this: 5\n. The \nrepresents ‘newline’, the enter key. trim() gets rid of this, leaving ourstring with only the 5. The parse() method on strings parses a stringinto some kind of number. Since it can parse a variety of numbers,we need to give Rust a hint as to the exact type of number we want.Hence, let guess: u32. The colon (:) after guess tells Rust we’regoing to annotate its type. u32 is an unsigned, thirty-two bit integer.Rust has a number of built-in number types, but we’ve chosen u32. It’sa good default choice for a small positive number.
Just like read_line(), our call to parse() could cause an error.What if our string contained A%? There’d be no way to convert thatto a number. As such, we’ll do the same thing we did with read_line(): use the expect() method to crash if there’s an error.
Let’s try our program out!
$ cargo runCompiling guessing_game v0.1.0 (file:///home/you/projects/
guessing_game)Finished debug [unoptimized + debuginfo] target(s)
in 0.57 secsRunning `target/guessing_game`
Guess the number!The secret number is: 58Please input your guess.
76You guessed: 76Too big!
Nice! You can see I even added spaces before my guess, and it stillfigured out that I guessed 76. Run the program a few times, and verifythat guessing the number works, as well as guessing a number too small.
Now we’ve got most of the game working, but we can only makeone guess. Let’s change that by adding loops!

52

Chapter 6
Looping
The loop keyword gives us an infinite loop. Let’s add that in:
extern crate rand;
use std::io;use std::cmp::Ordering;use rand::Rng;
fn main() println!("Guess the number!");
let secret_number = rand::thread_rng().gen_range(1,101);
println!("The secret number is: ", secret_number);
loop println!("Please input your guess.");
let mut guess = String::new();
io::stdin().read_line(&mut guess).expect("Failed to read line");
let guess: u32 = guess.trim().parse()

54
.expect("Please type a number!");
println!("You guessed: ", guess);
match guess.cmp(&secret_number) Ordering::Less => println!("Too small!")
,Ordering::Greater => println!("Too big!"),Ordering::Equal => println!("You win!"),
And try it out. But wait, didn’t we just add an infinite loop? Yup.Remember our discussion about parse()? If we give a non-numberanswer, we’ll panic! and quit. Observe:
$ cargo runCompiling guessing_game v0.1.0 (file:///home/you/projects/
guessing_game)Finished debug [unoptimized + debuginfo] target(s)
in 0.58 secsRunning `target/guessing_game`
Guess the number!The secret number is: 59Please input your guess.45You guessed: 45Too small!Please input your guess.60You guessed: 60Too big!Please input your guess.59You guessed: 59You win!Please input your guess.quitthread 'main' panicked at 'Please type a number!'
Ha! quit actually quits. As does any other non-number input. Well,

55
this is suboptimal to say the least. First, let’s actually quit when youwin the game:
extern crate rand;
use std::io;use std::cmp::Ordering;use rand::Rng;
fn main() println!("Guess the number!");
let secret_number = rand::thread_rng().gen_range(1,101);
println!("The secret number is: ", secret_number);
loop println!("Please input your guess.");
let mut guess = String::new();
io::stdin().read_line(&mut guess).expect("Failed to read line");
let guess: u32 = guess.trim().parse().expect("Please type a number!");
println!("You guessed: ", guess);
match guess.cmp(&secret_number) Ordering::Less => println!("Too small!")
,Ordering::Greater => println!("Too big!"),Ordering::Equal =>
println!("You win!");break;

56
By adding the break line after the You win!, we’ll exit the loop whenwe win. Exiting the loop also means exiting the program, since it’sthe last thing in main(). We have only one more tweak to make: whensomeone inputs a non-number, we don’t want to quit, we want to ignoreit. We can do that like this:
extern crate rand;
use std::io;use std::cmp::Ordering;use rand::Rng;
fn main() println!("Guess the number!");
let secret_number = rand::thread_rng().gen_range(1,101);
println!("The secret number is: ", secret_number);
loop println!("Please input your guess.");
let mut guess = String::new();
io::stdin().read_line(&mut guess).expect("Failed to read line");
let guess: u32 = match guess.trim().parse() Ok(num) => num,Err(_) => continue,
;
println!("You guessed: ", guess);
match guess.cmp(&secret_number) Ordering::Less => println!("Too small!")
,

57
Ordering::Greater => println!("Too big!"),Ordering::Equal =>
println!("You win!");break;
These are the lines that changed:
let guess: u32 = match guess.trim().parse() Ok(num) => num,Err(_) => continue,
;
This is how you generally move from ‘crash on error’ to ‘actually handlethe error’, by switching from expect() to a match statement. A Resultis returned by parse(), this is an enum like Ordering, but in this case,each variant has some data associated with it: Ok is a success, and Erris a failure. Each contains more information: the successfully parsedinteger, or an error type. In this case, we match on Ok(num), which setsthe name num to the unwrapped Ok value (the integer), and then wereturn it on the right-hand side. In the Err case, we don’t care whatkind of error it is, so we just use the catch all _ instead of a name. Thiscatches everything that isn’t Ok, and continue lets us move to the nextiteration of the loop; in effect, this enables us to ignore all errors andcontinue with our program.
Now we should be good! Let’s try:
$ cargo runCompiling guessing_game v0.1.0 (file:///home/you/projects/
guessing_game)Finished debug [unoptimized + debuginfo] target(s)
in 0.57 secsRunning `target/guessing_game`
Guess the number!The secret number is: 61Please input your guess.10You guessed: 10Too small!

58
Please input your guess.99You guessed: 99Too big!Please input your guess.fooPlease input your guess.61You guessed: 61You win!
Awesome! With one tiny last tweak, we have finished the guessinggame. Can you think of what it is? That’s right, we don’t want toprint out the secret number. It was good for testing, but it kind ofruins the game. Here’s our final source:
extern crate rand;
use std::io;use std::cmp::Ordering;use rand::Rng;
fn main() println!("Guess the number!");
let secret_number = rand::thread_rng().gen_range(1,101);
loop println!("Please input your guess.");
let mut guess = String::new();
io::stdin().read_line(&mut guess).expect("Failed to read line");
let guess: u32 = match guess.trim().parse() Ok(num) => num,Err(_) => continue,
;

59
println!("You guessed: ", guess);
match guess.cmp(&secret_number) Ordering::Less => println!("Too small!")
,Ordering::Greater => println!("Too big!"),Ordering::Equal =>
println!("You win!");break;

60

Chapter 7
Complete!
This project showed you a lot: let, match, methods, associated func-tions, using external crates, and more.
At this point, you have successfully built the Guessing Game! Con-gratulations!

62

Part IV
Syntax and Semantics


Chapter 1
Syntax and Semantics
This chapter breaks Rust down into small chunks, one for each concept.If you’d like to learn Rust from the bottom up, reading this in order
is a great way to do that.These sections also form a reference for each concept, so if you’re
reading another tutorial and find something confusing, you can find itexplained somewhere in here.
Variable BindingsVirtually every non-’Hello World’ Rust program uses variable bindings.They bind some value to a name, so it can be used later. let is usedto introduce a binding, like this:
fn main() let x = 5;
Putting fn main() in each example is a bit tedious, so we’ll leavethat out in the future. If you’re following along, make sure to edit yourmain() function, rather than leaving it off. Otherwise, you’ll get anerror.
PatternsIn many languages, a variable binding would be called a variable, butRust’s variable bindings have a few tricks up their sleeves. For example

66
the left-hand side of a let statement is a ‘pattern’, not a variable name.This means we can do things like:
let (x, y) = (1, 2);
After this statement is evaluated, x will be one, and y will be two.Patterns are really powerful, and have their own section in the book.We don’t need those features for now, so we’ll keep this in the back ofour minds as we go forward.
Type annotationsRust is a statically typed language, which means that we specify ourtypes up front, and they’re checked at compile time. So why does ourfirst example compile? Well, Rust has this thing called ‘type inference’.If it can figure out what the type of something is, Rust doesn’t requireyou to explicitly type it out.
We can add the type if we want to, though. Types come after acolon (:):
let x: i32 = 5;
If I asked you to read this out loud to the rest of the class, you’d say“x is a binding with the type i32 and the value 5.”
In this case we chose to represent x as a 32-bit signed integer. Rusthas many different primitive integer types. They begin with i for signedintegers and u for unsigned integers. The possible integer sizes are 8,16, 32, and 64 bits.
In future examples, we may annotate the type in a comment. Theexamples will look like this:
fn main() let x = 5; // x: i32
Note the similarities between this annotation and the syntax you usewith let. Including these kinds of comments is not idiomatic Rust, butwe’ll occasionally include them to help you understand what the typesthat Rust infers are.
MutabilityBy default, bindings are immutable. This code will not compile:

67
let x = 5;x = 10;
It will give you this error:
error: re-assignment of immutable variable `x`x = 10;^~~~~~~
If you want a binding to be mutable, you can use mut:
let mut x = 5; // mut x: i32x = 10;
There is no single reason that bindings are immutable by default, butwe can think about it through one of Rust’s primary focuses: safety. Ifyou forget to say mut, the compiler will catch it, and let you know thatyou have mutated something you may not have intended to mutate.If bindings were mutable by default, the compiler would not be ableto tell you this. If you did intend mutation, then the solution is quiteeasy: add mut.
There are other good reasons to avoid mutable state when possible,but they’re out of the scope of this guide. In general, you can oftenavoid explicit mutation, and so it is preferable in Rust. That said,sometimes, mutation is what you need, so it’s not forbidden.
Initializing bindingsRust variable bindings have one more aspect that differs from otherlanguages: bindings are required to be initialized with a value beforeyou’re allowed to use them.
Let’s try it out. Change your src/main.rs file to look like this:
fn main() let x: i32;
println!("Hello world!");
You can use cargo build on the command line to build it. You’ll geta warning, but it will still print “Hello, world!”:

68
Compiling hello_world v0.0.1 (file:///home/you/projects/hello_world)src/main.rs:2:9: 2:10 warning: unused variable: `x`, #[warn(unused_variables)]
on by defaultsrc/main.rs:2 let x: i32;
^
Rust warns us that we never use the variable binding, but since wenever use it, no harm, no foul. Things change if we try to actually usethis x, however. Let’s do that. Change your program to look like this:
fn main() let x: i32;
println!("The value of x is: ", x);
And try to build it. You’ll get an error:
$ cargo buildCompiling hello_world v0.0.1 (file:///home/you/projects/
hello_world)src/main.rs:4:39: 4:40 error: use of possibly uninitializedvariable: `x`src/main.rs:4 println!("The value of x is: ", x);
^note: in expansion of format_args!<std macros>:2:23: 2:77 note: expansion site<std macros>:1:1: 3:2 note: in expansion of println!src/main.rs:4:5: 4:42 note: expansion siteerror: aborting due to previous errorCould not compile `hello_world`.
Rust will not let us use a value that has not been initialized.Let us take a minute to talk about this stuff we’ve added to println!.If you include two curly braces (, some call them moustaches...) in
your string to print, Rust will interpret this as a request to interpolatesome sort of value. String interpolation is a computer science term thatmeans “stick in the middle of a string.” We add a comma, and thenx, to indicate that we want x to be the value we’re interpolating. Thecomma is used to separate arguments we pass to functions and macros,if you’re passing more than one.

69
When you use the curly braces, Rust will attempt to display thevalue in a meaningful way by checking out its type. If you want tospecify the format in a more detailed manner, there are a wide numberof options available. For now, we’ll stick to the default: integers aren’tvery complicated to print.
Scope and shadowingLet’s get back to bindings. Variable bindings have a scope - they areconstrained to live in the block they were defined in. A block is acollection of statements enclosed by and . Function definitions arealso blocks! In the following example we define two variable bindings,x and y, which live in different blocks. x can be accessed from insidethe fn main() block, while y can be accessed only from inside theinner block:
fn main() let x: i32 = 17;
let y: i32 = 3;println!("The value of x is and value of y is
", x, y);println!("The value of x is and value of y is ",
x, y); // This won't work.
The first println! would print “The value of x is 17 and the value ofy is 3”, but this example cannot be compiled successfully, because thesecond println! cannot access the value of y, since it is not in scopeanymore. Instead we get this error:
$ cargo buildCompiling hello v0.1.0 (file:///home/you/projects/hello_
world)main.rs:7:62: 7:63 error: unresolved name `y`. Did youmean `x`? [E0425]main.rs:7 println!("The value of x is and valueof y is ", x, y); // This won't work.
^

70
note: in expansion of format_args!<std macros>:2:25: 2:56 note: expansion site<std macros>:1:1: 2:62 note: in expansion of print!<std macros>:3:1: 3:54 note: expansion site<std macros>:1:1: 3:58 note: in expansion of println!main.rs:7:5: 7:65 note: expansion sitemain.rs:7:62: 7:63 help: run `rustc --explain E0425` tosee a detailed explanationerror: aborting due to previous errorCould not compile `hello`.
To learn more, run the command again with --verbose.
Additionally, variable bindings can be shadowed. This means that alater variable binding with the same name as another binding that iscurrently in scope will override the previous binding.
let x: i32 = 8;
println!("", x); // Prints "8".let x = 12;println!("", x); // Prints "12".
println!("", x); // Prints "8".let x = 42;println!("", x); // Prints "42".
Shadowing and mutable bindings may appear as two sides of the samecoin, but they are two distinct concepts that can’t always be usedinterchangeably. For one, shadowing enables us to rebind a name to avalue of a different type. It is also possible to change the mutability ofa binding. Note that shadowing a name does not alter or destroy thevalue it was bound to, and the value will continue to exist until it goesout of scope, even if it is no longer accessible by any means.
let mut x: i32 = 1;x = 7;let x = x; // `x` is now immutable and is bound to `7`.
let y = 4;let y = "I can also be bound to text!"; // `y` is now of

71
a different type.
FunctionsEvery Rust program has at least one function, the main function:
fn main()
This is the simplest possible function declaration. As we mentionedbefore, fn says ‘this is a function’, followed by the name, some paren-theses because this function takes no arguments, and then some curlybraces to indicate the body. Here’s a function named foo:
fn foo()
So, what about taking arguments? Here’s a function that prints anumber:fn print_number(x: i32)
println!("x is: ", x);
Here’s a complete program that uses print_number:
fn main() print_number(5);
fn print_number(x: i32) println!("x is: ", x);
As you can see, function arguments work very similar to let declara-tions: you add a type to the argument name, after a colon.
Here’s a complete program that adds two numbers together andprints them:
fn main() print_sum(5, 6);
fn print_sum(x: i32, y: i32)

72
println!("sum is: ", x + y);
You separate arguments with a comma, both when you call the func-tion, as well as when you declare it.
Unlike let, you must declare the types of function arguments. Thisdoes not work:
fn print_sum(x, y) println!("sum is: ", x + y);
You get this error:
expected one of `!`, `:`, or `@`, found `)`fn print_sum(x, y)
This is a deliberate design decision. While full-program inference ispossible, languages which have it, like Haskell, often suggest that doc-umenting your types explicitly is a best-practice. We agree that forcingfunctions to declare types while allowing for inference inside of functionbodies is a wonderful sweet spot between full inference and no inference.
What about returning a value? Here’s a function that adds one toan integer:
fn add_one(x: i32) -> i32 x + 1
Rust functions return exactly one value, and you declare the type afteran ‘arrow’, which is a dash (-) followed by a greater-than sign (>). Thelast line of a function determines what it returns. You’ll note the lackof a semicolon here. If we added it in:
fn add_one(x: i32) -> i32 x + 1;
We would get an error:
error: not all control paths return a valuefn add_one(x: i32) -> i32
x + 1;

73
help: consider removing this semicolon:x + 1;
^
This reveals two interesting things about Rust: it is an expression-basedlanguage, and semicolons are different from semicolons in other ‘curlybrace and semicolon’-based languages. These two things are related.
Expressions vs. StatementsRust is primarily an expression-based language. There are only twokinds of statements, and everything else is an expression.
So what’s the difference? Expressions return a value, and state-ments do not. That’s why we end up with ‘not all control paths returna value’ here: the statement x + 1; doesn’t return a value. There aretwo kinds of statements in Rust: ‘declaration statements’ and ‘expres-sion statements’. Everything else is an expression. Let’s talk aboutdeclaration statements first.
In some languages, variable bindings can be written as expressions,not statements. Like Ruby:
x = y = 5
In Rust, however, using let to introduce a binding is not an expression.The following will produce a compile-time error:
let x = (let y = 5); // Expected identifier, found keyword`let`.
The compiler is telling us here that it was expecting to see the begin-ning of an expression, and a let can only begin a statement, not anexpression.
Note that assigning to an already-bound variable (e.g. y = 5) isstill an expression, although its value is not particularly useful. Unlikeother languages where an assignment evaluates to the assigned value(e.g. 5 in the previous example), in Rust the value of an assignment isan empty tuple () because the assigned value can have only one owner,and any other returned value would be too surprising:
let mut y = 5;
let x = (y = 6); // `x` has the value `()`, not `6`.
74
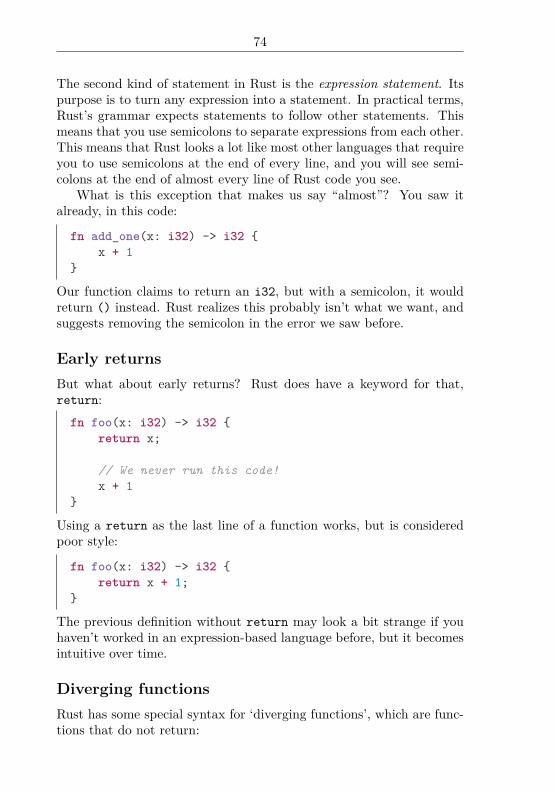
The second kind of statement in Rust is the expression statement. Itspurpose is to turn any expression into a statement. In practical terms,Rust’s grammar expects statements to follow other statements. Thismeans that you use semicolons to separate expressions from each other.This means that Rust looks a lot like most other languages that requireyou to use semicolons at the end of every line, and you will see semi-colons at the end of almost every line of Rust code you see.
What is this exception that makes us say “almost”? You saw italready, in this code:
fn add_one(x: i32) -> i32 x + 1
Our function claims to return an i32, but with a semicolon, it wouldreturn () instead. Rust realizes this probably isn’t what we want, andsuggests removing the semicolon in the error we saw before.
Early returnsBut what about early returns? Rust does have a keyword for that,return:fn foo(x: i32) -> i32
return x;
// We never run this code!x + 1
Using a return as the last line of a function works, but is consideredpoor style:
fn foo(x: i32) -> i32 return x + 1;
The previous definition without return may look a bit strange if youhaven’t worked in an expression-based language before, but it becomesintuitive over time.
Diverging functionsRust has some special syntax for ‘diverging functions’, which are func-tions that do not return:

75
fn diverges() -> ! panic!("This function never returns!");
panic! is a macro, similar to println!() that we’ve already seen.Unlike println!(), panic!() causes the current thread of executionto crash with the given message. Because this function will cause acrash, it will never return, and so it has the type ‘!’, which is read‘diverges’.
If you add a main function that calls diverges() and run it, you’llget some output that looks like this:
thread ‘main’ panicked at ‘This function never returns!’,hello.rs:2
If you want more information, you can get a backtrace by setting theRUST_BACKTRACE environment variable:
$ RUST_BACKTRACE=1 ./divergesthread 'main' panicked at 'This function never returns!',hello.rs:2Some details are omitted, run with `RUST_BACKTRACE=full`for a verbose backtrace.stack backtrace:
hello::divergesat ./hello.rs:2
hello::mainat ./hello.rs:6
If you want the complete backtrace and filenames:
$ RUST_BACKTRACE=full ./divergesthread 'main' panicked at 'This function never returns!',hello.rs:2stack backtrace:
1: 0x7f402773a829 - sys::backtrace::write::h0942de78b6c02817K8r2: 0x7f402773d7fc - panicking::on_panic::h3f23f9d0b5f4c91bu9w3: 0x7f402773960e - rt::unwind::begin_unwind_inner:
:h2844b8c5e81e79558Bw4: 0x7f4027738893 - rt::unwind::begin_unwind::h43752794474239036505: 0x7f4027738809 - diverges::h2266b4c4b850236beaa6: 0x7f40277389e5 - main::h19bb1149c2f00ecfBaa7: 0x7f402773f514 - rt::unwind::try::try_fn::h13186883479104382231

76
8: 0x7f402773d1d8 - __rust_try9: 0x7f402773f201 - rt::lang_start::ha172a3ce74bb453aK5w10: 0x7f4027738a19 - main11: 0x7f402694ab44 - __libc_start_main12: 0x7f40277386c8 - <unknown>13: 0x0 - <unknown>
If you need to override an already set RUST_BACKTRACE, in cases whenyou cannot just unset the variable, then set it to 0 to avoid getting abacktrace. Any other value (even no value at all) turns on backtrace.
$ export RUST_BACKTRACE=1...$ RUST_BACKTRACE=0 ./divergesthread 'main' panicked at 'This function never returns!',hello.rs:2note: Run with `RUST_BACKTRACE=1` for a backtrace.
RUST_BACKTRACE also works with Cargo’s run command:
$ RUST_BACKTRACE=full cargo runRunning `target/debug/diverges`
thread 'main' panicked at 'This function never returns!',hello.rs:2stack backtrace:
1: 0x7f402773a829 - sys::backtrace::write::h0942de78b6c02817K8r2: 0x7f402773d7fc - panicking::on_panic::h3f23f9d0b5f4c91bu9w3: 0x7f402773960e - rt::unwind::begin_unwind_inner:
:h2844b8c5e81e79558Bw4: 0x7f4027738893 - rt::unwind::begin_unwind::h43752794474239036505: 0x7f4027738809 - diverges::h2266b4c4b850236beaa6: 0x7f40277389e5 - main::h19bb1149c2f00ecfBaa7: 0x7f402773f514 - rt::unwind::try::try_fn::h131868834791043822318: 0x7f402773d1d8 - __rust_try9: 0x7f402773f201 - rt::lang_start::ha172a3ce74bb453aK5w10: 0x7f4027738a19 - main11: 0x7f402694ab44 - __libc_start_main12: 0x7f40277386c8 - <unknown>13: 0x0 - <unknown>
A diverging function can be used as any type:

77
# fn diverges() -> ! # panic!("This function never returns!");# let x: i32 = diverges();let x: String = diverges();
Function pointersWe can also create variable bindings which point to functions:
let f: fn(i32) -> i32;
f is a variable binding which points to a function that takes an i32 asan argument and returns an i32. For example:
fn plus_one(i: i32) -> i32 i + 1
// Without type inference:let f: fn(i32) -> i32 = plus_one;
// With type inference:let f = plus_one;
We can then use f to call the function:# fn plus_one(i: i32) -> i32 i + 1 # let f = plus_one;let six = f(5);
Primitive TypesThe Rust language has a number of types that are considered ‘primi-tive’. This means that they’re built-in to the language. Rust is struc-tured in such a way that the standard library also provides a numberof useful types built on top of these ones, as well, but these are themost primitive.
BooleansRust has a built-in boolean type, named bool. It has two values, trueand false:

78
let x = true;
let y: bool = false;
A common use of booleans is in if conditionals.You can find more documentation for bools in the standard library
documentation.
charThe char type represents a single Unicode scalar value. You can createchars with a single tick: (')
let x = 'x';let two_hearts = '';
Unlike some other languages, this means that Rust’s char is not a singlebyte, but four.
You can find more documentation for chars in the standard librarydocumentation.
Numeric typesRust has a variety of numeric types in a few categories: signed andunsigned, fixed and variable, floating-point and integer.
These types consist of two parts: the category, and the size. Forexample, u16 is an unsigned type with sixteen bits of size. More bitslets you have bigger numbers.
If a number literal has nothing to cause its type to be inferred, itdefaults:
let x = 42; // `x` has type `i32`.
let y = 1.0; // `y` has type `f64`.
Here’s a list of the different numeric types, with links to their docu-mentation in the standard library:
• i8
• i16
• i32

79
• i64
• u8
• u16
• u32
• u64
• isize
• usize
• f32
• f64
Let’s go over them by category:
Signed and UnsignedInteger types come in two varieties: signed and unsigned. To under-stand the difference, let’s consider a number with four bits of size. Asigned, four-bit number would let you store numbers from -8 to +7.Signed numbers use “two’s complement representation”. An unsignedfour bit number, since it does not need to store negatives, can storevalues from 0 to +15.
Unsigned types use a u for their category, and signed types use i.The i is for ‘integer’. So u8 is an eight-bit unsigned number, and i8 isan eight-bit signed number.
Fixed-size typesFixed-size types have a specific number of bits in their representation.Valid bit sizes are 8, 16, 32, and 64. So, u32 is an unsigned, 32-bitinteger, and i64 is a signed, 64-bit integer.
Variable-size typesRust also provides types whose particular size depends on the under-lying machine architecture. Their range is sufficient to express the sizeof any collection, so these types have ‘size’ as the category. They comein signed and unsigned varieties which account for two types: isizeand usize.

80
Floating-point typesRust also has two floating point types: f32 and f64. These correspondto IEEE-754 single and double precision numbers.
ArraysLike many programming languages, Rust has list types to representa sequence of things. The most basic is the array, a fixed-size list ofelements of the same type. By default, arrays are immutable.
let a = [1, 2, 3]; // a: [i32; 3]let mut m = [1, 2, 3]; // m: [i32; 3]
Arrays have type [T; N]. We’ll talk about this T notation in the genericssection. The N is a compile-time constant, for the length of the array.
There’s a shorthand for initializing each element of an array to thesame value. In this example, each element of a will be initialized to 0:
let a = [0; 20]; // a: [i32; 20]
You can get the number of elements in an array a with a.len():
let a = [1, 2, 3];
println!("a has elements", a.len());
You can access a particular element of an array with subscript notation:
let names = ["Graydon", "Brian", "Niko"]; // names: [&str;3]
println!("The second name is: ", names[1]);
Subscripts start at zero, like in most programming languages, so thefirst name is names[0] and the second name is names[1]. The aboveexample prints The second name is: Brian. If you try to use asubscript that is not in the array, you will get an error: array access isbounds-checked at run-time. Such errant access is the source of manybugs in other systems programming languages.
You can find more documentation for arrays in the standard librarydocumentation.

81
SlicesA ‘slice’ is a reference to (or “view” into) another data structure. Theyare useful for allowing safe, efficient access to a portion of an arraywithout copying. For example, you might want to reference only oneline of a file read into memory. By nature, a slice is not created directly,but from an existing variable binding. Slices have a defined length, andcan be mutable or immutable.
Internally, slices are represented as a pointer to the beginning of thedata and a length.
Slicing syntaxYou can use a combo of & and [] to create a slice from various things.The & indicates that slices are similar to references, which we will coverin detail later in this section. The []s, with a range, let you define thelength of the slice:
let a = [0, 1, 2, 3, 4];let complete = &a[..]; // A slice containing all of theelements in `a`.let middle = &a[1..4]; // A slice of `a`: only the elements`1`, `2`, and `3`.
Slices have type &[T]. We’ll talk about that T when we cover generics.You can find more documentation for slices in the standard library
documentation.
strRust’s str type is the most primitive string type. As an unsized type,it’s not very useful by itself, but becomes useful when placed behind areference, like &str. We’ll elaborate further when we cover Strings andreferences.
You can find more documentation for str in the standard librarydocumentation.
TuplesA tuple is an ordered list of fixed size. Like this:

82
let x = (1, "hello");
The parentheses and commas form this two-length tuple. Here’s thesame code, but with the type annotated:
let x: (i32, &str) = (1, "hello");
As you can see, the type of a tuple looks like the tuple, but with eachposition having a type name rather than the value. Careful readers willalso note that tuples are heterogeneous: we have an i32 and a &str inthis tuple. In systems programming languages, strings are a bit morecomplex than in other languages. For now, read &str as a string slice,and we’ll learn more soon.
You can assign one tuple into another, if they have the same con-tained types and arity. Tuples have the same arity when they have thesame length.
let mut x = (1, 2); // x: (i32, i32)let y = (2, 3); // y: (i32, i32)
x = y;
You can access the fields in a tuple through a destructuring let. Here’san example:
let (x, y, z) = (1, 2, 3);
println!("x is ", x);
Remember before when I said the left-hand side of a let statement wasmore powerful than assigning a binding? Here we are. We can put apattern on the left-hand side of the let, and if it matches up to theright-hand side, we can assign multiple bindings at once. In this case,let “destructures” or “breaks up” the tuple, and assigns the bits tothree bindings.
This pattern is very powerful, and we’ll see it repeated more later.You can disambiguate a single-element tuple from a value in paren-
theses with a comma:
(0,); // A single-element tuple.(0); // A zero in parentheses.

83
Tuple IndexingYou can also access fields of a tuple with indexing syntax:
let tuple = (1, 2, 3);
let x = tuple.0;let y = tuple.1;let z = tuple.2;
println!("x is ", x);
Like array indexing, it starts at zero, but unlike array indexing, it usesa ., rather than []s.
You can find more documentation for tuples in the standard librarydocumentation.
FunctionsFunctions also have a type! They look like this:
fn foo(x: i32) -> i32 x
let x: fn(i32) -> i32 = foo;
In this case, x is a ‘function pointer’ to a function that takes an i32and returns an i32.
CommentsNow that we have some functions, it’s a good idea to learn about com-ments. Comments are notes that you leave to other programmers tohelp explain things about your code. The compiler mostly ignores them.
Rust has two kinds of comments that you should care about: linecomments and doc comments.
// Line comments are anything after ‘//’ and extend tothe end of the line.
let x = 5; // This is also a line comment.
// If you have a long explanation for something, you can
84
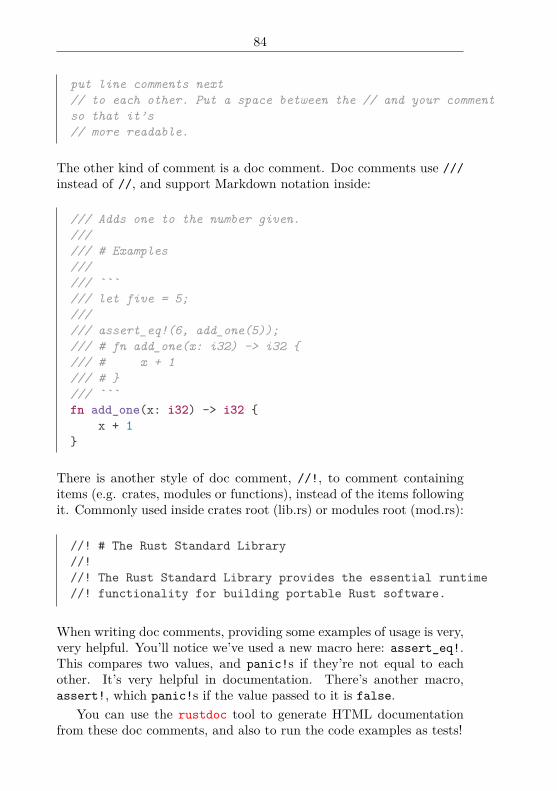
put line comments next// to each other. Put a space between the // and your commentso that it’s// more readable.
The other kind of comment is a doc comment. Doc comments use ///instead of //, and support Markdown notation inside:
/// Adds one to the number given.////// # Examples////// ```/// let five = 5;////// assert_eq!(6, add_one(5));/// # fn add_one(x: i32) -> i32 /// # x + 1/// # /// ```fn add_one(x: i32) -> i32
x + 1
There is another style of doc comment, //!, to comment containingitems (e.g. crates, modules or functions), instead of the items followingit. Commonly used inside crates root (lib.rs) or modules root (mod.rs):
//! # The Rust Standard Library//!//! The Rust Standard Library provides the essential runtime//! functionality for building portable Rust software.
When writing doc comments, providing some examples of usage is very,very helpful. You’ll notice we’ve used a new macro here: assert_eq!.This compares two values, and panic!s if they’re not equal to eachother. It’s very helpful in documentation. There’s another macro,assert!, which panic!s if the value passed to it is false.
You can use the rustdoc tool to generate HTML documentationfrom these doc comments, and also to run the code examples as tests!

85
ifRust’s take on if is not particularly complex, but it’s much more likethe if you’ll find in a dynamically typed language than in a moretraditional systems language. So let’s talk about it, to make sure yougrasp the nuances.
if is a specific form of a more general concept, the ‘branch’, whosename comes from a branch in a tree: a decision point, where dependingon a choice, multiple paths can be taken.
In the case of if, there is one choice that leads down two paths:
let x = 5;
if x == 5 println!("x is five!");
If we changed the value of x to something else, this line would not print.More specifically, if the expression after the if evaluates to true, thenthe block is executed. If it’s false, then it is not.
If you want something to happen in the false case, use an else:
let x = 5;
if x == 5 println!("x is five!");
else println!("x is not five :(");
If there is more than one case, use an else if:
let x = 5;
if x == 5 println!("x is five!");
else if x == 6 println!("x is six!");
else println!("x is not five or six :(");
This is all pretty standard. However, you can also do this:

86
let x = 5;
let y = if x == 5 10
else 15
; // y: i32
Which we can (and probably should) write like this:
let x = 5;
let y = if x == 5 10 else 15 ; // y: i32
This works because if is an expression. The value of the expression isthe value of the last expression in whichever branch was chosen. An ifwithout an else always results in () as the value.
LoopsRust currently provides three approaches to performing some kind ofiterative activity. They are: loop, while and for. Each approach hasits own set of uses.
loopThe infinite loop is the simplest form of loop available in Rust. Usingthe keyword loop, Rust provides a way to loop indefinitely until someterminating statement is reached. Rust’s infinite loops look like this:
loop println!("Loop forever!");
whileRust also has a while loop. It looks like this:
let mut x = 5; // mut x: i32let mut done = false; // mut done: bool
while !done
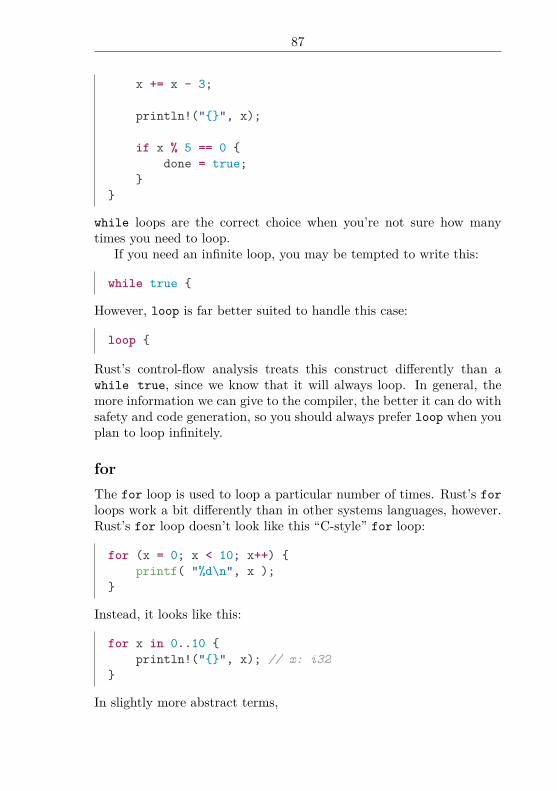
87
x += x - 3;
println!("", x);
if x % 5 == 0 done = true;
while loops are the correct choice when you’re not sure how manytimes you need to loop.
If you need an infinite loop, you may be tempted to write this:
while true
However, loop is far better suited to handle this case:
loop
Rust’s control-flow analysis treats this construct differently than awhile true, since we know that it will always loop. In general, themore information we can give to the compiler, the better it can do withsafety and code generation, so you should always prefer loop when youplan to loop infinitely.
forThe for loop is used to loop a particular number of times. Rust’s forloops work a bit differently than in other systems languages, however.Rust’s for loop doesn’t look like this “C-style” for loop:
for (x = 0; x < 10; x++) printf( "%d\n", x );
Instead, it looks like this:
for x in 0..10 println!("", x); // x: i32
In slightly more abstract terms,

88
for var in expression code
The expression is an item that can be converted into an iterator usingIntoIterator. The iterator gives back a series of elements, one elementper iteration of the loop. That value is then bound to the name var,which is valid for the loop body. Once the body is over, the next valueis fetched from the iterator, and we loop another time. When there areno more values, the for loop is over.
In our example, 0..10 is an expression that takes a start and anend position, and gives an iterator over those values. The upper boundis exclusive, though, so our loop will print 0 through 9, not 10.
Rust does not have the “C-style” for loop on purpose. Manuallycontrolling each element of the loop is complicated and error prone,even for experienced C developers.
Enumerate
When you need to keep track of how many times you have alreadylooped, you can use the .enumerate() function.
On ranges:
for (index, value) in (5..10).enumerate() println!("index = and value = ", index, value)
;
Outputs:
index = 0 and value = 5index = 1 and value = 6index = 2 and value = 7index = 3 and value = 8index = 4 and value = 9
Don’t forget to add the parentheses around the range.
On iterators:
let lines = "hello\nworld".lines();
for (linenumber, line) in lines.enumerate()

89
println!(": ", linenumber, line);
Outputs:0: hello1: world
Ending iteration earlyLet’s take a look at that while loop we had earlier:let mut x = 5;let mut done = false;
while !done x += x - 3;
println!("", x);
if x % 5 == 0 done = true;
We had to keep a dedicated mut boolean variable binding, done, toknow when we should exit out of the loop. Rust has two keywords tohelp us with modifying iteration: break and continue.
In this case, we can write the loop in a better way with break:let mut x = 5;
loop x += x - 3;
println!("", x);
if x % 5 == 0 break;
We now loop forever with loop and use break to break out early.Issuing an explicit return statement will also serve to terminate theloop early.
continue is similar, but instead of ending the loop, it goes to thenext iteration. This will only print the odd numbers:

90
for x in 0..10 if x % 2 == 0 continue;
println!("", x);
Loop labelsYou may also encounter situations where you have nested loops andneed to specify which one your break or continue statement is for. Likemost other languages, Rust’s break or continue apply to the innermostloop. In a situation where you would like to break or continue for oneof the outer loops, you can use labels to specify which loop the breakor continue statement applies to.
In the example below, we continue to the next iteration of outerloop when x is even, while we continue to the next iteration of innerloop when y is even. So it will execute the println! when both x andy are odd.
'outer: for x in 0..10 'inner: for y in 0..10
if x % 2 == 0 continue 'outer; // Continuesthe loop over `x`.
if y % 2 == 0 continue 'inner; // Continuesthe loop over `y`.
println!("x: , y: ", x, y);
VectorsA ‘vector’ is a dynamic or ‘growable’ array, implemented as the stan-dard library type Vec<T>. The T means that we can have vectors ofany type (see the chapter on generics for more). Vectors always allocatetheir data on the heap. You can create them with the vec! macro:
let v = vec![1, 2, 3, 4, 5]; // v: Vec<i32>
(Notice that unlike the println! macro we’ve used in the past, we usesquare brackets [] with vec! macro. Rust allows you to use either ineither situation, this is just convention.)
There’s an alternate form of vec! for repeating an initial value:
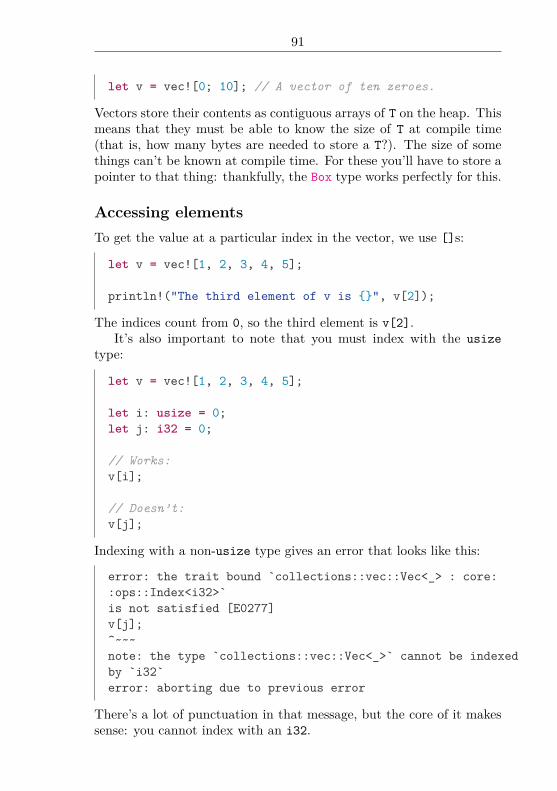
91
let v = vec![0; 10]; // A vector of ten zeroes.
Vectors store their contents as contiguous arrays of T on the heap. Thismeans that they must be able to know the size of T at compile time(that is, how many bytes are needed to store a T?). The size of somethings can’t be known at compile time. For these you’ll have to store apointer to that thing: thankfully, the Box type works perfectly for this.
Accessing elementsTo get the value at a particular index in the vector, we use []s:
let v = vec![1, 2, 3, 4, 5];
println!("The third element of v is ", v[2]);
The indices count from 0, so the third element is v[2].It’s also important to note that you must index with the usize
type:
let v = vec![1, 2, 3, 4, 5];
let i: usize = 0;let j: i32 = 0;
// Works:v[i];
// Doesn’t:v[j];
Indexing with a non-usize type gives an error that looks like this:
error: the trait bound `collections::vec::Vec<_> : core::ops::Index<i32>`is not satisfied [E0277]v[j];^~~~note: the type `collections::vec::Vec<_>` cannot be indexedby `i32`error: aborting due to previous error
There’s a lot of punctuation in that message, but the core of it makessense: you cannot index with an i32.

92
Out-of-bounds AccessIf you try to access an index that doesn’t exist:
let v = vec![1, 2, 3];println!("Item 7 is ", v[7]);
then the current thread will panic with a message like this:
thread 'main' panicked at 'index out of bounds: the lenis 3 but the index is 7'
If you want to handle out-of-bounds errors without panicking, you canuse methods like get or get_mut that return None when given an invalidindex:
let v = vec![1, 2, 3];match v.get(7)
Some(x) => println!("Item 7 is ", x),None => println!("Sorry, this vector is too short.")
IteratingOnce you have a vector, you can iterate through its elements with for.There are three versions:
let mut v = vec![1, 2, 3, 4, 5];
for i in &v println!("A reference to ", i);
for i in &mut v println!("A mutable reference to ", i);
for i in v println!("Take ownership of the vector and its element
", i);
Note: You cannot use the vector again once you have iterated by takingownership of the vector. You can iterate the vector multiple times by

93
taking a reference to the vector whilst iterating. For example, thefollowing code does not compile.
let v = vec![1, 2, 3, 4, 5];
for i in v println!("Take ownership of the vector and its element
", i);
for i in v println!("Take ownership of the vector and its element
", i);
Whereas the following works perfectly,
let v = vec![1, 2, 3, 4, 5];
for i in &v println!("This is a reference to ", i);
for i in &v println!("This is a reference to ", i);
Vectors have many more useful methods, which you can read about intheir API documentation.
OwnershipThis is the first of three sections presenting Rust’s ownership system.This is one of Rust’s most distinct and compelling features, with whichRust developers should become quite acquainted. Ownership is howRust achieves its largest goal, memory safety. There are a few distinctconcepts, each with its own chapter:
• ownership, which you’re reading now
• borrowing, and their associated feature ‘references’
• lifetimes, an advanced concept of borrowing

94
These three chapters are related, and in order. You’ll need all three tofully understand the ownership system.
MetaBefore we get to the details, two important notes about the ownershipsystem.
Rust has a focus on safety and speed. It accomplishes these goalsthrough many ‘zero-cost abstractions’, which means that in Rust, ab-stractions cost as little as possible in order to make them work. Theownership system is a prime example of a zero-cost abstraction. All ofthe analysis we’ll talk about in this guide is done at compile time. Youdo not pay any run-time cost for any of these features.
However, this system does have a certain cost: learning curve. Manynew users to Rust experience something we like to call ‘fighting with theborrow checker’, where the Rust compiler refuses to compile a programthat the author thinks is valid. This often happens because the pro-grammer’s mental model of how ownership should work doesn’t matchthe actual rules that Rust implements. You probably will experiencesimilar things at first. There is good news, however: more experiencedRust developers report that once they work with the rules of the own-ership system for a period of time, they fight the borrow checker lessand less.
With that in mind, let’s learn about ownership.
OwnershipVariable bindings have a property in Rust: they ‘have ownership’ ofwhat they’re bound to. This means that when a binding goes out ofscope, Rust will free the bound resources. For example:
fn foo() let v = vec![1, 2, 3];
When v comes into scope, a new vector is created on the stack, and itallocates space on the heap for its elements. When v goes out of scopeat the end of foo(), Rust will clean up everything related to the vector,even the heap-allocated memory. This happens deterministically, at theend of the scope.

95
We covered vectors in the previous chapter; we use them here as anexample of a type that allocates space on the heap at runtime. Theybehave like arrays, except their size may change by push()ing moreelements onto them.
Vectors have a generic type Vec<T>, so in this example v will havetype Vec<i32>. We’ll cover generics in detail in a later chapter.
Move semanticsThere’s some more subtlety here, though: Rust ensures that there isexactly one binding to any given resource. For example, if we have avector, we can assign it to another binding:
let v = vec![1, 2, 3];
let v2 = v;
But, if we try to use v afterwards, we get an error:
let v = vec![1, 2, 3];
let v2 = v;
println!("v[0] is: ", v[0]);
It looks like this:
error: use of moved value: `v`println!("v[0] is: ", v[0]);
^
A similar thing happens if we define a function which takes ownership,and try to use something after we’ve passed it as an argument:
fn take(v: Vec<i32>) // What happens here isn’t important.
let v = vec![1, 2, 3];
take(v);

96
println!("v[0] is: ", v[0]);
Same error: ‘use of moved value’. When we transfer ownership tosomething else, we say that we’ve ‘moved’ the thing we refer to. Youdon’t need some sort of special annotation here, it’s the default thingthat Rust does.
The detailsThe reason that we cannot use a binding after we’ve moved it is subtle,but important.
When we write code like this:let x = 10;
Rust allocates memory for an integer i32 on the stack, copies the bitpattern representing the value of 10 to the allocated memory and bindsthe variable name x to this memory region for future reference.
Now consider the following code fragment:
let v = vec![1, 2, 3];
let mut v2 = v;
The first line allocates memory for the vector object v on the stacklike it does for x above. But in addition to that it also allocates somememory on the heap for the actual data ([1, 2, 3]). Rust copies theaddress of this heap allocation to an internal pointer, which is part ofthe vector object placed on the stack (let’s call it the data pointer).
It is worth pointing out (even at the risk of stating the obvious) thatthe vector object and its data live in separate memory regions insteadof being a single contiguous memory allocation (due to reasons we willnot go into at this point of time). These two parts of the vector (theone on the stack and one on the heap) must agree with each other atall times with regards to things like the length, capacity, etc.
When we move v to v2, Rust actually does a bitwise copy of thevector object v into the stack allocation represented by v2. This shallowcopy does not create a copy of the heap allocation containing the actualdata. Which means that there would be two pointers to the contents ofthe vector both pointing to the same memory allocation on the heap.It would violate Rust’s safety guarantees by introducing a data race ifone could access both v and v2 at the same time.
For example if we truncated the vector to just two elements throughv2:

97
# let v = vec![1, 2, 3];# let mut v2 = v;v2.truncate(2);
and v were still accessible we’d end up with an invalid vector since vwould not know that the heap data has been truncated. Now, the partof the vector v on the stack does not agree with the corresponding parton the heap. v still thinks there are three elements in the vector andwill happily let us access the non existent element v[2] but as youmight already know this is a recipe for disaster. Especially because itmight lead to a segmentation fault or worse allow an unauthorized userto read from memory to which they don’t have access.
This is why Rust forbids using v after we’ve done the move.It’s also important to note that optimizations may remove the actual
copy of the bytes on the stack, depending on circumstances. So it maynot be as inefficient as it initially seems.
Copy typesWe’ve established that when ownership is transferred to another bind-ing, you cannot use the original binding. However, there’s a trait thatchanges this behavior, and it’s called Copy. We haven’t discussed traitsyet, but for now, you can think of them as an annotation to a particulartype that adds extra behavior. For example:
let v = 1;
let v2 = v;
println!("v is: ", v);
In this case, v is an i32, which implements the Copy trait. This meansthat, just like a move, when we assign v to v2, a copy of the data ismade. But, unlike a move, we can still use v afterward. This is becausean i32 has no pointers to data somewhere else, copying it is a full copy.
All primitive types implement the Copy trait and their ownershipis therefore not moved like one would assume, following the ‘ownershiprules’. To give an example, the two following snippets of code onlycompile because the i32 and bool types implement the Copy trait.

98
fn main() let a = 5;
let _y = double(a);println!("", a);
fn double(x: i32) -> i32 x * 2
fn main() let a = true;
let _y = change_truth(a);println!("", a);
fn change_truth(x: bool) -> bool !x
If we had used types that do not implement the Copy trait, we wouldhave gotten a compile error because we tried to use a moved value.
error: use of moved value: `a`println!("", a);
^
We will discuss how to make your own types Copy in the traits section.
More than ownershipOf course, if we had to hand ownership back with every function wewrote:
fn foo(v: Vec<i32>) -> Vec<i32> // Do stuff with `v`.
// Hand back ownership.

99
v
This would get very tedious. It gets worse the more things we want totake ownership of:
fn foo(v1: Vec<i32>, v2: Vec<i32>) -> (Vec<i32>, Vec<i32>,i32)
// Do stuff with `v1` and `v2`.
// Hand back ownership, and the result of our function.
(v1, v2, 42)
let v1 = vec![1, 2, 3];let v2 = vec![1, 2, 3];
let (v1, v2, answer) = foo(v1, v2);
Ugh! The return type, return line, and calling the function gets waymore complicated.
Luckily, Rust offers a feature which helps us solve this problem. It’scalled borrowing and is the topic of the next section!
References and BorrowingThis is the second of three sections presenting Rust’s ownership system.This is one of Rust’s most distinct and compelling features, with whichRust developers should become quite acquainted. Ownership is howRust achieves its largest goal, memory safety. There are a few distinctconcepts, each with its own chapter:
• ownership, the key concept
• borrowing, which you’re reading now
• lifetimes, an advanced concept of borrowing
These three chapters are related, and in order. You’ll need all three tofully understand the ownership system.

100
MetaBefore we get to the details, two important notes about the ownershipsystem.
Rust has a focus on safety and speed. It accomplishes these goalsthrough many ‘zero-cost abstractions’, which means that in Rust, ab-stractions cost as little as possible in order to make them work. Theownership system is a prime example of a zero-cost abstraction. All ofthe analysis we’ll talk about in this guide is done at compile time. Youdo not pay any run-time cost for any of these features.
However, this system does have a certain cost: learning curve. Manynew users to Rust experience something we like to call ‘fighting with theborrow checker’, where the Rust compiler refuses to compile a programthat the author thinks is valid. This often happens because the pro-grammer’s mental model of how ownership should work doesn’t matchthe actual rules that Rust implements. You probably will experiencesimilar things at first. There is good news, however: more experiencedRust developers report that once they work with the rules of the own-ership system for a period of time, they fight the borrow checker lessand less.
With that in mind, let’s learn about borrowing.
BorrowingAt the end of the ownership section, we had a nasty function thatlooked like this:
fn foo(v1: Vec<i32>, v2: Vec<i32>) -> (Vec<i32>, Vec<i32>,i32)
// Do stuff with `v1` and `v2`.
// Hand back ownership, and the result of our function.
(v1, v2, 42)
let v1 = vec![1, 2, 3];let v2 = vec![1, 2, 3];
let (v1, v2, answer) = foo(v1, v2);

101
This is not idiomatic Rust, however, as it doesn’t take advantage ofborrowing. Here’s the first step:
fn foo(v1: &Vec<i32>, v2: &Vec<i32>) -> i32 // Do stuff with `v1` and `v2`.
// Return the answer.42
let v1 = vec![1, 2, 3];let v2 = vec![1, 2, 3];
let answer = foo(&v1, &v2);
// We can use `v1` and `v2` here!
A more concrete example:
fn main() // Don't worry if you don't understand how `fold` works,
the point here is that an immutable reference is borrowed.
fn sum_vec(v: &Vec<i32>) -> i32 v.iter().fold(0, |a, &b| a + b)
// Borrow two vectors and sum them.// This kind of borrowing does not allow mutation through
the borrowed reference.fn foo(v1: &Vec<i32>, v2: &Vec<i32>) -> i32
// Do stuff with `v1` and `v2`.let s1 = sum_vec(v1);let s2 = sum_vec(v2);// Return the answer.s1 + s2
let v1 = vec![1, 2, 3];let v2 = vec![4, 5, 6];
let answer = foo(&v1, &v2);println!("", answer);

102
Instead of taking Vec<i32>s as our arguments, we take a reference:&Vec<i32>. And instead of passing v1 and v2 directly, we pass &v1and &v2. We call the &T type a ‘reference’, and rather than owningthe resource, it borrows ownership. A binding that borrows somethingdoes not deallocate the resource when it goes out of scope. This meansthat after the call to foo(), we can use our original bindings again.
References are immutable, like bindings. This means that inside offoo(), the vectors can’t be changed at all:
fn foo(v: &Vec<i32>) v.push(5);
let v = vec![];
foo(&v);
will give us this error:
error: cannot borrow immutable borrowed content `*v` asmutablev.push(5);^
Pushing a value mutates the vector, and so we aren’t allowed to do it.
&mut referencesThere’s a second kind of reference: &mut T. A ‘mutable reference’ allowsyou to mutate the resource you’re borrowing. For example:
let mut x = 5;
let y = &mut x;*y += 1;
println!("", x);
This will print 6. We make y a mutable reference to x, then add oneto the thing y points at. You’ll notice that x had to be marked mut as
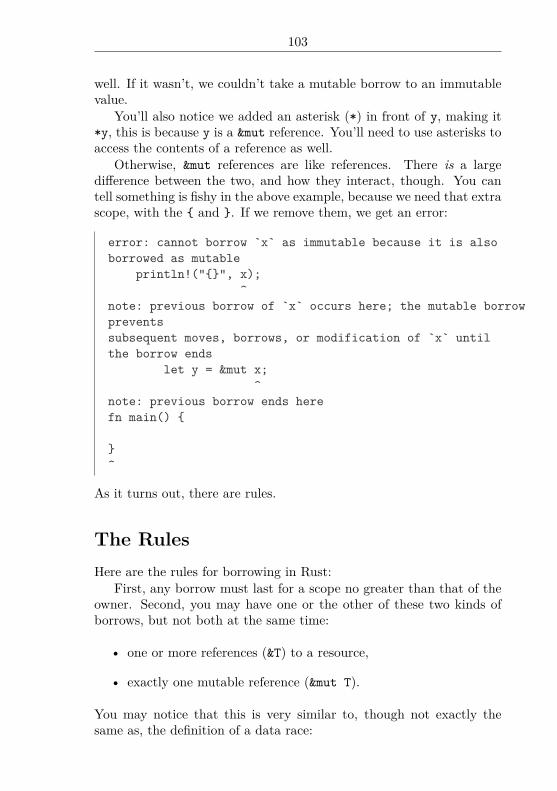
103
well. If it wasn’t, we couldn’t take a mutable borrow to an immutablevalue.
You’ll also notice we added an asterisk (*) in front of y, making it*y, this is because y is a &mut reference. You’ll need to use asterisks toaccess the contents of a reference as well.
Otherwise, &mut references are like references. There is a largedifference between the two, and how they interact, though. You cantell something is fishy in the above example, because we need that extrascope, with the and . If we remove them, we get an error:
error: cannot borrow `x` as immutable because it is alsoborrowed as mutable
println!("", x);^
note: previous borrow of `x` occurs here; the mutable borrowpreventssubsequent moves, borrows, or modification of `x` untilthe borrow ends
let y = &mut x;^
note: previous borrow ends herefn main()
^
As it turns out, there are rules.
The RulesHere are the rules for borrowing in Rust:
First, any borrow must last for a scope no greater than that of theowner. Second, you may have one or the other of these two kinds ofborrows, but not both at the same time:
• one or more references (&T) to a resource,
• exactly one mutable reference (&mut T).
You may notice that this is very similar to, though not exactly thesame as, the definition of a data race:

104
There is a ‘data race’ when two or more pointers accessthe same memory location at the same time, where at leastone of them is writing, and the operations are not synchro-nized.
With references, you may have as many as you’d like, since none ofthem are writing. However, as we can only have one &mut at a time, itis impossible to have a data race. This is how Rust prevents data racesat compile time: we’ll get errors if we break the rules.
With this in mind, let’s consider our example again.
Thinking in scopesHere’s the code:fn main()
let mut x = 5;let y = &mut x;
*y += 1;
println!("", x);
This code gives us this error:error: cannot borrow `x` as immutable because it is alsoborrowed as mutable
println!("", x);^
This is because we’ve violated the rules: we have a &mut T pointing tox, and so we aren’t allowed to create any &Ts. It’s one or the other.The note hints at how to think about this problem:note: previous borrow ends herefn main()
^
In other words, the mutable borrow is held through the rest of ourexample. What we want is for the mutable borrow by y to end so thatthe resource can be returned to the owner, x. x can then provide animmutable borrow to println!. In Rust, borrowing is tied to the scopethat the borrow is valid for. And our scopes look like this:

105
fn main() let mut x = 5;
let y = &mut x; // -+ &mut borrow of `x` startshere.
// |*y += 1; // |
// |println!("", x); // -+ - Try to borrow `x` here.
// -+ &mut borrow of `x` ends here.
The scopes conflict: we can’t make an &x while y is in scope.So when we add the curly braces:
let mut x = 5;
let y = &mut x; // -+ &mut borrow starts here.*y += 1; // |
// -+ ... and ends here.
println!("", x); // <- Try to borrow `x` here.
There’s no problem. Our mutable borrow goes out of scope before wecreate an immutable one. So scope is the key to seeing how long aborrow lasts for.
Issues borrowing preventsWhy have these restrictive rules? Well, as we noted, these rules preventdata races. What kinds of issues do data races cause? Here are a few.
Iterator invalidation
One example is ‘iterator invalidation’, which happens when you try tomutate a collection that you’re iterating over. Rust’s borrow checkerprevents this from happening:
let mut v = vec![1, 2, 3];
for i in &v

106
println!("", i);
This prints out one through three. As we iterate through the vector,we’re only given references to the elements. And v is itself borrowed asimmutable, which means we can’t change it while we’re iterating:
let mut v = vec![1, 2, 3];
for i in &v println!("", i);v.push(34);
Here’s the error:
error: cannot borrow `v` as mutable because it is alsoborrowed as immutable
v.push(34);^
note: previous borrow of `v` occurs here; the immutableborrow preventssubsequent moves or mutable borrows of `v` until the borrowendsfor i in &v
^note: previous borrow ends herefor i in &v
println!(“”, i);v.push(34);
^
We can’t modify v because it’s borrowed by the loop.
Use after free
References must not live longer than the resource they refer to. Rustwill check the scopes of your references to ensure that this is true.
If Rust didn’t check this property, we could accidentally use a ref-erence which was invalid. For example:

107
let y: &i32;
let x = 5;y = &x;
println!("", y);
We get this error:
error: `x` does not live long enoughy = &x;
^note: reference must be valid for the block suffix followingstatement 0 at2:16...let y: &i32;
let x = 5;y = &x;
note: ...but borrowed value is only valid for the blocksuffix followingstatement 0 at 4:18
let x = 5;y = &x;
In other words, y is only valid for the scope where x exists. As soon asx goes away, it becomes invalid to refer to it. As such, the error saysthat the borrow ‘doesn’t live long enough’ because it’s not valid for theright amount of time.
The same problem occurs when the reference is declared before thevariable it refers to. This is because resources within the same scopeare freed in the opposite order they were declared:
let y: &i32;let x = 5;y = &x;

108
println!("", y);
We get this error:
error: `x` does not live long enoughy = &x;
^note: reference must be valid for the block suffix followingstatement 0 at2:16...
let y: &i32;let x = 5;y = &x;
println!("", y);
note: ...but borrowed value is only valid for the blocksuffix followingstatement 1 at 3:14
let x = 5;y = &x;
println!("", y);
In the above example, y is declared before x, meaning that y lives longerthan x, which is not allowed.
LifetimesThis is the last of three sections presenting Rust’s ownership system.This is one of Rust’s most distinct and compelling features, with whichRust developers should become quite acquainted. Ownership is howRust achieves its largest goal, memory safety. There are a few distinctconcepts, each with its own chapter:
• ownership, the key concept
• borrowing, and their associated feature ‘references’
• lifetimes, which you’re reading now

109
These three chapters are related, and in order. You’ll need all three tofully understand the ownership system.
MetaBefore we get to the details, two important notes about the ownershipsystem.
Rust has a focus on safety and speed. It accomplishes these goalsthrough many ‘zero-cost abstractions’, which means that in Rust, ab-stractions cost as little as possible in order to make them work. Theownership system is a prime example of a zero-cost abstraction. All ofthe analysis we’ll talk about in this guide is done at compile time. Youdo not pay any run-time cost for any of these features.
However, this system does have a certain cost: learning curve. Manynew users to Rust experience something we like to call ‘fighting with theborrow checker’, where the Rust compiler refuses to compile a programthat the author thinks is valid. This often happens because the pro-grammer’s mental model of how ownership should work doesn’t matchthe actual rules that Rust implements. You probably will experiencesimilar things at first. There is good news, however: more experiencedRust developers report that once they work with the rules of the own-ership system for a period of time, they fight the borrow checker lessand less.
With that in mind, let’s learn about lifetimes.
LifetimesLending out a reference to a resource that someone else owns can becomplicated. For example, imagine this set of operations:
1. I acquire a handle to some kind of resource.
2. I lend you a reference to the resource.
3. I decide I’m done with the resource, and deallocate it, while youstill have your reference.
4. You decide to use the resource.
Uh oh! Your reference is pointing to an invalid resource. This is calleda dangling pointer or ‘use after free’, when the resource is memory. Asmall example of such a situation would be:

110
let r; // Introduce reference: `r`.
let i = 1; // Introduce scoped value: `i`.r = &i; // Store reference of `i` in `r`.
// `i` goes out of scope and is dropped.
println!("", r); // `r` still refers to `i`.
To fix this, we have to make sure that step four never happens afterstep three. In the small example above the Rust compiler is able toreport the issue as it can see the lifetimes of the various values in thefunction.
When we have a function that takes arguments by reference thesituation becomes more complex. Consider the following example:
fn skip_prefix(line: &str, prefix: &str) -> &str // ...
# line
let line = "lang:en=Hello World!";let lang = "en";
let v;
let p = format!("lang:=", lang); // -+ `p` comesinto scope.
v = skip_prefix(line, p.as_str()); // | // -+ `p` goesout of scope.println!("", v);
Here we have a function skip_prefix which takes two &str referencesas parameters and returns a single &str reference. We call it by passingin references to line and p: Two variables with different lifetimes.Now the safety of the println!-line depends on whether the referencereturned by skip_prefix function references the still living line orthe already dropped p string.
Because of the above ambiguity, Rust will refuse to compile theexample code. To get it to compile we need to tell the compiler moreabout the lifetimes of the references. This can be done by making the

111
lifetimes explicit in the function declaration:
fn skip_prefix<'a, 'b>(line: &'a str, prefix: &'b str)-> &'a str
// ...# line
Let’s examine the changes without going too deep into the syntax fornow - we’ll get to that later. The first change was adding the <’a,’b> after the method name. This introduces two lifetime parameters:’a and ’b. Next, each reference in the function signature was associ-ated with one of the lifetime parameters by adding the lifetime nameafter the &. This tells the compiler how the lifetimes between differentreferences are related.
As a result the compiler is now able to deduce that the return valueof skip_prefix has the same lifetime as the line parameter, whichmakes the v reference safe to use even after the p goes out of scope inthe original example.
In addition to the compiler being able to validate the usage of skip_prefix return value, it can also ensure that the implementation followsthe contract established by the function declaration. This is usefulespecially when you are implementing traits that are introduced laterin the book.
Note It’s important to understand that lifetime annotations aredescriptive, not prescriptive. This means that how long a reference isvalid is determined by the code, not by the annotations. The annota-tions, however, give information about lifetimes to the compiler thatuses them to check the validity of references. The compiler can doso without annotations in simple cases, but needs the programmer’ssupport in complex scenarios.
SyntaxThe ’a reads ‘the lifetime a’. Technically, every reference has somelifetime associated with it, but the compiler lets you elide (i.e. omit,see “Lifetime Elision” below) them in common cases. Before we get tothat, though, let’s look at a short example with explicit lifetimes:
fn bar<'a>(...)
We previously talked a little about function syntax, but we didn’t dis-cuss the <>s after a function’s name. A function can have ‘generic

112
parameters’ between the <>s, of which lifetimes are one kind. We’lldiscuss other kinds of generics later in the book, but for now, let’sfocus on the lifetimes aspect.
We use <> to declare our lifetimes. This says that bar has onelifetime, ’a. If we had two reference parameters with different lifetimes,it would look like this:
fn bar<'a, 'b>(...)
Then in our parameter list, we use the lifetimes we’ve named:
...(x: &'a i32)
If we wanted a &mut reference, we’d do this:
...(x: &'a mut i32)
If you compare &mut i32 to &’a mut i32, they’re the same, it’s thatthe lifetime ’a has snuck in between the & and the mut i32. We read&mut i32 as ‘a mutable reference to an i32’ and &’a mut i32 as ‘amutable reference to an i32 with the lifetime ’a’.
In structsYou’ll also need explicit lifetimes when working with structs that con-tain references:
struct Foo<'a> x: &'a i32,
fn main() let y = &5; // This is the same as `let _y = 5; let
y = &_y;`.let f = Foo x: y ;
println!("", f.x);
As you can see, structs can also have lifetimes. In a similar way tofunctions,

113
struct Foo<'a> # x: &'a i32,#
declares a lifetime, and
# struct Foo<'a> x: &'a i32,#
uses it. So why do we need a lifetime here? We need to ensure that anyreference to a Foo cannot outlive the reference to an i32 it contains.
impl blocksLet’s implement a method on Foo:
struct Foo<'a> x: &'a i32,
impl<'a> Foo<'a> fn x(&self) -> &'a i32 self.x
fn main() let y = &5; // This is the same as `let _y = 5; let
y = &_y;`.let f = Foo x: y ;
println!("x is: ", f.x());
As you can see, we need to declare a lifetime for Foo in the impl line.We repeat ’a twice, like on functions: impl<’a> defines a lifetime ’a,and Foo<’a> uses it.
Multiple lifetimesIf you have multiple references, you can use the same lifetime multipletimes:

114
fn x_or_y<'a>(x: &'a str, y: &'a str) -> &'a str # x#
This says that x and y both are alive for the same scope, and that thereturn value is also alive for that scope. If you wanted x and y to havedifferent lifetimes, you can use multiple lifetime parameters:
fn x_or_y<'a, 'b>(x: &'a str, y: &'b str) -> &'a str # x#
In this example, x and y have different valid scopes, but the returnvalue has the same lifetime as x.
Thinking in scopesA way to think about lifetimes is to visualize the scope that a referenceis valid for. For example:
fn main() let y = &5; // -+ `y` comes into scope.
// |// Stuff... // |
// | // -+ `y` goes out of scope.
Adding in our Foo:
struct Foo<'a> x: &'a i32,
fn main() let y = &5; // -+ `y` comes into scope.let f = Foo x: y ; // -+ `f` comes into scope.
// |// Stuff... // |
// | // -+ `f` and `y` go out of scope.
Our f lives within the scope of y, so everything works. What if itdidn’t? This code won’t work:

115
struct Foo<'a> x: &'a i32,
fn main() let x; // -+ `x` comes into scope.
// | // |
let y = &5; // ---+ `y` comes into scope.
let f = Foo x: y ; // ---+ `f` comes into scope.
x = &f.x; // | | This causes an error.
// ---+ `f` and y go outof scope.
// |println!("", x); // |
// -+ `x` goes out of scope.
Whew! As you can see here, the scopes of f and y are smaller thanthe scope of x. But when we do x = &f.x, we make x a reference tosomething that’s about to go out of scope.
Named lifetimes are a way of giving these scopes a name. Givingsomething a name is the first step towards being able to talk about it.
’staticThe lifetime named ‘static’ is a special lifetime. It signals that some-thing has the lifetime of the entire program. Most Rust programmersfirst come across ’static when dealing with strings:
let x: &'static str = "Hello, world.";
String literals have the type &’static str because the reference isalways alive: they are baked into the data segment of the final binary.Another example are globals:
static FOO: i32 = 5;let x: &'static i32 = &FOO;

116
This adds an i32 to the data segment of the binary, and x is a referenceto it.
Lifetime ElisionRust supports powerful local type inference in the bodies of functions,but it deliberately does not perform any reasoning about types for itemsignatures. However, for ergonomic reasons, a very restricted secondaryinference algorithm called “lifetime elision” does apply when judginglifetimes. Lifetime elision is concerned solely with inferring lifetime pa-rameters using three easily memorizable and unambiguous rules. Thismeans lifetime elision acts as a shorthand for writing an item signature,while not hiding away the actual types involved as full local inferencewould if applied to it.
When talking about lifetime elision, we use the terms input lifetimeand output lifetime. An input lifetime is a lifetime associated with aparameter of a function, and an output lifetime is a lifetime associatedwith the return value of a function. For example, this function has aninput lifetime:
fn foo<'a>(bar: &'a str)
This one has an output lifetime:
fn foo<'a>() -> &'a str
This one has a lifetime in both positions:
fn foo<'a>(bar: &'a str) -> &'a str
Here are the three rules:
• Each elided lifetime in a function’s arguments becomes a distinctlifetime parameter.
• If there is exactly one input lifetime, elided or not, that lifetimeis assigned to all elided lifetimes in the return values of that func-tion.
• If there are multiple input lifetimes, but one of them is &self or&mut self, the lifetime of self is assigned to all elided outputlifetimes.
Otherwise, it is an error to elide an output lifetime.

117
Examples
Here are some examples of functions with elided lifetimes. We’ve pairedeach example of an elided lifetime with its expanded form.
fn print(s: &str); // elidedfn print<'a>(s: &'a str); // expanded
fn debug(lvl: u32, s: &str); // elidedfn debug<'a>(lvl: u32, s: &'a str); // expanded
In the preceding example, lvl doesn’t need a lifetime because it’s nota reference (&). Only things relating to references (such as a structwhich contains a reference) need lifetimes.
fn substr(s: &str, until: u32) -> &str; // elidedfn substr<'a>(s: &'a str, until: u32) -> &'a str; // expanded
fn get_str() -> &str; // ILLEGAL, no inputs
fn frob(s: &str, t: &str) -> &str; // ILLEGAL, two inputsfn frob<'a, 'b>(s: &'a str, t: &'b str) -> &str; // Expanded:Output lifetime is ambiguous
fn get_mut(&mut self) -> &mut T; // elidedfn get_mut<'a>(&'a mut self) -> &'a mut T; // expanded
fn args<T: ToCStr>(&mut self, args: &[T]) -> &mut Command;// elidedfn args<'a, 'b, T: ToCStr>(&'a mut self, args: &'b [T])-> &'a mut Command; // expanded
fn new(buf: &mut [u8]) -> BufWriter; // elidedfn new<'a>(buf: &'a mut [u8]) -> BufWriter<'a>; // expanded
MutabilityMutability, the ability to change something, works a bit differently inRust than in other languages. The first aspect of mutability is its non-default status:
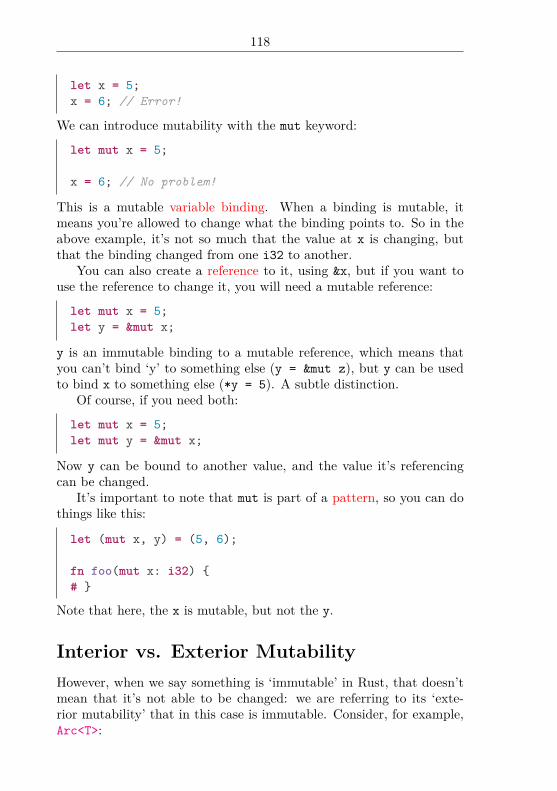
118
let x = 5;x = 6; // Error!
We can introduce mutability with the mut keyword:
let mut x = 5;
x = 6; // No problem!
This is a mutable variable binding. When a binding is mutable, itmeans you’re allowed to change what the binding points to. So in theabove example, it’s not so much that the value at x is changing, butthat the binding changed from one i32 to another.
You can also create a reference to it, using &x, but if you want touse the reference to change it, you will need a mutable reference:
let mut x = 5;let y = &mut x;
y is an immutable binding to a mutable reference, which means thatyou can’t bind ‘y’ to something else (y = &mut z), but y can be usedto bind x to something else (*y = 5). A subtle distinction.
Of course, if you need both:
let mut x = 5;let mut y = &mut x;
Now y can be bound to another value, and the value it’s referencingcan be changed.
It’s important to note that mut is part of a pattern, so you can dothings like this:
let (mut x, y) = (5, 6);
fn foo(mut x: i32) #
Note that here, the x is mutable, but not the y.
Interior vs. Exterior MutabilityHowever, when we say something is ‘immutable’ in Rust, that doesn’tmean that it’s not able to be changed: we are referring to its ‘exte-rior mutability’ that in this case is immutable. Consider, for example,Arc<T>:

119
use std::sync::Arc;
let x = Arc::new(5);let y = x.clone();
When we call clone(), the Arc<T> needs to update the reference count.Yet we’ve not used any muts here, x is an immutable binding, and wedidn’t take &mut 5 or anything. So what gives?
To understand this, we have to go back to the core of Rust’s guidingphilosophy, memory safety, and the mechanism by which Rust guaran-tees it, the ownership system, and more specifically, borrowing:
You may have one or the other of these two kinds ofborrows, but not both at the same time:
• one or more references (&T) to a resource,• exactly one mutable reference (&mut T).
So, that’s the real definition of ‘immutability’: is this safe to have twopointers to? In Arc<T>’s case, yes: the mutation is entirely containedinside the structure itself. It’s not user facing. For this reason, it handsout &T with clone(). If it handed out &mut Ts, though, that would bea problem.
Other types, like the ones in the std::cell module, have the op-posite: interior mutability. For example:
use std::cell::RefCell;
let x = RefCell::new(42);
let y = x.borrow_mut();
RefCell hands out &mut references to what’s inside of it with the borrow_mut() method. Isn’t that dangerous? What if we do:
use std::cell::RefCell;
let x = RefCell::new(42);
let y = x.borrow_mut();let z = x.borrow_mut();# (y, z);

120
This will in fact panic, at runtime. This is what RefCell does: itenforces Rust’s borrowing rules at runtime, and panic!s if they’re vio-lated. This allows us to get around another aspect of Rust’s mutabilityrules. Let’s talk about it first.
Field-level mutabilityMutability is a property of either a borrow (&mut) or a binding (letmut). This means that, for example, you cannot have a struct withsome fields mutable and some immutable:
struct Point x: i32,mut y: i32, // Nope.
The mutability of a struct is in its binding:
struct Point x: i32,y: i32,
let mut a = Point x: 5, y: 6 ;
a.x = 10;
let b = Point x: 5, y: 6 ;
b.x = 10; // Error: cannot assign to immutable field `b.x`.
However, by using Cell<T>, you can emulate field-level mutability:
use std::cell::Cell;
struct Point x: i32,y: Cell<i32>,
let point = Point x: 5, y: Cell::new(6) ;

121
point.y.set(7);
println!("y: :?", point.y);
This will print y: Cell value: 7 . We’ve successfully updatedy.
Structsstructs are a way of creating more complex data types. For example, ifwe were doing calculations involving coordinates in 2D space, we wouldneed both an x and a y value:
let origin_x = 0;let origin_y = 0;
A struct lets us combine these two into a single, unified datatype withx and y as field labels:
struct Point x: i32,y: i32,
fn main() let origin = Point x: 0, y: 0 ; // origin: Point
println!("The origin is at (, )", origin.x, origin.y);
There’s a lot going on here, so let’s break it down. We declare a structwith the struct keyword, and then with a name. By convention,structs begin with a capital letter and are camel cased: PointInSpace,not Point_In_Space.
We can create an instance of our struct via let, as usual, but weuse a key: value style syntax to set each field. The order doesn’tneed to be the same as in the original declaration.
Finally, because fields have names, we can access them through dotnotation: origin.x.
The values in structs are immutable by default, like other bindingsin Rust. Use mut to make them mutable:
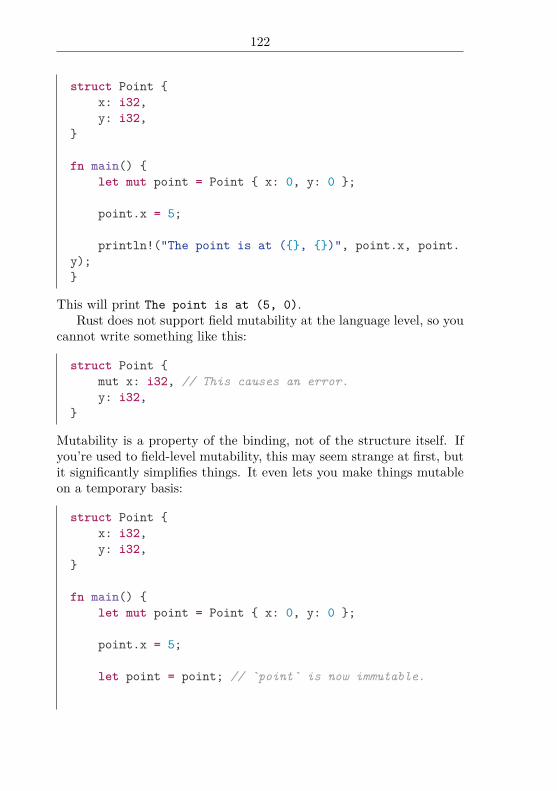
122
struct Point x: i32,y: i32,
fn main() let mut point = Point x: 0, y: 0 ;
point.x = 5;
println!("The point is at (, )", point.x, point.y);
This will print The point is at (5, 0).Rust does not support field mutability at the language level, so you
cannot write something like this:
struct Point mut x: i32, // This causes an error.y: i32,
Mutability is a property of the binding, not of the structure itself. Ifyou’re used to field-level mutability, this may seem strange at first, butit significantly simplifies things. It even lets you make things mutableon a temporary basis:
struct Point x: i32,y: i32,
fn main() let mut point = Point x: 0, y: 0 ;
point.x = 5;
let point = point; // `point` is now immutable.

123
point.y = 6; // This causes an error.
Your structure can still contain &mut references, which will let you dosome kinds of mutation:
struct Point x: i32,y: i32,
struct PointRef<'a> x: &'a mut i32,y: &'a mut i32,
fn main() let mut point = Point x: 0, y: 0 ;
let r = PointRef x: &mut point.x, y: &mut point.
y ;
*r.x = 5;*r.y = 6;
assert_eq!(5, point.x);assert_eq!(6, point.y);
Initialization of a data structure (struct, enum, union) can be simplifiedwhen fields of the data structure are initialized with variables of thesame names as the fields.
#[derive(Debug)]struct Person<'a>
name: &'a str,age: u8
fn main()
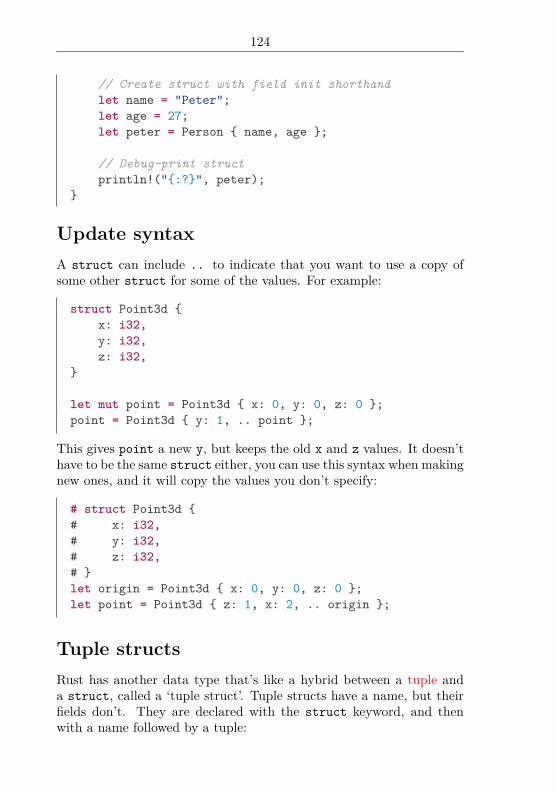
124
// Create struct with field init shorthandlet name = "Peter";let age = 27;let peter = Person name, age ;
// Debug-print structprintln!(":?", peter);
Update syntaxA struct can include .. to indicate that you want to use a copy ofsome other struct for some of the values. For example:
struct Point3d x: i32,y: i32,z: i32,
let mut point = Point3d x: 0, y: 0, z: 0 ;point = Point3d y: 1, .. point ;
This gives point a new y, but keeps the old x and z values. It doesn’thave to be the same struct either, you can use this syntax when makingnew ones, and it will copy the values you don’t specify:
# struct Point3d # x: i32,# y: i32,# z: i32,# let origin = Point3d x: 0, y: 0, z: 0 ;let point = Point3d z: 1, x: 2, .. origin ;
Tuple structsRust has another data type that’s like a hybrid between a tuple anda struct, called a ‘tuple struct’. Tuple structs have a name, but theirfields don’t. They are declared with the struct keyword, and thenwith a name followed by a tuple:

125
struct Color(i32, i32, i32);struct Point(i32, i32, i32);
let black = Color(0, 0, 0);let origin = Point(0, 0, 0);
Here, black and origin are not the same type, even though theycontain the same values.
The members of a tuple struct may be accessed by dot notation ordestructuring let, just like regular tuples:
# struct Color(i32, i32, i32);# struct Point(i32, i32, i32);# let black = Color(0, 0, 0);# let origin = Point(0, 0, 0);let black_r = black.0;let Point(_, origin_y, origin_z) = origin;
Patterns like Point(_, origin_y, origin_z) are also used in matchexpressions.
One case when a tuple struct is very useful is when it has only oneelement. We call this the ‘newtype’ pattern, because it allows you tocreate a new type that is distinct from its contained value and alsoexpresses its own semantic meaning:
struct Inches(i32);
let length = Inches(10);
let Inches(integer_length) = length;println!("length is inches", integer_length);
As above, you can extract the inner integer type through a destruc-turing let. In this case, the let Inches(integer_length) assigns 10to integer_length. We could have used dot notation to do the samething:
# struct Inches(i32);# let length = Inches(10);let integer_length = length.0;
It’s always possible to use a struct instead of a tuple struct, and canbe clearer. We could write Color and Point like this instead:
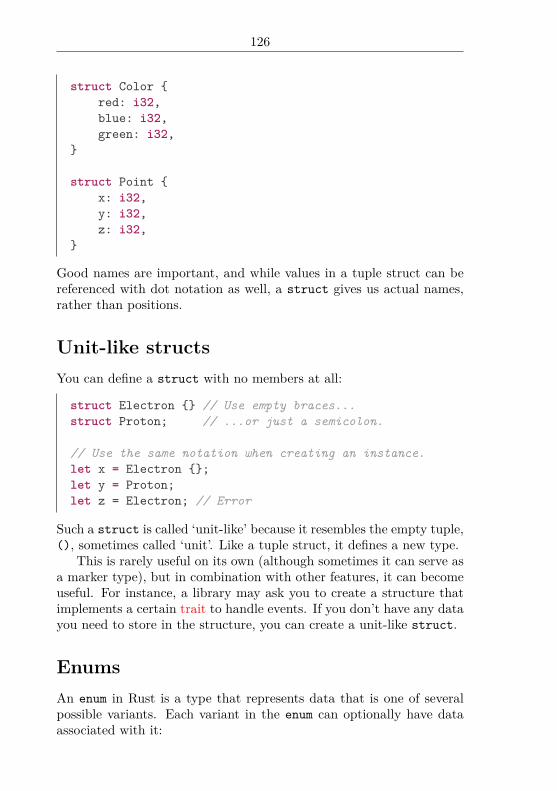
126
struct Color red: i32,blue: i32,green: i32,
struct Point x: i32,y: i32,z: i32,
Good names are important, and while values in a tuple struct can bereferenced with dot notation as well, a struct gives us actual names,rather than positions.
Unit-like structsYou can define a struct with no members at all:
struct Electron // Use empty braces...struct Proton; // ...or just a semicolon.
// Use the same notation when creating an instance.let x = Electron ;let y = Proton;let z = Electron; // Error
Such a struct is called ‘unit-like’ because it resembles the empty tuple,(), sometimes called ‘unit’. Like a tuple struct, it defines a new type.
This is rarely useful on its own (although sometimes it can serve asa marker type), but in combination with other features, it can becomeuseful. For instance, a library may ask you to create a structure thatimplements a certain trait to handle events. If you don’t have any datayou need to store in the structure, you can create a unit-like struct.
EnumsAn enum in Rust is a type that represents data that is one of severalpossible variants. Each variant in the enum can optionally have dataassociated with it:
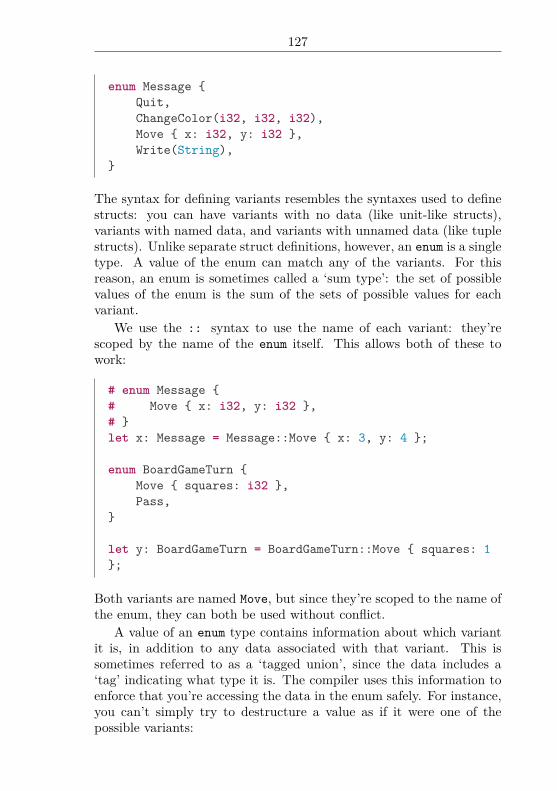
127
enum Message Quit,ChangeColor(i32, i32, i32),Move x: i32, y: i32 ,Write(String),
The syntax for defining variants resembles the syntaxes used to definestructs: you can have variants with no data (like unit-like structs),variants with named data, and variants with unnamed data (like tuplestructs). Unlike separate struct definitions, however, an enum is a singletype. A value of the enum can match any of the variants. For thisreason, an enum is sometimes called a ‘sum type’: the set of possiblevalues of the enum is the sum of the sets of possible values for eachvariant.
We use the :: syntax to use the name of each variant: they’rescoped by the name of the enum itself. This allows both of these towork:
# enum Message # Move x: i32, y: i32 ,# let x: Message = Message::Move x: 3, y: 4 ;
enum BoardGameTurn Move squares: i32 ,Pass,
let y: BoardGameTurn = BoardGameTurn::Move squares: 1;
Both variants are named Move, but since they’re scoped to the name ofthe enum, they can both be used without conflict.
A value of an enum type contains information about which variantit is, in addition to any data associated with that variant. This issometimes referred to as a ‘tagged union’, since the data includes a‘tag’ indicating what type it is. The compiler uses this information toenforce that you’re accessing the data in the enum safely. For instance,you can’t simply try to destructure a value as if it were one of thepossible variants:
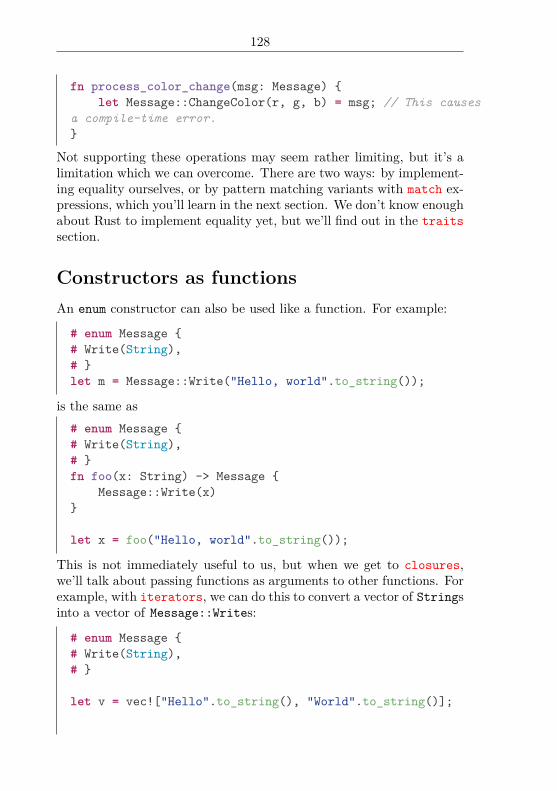
128
fn process_color_change(msg: Message) let Message::ChangeColor(r, g, b) = msg; // This causes
a compile-time error.
Not supporting these operations may seem rather limiting, but it’s alimitation which we can overcome. There are two ways: by implement-ing equality ourselves, or by pattern matching variants with match ex-pressions, which you’ll learn in the next section. We don’t know enoughabout Rust to implement equality yet, but we’ll find out in the traitssection.
Constructors as functionsAn enum constructor can also be used like a function. For example:
# enum Message # Write(String),# let m = Message::Write("Hello, world".to_string());
is the same as# enum Message # Write(String),# fn foo(x: String) -> Message
Message::Write(x)
let x = foo("Hello, world".to_string());
This is not immediately useful to us, but when we get to closures,we’ll talk about passing functions as arguments to other functions. Forexample, with iterators, we can do this to convert a vector of Stringsinto a vector of Message::Writes:
# enum Message # Write(String),#
let v = vec!["Hello".to_string(), "World".to_string()];

129
let v1: Vec<Message> = v.into_iter().map(Message::Write).collect();
MatchOften, a simple if/else isn’t enough, because you have more thantwo possible options. Also, conditions can get quite complex. Rusthas a keyword, match, that allows you to replace complicated if/elsegroupings with something more powerful. Check it out:
let x = 5;
match x 1 => println!("one"),2 => println!("two"),3 => println!("three"),4 => println!("four"),5 => println!("five"),_ => println!("something else"),
match takes an expression and then branches based on its value. Each‘arm’ of the branch is of the form val => expression. When the valuematches, that arm’s expression will be evaluated. It’s called match be-cause of the term ‘pattern matching’, which match is an implementationof. There’s a separate section on patterns that covers all the patternsthat are possible here.
One of the many advantages of match is it enforces ‘exhaustivenesschecking’. For example if we remove the last arm with the underscore_, the compiler will give us an error:
error: non-exhaustive patterns: `_` not covered
Rust is telling us that we forgot some value. The compiler infers fromx that it can have any 32bit integer value; for example -2,147,483,648to 2,147,483,647. The _ acts as a ‘catch-all’, and will catch all possiblevalues that aren’t specified in an arm of match. As you can see in theprevious example, we provide match arms for integers 1-5, if x is 6 orany other value, then it is caught by _.
match is also an expression, which means we can use it on the right-hand side of a let binding or directly where an expression is used:

130
let x = 5;
let number = match x 1 => "one",2 => "two",3 => "three",4 => "four",5 => "five",_ => "something else",
;
Sometimes it’s a nice way of converting something from one type toanother; in this example the integers are converted to String.
Matching on enumsAnother important use of the match keyword is to process the possiblevariants of an enum:
enum Message Quit,ChangeColor(i32, i32, i32),Move x: i32, y: i32 ,Write(String),
fn quit() /* ... */ fn change_color(r: i32, g: i32, b: i32) /* ... */ fn move_cursor(x: i32, y: i32) /* ... */
fn process_message(msg: Message) match msg
Message::Quit => quit(),Message::ChangeColor(r, g, b) => change_color(r,
g, b),Message::Move x, y: new_name_for_y => move_
cursor(x, new_name_for_y),Message::Write(s) => println!("", s),
;
Again, the Rust compiler checks exhaustiveness, so it demands that

131
you have a match arm for every variant of the enum. If you leave oneoff, it will give you a compile-time error unless you use _ or provide allpossible arms.
Unlike the previous uses of match, you can’t use the normal ifstatement to do this. You can use the if let statement, which can beseen as an abbreviated form of match.
PatternsPatterns are quite common in Rust. We use them in variable bindings,match expressions, and other places, too. Let’s go on a whirlwind tourof all of the things patterns can do!
A quick refresher: you can match against literals directly, and _acts as an ‘any’ case:
let x = 1;
match x 1 => println!("one"),2 => println!("two"),3 => println!("three"),_ => println!("anything"),
This prints one.It’s possible to create a binding for the value in the any case:
let x = 1;
match x y => println!("x: y: ", x, y),
This prints:
x: 1 y: 1
Note it is an error to have both a catch-all _ and a catch-all binding inthe same match block:let x = 1;
match x
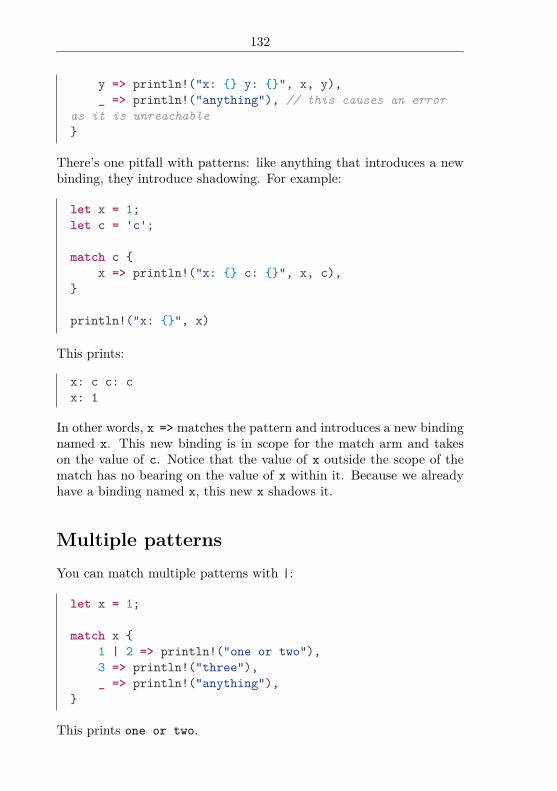
132
y => println!("x: y: ", x, y),_ => println!("anything"), // this causes an error
as it is unreachable
There’s one pitfall with patterns: like anything that introduces a newbinding, they introduce shadowing. For example:
let x = 1;let c = 'c';
match c x => println!("x: c: ", x, c),
println!("x: ", x)
This prints:
x: c c: cx: 1
In other words, x => matches the pattern and introduces a new bindingnamed x. This new binding is in scope for the match arm and takeson the value of c. Notice that the value of x outside the scope of thematch has no bearing on the value of x within it. Because we alreadyhave a binding named x, this new x shadows it.
Multiple patternsYou can match multiple patterns with |:
let x = 1;
match x 1 | 2 => println!("one or two"),3 => println!("three"),_ => println!("anything"),
This prints one or two.
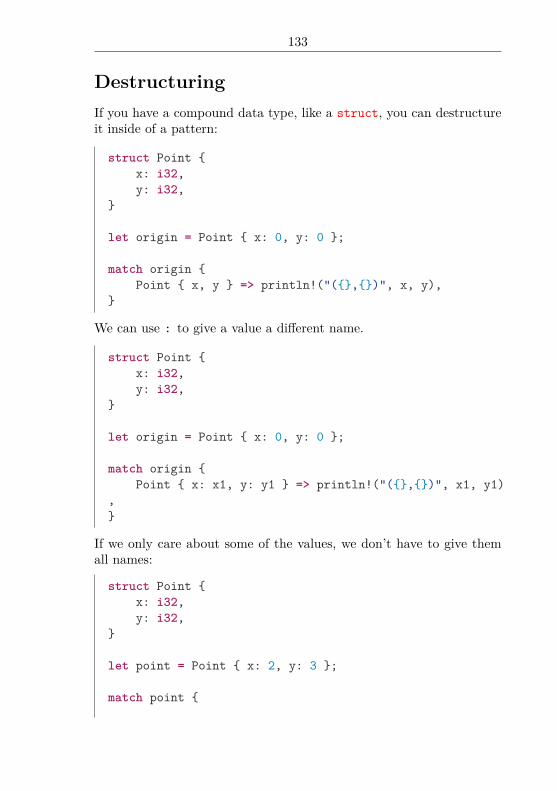
133
DestructuringIf you have a compound data type, like a struct, you can destructureit inside of a pattern:
struct Point x: i32,y: i32,
let origin = Point x: 0, y: 0 ;
match origin Point x, y => println!("(,)", x, y),
We can use : to give a value a different name.
struct Point x: i32,y: i32,
let origin = Point x: 0, y: 0 ;
match origin Point x: x1, y: y1 => println!("(,)", x1, y1)
,
If we only care about some of the values, we don’t have to give themall names:
struct Point x: i32,y: i32,
let point = Point x: 2, y: 3 ;
match point
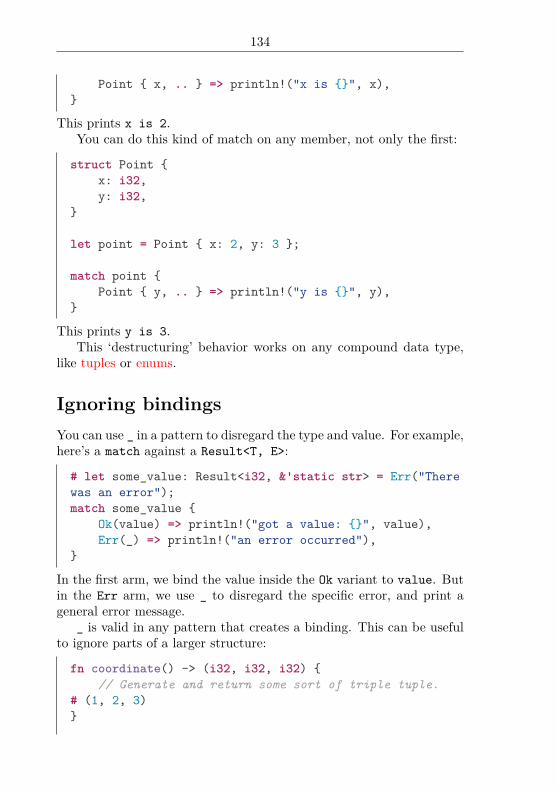
134
Point x, .. => println!("x is ", x),
This prints x is 2.You can do this kind of match on any member, not only the first:
struct Point x: i32,y: i32,
let point = Point x: 2, y: 3 ;
match point Point y, .. => println!("y is ", y),
This prints y is 3.This ‘destructuring’ behavior works on any compound data type,
like tuples or enums.
Ignoring bindingsYou can use _ in a pattern to disregard the type and value. For example,here’s a match against a Result<T, E>:
# let some_value: Result<i32, &'static str> = Err("Therewas an error");match some_value
Ok(value) => println!("got a value: ", value),Err(_) => println!("an error occurred"),
In the first arm, we bind the value inside the Ok variant to value. Butin the Err arm, we use _ to disregard the specific error, and print ageneral error message.
_ is valid in any pattern that creates a binding. This can be usefulto ignore parts of a larger structure:
fn coordinate() -> (i32, i32, i32) // Generate and return some sort of triple tuple.
# (1, 2, 3)

135
let (x, _, z) = coordinate();
Here, we bind the first and last element of the tuple to x and z, butignore the middle element.
It’s worth noting that using _ never binds the value in the firstplace, which means that the value does not move:
let tuple: (u32, String) = (5, String::from("five"));
// Here, tuple is moved, because the String moved:let (x, _s) = tuple;
// The next line would give "error: use of partially movedvalue: `tuple`".// println!("Tuple is: :?", tuple);
// However,
let tuple = (5, String::from("five"));
// Here, tuple is _not_ moved, as the String was nevermoved, and u32 is Copy:let (x, _) = tuple;
// That means this works:println!("Tuple is: :?", tuple);
This also means that any temporary variables will be dropped at theend of the statement:
// Here, the String created will be dropped immediately,as it’s not bound:
let _ = String::from(" hello ").trim();
You can also use .. in a pattern to disregard multiple values:
enum OptionalTuple Value(i32, i32, i32),Missing,

136
let x = OptionalTuple::Value(5, -2, 3);
match x OptionalTuple::Value(..) => println!("Got a tuple!")
,OptionalTuple::Missing => println!("No such luck.")
,
This prints Got a tuple!.
ref and ref mutIf you want to get a reference, use the ref keyword:
let x = 5;
match x ref r => println!("Got a reference to ", r),
This prints Got a reference to 5.Here, the r inside the match has the type &i32. In other words, the
ref keyword creates a reference, for use in the pattern. If you need amutable reference, ref mut will work in the same way:
let mut x = 5;
match x ref mut mr => println!("Got a mutable reference to
", mr),
RangesYou can match a range of values with ...:
let x = 1;
match x 1 ... 5 => println!("one through five"),_ => println!("anything"),

137
This prints one through five.Ranges are mostly used with integers and chars:
let x = '';
match x 'a' ... 'j' => println!("early letter"),'k' ... 'z' => println!("late letter"),_ => println!("something else"),
This prints something else.
BindingsYou can bind values to names with @:
let x = 1;
match x e @ 1 ... 5 => println!("got a range element ", e)
,_ => println!("anything"),
This prints got a range element 1. This is useful when you want todo a complicated match of part of a data structure:
#[derive(Debug)]struct Person
name: Option<String>,
let name = "Steve".to_string();let x: Option<Person> = Some(Person name: Some(name));match x
Some(Person name: ref a @ Some(_), .. ) => println!(":?", a),

138
_ =>
This prints Some(“Steve”): we’ve bound the inner name to a.If you use @ with |, you need to make sure the name is bound in
each part of the pattern:
let x = 5;
match x e @ 1 ... 5 | e @ 8 ... 10 => println!("got a range
element ", e),_ => println!("anything"),
GuardsYou can introduce ‘match guards’ with if:
enum OptionalInt Value(i32),Missing,
let x = OptionalInt::Value(5);
match x OptionalInt::Value(i) if i > 5 => println!("Got an
int bigger than five!"),OptionalInt::Value(..) => println!("Got an int!"),OptionalInt::Missing => println!("No such luck."),
This prints Got an int!.If you’re using if with multiple patterns, the if applies to both
sides:
let x = 4;let y = false;
match x 4 | 5 if y => println!("yes"),

139
_ => println!("no"),
This prints no, because the if applies to the whole of 4 | 5, and notto only the 5. In other words, the precedence of if behaves like this:
(4 | 5) if y => ...
not this:
4 | (5 if y) => ...
Mix and MatchWhew! That’s a lot of different ways to match things, and they can allbe mixed and matched, depending on what you’re doing:
match x Foo x: Some(ref name), y: None => ...
Patterns are very powerful. Make good use of them.
Method SyntaxFunctions are great, but if you want to call a bunch of them on somedata, it can be awkward. Consider this code:
baz(bar(foo));
We would read this left-to-right, and so we see ‘baz bar foo’. But thisisn’t the order that the functions would get called in, that’s inside-out:‘foo bar baz’. Wouldn’t it be nice if we could do this instead?
foo.bar().baz();
Luckily, as you may have guessed with the leading question, you can!Rust provides the ability to use this ‘method call syntax’ via the implkeyword.
Method callsHere’s how it works:

140
struct Circle x: f64,y: f64,radius: f64,
impl Circle fn area(&self) -> f64
std::f64::consts::PI * (self.radius * self.radius)
fn main() let c = Circle x: 0.0, y: 0.0, radius: 2.0 ;println!("", c.area());
This will print 12.566371.We’ve made a struct that represents a circle. We then write an
impl block, and inside it, define a method, area.Methods take a special first parameter, of which there are three
variants: self, &self, and &mut self. You can think of this first pa-rameter as being the foo in foo.bar(). The three variants correspondto the three kinds of things foo could be: self if it’s a value on thestack, &self if it’s a reference, and &mut self if it’s a mutable refer-ence. Because we took the &self parameter to area, we can use it likeany other parameter. Because we know it’s a Circle, we can accessthe radius like we would with any other struct.
We should default to using &self, as you should prefer borrow-ing over taking ownership, as well as taking immutable references overmutable ones. Here’s an example of all three variants:
struct Circle x: f64,y: f64,radius: f64,
impl Circle fn reference(&self)

141
println!("taking self by reference!");
fn mutable_reference(&mut self) println!("taking self by mutable reference!");
fn takes_ownership(self) println!("taking ownership of self!");
You can use as many impl blocks as you’d like. The previous examplecould have also been written like this:
struct Circle x: f64,y: f64,radius: f64,
impl Circle fn reference(&self)
println!("taking self by reference!");
impl Circle fn mutable_reference(&mut self)
println!("taking self by mutable reference!");
impl Circle fn takes_ownership(self)
println!("taking ownership of self!");

142
Chaining method callsSo, now we know how to call a method, such as foo.bar(). But whatabout our original example, foo.bar().baz()? This is called ‘methodchaining’. Let’s look at an example:
struct Circle x: f64,y: f64,radius: f64,
impl Circle fn area(&self) -> f64
std::f64::consts::PI * (self.radius * self.radius)
fn grow(&self, increment: f64) -> Circle Circle x: self.x, y: self.y, radius: self.radius
+ increment
fn main() let c = Circle x: 0.0, y: 0.0, radius: 2.0 ;println!("", c.area());
let d = c.grow(2.0).area();println!("", d);
Check the return type:
# struct Circle;# impl Circle fn grow(&self, increment: f64) -> Circle # Circle
We say we’re returning a Circle. With this method, we can grow anew Circle to any arbitrary size.

143
Associated functionsYou can also define associated functions that do not take a self pa-rameter. Here’s a pattern that’s very common in Rust code:
struct Circle x: f64,y: f64,radius: f64,
impl Circle fn new(x: f64, y: f64, radius: f64) -> Circle
Circle x: x,y: y,radius: radius,
fn main() let c = Circle::new(0.0, 0.0, 2.0);
This ‘associated function’ builds a new Circle for us. Note that associ-ated functions are called with the Struct::function() syntax, ratherthan the ref.method() syntax. Some other languages call associatedfunctions ‘static methods’.
Builder PatternLet’s say that we want our users to be able to create Circles, butwe will allow them to only set the properties they care about. Other-wise, the x and y attributes will be 0.0, and the radius will be 1.0.Rust doesn’t have method overloading, named arguments, or variablearguments. We employ the builder pattern instead. It looks like this:
struct Circle x: f64,y: f64,

144
radius: f64,
impl Circle fn area(&self) -> f64
std::f64::consts::PI * (self.radius * self.radius)
struct CircleBuilder x: f64,y: f64,radius: f64,
impl CircleBuilder fn new() -> CircleBuilder
CircleBuilder x: 0.0, y: 0.0, radius: 1.0,
fn x(&mut self, coordinate: f64) -> &mut CircleBuilder
self.x = coordinate;self
fn y(&mut self, coordinate: f64) -> &mut CircleBuilder
self.y = coordinate;self
fn radius(&mut self, radius: f64) -> &mut CircleBuilder
self.radius = radius;self
fn finalize(&self) -> Circle

145
Circle x: self.x, y: self.y, radius: self.radius
fn main() let c = CircleBuilder::new()
.x(1.0)
.y(2.0)
.radius(2.0)
.finalize();
println!("area: ", c.area());println!("x: ", c.x);println!("y: ", c.y);
What we’ve done here is make another struct, CircleBuilder. We’vedefined our builder methods on it. We’ve also defined our area()method on Circle. We also made one more method on CircleBuilder:finalize(). This method creates our final Circle from the builder.Now, we’ve used the type system to enforce our concerns: we can usethe methods on CircleBuilder to constrain making Circles in anyway we choose.
StringsStrings are an important concept for any programmer to master. Rust’sstring handling system is a bit different from other languages, due toits systems focus. Any time you have a data structure of variablesize, things can get tricky, and strings are a re-sizable data structure.That being said, Rust’s strings also work differently than in some othersystems languages, such as C.
Let’s dig into the details. A ‘string’ is a sequence of Unicode scalarvalues encoded as a stream of UTF-8 bytes. All strings are guaranteedto be a valid encoding of UTF-8 sequences. Additionally, unlike somesystems languages, strings are not NUL-terminated and can containNUL bytes.
Rust has two main types of strings: &str and String. Let’s talkabout &str first. These are called ‘string slices’. A string slice has afixed size, and cannot be mutated. It is a reference to a sequence of

146
UTF-8 bytes.
let greeting = "Hello there."; // greeting: &'static str
“Hello there.” is a string literal and its type is &’static str.A string literal is a string slice that is statically allocated, meaningthat it’s saved inside our compiled program, and exists for the entireduration it runs. The greeting binding is a reference to this staticallyallocated string. Any function expecting a string slice will also accepta string literal.
String literals can span multiple lines. There are two forms. Thefirst will include the newline and the leading spaces:
let s = "foobar";
assert_eq!("foo\n bar", s);
The second, with a \, trims the spaces and the newline:
let s = "foo\bar";
assert_eq!("foobar", s);
Note that you normally cannot access a str directly, but only througha &str reference. This is because str is an unsized type which requiresadditional runtime information to be usable. For more information seethe chapter on unsized types.
Rust has more than only &strs though. A String is a heap-allocated string. This string is growable, and is also guaranteed tobe UTF-8. Strings are commonly created by converting from a stringslice using the to_string method.
let mut s = "Hello".to_string(); // mut s: Stringprintln!("", s);
s.push_str(", world.");println!("", s);
Strings will coerce into &str with an &:

147
fn takes_slice(slice: &str) println!("Got: ", slice);
fn main() let s = "Hello".to_string();takes_slice(&s);
This coercion does not happen for functions that accept one of &str’straits instead of &str. For example, TcpStream::connect has a pa-rameter of type ToSocketAddrs. A &str is okay but a String must beexplicitly converted using &*.
use std::net::TcpStream;
TcpStream::connect("192.168.0.1:3000"); // Parameter isof type &str.
let addr_string = "192.168.0.1:3000".to_string();TcpStream::connect(&*addr_string); // Convert `addr_string`to &str.
Viewing a String as a &str is cheap, but converting the &str to aString involves allocating memory. No reason to do that unless youhave to!
IndexingBecause strings are valid UTF-8, they do not support indexing:
let s = "hello";
println!("The first letter of s is ", s[0]); // ERROR!!!
Usually, access to a vector with [] is very fast. But, because eachcharacter in a UTF-8 encoded string can be multiple bytes, you haveto walk over the string to find the n letter of a string. This is a signif-icantly more expensive operation, and we don’t want to be misleading.Furthermore, ‘letter’ isn’t something defined in Unicode, exactly. Wecan choose to look at a string as individual bytes, or as codepoints:

148
let hachiko = "";
for b in hachiko.as_bytes() print!(", ", b);
println!("");
for c in hachiko.chars() print!(", ", c);
println!("");
This prints:
229, 191, 160, 231, 138, 172, 227, 131, 143, 227, 131,129, 229, 133, 172,, , , , ,
As you can see, there are more bytes than chars.You can get something similar to an index like this:
# let hachiko = "";let dog = hachiko.chars().nth(1); // Kinda like `hachiko[1]`.
This emphasizes that we have to walk from the beginning of the list ofchars.
SlicingYou can get a slice of a string with the slicing syntax:
let dog = "hachiko";let hachi = &dog[0..5];
But note that these are byte offsets, not character offsets. So this willfail at runtime:
let dog = "";let hachi = &dog[0..2];
with this error:

149
thread 'main' panicked at 'byte index 2 is not a char boundary;it is inside ''(bytes 0..3) of ``'
ConcatenationIf you have a String, you can concatenate a &str to the end of it:
let hello = "Hello ".to_string();let world = "world!";
let hello_world = hello + world;
But if you have two Strings, you need an &:
let hello = "Hello ".to_string();let world = "world!".to_string();
let hello_world = hello + &world;
This is because &String can automatically coerce to a &str. This is afeature called ‘Deref coercions’.
GenericsSometimes, when writing a function or data type, we may want it towork for multiple types of arguments. In Rust, we can do this withgenerics. Generics are called ‘parametric polymorphism’ in type the-ory, which means that they are types or functions that have multi-ple forms (‘poly’ is multiple, ‘morph’ is form) over a given parameter(‘parametric’).
Anyway, enough type theory, let’s check out some generic code.Rust’s standard library provides a type, Option<T>, that’s generic:
enum Option<T> Some(T),None,
The <T> part, which you’ve seen a few times before, indicates that thisis a generic data type. Inside the declaration of our enum, whereverwe see a T, we substitute that type for the same type used in thegeneric. Here’s an example of using Option<T>, with some extra typeannotations:

150
let x: Option<i32> = Some(5);
In the type declaration, we say Option<i32>. Note how similar thislooks to Option<T>. So, in this particular Option, T has the value ofi32. On the right-hand side of the binding, we make a Some(T), whereT is 5. Since that’s an i32, the two sides match, and Rust is happy. Ifthey didn’t match, we’d get an error:
let x: Option<f64> = Some(5);// error: mismatched types: expected `core::option::Option<f64>`,// found `core::option::Option<_>` (expected f64 but foundintegral variable)
That doesn’t mean we can’t make Option<T>s that hold an f64! Theyhave to match up:
let x: Option<i32> = Some(5);let y: Option<f64> = Some(5.0f64);
This is just fine. One definition, multiple uses.Generics don’t have to only be generic over one type. Consider
another type from Rust’s standard library that’s similar, Result<T,E>:
enum Result<T, E> Ok(T),Err(E),
This type is generic over two types: T and E. By the way, the capitalletters can be any letter you’d like. We could define Result<T, E> as:
enum Result<A, Z> Ok(A),Err(Z),
if we wanted to. Convention says that the first generic parameter shouldbe T, for ‘type’, and that we use E for ‘error’. Rust doesn’t care, however.
The Result<T, E> type is intended to be used to return the resultof a computation, and to have the ability to return an error if it didn’twork out.

151
Generic functionsWe can write functions that take generic types with a similar syntax:
fn takes_anything<T>(x: T) // Do something with `x`.
The syntax has two parts: the <T> says “this function is generic overone type, T”, and the x: T says “x has the type T.”
Multiple arguments can have the same generic type:
fn takes_two_of_the_same_things<T>(x: T, y: T) // ...
We could write a version that takes multiple types:
fn takes_two_things<T, U>(x: T, y: U) // ...
Generic structsYou can store a generic type in a struct as well:
struct Point<T> x: T,y: T,
let int_origin = Point x: 0, y: 0 ;let float_origin = Point x: 0.0, y: 0.0 ;
Similar to functions, the <T> is where we declare the generic parameters,and we then use x: T in the type declaration, too.
When you want to add an implementation for the generic struct,you declare the type parameter after the impl:
# struct Point<T> # x: T,# y: T,# #impl<T> Point<T>

152
fn swap(&mut self) std::mem::swap(&mut self.x, &mut self.y);
So far you’ve seen generics that take absolutely any type. These areuseful in many cases: you’ve already seen Option<T>, and later you’llmeet universal container types like Vec<T>. On the other hand, oftenyou want to trade that flexibility for increased expressive power. Readabout trait bounds to see why and how.
Resolving ambiguitiesMost of the time when generics are involved, the compiler can infer thegeneric parameters automatically:
// v must be a Vec<T> but we don't know what T is yetlet mut v = Vec::new();// v just got a bool value, so T must be bool!v.push(true);// Debug-print vprintln!(":?", v);
Sometimes though, the compiler needs a little help. For example, hadwe omitted the last line, we would get a compile error:
let v = Vec::new();// ^^^^^^^^ cannot infer type for `T`//// note: type annotations or generic parameter bindingrequiredprintln!(":?", v);
We can solve this using either a type annotation:
let v: Vec<bool> = Vec::new();println!(":?", v);
or by binding the generic parameter T via the so-called ‘turbofish’ ::<> syntax:
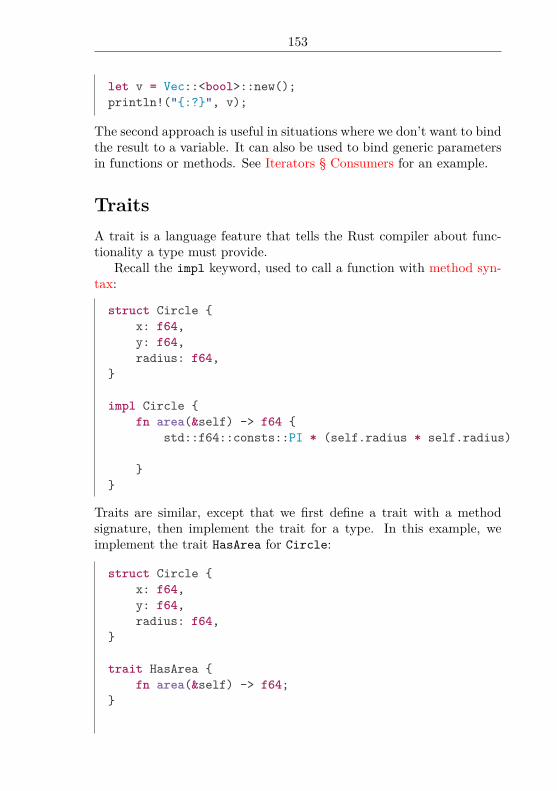
153
let v = Vec::<bool>::new();println!(":?", v);
The second approach is useful in situations where we don’t want to bindthe result to a variable. It can also be used to bind generic parametersin functions or methods. See Iterators § Consumers for an example.
TraitsA trait is a language feature that tells the Rust compiler about func-tionality a type must provide.
Recall the impl keyword, used to call a function with method syn-tax:
struct Circle x: f64,y: f64,radius: f64,
impl Circle fn area(&self) -> f64
std::f64::consts::PI * (self.radius * self.radius)
Traits are similar, except that we first define a trait with a methodsignature, then implement the trait for a type. In this example, weimplement the trait HasArea for Circle:
struct Circle x: f64,y: f64,radius: f64,
trait HasArea fn area(&self) -> f64;
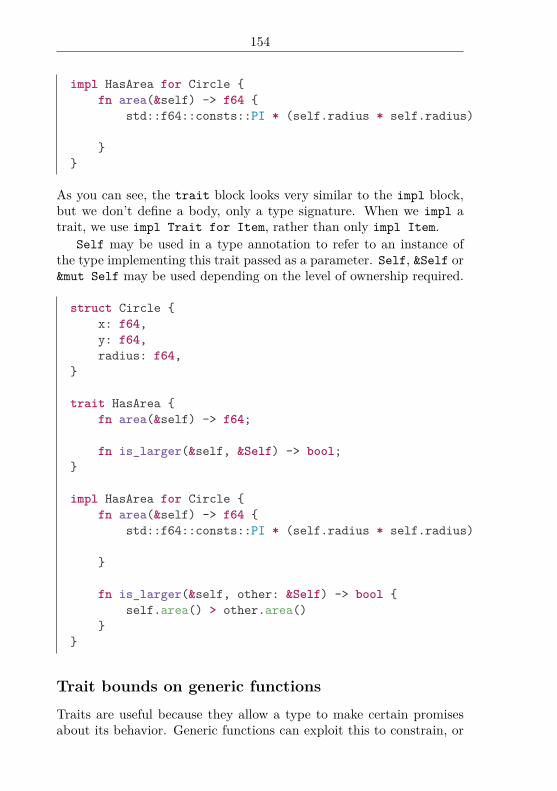
154
impl HasArea for Circle fn area(&self) -> f64
std::f64::consts::PI * (self.radius * self.radius)
As you can see, the trait block looks very similar to the impl block,but we don’t define a body, only a type signature. When we impl atrait, we use impl Trait for Item, rather than only impl Item.
Self may be used in a type annotation to refer to an instance ofthe type implementing this trait passed as a parameter. Self, &Self or&mut Self may be used depending on the level of ownership required.
struct Circle x: f64,y: f64,radius: f64,
trait HasArea fn area(&self) -> f64;
fn is_larger(&self, &Self) -> bool;
impl HasArea for Circle fn area(&self) -> f64
std::f64::consts::PI * (self.radius * self.radius)
fn is_larger(&self, other: &Self) -> bool self.area() > other.area()
Trait bounds on generic functionsTraits are useful because they allow a type to make certain promisesabout its behavior. Generic functions can exploit this to constrain, or

155
bound, the types they accept. Consider this function, which does notcompile:
fn print_area<T>(shape: T) println!("This shape has an area of ", shape.area(
));
Rust complains:
error: no method named `area` found for type `T` in thecurrent scope
Because T can be any type, we can’t be sure that it implements thearea method. But we can add a trait bound to our generic T, ensuringthat it does:# trait HasArea # fn area(&self) -> f64;# fn print_area<T: HasArea>(shape: T)
println!("This shape has an area of ", shape.area());
The syntax <T: HasArea>means “any type that implements the HasAreatrait.” Because traits define function type signatures, we can be surethat any type which implements HasArea will have an .area()method.
Here’s an extended example of how this works:
trait HasArea fn area(&self) -> f64;
struct Circle x: f64,y: f64,radius: f64,
impl HasArea for Circle fn area(&self) -> f64
std::f64::consts::PI * (self.radius * self.radius)
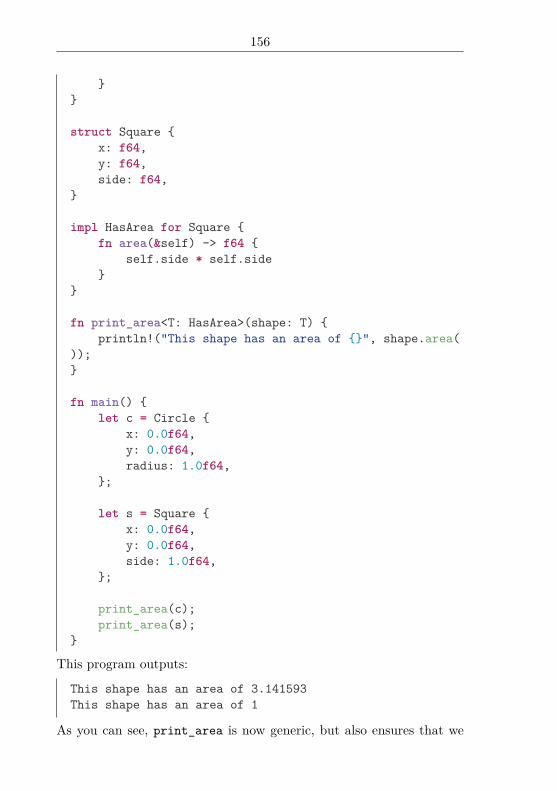
156
struct Square x: f64,y: f64,side: f64,
impl HasArea for Square fn area(&self) -> f64
self.side * self.side
fn print_area<T: HasArea>(shape: T) println!("This shape has an area of ", shape.area(
));
fn main() let c = Circle
x: 0.0f64,y: 0.0f64,radius: 1.0f64,
;
let s = Square x: 0.0f64,y: 0.0f64,side: 1.0f64,
;
print_area(c);print_area(s);
This program outputs:
This shape has an area of 3.141593This shape has an area of 1
As you can see, print_area is now generic, but also ensures that we

157
have passed in the correct types. If we pass in an incorrect type:
print_area(5);
We get a compile-time error:
error: the trait bound `_ : HasArea` is not satisfied [E0277]
Trait bounds on generic structsYour generic structs can also benefit from trait bounds. All you needto do is append the bound when you declare type parameters. Here isa new type Rectangle<T> and its operation is_square():
struct Rectangle<T> x: T,y: T,width: T,height: T,
impl<T: PartialEq> Rectangle<T> fn is_square(&self) -> bool
self.width == self.height
fn main() let mut r = Rectangle
x: 0,y: 0,width: 47,height: 47,
;
assert!(r.is_square());
r.height = 42;assert!(!r.is_square());
is_square() needs to check that the sides are equal, so the sides mustbe of a type that implements the core::cmp::PartialEq trait:

158
impl<T: PartialEq> Rectangle<T> ...
Now, a rectangle can be defined in terms of any type that can becompared for equality.
Here we defined a new struct Rectangle that accepts numbers ofany precision—really, objects of pretty much any type—as long as theycan be compared for equality. Could we do the same for our HasAreastructs, Square and Circle? Yes, but they need multiplication, and towork with that we need to know more about operator traits.
Rules for implementing traitsSo far, we’ve only added trait implementations to structs, but you canimplement a trait for any type such as f32:
trait ApproxEqual fn approx_equal(&self, other: &Self) -> bool;
impl ApproxEqual for f32
fn approx_equal(&self, other: &Self) -> bool // Appropriate for `self` and `other` being close
to 1.0.(self - other).abs() <= ::std::f32::EPSILON
println!("", 1.0.approx_equal(&1.00000001));
This may seem like the Wild West, but there are two restrictions aroundimplementing traits that prevent this from getting out of hand. Thefirst is that if the trait isn’t defined in your scope, it doesn’t apply.Here’s an example: the standard library provides a Write trait whichadds extra functionality to Files, for doing file I/O. By default, a Filewon’t have its methods:let mut f = std::fs::File::create("foo.txt").expect("Couldn’tcreate foo.txt");let buf = b"whatever"; // buf: &[u8; 8], a byte stringliteral.let result = f.write(buf);# result.unwrap(); // Ignore the error.
Here’s the error:

159
error: type `std::fs::File` does not implement any methodin scope named `write`let result = f.write(buf);
^~~~~~~~~~
We need to use the Write trait first:
use std::io::Write;
let mut f = std::fs::File::create("foo.txt").expect("Couldn’tcreate foo.txt");let buf = b"whatever";let result = f.write(buf);# result.unwrap(); // Ignore the error.
This will compile without error.This means that even if someone does something bad like add meth-
ods to i32, it won’t affect you, unless you use that trait.There’s one more restriction on implementing traits: either the trait
or the type you’re implementing it for must be defined by you. Or moreprecisely, one of them must be defined in the same crate as the implyou’re writing. For more on Rust’s module and package system, seethe chapter on crates and modules.
So, we could implement the HasArea type for i32, because we de-fined HasArea in our code. But if we tried to implement ToString, atrait provided by Rust, for i32, we could not, because neither the traitnor the type are defined in our crate.
One last thing about traits: generic functions with a trait bound use‘monomorphization’ (mono: one, morph: form), so they are staticallydispatched. What’s that mean? Check out the chapter on trait objectsfor more details.
Multiple trait boundsYou’ve seen that you can bound a generic type parameter with a trait:
fn foo<T: Clone>(x: T) x.clone();
If you need more than one bound, you can use +:

160
use std::fmt::Debug;
fn foo<T: Clone + Debug>(x: T) x.clone();println!(":?", x);
T now needs to be both Clone as well as Debug.
Where clauseWriting functions with only a few generic types and a small numberof trait bounds isn’t too bad, but as the number increases, the syntaxgets increasingly awkward:
use std::fmt::Debug;
fn foo<T: Clone, K: Clone + Debug>(x: T, y: K) x.clone();y.clone();println!(":?", y);
The name of the function is on the far left, and the parameter list ison the far right. The bounds are getting in the way.
Rust has a solution, and it’s called a ‘where clause’:
use std::fmt::Debug;
fn foo<T: Clone, K: Clone + Debug>(x: T, y: K) x.clone();y.clone();println!(":?", y);
fn bar<T, K>(x: T, y: K) where T: Clone, K: Clone + Debug
x.clone();y.clone();println!(":?", y);

161
fn main() foo("Hello", "world");bar("Hello", "world");
foo() uses the syntax we showed earlier, and bar() uses a where clause.All you need to do is leave off the bounds when defining your typeparameters, and then add where after the parameter list. For longerlists, whitespace can be added:
use std::fmt::Debug;
fn bar<T, K>(x: T, y: K)where T: Clone,
K: Clone + Debug
x.clone();y.clone();println!(":?", y);
This flexibility can add clarity in complex situations.where is also more powerful than the simpler syntax. For example:
trait ConvertTo<Output> fn convert(&self) -> Output;
impl ConvertTo<i64> for i32 fn convert(&self) -> i64 *self as i64
// Can be called with T == i32.fn convert_t_to_i64<T: ConvertTo<i64>>(x: T) -> i64
x.convert()
// Can be called with T == i64.fn convert_i32_to_t<T>(x: i32) -> T
// This is using ConvertTo as if it were "ConvertTo<i64>".
where i32: ConvertTo<T>

162
x.convert()
This shows off the additional feature of where clauses: they allowbounds on the left-hand side not only of type parameters T, but alsoof types (i32 in this case). In this example, i32 must implementConvertTo<T>. Rather than defining what i32 is (since that’s obvi-ous), the where clause here constrains T.
Default methodsA default method can be added to a trait definition if it is alreadyknown how a typical implementor will define a method. For example,is_invalid() is defined as the opposite of is_valid():
trait Foo fn is_valid(&self) -> bool;
fn is_invalid(&self) -> bool !self.is_valid()
Implementors of the Foo trait need to implement is_valid() but notis_invalid() due to the added default behavior. This default behaviorcan still be overridden as in:# trait Foo # fn is_valid(&self) -> bool;## fn is_invalid(&self) -> bool !self.is_valid() # struct UseDefault;
impl Foo for UseDefault fn is_valid(&self) -> bool
println!("Called UseDefault.is_valid.");true
struct OverrideDefault;
impl Foo for OverrideDefault
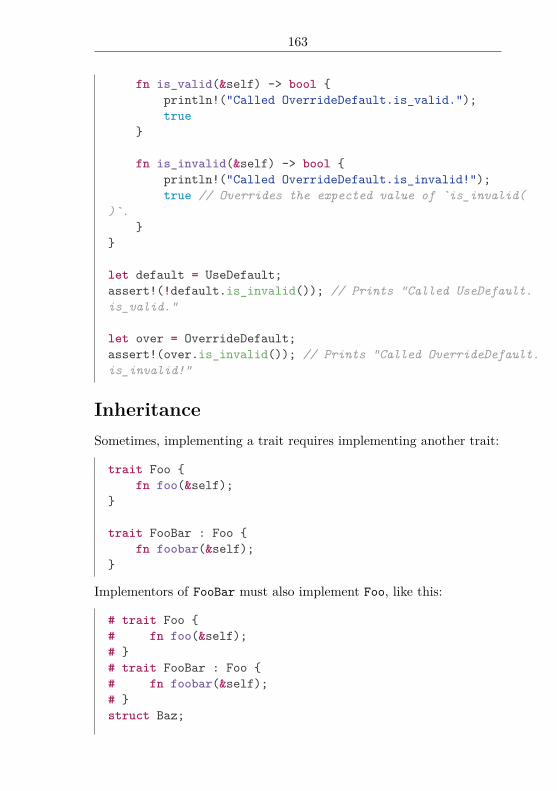
163
fn is_valid(&self) -> bool println!("Called OverrideDefault.is_valid.");true
fn is_invalid(&self) -> bool println!("Called OverrideDefault.is_invalid!");true // Overrides the expected value of `is_invalid(
)`.
let default = UseDefault;assert!(!default.is_invalid()); // Prints "Called UseDefault.is_valid."
let over = OverrideDefault;assert!(over.is_invalid()); // Prints "Called OverrideDefault.is_invalid!"
InheritanceSometimes, implementing a trait requires implementing another trait:
trait Foo fn foo(&self);
trait FooBar : Foo fn foobar(&self);
Implementors of FooBar must also implement Foo, like this:
# trait Foo # fn foo(&self);# # trait FooBar : Foo # fn foobar(&self);# struct Baz;

164
impl Foo for Baz fn foo(&self) println!("foo");
impl FooBar for Baz fn foobar(&self) println!("foobar");
If we forget to implement Foo, Rust will tell us:
error: the trait bound `main::Baz : main::Foo` is not satisfied[E0277]
DerivingImplementing traits like Debug and Default repeatedly can becomequite tedious. For that reason, Rust provides an attribute that allowsyou to let Rust automatically implement traits for you:
#[derive(Debug)]struct Foo;
fn main() println!(":?", Foo);
However, deriving is limited to a certain set of traits:
• Clone
• Copy
• Debug
• Default
• Eq
• Hash
• Ord
• PartialEq
• PartialOrd

165
DropNow that we’ve discussed traits, let’s talk about a particular trait pro-vided by the Rust standard library, Drop. The Drop trait provides away to run some code when a value goes out of scope. For example:
struct HasDrop;
impl Drop for HasDrop fn drop(&mut self)
println!("Dropping!");
fn main() let x = HasDrop;
// Do stuff.
// `x` goes out of scope here.
When x goes out of scope at the end of main(), the code for Drop willrun. Drop has one method, which is also called drop(). It takes amutable reference to self.
That’s it! The mechanics of Drop are very simple, but there aresome subtleties. For example, values are dropped in the opposite orderthey are declared. Here’s another example:
struct Firework strength: i32,
impl Drop for Firework fn drop(&mut self)
println!("BOOM times !!!", self.strength);
fn main() let firecracker = Firework strength: 1 ;

166
let tnt = Firework strength: 100 ;
This will output:
BOOM times 100!!!BOOM times 1!!!
The tnt goes off before the firecracker does, because it was declaredafterwards. Last in, first out.
So what is Drop good for? Generally, Drop is used to clean up anyresources associated with a struct. For example, the Arc<T> type isa reference-counted type. When Drop is called, it will decrement thereference count, and if the total number of references is zero, will cleanup the underlying value.
if letif let permits patterns matching within the condition of an if state-ment. This allows us to reduce the overhead of certain kinds of patternmatches and express them in a more convenient way.
For example, let’s say we have some sort of Option<T>. We want tocall a function on it if it’s Some<T>, but do nothing if it’s None. Thatlooks like this:
# let option = Some(5);# fn foo(x: i32) match option
Some(x) => foo(x) ,None => ,
We don’t have to use match here, for example, we could use if:
# let option = Some(5);# fn foo(x: i32) if option.is_some()
let x = option.unwrap();foo(x);
Neither of these options is particularly appealing. We can use if letto do the same thing in a nicer way:
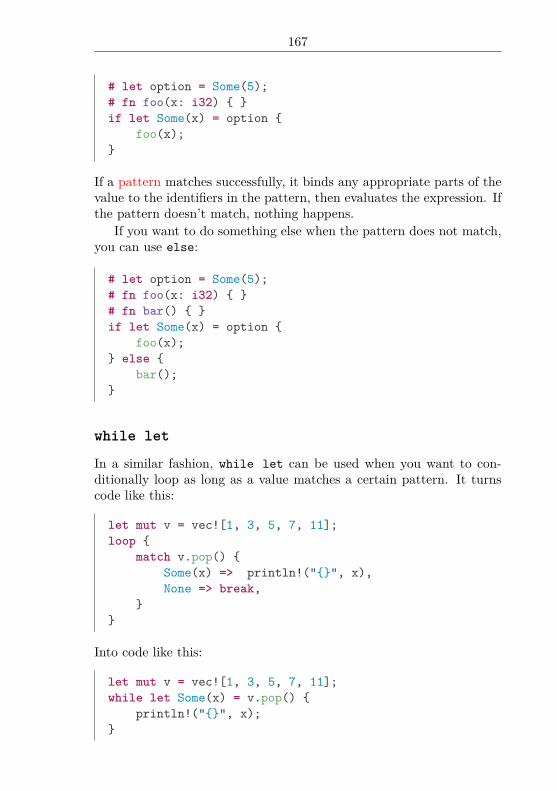
167
# let option = Some(5);# fn foo(x: i32) if let Some(x) = option
foo(x);
If a pattern matches successfully, it binds any appropriate parts of thevalue to the identifiers in the pattern, then evaluates the expression. Ifthe pattern doesn’t match, nothing happens.
If you want to do something else when the pattern does not match,you can use else:
# let option = Some(5);# fn foo(x: i32) # fn bar() if let Some(x) = option
foo(x); else
bar();
while let
In a similar fashion, while let can be used when you want to con-ditionally loop as long as a value matches a certain pattern. It turnscode like this:
let mut v = vec![1, 3, 5, 7, 11];loop
match v.pop() Some(x) => println!("", x),None => break,
Into code like this:
let mut v = vec![1, 3, 5, 7, 11];while let Some(x) = v.pop()
println!("", x);
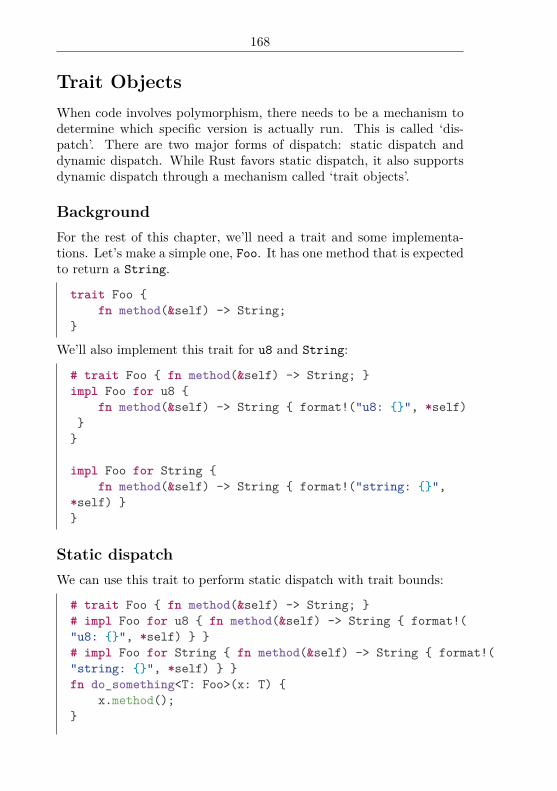
168
Trait ObjectsWhen code involves polymorphism, there needs to be a mechanism todetermine which specific version is actually run. This is called ‘dis-patch’. There are two major forms of dispatch: static dispatch anddynamic dispatch. While Rust favors static dispatch, it also supportsdynamic dispatch through a mechanism called ‘trait objects’.
BackgroundFor the rest of this chapter, we’ll need a trait and some implementa-tions. Let’s make a simple one, Foo. It has one method that is expectedto return a String.
trait Foo fn method(&self) -> String;
We’ll also implement this trait for u8 and String:
# trait Foo fn method(&self) -> String; impl Foo for u8
fn method(&self) -> String format!("u8: ", *self)
impl Foo for String fn method(&self) -> String format!("string: ",
*self)
Static dispatchWe can use this trait to perform static dispatch with trait bounds:
# trait Foo fn method(&self) -> String; # impl Foo for u8 fn method(&self) -> String format!("u8: ", *self) # impl Foo for String fn method(&self) -> String format!("string: ", *self) fn do_something<T: Foo>(x: T)
x.method();

169
fn main() let x = 5u8;let y = "Hello".to_string();
do_something(x);do_something(y);
Rust uses ‘monomorphization’ to perform static dispatch here. Thismeans that Rust will create a special version of do_something() forboth u8 and String, and then replace the call sites with calls to thesespecialized functions. In other words, Rust generates something likethis:
# trait Foo fn method(&self) -> String; # impl Foo for u8 fn method(&self) -> String format!("u8: ", *self) # impl Foo for String fn method(&self) -> String format!("string: ", *self) fn do_something_u8(x: u8)
x.method();
fn do_something_string(x: String) x.method();
fn main() let x = 5u8;let y = "Hello".to_string();
do_something_u8(x);do_something_string(y);
This has a great upside: static dispatch allows function calls to beinlined because the callee is known at compile time, and inlining is thekey to good optimization. Static dispatch is fast, but it comes at atradeoff: ‘code bloat’, due to many copies of the same function existingin the binary, one for each type.
Furthermore, compilers aren’t perfect and may “optimize” code tobecome slower. For example, functions inlined too eagerly will bloat

170
the instruction cache (cache rules everything around us). This is partof the reason that #[inline] and #[inline(always)] should be usedcarefully, and one reason why using a dynamic dispatch is sometimesmore efficient.
However, the common case is that it is more efficient to use staticdispatch, and one can always have a thin statically-dispatched wrapperfunction that does a dynamic dispatch, but not vice versa, meaningstatic calls are more flexible. The standard library tries to be staticallydispatched where possible for this reason.
Dynamic dispatchRust provides dynamic dispatch through a feature called ‘trait objects’.Trait objects, like &Foo or Box<Foo>, are normal values that store avalue of any type that implements the given trait, where the precisetype can only be known at runtime.
A trait object can be obtained from a pointer to a concrete typethat implements the trait by casting it (e.g. &x as &Foo) or coercingit (e.g. using &x as an argument to a function that takes &Foo).
These trait object coercions and casts also work for pointers like&mut T to &mut Foo and Box<T> to Box<Foo>, but that’s all at themoment. Coercions and casts are identical.
This operation can be seen as ‘erasing’ the compiler’s knowledgeabout the specific type of the pointer, and hence trait objects are some-times referred to as ‘type erasure’.
Coming back to the example above, we can use the same trait toperform dynamic dispatch with trait objects by casting:
# trait Foo fn method(&self) -> String; # impl Foo for u8 fn method(&self) -> String format!("u8: ", *self) # impl Foo for String fn method(&self) -> String format!("string: ", *self) fn do_something(x: &Foo)
x.method();
fn main() let x = 5u8;do_something(&x as &Foo);

171
or by coercing:
# trait Foo fn method(&self) -> String; # impl Foo for u8 fn method(&self) -> String format!("u8: ", *self) # impl Foo for String fn method(&self) -> String format!("string: ", *self) fn do_something(x: &Foo)
x.method();
fn main() let x = "Hello".to_string();do_something(&x);
A function that takes a trait object is not specialized to each of thetypes that implements Foo: only one copy is generated, often (but notalways) resulting in less code bloat. However, this comes at the costof requiring slower virtual function calls, and effectively inhibiting anychance of inlining and related optimizations from occurring.
Why pointers?
Rust does not put things behind a pointer by default, unlike manymanaged languages, so types can have different sizes. Knowing the sizeof the value at compile time is important for things like passing it asan argument to a function, moving it about on the stack and allocating(and deallocating) space on the heap to store it.
For Foo, we would need to have a value that could be at least eithera String (24 bytes) or a u8 (1 byte), as well as any other type forwhich dependent crates may implement Foo (any number of bytes atall). There’s no way to guarantee that this last point can work if thevalues are stored without a pointer, because those other types can bearbitrarily large.
Putting the value behind a pointer means the size of the value isnot relevant when we are tossing a trait object around, only the size ofthe pointer itself.
Representation
The methods of the trait can be called on a trait object via a specialrecord of function pointers traditionally called a ‘vtable’ (created and

172
managed by the compiler).Trait objects are both simple and complicated: their core represen-
tation and layout is quite straight-forward, but there are some curlyerror messages and surprising behaviors to discover.
Let’s start simple, with the runtime representation of a trait object.The std::raw module contains structs with layouts that are the sameas the complicated built-in types, including trait objects:
# mod foo pub struct TraitObject
pub data: *mut (),pub vtable: *mut (),
#
That is, a trait object like &Foo consists of a ‘data’ pointer and a ‘vtable’pointer.
The data pointer addresses the data (of some unknown type T) thatthe trait object is storing, and the vtable pointer points to the vtable(‘virtual method table’) corresponding to the implementation of Foofor T.
A vtable is essentially a struct of function pointers, pointing to theconcrete piece of machine code for each method in the implementation.A method call like trait_object.method() will retrieve the correctpointer out of the vtable and then do a dynamic call of it. For example:
struct FooVtable destructor: fn(*mut ()),size: usize,align: usize,method: fn(*const ()) -> String,
// u8:
fn call_method_on_u8(x: *const ()) -> String // The compiler guarantees that this function is only
called// with `x` pointing to a u8.let byte: &u8 = unsafe &*(x as *const u8) ;
byte.method()

173
static Foo_for_u8_vtable: FooVtable = FooVtable destructor: /* compiler magic */,size: 1,align: 1,
// Cast to a function pointer:method: call_method_on_u8 as fn(*const ()) -> String,
;
// String:
fn call_method_on_String(x: *const ()) -> String // The compiler guarantees that this function is only
called// with `x` pointing to a String.let string: &String = unsafe &*(x as *const String)
;
string.method()
static Foo_for_String_vtable: FooVtable = FooVtable destructor: /* compiler magic */,// Values for a 64-bit computer, halve them for 32-
bit ones.size: 24,align: 8,
method: call_method_on_String as fn(*const ()) -> String,;
The destructor field in each vtable points to a function that will cleanup any resources of the vtable’s type: for u8 it is trivial, but for Stringit will free the memory. This is necessary for owning trait objects likeBox<Foo>, which need to clean-up both the Box allocation as well asthe internal type when they go out of scope. The size and align fieldsstore the size of the erased type, and its alignment requirements.
Suppose we’ve got some values that implement Foo. The explicitform of construction and use of Foo trait objects might look a bit like

174
(ignoring the type mismatches: they’re all pointers anyway):
let a: String = "foo".to_string();let x: u8 = 1;
// let b: &Foo = &a;let b = TraitObject
// Store the data:data: &a,// Store the methods:vtable: &Foo_for_String_vtable
;
// let y: &Foo = x;let y = TraitObject
// Store the data:data: &x,// Store the methods:vtable: &Foo_for_u8_vtable
;
// b.method();(b.vtable.method)(b.data);
// y.method();(y.vtable.method)(y.data);
Object SafetyNot every trait can be used to make a trait object. For example, vectorsimplement Clone, but if we try to make a trait object:
let v = vec![1, 2, 3];let o = &v as &Clone;
We get an error:
error: cannot convert to a trait object because trait `core::clone::Clone` is not object-safe [E0038]let o = &v as &Clone;
^~note: the trait cannot require that `Self : Sized`

175
let o = &v as &Clone;^~
The error says that Clone is not ‘object-safe’. Only traits that areobject-safe can be made into trait objects. A trait is object-safe if bothof these are true:
• the trait does not require that Self: Sized
• all of its methods are object-safe
So what makes a method object-safe? Each method must require thatSelf: Sized or all of the following:
• must not have any type parameters
• must not use Self
Whew! As we can see, almost all of these rules talk about Self. A goodintuition is “except in special circumstances, if your trait’s method usesSelf, it is not object-safe.”
ClosuresSometimes it is useful to wrap up a function and free variables forbetter clarity and reuse. The free variables that can be used come fromthe enclosing scope and are ‘closed over’ when used in the function.From this, we get the name ‘closures’ and Rust provides a really greatimplementation of them, as we’ll see.
SyntaxClosures look like this:
let plus_one = |x: i32| x + 1;
assert_eq!(2, plus_one(1));
We create a binding, plus_one, and assign it to a closure. The closure’sarguments go between the pipes (|), and the body is an expression, inthis case, x + 1. Remember that is an expression, so we can havemulti-line closures too:
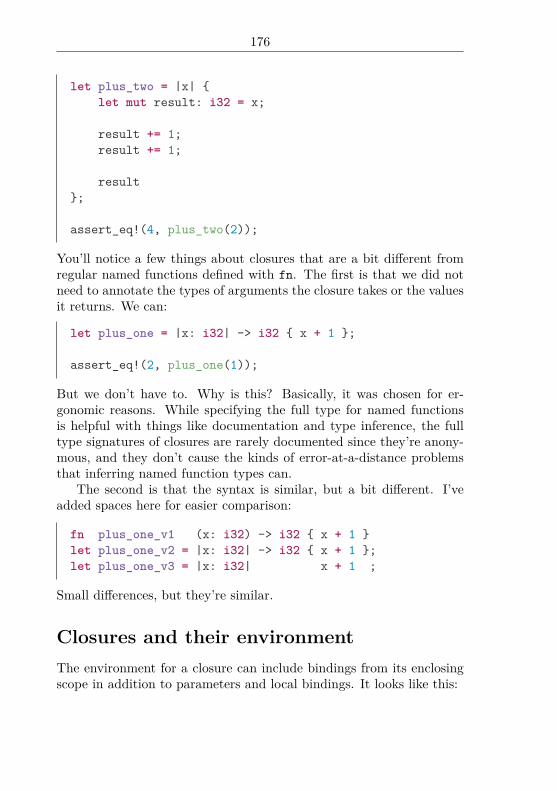
176
let plus_two = |x| let mut result: i32 = x;
result += 1;result += 1;
result;
assert_eq!(4, plus_two(2));
You’ll notice a few things about closures that are a bit different fromregular named functions defined with fn. The first is that we did notneed to annotate the types of arguments the closure takes or the valuesit returns. We can:
let plus_one = |x: i32| -> i32 x + 1 ;
assert_eq!(2, plus_one(1));
But we don’t have to. Why is this? Basically, it was chosen for er-gonomic reasons. While specifying the full type for named functionsis helpful with things like documentation and type inference, the fulltype signatures of closures are rarely documented since they’re anony-mous, and they don’t cause the kinds of error-at-a-distance problemsthat inferring named function types can.
The second is that the syntax is similar, but a bit different. I’veadded spaces here for easier comparison:
fn plus_one_v1 (x: i32) -> i32 x + 1 let plus_one_v2 = |x: i32| -> i32 x + 1 ;let plus_one_v3 = |x: i32| x + 1 ;
Small differences, but they’re similar.
Closures and their environmentThe environment for a closure can include bindings from its enclosingscope in addition to parameters and local bindings. It looks like this:

177
let num = 5;let plus_num = |x: i32| x + num;
assert_eq!(10, plus_num(5));
This closure, plus_num, refers to a let binding in its scope: num. Morespecifically, it borrows the binding. If we do something that wouldconflict with that binding, we get an error. Like this one:
let mut num = 5;let plus_num = |x: i32| x + num;
let y = &mut num;
Which errors with:error: cannot borrow `num` as mutable because it is alsoborrowed as immutable
let y = &mut num;^~~
note: previous borrow of `num` occurs here due to use inclosure; the immutableborrow prevents subsequent moves or mutable borrows of
`num` until the borrowendslet plus_num = |x| x + num;
^~~~~~~~~~~note: previous borrow ends herefn main()
let mut num = 5;let plus_num = |x| x + num;
let y = &mut num;^
A verbose yet helpful error message! As it says, we can’t take a mutableborrow on num because the closure is already borrowing it. If we letthe closure go out of scope, we can:
let mut num = 5;
let plus_num = |x: i32| x + num;
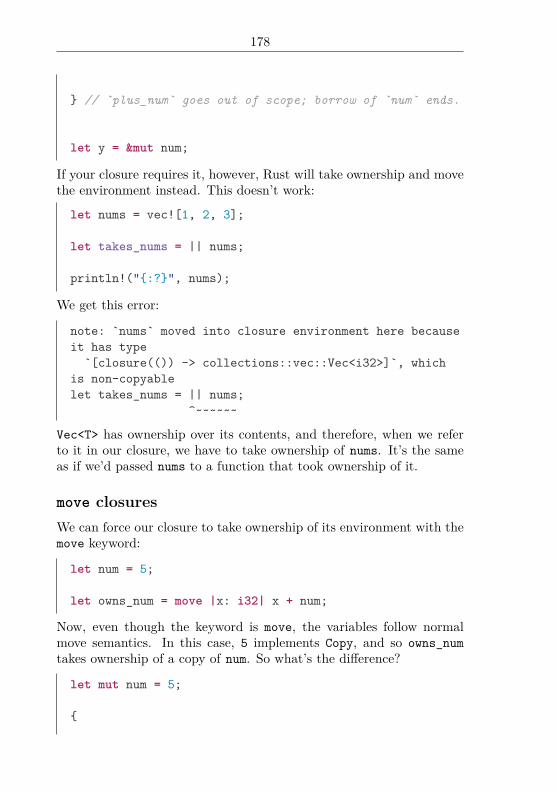
178
// `plus_num` goes out of scope; borrow of `num` ends.
let y = &mut num;
If your closure requires it, however, Rust will take ownership and movethe environment instead. This doesn’t work:
let nums = vec![1, 2, 3];
let takes_nums = || nums;
println!(":?", nums);
We get this error:
note: `nums` moved into closure environment here becauseit has type
`[closure(()) -> collections::vec::Vec<i32>]`, whichis non-copyablelet takes_nums = || nums;
^~~~~~~
Vec<T> has ownership over its contents, and therefore, when we referto it in our closure, we have to take ownership of nums. It’s the sameas if we’d passed nums to a function that took ownership of it.
move closuresWe can force our closure to take ownership of its environment with themove keyword:
let num = 5;
let owns_num = move |x: i32| x + num;
Now, even though the keyword is move, the variables follow normalmove semantics. In this case, 5 implements Copy, and so owns_numtakes ownership of a copy of num. So what’s the difference?
let mut num = 5;

179
let mut add_num = |x: i32| num += x;
add_num(5);
assert_eq!(10, num);
So in this case, our closure took a mutable reference to num, and thenwhen we called add_num, it mutated the underlying value, as we’d ex-pect. We also needed to declare add_num as mut too, because we’remutating its environment.
If we change to a move closure, it’s different:
let mut num = 5;
let mut add_num = move |x: i32| num += x;
add_num(5);
assert_eq!(5, num);
We only get 5. Rather than taking a mutable borrow out on our num,we took ownership of a copy.
Another way to think about move closures: they give a closure itsown stack frame. Without move, a closure may be tied to the stackframe that created it, while a move closure is self-contained. This meansthat you cannot generally return a non-move closure from a function,for example.
But before we talk about taking and returning closures, we shouldtalk some more about the way that closures are implemented. As asystems language, Rust gives you tons of control over what your codedoes, and closures are no different.
Closure implementationRust’s implementation of closures is a bit different than other lan-guages. They are effectively syntax sugar for traits. You’ll want tomake sure to have read the traits section before this one, as well as thesection on trait objects.
Got all that? Good.

180
The key to understanding how closures work under the hood issomething a bit strange: Using () to call a function, like foo(), is anoverloadable operator. From this, everything else clicks into place. InRust, we use the trait system to overload operators. Calling functionsis no different. We have three separate traits to overload with:
• Fn
• FnMut
• FnOnce
There are a few differences between these traits, but a big one is self:Fn takes &self, FnMut takes &mut self, and FnOnce takes self. Thiscovers all three kinds of self via the usual method call syntax. Butwe’ve split them up into three traits, rather than having a single one.This gives us a large amount of control over what kind of closures wecan take.
The || syntax for closures is sugar for these three traits. Rustwill generate a struct for the environment, impl the appropriate trait,and then use it.
Taking closures as argumentsNow that we know that closures are traits, we already know how toaccept and return closures: the same as any other trait!
This also means that we can choose static vs dynamic dispatch aswell. First, let’s write a function which takes something callable, callsit, and returns the result:
fn call_with_one<F>(some_closure: F) -> i32where F: Fn(i32) -> i32
some_closure(1)
let answer = call_with_one(|x| x + 2);
assert_eq!(3, answer);
We pass our closure, |x| x + 2, to call_with_one. It does what itsuggests: it calls the closure, giving it 1 as an argument.
Let’s examine the signature of call_with_one in more depth:

181
fn call_with_one<F>(some_closure: F) -> i32# where F: Fn(i32) -> i32 # some_closure(1)
We take one parameter, and it has the type F. We also return an i32.This part isn’t interesting. The next part is:
# fn call_with_one<F>(some_closure: F) -> i32where F: Fn(i32) -> i32
# some_closure(1)
Because Fn is a trait, we can use it as a bound for our generic type. Inthis case, our closure takes an i32 as an argument and returns an i32,and so the generic bound we use is Fn(i32) -> i32.
There’s one other key point here: because we’re bounding a genericwith a trait, this will get monomorphized, and therefore, we’ll be doingstatic dispatch into the closure. That’s pretty neat. In many languages,closures are inherently heap allocated, and will always involve dynamicdispatch. In Rust, we can stack allocate our closure environment, andstatically dispatch the call. This happens quite often with iterators andtheir adapters, which often take closures as arguments.
Of course, if we want dynamic dispatch, we can get that too. Atrait object handles this case, as usual:
fn call_with_one(some_closure: &Fn(i32) -> i32) -> i32
some_closure(1)
let answer = call_with_one(&|x| x + 2);
assert_eq!(3, answer);
Now we take a trait object, a &Fn. And we have to make a reference toour closure when we pass it to call_with_one, so we use &||.
A quick note about closures that use explicit lifetimes. Sometimesyou might have a closure that takes a reference like so:
fn call_with_ref<F>(some_closure:F) -> i32where F: Fn(&i32) -> i32
let value = 0;some_closure(&value)

182
Normally you can specify the lifetime of the parameter to our closure.We could annotate it on the function declaration:
fn call_with_ref<'a, F>(some_closure:F) -> i32where F: Fn(&'a i32) -> i32
However, this presents a problem in our case. When a function hasan explicit lifetime parameter, that lifetime must be at least as longas the entire call to that function. The borrow checker will complainthat value doesn’t live long enough, because it is only in scope afterits declaration inside the function body.
What we need is a closure that can borrow its argument only forits own invocation scope, not for the outer function’s scope. In orderto say that, we can use Higher-Ranked Trait Bounds with the for<...> syntax:
fn call_with_ref<F>(some_closure:F) -> i32where F: for<'a> Fn(&'a i32) -> i32
This lets the Rust compiler find the minimum lifetime to invoke our clo-sure and satisfy the borrow checker’s rules. Our function then compilesand executes as we expect.
fn call_with_ref<F>(some_closure:F) -> i32where F: for<'a> Fn(&'a i32) -> i32
let value = 0;some_closure(&value)
Function pointers and closuresA function pointer is kind of like a closure that has no environment.As such, you can pass a function pointer to any function expecting aclosure argument, and it will work:
fn call_with_one(some_closure: &Fn(i32) -> i32) -> i32
some_closure(1)
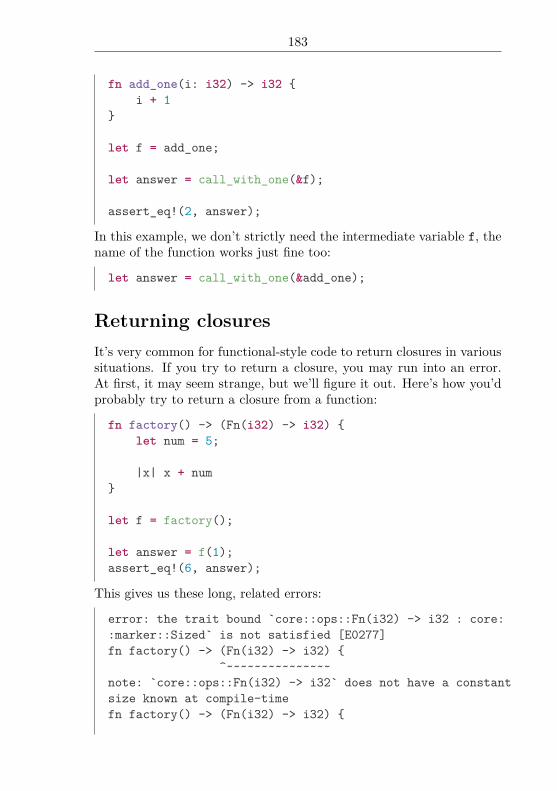
183
fn add_one(i: i32) -> i32 i + 1
let f = add_one;
let answer = call_with_one(&f);
assert_eq!(2, answer);
In this example, we don’t strictly need the intermediate variable f, thename of the function works just fine too:
let answer = call_with_one(&add_one);
Returning closuresIt’s very common for functional-style code to return closures in varioussituations. If you try to return a closure, you may run into an error.At first, it may seem strange, but we’ll figure it out. Here’s how you’dprobably try to return a closure from a function:
fn factory() -> (Fn(i32) -> i32) let num = 5;
|x| x + num
let f = factory();
let answer = f(1);assert_eq!(6, answer);
This gives us these long, related errors:
error: the trait bound `core::ops::Fn(i32) -> i32 : core::marker::Sized` is not satisfied [E0277]fn factory() -> (Fn(i32) -> i32)
^~~~~~~~~~~~~~~~note: `core::ops::Fn(i32) -> i32` does not have a constantsize known at compile-timefn factory() -> (Fn(i32) -> i32)

184
^~~~~~~~~~~~~~~~error: the trait bound `core::ops::Fn(i32) -> i32 : core::marker::Sized` is not satisfied [E0277]let f = factory();
^note: `core::ops::Fn(i32) -> i32` does not have a constantsize known at compile-timelet f = factory();
^
In order to return something from a function, Rust needs to know whatsize the return type is. But since Fn is a trait, it could be various thingsof various sizes: many different types can implement Fn. An easy wayto give something a size is to take a reference to it, as references havea known size. So we’d write this:
fn factory() -> &(Fn(i32) -> i32) let num = 5;
|x| x + num
let f = factory();
let answer = f(1);assert_eq!(6, answer);
But we get another error:
error: missing lifetime specifier [E0106]fn factory() -> &(Fn(i32) -> i32)
^~~~~~~~~~~~~~~~~
Right. Because we have a reference, we need to give it a lifetime. Butour factory() function takes no arguments, so elision doesn’t kick inhere. Then what choices do we have? Try ’static:
fn factory() -> &'static (Fn(i32) -> i32) let num = 5;
|x| x + num

185
let f = factory();
let answer = f(1);assert_eq!(6, answer);
But we get another error:
error: mismatched types:expected `&'static core::ops::Fn(i32) -> i32`,
found `[closure@<anon>:7:9: 7:20]`(expected &-ptr,
found closure) [E0308]|x| x + num^~~~~~~~~~~
This error is letting us know that we don’t have a &’static Fn(i32)-> i32, we have a [closure@<anon>:7:9: 7:20]. Wait, what?
Because each closure generates its own environment struct andimplementation of Fn and friends, these types are anonymous. Theyexist solely for this closure. So Rust shows them as closure@<anon>,rather than some autogenerated name.
The error also points out that the return type is expected to be areference, but what we are trying to return is not. Further, we cannotdirectly assign a ’static lifetime to an object. So we’ll take a differentapproach and return a ‘trait object’ by Boxing up the Fn. This almostworks:
fn factory() -> Box<Fn(i32) -> i32> let num = 5;
Box::new(|x| x + num)
let f = factory();
let answer = f(1);assert_eq!(6, answer);
There’s just one last problem:
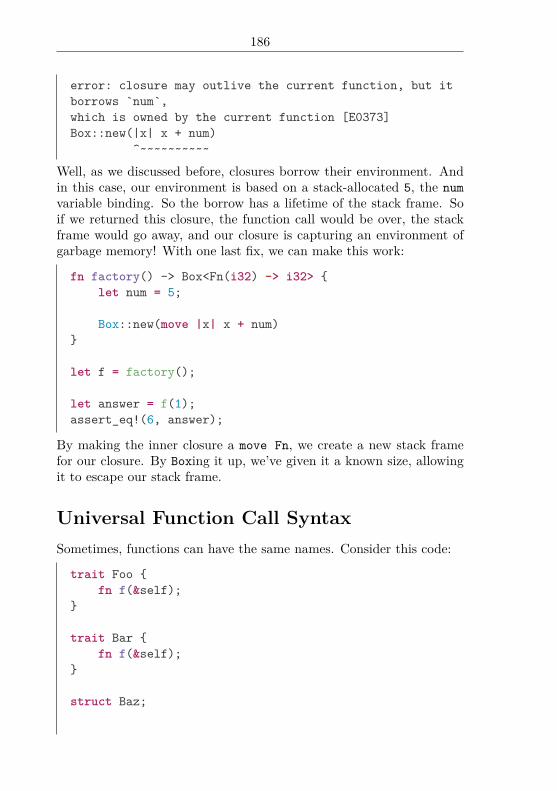
186
error: closure may outlive the current function, but itborrows `num`,which is owned by the current function [E0373]Box::new(|x| x + num)
^~~~~~~~~~~
Well, as we discussed before, closures borrow their environment. Andin this case, our environment is based on a stack-allocated 5, the numvariable binding. So the borrow has a lifetime of the stack frame. Soif we returned this closure, the function call would be over, the stackframe would go away, and our closure is capturing an environment ofgarbage memory! With one last fix, we can make this work:
fn factory() -> Box<Fn(i32) -> i32> let num = 5;
Box::new(move |x| x + num)
let f = factory();
let answer = f(1);assert_eq!(6, answer);
By making the inner closure a move Fn, we create a new stack framefor our closure. By Boxing it up, we’ve given it a known size, allowingit to escape our stack frame.
Universal Function Call SyntaxSometimes, functions can have the same names. Consider this code:
trait Foo fn f(&self);
trait Bar fn f(&self);
struct Baz;

187
impl Foo for Baz fn f(&self) println!("Baz’s impl of Foo");
impl Bar for Baz fn f(&self) println!("Baz’s impl of Bar");
let b = Baz;
If we were to try to call b.f(), we’d get an error:
error: multiple applicable methods in scope [E0034]b.f();
^~~note: candidate #1 is defined in an impl of the trait `main::Foo` for the type`main::Baz`
fn f(&self) println!("Baz’s impl of Foo"); ^~~~~~~~~~~~~~~~~~~~~~~~~~~~~~~~~~~~~~~~~~~~~~
note: candidate #2 is defined in an impl of the trait `main::Bar` for the type`main::Baz`
fn f(&self) println!("Baz’s impl of Bar"); ^~~~~~~~~~~~~~~~~~~~~~~~~~~~~~~~~~~~~~~~~~~~~~
We need a way to disambiguate which method we need. This featureis called ‘universal function call syntax’, and it looks like this:
# trait Foo # fn f(&self);# # trait Bar # fn f(&self);# # struct Baz;# impl Foo for Baz # fn f(&self) println!("Baz’s impl of Foo"); # # impl Bar for Baz # fn f(&self) println!("Baz’s impl of Bar");

188
# # let b = Baz;Foo::f(&b);Bar::f(&b);
Let’s break it down.Foo::Bar::
These halves of the invocation are the types of the two traits: Foo andBar. This is what ends up actually doing the disambiguation betweenthe two: Rust calls the one from the trait name you use.
f(&b)
When we call a method like b.f() using method syntax, Rust willautomatically borrow b if f() takes &self. In this case, Rust will not,and so we need to pass an explicit &b.
Angle-bracket FormThe form of UFCS we just talked about:
Trait::method(args);
Is a short-hand. There’s an expanded form of this that’s needed insome situations:<Type as Trait>::method(args);
The <>:: syntax is a means of providing a type hint. The type goesinside the <>s. In this case, the type is Type as Trait, indicating thatwe want Trait’s version of method to be called here. The as Traitpart is optional if it’s not ambiguous. Same with the angle brackets,hence the shorter form.
Here’s an example of using the longer form.
trait Foo fn foo() -> i32;
struct Bar;
impl Bar

189
fn foo() -> i32 20
impl Foo for Bar fn foo() -> i32
10
fn main() assert_eq!(10, <Bar as Foo>::foo());assert_eq!(20, Bar::foo());
Using the angle bracket syntax lets you call the trait method insteadof the inherent one.
Crates and ModulesWhen a project starts getting large, it’s considered good software engi-neering practice to split it up into a bunch of smaller pieces, and thenfit them together. It is also important to have a well-defined interface,so that some of your functionality is private, and some is public. Tofacilitate these kinds of things, Rust has a module system.
Basic terminology: Crates and ModulesRust has two distinct terms that relate to the module system: ‘crate’and ‘module’. A crate is synonymous with a ‘library’ or ‘package’ inother languages. Hence “Cargo” as the name of Rust’s package man-agement tool: you ship your crates to others with Cargo. Crates canproduce an executable or a library, depending on the project.
Each crate has an implicit root module that contains the code forthat crate. You can then define a tree of sub-modules under that rootmodule. Modules allow you to partition your code within the crateitself.
As an example, let’s make a phrases crate, which will give us variousphrases in different languages. To keep things simple, we’ll stick to‘greetings’ and ‘farewells’ as two kinds of phrases, and use English and

190
Japanese () as two languages for those phrases to be in. We’ll usethis module layout:
+-----------++---| greetings |
+---------+ | +-----------++---| english |---+| +---------+ | +-----------+| +---| farewells |
+---------+ | +-----------+| phrases |---++---------+ | +-----------+
| +---| greetings || +----------+ | +-----------++---| japanese |--+
+----------+ | +-----------++---| farewells |
+-----------+
In this example, phrases is the name of our crate. All of the rest aremodules. You can see that they form a tree, branching out from thecrate root, which is the root of the tree: phrases itself.
Now that we have a plan, let’s define these modules in code. Tostart, generate a new crate with Cargo:
$ cargo new phrases$ cd phrases
If you remember, this generates a simple project for us:
$ tree .. Cargo.toml src
lib.rs
1 directory, 2 files
src/lib.rs is our crate root, corresponding to the phrases in ourdiagram above.

191
Defining ModulesTo define each of our modules, we use the mod keyword. Let’s makeour src/lib.rs look like this:
mod english mod greetings
mod farewells
mod japanese mod greetings
mod farewells
After the mod keyword, you give the name of the module. Modulenames follow the conventions for other Rust identifiers: lower_snake_case. The contents of each module are within curly braces ().
Within a given mod, you can declare sub-mods. We can refer to sub-modules with double-colon (::) notation: our four nested modules areenglish::greetings, english::farewells, japanese::greetings,and japanese::farewells. Because these sub-modules are names-paced under their parent module, the names don’t conflict: english::greetings and japanese::greetings are distinct, even though theirnames are both greetings.
Because this crate does not have a main() function, and is calledlib.rs, Cargo will build this crate as a library:
$ cargo buildCompiling phrases v0.0.1 (file:///home/you/projects/
phrases)$ ls target/debugbuild deps examples libphrases-a7448e02a0468eaa.rlibnative
libphrases-<hash>.rlib is the compiled crate. Before we see how touse this crate from another crate, let’s break it up into multiple files.

192
Multiple File CratesIf each crate were just one file, these files would get very large. It’soften easier to split up crates into multiple files, and Rust supports thisin two ways.
Instead of declaring a module like this:
mod english // Contents of our module go here.
We can instead declare our module like this:
mod english;
If we do that, Rust will expect to find either a english.rs file, or aenglish/mod.rs file with the contents of our module.
Note that in these files, you don’t need to re-declare the module:that’s already been done with the initial mod declaration.
Using these two techniques, we can break up our crate into twodirectories and seven files:
$ tree .. Cargo.lock Cargo.toml src english farewells.rs greetings.rs mod.rs japanese farewells.rs greetings.rs mod.rs lib.rs target
debug build deps examples
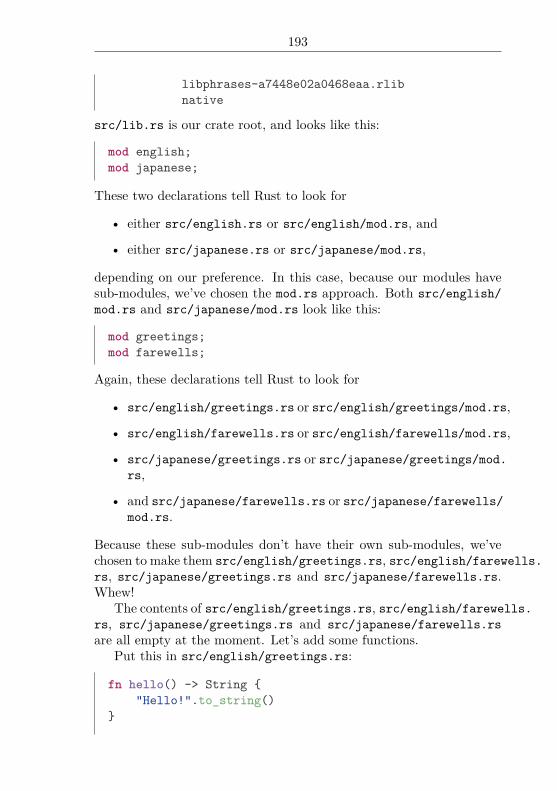
193
libphrases-a7448e02a0468eaa.rlib native
src/lib.rs is our crate root, and looks like this:
mod english;mod japanese;
These two declarations tell Rust to look for
• either src/english.rs or src/english/mod.rs, and
• either src/japanese.rs or src/japanese/mod.rs,
depending on our preference. In this case, because our modules havesub-modules, we’ve chosen the mod.rs approach. Both src/english/mod.rs and src/japanese/mod.rs look like this:
mod greetings;mod farewells;
Again, these declarations tell Rust to look for
• src/english/greetings.rs or src/english/greetings/mod.rs,
• src/english/farewells.rs or src/english/farewells/mod.rs,
• src/japanese/greetings.rs or src/japanese/greetings/mod.rs,
• and src/japanese/farewells.rs or src/japanese/farewells/mod.rs.
Because these sub-modules don’t have their own sub-modules, we’vechosen to make them src/english/greetings.rs, src/english/farewells.rs, src/japanese/greetings.rs and src/japanese/farewells.rs.Whew!
The contents of src/english/greetings.rs, src/english/farewells.rs, src/japanese/greetings.rs and src/japanese/farewells.rsare all empty at the moment. Let’s add some functions.
Put this in src/english/greetings.rs:
fn hello() -> String "Hello!".to_string()

194
Put this in src/english/farewells.rs:
fn goodbye() -> String "Goodbye.".to_string()
Put this in src/japanese/greetings.rs:
fn hello() -> String "".to_string()
Of course, you can copy and paste this from this web page, or typesomething else. It’s not important that you actually put ‘konnichiwa’to learn about the module system.
Put this in src/japanese/farewells.rs:
fn goodbye() -> String "".to_string()
(This is ‘Sayōnara’, if you’re curious.)Now that we have some functionality in our crate, let’s try to use
it from another crate.
Importing External CratesWe have a library crate. Let’s make an executable crate that importsand uses our library.
Make a src/main.rs and put this in it (it won’t quite compile yet):
extern crate phrases;
fn main() println!("Hello in English: ", phrases::english::
greetings::hello());println!("Goodbye in English: ", phrases::english:
:farewells::goodbye());
println!("Hello in Japanese: ", phrases::japanese::greetings::hello());
println!("Goodbye in Japanese: ", phrases::japanese:

195
:farewells::goodbye());
The extern crate declaration tells Rust that we need to compile andlink to the phrases crate. We can then use phrases’ modules in thisone. As we mentioned earlier, you can use double colons to refer tosub-modules and the functions inside of them.
(Note: when importing a crate that has dashes in its name “like-this”, which is not a valid Rust identifier, it will be converted by chang-ing the dashes to underscores, so you would write extern crate like_this;.)
Also, Cargo assumes that src/main.rs is the crate root of a bi-nary crate, rather than a library crate. Our package now has twocrates: src/lib.rs and src/main.rs. This pattern is quite commonfor executable crates: most functionality is in a library crate, and theexecutable crate uses that library. This way, other programs can alsouse the library crate, and it’s also a nice separation of concerns.
This doesn’t quite work yet, though. We get four errors that looksimilar to this:
$ cargo buildCompiling phrases v0.0.1 (file:///home/you/projects/
phrases)src/main.rs:4:38: 4:72 error: function `hello` is privatesrc/main.rs:4 println!("Hello in English: ", phrases::english::greetings::hello());
^~~~~~~~~~~~~~~~~~~~~~~~~~~~~~~~~~note: in expansion of format_args!<std macros>:2:25: 2:58 note: expansion site<std macros>:1:1: 2:62 note: in expansion of print!<std macros>:3:1: 3:54 note: expansion site<std macros>:1:1: 3:58 note: in expansion of println!phrases/src/main.rs:4:5: 4:76 note: expansion site
By default, everything is private in Rust. Let’s talk about this in somemore depth.
Exporting a Public InterfaceRust allows you to precisely control which aspects of your interface arepublic, and so private is the default. To make things public, you use the

196
pub keyword. Let’s focus on the english module first, so let’s reduceour src/main.rs to only this:
extern crate phrases;
fn main() println!("Hello in English: ", phrases::english::
greetings::hello());println!("Goodbye in English: ", phrases::english:
:farewells::goodbye());
In our src/lib.rs, let’s add pub to the english module declaration:
pub mod english;mod japanese;
And in our src/english/mod.rs, let’s make both pub:
pub mod greetings;pub mod farewells;
In our src/english/greetings.rs, let’s add pub to our fn declara-tion:pub fn hello() -> String
"Hello!".to_string()
And also in src/english/farewells.rs:
pub fn goodbye() -> String "Goodbye.".to_string()
Now, our crate compiles, albeit with warnings about not using thejapanese functions:
$ cargo runCompiling phrases v0.0.1 (file:///home/you/projects/
phrases)src/japanese/greetings.rs:1:1: 3:2 warning: function isnever used: `hello`, #[warn(dead_code)] on by defaultsrc/japanese/greetings.rs:1 fn hello() -> String src/japanese/greetings.rs:2 "".to_string()src/japanese/greetings.rs:3

197
src/japanese/farewells.rs:1:1: 3:2 warning: function isnever used: `goodbye`, #[warn(dead_code)] on by defaultsrc/japanese/farewells.rs:1 fn goodbye() -> String src/japanese/farewells.rs:2 "".to_string()src/japanese/farewells.rs:3
Running `target/debug/phrases`Hello in English: Hello!Goodbye in English: Goodbye.
pub also applies to structs and their member fields. In keeping withRust’s tendency toward safety, simply making a struct public won’tautomatically make its members public: you must mark the fields in-dividually with pub.
Now that our functions are public, we can use them. Great! How-ever, typing out phrases::english::greetings::hello() is very longand repetitive. Rust has another keyword for importing names into thecurrent scope, so that you can refer to them with shorter names. Let’stalk about use.
Importing Modules with useRust has a use keyword, which allows us to import names into our localscope. Let’s change our src/main.rs to look like this:
extern crate phrases;
use phrases::english::greetings;use phrases::english::farewells;
fn main() println!("Hello in English: ", greetings::hello()
);println!("Goodbye in English: ", farewells::goodbye(
));
The two use lines import each module into the local scope, so we canrefer to the functions by a much shorter name. By convention, whenimporting functions, it’s considered best practice to import the module,rather than the function directly. In other words, you can do this:

198
extern crate phrases;
use phrases::english::greetings::hello;use phrases::english::farewells::goodbye;
fn main() println!("Hello in English: ", hello());println!("Goodbye in English: ", goodbye());
But it is not idiomatic. This is significantly more likely to introducea naming conflict. In our short program, it’s not a big deal, but asit grows, it becomes a problem. If we have conflicting names, Rustwill give a compilation error. For example, if we made the japanesefunctions public, and tried to do this:
extern crate phrases;
use phrases::english::greetings::hello;use phrases::japanese::greetings::hello;
fn main() println!("Hello in English: ", hello());println!("Hello in Japanese: ", hello());
Rust will give us a compile-time error:
Compiling phrases v0.0.1 (file:///home/you/projects/phrases)src/main.rs:4:5: 4:40 error: a value named `hello` hasalready been imported in this module [E0252]src/main.rs:4 use phrases::japanese::greetings::hello;
^~~~~~~~~~~~~~~~~~~~~~~~~~~~~~~~~~~error: aborting due to previous errorCould not compile `phrases`.
If we’re importing multiple names from the same module, we don’t haveto type it out twice. Instead of this:
use phrases::english::greetings;use phrases::english::farewells;
We can use this shortcut:

199
use phrases::english::greetings, farewells;
Re-exporting with pub useYou don’t only use use to shorten identifiers. You can also use it insideof your crate to re-export a function inside another module. This allowsyou to present an external interface that may not directly map to yourinternal code organization.
Let’s look at an example. Modify your src/main.rs to read likethis:
extern crate phrases;
use phrases::english::greetings,farewells;use phrases::japanese;
fn main() println!("Hello in English: ", greetings::hello()
);println!("Goodbye in English: ", farewells::goodbye(
));
println!("Hello in Japanese: ", japanese::hello());
println!("Goodbye in Japanese: ", japanese::goodbye());
Then, modify your src/lib.rs to make the japanese mod public:
pub mod english;pub mod japanese;
Next, make the two functions public, first in src/japanese/greetings.rs:
pub fn hello() -> String "".to_string()
And then in src/japanese/farewells.rs:
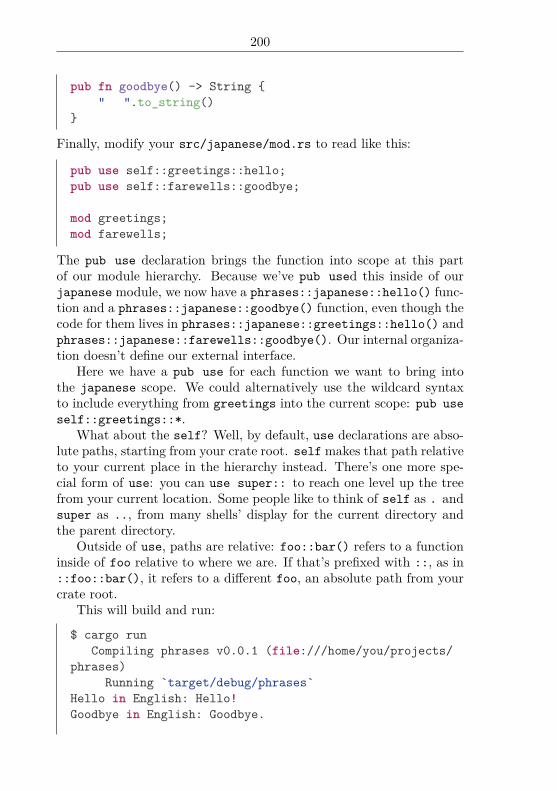
200
pub fn goodbye() -> String "".to_string()
Finally, modify your src/japanese/mod.rs to read like this:
pub use self::greetings::hello;pub use self::farewells::goodbye;
mod greetings;mod farewells;
The pub use declaration brings the function into scope at this partof our module hierarchy. Because we’ve pub used this inside of ourjapanese module, we now have a phrases::japanese::hello() func-tion and a phrases::japanese::goodbye() function, even though thecode for them lives in phrases::japanese::greetings::hello() andphrases::japanese::farewells::goodbye(). Our internal organiza-tion doesn’t define our external interface.
Here we have a pub use for each function we want to bring intothe japanese scope. We could alternatively use the wildcard syntaxto include everything from greetings into the current scope: pub useself::greetings::*.
What about the self? Well, by default, use declarations are abso-lute paths, starting from your crate root. selfmakes that path relativeto your current place in the hierarchy instead. There’s one more spe-cial form of use: you can use super:: to reach one level up the treefrom your current location. Some people like to think of self as . andsuper as .., from many shells’ display for the current directory andthe parent directory.
Outside of use, paths are relative: foo::bar() refers to a functioninside of foo relative to where we are. If that’s prefixed with ::, as in::foo::bar(), it refers to a different foo, an absolute path from yourcrate root.
This will build and run:
$ cargo runCompiling phrases v0.0.1 (file:///home/you/projects/
phrases)Running `target/debug/phrases`
Hello in English: Hello!Goodbye in English: Goodbye.

201
Hello in Japanese: Goodbye in Japanese:
Complex importsRust offers several advanced options that can add compactness andconvenience to your extern crate and use statements. Here is anexample:
extern crate phrases as sayings;
use sayings::japanese::greetings as ja_greetings;use sayings::japanese::farewells::*;use sayings::english::self, greetings as en_greetings,farewells as en_farewells;
fn main() println!("Hello in English; ", en_greetings::hello(
));println!("And in Japanese: ", ja_greetings::hello(
));println!("Goodbye in English: ", english::farewells:
:goodbye());println!("Again: ", en_farewells::goodbye());println!("And in Japanese: ", goodbye());
What’s going on here?First, both extern crate and use allow renaming the thing that is
being imported. So the crate is still called “phrases”, but here we willrefer to it as “sayings”. Similarly, the first use statement pulls in thejapanese::greetings module from the crate, but makes it availableas ja_greetings as opposed to simply greetings. This can help toavoid ambiguity when importing similarly-named items from differentplaces.
The second use statement uses a star glob to bring in all publicsymbols from the sayings::japanese::farewells module. As youcan see we can later refer to the Japanese goodbye function with nomodule qualifiers. This kind of glob should be used sparingly. It’sworth noting that it only imports the public symbols, even if the codedoing the globbing is in the same module.

202
The third use statement bears more explanation. It’s using “braceexpansion” globbing to compress three use statements into one (thissort of syntax may be familiar if you’ve written Linux shell scriptsbefore). The uncompressed form of this statement would be:
use sayings::english;use sayings::english::greetings as en_greetings;use sayings::english::farewells as en_farewells;
As you can see, the curly brackets compress use statements for severalitems under the same path, and in this context self refers back to thatpath. Note: The curly brackets cannot be nested or mixed with starglobbing.
const and staticRust has a way of defining constants with the const keyword:
const N: i32 = 5;
Unlike let bindings, you must annotate the type of a const.Constants live for the entire lifetime of a program. More specifically,
constants in Rust have no fixed address in memory. This is becausethey’re effectively inlined to each place that they’re used. References tothe same constant are not necessarily guaranteed to refer to the samememory address for this reason.
staticRust provides a ‘global variable’ sort of facility in static items. They’resimilar to constants, but static items aren’t inlined upon use. Thismeans that there is only one instance for each value, and it’s at a fixedlocation in memory.
Here’s an example:
static N: i32 = 5;
Unlike let bindings, you must annotate the type of a static.Statics live for the entire lifetime of a program, and therefore any
reference stored in a static has a ’static lifetime:

203
static NAME: &'static str = "Steve";
MutabilityYou can introduce mutability with the mut keyword:
static mut N: i32 = 5;
Because this is mutable, one thread could be updating N while anotheris reading it, causing memory unsafety. As such both accessing andmutating a static mut is unsafe, and so must be done in an unsafeblock:# static mut N: i32 = 5;
unsafe N += 1;
println!("N: ", N);
Furthermore, any type stored in a static must be Sync, and must nothave a Drop implementation.
InitializingBoth const and static have requirements for giving them a value.They must be given a value that’s a constant expression. In otherwords, you cannot use the result of a function call or anything similarlycomplex or at runtime.
Which construct should I use?Almost always, if you can choose between the two, choose const. It’spretty rare that you actually want a memory location associated withyour constant, and using a const allows for optimizations like constantpropagation not only in your crate but downstream crates.
AttributesDeclarations can be annotated with ‘attributes’ in Rust. They look likethis:

204
#[test]# fn foo()
or like this:
# mod foo #![test]#
The difference between the two is the !, which changes what the at-tribute applies to:
#[foo]struct Foo;
mod bar #![bar]
The #[foo] attribute applies to the next item, which is the structdeclaration. The #![bar] attribute applies to the item enclosing it,which is the mod declaration. Otherwise, they’re the same. Both changethe meaning of the item they’re attached to somehow.
For example, consider a function like this:
#[test]fn check()
assert_eq!(2, 1 + 1);
It is marked with #[test]. This means it’s special: when you run tests,this function will execute. When you compile as usual, it won’t evenbe included. This function is now a test function.
Attributes may also have additional data:
#[inline(always)]fn super_fast_fn() #
Or even keys and values:
#[cfg(target_os = "macos")]mod macos_only
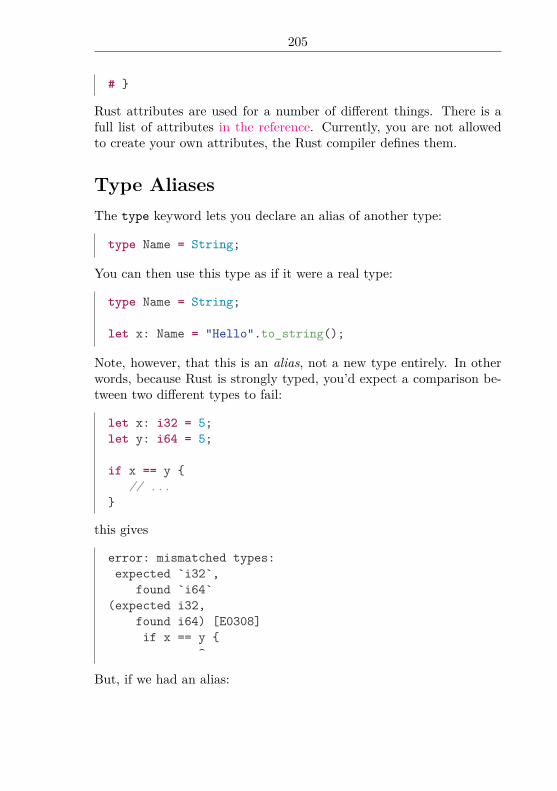
205
#
Rust attributes are used for a number of different things. There is afull list of attributes in the reference. Currently, you are not allowedto create your own attributes, the Rust compiler defines them.
Type AliasesThe type keyword lets you declare an alias of another type:
type Name = String;
You can then use this type as if it were a real type:
type Name = String;
let x: Name = "Hello".to_string();
Note, however, that this is an alias, not a new type entirely. In otherwords, because Rust is strongly typed, you’d expect a comparison be-tween two different types to fail:
let x: i32 = 5;let y: i64 = 5;
if x == y // ...
this gives
error: mismatched types:expected `i32`,
found `i64`(expected i32,
found i64) [E0308]if x == y
^
But, if we had an alias:

206
type Num = i32;
let x: i32 = 5;let y: Num = 5;
if x == y // ...
This compiles without error. Values of a Num type are the same as avalue of type i32, in every way. You can use tuple struct to really geta new type.
You can also use type aliases with generics:
use std::result;
enum ConcreteError Foo,Bar,
type Result<T> = result::Result<T, ConcreteError>;
This creates a specialized version of the Result type, which always hasa ConcreteError for the E part of Result<T, E>. This is commonlyused in the standard library to create custom errors for each subsection.For example, io::Result.
Casting Between TypesRust, with its focus on safety, provides two different ways of castingdifferent types between each other. The first, as, is for safe casts. Incontrast, transmute allows for arbitrary casting, and is one of the mostdangerous features of Rust!
CoercionCoercion between types is implicit and has no syntax of its own, butcan be spelled out with as.
Coercion occurs in let, const, and static statements; in functioncall arguments; in field values in struct initialization; and in a functionresult.
207
The most common case of coercion is removing mutability from areference:
• &mut T to &T
An analogous conversion is to remove mutability from a raw pointer:
• *mut T to *const T
References can also be coerced to raw pointers:
• &T to *const T
• &mut T to *mut T
Custom coercions may be defined using Deref.Coercion is transitive.
asThe as keyword does safe casting:
let x: i32 = 5;
let y = x as i64;
There are three major categories of safe cast: explicit coercions, castsbetween numeric types, and pointer casts.
Casting is not transitive: even if e as U1 as U2 is a valid expression,e as U2 is not necessarily so (in fact it will only be valid if U1 coercesto U2).
Explicit coercionsA cast e as U is valid if e has type T and T coerces to U.
Numeric castsA cast e as U is also valid in any of the following cases:
• e has type T and T and U are any numeric types; numeric-cast
• e is a C-like enum (with no data attached to the variants), and Uis an integer type; enum-cast

208
• e has type bool or char and U is an integer type; prim-int-cast
• e has type u8 and U is char; u8-char-cast
For example
let one = true as u8;let at_sign = 64 as char;let two_hundred = -56i8 as u8;
The semantics of numeric casts are:
• Casting between two integers of the same size (e.g. i32 -> u32)is a no-op
• Casting from a larger integer to a smaller integer (e.g. u32 ->u8) will truncate
• Casting from a smaller integer to a larger integer (e.g. u8 -> u32)will
– zero-extend if the source is unsigned– sign-extend if the source is signed
• Casting from a float to an integer will round the float towardszero
– NOTE: currently this will cause Undefined Behaviorif the rounded value cannot be represented by thetarget integer type. This includes Inf and NaN. This is abug and will be fixed.
• Casting from an integer to float will produce the floating pointrepresentation of the integer, rounded if necessary (rounding strat-egy unspecified)
• Casting from an f32 to an f64 is perfect and lossless
• Casting from an f64 to an f32 will produce the closest possiblevalue (rounding strategy unspecified)
– NOTE: currently this will cause Undefined Behaviorif the value is finite but larger or smaller than thelargest or smallest finite value representable by f32.This is a bug and will be fixed.

209
Pointer castsPerhaps surprisingly, it is safe to cast raw pointers to and from inte-gers, and to cast between pointers to different types subject to someconstraints. It is only unsafe to dereference the pointer:
let a = 300 as *const char; // `a` is a pointer to location300.let b = a as u32;
e as U is a valid pointer cast in any of the following cases:
• e has type *T, U has type *U_0, and either U_0: Sized or unsize_kind(T) == unsize_kind(U_0); a ptr-ptr-cast
• e has type *T and U is a numeric type, while T: Sized; ptr-addr-cast
• e is an integer and U is *U_0, while U_0: Sized; addr-ptr-cast
• e has type &[T; n] and U is *const T; array-ptr-cast
• e is a function pointer type and U has type *T, while T: Sized;fptr-ptr-cast
• e is a function pointer type and U is an integer; fptr-addr-cast
transmuteas only allows safe casting, and will for example reject an attempt tocast four bytes into a u32:
let a = [0u8, 0u8, 0u8, 0u8];
let b = a as u32; // Four u8s makes a u32.
This errors with:
error: non-scalar cast: `[u8; 4]` as `u32`let b = a as u32; // Four u8s makes a u32.
^~~~~~~~
This is a ‘non-scalar cast’ because we have multiple values here: thefour elements of the array. These kinds of casts are very dangerous,

210
because they make assumptions about the way that multiple under-lying structures are implemented. For this, we need something moredangerous.
The transmute function is very simple, but very scary. It tells Rustto treat a value of one type as though it were another type. It doesthis regardless of the typechecking system, and completely trusts you.
In our previous example, we know that an array of four u8s repre-sents a u32 properly, and so we want to do the cast. Using transmuteinstead of as, Rust lets us:
use std::mem;
fn main() unsafe
let a = [0u8, 1u8, 0u8, 0u8];let b = mem::transmute::<[u8; 4], u32>(a);println!("", b); // 256// Or, more concisely:let c: u32 = mem::transmute(a);println!("", c); // 256
We have to wrap the operation in an unsafe block for this to compilesuccessfully. Technically, only the mem::transmute call itself needs tobe in the block, but it’s nice in this case to enclose everything related,so you know where to look. In this case, the details about a are alsoimportant, and so they’re in the block. You’ll see code in either style,sometimes the context is too far away, and wrapping all of the code inunsafe isn’t a great idea.
While transmute does very little checking, it will at least make surethat the types are the same size. This errors:
use std::mem;
unsafe let a = [0u8, 0u8, 0u8, 0u8];
let b = mem::transmute::<[u8; 4], u64>(a);
with:

211
error: transmute called with differently sized types: [u8;4] (32 bits) to u64(64 bits)
Other than that, you’re on your own!
Associated TypesAssociated types are a powerful part of Rust’s type system. They’rerelated to the idea of a ‘type family’, in other words, grouping multipletypes together. That description is a bit abstract, so let’s dive rightinto an example. If you want to write a Graph trait, you have twotypes to be generic over: the node type and the edge type. So youmight write a trait, Graph<N, E>, that looks like this:
trait Graph<N, E> fn has_edge(&self, &N, &N) -> bool;fn edges(&self, &N) -> Vec<E>;// Etc.
While this sort of works, it ends up being awkward. For example, anyfunction that wants to take a Graph as a parameter now also needs tobe generic over the Node and Edge types too:
fn distance<N, E, G: Graph<N, E>>(graph: &G, start: &N,end: &N) -> u32 ...
Our distance calculation works regardless of our Edge type, so the Estuff in this signature is a distraction.
What we really want to say is that a certain Edge and Node typecome together to form each kind of Graph. We can do that with asso-ciated types:
trait Graph type N;type E;
fn has_edge(&self, &Self::N, &Self::N) -> bool;fn edges(&self, &Self::N) -> Vec<Self::E>;// Etc.

212
Now, our clients can be abstract over a given Graph:
fn distance<G: Graph>(graph: &G, start: &G::N, end: &G::N) -> u32 ...
No need to deal with the Edge type here!Let’s go over all this in more detail.
Defining associated typesLet’s build that Graph trait. Here’s the definition:
trait Graph type N;type E;
fn has_edge(&self, &Self::N, &Self::N) -> bool;fn edges(&self, &Self::N) -> Vec<Self::E>;
Simple enough. Associated types use the type keyword, and go insidethe body of the trait, with the functions.
These type declarations work the same way as those for functions.For example, if we wanted our N type to implement Display, so we canprint the nodes out, we could do this:
use std::fmt;
trait Graph type N: fmt::Display;type E;
fn has_edge(&self, &Self::N, &Self::N) -> bool;fn edges(&self, &Self::N) -> Vec<Self::E>;
Implementing associated typesJust like any trait, traits that use associated types use the impl keywordto provide implementations. Here’s a simple implementation of Graph:

213
# trait Graph # type N;# type E;# fn has_edge(&self, &Self::N, &Self::N) -> bool;# fn edges(&self, &Self::N) -> Vec<Self::E>;# struct Node;
struct Edge;
struct MyGraph;
impl Graph for MyGraph type N = Node;type E = Edge;
fn has_edge(&self, n1: &Node, n2: &Node) -> bool true
fn edges(&self, n: &Node) -> Vec<Edge> Vec::new()
This silly implementation always returns true and an empty Vec<Edge>,but it gives you an idea of how to implement this kind of thing. Wefirst need three structs, one for the graph, one for the node, and onefor the edge. If it made more sense to use a different type, that wouldwork as well, we’re going to use structs for all three here.
Next is the impl line, which is an implementation like any othertrait.
From here, we use = to define our associated types. The namethe trait uses goes on the left of the =, and the concrete type we’reimplementing this for goes on the right. Finally, we use the concretetypes in our function declarations.
Trait objects with associated typesThere’s one more bit of syntax we should talk about: trait objects. Ifyou try to create a trait object from a trait with an associated type,like this:

214
# trait Graph # type N;# type E;# fn has_edge(&self, &Self::N, &Self::N) -> bool;# fn edges(&self, &Self::N) -> Vec<Self::E>;# # struct Node;# struct Edge;# struct MyGraph;# impl Graph for MyGraph # type N = Node;# type E = Edge;# fn has_edge(&self, n1: &Node, n2: &Node) -> bool# true# # fn edges(&self, n: &Node) -> Vec<Edge> # Vec::new()# # let graph = MyGraph;let obj = Box::new(graph) as Box<Graph>;
You’ll get two errors:
error: the value of the associated type `E` (from the trait`main::Graph`) mustbe specified [E0191]let obj = Box::new(graph) as Box<Graph>;
^~~~~~~~~~~~~~~~~~~~~~~~~~~~~24:44 error: the value of the associated type `N` (fromthe trait`main::Graph`) must be specified [E0191]let obj = Box::new(graph) as Box<Graph>;
^~~~~~~~~~~~~~~~~~~~~~~~~~~~~
We can’t create a trait object like this, because we don’t know theassociated types. Instead, we can write this:
# trait Graph # type N;# type E;

215
# fn has_edge(&self, &Self::N, &Self::N) -> bool;# fn edges(&self, &Self::N) -> Vec<Self::E>;# # struct Node;# struct Edge;# struct MyGraph;# impl Graph for MyGraph # type N = Node;# type E = Edge;# fn has_edge(&self, n1: &Node, n2: &Node) -> bool# true# # fn edges(&self, n: &Node) -> Vec<Edge> # Vec::new()# # let graph = MyGraph;let obj = Box::new(graph) as Box<Graph<N=Node, E=Edge>>;
The N=Node syntax allows us to provide a concrete type, Node, forthe N type parameter. Same with E=Edge. If we didn’t provide thisconstraint, we couldn’t be sure which impl to match this trait objectto.
Unsized TypesMost types have a particular size, in bytes, that is knowable at compiletime. For example, an i32 is thirty-two bits big, or four bytes. However,there are some types which are useful to express, but do not have adefined size. These are called ‘unsized’ or ‘dynamically sized’ types.One example is [T]. This type represents a certain number of T insequence. But we don’t know how many there are, so the size is notknown.
Rust understands a few of these types, but they have some restric-tions. There are three:
1. We can only manipulate an instance of an unsized type via apointer. An &[T] works fine, but a [T] does not.
2. Variables and arguments cannot have dynamically sized types.

216
3. Only the last field in a struct may have a dynamically sizedtype; the other fields must not. Enum variants must not havedynamically sized types as data.
So why bother? Well, because [T] can only be used behind a pointer,if we didn’t have language support for unsized types, it would be im-possible to write this:
impl Foo for str
orimpl<T> Foo for [T]
Instead, you would have to write:
impl Foo for &str
Meaning, this implementation would only work for references, and notother types of pointers. With the impl for str, all pointers, including(at some point, there are some bugs to fix first) user-defined customsmart pointers, can use this impl.
?SizedIf you want to write a function that accepts a dynamically sized type,you can use the special bound syntax, ?Sized:
struct Foo<T: ?Sized> f: T,
This ?Sized, read as “T may or may not be Sized”, which allows usto match both sized and unsized types. All generic type parametersimplicitly have the Sized bound, so the ?Sized can be used to opt-outof the implicit bound.
Operators and OverloadingRust allows for a limited form of operator overloading. There are cer-tain operators that are able to be overloaded. To support a particularoperator between types, there’s a specific trait that you can implement,which then overloads the operator.
For example, the + operator can be overloaded with the Add trait:

217
use std::ops::Add;
#[derive(Debug)]struct Point
x: i32,y: i32,
impl Add for Point type Output = Point;
fn add(self, other: Point) -> Point Point x: self.x + other.x, y: self.y + other.
y
fn main() let p1 = Point x: 1, y: 0 ;let p2 = Point x: 2, y: 3 ;
let p3 = p1 + p2;
println!(":?", p3);
In main, we can use + on our two Points, since we’ve implementedAdd<Output=Point> for Point.
There are a number of operators that can be overloaded this way,and all of their associated traits live in the std::ops module. Checkout its documentation for the full list.
Implementing these traits follows a pattern. Let’s look at Add inmore detail:# mod foo pub trait Add<RHS = Self>
type Output;
fn add(self, rhs: RHS) -> Self::Output;#
There’s three types in total involved here: the type you impl Add for,

218
RHS, which defaults to Self, and Output. For an expression let z =x + y, x is the Self type, y is the RHS, and z is the Self::Outputtype.
# struct Point;# use std::ops::Add;impl Add<i32> for Point
type Output = f64;
fn add(self, rhs: i32) -> f64 // Add an i32 to a Point and get an f64.
# 1.0
will let you do this:
let p: Point = // ...let x: f64 = p + 2i32;
Using operator traits in generic structsNow that we know how operator traits are defined, we can define ourHasArea trait and Square struct from the traits chapter more generi-cally:
use std::ops::Mul;
trait HasArea<T> fn area(&self) -> T;
struct Square<T> x: T,y: T,side: T,
impl<T> HasArea<T> for Square<T>where T: Mul<Output=T> + Copy
fn area(&self) -> T self.side * self.side

219
fn main() let s = Square
x: 0.0f64,y: 0.0f64,side: 12.0f64,
;
println!("Area of s: ", s.area());
For HasArea and Square, we declare a type parameter T and replacef64 with it. The impl needs more involved modifications:
impl<T> HasArea<T> for Square<T>where T: Mul<Output=T> + Copy ...
The area method requires that we can multiply the sides, so we de-clare that type Tmust implement std::ops::Mul. Like Add, mentionedabove, Mul itself takes an Output parameter: since we know that num-bers don’t change type when multiplied, we also set it to T. T mustalso support copying, so Rust doesn’t try to move self.side into thereturn value.
Deref coercionsThe standard library provides a special trait, Deref. It’s normally usedto overload *, the dereference operator:
use std::ops::Deref;
struct DerefExample<T> value: T,
impl<T> Deref for DerefExample<T> type Target = T;
fn deref(&self) -> &T &self.value

220
fn main() let x = DerefExample value: 'a' ;assert_eq!('a', *x);
This is useful for writing custom pointer types. However, there’s alanguage feature related to Deref: ‘deref coercions’. Here’s the rule: Ifyou have a type U, and it implements Deref<Target=T>, values of &Uwill automatically coerce to a &T. Here’s an example:
fn foo(s: &str) // Borrow a string for a second.
// String implements Deref<Target=str>.let owned = "Hello".to_string();
// Therefore, this works:foo(&owned);
Using an ampersand in front of a value takes a reference to it. So ownedis a String, &owned is an &String, and since impl Deref<Target=str>for String, &String will deref to &str, which foo() takes.
That’s it. This rule is one of the only places in which Rust doesan automatic conversion for you, but it adds a lot of flexibility. Forexample, the Rc<T> type implements Deref<Target=T>, so this works:
use std::rc::Rc;
fn foo(s: &str) // Borrow a string for a second.
// String implements Deref<Target=str>.let owned = "Hello".to_string();let counted = Rc::new(owned);
// Therefore, this works:foo(&counted);

221
All we’ve done is wrap our String in an Rc<T>. But we can now passthe Rc<String> around anywhere we’d have a String. The signature offoo didn’t change, but works just as well with either type. This examplehas two conversions: &Rc<String> to &String and then &String to&str. Rust will do this as many times as possible until the typesmatch.
Another very common implementation provided by the standardlibrary is:
fn foo(s: &[i32]) // Borrow a slice for a second.
// Vec<T> implements Deref<Target=[T]>.let owned = vec![1, 2, 3];
foo(&owned);
Vectors can Deref to a slice.
Deref and method callsDeref will also kick in when calling a method. Consider the followingexample.
struct Foo;
impl Foo fn foo(&self) println!("Foo");
let f = &&Foo;
f.foo();
Even though f is a &&Foo and foo takes &self, this works. That’sbecause these things are the same:
f.foo();(&f).foo();(&&f).foo();(&&&&&&&&f).foo();

222
A value of type &&&&&&&&&&&&&&&&Foo can still have methods definedon Foo called, because the compiler will insert as many * operations asnecessary to get it right. And since it’s inserting *s, that uses Deref.
MacrosBy now you’ve learned about many of the tools Rust provides for ab-stracting and reusing code. These units of code reuse have a rich se-mantic structure. For example, functions have a type signature, typeparameters have trait bounds, and overloaded functions must belongto a particular trait.
This structure means that Rust’s core abstractions have powerfulcompile-time correctness checking. But this comes at the price of re-duced flexibility. If you visually identify a pattern of repeated code,you may find it’s difficult or cumbersome to express that pattern as ageneric function, a trait, or anything else within Rust’s semantics.
Macros allow us to abstract at a syntactic level. A macro invocationis shorthand for an “expanded” syntactic form. This expansion happensearly in compilation, before any static checking. As a result, macroscan capture many patterns of code reuse that Rust’s core abstractionscannot.
The drawback is that macro-based code can be harder to under-stand, because fewer of the built-in rules apply. Like an ordinary func-tion, a well-behaved macro can be used without understanding its im-plementation. However, it can be difficult to design a well-behavedmacro! Additionally, compiler errors in macro code are harder to in-terpret, because they describe problems in the expanded code, not thesource-level form that developers use.
These drawbacks make macros something of a “feature of last re-sort”. That’s not to say that macros are bad; they are part of Rust be-cause sometimes they’re needed for truly concise, well-abstracted code.Just keep this tradeoff in mind.
Defining a macroYou may have seen the vec! macro, used to initialize a vector withany number of elements.
let x: Vec<u32> = vec![1, 2, 3];# assert_eq!(x, [1, 2, 3]);

223
This can’t be an ordinary function, because it takes any number ofarguments. But we can imagine it as syntactic shorthand for
let x: Vec<u32> = let mut temp_vec = Vec::new();temp_vec.push(1);temp_vec.push(2);temp_vec.push(3);temp_vec
;# assert_eq!(x, [1, 2, 3]);
We can implement this shorthand, using a macro: 1
macro_rules! vec ( $( $x:expr ),* ) =>
let mut temp_vec = Vec::new();$(
temp_vec.push($x);)*temp_vec
;
# fn main() # assert_eq!(vec![1,2,3], [1, 2, 3]);#
Whoa, that’s a lot of new syntax! Let’s break it down.
macro_rules! vec ...
This says we’re defining a macro named vec, much as fn vec woulddefine a function named vec. In prose, we informally write a macro’sname with an exclamation point, e.g. vec!. The exclamation point ispart of the invocation syntax and serves to distinguish a macro froman ordinary function.
1The actual definition of vec! in libcollections differs from the one presentedhere, for reasons of efficiency and reusability.

224
MatchingThe macro is defined through a series of rules, which are pattern-matching cases. Above, we had
( $( $x:expr ),* ) => ... ;
This is like a match expression arm, but the matching happens onRust syntax trees, at compile time. The semicolon is optional on thelast (here, only) case. The “pattern” on the left-hand side of => isknown as a ‘matcher’. These have their own little grammar within thelanguage.
The matcher $x:expr will match any Rust expression, binding thatsyntax tree to the ‘metavariable’ $x. The identifier expr is a ‘fragmentspecifier’; the full possibilities are enumerated later in this chapter.Surrounding the matcher with $(...),* will match zero or more ex-pressions, separated by commas.
Aside from the special matcher syntax, any Rust tokens that appearin a matcher must match exactly. For example,
macro_rules! foo (x => $e:expr) => (println!("mode X: ", $e));(y => $e:expr) => (println!("mode Y: ", $e));
fn main() foo!(y => 3);
will print
mode Y: 3
Withfoo!(z => 3);
we get the compiler error
error: no rules expected the token `z`
ExpansionThe right-hand side of a macro rule is ordinary Rust syntax, for themost part. But we can splice in bits of syntax captured by the matcher.From the original example:

225
$(temp_vec.push($x);
)*
Each matched expression $x will produce a single push statement in themacro expansion. The repetition in the expansion proceeds in “lock-step” with repetition in the matcher (more on this in a moment).
Because $x was already declared as matching an expression, wedon’t repeat :expr on the right-hand side. Also, we don’t include aseparating comma as part of the repetition operator. Instead, we havea terminating semicolon within the repeated block.
Another detail: the vec! macro has two pairs of braces on theright-hand side. They are often combined like so:
macro_rules! foo () =>
...
The outer braces are part of the syntax of macro_rules!. In fact, youcan use () or [] instead. They simply delimit the right-hand side as awhole.
The inner braces are part of the expanded syntax. Remember, thevec! macro is used in an expression context. To write an expressionwith multiple statements, including let-bindings, we use a block. Ifyour macro expands to a single expression, you don’t need this extralayer of braces.
Note that we never declared that the macro produces an expression.In fact, this is not determined until we use the macro as an expression.With care, you can write a macro whose expansion works in severalcontexts. For example, shorthand for a data type could be valid aseither an expression or a pattern.
RepetitionThe repetition operator follows two principal rules:
1. $(...)* walks through one “layer” of repetitions, for all of the$names it contains, in lockstep, and
2. each $name must be under at least as many $(...)*s as it wasmatched against. If it is under more, it’ll be duplicated, as ap-propriate.

226
This baroque macro illustrates the duplication of variables from outerrepetition levels.
macro_rules! o_O (
$($x:expr; [ $( $y:expr ),* ]
);*) =>
&[ $($( $x + $y ),*),* ]
fn main() let a: &[i32]
= o_O!(10; [1, 2, 3];20; [4, 5, 6]);
assert_eq!(a, [11, 12, 13, 24, 25, 26]);
That’s most of the matcher syntax. These examples use $(...)*, whichis a “zero or more” match. Alternatively you can write $(...)+ for a“one or more” match. Both forms optionally include a separator, whichcan be any token except + or *.
This system is based on ”Macro-by-Example” (PDF link).
HygieneSome languages implement macros using simple text substitution, whichleads to various problems. For example, this C program prints 13 in-stead of the expected 25.
#define FIVE_TIMES(x) 5 * x
int main() printf("%d\n", FIVE_TIMES(2 + 3));return 0;
After expansion we have 5 * 2 + 3, and multiplication has greaterprecedence than addition. If you’ve used C macros a lot, you probably
227
know the standard idioms for avoiding this problem, as well as five orsix others. In Rust, we don’t have to worry about it.
macro_rules! five_times ($x:expr) => (5 * $x);
fn main() assert_eq!(25, five_times!(2 + 3));
The metavariable $x is parsed as a single expression node, and keepsits place in the syntax tree even after substitution.
Another common problem in macro systems is ‘variable capture’.Here’s a C macro using a block with multiple statements.
#define LOG(msg) do \int state = get_log_state(); \if (state > 0) \
printf("log(%d): %s\n", state, msg); \ \
while (0)
Here’s a simple use case that goes terribly wrong:
const char *state = "reticulating splines";LOG(state);
This expands to
const char *state = "reticulating splines";do
int state = get_log_state();if (state > 0)
printf("log(%d): %s\n", state, state);
while (0);
The second variable named state shadows the first one. This is aproblem because the print statement should refer to both of them.
The equivalent Rust macro has the desired behavior.

228
# fn get_log_state() -> i32 3 macro_rules! log
($msg:expr) => let state: i32 = get_log_state();if state > 0
println!("log(): ", state, $msg);
;
fn main() let state: &str = "reticulating splines";log!(state);
This works because Rust has a hygienic macro system. Each macroexpansion happens in a distinct ‘syntax context’, and each variable istagged with the syntax context where it was introduced. It’s as thoughthe variable state inside main is painted a different “color” from thevariable state inside the macro, and therefore they don’t conflict.
This also restricts the ability of macros to introduce new bindingsat the invocation site. Code such as the following will not work:
macro_rules! foo () => (let x = 3;);
fn main() foo!();println!("", x);
Instead you need to pass the variable name into the invocation, so thatit’s tagged with the right syntax context.
macro_rules! foo ($v:ident) => (let $v = 3;);
fn main() foo!(x);println!("", x);

229
This holds for let bindings and loop labels, but not for items. So thefollowing code does compile:
macro_rules! foo () => (fn x() );
fn main() foo!();x();
Recursive macrosA macro’s expansion can include more macro invocations, includinginvocations of the very same macro being expanded. These recursivemacros are useful for processing tree-structured input, as illustrated bythis (simplistic) HTML shorthand:
# #![allow(unused_must_use)]macro_rules! write_html
($w:expr, ) => (());
($w:expr, $e:tt) => (write!($w, "", $e));
($w:expr, $tag:ident [ $($inner:tt)* ] $($rest:tt)*)=>
write!($w, "<>", stringify!($tag));write_html!($w, $($inner)*);write!($w, "</>", stringify!($tag));write_html!($w, $($rest)*);
;
fn main() # // FIXME(#21826)
use std::fmt::Write;let mut out = String::new();
230
write_html!(&mut out,html[
head[title["Macros guide"]]body[h1["Macros are the best!"]]
]);
assert_eq!(out,"<html><head><title>Macros guide</title></head>\<body><h1>Macros are the best!</h1></body></html>")
;
Debugging macro codeTo see the results of expanding macros, run rustc --pretty expanded.The output represents a whole crate, so you can also feed it back in torustc, which will sometimes produce better error messages than theoriginal compilation. Note that the --pretty expanded output mayhave a different meaning if multiple variables of the same name (butdifferent syntax contexts) are in play in the same scope. In this case --pretty expanded,hygiene will tell you about the syntax contexts.
rustc provides two syntax extensions that help with macro debug-ging. For now, they are unstable and require feature gates.
• log_syntax!(...) will print its arguments to standard output,at compile time, and “expand” to nothing.
• trace_macros!(true) will enable a compiler message every timea macro is expanded. Use trace_macros!(false) later in expan-sion to turn it off.
Syntactic requirementsEven when Rust code contains un-expanded macros, it can be parsedas a full syntax tree. This property can be very useful for editors andother tools that process code. It also has a few consequences for thedesign of Rust’s macro system.
One consequence is that Rust must determine, when it parses amacro invocation, whether the macro stands in for
• zero or more items,

231
• zero or more methods,
• an expression,
• a statement, or
• a pattern.
A macro invocation within a block could stand for some items, or foran expression / statement. Rust uses a simple rule to resolve thisambiguity. A macro invocation that stands for items must be either
• delimited by curly braces, e.g. foo! ... , or
• terminated by a semicolon, e.g. foo!(...);
Another consequence of pre-expansion parsing is that the macro invo-cation must consist of valid Rust tokens. Furthermore, parentheses,brackets, and braces must be balanced within a macro invocation. Forexample, foo!([) is forbidden. This allows Rust to know where themacro invocation ends.
More formally, the macro invocation body must be a sequence of‘token trees’. A token tree is defined recursively as either
• a sequence of token trees surrounded by matching (), [], or ,or
• any other single token.
Within a matcher, each metavariable has a ‘fragment specifier’, identi-fying which syntactic form it matches.
• ident: an identifier. Examples: x; foo.
• path: a qualified name. Example: T::SpecialA.
• expr: an expression. Examples: 2 + 2; if true 1 else 2 ; f(42).
• ty: a type. Examples: i32; Vec<(char, String)>; &T.
• pat: a pattern. Examples: Some(t); (17, ‘a’); _.
• stmt: a single statement. Example: let x = 3.
• block: a brace-delimited sequence of statements and optionallyan expression. Example: log(error, “hi”); return 12; .

232
• item: an item. Examples: fn foo() ; struct Bar;.
• meta: a “meta item”, as found in attributes. Example: cfg(target_os = “windows”).
• tt: a single token tree.
There are additional rules regarding the next token after a metavari-able:
• expr and stmt variables may only be followed by one of: => , ;
• ty and path variables may only be followed by one of: => , = |; : > [ as where
• pat variables may only be followed by one of: => , = | if in
• Other variables may be followed by any token.
These rules provide some flexibility for Rust’s syntax to evolve withoutbreaking existing macros.
The macro system does not deal with parse ambiguity at all. Forexample, the grammar $($i:ident)* $e:expr will always fail to parse,because the parser would be forced to choose between parsing $i andparsing $e. Changing the invocation syntax to put a distinctive tokenin front can solve the problem. In this case, you can write $(I $i:ident)* E $e:expr.
Scoping and macro import/exportMacros are expanded at an early stage in compilation, before nameresolution. One downside is that scoping works differently for macros,compared to other constructs in the language.
Definition and expansion of macros both happen in a single depth-first, lexical-order traversal of a crate’s source. So a macro defined atmodule scope is visible to any subsequent code in the same module,which includes the body of any subsequent child mod items. If youwant to use your macro, which is defined in a different module, youneed to use macro_use attribute before using the macro. Let’s say ourmacros are defined in module macros and we would like to use theminside module client. This is the required module definition order:

233
#[macro_use]mod macros;mod client;
The opposite order would result in a compilation failure:
mod client;#[macro_use]mod macros;
error: cannot find macro `my_macro!` in this scope
A macro defined within the body of a single fn, or anywhere else notat module scope, is visible only within that item.
If a module has the macro_use attribute, its macros are also visiblein its parent module after the child’s mod item. If the parent also hasmacro_use then the macros will be visible in the grandparent after theparent’s mod item, and so forth.
The macro_use attribute can also appear on extern crate. In thiscontext it controls which macros are loaded from the external crate,e.g.
#[macro_use(foo, bar)]extern crate baz;
If the attribute is given simply as #[macro_use], all macros are loaded.If there is no #[macro_use] attribute then no macros are loaded. Onlymacros defined with the #[macro_export] attribute may be loaded.
To load a crate’s macros without linking it into the output, use#[no_link] as well.
An example:
macro_rules! m1 () => (())
// Visible here: `m1`.
mod foo // Visible here: `m1`.
#[macro_export]macro_rules! m2 () => (())
// Visible here: `m1`, `m2`.

234
// Visible here: `m1`.
macro_rules! m3 () => (())
// Visible here: `m1`, `m3`.
#[macro_use]mod bar
// Visible here: `m1`, `m3`.
macro_rules! m4 () => (())
// Visible here: `m1`, `m3`, `m4`.
// Visible here: `m1`, `m3`, `m4`.# fn main()
When this library is loaded with #[macro_use] extern crate, onlym2 will be imported.
The Rust Reference has a listing of macro-related attributes.
The variable $crateA further difficulty occurs when a macro is used in multiple crates. Saythat mylib defines
pub fn increment(x: u32) -> u32 x + 1
#[macro_export]macro_rules! inc_a
($x:expr) => ( ::increment($x) )
#[macro_export]macro_rules! inc_b
($x:expr) => ( ::mylib::increment($x) )

235
# fn main()
inc_a only works within mylib, while inc_b only works outside thelibrary. Furthermore, inc_b will break if the user imports mylib underanother name.
Rust does not (yet) have a hygiene system for crate references, butit does provide a simple workaround for this problem. Within a macroimported from a crate named foo, the special macro variable $cratewill expand to ::foo. By contrast, when a macro is defined and thenused in the same crate, $crate will expand to nothing. This means wecan write#[macro_export]macro_rules! inc
($x:expr) => ( $crate::increment($x) )# fn main()
to define a single macro that works both inside and outside our library.The function name will expand to either ::increment or ::mylib::increment.
To keep this system simple and correct, #[macro_use] externcrate ... may only appear at the root of your crate, not insidemod.
The deep endThe introductory chapter mentioned recursive macros, but it did notgive the full story. Recursive macros are useful for another reason:Each recursive invocation gives you another opportunity to pattern-match the macro’s arguments.
As an extreme example, it is possible, though hardly advisable,to implement the Bitwise Cyclic Tag automaton within Rust’s macrosystem.
macro_rules! bct // cmd 0: d ... => ...(0, $($ps:tt),* ; $_d:tt)
=> (bct!($($ps),*, 0 ; ));(0, $($ps:tt),* ; $_d:tt, $($ds:tt),*)
=> (bct!($($ps),*, 0 ; $($ds),*));

236
// cmd 1p: 1 ... => 1 ... p(1, $p:tt, $($ps:tt),* ; 1)
=> (bct!($($ps),*, 1, $p ; 1, $p));(1, $p:tt, $($ps:tt),* ; 1, $($ds:tt),*)
=> (bct!($($ps),*, 1, $p ; 1, $($ds),*, $p));
// cmd 1p: 0 ... => 0 ...(1, $p:tt, $($ps:tt),* ; $($ds:tt),*)
=> (bct!($($ps),*, 1, $p ; $($ds),*));
// Halt on empty data string:( $($ps:tt),* ; )
=> (());
Exercise: use macros to reduce duplication in the above definition ofthe bct! macro.
Common macrosHere are some common macros you’ll see in Rust code.
panic!This macro causes the current thread to panic. You can give it amessage to panic with:
panic!("oh no!");
vec!The vec! macro is used throughout the book, so you’ve probably seenit already. It creates Vec<T>s with ease:
let v = vec![1, 2, 3, 4, 5];
It also lets you make vectors with repeating values. For example, ahundred zeroes:
let v = vec![0; 100];

237
assert! and assert_eq!These two macros are used in tests. assert! takes a boolean. assert_eq! takes two values and checks them for equality. true passes, falsepanic!s. Like this:
// A-ok!
assert!(true);assert_eq!(5, 3 + 2);
// Nope :(
assert!(5 < 3);assert_eq!(5, 3);
try!try! is used for error handling. It takes something that can return aResult<T, E>, and gives T if it’s a Ok<T>, and returns with the Err(E) if it’s that. Like this:use std::fs::File;
fn foo() -> std::io::Result<()> let f = try!(File::create("foo.txt"));
Ok(())
This is cleaner than doing this:
use std::fs::File;
fn foo() -> std::io::Result<()> let f = File::create("foo.txt");
let f = match f Ok(t) => t,Err(e) => return Err(e),
;
Ok(())

238
unreachable!This macro is used when you think some code should never execute:
if false unreachable!();
Sometimes, the compiler may make you have a different branch thatyou know will never, ever run. In these cases, use this macro, so thatif you end up wrong, you’ll get a panic! about it.
let x: Option<i32> = None;
match x Some(_) => unreachable!(),None => println!("I know x is None!"),
unimplemented!The unimplemented! macro can be used when you’re trying to get yourfunctions to typecheck, and don’t want to worry about writing out thebody of the function. One example of this situation is implementinga trait with multiple required methods, where you want to tackle oneat a time. Define the others as unimplemented! until you’re ready towrite them.
Raw PointersRust has a number of different smart pointer types in its standardlibrary, but there are two types that are extra-special. Much of Rust’ssafety comes from compile-time checks, but raw pointers don’t havesuch guarantees, and are unsafe to use.
*const T and *mut T are called ‘raw pointers’ in Rust. Sometimes,when writing certain kinds of libraries, you’ll need to get around Rust’ssafety guarantees for some reason. In this case, you can use raw pointersto implement your library, while exposing a safe interface for your users.For example, * pointers are allowed to alias, allowing them to be usedto write shared-ownership types, and even thread-safe shared memory

239
types (the Rc<T> and Arc<T> types are both implemented entirely inRust).
Here are some things to remember about raw pointers that aredifferent than other pointer types. They:
• are not guaranteed to point to valid memory and are not evenguaranteed to be non-NULL (unlike both Box and &);
• do not have any automatic clean-up, unlike Box, and so requiremanual resource management;
• are plain-old-data, that is, they don’t move ownership, again un-like Box, hence the Rust compiler cannot protect against bugs likeuse-after-free;
• lack any form of lifetimes, unlike &, and so the compiler cannotreason about dangling pointers; and
• have no guarantees about aliasing or mutability other than mu-tation not being allowed directly through a *const T.
BasicsCreating a raw pointer is perfectly safe:
let x = 5;let raw = &x as *const i32;
let mut y = 10;let raw_mut = &mut y as *mut i32;
However, dereferencing one is not. This won’t work:
let x = 5;let raw = &x as *const i32;
println!("raw points at ", *raw);
It gives this error:
error: dereference of raw pointer requires unsafe functionor block [E0133]
println!("raw points at ", *raw);

240
^~~~
When you dereference a raw pointer, you’re taking responsibility thatit’s not pointing somewhere that would be incorrect. As such, you needunsafe:let x = 5;let raw = &x as *const i32;
let points_at = unsafe *raw ;
println!("raw points at ", points_at);
For more operations on raw pointers, see their API documentation.
FFIRaw pointers are useful for FFI: Rust’s *const T and *mut T are similarto C’s const T* and T*, respectively. For more about this use, consultthe FFI chapter.
References and raw pointersAt runtime, a raw pointer * and a reference pointing to the same pieceof data have an identical representation. In fact, an &T reference willimplicitly coerce to an *const T raw pointer in safe code and similarlyfor the mut variants (both coercions can be performed explicitly with,respectively, value as *const T and value as *mut T).
Going the opposite direction, from *const to a reference &, is notsafe. A &T is always valid, and so, at a minimum, the raw pointer*const T has to point to a valid instance of type T. Furthermore, theresulting pointer must satisfy the aliasing and mutability laws of ref-erences. The compiler assumes these properties are true for any refer-ences, no matter how they are created, and so any conversion from rawpointers is asserting that they hold. The programmer must guaranteethis.
The recommended method for the conversion is:// Explicit cast:let i: u32 = 1;let p_imm: *const u32 = &i as *const u32;

241
// Implicit coercion:let mut m: u32 = 2;let p_mut: *mut u32 = &mut m;
unsafe let ref_imm: &u32 = &*p_imm;let ref_mut: &mut u32 = &mut *p_mut;
The &*x dereferencing style is preferred to using a transmute. Thelatter is far more powerful than necessary, and the more restrictedoperation is harder to use incorrectly; for example, it requires that x isa pointer (unlike transmute).
UnsafeRust’s main draw is its powerful static guarantees about behavior. Butsafety checks are conservative by nature: there are some programs thatare actually safe, but the compiler is not able to verify this is true. Towrite these kinds of programs, we need to tell the compiler to relax itsrestrictions a bit. For this, Rust has a keyword, unsafe. Code usingunsafe has fewer restrictions than normal code does.
Let’s go over the syntax, and then we’ll talk semantics. unsafe isused in four contexts. The first one is to mark a function as unsafe:
unsafe fn danger_will_robinson() // Scary stuff...
All functions called from FFI must be marked as unsafe, for example.The second use of unsafe is an unsafe block:
unsafe // Scary stuff...
The third is for unsafe traits:
unsafe trait Scary
And the fourth is for implementing one of those traits:

242
# unsafe trait Scary unsafe impl Scary for i32
It’s important to be able to explicitly delineate code that may havebugs that cause big problems. If a Rust program segfaults, you can besure the cause is related to something marked unsafe.
What does ‘safe’ mean?Safe, in the context of Rust, means ‘doesn’t do anything unsafe’. It’salso important to know that there are certain behaviors that are prob-ably not desirable in your code, but are expressly not unsafe:
• Deadlocks
• Leaks of memory or other resources
• Exiting without calling destructors
• Integer overflow
Rust cannot prevent all kinds of software problems. Buggy code canand will be written in Rust. These things aren’t great, but they don’tqualify as unsafe specifically.
In addition, the following are all undefined behaviors in Rust, andmust be avoided, even when writing unsafe code:
• Data races
• Dereferencing a NULL/dangling raw pointer
• Reads of undef (uninitialized) memory
• Breaking the pointer aliasing rules with raw pointers.
• &mut T and &T follow LLVM’s scoped noalias model, except if the&T contains an UnsafeCell<U>. Unsafe code must not violatethese aliasing guarantees.
• Mutating an immutable value/reference without UnsafeCell<U>
• Invoking undefined behavior via compiler intrinsics:
– Indexing outside of the bounds of an object with std::ptr::offset (offset intrinsic), with the exception of one bytepast the end which is permitted.

243
– Using std::ptr::copy_nonoverlapping_memory (memcpy32/memcpy64intrinsics) on overlapping buffers
• Invalid values in primitive types, even in private fields/locals:
– NULL/dangling references or boxes– A value other than false (0) or true (1) in a bool
– A discriminant in an enum not included in its type definition– A value in a char which is a surrogate or above char::MAX– Non-UTF-8 byte sequences in a str
• Unwinding into Rust from foreign code or unwinding from Rustinto foreign code.
Unsafe SuperpowersIn both unsafe functions and unsafe blocks, Rust will let you do threethings that you normally can not do. Just three. Here they are:
1. Access or update a static mutable variable.
2. Dereference a raw pointer.
3. Call unsafe functions. This is the most powerful ability.
That’s it. It’s important that unsafe does not, for example, ‘turn offthe borrow checker’. Adding unsafe to some random Rust code doesn’tchange its semantics, it won’t start accepting anything. But it will letyou write things that do break some of the rules.
You will also encounter the unsafe keyword when writing bindingsto foreign (non-Rust) interfaces. You’re encouraged to write a safe,native Rust interface around the methods provided by the library.
Let’s go over the basic three abilities listed, in order.
Access or update a static mutRust has a feature called ‘static mut’ which allows for mutable globalstate. Doing so can cause a data race, and as such is inherently notsafe. For more details, see the static section of the book.

244
Dereference a raw pointerRaw pointers let you do arbitrary pointer arithmetic, and can cause anumber of different memory safety and security issues. In some senses,the ability to dereference an arbitrary pointer is one of the most dan-gerous things you can do. For more on raw pointers, see their sectionof the book.
Call unsafe functionsThis last ability works with both aspects of unsafe: you can only callfunctions marked unsafe from inside an unsafe block.
This ability is powerful and varied. Rust exposes some compilerintrinsics as unsafe functions, and some unsafe functions bypass safetychecks, trading safety for speed.
I’ll repeat again: even though you can do arbitrary things in unsafeblocks and functions doesn’t mean you should. The compiler will actas though you’re upholding its invariants, so be careful!

Part V
Effective Rust


Chapter 1
Effective Rust
So you’ve learned how to write some Rust code. But there’s a differencebetween writing any Rust code and writing good Rust code.
This chapter consists of relatively independent tutorials which showyou how to take your Rust to the next level. Common patterns andstandard library features will be introduced. Read these sections inany order of your choosing.
The Stack and the Heap
As a systems language, Rust operates at a low level. If you’re comingfrom a high-level language, there are some aspects of systems program-ming that you may not be familiar with. The most important one ishow memory works, with a stack and a heap. If you’re familiar withhow C-like languages use stack allocation, this chapter will be a re-fresher. If you’re not, you’ll learn about this more general concept, butwith a Rust-y focus.
As with most things, when learning about them, we’ll use a simpli-fied model to start. This lets you get a handle on the basics, withoutgetting bogged down with details which are, for now, irrelevant. Theexamples we’ll use aren’t 100% accurate, but are representative for thelevel we’re trying to learn at right now. Once you have the basics down,learning more about how allocators are implemented, virtual memory,and other advanced topics will reveal the leaks in this particular ab-straction.

248
Memory managementThese two terms are about memory management. The stack and theheap are abstractions that help you determine when to allocate anddeallocate memory.
Here’s a high-level comparison:The stack is very fast, and is where memory is allocated in Rust by
default. But the allocation is local to a function call, and is limited insize. The heap, on the other hand, is slower, and is explicitly allocatedby your program. But it’s effectively unlimited in size, and is globallyaccessible. Note this meaning of heap, which allocates arbitrary-sizedblocks of memory in arbitrary order, is quite different from the heapdata structure.
The StackLet’s talk about this Rust program:
fn main() let x = 42;
This program has one variable binding, x. This memory needs to beallocated from somewhere. Rust ‘stack allocates’ by default, whichmeans that basic values ‘go on the stack’. What does that mean?
Well, when a function gets called, some memory gets allocated forall of its local variables and some other information. This is calleda ‘stack frame’, and for the purpose of this tutorial, we’re going toignore the extra information and only consider the local variables we’reallocating. So in this case, when main() is run, we’ll allocate a single32-bit integer for our stack frame. This is automatically handled foryou, as you can see; we didn’t have to write any special Rust code oranything.
When the function exits, its stack frame gets deallocated. Thishappens automatically as well.
That’s all there is for this simple program. The key thing to under-stand here is that stack allocation is very, very fast. Since we know allthe local variables we have ahead of time, we can grab the memory allat once. And since we’ll throw them all away at the same time as well,we can get rid of it very fast too.
The downside is that we can’t keep values around if we need themfor longer than a single function. We also haven’t talked about what the

249
word, ‘stack’, means. To do that, we need a slightly more complicatedexample:
fn foo() let y = 5;let z = 100;
fn main() let x = 42;
foo();
This program has three variables total: two in foo(), one in main(). Just as before, when main() is called, a single integer is allocatedfor its stack frame. But before we can show what happens when foo() is called, we need to visualize what’s going on with memory. Youroperating system presents a view of memory to your program that’spretty simple: a huge list of addresses, from 0 to a large number, rep-resenting how much RAM your computer has. For example, if you havea gigabyte of RAM, your addresses go from 0 to 1,073,741,823. Thatnumber comes from 230, the number of bytes in a gigabyte. 1
1‘Gigabyte’ can mean two things: 109, or 230. The IEC standard resolved thisby stating that ‘gigabyte’ is 109, and ‘gibibyte’ is 230. However, very few people usethis terminology, and rely on context to differentiate. We follow in that traditionhere.
This memory is kind of like a giant array: addresses start at zero and go up tothe final number. So here’s a diagram of our first stack frame:
Address Name Value0 x 42
We’ve got x located at address 0, with the value 42.When foo() is called, a new stack frame is allocated:
Address Name Value2 z 1001 y 50 x 42
Because 0 was taken by the first frame, 1 and 2 are used for foo()’s stack frame.It grows upward, the more functions we call. Notice that we are not taking intoaccount the size of each variable (for example, a 32 bit variable would use thememory addresses from 0 to 3, or 4 bytes).
250
There are some important things we have to take note of here. Thenumbers 0, 1, and 2 are all solely for illustrative purposes, and bear norelationship to the address values the computer will use in reality. Inparticular, the series of addresses are in reality going to be separated bysome number of bytes that separate each address, and that separationmay even exceed the size of the value being stored.
After foo() is over, its frame is deallocated:
Address Name Value0 x 42
And then, after main(), even this last value goes away. Easy!It’s called a ‘stack’ because it works like a stack of dinner plates:
the first plate you put down is the last plate to pick back up. Stacksare sometimes called ‘last in, first out queues’ for this reason, as thelast value you put on the stack is the first one you retrieve from it.
Let’s try a three-deep example:
fn italic() let i = 6;
fn bold() let a = 5;let b = 100;let c = 1;
italic();
fn main() let x = 42;
bold();
We have some kooky function names to make the diagrams clearer.Okay, first, we call main():
Address Name Value0 x 42
Next up, main() calls bold():
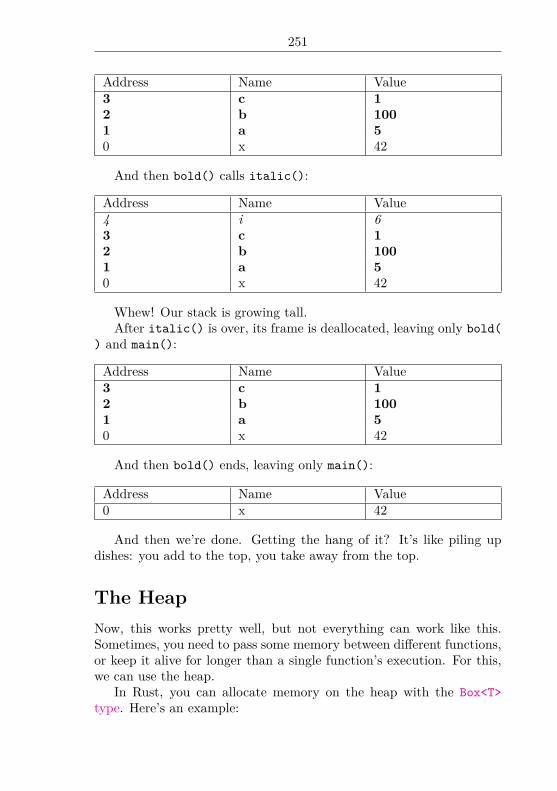
251
Address Name Value3 c 12 b 1001 a 50 x 42
And then bold() calls italic():
Address Name Value4 i 63 c 12 b 1001 a 50 x 42
Whew! Our stack is growing tall.After italic() is over, its frame is deallocated, leaving only bold(
) and main():
Address Name Value3 c 12 b 1001 a 50 x 42
And then bold() ends, leaving only main():
Address Name Value0 x 42
And then we’re done. Getting the hang of it? It’s like piling updishes: you add to the top, you take away from the top.
The HeapNow, this works pretty well, but not everything can work like this.Sometimes, you need to pass some memory between different functions,or keep it alive for longer than a single function’s execution. For this,we can use the heap.
In Rust, you can allocate memory on the heap with the Box<T>type. Here’s an example:

252
fn main() let x = Box::new(5);let y = 42;
Here’s what happens in memory when main() is called:
Address Name Value1 y 420 x ??????
We allocate space for two variables on the stack. y is 42, as it alwayshas been, but what about x? Well, x is a Box<i32>, and boxes allocatememory on the heap. The actual value of the box is a structure whichhas a pointer to ‘the heap’. When we start executing the function, andBox::new() is called, it allocates some memory for the heap, and puts5 there. The memory now looks like this:
Address Name Value(230) - 1 5... ... ...1 y 420 x → (230) - 1
We have (230) addresses in our hypothetical computer with 1GB ofRAM. And since our stack grows from zero, the easiest place to allocatememory is from the other end. So our first value is at the highest placein memory. And the value of the struct at x has a raw pointer to theplace we’ve allocated on the heap, so the value of x is (230) - 1, thememory location we’ve asked for.
We haven’t really talked too much about what it actually means toallocate and deallocate memory in these contexts. Getting into verydeep detail is out of the scope of this tutorial, but what’s importantto point out here is that the heap isn’t a stack that grows from theopposite end. We’ll have an example of this later in the book, butbecause the heap can be allocated and freed in any order, it can endup with ‘holes’. Here’s a diagram of the memory layout of a programwhich has been running for a while now:

253
Address Name Value(230) - 1 5(230) - 2(230) - 3(230) - 4 42... ... ...2 z → (230) - 41 y 420 x → (230) - 1
In this case, we’ve allocated four things on the heap, but deallocatedtwo of them. There’s a gap between (230) - 1 and (230) - 4 which isn’tcurrently being used. The specific details of how and why this happensdepends on what kind of strategy you use to manage the heap. Differentprograms can use different ‘memory allocators’, which are libraries thatmanage this for you. Rust programs use jemalloc for this purpose.
Anyway, back to our example. Since this memory is on the heap, itcan stay alive longer than the function which allocates the box. In thiscase, however, it doesn’t.2 When the function is over, we need to freethe stack frame for main(). Box<T>, though, has a trick up its sleeve:Drop. The implementation of Drop for Box deallocates the memorythat was allocated when it was created. Great! So when x goes away,it first frees the memory allocated on the heap:
Address Name Value1 y 420 x ??????
And then the stack frame goes away, freeing all of our memory.
Arguments and borrowingWe’ve got some basic examples with the stack and the heap going, butwhat about function arguments and borrowing? Here’s a small Rustprogram:
fn foo(i: &i32) let z = 42;
2We can make the memory live longer by transferring ownership, sometimescalled ‘moving out of the box’. More complex examples will be covered later.

254
fn main() let x = 5;let y = &x;
foo(y);
When we enter main(), memory looks like this:
Address Name Value1 y → 00 x 5
x is a plain old 5, and y is a reference to x. So its value is thememory location that x lives at, which in this case is 0.
What about when we call foo(), passing y as an argument?
Address Name Value3 z 422 i → 01 y → 00 x 5
Stack frames aren’t only for local bindings, they’re for argumentstoo. So in this case, we need to have both i, our argument, and z, ourlocal variable binding. i is a copy of the argument, y. Since y’s valueis 0, so is i’s.
This is one reason why borrowing a variable doesn’t deallocate anymemory: the value of a reference is a pointer to a memory location. Ifwe got rid of the underlying memory, things wouldn’t work very well.
A complex exampleOkay, let’s go through this complex program step-by-step:
fn foo(x: &i32) let y = 10;let z = &y;
baz(z);bar(x, z);

255
fn bar(a: &i32, b: &i32) let c = 5;let d = Box::new(5);let e = &d;
baz(e);
fn baz(f: &i32) let g = 100;
fn main() let h = 3;let i = Box::new(20);let j = &h;
foo(j);
First, we call main():
Address Name Value(230) - 1 20... ... ...2 j → 01 i → (230) - 10 h 3
We allocate memory for j, i, and h. i is on the heap, and so has avalue pointing there.
Next, at the end of main(), foo() gets called:
Address Name Value(230) - 1 20... ... ...5 z → 44 y 103 x → 02 j → 01 i → (230) - 10 h 3

256
Space gets allocated for x, y, and z. The argument x has the samevalue as j, since that’s what we passed it in. It’s a pointer to the 0address, since j points at h.
Next, foo() calls baz(), passing z:
Address Name Value(230) - 1 20... ... ...7 g 1006 f → 45 z → 44 y 103 x → 02 j → 01 i → (230) - 10 h 3
We’ve allocated memory for f and g. baz() is very short, so whenit’s over, we get rid of its stack frame:
Address Name Value(230) - 1 20... ... ...5 z → 44 y 103 x → 02 j → 01 i → (230) - 10 h 3
Next, foo() calls bar() with x and z:

257
Address Name Value(230) - 1 20(230) - 2 5... ... ...10 e → 99 d → (230) - 28 c 57 b → 46 a → 05 z → 44 y 103 x → 02 j → 01 i → (230) - 10 h 3
We end up allocating another value on the heap, and so we have tosubtract one from (230) - 1. It’s easier to write that than 1,073,741,822.In any case, we set up the variables as usual.
At the end of bar(), it calls baz():
Address Name Value(230) - 1 20(230) - 2 5... ... ...12 g 10011 f → (230) - 210 e → 99 d → (230) - 28 c 57 b → 46 a → 05 z → 44 y 103 x → 02 j → 01 i → (230) - 10 h 3
With this, we’re at our deepest point! Whew! Congrats for followingalong this far.
After baz() is over, we get rid of f and g:

258
Address Name Value(230) - 1 20(230) - 2 5... ... ...10 e → 99 d → (230) - 28 c 57 b → 46 a → 05 z → 44 y 103 x → 02 j → 01 i → (230) - 10 h 3
Next, we return from bar(). d in this case is a Box<T>, so it alsofrees what it points to: (230) - 2.
Address Name Value(230) - 1 20... ... ...5 z → 44 y 103 x → 02 j → 01 i → (230) - 10 h 3
And after that, foo() returns:
Address Name Value(230) - 1 20... ... ...2 j → 01 i → (230) - 10 h 3
And then, finally, main(), which cleans the rest up. When i isDropped, it will clean up the last of the heap too.

259
What do other languages do?Most languages with a garbage collector heap-allocate by default. Thismeans that every value is boxed. There are a number of reasons whythis is done, but they’re out of scope for this tutorial. There are somepossible optimizations that don’t make it true 100% of the time, too.Rather than relying on the stack and Drop to clean up memory, thegarbage collector deals with the heap instead.
Which to use?So if the stack is faster and easier to manage, why do we need the heap?A big reason is that Stack-allocation alone means you only have ‘LastIn First Out (LIFO)’ semantics for reclaiming storage. Heap-allocationis strictly more general, allowing storage to be taken from and returnedto the pool in arbitrary order, but at a complexity cost.
Generally, you should prefer stack allocation, and so, Rust stack-allocates by default. The LIFO model of the stack is simpler, at afundamental level. This has two big impacts: runtime efficiency andsemantic impact.
Runtime EfficiencyManaging the memory for the stack is trivial: The machine incrementsor decrements a single value, the so-called “stack pointer”. Managingmemory for the heap is non-trivial: heap-allocated memory is freedat arbitrary points, and each block of heap-allocated memory can beof arbitrary size, so the memory manager must generally work muchharder to identify memory for reuse.
If you’d like to dive into this topic in greater detail, this paper is agreat introduction.
Semantic impactStack-allocation impacts the Rust language itself, and thus the devel-oper’s mental model. The LIFO semantics is what drives how the Rustlanguage handles automatic memory management. Even the deallo-cation of a uniquely-owned heap-allocated box can be driven by thestack-based LIFO semantics, as discussed throughout this chapter. Theflexibility (i.e. expressiveness) of non LIFO-semantics means that ingeneral the compiler cannot automatically infer at compile-time where

260
memory should be freed; it has to rely on dynamic protocols, poten-tially from outside the language itself, to drive deallocation (referencecounting, as used by Rc<T> and Arc<T>, is one example of this).
When taken to the extreme, the increased expressive power of heapallocation comes at the cost of either significant runtime support (e.g.in the form of a garbage collector) or significant programmer effort (inthe form of explicit memory management calls that require verificationnot provided by the Rust compiler).
TestingProgram testing can be a very effective way to show the
presence of bugs, but it is hopelessly inadequate for showingtheir absence.
Edsger W. Dijkstra, “The Humble Programmer” (1972)
Let’s talk about how to test Rust code. What we will not be talkingabout is the right way to test Rust code. There are many schools ofthought regarding the right and wrong way to write tests. All of theseapproaches use the same basic tools, and so we’ll show you the syntaxfor using them.
The test attributeAt its simplest, a test in Rust is a function that’s annotated with thetest attribute. Let’s make a new project with Cargo called adder:
$ cargo new adder$ cd adder
Cargo will automatically generate a simple test when you make a newproject. Here’s the contents of src/lib.rs:
# // The next line exists to trick play.rust-lang.org intorunning our code as a# // test:# // fn main##[cfg(test)]mod tests
#[test]

261
fn it_works()
For now, let’s remove the mod bit, and focus on just the function:
# // The next line exists to trick play.rust-lang.org intorunning our code as a# // test:# // fn main##[test]fn it_works()
Note the #[test]. This attribute indicates that this is a test function.It currently has no body. That’s good enough to pass! We can run thetests with cargo test:
$ cargo testCompiling adder v0.1.0 (file:///home/you/projects/adder)
Finished debug [unoptimized + debuginfo] target(s)in 0.15 secs
Running target/debug/deps/adder-941f01916ca4a642
running 1 testtest it_works ... ok
test result: ok. 1 passed; 0 failed; 0 ignored; 0 measured
Doc-tests adder
running 0 tests
test result: ok. 0 passed; 0 failed; 0 ignored; 0 measured
Cargo compiled and ran our tests. There are two sets of output here:one for the test we wrote, and another for documentation tests. We’lltalk about those later. For now, see this line:
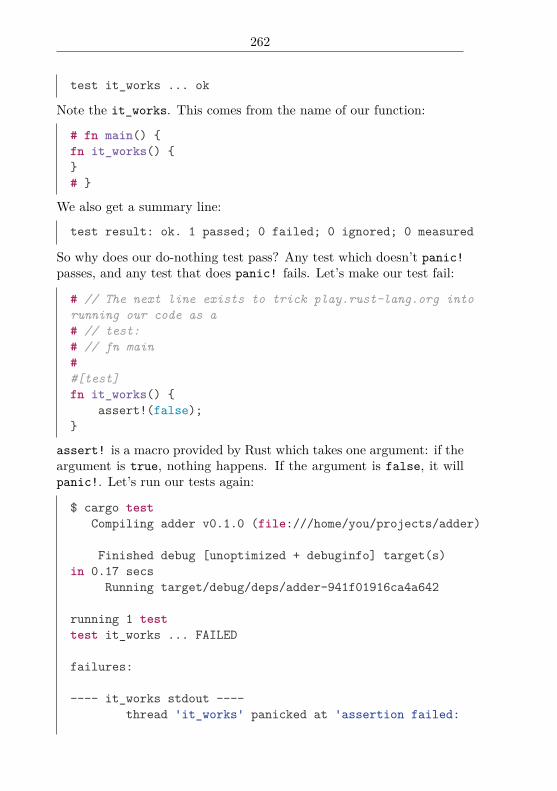
262
test it_works ... ok
Note the it_works. This comes from the name of our function:
# fn main() fn it_works() #
We also get a summary line:
test result: ok. 1 passed; 0 failed; 0 ignored; 0 measured
So why does our do-nothing test pass? Any test which doesn’t panic!passes, and any test that does panic! fails. Let’s make our test fail:
# // The next line exists to trick play.rust-lang.org intorunning our code as a# // test:# // fn main##[test]fn it_works()
assert!(false);
assert! is a macro provided by Rust which takes one argument: if theargument is true, nothing happens. If the argument is false, it willpanic!. Let’s run our tests again:
$ cargo testCompiling adder v0.1.0 (file:///home/you/projects/adder)
Finished debug [unoptimized + debuginfo] target(s)in 0.17 secs
Running target/debug/deps/adder-941f01916ca4a642
running 1 testtest it_works ... FAILED
failures:
---- it_works stdout ----thread 'it_works' panicked at 'assertion failed:

263
false', src/lib.rs:5note: Run with `RUST_BACKTRACE=1` for a backtrace.
failures:it_works
test result: FAILED. 0 passed; 1 failed; 0 ignored; 0 measured
error: test failed
Rust indicates that our test failed:test it_works ... FAILED
And that’s reflected in the summary line:
test result: FAILED. 0 passed; 1 failed; 0 ignored; 0 measured
We also get a non-zero status code. We can use $? on macOS andLinux:$ echo $?101
On Windows, if you’re using cmd:
> echo %ERRORLEVEL%
And if you’re using PowerShell:
> echo $LASTEXITCODE # the code itself> echo $? # a boolean, fail or succeed
This is useful if you want to integrate cargo test into other tooling.We can invert our test’s failure with another attribute: should_
panic:
# // The next line exists to trick play.rust-lang.org intorunning our code as a# // test:# // fn main##[test]#[should_panic]fn it_works()
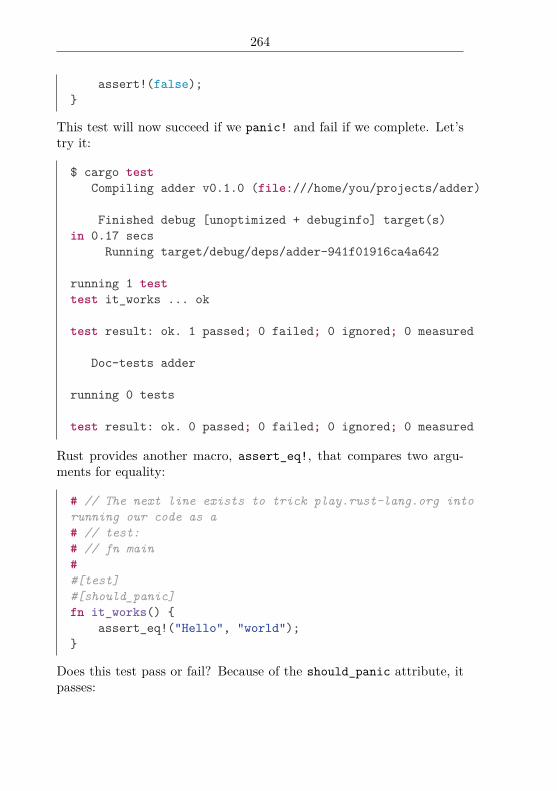
264
assert!(false);
This test will now succeed if we panic! and fail if we complete. Let’stry it:
$ cargo testCompiling adder v0.1.0 (file:///home/you/projects/adder)
Finished debug [unoptimized + debuginfo] target(s)in 0.17 secs
Running target/debug/deps/adder-941f01916ca4a642
running 1 testtest it_works ... ok
test result: ok. 1 passed; 0 failed; 0 ignored; 0 measured
Doc-tests adder
running 0 tests
test result: ok. 0 passed; 0 failed; 0 ignored; 0 measured
Rust provides another macro, assert_eq!, that compares two argu-ments for equality:
# // The next line exists to trick play.rust-lang.org intorunning our code as a# // test:# // fn main##[test]#[should_panic]fn it_works()
assert_eq!("Hello", "world");
Does this test pass or fail? Because of the should_panic attribute, itpasses:

265
$ cargo testCompiling adder v0.1.0 (file:///home/you/projects/adder)
Finished debug [unoptimized + debuginfo] target(s)in 0.21 secs
Running target/debug/deps/adder-941f01916ca4a642
running 1 testtest it_works ... ok
test result: ok. 1 passed; 0 failed; 0 ignored; 0 measured
Doc-tests adder
running 0 tests
test result: ok. 0 passed; 0 failed; 0 ignored; 0 measured
should_panic tests can be fragile, as it’s hard to guarantee that thetest didn’t fail for an unexpected reason. To help with this, an optionalexpected parameter can be added to the should_panic attribute. Thetest harness will make sure that the failure message contains the pro-vided text. A safer version of the example above would be:
# // The next line exists to trick play.rust-lang.org intorunning our code as a# // test:# // fn main##[test]#[should_panic(expected = "assertion failed")]fn it_works()
assert_eq!("Hello", "world");
That’s all there is to the basics! Let’s write one ‘real’ test:
# // The next line exists to trick play.rust-lang.org intorunning our code as a# // test:# // fn main#

266
pub fn add_two(a: i32) -> i32 a + 2
#[test]fn it_works()
assert_eq!(4, add_two(2));
This is a very common use of assert_eq!: call some function withsome known arguments and compare it to the expected output.
The ignore attributeSometimes a few specific tests can be very time-consuming to execute.These can be disabled by default by using the ignore attribute:
# // The next line exists to trick play.rust-lang.org intorunning our code as a# // test:# // fn main#pub fn add_two(a: i32) -> i32
a + 2
#[test]fn it_works()
assert_eq!(4, add_two(2));
#[test]#[ignore]fn expensive_test()
// Code that takes an hour to run...
Now we run our tests and see that it_works is run, but expensive_test is not:

267
$ cargo testCompiling adder v0.1.0 (file:///home/you/projects/adder)
Finished debug [unoptimized + debuginfo] target(s)in 0.20 secs
Running target/debug/deps/adder-941f01916ca4a642
running 2 teststest expensive_test ... ignoredtest it_works ... ok
test result: ok. 1 passed; 0 failed; 1 ignored; 0 measured
Doc-tests adder
running 0 tests
test result: ok. 0 passed; 0 failed; 0 ignored; 0 measured
The expensive tests can be run explicitly using cargo test -- --ignored:
$ cargo test -- --ignoredFinished debug [unoptimized + debuginfo] target(s)
in 0.0 secsRunning target/debug/deps/adder-941f01916ca4a642
running 1 testtest expensive_test ... ok
test result: ok. 1 passed; 0 failed; 0 ignored; 0 measured
Doc-tests adder
running 0 tests
test result: ok. 0 passed; 0 failed; 0 ignored; 0 measured
The --ignored argument is an argument to the test binary, and notto Cargo, which is why the command is cargo test -- --ignored.

268
The tests moduleThere is one way in which our existing example is not idiomatic: it’smissing the tests module. You might have noticed this test modulewas present in the code that was initially generated with cargo newbut was missing from our last example. Let’s explain what this does.
The idiomatic way of writing our example looks like this:
# // The next line exists to trick play.rust-lang.org intorunning our code as a# // test:# // fn main#pub fn add_two(a: i32) -> i32
a + 2
#[cfg(test)]mod tests
use super::add_two;
#[test]fn it_works()
assert_eq!(4, add_two(2));
There’s a few changes here. The first is the introduction of a modtests with a cfg attribute. The module allows us to group all of ourtests together, and to also define helper functions if needed, that don’tbecome a part of the rest of our crate. The cfg attribute only compilesour test code if we’re currently trying to run the tests. This can savecompile time, and also ensures that our tests are entirely left out of anormal build.
The second change is the use declaration. Because we’re in an innermodule, we need to bring the tested function into scope. This can beannoying if you have a large module, and so this is a common use ofglobs. Let’s change our src/lib.rs to make use of it:
# // The next line exists to trick play.rust-lang.org intorunning our code as a# // test:

269
# // fn main#pub fn add_two(a: i32) -> i32
a + 2
#[cfg(test)]mod tests
use super::*;
#[test]fn it_works()
assert_eq!(4, add_two(2));
Note the different use line. Now we run our tests:
$ cargo testUpdating registry `https://github.com/rust-lang/crates.
io-index`Compiling adder v0.1.0 (file:///home/you/projects/adder)
Running target/debug/deps/adder-91b3e234d4ed382a
running 1 testtest tests::it_works ... ok
test result: ok. 1 passed; 0 failed; 0 ignored; 0 measured
Doc-tests adder
running 0 tests
test result: ok. 0 passed; 0 failed; 0 ignored; 0 measured
It works!The current convention is to use the tests module to hold your
“unit-style” tests. Anything that tests one small bit of functionalitymakes sense to go here. But what about “integration-style” tests in-stead? For that, we have the tests directory.

270
The tests directoryEach file in tests/*.rs directory is treated as an individual crate. Towrite an integration test, let’s make a tests directory and put a tests/integration_test.rs file inside with this as its contents:
# // The next line exists to trick play.rust-lang.org intorunning our code as a# // test:# // fn main## // Sadly, this code will not work in play.rust-lang.org,because we have no# // crate adder to import. You'll need to try this parton your own machine.extern crate adder;
#[test]fn it_works()
assert_eq!(4, adder::add_two(2));
This looks similar to our previous tests, but slightly different. We nowhave an extern crate adder at the top. This is because each testin the tests directory is an entirely separate crate, and so we need toimport our library. This is also why tests is a suitable place to writeintegration-style tests: they use the library like any other consumer ofit would.
Let’s run them:
$ cargo testCompiling adder v0.1.0 (file:///home/you/projects/adder)
Running target/debug/deps/adder-91b3e234d4ed382a
running 1 testtest tests::it_works ... ok
test result: ok. 1 passed; 0 failed; 0 ignored; 0 measured
Running target/debug/integration_test-68064b69521c828a

271
running 1 testtest it_works ... ok
test result: ok. 1 passed; 0 failed; 0 ignored; 0 measured
Doc-tests adder
running 0 tests
test result: ok. 0 passed; 0 failed; 0 ignored; 0 measured
Now we have three sections: our previous test is also run, as well asour new one.
Cargo will ignore files in subdirectories of the tests/ directory.Therefore shared modules in integrations tests are possible. For exam-ple tests/common/mod.rs is not separately compiled by cargo but canbe imported in every test with mod common;
That’s all there is to the tests directory. The tests module isn’tneeded here, since the whole thing is focused on tests.
Note, when building integration tests, cargo will not pass the testattribute to the compiler. It means that all parts in cfg(test) won’tbe included in the build used in your integration tests.
Let’s finally check out that third section: documentation tests.
Documentation testsNothing is better than documentation with examples. Nothing is worsethan examples that don’t actually work, because the code has changedsince the documentation has been written. To this end, Rust supportsautomatically running examples in your documentation (note: thisonly works in library crates, not binary crates). Here’s a fleshed-outsrc/lib.rs with examples:
# // The next line exists to trick play.rust-lang.org intorunning our code as a# // test:# // fn main#//! The `adder` crate provides functions that add numbersto other numbers.//!

272
//! # Examples//!//! ```//! assert_eq!(4, adder::add_two(2));//! ```
/// This function adds two to its argument.////// # Examples////// ```/// use adder::add_two;////// assert_eq!(4, add_two(2));/// ```pub fn add_two(a: i32) -> i32
a + 2
#[cfg(test)]mod tests
use super::*;
#[test]fn it_works()
assert_eq!(4, add_two(2));
Note the module-level documentation with //! and the function-leveldocumentation with ///. Rust’s documentation supports Markdownin comments, and so triple graves mark code blocks. It is conventionalto include the # Examples section, exactly like that, with examplesfollowing.
Let’s run the tests again:
$ cargo testCompiling adder v0.1.0. (file:///home/you/projects/adder)
Running target/debug/deps/adder-91b3e234d4ed382a

273
running 1 testtest tests::it_works ... ok
test result: ok. 1 passed; 0 failed; 0 ignored; 0 measured
Running target/debug/integration_test-68064b69521c828a
running 1 testtest it_works ... ok
test result: ok. 1 passed; 0 failed; 0 ignored; 0 measured
Doc-tests adder
running 2 teststest add_two_0 ... oktest _0 ... ok
test result: ok. 2 passed; 0 failed; 0 ignored; 0 measured
Now we have all three kinds of tests running! Note the names of thedocumentation tests: the _0 is generated for the module test, and add_two_0 for the function test. These will auto increment with names likeadd_two_1 as you add more examples.
We haven’t covered all of the details with writing documentationtests. For more, please see the Documentation chapter.
Testing and concurrencyIt is important to note that tests are run concurrently using threads.For this reason, care should be taken to ensure your tests do not dependon each-other, or on any shared state. “Shared state” can also includethe environment, such as the current working directory, or environmentvariables.
If this is an issue it is possible to control this concurrency, eitherby setting the environment variable RUST_TEST_THREADS, or by passingthe argument --test-threads to the tests:
$ RUST_TEST_THREADS=1 cargo test # Run tests with noconcurrency...

274
$ cargo test -- --test-threads=1 # Same as above...
Test outputBy default Rust’s test library captures and discards output to standardout/error, e.g. output from println!(). This too can be controlledusing the environment or a switch:
$ RUST_TEST_NOCAPTURE=1 cargo test # Preserve stdout/stderr...$ cargo test -- --nocapture # Same as above...
However a better method avoiding capture is to use logging rather thanraw output. Rust has a standard logging API, which provides a fron-tend to multiple logging implementations. This can be used in conjunc-tion with the default env_logger to output any debugging informationin a manner that can be controlled at runtime.
Conditional CompilationRust has a special attribute, #[cfg], which allows you to compile codebased on a flag passed to the compiler. It has two forms:
#[cfg(foo)]# fn foo()
#[cfg(bar = "baz")]# fn bar()
They also have some helpers:
#[cfg(any(unix, windows))]# fn foo()
#[cfg(all(unix, target_pointer_width = "32"))]# fn bar()

275
#[cfg(not(foo))]# fn not_foo()
These can nest arbitrarily:
#[cfg(any(not(unix), all(target_os="macos", target_arch= "powerpc")))]# fn foo()
As for how to enable or disable these switches, if you’re using Cargo,they get set in the [features] section of your Cargo.toml:
[features]# no features by defaultdefault = []
# Add feature "foo" here, then you can use it.# Our "foo" feature depends on nothing else.foo = []
When you do this, Cargo passes along a flag to rustc:
--cfg feature="$feature_name"
The sum of these cfg flags will determine which ones get activated,and therefore, which code gets compiled. Let’s take this code:
#[cfg(feature = "foo")]mod foo
If we compile it with cargo build --features “foo”, it will send the--cfg feature=“foo” flag to rustc, and the output will have the modfoo in it. If we compile it with a regular cargo build, no extra flagsget passed on, and so, no foo module will exist.
cfg_attrYou can also set another attribute based on a cfg variable with cfg_attr:

276
#[cfg_attr(a, b)]# fn foo()
Will be the same as #[b] if a is set by cfg attribute, and nothingotherwise.
cfg!The cfg! macro lets you use these kinds of flags elsewhere in yourcode, too:
if cfg!(target_os = "macos") || cfg!(target_os = "ios")
println!("Think Different!");
These will be replaced by a true or false at compile-time, dependingon the configuration settings.
DocumentationDocumentation is an important part of any software project, and it’sfirst-class in Rust. Let’s talk about the tooling Rust gives you to doc-ument your project.
About rustdocThe Rust distribution includes a tool, rustdoc, that generates docu-mentation. rustdoc is also used by Cargo through cargo doc.
Documentation can be generated in two ways: from source code,and from standalone Markdown files.
Documenting source codeThe primary way of documenting a Rust project is through annotat-ing the source code. You can use documentation comments for thispurpose:
/// Constructs a new `Rc<T>`.////// # Examples

277
////// ```/// use std::rc::Rc;////// let five = Rc::new(5);/// ```pub fn new(value: T) -> Rc<T>
// Implementation goes here.
This code generates documentation that looks like this. I’ve left theimplementation out, with a regular comment in its place.
The first thing to notice about this annotation is that it uses ///instead of //. The triple slash indicates a documentation comment.
Documentation comments are written in Markdown.Rust keeps track of these comments, and uses them when generat-
ing documentation. This is important when documenting things likeenums:/// The `Option` type. See [the module level documentation](index.html) for more.enum Option<T>
/// No valueNone,/// Some value `T`Some(T),
The above works, but this does not:
/// The `Option` type. See [the module level documentation](index.html) for more.enum Option<T>
None, /// No valueSome(T), /// Some value `T`
You’ll get an error:
hello.rs:4:1: 4:2 error: expected ident, found ``hello.rs:4
^
This unfortunate error is correct; documentation comments apply tothe thing after them, and there’s nothing after that last comment.

278
Writing documentation comments
Anyway, let’s cover each part of this comment in detail:
/// Constructs a new `Rc<T>`.# fn foo()
The first line of a documentation comment should be a short summaryof its functionality. One sentence. Just the basics. High level.
////// Other details about constructing `Rc<T>`s, maybe describingcomplicated/// semantics, maybe additional options, all kinds of stuff.
///# fn foo()
Our original example had just a summary line, but if we had morethings to say, we could have added more explanation in a new para-graph.
Special sections Next, are special sections. These are indicated witha header, #. There are four kinds of headers that are commonly used.They aren’t special syntax, just convention, for now.
/// # Panics# fn foo()
Unrecoverable misuses of a function (i.e. programming errors) in Rustare usually indicated by panics, which kill the whole current thread atthe very least. If your function has a non-trivial contract like this, thatis detected/enforced by panics, documenting it is very important.
/// # Errors# fn foo()
If your function or method returns a Result<T, E>, then describingthe conditions under which it returns Err(E) is a nice thing to do. Thisis slightly less important than Panics, because failure is encoded intothe type system, but it’s still a good thing to do.
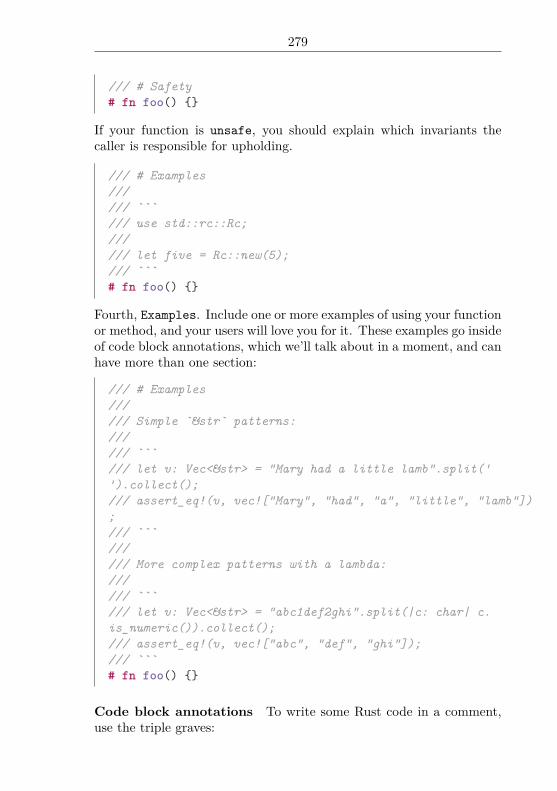
279
/// # Safety# fn foo()
If your function is unsafe, you should explain which invariants thecaller is responsible for upholding.
/// # Examples////// ```/// use std::rc::Rc;////// let five = Rc::new(5);/// ```# fn foo()
Fourth, Examples. Include one or more examples of using your functionor method, and your users will love you for it. These examples go insideof code block annotations, which we’ll talk about in a moment, and canhave more than one section:
/// # Examples////// Simple `&str` patterns:////// ```/// let v: Vec<&str> = "Mary had a little lamb".split('').collect();/// assert_eq!(v, vec!["Mary", "had", "a", "little", "lamb"]);/// ```////// More complex patterns with a lambda:////// ```/// let v: Vec<&str> = "abc1def2ghi".split(|c: char| c.is_numeric()).collect();/// assert_eq!(v, vec!["abc", "def", "ghi"]);/// ```# fn foo()
Code block annotations To write some Rust code in a comment,use the triple graves:

280
/// ```/// println!("Hello, world");/// ```# fn foo()
This will add code highlighting. If you are only showing plain text, puttext instead of rust after the triple graves (see below).
Documentation as testsLet’s discuss our sample example documentation:
/// ```/// println!("Hello, world");/// ```# fn foo()
You’ll notice that you don’t need a fn main() or anything here. rustdocwill automatically add a main() wrapper around your code, usingheuristics to attempt to put it in the right place. For example:
/// ```/// use std::rc::Rc;////// let five = Rc::new(5);/// ```# fn foo()
This will end up testing:
fn main() use std::rc::Rc;let five = Rc::new(5);
Here’s the full algorithm rustdoc uses to preprocess examples:
1. Any leading #![foo] attributes are left intact as crate attributes.
2. Some common allow attributes are inserted, including unused_variables, unused_assignments, unused_mut, unused_attributes,and dead_code. Small examples often trigger these lints.
3. If the example does not contain extern crate, then externcrate <mycrate>; is inserted (note the lack of #[macro_use]).

281
4. Finally, if the example does not contain fn main, the remainderof the text is wrapped in fn main() your_code .
This generated fn main can be a problem! If you have extern crateor a mod statements in the example code that are referred to by usestatements, they will fail to resolve unless you include at least fn main() to inhibit step 4. #[macro_use] extern crate also does notwork except at the crate root, so when testing macros an explicit mainis always required. It doesn’t have to clutter up your docs, though --keep reading!
Sometimes this algorithm isn’t enough, though. For example, all ofthese code samples with /// we’ve been talking about? The raw text:
/// Some documentation.# fn foo()
looks different than the output:
/// Some documentation.# fn foo()
Yes, that’s right: you can add lines that start with #, and they will behidden from the output, but will be used when compiling your code.You can use this to your advantage. In this case, documentation com-ments need to apply to some kind of function, so if I want to show youjust a documentation comment, I need to add a little function definitionbelow it. At the same time, it’s only there to satisfy the compiler, sohiding it makes the example more clear. You can use this technique toexplain longer examples in detail, while still preserving the testabilityof your documentation.
For example, imagine that we wanted to document this code:
let x = 5;let y = 6;println!("", x + y);
We might want the documentation to end up looking like this:
First, we set x to five:
let x = 5;# let y = 6;# println!("", x + y);

282
Next, we set y to six:
# let x = 5;let y = 6;# println!("", x + y);
Finally, we print the sum of x and y:
# let x = 5;# let y = 6;println!("", x + y);
To keep each code block testable, we want the whole program in eachblock, but we don’t want the reader to see every line every time. Here’swhat we put in our source code:
First, we set `x` to five:
```rustlet x = 5;# let y = 6;# println!("", x + y);```
Next, we set `y` to six:
```rust# let x = 5;let y = 6;# println!("", x + y);```
Finally, we print the sum of `x` and `y`:
```rust# let x = 5;# let y = 6;println!("", x + y);```
By repeating all parts of the example, you can ensure that your examplestill compiles, while only showing the parts that are relevant to thatpart of your explanation.

283
Documenting macros
Here’s an example of documenting a macro:
/// Panic with a given message unless an expression evaluatesto true.////// # Examples////// ```/// # #[macro_use] extern crate foo;/// # fn main() /// panic_unless!(1 + 1 == 2, “Math is broken.”);/// # /// ```////// ```rust,should_panic/// # #[macro_use] extern crate foo;/// # fn main() /// panic_unless!(true == false, “I’m broken.”);/// # /// ```#[macro_export]macro_rules! panic_unless
($condition:expr, $($rest:expr),+) => ( if ! $condition panic!($($rest),+); );# fn main()
You’ll note three things: we need to add our own extern crate line,so that we can add the #[macro_use] attribute. Second, we’ll need toadd our own main() as well (for reasons discussed above). Finally, ajudicious use of # to comment out those two things, so they don’t showup in the output.
Another case where the use of # is handy is when you want to ignoreerror handling. Lets say you want the following,
/// use std::io;/// let mut input = String::new();/// try!(io::stdin().read_line(&mut input));
The problem is that try! returns a Result<T, E> and test functionsdon’t return anything so this will give a mismatched types error.

284
/// A doc test using try!////// ```/// use std::io;/// # fn foo() -> io::Result<()> /// let mut input = String::new();/// try!(io::stdin().read_line(&mut input));/// # Ok(())/// # /// ```# fn foo()
You can get around this by wrapping the code in a function. Thiscatches and swallows the Result<T, E> when running tests on thedocs. This pattern appears regularly in the standard library.
Running documentation tests
To run the tests, either:
$ rustdoc --test path/to/my/crate/root.rs# or$ cargo test
That’s right, cargo test tests embedded documentation too. How-ever, cargo test will not test binary crates, only library ones.This is due to the way rustdoc works: it links against the library tobe tested, but with a binary, there’s nothing to link to.
There are a few more annotations that are useful to help rustdocdo the right thing when testing your code:
/// ```rust,ignore/// fn foo() /// ```# fn foo()
The ignore directive tells Rust to ignore your code. This is almostnever what you want, as it’s the most generic. Instead, consider anno-tating it with text if it’s not code, or using #s to get a working examplethat only shows the part you care about.

285
/// ```rust,should_panic/// assert!(false);/// ```# fn foo()
should_panic tells rustdoc that the code should compile correctly,but not actually pass as a test.
/// ```rust,no_run/// loop /// println!("Hello, world");/// /// ```# fn foo()
The no_run attribute will compile your code, but not run it. This isimportant for examples such as “Here’s how to retrieve a web page,”which you would want to ensure compiles, but might be run in a testenvironment that has no network access.
Documenting modules
Rust has another kind of doc comment, //!. This comment doesn’tdocument the next item, but the enclosing item. In other words:
mod foo //! This is documentation for the `foo` module.//!//! # Examples
// ...
This is where you’ll see //! used most often: for module documenta-tion. If you have a module in foo.rs, you’ll often open its code andsee this:
//! A module for using `foo`s.//!//! The `foo` module contains a lot of useful functionalityblah blah blah...

286
Crate documentation
Crates can be documented by placing an inner doc comment (//!) atthe beginning of the crate root, aka lib.rs:
//! This is documentation for the `foo` crate.//!//! The foo crate is meant to be used for bar.
Documentation comment style
Check out RFC 505 for full conventions around the style and format ofdocumentation.
Other documentationAll of this behavior works in non-Rust source files too. Because com-ments are written in Markdown, they’re often .md files.
When you write documentation in Markdown files, you don’t needto prefix the documentation with comments. For example:
/// # Examples////// ```/// use std::rc::Rc;////// let five = Rc::new(5);/// ```# fn foo()
is:
# Examples
```use std::rc::Rc;
let five = Rc::new(5);```
when it’s in a Markdown file. There is one wrinkle though: Markdownfiles need to have a title like this:

287
% The title
This is the example documentation.
This % line needs to be the very first line of the file.
doc attributesAt a deeper level, documentation comments are syntactic sugar fordocumentation attributes:
/// this# fn foo()
#[doc="this"]# fn bar()
are the same, as are these:
//! this
#![doc="this"]
You won’t often see this attribute used for writing documentation, butit can be useful when changing some options, or when writing a macro.
Re-exports
rustdoc will show the documentation for a public re-export in bothplaces:
extern crate foo;
pub use foo::bar;
This will create documentation for bar both inside the documentationfor the crate foo, as well as the documentation for your crate. It willuse the same documentation in both places.
This behavior can be suppressed with no_inline:
extern crate foo;
#[doc(no_inline)]

288
pub use foo::bar;
Missing documentationSometimes you want to make sure that every single public thing in yourproject is documented, especially when you are working on a library.Rust allows you to to generate warnings or errors, when an item ismissing documentation. To generate warnings you use warn:
#![warn(missing_docs)]
And to generate errors you use deny:
#![deny(missing_docs)]
There are cases where you want to disable these warnings/errors toexplicitly leave something undocumented. This is done by using allow:
#[allow(missing_docs)]struct Undocumented;
You might even want to hide items from the documentation completely:
#[doc(hidden)]struct Hidden;
Controlling HTML
You can control a few aspects of the HTML that rustdoc generatesthrough the #![doc] version of the attribute:
#![doc(html_logo_url = "https://www.rust-lang.org/logos/rust-logo-128x128-blk-v2.png",
html_favicon_url = "https://www.rust-lang.org/favicon.ico",
html_root_url = "https://doc.rust-lang.org/")]
This sets a few different options, with a logo, favicon, and a root URL.
Configuring documentation tests
You can also configure the way that rustdoc tests your documentationexamples through the #![doc(test(..))] attribute.

289
#![doc(test(attr(allow(unused_variables), deny(warnings))))]
This allows unused variables within the examples, but will fail the testfor any other lint warning thrown.
Generation optionsrustdoc also contains a few other options on the command line, forfurther customization:
• --html-in-header FILE: includes the contents of FILE at theend of the <head>...</head> section.
• --html-before-content FILE: includes the contents of FILEdirectly after <body>, before the rendered content (including thesearch bar).
• --html-after-content FILE: includes the contents of FILE afterall the rendered content.
Security noteThe Markdown in documentation comments is placed without process-ing into the final webpage. Be careful with literal HTML:
/// <script>alert(document.cookie)</script># fn foo()
IteratorsLet’s talk about loops.
Remember Rust’s for loop? Here’s an example:
for x in 0..10 println!("", x);
Now that you know more Rust, we can talk in detail about how thisworks. Ranges (the 0..10) are ‘iterators’. An iterator is somethingthat we can call the .next() method on repeatedly, and it gives us asequence of things.

290
A range with two dots like 0..10 is inclusive on the left (so it startsat 0) and exclusive on the right (so it ends at 9). A mathematicianwould write “[0, 10)”.
Like this:
let mut range = 0..10;
loop match range.next()
Some(x) => println!("", x);
,None => break
Wemake a mutable binding to the range, which is our iterator. We thenloop, with an inner match. This match is used on the result of range.next(), which gives us a reference to the next value of the iterator.next returns an Option<i32>, in this case, which will be Some(i32)when we have a value and None once we run out. If we get Some(i32), we print it out, and if we get None, we break out of the loop.
This code sample is basically the same as our for loop version. Thefor loop is a handy way to write this loop/match/break construct.
for loops aren’t the only thing that uses iterators, however. Writingyour own iterator involves implementing the Iterator trait. Whiledoing that is outside of the scope of this guide, Rust provides a numberof useful iterators to accomplish various tasks. But first, a few notesabout limitations of ranges.
Ranges are very primitive, and we often can use better alternatives.Consider the following Rust anti-pattern: using ranges to emulate aC-style for loop. Let’s suppose you needed to iterate over the contentsof a vector. You may be tempted to write this:
let nums = vec![1, 2, 3];
for i in 0..nums.len() println!("", nums[i]);
This is strictly worse than using an actual iterator. You can iterateover vectors directly, so write this:

291
let nums = vec![1, 2, 3];
for num in &nums println!("", num);
There are two reasons for this. First, this more directly expresses whatwe mean. We iterate through the entire vector, rather than iteratingthrough indexes, and then indexing the vector. Second, this versionis more efficient: the first version will have extra bounds checking be-cause it used indexing, nums[i]. But since we yield a reference to eachelement of the vector in turn with the iterator, there’s no bounds check-ing in the second example. This is very common with iterators: we canignore unnecessary bounds checks, but still know that we’re safe.
There’s another detail here that’s not 100% clear because of howprintln! works. num is actually of type &i32. That is, it’s a referenceto an i32, not an i32 itself. println! handles the dereferencing forus, so we don’t see it. This code works fine too:
let nums = vec![1, 2, 3];
for num in &nums println!("", *num);
Now we’re explicitly dereferencing num. Why does &nums give us ref-erences? Firstly, because we explicitly asked it to with &. Secondly, ifit gave us the data itself, we would have to be its owner, which wouldinvolve making a copy of the data and giving us the copy. With ref-erences, we’re only borrowing a reference to the data, and so it’s onlypassing a reference, without needing to do the move.
So, now that we’ve established that ranges are often not what youwant, let’s talk about what you do want instead.
There are three broad classes of things that are relevant here: iter-ators, iterator adaptors, and consumers. Here’s some definitions:
• iterators give you a sequence of values.
• iterator adaptors operate on an iterator, producing a new iteratorwith a different output sequence.
• consumers operate on an iterator, producing some final set ofvalues.

292
Let’s talk about consumers first, since you’ve already seen an iterator,ranges.
ConsumersA consumer operates on an iterator, returning some kind of value orvalues. The most common consumer is collect(). This code doesn’tquite compile, but it shows the intention:
let one_to_one_hundred = (1..101).collect();
As you can see, we call collect() on our iterator. collect() takes asmany values as the iterator will give it, and returns a collection of theresults. So why won’t this compile? Rust can’t determine what type ofthings you want to collect, and so you need to let it know. Here’s theversion that does compile:
let one_to_one_hundred = (1..101).collect::<Vec<i32>>();
If you remember, the ::<> syntax allows us to give a type hint thattells the compiler we want a vector of integers. You don’t always needto use the whole type, though. Using a _ will let you provide a partialhint:let one_to_one_hundred = (1..101).collect::<Vec<_>>();
This says “Collect into a Vec<T>, please, but infer what the T is forme.” _ is sometimes called a “type placeholder” for this reason.
collect() is the most common consumer, but there are others too.find() is one:let greater_than_forty_two = (0..100)
.find(|x| *x > 42);
match greater_than_forty_two Some(_) => println!("Found a match!"),None => println!("No match found :("),
find takes a closure, and works on a reference to each element of aniterator. This closure returns true if the element is the element we’relooking for, and false otherwise. find returns the first element sat-isfying the specified predicate. Because we might not find a matchingelement, find returns an Option rather than the element itself.
Another important consumer is fold. Here’s what it looks like:
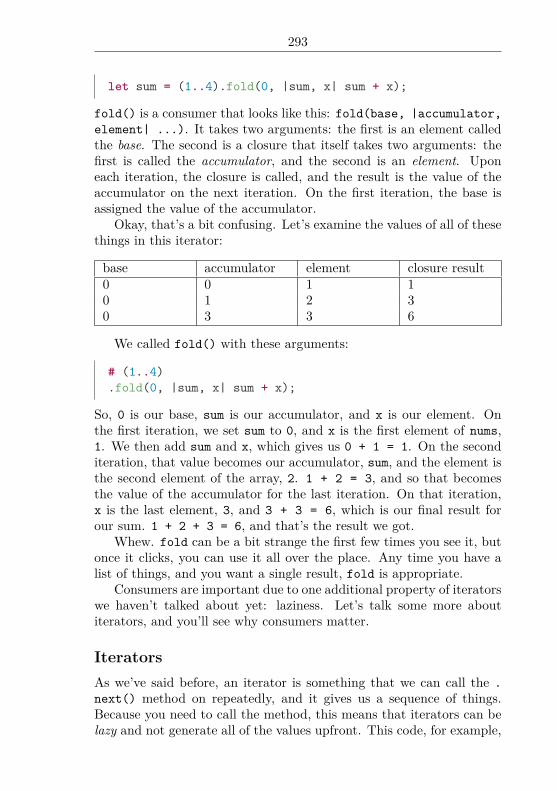
293
let sum = (1..4).fold(0, |sum, x| sum + x);
fold() is a consumer that looks like this: fold(base, |accumulator,element| ...). It takes two arguments: the first is an element calledthe base. The second is a closure that itself takes two arguments: thefirst is called the accumulator, and the second is an element. Uponeach iteration, the closure is called, and the result is the value of theaccumulator on the next iteration. On the first iteration, the base isassigned the value of the accumulator.
Okay, that’s a bit confusing. Let’s examine the values of all of thesethings in this iterator:
base accumulator element closure result0 0 1 10 1 2 30 3 3 6
We called fold() with these arguments:
# (1..4).fold(0, |sum, x| sum + x);
So, 0 is our base, sum is our accumulator, and x is our element. Onthe first iteration, we set sum to 0, and x is the first element of nums,1. We then add sum and x, which gives us 0 + 1 = 1. On the seconditeration, that value becomes our accumulator, sum, and the element isthe second element of the array, 2. 1 + 2 = 3, and so that becomesthe value of the accumulator for the last iteration. On that iteration,x is the last element, 3, and 3 + 3 = 6, which is our final result forour sum. 1 + 2 + 3 = 6, and that’s the result we got.
Whew. fold can be a bit strange the first few times you see it, butonce it clicks, you can use it all over the place. Any time you have alist of things, and you want a single result, fold is appropriate.
Consumers are important due to one additional property of iteratorswe haven’t talked about yet: laziness. Let’s talk some more aboutiterators, and you’ll see why consumers matter.
IteratorsAs we’ve said before, an iterator is something that we can call the .next() method on repeatedly, and it gives us a sequence of things.Because you need to call the method, this means that iterators can belazy and not generate all of the values upfront. This code, for example,

294
does not actually generate the numbers 1-99, instead creating a valuethat merely represents the sequence:
let nums = 1..100;
Since we didn’t do anything with the range, it didn’t generate thesequence. Let’s add the consumer:
let nums = (1..100).collect::<Vec<i32>>();
Now, collect() will require that the range gives it some numbers, andso it will do the work of generating the sequence.
Ranges are one of two basic iterators that you’ll see. The other isiter(). iter() can turn a vector into a simple iterator that gives youeach element in turn:
let nums = vec![1, 2, 3];
for num in nums.iter() println!("", num);
These two basic iterators should serve you well. There are some moreadvanced iterators, including ones that are infinite.
That’s enough about iterators. Iterator adaptors are the last con-cept we need to talk about with regards to iterators. Let’s get to it!
Iterator adaptorsIterator adaptors take an iterator and modify it somehow, producing anew iterator. The simplest one is called map:
(1..100).map(|x| x + 1);
map is called upon another iterator, and produces a new iterator whereeach element reference has the closure it’s been given as an argumentcalled on it. So this would give us the numbers from 2-100. Well,almost! If you compile the example, you’ll get a warning:
warning: unused result which must be used: iterator adaptorsare lazy and
do nothing unless consumed, #[warn(unused_must_use)] on by default

295
(1..100).map(|x| x + 1);^~~~~~~~~~~~~~~~~~~~~~~~~~~~~~~~
Laziness strikes again! That closure will never execute. This exampledoesn’t print any numbers:
(1..100).map(|x| println!("", x));
If you are trying to execute a closure on an iterator for its side effects,use for instead.
There are tons of interesting iterator adaptors. take(n) will returnan iterator over the next n elements of the original iterator. Let’s tryit out with an infinite iterator:
for i in (1..).take(5) println!("", i);
This will print
12345
filter() is an adapter that takes a closure as an argument. Thisclosure returns true or false. The new iterator filter() producesonly the elements that the closure returns true for:
for i in (1..100).filter(|&x| x % 2 == 0) println!("", i);
This will print all of the even numbers between one and a hundred.(Note that, unlike map, the closure passed to filter is passed a refer-ence to the element instead of the element itself. The filter predicatehere uses the &x pattern to extract the integer. The filter closure ispassed a reference because it returns true or false instead of the ele-ment, so the filter implementation must retain ownership to put theelements into the newly constructed iterator.)
You can chain all three things together: start with an iterator, adaptit a few times, and then consume the result. Check it out:

296
(1..).filter(|&x| x % 2 == 0).filter(|&x| x % 3 == 0).take(5).collect::<Vec<i32>>();
This will give you a vector containing 6, 12, 18, 24, and 30.This is just a small taste of what iterators, iterator adaptors, and
consumers can help you with. There are a number of really usefuliterators, and you can write your own as well. Iterators provide a safe,efficient way to manipulate all kinds of lists. They’re a little unusualat first, but if you play with them, you’ll get hooked. For a full listof the different iterators and consumers, check out the iterator moduledocumentation.
ConcurrencyConcurrency and parallelism are incredibly important topics in com-puter science, and are also a hot topic in industry today. Computers aregaining more and more cores, yet many programmers aren’t preparedto fully utilize them.
Rust’s memory safety features also apply to its concurrency story.Even concurrent Rust programs must be memory safe, having no dataraces. Rust’s type system is up to the task, and gives you powerfulways to reason about concurrent code at compile time.
Before we talk about the concurrency features that come with Rust,it’s important to understand something: Rust is low-level enough thatthe vast majority of this is provided by the standard library, not bythe language. This means that if you don’t like some aspect of theway Rust handles concurrency, you can implement an alternative wayof doing things. mio is a real-world example of this principle in action.
Background: Send and Sync
Concurrency is difficult to reason about. In Rust, we have a strong,static type system to help us reason about our code. As such, Rustgives us two traits to help us make sense of code that can possibly beconcurrent.

297
Send
The first trait we’re going to talk about is Send. When a type T im-plements Send, it indicates that something of this type is able to haveownership transferred safely between threads.
This is important to enforce certain restrictions. For example, if wehave a channel connecting two threads, we would want to be able tosend some data down the channel and to the other thread. Therefore,we’d ensure that Send was implemented for that type.
In the opposite way, if we were wrapping a library with FFI thatisn’t thread-safe, we wouldn’t want to implement Send, and so thecompiler will help us enforce that it can’t leave the current thread.
Sync
The second of these traits is called Sync. When a type T implementsSync, it indicates that something of this type has no possibility of intro-ducing memory unsafety when used from multiple threads concurrentlythrough shared references. This implies that types which don’t haveinterior mutability are inherently Sync, which includes simple primitivetypes (like u8) and aggregate types containing them.
For sharing references across threads, Rust provides a wrapper typecalled Arc<T>. Arc<T> implements Send and Sync if and only if Timplements both Send and Sync. For example, an object of typeArc<RefCell<U>> cannot be transferred across threads because RefCelldoes not implement Sync, consequently Arc<RefCell<U>> would notimplement Send.
These two traits allow you to use the type system to make strongguarantees about the properties of your code under concurrency. Beforewe demonstrate why, we need to learn how to create a concurrent Rustprogram in the first place!
ThreadsRust’s standard library provides a library for threads, which allow youto run Rust code in parallel. Here’s a basic example of using std::thread:
use std::thread;
fn main() thread::spawn(||

298
println!("Hello from a thread!"););
The thread::spawn() method accepts a closure, which is executed ina new thread. It returns a handle to the thread, that can be used towait for the child thread to finish and extract its result:
use std::thread;
fn main() let handle = thread::spawn(||
"Hello from a thread!");
println!("", handle.join().unwrap());
As closures can capture variables from their environment, we can alsotry to bring some data into the other thread:
use std::thread;
fn main() let x = 1;thread::spawn(||
println!("x is ", x););
However, this gives us an error:
5:19: 7:6 error: closure may outlive the current function,but it
borrows `x`, which is owned by the currentfunction...5:19: 7:6 help: to force the closure to take ownershipof `x` (and any other referenced variables),
use the `move` keyword, as shown:thread::spawn(move ||
println!("x is ", x);
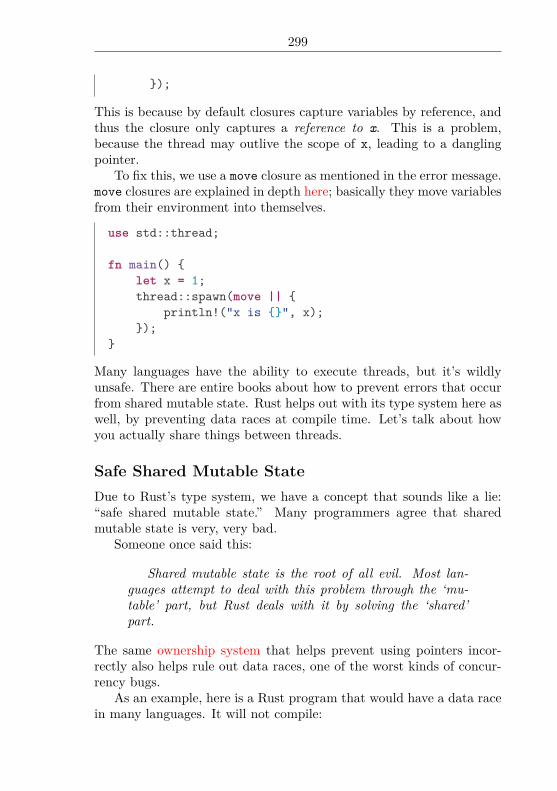
299
);
This is because by default closures capture variables by reference, andthus the closure only captures a reference to x. This is a problem,because the thread may outlive the scope of x, leading to a danglingpointer.
To fix this, we use a move closure as mentioned in the error message.move closures are explained in depth here; basically they move variablesfrom their environment into themselves.
use std::thread;
fn main() let x = 1;thread::spawn(move ||
println!("x is ", x););
Many languages have the ability to execute threads, but it’s wildlyunsafe. There are entire books about how to prevent errors that occurfrom shared mutable state. Rust helps out with its type system here aswell, by preventing data races at compile time. Let’s talk about howyou actually share things between threads.
Safe Shared Mutable StateDue to Rust’s type system, we have a concept that sounds like a lie:“safe shared mutable state.” Many programmers agree that sharedmutable state is very, very bad.
Someone once said this:
Shared mutable state is the root of all evil. Most lan-guages attempt to deal with this problem through the ‘mu-table’ part, but Rust deals with it by solving the ‘shared’part.
The same ownership system that helps prevent using pointers incor-rectly also helps rule out data races, one of the worst kinds of concur-rency bugs.
As an example, here is a Rust program that would have a data racein many languages. It will not compile:

300
use std::thread;use std::time::Duration;
fn main() let mut data = vec![1, 2, 3];
for i in 0..3 thread::spawn(move ||
data[0] += i;);
thread::sleep(Duration::from_millis(50));
This gives us an error:
8:17 error: capture of moved value: `data`data[0] += i;^~~~
Rust knows this wouldn’t be safe! If we had a reference to data in eachthread, and the thread takes ownership of the reference, we’d have threeowners! data gets moved out of main in the first call to spawn(), sosubsequent calls in the loop cannot use this variable.
So, we need some type that lets us have more than one owning ref-erence to a value. Usually, we’d use Rc<T> for this, which is a referencecounted type that provides shared ownership. It has some runtimebookkeeping that keeps track of the number of references to it, hencethe “reference count” part of its name.
Calling clone() on an Rc<T> will return a new owned referenceand bump the internal reference count. We create one of these for eachthread:
use std::thread;use std::time::Duration;use std::rc::Rc;
fn main() let mut data = Rc::new(vec![1, 2, 3]);
for i in 0..3
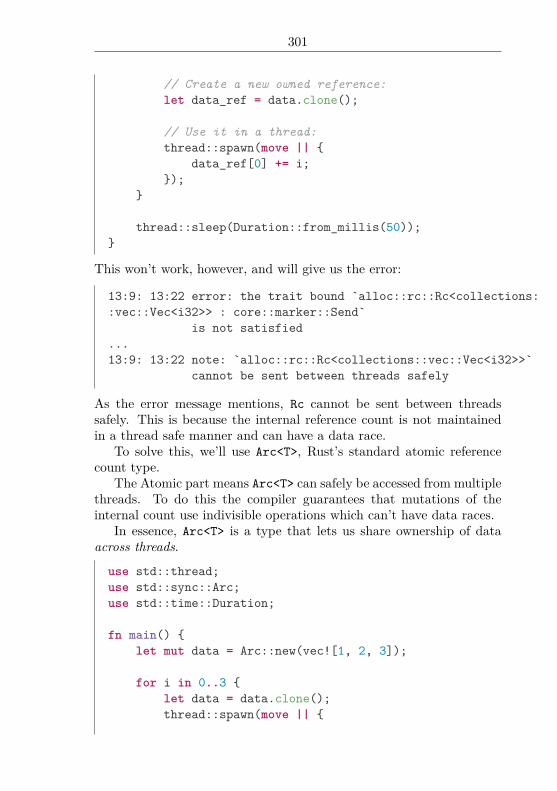
301
// Create a new owned reference:let data_ref = data.clone();
// Use it in a thread:thread::spawn(move ||
data_ref[0] += i;);
thread::sleep(Duration::from_millis(50));
This won’t work, however, and will give us the error:
13:9: 13:22 error: the trait bound `alloc::rc::Rc<collections::vec::Vec<i32>> : core::marker::Send`
is not satisfied...13:9: 13:22 note: `alloc::rc::Rc<collections::vec::Vec<i32>>`
cannot be sent between threads safely
As the error message mentions, Rc cannot be sent between threadssafely. This is because the internal reference count is not maintainedin a thread safe manner and can have a data race.
To solve this, we’ll use Arc<T>, Rust’s standard atomic referencecount type.
The Atomic part means Arc<T> can safely be accessed from multiplethreads. To do this the compiler guarantees that mutations of theinternal count use indivisible operations which can’t have data races.
In essence, Arc<T> is a type that lets us share ownership of dataacross threads.
use std::thread;use std::sync::Arc;use std::time::Duration;
fn main() let mut data = Arc::new(vec![1, 2, 3]);
for i in 0..3 let data = data.clone();thread::spawn(move ||
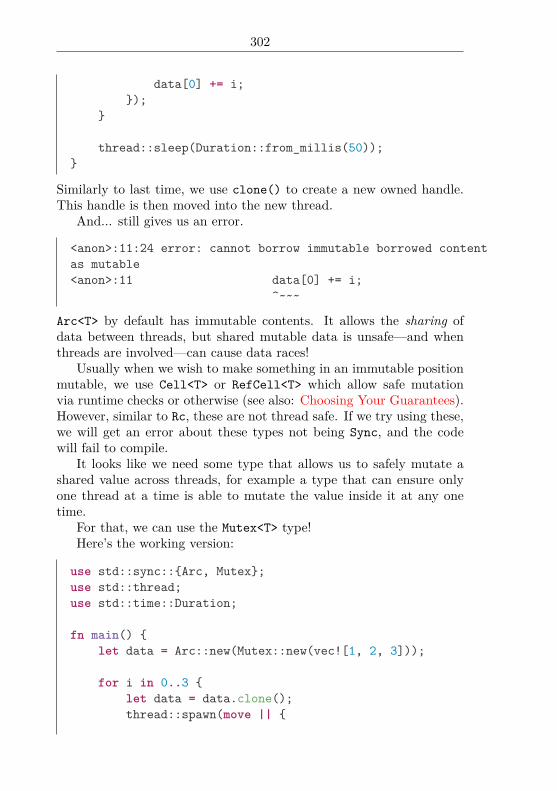
302
data[0] += i;);
thread::sleep(Duration::from_millis(50));
Similarly to last time, we use clone() to create a new owned handle.This handle is then moved into the new thread.
And... still gives us an error.
<anon>:11:24 error: cannot borrow immutable borrowed contentas mutable<anon>:11 data[0] += i;
^~~~
Arc<T> by default has immutable contents. It allows the sharing ofdata between threads, but shared mutable data is unsafe—and whenthreads are involved—can cause data races!
Usually when we wish to make something in an immutable positionmutable, we use Cell<T> or RefCell<T> which allow safe mutationvia runtime checks or otherwise (see also: Choosing Your Guarantees).However, similar to Rc, these are not thread safe. If we try using these,we will get an error about these types not being Sync, and the codewill fail to compile.
It looks like we need some type that allows us to safely mutate ashared value across threads, for example a type that can ensure onlyone thread at a time is able to mutate the value inside it at any onetime.
For that, we can use the Mutex<T> type!Here’s the working version:
use std::sync::Arc, Mutex;use std::thread;use std::time::Duration;
fn main() let data = Arc::new(Mutex::new(vec![1, 2, 3]));
for i in 0..3 let data = data.clone();thread::spawn(move ||

303
let mut data = data.lock().unwrap();data[0] += i;
);
thread::sleep(Duration::from_millis(50));
Note that the value of i is bound (copied) to the closure and not sharedamong the threads.
We’re “locking” the mutex here. A mutex (short for “mutual ex-clusion”), as mentioned, only allows one thread at a time to access avalue. When we wish to access the value, we use lock() on it. Thiswill “lock” the mutex, and no other thread will be able to lock it (andhence, do anything with the value) until we’re done with it. If a threadattempts to lock a mutex which is already locked, it will wait until theother thread releases the lock.
The lock “release” here is implicit; when the result of the lock (inthis case, data) goes out of scope, the lock is automatically released.
Note that lock method of Mutex has this signature:
fn lock(&self) -> LockResult<MutexGuard<T>>
and because Send is not implemented for MutexGuard<T>, the guardcannot cross thread boundaries, ensuring thread-locality of lock acquireand release.
Let’s examine the body of the thread more closely:
# use std::sync::Arc, Mutex;# use std::thread;# use std::time::Duration;# fn main() # let data = Arc::new(Mutex::new(vec![1, 2, 3]));# for i in 0..3 # let data = data.clone();thread::spawn(move ||
let mut data = data.lock().unwrap();data[0] += i;
);# # thread::sleep(Duration::from_millis(50));#

304
First, we call lock(), which acquires the mutex’s lock. Because thismay fail, it returns a Result<T, E>, and because this is just an example,we unwrap() it to get a reference to the data. Real code would havemore robust error handling here. We’re then free to mutate it, sincewe have the lock.
Lastly, while the threads are running, we wait on a short timer. Butthis is not ideal: we may have picked a reasonable amount of time towait but it’s more likely we’ll either be waiting longer than necessary ornot long enough, depending on just how much time the threads actuallytake to finish computing when the program runs.
A more precise alternative to the timer would be to use one of themechanisms provided by the Rust standard library for synchronizingthreads with each other. Let’s talk about one of them: channels.
ChannelsHere’s a version of our code that uses channels for synchronization,rather than waiting for a specific time:
use std::sync::Arc, Mutex;use std::thread;use std::sync::mpsc;
fn main() let data = Arc::new(Mutex::new(0));
// `tx` is the "transmitter" or "sender".// `rx` is the "receiver".let (tx, rx) = mpsc::channel();
for _ in 0..10 let (data, tx) = (data.clone(), tx.clone());
thread::spawn(move || let mut data = data.lock().unwrap();*data += 1;
tx.send(()).unwrap(););

305
for _ in 0..10 rx.recv().unwrap();
We use the mpsc::channel() method to construct a new channel. Wesend a simple () down the channel, and then wait for ten of them tocome back.
While this channel is sending a generic signal, we can send any datathat is Send over the channel!
use std::thread;use std::sync::mpsc;
fn main() let (tx, rx) = mpsc::channel();
for i in 0..10 let tx = tx.clone();
thread::spawn(move || let answer = i * i;
tx.send(answer).unwrap(););
for _ in 0..10 println!("", rx.recv().unwrap());
Here we create 10 threads, asking each to calculate the square of anumber (i at the time of spawn()), and then send() back the answerover the channel.
PanicsA panic! will crash the currently executing thread. You can use Rust’sthreads as a simple isolation mechanism:

306
use std::thread;
let handle = thread::spawn(move || panic!("oops!");
);
let result = handle.join();
assert!(result.is_err());
Thread.join() gives us a Result back, which allows us to check if thethread has panicked or not.
Error HandlingLike most programming languages, Rust encourages the programmer tohandle errors in a particular way. Generally speaking, error handling isdivided into two broad categories: exceptions and return values. Rustopts for return values.
In this section, we intend to provide a comprehensive treatment ofhow to deal with errors in Rust. More than that, we will attempt tointroduce error handling one piece at a time so that you’ll come awaywith a solid working knowledge of how everything fits together.
When done naïvely, error handling in Rust can be verbose and an-noying. This section will explore those stumbling blocks and demon-strate how to use the standard library to make error handling conciseand ergonomic.
Table of ContentsThis section is very long, mostly because we start at the very beginningwith sum types and combinators, and try to motivate the way Rust doeserror handling incrementally. As such, programmers with experiencein other expressive type systems may want to jump around.
• The Basics
– Unwrapping explained– The Option type
* Composing Option<T> values

307
– The Result type
* Parsing integers* The Result type alias idiom
– A brief interlude: unwrapping isn’t evil
• Working with multiple error types
– Composing Option and Result
– The limits of combinators
– Early returns
– The try! macro
– Defining your own error type
• Standard library traits used for error handling
– The Error trait
– The From trait
– The real try! macro
– Composing custom error types
– Advice for library writers
• Case study: A program to read population data
– Initial setup
– Argument parsing
– Writing the logic
– Error handling with Box<Error>
– Reading from stdin
– Error handling with a custom type
– Adding functionality
• The short story

308
The BasicsYou can think of error handling as using case analysis to determinewhether a computation was successful or not. As you will see, the keyto ergonomic error handling is reducing the amount of explicit caseanalysis the programmer has to do while keeping code composable.
Keeping code composable is important, because without that re-quirement, we could panic whenever we come across something unex-pected. (panic causes the current task to unwind, and in most cases,the entire program aborts.) Here’s an example:
// Guess a number between 1 and 10.// If it matches the number we had in mind, return `true`.Else, return `false`.fn guess(n: i32) -> bool
if n < 1 || n > 10 panic!("Invalid number: ", n);
n == 5
fn main() guess(11);
If you try running this code, the program will crash with a message likethis:
thread 'main' panicked at 'Invalid number: 11', src/bin/panic-simple.rs:5
Here’s another example that is slightly less contrived. A program thataccepts an integer as an argument, doubles it and prints it.
use std::env;
fn main() let mut argv = env::args();let arg: String = argv.nth(1).unwrap(); // error 1let n: i32 = arg.parse().unwrap(); // error 2println!("", 2 * n);

309
If you give this program zero arguments (error 1) or if the first argumentisn’t an integer (error 2), the program will panic just like in the firstexample.
You can think of this style of error handling as similar to a bullrunning through a china shop. The bull will get to where it wants togo, but it will trample everything in the process.
Unwrapping explainedIn the previous example, we claimed that the program would simplypanic if it reached one of the two error conditions, yet, the programdoes not include an explicit call to panic like the first example. Thisis because the panic is embedded in the calls to unwrap.
To “unwrap” something in Rust is to say, “Give me the result of thecomputation, and if there was an error, panic and stop the program.”It would be better if we showed the code for unwrapping because itis so simple, but to do that, we will first need to explore the Optionand Result types. Both of these types have a method called unwrapdefined on them.
The Option type
The Option type is defined in the standard library:
enum Option<T> None,Some(T),
The Option type is a way to use Rust’s type system to express thepossibility of absence. Encoding the possibility of absence into the typesystem is an important concept because it will cause the compiler toforce the programmer to handle that absence. Let’s take a look at anexample that tries to find a character in a string:
// Searches `haystack` for the Unicode character `needle`.If one is found, the
// byte offset of the character is returned. Otherwise,`None` is returned.fn find(haystack: &str, needle: char) -> Option<usize>
for (offset, c) in haystack.char_indices()

310
if c == needle return Some(offset);
None
Notice that when this function finds a matching character, it doesn’tonly return the offset. Instead, it returns Some(offset). Some isa variant or a value constructor for the Option type. You can thinkof it as a function with the type fn<T>(value: T) -> Option<T>.Correspondingly, None is also a value constructor, except it has noarguments. You can think of None as a function with the type fn<T>() -> Option<T>.
This might seem like much ado about nothing, but this is only halfof the story. The other half is using the find function we’ve written.Let’s try to use it to find the extension in a file name.
# fn find(haystack: &str, needle: char) -> Option<usize> haystack.find(needle) fn main()
let file_name = "foobar.rs";match find(file_name, '.')
None => println!("No file extension found."),Some(i) => println!("File extension: ", &file_
name[i+1..]),
This code uses pattern matching to do case analysis on the Option<usize>returned by the find function. In fact, case analysis is the only wayto get at the value stored inside an Option<T>. This means that you,as the programmer, must handle the case when an Option<T> is Noneinstead of Some(t).
But wait, what about unwrap, which we used previously? Therewas no case analysis there! Instead, the case analysis was put insidethe unwrap method for you. You could define it yourself if you want:
enum Option<T> None,Some(T),

311
impl<T> Option<T> fn unwrap(self) -> T
match self Option::Some(val) => val,Option::None =>panic!("called `Option::unwrap()` on a `None`
value"),
The unwrap method abstracts away the case analysis. This is preciselythe thing that makes unwrap ergonomic to use. Unfortunately, thatpanic! means that unwrap is not composable: it is the bull in thechina shop.
Composing Option<T> values
In an example from before, we saw how to use find to discover theextension in a file name. Of course, not all file names have a . in them,so it’s possible that the file name has no extension. This possibility ofabsence is encoded into the types using Option<T>. In other words, thecompiler will force us to address the possibility that an extension doesnot exist. In our case, we only print out a message saying as such.
Getting the extension of a file name is a pretty common operation,so it makes sense to put it into a function:
# fn find(haystack: &str, needle: char) -> Option<usize> haystack.find(needle) // Returns the extension of the given file name, wherethe extension is defined// as all characters following the first `.`.// If `file_name` has no `.`, then `None` is returned.fn extension_explicit(file_name: &str) -> Option<&str>
match find(file_name, '.') None => None,Some(i) => Some(&file_name[i+1..]),
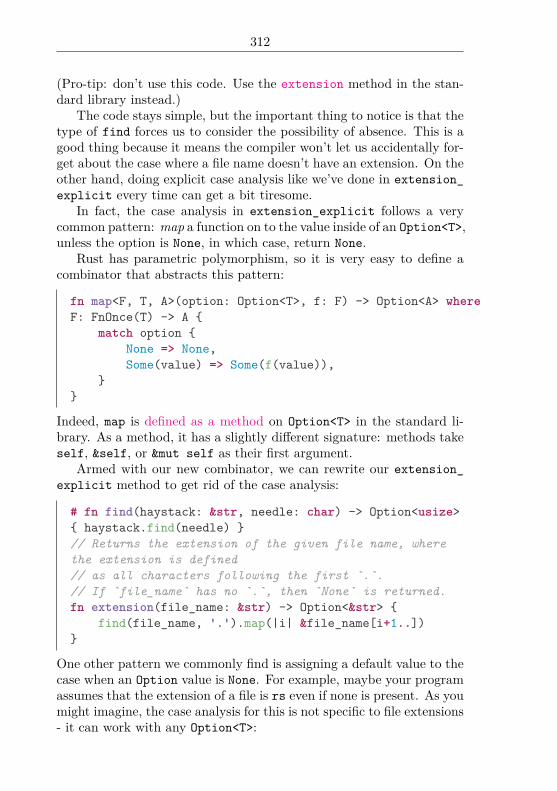
312
(Pro-tip: don’t use this code. Use the extension method in the stan-dard library instead.)
The code stays simple, but the important thing to notice is that thetype of find forces us to consider the possibility of absence. This is agood thing because it means the compiler won’t let us accidentally for-get about the case where a file name doesn’t have an extension. On theother hand, doing explicit case analysis like we’ve done in extension_explicit every time can get a bit tiresome.
In fact, the case analysis in extension_explicit follows a verycommon pattern: map a function on to the value inside of an Option<T>,unless the option is None, in which case, return None.
Rust has parametric polymorphism, so it is very easy to define acombinator that abstracts this pattern:
fn map<F, T, A>(option: Option<T>, f: F) -> Option<A> whereF: FnOnce(T) -> A
match option None => None,Some(value) => Some(f(value)),
Indeed, map is defined as a method on Option<T> in the standard li-brary. As a method, it has a slightly different signature: methods takeself, &self, or &mut self as their first argument.
Armed with our new combinator, we can rewrite our extension_explicit method to get rid of the case analysis:
# fn find(haystack: &str, needle: char) -> Option<usize> haystack.find(needle) // Returns the extension of the given file name, wherethe extension is defined// as all characters following the first `.`.// If `file_name` has no `.`, then `None` is returned.fn extension(file_name: &str) -> Option<&str>
find(file_name, '.').map(|i| &file_name[i+1..])
One other pattern we commonly find is assigning a default value to thecase when an Option value is None. For example, maybe your programassumes that the extension of a file is rs even if none is present. As youmight imagine, the case analysis for this is not specific to file extensions- it can work with any Option<T>:
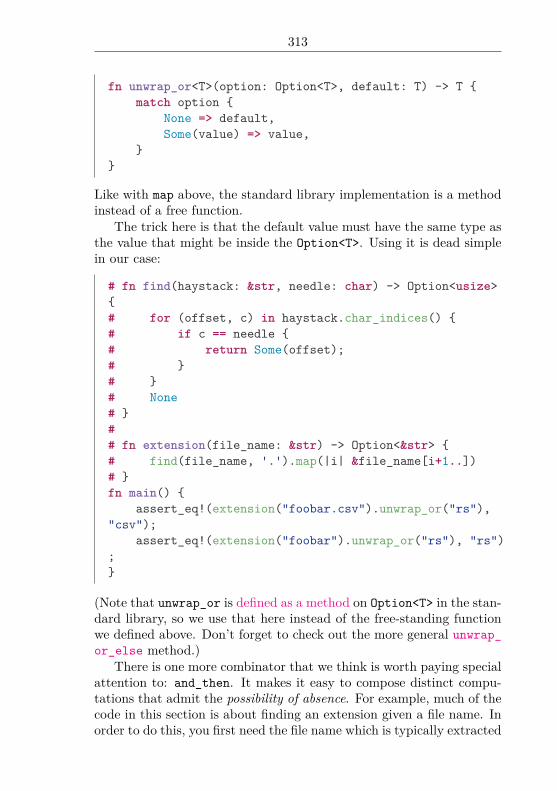
313
fn unwrap_or<T>(option: Option<T>, default: T) -> T match option
None => default,Some(value) => value,
Like with map above, the standard library implementation is a methodinstead of a free function.
The trick here is that the default value must have the same type asthe value that might be inside the Option<T>. Using it is dead simplein our case:
# fn find(haystack: &str, needle: char) -> Option<usize># for (offset, c) in haystack.char_indices() # if c == needle # return Some(offset);# # # None# ## fn extension(file_name: &str) -> Option<&str> # find(file_name, '.').map(|i| &file_name[i+1..])# fn main()
assert_eq!(extension("foobar.csv").unwrap_or("rs"),"csv");
assert_eq!(extension("foobar").unwrap_or("rs"), "rs");
(Note that unwrap_or is defined as a method on Option<T> in the stan-dard library, so we use that here instead of the free-standing functionwe defined above. Don’t forget to check out the more general unwrap_or_else method.)
There is one more combinator that we think is worth paying specialattention to: and_then. It makes it easy to compose distinct compu-tations that admit the possibility of absence. For example, much of thecode in this section is about finding an extension given a file name. Inorder to do this, you first need the file name which is typically extracted

314
from a file path. While most file paths have a file name, not all of themdo. For example, ., .. or /.
So, we are tasked with the challenge of finding an extension givena file path. Let’s start with explicit case analysis:
# fn extension(file_name: &str) -> Option<&str> Nonefn file_path_ext_explicit(file_path: &str) -> Option<&str>
match file_name(file_path) None => None,Some(name) => match extension(name)
None => None,Some(ext) => Some(ext),
fn file_name(file_path: &str) -> Option<&str> // Implementation elided.unimplemented!()
You might think that we could use the map combinator to reduce thecase analysis, but its type doesn’t quite fit...
fn file_path_ext(file_path: &str) -> Option<&str> file_name(file_path).map(|x| extension(x)) // This
causes a compilation error.
The map function here wraps the value returned by the extensionfunction inside an Option<_> and since the extension function itselfreturns an Option<&str> the expression file_name(file_path).map(|x| extension(x)) actually returns an Option<Option<&str>>.
But since file_path_ext just returns Option<&str> (and not Option<Option<&str>>)we get a compilation error.
The result of the function taken by map as input is always rewrappedwith Some. Instead, we need something like map, but which allows thecaller to return a Option<_> directly without wrapping it in anotherOption<_>.
Its generic implementation is even simpler than map:

315
fn and_then<F, T, A>(option: Option<T>, f: F) -> Option<A>where F: FnOnce(T) -> Option<A>
match option None => None,Some(value) => f(value),
Now we can rewrite our file_path_ext function without explicit caseanalysis:
# fn extension(file_name: &str) -> Option<&str> None# fn file_name(file_path: &str) -> Option<&str> Nonefn file_path_ext(file_path: &str) -> Option<&str>
file_name(file_path).and_then(extension)
Side note: Since and_then essentially works like map but returns anOption<_> instead of an Option<Option<_>> it is known as flatmapin some other languages.
The Option type has many other combinators defined in the stan-dard library. It is a good idea to skim this list and familiarize yourselfwith what’s available—they can often reduce case analysis for you. Fa-miliarizing yourself with these combinators will pay dividends becausemany of them are also defined (with similar semantics) for Result,which we will talk about next.
Combinators make using types like Option ergonomic because theyreduce explicit case analysis. They are also composable because theypermit the caller to handle the possibility of absence in their ownway. Methods like unwrap remove choices because they will panic ifOption<T> is None.
The Result typeThe Result type is also defined in the standard library:
enum Result<T, E> Ok(T),Err(E),

316
The Result type is a richer version of Option. Instead of expressing thepossibility of absence like Option does, Result expresses the possibilityof error. Usually, the error is used to explain why the execution of somecomputation failed. This is a strictly more general form of Option.Consider the following type alias, which is semantically equivalent tothe real Option<T> in every way:
type Option<T> = Result<T, ()>;
This fixes the second type parameter of Result to always be () (pro-nounced “unit” or “empty tuple”). Exactly one value inhabits the ()type: (). (Yup, the type and value level terms have the same notation!)
The Result type is a way of representing one of two possible out-comes in a computation. By convention, one outcome is meant to beexpected or “Ok” while the other outcome is meant to be unexpectedor “Err”.
Just like Option, the Result type also has an unwrap method de-fined in the standard library. Let’s define it:
# enum Result<T, E> Ok(T), Err(E) impl<T, E: ::std::fmt::Debug> Result<T, E>
fn unwrap(self) -> T match self
Result::Ok(val) => val,Result::Err(err) =>panic!("called `Result::unwrap()` on an `Err`
value: :?", err),
This is effectively the same as our definition for Option::unwrap, ex-cept it includes the error value in the panic! message. This makesdebugging easier, but it also requires us to add a Debug constraint onthe E type parameter (which represents our error type). Since the vastmajority of types should satisfy the Debug constraint, this tends towork out in practice. (Debug on a type simply means that there’s areasonable way to print a human readable description of values withthat type.)
OK, let’s move on to an example.

317
Parsing integers
The Rust standard library makes converting strings to integers deadsimple. It’s so easy in fact, that it is very tempting to write somethinglike the following:
fn double_number(number_str: &str) -> i32 2 * number_str.parse::<i32>().unwrap()
fn main() let n: i32 = double_number("10");assert_eq!(n, 20);
At this point, you should be skeptical of calling unwrap. For example,if the string doesn’t parse as a number, you’ll get a panic:
thread 'main' panicked at 'called `Result::unwrap()` onan `Err` value: ParseIntError kind: InvalidDigit ',/home/rustbuild/src/rust-buildbot/slave/beta-dist-rustc-linux/build/src/libcore/result.rs:729
This is rather unsightly, and if this happened inside a library you’reusing, you might be understandably annoyed. Instead, we should tryto handle the error in our function and let the caller decide what to do.This means changing the return type of double_number. But to what?Well, that requires looking at the signature of the parse method in thestandard library:
impl str fn parse<F: FromStr>(&self) -> Result<F, F::Err>;
Hmm. So we at least know that we need to use a Result. Certainly,it’s possible that this could have returned an Option. After all, astring either parses as a number or it doesn’t, right? That’s certainly areasonable way to go, but the implementation internally distinguisheswhy the string didn’t parse as an integer. (Whether it’s an emptystring, an invalid digit, too big or too small.) Therefore, using a Resultmakes sense because we want to provide more information than simply“absence.” We want to say why the parsing failed. You should try toemulate this line of reasoning when faced with a choice between Option

318
and Result. If you can provide detailed error information, then youprobably should. (We’ll see more on this later.)
OK, but how do we write our return type? The parse method asdefined above is generic over all the different number types defined inthe standard library. We could (and probably should) also make ourfunction generic, but let’s favor explicitness for the moment. We onlycare about i32, so we need to find its implementation of FromStr (do aCTRL-F in your browser for “FromStr”) and look at its associated typeErr. We did this so we can find the concrete error type. In this case,it’s std::num::ParseIntError. Finally, we can rewrite our function:
use std::num::ParseIntError;
fn double_number(number_str: &str) -> Result<i32, ParseIntError>
match number_str.parse::<i32>() Ok(n) => Ok(2 * n),Err(err) => Err(err),
fn main() match double_number("10")
Ok(n) => assert_eq!(n, 20),Err(err) => println!("Error: :?", err),
This is a little better, but now we’ve written a lot more code! The caseanalysis has once again bitten us.
Combinators to the rescue! Just like Option, Result has lots ofcombinators defined as methods. There is a large intersection of com-mon combinators between Result and Option. In particular, map ispart of that intersection:
use std::num::ParseIntError;
fn double_number(number_str: &str) -> Result<i32, ParseIntError>
number_str.parse::<i32>().map(|n| 2 * n)
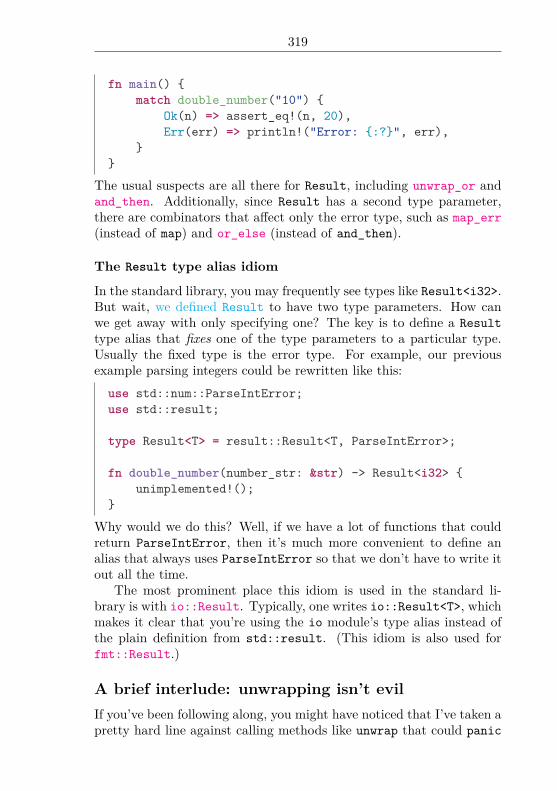
319
fn main() match double_number("10")
Ok(n) => assert_eq!(n, 20),Err(err) => println!("Error: :?", err),
The usual suspects are all there for Result, including unwrap_or andand_then. Additionally, since Result has a second type parameter,there are combinators that affect only the error type, such as map_err(instead of map) and or_else (instead of and_then).
The Result type alias idiom
In the standard library, you may frequently see types like Result<i32>.But wait, we defined Result to have two type parameters. How canwe get away with only specifying one? The key is to define a Resulttype alias that fixes one of the type parameters to a particular type.Usually the fixed type is the error type. For example, our previousexample parsing integers could be rewritten like this:use std::num::ParseIntError;use std::result;
type Result<T> = result::Result<T, ParseIntError>;
fn double_number(number_str: &str) -> Result<i32> unimplemented!();
Why would we do this? Well, if we have a lot of functions that couldreturn ParseIntError, then it’s much more convenient to define analias that always uses ParseIntError so that we don’t have to write itout all the time.
The most prominent place this idiom is used in the standard li-brary is with io::Result. Typically, one writes io::Result<T>, whichmakes it clear that you’re using the io module’s type alias instead ofthe plain definition from std::result. (This idiom is also used forfmt::Result.)
A brief interlude: unwrapping isn’t evilIf you’ve been following along, you might have noticed that I’ve taken apretty hard line against calling methods like unwrap that could panic
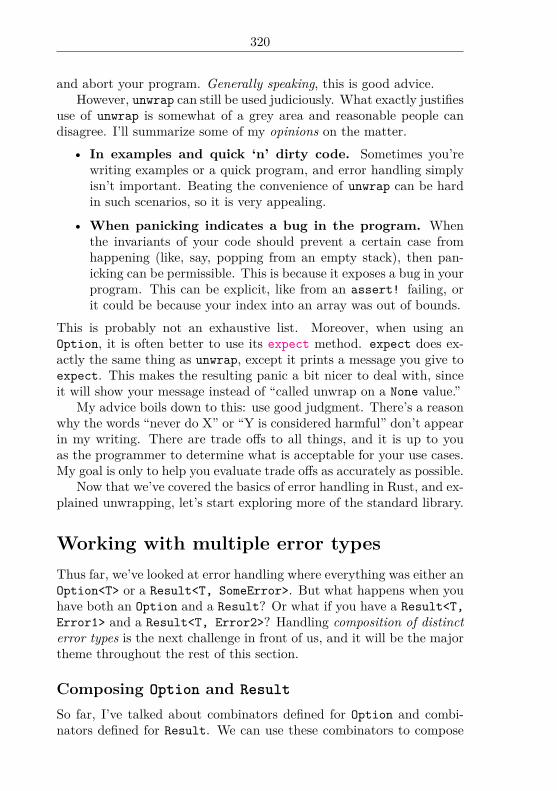
320
and abort your program. Generally speaking, this is good advice.However, unwrap can still be used judiciously. What exactly justifies
use of unwrap is somewhat of a grey area and reasonable people candisagree. I’ll summarize some of my opinions on the matter.
• In examples and quick ‘n’ dirty code. Sometimes you’rewriting examples or a quick program, and error handling simplyisn’t important. Beating the convenience of unwrap can be hardin such scenarios, so it is very appealing.
• When panicking indicates a bug in the program. Whenthe invariants of your code should prevent a certain case fromhappening (like, say, popping from an empty stack), then pan-icking can be permissible. This is because it exposes a bug in yourprogram. This can be explicit, like from an assert! failing, orit could be because your index into an array was out of bounds.
This is probably not an exhaustive list. Moreover, when using anOption, it is often better to use its expect method. expect does ex-actly the same thing as unwrap, except it prints a message you give toexpect. This makes the resulting panic a bit nicer to deal with, sinceit will show your message instead of “called unwrap on a None value.”
My advice boils down to this: use good judgment. There’s a reasonwhy the words “never do X” or “Y is considered harmful” don’t appearin my writing. There are trade offs to all things, and it is up to youas the programmer to determine what is acceptable for your use cases.My goal is only to help you evaluate trade offs as accurately as possible.
Now that we’ve covered the basics of error handling in Rust, and ex-plained unwrapping, let’s start exploring more of the standard library.
Working with multiple error typesThus far, we’ve looked at error handling where everything was either anOption<T> or a Result<T, SomeError>. But what happens when youhave both an Option and a Result? Or what if you have a Result<T,Error1> and a Result<T, Error2>? Handling composition of distincterror types is the next challenge in front of us, and it will be the majortheme throughout the rest of this section.
Composing Option and ResultSo far, I’ve talked about combinators defined for Option and combi-nators defined for Result. We can use these combinators to compose

321
results of different computations without doing explicit case analysis.Of course, in real code, things aren’t always as clean. Sometimes
you have a mix of Option and Result types. Must we resort to explicitcase analysis, or can we continue using combinators?
For now, let’s revisit one of the first examples in this section:
use std::env;
fn main() let mut argv = env::args();let arg: String = argv.nth(1).unwrap(); // error 1let n: i32 = arg.parse().unwrap(); // error 2println!("", 2 * n);
Given our new found knowledge of Option, Result and their variouscombinators, we should try to rewrite this so that errors are handledproperly and the program doesn’t panic if there’s an error.
The tricky aspect here is that argv.nth(1) produces an Optionwhile arg.parse() produces a Result. These aren’t directly compos-able. When faced with both an Option and a Result, the solution isusually to convert the Option to a Result. In our case, the absence ofa command line parameter (from env::args()) means the user didn’tinvoke the program correctly. We could use a String to describe theerror. Let’s try:
use std::env;
fn double_arg(mut argv: env::Args) -> Result<i32, String>
argv.nth(1).ok_or("Please give at least one argument".to_owned(
)).and_then(|arg| arg.parse::<i32>().map_err(|err|
err.to_string())).map(|n| 2 * n)
fn main() match double_arg(env::args())
Ok(n) => println!("", n),Err(err) => println!("Error: ", err),
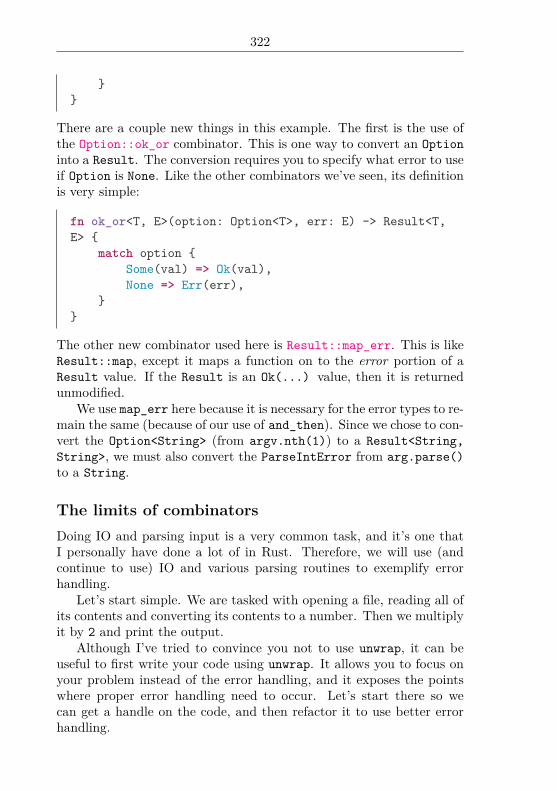
322
There are a couple new things in this example. The first is the use ofthe Option::ok_or combinator. This is one way to convert an Optioninto a Result. The conversion requires you to specify what error to useif Option is None. Like the other combinators we’ve seen, its definitionis very simple:
fn ok_or<T, E>(option: Option<T>, err: E) -> Result<T,E>
match option Some(val) => Ok(val),None => Err(err),
The other new combinator used here is Result::map_err. This is likeResult::map, except it maps a function on to the error portion of aResult value. If the Result is an Ok(...) value, then it is returnedunmodified.
We use map_err here because it is necessary for the error types to re-main the same (because of our use of and_then). Since we chose to con-vert the Option<String> (from argv.nth(1)) to a Result<String,String>, we must also convert the ParseIntError from arg.parse()to a String.
The limits of combinatorsDoing IO and parsing input is a very common task, and it’s one thatI personally have done a lot of in Rust. Therefore, we will use (andcontinue to use) IO and various parsing routines to exemplify errorhandling.
Let’s start simple. We are tasked with opening a file, reading all ofits contents and converting its contents to a number. Then we multiplyit by 2 and print the output.
Although I’ve tried to convince you not to use unwrap, it can beuseful to first write your code using unwrap. It allows you to focus onyour problem instead of the error handling, and it exposes the pointswhere proper error handling need to occur. Let’s start there so wecan get a handle on the code, and then refactor it to use better errorhandling.

323
use std::fs::File;use std::io::Read;use std::path::Path;
fn file_double<P: AsRef<Path>>(file_path: P) -> i32 let mut file = File::open(file_path).unwrap(); // error
1let mut contents = String::new();file.read_to_string(&mut contents).unwrap(); // error
2let n: i32 = contents.trim().parse().unwrap(); // error
32 * n
fn main() let doubled = file_double("foobar");println!("", doubled);
(N.B. The AsRef<Path> is used because those are the same boundsused on std::fs::File::open. This makes it ergonomic to use anykind of string as a file path.)
There are three different errors that can occur here:
1. A problem opening the file.
2. A problem reading data from the file.
3. A problem parsing the data as a number.
The first two problems are described via the std::io::Error type.We know this because of the return types of std::fs::File::openand std::io::Read::read_to_string. (Note that they both use theResult type alias idiom described previously. If you click on the Resulttype, you’ll see the type alias, and consequently, the underlying io::Error type.) The third problem is described by the std::num::ParseIntError type. The io::Error type in particular is pervasivethroughout the standard library. You will see it again and again.
Let’s start the process of refactoring the file_double function. Tomake this function composable with other components of the program,it should not panic if any of the above error conditions are met. Effec-tively, this means that the function should return an error if any of its

324
operations fail. Our problem is that the return type of file_double isi32, which does not give us any useful way of reporting an error. Thus,we must start by changing the return type from i32 to something else.
The first thing we need to decide: should we use Option or Result?We certainly could use Option very easily. If any of the three errorsoccur, we could simply return None. This will work and it is better thanpanicking, but we can do a lot better. Instead, we should pass somedetail about the error that occurred. Since we want to express thepossibility of error, we should use Result<i32, E>. But what shouldE be? Since two different types of errors can occur, we need to convertthem to a common type. One such type is String. Let’s see how thatimpacts our code:
use std::fs::File;use std::io::Read;use std::path::Path;
fn file_double<P: AsRef<Path>>(file_path: P) -> Result<i32,String>
File::open(file_path).map_err(|err| err.to_string()).and_then(|mut file|
let mut contents = String::new();file.read_to_string(&mut contents)
.map_err(|err| err.to_string())
.map(|_| contents)).and_then(|contents|
contents.trim().parse::<i32>().map_err(|err| err.to_string())
).map(|n| 2 * n)
fn main() match file_double("foobar")
Ok(n) => println!("", n),Err(err) => println!("Error: ", err),
This code looks a bit hairy. It can take quite a bit of practice before
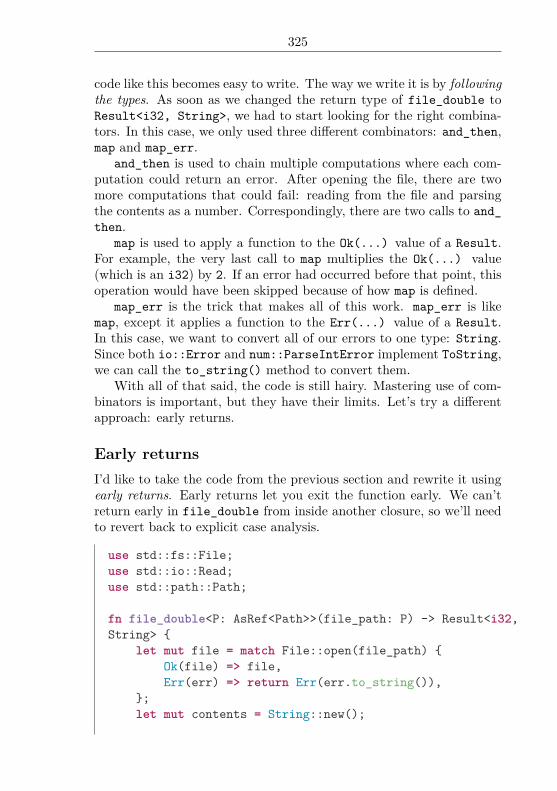
325
code like this becomes easy to write. The way we write it is by followingthe types. As soon as we changed the return type of file_double toResult<i32, String>, we had to start looking for the right combina-tors. In this case, we only used three different combinators: and_then,map and map_err.
and_then is used to chain multiple computations where each com-putation could return an error. After opening the file, there are twomore computations that could fail: reading from the file and parsingthe contents as a number. Correspondingly, there are two calls to and_then.
map is used to apply a function to the Ok(...) value of a Result.For example, the very last call to map multiplies the Ok(...) value(which is an i32) by 2. If an error had occurred before that point, thisoperation would have been skipped because of how map is defined.
map_err is the trick that makes all of this work. map_err is likemap, except it applies a function to the Err(...) value of a Result.In this case, we want to convert all of our errors to one type: String.Since both io::Error and num::ParseIntError implement ToString,we can call the to_string() method to convert them.
With all of that said, the code is still hairy. Mastering use of com-binators is important, but they have their limits. Let’s try a differentapproach: early returns.
Early returnsI’d like to take the code from the previous section and rewrite it usingearly returns. Early returns let you exit the function early. We can’treturn early in file_double from inside another closure, so we’ll needto revert back to explicit case analysis.
use std::fs::File;use std::io::Read;use std::path::Path;
fn file_double<P: AsRef<Path>>(file_path: P) -> Result<i32,String>
let mut file = match File::open(file_path) Ok(file) => file,Err(err) => return Err(err.to_string()),
;let mut contents = String::new();
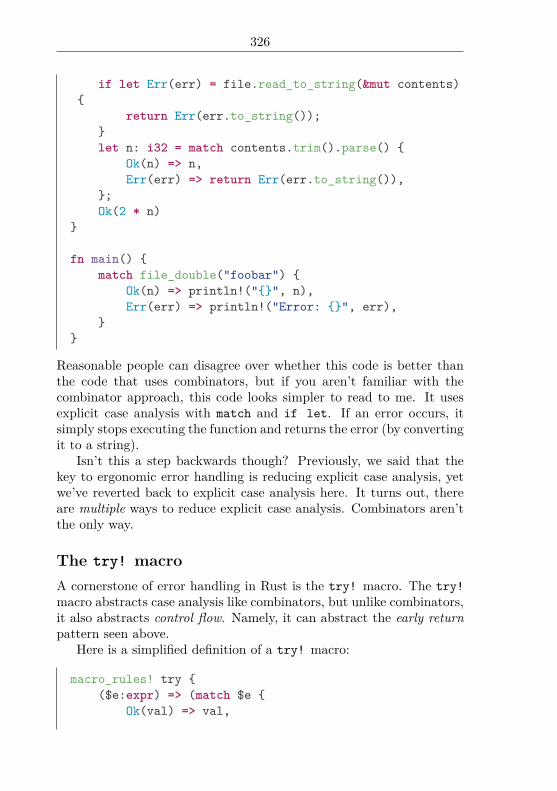
326
if let Err(err) = file.read_to_string(&mut contents)
return Err(err.to_string());let n: i32 = match contents.trim().parse()
Ok(n) => n,Err(err) => return Err(err.to_string()),
;Ok(2 * n)
fn main() match file_double("foobar")
Ok(n) => println!("", n),Err(err) => println!("Error: ", err),
Reasonable people can disagree over whether this code is better thanthe code that uses combinators, but if you aren’t familiar with thecombinator approach, this code looks simpler to read to me. It usesexplicit case analysis with match and if let. If an error occurs, itsimply stops executing the function and returns the error (by convertingit to a string).
Isn’t this a step backwards though? Previously, we said that thekey to ergonomic error handling is reducing explicit case analysis, yetwe’ve reverted back to explicit case analysis here. It turns out, thereare multiple ways to reduce explicit case analysis. Combinators aren’tthe only way.
The try! macroA cornerstone of error handling in Rust is the try! macro. The try!macro abstracts case analysis like combinators, but unlike combinators,it also abstracts control flow. Namely, it can abstract the early returnpattern seen above.
Here is a simplified definition of a try! macro:
macro_rules! try ($e:expr) => (match $e
Ok(val) => val,

327
Err(err) => return Err(err),);
(The real definition is a bit more sophisticated. We will address thatlater.)
Using the try! macro makes it very easy to simplify our last ex-ample. Since it does the case analysis and the early return for us, weget tighter code that is easier to read:
use std::fs::File;use std::io::Read;use std::path::Path;
fn file_double<P: AsRef<Path>>(file_path: P) -> Result<i32,String>
let mut file = try!(File::open(file_path).map_err(|e|e.to_string()));
let mut contents = String::new();try!(file.read_to_string(&mut contents).map_err(|e|
e.to_string()));let n = try!(contents.trim().parse::<i32>().map_err(
|e| e.to_string()));Ok(2 * n)
fn main() match file_double("foobar")
Ok(n) => println!("", n),Err(err) => println!("Error: ", err),
The map_err calls are still necessary given our definition of try!. Thisis because the error types still need to be converted to String. Thegood news is that we will soon learn how to remove those map_err calls!The bad news is that we will need to learn a bit more about a coupleimportant traits in the standard library before we can remove the map_err calls.

328
Defining your own error typeBefore we dive into some of the standard library error traits, I’d like towrap up this section by removing the use of String as our error typein the previous examples.
Using String as we did in our previous examples is convenientbecause it’s easy to convert errors to strings, or even make up yourown errors as strings on the spot. However, using String for yourerrors has some downsides.
The first downside is that the error messages tend to clutter yourcode. It’s possible to define the error messages elsewhere, but unlessyou’re unusually disciplined, it is very tempting to embed the errormessage into your code. Indeed, we did exactly this in a previousexample.
The second and more important downside is that Strings are lossy.That is, if all errors are converted to strings, then the errors we passto the caller become completely opaque. The only reasonable thing thecaller can do with a String error is show it to the user. Certainly,inspecting the string to determine the type of error is not robust. (Ad-mittedly, this downside is far more important inside of a library asopposed to, say, an application.)
For example, the io::Error type embeds an io::ErrorKind, whichis structured data that represents what went wrong during an IO oper-ation. This is important because you might want to react differentlydepending on the error. (e.g., A BrokenPipe error might mean quit-ting your program gracefully while a NotFound error might mean exit-ing with an error code and showing an error to the user.) With io::ErrorKind, the caller can examine the type of an error with case anal-ysis, which is strictly superior to trying to tease out the details of anerror inside of a String.
Instead of using a String as an error type in our previous exampleof reading an integer from a file, we can define our own error typethat represents errors with structured data. We endeavor to not dropinformation from underlying errors in case the caller wants to inspectthe details.
The ideal way to represent one of many possibilities is to define ourown sum type using enum. In our case, an error is either an io::Erroror a num::ParseIntError, so a natural definition arises:
use std::io;use std::num;

329
// We derive `Debug` because all types should probablyderive `Debug`.// This gives us a reasonable human readable descriptionof `CliError` values.#[derive(Debug)]enum CliError
Io(io::Error),Parse(num::ParseIntError),
Tweaking our code is very easy. Instead of converting errors to strings,we simply convert them to our CliError type using the correspondingvalue constructor:# #[derive(Debug)]# enum CliError Io(::std::io::Error), Parse(::std::num::ParseIntError) use std::fs::File;use std::io::Read;use std::path::Path;
fn file_double<P: AsRef<Path>>(file_path: P) -> Result<i32,CliError>
let mut file = try!(File::open(file_path).map_err(CliError::Io));
let mut contents = String::new();try!(file.read_to_string(&mut contents).map_err(CliError:
:Io));let n: i32 = try!(contents.trim().parse().map_err(CliError:
:Parse));Ok(2 * n)
fn main() match file_double("foobar")
Ok(n) => println!("", n),Err(err) => println!("Error: :?", err),
The only change here is switching map_err(|e| e.to_string()) (whichconverts errors to strings) to map_err(CliError::Io) or map_err(

330
CliError::Parse). The caller gets to decide the level of detail toreport to the user. In effect, using a String as an error type re-moves choices from the caller while using a custom enum error typelike CliError gives the caller all of the conveniences as before in addi-tion to structured data describing the error.
A rule of thumb is to define your own error type, but a String errortype will do in a pinch, particularly if you’re writing an application. Ifyou’re writing a library, defining your own error type should be stronglypreferred so that you don’t remove choices from the caller unnecessarily.
Standard library traits used for error han-dlingThe standard library defines two integral traits for error handling: std::error::Error and std::convert::From. While Error is designedspecifically for generically describing errors, the From trait serves amore general role for converting values between two distinct types.
The Error traitThe Error trait is defined in the standard library:
use std::fmt::Debug, Display;
trait Error: Debug + Display /// A short description of the error.fn description(&self) -> &str;
/// The lower level cause of this error, if any.fn cause(&self) -> Option<&Error> None
This trait is super generic because it is meant to be implemented forall types that represent errors. This will prove useful for writing com-posable code as we’ll see later. Otherwise, the trait allows you to do atleast the following things:
• Obtain a Debug representation of the error.
• Obtain a user-facing Display representation of the error.
• Obtain a short description of the error (via the descriptionmethod).

331
• Inspect the causal chain of an error, if one exists (via the causemethod).
The first two are a result of Error requiring impls for both Debugand Display. The latter two are from the two methods defined onError. The power of Error comes from the fact that all error typesimpl Error, which means errors can be existentially quantified as a traitobject. This manifests as either Box<Error> or &Error. Indeed, thecause method returns an &Error, which is itself a trait object. We’llrevisit the Error trait’s utility as a trait object later.
For now, it suffices to show an example implementing the Errortrait. Let’s use the error type we defined in the previous section:
use std::io;use std::num;
// We derive `Debug` because all types should probablyderive `Debug`.// This gives us a reasonable human readable descriptionof `CliError` values.#[derive(Debug)]enum CliError
Io(io::Error),Parse(num::ParseIntError),
This particular error type represents the possibility of two types oferrors occurring: an error dealing with I/O or an error converting astring to a number. The error could represent as many error types asyou want by adding new variants to the enum definition.
Implementing Error is pretty straight-forward. It’s mostly going tobe a lot explicit case analysis.
use std::error;use std::fmt;
impl fmt::Display for CliError fn fmt(&self, f: &mut fmt::Formatter) -> fmt::Result
match *self
// Both underlying errors already impl `Display`,so we defer to

332
// their implementations.CliError::Io(ref err) => write!(f, "IO error:
", err),CliError::Parse(ref err) => write!(f, "Parse
error: ", err),
impl error::Error for CliError fn description(&self) -> &str
// Both underlying errors already impl `Error`,so we defer to their
// implementations.match *self
CliError::Io(ref err) => err.description(),CliError::Parse(ref err) => err.description(
),
fn cause(&self) -> Option<&error::Error> match *self
// N.B. Both of these implicitly cast `err`from their concrete
// types (either `&io::Error` or `&num::ParseIntError`)
// to a trait object `&Error`. This works becauseboth error types
// implement `Error`.CliError::Io(ref err) => Some(err),CliError::Parse(ref err) => Some(err),
We note that this is a very typical implementation of Error: match onyour different error types and satisfy the contracts defined for descriptionand cause.
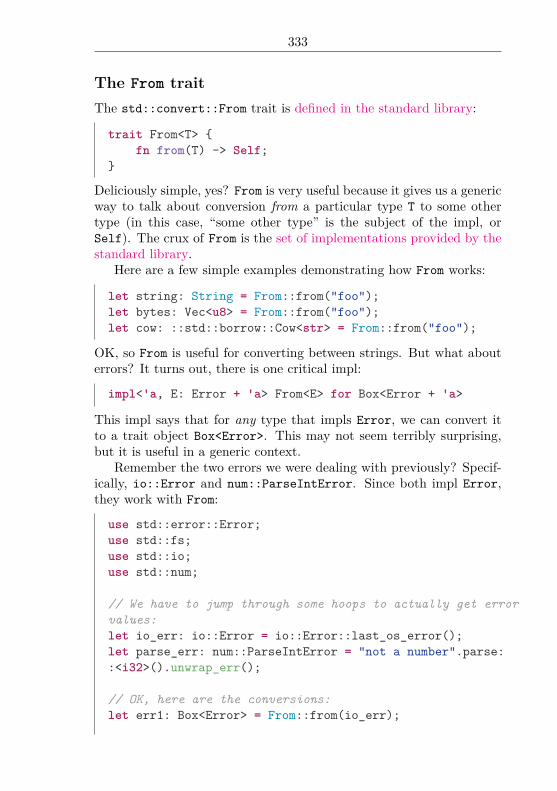
333
The From traitThe std::convert::From trait is defined in the standard library:
trait From<T> fn from(T) -> Self;
Deliciously simple, yes? From is very useful because it gives us a genericway to talk about conversion from a particular type T to some othertype (in this case, “some other type” is the subject of the impl, orSelf). The crux of From is the set of implementations provided by thestandard library.
Here are a few simple examples demonstrating how From works:
let string: String = From::from("foo");let bytes: Vec<u8> = From::from("foo");let cow: ::std::borrow::Cow<str> = From::from("foo");
OK, so From is useful for converting between strings. But what abouterrors? It turns out, there is one critical impl:
impl<'a, E: Error + 'a> From<E> for Box<Error + 'a>
This impl says that for any type that impls Error, we can convert itto a trait object Box<Error>. This may not seem terribly surprising,but it is useful in a generic context.
Remember the two errors we were dealing with previously? Specif-ically, io::Error and num::ParseIntError. Since both impl Error,they work with From:
use std::error::Error;use std::fs;use std::io;use std::num;
// We have to jump through some hoops to actually get errorvalues:let io_err: io::Error = io::Error::last_os_error();let parse_err: num::ParseIntError = "not a number".parse::<i32>().unwrap_err();
// OK, here are the conversions:let err1: Box<Error> = From::from(io_err);

334
let err2: Box<Error> = From::from(parse_err);
There is a really important pattern to recognize here. Both err1 anderr2 have the same type. This is because they are existentially quan-tified types, or trait objects. In particular, their underlying type iserased from the compiler’s knowledge, so it truly sees err1 and err2as exactly the same. Additionally, we constructed err1 and err2 usingprecisely the same function call: From::from. This is because From::from is overloaded on both its argument and its return type.
This pattern is important because it solves a problem we had earlier:it gives us a way to reliably convert errors to the same type using thesame function.
Time to revisit an old friend; the try! macro.
The real try! macroPreviously, we presented this definition of try!:
macro_rules! try ($e:expr) => (match $e
Ok(val) => val,Err(err) => return Err(err),
);
This is not its real definition. Its real definition is in the standardlibrary:
macro_rules! try ($e:expr) => (match $e
Ok(val) => val,Err(err) => return Err(::std::convert::From::from(
err)),);
There’s one tiny but powerful change: the error value is passed throughFrom::from. This makes the try! macro a lot more powerful becauseit gives you automatic type conversion for free.
Armed with our more powerful try! macro, let’s take a look atcode we wrote previously to read a file and convert its contents to aninteger:

335
use std::fs::File;use std::io::Read;use std::path::Path;
fn file_double<P: AsRef<Path>>(file_path: P) -> Result<i32,String>
let mut file = try!(File::open(file_path).map_err(|e|e.to_string()));
let mut contents = String::new();try!(file.read_to_string(&mut contents).map_err(|e|
e.to_string()));let n = try!(contents.trim().parse::<i32>().map_err(
|e| e.to_string()));Ok(2 * n)
Earlier, we promised that we could get rid of the map_err calls. Indeed,all we have to do is pick a type that From works with. As we saw in theprevious section, From has an impl that lets it convert any error typeinto a Box<Error>:use std::error::Error;use std::fs::File;use std::io::Read;use std::path::Path;
fn file_double<P: AsRef<Path>>(file_path: P) -> Result<i32,Box<Error>>
let mut file = try!(File::open(file_path));let mut contents = String::new();try!(file.read_to_string(&mut contents));let n = try!(contents.trim().parse::<i32>());Ok(2 * n)
We are getting very close to ideal error handling. Our code has verylittle overhead as a result from error handling because the try! macroencapsulates three things simultaneously:
1. Case analysis.
2. Control flow.
3. Error type conversion.

336
When all three things are combined, we get code that is unencumberedby combinators, calls to unwrap or case analysis.
There’s one little nit left: the Box<Error> type is opaque. If wereturn a Box<Error> to the caller, the caller can’t (easily) inspect un-derlying error type. The situation is certainly better than String be-cause the caller can call methods like description and cause, but thelimitation remains: Box<Error> is opaque. (N.B. This isn’t entirelytrue because Rust does have runtime reflection, which is useful in somescenarios that are beyond the scope of this section.)
It’s time to revisit our custom CliError type and tie everythingtogether.
Composing custom error typesIn the last section, we looked at the real try! macro and how it doesautomatic type conversion for us by calling From::from on the errorvalue. In particular, we converted errors to Box<Error>, which works,but the type is opaque to callers.
To fix this, we use the same remedy that we’re already familiarwith: a custom error type. Once again, here is the code that reads thecontents of a file and converts it to an integer:
use std::fs::File;use std::io::self, Read;use std::num;use std::path::Path;
// We derive `Debug` because all types should probablyderive `Debug`.// This gives us a reasonable human readable descriptionof `CliError` values.#[derive(Debug)]enum CliError
Io(io::Error),Parse(num::ParseIntError),
fn file_double_verbose<P: AsRef<Path>>(file_path: P) ->Result<i32, CliError>
let mut file = try!(File::open(file_path).map_err(CliError::Io));
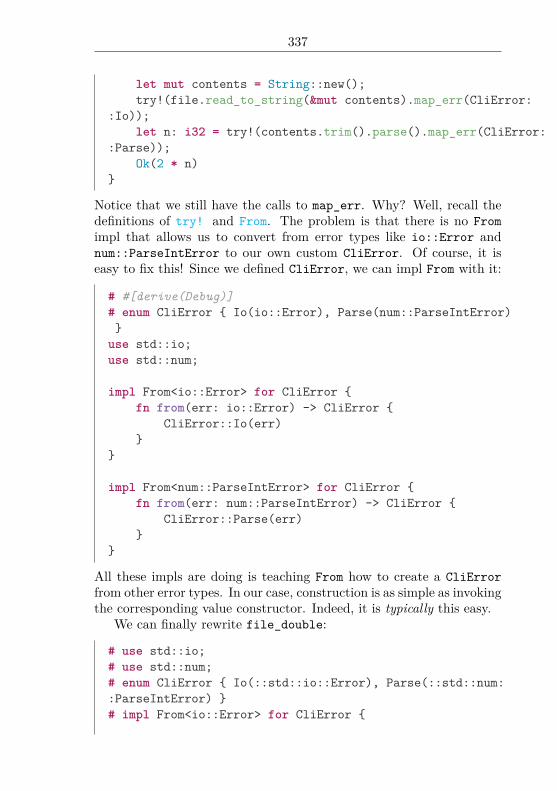
337
let mut contents = String::new();try!(file.read_to_string(&mut contents).map_err(CliError:
:Io));let n: i32 = try!(contents.trim().parse().map_err(CliError:
:Parse));Ok(2 * n)
Notice that we still have the calls to map_err. Why? Well, recall thedefinitions of try! and From. The problem is that there is no Fromimpl that allows us to convert from error types like io::Error andnum::ParseIntError to our own custom CliError. Of course, it iseasy to fix this! Since we defined CliError, we can impl From with it:
# #[derive(Debug)]# enum CliError Io(io::Error), Parse(num::ParseIntError)
use std::io;use std::num;
impl From<io::Error> for CliError fn from(err: io::Error) -> CliError
CliError::Io(err)
impl From<num::ParseIntError> for CliError fn from(err: num::ParseIntError) -> CliError
CliError::Parse(err)
All these impls are doing is teaching From how to create a CliErrorfrom other error types. In our case, construction is as simple as invokingthe corresponding value constructor. Indeed, it is typically this easy.
We can finally rewrite file_double:
# use std::io;# use std::num;# enum CliError Io(::std::io::Error), Parse(::std::num::ParseIntError) # impl From<io::Error> for CliError
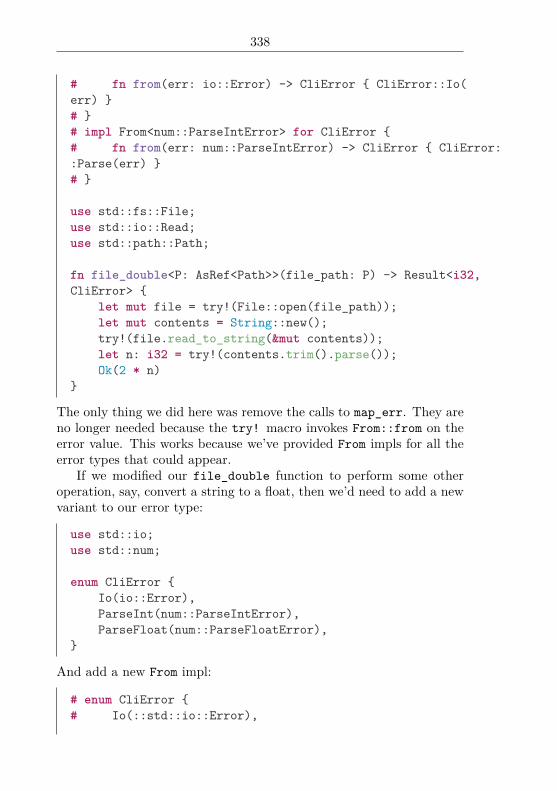
338
# fn from(err: io::Error) -> CliError CliError::Io(err) # # impl From<num::ParseIntError> for CliError # fn from(err: num::ParseIntError) -> CliError CliError::Parse(err) #
use std::fs::File;use std::io::Read;use std::path::Path;
fn file_double<P: AsRef<Path>>(file_path: P) -> Result<i32,CliError>
let mut file = try!(File::open(file_path));let mut contents = String::new();try!(file.read_to_string(&mut contents));let n: i32 = try!(contents.trim().parse());Ok(2 * n)
The only thing we did here was remove the calls to map_err. They areno longer needed because the try! macro invokes From::from on theerror value. This works because we’ve provided From impls for all theerror types that could appear.
If we modified our file_double function to perform some otheroperation, say, convert a string to a float, then we’d need to add a newvariant to our error type:
use std::io;use std::num;
enum CliError Io(io::Error),ParseInt(num::ParseIntError),ParseFloat(num::ParseFloatError),
And add a new From impl:
# enum CliError # Io(::std::io::Error),

339
# ParseInt(num::ParseIntError),# ParseFloat(num::ParseFloatError),#
use std::num;
impl From<num::ParseFloatError> for CliError fn from(err: num::ParseFloatError) -> CliError
CliError::ParseFloat(err)
And that’s it!
Advice for library writersIf your library needs to report custom errors, then you should probablydefine your own error type. It’s up to you whether or not to expose itsrepresentation (like ErrorKind) or keep it hidden (like ParseIntError).Regardless of how you do it, it’s usually good practice to at least pro-vide some information about the error beyond its String representa-tion. But certainly, this will vary depending on use cases.
At a minimum, you should probably implement the Error trait.This will give users of your library some minimum flexibility for com-posing errors. Implementing the Error trait also means that usersare guaranteed the ability to obtain a string representation of an error(because it requires impls for both fmt::Debug and fmt::Display).
Beyond that, it can also be useful to provide implementations ofFrom on your error types. This allows you (the library author) andyour users to compose more detailed errors. For example, csv::Errorprovides From impls for both io::Error and byteorder::Error.
Finally, depending on your tastes, you may also want to define aResult type alias, particularly if your library defines a single error type.This is used in the standard library for io::Result and fmt::Result.
Case study: A program to read populationdataThis section was long, and depending on your background, it might berather dense. While there is plenty of example code to go along with

340
the prose, most of it was specifically designed to be pedagogical. So,we’re going to do something new: a case study.
For this, we’re going to build up a command line program that letsyou query world population data. The objective is simple: you give ita location and it will tell you the population. Despite the simplicity,there is a lot that can go wrong!
The data we’ll be using comes from the Data Science Toolkit. I’veprepared some data from it for this exercise. You can either grab theworld population data (41MB gzip compressed, 145MB uncompressed)or only the US population data (2.2MB gzip compressed, 7.2MB un-compressed).
Up until now, we’ve kept the code limited to Rust’s standard library.For a real task like this though, we’ll want to at least use something toparse CSV data, parse the program arguments and decode that stuffinto Rust types automatically. For that, we’ll use the csv, and rustc-serialize crates.
Initial setupWe’re not going to spend a lot of time on setting up a project with Cargobecause it is already covered well in the Cargo section and Cargo’sdocumentation.
To get started from scratch, run cargo new --bin city-pop andmake sure your Cargo.toml looks something like this:
[package]name = "city-pop"version = "0.1.0"authors = ["Andrew Gallant <[email protected]>"]
[[bin]]name = "city-pop"
[dependencies]csv = "0.*"rustc-serialize = "0.*"getopts = "0.*"
You should already be able to run:

341
cargo build --release./target/release/city-pop# Outputs: Hello, world!
Argument parsingLet’s get argument parsing out of the way. We won’t go into too muchdetail on Getopts, but there is some good documentation describing it.The short story is that Getopts generates an argument parser and ahelp message from a vector of options (The fact that it is a vector ishidden behind a struct and a set of methods). Once the parsing is done,the parser returns a struct that records matches for defined options,and remaining “free” arguments. From there, we can get informationabout the flags, for instance, whether they were passed in, and whatarguments they had. Here’s our program with the appropriate externcrate statements, and the basic argument setup for Getopts:
extern crate getopts;extern crate rustc_serialize;
use getopts::Options;use std::env;
fn print_usage(program: &str, opts: Options) println!("", opts.usage(&format!("Usage: [options]
<data-path> <city>", program)));
fn main() let args: Vec<String> = env::args().collect();let program = &args[0];
let mut opts = Options::new();opts.optflag("h", "help", "Show this usage message.
");
let matches = match opts.parse(&args[1..]) Ok(m) => m Err(e) => panic!(e.to_string())
;if matches.opt_present("h")
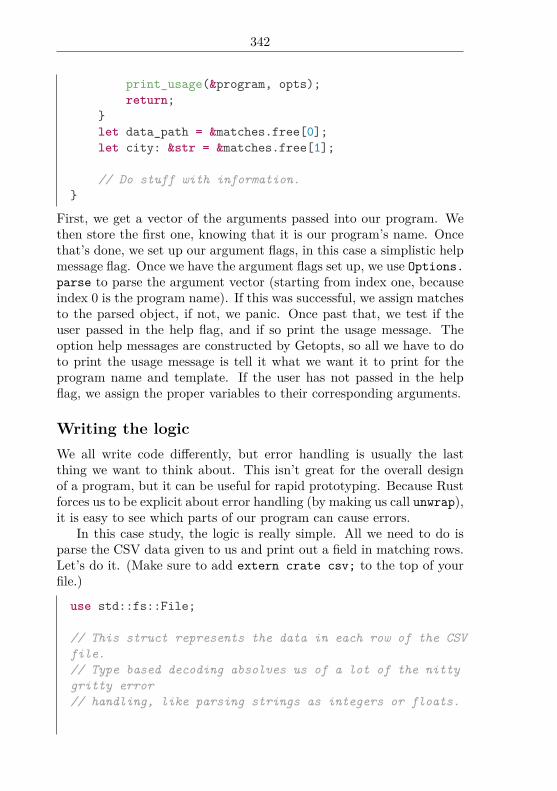
342
print_usage(&program, opts);return;
let data_path = &matches.free[0];let city: &str = &matches.free[1];
// Do stuff with information.
First, we get a vector of the arguments passed into our program. Wethen store the first one, knowing that it is our program’s name. Oncethat’s done, we set up our argument flags, in this case a simplistic helpmessage flag. Once we have the argument flags set up, we use Options.parse to parse the argument vector (starting from index one, becauseindex 0 is the program name). If this was successful, we assign matchesto the parsed object, if not, we panic. Once past that, we test if theuser passed in the help flag, and if so print the usage message. Theoption help messages are constructed by Getopts, so all we have to doto print the usage message is tell it what we want it to print for theprogram name and template. If the user has not passed in the helpflag, we assign the proper variables to their corresponding arguments.
Writing the logicWe all write code differently, but error handling is usually the lastthing we want to think about. This isn’t great for the overall designof a program, but it can be useful for rapid prototyping. Because Rustforces us to be explicit about error handling (by making us call unwrap),it is easy to see which parts of our program can cause errors.
In this case study, the logic is really simple. All we need to do isparse the CSV data given to us and print out a field in matching rows.Let’s do it. (Make sure to add extern crate csv; to the top of yourfile.)
use std::fs::File;
// This struct represents the data in each row of the CSVfile.// Type based decoding absolves us of a lot of the nittygritty error// handling, like parsing strings as integers or floats.

343
#[derive(Debug, RustcDecodable)]struct Row
country: String,city: String,accent_city: String,region: String,
// Not every row has data for the population, latitudeor longitude!
// So we express them as `Option` types, which admitsthe possibility of
// absence. The CSV parser will fill in the correctvalue for us.
population: Option<u64>,latitude: Option<f64>,longitude: Option<f64>,
fn print_usage(program: &str, opts: Options) println!("", opts.usage(&format!("Usage: [options]
<data-path> <city>", program)));
fn main() let args: Vec<String> = env::args().collect();let program = &args[0];
let mut opts = Options::new();opts.optflag("h", "help", "Show this usage message.
");
let matches = match opts.parse(&args[1..]) Ok(m) => m Err(e) => panic!(e.to_string())
;
if matches.opt_present("h") print_usage(&program, opts);return;

344
let data_path = &matches.free[0];let city: &str = &matches.free[1];
let file = File::open(data_path).unwrap();let mut rdr = csv::Reader::from_reader(file);
for row in rdr.decode::<Row>() let row = row.unwrap();
if row.city == city println!(", : :?",
row.city, row.country,row.population.expect("population count")
);
Let’s outline the errors. We can start with the obvious: the three placesthat unwrap is called:
1. File::open can return an io::Error.
2. csv::Reader::decode decodes one record at a time, and decod-ing a record (look at the Item associated type on the Iteratorimpl) can produce a csv::Error.
3. If row.population is None, then calling expect will panic.
Are there any others? What if we can’t find a matching city? Toolslike grep will return an error code, so we probably should too. So wehave logic errors specific to our problem, IO errors and CSV parsingerrors. We’re going to explore two different ways to approach handlingthese errors.
I’d like to start with Box<Error>. Later, we’ll see how defining ourown error type can be useful.
Error handling with Box<Error>Box<Error> is nice because it just works. You don’t need to define yourown error types and you don’t need any From implementations. Thedownside is that since Box<Error> is a trait object, it erases the type,

345
which means the compiler can no longer reason about its underlyingtype.
Previously we started refactoring our code by changing the typeof our function from T to Result<T, OurErrorType>. In this case,OurErrorType is only Box<Error>. But what’s T? And can we add areturn type to main?
The answer to the second question is no, we can’t. That meanswe’ll need to write a new function. But what is T? The simplest thingwe can do is to return a list of matching Row values as a Vec<Row>.(Better code would return an iterator, but that is left as an exercise tothe reader.)
Let’s refactor our code into its own function, but keep the callsto unwrap. Note that we opt to handle the possibility of a missingpopulation count by simply ignoring that row.
use std::path::Path;
struct Row // This struct remains unchanged.
struct PopulationCount city: String,country: String,// This is no longer an `Option` because values of
this type are only// constructed if they have a population count.count: u64,
fn print_usage(program: &str, opts: Options) println!("", opts.usage(&format!("Usage: [options]
<data-path> <city>", program)));
fn search<P: AsRef<Path>>(file_path: P, city: &str) ->Vec<PopulationCount>
let mut found = vec![];let file = File::open(file_path).unwrap();let mut rdr = csv::Reader::from_reader(file);for row in rdr.decode::<Row>()
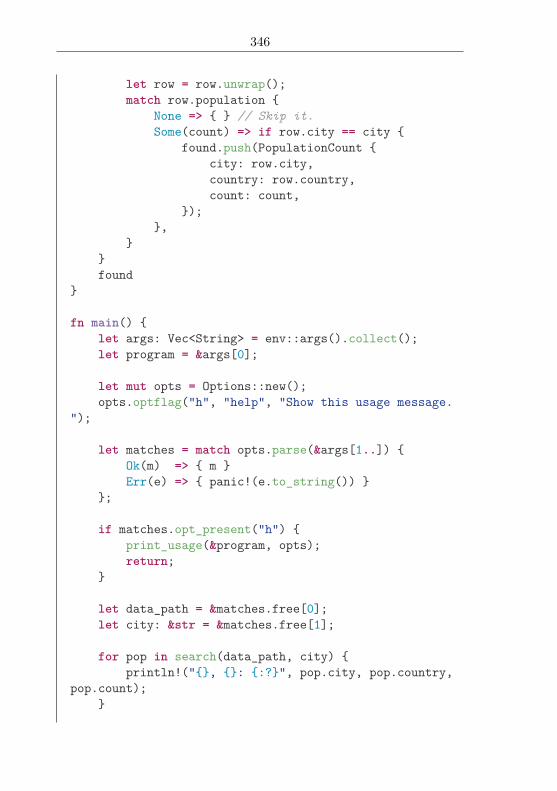
346
let row = row.unwrap();match row.population
None => // Skip it.Some(count) => if row.city == city
found.push(PopulationCount city: row.city,country: row.country,count: count,
);,
found
fn main() let args: Vec<String> = env::args().collect();let program = &args[0];
let mut opts = Options::new();opts.optflag("h", "help", "Show this usage message.
");
let matches = match opts.parse(&args[1..]) Ok(m) => m Err(e) => panic!(e.to_string())
;
if matches.opt_present("h") print_usage(&program, opts);return;
let data_path = &matches.free[0];let city: &str = &matches.free[1];
for pop in search(data_path, city) println!(", : :?", pop.city, pop.country,
pop.count);
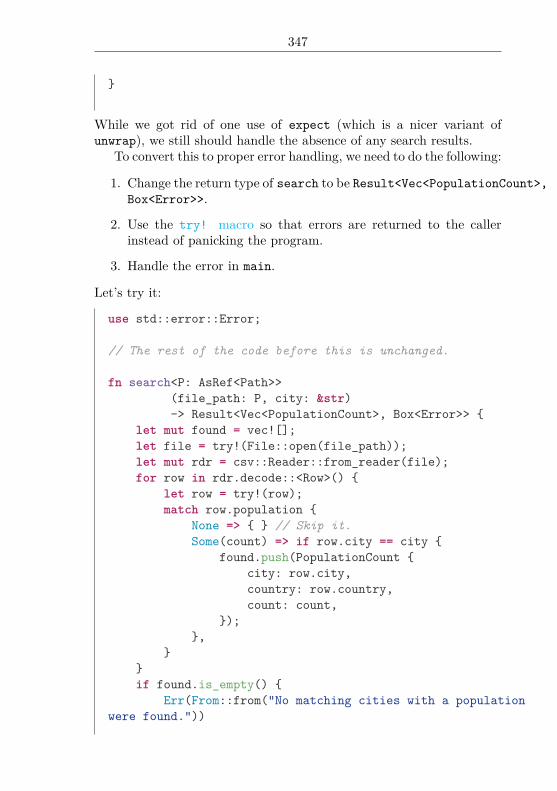
347
While we got rid of one use of expect (which is a nicer variant ofunwrap), we still should handle the absence of any search results.
To convert this to proper error handling, we need to do the following:
1. Change the return type of search to be Result<Vec<PopulationCount>,Box<Error>>.
2. Use the try! macro so that errors are returned to the callerinstead of panicking the program.
3. Handle the error in main.
Let’s try it:
use std::error::Error;
// The rest of the code before this is unchanged.
fn search<P: AsRef<Path>>(file_path: P, city: &str)-> Result<Vec<PopulationCount>, Box<Error>>
let mut found = vec![];let file = try!(File::open(file_path));let mut rdr = csv::Reader::from_reader(file);for row in rdr.decode::<Row>()
let row = try!(row);match row.population
None => // Skip it.Some(count) => if row.city == city
found.push(PopulationCount city: row.city,country: row.country,count: count,
);,
if found.is_empty()
Err(From::from("No matching cities with a populationwere found."))

348
else Ok(found)
Instead of x.unwrap(), we now have try!(x). Since our function re-turns a Result<T, E>, the try! macro will return early from thefunction if an error occurs.
At the end of search we also convert a plain string to an error typeby using the corresponding From impls:
// We are making use of this impl in the code above, sincewe call `From::from`// on a `&'static str`.impl<'a> From<&'a str> for Box<Error>
// But this is also useful when you need to allocate anew string for an// error message, usually with `format!`.impl From<String> for Box<Error>
Since search now returns a Result<T, E>, main should use case anal-ysis when calling search:...
match search(data_path, city) Ok(pops) =>
for pop in pops println!(", : :?", pop.city, pop.
country, pop.count);
Err(err) => println!("", err)
...
Now that we’ve seen how to do proper error handling with Box<Error>,let’s try a different approach with our own custom error type. But first,let’s take a quick break from error handling and add support for readingfrom stdin.
Reading from stdinIn our program, we accept a single file for input and do one pass overthe data. This means we probably should be able to accept input on

349
stdin. But maybe we like the current format too—so let’s have both!Adding support for stdin is actually quite easy. There are only three
things we have to do:
1. Tweak the program arguments so that a single parameter—thecity—can be accepted while the population data is read fromstdin.
2. Modify the program so that an option -f can take the file, if it isnot passed into stdin.
3. Modify the search function to take an optional file path. WhenNone, it should know to read from stdin.
First, here’s the new usage:
fn print_usage(program: &str, opts: Options) println!("", opts.usage(&format!("Usage: [options]
<city>", program)));
Of course we need to adapt the argument handling code:...
let mut opts = Options::new();opts.optopt("f", "file", "Choose an input file, instead
of using STDIN.", "NAME");opts.optflag("h", "help", "Show this usage message.
");...let data_path = matches.opt_str("f");
let city = if !matches.free.is_empty() &matches.free[0]
else print_usage(&program, opts);return;
;
match search(&data_path, city) Ok(pops) =>
for pop in pops println!(", : :?", pop.city, pop.
country, pop.count);

350
Err(err) => println!("", err)
...
We’ve made the user experience a bit nicer by showing the usage mes-sage, instead of a panic from an out-of-bounds index, when city, theremaining free argument, is not present.
Modifying search is slightly trickier. The csv crate can build aparser out of any type that implements io::Read. But how can weuse the same code over both types? There’s actually a couple ways wecould go about this. One way is to write search such that it is genericon some type parameter R that satisfies io::Read. Another way is touse trait objects:
use std::io;
// The rest of the code before this is unchanged.
fn search<P: AsRef<Path>>(file_path: &Option<P>, city: &str)-> Result<Vec<PopulationCount>, Box<Error>>
let mut found = vec![];let input: Box<io::Read> = match *file_path
None => Box::new(io::stdin()),Some(ref file_path) => Box::new(try!(File::open(
file_path))),;let mut rdr = csv::Reader::from_reader(input);// The rest remains unchanged!
Error handling with a custom typePreviously, we learned how to compose errors using a custom error type.We did this by defining our error type as an enum and implementingError and From.
Since we have three distinct errors (IO, CSV parsing and not found),let’s define an enum with three variants:

351
#[derive(Debug)]enum CliError
Io(io::Error),Csv(csv::Error),NotFound,
And now for impls on Display and Error:
use std::fmt;
impl fmt::Display for CliError fn fmt(&self, f: &mut fmt::Formatter) -> fmt::Result
match *self
CliError::Io(ref err) => err.fmt(f),CliError::Csv(ref err) => err.fmt(f),CliError::NotFound => write!(f, "No matching
cities with a \population
were found."),
impl Error for CliError fn description(&self) -> &str
match *self CliError::Io(ref err) => err.description(),CliError::Csv(ref err) => err.description()
,CliError::NotFound => "not found",
fn cause(&self) -> Option<&Error> match *self
CliError::Io(ref err) => Some(err),CliError::Csv(ref err) => Some(err),// Our custom error doesn't have an underlying
cause,

352
// but we could modify it so that it does.CliError::NotFound => None,
Before we can use our CliError type in our search function, we need toprovide a couple From impls. How do we know which impls to provide?Well, we’ll need to convert from both io::Error and csv::Error toCliError. Those are the only external errors, so we’ll only need twoFrom impls for now:
impl From<io::Error> for CliError fn from(err: io::Error) -> CliError
CliError::Io(err)
impl From<csv::Error> for CliError fn from(err: csv::Error) -> CliError
CliError::Csv(err)
The From impls are important because of how try! is defined. Inparticular, if an error occurs, From::from is called on the error, whichin this case, will convert it to our own error type CliError.
With the From impls done, we only need to make two small tweaksto our search function: the return type and the “not found” error.Here it is in full:
fn search<P: AsRef<Path>>(file_path: &Option<P>, city: &str)-> Result<Vec<PopulationCount>, CliError>
let mut found = vec![];let input: Box<io::Read> = match *file_path
None => Box::new(io::stdin()),Some(ref file_path) => Box::new(try!(File::open(
file_path))),;let mut rdr = csv::Reader::from_reader(input);for row in rdr.decode::<Row>()

353
let row = try!(row);match row.population
None => // Skip it.Some(count) => if row.city == city
found.push(PopulationCount city: row.city,country: row.country,count: count,
);,
if found.is_empty()
Err(CliError::NotFound) else
Ok(found)
No other changes are necessary.
Adding functionalityWriting generic code is great, because generalizing stuff is cool, andit can then be useful later. But sometimes, the juice isn’t worth thesqueeze. Look at what we just did in the previous step:
1. Defined a new error type.
2. Added impls for Error, Display and two for From.
The big downside here is that our program didn’t improve a wholelot. There is quite a bit of overhead to representing errors with enums,especially in short programs like this.
One useful aspect of using a custom error type like we’ve done hereis that the main function can now choose to handle errors differently.Previously, with Box<Error>, it didn’t have much of a choice: just printthe message. We’re still doing that here, but what if we wanted to,say, add a --quiet flag? The --quiet flag should silence any verboseoutput.
Right now, if the program doesn’t find a match, it will output amessage saying so. This can be a little clumsy, especially if you intendfor the program to be used in shell scripts.

354
So let’s start by adding the flags. Like before, we need to tweak theusage string and add a flag to the Option variable. Once we’ve donethat, Getopts does the rest:...
let mut opts = Options::new();opts.optopt("f", "file", "Choose an input file, instead
of using STDIN.", "NAME");opts.optflag("h", "help", "Show this usage message.
");opts.optflag("q", "quiet", "Silences errors and warnings.
");...
Now we only need to implement our “quiet” functionality. This requiresus to tweak the case analysis in main:use std::process;...
match search(&data_path, city) Err(CliError::NotFound) if matches.opt_present(
"q") => process::exit(1),Err(err) => panic!("", err),Ok(pops) => for pop in pops
println!(", : :?", pop.city, pop.country,pop.count);
...Certainly, we don’t want to be quiet if there was an IO error or if thedata failed to parse. Therefore, we use case analysis to check if theerror type is NotFound and if --quiet has been enabled. If the searchfailed, we still quit with an exit code (following grep’s convention).
If we had stuck with Box<Error>, then it would be pretty tricky toimplement the --quiet functionality.
This pretty much sums up our case study. From here, you shouldbe ready to go out into the world and write your own programs andlibraries with proper error handling.
The Short StorySince this section is long, it is useful to have a quick summary for errorhandling in Rust. These are some good “rules of thumb.” They are

355
emphatically not commandments. There are probably good reasons tobreak every one of these heuristics!
• If you’re writing short example code that would be overburdenedby error handling, it’s probably fine to use unwrap (whetherthat’s Result::unwrap, Option::unwrap or preferably Option::expect). Consumers of your code should know to use propererror handling. (If they don’t, send them here!)
• If you’re writing a quick ‘n’ dirty program, don’t feel ashamedif you use unwrap. Be warned: if it winds up in someone else’shands, don’t be surprised if they are agitated by poor error mes-sages!
• If you’re writing a quick ‘n’ dirty program and feel ashamed aboutpanicking anyway, then use either a String or a Box<Error> foryour error type.
• Otherwise, in a program, define your own error types with ap-propriate From and Error impls to make the try! macro moreergonomic.
• If you’re writing a library and your code can produce errors, de-fine your own error type and implement the std::error::Errortrait. Where appropriate, implement From to make both yourlibrary code and the caller’s code easier to write. (Because ofRust’s coherence rules, callers will not be able to impl From onyour error type, so your library should do it.)
• Learn the combinators defined on Option and Result. Usingthem exclusively can be a bit tiring at times, but I’ve person-ally found a healthy mix of try! and combinators to be quiteappealing. and_then, map and unwrap_or are my favorites.
Choosing your GuaranteesOne important feature of Rust is that it lets us control the costs andguarantees of a program.
There are various “wrapper type” abstractions in the Rust stan-dard library which embody a multitude of tradeoffs between cost, er-gonomics, and guarantees. Many let one choose between run time andcompile time enforcement. This section will explain a few selected ab-stractions in detail.

356
Before proceeding, it is highly recommended that one reads aboutownership and borrowing in Rust.
Basic pointer typesBox<T>Box<T> is an “owned” pointer, or a “box”. While it can hand outreferences to the contained data, it is the only owner of the data. Inparticular, consider the following:
let x = Box::new(1);let y = x;// `x` is no longer accessible here.
Here, the box was moved into y. As x no longer owns it, the compilerwill no longer allow the programmer to use x after this. A box cansimilarly be moved out of a function by returning it.
When a box (that hasn’t been moved) goes out of scope, destructorsare run. These destructors take care of deallocating the inner data.
This is a zero-cost abstraction for dynamic allocation. If you want toallocate some memory on the heap and safely pass around a pointer tothat memory, this is ideal. Note that you will only be allowed to sharereferences to this by the regular borrowing rules, checked at compiletime.
&T and &mut TThese are immutable and mutable references respectively. They followthe “read-write lock” pattern, such that one may either have only onemutable reference to some data, or any number of immutable ones,but not both. This guarantee is enforced at compile time, and has novisible cost at runtime. In most cases these two pointer types sufficefor sharing cheap references between sections of code.
These pointers cannot be copied in such a way that they outlive thelifetime associated with them.
*const T and *mut TThese are C-like raw pointers with no lifetime or ownership attachedto them. They point to some location in memory with no other restric-

357
tions. The only guarantee that these provide is that they cannot bedereferenced except in code marked unsafe.
These are useful when building safe, low cost abstractions like Vec<T>,but should be avoided in safe code.
Rc<T>This is the first wrapper we will cover that has a runtime cost.
Rc<T> is a reference counted pointer. In other words, this lets ushave multiple “owning” pointers to the same data, and the data will bedropped (destructors will be run) when all pointers are out of scope.
Internally, it contains a shared “reference count” (also called “ref-count”), which is incremented each time the Rc is cloned, and decre-mented each time one of the Rcs goes out of scope. The main responsi-bility of Rc<T> is to ensure that destructors are called for shared data.
The internal data here is immutable, and if a cycle of referencesis created, the data will be leaked. If we want data that doesn’t leakwhen there are cycles, we need a garbage collector.
Guarantees The main guarantee provided here is that the data willnot be destroyed until all references to it are out of scope.
This should be used when we wish to dynamically allocate andshare some data (read-only) between various portions of your program,where it is not certain which portion will finish using the pointer last.It’s a viable alternative to &T when &T is either impossible to staticallycheck for correctness, or creates extremely unergonomic code where theprogrammer does not wish to spend the development cost of workingwith.
This pointer is not thread safe, and Rust will not let it be sent orshared with other threads. This lets one avoid the cost of atomics insituations where they are unnecessary.
There is a sister smart pointer to this one, Weak<T>. This is a non-owning, but also non-borrowed, smart pointer. It is also similar to &T,but it is not restricted in lifetime—a Weak<T> can be held on to forever.However, it is possible that an attempt to access the inner data may failand return None, since this can outlive the owned Rcs. This is usefulfor cyclic data structures and other things.
Cost As far as memory goes, Rc<T> is a single allocation, though itwill allocate two extra words (i.e. two usize values) as compared to aregular Box<T> (for “strong” and “weak” refcounts).

358
Rc<T> has the computational cost of incrementing/decrementing therefcount whenever it is cloned or goes out of scope respectively. Notethat a clone will not do a deep copy, rather it will simply increment theinner reference count and return a copy of the Rc<T>.
Cell typesCells provide interior mutability. In other words, they contain datawhich can be manipulated even if the type cannot be obtained in amutable form (for example, when it is behind an &-ptr or Rc<T>).
The documentation for the cell module has a pretty good expla-nation for these.
These types are generally found in struct fields, but they may befound elsewhere too.
Cell<T>Cell<T> is a type that provides zero-cost interior mutability by movingdata in and out of the cell. Since the compiler knows that all the dataowned by the contained value is on the stack, there’s no worry of leakingany data behind references (or worse!) by simply replacing the data.
It is still possible to violate your own invariants using this wrapper,so be careful when using it. If a field is wrapped in Cell, it’s a niceindicator that the chunk of data is mutable and may not stay the samebetween the time you first read it and when you intend to use it.
use std::cell::Cell;
let x = Cell::new(1);let y = &x;let z = &x;x.set(2);y.set(3);z.set(4);println!("", x.get());
Note that here we were able to mutate the same value from variousimmutable references.
This has the same runtime cost as the following:

359
let mut x = 1;let y = &mut x;let z = &mut x;x = 2;*y = 3;*z = 4;println!("", x);
but it has the added benefit of actually compiling successfully.
Guarantees This relaxes the “no aliasing with mutability” restric-tion in places where it’s unnecessary. However, this also relaxes theguarantees that the restriction provides; so if your invariants dependon data stored within Cell, you should be careful.
This is useful for mutating primitives and other types when thereis no easy way of doing it in line with the static rules of & and &mut.
Cell does not let you obtain interior references to the data, whichmakes it safe to freely mutate.
Cost There is no runtime cost to using Cell<T>, however if you areusing it to wrap larger structs, it might be worthwhile to instead wrapindividual fields in Cell<T> since each write is otherwise a full copy ofthe struct.
RefCell<T>RefCell<T> also provides interior mutability, but doesn’t move data inand out of the cell.
However, it has a runtime cost. RefCell<T> enforces the read-write lock pattern at runtime (it’s like a single-threaded mutex), unlike&T/&mut T which do so at compile time. This is done by the borrow()and borrow_mut() functions, which modify an internal reference countand return smart pointers which can be dereferenced immutably andmutably respectively. The refcount is restored when the smart pointersgo out of scope. With this system, we can dynamically ensure thatthere are never any other borrows active when a mutable borrow isactive. If the programmer attempts to make such a borrow, the threadwill panic.
use std::cell::RefCell;

360
let x = RefCell::new(vec![1,2,3,4]);
println!(":?", *x.borrow())
let mut my_ref = x.borrow_mut();my_ref.push(1);
Similar to Cell, this is mainly useful for situations where it’s hard orimpossible to satisfy the borrow checker. Generally we know that suchmutations won’t happen in a nested form, but it’s good to check.
For large, complicated programs, it becomes useful to put somethings in RefCells to make things simpler. For example, a lot of themaps in the ctxt struct in the Rust compiler internals are inside thiswrapper. These are only modified once (during creation, which is notright after initialization) or a couple of times in well-separated places.However, since this struct is pervasively used everywhere, juggling mu-table and immutable pointers would be hard (perhaps impossible) andprobably form a soup of &-ptrs which would be hard to extend. Onthe other hand, the RefCell provides a cheap (not zero-cost) way ofsafely accessing these. In the future, if someone adds some code thatattempts to modify the cell when it’s already borrowed, it will cause a(usually deterministic) panic which can be traced back to the offendingborrow.
Similarly, in Servo’s DOM there is a lot of mutation, most of whichis local to a DOM type, but some of which crisscrosses the DOM andmodifies various things. Using RefCell and Cell to guard all mutationlets us avoid worrying about mutability everywhere, and it simultane-ously highlights the places where mutation is actually happening.
Note that RefCell should be avoided if a mostly simple solution ispossible with & pointers.
Guarantees RefCell relaxes the static restrictions preventing aliasedmutation, and replaces them with dynamic ones. As such the guaran-tees have not changed.
Cost RefCell does not allocate, but it contains an additional “bor-row state” indicator (one word in size) along with the data.
At runtime each borrow causes a modification/check of the refcount.

361
Synchronous typesMany of the types above cannot be used in a threadsafe manner. Par-ticularly, Rc<T> and RefCell<T>, which both use non-atomic refer-ence counts (atomic reference counts are those which can be incre-mented from multiple threads without causing a data race), cannot beused this way. This makes them cheaper to use, but we need threadsafe versions of these too. They exist, in the form of Arc<T> andMutex<T>/RwLock<T>
Note that the non-threadsafe types cannot be sent between threads,and this is checked at compile time.
There are many useful wrappers for concurrent programming in thesync module, but only the major ones will be covered below.
Arc<T>Arc<T> is a version of Rc<T> that uses an atomic reference count (hence,“Arc”). This can be sent freely between threads.
C++’s shared_ptr is similar to Arc, however in the case of C++the inner data is always mutable. For semantics similar to that fromC++, we should use Arc<Mutex<T>>, Arc<RwLock<T>>, or Arc<UnsafeCell<T>>3
3Arc<UnsafeCell<T>> actually won’t compile since UnsafeCell<T> isn’t Send orSync, but we can wrap it in a type and implement Send/Sync for it manually to getArc<Wrapper<T>> where Wrapper is struct Wrapper<T>(UnsafeCell<T>).
GuaranteesLike Rc, this provides the (thread safe) guarantee that the destructor for the internaldata will be run when the last Arc goes out of scope (barring any cycles).
CostThis has the added cost of using atomics for changing the refcount (which willhappen whenever it is cloned or goes out of scope). When sharing data from an Arcin a single thread, it is preferable to share & pointers whenever possible.
Mutex<T> and RwLock<T>Mutex<T> and RwLock<T> provide mutual-exclusion via RAII guards (guards areobjects which maintain some state, like a lock, until their destructor is called). Forboth of these, the mutex is opaque until we call lock() on it, at which point thethread will block until a lock can be acquired, and then a guard will be returned.This guard can be used to access the inner data (mutably), and the lock will bereleased when the guard goes out of scope.

362
(UnsafeCell<T> is a cell type that can be used to hold any data andhas no runtime cost, but accessing it requires unsafe blocks). The lastone should only be used if we are certain that the usage won’t causeany memory unsafety. Remember that writing to a struct is not anatomic operation, and many functions like vec.push() can reallocateinternally and cause unsafe behavior, so even monotonicity may not beenough to justify UnsafeCell.
RwLock has the added benefit of being efficient for multiple reads. Itis always safe to have multiple readers to shared data as long as thereare no writers; and RwLock lets readers acquire a “read lock”. Suchlocks can be acquired concurrently and are kept track of via a referencecount. Writers must obtain a “write lock” which can only be obtainedwhen all readers have gone out of scope.
Guarantees Both of these provide safe shared mutability across threads,however they are prone to deadlocks. Some level of additional protocolsafety can be obtained via the type system.
Costs These use internal atomic-like types to maintain the locks,which are pretty costly (they can block all memory reads across pro-cessors till they’re done). Waiting on these locks can also be slow whenthere’s a lot of concurrent access happening.
CompositionA common gripe when reading Rust code is with types like Rc<RefCell<Vec<T>>>(or even more complicated compositions of such types). It’s not alwaysclear what the composition does, or why the author chose one like this(and when one should be using such a composition in one’s own code)
Usually, it’s a case of composing together the guarantees that youneed, without paying for stuff that is unnecessary.
For example, Rc<RefCell<T>> is one such composition. Rc<T> itselfcan’t be dereferenced mutably; because Rc<T> provides sharing andshared mutability can lead to unsafe behavior, so we put RefCell<T>inside to get dynamically verified shared mutability. Now we have
let guard = mutex.lock();// `guard` dereferences mutably to the inner type.*guard += 1;
// Lock is released when destructor runs.

363
shared mutable data, but it’s shared in a way that there can only beone mutator (and no readers) or multiple readers.
Now, we can take this a step further, and have Rc<RefCell<Vec<T>>>or Rc<Vec<RefCell<T>>>. These are both shareable, mutable vectors,but they’re not the same.
With the former, the RefCell<T> is wrapping the Vec<T>, so theVec<T> in its entirety is mutable. At the same time, there can onlybe one mutable borrow of the whole Vec at a given time. This meansthat your code cannot simultaneously work on different elements of thevector from different Rc handles. However, we are able to push andpop from the Vec<T> at will. This is similar to a &mut Vec<T> withthe borrow checking done at runtime.
With the latter, the borrowing is of individual elements, but theoverall vector is immutable. Thus, we can independently borrow sep-arate elements, but we cannot push or pop from the vector. This issimilar to a &mut [T]4, but, again, the borrow checking is at runtime.
In concurrent programs, we have a similar situation with Arc<Mutex<T>>,which provides shared mutability and ownership.
When reading code that uses these, go in step by step and look atthe guarantees/costs provided.
When choosing a composed type, we must do the reverse; figure outwhich guarantees we want, and at which point of the composition weneed them. For example, if there is a choice between Vec<RefCell<T>>and RefCell<Vec<T>>, we should figure out the tradeoffs as done aboveand pick one.
Foreign Function Interface
IntroductionThis guide will use the snappy compression/decompression library asan introduction to writing bindings for foreign code. Rust is currentlyunable to call directly into a C++ library, but snappy includes a Cinterface (documented in snappy-c.h).
4&[T] and &mut [T] are slices; they consist of a pointer and a length and canrefer to a portion of a vector or array. &mut [T] can have its elements mutated,however its length cannot be touched.

364
A note about libcMany of these examples use the libc crate, which provides varioustype definitions for C types, among other things. If you’re trying theseexamples yourself, you’ll need to add libc to your Cargo.toml:
[dependencies]libc = "0.2.0"
and add extern crate libc; to your crate root.
Calling foreign functionsThe following is a minimal example of calling a foreign function whichwill compile if snappy is installed:
extern crate libc;use libc::size_t;
#[link(name = "snappy")]extern
fn snappy_max_compressed_length(source_length: size_t) -> size_t;
fn main() let x = unsafe snappy_max_compressed_length(100)
;println!("max compressed length of a 100 byte buffer:
", x);
The extern block is a list of function signatures in a foreign library,in this case with the platform’s C ABI. The #[link(...)] attributeis used to instruct the linker to link against the snappy library so thesymbols are resolved.
Foreign functions are assumed to be unsafe so calls to them need tobe wrapped with unsafe as a promise to the compiler that every-thing contained within truly is safe. C libraries often expose interfacesthat aren’t thread-safe, and almost any function that takes a pointerargument isn’t valid for all possible inputs since the pointer could bedangling, and raw pointers fall outside of Rust’s safe memory model.

365
When declaring the argument types to a foreign function, the Rustcompiler cannot check if the declaration is correct, so specifying it cor-rectly is part of keeping the binding correct at runtime.
The extern block can be extended to cover the entire snappy API:
extern crate libc;use libc::c_int, size_t;
#[link(name = "snappy")]extern
fn snappy_compress(input: *const u8,input_length: size_t,compressed: *mut u8,compressed_length: *mut size_t)
-> c_int;fn snappy_uncompress(compressed: *const u8,
compressed_length: size_t,uncompressed: *mut u8,uncompressed_length: *mut size_
t) -> c_int;fn snappy_max_compressed_length(source_length: size_
t) -> size_t;fn snappy_uncompressed_length(compressed: *const u8,
compressed_length: size_t,
result: *mut size_t)-> c_int;
fn snappy_validate_compressed_buffer(compressed: *constu8,
compressed_length:size_t) -> c_int;
# fn main()
Creating a safe interfaceThe raw C API needs to be wrapped to provide memory safety andmake use of higher-level concepts like vectors. A library can choose toexpose only the safe, high-level interface and hide the unsafe internaldetails.
Wrapping the functions which expect buffers involves using the

366
slice::raw module to manipulate Rust vectors as pointers to memory.Rust’s vectors are guaranteed to be a contiguous block of memory. Thelength is the number of elements currently contained, and the capacityis the total size in elements of the allocated memory. The length is lessthan or equal to the capacity.
# extern crate libc;# use libc::c_int, size_t;# unsafe fn snappy_validate_compressed_buffer(_: *constu8, _: size_t) -> c_int 0 # fn main() pub fn validate_compressed_buffer(src: &[u8]) -> bool
unsafe snappy_validate_compressed_buffer(src.as_ptr(),
src.len() as size_t) == 0
The validate_compressed_buffer wrapper above makes use of anunsafe block, but it makes the guarantee that calling it is safe for allinputs by leaving off unsafe from the function signature.
The snappy_compress and snappy_uncompress functions are morecomplex, since a buffer has to be allocated to hold the output too.
The snappy_max_compressed_length function can be used to al-locate a vector with the maximum required capacity to hold the com-pressed output. The vector can then be passed to the snappy_compressfunction as an output parameter. An output parameter is also passedto retrieve the true length after compression for setting the length.
# extern crate libc;# use libc::size_t, c_int;# unsafe fn snappy_compress(a: *const u8, b: size_t, c:*mut u8,# d: *mut size_t) -> c_int 0 # unsafe fn snappy_max_compressed_length(a: size_t) ->size_t a # fn main() pub fn compress(src: &[u8]) -> Vec<u8>
unsafe let srclen = src.len() as size_t;let psrc = src.as_ptr();

367
let mut dstlen = snappy_max_compressed_length(srclen);
let mut dst = Vec::with_capacity(dstlen as usize);
let pdst = dst.as_mut_ptr();
snappy_compress(psrc, srclen, pdst, &mut dstlen);
dst.set_len(dstlen as usize);dst
Decompression is similar, because snappy stores the uncompressed sizeas part of the compression format and snappy_uncompressed_lengthwill retrieve the exact buffer size required.
# extern crate libc;# use libc::size_t, c_int;# unsafe fn snappy_uncompress(compressed: *const u8,# compressed_length: size_t,# uncompressed: *mut u8,# uncompressed_length: *mutsize_t) -> c_int 0 # unsafe fn snappy_uncompressed_length(compressed: *constu8,# compressed_length:size_t,
# result: *mut size_t) -> c_int 0 # fn main() pub fn uncompress(src: &[u8]) -> Option<Vec<u8>>
unsafe let srclen = src.len() as size_t;let psrc = src.as_ptr();
let mut dstlen: size_t = 0;snappy_uncompressed_length(psrc, srclen, &mut dstlen)
;
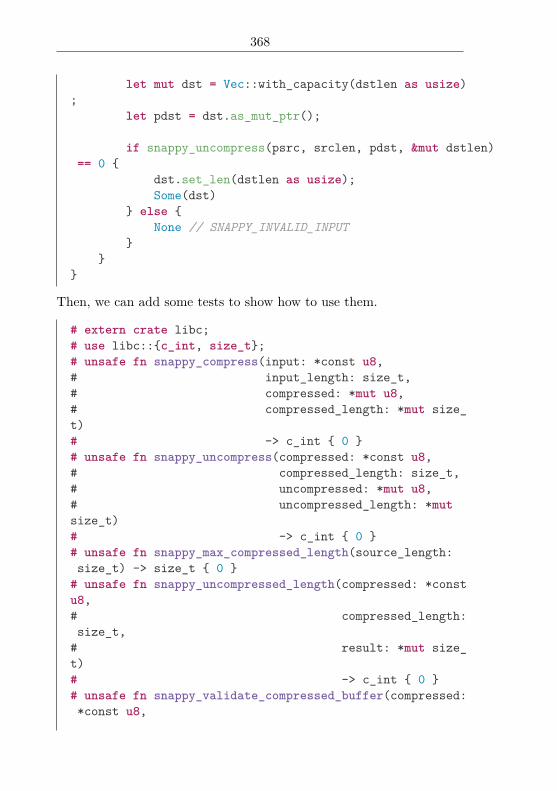
368
let mut dst = Vec::with_capacity(dstlen as usize);
let pdst = dst.as_mut_ptr();
if snappy_uncompress(psrc, srclen, pdst, &mut dstlen)== 0
dst.set_len(dstlen as usize);Some(dst)
else None // SNAPPY_INVALID_INPUT
Then, we can add some tests to show how to use them.
# extern crate libc;# use libc::c_int, size_t;# unsafe fn snappy_compress(input: *const u8,# input_length: size_t,# compressed: *mut u8,# compressed_length: *mut size_t)# -> c_int 0 # unsafe fn snappy_uncompress(compressed: *const u8,# compressed_length: size_t,# uncompressed: *mut u8,# uncompressed_length: *mutsize_t)# -> c_int 0 # unsafe fn snappy_max_compressed_length(source_length:size_t) -> size_t 0 # unsafe fn snappy_uncompressed_length(compressed: *constu8,# compressed_length:size_t,# result: *mut size_t)# -> c_int 0 # unsafe fn snappy_validate_compressed_buffer(compressed:*const u8,

369
# compressed_length: size_t)# -> c_int 0 # fn main()
#[cfg(test)]mod tests
use super::*;
#[test]fn valid()
let d = vec![0xde, 0xad, 0xd0, 0x0d];let c: &[u8] = &compress(&d);assert!(validate_compressed_buffer(c));assert!(uncompress(c) == Some(d));
#[test]fn invalid()
let d = vec![0, 0, 0, 0];assert!(!validate_compressed_buffer(&d));assert!(uncompress(&d).is_none());
#[test]fn empty()
let d = vec![];assert!(!validate_compressed_buffer(&d));assert!(uncompress(&d).is_none());let c = compress(&d);assert!(validate_compressed_buffer(&c));assert!(uncompress(&c) == Some(d));
DestructorsForeign libraries often hand off ownership of resources to the callingcode. When this occurs, we must use Rust’s destructors to providesafety and guarantee the release of these resources (especially in the

370
case of panic).For more about destructors, see the Drop trait.
Callbacks from C code to Rust functionsSome external libraries require the usage of callbacks to report backtheir current state or intermediate data to the caller. It is possible topass functions defined in Rust to an external library. The requirementfor this is that the callback function is marked as extern with thecorrect calling convention to make it callable from C code.
The callback function can then be sent through a registration callto the C library and afterwards be invoked from there.
A basic example is:Rust code:extern fn callback(a: i32)
println!("I'm called from C with value 0", a);
#[link(name = "extlib")]extern
fn register_callback(cb: extern fn(i32)) -> i32;fn trigger_callback();
fn main() unsafe
register_callback(callback);trigger_callback(); // Triggers the callback.
C code:typedef void (*rust_callback)(int32_t);rust_callback cb;
int32_t register_callback(rust_callback callback) cb = callback;return 1;
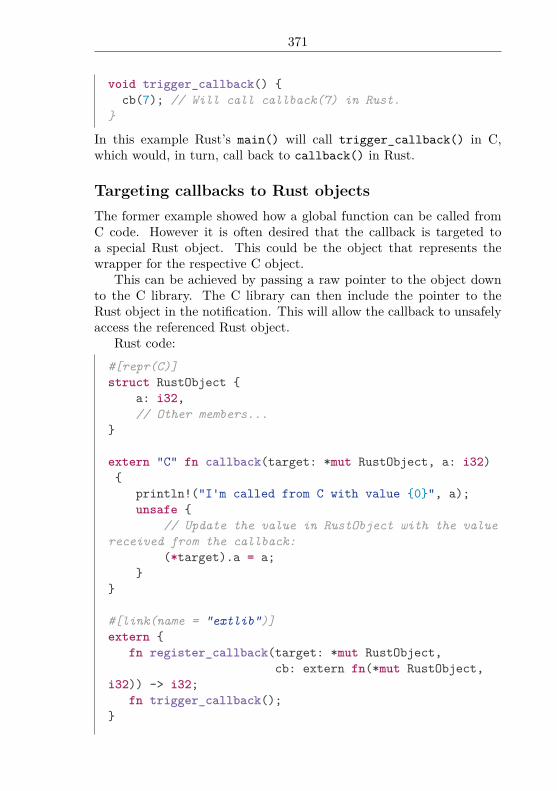
371
void trigger_callback() cb(7); // Will call callback(7) in Rust.
In this example Rust’s main() will call trigger_callback() in C,which would, in turn, call back to callback() in Rust.
Targeting callbacks to Rust objectsThe former example showed how a global function can be called fromC code. However it is often desired that the callback is targeted toa special Rust object. This could be the object that represents thewrapper for the respective C object.
This can be achieved by passing a raw pointer to the object downto the C library. The C library can then include the pointer to theRust object in the notification. This will allow the callback to unsafelyaccess the referenced Rust object.
Rust code:#[repr(C)]struct RustObject
a: i32,// Other members...
extern "C" fn callback(target: *mut RustObject, a: i32)
println!("I'm called from C with value 0", a);unsafe
// Update the value in RustObject with the valuereceived from the callback:
(*target).a = a;
#[link(name = "extlib")]extern
fn register_callback(target: *mut RustObject,cb: extern fn(*mut RustObject,
i32)) -> i32;fn trigger_callback();

372
fn main() // Create the object that will be referenced in the
callback:let mut rust_object = Box::new(RustObject a: 5 )
;
unsafe register_callback(&mut *rust_object, callback);trigger_callback();
C code:
typedef void (*rust_callback)(void*, int32_t);void* cb_target;rust_callback cb;
int32_t register_callback(void* callback_target, rust_callbackcallback)
cb_target = callback_target;cb = callback;return 1;
void trigger_callback() cb(cb_target, 7); // Will call callback(&rustObject,
7) in Rust.
Asynchronous callbacksIn the previously given examples the callbacks are invoked as a directreaction to a function call to the external C library. The control over thecurrent thread is switched from Rust to C to Rust for the executionof the callback, but in the end the callback is executed on the samethread that called the function which triggered the callback.
Things get more complicated when the external library spawns itsown threads and invokes callbacks from there. In these cases accessto Rust data structures inside the callbacks is especially unsafe andproper synchronization mechanisms must be used. Besides classical

373
synchronization mechanisms like mutexes, one possibility in Rust is touse channels (in std::sync::mpsc) to forward data from the C threadthat invoked the callback into a Rust thread.
If an asynchronous callback targets a special object in the Rustaddress space it is also absolutely necessary that no more callbacksare performed by the C library after the respective Rust object getsdestroyed. This can be achieved by unregistering the callback in theobject’s destructor and designing the library in a way that guaranteesthat no callback will be performed after deregistration.
LinkingThe link attribute on extern blocks provides the basic building blockfor instructing rustc how it will link to native libraries. There are twoaccepted forms of the link attribute today:
• #[link(name = “foo”)]
• #[link(name = “foo”, kind = “bar”)]
In both of these cases, foo is the name of the native library that we’relinking to, and in the second case bar is the type of native library thatthe compiler is linking to. There are currently three known types ofnative libraries:
• Dynamic - #[link(name = “readline”)]
• Static - #[link(name = “my_build_dependency”, kind = “static”)]
• Frameworks - #[link(name = “CoreFoundation”, kind = “framework”)]
Note that frameworks are only available on macOS targets.The different kind values are meant to differentiate how the native
library participates in linkage. From a linkage perspective, the Rustcompiler creates two flavors of artifacts: partial (rlib/staticlib) andfinal (dylib/binary). Native dynamic library and framework dependen-cies are propagated to the final artifact boundary, while static librarydependencies are not propagated at all, because the static libraries areintegrated directly into the subsequent artifact.
A few examples of how this model can be used are:

374
• A native build dependency. Sometimes some C/C++ glue isneeded when writing some Rust code, but distribution of theC/C++ code in a library format is a burden. In this case, thecode will be archived into libfoo.a and then the Rust cratewould declare a dependency via #[link(name = “foo”, kind =“static”)].Regardless of the flavor of output for the crate, the native staticlibrary will be included in the output, meaning that distributionof the native static library is not necessary.
• A normal dynamic dependency. Common system libraries (likereadline) are available on a large number of systems, and oftena static copy of these libraries cannot be found. When this de-pendency is included in a Rust crate, partial targets (like rlibs)will not link to the library, but when the rlib is included in a finaltarget (like a binary), the native library will be linked in.
On macOS, frameworks behave with the same semantics as a dynamiclibrary.
Unsafe blocksSome operations, like dereferencing raw pointers or calling functionsthat have been marked unsafe are only allowed inside unsafe blocks.Unsafe blocks isolate unsafety and are a promise to the compiler thatthe unsafety does not leak out of the block.
Unsafe functions, on the other hand, advertise it to the world. Anunsafe function is written like this:
unsafe fn kaboom(ptr: *const i32) -> i32 *ptr
This function can only be called from an unsafe block or anotherunsafe function.
Accessing foreign globalsForeign APIs often export a global variable which could do somethinglike track global state. In order to access these variables, you declarethem in extern blocks with the static keyword:
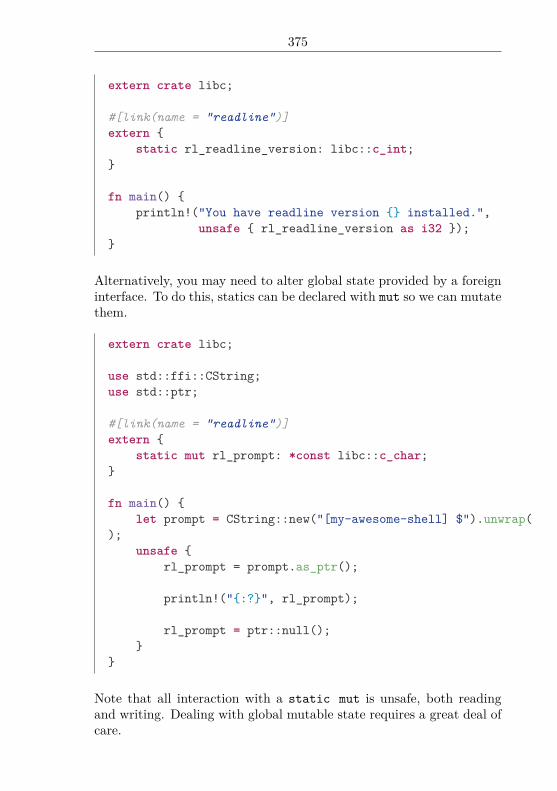
375
extern crate libc;
#[link(name = "readline")]extern
static rl_readline_version: libc::c_int;
fn main() println!("You have readline version installed.",
unsafe rl_readline_version as i32 );
Alternatively, you may need to alter global state provided by a foreigninterface. To do this, statics can be declared with mut so we can mutatethem.
extern crate libc;
use std::ffi::CString;use std::ptr;
#[link(name = "readline")]extern
static mut rl_prompt: *const libc::c_char;
fn main() let prompt = CString::new("[my-awesome-shell] $").unwrap(
);unsafe
rl_prompt = prompt.as_ptr();
println!(":?", rl_prompt);
rl_prompt = ptr::null();
Note that all interaction with a static mut is unsafe, both readingand writing. Dealing with global mutable state requires a great deal ofcare.
376
Foreign calling conventionsMost foreign code exposes a C ABI, and Rust uses the platform’s C call-ing convention by default when calling foreign functions. Some foreignfunctions, most notably the Windows API, use other calling conven-tions. Rust provides a way to tell the compiler which convention touse:
extern crate libc;
#[cfg(all(target_os = "win32", target_arch = "x86"))]#[link(name = "kernel32")]#[allow(non_snake_case)]extern "stdcall"
fn SetEnvironmentVariableA(n: *const u8, v: *constu8) -> libc::c_int;# fn main()
This applies to the entire extern block. The list of supported ABIconstraints are:
• stdcall
• aapcs
• cdecl
• fastcall
• vectorcall This is currently hidden behind the abi_vectorcallgate and is subject to change.
• Rust
• rust-intrinsic
• system
• C
• win64
• sysv64

377
Most of the abis in this list are self-explanatory, but the system abimay seem a little odd. This constraint selects whatever the appropriateABI is for interoperating with the target’s libraries. For example, onwin32 with a x86 architecture, this means that the abi used would bestdcall. On x86_64, however, windows uses the C calling convention,so C would be used. This means that in our previous example, we couldhave used extern “system” ... to define a block for all windowssystems, not only x86 ones.
Interoperability with foreign codeRust guarantees that the layout of a struct is compatible with theplatform’s representation in C only if the #[repr(C)] attribute is ap-plied to it. #[repr(C, packed)] can be used to lay out struct memberswithout padding. #[repr(C)] can also be applied to an enum.
Rust’s owned boxes (Box<T>) use non-nullable pointers as handleswhich point to the contained object. However, they should not be man-ually created because they are managed by internal allocators. Refer-ences can safely be assumed to be non-nullable pointers directly to thetype. However, breaking the borrow checking or mutability rules is notguaranteed to be safe, so prefer using raw pointers (*) if that’s neededbecause the compiler can’t make as many assumptions about them.
Vectors and strings share the same basic memory layout, and util-ities are available in the vec and str modules for working with CAPIs. However, strings are not terminated with \0. If you need aNUL-terminated string for interoperability with C, you should use theCString type in the std::ffi module.
The libc crate on crates.io includes type aliases and function defi-nitions for the C standard library in the libc module, and Rust linksagainst libc and libm by default.
Variadic functionsIn C, functions can be ‘variadic’, meaning they accept a variable num-ber of arguments. This can be achieved in Rust by specifying ...within the argument list of a foreign function declaration:
extern fn foo(x: i32, ...);

378
fn main() unsafe
foo(10, 20, 30, 40, 50);
Normal Rust functions can not be variadic:
// This will not compile
fn foo(x: i32, ...)
The “nullable pointer optimization”Certain Rust types are defined to never be null. This includes ref-erences (&T, &mut T), boxes (Box<T>), and function pointers (extern“abi” fn()). When interfacing with C, pointers that might be nullare often used, which would seem to require some messy transmutesand/or unsafe code to handle conversions to/from Rust types. How-ever, the language provides a workaround.
As a special case, an enum is eligible for the “nullable pointer op-timization” if it contains exactly two variants, one of which containsno data and the other contains a field of one of the non-nullable typeslisted above. This means no extra space is required for a discriminant;rather, the empty variant is represented by putting a null value intothe non-nullable field. This is called an “optimization”, but unlike otheroptimizations it is guaranteed to apply to eligible types.
The most common type that takes advantage of the nullable pointeroptimization is Option<T>, where None corresponds to null. So Option<extern“C” fn(c_int) -> c_int> is a correct way to represent a nullable func-tion pointer using the C ABI (corresponding to the C type int (*)(int)).
Here is a contrived example. Let’s say some C library has a facilityfor registering a callback, which gets called in certain situations. Thecallback is passed a function pointer and an integer and it is supposed torun the function with the integer as a parameter. So we have functionpointers flying across the FFI boundary in both directions.
extern crate libc;use libc::c_int;

379
# #[cfg(hidden)]extern "C"
/// Registers the callback.fn register(cb: Option<extern "C" fn(Option<extern
"C" fn(c_int) -> c_int>, c_int) -> c_int>);# unsafe fn register(_: Option<extern "C" fn(Option<extern"C" fn(c_int) -> c_int>,# c_int) ->c_int>)#
/// This fairly useless function receives a function pointerand an integer/// from C, and returns the result of calling the functionwith the integer./// In case no function is provided, it squares the integerby default.extern "C" fn apply(process: Option<extern "C" fn(c_int)-> c_int>, int: c_int) -> c_int
match process Some(f) => f(int),None => int * int
fn main() unsafe
register(Some(apply));
And the code on the C side looks like this:
void register(void (*f)(void (*)(int), int)) ...
No transmute required!
380
Calling Rust code from C
You may wish to compile Rust code in a way so that it can be calledfrom C. This is fairly easy, but requires a few things:
#[no_mangle]pub extern fn hello_rust() -> *const u8
"Hello, world!\0".as_ptr()# fn main()
The extern makes this function adhere to the C calling convention,as discussed above in ”Foreign Calling Conventions“. The no_mangleattribute turns off Rust’s name mangling, so that it is easier to link to.
FFI and panics
It’s important to be mindful of panic!s when working with FFI. Apanic! across an FFI boundary is undefined behavior. If you’re writingcode that may panic, you should run it in a closure with catch_unwind:
use std::panic::catch_unwind;
#[no_mangle]pub extern fn oh_no() -> i32
let result = catch_unwind(|| panic!("Oops!");
);match result
Ok(_) => 0,Err(_) => 1,
fn main()
Please note that catch_unwind will only catch unwinding panics, notthose who abort the process. See the documentation of catch_unwindfor more information.
381
Representing opaque structsSometimes, a C library wants to provide a pointer to something, butnot let you know the internal details of the thing it wants. The simplestway is to use a void * argument:
void foo(void *arg);void bar(void *arg);
We can represent this in Rust with the c_void type:extern crate libc;
extern "C" pub fn foo(arg: *mut libc::c_void);pub fn bar(arg: *mut libc::c_void);
# fn main()
This is a perfectly valid way of handling the situation. However, wecan do a bit better. To solve this, some C libraries will instead create astruct, where the details and memory layout of the struct are private.This gives some amount of type safety. These structures are called‘opaque’. Here’s an example, in C:
struct Foo; /* Foo is a structure, but its contents arenot part of the public interface */struct Bar;void foo(struct Foo *arg);void bar(struct Bar *arg);
To do this in Rust, let’s create our own opaque types with enum:
pub enum Foo pub enum Bar
extern "C" pub fn foo(arg: *mut Foo);pub fn bar(arg: *mut Bar);
# fn main()
By using an enum with no variants, we create an opaque type that wecan’t instantiate, as it has no variants. But because our Foo and Bartypes are different, we’ll get type safety between the two of them, sowe cannot accidentally pass a pointer to Foo to bar().

382
Borrow and AsRefThe Borrow and AsRef traits are very similar, but different. Here’s aquick refresher on what these two traits mean.
BorrowThe Borrow trait is used when you’re writing a data structure, and youwant to use either an owned or borrowed type as synonymous for somepurpose.
For example, HashMap has a get method which uses Borrow:
fn get<Q: ?Sized>(&self, k: &Q) -> Option<&V>where K: Borrow<Q>,
Q: Hash + Eq
This signature is pretty complicated. The K parameter is what we’reinterested in here. It refers to a parameter of the HashMap itself:
struct HashMap<K, V, S = RandomState>
The K parameter is the type of key the HashMap uses. So, looking at thesignature of get() again, we can use get() when the key implementsBorrow<Q>. That way, we can make a HashMap which uses String keys,but use &strs when we’re searching:
use std::collections::HashMap;
let mut map = HashMap::new();map.insert("Foo".to_string(), 42);
assert_eq!(map.get("Foo"), Some(&42));
This is because the standard library has impl Borrow<str> for String.For most types, when you want to take an owned or borrowed type,
a &T is enough. But one area where Borrow is effective is when there’smore than one kind of borrowed value. This is especially true of refer-ences and slices: you can have both an &T or a &mut T. If we wantedto accept both of these types, Borrow is up for it:

383
use std::borrow::Borrow;use std::fmt::Display;
fn foo<T: Borrow<i32> + Display>(a: T) println!("a is borrowed: ", a);
let mut i = 5;
foo(&i);foo(&mut i);
This will print out a is borrowed: 5 twice.
AsRefThe AsRef trait is a conversion trait. It’s used for converting somevalue to a reference in generic code. Like this:
let s = "Hello".to_string();
fn foo<T: AsRef<str>>(s: T) let slice = s.as_ref();
Which should I use?We can see how they’re kind of the same: they both deal with ownedand borrowed versions of some type. However, they’re a bit different.
Choose Borrow when you want to abstract over different kinds ofborrowing, or when you’re building a data structure that treats ownedand borrowed values in equivalent ways, such as hashing and compari-son.
Choose AsRef when you want to convert something to a referencedirectly, and you’re writing generic code.
Release ChannelsThe Rust project uses a concept called ‘release channels’ to managereleases. It’s important to understand this process to choose whichversion of Rust your project should use.

384
OverviewThere are three channels for Rust releases:
• Nightly
• Beta
• Stable
New nightly releases are created once a day. Every six weeks, the latestnightly release is promoted to ‘Beta’. At that point, it will only receivepatches to fix serious errors. Six weeks later, the beta is promoted to‘Stable’, and becomes the next release of 1.x.
This process happens in parallel. So every six weeks, on the sameday, nightly goes to beta, beta goes to stable. When 1.x is released, atthe same time, 1.(x + 1)-beta is released, and the nightly becomesthe first version of 1.(x + 2)-nightly.
Choosing a versionGenerally speaking, unless you have a specific reason, you should beusing the stable release channel. These releases are intended for ageneral audience.
However, depending on your interest in Rust, you may choose to usenightly instead. The basic tradeoff is this: in the nightly channel, youcan use unstable, new Rust features. However, unstable features aresubject to change, and so any new nightly release may break your code.If you use the stable release, you cannot use experimental features,but the next release of Rust will not cause significant issues throughbreaking changes.
Helping the ecosystem through CIWhat about beta? We encourage all Rust users who use the stablerelease channel to also test against the beta channel in their continuousintegration systems. This will help alert the team in case there’s anaccidental regression.
Additionally, testing against nightly can catch regressions even sooner,and so if you don’t mind a third build, we’d appreciate testing againstall channels.
385
As an example, many Rust programmers use Travis to test theircrates, which is free for open source projects. Travis supports Rustdirectly, and you can use a .travis.yml file like this to test on allchannels:
language: rustrust:
- nightly- beta- stable
matrix:allow_failures:- rust: nightly
With this configuration, Travis will test all three channels, but if some-thing breaks on nightly, it won’t fail your build. A similar configurationis recommended for any CI system, check the documentation of the oneyou’re using for more details.
Using Rust Without the Standard LibraryRust’s standard library provides a lot of useful functionality, but as-sumes support for various features of its host system: threads, net-working, heap allocation, and others. There are systems that do nothave these features, however, and Rust can work with those too! To doso, we tell Rust that we don’t want to use the standard library via anattribute: #![no_std].
Note: This feature is technically stable, but there aresome caveats. For one, you can build a #![no_std] libraryon stable, but not a binary. For details on binaries withoutthe standard library, see the nightly chapter on ‘lang items’
To use #![no_std], add it to your crate root:
#![no_std]
fn plus_one(x: i32) -> i32 x + 1

386
Much of the functionality that’s exposed in the standard library isalso available via the core crate. When we’re using the standard li-brary, Rust automatically brings std into scope, allowing you to useits features without an explicit import. By the same token, when us-ing #![no_std], Rust will bring core into scope for you, as well as itsprelude. This means that a lot of code will Just Work:
#![no_std]
fn may_fail(failure: bool) -> Result<(), &'static str>
if failure Err("this didn’t work!")
else Ok(())
Procedural Macros (and custom Derive)As you’ve seen throughout the rest of the book, Rust provides a mecha-nism called “derive” that lets you implement traits easily. For example,
#[derive(Debug)]struct Point
x: i32,y: i32,
is a lot simpler than
struct Point x: i32,y: i32,
use std::fmt;
impl fmt::Debug for Point fn fmt(&self, f: &mut fmt::Formatter) -> fmt::Result

387
write!(f, "Point x: , y: ", self.x, self.y)
Rust includes several traits that you can derive, but it also lets youdefine your own. We can accomplish this task through a feature ofRust called “procedural macros.” Eventually, procedural macros willallow for all sorts of advanced metaprogramming in Rust, but today,they’re only for custom derive.
Let’s build a very simple trait, and derive it with custom derive.
Hello WorldSo the first thing we need to do is start a new crate for our project.
$ cargo new --bin hello-world
All we want is to be able to call hello_world() on a derived type.Something like this:
#[derive(HelloWorld)]struct Pancakes;
fn main() Pancakes::hello_world();
With some kind of nice output, like Hello, World! My name isPancakes..
Let’s go ahead and write up what we think our macro will look likefrom a user perspective. In src/main.rs we write:
#[macro_use]extern crate hello_world_derive;
trait HelloWorld fn hello_world();
#[derive(HelloWorld)]struct FrenchToast;

388
#[derive(HelloWorld)]struct Waffles;
fn main() FrenchToast::hello_world();Waffles::hello_world();
Great. So now we just need to actually write the procedural macro. Atthe moment, procedural macros need to be in their own crate. Eventu-ally, this restriction may be lifted, but for now, it’s required. As such,there’s a convention; for a crate named foo, a custom derive procedu-ral macro is called foo-derive. Let’s start a new crate called hello-world-derive inside our hello-world project.
$ cargo new hello-world-derive
To make sure that our hello-world crate is able to find this new cratewe’ve created, we’ll add it to our toml:
[dependencies]hello-world-derive = path = "hello-world-derive"
As for the source of our hello-world-derive crate, here’s an example:
extern crate proc_macro;extern crate syn;#[macro_use]extern crate quote;
use proc_macro::TokenStream;
#[proc_macro_derive(HelloWorld)]pub fn hello_world(input: TokenStream) -> TokenStream
// Construct a string representation of the type definitionlet s = input.to_string();
// Parse the string representationlet ast = syn::parse_derive_input(&s).unwrap();
// Build the impllet gen = impl_hello_world(&ast);

389
// Return the generated implgen.parse().unwrap()
So there is a lot going on here. We have introduced two new crates: synand quote. As you may have noticed, input: TokenSteam is immedi-ately converted to a String. This String is a string representation ofthe Rust code for which we are deriving HelloWorld. At the moment,the only thing you can do with a TokenStream is convert it to a string.A richer API will exist in the future.
So what we really need is to be able to parse Rust code into some-thing usable. This is where syn comes to play. syn is a crate for parsingRust code. The other crate we’ve introduced is quote. It’s essentiallythe dual of syn as it will make generating Rust code really easy. Wecould write this stuff on our own, but it’s much simpler to use theselibraries. Writing a full parser for Rust code is no simple task.
The comments seem to give us a pretty good idea of our overallstrategy. We are going to take a String of the Rust code for the typewe are deriving, parse it using syn, construct the implementation ofhello_world (using quote), then pass it back to Rust compiler.
One last note: you’ll see some unwrap()s there. If you want toprovide an error for a procedural macro, then you should panic! withthe error message. In this case, we’re keeping it as simple as possible.
Great, so let’s write impl_hello_world(&ast).
fn impl_hello_world(ast: &syn::DeriveInput) -> quote::Tokens
let name = &ast.ident;quote!
impl HelloWorld for #name fn hello_world()
println!("Hello, World! My name is ",stringify!(#name));
So this is where quotes comes in. The ast argument is a struct thatgives us a representation of our type (which can be either a structor an enum). Check out the docs, there is some useful informationthere. We are able to get the name of the type using ast.ident.

390
The quote! macro lets us write up the Rust code that we wish toreturn and convert it into Tokens. quote! lets us use some really cooltemplating mechanics; we simply write #name and quote! will replaceit with the variable named name. You can even do some repetitionsimilar to regular macros work. You should check out the docs for agood introduction.
So I think that’s it. Oh, well, we do need to add dependencies forsyn and quote in the cargo.toml for hello-world-derive.
[dependencies]syn = "0.11.11"quote = "0.3.15"
That should be it. Let’s try to compile hello-world.
error: the `#[proc_macro_derive]` attribute is only usablewith crates of the `proc-macro` crate type--> hello-world-derive/src/lib.rs:8:3|
8 | #[proc_macro_derive(HelloWorld)]| ^^^^^^^^^^^^^^^^^^^^^^^^^^^^^
Oh, so it appears that we need to declare that our hello-world-derivecrate is a proc-macro crate type. How do we do this? Like this:
[lib]proc-macro = true
Ok so now, let’s compile hello-world. Executing cargo run nowyields:
Hello, World! My name is FrenchToastHello, World! My name is Waffles
We’ve done it!
Custom AttributesIn some cases it might make sense to allow users some kind of config-uration. For example, the user might want to overwrite the name thatis printed in the hello_world() method.
This can be achieved with custom attributes:

391
#[derive(HelloWorld)]#[HelloWorldName = "the best Pancakes"]struct Pancakes;
fn main() Pancakes::hello_world();
If we try to compile this though, the compiler will respond with anerror:error: The attribute `HelloWorldName` is currently unknownto the compiler and may have meaning added to it in thefuture (see issue #29642)
The compiler needs to know that we’re handling this attribute and tonot respond with an error. This is done in the hello-world-derivecrate by adding attributes to the proc_macro_derive attribute:
#[proc_macro_derive(HelloWorld, attributes(HelloWorldName))]pub fn hello_world(input: TokenStream) -> TokenStream
Multiple attributes can be specified that way.
Raising ErrorsLet’s assume that we do not want to accept enums as input to ourcustom derive method.
This condition can be easily checked with the help of syn. But howdo we tell the user, that we do not accept enums? The idiomatic wayto report errors in procedural macros is to panic:
fn impl_hello_world(ast: &syn::DeriveInput) -> quote::Tokens
let name = &ast.ident;// Check if derive(HelloWorld) was specified for a
structif let syn::Body::Struct(_) = ast.body
// Yes, this is a structquote!
impl HelloWorld for #name fn hello_world()

392
println!("Hello, World! My name is", stringify!(#name));
else
//Nope. This is an Enum. We cannot handle these!panic!("#[derive(HelloWorld)] is only defined for
structs, not for enums!");
If a user now tries to derive HelloWorld from an enum they will begreeted with following, hopefully helpful, error:
error: custom derive attribute panicked--> src/main.rs|| #[derive(HelloWorld)]| ^^^^^^^^^^|= help: message: #[derive(HelloWorld)] is only defined
for structs, not for enums!

Part VI
Appendix


Chapter 1
Glossary
Not every Rustacean has a background in systems programming, norin computer science, so we’ve added explanations of terms that mightbe unfamiliar.
Abstract Syntax TreeWhen a compiler is compiling your program, it does a number of dif-ferent things. One of the things that it does is turn the text of yourprogram into an ‘abstract syntax tree’, or ‘AST’. This tree is a repre-sentation of the structure of your program. For example, 2 + 3 can beturned into a tree:
+/ \
2 3
And 2 + (3 * 4) would look like this:
+/ \
2 */ \3 4
ArityArity refers to the number of arguments a function or operation takes.

396
let x = (2, 3);let y = (4, 6);let z = (8, 2, 6);
In the example above x and y have arity 2. z has arity 3.
BoundsBounds are constraints on a type or trait. For example, if a bound isplaced on the argument a function takes, types passed to that functionmust abide by that constraint.
CombinatorsCombinators are higher-order functions that apply only functions andearlier defined combinators to provide a result from its arguments.They can be used to manage control flow in a modular fashion.
DST (Dynamically Sized Type)A type without a statically known size or alignment. (more info)
ExpressionIn computer programming, an expression is a combination of values,constants, variables, operators and functions that evaluate to a singlevalue. For example, 2 + (3 * 4) is an expression that returns thevalue 14. It is worth noting that expressions can have side-effects. Forexample, a function included in an expression might perform actionsother than simply returning a value.
Expression-Oriented LanguageIn early programming languages, expressions and statements were twoseparate syntactic categories: expressions had a value and statementsdid things. However, later languages blurred this distinction, allow-ing expressions to do things and statements to have a value. In anexpression-oriented language, (nearly) every statement is an expressionand therefore returns a value. Consequently, these expression state-ments can themselves form part of larger expressions.

397
StatementIn computer programming, a statement is the smallest standalone ele-ment of a programming language that commands a computer to per-form an action.

398
Chapter 2
Syntax Index
Keywords• as: primitive casting, or disambiguating the specific trait contain-
ing an item. See Casting Between Types (as), Universal FunctionCall Syntax (Angle-bracket Form), Associated Types.
• break: break out of loop. See Loops (Ending Iteration Early).
• const: constant items and constant raw pointers. See const andstatic, Raw Pointers.
• continue: continue to next loop iteration. See Loops (EndingIteration Early).
• crate: external crate linkage. See Crates and Modules (Import-ing External Crates).
• else: fallback for if and if let constructs. See if, if let.
• enum: defining enumeration. See Enums.
• extern: external crate, function, and variable linkage. See Cratesand Modules (Importing External Crates), Foreign Function In-terface.
• false: boolean false literal. See Primitive Types (Booleans).
• fn: function definition and function pointer types. See Functions.

400
• for: iterator loop, part of trait impl syntax, and higher-rankedlifetime syntax. See Loops (for), Method Syntax.
• if: conditional branching. See if, if let.
• impl: inherent and trait implementation blocks. See MethodSyntax.
• in: part of for loop syntax. See Loops (for).
• let: variable binding. See Variable Bindings.
• loop: unconditional, infinite loop. See Loops (loop).
• match: pattern matching. See Match.
• mod: module declaration. See Crates and Modules (DefiningModules).
• move: part of closure syntax. See Closures (move closures).
• mut: denotes mutability in pointer types and pattern bindings.See Mutability.
• pub: denotes public visibility in struct fields, impl blocks, andmodules. See Crates and Modules (Exporting a Public Interface).
• ref: by-reference binding. See Patterns (ref and ref mut).
• return: return from function. See Functions (Early Returns).
• Self: implementor type alias. See Traits.
• self: method subject. See Method Syntax (Method Calls).
• static: global variable. See const and static (static).
• struct: structure definition. See Structs.
• trait: trait definition. See Traits.
• true: boolean true literal. See Primitive Types (Booleans).
• type: type alias, and associated type definition. See type Aliases,Associated Types.
• unsafe: denotes unsafe code, functions, traits, and implementa-tions. See Unsafe.

401
• use: import symbols into scope. See Crates and Modules (Im-porting Modules with use).
• where: type constraint clauses. See Traits (where clause).
• while: conditional loop. See Loops (while).
Operators and Symbols• ! (ident!(…), ident!…, ident![…]): denotes macro expan-
sion. See Macros.
• ! (!expr): bitwise or logical complement. Overloadable (Not).
• != (var != expr): nonequality comparison. Overloadable (PartialEq).
• % (expr % expr): arithmetic remainder. Overloadable (Rem).
• %= (var %= expr): arithmetic remainder & assignment. Over-loadable (RemAssign).
• & (expr & expr): bitwise and. Overloadable (BitAnd).
• & (&expr, &mut expr): borrow. See References and Borrowing.
• & (&type, &mut type, &’a type, &’a mut type): borrowedpointer type. See References and Borrowing.
• &= (var &= expr): bitwise and & assignment. Overloadable(BitAndAssign).
• && (expr && expr): logical and.
• * (expr * expr): arithmetic multiplication. Overloadable (Mul).
• * (*expr): dereference.
• * (*const type, *mut type): raw pointer. See Raw Pointers.
• *= (var *= expr): arithmetic multiplication & assignment. Over-loadable (MulAssign).
• + (expr + expr): arithmetic addition. Overloadable (Add).
• + (trait + trait, ’a + trait): compound type constraint. SeeTraits (Multiple Trait Bounds).

402
• += (var += expr): arithmetic addition & assignment. Overload-able (AddAssign).
• ,: argument and element separator. See Attributes, Functions,Structs, Generics, Match, Closures, Crates and Modules (Import-ing Modules with use).
• - (expr - expr): arithmetic subtraction. Overloadable (Sub).
• - (- expr): arithmetic negation. Overloadable (Neg).
• -= (var -= expr): arithmetic subtraction & assignment. Over-loadable (SubAssign).
• -> (fn(…) -> type, |…| -> type): function and closure returntype. See Functions, Closures.
• . (expr.ident): member access. See Structs, Method Syntax.
• .. (.., expr.., ..expr, expr..expr): right-exclusive range lit-eral.
• .. (..expr): struct literal update syntax. See Structs (Updatesyntax).
• .. (variant(x, ..), struct_type x, .. ): “and the rest”pattern binding. See Patterns (Ignoring bindings).
• ... (...expr, expr...expr) in an expression: inclusive rangeexpression. See Iterators.
• ... (expr...expr) in a pattern: inclusive range pattern. SeePatterns (Ranges).
• / (expr / expr): arithmetic division. Overloadable (Div).
• /= (var /= expr): arithmetic division & assignment. Overload-able (DivAssign).
• : (pat: type, ident: type): constraints. See Variable Bind-ings, Functions, Structs, Traits.
• : (ident: expr): struct field initializer. See Structs.
• : (’a: loop …): loop label. See Loops (Loops Labels).
• ;: statement and item terminator.

403
• ; ([…; len]): part of fixed-size array syntax. See PrimitiveTypes (Arrays).
• << (expr << expr): left-shift. Overloadable (Shl).
• <<= (var <<= expr): left-shift & assignment. Overloadable(ShlAssign).
• < (expr < expr): less-than comparison. Overloadable (PartialOrd).
• <= (var <= expr): less-than or equal-to comparison. Overload-able (PartialOrd).
• = (var = expr, ident = type): assignment/equivalence. SeeVariable Bindings, type Aliases, generic parameter defaults.
• == (var == expr): equality comparison. Overloadable (PartialEq).
• => (pat => expr): part of match arm syntax. See Match.
• > (expr > expr): greater-than comparison. Overloadable (PartialOrd).
• >= (var >= expr): greater-than or equal-to comparison. Over-loadable (PartialOrd).
• >> (expr >> expr): right-shift. Overloadable (Shr).
• >>= (var >>= expr): right-shift & assignment. Overloadable(ShrAssign).
• @ (ident @ pat): pattern binding. See Patterns (Bindings).
• ^ (expr ^ expr): bitwise exclusive or. Overloadable (BitXor).
• ^= (var ^= expr): bitwise exclusive or & assignment. Overload-able (BitXorAssign).
• | (expr | expr): bitwise or. Overloadable (BitOr).
• | (pat | pat): pattern alternatives. See Patterns (Multiplepatterns).
• | (|…| expr): closures. See Closures.
• |= (var |= expr): bitwise or & assignment. Overloadable (BitOrAssign).
• || (expr || expr): logical or.
404
• _: “ignored” pattern binding (see Patterns (Ignoring bindings)).Also used to make integer-literals readable (see Reference (Integerliterals)).
• ? (expr?): Error propagation. Returns early when Err(_) isencountered, unwraps otherwise. Similar to the try! macro.
Other Syntax• ’ident: named lifetime or loop label. See Lifetimes, Loops
(Loops Labels).
• …u8, …i32, …f64, …usize, …: numeric literal of specific type.
• “…”: string literal. See Strings.
• r"…", r#"…"#, r##"…"##, …: raw string literal, escape charactersare not processed. See Reference (Raw String Literals).
• b"…": byte string literal, constructs a [u8] instead of a string.See Reference (Byte String Literals).
• br"…", br#"…"#, br##"…"##, …: raw byte string literal, combi-nation of raw and byte string literal. See Reference (Raw ByteString Literals).
• ‘…’: character literal. See Primitive Types (char).
• b’…’: ASCII byte literal.
• |…| expr: closure. See Closures.
• ident::ident: path. See Crates and Modules (Defining Mod-ules).
• ::path: path relative to the crate root (i.e. an explicitly absolutepath). See Crates and Modules (Re-exporting with pub use).
• self::path: path relative to the current module (i.e. an explic-itly relative path). See Crates and Modules (Re-exporting withpub use).
• super::path: path relative to the parent of the current module.See Crates and Modules (Re-exporting with pub use).

405
• type::ident, <type as trait>::ident: associated constants,functions, and types. See Associated Types.
• <type>::…: associated item for a type which cannot be directlynamed (e.g. <&T>::…, <[T]>::…, etc.). See Associated Types.
• trait::method(…): disambiguating a method call by naming thetrait which defines it. See Universal Function Call Syntax.
• type::method(…): disambiguating a method call by naming thetype for which it’s defined. See Universal Function Call Syntax.
• <type as trait>::method(…): disambiguating a method call bynaming the trait and type. See Universal Function Call Syntax(Angle-bracket Form).
• path<…> (e.g. Vec<u8>): specifies parameters to generic type ina type. See Generics.
• path::<…>, method::<…> (e.g. “42”.parse::<i32>()): specifiesparameters to generic type, function, or method in an expression.See Generics § Resolving ambiguities.
• fn ident<…> …: define generic function. See Generics.
• struct ident<…> …: define generic structure. See Generics.
• enum ident<…> …: define generic enumeration. See Generics.
• impl<…> …: define generic implementation.
• for<…> type: higher-ranked lifetime bounds.
• type<ident=type> (e.g. Iterator<Item=T>): a generic typewhere one or more associated types have specific assignments.See Associated Types.
• T: U: generic parameter T constrained to types that implementU. See Traits.
• T: ’a: generic type T must outlive lifetime ’a. When we say thata type ‘outlives’ the lifetime, we mean that it cannot transitivelycontain any references with lifetimes shorter than ’a.
• T : ’static: The generic type T contains no borrowed referencesother than ’static ones.

406
• ’b: ’a: generic lifetime ’b must outlive lifetime ’a.
• T: ?Sized: allow generic type parameter to be a dynamically-sized type. See Unsized Types (?Sized).
• ’a + trait, trait + trait: compound type constraint. SeeTraits (Multiple Trait Bounds).
• #[meta]: outer attribute. See Attributes.
• #![meta]: inner attribute. See Attributes.
• $ident: macro substitution. See Macros.
• $ident:kind: macro capture. See Macros.
• $(…)…: macro repetition. See Macros.
• //: line comment. See Comments.
• //!: inner line doc comment. See Comments.
• ///: outer line doc comment. See Comments.
• /*…*/: block comment. See Comments.
• /*!…*/: inner block doc comment. See Comments.
• /**…*/: outer block doc comment. See Comments.
• !: always empty Never type. See Diverging Functions.
• (): empty tuple (a.k.a. unit), both literal and type.
• (expr): parenthesized expression.
• (expr,): single-element tuple expression. See Primitive Types(Tuples).
• (type,): single-element tuple type. See Primitive Types (Tu-ples).
• (expr, …): tuple expression. See Primitive Types (Tuples).
• (type, …): tuple type. See Primitive Types (Tuples).
• expr(expr, …): function call expression. Also used to initializetuple structs and tuple enum variants. See Functions.
407
• ident!(…), ident!…, ident![…]: macro invocation. See Macros.
• expr.0, expr.1, …: tuple indexing. See Primitive Types (TupleIndexing).
• …: block expression.
• Type …: struct literal. See Structs.
• […]: array literal. See Primitive Types (Arrays).
• [expr; len]: array literal containing len copies of expr. SeePrimitive Types (Arrays).
• [type; len]: array type containing len instances of type. SeePrimitive Types (Arrays).
• expr[expr]: collection indexing. Overloadable (Index, IndexMut).
• expr[..], expr[a..], expr[..b], expr[a..b]: collection index-ing pretending to be collection slicing, using Range, RangeFrom,RangeTo, RangeFull as the “index”.

408

Chapter 3
Bibliography
This is a reading list of material relevant to Rust. It includes priorresearch that has - at one time or another - influenced the design ofRust, as well as publications about Rust.
Type system• Region based memory management in Cyclone
• Safe manual memory management in Cyclone
• Typeclasses: making ad-hoc polymorphism less ad hoc
• Macros that work together
• Traits: composable units of behavior
• Alias burying - We tried something similar and abandoned it.
• External uniqueness is unique enough
• Uniqueness and Reference Immutability for Safe Parallelism
• Region Based Memory Management
Concurrency• Singularity: rethinking the software stack
• Language support for fast and reliable message passing in singu-larity OS

410
• Scheduling multithreaded computations by work stealing
• Thread scheduling for multiprogramming multiprocessors
• The data locality of work stealing
• Dynamic circular work stealing deque - The Chase/Lev deque
• Work-first and help-first scheduling policies for async-finish taskparallelism - More general than fully-strict work stealing
• A Java fork/join calamity - critique of Java’s fork/join library,particularly its application of work stealing to non-strict compu-tation
• Scheduling techniques for concurrent systems
• Contention aware scheduling
• Balanced work stealing for time-sharing multicores
• Three layer cake for shared-memory programming
• Non-blocking steal-half work queues
• Reagents: expressing and composing fine-grained concurrency
• Algorithms for scalable synchronization of shared-memory multi-processors
• Epoch-based reclamation.
Others• Crash-only software
• Composing High-Performance Memory Allocators
• Reconsidering Custom Memory Allocation
Papers about Rust• GPU Programming in Rust: Implementing High Level Abstrac-
tions in a Systems Level Language. Early GPU work by EricHolk.
• Parallel closures: a new twist on an old idea

411
– not exactly about Rust, but by nmatsakis
• Patina: A Formalization of the Rust Programming Language.Early formalization of a subset of the type system, by Eric Reed.
• Experience Report: Developing the Servo Web Browser Engineusing Rust. By Lars Bergstrom.
• Implementing a Generic Radix Trie in Rust. Undergrad paper byMichael Sproul.
• Reenix: Implementing a Unix-Like Operating System in Rust.Undergrad paper by Alex Light.
• Evaluation of performance and productivity metrics of potentialprogramming languages in the HPC environment. Bachelor’s the-sis by Florian Wilkens. Compares C, Go and Rust.
• Nom, a byte oriented, streaming, zero copy, parser combinatorslibrary in Rust. By Geoffroy Couprie, research for VLC.
• Graph-Based Higher-Order Intermediate Representation. An ex-perimental IR implemented in Impala, a Rust-like language.
• Code Refinement of Stencil Codes. Another paper using Impala.
• Parallelization in Rust with fork-join and friends. Linus Farn-strand’s master’s thesis.
• Session Types for Rust. Philip Munksgaard’s master’s thesis.Research for Servo.
• Ownership is Theft: Experiences Building an Embedded OS inRust - Amit Levy, et. al.
• You can’t spell trust without Rust. Alexis Beingessner’s master’sthesis.
• Rust as a Language for High Performance GC Implementation


![VDG2 [abstractions]](https://img.dokumen.tips/doc/110x75/577dab811a28ab223f8c82cc/vdg2-abstractions.jpg)
![Architecture Abstractions[1]](https://img.dokumen.tips/doc/110x75/577d380c1a28ab3a6b96f7e7/architecture-abstractions1.jpg)