Embed Size (px)
Citation preview

The NetBSD Operating System
A Guide(2003/12/14)
Federico Lupi
The NetBSD Operating System: A Guideby Federico Lupi
Published 2003/12/14 15:56:15Copyright © 1999, 2000, 2001, 2002 by Federico LupiCopyright © 2003 by The NetBSD Foundation
License
Redistribution and use in source and binary forms, with or without modification, are permitted provided that the following conditions are met:
1. Redistributions of source code must retain the above copyright notice, this list of conditions and the followingdisclaimer.
2. Redistributions in binary form must reproduce the above copyright notice, this list of conditions and thefollowing disclaimer in the documentation and/or other materials provided with the distribution.
3. All advertising materials mentioning features or use of this software must display the followingacknowledgement: This product includes software developed by Federico Lupi for the NetBSD Project.
4. The name of the author may not be used to endorse or promote products derived from this software withoutspecific prior written permission.
THIS SOFTWARE IS PROVIDED BY THE AUTHOR “AS IS” AND ANY EXPRESS OR IMPLIED WARRANTIES, INCLUDING, BUT NOT
LIMITED TO, THE IMPLIED WARRANTIES OF MERCHANTABILITY AND FITNESS FOR A PARTICULAR PURPOSE ARE
DISCLAIMED. IN NO EVENT SHALL THE AUTHOR BE LIABLE FOR ANY DIRECT, INDIRECT, INCIDENTAL, SPECIAL,
EXEMPLARY, OR CONSEQUENTIAL DAMAGES (INCLUDING, BUT NOT LIMITED TO, PROCUREMENT OF SUBSTITUTE GOODS
OR SERVICES; LOSS OF USE, DATA, OR PROFITS; OR BUSINESS INTERRUPTION) HOWEVER CAUSED AND ON ANY THEORY OF
LIABILITY, WHETHER IN CONTRACT, STRICT LIABILITY, OR TORT (INCLUDING NEGLIGENCE OR OTHERWISE) ARISING IN
ANY WAY OUT OF THE USE OF THIS SOFTWARE, EVEN IF ADVISED OF THE POSSIBILITY OF SUCH DAMAGE.

Table of ContentsPurpose of this guide .................................................................................................................................. i
1 What is NetBSD? .................................................................................................................................... 1
1.1 The story of NetBSD.................................................................................................................... 11.2 NetBSD features .......................................................................................................................... 11.3 Supported platforms..................................................................................................................... 21.4 NetBSD’s target users .................................................................................................................. 21.5 Applications for NetBSD ............................................................................................................. 21.6 The philosophy of NetBSD.......................................................................................................... 31.7 How to get NetBSD ..................................................................................................................... 3
2 New features in NetBSD 2.0 ................................................................................................................... 4
2.1 What’s new in NetBSD 2.0? ........................................................................................................ 42.1.1 Native threads .................................................................................................................. 42.1.2 Kernel events notification framework - kqueue...............................................................42.1.3 systrace ............................................................................................................................ 42.1.4 UFSv2.............................................................................................................................. 42.1.5 Java support ..................................................................................................................... 52.1.6 Verified Exec.................................................................................................................... 52.1.7 Cryptographic disk driver ................................................................................................ 52.1.8 Non-executable stack and heap ....................................................................................... 52.1.9 New toolchain.................................................................................................................. 5
2.2 New ports and enhancements to existing ports ............................................................................ 52.2.1 amd64 .............................................................................................................................. 62.2.2 evbsh5.............................................................................................................................. 62.2.3 i386.................................................................................................................................. 62.2.4 macppc............................................................................................................................. 62.2.5 sparc................................................................................................................................. 6
2.3 The NetBSD Packages Collection (pkgsrc) ................................................................................. 6
3 Installation............................................................................................................................................... 7
3.1 Documentation ............................................................................................................................. 73.2 The layout of a NetBSD installation ............................................................................................ 83.3 Installation.................................................................................................................................... 8
3.3.1 Keyboard ......................................................................................................................... 83.3.2 Geometries....................................................................................................................... 93.3.3 Partitions........................................................................................................................ 103.3.4 Hard disk space requirements........................................................................................ 103.3.5 Retry .............................................................................................................................. 11
4 Example Installation............................................................................................................................. 12
4.1 Installation example ................................................................................................................... 124.1.1 Preparing the installation............................................................................................... 124.1.2 Creating the installation floppy ..................................................................................... 124.1.3 Last preparatory steps.................................................................................................... 134.1.4 Beginning the installation.............................................................................................. 144.1.5 Partitions........................................................................................................................ 164.1.6 Disklabel........................................................................................................................ 21
iii

4.1.7 Creating a disklabel ....................................................................................................... 224.1.8 Final operations ............................................................................................................. 254.1.9 Choosing the installation media .................................................................................... 25
5 The first boot ......................................................................................................................................... 29
5.1 If something went wrong ........................................................................................................... 295.2 Login .......................................................................................................................................... 295.3 Changing the keyboard layout ................................................................................................... 305.4 The man command..................................................................................................................... 305.5 Changing the root password..................................................................................................... 325.6 Changing the shell...................................................................................................................... 325.7 System time................................................................................................................................ 325.8 Basic configuration /etc/rc.conf.......................................................................................... 335.9 Rebooting the system ................................................................................................................. 34
6 The second boot..................................................................................................................................... 35
6.1 dmesg ......................................................................................................................................... 356.2 Mounting the CD-ROM ............................................................................................................. 356.3 Mounting the floppy................................................................................................................... 366.4 Accessing a DOS/Windows partition......................................................................................... 366.5 Adding users .............................................................................................................................. 376.6 Shadow passwords ..................................................................................................................... 386.7 Stopping and rebooting the system ............................................................................................ 38
7 Printing .................................................................................................................................................. 40
7.1 Enabling the printer daemon ...................................................................................................... 407.2 Configuring /etc/printcap ................................................................................................... 417.3 Configuring Ghostscript ............................................................................................................. 427.4 Printer management commands ................................................................................................. 437.5 Remote printing.......................................................................................................................... 44
8 Using the build.sh Front End ........................................................................................................... 45
8.1 Building the tools ....................................................................................................................... 458.2 Cross Compiling a Kernel .......................................................................................................... 468.3 Build & Release ......................................................................................................................... 468.4 Environment Variables ............................................................................................................... 47
8.4.1 Changing the Destination Directory.............................................................................. 478.4.2 Static Builds................................................................................................................... 47
9 Compiling the kernel ............................................................................................................................ 49
9.1 Installing the kernel sources....................................................................................................... 499.2 Italian keyboard layout............................................................................................................... 499.3 Recompiling the kernel .............................................................................................................. 509.4 Build the toolchain ..................................................................................................................... 509.5 Creating the kernel configuration file......................................................................................... 519.6 Configuring the kernel................................................................................................................ 529.7 Generating dependencies and recompiling ................................................................................ 529.8 If something went wrong ........................................................................................................... 53
iv

10 The package collection ....................................................................................................................... 55
10.1 Installing the package collection.............................................................................................. 5510.2 Updating the package collection .............................................................................................. 5610.3 Example: installing a program from source ............................................................................. 57
10.3.1 Downloading the sources............................................................................................. 5710.3.2 Compiling and installing ............................................................................................. 58
10.4 Example: installing a binary package ...................................................................................... 5810.5 Package management commands............................................................................................. 6010.6 Quick Start Packaging Guide ................................................................................................... 60
10.6.1 Tools ............................................................................................................................ 6010.6.1.1 url2pkg............................................................................................................ 6110.6.1.2 Template package............................................................................................ 6110.6.1.3 pkglint ............................................................................................................. 61
10.6.2 Getting Started............................................................................................................. 6110.6.2.1 Using url2pkg.................................................................................................. 61
10.6.3 Filling in the Rest ........................................................................................................ 6210.6.4 Checking with pkglint ................................................................................................. 6210.6.5 Running and Checking Build/Installs.......................................................................... 6310.6.6 Submitting a Package Using send-pr........................................................................... 6310.6.7 Final Notes................................................................................................................... 63
11 Networking .......................................................................................................................................... 64
11.1 Introduction to TCP/IP Networking......................................................................................... 6411.1.1 Audience...................................................................................................................... 6411.1.2 Supported Networking Protocols ................................................................................ 6411.1.3 Supported Media ......................................................................................................... 65
11.1.3.1 Serial Line....................................................................................................... 6511.1.3.2 Ethernet ........................................................................................................... 65
11.1.4 TCP/IP Address Format .............................................................................................. 6611.1.5 Subnetting and Routing ............................................................................................... 6811.1.6 Name Service Concepts............................................................................................... 70
11.1.6.1 /etc/hosts ......................................................................................................... 7111.1.6.2 Domain Name Service (DNS) ........................................................................ 7111.1.6.3 Network Information Service (NIS/YP) .........................................................7211.1.6.4 Other ............................................................................................................... 72
11.1.7 Next generation Internet protocol - IPv6.....................................................................7311.1.7.1 The Future of the Internet ............................................................................... 7311.1.7.2 What good is IPv6?......................................................................................... 73
11.1.7.2.1 Bigger Address Space ........................................................................ 7411.1.7.2.2 Mobility.............................................................................................. 7411.1.7.2.3 Security............................................................................................... 74
11.1.7.3 Changes to IPv4 .............................................................................................. 7411.1.7.3.1 Addressing.......................................................................................... 7411.1.7.3.2 Multiple Addresses............................................................................. 7611.1.7.3.3 Multicasting........................................................................................ 7711.1.7.3.4 Name Resolving in IPv6 ....................................................................78
11.2 Practice..................................................................................................................................... 7911.2.1 A walk through the kernel configuration.....................................................................79
v

11.2.2 Overview of the network configuration files ...............................................................8311.2.3 Connecting to the Internet ........................................................................................... 84
11.2.3.1 Getting the connection information ................................................................8411.2.3.2 resolv.conf and nsswitch.conf ......................................................................... 8511.2.3.3 Creating the directories for pppd ....................................................................8511.2.3.4 Connection script and chat file........................................................................ 8511.2.3.5 Authentication................................................................................................. 86
11.2.3.5.1 PAP/CHAP authentication .................................................................8711.2.3.5.2 Login authentication........................................................................... 87
11.2.3.6 pppd options.................................................................................................... 8711.2.3.7 Testing the modem.......................................................................................... 8811.2.3.8 Activating the link........................................................................................... 8911.2.3.9 Using a script for connection and disconnection ............................................89
11.2.4 Creating a small home network................................................................................... 9011.2.5 Connecting two PCs through a serial line ...................................................................92
11.2.5.1 Connecting NetBSD with BSD or Linux........................................................9211.2.5.2 Connecting NetBSD and Windows NT ..........................................................9311.2.5.3 Connecting NetBSD and Windows 95............................................................94
11.3 Advanced Topics ...................................................................................................................... 9411.3.1 IPNAT.......................................................................................................................... 94
11.3.1.1 Configuring the gateway/firewall ....................................................................9511.3.1.2 Configuring the clients .................................................................................... 9611.3.1.3 Some useful commands .................................................................................. 96
11.3.2 Bridge .......................................................................................................................... 9711.3.2.1 Bridge example ............................................................................................... 97
11.3.3 NFS.............................................................................................................................. 9811.3.3.1 NFS setup example ......................................................................................... 98
11.3.4 Setting up /net with amd .......................................................................................... 9911.3.4.1 Introduction..................................................................................................... 9911.3.4.2 Actual setup .................................................................................................. 100
11.3.5 IPv6 Connectivity & Transition via 6to4...................................................................10011.3.5.1 Getting 6to4 IPv6 up & running ...................................................................10111.3.5.2 Obtaining IPv6 Address Space for 6to4........................................................10111.3.5.3 How to get connected.................................................................................... 10211.3.5.4 Security Considerations ................................................................................ 10211.3.5.5 Data Needed for 6to4 Setup.......................................................................... 10311.3.5.6 Kernel Preparation ........................................................................................ 10311.3.5.7 6to4 Setup ..................................................................................................... 10411.3.5.8 Quickstart using pkgsrc/net/6to4 ..................................................................10511.3.5.9 Known 6to4 Gateway.................................................................................... 10611.3.5.10 Conclusion & Further Reading ...................................................................106
Bibliography................................................................................................................................... 107
12 The Domain Name System............................................................................................................... 109
12.1 Notes and Pre-Requisites ....................................................................................................... 10912.2 What is DNS?......................................................................................................................... 10912.3 The DNS Files........................................................................................................................ 109
12.3.1 /etc/namedb/named.conf.................................................................................... 110
vi

12.3.1.1 options........................................................................................................... 11112.3.1.2 zone “diverge.org” ........................................................................................ 112
12.3.2 /etc/namedb/localhost...................................................................................... 11212.3.3 /etc/named/zone.127.0.0............................................................................................ 11312.3.4 /etc/namedb/diverge.org ................................................................................. 11412.3.5 /etc/namedb/1.168.192...................................................................................... 11512.3.6 /etc/namedb/root.cache.................................................................................... 115
12.4 Using DNS ............................................................................................................................. 11612.5 Setting up a caching only name server................................................................................... 117
12.5.1 Testing the server....................................................................................................... 118
13 Mail and news ................................................................................................................................... 119
13.1 sendmail ................................................................................................................................. 12113.1.1 Configuration with genericstable............................................................................... 12213.1.2 Testing the configuration ........................................................................................... 12413.1.3 Using an alternative MTA.......................................................................................... 126
13.2 fetchmail................................................................................................................................. 12613.3 Reading and writing mail with mutt ...................................................................................... 12713.4 Strategy for receiving mail ..................................................................................................... 12813.5 Strategy for sending mail ....................................................................................................... 12813.6 Advanced mail tools............................................................................................................... 12813.7 News with tin ......................................................................................................................... 130
14 Console drivers.................................................................................................................................. 132
14.1 wscons .................................................................................................................................... 13214.1.1 50 lines text mode with wscons................................................................................. 13314.1.2 wsmouse .................................................................................................................... 134
14.2 pccons..................................................................................................................................... 13414.3 pcvt......................................................................................................................................... 134
14.3.1 Changing the screen size ........................................................................................... 136
15 Editing................................................................................................................................................ 137
15.1 Introducing vi ......................................................................................................................... 13715.1.1 The vi interface.......................................................................................................... 13715.1.2 Switching to Edit Mode............................................................................................. 13715.1.3 Switching Modes & Saving Buffers to Files .............................................................13815.1.4 Yanking and Putting .................................................................................................. 138
15.1.4.1 Oops I Did Not Mean to do that! ..................................................................13815.1.5 Navigation in the Buffer ............................................................................................ 13815.1.6 Searching a File, the Alternate Navigational Aid......................................................139
15.1.6.1 Additional Navigation Commands ...............................................................13915.1.7 A Sample Session ...................................................................................................... 139
15.2 Configuring vi ........................................................................................................................ 14015.2.1 Extensions to .exrc.................................................................................................. 14115.2.2 Documentation .......................................................................................................... 141
15.3 Using tags with vi .................................................................................................................. 142
vii

16 X ......................................................................................................................................................... 143
16.1 What is X?.............................................................................................................................. 14316.2 Configuration ......................................................................................................................... 14416.3 The mouse .............................................................................................................................. 14516.4 The keyboard.......................................................................................................................... 14516.5 The monitor............................................................................................................................ 14516.6 The video card........................................................................................................................ 146
16.6.1 XFree 3.x ................................................................................................................... 14616.6.2 XFree86 4.x ............................................................................................................... 146
16.7 Starting X ............................................................................................................................... 14616.8 Customizing X ....................................................................................................................... 14716.9 Other window managers ........................................................................................................ 14816.10 Graphical login with xdm .................................................................................................... 149
17 Linux emulation ................................................................................................................................ 151
17.1 Emulation setup...................................................................................................................... 15117.1.1 Configuring the kernel ............................................................................................... 15117.1.2 Installing the Linux libraries ..................................................................................... 15117.1.3 Installing Acrobat Reader.......................................................................................... 152
17.2 Directory structure ................................................................................................................. 152
18 Audio .................................................................................................................................................. 154
18.1 Basic hardware elements........................................................................................................ 15418.2 BIOS settings ......................................................................................................................... 15418.3 Configuring the audio device ................................................................................................. 15518.4 Configuring the kernel audio devices..................................................................................... 15518.5 Advanced commands ............................................................................................................. 156
18.5.1 audioctl(1).................................................................................................................. 15618.5.2 mixerctl(1) ................................................................................................................. 15618.5.3 audioplay(1)............................................................................................................... 15718.5.4 audiorecord(1) ........................................................................................................... 157
19 Obtaining sources by CVS ............................................................................................................... 158
19.1 Fetching system and userland source..................................................................................... 15819.2 Fetching pkgsrc ...................................................................................................................... 160
20 CCD Configuration........................................................................................................................... 162
20.1 Install physical media............................................................................................................. 16220.2 Configure Kernel Support ...................................................................................................... 16320.3 Disklabel each volume member of the CCD.......................................................................... 16320.4 Configure the CCD................................................................................................................. 16520.5 Initialize the CCD device ....................................................................................................... 16520.6 Create a 4.4BSD/UFS filesystem on the new CCD device ....................................................16620.7 Mount the filesystem.............................................................................................................. 167
21 The cryptographic device driver ..................................................................................................... 168
21.1 Configuring kernel support .................................................................................................... 16821.2 Setting up a cgd device .......................................................................................................... 16821.3 Swap encryption..................................................................................................................... 169
viii

22 rc.d System ........................................................................................................................................ 171
22.1 The rc.d Configuration ........................................................................................................... 17122.2 The rc.d Scripts ...................................................................................................................... 17222.3 The Role of rcorder and rc Scripts ......................................................................................... 17222.4 Additional Reading ................................................................................................................ 173
23 RAID-1 with RAIDframe................................................................................................................. 174
23.1 Introduction............................................................................................................................ 17423.2 Initial install ........................................................................................................................... 17523.3 Setting up the second disk...................................................................................................... 17523.4 Configuring the RAID device ................................................................................................ 17623.5 Setting up filesystems............................................................................................................. 17723.6 Setting up kernel dumps......................................................................................................... 17823.7 Moving the existing files into the new filesystems ................................................................17923.8 The first boot with RAID-1.................................................................................................... 18023.9 Adding the first disk ............................................................................................................... 181
24 The Internet Super Server ............................................................................................................... 183
24.1 Overview ................................................................................................................................ 18324.2 What is Inetd .......................................................................................................................... 18324.3 Protocols................................................................................................................................. 18324.4 Services .................................................................................................................................. 18424.5 RPC ........................................................................................................................................ 18424.6 Inetd ....................................................................................................................................... 18424.7 Adding a Service .................................................................................................................... 18524.8 When to use or not to use inetd.............................................................................................. 18624.9 Other Resources ..................................................................................................................... 187
24.9.1 NetBSD/i386 Man Pages........................................................................................... 18724.9.2 Misc. Links ................................................................................................................ 187
25 Miscellaneous operations ................................................................................................................. 188
25.1 Creating install boot floppies for i386.................................................................................... 18825.2 Creating a CD-ROM .............................................................................................................. 188
25.2.1 Creating the ISO image ............................................................................................. 18925.2.2 Writing the image to the CD ..................................................................................... 19025.2.3 Copying a CD ............................................................................................................ 19025.2.4 Creating a bootable CD ............................................................................................. 191
25.3 Synchronizing the system clock............................................................................................. 19125.4 Installing the boot manager.................................................................................................... 19225.5 Deleting the disklabel............................................................................................................. 19325.6 Speaker................................................................................................................................... 19325.7 Forgot root password?............................................................................................................ 19325.8 Adding a new hard disk.......................................................................................................... 19425.9 Password file is busy? ............................................................................................................ 19625.10 How to rebuild the devices in /dev ....................................................................................... 197
A. Information........................................................................................................................................ 198
A.1 Guide history ........................................................................................................................... 198
ix

B. Contributing to the NetBSD guide .................................................................................................. 199
B.1 Translating the guide ............................................................................................................... 199B.1.1 What you need to start a translation............................................................................ 199B.1.2 Writing SGML/DocBook ........................................................................................... 200
B.2 Sending contributions.............................................................................................................. 201B.3 SGML/DocBook template....................................................................................................... 201
C. Getting started with XML/DocBook ............................................................................................... 204
C.1 What is XML/DocBook .......................................................................................................... 204C.2 Jade.......................................................................................................................................... 205C.3 DocBook.................................................................................................................................. 206C.4 The DSSSL stylesheets ........................................................................................................... 206C.5 Using the tools......................................................................................................................... 207C.6 An alternative approach to catalog files .................................................................................. 208C.7 Producing PostScript output .................................................................................................... 208
C.7.1 Installing TeX ............................................................................................................. 208C.7.2 Enabling hyphenation for the italian language ...........................................................208C.7.3 Creating the hugelatex format..................................................................................... 209C.7.4 Installing Jadetex ........................................................................................................ 211
C.8 Links........................................................................................................................................ 211
D. Acknowledgements ........................................................................................................................... 213
D.1 Original acknowledgements.................................................................................................... 213D.2 Current acknowledgements ..................................................................................................... 213
x

List of Figures3-1. Partitions............................................................................................................................................. 104-1. Beginning the installation................................................................................................................... 144-2. Confirming the installation................................................................................................................. 144-3. Choosing a hard disk .......................................................................................................................... 154-4. BIOS geometry................................................................................................................................... 154-5. Choosing the partitioning scheme ...................................................................................................... 164-6. Choosing a unit of measure ................................................................................................................ 174-7. fdisk .................................................................................................................................................... 174-8. Deleting a partition............................................................................................................................. 184-9. Deleted partition ................................................................................................................................. 184-10. Partitioning completed ..................................................................................................................... 194-11. Configuring the boot selector ........................................................................................................... 204-12. Boot selector configuration .............................................................................................................. 204-13. Disklabel........................................................................................................................................... 214-14. Standard disklabel ............................................................................................................................ 224-15. Modify the disklabel (sec)................................................................................................................ 234-16. Modifying a BSD partition............................................................................................................... 244-17. Modified disklabel............................................................................................................................ 244-18. Selecting the sets .............................................................................................................................. 264-19. Installation media ............................................................................................................................. 264-20. CD-ROM installation ....................................................................................................................... 264-21. Congratulations ................................................................................................................................ 2811-1. Our demo-network ........................................................................................................................... 6911-2. Attaching one subnet to another one ................................................................................................ 7011-3. Addresses are divided into more significant network- and less significant hostbits ........................7511-4. IPv6-addresses have a similar structure to class B addresses...........................................................7611-5. Several interfaces attached to a link result in only one scope ID for the link ..................................7711-6. Network with gateway...................................................................................................................... 9511-7. A frequently used method for transition is tunneling IPv6 in IPv4 packets...................................10111-8. 6to4 derives a IPv6 from an IPv4 address ...................................................................................... 10211-9. Request and reply can be routed via different gateways in 6to4 ....................................................10211-10. Enabling packet forwarding is needed for a 6to4 router ..............................................................10513-1. Structure of the mail system........................................................................................................... 121
List of Examples5-1. Manual sections.................................................................................................................................. 317-1. /etc/printcap ................................................................................................................................ 417-2. /usr/local/libexec/lpfilter.................................................................................................. 417-3. /etc/printcap ................................................................................................................................ 427-4. /usr/local/libexec/lpfilter-ps ........................................................................................... 4311-1. resolv.conf ........................................................................................................................................ 8511-2. nsswitch.conf.................................................................................................................................... 8511-3. Connection script.............................................................................................................................. 86
xi

11-4. Chat file ............................................................................................................................................ 8611-5. Chat file with login ........................................................................................................................... 8711-6. /etc/ppp/options ................................................................................................................................ 8811-7. ppp-up............................................................................................................................................... 8911-8. ppp-down.......................................................................................................................................... 9011-9. /etc/hosts........................................................................................................................................... 9112-1. strider’s /etc/hosts file..................................................................................................................... 11012-2. localhost..................................................................................................................................... 112
xii

Purpose of this guide
This guide describes the installation and the configuration of the NetBSD operating system. It addressesmainly people coming from other operating systems in hope of being useful for the solution of the manysmall problems found when one starts using a new tool.
This guide is not a Unix tutorial: a basic knowledge of some concepts and tools is required to understandit. You should know, for example, what a file and a directory are and how to use an editor. There areplenty of books explaining these things so, if you don’t know them, I suggest that you buy anintroductory text. I think that it is better to choose a general book an avoid titles like “LearningUnix-XYZ, version 1.2.3.4 in 10 days”, but this is a matter of personal taste. If you install a BSD system,sooner or later you will be confronted with the vi editor: without some documentation this could be aninsurmountable obstacle. When you finish installing your system, you will be able to install whatevereditor and programs you like.
Still a lot of work is required to finish this short introduction to NetBSD: some chapters are not finished(some are not even started) and some subjects still need testing (yes, a guide must also be tested). I’ll tryto work on it and improve it in my spare time but if you want to help, you’re welcome: you can write newchapters (or parts of) or send corrections for existing subjects.
Federico Lupi <[email protected]>
This guide is currently maintained by the NetBSD www team (<[email protected]>). Corrections andsuggestions should be sent to that address. Also see Appendix B.
i

Chapter 1
What is NetBSD?
NetBSD is a free, highly portable UNIX-like operating system available for many platforms, from 64bitalpha servers to handheld devices. Its clean design and advanced features make it excellent in bothproduction and research environments, and it is user-supported with complete source. Many applicationsare easily available.
1.1 The story of NetBSDThe first version of NetBSD (0.8) dates back to 1993 and springs from the 4.3BSD Lite operatingsystem, a version of Unix developed at the University of California, Berkeley (BSD = Berkeley SoftwareDistribution), and from the 386BSD system, the first BSD port to the Intel 386 CPU. In the followingyears, the modifications from the 4.4BSD Lite release (the last release of the Berkeley group) have beenintegrated in the system. The BSD branch of Unix has had a great importance and influence in the historyof this operating system, to which it has contributed many tools, ideas and improvements (the vi editor,the C shell, job control, the Berkeley fast file system, reliable signals, support for virtual memory,TCP/IP implementation, just to name a few) which are now standard in all Unix environments. Thistradition of research and development survives today in the BSD systems (free and commercial) and, inparticular, in NetBSD.
1.2 NetBSD featuresNetBSD operates on a vast range of hardware platforms and is very portable, probably the most portableoperating system in the world. The full source to the NetBSD kernel and userland is available for all thesupported platfoms; please see the details on the official site of the NetBSD Project(http://www.NetBSD.org/).
A detailed list of NetBSD features can be found at: http://www.NetBSD.org/Misc/features.html.
The basic features of NetBSD are:
• Portability (more than 50 platforms are supported)
• Code quality and correctness
• Adherence to the standards
• Research and innovation
The aforementioned characteristics bring also indirect advantages. For example, if you work on just oneplatform you could think that you’re not interested in portability. But portability is tied to code quality:without a well written and well organized code base it would be impossible to support that manyplatforms. And code quality is the base of any good and solid software systems, though surprisingly few
1
Chapter 1 What is NetBSD?
people seem to understand it. The attention to architectural and quality issues is rewarded with the greatpotentiality of NetBSD’s code and the quality of it’s drivers.
One of the distinguishing characteristics of NetBSD is not to be satisfied with partial implementations.Some systems seem to have the philosophy of “If it works, it’s right”. In that light NetBSD could bedescribed as “It doesn’t work unless it’s right”. Think about how many overgrown programs arenowadays sadly collapsing under their own weight and “features” and you’ll understand why NetBSDwants to avoid this situation at all costs.
1.3 Supported platformsNetBSD supports over 50 platforms, including the popular i386, sparc, sparc64, alpha, mac68k andmacppc platforms. Technical details for all of them can be found on the NetBSD site.
1.4 NetBSD’s target usersThe NetBSD site states that: “The NetBSD Project provides a freely available and redistributable systemthat professionals, hobbyists, and researchers can use in whatever manner they wish”. I would add thatNetBSD is an ideal system if you want to learn Unix, mainly because of its adherence to standards (oneof the project goals) and because it can run on hardware which is considered obsolete by most otheroperating systems; we could say “to learn and use Unix you don’t need to buy expensive hardware: youcan reuse the old PC or Mac that you have in your attic”. Also, if you need a Unix system which runsconsitently on a variety of platforms, NetBSD is probably your best (only) choice.
1.5 Applications for NetBSDWhen you install NetBSD you have a rich set of programs and applications that you can install on yoursystem. Besides having all the standard Unix productivity tools, editors, formatters, C/C++ compilersand debuggers and so on, there is a huge (and constantly growing, currently over 4000) number ofpackages that can be installed both from source and in pre-compiled form. All the packages that youexpect to find on a well configured system are available for NetBSD for free and there is also a numberof commercial applications. In addition, NetBSD provides binary emulation for various other *nixoperating systems, thusly allowing you to run non-native applications. Linux emulation is probably themost relevant example, lots of efforts have gone into it and it is used by almost all NetBSD users; youcan run the Linux version of
• Netscape
• Acrobat Reader
• Doom, Quake
• Adobe FrameMaker
• many other programs
NetBSD is also capable of emulating FreeBSD, BSDI and other systems.
2

Chapter 1 What is NetBSD?
1.6 The philosophy of NetBSDDifferently from many contemporary operating systems, the NetBSD installation, though feature rich isnot huge in size, because it strives to produce a stable and complete base system without beingredundant. After the installation you get a fully working system which still lacks a number ofapplications like, for example, a web browser (NetBSD, contrary to other OS, does not consider thebrowser as part of the base system): you have the freedom to decide which programs to install on yourmachine and the installation of new programs is very easy with the packages collection.
Another advantage of this approach is that the base system will work without these additional packages;if you decide to upgrade your version of Perl you needn’t be afraid to break some parts of your system.When you install NetBSD you don’t find huge pre-packaged collections of applications: you may nowsee this as a disadvantage but when you start understanding the philosophy behind this you will find thatit gives you freedom. When you install these software collections (which someone else has decided foryou) you fill your hard disk with tons of programs, most of which will stay unused (and unknown) andonly waste space (and possibly make the system less stable): this is something which the typical BSDuser doesn’t want to do.
Even when you start knowing NetBSD, there is always something that will continue to amaze you, theextreme consistency and logic of the system and the attention to the details: nothing appears the result ofchance and everything is well thought out. Yes, that’s what quality is about and, in my opinion, this is themost distinguishing feature of NetBSD.
We could spend days arguing on the relative merits of operating systems (and some people like to do it)but if you don’t try something seriously you can’t really judge. I am convinced, because I saw it manytimes in the mailing lists, that if you try NetBSD you’ll be conquered by the perfect balance betweencomplexity and effectiveness; all problems have more than one solution: NetBSD is not happy with asolution but always tries to find the easiest and most elegant one. NetBSD is a tool that enables you to doyour work without getting in your way. In this light it is an optimal tool; it’s like using a pen: you workhard to learn how to use it but once you’ve learned you can write or draw and completely forget about thepen.
1.7 How to get NetBSDThere is no “official” supplier of NetBSD CD-ROMs but there are various resellers. You can find themost up to date list on the relevant page (http://www.NetBSD.org/Sites/cdroms.html) on the NetBSDsite. Of course you can also download NetBSD from the Internet from one of the mirrors.
3

Chapter 2
New features in NetBSD 2.0
2.1 What’s new in NetBSD 2.0?It is impossible to list every single improvement to NetBSD since the previous release, 1.6, however, asummary of the major new features in NetBSD 2.0 are below.
2.1.1 Native threadsNative thread support has been added, based on Scheduler Activations. Applications which supportnative threads can now take full advantage of the high-performance NetBSD POSIX threadsimplementation.
Multi-threading provides application-level parallelism; multiple threads within the same process can runconcurrently on different CPUs; concurrency requires kernel support for threads, which is whatScheduler Activations provides.
Scheduler Activations is an efficient method of mapping N userland threads to M kernel threads whichavoids both the concurrency problems of N:1 implementations and the scalability problems of 1:1implementations.
2.1.2 Kernel events notification framework - kqueuekqueue provides a stateful and efficient event notification framework. Currently supported events includesocket, file, directory, fifo, pipe, tty and device changes, and monitoring of processes and signals.
kqueue is supported by all writable filesystems in the NetBSD tree (with the exception of Coda) and alldevice drivers supporting poll(2).
2.1.3 systracesystrace monitors and controls an application access to the system by enforcing access policies forsystem calls. The systrace utility might be used to trace an untrusted application’s access to the system.In addition, it can be used to protect the system from software bugs (such as buffer overflows) byconstraining a daemon’s access to the system.
The privilege elevation feature of systrace can be used to obviate the need to run large, untrustedprograms as root when only one or two system calls require the elevated privilege.
4

Chapter 2 New features in NetBSD 2.0
2.1.4 UFSv2FreeBSD’s UFS2 has been ported to NetBSD. UFS2 is an extension to FFS, adding 64 bit block pointersand support for extended file storage. Among other enhancements, UFS2 allows for file systems largerthan 1Terabyte.
2.1.5 Java supportImprovements have been made to NetBSD’s Linux emulation to support the latest Sun JDK/JRE forLinux. Testing has shown that it now runs as well as it does on Linux natively.
2.1.6 Verified ExecAs the name suggests, Verified Exec verifies a cryptographic hash before allowing execution of binariesand scripts.
This can be used to prevent a system from running binaries or scripts which have been illegally modifiedor installed. In addition, Verified Exec can also be used to limit the use of script interpreters to authorizedscripts only and disallow interactive use.
2.1.7 Cryptographic disk driverThe cryptographic disk driver (cgd) can be used to encrypt disks or partitions, using some strongencryption algorithms, like AES (Rijndael) and Blowfish. cgd can be configured to encrypt swap.
2.1.8 Non-executable stack and heapNetBSD 2.0 has support for non-executable mappings on many platforms. If enabled, parts of the stackand heap are made non-executable when they are marked writable. This makes exploiting potentialbuffer overflows harder.
2.1.9 New toolchainNetBSD 2.0 sports a new toolchain based on gcc 3.3.1 and binutils 2.13.2.1. gcc 3.3.1 adds support for anumber of CPU targets and greatly improved support for i386 and other targets. New platformssupported by gcc 3.3.1 has enabled the porting of NetBSD to even more architectures.
5

Chapter 2 New features in NetBSD 2.0
2.2 New ports and enhancements to existing ports
2.2.1 amd64New port to AMD’s 64-bit Opteron CPU, including SMP support.
2.2.2 evbsh5The SuperH SH-5 is a bi-endian, 32 and 64-bit capable CPU, and this is a new port to the SH-5 Caymanevaluation board. Support for a number of generic, machine-independent device drivers including audio,SCSI and ethernet cards is present.
2.2.3 i386The i386 port now supports SMP and has a new ACPI and power management framework which takesadvantage of Intel’s ACPI implementation.
2.2.4 macppcSMP is now supported on macppc. Hardware support for newer G4 models has been added.
2.2.5 sparcSMP is now supported on sparc.
2.3 The NetBSD Packages Collection (pkgsrc)pkgsrc has been significantly expanded and now contains over 4000 packages. A number of newplatforms are supported, including Darwin, FreeBSD, IRIX, Linux, OpenBSD and Solaris. Support forvarious other platforms (among them AIX, BSD/OS and HP-UX) is currently being worked on thanks toour new, portable bootstrap kit which makes it much simpler to port pkgsrc support to new operatingsystems.
6
Chapter 3
Installation
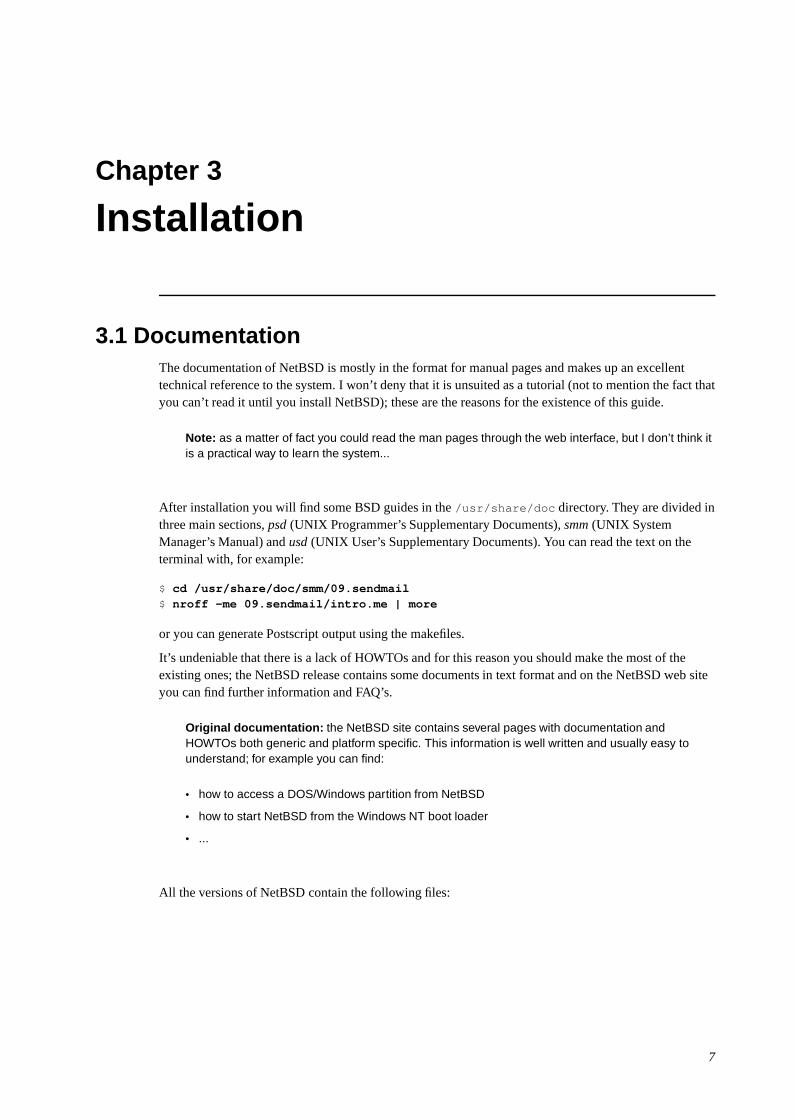
3.1 DocumentationThe documentation of NetBSD is mostly in the format for manual pages and makes up an excellenttechnical reference to the system. I won’t deny that it is unsuited as a tutorial (not to mention the fact thatyou can’t read it until you install NetBSD); these are the reasons for the existence of this guide.
Note: as a matter of fact you could read the man pages through the web interface, but I don’t think itis a practical way to learn the system...
After installation you will find some BSD guides in the /usr/share/doc directory. They are divided inthree main sections, psd (UNIX Programmer’s Supplementary Documents), smm (UNIX SystemManager’s Manual) and usd (UNIX User’s Supplementary Documents). You can read the text on theterminal with, for example:
$ cd /usr/share/doc/smm/09.sendmail$ nroff -me 09.sendmail/intro.me | more
or you can generate Postscript output using the makefiles.
It’s undeniable that there is a lack of HOWTOs and for this reason you should make the most of theexisting ones; the NetBSD release contains some documents in text format and on the NetBSD web siteyou can find further information and FAQ’s.
Original documentation: the NetBSD site contains several pages with documentation andHOWTOs both generic and platform specific. This information is well written and usually easy tounderstand; for example you can find:
• how to access a DOS/Windows partition from NetBSD
• how to start NetBSD from the Windows NT boot loader
• ...
All the versions of NetBSD contain the following files:
7

Chapter 3 Installation
INSTALL
installation notes. This is the most important document and you should read (and reread it)carefully; it contains a description of the NetBSD system, a list of the supported hardware and, mostnotably, the installation instructions.
README.first
you should also read this.
release.man
describes the structure of the NetBSD release you are installing. It is a text file in man layout: it ispreformatted and you can read it with any editor.
On the NetBSD web site you can find, amongst the others, the following guides:
NetBSD FAQ
general information and pointers to other FAQ.
NetBSD/i386 FAQ
NetBSD/i386 specific FAQ.
Basic NetBSD Networking
Guide to network and PPP configuration.
3.2 The layout of a NetBSD installationThe layout of the files of a NetBSD installation is described in the aforementioned INSTALL file. Forexample, for the i386 platform the system binaries are in the i386/binary/sets directory and thesources are in the source/sets directory. The source/patches directory contains patches to the baserelease which usually fix bugs or security related problems discovered after the release.
3.3 InstallationThe first thing to do before installing NetBSD is to read the release information and installation notes inthe INSTALL file: this is the official description of the installation procedure. Next you should decide theinstallation media that you will use; you can choose between:
• ftp
• nfs
• CDROM
• floppy
• unmounted filesystem
• local directory
8

Chapter 3 Installation
3.3.1 Keyboardsysinst will not allow you to change the keyboard layout during the installation: if you use a USkeyboard it’s OK, but for the rest of the world it’s a minor annoyance, though not a big problem. If youinstall from CD-ROM you only need to use alphanumeric keys (which have the same layout on most, ifnot all, national keyboards) and only in a couple of places you need to press other keys. I hope that thenext releases of the installation program will allow to change the keyboard layout; for the present, youcan use the map in the following table.
US IT DE FR
- ’ ß )
/ - - !
= ì ’ -
: ç Ö M
; ò ö m
# £ § 3
" ° Ä %
* ( ( 8
( ) ) 9
) = = 0
’ à ä ù
‘ \ ^ @
\ ù # ‘
If you use a non US keyboard, one of the first things that you will do after installation will be to changethe keyboard layout. Until then, please be patient.
3.3.2 GeometriesThe installation program mentions two types of hard disk geometries; you should understand what theymean:
• real geometry
• BIOS geometry
real geometry is the real geometry of the hard disk, detected by the system. BIOS geometry is thegeometry used by the BIOS and it could be different from the real one (for example, BIOS could remapthe disk using LBA).
The disk used in the installation example is an IDE disk with the following geometries:
real: 6232 cyl, 16 heads, 63 secBIOS: 779 cyl, 128 heads, 63 sec (LBA)
As you can see the BIOS remaps the disk using LBA, effectively reducing the number of cylinders andincreasing the number of tracks (but the result is the same: 6232 * 16 = 779 * 128 = 99712). A sector
9

Chapter 3 Installation
contains 512 bytes, which means that the disk size is 6232 * 16 * 63 * 512 = 3 GB. NetBSD does notneed to remap the disk geometry (and in fact won’t do it). During the installation it is possible to changemanually the geometry if sysinst got it wrong.
3.3.3 PartitionsThe terminology used by NetBSD for partitioning is different from the typical DOS/Windowsterminology; in fact, there are two partitioning schemes. NetBSD installs in one of the four primaryBIOS partitions (the partitions defined in the hard disk partition table).
Within its BIOS partition (also called slice) NetBSD defines the BSD partitions using a disklabel: thesepartitions can be seen only by NetBSD and are identified by lowercase letters (starting with “a”). Forexample, wd0a refers to the “a” partition of the first IDE disk (wd0) and sd0a refers to the “a” partitionof the first SCSI disk. In Figure 3-1 there are two primary BIOS partitions, one used by DOS and theother by NetBSD. NetBSD describes the disk layout through the disklabel.
Figure 3-1. Partitions
BIOS partitions (MBR)
0 - DOS
1 - NetBSD
a /
b swap
e /usr
c NetBSD slice
d whole disk
Disklabel
Note: the meaning of partitions “c” and “d” is typical of the i386 port. Other ports use differentconventions (e.g. “c” represents the whole disk.)
Note: if NetBSD shares the hard disk with another OS (like in the previous example) you willprobably need to install a boot manager , i.e. a program which enables you to chose the OS to startat boot time. sysinst can automatically install and configure a simple but effective boot manager.
If Windows NT is installed on the same hard disk, you can use the NT bootloader to start NetBSD.An easy way to accomplish this is described on the NetBSD web site.
10

Chapter 3 Installation
3.3.4 Hard disk space requirementsThe space required by a NetBSD installation depends on the use that you plan to do with it (eg. server orworkstation). For example, consider a home desktop system with a 420 MB hard disk (rather small bytoday’s standards) with X, the kernel sources and some applications (Netscape, ...). The swap partition is32 MB. df shows the following:
Filesystem 1K-blocks Used Avail Capacity Mounted on/dev/wd1a 31887 16848 13444 56% //dev/wd1e 363507 173202 172129 50% /usr
As you can see there are 180 MB left on the system.
3.3.5 RetryWhen you install an OS for the first time it is seldom a success and NetBSD is no exception. Even ifeverything goes well, as soon as you start using the system you usually realize that (for example) youcould have chosen a better layout for your partitions. It is important not to give up; if you try again you’llrealize that what was difficult to understand the first time gradually becomes clearer by virtue of theaccumulated experience and numerous rereads of the INSTALL document.
During the first installations it is wiser to accept the defaults suggested by sysinst and avoid, for example,changing the disklabel. The only thing that you must decide is the disk space for the NetBSD fdiskpartition.
11

Chapter 4
Example Installation
4.1 Installation exampleThe remaining part of this chapter deals with a real installation example for a common case: installationfrom CD-ROM. The concepts are the same for all types of installation (eg. ftp); the only difference is inthe way the binary sets are found by sysinst. Please note that some details of the installation differdepending on the NetBSD release: this example was created with release 1.5.
For the sake of teaching, in the following example the most “difficult” options will always be chosen.
• BIOS partition table full: one or more existing partitions will be deleted to make room for NetBSD.
• fdisk partitioning using sectors instead of MB.
• manual modification of the disklabel created by sysinst, also using sectors.
• “custom” installation (meaning that you can select one by one the binary sets that you want to install).
This set of choices gives the impression that the installation is very complicated and requires a lot ofwork: remember that if you accept the defaults everything is much simpler. On the other hand, a tutorialwhich explains only the “easy” parts is not very useful (except from the marketing point of view...)
4.1.1 Preparing the installationBefore installing it is a good idea to make a detailed plan of the steps that you will need to perform. First,read the INSTALL file (I promise it’s the last time that I say it) reading the description of the installationand checking the hardware compatibilities. Next, if there is already something on the hard disk, thinkhow you can free some space for NetBSD; if NetBSD will share the disk with other operating systemsyou will probably need to create a new partition (which you will do with sysinst) and, maybe, to resizean existing one. It is not possible to resize an existing partition with sysinst, but there are somecommercial products (like Partition Magic) and some free tools (FIPS, pfdisk) available for this.
The installation is divided logically in two steps. In the first part you create a partition for NetBSD andyou write the diklabel for that partition. In the second part you decide which binary sets you want toinstall and extract the files in the newly created partitions. The first part is independent of the intallationmethod (CD-ROM, ftp, NFS, ...); at the end of the first part nothing has yet been written to the hard diskand you are prompted to confirm the installation. If you confirm, the installation goes on, else you arebrought back to the main menu and the hard disk remains unchanged.
12

Chapter 4 Example Installation
4.1.2 Creating the installation floppy
Note: if you have a bootable NetBSD CD-ROM you don’t need to create an installation floppy: enablethe “boot from CD-ROM” in your BIOS settings, insert the CD and reboot the machine. This option isprobably not available on older machines.
Before installing you need to create the installation floppy, i.e. to copy the floppy image from theCD-ROM to a diskette. To perform this operation in DOS you can use the rawrite program in thei386/installation/misc directory. The image file is i386/installation/floppy/boot.fs.
Before creating the installation disks always check that the floppies are good: this simplestep is often overlooked and can save you a lot of trouble.
1. Format the floppy.
2. Go to the I386\INSTALLATION\FLOPPY directory of the CD-ROM.
3. Run the ..\MISC\RAWRITE program. The “Source file” is BOOT.FS and the “Destination drive” isA:
If you create the boot floppy in a Unix environment, you can use the dd command. For example:
# cd i386/installation/floppy# dd if=boot.fs of=/dev/fd0a bs=36b
dd copies blocks of 512 bytes: the bs=36b option copies 36 blocks at a time, effectively making theoperation faster.
Note: a 1440K floppy contains 1474560 bytes and is made up of 80 cylinders, 2 tracks, 18 sectorsand 512 bytes per sector, i.e. 80 * 2 * 18 = 2880 blocks. Thus bs=36b copies one cylinder (18 * 2blocks) at a time and repeats the operation 80 times instead of 2880.
4.1.3 Last preparatory stepsEverything is now ready for the installation but, before beginning, it is better to gather some informationon the hardware of the PC.
The most important thing to check is the type of hard disk (IDE, SCSI) and its geometry. You can findthis information on the hard disk manual or using a diagnostic program. Some hard disks have a label onwhich this data is written. Another option is to connect to the web site of the producer of your disk andlook for the product info.
If you install via ftp or NFS remember to check your network card settings: if the installation kernelexpects your card to be on an IRQ but the card’s settings are different you won’t be able to install. Forexample, the install kernel can recognize an NE2000 compatible network card with one of the followingtwo settings:
13
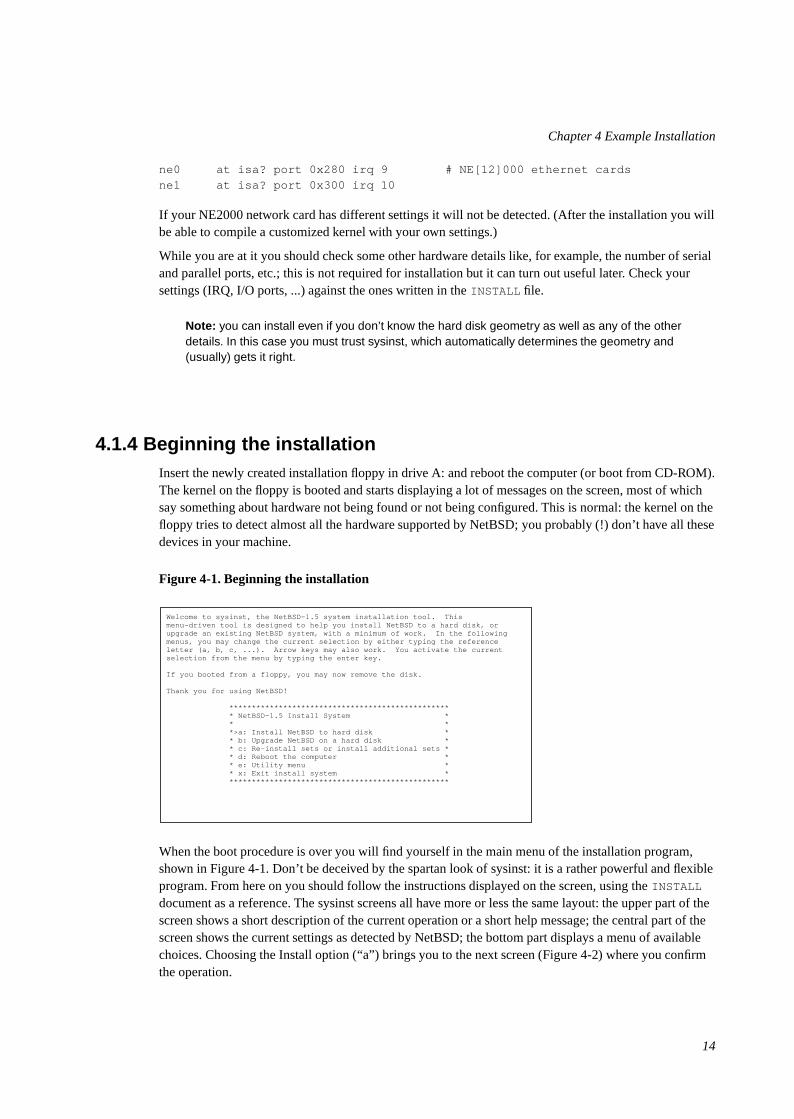
Chapter 4 Example Installation
ne0 at isa? port 0x280 irq 9 # NE[12]000 ethernet cardsne1 at isa? port 0x300 irq 10
If your NE2000 network card has different settings it will not be detected. (After the installation you willbe able to compile a customized kernel with your own settings.)
While you are at it you should check some other hardware details like, for example, the number of serialand parallel ports, etc.; this is not required for installation but it can turn out useful later. Check yoursettings (IRQ, I/O ports, ...) against the ones written in the INSTALL file.
Note: you can install even if you don’t know the hard disk geometry as well as any of the otherdetails. In this case you must trust sysinst, which automatically determines the geometry and(usually) gets it right.
4.1.4 Beginning the installationInsert the newly created installation floppy in drive A: and reboot the computer (or boot from CD-ROM).The kernel on the floppy is booted and starts displaying a lot of messages on the screen, most of whichsay something about hardware not being found or not being configured. This is normal: the kernel on thefloppy tries to detect almost all the hardware supported by NetBSD; you probably (!) don’t have all thesedevices in your machine.
Figure 4-1. Beginning the installation
Welcome to sysinst, the NetBSD-1.5 system installation tool. Thismenu-driven tool is designed to help you install NetBSD to a hard disk, orupgrade an existing NetBSD system, with a minimum of work. In the followingmenus, you may change the current selection by either typing the referenceletter (a, b, c, ...). Arrow keys may also work. You activate the currentselection from the menu by typing the enter key.
If you booted from a floppy, you may now remove the disk.
Thank you for using NetBSD!
************************************************* * NetBSD-1.5 Install System * * * *>a: Install NetBSD to hard disk * * b: Upgrade NetBSD on a hard disk * * c: Re-install sets or install additional sets * * d: Reboot the computer * * e: Utility menu * * x: Exit install system * *************************************************
When the boot procedure is over you will find yourself in the main menu of the installation program,shown in Figure 4-1. Don’t be deceived by the spartan look of sysinst: it is a rather powerful and flexibleprogram. From here on you should follow the instructions displayed on the screen, using the INSTALLdocument as a reference. The sysinst screens all have more or less the same layout: the upper part of thescreen shows a short description of the current operation or a short help message; the central part of thescreen shows the current settings as detected by NetBSD; the bottom part displays a menu of availablechoices. Choosing the Install option (“a”) brings you to the next screen (Figure 4-2) where you confirmthe operation.
14

Chapter 4 Example Installation
Figure 4-2. Confirming the installation
You have chosen to install NetBSD on your hard disk. This will changeinformation on your hard disk. You should have made a full backupbefore this procedure! This procedure will do the following things: a) Partition you hard disk b) Create new BSD file systems c) Load and install distribution sets
(After you enter the partition information but before your disk ischanged, you will have the opportunity to quit this procedure.)Shall we continue?
************** * yes or no? * * * *>a: No * * b: Yes * **************
After choosing to continue with option “b”, it is time to select on which hard disk you want to installNetBSD. If more than one disk is available, sysinst displays a list of disks from which you can pick one.In this example there is only one hard disk and the installation program only displays an informationalmessage, shown in Figure 4-3.
Note: the information in this screen will be different depending on the type and number of hard disksinstalled on the system.
Figure 4-3. Choosing a hard disk
I found only one disk, wd0. Therefore I assume you want to install NetBSD onit.
************************* * Hit enter to continue * * * *>a: ok * *************************
Next (Figure 4-4) sysinst displays the BIOS geometry for the chosen disk; you can confirm that it iscorrect or, if the installation program got it wrong, you can modify it by entering new values manually.
15

Chapter 4 Example Installation
Figure 4-4. BIOS geometry
This disk matches the following BIOS disk:
BIOS # cylinders heads sectors 0 779 128 63
Note: since sysinst was able to uniquely match the disk you chose with a disk known to the BIOS, the values displayed above are very likely correct, andshould not be changed. Only change them if they are very obviously wrong.
*********************************** *>a: This is the correct geometry * * b: Set the geometry by hand * ***********************************
4.1.5 PartitionsThe first important step of the installation has come: the partitioning of the hard disk. First you mustspecify if NetBSD will use a partition (suggested choice) or the whole disk (“dangerous” choice). In theformer case it is still possible to create a partition that uses the whole hard disk (Figure 4-5) so Irecommend to select this option which, if I understand correctly, keeps the BIOS partition table in aformat compatible with other operating systems.
In the this example we will use a disk with the following “real” geometry, corresponding to the BIOSgeometry of Figure 4-4.
6232 cyl, 16 heads, 63 sec (6232 x 16 x 63 = 6281856 total sectors)1 sector = 512 bytes1 track = 63 sectors = 63 * 512 bytes = 32 K1 cylinder = 16 * 63 * 512 bytes = 504 K
Figure 4-5. Choosing the partitioning scheme
We are now going to install NetBSD on the disk wd0. You may choose toinstall NetBSD on the entire disk, or on part of the disk.
Partial-disk installation creates a partition, or ‘slice’, for NetBSD in yourdisk’s MBR partition table. Whole-disk installation is ‘dangerouslydedicated’: it takes over the entire MBR. This WILL overwrite all existingdata and OSes on the disk. It also prohibits later installation of multipleOSes on that disk (unless you overwrite NetBSD and reinstall using only partof the disk).
Which would you like to do? ******************************** * Select your choice * * * *>a: Use only part of the disk * * b: Use the entire disk * ********************************
16

Chapter 4 Example Installation
The next step, depicted in Figure 4-6, is the selection of a unit of measure to be used for hard diskpartitioning: sectors give the most flexibility and precision (note that it is usually better to align partitionon cylinder boundaries for performance reasons, at least on older hard disks.) Megabytes are easier touse because they don’t require manual calculations and are more “intuitive”.
Figure 4-6. Choosing a unit of measure
You have elected to specify partition sizes (either for the BSD disklabel, oron some ports, for MBR slices). You must first choose a size unit to use.Choosing megabytes will give partition sizes close to your choice, butaligned to cylinder boundaries. Choosing sectors will allow you to moreaccurately specify the sizes. On modern ZBR disks, actual cylinder sizevaries across the disk and there is little real gain from cylinder alignment.On older disks, it is most efficient to choose partition sizes that are exactmultiples of your actual cylinder size.
****************************** * Choose your size specifier * * * *>a: Megabytes * * b: Cylinders * * c: Sectors * ******************************
This tutorial will use sectors because they are more useful for teaching purposes. Chosing option “c” youare taken to the fdisk interface screen.
Figure 4-7. fdisk
Edit your DOS partition table. The highlighted partition is the currentlyactive partition. The partition table currently looks like:
Total disksize 6281856 sec.
Start(sec) Size(sec) End(sec) Kind ---------- ---------- ---------- ----0: 63 2088516 2088579 DOS FAT16, >32MB1: 2088579 3991680 6080259 Linux native2: 6080259 201597 6281856 Linux swap3: unused
********************************** * Choose your partition * * * *>a: Edit partition 0 * * b: Edit partition 1 * * c: Edit partition 2 * * d: Edit partition 3 * * e: Reselect size specification * * x: Exit * **********************************
Figure 4-7 shows the current situation of the hard disk before the installation of NetBSD; there are fourprimary partitions: one is used by DOS/Windows and two by GNU/Linux; the last one is unused. Thereis no free space on the disk: the End(sec) column of partition 2 shows that the 6281856 sectors of thehard disk are all occupied.
Note: in the fdisk screen the following formula holds:
Start(sec) + Size(sec) = End(sec)
17

Chapter 4 Example Installation
This means that the End(sec) column of a partition is equal to the Start(sec) column of the followingpartition, which is not very intuitive because the sector in the End(sec) column of a partition actuallybelongs to the following one. Disklabel will use a different (and more logical) convention.
To make room the two GNU/Linux partitions will have to be sacrificed, starting with the last one. Sysinstdisplays a screen that can be used to modify the existing data for a partition and Figure 4-8 shows thecurrent data for partition 2.
Figure 4-8. Deleting a partition
You are editing partition 2. The highlighted partition is the partition youare editing. Total disksize 6281856 sec.
Start(sec) Size(sec) End(sec) Kind ---------- ---------- ---------- ----0: 63 2088516 2088579 DOS FAT16, >32MB1: 2088579 3991680 6080259 Linux native2: 6080259 201597 6281856 Linux swap3: unused
+*******************+ * Select to change * * * *>a: Kind * * b: Start and size * * c: Set active * * d: Partition OK * +*******************+
To delete the partition, select type unused using option “a” and than choose option “b” leaving the fields“Start” and “Size” empty (press Enter leaving the fields blank). Finally, confirm everything with option“d” and you are back in the main fdisk screen, where partition 3 is now empty. Use the same method todelete partitions 2 and 1, leaving only partition 0 on the disk (Figure 4-9.)
Figure 4-9. Deleted partition
Edit your DOS partition table. The highlighted partition is the currentlyactive partition. The partition table currently looks like:
Total disksize 6281856 sec.
Start(sec) Size(sec) End(sec) Kind ---------- ---------- ---------- ----0: 63 2088516 2088579 DOS FAT16, >32MB1: unused2: unused3: unused
********************************** * Choose your partition * * * *>a: Edit partition 0 * * b: Edit partition 1 * * c: Edit partition 2 * * d: Edit partition 3 * * e: Reselect size specification * * x: Exit * **********************************
Only the DOS/Windows partition is left, using 2088516 sectors which are equal to 1029 MB (about 1GB). The free space is calculated as the difference between the already calculated total number of sectors
18

Chapter 4 Example Installation
and the end sector of the DOS partition (the number in the End(sec) column.)
6281856 - 2088579 = 4193277 sectors = 2047 MB free on disk
Note: the DOS partition begins at sector 63 and not at sector 0 as you could expect. This is notunusual: the first track (63 sectors) is reserved. At cylinder 0, track 0, sector 1 of the hard disk thereis the Master Boot Record (MBR). When the system is booted the BIOS loads the MBR in memoryfrom the hard disk, detects which partition is active and loads in memory the boot sector of thatpartition, to which it yields control. The boot sector, then, starts the operating system on his partition.
Now, using option “b”, a new partition for NetBSD will be created, starting at the end of the DOSpartition. To create a new partition the following information must be supplied:
• the type of the new partition
• the first sector of the new partition
• the size (in sectors) of the new partition
Choose the partition type “NetBSD” for the new partition (option “a: Kind”) and input the data that wehave calculated: start = 2088579 and size = 4193277 using option “b”. Check that everything is correctand confirm the creation with option “d”, which brings you back to the main fdisk menu. The result isshown in Figure 4-10 which displays the final layout of the partition table. Now, selecting option “x” youproceed to the next menu.
Figure 4-10. Partitioning completed
Edit your DOS partition table. The highlighted partition is the currentlyactive partition. The partition table currently looks like:
Total disksize 6281856 sec.
Start(sec) Size(sec) End(sec) Kind ---------- ---------- ---------- ----0: 63 2088516 2088579 DOS FAT16, >32MB1: 2088579 4193277 6281856 NetBSD2: unused3: unused
********************************** * Choose your partition * * * *>a: Edit partition 0 * * b: Edit partition 1 * * c: Edit partition 2 * * d: Edit partition 3 * * e: Reselect size specification * * x: Exit * **********************************
Note: sysinst for NetBSD 1.5 checks the start and end sectors of the unused partitions too, eventhough you can’t see this information on the screen. Thus it can happen that the program issues awarning about overlapping partitions even if everything looks correct on the screen. I suggest tocorrectly define the start and size of the unused partitions.
If you have made an error in partitioning (for example you have created overlapping partitions) sysinstwill display a message and suggest to go back to the fdisk menu (you are also allowed to continue). If the
19

Chapter 4 Example Installation
data is correct but the NetBSD partition lies outside the range of sectors which is bootable by the BIOS,sysinst warns you and asks if you want to proceed anyway. This could lead to problems on older PC’s:the PC used in the example received this warning but boots perfectly. It is not possible to give a generalrule (it is BIOS dependent); if the PC is not very old I suggest to ignore the warning and continue.
Note: this is not a limitation of NetBSD; some old BIOSes cannot boot a partition which lies outsidethe first 1024 cylinders. To understand fully the problem you should study the different type ofBIOSes and the many addressing schemes that they use (physical CHS, logical CHS, LBA, ...).These topics are not described in this guide.
With the most recent BIOS, supporting int13 extensions, it is possible to install NetBSD in partitionsthat live outside the first 8 GB of the hard disk, provided that the NetBSD boot selector is installed.
If the data is correct and sysinst detects that you have more than one operating system on your hard disk,it will offer to install a boot selector on the hard disk. Using the installation program you can both installthe boot selector and configure it; you can specify what strings will be displayed on the boot menu foreach operating system, which partition is booted by default and the timeout used when the user does notselect anything. This screen is shown in Figure 4-11.
Note: if the arrow keys don’t work you can scroll the menu options using the < and > keys.
Figure 4-11. Configuring the boot selector
Configure the different bootselection menu items. You can change the simplemenu entries for the matching partition entries that are displayed when thesystem boots. Also, you can specify the timeout and default action to betaken (if no selection is made in the bootmenu).
Number Type Menu entry------ ---- ---------- 0 DOS FAT16, >32MB1 NetBSD2 unused3 unused
Boot menu timeout: 10Default boot menu action: boot the first active partition
***************************** * Change a bootmenu item * * * *>a: Edit menu entry 0 * * b: Edit menu entry 1 * * c: Edit menu entry 2 * * d: Edit menu entry 3 * * <: page up, >: page down * *****************************
Select the partitions that will appear in the boot manager menu and define a menu item string for eachone using the options from “a” to “d”. In the “Menu entry” column you should see an entry for eachbootable partition, as shown in Figure 4-12.
20

Chapter 4 Example Installation
Figure 4-12. Boot selector configuration
Configure the different bootselection menu items. You can change the simplemenu entries for the matching partition entries that are displayed when thesystem boots. Also, you can specify the timeout and default action to betaken (if no selection is made in the bootmenu).
Number Type Menu entry------ ---- ---------- 0 DOS FAT16, >32MB Windows1 NetBSD NetBSD2 unused3 unused
Boot menu timeout: 10Default boot menu action: boot the first active partition
***************************** * Change a bootmenu item * * * *>a: Edit menu entry 0 * * b: Edit menu entry 1 * * c: Edit menu entry 2 * * d: Edit menu entry 3 * * <: page up, >: page down * *****************************
Option “e” enables you to choose a timeout for the boot menu: once the timeout is elapsed without achoice from the user, the default partition (defined with option “f”) is booted. You can specify one of thefollowing as default:
• a partition
• another hard disk
• the first active partition
After finishing the boot manager configuration, the first part of the installation, namely disk partitioning,is over.
The BIOS partitions, also called slices by BSD, have been created; there are now two slices: DOS andNetBSD. It’s time to define the BSD partitions.
4.1.6 DisklabelThere are three alternatives for the creation of the BSD partitions, as shown by Figure 4-13.
21

Chapter 4 Example Installation
Figure 4-13. Disklabel
NetBSD uses a BSD disklabel to carve up the NetBSD portion of the disk intomultiple BSD partitions. You must now set up your BSD disklabel. You haveseveral choices. They are summarized below.-- Standard: the BSD disklabel partitions are computed by this program.-- Standard with X: twice the swap space, space for X binaries.-- Custom: you specify the sizes of all the BSD disklabel partitions.
The NetBSD part of your disk is 2047.50 Megabytes.Standard requires at least 464.00 Megabytes.Standard with X requires at least 610.00 Megabytes.
**************************** * Choose your installation * * * *>a: Standard * * b: Standard with X * * c: Custom * ****************************
For a first time installation I suggest choosing options “a” or “b” and leaving to sysinst the partitioningdecisions. In this example life will be a little more complicated by modifying manually the disklabel(only for teaching purposes, of course).
Note: even if you let the system decide for you, it is still better to examine carefully the generateddisklabel. If the disk space is insufficient the 1.5 sysinst is smart enough to detect it and issue awarning; previous versions of the installer didn’t and silently created invalid partitions.
4.1.7 Creating a disklabelFirst, let the installation program automatically create a disklabel. Choosing option “b” from Figure 4-13we are taken to Figure 4-14.
Figure 4-14. Standard disklabel
We now have your BSD-disklabel partitions as (Size and Offset in MB):
Size Offset End FStype Bsize Fsize Mount point -------- ---------- --------- ------ ----- ----- -----------a: 212 1019 1231 4.2BSD 8192 1024 /b: 384 1232 1616 swapc: 2047 1019 3066 unusedd: 3067 0 3066 unusede: 1449 1617 3066 4.2BSD 8192 1024 /usr
************************* * Partitions ok? * * * *>a: Change a partition * * b: Partitions are ok * *************************
22

Chapter 4 Example Installation
Having done this you could just confirm everything (with option “b”) and your work would be over.Instead, let’s see what you need to do to modify the size of the swap partition to make it smaller andincrease the size of the /usr partition. To change the size of the swap partition, choose option “a”: in thenew screen we change the unit of measure to sectors. The result is shown in Figure 4-15.
Figure 4-15. Modify the disklabel (sec)
We now have your BSD-disklabel partitions as (Size and Offset in sec): Size Offset End FStype Bsize Fsize Mount point -------- ---------- --------- ------ ----- ----- -----------a: 435453 2088579 2524031 4.2BSD 8192 1024 /b: 788256 2524032 3312287 swapc: 4193277 2088579 6281855 unusedd: 6281856 0 6281855 unusede: 2969568 3312228 6281855 4.2BSD 8192 1024 /usrf: 0 0 0 unusedg: 0 0 0 unusedh: 0 0 0 unused
************************************** * a: Change a * * b: Change b * * c: NetBSD partition - can’t change * * d: Whole disk - can’t change * * e: Change e * * f: Change f * * g: Change g * * h: Change h * *>i: Set new allocation size * * x: Exit * **************************************
The sequence of partition identifiers is standard: some letters are reserved for predefined uses.
• a is usually the root partition.
• b is the swap partition.
• c covers the whole NetBSD slice.
• d covers the whole hard disk: extending outside the NetBSD slice. With a similar method you will beable to make a DOS or a Linux partition visible to NetBSD, by creating a BSD partition which isoutside the NetBSD slice.
• e is the first free partition. Usually /usr is mounted on “e”.
Note: the meaning of a partition id can differ from port to port. The preceding description applies toport-i386.
You normally don’t want to modify partitions b and c. You are free to change the size and mount point ofthe remaining partitions and to create new ones (with a maximum of 8, using the letters from e to h.)
To modify the swap partition you need to modify partition b. You will also need to modify partition “e”,so that it begins right after the end of “b”. Partitions “c” and “d” will be left unchanged.
You will now create a 150 MB (307200 sectors) swap partition; this means that “b” will start at sector2524032 and end at sector 2831231 (2524032+307200-1).
id: Size Offset End FStype Bsize Fsize Mount point--- ---- ------ --- ------ ----- ----- -----------a: 435453 2088579 2524031 4.2BSD 8192 1024 /b: 307200 2524032 2831231 swap
23

Chapter 4 Example Installation
...
The newly freed space will be assigned to partition “e”, which will have: start = 2831232, size =3450624 and end = 6281855. These values have been calculated as follows: “start” is the sectorimmediately following the end sector of partition “b”; “end” is equal to the last sector of the NetBSDpartition; “size” is given by: End - Offset + 1.
id: Size Offset End FStype Bsize Fsize Mount point--- ---- ------ --- ------ ----- ----- -----------a: 435453 2088579 2524031 4.2BSD 8192 1024 /b: 307200 2524032 2831231 swap...e: 3450624 2831232 6281855 4.2BSD 8192 1024 /usr
The preceding example shows the disklabel that you want. With option “b” and “e” you can input thedata that you have calculated.
This is depicted in Figure 4-16.
Figure 4-16. Modifying a BSD partition
You should set the file system (FS) kind first. Then set the other values.
The current values for partition b are:
Size Offset End FStype Bsize Fsize Mount point --------- --------- --------- ------ ----- ----- ----------- b: 788256 2524032 3312287 swap
****************** * Change what? * * * *>a: FS kind * * b: Offset/size * * c: Bsize/Fsize * * d: Mount point * * x: Exit * ******************
Figure 4-17 shows the modified disklabel.
24

Chapter 4 Example Installation
Figure 4-17. Modified disklabel
We now have your BSD-disklabel partitions as (Size and Offset in sec): Size Offset End FStype Bsize Fsize Mount point -------- ---------- --------- ------ ----- ----- -----------a: 435453 2088579 2524031 4.2BSD 8192 1024 /b: 307200 2524032 2831231 swapc: 4193277 2088579 6281855 unusedd: 6281856 0 6281855 unusede: 3450624 2831232 6281855 4.2BSD 8192 1024 /usrf: 0 0 0 unusedg: 0 0 0 unusedh: 0 0 0 unused
************************************** * a: Change a * * b: Change b * * c: NetBSD partition - can’t change * * d: Whole disk - can’t change * * e: Change e * * f: Change f * * g: Change g * * h: Change h * *>i: Set new allocation size * * x: Exit * **************************************
Partition sizes: it is very difficult to give a general rule to decide how many partitions you shouldcreate and their best sizes: this depends on the intended usage of the computer (server, workstation,mail server, ...). This is why I recommend, for a first time installation, to stick with the sysinstgenerated defaults. A complex server will probably need a more sofisticated partitioning; those whodeal with this type of problems will also know the answers.
When you are happy with the result, you can select option “x” to save and exit. You are now back inFigure 4-14 where you can choose option “b”.
4.1.8 Final operationsThe difficult part (creating the BIOS and the BSD partitions) is now over; the remaining part of theinstallation is much simpler. Now you can choose a name for the hard disk (the default name is mydisk)and confirm the operations that you have done.
Note: all that was done until now has not yet been committed to disk: it is still possible to changeyour mind and go back to the main sysinst menu leaving the disk unchanged.
sysinst will now create the partitions and the file systems with fdisk, newfs, fsck and installboot andthen we will install the NetBSD sets.
4.1.9 Choosing the installation mediaYou have finished the first and most difficult part of the installation. In the next step you will choose thetype of installation, which can be full, which installs all the sets, or custom, which enables you to choosethe sets to be installed. If you don’t have a shortage of space on the hard disk I suggest to choose the
25

Chapter 4 Example Installation
former option. In this example option custom will be used only to show what it looks like. This bringsyou to Figure 4-18.
Figure 4-18. Selecting the sets
The following is the list of distribution sets that will be used.
Distribution set Use?------------------ ----Generic Kernel: Yes +*****************************+Base : Yes * Selection toggles inclusion *System (/etc) : Yes * *Compiler : Yes *>a: Kernel *Games : Yes * b: Base *Manuals : Yes * c: System (/etc) *Miscellaneous : Yes * d: Compiler Tools *Text tools : Yes * e: Games *X11 clients : Yes * f: Online Manual Pages *X11 fonts : Yes * g: Miscellaneous *X11 servers : Yes * h: Text Processing Tools *X11 contrib : Yes * i: X11 base and clients *X programming : Yes * j: X11 fonts *X11 misc : Yes * k: X11 servers * * l: X contrib clients * * m: X11 programming * * n: X11 misc * * x: Exit * +*****************************+
The first three sets are mandatory: without them the system can’t work. You can toggle the installation ofthe remaining sets using the menu options. Initially all sets are selected for installation, which is the sameas the aforementioned full option. Leave all the sets on and proceed to the next step with option “x: Exit”.
sysinst then asks if you want to see filenames during the extraction from the sets.
Now sysinst needs to find the NetBSD sets (the .tgz files) and you must supply this information. Themenu offers several choiches:
Figure 4-19. Installation media
Your disk is now ready for installing the kernel and the distribution sets.As noted in your INSTALL notes, you have several options. For ftp or nfs,you must be connected to a network with access to the proper machines. Ifyou are not ready to complete the installation at this time, you may select"none" and you will be returned to the main menu. When you are ready at alater time, you may select "upgrade" from the main menu to complete theinstallation.
******************* * Select medium * * * *>a: ftp * * b: nfs * * c: cdrom * * d: floppy * * e: unmounted fs * * f: local dir * * g: none * *******************
The options are explained in detail in the INSTALL document. It is also possible to install from anunmounted filesystem (provided that it is of a type recognised by the install kernel): this means that, forexample, it is possible to copy all the sets to an existing MS-DOS partition and install from there.
26

Chapter 4 Example Installation
Figure 4-20. CD-ROM installation
Enter the CDROM device to be used and directory on the CDROM where thedistribution is located. Remember, the directory should contain the .tgzfiles.
device: cd0 directory: /i386/binary/sets
**************** * Change * * * *>a: Device * * b: Directory * * c: Continue * ****************
Selecting “cdrom”, sysinst asks the name of the device (for example cd0) and mounts it automatically.You should also input the pathname to the installation sets on the CD-ROM if it is different from thedefault value. If, for example, the NetBSD distribution is in the NetBSD-1.5 directory you must modifythe pathname, using option “b”, like this:
/NetBSD-1.5/i386/binary/sets
Note: if you are using a non US keyboard you’ll have to be careful when you type the “/” character.See Section 3.3.1.
The CD-ROM device name: if you don’t know the name of the CD-ROM device, you can find it in thefollowing way:
1. Press Ctrl-Z to pause sysinst and go to the shell prompt (that’s a nice feature!)
2. Type the command:
# cat /kern/msgbuf
This will show the kernel startup messages, including the name of the CD-ROM device (forexample cd0).
3. If the display scrolls too quickly, you can also use the ed editor.
# ed /kern/msgbuf
4. Go back to the installation program with the command:
# fg
27
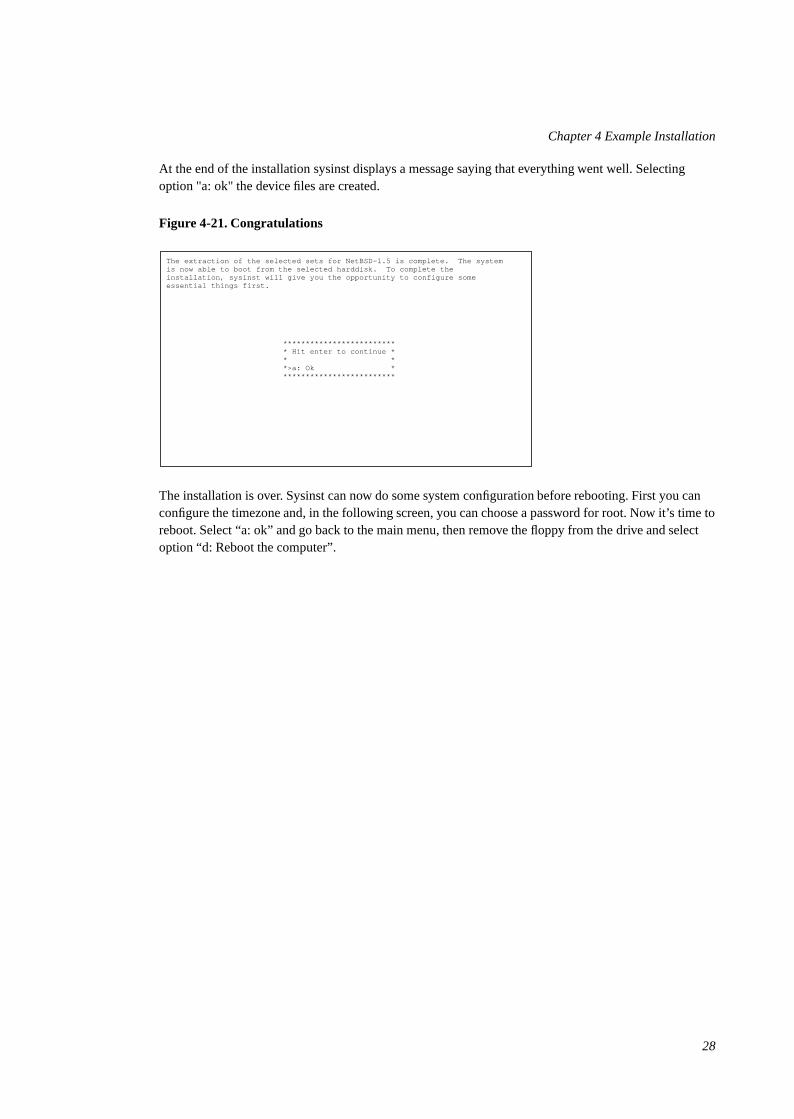
Chapter 4 Example Installation
At the end of the installation sysinst displays a message saying that everything went well. Selectingoption "a: ok" the device files are created.
Figure 4-21. Congratulations
The extraction of the selected sets for NetBSD-1.5 is complete. The systemis now able to boot from the selected harddisk. To complete theinstallation, sysinst will give you the opportunity to configure someessential things first.
************************* * Hit enter to continue * * * *>a: Ok * *************************
The installation is over. Sysinst can now do some system configuration before rebooting. First you canconfigure the timezone and, in the following screen, you can choose a password for root. Now it’s time toreboot. Select “a: ok” and go back to the main menu, then remove the floppy from the drive and selectoption “d: Reboot the computer”.
28
Chapter 5
The first boot
After installing the computer will reboot from the hard disk: if everything went well you’ll be looking atthe login prompt within a few seconds (or minutes, depending on your hardware). The system is not yetconfigured but don’t worry: configuration is very easy and this approach is not inconvenient but, instead,gives you a lot of flexibility. You’ll see how to quickly configure everyhing and, in the meantime, you’lllearn how the system works; in the future, in case of trouble you’ll know where to look.
5.1 If something went wrongIf the system doesn’t boot it could be that the boot manager was not installed correctly or that there is aproblem with the MBR (Master Boot Record). Reboot the machine from the boot floppy and when yousee the prompt:
booting fd0a:netbsd - starting in ...
press the space bar during the 5 second countdown; the boot stops and a prompt is displayed. You canhave a basic help with the “?” key or with the “help” command.
type "?" or "help" for help.> ?commands are:boot [xdNx:][filename] [-adrs]
(ex. "sd0a:netbsd.old -s")ls [path]dev xd[N[x]]:help|?quit> boot wd0a:netbsd
The system should now boot from the hard disk instead of the foppy. If NetBSD boots correctly from thehard disk, there is probably a Master Boot Record problem: you can install the boot manager or modifyits configuration with the fdisk -B command. See Section 25.4 for a detailed description.
5.2 LoginFor the first login you will use the root superuser, which is the only user defined at the end of theinstallation. At the password prompt write the password for root that you have defined during theinstallation. If you haven’t defined a password, just press Enter.
NetBSD/i386 (Amnesiac) (ttyE0)
29

Chapter 5 The first boot
login: rootpassword
...We recommend creating a non-root account and using su(1) for root access.#
5.3 Changing the keyboard layoutThe keyboard has still the US layout; if you have a different keyboard it’s better to change its layout now,before starting to configure the system. For example, to use the italian keyboard, give the followingcommand:
# wsconsctl -k -w encoding=itencoding -> it
A full list of keyboard mappings is in /sys/dev/wscons/wsksymdef.h but some of the morecommon maps are:
• de
• dk
• fr
• it
• jp
• sv
• uk
• us
This setting will last until the next reboot. To make it permanent, add the previous command at the end ofthe /etc/rc.local: it will be executed automatically the next time you reboot.
# echo "wsconsctl -k -w encoding=it" >> /etc/rc.local
Note: be careful and type two “>” characters. If you type only one “>”, you will overwrite the fileinstead of adding a line.
There is also a better approach to the keyboard layout problem: you can compile a new kernel which usesyour preferred layout by default. This will be described in Chapter 9.
30

Chapter 5 The first boot
5.4 The man commandIf you have never used a Unix(-like) operating system before, your best friend is now the man command,which displays a manual page: the NetBSD manual pages are amongst the best and most detailed youcan find, although they are very technical.
man name shows the man page of the “name” command and man -k name shows a list of man pagesdealing with “name” (you can also use the apropos command.)
To learn the basics of the man command, type:
# man man
The manual is divided in nine sections, containing not only basic infomations on commands but also thedescriptions of some NetBSD features and structures. For example, take a look at the hier(7) man page,which describes in detail the layout of the filesystem used by NetBSD.
# man hier
Other similar pages are release(7) and packages(7). Each section of the manual has an intro(8) man pagedescribing its content. For example, try:
# man 8 intro
Example 5-1. Manual sections
1. general commands (tools and utilities)
2. system calls and error numbers
3. C libraries
4. special files and hardware support
5. file formats
6. games
7. miscellaneous information pages
8. system maintenance and operation commands
9. kernel internals
A subject may appear in more than one section of the manual; to view a specific page, supply the sectionnumber as an argument to the man command. For example, time appears in section 1 (the time usercommand), in section 3 (the time function of the C library) and in section 9 (the time system variable).To see the man page for the time C function, write:
# man 3 time
To see all the available pages:
# man -a time
31

Chapter 5 The first boot
5.5 Changing the root passwordIf you haven’t defined a password for root during installation (which was not possible on pre 1.5systems) now it’s time to do it, using the passwd command.
# passwdChanging local password for root.New password:Retype new password:
Password are not displayed on the screen while you type. Later we will see how to add other accounts onthe system.
5.6 Changing the shellThe default shell for root is csh; if this doesn’t mean anything to you, you should begin studying cshwith (csh(1)): it’s a good interactive shell although it lacks history editing (have a look at tcsh, bash oreven the NetBSD /bin/sh for this). If you want to change your shell, use the chsh(1) command. Theshells available on NetBSD after installation are:
• csh
• sh
• ksh
The new shell will come into effect the next time you login. In the mean time, you can issue thefollowing command:
# set filec
that enables filename completion on the command line (with the ESC key; use Ctrl+D for a list ofpossible completions.)
You can also install other shells on the system, if you want to: tcsh, bash, zsh and other shells areavailable in the package collection (which we shall examine later).
This is a good time to create the shell’s initialization files (.chsrc, .login, ...)
5.7 System timeNetBSD, like all UNIX systems, uses a system clock based on Greenwich time (UTC) and this is whatyou should set your system clock to. If you want to keep the system clock set to the local time (because,for example, you have a dual boot system with Windows installed), you must notify NetBSD, modifyingthe rtc_offset system variable. You can edit the kernel configuration file and recompile the kernel oryou can patch directly the existing kernel (the new time will be effective only after rebooting): this iseasier than you think. For example:
# gdb --write /netbsdGNU gdb 4.17
32

Chapter 5 The first boot
Copyright 1998 Free Software Foundation, Inc....This GDB was configured as "i386--netbsd"...(no debugging symbols found)...(gdb) set rtc_offset=-60(gdb) quit
The value supplied (-60) is the number of minutes west of UTC.
To display the current setting of the rtc_offset variable:
# sysctl kern.rtc_offsetkern.rtc_offset = -60
Now the kernel knows how to convert the time of the PC clock in the UTC system time but you must stillconfigure the system for your local time zone (which you will find in /usr/share/zoneinfo/.) If youhave already done this during the installation you can skip this step (although it is better to check that thesetting is correct.) For example, for Italy:
# rm -f /etc/localtime# ln -s /usr/share/zoneinfo/Europe/Rome /etc/localtime
Once everything is set up correctly, you can change the time with the following command:
# date [[[[[cc]yy]mm]dd]hh]mm
5.8 Basic configuration /etc/rc.conf
NetBSD uses the /etc/rc.conf for system configuration at startup: this file determines what will beexecuted when the system boots. Understanding this file is very important.
Starting from version 1.5 of NetBSD the administration of rc.conf has changed. In prior versions all thedefault values were stored in /etc/rc.conf and the user was supposed to modify directly this file;version 1.5 introduced the /etc/defaults/rc.conf file, which contains the default values. To modifya default value the user must write the new value in /etc/rc.conf: this definition overrides the one in/etc/defaults/rc.conf (which stays unchanged.)
Understanding this file is very important. The manual page contains a detailed description of all theoptions.
# man rc.conf
The first modifications are:
• Set “rc_configured=YES” (this modification might already have been done by the installationsoftware.)
• Set “lpd=YES” to activate the printer spooler daemon
• Define an hostname for your machine (use a fully qualified hostname). If you have a standalonemachine you can use any name (for example, woody.toys.net.) If your machine is connected to anetwork, you should supply the correct network name.
33

Chapter 5 The first boot
Instead of defining the host name in the configuration file, you can write it in the /etc/myname file:the result is the same.
Note: Make sure that the hostname is resolvable, either using DNS or /etc/hosts, someprograms do not work with an unresolvable hostname.
5.9 Rebooting the systemIn this first session you have
• Configured the keyboard
• Changed the root password
• Changed root’s shell (optional)
• Changed the system time and the RTC offset
• Defined the local time
• Configured /etc/rc.conf
Now it’s time to reboot the system, with the following command:
# reboot
34

Chapter 6
The second boot
During the first boot you have set up a basic system configuration. This chapter describes some commoncommands and operations.
6.1 dmesgAt system startup the kernel displays a long sequence of messages on the screen: these messages giveinformation about the kernel status (for example, available memory) and the peripherals that have beendetected on the system. This information is very important for diagnosing hardware or configurationproblems, and for determining the name of the devices for the peripherals (for example you can check ifyour network card has been detected as ne0 or ne1.) Usually these messages scroll on the screen too fastto be useful, but you can use the dmesg(8) command to view them again.
# dmesg | more
If something on your system doesn’t appear to work correctly and you ask for help on one of theNetBSD mailing lists, always remember to include the relevant dmesg output in your post: it will helpother people diagnose your problem.
During the boot process NetBSD also writes a copy of the dmesg output to/var/run/dmesg.out. This feature is useful because the system will scroll out “old”messages over time.
6.2 Mounting the CD-ROMNew users are often surprised by the fact that although the installation program recognized and mountedtheir CD-ROM perfectly, the installed system seems to have “forgotten” how to use the CD-ROM. Thereis no special magic for using a CD-ROM: you can mount it as any other file system, all you need to knowis the device name and some options to the mount(8) command. You can find the device name with theaforementioned dmesg(8) command. For example, if dmesg(8) displays:
# dmesg | grep ^cdcd0 at atapibus0 drive 1: <ASUS CD-S400/A, , V2.1H> type 5 cdrom removable
the device name is cd0, and you can mount the CD-ROM with the following commands:
# mkdir /cdrom# mount -t cd9660 -o ro /dev/cd0a /cdrom
35

Chapter 6 The second boot
in most cases NetBSD can also automatically detect the filesystem type. In most cases the followingcommand is sufficient:
# mount /dev/cd0a /cdrom
To make things easier, you can add a line to the /etc/fstab file.
/dev/cd0a /cdrom cd9660 ro,noauto 0 0
Without the need to reboot, you can now mount the cdrom with:
# mount /cdrom
When the cdrom is mounted you can’t eject it manually; you’ll have to unmount it before you can do that:
# umount /cdrom
There is also a software command which unmounts the cdrom and ejects it:
# eject /dev/cd0a
6.3 Mounting the floppyTo mount a floppy you must know the name of the floppy device and the file system type of the floppy.Read the fdc(4) manpage for more information about device naming. For example, to read and write afloppy in MS-DOS format you use the following command:
# mount -t msdos /dev/fd0a /mnt
Instead of /mnt, you can use another directory of your choice; you could, for example, create a /floppydirectory like you did for the cdrom. If you do a lot of work with MS-DOS floppies, you will want toinstall the mtools package, which enables you to access a MS-DOS floppy (or hard disk partition)without the need to mount it. It is very handy for quickly copying a file from/to floppy.
6.4 Accessing a DOS/Windows partitionIf NetBSD shares the hard disk with MS-DOS or Windows, it is possible modify the disklabel and makethe DOS partitions visible from NetBSD. First, you must determine the geometry of the DOS partition ,for example using fdisk(8).
# fdisk wd0NetBSD disklabel disk geometry:cylinders: 6232 heads: 16 sectors/track: 63 (1008 sectors/cylinder)...Partition table:0: sysid 6 (Primary ’big’ DOS, 16-bit FAT (> 32MB))
start 63, size 2088516 (1019 MB), flag 0x80beg: cylinder 0, head 1, sector 1end: cylinder 259, head 0, sector 4
36

Chapter 6 The second boot
1: sysid 169 (NetBSD)start 2088579, size 4193277 (2047 MB), flag 0x0
beg: cylinder 259, head 0, sector 4end: cylinder 779, head 0, sector 1
2: <UNUSED>3: <UNUSED>
Note: this example uses the wd0 hard disk: substitute the device for your hard disk.
The output of the fdisk command shows that the DOS partition begins at sector 63 and has a size of2088516 sectors. The NetBSD partition begins at sector 2088579 (2088579 = 2088516 + 63). You willuse this data to modify the BSD disklabel: all you have to do is add one line which defines the positionand type of the MS-DOS partition, choosing one of the still unused partition id letters. Use the disklabelcommand to modify the disklabel. If you give the -e option to disklabel it will invoke your favouriteeditor ($EDITOR) to modify the disklabel. For example:
# disklabel -e wd0...# size offset fstype [fsize bsize cpg]...
e: 3450624 2831232 4.2BSD 1024 8192 16 # (Cyl. 2808* - 6231)f: 2088516 63 MSDOS
The partitions from “a” to “e” were already used by NetBSD and the first available id was “f”. The “size”and “offset” fields have been filled with the previously calculated numbers. Next, the mount point mustbe created. For example:
# mkdir /msdos
finally, a line will be added to the /etc/fstab file.
/dev/wd0f /msdos msdos rw,noauto 1 3
Note: a disklabel can also be generated automatically using the mbrlabel command. Please readthe mbrlabel(8) manpage for more information.
Now the MS-DOS partition can be mounted with a simple command:
# mount /msdos
With this method you can mount FAT and FAT32 partitions. If you want to mount the partition(s)automatically at startup, remove the noauto option from /etc/fstab.
/dev/wd0f /msdos msdos rw 1 3
37

Chapter 6 The second boot
6.5 Adding usersIt’s time to add new users to the system, since you don’t want to use the root account for your daily work.NetBSD doesn’t have a program to create new users; instead you should read the adduser(8) manpage.
# man adduser
Following the instructions on the page you’ll also begin using vipw(8) which is the basic administrationtool for new accounts under NetBSD.
Note: NetBSD has a set of user administration tools; a useradd(8) command and other commandstoo. For example, to create a new user:
# useradd -m joe
The defaults for the useradd(8) command can be changed; see the useradd(8) man page.
If you have an earlier version of NetBSD and don’t want to add new accounts manually you caninstall a package like, for example, addnerd from the packages collection. I suggest that you take alook at the man page and add at least one account manually, though.
Any accounts that can su to root require the account to be in the wheel group. This can be done when theaccount is created by specifying a secondary group.
# useradd -m joe -G wheel
Note: If the system uses ssh, direct root access via ssh is disabled by default.
6.6 Shadow passwordsShadow passwords are enabled by default on NetBSD and can’t be disabled: all the passwords in/etc/passwd contain an “*”; the encrypted passwords belong to another file, /etc/master.passwd,that can be read only by root. When you start vipw(8) to edit the password file, the program opens a copyof /etc/master.passwd; when you exit, vipw(8) checks the validity of the copy, creates a new/etc/passwd and installs a new /etc/master.passwd file. Finally, vipw(8) launches pwd_mkdb(8),which creates the files /etc/pwd.db and /etc/spwd.db, two databases equivalent to /etc/passwd
and /etc/master.passwd but faster to process.
As you can see, passwords are handled automatically by NetBSD; if you use vipw(8) to edit thepassword file you don’t need any special administration procedure.
It’s very important to always use vipw and the other tools for account administration (chfn(1), chsh(1),chpass(1), passwd(1)) and to never modify directly /etc/master.passwd.
38

Chapter 6 The second boot
6.7 Stopping and rebooting the systemThe command used to halt and/or reboot the system is shutdown(8).
# shutdown -h now# shutdown -r now
Two other commands perform the same tasks:
# halt# reboot
halt(8), reboot(8), and shutdown(8) are not synonyms: the latter is more sophisticated. On a multiusersystem you should really use shutdown(8); you can also schedule a shutdown, notify users, etc. For amore detailed description, see shutdown(8), halt(8) and reboot(8).
39

Chapter 7
Printing
This chapter describes a simple configuration for printing, using an HP Deskjet 690C connected to thefirst parallel port as an example. First, the system will be configured to print text documents, and next theconfiguration will be extended to print PostScript documents using the Ghostscript program.
7.1 Enabling the printer daemonAfter installation it is not yet possible to print, because the lpd printer spooler daemon is not enabled. Toenable lpd, one line in the /etc/rc.conf file must be changed from:
lpd=NO
to
lpd=YES
The change will come into effect at the next boot, but the daemon can be started manually now:
# lpd -s
To check if lpd is active, type the following command:
# ps ax | grep lpd179 ?? Is 0:00.01 lpd
If you don’t see an entry for lpd in the output of the previous command, the daemon is not active.
Before configuring /etc/printcap it is better to make a printer test, to check if the connection isworking. For example:
# lptest 20 10 > /dev/lpt0
To see what the output should look like, try the same command without redirecting the output to theprinter:
# lptest 20 10
A frequent problem is that the output on the printer is not correctly aligned in columns but has a“staircase” configuration. This usually means that the printer is configured to begin a new line at the leftmargin after receiving both a <CR> (carriage return, ASCII 13) character and a <LF> (line feed, ASCII10) character. NetBSD only sends a <LF> character. You can fix this problem:
• changing the configuration of the printer
40

Chapter 7 Printing
• using a simple printer filter (described later)
Note: in the previous example the lpd spooler is not involved because the program output is sentdirectly to the printer device (/dev/lpt0) and is not spooled.
7.2 Configuring /etc/printcap
This section explains how to configure the example printer to print text documents.
The printer must have an entry in the /etc/printcap file; the entry contains the printer id (the name ofthe printer) and the printer description. The lp id, is the default used by many programs.
Example 7-1. /etc/printcap
lp|local printer|HP DeskJet 690C:\:lp=/dev/lpa0:sd=/var/spool/lpd/lp:lf=/var/log/lpd-errs:\:sh:pl#66:pw#80:if=/usr/local/libexec/lpfilter:
The file format and options are described in detail in printcap(5). Please note that an input filter has beenspecified (with the if option) which will take care of eliminating the staircase problem.
if=/usr/local/libexec/lpfilter
Printer driver and HP printers: Example 7-1 uses the lpa# device (polled driver) for the printer,instead of the lpd# (interrupt driven driver). Using interrupts there is a communication problem withsome printers, and the HP Deskjet 690C is one of them: printing is very slow and one PostScriptpage can take hours. The problem is solved using the lpa driver. It is also possible to compile acustom kernel where lpd is polled.
The printcap entry for the printer also specifies a spool directory, which must be created; this directorywill be used by the lpd daemon to accumulate the data to be printed.
# cd /var/spool/lpd# mkdir lp# chown daemon:daemon lp# chmod 770 lp
The only missing part is the lpfilter input filter, which must be written. The only task performed bythis filter is to configure the printer for the elimination of the staircase problem before sending the text tobe printed. The printer used in this example requires the following initialization string: “ESC &k2G”.
Example 7-2. /usr/local/libexec/lpfilter
#!/bin/sh# Treat LF as CR+LFprintf "\033&k2G" && cat && exit 0
41

Chapter 7 Printing
exit 2
# cd /usr/local/libexec# chmod 755 lpfilter*
Note: there is another filter that can be used:
\:if=/usr/libexec/lpr/lpf:
This filter is much more complex than the one presented before. It is written to process the output ofnroff and handles underline and overprinting, expands tab characters and converts LF to CR + LF.The source to this filter program can be found in /usr/src/usr.sbin/lpr/filters/lpf.c.
The lptest command can be run again now, this time using the lpd spooler.
# lptest 20 10 | lpr -h
The lpr program prints text using the spooler to send data to the printer; the -h option turns off theprinting of a banner page (not really necessary, because of the sh option in /etc/printcap).
You can solve the staircase problem using a variety of tools and methods, for example C programs. Thesolution presented has the benefit of being very simple.
7.3 Configuring GhostscriptNow that basic printing works, the functionality for printing PostScript files can be added. The simpleprinter used in this example does not support native printing of PostScript files; a program must be usedcapable of converting a PostScript document in a sequence of commands that can be understood by theprinter. The Ghostscript program, from the packages collection, can be used to this purpose (seeChapter 10). This section explains how to configure Ghostscript to print PostScript files on the HPDeskjet 690C.
A second id for the printer will be created in /etc/printcap: this new id will use a different inputfilter, which will call Ghostscript to perform the actual print of the PostScript document. Therefore, textdocuments will be printed on the lp printer and PostScript documents on the ps printer: both entries usethe same physical printer but have different printing filters.
The same result can be achieved using different configurations. For example, a single entry with a filtercould be used: the filter should be able to automatically determine the format of the document beingprinted and use the appropriate printing program. This approach is simpler but leads to a more complexfilter; if you like it you should consider installing the magicfilter program from the packages collection: itdoes this and many other things automatically.
The new /etc/printcap file looks like this:
Example 7-3. /etc/printcap
lp|local printer|HP DeskJet 690C:\:lp=/dev/lpa0:sd=/var/spool/lpd/lp:lf=/var/log/lpd-errs:\
42

Chapter 7 Printing
:sh:pl#66:pw#80:if=/usr/local/libexec/lpfilter:
ps|Ghostscript driver:\:lp=/dev/lpa0:sd=/var/spool/lpd/ps:lf=/var/log/lpd-errs:\:mx#0:sh:if=/usr/local/libexec/lpfilter-ps:
Option mx#0 is very important for printing PostScript files because it eliminates size restrictions on theinput file; PostScript documents tend to be very big. The if option points to the new filter. There is also anew spool directory.
The last step is the creation of the new spool directory and of the filter program.
# cd /var/spool/lpd# mkdir ps# chown daemon:daemon ps# chmod 770 ps
The filter program for PostScript output is more complex than the text base one: the file to be printed isfed to the interpreter which, in turn, sends to the printer a sequence of commands in the printer’s controllanguage. We have achieved to transform a cheap color printer in a device suitable for PostScript output,by virtue of the NetBSD operating system and some powerful freeware packages. The options used toconfigure Ghostscript are described in the Ghostscript documentation: cdj550 is the device used to drivethe HP printer.
Example 7-4. /usr/local/libexec/lpfilter-ps
#!/bin/sh# Treat LF as CR+LFprintf "\033&k2G" || exit 2# Print the postscript file/usr/pkg/bin/gs -dSAFER -dBATCH -dQUIET -dNOPAUSE -q -sDEVICE=cdj550 \-sOutputFile=- -sPAPERSIZE=a4 - && exit 0exit 2
To summarize: two different printer names have been created on the system, which point to the samephysical printer but use different options, different filters and different spool directories. Text files andPostScript files can be printed. To print PostScript files the Ghostscript package must be installed on thesystem.
7.4 Printer management commandsThis section lists some useful BSD commands for printer and print jobs administration. Besides thealready mentioned lpr and lpd commands, we have:
lpq
examine the printer job queue.
lprm
delete jobs from the printer’s queue.
43

Chapter 7 Printing
lpc
check the printing system, enable/disable printers and printer features.
7.5 Remote printingIt is possible to configure the printing system in order to print on a printer connected to a remote host.Let’s say that, for example, you work on the wotan host and you want to print on the printer connected tothe loge host. The /etc/printcap file of loge is the one of Example 7-3. From wotan it will bepossible to print Postscript files using Ghostscript on loge.
The first step is to enable on the loge host the print jobs submitted from the wotan host. This isaccomplished inserting a line with the wotan host name in the /etc/hosts.lpd file on loge. Theformat of this file is very simple: each line contains the name of a host to be
Next, the /etc/printcap file on wotan must be configured in order to send print jobs to loge. Forexample:
lp|line printer on loge:\:lp=:sd=/var/spool/lpd/lp:lf=/var/log/lp-errs:\:rm=loge:rp=lp
ps|Ghostscript driver on loge:\:lp=:sd=/var/spool/lpd/lp:lf=/var/log/lp-errs:\:mx#0:\:rm=loge:rp=ps
There are four main differences between this configuration and the one of Example 7-3.
1. The definition of “lp” is empty.
2. The “rm” entry defines the name of the host to which the printer is connected.
3. The “rp” entry defines the name of the printer connected to the remote host.
4. It is not necessary to specify input filters because the definitions on the loge host will be used.
Now the print jobs for “lp” and “ps” on wotan will be sent automatically to printer connected to loge.
44

Chapter 8
Using the build.sh Front End
NetBSD 1.6 and forward comes equipped with an improved toolchain that can be used to easily performsystem builds, new kernels, and cross compile with a relative amount of ease. In this chapter, the use ofthe build.sh cross compiling a kernel, cross compiling a build, and creating a release are covered.Native kernel builds are covered in Chapter 9.
Before we do anything, the sources must be retrieved. See Chapter 19 for getting the sources.
8.1 Building the toolsOnce the sources have been obtained, the native platform tools have to be built before doing anythingelse. Doing this is simple, we will use the default object directory.
# mkdir /usr/obj# cd /usr/src# ./build.sh tools
If the tools have already been built and they only need updated, then the update option can be used toonly rebuild tools that have changed.
# ./build.sh -u tools
Now that the native tools have been built, the tools for another target system can be created. In ourexample, sparc64 will be used.
# ./build.sh -m sparc64 tools
When the tools are finished building, information about them and several environment variables isprinted out:
Summary of results:build.sh command: ./build.sh -u -m sparc64 toolsbuild.sh started: Mon Jul 28 11:08:30 UTC 2003Bootstrapping nbmakeMACHINE: sparc64MACHINE_ARCH: sparc64TOOLDIR path: /usr/src/tooldir.NetBSD-1.6U-i386DESTDIR path: /usr/src/destdir.sparc64RELEASEDIR path: /usr/src/releasedirCreated /usr/src/tooldir.NetBSD-1.6U-i386/bin/nbmakemakewrapper: /usr/src/tooldir.NetBSD-1.6U-i386/bin/nbmake-sparc64Updated /usr/src/tooldir.NetBSD-1.6U-i386/bin/nbmake-sparc64Tools built to /usr/src/tooldir.NetBSD-1.6U-i386build.sh started: Mon Jul 28 11:08:30 UTC 2003
45

Chapter 8 Using the build.sh Front End
build.sh ended: Mon Jul 28 11:11:14 UTC 2003
Now that the tools for sparc64 have been built, it is time to cross compile the kernel.
8.2 Cross Compiling a KernelA cross compiled kernel can be done by either going to the architecture conf directory and explicitlycalling the cross compiled tools or the easier method of using build.sh.
Configuring the kernel is the same:
# cd /usr/src/sys/arch/sparc64/conf# cp GENERIC MYKERNEL
Then edit MYKERNEL. Once finished, all that needs to be done is to use build.sh to build the kernel (itwill also configure it):
# cd /usr/src# ./build.sh -u -m sparc kernel=MYKERNEL
Notice that update was specified, the tools are already built, there is no reason to rebuild all of the tools.Once the kernel is built, build.sh will print out the location of it along with other information:
Summary of results:build.sh command: ./build.sh -u -m sparc64 toolsbuild.sh started: Mon Jul 28 11:08:30 UTC 2003Bootstrapping nbmakeMACHINE: sparc64MACHINE_ARCH: sparc64TOOLDIR path: /usr/src/tooldir.NetBSD-1.6U-i386DESTDIR path: /usr/src/destdir.sparc64RELEASEDIR path: /usr/src/releasedirCreated /usr/src/tooldir.NetBSD-1.6U-i386/bin/nbmakemakewrapper: /usr/src/tooldir.NetBSD-1.6U-i386/bin/nbmake-sparc64Updated /usr/src/tooldir.NetBSD-1.6U-i386/bin/nbmake-sparc64Building kernel without building new toolsBuilding kernel: MYKERNELBuild directory: /usr/src/sys/arch/i386/compile/MYKERNELKernels built from MYKERNEL:/usr/src/sys/arch/sparc64/compile/MYKERNEL/netbsd
build.sh started: Mon Jul 28 11:08:30 UTC 2003build.sh ended: Mon Jul 28 11:11:14 UTC 2003
8.3 Build & ReleaseBy now it is probably becoming clear that the toolchain actually works in stages. First is the native toolsbuild (which actually has a step before it, makewrappers), then a kernel. Since build.sh will attempt torebuild the tools at every invocation, using update saves time. It is also probably clear that outside of a
46

Chapter 8 Using the build.sh Front End
few options, the build.sh semantics are basically [ build.sh command ]. So, it stands to reason thatcreating a build and/or release, is a matter of using the right commands.
It should be no surprise that building and creating a release would look like the following:
# ./build.sh -u -m sparc build# ./build.sh -u -m sparc release
Looking at the information about environment variables (since so far only the defaults have been used), abuild would be at:
/usr/src/destdir.sparc64
The release would be located at:
RELEASEDIR path: /usr/src/releasedir
8.4 Environment VariablesNot unlike the old building method, the toolchain has a lot of variables that can be used to direct thingslike where certain files go, what (if any) tools are used and so on. A look in src/BUILDING covers mostof them. In this section two examples of changing default variables are given in two different ways.
8.4.1 Changing the Destination DirectoryMany people like to track current and perform cross compiles of architectures that they use. The logic forthis is simple, sometimes a new feature or device becomes available and someone may wish to use it. Bykeeping track of changes and building every now and again, one can be assured that they can create theirown release.
It is reasonable to assume that if one is tracking and building for more than one architecture, they mightwant to keep the builds in a different location than the default. There are two ways to go about this, use ascript to set the new DESTDIR, or simply do so interactively. In any case, it can be set the same way asany other variable (depending on your shell of course).
For the bourne or korn shells:
# export DESTDIR=/usr/builds/sparc64
For the c shell:
# setenv DESTDIR /usr/builds/shark
Simple enough. When the build is run, the binaries and files will be sent to /usr/builds.
8.4.2 Static BuildsThe NetBSD Toolchain builds dynamically by default. Many users still prefer to be able to buildstatically. Sometimes a small system can be created without having libs is a good example of a full static
47

Chapter 8 Using the build.sh Front End
build. If a particular build machine will always need one environment variable set in a particular way,then it is easiest to simply add the changed setting to /etc/mk.conf.
To make sure a build box always builds statically, simply add the following line to /etc/mk.conf:
LDSTATIC=-static
48

Chapter 9
Compiling the kernel
Most NetBSD users will, sooner or later, compile a customized kernel. This gives you several benefits:
• you can dramatically reduce kernel size and, therefore, memory occupation (for example, from 2.5MB to 1.2 MB). On version 1.5 of NetBSD compiling a custom kernel reduced the size from 4.7 MBto 1.9 MB.
• you can improve performance.
• you can tune the system.
• you can solve problems of detection/conflicts of peripherals.
• you can customize some options (for example keyboard layout, BIOS clock offset, ...)
• you can get a deeper knowledge of the system.
9.1 Installing the kernel sources
You can get the kernel sources from AnonCVS, see Chapter 19.
Be patient: this operation lasts many minutes, because the repository contains hundreds of files. Thesources live in /usr/src/sys; the symbolic link sys points to this directory. Therefore the followingcommands have the same effect:
# cd /usr/src/sys# cd /sys
Once the sources are checked out, you can create a custom kernel: this is not as difficult as you think. Infact, a new kernel can be created in a few steps which will be described in the following sections.
9.2 Italian keyboard layoutBefore compiling the kernel, Italian users should consider modifying the predefined layout for the italiankeyboard, which is defined in the source file /sys/dev/pckbc/wskbdmap_mfii.c. In the defaultlayout some characters useful for programmers are missing (for example, left and right braces and tilde).This is an alternative layout:
static const keysym_t pckbd_keydesc_it[] = {...
49

Chapter 9 Compiling the kernel
KC(8), KS_7, KS_slash, KS_braceleft,KC(9), KS_8, KS_parenleft, KS_bracketleft,KC(10), KS_9, KS_parenright, KS_bracketright,KC(11), KS_0, KS_equal, KS_braceright,KC(12), KS_apostrophe, KS_question, KS_grave,KC(13), KS_igrave, KS_asciicircum, KS_asciitilde,KC(26), KS_egrave, KS_eacute, KS_bracketleft, KS_braceleft,KC(27), KS_plus, KS_asterisk, KS_bracketright,KS_braceright,...
The previous layout defines the following mappings:
Keys Character
Alt Gr + 7 {
Alt Gr + 8 [
Alt Gr + 9 ]
Alt Gr + 0 }
Alt Gr + ’ ‘
Alt Gr + ì ~
Alt Gr + é [
Alt Gr + + ]
Shift + Alt Gr + è {
Shift + Alt Gr + + }
Console driver: starting with version 1.4, NetBSD uses the wscons multiplatform console driver tohandle screen, keyboard and mouse. Previous versions used pccons or pcvt. For a detaileddescription, see Chapter 14.
9.3 Recompiling the kernelTo recompile the kernel you must have installed the compiler set (comp.tgz).
Basic steps for kernel compilation
1. Build the toolchain
2. Create/modify the kernel configuration file
3. Configure the kernel
4. Generate dependencies
5. “Make” the kernel
6. Install the kernel
50

Chapter 9 Compiling the kernel
9.4 Build the toolchainThe NetBSD toolchain provides a simple mechanism for compiling the NetBSD system both natively orwhen the need arises, cross compiling for other targets. In this example, a native toolchain is built (asroot) by simply typing:
# cd /usr/src# ./build.sh tools
Once the tools are built, the kernel can be reconfigured and compiled.
9.5 Creating the kernel configuration file
Note: The directories described in this section are i386 specific. Users of other architectures mustsubstitute the appropriate directories (usually subdirectories of arch.)
The kernel configuration file defines the type, the number and the characteristics of the devices supportedby the kernel as well as several kernel configuration options. Kernel configuration files are located in the/sys/arch/i386/conf directory. The easiest way to create a new file is to copy an existing one andmodify it: usually the best choice on most platforms is the GENERIC configuration. In the configurationfile there are comments describing the options; a more detailed description is found in the options(4) manpage.
# cd /sys/arch/i386/conf/# cp GENERIC MYKERNEL# vi MYKERNEL
Kernel names: the names of the kernel configuration files are historically in all uppercase.
The modification of a kernel configuration file basically involves three operations:
1. support for hardware devices is included/excluded in the kernel (for example, SCSI support can beremoved if it is not needed.)
2. support for kernel features is enabled/disabled (for example, enable NFS client support, enableLinux compatibility, ...)
3. tuning kernel parameters.
Lines beginning with “#” are comments; lines are disabled by commenting them and enabled byremoving the comment character. It is better to comment lines instead of deleting them; it is alwayspossible uncomment them later.
The output of the dmesg(8) command can be used to determine which lines can be disabled. For eachline of the type:
XXX at YYY
51

Chapter 9 Compiling the kernel
both XXX and YYY must be active in the kernel configuration file. You’ll probably have to experiment abit before achieving a minimal configuration but on a desktop system without SCSI and PCMCIA youcan halve the kernel size.
You should also examine the options in the configuration file and disable the ones that you don’t need.Each option has a short comment describing it, which is normally sufficient to understand what theoption does. Many options have a longer and more detailed description in the options(4) man page.While you are at it you should set correctly the options for the national keyboard support and for localtime on the CMOS clock. For example, for Italy:
options RTC_OFFSET=-60...options PCKBD_LAYOUT="KB_IT"
The adjustkernel Perl script, which can be found at http://www.feyrer.de/Misc/adjustkernel, analizesthe output of dmesg(8) and automatically generates a minimal configuration file. To run it you need tohave Perl installed on your system. The installation of new software is described in detail in theChapter 10. If you want to install Perl now, download the pre-compiled package perl-5.00404.tgzand write the following command:
# pkg_add perl-5.00404.tgz
Now Perl is installed, configured and ready to work: easier than this it’s impossible...
You can now run the script with:
# cd /sys/arch/i386/conf# perl adjustkernel GENERIC > MYKERNEL
I tried this script and it worked very well, saving me a lot of manual editing. Beware that the script onlyconfigures the available devices: you must still configure manually the other options (eg. Linuxemulation, ...)
9.6 Configuring the kernelWhen you’ve finished modifying the kernel configuration file (which we’ll call MYKERNEL), you shouldissue the following command:
# config MYKERNEL
If MYKERNEL contains no errors, the config(8) program will create the necessary files for the compilationof the kernel, otherwise it will be necessary to correct the errors before running config(8) again.
9.7 Generating dependencies and recompilingDependencies generation and kernel compilation is performed by the following commands:
# cd ../compile/MYKERNEL# make depend
52
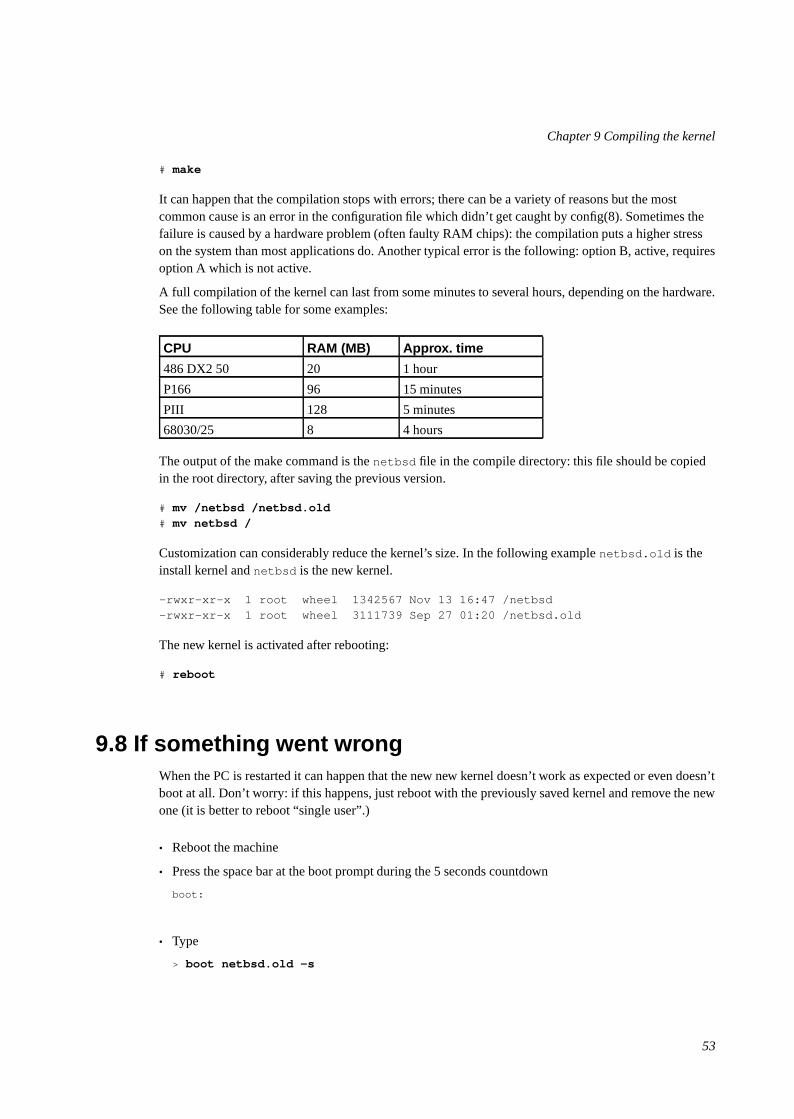
Chapter 9 Compiling the kernel
# make
It can happen that the compilation stops with errors; there can be a variety of reasons but the mostcommon cause is an error in the configuration file which didn’t get caught by config(8). Sometimes thefailure is caused by a hardware problem (often faulty RAM chips): the compilation puts a higher stresson the system than most applications do. Another typical error is the following: option B, active, requiresoption A which is not active.
A full compilation of the kernel can last from some minutes to several hours, depending on the hardware.See the following table for some examples:
CPU RAM (MB) Approx. time
486 DX2 50 20 1 hour
P166 96 15 minutes
PIII 128 5 minutes
68030/25 8 4 hours
The output of the make command is the netbsd file in the compile directory: this file should be copiedin the root directory, after saving the previous version.
# mv /netbsd /netbsd.old# mv netbsd /
Customization can considerably reduce the kernel’s size. In the following example netbsd.old is theinstall kernel and netbsd is the new kernel.
-rwxr-xr-x 1 root wheel 1342567 Nov 13 16:47 /netbsd-rwxr-xr-x 1 root wheel 3111739 Sep 27 01:20 /netbsd.old
The new kernel is activated after rebooting:
# reboot
9.8 If something went wrongWhen the PC is restarted it can happen that the new new kernel doesn’t work as expected or even doesn’tboot at all. Don’t worry: if this happens, just reboot with the previously saved kernel and remove the newone (it is better to reboot “single user”.)
• Reboot the machine
• Press the space bar at the boot prompt during the 5 seconds countdown
boot:
• Type
> boot netbsd.old -s
53

Chapter 9 Compiling the kernel
• Now issue the following commands to restore the previous version of the kernel:
# fsck /# mount /# mv netbsd.old netbsd# exit
54

Chapter 10
The package collection
The NetBSD package collection is a collection of tools that greatly simplify the compilation andinstallation of a huge quantity of free software for Unix systems. Only one or two commands arerequired to install a perfectly configured and working package.
The first contact with the NetBSD package system can generate a little confusion: apparently there aredifferent commands that do the same thing. The question is actually very simple: here are two ways toinstall a program. You can
• compile a package from source on your system. This is accomplished using the package collection,which can automatically download the sources from the Internet, compile them, install and configurethe program and the documentation with only two commands. The Package Collection consists of aset of makefiles and configuration files which use the standard Unix tools installed with the basesystem. Another nice feaure of the package system is that it can automatically check the requireddependencies and download and install the dependent packages too. The package collection is notinstalled automatically with the base system because it undergoes frequent updates: the followingsections explain how to download and install it on your system. The NetBSD site contains a verythorough technical description of the package system.
• install a precompiled and preconfigured version of the program. This is accomplished with thepkgtools set of utilities, which are installed with the base system. This method is faster but less flexiblethan the previous one (for example, you can’t configure the compile time options.) The pkgtools arealso used for the management of the installed programs (both from source and precompiled), whichare recorded in a database: you can, for example, list the installed packages, remove a package, etc.
If you only want to install precompiled programs, you don’t need to download the package collection.
The two aforementioned methods both require that someone else has “created a package”, i.e. has portedand configured a program for NetBSD. Although the package collection comprises more that 3500programs, it is possible that the one that you want is still not included. In this case you can compile itwithout using the package system and, once you get it working, create a package that can be added to thecollection: other users will benefit from your work.
10.1 Installing the package collectionBefore installing a program from source, you should download and install the package collection fromthe NetBSD site or from the mirror of your choice. This is described in the following steps.
55

Chapter 10 The package collection
1. Download the latest version of the package system sources, which include all the necessarymakefiles and configuration files, from ftp://ftp.NetBSD.org/pub/NetBSD/NetBSD-current/tar_files/.The file to be downloaded is pkgsrc.tar.gz.
2. Remove the existing collection from your hard disk (if you already have installed it) with thefollowing command:
# cd /usr# rm -rf pkgsrc
3. Install the collection that you have downloaded:
# tar -xzvpf pkgsrc.tar.gz -C /usr
The execution of the previous command can last many minutes, because of the huge number of(small) files that are extracted. At the end, the framework required for the installation of newprograms is ready and you can start installing them.
Note: by now it is probably clear that the previous commands installed the configuration filesrequired for the automatic installation of programs on your system: you have not yet installed theprograms! Basically, the system now has a list of the available packages and the instructions tofetch, compile and install them.
When you have installed the package collection you can browse it with Lynx or Netscape and read thedetails and the descriptions of all the available packages and package categories. For example:
$ cd /usr/pkgsrc$ lynx README.html
Don’t lose the distfiles
When you remove an existing package collection to install a newer version, don’t forget toback up your /usr/pkgsrc/distfiles subdirectory before removing /usr/pkgsrc.This directory is used to store downloaded source tarballs, if you remove this directory yoursystem has to download these tarballs one more time when pkgsrc needs them. If you don’twant to run this risk, you can instruct the system to use another directory for the distfiles,one which is not a subdirectory of /usr/pkgsrc. For example, create the new directory:
# mkdir /usr/pkgsrc_distfiles
Add the following line to /etc/mk.conf:
DISTDIR=/usr/pkgsrc_distfiles
Of course, you can use a directory of your choice instead of /usr/pkgsrc_distfiles.
You can configure many aspects of the package system with /etc/mk.conf. You can finda detailed example in the /usr/pkgsrc/mk/mk.conf.example file.
56

Chapter 10 The package collection
10.2 Updating the package collectionThe package collection is frequently updated: you can find a new version on the ftp site almost weekly.To update the collection on your system follow the same instructions as for first time installation.
Sometimes, when updating the package collection, it will be necessary to update the “pkgtools” utilitiestoo. You can easily spot if you need to do it: when you try to install a program the package systemcomplains that your pkgtools are outdated.
# make===> Validating dependencies for gqmpeg-0.6.3Your package tools need to be updated to 2000/02/02 versions.The installed package tools were last updated on 1999/01/01.Please make and install the pkgsrc/pkgtools/pkg_install package.*** Error code 1
The easiest way to update is:
# cd /usr/pkgsrc/pkgtools/pkg_install# make install
After this you can resume the installation of the package which issued the original error message.
Note: You can determine the required version examing the pkgsrc/mk/bsd.pkg.mk file: look for theline with:
PKGTOOLS_REQD = 20000202
(the 20000202 date is only an example.) This means that the version of the programs that you needis in the pkg_install-20000202.tar.gz file, that you can find on the NetBSD ftp site underpackages/distfiles/LOCAL_PORTS. pkg_install can be installed like any other package.
10.3 Example: installing a program from sourceThis section describes the installation of an example program: the cdrecord application. First, cd to the/usr/pkgsrc/sysutils/cdrecord directory.
10.3.1 Downloading the sourcesIf you are connected to the Internet, the Makefile will automatically fetch the required sources and youdon’t need to read this section.
Downloading from another machine
A very common scenario is that you download the package sources on another machinewith a fast Internet connection (for example at work) and then install them on your NetBSDsystem (for example at home.)
57

Chapter 10 The package collection
Otherwise you should take care of getting the tarballs yourself. In this case you need to know thename(s) of the tarball(s); look in the Makefile for the line
DISTNAME = cdrtools-2.0
The full name of the package is cdrtools-2.0.tar.gz.
You can achieve the same result in an easier way with the following commands:
# cd /usr/pkgsrc/sysutils/cdrecord# make fetch-list
which also show a list of sites from where the package can be downloaded.
10.3.2 Compiling and installingTo compile the package write
# cd /usr/pkgsrc/sysutils/cdrecord# make
The previous command fetches the source archive (if it is not already present in the distfiles directory),extracts the sources, applies the patches necessary to compile it on NetBSD and then builds the package.
To install it
# make install
The installation of the new program is recorded on your system: you can check with the pkg_info -acommand.
Then cdrecord package is ready for use; you can make some room removing the intermediate filescreated by the compiler:
# make clean# make clean-depends
The second command is needed if some dependent packages have been installed. The same result can beachieved with one command:
# make clean CLEANDEPENDS=1
10.4 Example: installing a binary packageI have already explained in the first part of this chapter that the package system can install program fromsource but can also install binary packages, prepared by someone else for NetBSD. This second form ofinstallation is faster because the compilation of the package is not needed and the tarballs for the binarypackage are usually smaller and faster to fetch. To install a binary package the package collection is notneeded: only the “pkgtools” utilities are needed.
58

Chapter 10 The package collection
The tarballs for the binary programs usually have the extension .tgz while the source tarballs usuallyend with .tar.gz.
Note: not all the source tarballs end with .tar.gz. The package system can handle other types ofpackages, for example .zip, .bz2, etc.
It is not strictly necessary to download binary packages prior to installation: you can also useftp://-URLs. For example:
ftp://ftp.NetBSD.org/pub/NetBSD/packages/1.4.2/i386/All/tcsh-6.09.00.tgz
If you don’t know what version of the package is available on the FTP site you can even leave out theversion inormation and pkg_add will pick the latest version on the FTP server. For example:
# pkg_add ftp://ftp.NetBSD.org/pub/NetBSD/packages/1.4.2/i386/All/tcsh
It is also possible to set PKG_PATH to a ;-separated list of path and URLs and then omit that part forpkg_add:
# PKG_PATH="/cdrom;/usr/pkgsrc/packages/All;ftp://ftp.NetBSD.org/pub/NetBSD/packages/1.4.2/i386/All"export PKG_PATH# pkg_add tcsh
The previous command installs the first tcsh binary package that it finds.
As an example, let’s install the texinfo program in precompiled form.
1. Copy gtexinfo-3.12.tgz in a temporary directory.
2. Give the following command
# pkg_add -v gtexinfo-3.12.tgz
3. Check that the package has been installed with the command
# pkg_info
4. Remove the file gtexinfo-3.12.tgz from the temporary directory.
Precompiled packages are very practical to use because they require a minimal effort and time forinstallation, but source packages give more control because their compilation options can be customized.The installation is somewhat longer, because of the compilation, and this could be critical on some(older) platforms.
Before installing a precompiled package with pkg_add, it is better to examine it with the pkg_infocommand. For example:
# pkg_info -f jpeg-6b.tgz
It is worth examining the first CWD command, to check where the package is installed (base directory.)The most common base directories are /usr/pkg and /usr/X11R6. If the base directory is not whatyou want, you can change it with the -p of the pkg_add command. For example, the jpeg-6b.tgzpackage is installed in /usr/pkg by default, but you can install it in /usr/X11R6 if you extract it withthe following command:
59

Chapter 10 The package collection
# pkg_add -p /usr/X11R6 -v jpeg-6b.tgz
10.5 Package management commandsThe most important commands for package management are:
pkg_add
adds precompiled packages.
pkg_delete
removes installed packages. Package names can be given with or without version; if no version isgiven, pkg_delete will find out which version is installed. Wildcards can be used (but must beescaped for the shell); for example:
# pkg_delete "*emacs*"
The -r option is very powerful: it removes all the packages that require the package in question andthen removes the package itself. For example:
# pkg_delete -r jpeg
will remove jpeg and all the packages that used it; this allows upgrading the jpeg package.
pkg_info
shows information on packages, installed and not installed.
pkg_create
creates new packages for the package collection. This program is used to create new precompiledpackages. It’s called automatically by the build system and there’s no need to call it by hand.
pkg_admin
executes various administrative functions on the package system.
10.6 Quick Start Packaging GuideThis section details a quick start method for building relatively small Packages for the NetBSDpackaging system. For more details on some of the intricacies on the NetBSD packaging system seepkgsrc documentation (../../Documentation/pkgsrc/).
10.6.1 ToolsThere are three primary tools for rapidly building a small package addition to NetBSD:
url2pkg
60
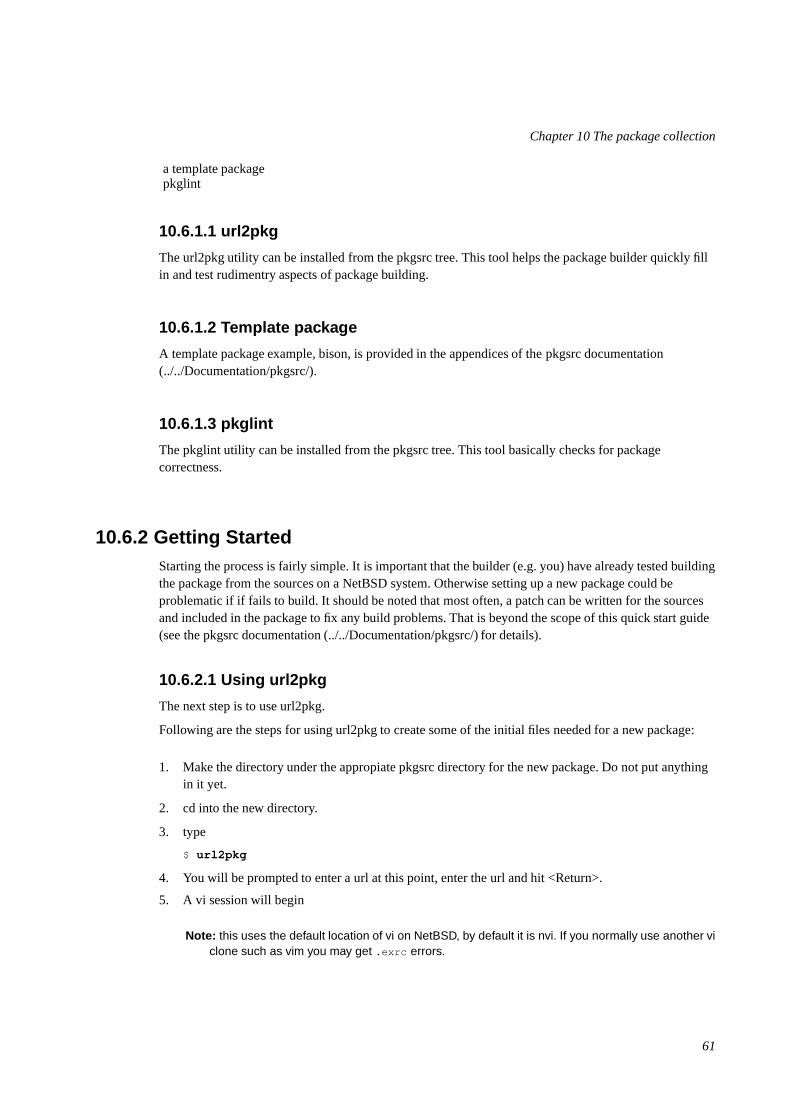
Chapter 10 The package collection
a template packagepkglint
10.6.1.1 url2pkg
The url2pkg utility can be installed from the pkgsrc tree. This tool helps the package builder quickly fillin and test rudimentry aspects of package building.
10.6.1.2 Template package
A template package example, bison, is provided in the appendices of the pkgsrc documentation(../../Documentation/pkgsrc/).
10.6.1.3 pkglint
The pkglint utility can be installed from the pkgsrc tree. This tool basically checks for packagecorrectness.
10.6.2 Getting StartedStarting the process is fairly simple. It is important that the builder (e.g. you) have already tested buildingthe package from the sources on a NetBSD system. Otherwise setting up a new package could beproblematic if if fails to build. It should be noted that most often, a patch can be written for the sourcesand included in the package to fix any build problems. That is beyond the scope of this quick start guide(see the pkgsrc documentation (../../Documentation/pkgsrc/) for details).
10.6.2.1 Using url2pkg
The next step is to use url2pkg.
Following are the steps for using url2pkg to create some of the initial files needed for a new package:
1. Make the directory under the appropiate pkgsrc directory for the new package. Do not put anythingin it yet.
2. cd into the new directory.
3. type
$ url2pkg
4. You will be prompted to enter a url at this point, enter the url and hit <Return>.
5. A vi session will begin
Note: this uses the default location of vi on NetBSD, by default it is nvi. If you normally use another viclone such as vim you may get .exrc errors.
61
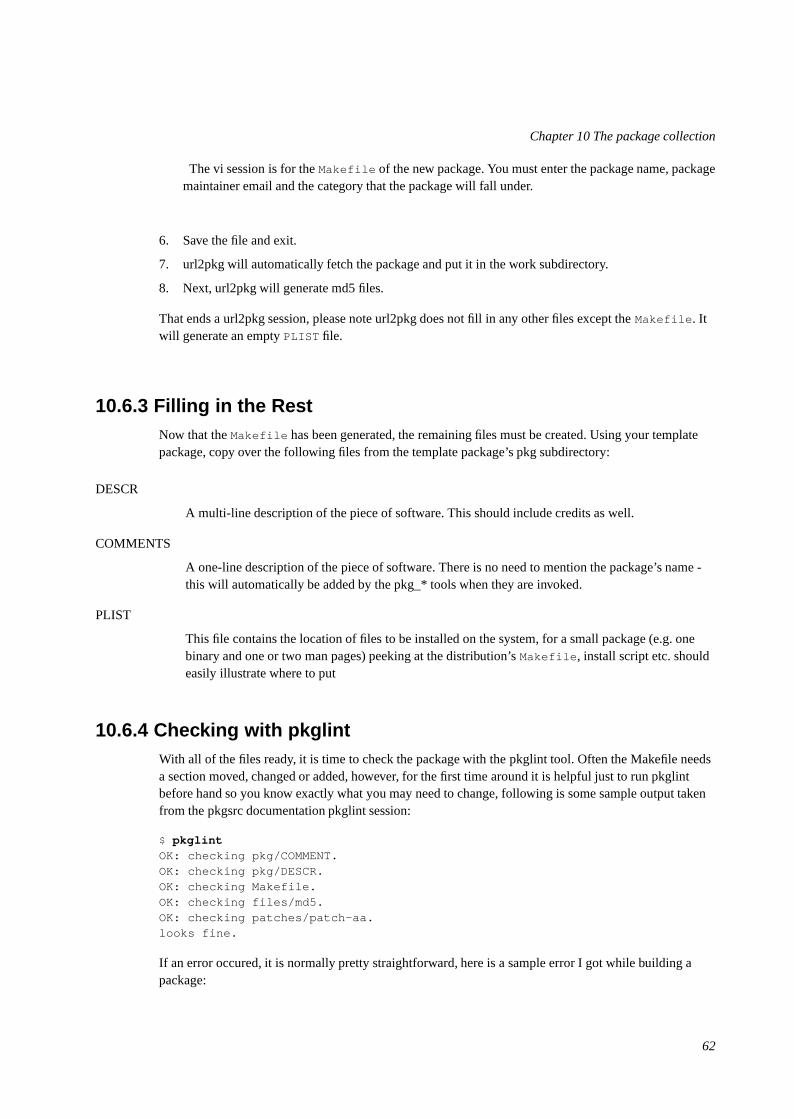
Chapter 10 The package collection
The vi session is for the Makefile of the new package. You must enter the package name, packagemaintainer email and the category that the package will fall under.
6. Save the file and exit.
7. url2pkg will automatically fetch the package and put it in the work subdirectory.
8. Next, url2pkg will generate md5 files.
That ends a url2pkg session, please note url2pkg does not fill in any other files except the Makefile. Itwill generate an empty PLIST file.
10.6.3 Filling in the RestNow that the Makefile has been generated, the remaining files must be created. Using your templatepackage, copy over the following files from the template package’s pkg subdirectory:
DESCR
A multi-line description of the piece of software. This should include credits as well.
COMMENTS
A one-line description of the piece of software. There is no need to mention the package’s name -this will automatically be added by the pkg_* tools when they are invoked.
PLIST
This file contains the location of files to be installed on the system, for a small package (e.g. onebinary and one or two man pages) peeking at the distribution’s Makefile, install script etc. shouldeasily illustrate where to put
10.6.4 Checking with pkglintWith all of the files ready, it is time to check the package with the pkglint tool. Often the Makefile needsa section moved, changed or added, however, for the first time around it is helpful just to run pkglintbefore hand so you know exactly what you may need to change, following is some sample output takenfrom the pkgsrc documentation pkglint session:
$ pkglintOK: checking pkg/COMMENT.OK: checking pkg/DESCR.OK: checking Makefile.OK: checking files/md5.OK: checking patches/patch-aa.looks fine.
If an error occured, it is normally pretty straightforward, here is a sample error I got while building apackage:
62

Chapter 10 The package collection
extract suffix not required
I did not need to define an extract suffix in the Makefile.
10.6.5 Running and Checking Build/InstallsAt this point if pkglint has passed, I normally run a complete check of the fetch, build and installation. Todo this properly I must delete the work subdirectory and the distfile(s) from /usr/pkgsrc/distfiles.This way I can ensure I will be doing a full and complete test.
10.6.6 Submitting a Package Using send-prFirst make an archive of the package tree itself (including the pkg/work subdirectory) like so:
$ tar -czf packagename.tgz package_dir
Next, upload the archive to a location that NetBSD package maintainers can access it from, if you cannotupload the archive, contact NetBSD to see if there is some other method you might try to make yourarchive available to package maintainers.
The preferred method of notifying NetBSD package maintainers is to use the send-pr utility with acategory of “pkg”, a synopsis which includes the package name and version number, a short descriptionof the package and the URL of the tar file.
You can use either the send-pr utility on your NetBSD system or the online form athttp://www.NetBSD.org/cgi-bin/sendpr.cgi?gndb=netbsd if for some reason you cannot get send-pr towork locally.
10.6.7 Final NotesAgain this little guide is for small packages that contain only a few files to be installed on a NetBSDsystem. It makes the assumption that the package does not require any patches and can build with nodependancies.
For more advanced issues, be sure to read the full pkgsrc documentation (../../Documentation/pkgsrc/).
63

Chapter 11
Networking
11.1 Introduction to TCP/IP Networking
11.1.1 AudienceThis networking section of this guide explains various aspects of networking and is intended to helppeople with little knowledge about networks to get started. It is divided into three sections. We start bygiving a general overview of how networking works and introduce the basic concepts. Then we go intodetails for setting up various types of networking in the second section, and the third section covers any“advanced” topics that go beyond the scope of basic operation as introduced in the first two sections.
The reader is assumed to know about basic system administration tasks: how to become root, edit files,change permissions, stop processes, etc. See [AeleenFrisch] for further information on this topic. Besidesthat, you should know how to handle the utilities we’re going to set up here, i. e. you should know how touse telnet, FTP, ... I will not explain the basic features of those utilities, please refer to the appropriateman-pages, the references listed or of course the other parts of this document instead.
This Introduction to TCP/IP Networking was written with the intention in mind to give starters a basicknowledge. If you really want to know what’s it all about, read [CraigHunt]. This book does not onlycover the basics, but goes on and explains all the concepts, services and how to set them up in detail. It’sgreat, I love it! :-)
11.1.2 Supported Networking ProtocolsThere are several protocol suites supported by NetBSD, most of which were inherited from NetBSD’spredecessor, 4.4BSD, and subsequently enhanced and improved. The first and most important one todayis DARPA’s Transmission Control Protocol/Internet Protocol (TCP/IP). Other protocol suites available inNetBSD include the Xerox Network System (XNS) which was only implemented at UCB to connectisolated machines to the net, Apple’s AppleTalk protocol suite and the ISO protocol suite, CCITT X.25and ARGO TP. They are only used in some special applications these days.
Today, TCP/IP is the most widespread protocol of the ones mentioned above. It is implemented onalmost every hardware and operating system, and it is also the most-used protocol in heterogenousenvironments. So, if you just want to connect your computer running NetBSD to some other machine athome, or you want to integrate it into your company’s or university’s network, TCP/IP is the right choice.
IPv6 (TCP/IP protocol issue 6, current version IPv4) is still under development, and the KAME project’sIPv6 code was merged into NetBSD and shipped starting with the NetBSD 1.5 release.
64

Chapter 11 Networking
There are other protocol suites such as DECNET, Novell’s IPX/SPX or Microsoft’s NetBIOS, but theseare not currently supported by NetBSD. These two protocols differ from the protocols mentioned abovein that they are proprietary, in contrast to the others, which are well-defined in several RFCs and otheropen standards.
11.1.3 Supported MediaTCP/IP can be used on a wide range of media. Among the ones supported by NetBSD are Ethernet(10/100/1000MBd), Arcnet, serial line, ATM, FDDI, Fiber Channel, USB, HIPPI, FireWire (IEEE1394), Token Ring, serial lines and others.
11.1.3.1 Serial Line
There are a couple of reasons for using TCP/IP over a serial line.
• If your remote host is only reachable via telephone, you can use a modem to access it.
• Almost every computer has a serial port today, and the cable needed is rather cheap.
The disadvantage of a serial connection is that it’s slower than other methods. NetBSD can use at most115200 bit/s, making it a lot slower than e.g Ethernet’s minimum 10 Mbit/s and Arcnet’s 4 Mbit/s.
There are two possible protocols to connect a host running NetBSD to another host using a serial line(possibly over a phone-line):
• Serial Line IP (SLIP)
• Point to Point Protocol (PPP)
The choice here depends on whether you use a dial-up connection through a modem or if you use a staticconnection (null-modem or leased line). If you dial up for your IP connection, it’s wise to use PPP as itoffers some possibilities to auto-negotiate IP-addresses and routes, which can be quite painful to do byhand. If you want to connect to another machine which is directly connected, use SLIP, as this issupported by about every operating system and more easy to set up with fixed addresses and routes.
PPP on a direct connection is a bit difficult to setup, as it’s easy to timeout the initial handshake; withSLIP, there’s no such initial handshake, i.e. you start up one side, and when the other site has its firstpacket, it will send it over the line.
[RFC1331] and [RFC1332] describe PPP and TCP/IP over PPP. SLIP is defined in [RFC1055].
11.1.3.2 Ethernet
Ethernet is the medium commonly used to build local area networks (LANs) of interconnected machineswithin a limited area such as an office, company or university campus. Ethernet is based on a bus thatmany machines can connect to, and communication always happens between two nodes at a time. Whentwo or more nodes want to talk at the same time, both will restart communication after some timeout.The technical term for this is CSMA/CD (Carrier Sense w/ Multiple Access and Collision Detection).
Initially, Ethernet hardware consisted of a thick (yellow) cable that machines tapped into using specialconnectors that poked through the cable’s outer shielding. The successor of this was called 10base5,
65
Chapter 11 Networking
which used BNC-type connectors for tapping in special T-connectors and terminators on both ends of thebus. Today, ethernet is mostly used with twisted pair lines which are used in a collapsed bus system thatare contained in switches or hubs. The twisted pair lines give this type of media it’s name - 10baseT for10 Mbit/s networks, and 100baseT for 100 MBit/s ones. In switched environments there’s also thedistinction if communication between the node and the switch can happen in half- or in full duplex mode.
11.1.4 TCP/IP Address FormatTCP/IP uses 4-byte (32-bit) addresses in the current implementations (IPv4), also called IP-numbers(Internet-Protocol numbers), to address hosts.
TCP/IP allows any two machines to communicate directly. To permit this all hosts on a given networkmust have a unique IP address. To assure this, IP addresses are administrated by one central organisation,the InterNIC. They give certain ranges of addresses (network-addresses) directly to sites which want toparticipate in the internet or to internet-providers, which give the addresses to their customers.
If your university or company is connected to the Internet, it has (at least) one such network-address forit’s own use, usually not assigned by the InterNIC directly, but rather through an Internet ServiceProvider (ISP).
If you just want to run your private network at home, see below on how to “build” your own IPaddresses. However, if you want to connect your machine to the (real :-) Internet, you should get an IPaddresses from your local network-administrator or -provider.
IP addresses are usually written in “dotted quad”-notation - the four bytes are written down in decimal(most significant byte first), separated by dots. For example, 132.199.15.99 would be a valid address.Another way to write down IP-addresses would be as one 32-bit hex-word, e.g. 0x84c70f63. This is notas convenient as the dotted-quad, but quite useful at times, too. (See below!)
Being assigned a network means nothing else but setting some of the above-mentioned 32 address-bits tocertain values. These bits that are used for identifying the network are called network-bits. Theremaining bits can be used to address hosts on that network, therefore they are called host-bits.
In the above example, the network-address is 132.199.0.0 (host-bits are set to 0 in network-addresses),the host’s address is 15.99 on that network.
How do you know that the host’s address is 16 bit wide? Well, this is assigned by the provider fromwhich you get your network-addresses. In the classless inter-domain routing (CIDR) used today, hostfields are usually between as little as 2 to 16 bits wide, and the number of network-bits is written after thenetwork address, separated by a “/”, e.g. 132.199.0.0/16 tells that the network in question has 16network-bits. When talking about the “size” of a network, it’s usual to only talk about it as “/16”, “/24”,etc.
Before CIDR was used, there used to be four classes of networks. Each one starts with a certainbit-pattern identifying it. Here are the four classes:
• Class A starts with “0” as most significant bit. The next seven bits of a class A address identify thenetwork, the remaining 24 bit can be used to address hosts. So, within one class A network there canbe 224 hosts. It’s not very likely that you (or your university, or company, or whatever) will get a wholeclass A address.
66

Chapter 11 Networking
The CIDR notation for a class A network with it’s eight network bits is an “/8”.
• Class B starts with “10” as most significant bits. The next 14 bits are used for the networks address,the remaining 16 bits can be used to address more than 65000 hosts. Class B addresses are very rarelygiven out today, they used to be common for companies and universities before IPv4 address spacewent scarce.
The CIDR notation for an class B network with it’s 16 network bits is an “/16”.
Returning to our above example, you can see that 132.199.15.99 (or 0x84c70f63, which is moreappropriate here!) is on a class B network, as 0x84... = 1000... (base 2).
Therefore, the address 132.199.15.99 can be split into an network-address of 132.199.0.0 and anhost-address of 15.99.
• Class C is identified by the MSBs being “110”, allowing only 256 (actually: only 254, see below)hosts on each of the 221 possible class C networks. Class C addresses are usually found at (small)companies.
The CIDR notation for an class C network with it’s 24 network bits is an “/24”.
• There are also other addresses, starting with “111”. Those are used for special purposes (e. g.multicast-addresses) and are not of interest here.
Please note that the bits which are used for identifying the network-class are part of the network-address.
When separating host-addresses from network-addresses, the “netmask” comes in handy. In this mask,all the network-bits are set to “1”, the host-bits are “0”. Thus, putting together IP-address and netmaskwith a logical AND-function, the network-address remains.
To continue our example, 255.255.0.0 is a possible netmask for 132.199.15.99. When applying thismask, the network-address 132.199.0.0 remains.
For addresses in CIDR notation, the number of network-bits given also says how many of the mostsignificant bits of the address must be set to “1” to get the netmask for the corresponding network. Forclassfull addressing, every network-class has a fixed default netmask assigned:
• Class A (/8): default-netmask: 255.0.0.0, first byte of address: 1-127
• Class B (/16): default-netmask: 255.255.0.0, first byte of address: 128-191
• Class C (/24): default-netmask: 255.255.255.0, first byte of address: 192-223
Another thing to mention here is the “broadcast-address”. When sending to this address, all hosts on thecorresponding network will receive the message sent. The broadcast address is characterized by havingall host-bits set to “1”.
Taking 132.199.15.99 with its netmask 255.255.0.0 again, the broadcast-address would result in132.199.255.255.
You’ll ask now: But what if I want a hosts address to be all bits “0” or “1”? Well, this doesn’t work, asnetwork- and broadcast-address must be present! Because of this, a class B (/16) network can contain atmost 216-2 hosts, a class C (/24) network can hold no more than 28-2 = 254 hosts.
67

Chapter 11 Networking
Besides all those categories of addresses, there’s the special IP-address 127.0.0.1 which always refers tothe “local” host, i. e. if you talk to 127.0.0.1 you’ll talk to yourself without starting any network-activity.This is sometimes useful to use services installed on your own machine or to play around if you don’thave other hosts to put on your network.
Let’s put together the things we’ve introduced in this section:
IP-address
32 bit-address, with network- and host-bits.
Network-address
IP-address with all host bits set to “0”.
Netmask
32-bit mask with “1” for network- and “0” for host-bits.
Broadcast
IP-address with all host bits set “1”.
locahost’s address
The local host’s IP address is always 127.0.0.1.
11.1.5 Subnetting and RoutingAfter talking so much about netmasks, network-, host- and other addresses, I have to admit that this isnot the whole truth.
Imagine the situation at your university, which usually has a class B (/16) address, allowing it to have upto 216 ~= 65534 hosts on that net. Maybe it would be a nice thing to have all those hosts on one singlenetwork, but it’s simply not possible due to limitations in the transport media commonly used today.
For example, when using thinwire ethernet, the maximum length of the cable is 185 meters. Even withrepeaters in between, which refresh the signals, this is not enough to cover all the locations wheremachines are located. Besides that, there is a maximum number of 1024 hosts on one ethernet wire, andyou’ll loose quite a bit of performance if you go to this limit.
So, are you hosed now? Having an address which allows more than 60000 hosts, but being bound tomedia which allows far less than that limit?
Well, of course not! :-)
The idea is to divide the “big” class B net into several smaller networks, commonly called sub-networksor simply subnets. Those subnets are only allowed to have, say, 254 hosts on them (i.e. you divide onebig class B network into several class C networks!).
To do this, you adjust your netmask to have more network- and less host-bits on it. This is usually doneon a byte-boundary, but you’re not forced to do it there. So, commonly your netmask will not be255.255.0.0 as supposed by a class B network, but it will be set to 255.255.255.0.
In CIDR notation, you now write a “/24” instead of the “/16” to show that 24 bits of the address are usedfor identifying the network and subnet, instead of the 16 that were used before.
68

Chapter 11 Networking
This gives you one additional network-byte to assign to each (physical!) network. All the 254 hosts onthat subnet can now talk directly to each other, and you can build 256 such class C nets. This should fityour needs.
To explain this better, let’s continue our above example. Say our host 132.199.15.99 (I’ll call him duskfrom now; we’ll talk about assigning hostnames later) has a netmask of 255.255.255.0 and thus is on thesubnet 132.199.15.0/24. Let’s furthermore introduce some more hosts so we have something to playaround with, see Figure 11-1.
Figure 11-1. Our demo-network
132.199.15.100
dawn132.199.15.99
132.199.15.98
dusk
132.199.15.97
noon
132.199.1.33
132.199.15.1
rzi
132.199.1.202
ftp132.199.1.8
cisco
Subnet 132.199.1.0
S L
I P
Broadcast 132.199.1.255
Netmask 255.255.255.0
Subnet 132.199.15.0
Broadcast 132.199.15.255
Netmask 255.255.255.0
In the above network, dusk can talk directly to dawn, as they are both on the same subnet. (There areother hosts attached to the 132.199.15.0/24-subnet but they are not of importance for us now)
But what, if dusk wants to talk to a host on another subnet?
Well, the traffic will then go through one or more gateways (routers), which are attached to two subnets.Because of this, a router always has two different addresses, one for each of the subnets it is on. Therouter is functionally transparent, i.e. you don’t have to address it to reach hosts on the “other” side.Instead, you address that host directly and the packets will be routed to it correctly.
Example. Let’s say dusk wants to get some files from the local ftp-server. As dusk can’t reach ftp directly(because it’s on a different subnet), all its packets will be forwarded to it’s "defaultrouter" rzi(132.199.15.1), which knows where to forward the packets to.
Dusk knows the address of it’s defaultrouter in its network (rzi, 132.199.15.1), and it will forward anypackets to it which are not on the same subnet, i.e. it will forward all IP-packets in which the thirdaddress-byte isn’t 15.
The (default)router then gives the packets to the appropriate host, as it’s also on the FTP-server’snetwork.
In this example, all packets are forwarded to the 132.199.1.0/24-network, simply because it’s thenetwork’s backbone, the most important part of the network, which carries all the traffic that passes
69

Chapter 11 Networking
between several subnets. Almost all other networks besides 132.199.15.0/24 are attached to thebackbone in a similar manner.
But what, if we had hooked up another subnet to 132.199.15.0/24 instead of 132.199.1.0/24? Maybesomething the situation displayed in Figure 11-2.
Figure 11-2. Attaching one subnet to another one
132.199.1.33
132.199.15.1
rzi
132.199.15.99
dusk
Subnet 132.199.1.0
Subnet 132.199.16.0
(Backbone)
route2
132.199.15.2
132.199.16.1
Subnet 132.199.15.0
When we now want to reach a host which is located in the 132.199.16.0/24-subnet from dusk, it won’twork routing it to rzi, but you’ll have to send it directly to route2 (132.199.15.2). Dusk will have to knowto forward those packets to route2 and send all the others to rzi.
When configuring dusk, you tell it to forward all packets for the 132.199.16.0/24-subnet to route2, andall others to rzi. Instead of specifying this default as 132.199.1.0/24, 132.199.2.0/24, etc., 0.0.0.0 can beused to set the default-route.
Returning to Figure 11-1, there’s a similar problem when dawn wants to send to noon, which isconnected to dusk via a serial line running. When looking at the IP-addresses, noon seems to be attachedto the 132.199.15.0-network, but it isn’t really. Instead, dusk is used as gateway, and dawn will have tosend its packets to dusk, which will forward them to noon then. The way dusk is forced into acceptingpackets that aren’t destined at it but for a different host (noon) instead is called “proxy arp”.
The same goes when hosts from other subnets want to send to noon. They have to send their packets todusk (possibly routed via rzi),
11.1.6 Name Service ConceptsIn the previous sections, when we talked about hosts, we referred to them by their IP-addresses. This wasnecessary to introduce the different kinds of addresses. When talking about hosts in general, it’s moreconvenient to give them “names”, as we did when talking about routing.
Most applications don’t care whether you give them an IP address or an hostname. However, they’ll useIP addresses internally, and there are several methods for them to map hostnames to IP addresses, eachone with its own way of configuration. In this section we’ll introduce the idea behind each method, in thenext chapter, we’ll talk about the configuration-part.
The mapping from hostnames (and domainnames) to IP-addresses is done by a piece of software calledthe “resolver”. This is not an extra service, but some library routines which are linked to every
70

Chapter 11 Networking
application using networking-calls. The resolver will then try to resolve (hence the name ;-) thehostnames you give into IP addresses. See [RFC1034] and [RFC1035] for details on the resolver.
Hostnames are usually up to 10 characters long, and contain letters, numbers and dashes (“-”); case isignored.
Just as with networks and subnets, it’s possible (and desirable) to group hosts into domains andsubdomains. When getting your network-address, you usually also obtain a domainname by yourprovider. As with subnets, it’s up to you to introduce subdomains. Other as with IP-addresses,(sub)domains are not directly related to (sub)nets; for example, one domain can contain hosts fromseveral subnets.
Figure 11-1 shows this: Both subnets 132.199.1.0/24 and 132.199.15.0/24 (and others) are part of thesubdomain “rz.uni-regensburg.de”. The domain the University of Regensburg got from it’s IP-provider is“uni-regensburg.de” (“.de” is for Deutschland, Germany), the subdomain “rz” is for Rechenzentrum,computing center.
Hostnames, subdomain- and domainnames are separated by dots (“.”). It’s also possible to use more thanone stage of subdomains, although this is not very common. An example would befox_in.socs.uts.edu.au.
A hostname which includes the (sub)domain is also called a fully qualified domain name (FQDN). Forexample, the IP-address 132.199.15.99 belongs to the host with the FQDN dusk.rz.uni-regensburg.de.
Further above I told you that the IP-address 127.0.0.1 always belongs to the local host, regardless what’sthe “real” IP-address of the host. Therefore, 127.0.0.1 is always mapped to the name “localhost”.
The three different ways to translate hostnames into IP addresses are: /etc/hosts, the Domain NameService (DNS) and the Network Information Service (NIS).
11.1.6.1 /etc/hosts
The first and most simplest way to translate hostnames into IP-addresses is by using a table telling whichIP address belongs to which hostname(s). This table is stored in the file /etc/hosts and has thefollowing format:
IP-address hostname [nickname [...]]
Lines starting with a hash mark (“#”) are treated as comments. The other lines contain one IP-addressand the corresponding hostname(s).
It’s not possible for a hostname to belong to several IP addresses, even if I made you think so whentalking about routing. rzi for example has really two distinct names for each of its two addresses: rzi andrzia (but please don’t ask me which name belongs to which address!).
Giving a host several nicknames can be convenient if you want to specify your favorite host providing aspecial service with that name, as is commonly done with FTP-servers. The first (leftmost) name isusually the real (canonical) name of the host.
Besides giving nicknames, it’s also convenient to give a host’s full name (including domain) as itscanonical name, and using only its hostname (without domain) as a nickname.
Important: There must be an entry mapping localhost to 127.0.0.1!
71

Chapter 11 Networking
11.1.6.2 Domain Name Service (DNS)
/etc/hosts bears an inherent problem, especially in big networks: when one host is added or onehost’s address changes, all the /etc/hosts’ on all machines have to be changed! This is not onlytime-consuming, it’s also very likely that there will be some errors and inconsistencies, leading toproblems.
Another approach is to hold only one hostnames-table (-database) for a network, and make all the clientsquery that “nameserver”. Updates will be made only on the nameserver.
This is the basic idea behind the Domain Name Service (DNS).
Usually, there’s one nameserver for each domain (hence DNS), and every host (client) in that domainknows which domain it is in and which nameserver to query for its domain.
When the DNS gets a query about an host which is not in its domain, it will forward the query to a DNSwhich is either the DNS of the domain in question or knows which DNS to ask for the specified domain.If the DNS forwarded the query doesn’t know how to handle it, it will forward that query again to a DNSone step higher. This is not ad infinitum, there are several “root”-servers, which know about any domain.
See Chapter 12 for details on DNS.
11.1.6.3 Network Information Service (NIS/YP)
Yellow Pages (YP) was invited by Sun Microsystems. The name has been changed into NetworkInformation Service (NIS) because YP was already a trademark of the British telecom. So, when I’ll talkabout NIS you’ll know what I mean. ;-)
There are quite some configuration files on a unix-system, and often it’s desired to maintain only one setof those files for a couple of hosts. Those hosts are grouped together in a NIS-domain (which has nothingto do with the domains built by using DNS!) and are usually contained in one workstation cluster.
Examples for the config-files shared among those hosts are /etc/passwd, /etc/group and - last butnot least - /etc/hosts.
So, you can “abuse” NIS for getting a unique name-to-address-translation on all hosts throughout one(NIS-)domain.
There’s only one drawback, which prevents NIS from actually being used for that translation: In contrastto the DNS, NIS provides no way to resolve hostnames which are not in the hosts-table. There’s no hosts“one level up” which the NIS-server can query, and so the translation will fail! Suns NIS+ takes measuresagainst that problem, but as NIS+ is only available on Solaris-systems, this is of little use for us now.
Don’t get me wrong: NIS is a fine thing for managing e.g. user-information (/etc/passwd, ...) inworkstation-clusters, it’s simply not too useful for resolving hostnames.
11.1.6.4 Other
The name resolving methods described above are what’s used commonly today to resolve hostnames intoIP addresses, but they aren’t the only ones. Basically, every database mechanism would do, but none isimplemented in NetBSD. Let’s have a quick look what you may encounter.
With NIS lacking hierarchy in data structures, NIS+ is intended to help out in that field. Tables can besetup in a way so that if a query cannot be answered by a domain’s server, there can be another domain
72

Chapter 11 Networking
“above” that might be able to do so. E.g. you could choose to have a domain that lists all the hosts (users,groups, ...) that are valid in the whole company, one that defines the same for each division, etc. NIS+ isnot used a lot today, even Sun went back to ship back NIS by default.
Last century, the X.500 standard was designed to accommodate both simple databases like /etc/hostsas well as complex, hierarchical systems as can be found e.g. in DNS today. X.500 wasn’t really asuccess, mostly due to the fact that it tried to do too much at the same time. A cut-down version isavailable today as the Lightweight Directory Access Protocol (LDAP), which is becoming popular in thelast years to manage data like users but also hosts and others in small to medium sized organisations.
11.1.7 Next generation Internet protocol - IPv6
11.1.7.1 The Future of the Internet
According to experts, the Internet as we know it will face a serious problem in a few years. Due to it’srapid growth and the limitations in it’s design, there will be a point at which no more free addresses areavailable for connecting new hosts. At that point, no more new web servers can be set up, no more userscan sign up for accounts at ISPs, no more new machines can be setup to access the web or participate inonline games - some people may call this a serious problem.
Several approaches have been made to solve the problem. A very popular one is to not assign aworldwide unique address to every users’ machine, but rather to assign them “private” addresses, andhide several machines behind one official, globally unique address. This approach is called “NetworkAddress Translation” (NAT, also known as IP Masquerading). It has problems, as the machines hiddenbehind the global address can’t be addressed, and as a result of this, opening connections to them - whichis used in online gaming, peer to peer networking, etc. - is not possible. For a more in-depth discussionof the drawbacks of NAT, see [RFC3027].
A different approach to the problem of internet addresses getting scarce is to abandon the old Internetprotocol with it’s limited addressing capabilities, and use a new protocol that does not have theselimitations. The protocol - or actually, a set of protocols - used by machines connected to form today’sInternet is know as the TCP/IP (Transmission Control Protocol, Internet Protocol) suite, and version 4currently in use has all the problems described above. Switching to a different protocol version that doesnot have these problems of course requires for a ’better’ version to be available, which actually is.Version 6 of the Internet Protocol (IPv6) does fulfill any possible future demands on address space, andalso addresses further features such as privacy, encryption, and better support of mobile computing.
Assuming a basic understanding of how today’s IPv4 works, this text is intended as an introduction to theIPv6 protocol. The changes in address formats and name resolution are covered. With the backgroundgiven here, Section 11.3.5 will show how to use IPv6 even if your ISP doesn’t offer it by using a simpleyet efficient transition mechanism called 6to4. The goal is to to get online with IPv6, giving exampleconfiguration for NetBSD.
11.1.7.2 What good is IPv6?
When telling people to migrate from IPv4 to IPv6, the question you usually hear is “why?”. There areactually a few good reasons to move to the new version:
73

Chapter 11 Networking
• Bigger address space
• Support for mobile devices
• Built-in security
11.1.7.2.1 Bigger Address Space
The bigger address space that IPv6 offers is the most obvious enhancement it has over IPv4. Whiletoday’s internet architecture is based on 32-bit wide addresses, the new version has 128 bit available foraddressing. Thanks to the enlarged address space, work-arounds like NAT don’t have to be used anymore. This allows full, unconstrained IP connectivity for today’s IP based machines as well as upcomingmobile devices like PDAs and cell phones will benefit from full IP access through GPRS and UMTS.
11.1.7.2.2 Mobility
When mentioning mobile devices and IP, another important point to note is that some special protocol isneeded to support mobility, and implementing this protocol - called “Mobile IP” - is one of therequirements for every IPv6 stack. Thus, if you have IPv6 going, you have support for roaming betweendifferent networks, with everyone being updated when you leave one network and enter the other one.Support for roaming is possible with IPv4 too, but there are a number of hoops that need to be jumped inorder to get things working. With IPv6, there’s no need for this, as support for mobility was one of thedesign requirements for IPv6. See [RFC3024] for some more information on the issues that need to beaddressed with Mobile IP on IPv4.
11.1.7.2.3 Security
Besides support for mobility, security was another requirement for the successor to today’s InternetProtocol version. As a result, IPv6 protocol stacks are required to include IPsec. IPsec allowsauthentication, encryption and compression of any IP traffic. Unlike application level protocols like SSLor SSH, all IP traffic between two nodes can be handled, without adjusting any applications. The benefitof this is that all applications on a machine can benefit from encryption and authentication, and thatpolicies can be set on a per-host (or even per-network) base, not per application/service. An introductionto IPsec with a roadmap to the documentation can be found in [RFC2411], the core protocol is describedin [RFC2401].
11.1.7.3 Changes to IPv4
After giving a brief overview of all the important features of IPv6, we’ll go into the details of the basicsof IPv6 here. A brief understanding of how IPv4 works is assumed, and the changes in IPv6 will behighlighted. Starting with IPv6 addresses and how they’re split up we’ll go into the various types ofaddresses there are, what became of broadcasts, then after discussing the IP layer go into changes forname resolving and what’s new in DNS for IPv6.
11.1.7.3.1 Addressing
An IPv4 address is a 32 bit value, that’s usually written in “dotted quad” representation, where each“quad” represents a byte value between 0 and 255, for example:
74

Chapter 11 Networking
127.0.0.1
This allows a theoretical number of 232 or ~4 billion hosts to be connected on the internet today. Due togrouping, not all addresses are available today.
IPv6 addresses use 128 bit, which results in 2128 theoretically addressable hosts. This allows for a ReallyBig number of machines to addressed, and it sure fits all of today’s requirements plus all those niftyPDAs and cell phones with IP phones in the near future without any sweat. When writing IPv6addresses, they are usually divided into groups of 16 bits written as four hex digits, and the groups areseparated by colons. An example is:
fe80::2a0:d2ff:fea5:e9f5
This shows a special thing - a number of consecutive zeros can be abbreviated by a single “::” once in theIPv6 address. The above address is thus equivalent to fe80:0:00:000:2a0:d2ff:fea5:e9f5 - leading zeroswithin groups can be omitted.
To make addresses manageable, they are split in two parts, which are the bits identifying the network amachine is on, and the bits that identify a machine on a (sub)network. The bits are known as netbits andhostbits, and in both IPv4 and IPv6, the netbits are the “left”, most significant bits of an IP address, andthe host bits are the “right”, least significant bits, as shown in Figure 11-3.
Figure 11-3. Addresses are divided into more significant network- and less significant hostbits
128−n hostbitsn netbits
In IPv4, the border is drawn with the aid of the netmask, which can be used to mask all net/host bits.Typical examples are 255.255.0.0 that uses 16 bit for addressing the network, and 16 bit for the machine,or 255.255.255.0 which takes another 8 bit to allow addressing 256 subnets on e.g. a class B net.
When addressing switched from classful addressing to CIDR routing, the borders between net and hostbits stopped being on 8 bit boundaries, and as a result the netmasks started looking ugly and not reallymanageable. As a replacement, the number of network bits is used for a given address, to denote theborder, e.g.
10.0.0.0/24
is the same as a netmask of 255.255.255.0 (24 1-bits). The same scheme is used in IPv6:
2001:638:a01:2::/64
tells us that the address used here has the first (leftmost) 64 bits used as the network address, and the last(rightmost) 64 bits are used to identify the machine on the network. The network bits are commonlyreferred to as (network) “prefix”, and the “prefixlen” here would be 64 bits.
Common addressing schemes found in IPv4 are the (old) class B and class C nets. With a class Cnetwork (/24), you get 24 bits assigned by your provider, and it leaves 8 bits to be assigned by you. Ifyou want to add any subnetting to that, you end up with “uneven” netmasks that are a bit nifty to dealwith. Easier for such cases are class B networks (/16), which only have 16 bits assigned by the provider,and that allow subnetting, i.e. splitting of the rightmost bits into two parts. One to address the on-sitesubnet, and one to address the hosts on that subnet. Usually, this is done on byte (8 bit) boundaries.Using a netmask of 255.255.255.0 (or a /24 prefix) allows flexible management even of bigger networkshere. Of course there is the upper limit of 254 machines per subnet, and 256 subnets.
75

Chapter 11 Networking
With 128 bits available for addressing in IPv6, the scheme commonly used is the same, only the fieldsare wider. Providers usually assign /48 networks, which leaves 16 bits for a subnetting and 64 hostbits.
Figure 11-4. IPv6-addresses have a similar structure to class B addresses
16bit 64bitIPv6:
Host−bits
16bit 8bit 8bitIPv4:
Self−assigned subnet−bits
48bit
Provider−assigned network−bits
Now while the space for network and subnets here is pretty much ok, using 64 bits for addressing hostsseems like a waste. It’s unlikely that you will want to have several billion hosts on a single subnet, sowhat is the idea behind this?
The idea behind fixed width 64 bit wide host identifiers is that they aren’t assigned manually as it’susually done for IPv4 nowadays. Instead, IPv6 host addresses are recommended (not mandatory!) to bebuilt from so-called EUI64 addresses. EUI64 addresses are - as the name says - 64 bit wide, and derivedfrom MAC addresses of the underlying network interface. E.g. for ethernet, the 6 byte (48 bit) MACaddress is usually filled with the hex bits “fffe” in the middle and a bit is set to mark the address asunique (which is true for Ethernet), e.g. the MAC address
01:23:45:67:89:ab
results in the EUI64 address
03:23:45:ff:fe:67:89:ab
which again gives the host bits for the IPv6 address as
::0323:45ff:fe67:89ab
These host bits can now be used to automatically assign IPv6 addresses to hosts, which supportsautoconfiguration of IPv6 hosts - all that’s needed to get a complete IPv6 address is the first (net/subnet)bits, and IPv6 also offers a solution to assign them automatically.
When on a network of machines speaking IP, there’s usually one router which acts as the gateway tooutside networks. In IPv6 land, this router will send “router advertisement” information, which clientsare expected to either receive during operation or to solicit upon system startup. The router advertisementinformation includes data on the router’s address, and which address prefix it routes. With thisinformation and the host-generated EUI64 address, a IPv6-host can calculate it’s IP address, and there isno need for manual address assignment. Of course routers still need some configuration.
The router advertisement information they create are part of the Neighbor Discovery Protocol (NDP, see[RFC2461]), which is the successor to IPv4’s ARP protocol. In contrast to ARP, NDP does not only dolookup of IPv6 addresses for MAC addresses (the neighbor solicitation/advertisement part), but also doesa similar service for routers and the prefixes they serve, which is used for autoconfiguration of IPv6 hostsas described in the previous paragraph.
76

Chapter 11 Networking
11.1.7.3.2 Multiple Addresses
In IPv4, a host usually has one IP address per network interface or even per machine if the IP stacksupports it. Only very rare applications like web servers result in machines having more than one IPaddress. In IPv6, this is different. For each interface, there is not only a globally unique IP address, butthere are two other addresses that are of interest: The link local address, and the site local address. Thelink local address has a prefix of fe80::/64, and the host bits are built from the interface’s EUI64 address.The link local address is used for contacting hosts and routers on the same network only, the addressesare not visible or reachable from different subnets. If wanted, there’s the choice of either using globaladdresses (as assigned by a provider), or using site local addresses. Site local addresses are assigned thenetwork address fec0::/10, and subnets and hosts can be addressed just as for provider-assignednetworks. The only difference is, that the addresses will not be visible to outside machines, as these areon a different network, and their “site local” addresses are in a different physical net (if assigned at all).As with the 10/8 network in IPv4, site local addresses can be used, but don’t have to. For IPv6 it’s mostcommon to have hosts assigned a link-local and a global IP address. Site local addresses are ratheruncommon today, and are no substitute for globally unique addresses if global connectivity is required.
11.1.7.3.3 Multicasting
In IP land, there are three ways to talk to a host: unicast, broadcast and multicast. The most common oneis by talking to it directly, using it’s unicast address. In IPv4, the unicast address is the “normal” IPaddress assigned to a single host, with all address bits assigned. The broadcast address used to address allhosts in the same IP subnet has the network bits set to the network address, and all host bits set to “1”(which can be easily done using the netmask and some bit operations). Multicast addresses are used toreach a number of hosts in the same multicast group, which can be machines spread over the wholeinternet. Machines must join multicast groups explicitly to participate, and there are special IPv4addresses used for multicast addresses, allocated from the 224/8 subnet. Multicast isn’t used very muchin IPv4, and only few applications like the MBone audio and video broadcast utilities use it.
In IPv6, unicast addresses are used the same as in IPv4, no surprise there - all the network and host bitsare assigned to identify the target network and machine. Broadcasts are no longer available in IPv6 in theway they were in IPv4, this is where multicasting comes into play. Addresses in the ff::/8 network arereserved for multicast applications, and there are two special multicast addresses that supersede thebroadcast addresses from IPv4. One is the “all routers” multicast address, the others is for “all hosts”.The addresses are specific to the subnet, i.e. a router connected to two different subnets can address allhosts/routers on any of the subnets it’s connected to. Addresses here are:
• ff0X::1 for all hosts and
• ff0X::2 for all routers,
where “X” is the scope ID of the link here, identifying the network. Usually this starts from “1” for the“node local” scope, “2” for the first link, etc. Note that it’s perfectly ok for two network interfaces to beattached to one link, thus resulting in double bandwidth:
77

Chapter 11 Networking
Figure 11-5. Several interfaces attached to a link result in only one scope ID for the link
200MBps
node
One use of the “all hosts” multicast is in the neighbor solicitation code of NDP, where any machine thatwants to communicate with another machine sends out a request to the “all hosts” group, and themachine in question is expected to respond.
11.1.7.3.4 Name Resolving in IPv6
After talking a lot about addressing in IPv6, anyone still here will hope that there’s a proper way toabstract all these long & ugly IPv6 addresses with some nice hostnames as one can do in IPv4, and ofcourse there is.
Hostname to IP address resolving in IPv4 is usually done in one of three ways: using a simple table in/etc/hosts, by using the Network Information Service (NIS, formerly YP) or via the Domain NameSystem (DNS).
As of this writing, NIS/NIS+ over IPv6 is currently only available on Solaris 8, for both databasecontents and transport, using a RPCextension.
Having a simple address<->name map like /etc/hosts is supported in all IPv6 stacks. With the KAMEimplementation used in NetBSD, /etc/hosts contains IPv6 addresses as well as IPv4 addresses. Asimple example is the “localhost” entry in the default NetBSD installation:
127.0.0.1 localhost::1 localhost
For DNS, there are no fundamentally new concepts. IPv6 name resolving is done with AAAA recordsthat - as the name implies - point to an entity that’s four times the size of an A record. The AAAA recordtakes a hostname on the left side, just as A does, and on the right side there’s an IPv6 address, e.g.
noon IN AAAA 3ffe:400:430:2:240:95ff:fe40:4385
For reverse resolving, IPv4 uses the in-addr.arpa zone, and below that it writes the bytes (in decimal) inreversed order, i.e. more significant bytes are more right. For IPv6 this is similar, only that hex digitsrepresenting 4 bits are used instead of decimal numbers, and the resource records are also under adifferent domain, ip6.int.
So to have the reverse resolving for the above host, you would put into your /etc/named.confsomething like:
zone "0.3.4.0.0.0.4.0.e.f.f.3.IP6.INT" {type master;file "db.reverse";
};
and in the zone file db.reverse you put (besides the usual records like SOA and NS):
78

Chapter 11 Networking
5.8.3.4.0.4.e.f.f.f.5.9.0.4.2.0.2.0.0.0 IN PTR noon.ipv6.example.com.
The address is reversed here, and written down one hex digit after the other, starting with the leastsignificant (rightmost) one, separating the hex digits with dots, as usual in zone files.
One thing to note when setting up DNS for IPv6 is to take care of the DNS software version in use.BIND 8.x does understand AAAA records, but it does not offer name resolving via IPv6. You needBIND 9.x for that. Beyond that, BIND 9.x supports a number of resource records that are currently beingdiscussed but not officially introduced yet. The most noticeable one here is the A6 record which allowseasier provider/prefix changing.
To sum up, this section talked about the technical differences between IPv4 and IPv6 for addressing andname resolving. Some details like IP header options, QoS and flows were deliberately left out to notmake the this document more complex than necessary.
11.2 Practice
11.2.1 A walk through the kernel configurationBefore we dive into configuring various aspects of network setup, we want to walk through the necessarybits that have to or can be present in the kernel. See Chapter 9 for more details on compiling the kernel,we will concentrate on the configuration of the kernel here. We will take the i386/GENERIC config fileas an example here. Config files for other platforms should contain similar information, the comments inthe config files give additional hints. Besides the information given here, each kernel option is alsodocumented in the options(4) manpage, and there is usually a manpage for each driver too, e.g. tlp(4).
# $NetBSD: GENERIC,v 1.354.2.15 2001/05/06 15:18:54 he Exp $
The first line of each config file shows the version, which is 1.354.2.15 here. It can be used to compareagainst other versions via CVS, or when reporting bugs.
options NTP # NTP phase/frequency locked loop
If you want to run the Network Time Protocol (NTP), this option can be enabled for maximum precision.If the option is not present, NTP will still work. See ntpd(8) for more information.
file-system NFS # Network File System client
If you want to use another machine’s harddisk via the Network File System (NFS), this option is needed.Section 11.3.3 gives more information on NFS.
options NFSSERVER # Network File System server
This option includes the server side of the NFS remote file sharing protocol. Enable if you want to allowother machines to use your harddisk. Section 11.3.3 contains more information on NFS.
#options GATEWAY # packet forwarding
79

Chapter 11 Networking
If you want to setup a router that forwards packets between networks or network interfaces, setting thisoption is needed. If doesn’t only switch on packet forwarding, but also increases some buffers. Seeoptions(4) for details.
options INET # IP + ICMP + TCP + UDP
This enables the TCP/IP code in the kernel. Even if you don’t want/use networking, you will still needthis for machine-internal communication of subsystems like the X Window System. See inet(4) for moredetails.
options INET6 # IPV6
If you want to use IPv6, this is your option. If you don’t want IPv6, which is part of NetBSD since the1.5 release, you can remove/comment out that option. See the inet6(4) manpage and Section 11.1.7 formore information on the next generation Internet protocol.
#options IPSEC # IP security
Includes support for the IPsec protocol, including key and policy management, authentication andcompression. This option can be used without the previous option INET6, if you just want to use IPsecwith IPv4, which is possible. See ipsec(4) for more information.
#options IPSEC_ESP # IP security (encryption part; define w/IPSEC)
This option is needed in addition to IPSEC if encryption is wanted in IPsec.
#options MROUTING # IP multicast routing
If multicast services like the MBone services should be routed, this option needs to be included. Notethat the routing itself is controlled by the mrouted(8) daemon.
options NS # XNS#options NSIP # XNS tunneling over IP
These options enables the Xerox Network Systems(TM) protocol family. It’s not related to the TCP/IPprotocol stack, and in rare use today. The ns(4) manpage has some details.
options ISO,TPIP # OSI#options EON # OSI tunneling over IP
These options include the OSI protocol stack, that was said for a long time to be the future ofnetworking. It’s mostly history these days. :-) See the iso(4) manpage for more information.
options CCITT,LLC,HDLC # X.25
These options enable the X.25 protocol set for transmission of data over serial lines. It is/was usedmostly in conjunction with the OSI protocols and in WAN networking.
options NETATALK # AppleTalk networking protocols
Include support for the AppleTalk protocol stack. Userland server programs are needed to make use ofthat. See pkgsrc/net/netatalk and pkgsrc/net/netatalk-asun for such packages. More information on theAppleTalk protocol and protocol stack are available in the atalk(4) manpage.
80

Chapter 11 Networking
options PPP_BSDCOMP # BSD-Compress compression support for PPPoptions PPP_DEFLATE # Deflate compression support for PPPoptions PPP_FILTER # Active filter support for PPP (requires bpf)
These options tune various aspects of the Point-to-Point protocol. The first two determine thecompression algorithms used and available, while the third one enables code to filter some packets.
options PFIL_HOOKS # pfil(9) packet filter hooksoptions IPFILTER_LOG # ipmon(8) log support
These options enable firewalling in NetBSD, using IPfilter. See the ipf(4) and ipf(8) manpages for moreinformation on operation of IPfilter, and Section 11.3.1.1 for a configuration example.
# Compatibility with 4.2BSD implementation of TCP/IP. Not recommended.#options TCP_COMPAT_42
This option is only needed if you have machines on the network that still run 4.2BSD or a network stackderived from it. If you’ve got one or more 4.2BSD-systems on your network, you’ve to pay attention toset the right broadcast-address, as 4.2BSD has a bug in its networking code, concerning the broadcastaddress. This bug forces you to set all host-bits in the broadcast-address to “0”. The TCP_COMPAT_42option helps you ensuring this.
options NFS_BOOT_DHCP,NFS_BOOT_BOOTPARAM
These options enable lookup of data via DHCP or the BOOTPARAM protocol if the kernel is told to usea NFS root file system. See the diskless(8) manpage for more information.
# Kernel root file system and dump configuration.config netbsd root on ? type ?#config netbsd root on sd0a type ffs#config netbsd root on ? type nfs
These lines tell where the kernel looks for it’s root file system, and which filesystem type it is expected tohave. If you want to make a kernel that uses a NFS root filesystem via the tlp0 interface, you can do thiswith “root on tlp0 type nfs”. If a ? is used instead of a device/type, the kernel tries to figure oneout on it’s own.
# ISA serial interfacescom0 at isa? port 0x3f8 irq 4 # Standard PC serial portscom1 at isa? port 0x2f8 irq 3com2 at isa? port 0x3e8 irq 5
If you want to use PPP or SLIP, you will need some serial (com) interfaces. Others with attachment onUSB, PCMCIA or PUC will do as well.
# Network Interfaces
This rather long list contains all sort of network drivers. Please pick the one that matches your hardware,according to the comments. For most drivers, there’s also a manual page available, e.g. tlp(4), ne(4), etc.
# MII/PHY support
81

Chapter 11 Networking
This section lists media independent interfaces for network cards. Pick one that matches your hardware.If in doubt, enable them all and see what the kernel picks. See the mii(4) manpage for more information.
# USB Ethernet adaptersaue* at uhub? port ? # ADMtek AN986 Pegasus based adapterscue* at uhub? port ? # CATC USB-EL1201A based adapterskue* at uhub? port ? # Kawasaki LSI KL5KUSB101B based adapters
USB-ethernet adapters only have about 2MBit/s bandwidth, but they are very convenient to use. Ofcourse this needs other USB related options which we won’t cover here, as well as the necessaryhardware. See the corresponding manpages for more information.
# network pseudo-devicespseudo-device bpfilter 8 # Berkeley packet filter
This pseudo-device allows sniffing packets of all sorts. It’s needed for tcpdump, but also rarpd and someother applications that need to know about network traffic. See bpf(4) for more information.
pseudo-device ipfilter # IP filter (firewall) and NAT
This one enables the IPfilter’s packet filtering kernel interface used for firewalling, NAT (IPMasquerading) etc. See ipf(4) and Section 11.3.1.1 for more information.
pseudo-device loop # network loopback
This is the “lo0” software loopback network device which is used by some programs these days, as wellas for routing things. Should not be omitted. See lo(4) for more details.
pseudo-device ppp 2 # Point-to-Point Protocol
If you want to use PPP either over a serial interface or ethernet (PPPoE), you will need this option. Seeppp(4) for details on this interface.
pseudo-device sl 2 # Serial Line IP
Serial Line IP is a simple encapsulation for IP over (well :) serial lines. It does not include negotiation ofIP addresses and other options, which is the reason that it’s not in widespread use today any more. Seesl(4).
pseudo-device strip 2 # Starmode Radio IP (Metricom)
If you happen to have one of the old Metricon Ricochet packet radio wireless network devices, use thispseudo-device to use it. See the strip(4) manpage for detailed information.
pseudo-device tun 2 # network tunneling over tty
This network device can be used to tunnel network packets to a device file, /dev/tun*. Packets routedto the tun0 interface can be read from /dev/tun0, and data written to /dev/tun0 will be sent out thetun0 network interface. This can be used to implement e.g. QoS routing in userland. See tun(4) fordetails.
pseudo-device gre 2 # generic L3 over IP tunnel
82

Chapter 11 Networking
The GRE encapsulation can be used to tunnel arbitrary layer 3 packets over IP, e.g. to implement VPNs.See gre(4) for more.
pseudo-device ipip 2 # IP Encapsulation within IP (RFC 2003)
Another IP-in-IP encapsulation device, with a different encapsulation format. See the ipip(4) manpagefor details.
pseudo-device gif 4 # IPv[46] over IPv[46] tunnel (RFC 1933)
Using the GIF interface allows to tunnel e.g. IPv6 over IPv4, which can be used to get IPv6 connectivityif no IPv6-capable uplink (ISP) is available. Other mixes of operations are possible, too. See the gif(4)manpage for some examples.
#pseudo-device faith 1 # IPv[46] tcp relay translation i/f
The faith interface captures IPv6 TCP traffic, for implementing userland IPv6-to-IPv4 TCP relays e.g.for protocol transitions. See the faith(4) manpage for more details on this device.
#pseudo-device stf 1 # 6to4 IPv6 over IPv4 encapsulation
This add a network device that can be used to tunnel IPv6 over IPv4 without setting up a configuredtunnel before. The source address of outgoing packets contains the IPv4 address, which allows routingreplies back via IPv4. See the stf(4) manpage and Section 11.3.5 for more details.
pseudo-device vlan # IEEE 802.1q encapsulation
This interface provides support for IEEE 802.1Q Virtual LANs, which allows tagging Ethernet frameswith a “vlan” ID. Using properly configured switches (that also have to support VLAN, of course), thiscan be used to build virtual LANs where one set of machines doesn’t see traffic from the other (broadcastand other). The vlan(4) manpage tells more about this.
11.2.2 Overview of the network configuration filesThe following is a list of the files used to configure the network. The usage of these files, some of whichhave already been met the first chapters, will be described in the following sections.
/etc/hosts
Local hosts database file. Each line contains information regarding a known host and contains theinternet address, the host’s name and the aliases. Small networks can be configured using only thehosts file, without a name server.
/etc/resolv.conf
This file specifies how the routines which provide access to the Internet Domain Name Systemshould operate. Generally it contains the addresses of the name servers.
/etc/ifconfig.xxx
This file is used for the automatic configuration of the network card at boot.
83

Chapter 11 Networking
/etc/mygate
Contains the IP address of the gateway.
/etc/nsswitch.conf
Name service switch configuration file. It controls how a process looks up various databasescontaining information regarding hosts, users, groups, etc. Specifically, this file defines the order tolook up the databases. For example, the line:
hosts: files dns
specifies that the hosts database comes from two sources, files (the local /etc/hosts file) andDNS, (the Internet Domain Name System) and that the local files are searched before the DNS.
It is usually not necessary to modify this file.
11.2.3 Connecting to the InternetThere are many types of Internet connections: this section explains how to connect to a provider using amodem over a telephone line using the PPP protocol, a very common setup. In order to have a workingconnection, the following steps must be done:
1. Get the necessary information from the provider.
2. Edit the file /etc/resolv.conf and check /etc/nsswitch.conf.
3. Create the directories /etc/ppp and /etc/ppp/peers if they don’t exist.
4. Create the connection script, the chat file and the pppd options file.
5. Created the user-password authentication file.
Judging from the previous list it looks like a complicated procedure that requires a lot of work. Actually,the single steps are very easy: it’s just a matter of modifying, creating or simply checking some smalltext files. In the following example it will be assumed that the modem is connected to the second serialport /dev/tty01 (COM2 in DOS.)
Besides external modems connected to COM ports (using /dev/tty0[012] on i386,/dev/tty[ab] on sparc, ...) modems on USB (/dev/ttyU*) and pcmcia/cardbus(/dev/tty0[012]) can be used.
11.2.3.1 Getting the connection information
The first thing to do is ask the provider the necessary information for the connection, which means:
• The phone number of the nearest POP.
• The authentication method to be used.
• The username and password for the connection.
84

Chapter 11 Networking
• The IP addresses of the name servers.
11.2.3.2 resolv.conf and nsswitch.conf
The /etc/resolv.conf file must be configured using the information supplied by the provider,especially the addresses of the DNS. In this example the two DNS will be "194.109.123.2" and"191.200.4.52".
Example 11-1. resolv.conf
nameserver 194.109.123.2nameserver 191.200.4.52#lookup file bind
Note: the last line (lookup file bind) indicates that the name servers will be used only for thenames which are not present in the /etc/hosts file. The line is commented, because starting withNetBSD 1.4 it is not needed any more; this type of information is now defined in the/etc/nsswitch.conf file. The new Name Service Switch changes the access to the databasesused by programs to find the base system information.
And now an example of the /etc/nsswitch.conf file.
Example 11-2. nsswitch.conf
# /etc/nsswitch.confgroup: compatgroup_compat: nishosts: files dnsnetgroup: files [notfound=return] nisnetworks: filespasswd: compatpasswd_compat: nis
Note: only one line has been modified, the one beginning with the word “hosts:”; when resolving hostnames, the local hosts file will be searched before resorting to DNS.
11.2.3.3 Creating the directories for pppd
The directories /etc/ppp and /etc/ppp/peers will contain the configuration files for the PPPconnection. After a fresh install of NetBSD they don’t exist and must be created (chmod 700.)
85
Chapter 11 Networking
11.2.3.4 Connection script and chat file
The connection script will be used as a parameter on the pppd command line; it is located in/etc/ppp/peers and has usually the name of the provider. For example, if the provider’s name isBigNet and your user name for the connection to the provider is alan, an example connection script couldbe:
Example 11-3. Connection script
# /etc/ppp/peers/bignetconnect ’/usr/sbin/chat -v -f /etc/ppp/peers/bignet.chat’noauthuser alanremotename bignet.it
In the previous example, the script specifies a chat file to be used for the connection. The options in thescript are detailed in the pppd(8) man page.
Note: if you are experiencing connection problems, add the following two lines to the connectionscript
debugkdebug 4
You will get a log of the operations performed when the system tries to connect. See pppd(8),syslog.conf(5).
The connection script calls the chat application to deal with the physical connection (modeminitialization, dialing, ...) The parameters to chat can be specified inline in the connection script, but it isbetter to put them in a separate file. If, for example, the telephone number of the POP to call is 0299999999, an example chat script could be:
Example 11-4. Chat file
# /etc/ppp/peers/bignet.chatABORT BUSYABORT "NO CARRIER"ABORT "NO DIALTONE"” ATDT0299999999CONNECT ”
Note: if you have problems with the chat file, you can try connecting manually to the POP with the cuprogram and verify the exact strings that you are receiving. See cu(1).
86

Chapter 11 Networking
11.2.3.5 Authentication
During authentication each of the two systems verifies the identity of the other system, although inpractice you are not supposed to authenticate the provider, but only to be verified by him, using one ofthe following methods.
• login
• PAP/CHAP
Most providers use a PAP/CHAP authentication.
11.2.3.5.1 PAP/CHAP authentication
The authentication information is stored in the /etc/ppp/pap-secrets for PAP and in/etc/ppp/chap-secrets for CHAP. The lines have the following format:
user * password
For example:
alan * pZY9o
Note: for security reasons the pap-secrets and chap-secrets files should be owned by root andhave permissions “600”.
11.2.3.5.2 Login authentication
This type of authentication is not widely used today; if the provider uses login authentication, user nameand password must be supplied in the chat file instead of the PAP/CHAP files, because the chat filesimulates an interactive login. In this case, set up appropriate permissions for the chat file.
The following is an example chat file with login authentication:
Example 11-5. Chat file with login
# /etc/ppp/peers/bignet.chatABORT BUSYABORT "NO CARRIER"ABORT "NO DIALTONE"” ATDT0299999999CONNECT ”TIMEOUT 50ogin: alanssword: pZY9o
87

Chapter 11 Networking
11.2.3.6 pppd options
The only thing left to do is the creation of the pppd options file, which is /etc/ppp/options (chmod644).
Example 11-6. /etc/ppp/options
/dev/tty01lockcrtscts57600modemdefaultroutenoipdefault
Check the pppd(8) man page for the meaning of the options.
11.2.3.7 Testing the modem
Before activating the link it is a good idea to make a quick modem test, in order to verify that thephysical connection and the communication with the modem works. For the test the cu program can beused, as in the following example.
1. Create the file /etc/uucp/port with the following lines:
type modemport modemdevice /dev/tty01speed 115200
(substitute the correct device in place of /dev/tty01.)
2. Write the command cu -p modem to start sending commands to the modem. For example:
# cu -p modemConnected.ATZOK~.
Disconnected.#
In the previous example the reset command (ATZ) was sent to the modem, which replied with OK:the communication works. To exit cu, write ~ (tilde) followed by . (dot), as in the example.
If the modem doesn’t work, check that it is connected to the correct port (i.e. you are using the right portwith cu. Cables are a frequent cause of trouble, too.
Note: when you start cu, if a message saying “Permission denied” appears, check who is the ownerof the /dev/tty## device: it must be uucp. For example:
88

Chapter 11 Networking
$ ls -l /dev/tty00crw------- 1 uucp wheel 8, 0 Mar 22 20:39 /dev/tty00
If the owner is root, the following happens:
$ ls -l /dev/tty00crw------- 1 root wheel 8, 0 Mar 22 20:39 /dev/tty00$ cu -p modemcu: open (/dev/tty00): Permission deniedcu: All matching ports in use
COM, com and tty
A few words on the difference between com, COM and tty. For NetBSD, “com” is the nameof the serial port driver (the one that is displayed by dmesg) and “tty” is the name of theport. Since numbering starts at 0, com0 is the driver for the first serial port, named tty00. Inthe DOS world, instead, COM1 refers to the first serial port (usually located at (0x3f8),COM2 to the second, and so on. Therefore COM1 (DOS) corresponds to tty00 (NetBSD.)
11.2.3.8 Activating the link
At last everything is ready to connect to the provider with the following command:
# pppd call bignet
where bignet is the name of the already described connection script. To see the connection messages ofpppd, give the following command:
# tail -f /var/log/messages
To disconnect, do a kill -HUP of pppd.
11.2.3.9 Using a script for connection and disconnection
When the connection works correctly, it’s time to write a couple of scripts to avoid repeating thecommands every time. These two scripts can be named, for example, ppp-up and ppp-down.
ppp-up is used to connect to the provider:
Example 11-7. ppp-up
#!/bin/shMODEM=tty01POP=bignetif [ -f /var/spool/lock/LCK..$MODEM ]; then
echo ppp is already running...else
pppd call $POPtail -f /var/log/messages
89
Chapter 11 Networking
fi
ppp-down is used to close the connection:
Example 11-8. ppp-down
#!/bin/shMODEM=tty01if [ -f /var/spool/lock/LCK..$MODEM ]; then
echo -f killing pppd...kill -HUP ‘cat /var/spool/lock/LCK..$MODEM‘echo done
elseecho ppp is not active
fi
The two scripts take advantage of the fact that when pppd is active, it creates the file LCK..tty01 in the/var/spool/lock directory. This file contains the pid of the pppd process.
The two scripts must be executable:
# chmod u+x ppp-up ppp-down
11.2.4 Creating a small home networkNetworking is one of the main strengths of Unix and NetBSD is no exception: networking is bothpowerful and easy to set up and inexpensive too, because there is no need to buy additional software tocommunicate or to build a server. Section 11.3.1 explains how to configure a NetBSD machine to act as agateway for a network: with IPNAT all the hosts of the network can reach the Internet with a singleconnection to a provider made by the gateway machine. The only thing to be checked before creating thenetwork is to buy network cards supported by NetBSD (check the INSTALL file for a list of supporteddevices.)
First, the network cards must be installed and connected to a hub, switch or directly (see Figure 11-6.)
Next, check that the network cards are recognized by the kernel, studying the output of the dmesgcommand. In the following example the kernel recognized correctly an NE2000 clone:
...ne0 at isa0 port 0x280-0x29f irq 9ne0: NE2000 Ethernetne0: Ethernet address 00:c2:dd:c1:d1:21...
If the card is not recognized by the kernel, check that it is enabled in the kernel configuration file andthen that the card’s IRQ matches the one that the kernel expects. For example, this is the isa NE2000 linein the configuration file; the kernel expects the card to be at IRQ 9.
...ne0 at isa? port 0x280 irq 9 # NE[12]000 ethernet cards...
90

Chapter 11 Networking
If the card’s configuration is different, it will probably not be found at boot. In this case, either changethe line in the kernel configuration file and compile a new kernel or change the card’s setup (usuallythrough a setup disk or, for old cards, a jumper on the card.)
The following command shows the network card’s current configuration:
# ifconfig ne0ne0: flags=8822<BROADCAST,NOTRAILERS,SIMPLEX,MULTICAST> mtu 1500 media: Ethernet 10base2
The software configuration of the network card is very easy. The IP address “192.168.1.1” (which isreserved for internal networks) is assigned to the card.
# ifconfig ne0 inet 192.168.1.1 netmask 0xffffff00
Repeating the previous command now gives a different result:
# ifconfig ne0ne0: flags=8863<UP,BROADCAST,NOTRAILERS,RUNNING,SIMPLEX,MULTICAST> mtu 1500
media: Ethernet 10base2inet 192.168.1.1 netmask 0xffffff00 broadcast 192.168.1.255
The output of ifconfig has now changed: the IP address is now printed and there are two new flags, “UP”and “RUNNING” If the interface isn’t “UP”, it will not be used by the system to send packets.
The host was given the IP address 192.168.1.1, which belongs to the set of addresses reserved forinternal networks which are not reachable from the Internet. The configuration is finished and must nowbe tested; if there is another active host on the network, a ping can be tried. For example, if 192.168.1.2is the address of the active host:
# ping 192.168.1.2PING ape (192.168.1.2): 56 data bytes64 bytes from 192.168.1.2: icmp_seq=0 ttl=255 time=1.286 ms64 bytes from 192.168.1.2: icmp_seq=1 ttl=255 time=0.649 ms64 bytes from 192.168.1.2: icmp_seq=2 ttl=255 time=0.681 ms64 bytes from 192.168.1.2: icmp_seq=3 ttl=255 time=0.656 ms^C----ape PING Statistics----4 packets transmitted, 4 packets received, 0.0% packet lossround-trip min/avg/max/stddev = 0.649/0.818/1.286/0.312 ms
With the current setup, at the next boot it will be necessary to repeat the configuration of the networkcard. In order to avoid repeating the card’s configuration at each boot, two things need to be done: first,create the file /etc/ifconfig.ne0 containing the following line:
inet 192.168.1.1 netmask 0xffffff00
Next, in the /etc/rc.conf file, set the following option
auto_ifconfig=YES
At the next boot the network card will be configured automatically.
The /etc/hosts file is a database of IP addresses and textual aliases: it should contain the addresses ofall the hosts belonging to the internal network. For example:
91

Chapter 11 Networking
Example 11-9. /etc/hosts
# $NetBSD: hosts,v 1.6 2000/08/15 09:33:05 itojun Exp $## Host Database# This file should contain the addresses and aliases# for local hosts that share this file.# It is used only for "ifconfig" and other operations# before the nameserver is started.##127.0.0.1 localhost## RFC 1918 specifies that these networks are "internal".# 10.0.0.0 10.255.255.255# 172.16.0.0 172.31.255.255# 192.168.0.0 192.168.255.255
192.168.1.1 ape.insetti.net ape192.168.1.2 vespa.insetti.net vespa192.168.1.0 insetti.net
The /etc/nsswitch.conf should be modified as explained in Example 11-2.
Note: in this example the file /etc/ifconfig.ne0 was created because the network card wasrecognized as ne0 by the kernel; if you are using a different adapter, substitute the appropriate namein place of ne0.
Summing up, to configure the network the following must be done: the network adapters must beinstalled and physically connected. Next they must be configured (with ifconfig) and, finally, the/etc/hosts and /etc/nsswitch.conf files must be modified. This type of network management invery simplified and is suited only for small networks without sophisticated needs.
11.2.5 Connecting two PCs through a serial lineIf you need to transfer files between two PCs which are not networked there is a simple solution which isparticularly handy when copying the files to a floppy is not practical: the two machines can be networkedwith a serial cable (a null modem cable.) The following sections describe some configurations.
11.2.5.1 Connecting NetBSD with BSD or Linux
The easiest case is when both machines run NetBSD: making a connection with the SLIP protocol isvery easy. On the first machine write the following commands:
# slattach /dev/tty00# ifconfig sl0 inet 192.168.1.1 192.168.1.2
On the second machine write the following commands:
92

Chapter 11 Networking
# slattach /dev/tty00# ifconfig sl0 inet 192.168.1.2 192.168.1.1
Now you can test the connection with ping; for example, on the second PC write:
# ping 192.168.1.1
If everything worked there is now an active network connection between the two machines and ftp, telnetand other similar commands can be executed. The textual aliases of the machines can be written in the/etc/hosts file.
• In the previous example both PC’s used the first serial port (/dev/tty0). Substitute the appropriatedevice if you are using another port.
• IP addresses like 192.168.x.x are reserved for “internal” networks. The first PC has address192.168.1.1 and the second 192.168.1.2.
• To achieve a faster connection the -s speed option to slattach can be specified.
• ftp can be used to transfer files only if inetd is active and the ftpd server is enabled.
Linux: if one of the two PC’s runs Linux, the commands are slightly different (on the Linux machineonly.) If the Linux machine gets the 192.168.1.2 address, the following commands are needed:
# slattach -p slip -s 115200 /dev/ttyS0 &# ifconfig sl0 192.168.1.2 pointopoint 192.168.1.1 up# route add 192.168.1.1 dev sl0
Don’t forget the “&” in the first command.
11.2.5.2 Connecting NetBSD and Windows NT
NetBSD and Windows NT can be (almost) easily networked with a serial null modem cable. Basicallywhat needs to be done is to create a “Remote Access” connection under Windows NT and to start pppdon NetBSD.
Start pppd as root after having created a .ppprc in /root. Use the following example as a template.
connect ’/usr/sbin/chat -v CLIENT CLIENTSERVER’localtty00115200crtsctslocknoauthnodefaultroute:192.168.1.2
The meaning of the first line will be explained later in this section; 192.168.1.2 is the IP address that willbe assigned by NetBSD to the Windows NT host; tty00 is the serial port used for the connection (firstserial port.)
93

Chapter 11 Networking
On the NT side a null modem device must be installed from the Control Panel (Modem icon) and aRemote Access connection using this modem must be created. The null modem driver is standard underWindows NT 4 but it’s not a 100% null modem: when the link is activated, NT sends the string CLIENTand expects to receive the answer CLIENTSERVER. This is the meaning of the first line of the .ppprcfile: chat must answer to NT when the connection is activated or the connection will fail.
In the configuration of the Remote Access connection the following must be specified: use the nullmodem, telephone number “1” (it’s not used, anyway), PPP server, enable only TCP/IP protocol, use IPaddress and namservers from the server (NetBSD in this case.) Select the hardware control flow and setthe port to 115200 8N1.
Now everything is ready to activate the connection.
• Connect the serial ports of the two machines with the null modem cable.
• Launch pppd on NetBSD. To see the messages of pppd: tail -f /var/log/messages).
• Activate the Remote Access connection on Windows NT.
11.2.5.3 Connecting NetBSD and Windows 95
The setup for Windows 95 is similar to the one for Windows NT: Remote Access on Windows 95 and thePPP server on NetBSD will be used. Most (if not all) Windows 95 releases don’t have the null modemdriver, which makes things a little more complicated. The easiest solution is to find one of the availablenull modem drivers on the Internet (it’s a small .INF file) and repeat the same steps as for Windows NT.The only difference is that the first line of the .ppprc file (the one that calls chat) can be removed.
If you can’t find a real null modem driver for Windows 95 it’s still possible to use a little trick:
• Create a Remote Access connection like the one described in Section 11.2.5.2 but using the “StandardModem”.
• In .ppprc substitute the line that calls chat with the following line
connect ’/usr/sbin/chat -v ATH OK AT OK ATE0V1 OK AT OK ATDT CONNECT’
• Activate the connection as described in Section 11.2.5.2.
In this way the chat program, called when the connection is activated, emulates what Windows 95 thinksis a standard modem, returning to Windows 95 the same answers that a standard modem would return.Whenever Windows 95 sends a modem command string, chat returns OK.
11.3 Advanced Topics
11.3.1 IPNATThe mysterious acronym IPNAT hides the Internet Protocol Network Address Translation, which enables
94

Chapter 11 Networking
the routing of an internal network on a real network (Internet.) This means that with only one “real” IP,static or dynamic, belonging to a gateway running IPNAT, it is possible to create simultaneousconnections to the Internet for all the hosts of the internal network.
Some usage examples of IPNAT can be found in the subdirectory /usr/share/examples/ipf: look atthe files BASIC.NAT and nat-setup.
The setup for the example described in this section is detailed in Figure 11-6: host 1 can connect to theInternet calling a provider with a modem and getting a dynamic IP address. host 2 and host 3 can’tcommunicate with the Internet with a normal setup: IPNAT allows them to do it: host 1 will act as agateway for hosts 2 and 3.
Figure 11-6. Network with gateway
192.168.1.3 192.168.1.2 192.168.1.1
host 3 host 2 host 1
modem
local net 192.168.1.0
ISPppp0
ne0
......
Gateway
ne0ne0
static/dynamic IP
INTERNET
11.3.1.1 Configuring the gateway/firewall
To use IPNAT, in the kernel configuration file the “pseudo-device ipfilter” must be enabled in the kernel.To check if it is enabled in the current kernel:
# sysctl net.inet.ip.forwardingnet.inet.ip.forwarding = 1
If the result is “1” as in the previous example, the option is enabled, otherwise, if the result is “0” theoption is disabled. You can do two things:
1. Compile a new kernel, with the GATEWAY option enabled by default.
2. Enable the option in the current kernel with the following command:
# sysctl -w net.inet.ip.forwarding=1
You can add sysctl settings to /etc/sysctl.conf to have them set automatically at boot. In thiscase you would want
net.inet.ip.forwarding=1
The rest of this section explains how to create an IPNAT configuration that is automatically started everytime that a connection to the provider is activated with the PPP link. With this configuration all the host
95

Chapter 11 Networking
of a home network (for example) will be able to connect to the Internet through the gateway machine,even if they don’t use NetBSD.
First, create the /etc/ipnat.conf file containing the following rules:
map ppp0 192.168.1.0/24 -> 0/32 proxy port ftp ftp/tcpmap ppp0 192.168.1.0/24 -> 0/32 portmap tcp/udp 40000:60000map ppp0 192.168.1.0/24 -> 0/32
192.168.1.0/24 are the network addresses that should be mapped The first line of the configuration file isoptional: it enables active FTP to work through the gateway. The second line is used to handle correctlytcp and udp packets; the portmapping is necessary because of the many to one relationship.) The thirdline is used to enable ICMP, ping, etc.
Create the /etc/ppp/ip-up file; it will be called automatically every time that the PPP link is activated.
#!/bin/sh# /etc/ppp/ip-up/etc/rc.d/ipnat forcestart
Create the file /etc/ppp/ip-down; it will be called automatically when the PPP link is closed.
#!/bin/sh# /etc/ppp/ip-down/etc/rc.d/ipnat forcestop
Both ip-up and ip-down must be executable:
# chmod u+x ip-up ip-down
The gateway machine is now ready.
11.3.1.2 Configuring the clients
Create a /etc/resolv.conf file like the one on the gateway machine.
Write the following command:
# route add default 192.168.1.1
192.168.1.1 is the address of the gateway machine configured in the previous section.
Of course you don’t want to give this command every time, so it’s better to define the “defaultroute” entryin the /etc/rc.conf file or, which is the same, write the address of the gateway in the /etc/mygatefile: the default route will be set automatically during system initialization, using the contents of/etc/mygate (or the defaultroute option) as an argument to the route add default command.
If the client machine is not using NetBSD, the configuration will be different. On Windows PC’s youneed to set the gateway property of the TCP/IP protocol to the IP address of the NetBSD gateway.
That’s all that needs to be done on the client machines.
96

Chapter 11 Networking
11.3.1.3 Some useful commands
The following commands can be useful for diagnosing problems:
ping
netstat -r
Displays the routing tables (similar to route show).
traceroute
On the client it shows the route followed by the packets to their destination.
tcpdump
Use on the gateway to monitor TCP/IP traffic.
11.3.2 BridgeA bridge can be used to combine different physical networks into one logical network. The NetBSD“bridge” driver provides bridge functionality on NetBSD systems.
11.3.2.1 Bridge example
In this example two physical networks are going to be combined in one logical network, 192.168.1.0,using a NetBSD bridge. The NetBSD machine which is going to act as bridge has two interfaces, ne0and ne1, which are both connected to one physical network.
The first step is to make sure support for the “bridge” is compiled in the running kernel. Support isincluded in the GENERIC kernel.
When the system is ready the bridge can be created, this can be done using the brconfig(8) command.First of a bridge interface has to be created. With the following ifconfig command the “bridge0” interfacewill be created:
$ ifconfig bridge0 create
Please make sure that at this point both the ne0 and ne1 interfaces are up. The next step is to add the ne0and ne1 interfaces to the bridge.
$ brconfig bridge0 add ne0 add ne1 up
This configuration can be automatically set up by creating an /etc/ifconfig.interface file, in thiscase /etc/ifconfig.bridge0, with the following contents:
create!brconfig $int add ne0 add ne1 up
97
Chapter 11 Networking
After setting up the bridge the bridge configuration can be displayed using the brconfig -a command.Remember that if you want to give the bridge machine an IP address you can only allocate an IP addressto one of the interfaces which are part of the bridge.
11.3.3 NFSNow that the network is working it is possible to share files and directories over the network using NFS.From the point of view of file sharing, the computer which gives access to its files and directories iscalled the server, and the computer using these files and directories is the client. A computer can beclient and server at the same time.
• A kernel must be compiled with the appropriate options for the client and the server (the options areeasy to find in the kernel configuration file. See Section 11.2.1 for more information on NFS relatedkernel options.
• The server must enable its RPC services in /etc/inetd.conf.
• In /etc/rc.conf the server must enable the inetd and portmap daemons and the nfs_serveroption.
• In /etc/rc.conf the client must enable inetd and nfs_client.
• The server must list the exported directories in /etc/exports and then run the command kill -HUP‘cat /var/run/mountd.pid.
A client host can access a remote directory through NFS if:
• The server host exports the directory.
• The client host mounts the remote directory with the command mount server:/xx/yy /mnt
The mount command has a rich set of options for remote directories which are not very intuitive (to saythe least.)
11.3.3.1 NFS setup example
Warning: I have taken this rather complicated example from a NetBSD mailing list and I haven’t testedit; it should give an idea of how NFS works.
The scenario is the following: five client machines (cli1, ..., cli5) share some directories on a server(buzz.toys.org.) Some of the directories exported by the server are reserved for a specific client, the otherdirectories are common for all client machines. All the clients boot from the server and must mount thedirectories.
The directories exported from the server are:
/export/cli?/root
the five root directories for the five client machines. Each client has its own root directory.
98

Chapter 11 Networking
/export/cli?/swap
Five swap directories for the five swap machines.
/export/common/usr
/usr directory; common for all client hosts.
/usr/src
Common /usr/src directory for all client machines.
The following file systems exist on the server
/dev/ra0a on //dev/ra0f on /usr/dev/ra1a on /usr/src/dev/ra2a on /export
Each client needs the following file systems
buzz:/export/cli?/root on /buzz:/export/common/usr on /usrbuzz:/usr/src on /usr/src
The server configuration is the following:
# /etc/exports/usr/src -network 123.45.67.0 -mask 255.255.255.0/export -alldirs -maproot=root -network 123.45.67.0 -mask 255.255.255.0
On the client machines /etc/fstab contains
buzz:/export/cli?/root / nfs rwbuzz:/export/common/usr /usr nfs rw,nodev,nosuidbuzz:/usr/src /usr/src rw,nodev,nosuid
Each client machine has its number substituted to the “?” character in the first line of the previousexample.
11.3.4 Setting up /net with amd
11.3.4.1 Introduction
The problem with NFS (and other) mounts is, that you usually have to be root to make them, which canbe rather inconvenient for users. Using amd you can set up a certain directory (I’ll take /net), underwhich one can make any NFS-mount as a normal user, as long as the filesystem about to be accessed isactually exported by the NFS server.
To check if a certain server exports a filesystem, and which ones, use the showmount-command with the-e (export) switch:
99

Chapter 11 Networking
$ showmount -e wuarchive.wustl.eduExports list on wuarchive.wustl.edu:/export/home onc.wustl.edu/export/local onc.wustl.edu/export/adm/log onc.wustl.edu/usr onc.wustl.edu/ onc.wustl.edu/archive Everyone
If you then want to mount a directory to access anything below it (for example/archive/systems/unix/NetBSD), just change into that directory:
$ cd /net/wuarchive.wustl.edu/archive/systems/unix/NetBSD
The filesystem will be mounted (by amd), and you can a access any files just as if the directory wasmounted by the superuser of your system.
11.3.4.2 Actual setup
You can set up such a /net directory with the following steps (including basic amd configuration):
1. in /etc/rc.conf, set the following variable:
amd=yes
2. mkdir /amd
3. mkdir /net
4. Taking /usr/share/examples/amd/master, put the following into /etc/amd/master:
/net /etc/amd/net
5. Taking /usr/share/examples/amd/net as example, put the following into /etc/amd/net:
/defaults type:=host;rhost:=${key};fs:=${autodir}/${rhost}/root* host==${key};type:=link;fs:=/ \
host!=${key};opts:=ro,soft,intr,nodev,nosuid,noconn
6. Reboot, or (re)start amd by hand:
# sh /etc/rc.d/amd restart
11.3.5 IPv6 Connectivity & Transition via 6to4This section will concentrate on how to get network connectivity for IPv6 and - as that’s still not easy toget native today - talk in length about the alternatives to native IPv6 connectivity as a transitional methoduntil native IPv6 peers are available.
Finding an ISP that offers IPv6 natively needs quite some luck. What you need next is a router that willbe able to handle the traffic. To date, not all router manufacturers offer IPv6 support for their machines,and even if they do, it’s unlikely that they offer hardware accelerated IPv6 routing or switching. A rathercheap alternative to the router hardware commonly in use today is using a standard PC and configure it
100

Chapter 11 Networking
as a router, e.g. by using some Linux or BSD derived operating system like NetBSD, and use softwarelike Zebra for handling the routing protocols. This solution is rather common today for sites that wantIPv6 connectivity today. The drawbacks are that you need an ISP that supports IPv6, and that you needdedicated uplink only for IPv6.
If this is not an option for you, you can still get IPv6 connectivity by using tunnels. Instead of talkingIPv6 on the wire, the IPv6 packets are encapsulated in IPv4 packets, as shown in Figure 11-7. Usingexisting IPv4 infrastructure, the encapsulated packets are sent to a IPv6-capable uplink that will thenremove the encapsulation, and forward the IPv6 packets via native IPv6.
Figure 11-7. A frequently used method for transition is tunneling IPv6 in IPv4 packets
v6 v6
v6
local v4 gate v4
gate v6local v6
de−encapsulation
v4
encapsulation
When using tunnels, there are two possibilities. One is to use a so-called “configured” tunnel, the other iscalled an “automatic” tunnel. A “configured” tunnel is one that required preparation from both ends ofthe tunnel, usually connected with some kind of registration to exchange setup information. An examplefor such a configured tunnel is the IPv6-over-IPv4 encapsulation described in [RFC1933], and that’simplemented e.g. by the gif(4) device found in NetBSD.
An “automatic” tunnel consists of a public server that has some kind of IPv6 connectivity, e.g. via6Bone. That server has made it’s connectivity data public, and also runs a tunneling protocol that doesnot require an explicit registration of the sites using it as uplink. A well-used example of such a protocolis the 6to4 mechanism described in [RFC3056], and that is implemented in the stf(4) device found inNetBSD’s. Another mechanism that does not require registration of IPv6-information is the 6over4mechanism, which implements transporting of IPv6 over a multicast-enabled IPv4 network, instead ofe.g. ethernet or FDDI. 6over4 is documented in [RFC2529]. It’s main drawback is that you do needexisting multicast infrastructure. If you don’t have that, setting it up is about as much effort as setting upa configured IPv6 tunnel directly, so it’s usually not worth bothering in that case.
11.3.5.1 Getting 6to4 IPv6 up & running
6to4 is an easy way to get IPv6 connectivity for hosts that only have an IPv4 uplink, esp. if you have thebackground given in Section 11.1.7. It can be used with static as well as dynamically assigned IPv4addresses, e.g. as found in modem dialup scenarios today. When using dynamic IPv4 addresses, a changeof IP addresses will be a problem for incoming traffic, i.e. you can’t run persistent servers.
Example configurations given in this section is for NetBSD 1.5.2.
11.3.5.2 Obtaining IPv6 Address Space for 6to4
The 6to4 IPv6 setup on your side doesn’t consist of a single IPv6 address; Instead, you get a whole /48network! The IPv6 addresses are derived from your (single) IPv4 address. The address prefix “2002:” isreserved for 6to4 based addresses (i.e. IPv6 addresses derived from IPv4 addresses). The next 32 bits areyour IPv4 address. This results in a /48 network that you can use for your very own purpose. It leaves 16
101

Chapter 11 Networking
bits space for 216 IPv6 subnets, which can take up to 264 nodes each. Figure 11-8 illustrates the buildingof your IPv6 address (range) from your IPv4 address.
Thanks to the 6to4 prefix and your worldwide unique IPv4 address, this address block is unique, and it’smapped to your machine carrying the IPv4 address in question.
Figure 11-8. 6to4 derives a IPv6 from an IPv4 address
2002:
prefix6to4
:
address space80 bit
:0001::1
Your IPv4 address:
0962
62.157.9.98
62 157 9 98
3e 09 629dHex:
Decimal:
Your IPv6 address: 3e9d
11.3.5.3 How to get connected
In contrast to the configured “IPv6-over-IPv4 tunnel” setup, you do not have to register at a6bone-gateway, which will then forward you any IPv6 traffic (encapsulated in IPv4). Instead, as yourIPv6 address is derived from your IPv4 address, any answers can be sent through your nearest 6to4gateway to you. De-encapsulation of the packet is done via a 6to4-capable network interface, which thenforwards the resulting IPv6 package according to your routing setup (in case you have more than onemachine connected on your 6to4 assigned network).
For sending out IPv6 packets, the 6to4-capable network interface will take the IPv6 packet, andencapsulate it into a IPv4 packet. You still need a 6bone-connected 6to4-gateway as uplink that willde-encapsulate your packets, and forward them on over the 6Bone. Figure 11-9 illustrates this.
Figure 11-9. Request and reply can be routed via different gateways in 6to4
upstream
downstream
IPv6−EnabledInternet
(6Bone, ...)myhost my6to4gate
yetanother6to4gate
other6to4gate
11.3.5.4 Security Considerations
In contrast to the “configured tunnel” setup, you usually can’t setup packet filters to block 6to4-packetsfrom unauthorized sources, as this is exactly how (and why) 6to4 works at all. As such, malicious users
102

Chapter 11 Networking
can send packets with invalid/hazardous IPv6 payload. If you don’t already filter on your bordergateways anyways, packets with the following characteristics should not be allowed as valid 6to4packets, and some firewalling seems to be justified for them:
• unspecified IPv4 source/destination address: 0.0.0.0/8
• loopback address in outer (v4) source/destination: 127.0.0.0/8
• IPv4 multicast in source/destination: 224.0.0.0/4
• limited broadcasts: 255.0.0.0/8
• subnet broadcast address as source/destination: depends on your IPv4 setup
The NetBSD stf(4) manual page documents some common configuration mistakes intercepted by defaultby the KAME stack as well as some further advice on filtering, but keep in mind that because of therequirement of these filters, 6to4 is not perfectly secure. Still, if forged 6to4 packets become a problem,you can use IPsec authentication to ensure the IPv6 packets are not modified.
11.3.5.5 Data Needed for 6to4 Setup
In order to setup and configure IPv6 over 6to4, a few bits of configuration data must be known inadvance. These are:
• Your local IPv4 address. It can be determined using either the ’ifconfig -a’ or ’netstat -i’ commandson most Unix systems. If you use a NATing gateway or something, be sure to use the official,outside-visible address, not your private (10/8 or 192.168/16) one.
We will use 62.224.57.114 as the local IPv4 address in our example.
• Your local IPv6 address, as derived from the IPv4 address. See Figure 11-8 on how to do that.
For our example, this is 2002:3ee0:3972:0001::1 (62.224.57.114 == 0x3ee03972, 0001::1 arbitrarilychosen).
• The IPv6-address of the 6to4 uplink gateway you want to use. The IPv6 address will do, as it alsocontains the IPv4 address in the usual 6to4 translation.
We will use 2002:c25f:6cbf::1 (== 194.95.108.191 == 6to4.ipv6.fh-regensburg.de).
11.3.5.6 Kernel Preparation
To process 6to4 packets, the operating system kernel needs to know about them. For that a driver has tobe compiled in that knows about 6to4, and how to handle it.
For a NetBSD kernel, put the following into your kernel config file to prepare it for using IPv6 and 6to4,e.g. on NetBSD use:
options INET6 # IPv6
103

Chapter 11 Networking
pseudo-device stf # 6to4 IPv6 over IPv4 encapsulation
Note that the stf(4) device is not enabled by default. Rebuild your kernel, then reboot your system to usethe new kernel. Please consult Chapter 9 for further information on configuring, building and installing anew kernel!
11.3.5.7 6to4 Setup
This section describes the commands to setup 6to4. In short, the steps performed here are:
1. Configure interface
2. Set default route
3. Setup Router Advertisement, if wanted
The first step in setting up 6to4 is assigning an IPv6 address to the 6to4 interface. This is achieved withthe ifconfig(8) command. Assuming the example configuration above, the command for NetBSD is:
# ifconfig stf0 inet6 2002:3ee0:3972:1::1 prefixlen 16 alias (local)
After configuring the 6to4 device with these commands, routing needs to be setup, to forward all IPv6traffic to the 6to4 (uplink) gateway. The best way to do this is by setting a default route, the command todo so is, for NetBSD:
# route add -inet6 default 2002:cdb2:5ac2::1 (remote)
Note that NetBSD’s stf(4) device determines the IPv4 address of the 6to4 uplink from the routing table.Using this feature, it is easy to setup your own 6to4 (uplink) gateway if you have a IPv6 uplink, e.g. via6Bone.
After these commands, you are connected to the IPv6-enabled world - Congratulations! Assuming nameresolution is still done via IPv4, you can now ping a IPv6-site like www.kame.net or www6.NetBSD.org:
# /sbin/ping6 www.kame.net
As a final step in setting up IPv6 via 6to4, you will want to setup Router Advertisement if you haveseveral hosts on your network. While it is possible to setup 6to4 on each node, doing so will result invery expensive routing from one node to the other - packets will be sent to the remote 6to4 gateway,which will then route the packets back to the neighbor node. Instead, setting up 6to4 on one machine andtalking native IPv6 on-wire is the preferred method of handling things.
The first step to do so is to assign a IPv6-address to your ethernet. In the following example we willassume subnet “2” of the IPv6-net is used for the local ethernet and the MAC address of the ethernetinterface is 12:34:56:78:9a:bc, i.e. your local gateway’s ethernet interface’s IP address will be2002:3ee0:3972:2:1234:56ff:fe78:9abc. Assign this address to your ethernet interface, e.g.
# ifconfig ne0 inet6 alias 2002:3ee0:3972:2:1234:56ff:fe78:9abc
Here, “ne0” is an example for your ethernet card interface. This will most likely be different for yoursetup, depending on what kind of card is used.
104

Chapter 11 Networking
Next thing that needs to be ensured for setting up the router is that it will actually forward packets fromthe local 6to4 device to the ethernet device and back. To enable IPv6 packet forwarding, set“ip6mode=router” in NetBSD’s /etc/rc.conf, which will result in the “net.inet6.ip6.forwarding”sysctl being set to “1”:
# sysctl -w net.inet6.ip6.forwarding=1
Figure 11-10. Enabling packet forwarding is needed for a 6to4 router
ethernet interface
node node
forwardingIPv66to4 interface
router
To setup router advertisement on BSD, the file /etc/rtadvd.conf needs to be checked. It allowsconfiguration of many things, but usually the default config of not containing any data is ok. With thatdefault, IPv6 addresses found on all of the router’s network interfaces will be advertised.
After checking the router advertisement configuration is correct and IPv6 forwarding is turned on, thedaemon handling it can be started. Under NetBSD, it is called ’rtadvd’. Start it up either manually (fortesting it the first time) or via the system’s startup scripts, and see all your local nodes automagicallyconfigure the advertised subnet address in addition to their already-existing link local address.
# rtadvd
11.3.5.8 Quickstart using pkgsrc/net/6to4
So far, we have described how 6to4 works and how to set it up manually. For an automated way to makeeverything happen e.g. when going online, the ’6to4’ package is convenient. It will determine your IPv6address from the IPv4 address you got assigned by your provider, then set things up that you areconnected.
Steps to setup the pkgsrc/net/6to4 package are:
1. Install the package either by compiling it from pkgsrc, or by pkg_add’ing the 6to4-1.1nb1 package.
# cd /usr/pkgsrc/net/6to4# make install
2. Make sure you have the stf(4) pseudo-device in your kernel, see above.
3. Configure the ’6to4’ package. Frist, copy /usr/pkg/etc/6to4.conf-example to/usr/pkg/etc/6to4.conf, then adjust the variables. Note that the file is in perl syntax.
# cd /usr/pkg/etc# cp 6to4.conf-example 6to4.conf
105

Chapter 11 Networking
# vi 6to4.conf
Please see the 6to4(8) manpage for an explanation of all the variables you can set in 6to4.conf. Ifyou have dialup IP via PPP, and don’t want to run Router Advertizing for other IPv6 machines onyour home or office network, you don’t need to configure anything. If you want to setup RouterAdvertising, you need to set the in_if to the internal (ethernet) interface, e.g.
$in_if="rtk0"; # Inside (ethernet) interface
4. Now dial up, then start the 6to4 command manually:
# /usr/pkg/sbin/6to4.pl start
After that, you should be connected, use ping6(8) etc. to see if everything works. If it does, you canput the following lines into your /etc/ppp/ip-up script to run the command each time you goonline:
logger -p user.info -t ip-up Configuring 6to4 IPv6/usr/pkg/sbin/6to4.pl stop/usr/pkg/sbin/6to4.pl start
5. If you want to route IPv6 for your LAN, you can instruct 6to4.pl to setup Router Advertising foryou too:
# /usr/pkg/sbin/6to4 rtadvd-start
You can put that command into /etc/ppp/ip-up as well to make it permanent.
6. If you have changed /etc/ppp/ip-up to setup 6to4 automatically, you will most likely want tochange /etc/ppp/ip-down too, to shut it down when you go offline. Here’s what to put into/etc/ppp/ip-down:
logger -p user.info -t ip-down Shutting down 6to4 IPv6/usr/pkg/sbin/6to4.pl rtadvd-stop/usr/pkg/sbin/6to4.pl stop
11.3.5.9 Known 6to4 Gateway
There are not many public 6to4 gateways available today, and from the few available, you will want tochose the one closest to you, netwise. A list of known working 6to4 gateways is available athttp://www.kfu.com/~nsayer/6to4/. In tests, only 6to4.kfu.com and 6to4.ipv6.microsoft.com were foundworking. Cisco has another one that you have to register to before using it, seehttp://www.cisco.com/ipv6/.
There’s also an experimental 6to4 server located in Germany, 6to4.ipv6.fh-regensburg.de. This serverruns under NetBSD 1.5 and was setup using the configuration steps described above. The wholeconfiguration of the machine can be seen at http://www.feyrer.de/IPv6/netstart.local.
106

Chapter 11 Networking
11.3.5.10 Conclusion & Further Reading
Compared to where IPv4 is today, IPv6 is still in it’s early steps. It is working, there are all sort ofservices and clients available, only the userbase is missing. It is hoped the information provided herehelps people better understand what IPv6 is, and to start playing with it.
A few links should be mentioned here for interested parties:
• An example script to setup 6to4 on BSD based machines is available athttp://www.NetBSD.org/packages/net/hf6to4/. The script determines your IPv6 address and sets up6to4 and (if wanted) router advertising. It was designed to work in dialup setups with changing IPv4addresses.
• Given that there isn’t a standard for IPv6 in Linux land today, there are different setup instructions formost distributions. The setup of IPv6 on Debian GNU/Linux can be found athttp://people.debian.org/~csmall/ipv6/setup.html andhttp://www.mailgate.org/linux/linux.debian.ipv6/msg00137.html.
• The BSD Unix implementations have their own IPv6 documentation each, interesting URLs arehttp://www.NetBSD.org/Documentation/network/ipv6/ for NetBSD,http://www.freebsd.org/doc/en_US.ISO8859-1/books/handbook/network-ipv6.html for FreeBSD andpages 61 and 62 of the BSD/OS Administrator’s Guide athttp://www.bsdi.com/products/internet/release-notes/rn42.pdf.
• Projects working on implementing IPv6 protocol stacks for free Unix like operating systems areKAME for BSD and USAGI for Linux. Their web sites can be found at http://www.kame.net/ andhttp://www.linux-ipv6.org/. A list of host and router implementations can be found athttp://playground.sun.com/pub/ipng/html/ipng-implementations.html.
• Besides the official RFC archive at ftp://ftp.isi.edu/in-notes, information on IPv6 can be found atseveral web sites. First and foremost, the 6Bone’s web page at http://www.6bone.net/ must bementioned. 6Bone was started as the testbed for IPv6, and is now an important part of theIPv6-connected world. Other web pages that contain IPv6-related contents includehttp://www.ipv6.org/, http://playground.sun.com/pub/ipng/html/ and http://www.ipv6forum.com/.Most of these sites carry further links - be sure to have a look!
Bibliography
[AeleenFrisch] Aeleen Frisch, 1991, O’Reilly & Associates, Essential System Administration.
[CraigHunt] Craig Hunt, 1993, O’Reilly & Associates, TCP/IP Network Administration.
[RFC1034] P. V. Mockapetris, 1987, RFC 1034: Domain names - concepts and facilities.
[RFC1035] P. V. Mockapetris, 1987, RFC 1035: Domain names - implementation and specification.
[RFC1055] J. L. Romkey, 1988, RFC 1055: Nonstandard for transmission of IP datagrams over seriallines: SLIP.
107

Chapter 11 Networking
[RFC1331] W. Simpson, 1992, RFC 1331: The Point-to-Point Protocol (PPP) for the Transmission ofMulti-protocol Datagrams over Point-to-Point Links.
[RFC1332] G. McGregor, 1992, RFC 1332: The PPP Internet Protocol Control Protocol (IPCP).
[RFC1933] R. Gilligan and E. Nordmark, 1996, RFC 1933: Transition Mechanisms for IPv6 Hosts andRouters.
[RFC2004] C. Perkins, 1996, RFC 2003: IP Encapsulation within IP.
[RFC2401] S. Kent and R. Atkinson, 1998, RFC 2401: Security Architecture for the Internet Protocol.
[RFC2411] R. Thayer, N. Doraswamy, and R. Glenn, 1998, RFC 2411: IP Security Document Roadmap.
[RFC2461] T. Narten, E. Nordmark, and W. Simpson, 1998, RFC 2461: Neighbor Discovery for IPVersion 6 (IPv6).
[RFC2529] B. Carpenter and C. Jung, 1999, RFC 2529: Transmission of IPv6 over IPv4 Domainswithout Explicit Tunnels.
[RFC3024] G. Montenegro, 2001, RFC 3024: Reverse Tunneling for Mobile IP.
[RFC3027] M. Holdrege and P. Srisuresh, 2001, RFC 3027: Protocol Complications with the IP NetworkAddress Translator.
[RFC3056] B. Carpenter and K. Moore, 2001, RFC 3056: Connection of IPv6 Domains via IPv4 Clouds.
108

Chapter 12
The Domain Name System
The Domain Name System on NetBSD. This chapter describes setting up a simple small domain withone Domain Name Server (DNS) on a NetBSD system. It does not provide a detailed overview of whatDNS is, however, a brief explanation is offered. Further information can be obtained from the DNSResources Directory (DNSRD) at http://www.dns.net/dnsrd/.
12.1 Notes and Pre-RequisitesThe examples in this chapter refer to BIND major version 8, however, it should be noted that the data-base format and named.conf are almost 100% compatible between version. The only difference Inoticed was that the “$TTL” information was not required.
The reader should have a good understanding of basic hosts to IP address mapping and IP address classspecifications.
12.2 What is DNS?The Domain Name System converts machine names to IP addresses. The mapping is done from name toaddress and address to name. The difference between just plain hosts IP mapping and Domain mappingis that DNS uses a hierarchichal naming standard. This hierarchy works from right-to-left with thehighest level being on the right. As an example, here is a simple domain break-out:
TOP-LEVEL .org|
MID-LEVEL .diverge.org______________________|________________________
| | |BOTTOM-LEVEL strider.diverge.org samwise.diverge.org wormtongue.diverge.org
It seems simple enough, however, the system can also be logically divided even further if one wishes atdifferent points. The example shown above shows three nodes on the diverge.org domain, but we couldeven divide diverge.org into subdomains such as strider.net1.diverge.org, samwise.net2.diverge.org andwormtongue.net2.diverge.org, in this case, 2 nodes reside on net2.diverge.org and one onnet1.diverge.org.
109

Chapter 12 The Domain Name System
12.3 The DNS FilesNow let’s look at actually setting up a small DNS enabled network. We will continue to use the examplesmentioned above, before we begin we must make a few assumptions:
• Our host-to-ip is working correctly
• We have IPNAT working correctly
• Currently all hosts use the ISP for DNS
Note: this type of configuration was described in Chapter 11.
Our Name Server will be the “strider” host, it also runs IPNAT and our two clients use strider as agateway. It is not really relevant as to what type of interface is on strider, but for argument’s sake we willsay a 56k dial up connection.
So, before going any further, let’s look at our hosts file on strider before we have made the alterations touse DNS.
Example 12-1. strider’s /etc/hosts file
127.0.0.1 localhost192.168.1.1 strider192.168.1.2 samwise sam192.168.1.3 wormtongue worm
not exactly a huge network, it is worth noting that the same rules apply for larger networks as we discussin the context of this section.
12.3.1 /etc/namedb/named.conf
The NetBSD Operating System provides a set of default files for you to use or go from, they are stored in/etc/namedb, I strongly suggest making a backup copy of this directory for reference purposes.
The default directory contains the following files:
• 127
• localhost
• loopback.v6
• named.conf
• root.cache
You will see modified versions of these files in my configuration.
The first file we want to look at is /etc/namedb/named.conf. This file is the config file for bind(hence the catchy name). Setting up system like the one we are doing is relatively simple. First, here iswhat mine looks like:
110

Chapter 12 The Domain Name System
options {directory "/etc/namedb";allow-transfer { 192.168.1.0/24; };recursion yes;allow-query { 192.168.1.0/24; };listen-on port 53 { 192.168.1.1; };
};
zone "localhost" {type master;notify no;file "localhost";
};
zone "127.IN-ADDR.ARPA" {type master;notify no;file "127";
};
zone "0.0.0.0.0.0.0.0.0.0.0.0.0.0.0.0.0.0.0.0.0.0.0.0.0.0.0.0.0.0.0.ip6.int" {type master;file "loopback.v6";
};
zone "diverge.org" {type master;notify no;file "diverge.org";
};
zone "1.168.192.in-addr.arpa" {type master;notify no;file "1.168.192";
};
zone "." in {type hint;file "root.cache";
};
Note that in my named.conf the root section is last, that is because there is another domain calleddiverge.org on the internet (I happen to own it) so I want the resolver to look out on the internet last. Thisis not normally the case on most systems.
Another very important thing to remember here is that if you have an internal setup, in other words nolive internet connection and/or no need to do root server lookups, comment out the root zone. It maycause lookup problems if a particular client decides it wants to reference a domain on the internet.
Looks like a pretty big mess, upon closer examination it is revealed that many of the lines in each sectionare somewhat redundant. So we should only have to explain them a few times.
Lets go through the sections of named.conf:
111

Chapter 12 The Domain Name System
12.3.1.1 options
This section defines some global parameters, most noticeable is the location of the DNS tables, on thisparticular system, they will be put in /etc/named.
Following are the rest of the params:
allow-transfer
for remote DNS servers acting as secondaries and need zone file information from you.
allow-query
what network may query this name server
listen-on port
the port this server will run named on
The rest of the named.conf file consists of “zones”, each zone has a file associated with and tableswithin that file for resolving that particular area (or, zone) of the domain. As is readily apparent, theirformat in named.conf is strikingly similar, so I will highlight just one of their records:
12.3.1.2 zone “diverge.org”
type
the type of zone in all cases except “.” they are master
notify
do you want to send out notifications when your zone changes? Obviously not in this setup.
file
the filename in our named directory where records about this particular zone may be found.
12.3.2 /etc/namedb/localhost
For the most part, the zone files look quite similar, however, each one does have some unique properties.Here is what the localhost file looks like:
Example 12-2. localhost
1|$TTL 36002|@ IN SOA strider.diverge.org. hostmaster.diverge.org. (3| 1 ; Serial4| 8H ; Refresh5| 2H ; Retry6| 1W ; Expire7| 1D) ; Minimum TTL8| IN NS localhost.
112

Chapter 12 The Domain Name System
9|localhost. IN A 127.0.0.110| IN AAAA ::1
Line by line:
Line 1
This is the Time To Live for lookups, this is generally the same in all of the files.
Line 2
This line is generally the same in all zone files except root. Of specific interest on this line arestrider.diverge.org. and root.diverge.org. Obviously one is the name of this server and the other is thecontact for this DNS server, in most cases root seems a little ambiguous, it is preferred that a regularemail account be used for the contact information (for example, mine would be jrf.diverge.org.).
Line 3
This line is the serial number, most people use the date they installed the server in a format like so:MMDDYYYY. The serial number should be incremented each time there is a change to the fileafter it has been initially installed. That is why I prefer to just start with 1.
Line 4
This is the refresh rate of the server, in this file it is set to once every 8 hours.
Line 5
The retry rate.
Line 6
Lookup expiry.
Line 7
The minimum Time To Live
Line 8
This is the Nameserver line, as you can see it is set to localhost.
Line 9
This is the local host entry.
Line 10
This line is the ipv6 entry.
12.3.3 /etc/named/zone.127.0.0This is the reverse lookup file (or zone) for the localhost. It looks like this:
1| $TTL 36002| @ IN SOA strider.diverge.org. root.diverge.org. (
113

Chapter 12 The Domain Name System
3| 1 ; Serial4| 8H ; Refresh5| 2H ; Retry6| 1W ; Expire7| 1D) ; Minimum TTL8| IN NS localhost.9| 1.0.0 IN PTR localhost.
In this file, all of the lines are the same as the localhost zonefile with exception of line 9, this is thereverse lookup record. It is defined in a separate file because it is the localhost and has a totally differentaddress than the remaining zones. Something we will discuss after looking at all of the zone files.
12.3.4 /etc/namedb/diverge.org
This zone file is populated by records for all of our hosts on the 192.168.1.0/24 network. Here is what itlooks like:
1| $TTL 36002| @ IN SOA strider.diverge.org. root.diverge.org. (3| 1 ; serial4| 8H ; refresh5| 2H ; retry6| 1W ; expire7| 1D ) ; minimum seconds8| IN NS strider.diverge.org.9| IN MX 10 maila.diverge.org. ; primary mail server
10| IN MX 20 mailb.diverge.org. ; secondary mail server11| strider IN A 192.168.1.112| maila IN CNAME strider.diverge.org.13| samwise IN A 192.168.1.214| www IN CNAME samwise.diverge.org.15| mailb16| worm IN A 192.168.1.3
There is a lot of new stuff here, so lets just look over each line that is new here:
Line 12
This line shows our mail handler, in this case it is strider, but for scaling reasons, we want to call itmaila. As you will see below this is not a big deal, the number that precedes maila.diverge.org. isthe priority number, the lower the number their higher the priority. The way we are setup here is ifstrider cannot handle the mail, then mailb (which is really samwise) will.
Line 12
CNAME stands for canonical name, or in lamens, an alias. So we have aliased the following:
maila.diverge.org to strider.diverge.orgmailb.diverge.org to samwise.diverge.orgwww.diverge.org to samwise.diverge.org
114

Chapter 12 The Domain Name System
The rest of the records are simply mappings of IP address to a full name.
12.3.5 /etc/namedb/1.168.192
This zone file is the reverse file for all of the host records, the format is similar to that of the localhostversion with the obvious exception being the addresses are different:
1|$TTL 36002|@ IN SOA strider.diverge.org. root.diverge.org. (3| 1 ; serial4| 8H ; refresh5| 2H ; retry6| 1W ; expire7| 1D ) ; minimum seconds8| IN NS strider.diverge.org.9|1 IN PTR strider.diverge.org.
10|2 IN PTR samwise.diverge.org.11|3 IN PTR worm.diverge.org.
12.3.6 /etc/namedb/root.cache
This file is a list of root servers for your server to query when it gets requests outside of it’s own domain.Here are first few lines of a root zone file:
; $NetBSD: root.cache,v 1.8 1997/08/24 15:50:47 perry Exp $;; This file holds the information on root name servers needed to; initialize cache of Internet domain name servers; (e.g. reference this file in the "cache . file"; configuration file of BIND domain name servers).;; This file is made available by InterNIC registration services; under anonymous FTP as; file /domain/named.root; on server FTP.RS.INTERNIC.NET; -OR- under Gopher at RS.INTERNIC.NET; under menu InterNIC Registration Services (NSI); submenu InterNIC Registration Archives; file named.root;; last update: Aug 22, 1997; related version of root zone: 1997082200;;; formerly NS.INTERNIC.NET;. 3600000 IN NS A.ROOT-SERVERS.NET.A.ROOT-SERVERS.NET. 3600000 A 198.41.0.4;; formerly NS1.ISI.EDU
115

Chapter 12 The Domain Name System
;. 3600000 NS B.ROOT-SERVERS.NET.B.ROOT-SERVERS.NET. 3600000 A 128.9.0.107;; formerly C.PSI.NET;. 3600000 NS C.ROOT-SERVERS.NET.C.ROOT-SERVERS.NET. 3600000 A 192.33.4.12. . .
This file can be obtained from ISC at http://www.isc.org/ and usually comes with a distribution of BIND.A root.cache file is included with the NetBSD core Operating System.
12.4 Using DNSIn this section we will look at how to get DNS going and setup strider to use it’s own services.
NetBSD already provides a dns caching server install (shown in the next section). Along with this are thetools to manage the server at runtime. Before that can start, however, we must look at how to properlyinitialize the server.
Setting up named to start automatically is quite simple. In /etc/defaults/rc.conf simply go to theline named and replace NO with YES. Additional options can be specified on that line in between thequotes, for example, I like to use -g nogroup -u nobody, so a non root account runs the named process.
In addition to being able to startup named at boot time, it can also be controlled with the ndc facility. In anutshell the ndc facility can stop, start or restart the named server process. It can also do a great manyother things (see the ndc man page for more details).
The general usage is ndc.
Next we want to point strider to itself for lookups. We have two simple steps, first, decide on ourresolution order. On a network this small, it is likely that each host has a copy of the hosts table, so wecan get away with using hosts then dns, however, on larger networks it is much easier to use DNS. Eitherway, the file where this is determined is /etc/nsswitch.conf (see Example 11-2.) Here is part of atypical nsswitch.conf:
. . .group_compat: nishosts: files dnsnetgroup: files [notfound=return] nis. . .
the line we are concerned with is hosts, files means the system uses /etc/hosts to determine ip toname translation. The entry on the left is the first method of resolution.
The next file is /etc/resolv.conf, this file is the dns resolution file, the format is pretty selfexplanatory but we will go over it anyway:
domain diverge.orgsearch diverge.orgnameserver 192.168.1.1
116

Chapter 12 The Domain Name System
In a nutshell this file is telling the resolver that this machine belongs to diverge.org, should search itbefore looking elsewhere and the nameserver address is 192.168.1.1 .
To test our nameserver we can use several commands, for example:
# host www.blah.net
here is the output of running host www.yahoo.com:
www.yahoo.com is a nickname for www.yahoo.akadns.netwww.yahoo.akadns.net has address 216.32.74.50www.yahoo.akadns.net has address 216.32.74.51www.yahoo.akadns.net has address 216.32.74.52www.yahoo.akadns.net has address 216.32.74.53www.yahoo.akadns.net has address 216.32.74.55
The procedure for setting up the client hosts are the same, setup /etc/nsswitch.conf and/etc/resolv.conf.
12.5 Setting up a caching only name serverA caching only name server has no local zones; all the queries go to the root servers and the replies areaccumulated in the local cache. The next time the query is performed the answer will be faster becausethe data is already in the server’s cache. Since this type of server doesn’t handle local zones, to resolvethe names of the local hosts it will still be necessary to use the already known /etc/hosts file.
Since NetBSD supplies defaults for all the files needed by a caching only server, the configuration of thistype of DNS is very easy, and can be performed with a few commands, without writing a single line inthe configuration files.
Note: the number of the configuration files and their contents varies between versions of NetBSD.
The program which supplies the DNS server is the named daemon, which uses the named.confconfiguration file for its setup. The default file supplied by NetBSD is located in the /etc/namedbdirectory, but the daemon looks for it in the /etc/ directory, so we start by creating a link:
# ln -s /etc/namedb/named.conf /etc/named.conf
The name server is ready for use! We can now tell to the system to use it adding the following line to the/etc/resolv.conf file:
nameserver 127.0.0.1
Now we can start named.
# named
Note: we have now started the name server manually. Once we have tested it and are confident thatit works, we can launch it automatically at boot using the relevant option of the /etc/rc.conf file.
117
Chapter 12 The Domain Name System
12.5.1 Testing the serverNow that the server is running we can test it using the nslookup program.
# nslookupDefault server: localhostAddress: 127.0.0.1
>
Let’s try to resolve an host name, for example www.mclink.it (try a site near you.)
> www.mclink.itServer: localhostAddress: 127.0.0.1
Name: www.mclink.itAddress: 195.110.128.8
If you repeat the query a second time, the result is slightly different:
> www.mclink.itServer: localhostAddress: 127.0.0.1
Non-authoritative answer:Name: www.mclink.itAddress: 195.110.128.8
As you’ve probably noticed, the address is the same, but the message “Non-authoritative answer”, hasappeared. This message indicates that the answer is not coming from an authoritative server for thedomain mclink.it but from the cache of our own server.
The results of this first test confirm that the server is working correctly.
We can also try the host command, which gives the following result.
# host www.mclink.itwww.mclink.it has address 195.110.128.8
118

Chapter 13
Mail and news
This chapter explains how to set up NetBSD to use mail and news. Only a simple but very common setupis described: the configuration of a host connected to the Internet with a modem through a provider: thinkof this chapter as the continuation of Chapter 11, assuming a similar network configuration. Even this"simple" setup proves to be difficult if you don’t know where to start or if you’ve only read introductoryor technical documentation; in fact you will notice that some details are really challenging (for example,mapping your internal network names to “real” names requires a good knowledge of sendmail.) Ageneral description of mail and news configuration is beyond the scope of this guide; please read a goodUnix Administration book (some very good ones are listed on the NetBSD site.) The problem is in factvery complex because of the myriad of possible configurations and connections and because it’s notenough to configure a single program: you need to correctly match the configuration of severalcooperating components.
This chapter also briefly describes the configuration (but not the usage) of two popular applications, muttfor mail and tin for news. The usage is not described because they are easy to use and well documented.Obviously, both mutt and tin are not mandatory choices: many other similar applications exist but I thinkthat they are a good starting point because they are widely used, simple, work well and don’t use toomuch disk space and memory. Both are console mode programs; if you prefer graphics applications thereare also many choices for X.
In short, the programs required for the configuration described in this chapter are:
• sendmail
• fetchmail
• m4
• mutt
• tin
Of these, only sendmail and m4 are installed with the base system; you can install the other programsfrom the package collection.
Before continuing, remember that none of the programs presented in this chapter is mandatory: there areother applications performing similar tasks and many users prefer them. You’ll find different opinionsreading the mailing lists. You can also use different strategies for sending and receiving mail: the oneexplained here is only a starting point; once you understand how it works you’ll probably want to modifyit to suit your needs or to adopt a different method altogether.
At the opposite extreme of the example presented here, there is the usage of an application like NetscapeCommunicator, which does everything and frees you from the need of configuring many components:with Communicator you can browse the Internet, send and receive mail and read news. Besides, the setupis very simple. There is a price to pay, though: Communicator is a “closed” program that will notcooperate with other standard Unix utilities.
119

Chapter 13 Mail and news
Another possibility is to use emacs to read mail and news. Emacs needs no introduction to Unix usersbut, in case you don’t know, it is an extensible editor (although calling emacs an editor is somewhatreductive) which becomes a complete work environment, and can be used to read mail, news and toperform many operations. For many people emacs is the only environment that they need and they use itfor all their work. The configuration of emacs for mail and news is described in the emacs manual.
In the rest of this chapter we will deal with a host connected to the Internet through a PPP connection viaserial modem to a provider.
• the local host’s name is “ape” and the internal network is “insetti.net”, which means that the FQDN(Fully Qualified Domain Name) is “ape.insetti.net”.
• the user’s login name on ape is “carlo”.
• the provider’s name is BigNet.
• the provider’s mail server is “mail.bignet.it”.
• the provider’s news server is “news.bignet.it”.
• the user’s (“carlo”) account at the provider is “alan” with the password “pZY9o”.
First some basic terminology:
MUA (mail user agent)
a program to read and write mail. For example: mutt, elm and pine but also the simple mailapplication installed with the base system.
MTA (mail transfer agent)
a program that transfers mail between two host but also locally (on the same host.) The MTAdecides the path that the mail will follow to get to the destination. On BSD systems (but not only)the standard MTA is sendmail.
MDA (mail delivery agent)
a program, usually used by the MTA, that delivers the mail; for example, it physically puts themessages in the recipient’s mailbox. For example, sendmail uses one or more MDA to deliver mail.
Figure 13-1 depicts the mail system that we want to set up. Between the local network (or the singlehost) and the provider there is a modem PPP connection. The “bubbles” with the thick border are theprograms launched manually by the user; the remaining bubbles are the programs that are launchedautomatically. The circled numbers refere to the logical steps of the mail cycle:
1. In step (1) mail is downloaded from the provider’s POP server using fetchmail, which uses sendmailto put the messages in the user’s mailbox.
2. In step (2) the user launches mutt (or another MUA) to read mail, reply and write new messages.
3. In step (3) the user “sends” the mail from within mutt. Messages are accumulated in the spool area.
4. In step (4) the user calls sendmail to transfer the messages to the provider’s SMTP server, that willdeliver them to the final destination (possibly through other mail servers.) The provider’s SMTPserver acts as a relay for our mail.
120

Chapter 13 Mail and news
The connection with the provider must be up only during steps (1) and (4); for the remaining steps it isnot needed.
Figure 13-1. Structure of the mail system
mutt
sendmail
spool: /var/spool/mqueue
sendmail
mailbox: /var/mail
sendmail
fetchmail
POP server SMTP server
provider
home
1 4
2 3
PPP link
13.1 sendmailWhen an MTA, sendmail in the default installation, must deliver a message, if it’s a local message itdelivers it directly. If the message is for a different domain, the MTA must find out the address of themail server for that domain. Sendmail uses the DNS service (described in Chapter 12) to find therequired address (stored as an MX record by the DNS server) and delivers the message to the destinationmail server.
The most used MTA in the BSD world is probably sendmail. Sendmail is controlled by a set ofconfiguration files and databases, of which /etc/mail/sendmail.cf is the most important. Ingeneral, if you are not an expert it is better not to modify the /etc/mail/sendmail.cf file directly;instead, use a set of predefined macros and the m4 preprocessor, which greatly (well, almost) simplifythe configuration.
121

Chapter 13 Mail and news
Note: prior to version 1.5 of NetBSD, the mail configuration files were in /etc instead of /etc/mail.
Even using the macros, the configuration of sendmail is not for the faint of heart, and the next sectionsonly describe an example which can be modified to suit different needs and different configurations. Ifyou connect to the Internet with a modem, the example configuration file will probably fit all your needs:just replace the fictitious data with yours.
The first problem to be solved is that the local network we are dealing with is an internal network, i.e. notdirectly accessible from the Internet. This means that the names used internally have no meaning on theInternet; in short, “ape.insetti.net” cannot be reached by an external host: no one will be able to reply to amail sent with this return address (some mail systems will even reject the message because it comes froman unknown host.) The true address, the one visible from everybody, is assigned by the provider and,therefore, it is necessary to convert the local address “[email protected]” to the real address“[email protected]”. Sendmail, if correctly configured, will take care of this when it transfers the messages.
You’ll probably also want to configure sendmail in order to send the e-mails to the provider’s mail server,using it as a relay. In the configuration described in this chapter, sendmail does not directly contact therecipient’s mail server (as previously described) but relays all its mail to the provider’s mail server.
Note: the provider’s mail server acts as a relay , which means that it delivers mail which is notdestined to its own domain, to another mail server. It acts as an intermediary between two servers.
Since the connection with the provider is not always active, it is not necessary to start sendmail as adaemon in /etc/rc.conf: you can disable it with the line “sendmail=NO”. As a consequence it willbe necessary to launch sendmail manually when you want to transfer mail to the provider. Local mail isdelivered correctly even if sendmail is not active as a daemon.
Let’s start configuring sendmail.
13.1.1 Configuration with genericstableThis type of configuration uses the file /etc/mail/genericstablewhich contains the mapping usedby sendmail to rewrite the internal hostnames.
The first step is therefore to write the genericstable file. For example:
carlo: [email protected]: [email protected]: [email protected]
For the sake of efficiency, genericstable must be transformed with the following command:
# /usr/sbin/sendmail -bi -oA/etc/mail/genericstable
Now it’s time to create the prototype configuration file which we’ll use to create the sendmailconfiguration file.
# cd /usr/share/sendmail/m4
122
Chapter 13 Mail and news
The new sendmail configuration file, which we’ll call mycf.mc, contains:
divert(-1)dnlinclude(‘../m4/cf.m4’)dnlVERSIONID(‘mycf.mc created by [email protected] May 18 2001’)dnlOSTYPE(bsd4.4)dnl
dnl # Settings for masquerading. Addresses of the following typesdnl # are rewrittendnl # [email protected] # carlo@apeGENERICS_DOMAIN(ape.insetti.net ape)dnlFEATURE(genericstable)dnlFEATURE(masquerade_envelope)dnl
define(‘SMART_HOST’,‘mail.bignet.it’)dnl
FEATURE(redirect)dnlFEATURE(nocanonify)dnl
dnl # The following feature is useful if sendmail is called bydnl # fetchmail (which is usually the case.) If sendmail cannotdnl # resolve the name of the sender, the mail will not be delivered.dnl # For example:dnl # MAIL FROM:<[email protected]> SIZE=2718dnl # 501 <[email protected]>... Sender domain must existFEATURE(‘accept_unresolvable_domains’)dnl
dnl # accept_unqualified_senders is useful with some MUA, which senddnl # mail as, for example:dnl # MAIL FROM:<carlo>FEATURE(‘accept_unqualified_senders’)dnl
dnl # Mail for ‘smtp’ mailer is marked ‘expensive’ (‘e’ flag):dnl # instead of connecting with the relay, sendmail puts it indnl # a queue for delayed processing.dnl # Sendmail starts complaining about undelivered messages afterdnl # 16 hours.define(‘SMTP_MAILER_FLAGS’,‘e’)dnldefine(‘confCON_EXPENSIVE’,‘True’)dnldefine(‘confTO_QUEUEWARN’, ‘16h’)dnl
dnl # For european usersdefine(‘confDEF_CHAR_SET’,‘ISO-8859-1’)dnl
dnl # Enable the following three lines to use procmail as a localdnl # delivery agent. The third line is optional, only the firstdnl # two are required.dnl # define(‘PROCMAIL_MAILER_PATH’, /usr/pkg/bin/procmail)dnldnl # FEATURE(local_procmail)dnldnl # MAILER(procmail)dnl
dnl # The following two mailers must always be defined
123
Chapter 13 Mail and news
MAILER(local)dnlMAILER(smtp)dnl
Note: in the previous example, everything after a “dnl” is considered a comment and will bediscarded by the m4 preprocessor.
This configuration tells sendmail to rewrite the addresses of type “ape.insetti.net” using the real namesfound in the /etc/mail/genericstable file. It also says that mail should be sent to the“mail.bignet.it” server. The meaning of the options is described in detail in the file/usr/share/sendmail/README.
In order to create your own version of the example configuration file, you must change only two lines,substituting your real data:
GENERICS_DOMAIN(ape.insetti.net ape)dnldefine(‘SMART_HOST’,‘mail.bignet.it’)dnl
Finally, the new configuration file must be generated, after having saved the previous version:
# cp /etc/mail/sendmail.cf /etc/mail/sendmail.cf.bak# m4 mycf.mc > /etc/mail/sendmail.cf
Note: in the /usr/share/sendmail/cf directory there is the file netbsd-proto.mc, which is used tocreate the default /etc/mail/sendmail.cf shipped with NetBSD. With the make command it canbe rebuilt, if needed.
Another important file is /etc/mail/aliases, which can be left in the default configuration, althoughit is still necessary to give the following command:
# newaliases
Now everything is ready to start sending mail.
13.1.2 Testing the configurationSendmail is finally configured and ready to work, but before sending real mail it is better to do somesimple tests. First let’s try sending a local e-mail with the following command:
$ sendmail -v carloSubject: test
Prova.carlo... Connecting to local...carlo... Sent
124

Chapter 13 Mail and news
Please follow exactly the example above: leave a blank line after Subject: and end the message with aline containing only one dot. Now you should be able to read the message with your mail client andverify that the From: field has been correctly rewritten.
From: [email protected]
Next you can verify the address rewriting rules directly, using sendmail in address test mode with option-bt. This mode shows the parsing performed by sendmail for an address and how it gets rewrittenaccording to the rules in the configuration file. It is also possible to perform other tests and view someinformation.
$ sendmail -btADDRESS TEST MODE (ruleset 3 NOT automatically invoked)Enter <ruleset> <address>>
You can display the help with the “?” command.
First, let’s verify that the generictable map file works correctly:
/map generics carlomap_lookup: generics (carlo) returns [email protected]
Everything’s ok here; sendmail found the local name and its real counterpart in the map.
Now we can test the rewriting of the envelope’s sender address with the following commands:
/tryflags ES/try smtp [email protected]
The result should be similar to the following:
Trying envelope sender address [email protected] for mailer smtprewrite: ruleset 3 input: carlo @ ape . insetti . netrewrite: ruleset 96 input: carlo < @ ape . insetti . net >rewrite: ruleset 96 returns: carlo < @ ape . insetti . net . >rewrite: ruleset 3 returns: carlo < @ ape . insetti . net . >rewrite: ruleset 1 input: carlo < @ ape . insetti . net . >rewrite: ruleset 1 returns: carlo < @ ape . insetti . net . >rewrite: ruleset 11 input: carlo < @ ape . insetti . net . >rewrite: ruleset 51 input: carlo < @ ape . insetti . net . >rewrite: ruleset 51 returns: carlo < @ ape . insetti . net . >rewrite: ruleset 61 input: carlo < @ ape . insetti . net . >rewrite: ruleset 61 returns: carlo < @ ape . insetti . net . >rewrite: ruleset 94 input: carlo < @ ape . insetti . net . >rewrite: ruleset 93 input: carlo < @ ape . insetti . net . >rewrite: ruleset 3 input: alan @ bignet . itrewrite: ruleset 96 input: alan < @ bignet . it >rewrite: ruleset 96 returns: alan < @ bignet . it >rewrite: ruleset 3 returns: alan < @ bignet . it >rewrite: ruleset 93 returns: alan < @ bignet . it >rewrite: ruleset 94 returns: alan < @ bignet . it >rewrite: ruleset 11 returns: alan < @ bignet . it >rewrite: ruleset 4 input: alan < @ bignet . it >
125

Chapter 13 Mail and news
rewrite: ruleset 4 returns: alan @ bignet . itRcode = 0, addr = [email protected]>
As you can see, the local address has been rewritten to the real address, which will appear in youre-mails when they leave your system.
You can achieve a similar result with the following command:
/try smtp carlo
We can also verify the rewriting of the header’s sender with the following commands:
/tryflags HS/try smtp [email protected]
13.1.3 Using an alternative MTAStarting from version 1.4 of NetBSD sendmail is not called directly:
$ ls -l /usr/sbin/sendmaillrwxr-xr-x 1 root wheel 21 Nov 1 01:14 /usr/sbin/sendmail@ -> /usr/sbin/mailwrapper
The purpose of mailwrapper is to allow the usage of an alternative MTA instead of sendmail (forexample, postfix). If you plan to use a different mailer I suggest that you read the mailwrapper(8) and themailer.conf(5) manpages, which are very clear.
13.2 fetchmailMail is received by the provider and it is not automatically transfered to the local hosts; therefore it isnecessary to download it. Fetchmail is a very popular program that downloads mail from a remote mailserver and forwards it to the local system for delivery (usually using sendmail.) It is powerful yet easy touse and configure: after installation, the file ~/.fetchmailrc must be created and the program is readyto run (~/.fetchmailrc contains a password so appropriate permissions on the file are required.)
This is an example .fetchmailrc:
poll mail.bignet.itprotocol POP3username alan there with password pZY9o is carlo hereflushmda "/usr/sbin/sendmail -oem %T"
Note: The last line (“mda ...”) is used only if sendmail is not active as daemon on the system. Pleasenote that the mail server indicated in this file (mail.bignet.it) is not necessary the same as the mailrelay used by sendmail.
126

Chapter 13 Mail and news
Now the following command can be used to download and deliver mail to the local system:
$ fetchmail
The messages can now be read with mutt.
13.3 Reading and writing mail with muttMutt is one of the most popular mail programs: it is “lightweight”, easy to use and has lots of features.The man page mutt is very bare bones; the real documentation is in /usr/pkg/share/doc/mutt/, inparticular manual.txt.
Mutt’s configuration is defined by the ~/.muttrc file. The easiest way to create it is to copy mutt’sexample muttrc file (usually /usr/pkg/etc/Muttrc) to the home directory and modify it. Thefollowing example shows how to achieve some results:
• Save a copy of sent mail.
• Define a directory and two files for incoming and outgoing mail saved by mutt (in this example thedirectory is ~/Mail and the files are incoming and outgoing).
• Define some colors.
• Define an alias.
set copy=yesset edit_headersset folder="~/Mail"unset force_nameset mbox="~/Mail/incoming"set record="~/Mail/outgoing"unset save_name
bind pager <up> previous-pagebind pager <down> next-page
color normal white blackcolor hdrdefault blue blackcolor indicator white bluecolor markers red blackcolor quoted cyan blackcolor status white bluecolor error red whitecolor underline yellow black
mono quoted standoutmono hdrdefault underlinemono indicator underlinemono status bold
alias pippo Pippo Verdi <[email protected]>
127

Chapter 13 Mail and news
To start mutt:
$ mutt
Note: Mutt supports color, but this depends on the terminal settings. Under X you can usexterm-color; for example:
TERM=xterm-color mutt
13.4 Strategy for receiving mailThis section describes a simple method for receiving and reading mail. The connection to the provider isactivated only for the time required to dowload the messages; mail is then read offline.
1. Activate the connection to the provider.
2. Run fetchmail.
3. Deactivate the connection.
4. Read mail with mutt.
13.5 Strategy for sending mailWhen mail has been written and “sent” with mutt, the messages must be transferred to the provider withsendmail. Mail is sent from mutt with the y command, but this does not really send it; the messages areenqueued in the spool area; if sendmail is not active as a daemon it is necessary to start it manually or themessages will remain on the hard disk. The necessary steps are:
1. Write mail with mutt, send it and exit mutt.
2. Activate the connection with the provider.
3. Write the command /usr/sbin/sendmail -q -v to transfer the queued messages to the provider.
4. Deactivate the connection.
13.6 Advanced mail toolsWhen you start using mail, you won’t probably have very sophisticated requirements and the alreadydescribed standard configuration will satisfy all your needs. But for many users the number of dailymessages will increase with time and a more rational organization of the mail storage will becomenecessary, for example subdividing mail in different mail boxes organized by topic. If, for example, yousubscribe to a mailing list, you will likely receive many messages every day and you will want to keep
128

Chapter 13 Mail and news
them separate from the rest of your mail. You will soon find that you are spending too much time everyday repeating the same manual operations to organize your mail boxes.
Why repeat manually the same operations when you can have a program perform them automatically foryou? There are numerous tools that you can add to your mail system to increase its flexibility andautomatically process your messages. Amongst the most known and used there are:
• procmail, an advanced mail delivery agent and general purpose mail filter for local mail, whichautomatically processes incoming mail using user defined rulesets. It integrates smoothly withsendmail.
• metamail, a tool to process attachments.
• formail, a mail formatter.
In the remaining part of this section a sample configuration for procmail will be presented for a verycommon case: delivering automatically to a user defined mailbox all the messages coming from amailing list. The configuration of sendmail will be modified in order to call procmail directly (procmailwill be the local mailer used by sendmail.) and a custom configuration file for procmail will be created.
First, procmail must be installed using the package system (mail/procmail.)
Next, the configuration of sendmail must be changed, in order to use procmail as local mailer.Uncomment the following three lines from the mycf.mc sendmail M4 prototype file and recreate thesendmail configuration file.
define(‘PROCMAIL_MAILER_PATH’, /usr/pkg/bin/procmail)dnlFEATURE(local_procmail)dnlMAILER(procmail)dnl
The first line defines the path of the procmail program (you can see where procmail is installed with thecommand which procmail.) The second line tells sendmail to use procmail for local mail delivery andthe third adds procmail to the list of sendmail’s mailers. The third line adds procmail to the list ofsendmail’s mailers (this line is optional.)
The last step is the creation of the procmail configuration file, containing the recipes for mail delivery.
Let’s say that, for example, you subscribed to a mailing list on roses whose address is<[email protected]> and that every message from the list contains the following line in the header:
Delivered-To: [email protected]
The procmail configuration file (.procmailrc) looks like this:
PATH=/bin:/usr/bin:/usr/pkg/binMAILDIR=$HOME/mailLOGFILE=$MAILDIR/from
:0* ^Delivered-To: [email protected]_list
The previous file contains only one rule, beginning with the line containing “:0”. The following lineidentifies all messages containing the string “Delivered-To: [email protected]” and the last line says thatthe selected messages must go to the roses_list mailbox (which you should have created in
129

Chapter 13 Mail and news
$MAILDIR.) The remaining messages will be delivered to the default mailbox. Note that $MAILDIR isthe same directory that you have configured with mutt:
set folder="~/Mail"
Of course the mailing list is only an example; procmail is a very versatile tool which can be used to filtermail based on many criteria. As usual, refer to the man pages for more details: procmail(1),procmailrc(5), and procmailex(5) (this last one contains many examples of configuration files.)
You can check that procmail is used as local mailer by sendmail if you run the latter in test mode:
$ /usr/sbin/sendmail -btADDRESS TEST MODE (ruleset 3 NOT automatically invoked)Enter <ruleset> <address>>
The following command displays the list of mailers known to sendmail:
> =M
You should find a line like the following one:
mailer 3 (local): P=/usr/pkg/bin/procmail S=EnvFromL/HdrFromL ...
13.7 News with tinThe word news indicates the set of articles of the USENET newsgroups, a service available on theInternet. Each newsgroup contains articles related to a specific topic. Reading a newsgroup is differentthan reading a mailing list: when you subscribe to a mailing list you receive the articles by mail and youread them with a standard mail program like mutt, which you use also to send replies. News, instead, areread directly from a news server with a dedicated program called newsreader like, for example, tin. Withtin you can subscribe to the newsgroups that you’re interested in and follow the threads.
thread: a thread is a sequence of articles which all derive from an article that we could call “original”.In short, a message is sent to the group, someone answers, other people answer to those whoanswered in the first place and so on, creating a tree like structure of messages and replies: withouta newsreader it is impossible to understand the correct sequence of messages.
After the installation of tin (from the package collection as usual) the only thing left to do is to write thename of the NNTP server in the file /usr/pkg/etc/nntp/server. For example:
news.bignet.it
Once this has been done, the program can be started with the command rtin. On the screen somethingsimilar to the following example will be displayed:
$ rtinConnecting to news.bignet.it...news.bignet.it InterNetNews NNRP server INN 1.7.2 08-Dec-1997 ready (posting ok).
130

Chapter 13 Mail and news
Reading groups from active file...Checking for new groups...Reading attributes file...Reading newsgroups file...Creating newsrc file...Autosubscribing groups...Reading newsrc file...
Be patient when you connect for the first time, because tin downloads an immense list of newsgroups towhich you can subscribe and this takes several minutes. When the donwload is finished, the program’smain screen is displayed; usually no groups are displayed; to see the list of groups press y. To subscribeto a group, move on the group’s name and press y.
Once that you have subscribed to some newsgroups you can start tin more quickly with the commandrtin -Q. The search for new groups is disabled (-q), only active groups are searched (-n) and newsgroupdescription are not loaded (-d): it will not be possible to use the y (yank) command in tin. When tin isstarted with these option it can’t tell if a newsgroup is moderated or not.
Note: if you are connecting from an internal network (like in our example), when you send amessage the address at the beginning of the message will be wrong (because it is the internaladdress.) To solve the problem, use the option “mail_address” in the tin configuration file(~/.tin/tinrc) or set the REPLYTO environment variable.
131

Chapter 14
Console drivers
In NetBSD versions before 1.4 the user could choose between two different drivers for screen andkeyboard, pccons (specific for i386) and pcvt. In version 1.4 the new wscons multiplatform driverappeared, which is supposed to substitute the two previous drivers (which are still supported.)
14.1 wsconsWscons is NetBSD’s new console driver. It offers virtual terminal, support for international keyboards,mouse handling, etc. The capabilities of wscons can vary depending on the port (wscons is not availableon all ports): the i386 version is very feature rich.
If you are compiling a customized kernel, to enable wscons you must activate the relevant options andcomment out the options of pcvt and pccons (they can’t be enabled at the same time.) For example
#pc0 at isa? port 0x60 irq 1 # pccons generic PC console driver#vt0 at isa? port 0x60 irq 1 # PCVT console driver
In the kernel configuration file you can also enable a foreign keyboard. For example, to use the italiankeyboard by default:
options PCKBD_LAYOUT="KB_IT"
Note: the layout of the italian keyboard is not ideal for programming tasks. To modify it see Chapter 5.
The number of pre-allocated virtual console is controlled by the following option
options WSDISPLAY_DEFAULTSCREENS=4
Other consoles can be added by enabling the relevant lines in the /etc/wscons.conf file: the commentmark (#) must be removed from the lines beginning with “screen x”. In the following example a fifthconsole is added to the four pre-allocated ones:
# screens to create# idx screen emul#screen 0 - vt100screen 1 - vt100screen 2 - vt100screen 3 - vt100screen 4 - -#screen 4 80x25bf vt100#screen 5 80x50 vt100
132

Chapter 14 Console drivers
The rc.wscons script transforms each of the non commented lines in a call to the wsconscfg command:the columns become the parameters of the call. The idx column becomes the index parameter, thescreen column becomes the -t type parameter (which defines the type of screen: rows and columns,number of colors, ...) and the emul column becomes the -e emul parameter, which defines theemulation. For example:
screen 3 - vt100
becomes a call to:
wsconscfg -e vt100 3
Note: it is possible to have a (harmless) conflict between the consoles pre-allocated by the kerneland the consoles allocated at boot time through /etc/wscons.conf. If during boot the system triesto allocate an already allocated screen, the following message will be displayed:
wsconscfg: WSDISPLAYIO_ADDSCREEN: Device busy
The soulution is to comment out the offending lines in /etc/wscons.conf.
The virtual console must also be active in /etc/ttys. For example:
console "/usr/libexec/getty Pc" pc3 off securettyE0 "/usr/libexec/getty Pc" vt220 on securettyE1 "/usr/libexec/getty Pc" vt220 on securettyE2 "/usr/libexec/getty Pc" vt220 on securettyE3 "/usr/libexec/getty Pc" vt220 off secure...
The line
ttyE3 "/usr/libexec/getty Pc" vt220 off secure
of /etc/ttys is used by the X server to find a free terminal. To use a screen different from number 4, aparameter of the form vtn must be passed to the X server (n is the number of the function key used toactivate the screen for X.)
For example, “screen 7” could be enabled in /etc/wscons.conf and X could be started with “vt8”. Ifyou use xdm you must edit /usr/X11R6/lib/X11/xdm/Xserver. For example:
:0 local /usr/X11R6/bin/X +kb dpms -bpp 16 dpms vt8
For xdm3d the path is different: /usr/X11R6/share/xdm3d/Xservers.
14.1.1 50 lines text mode with wsconsA text mode with 50 lines can be used starting with version 1.4.1 of NetBSD. This mode is activated inthe /etc/wscons.conf. The following line must be uncommented:
font ibm - 8 ibm /usr/share/pcvt/fonts/vt220l.808
133

Chapter 14 Console drivers
Then the following lines must be modified:
#screen 0 80x50 vt100screen 1 80x50 vt100screen 2 80x50 vt100screen 3 80x50 vt100screen 4 80x50 vt100screen 5 80x50 vt100screen 6 80x50 vt100screen 7 80x50 vt100
This configuration enables eight screens, which can be accessed with the key combination Ctrl-Alt-Fn(where n varies from 1 to 8); the corresponding devices are ttyE0..ttyE7. To enable them and get a loginprompt, /etc/ttys must be modified:
ttyE0 "/usr/libexec/getty Pc" vt220 on securettyE1 "/usr/libexec/getty Pc" vt220 on securettyE2 "/usr/libexec/getty Pc" vt220 on securettyE3 "/usr/libexec/getty Pc" vt220 on securettyE4 "/usr/libexec/getty Pc" vt220 on securettyE5 "/usr/libexec/getty Pc" vt220 on securettyE6 "/usr/libexec/getty Pc" vt220 on securettyE7 "/usr/libexec/getty Pc" vt220 on secure
It is not possible to modify the 80x25 setting of screen 0, probably to guarantee that even in case ofproblems there is always a working screen.
14.1.2 wsmouse
14.2 pcconsThis is the console driver found on the i386 install floppy. It doesn’t offer virtual consoles and utilityprograms for configuration but takes up very little space.
14.3 pcvtPcvt is a VT220 terminal emulator and has more advanced functions than the simple pccons. It supportsforeign keyboards and virtual consoles (with Ctrl-Alt-F1..F8 or with the F9..F12 function keys.) Toactivate pcvt the following lines must be uncommented in the kernel configuration file.
# Enable only one of the following lines#pc0 at isa? port 0x60 irq 1vt0 at isa? port 0x60 irq 1
# Options for PCVT console driver
134

Chapter 14 Console drivers
#options FAT_CURSORoptions PCVT_NETBSD=132options PCVT_NSCREENS=3
To use a foreign keyboard you must activate it at boot; it is also necessary to choose the correct terminal.For example:
/usr/local/bin/kcon -m i2TERM=pcvt25; export TERM
/etc/ttys must be modified accordingly. For example:
#console "/usr/libexec/getty Pc" pcvt25 on securettyv0 "/usr/libexec/getty Pc" pcvt25 on secure
Pcvt italian keyboard: the definition of the i2 keyboard is not correct and the file/sys/arch/i386/isa/pcvt/Util/keycap/keycap.src must be modified. This is a working version,tested with NetBSD 1.3.3.
i2|italy142|Italian 142 mapping:\:A8={:A9=[:A10=]:A11=}:\:A12=‘:A13=~:\:A17=@:A18=#:\:tc=italy141:
The settings for the foreign keyboard (the italian keyboard in this example) must be loaded at boot, forexample in /etc/rc.local:
KCONP=/usr/local/binSCONP=/usr/local/binLDFNP=/usr/local/binISPCP=/usr/sbinCURSP=/usr/local/bin
set_keybd=YES
#------------------------------------------------------# if desired, setup keyboard for italian keyboard layout#------------------------------------------------------
if [ X${set_keybd} = X"YES" -a -x $KCONP/kcon ]then
echoecho ’switching to italian keyboard layout’$KCONP/kcon -m i2
fi
echo ’.’
/etc/ttys must be also modified:
135

Chapter 14 Console drivers
#console "/usr/libexec/getty Pc" pcvt25 on securettyv0 "/usr/libexec/getty Pc" pcvt25 on securettyv1 "/usr/libexec/getty Pc" pcvt25 on securettyv2 "/usr/libexec/getty Pc" pcvt25 on secure
The pcvt utility programs must be compiled and installed.
# cd /sys/arch/i386/isa/pcvt/Util# make# make install
14.3.1 Changing the screen sizeWith pcvt you can change the number of lines and columns on the screen. The following example scriptcan be used to automatically switch between different configurations:
#!/bin/sh# Set the screen to # linescase $1 in
25)/usr/local/bin/scon -s 25/usr/local/bin/cursor -s13 -e14;;
28)/usr/local/bin/loadfont -c1 -f/usr/share/misc/pcvtfonts/vt220l.814/usr/local/bin/loadfont -c2 -f/usr/share/misc/pcvtfonts/vt220h.814/usr/local/bin/scon -s 28/usr/local/bin/cursor -s12 -e14;;
40)/usr/local/bin/loadfont -c3 -f/usr/share/misc/pcvtfonts/vt220l.810/usr/local/bin/loadfont -c4 -f/usr/share/misc/pcvtfonts/vt220h.810/usr/local/bin/scon -s 40/usr/local/bin/cursor -s8 -e10;;
50)/usr/local/bin/loadfont -c5 -i/usr/share/misc/pcvtfonts/vt220l.808/usr/local/bin/loadfont -c6 -i/usr/share/misc/pcvtfonts/vt220h.808/usr/local/bin/scon -s 50/usr/local/bin/cursor -s6 -e8;;
*)echo "Invalid # of lines (25/28/40/50)";;
esac
136

Chapter 15
Editing
15.1 Introducing viIt is not like the vi editor needs introducing to seasoned UNIX users. The vi editor, originally developedby Bill Joy of Sun Microsystems, is an endlessly extensible, easy to use light ASCII editor and the baneof the newbie existence. This section will introduce the vi editor to the newbie and perhaps toss in a fewideas for the seasoned user as well.
The first half of this section will overview editing, saving, yanking/putting and navigating a file within avi session. The second half will be a step by step sample vi session to help get started.
This is intended as a primer for using thevi editor, it is not by any means a thorough guide. it is meant toget the first time user up and using vi with enough skills to make changes to and create files.
15.1.1 The vi interfaceUsing the vi editor really is not much different than any other terminal based software with oneexception, it does not use a tab type (or curses if you will) style interface, although many versions of vido use curses it does not give the same look and feel of the typical curses based interface. Instead itworks in two modes, command and edit. While this may seem strange, it is not much different thanwindows based editing if you think about it. Take this as an example, if you are using say gedit and youtake the mouse, highlight some text, select cut and then paste, the whole time you are using the mouseyou are not editing (even though you can). In vi, the same action is done by simply deleting the wholeline with dd in command mode, moving to the line you wish to place it below and hitting p in commandmode. One could almost say the analogy is “mouse mode vs. command mode” (although they are notexactly identical, conceptually the idea is similar).
To start up a vi session, one simply begins the way they might with any terminal based software:
$ vi filename
One important note to remember here is that when a file is edited, it is loaded into a memory buffer. Therest of the text will make reference to the buffer and file in their proper context. A file only changes whenthe user has committed changes with one of the write commands.
15.1.2 Switching to Edit ModeThe vi editor sports a range of options one can provide at start up, for the time being we will just look atthe default startup. When invoked as shown above, the editors default startup mode is command mode, so
137
Chapter 15 Editing
in essence you cannot commence to typing into the buffer. Instead you must switch out out of commandmode to enter text. The following text describes edit start modes:
a Append after cursor.A Append to end of line.C Change the rest of current line.cw Change the current word.i Insert before cursor.I Insert before first non blank line.o Open a line below for insertO Open a line above for insert.
15.1.3 Switching Modes & Saving Buffers to FilesOf course knowing the edit commands does not do much good if you can’t switch back to commandmode and save a file, to switch back simply hit the ESC key. To enter certain commands, the colon mustbe used. Write commands are one such set of commands. To do this, simply enter :.
Hitting the colon then will put the user at the colon (or command if you will) prompt at the bottom leftcorner of the screen. Now let us look at the save commands:
:w Write the buffer to file.:wq Write the buffer to file and quit.
15.1.4 Yanking and PuttingWhat good is an editor if you cannot manipulate blocks of text? Of course vi supports this feature as welland as with most of the vi commands it somewhat intuitive. To yank a line but not delete it, simply enteryy or Y in command mode and the current line will be copied into a buffer. To put the line somewhere,navigate to the line above where the line is to be put and hit the p key for the “put” command. To move aline, simply delete the whole line with the dd command, navigate and put.
15.1.4.1 Oops I Did Not Mean to do that!
Undo is pretty simple, u undoes the last action and U undoes the last line deleted or changes made on thelast line.
15.1.5 Navigation in the BufferMost vi primers or tutorials start off with navigation, however, not unlike most editors in order tonavigate a file there must be something to navigate to and from (hence why this column sort of went inreverse). Depending on your flavor of vi (or if it even is vi and not say elvis, nvi or vim) you can navigatein both edit and command mode.
138

Chapter 15 Editing
For the beginner I feel that switching to command mode and then navigating is a bit safer until one haspracticed for awhile. The navigation keys for terminals that are not recognized or do not support the useof arrow keys are the following:
k Moves the cursor up one line.j Moves the cursor down one line.l Moves the cursor right one character.h Moves the cursor left one character.
If the terminal is recognized and supports them, the arrow keys can be used to navigate the buffer incommand mode.
In addition to simple “one spot navigation” vi supports jumping to a line by simply typing in the linenumber at the colon prompt. For example, if you wanted to jump to line 223 the keystrokes from editormode would look like so:
ESC:223
15.1.6 Searching a File, the Alternate Navigational AidThe vi editor supports searching using regular expression syntax, however, it is slightly different toinvoke from command mode. One simply hits the / key in command mode and enters what they aresearching for, as an example let us say I am searching for the expression foo:
/foo
That is it, to illustrate a slightly different expression, let us say I am looking for foo bar:
/foo bar
15.1.6.1 Additional Navigation Commands
Searching and scrolling are not the only ways to navigate a vi buffer. Following is a list of succinctnavigation commands available for vi:
0 Move to beginning of line.$ Move to end of line.b Back up one word.w Move forward one word.G Move to the bottom of the buffer.H Move to the top line on the screen.L Move to the last line on the screen.M Move the cursor to the middle of the screen.N Scan for next search match but opposite direction.n Scan for next search match in the same direction.
139

Chapter 15 Editing
15.1.7 A Sample SessionNow that we have covered the basics, let us run a sample session using a couple of the items discussed sofar. First, we open an empty file into the buffer from the command line like so:
# vi foo.txt
Next we switch to edit mode and enter two lines separated by an empty line, remember our buffer isempty so we hit the i key to insert before cursor and enter some text:
This is some text
there we skipped a line~~~~
Now hit the ESC key to switch back into command mode.
Now that we are in command mode, let us save the file. First, hit the : key, the cursor should be sitting inthe lower left corner right after a prompt. At the : prompt enter w and hit the ENTER or RETURN key.The file has just been saved. There should have been a message to that effect, some vi editors will alsotell you the name, how many lines and the size of the file as well.
It is time to navigate, the cursor should be sitting wherever it was when the file was saved. Try using thearrow keys to move around a bit. If they do not work (or you are just plain curious) try out the hjkl keysto see how they work.
Finally, let us do two more things, first, navigate up to the first line and then to the first character. Try outsome of the other command mode navigation keys on that line, hit the following keys a couple of times:
$0$0
The cursor should hop to the end of line, back to the beginning and then to the end again.
Next, search for an expression by hitting the / key and an expression like so:
/we
The cursor should jump to the first occurance of we.
Now save the file and exit using write and quit:
:wq
140
Chapter 15 Editing
15.2 Configuring viThe standard editor supplied with NetBSD is, needless to say, vi, the most loved and hated editor in theworld. If you don’t use vi, skip this section, otherwise read it before installing other versions of vi.NetBSD’s vi (nvi) was written by Keith Bostic of UCB to have a freely redistributable version of thiseditor and has many powerful extensions worth learning while being still very compatible with theoriginal vi. Nvi has become the standard version of vi for BSD.
Amongst the most interesting extensions are:
• Extended regular expressions (egrep style), enabled with option extended.
• Tag stacks.
• Infinite undo (to undo, press u; to continue undoing, press .).
• Incremental search, enabled with the option searchincr.
• Left-right scrolling of lines, enabled with the option leftright; the number of columns to scroll isdefined by the sidescroll option.
• Command line history editing, enabled with the option cedit.
• Filename completion, enabled by the filec option.
• Backgrounded screens and displays.
• Split screen editing.
15.2.1 Extensions to .exrc
The following example shows a .exrc file with some extended options enabled.
set showmode rulerset filec=^[set cedit=^[
The first line enables the display of the cursor position (row and column) and of the current mode(Command, Insert, Append) on the status line. The second line (where ^[ is the ESC character) enablesfilename completion with the ESC character. The third line enables command line history editing (alsowith the ESC character.) For example, writing “:” and then pressing ESC opens a window with a list ofthe previous commands which can be edited and executed (pressing Enter on a command executes it.)
15.2.2 DocumentationThe source tarball (src.tgz) contains a lot of useful documentation on (n)vi and ex, in the/usr/src/usr.bin/vi/docs directory. For example:
• Edit: A tutorial
• Ex Reference Manual
• Vi man page
141

Chapter 15 Editing
• An Introduction to Display Editing with Vi by William Joy and Mark Horton
• Ex/Vi Reference Manual by Keith Bostic
• Vi Command & Function Reference
• Vi tutorial (beginnner and advanced)
If you have never used vi, the “Vi tutorial” is a good starting point. It is meant to be read using vi and itgradually introduces the reader to all the vi commands, which can be tested while reading. AnIntroduction to Display Editing with Vi by William Joy and Mark Horton is also a very good startingpoint.
If you want to learn more about vi and the nvi extensions you should read the Ex/Vi Reference Manual byKeith Bostic which documents all the editor’s commands and options.
15.3 Using tags with viThis topic is not directly related to NetBSD but it can be useful, for example, for examining the kernelsources.
When you examine a set of sources in a tree of directories and subdirectories you can simplify your workusing the tag feature of vi. The method is the following:
1. cd to the base directory of the sources.
$ cd /path
2. Write the following commands:
$ find . -name "*.[ch]" > filelist$ cat filelist | xargs ctags
3. Add the following line to .exrc
set tags=/path/tags
(substitute the correct path instead of path.)
142

Chapter 16
X
16.1 What is X?The X Window System is a graphical environment available for NetBSD and many Unix (and non Unix)systems. In fact it is much more than that: thanks to the usage of the X protocol, the X Window System is“network transparent” and can run distributed applications (client-server). This means, roughly, that youcan run an application on one host (client) and transparently display the graphical output on another host(server); transparently means that you don’t have to modify the application to achieve this result. The XWindow System is produced and mantained by the X Consortium and the current release is X11R6. Theflavour of X used by NetBSD is XFree86, a freely redistributable open source implementation of the XWindow System.
When you start using X you’ll find many new terms which you’ll probably find confusing, at first. Thebasic elements to use X are:
• Video hardware supported by XFree86.
• An X server running on top of the hardware. The X server provides a standard way to open windows,do graphics (including fonts for text display), and get mouse/keyboard/other input. X isnetwork-transparent, so that you can run X clients on one machine, and the X server (i.e., the display,with video hardware) on another machine.
• A window manager running on the X server. The window manager is essentially a special client that isallowed to control placement of windows. It also “decorates” windows with standard “widgets”(usually these provide window-motion, resizing, iconifying, and perhaps a few other actions). Awindow manager also may provide backdrops, etc. Window managers can also let you killwindows/programs by clicking on their windows, and so forth.
• A desktop manager (optional.) KDE and GNOME, for example, are desktops: they are suites ofmore-or-less integrated software designed to give you a well-defined range of software and a more orless common interface to each of the programs. These include a help browser of some kind, a“desktop-metaphor” access to your filesystem, custom terminals to replace xterm, softwaredevelopment environments, audio, picture/animation viewres, etc.
• Any other applications (3rd party X clients) that you have. These talk to the X server and to thewindow manager. Unless the window manager is part of the destkop (if any), the desktop probablydoesn’t get involved in much of anything that these applications do. (However, e.g., GNOME may beable to detect that you’ve installed the GIMP, for example, and so offer a menu to launch the GIMP.)
To summarize: in order to use a graphical environment you need
• the XFree86 system
143

Chapter 16 X
• a window manager (XFree86 already comes with a very basic window manager called twm.)
• If you prefer a more sophisticated environment you’ll probably want to install a desktop too, althoughthis is not necessary. Desktops have some nice features that are helpful to users who come fromenvironments such as MacIntosh or MS-WINDOWS (the KDE desktop, for example, has a verysimilar flavour to MS-WINDOWS.)
Note: by now it should be clear that desktops like GNOME and KDE do not provide X servers. Theyrun on top of an existing X server supplied by XFree86. KDE and GNOME can make use of their ownwindow manager or of a separately installed window manager.
Normally, you can run at most one window manager at any given time on a given X server. (But you canrun multiple X servers on a single computer.) If you are not running a window manager of yourchoosing, and start KDE/GNOME, then that desktop environment will run a window manager for you.
16.2 ConfigurationIf you haven’t chosen a minimal configuration during installation, X is already installed and ready to runon your computer; you only have to create the menacing /etc/XF86Config file. To get an idea of whatthis file looks like, examine the /usr/X11R6/lib/X11/XF86Config.eg file. The structure of theconfiguration file is described formally in XF86Config(5), which can be examined with the followingcommand:
# man XF86Config
Before configuring the system it is advisable to carefully read the documentation found in/usr/X11R6/lib/X11/doc: there are various README’s for the video cards, for the mouse and evena NetBSD specific one (README.NetBSD.) I suggest to start by reading QuickStart.doc. You mighthave the feeling that other systems let you start more quickly and with less effort, but the time spentreading this documentation is not wasted: the knowledge of X and of your configuration that you gainwill turn out very useful on many future occasions and you’ll be able to get the most from your hardware(and software too.)
You can create the /etc/XF86Config file manually with an editor or you can generate it automaticallywith an interactive configuration program. The best known programs are xf86config, XF86Setup(XFree86 3.x) and xf86cfg (XFree86 4.x). Both xf86config and xf86cfg are installed by default with X;XF86Setup is a graphical configuration tool which can be installed from the package collection.
You may find that a mixed approach is better: first create the XF86Config with one of the two programsand then check it and tune it manually with an editor.
The interface of the two programs is different but they both require the same set of information:
• the mouse type and the mouse device to be used
• the keyboard type and its layout
• the type of video card
144

Chapter 16 X
• the type of monitor
Before configuring the system you should collect the required information.
16.3 The mouseThe first thing to check is the type of mouse you are using (for example, serial or PS/2, ...) and the mousedevice (for example, wsmouse requires a different protocol.) If you are using a serial mouse, choose therequired protocol and specify the serial port to which it is connected. For example, for a serial mouse onthe first serial port:
Section "Pointer"Protocol "Microsoft"Device "/dev/tty00"
EndSection
For a mouse using the wsmouse device you might have:
Section "Pointer"Protocol "wsmouse"Device "/dev/wsmouse0"
EndSection
In the “Device” field you can also specify /dev/mouse provided that you have created the correct linkin the filesystem. For example:
# ln -sf /dev/wsmouse0 /dev/mouse
16.4 The keyboardEven if you have already configured your keyboard for wscons, you need to configure it for X too, inorder to get a non US layout.
An easy solution is to use the XKB protocol, specifying the keyboard type and layout.
This is one area in which that configuration programs are weak and you may want to choose the standardlayout and modify the generated configuration file manually.
# XkbDisable# XkbKeymap "xfree86(us)"
XkbModel "pc102"XkbLayout "de"XkbVariant "nodeadkeys"
If you want to use the “Windows” keys on your keyboard, use pc105 instead of pc102 for XkbModel.
145

Chapter 16 X
16.5 The monitorIt is very important to correctly specify the values of the horizontal and vertical frequency of the monitor:a correct definition shields the monitor from damages deriving from an incompatible setup of the videocard. This information can be found in the monitor’s manual. In the X documentation directory there is afile containing the settings of many monitors; it can be used as a starting point to customize your ownsettings.
16.6 The video cardThe video card can be chosen from the database of the configuration programs; the program will takecare of all the needed setups. Video card support is slightly different between XFree86 3.x and 4.x.
XFree86 3.x has multiple servers for different categories of video card chipsets. XFree86 4.x has onlyone server. Different video chipsets are supported via platform independent driver modules, which can befound in /usr/X11R6/lib/modules/drivers.
16.6.1 XFree 3.xWhen you have selected the correct video card you must choose the X server for the card. Usually, theconfiguration programs can automatically determine the correct server, but some video cards can bedriven by more than one server (for example, S3 Virge is supported by the SVGA and S3V servers); inthis case, study the documentation of the servers to decide which one you need: different servers usuallyhave different capabilities and a different degree of support for the video cards.
16.6.2 XFree86 4.xAfter selecting the correct video card the configuration program will automatically select the appropriatedriver or suggest it. If you have not selected a card you can configure your video card by selecting therequired module.
16.7 Starting XWhen you exit the configuration program, it creates the file /etc/XF86Config, which can be furtherexamined and modified by hand.
Before starting X you should:
• check that the symbolic link /usr/X11R6/bin/X points to the correct X server:
# ls -l /usr/X11R6/bin/X
• Verify that the configuration is correct. Launch:
146

Chapter 16 X
# X -probeonly
and examine carefully the output.
Now you can start X with the following command:
# startx
If X doesn’t fire up there is probably some error in the configuration file.
If X starts but doesn’t work as expected (for example, you can’t move the mouse pointer) you can exitquickly with the Ctrl-Alt-Backspace key combination (not available on all ports.) If everything workedcorrectly you are left in the X environment with the default window manager (twm): although it is asimple window manager many users feel that it is enough for their needs. If you want a highlyconfigurable window manager with many bells and whistles, you have many choices in the packagecollection.
To start customizing X, try giving the following command in an xterm to change the background color:
# xsetroot -solid DarkSeaGreen
16.8 Customizing XThe look of the X environment can be customized in several ways. The easiest method is to copy thedefault .xinitrc file in your home directory and modify it. For example:
# cp /usr/X11R6/lib/X11/xinit/xinitrc ~/.xinitrc# vi .xinitrc
The following example shows how to start the window manager (twm), open an instance of the xclockprogram in the lower right part of the screen and two xterm windows. The “Bisque4” color is used forthe background.
the first part of the file is the same...# start some nice programstwm &xclock -geometry 50x50-1-1 &xterm -geometry 80x34-1+1 -bg OldLace &xsetroot -solid Bisque4 &exec xterm -geometry 80x44+0+0 -bg AntiqueWhite -name login
With this type of setup, to exit X you must close the last xterm (the one with the “login” title.)
Even with this simple configuration X has a considerably nicer look. To give an even better look to theenvironment you can install some utility program from the package collection. For example:
xcolorsel
displays all the colors defined in rgb.txt. Use it to choose background colors for the root windowor for xterms.
147

Chapter 16 X
xpmroot
lets you use a pixmap for the background.
xscreensaver
X screen saver.
xdaemon
no desktop can be complete without this package, which displays a moveable bitmap of the BSDdaemon in two selectable sizes.
16.9 Other window managersIf you don’t like twm, which is a very simple window manager lacking many features and not veryconfigurable, you can choose another window manager from the package collection. Some of the mostpopular are: fvwm2, olwm/olvwm (Open Look Window Manager), WindowMaker, Enlightenment,AfterStep.
In the rest of this section the installation of WindowMaker is described as an example. WindowMaker isa very nice looking and highly configurable window manager. To add the program thewindowmaker-0.60.tgz precompiled package will be used, which depends on some other packageswhich must be installed. As usual, both pkg_add and make install will fetch the needed packagesautomatically, so there is no need to go through the dependencies manually.
# cd /usr/pkgsrc/x11/windowmaker# make depends-listxpm-3.4kjpeg-6bpkglibtool-1.2p2giflib-3.0libproplist-0.9.1tiff-3.5.2
Note: you can also see the dependencies with the following command:
# pkg_info -f windowmaker-0.61.0.tgz | grep depends
After adding the required packages, WindowMaker and some preconfigured themes can be added:
# pkg_add windowmaker-0.61.0.tgz wmthemes-0.6x.tgz
WindowMaker is now installed; to start it you must modify your .xinitrc and/or .xsession:substitute the line which calls twm with a line which calls wmaker. For example:
# start some nice programs# start WindowMaker
148

Chapter 16 X
wmaker &xclock -geometry 50x50-1-1 &xdaemon2 -geometry +0-70 &...
In this example the xdaemon program is also started automatically.
Before starting WindowMaker the configuration program must be run:
$ wmaker.inst$ startx
16.10 Graphical login with xdmIf you always use X for your work and the first thing you do after you log in is run startx, you can set upa graphical login for your workstation which does this automatically. It is very easy:
1. Create the .xsession file in your home directory. This file is similar to ~/.xinitrc and can, infact, be a link to the latter.
2. Modify /etc/rc.conf:
xdm=YES xdm_flags="" # x11 display manager
If you prefer (why?) you can add the following line at the end of /etc/rc.local instead ofmodifying rc.conf:
/usr/X11R6/bin/xdm
This method can be used to start, for example, kdm or gdm instead of xdm.
The configuration files for xdm are in the /usr/X11R6/lib/X11/xdm directory. In the Xservers fileX is started by default on the vt05 virtual terminal; if you want to use another terminal instead, this is theright place to modify the setting. In order to avoid keyboard contention between getty and xdm it isadvisable to start xdm on a virtual terminal where getty is disabled. For example if in Xservers youhave:
:0 local /usr/X11R6/bin/X :0 vt04
in /etc/ttys you should have
ttyE3 "/usr/libexec/getty Pc" vt220 off secure
(please note that vt04 corresponds to ttyE3 because vt start at 1 and ttyE start at 0.)
If you want a nice look for your xdm login screen, you can modify the xdm configuration file. Forexample, to change the background color you can add the following line the the Xsetup_0 file:
xsetroot -solid SeaGreen
Instead of setting a color, you can put an image on the background using the xpmroot program: Forexample:
149

Chapter 16 X
xpmroot /path_to_xpm/netbsd.xpm
If you experiment a little with the configuration file you can achieve many nice looking effects and builda pleasing login screen.
150

Chapter 17
Linux emulation
The NetBSD port for i386 can execute a great number of native Linux programs, using the Linuxemulation layer. Generally, when you think about emulation you imagine something slow and inefficientbecause, often, emulations must reproduce hardware instructions and even architectures (usually fromold machines) in software. In the case of the Linux emulation this is radically different: it is only a thinsoftware layer, mostly for system calls which are already very similar between the two systems. Theapplication code itself is processed at the full speed of your CPU, so you don’t get a degradedperformance with the Linux emulation and the feeling is exactly the same as for native NetBSDapplications.
This chapter explains how to configure the Linux emulation with an example: the installation of the wellknown Acrobat Reader version 4 program.
17.1 Emulation setupThe installation of the Linux emulation is described in the compat_linux(8) man page; using the packagesystem only two steps are needed.
1. Configuring the kernel.
2. Installing the Linux libraries.
17.1.1 Configuring the kernelIf you use a GENERIC kernel you don’t need to do anything because Linux compatibility is alreadyenabled.
If you use a customized kernel, check that the following options are enabled:
option COMPAT_LINUXoption EXEC_ELF32
when you have compiled a kernel with the previous options you can start installing the necessarysoftware.
17.1.2 Installing the Linux librariesYou can get the linux libraries from any Linux distribution, provided it’s not too old, but the suggestedmethod is to use the package system and install the libraries automatically (the Suse libraries are used.)When you install the libraries, the following happens:
151

Chapter 17 Linux emulation
• A secondary root directory is created which will be used for Linux programs. This directory is/emul/linux/. The Linux programs in emulation mode will use this directory as their root directory.
• The shared libraries for Linux are installed. Most applications are linked dynamically and expect tofind the necessary libraries on the system. For example, for Acrobat Reader, if you go to the/usr/pkgsrc/print/acroread and give the make depends command, you get the followingmessage:
===> acroread-4.0 requires Linux glibc2 libraries - see compat_linux(8).
Both operations will be handled automatically by the package system, without the need of manualintervention from the user (I suppose that, by now, you have already begun to love the packagesystem...). Note that this section describes manual installation of the Linux libraries.
To install the libraries, a program must be installed that handles the RPM format: it is rpm, which will beused to extract the Suse libraries. Execute make and make install in the /usr/pkgsrc/misc/rpm/directory to build and install rpm.
Next the suse_base package must be installed. The Suse RPM files can be downloaded by the packagesystem or, if you have a Suse CD, you can copy them in the /usr/pkgsrc/distfiles/suse directoryand then run make and make install after going to the /usr/pkgsrc/emulators/suse_basedirectory.
With the same method install suse_compat, suse_libc5 and suse_x11. The final configuration is:
# pkg_info -a | grep susesuse_base-6.1p1 Linux compatibility packagesuse_x11-6.1p1 Linux compatibility package for X11 binariessuse_compat-6.1p1 Linux compatibility package with old shared librariessuse_libc5-6.1p1 Linux compatibility package for libc5 binaries
17.1.3 Installing Acrobat ReaderNow everything is ready for the installation of the Acrobat Reader program (or other Linux programs.)Change to /usr/pkgsrc/print/acroread and give the usual commands.
# make# make install
Note: to download and install Acrobat Reader you need to add the line“ACCEPTABLE_LICENSES+=adobe-acrobat-license” to /etc/mk.conf to accept the AcrobatReader license.
152

Chapter 17 Linux emulation
17.2 Directory structureIf we examine the outcome of the installation of the Linux libraries and programs we find that/emul/linux is a symbolic link pointing to /usr/pkg/emul/linux, where the following directorieshave been created:
bin/boot/cdrom/dev/etc/floppy/home/lib/mnt/opt/proc/root/sbin/usr/
Note: please alwayr refer to /emul/linux and not to /usr/pkg/emul/linux. The latter is animplementation detail and may change in the future.
How much space is required for the Linux emulation software? On my system I get the following figure:
# cd /usr/pkg/emul# du -k linux...60525 linux/
Acrobat Reader, the program, has been installed in the usual directory for package binaries:/usr/pkg/bin/.
153

Chapter 18
Audio
This chapter is a short introduction to the usage of audio devices on NetBSD (who wants a dumbcomputer, anyway?)
18.1 Basic hardware elementsIn order to make audio work on your system you must know what audio card is installed. Sadly it oftennot enough to know the brand and model of the card, because many cards use chipsets manufacturedfrom third parties. Therefore knowing the chipset installed on the audio card can sometimes be useful.The NetBSD kernel can recognize many chipsets and a quick look at dmesg is enough most of the times.
Therefore, write the following command:
# dmesg | more
and look for the audio card and chipset. If you’re lucky you don’t need to do anything because NetBSDautomatically detects and configures many audio cards.
Sometimes audio doesn’t work because the card is not supported or because you need to do some workin order for the card to be detected by NetBSD. Many audio cards are nowadays very cheap, and it isworth considering buying a different card, but before doing this you can try some simple steps to makethe card work with NetBSD.
18.2 BIOS settingsThis section is useful only to the owners of i386 PCs; on other architectures (eg. Amiga) there are nosuch features. The most important thing to determine in order to use the audio card with NetBSD is thetype of bus supported by the card.
The most common interfaces are ISA and PCI.
ISA Plug and Play cards are usually more tricky to configure mostly because of the interaction with theBIOS of the computer.
On the newer machines (those produced after 1997) there is a BIOS option which causes manyheadaches for the configuration of ISA Plug and Play audio cards (but not only audio cards): this optionis usually named “PNP OS Installed” and is commonly found in the “PNP/PCI Configuration” (thenames can be different in your BIOS.) As a general rule it is usually better to disable (i.e. set it to “NO”)this option for NetBSD.
Note: on many systems everything works fine even if this option is enabled. This is highly systemdependent.
154
Chapter 18 Audio
18.3 Configuring the audio deviceDuring the installation of NetBSD the devices are created in the dev directory. We are primarilyinterested in:
/dev/audio
/dev/sound
/dev/mixer
If they are not present they can be created like this:
# cd /dev# ./MAKEDEV all
This command creates all the devices, including the audio devices.
The audio card is now probably ready to be used without further work.
You can make a quick test and send an audio file to the device (audio files usually have the .au
extension), but if you don’t have an audio file you can just send a text or binary file (of course you won’thear anything useful...). Use /dev/audio or /dev/sound:
# cat filename > /dev/audio
or
# cat filename > /dev/sound
If you hear something it means that the card is supported by NetBSD and was recognized and configuredby the kernel at boot, otherwise you must configure the kernel settings for the audio device installed onthe system (assuming the card/chipset is supported.)
18.4 Configuring the kernel audio devicesNetBSD supports a wide range of audio cards and the GENERIC kernel already enables and configuresmost of them. Sometimes it is necessary to setup manually the IRQ and DMA for non-PnP ISA cards.
Note: when you create a custom kernel it is better to work on a copy of the GENERIC file, asdescribed in Chapter 9.
If you still have problems you can try enabling all the devices, because some audio cards can be made towork only by emulating another card.
Many chipset make use of the SoundBlaster and OPL compatibility, but a great number of them workwith the WSS emulation.
155

Chapter 18 Audio
OPL is a MIDI synthetizer produced by Yamaha; there are many OPL variants (eg. OPL2, OPL3SA,OPL3SA2, etc.). Many audio cards rely on this component or on a compatible one. For example, thechips produced by Crystal (and amongst them the very common CS423x) all have this chipset, and that’swhy they work with NetBSD.
WSS is not a microchip; it is the acronym of Windows Sound System. Wss is the name of the NetBSDkernel driver which supports the audio system of Microsoft Windows. Many audio cards work withWindows because they adhere to this standard (WSS) and the same holds for NetBSD.
Of the many audio cards that I tested with NetBSD, a good number works only if opl* and wss* areenabled in the kernel.
You should have no problem to get the Creative SoundBlaster cards to work with NetBSD: almost all ofthem are supported, including the Sound Blaster Live 1024!
When everything works you can disable in the kernel configuration file the devices that you don’t need.
18.5 Advanced commandsNetBSD comes with a number of commands that deal with audio devices. They are:
• audioctl(1)
• mixerctl(1)
• audioplay(1)
• audiorecord(1)
18.5.1 audioctl(1)audioctl(1) made its appearance in NetBSD 1.3 and is used to manually set some variables regardingaudio I/O, like the frequencies for playing and recording. The available parameters can be displayed withthe following command:
# audioctl -a | more
For example, to listen to CD quality music you can use the following command.
# audioctl -w play=44100,2,16,slinear_le
This command sets the frequence to 44100Hz, 2 audio channels, 16 bit, slinear_le encoding.
You can see the supported encodings with:
# audioctl encodings
This command displays the list of all the encodings supported by the audio card on your system.
156
Chapter 18 Audio
18.5.2 mixerctl(1)This command is used to configure the audio mixing and has an interface similar to that of audioctl(1).
18.5.3 audioplay(1)With this command you can play audio files. For more sophisticated needs you might want to install oneof the many programs available in the package system which let you play audio files in different formats(eg. MP3, etc.)
18.5.4 audiorecord(1)Not unsurprisingly this command is used to record audio files.
157

Chapter 19
Obtaining sources by CVS
CVS (Concurrent Versions System) can be used to fetch the NetBSD source tree or to keep the NetBSDsource tree up to date with respect to changes made to the NetBSD sources. There are three treesmaintained for which you can use CVS to obtain them or keep them up to date: the current source tree, inwhich the bleeding edge of developement can be followed or tested, the release source tree in whichpatches for errata are applied to fix issued and to close security holes found (for example thefragmentation issue in ipf was fixed) and in which some things are added, or replaced by a newerversion, which have been found stable and safe to use. For example its now possible to remove thecomplete arp table with the arp command, this is added functionality and not a fix.
19.1 Fetching system and userland sourceTo install CVS (if you dont already have it), just do:
% pkg_add ftp://ftp.NetBSD.org/pub/NetBSD/packages/OS Ver/arch/All/cvs-1.11nb2.tgz
Where OS Ver, and arch can be obtained by running
% sysctl kern.osrelease hw.machine_arch
To get the sources from scratch without having anything in /usr/src
% setenv CVSROOT :pserver:[email protected]:/cvsroot% cd /usr% cvs loginpassword: anoncvs% cvs checkout -rnetbsd-<BRANCH> -PA src
Where <BRANCH> is the release branch to be checked out, for example, 1.6 would be 1-6, 2.2 would be2-2. If 2.0 were the branch then it would look like:
% cvs checkout -rnetbsd-2-0 -PA src
Where <BRANCH> is the release branch to be checked out, for example, 1.6 would be 1-6, 2.2 would be2-2. Note that the branch name does not include the patch level, thus for 1.6.2 it would still be 1-6. If 2.0were the branch then it would look like:
% cvs checkout -rnetbsd-2-0 -PA src
Or do it by ssh, so that the data is encrypted:
% setenv CVS_RSH ssh% setenv CVSROOT [email protected]:/cvsroot
158

Chapter 19 Obtaining sources by CVS
% cd /usr% cvs checkout -rnetbsd-<BRANCH> -PA src
To obtain the current source just omit “-rnetbsd-BRANCH” in the last line.
To just update the release source tree if you already got one:
% setenv CVSROOT :pserver:[email protected]:/cvsroot% cd /usr% cvs loginpassword: anoncvs% cvs -d $CVSROOT update -rnetbsd-BRANCH -PAd src
Or by ssh:
% setenv CVS_RSH ssh% setenv CVSROOT [email protected]:/cvsroot% cd /usr% cvs -d $CVSROOT update -rnetbsd-BRANCH -PAd src
To update the current source tree, omit the BRANCH .
When you wish to do an update from an unclean tree, i.e. when you rebuild some part of the source oreven the whole source tree or the kernel source, and didn’t do a make cleandir you have to make objectfiles in the source tree.
The object directories are necessary to do a “cvs update” on an unclean tree. An unclean tree is a sourcetree in which you have built parts of the tree, i.e. compiled parts or the whole source tree, without havingdone a “make clean” in those parts or a “make” cleandir on the whole source tree. Otherwise, cvs willwant to create directories that have the same name as some of the binairies, and will fail. (Where youused to have a directory called “groff”, you now build the binary “groff”, but “cvs” must create all theempty directories before pruning them.)
So in /usr/src:
% makedir /usr/obj% make obj
% makedir /usr/obj% make obj
Now you’re ready to do the cvs update. Or do a make cleandir in /usr/src before using cvs. It’s easierand less work instead of making the objectdirs when updating from an unclean tree. CVS is going a lotfaster then sup. I don’t know exactly how long it’s going to take to fetch all the sources. I have onlyexperience with T1 and higher speed lines in which case it just takes an hour or a little more to fetch thecomplete source, depending of course how well the connection is at the moment. I have no experiencehow long it takes with a modem. However, in a case you are using a modem, you will wish to compressond decompress data once it is transferred. In that case do
% cvs -z5 checkout .........
or
% cvs -z5 -d $CVSROOT update ......
159

Chapter 19 Obtaining sources by CVS
The 5 is the level of compression, you can use any number between 1 and 9 where 1 is the fastestcompression method and 9 the best but slowest compression method. Keep in mind that this will putextra load on the cvs server.
Note: you must go to: /usr/src/sys/arch/$arch/compile/$kernel_conf_name and do makeclean in there and remove that dir before you wish to do a cvs update, for else that one can beunclean as well. That takes care of the kernel source part to go well during cvs update.
19.2 Fetching pkgsrcPkgsrc (package source), is a set of software utilities and libraries which have been ported to NetBSD. Itsvery easy this way to install and deinstall software on your NetBSD system: it fetches the sources filesneeded, patches the source if needed, configures it and builds the binairies and installs the binaries andman pages. It keeps a database of all packages installed and exactly which files belongs to a package andwhere the are stored.
To fetch all the pkgsrc from scratch:
% setenv CVSROOT :pserver:[email protected]:/cvsroot% cd /usr% cvs login(the password is: "anoncvs")% cvs checkout -PA pkgsrc
Or by ssh:
% setenv CVS_RSH ssh% setenv CVSROOT [email protected]:/cvsroot% cd /usr% cvs checkout -PA pkgsrc
This will create the directory pkgsrc in your /usr and all the package source will be stored under/usr/pkgsrc
To update the pkgsrc just do:
% setenv CVSROOT :pserver:[email protected]:/cvsroot% cd /usr% cvs login(the password is: "anoncvs")% cvs -d $CVSROOT update -PAd pkgsrc
Or by ssh:
% setenv CVS_RSH ssh% setenv CVSROOT [email protected]:/cvsroot% cd /usr% cvs -d $CVSROOT update -PAd pkgsrc
160

Chapter 19 Obtaining sources by CVS
However, make sure the pkgsrc dir is clean when you start udating. So do a make clean in/usr/pkgsrc if you aint sure.
161

Chapter 20
CCD Configuration
The CCD driver allows the user to “concatenate” several physical disks into one pseudo volume. CCDalso lets you overcome a feature limitation in CMU RAIDFrame that does not allow you to RAID0 (filesystem spanning across disks) across disks of different geometry. CCD also allows for an “interleave” toimprove disk performance with a gained space loss. This example will not cover that feature.
The steps required to setup a CCD are as follows:
1. Install physical media
2. Configure kernel support
3. Disklabel each volume member of the CCD
4. Configure the CCD conf file
5. Initialize the CCD device
6. Create a 4.4BSD/UFS filesystem on the new CCD device
7. Mount the CCD filesystem
This example features a CCD setup on NetBSD/sparc 1.5. The CCD will reside on 4 SCSI disks in ageneric external Sun disk pack chassis connected to the external 50 pin SCSI port.
20.1 Install physical mediaThis step is at your own discretion, depending on your platform and the hardware at your disposal.
From my DMESG:
Disk #1:probe(esp0:0:0): max sync rate 10.00MB/ssd0 at scsibus0 target 0 lun 0: <SEAGATE, ST32430N SUN2.1G, 0444> SCSI2 0/direct fixedsd0: 2049 MB, 3992 cyl, 9 head, 116 sec, 512 bytes/sect x 4197405 sectors
Disk #2probe(esp0:1:0): max sync rate 10.00MB/ssd1 at scsibus0 target 1 lun 0: <SEAGATE, ST32430N SUN2.1G, 0444> SCSI2 0/direct fixedsd1: 2049 MB, 3992 cyl, 9 head, 116 sec, 512 bytes/sect x 4197405 sectors
Disk #3probe(esp0:2:0): max sync rate 10.00MB/ssd2 at scsibus0 target 2 lun 0: <SEAGATE, ST11200N SUN1.05, 9500> SCSI2 0/direct fixedsd2: 1005 MB, 1872 cyl, 15 head, 73 sec, 512 bytes/sect x 2059140 sectors
162

Chapter 20 CCD Configuration
Disk #4probe(esp0:3:0): max sync rate 10.00MB/ssd3 at scsibus0 target 3 lun 0: <SEAGATE, ST11200N SUN1.05, 8808 > SCSI2 0sd3: 1005 MB, 1872 cyl, 15 head, 73 sec, 512 bytes/sect x 2059140 sectors
20.2 Configure Kernel SupportThe following kernel configuration directive is needed to provide CCD device support. It is enabled inthe GENERIC kernel:
pseudo-device ccd 4 # concatenated disk devices
In my kernel config, I also hard code SCSI ID associations to /dev device entries to prevent bad thingsfrom happening:
sd0 at scsibus0 target 0 lun ?# SCSI disk drivessd1 at scsibus0 target 1 lun ?# SCSI disk drivessd2 at scsibus0 target 2 lun ?# SCSI disk drivessd3 at scsibus0 target 3 lun ?# SCSI disk drivessd4 at scsibus0 target 4 lun ?# SCSI disk drivessd5 at scsibus0 target 5 lun ?# SCSI disk drivessd6 at scsibus0 target 6 lun ?# SCSI disk drives
20.3 Disklabel each volume member of the CCDEach member disk of the CCD will need a special file system established. In this example, I will need todisklabel:
/dev/rsd0c
/dev/rsd1c
/dev/rsd2c
/dev/rsd3c
Note: always remember to disklabel the character device, not the block device, in /dev/r{s,w}d*
Note: on all platforms, the cslice is symbolic of the entire NetBSD partition and is reserved.
163

Chapter 20 CCD Configuration
You will probably want to remove any pre-existing disklabels on the disks in the CCD. This can beaccomplished one of two ways the dd(1) command:
# dd if=/dev/zero of=/dev/rsd0c bs=8k count=1# dd if=/dev/zero of=/dev/rsd1c bs=8k count=1# dd if=/dev/zero of=/dev/rsd2c bs=8k count=1# dd if=/dev/zero of=/dev/rsd3c bs=8k count=1
If your port uses a MBR (Master Boot Record) to partition the disks so that the NetBSD partitions areonly part of the overall disk, and other OSs like Windows or Linux use other parts, you can void theMBR and all partitions on disk by using the command:
# dd if=/dev/zero of=/dev/rsd0d count=1
This will make all data on the entire disk unaccessible.
The default disklabel for the disk will look similar to this:
# disklabel -r /dev/rsd0c[...snip...]bytes/sector: 512sectors/track: 116tracks/cylinder: 9sectors/cylinder: 1044cylinders: 3992total sectors: 4197405[..snip...]3 partitions:# size offset fstype [fsize bsize cpg]
c: 4197405 0 unused 1024 8192 # (Cyl. 0 - 4020*)
You will need to create one “slice” on the NetBSD partition of the disk that consumes the entirepartition. The slice must begin at least one cylinder offset from the beginning of the disk/partition toprovide space for the special CCD disklabel. The offset should be 1x sectors/cylinder (see followingnote). Therefore, the “size” value should be “total sectors” minus 1x “sectors/cylinder”.
Note: the offset of a slice of type “ccd” must be a multiple of the “sectors/cylinder” value.
Edit your disklabels accordingly. Be sure to specify the path to the character device, not the block device.
Note: be sure to export EDITOR=[path to your favorite editor] before editing the disklabels.
# disklabel -e /dev/rsd0c
Note: the slice must be fstype ccd.
Because there will only be one slice on this partition, you can recycle the c slice (normally reserved forsymbolic uses). Change your disklabel to the following:
164
Chapter 20 CCD Configuration
3 partitions:# size offset fstype [fsize bsize cpg]
c: 4196361 1044 ccd # (Cyl. 1 - 4020*)
Optionally you can setup a slice other than c to use, simply adjust accordingly below:
3 partitions:# size offset fstype [fsize bsize cpg]
a: 4196361 1044 ccd # (Cyl. 1 - 4020*)c: 4197405 0 unused 1024 8192 # (Cyl. 0 - 4020*)
Be sure to write the label when you have completed. Disklabel will object to your disklabel and promptyou to re-edit if it does not pass it’s sanity checks.
20.4 Configure the CCDOnce all disk are properly labeled, you will need to generate a configuration file. The configuration fileresides in /etc by default. You may need to create a new one. Format:
#ccd ileave flags component devices
Note: for the “ileave”, if a value of zero is used then the disks are concatenated, but if you use avalue equal to the “sectors/track” number the disks are interleaved.
Example in this case:
# more /etc/ccd.confccd0 0 none /dev/sd0c /dev/sd1c /dev/sd2c /dev/sd3c
Note: the CCD configuration file references the device file for the newly created CCD filesystems. Besure not to reference the block device at this point, instead use the character device.
20.5 Initialize the CCD deviceOnce you are confident that your CCD configuration is sane, you can initialize the device using theccdconfig(8) command: Configure:
# ccdconfig -c -f /etc/ccd.conf
Unconfigure:
# ccdconfig -u -f /etc/ccd.conf
Initializing the CCD device will activate /dev entries: /dev/{,r}ccd#:
165

Chapter 20 CCD Configuration
# ls -la /dev/{,r}ccd0*brw-r----- 1 root operator 9, 0 Apr 28 21:35 /dev/ccd0abrw-r----- 1 root operator 9, 1 Apr 28 21:35 /dev/ccd0bbrw-r----- 1 root operator 9, 2 May 12 00:10 /dev/ccd0cbrw-r----- 1 root operator 9, 3 Apr 28 21:35 /dev/ccd0dbrw-r----- 1 root operator 9, 4 Apr 28 21:35 /dev/ccd0ebrw-r----- 1 root operator 9, 5 Apr 28 21:35 /dev/ccd0fbrw-r----- 1 root operator 9, 6 Apr 28 21:35 /dev/ccd0gbrw-r----- 1 root operator 9, 7 Apr 28 21:35 /dev/ccd0hcrw-r----- 1 root operator 23, 0 Jun 12 20:40 /dev/rccd0acrw-r----- 1 root operator 23, 1 Apr 28 21:35 /dev/rccd0bcrw-r----- 1 root operator 23, 2 Jun 12 20:58 /dev/rccd0ccrw-r----- 1 root operator 23, 3 Apr 28 21:35 /dev/rccd0dcrw-r----- 1 root operator 23, 4 Apr 28 21:35 /dev/rccd0ecrw-r----- 1 root operator 23, 5 Apr 28 21:35 /dev/rccd0fcrw-r----- 1 root operator 23, 6 Apr 28 21:35 /dev/rccd0gcrw-r----- 1 root operator 23, 7 Apr 28 21:35 /dev/rccd0h
20.6 Create a 4.4BSD/UFS filesystem on the new CCDdevice
You may now disklabel the new virtual disk device associated with your CCD. Be sure to use thecharacter device:
# disklabel -e /dev/rccd0c
Once again, there will be only one slice, so you may either recycle the c slice or create a separate slicefor use.
# disklabel -r /dev/rccd0c# /dev/rccd0c:type: ccddisk: ccdlabel: default labelflags:bytes/sector: 512sectors/track: 2048tracks/cylinder: 1sectors/cylinder: 2048cylinders: 6107total sectors: 12508812rpm: 3600interleave: 1trackskew: 0cylinderskew: 0headswitch: 0 # microsecondstrack-to-track seek: 0 # microsecondsdrivedata: 0# size offset fstype [fsize bsize cpg]
c: 12508812 0 4.2BSD 1024 8192 16 # (Cyl. 0 - 6107*)
166

Chapter 20 CCD Configuration
The filesystem will then need formatted:
# newfs /dev/rccd0cWarning: 372 sector(s) in last cylinder unallocated/dev/rccd0c: 12508812 sectors in 6108 cylinders of 1 tracks, 2048 sectors
6107.8MB in 382 cyl groups (16 c/g, 16.00MB/g, 3968 i/g)
super-block backups (for fsck -b #) at:[...]
20.7 Mount the filesystemOnce you have a created a file system on the CCD device, you can can mount the file system against anmount point on your system. Be sure to mount the slice labeled type ffs or 4.4BSD:
# mount /dev/ccd0c /mnt
Then:
# export BLOCKSIZE=1024; dfFilesystem 1K-blocks Used Avail Capacity Mounted on/dev/sd6a 376155 320290 37057 89% //dev/ccd0c 6058800 1 5755859 0% /mnt
Congratulations, you now have a working CCD. Please consult the rest of the manual for instructions onhow to initialize the device at boot-time via RC. For more detail on any of the commands here, please seetheir respective man pages.
167

Chapter 21
The cryptographic device driver
The cgd driver provides functionality which allows you to use disks or partitions for encrypted storage.After authentication the encrypted partition is accessible using cgd pseudo-devices. The cgd driverprovides the following encryption algorithms:
• aes-cbc: AES (Rijndael). AES uses a 128 bit blocksize and accepts 128, 192 or 256 bit keys.
• blowfish-cbc: Blowfish uses a 64 bits blocksize and accepts 128 bit keys
• 3des-cbc: Triple DES uses a 64 bit blocksize and accepts 192 bit keys (only 168 bits are actually usedfor encryption)
All three ciphers are used in CBC mode. This means each block is XORed with the previous encryptedblock before encryption. This reduces the risk that a pattern can be found, which can be used to break theencryption.
Another aspect of cgd that needs some attention are the verification methods cgdconfig provides. Theseverification methods are used to verify the passphrase is correct. The following verification methods areavailable:
• none: no verification is performed. This can be dangerous, because the key is not verified at all. Whena wrong key is entered cgdconfig configures the cgd device as normal, but data which was available onthe volume will be destroyed (decrypting blocks with a wrong key will result in random data, whichwill result in a regeneration of the disklabel with the current key).
• disklabel: cgdconfig scans for a valid disklabel. If a valid disklabel is found with the key that isprovided authentication will succeed.
• ffs: cgdconfig scans for a valid FFS file system. If a valid FFS file system is found with the key that isprovided authentication will succeed.
21.1 Configuring kernel supportTo use cgd you need a kernel with support for the cgd pseudo device. Make sure the following line is inthe kernel configuration:
pseudo-device cgd 4 # cryptographic disk driver
The number specifies how many cgd devices may be configured at the same time. After configuring thecgd pseudo-device you can recompile the kernel and boot it to enable cgd support.
168

Chapter 21 The cryptographic device driver
21.2 Setting up a cgd deviceThe best way to learn something is by practice. In this section we will look at an example of setting upcgd. In this example we have reserved the “h” partition of the wd0 disk for encryption purposes, and wewant want to create an encrypted FFS filesystem. The first thing that needs to be done is to create aconfiguration file for the wd0h partition. This file is named /etc/cgd/wd0h. This file can be createdusing the cgdconfig. Suppose we want to use the Blowfish cipher and want to check for an FFSfilesystem for verification, this command would create that configuration:
# cgdconfig -g -o /etc/cgd/wd0h -V ffs blowfish-cbc
The “-g” parameter forces cgdconfig to create a configuration file, the filename is specified by the “-o”parameter. The “-V” parameter specifies which verification method should be used, valid choices arenone, disklabel, and ffs (which are explained above). The resulting configuration file looks like this:
algorithm blowfish-cbc;iv-method encblkno;keylength 128;verify_method ffs;keygen pkcs5_pbkdf2 {
iterations 71564;salt AAAAgOGFALVANSHf61jf4XYlnUI=;
};
At this moment we have created a configuration file and we can start to use this configuration. The nextthing that has to be done is to configure an cgd pseudo device. This can be done with the followingcommand:
# cgdconfig -V none cgd0 /dev/wd0h
This command configures the cgd0 device to use the wd0h parition to store encrypted data. At this pointwe will not use verification, because the cgd0 “disk” does not have a valid FFS filesystem. cgdconfigwill ask for a passphrase, just enter the passphrase you would like to use for this encrypted partition. Youcan use the cgd0 device as an normal disk and disklabel it. Create a partition with the 4.2BSD type andmake a FFS filesystem on this partition with newfs.
After the initial partitioning and formatting the cgd pseudo-device can be unconfigured with:
# cgdconfig -u cgd0
After these configuration steps the encrypted partition can be used with:
# cgdconfig cgd0 /dev/wd0h
Note that the “-V” parameter is omitted. The verification method configured in /etc/cgd/wd0h will beused.
169

Chapter 21 The cryptographic device driver
21.3 Swap encryptionA question that pops up quite often on the mailinglists is how one can setup NetBSD to encrypt swap.While the instructions above should be sufficient to know how to set up swap, we will provide a shortoutline in this section. In this example we will use wd0b for storage of the encrypted swap partition.Swap will be encrypted with the Blowfish cipher. As normal, the first step is to create a cgd configurationfile. This time we will use the “-k” parameter to generate a random key, and we will not use a verificationmethod (because the parition will be reinitialized after each boot). Execute the following command togenerate /etc/cgd/wd0b:
# cgdconfig -g -o /etc/cgd/wd0b -V none -k randomkey blowfish-cbc
With the configuration file set up we can configure the cgd0 pseudo-device:
# cgdconfig cgd0 /dev/wd0b
The next step is to configure the disklabel and to save it to /etc/cgd/wd0b.disklabel. Please refer todisklabel(8) for information about how to use disklabel to set up a swap partition.
Now we have to configure cgd to make sure cgd0 is configured during boot process of NetBSD. Add thefollowing line to /etc/cgd/cgd.conf:
cgd0 /dev/wd0b
cgd0 is reinitialized with a blank disklabel after a reboot, because no verification is used and a randomkey is generated. So, the cgd0 device has to disklabelled with the disklabel we just saved during eachboot. This can be done by creating the /etc/rc.conf.d/cgd and add this function (thanks to LubomirSedlacik):
swap_device="cgd0"swap_disklabel="/etc/cgd/wd0b.disklabel"start_postcmd="cgd_swap"
cgd_swap(){if [ -f $swap_disklabel ]; thendisklabel -R -r $swap_device $swap_disklabel
fi}
Finally add the cgd0 partition you configured to /etc/fstab.
170

Chapter 22
rc.d System
As of NetBSD version 1.5 the startup of the system changed slightly to using rc scripts for controllingservices. This chapter is an overview of the rc configuration on NetBSD 1.5 and later.
22.1 The rc.d ConfigurationThe rc files for the system reside under /etc, they are:
• /etc/rc
• /etc/rc.conf
• /etc/rc.d/*
• /etc/rc.lkm
• /etc/rc.local
• /etc/rc.shutdown
• /etc/rc.subr
• /etc/defaults/*
• /etc/rc.conf.d/*
First, a look at controlling and supporting scripts:
• /etc/rc runs the scripts in /etc/rc.d
• /etc/rc.subr contains common functions used by rc scripts.
• /etc/shutdown calls the scripts in /etc/rc.d in reverse order.
Additional scripts outside of the rc.d directory:
• /etc/rc.lkm loads or unloads Loadable Kernel Modules.
• /etc/rc.local almost the last script called at boot up, local daemons may be added here.
Following is the example from the system for an apache web server added to /etc/rc.local:
if [ -f /usr/pkg/etc/rc.d/apache ]; then/usr/pkg/etc/rc.d/apache start
fi
The /etc/defaults directory contains the default settings for NetBSD and the contents should not bechanged. Within the rc context the only file of interest is rc.conf, this is the default rc configuration
171
Chapter 22 rc.d System
that ships with NetBSD. In order to alter a default setting, an override may be installed in/etc/rc.conf. For example, if you wanted to enable the Secure Shell Daemon:
# cd /etc; grep ssh defaults/rc.confsshd=NO sshd_flags=""# echo "sshd=YES" >> rc.conf
Or just edit the file with your favorite editor. The same can be done with any default that needs to bechanged.
Another way to make rc.conf easy to edit is to do the following:
# cd /etc/defaults# cat rc.conf >> ../rc.conf
Then modify anything you need to.
Last and not least, the /etc/rc.conf.d/ directory can be used for scripts that are third party.
22.2 The rc.d ScriptsThe actual scripts that control services are in /etc/rc.d. Once a service has been activated or told notto activate in /etc/rc.conf it can be also be modified by calling the rc script from the command line,for example if an administrator needed to start secure shell:
# /etc/rc.d/sshd startStarting sshd.
The rc scripts must receive one of the following arguments:
• start
• stop
• restart
• kill
An example might be when a new record has been added to the named database on a named server:
# /etc/rc.d/named restartStopping named.Starting named.
A slightly more complex example is when a series of settings have been changed, for instance a firewall’sipfilter rules, ipnat configuration, and the secure shell server has switched encryption type:
# cd /etc/rc.d# ./ipfilter restart; ./ipnat restart; ./sshd restart
172

Chapter 22 rc.d System
22.3 The Role of rcorder and rc ScriptsAs per the System Manager’s Manual, rcorder is designed to print out a dependancy ordering of a set ofinterdependent files. It basically determines the order of execution one way or another. On some Unixsystems this is done by numbering the files and/or putting them in separate run level directories. Whichcan be messy. On NetBSD this is done by the controlling scripts mentioned at the beginning of thisdocument and by the contents of each rc script.
In the rc scripts there is a series of lines that have one of the following in them:
• REQUIRE
• PROVIDE
• BEFORE
• KEYWORD
These dicatate the dependencies of that particular rc script and hence rcorder can easily work either “up”or “down” as the situation requires. Following is an example of the nfsd rc script:
...PROVIDE: nfsdREQUIRE: mountd
. /etc/rc.subr
...
Here we can see that this script provides the nfsd service, however, it requires mountd to be running.
22.4 Additional ReadingThere are other resources available pertaining to the rc.d system:
• One of the principal designers of rc.d, Luke Mewburn, gave a presentation on the system at USENIX2001. It is available in PDF (http://www.mewburn.net/luke/papers/rc.d.pdf) format.
• Will Andrews wrote a Daemonnews (http://www.daemonnews.org/) article called The NetBSD rc.dSystem (http://www.daemonnews.org/200108/rcdsystem.html).
173

Chapter 23
RAID-1 with RAIDframe
Many users have nowadays big hard drives which contain lots of valuable files such as email archives,pictures from digital cameras, “backup copies” of the latest movies and so on. As the hard drives are socheap yet so big in capacity it can be a difficult task to take backup of the not-so-important files. At thesame time it would be a real pity to lose those files in case of a disk failure.
This article describes a real-life NetBSD installation with RAID-1 protected filesystems. With RAID-1the server can be fully accessible even if the faulty drive is disconnected and sent back to themanufacturer.
23.1 IntroductionI wanted to create a home server with failure resistant filesystems to protect myself against disk failuresas this is unfortunately not very uncommon these days. I decided to use RAID-1 for everything (/, swapand /home). This article describes how to setup RAID-1 and make the system bootable even if theprimary boot device is removed due to failure. The reason for choosing RAID-1 instead of RAID-10 orRAID-5 is the fact that currently NetBSD supports only RAID-1 on root filesystem (/). RAID-0 was noteven considered as it provides no redundancy in case of disk failure.
This article assumes basic knowledge about RAID (http://www.acnc.com/04_00.html). In this examplewe have two identical IDE disks (wd#) which we are going to mirror (RAID-1). These disks areidentified as:
wd0 at pciide0 channel 0 drive 0: <MAXTOR 4K080H4>wd0: drive supports 16-sector PIO transfers, LBA addressingwd0: 76319 MB, 16383 cyl, 16 head, 63 sec, 512 bytes/sect x 156301487 sectorswd0: 32-bit data portwd0: drive supports PIO mode 4, DMA mode 2, Ultra-DMA mode 5 (Ultra/100)wd0(pciide0:0:0): using PIO mode 4, Ultra-DMA mode 2 (Ultra/33) (using DMA datatransfers)wd1 at pciide0 channel 1 drive 0: <MAXTOR 4K080H4>wd1: drive supports 16-sector PIO transfers, LBA addressingwd1: 76319 MB, 16383 cyl, 16 head, 63 sec, 512 bytes/sect x 156301487 sectorswd1: 32-bit data portwd1: drive supports PIO mode 4, DMA mode 2, Ultra-DMA mode 5 (Ultra/100)wd1(pciide0:1:0): using PIO mode 4, Ultra-DMA mode 2 (Ultra/33) (using DMA datatransfers)
Both disks are masters (drive 0) in separate channels. This is important with IDE disks as you might notbe able to boot from a slave disk (drive 1). Also performance is better if both disks are on separatechannels. SCSI disks (sd#) can be on the same channel as the controller is smart and knows how to getthe optimal throughput with multiple disks. In case of SCSI disks we need to replace wd# with sd# inthis article.
174

Chapter 23 RAID-1 with RAIDframe
23.2 Initial installWe start by installing NetBSD on the first disk (wd0) without any RAID support. We split the disk intothree parts (/, swap and /home) as this is what we are going to have in the final RAID-1 configuration. Itis also possible to convert an existing system to RAID-1, even without console access. The author hasdone this over SSH session and there was no need to go to the console. If an existing system is convertedit is important to take backup of all important files!
Next we need to make sure we have RAID support in the kernel (which is included in the GENERICkernel). The kernel configuration file must have the following settings:
pseudo-device raid 8 # RAIDframe disk driveroptions RAID_AUTOCONFIG # auto-configuration of RAID components
The RAID support must be detected by the NetBSD kernel, which can be checked by looking at theoutput of the dmesg command.
# dmesg...Kernelized RAIDframe activated
23.3 Setting up the second diskNext we setup the second disk (wd1). We can find the correct numbers from wd0 and use them with wd1as the disks are identical. We must remember to mark the NetBSD partition active or the system will notboot.
# fdisk /dev/wd0Disk: /dev/rwd0dNetBSD disklabel disk geometry:cylinders: 16383 heads: 16 sectors/track: 63 (1008 sectors/cylinder)
BIOS disk geometry:cylinders: 1024 heads: 255 sectors/track: 63 (16065 sectors/cylinder)
Partition table:0: <UNUSED>1: <UNUSED>2: <UNUSED>3: sysid 169 (NetBSD)
start 63, size 156301424 (76319 MB), flag 0x80beg: cylinder 0, head 1, sector 1end: cylinder 1023, head 254, sector 63
NetBSD is on the 3rd partition on wd0 so we use the same number for wd1.
# dd if=/dev/zero of=/dev/rwd1d bs=8k count=1# fdisk -3ua /dev/wd1
Both disks should be identical now. We verify this once more.
175

Chapter 23 RAID-1 with RAIDframe
# fdisk /dev/wd0# fdisk /dev/wd1
Next we configure our newly created partition. In this example we have one RAID slice (a) for allfilesystems and swap. We also have one additional slice (h) in addition to the standard c and d slices.Note that there is no swap (b) yet.
# disklabel /dev/wd1 > disklabel.wd1# vi disklabel.wd1
8 partitions:# size offset fstype [fsize bsize cpg/sgs]a: 156297328 4159 RAIDc: 156301424 63 unused 0 0d: 156301487 0 unused 0 0h: 4096 63 4.2BSD 1024 8192 64
Here is a short description of each slice:
• wd1a is a RAID device which will contain all our filesystems and swap.
• wd1h is a small filesystem in the beginning of the disk to hold the boot loader (/boot).
The sizes are calculated like this:
# dc156301424 # size of c4096 # size of h-p156297328 # size of a
4096 # size of h63 # start of h+p4159 # start of aq
Next we install the new disklabel on wd1.
# disklabel -R -r /dev/wd1 disklabel.wd1# disklabel /dev/wd1
23.4 Configuring the RAID deviceNext we create configuration files for the RAID devices. These files are needed only during the initialsetup as we auto-configure the devices later.
# cat > /var/tmp/raid0.conf << EOFSTART array
176

Chapter 23 RAID-1 with RAIDframe
1 2 0
START disks/dev/wd9a/dev/wd1a
START layout128 1 1 1
START queuefifo 100EOF
Note that wd9 is a non-existing disk. There must be, however, a device node for that in the /dev directory.wd9 will be replaced later by wd0.
# cd /dev# sh MAKEDEV wd9# cd
Next we configure the RAID device and initialize the serial number to something unique. In this examplewe use 2003### (Nth RAID device in 2003). After that we start the initialization process.
# raidctl -C /var/tmp/raid0.conf raid0# raidctl -I 2003001 raid0# raidctl -i raid0# raidctl -s raid0
23.5 Setting up filesystemsThe RAID device is now configured and available. Now it is the time to think about the filesystems. Inthis example we use the following layout:
• 10 GB for /
• 1 GB for swap
• everything else for /home
We must next create a disklabel inside the RAID device and format the filesystems.
# disklabel raid0 > disklabel.raid0# vi disklabel.raid0
8 partitions:# size offset fstype [fsize bsize cpg/sgs]a: 20971520 0 4.2BSD 1024 8192 64b: 2097152 20971520 swapd: 156297216 0 unused 0 0 0e: 133228544 23068672 4.2BSD 1024 8192 64
177

Chapter 23 RAID-1 with RAIDframe
It should be noted that 1 GB is 2*1024*1024=2097152 blocks (1 block is 512 bytes, or 0.5 kilobytes).The sizes and offsets can be calculated like this:
# dc156297216 # size of d20971520 # size of a (10 GB)-2097152 # size of b (1 GB)-p133228544 # size of e
20971520 # size of a2097152 # size of b+p23068672 # offset of eq
raid0a will be the root filesystem (/), raid0b the swap and raid0e /home. In this example we do not haveseparate filesystems for /usr and /var. The next thing is to install the new disklabel for the RAIDdevice and format the filesystems. Note that the swap area is not formated.
# disklabel -R -r raid0 disklabel.raid0# newfs /dev/raid0a# newfs /dev/raid0e
23.6 Setting up kernel dumpsThe normal swap area in our case is on raid0b but this can not be used for crash dumps as processscheduling is stopped when dumps happen. Therefore we must use a real disk device. However, nothingstops us from defining a dump area which overlaps with raid0b. The trick here is to calculate the correctstart offset for our crash dump area. This is dangerous and it is possible to destroy valuable data if wemake a mistake in these calculations! Data corruption will happen when the kernel write its memorydump over a normal filesystem. So we must be extra careful here.
First we need to take a look at the disklabel for swap (raid0b) and the real physical disk (wd1).
# disklabel raid0
8 partitions:# size offset fstype [fsize bsize cpg/sgs]a: 20971520 0 4.2BSD 1024 8192 64b: 2097152 20971520 swapd: 156297216 0 unused 0 0e: 133228544 23068672 4.2BSD 1024 8192 64
# disklabel /dev/wd1
8 partitions:# size offset fstype [fsize bsize cpg/sgs]
178

Chapter 23 RAID-1 with RAIDframe
a: 156297328 4159 RAIDc: 156301424 63 unused 0 0d: 156301487 0 unused 0 0h: 4096 63 4.2BSD 1024 8192 64
We can calculate the start offset of raid0b on wd1 like this:
# dc156297328 # size of wd1a156297216 # size of raid0d-p112 # size of internal RAID structures
4159 # offset of wd1a112 # size of internal RAID structures+20971520 # size of raid1a+p20975791 # offset of swap within wd1q
It is also possible to calculate the offset using a simpler method as the end of wd1 is also the end of raid0.However, the previous method is more generic.
# dc156301487 # size of the whole disk (wd1d)133228544 # size of raid0e-2097152 # size of raid0b-p20975791q
We know now that real offset of the still-nonexisting wd1b is 20975791 and size is 2097152. Next weneed to add wd1b to wd1’s disklabel.
# disklabel /dev/wd1 > disklabel.wd1# vi disklabel.wd1
8 partitions:# size offset fstype [fsize bsize cpg/sgs]a: 156297328 4159 RAIDb: 2097152 20975791 swapc: 156301424 63 unused 0 0d: 156301487 0 unused 0 0h: 4096 63 4.2BSD 1024 8192 64
Next we install the new disklabel.
# disklabel -R -r /dev/wd1 disklabel.wd1
179

Chapter 23 RAID-1 with RAIDframe
23.7 Moving the existing files into the new filesystemsThe new RAID filesystems are now ready for use. We mount them under /mnt and copy all files fromthe old system.
# mount /dev/raid0a /mnt# dump -0 -f - / | (cd /mnt && restore -x -f -)
# mount /dev/raid0e /mnt/home# dump -0 -f - /home | (cd /mnt/home && restore -x -f -)
The data is now on the RAID filesystems. We need to fix the mount-points in fstab or the system will notcome up correctly.
Note that the kernel crash dumps must not be saved on a RAID device but on a real physical disk (wd0b).This dump area was created in the previous chapter on the second disk (wd1b) but we will make wd0 anidentical copy of wd1 later so wd0b and wd1b will have the same size and offset. If wd0 fails and isremoved from the server wd1 becomes wd0 after reboot and crash dumps will still work as we are usingwd0b in /etc/fstab. The only fault in this configuration is when the original, failed wd0 is replaces bya new drive and we haven’t initialized it yet with fdisk and disklabel. In this short period of time we cannot make crash dumps in case of kernel panic. Note how the dump device has the “dp” keyword on the4th field.
# vi /mnt/etc/fstab
/dev/raid0a / ffs rw 1 1/dev/raid0b none swap sw 0 0/dev/raid0e /home ffs rw 1 1/dev/wd0b none swap dp 0 0
The swap should be unconfigured upon shutdown to avoid parity errors on the RAID device. This can bedone with a simple, one-line setting in /etc/rc.conf.
# cat >> /mnt/etc/rc.conf << EOFswapoff=YESEOF
Next the boot loader must be installed on wd1. Failure to install the loader will render the systemunbootable if wd0 fails. Please note how the boot loader is installed on the small slice (wd1h) which is inthe beginning of wd1.
# newfs /dev/wd1h# /usr/mdec/installboot /usr/mdec/biosboot.sym /dev/rwd1h
Finally the RAID sets must be made auto-configurable and the system should be rebooted. After thereboot everything is mounted from the RAID devices.
# raidctl -A root raid0# shutdown -r now
180

Chapter 23 RAID-1 with RAIDframe
23.8 The first boot with RAID-1The system should come up now and all filesystems should be on the RAID devices.
# dfFilesystem 1K-blocks Used Avail Capacity Mounted on/dev/raid0a 10163764 291704 9363871 3% //dev/raid0e 63552304 1 60374687 0% /home
# swapctl -lDevice 1K-blocks Used Avail Capacity Priority/dev/raid0b 1048576 0 1048576 0% 0
The RAID devices are not fully functional yet as the (non-existing) drive wd9 has failed.
# raidctl -s raid0Components:
component0: failed/dev/wd1a: optimal
23.9 Adding the first diskFirst we need to relabel wd0 to have the same layout as wd1. Then we add wd0 as hot-space and initiatethe reconstruction for all RAID devices.
# disklabel /dev/wd1 > disklabel.wd1# disklabel -R -r /dev/wd0 disklabel.wd1# disklabel /dev/wd0
# raidctl -a /dev/wd0a raid0# raidctl -F component0 raid0
Please note that the reconstruction is a slow process and can take several hours to complete.
# raidctl -S raid0Reconstruction is 0% complete.Parity Re-write is 100% complete.Copyback is 100% complete.Reconstruction status:
17% |****** | ETA: 01:58:08 -
After reconstruction both disks should be “optimal”.
# raidctl -s raid0Components:
component0: spared/dev/wd1a: optimal
Spares:/dev/wd0a: used_spare
When the reconstruction is ready we need to install the boot loader on the first disk (wd0).
181

Chapter 23 RAID-1 with RAIDframe
# newfs /dev/wd0h# /usr/mdec/installboot /usr/mdec/biosboot.sym /dev/rwd0h# shutdown -r now
That’s it, we have a redundant RAID-1 host. The next thing we should do is to read the raid(4) andraidctl(8) manual pages and educate yourself what to do when (not if) one of the drives fail. Finally thereader must note that RAID systems do not make backups obsolete as they do not protect against rm -rf.
182
Chapter 24
The Internet Super Server
Many systems administrators, users, engineers and the like are familar with the internet super server orinetd. Additionally, most are also quite familar with the relationship between several key files in the /etcdirectory and inetd. Suprisingly there is very little documentation on the internet that is easily obtainablewhich explains the basics of inetd and its relation to other files and the system as a whole.
24.1 OverviewIn this document we will look at a simple definition of inetd, how several files that relate to inetd work(not that these files are not related to other software), how to add a service to inetd and someconsiderations both to use inetd for a particular service and times when a service might be better offrunning outside of inetd.
24.2 What is InetdThe internet super server listens on its own sockets, when it receives a request it then determines whichserver to connect the request to and starts an instance of the server program.
Following is a very simple diagram to illustrate inetd:
pop3 ------ ||
ftpd ------- | INETD | ---- Internet / DMZ / Switch / Whatever . . .|
cvspserver - |
In the above diagram you can see the general idea. The inetd server receives a request and then starts theappropiate server process. What inetd is doing is software multiplexing. An important note here, onmany other UNIX-like systems, inetd has a package called tcpwrappers as a security enhancment, onNetBSD the secure behavoir of tcpwrappers was built in using libwrap.
24.3 ProtocolsThe first file is the protocols name data base which is /etc/protocols. This file has the informationpertaining to DARPA Internet protocols. The format of the protocols name data base is:
protocol_name number aliases
183

Chapter 24 The Internet Super Server
Lets look at the second entry in the /etc/protocols db as an example:
icmp 1 ICMP
Starting from the left, we see that the protocol name is icmp, the number is 1 and the only aliases listed isICMP.
24.4 ServicesThe next file to consider is the service name data base that can be found in /etc/services. This dbbasically contains information about services and the mappings from protocol to port number. Theformat of the /etc/services file is:
service_name port_number protocol_name aliases
Lets take a look at the ssh entries as an example:
ssh 22/tcpssh 22/udp
As we can see, from the left, the service name is ssh, the port number is 22, the protocols are both tcpand udp. Notice that there is a separate entry for every protocol a service can use (even on the same port).
24.5 RPCThe rpc program number data base is kept in /etc/rpc and contains name mappings to rpc programnumbers, the format of the file is:
server_name program_number aliases
For example, here is the nfs entry:
nfs 100003 nfsprog
24.6 InetdLast and definitely not least of the files we are concerned with is the internet super-server file,/etc/inetd.conf. The inetd.conf file basically provides enabling and mapping of services thesystems administrator would like to have multiplexed through inetd.
The previous files were very much informational for the system and hence their layout was alsorelatively simple, the inetd.conf file, however, is a little more complex (but not too much) anddeserves a little deeper explanation.
The basic field layout of the inetd.conf file is:
184

Chapter 24 The Internet Super Server
service_name socket_type protocol wait/nowait user:group server_program arguments
service-name
The service name should match up with the /etc/services file for all standard services (it is atleast highly recommended), however, non-standard services you may be running locally do not, it isimportant that you take care in selecting a non-standard service name so it does not clash with astandard one.
socket-type
The communications socket type, the different types are stream dgram raw rdm and seqpacket. Themost common socket types are stream and dgram.
protocol
The protocol used, mostly tcp, tcp6, udp and udp6. It is worth noting that tcp and udp mean theyare backwards compatible with all previous versions, however, tcp4 specifically meanscommunication via ipv4 only. This can be taken a step forward by putting ipv46. In additon tothose, rpc uses rpc and tcp or rpc/tcp.
wait/nowait
This field tells inetd if it should wait for a server program to return or to keep processing aconnection steadily. Many connections to their server processes require answers after data transfersare complete, where other types can keep transmitting on a connection continously, the latter is anowait and the former wait. In most cases, this entry corresponds to the socket-type, for example astreaming connection would (most of the time) have a nowait value in this field.
user[:group]
This field is pretty obvious, the user and optionally a group that runs the server process which inetdstarts up.
server-program
This field is path to the program that gets started.
program-arguments
This field contains the program and additional arguments the systems administrator may need tospecifiy for the server program that is started.
That is all a lot to digest and there are other things the systems administrator can do with some of thefields. Here is a sample line from an inetd.conf file:
ftp stream tcp nowait root /usr/libexec/ftpd ftpd -ll
From the left, the service-name is ftp, socket-type is stream, protocol is tcp, wait/nowait is set to nowait,the user is root, path is /usr/libexec/ftpd and program name and arguments is ftpd -ll. Notice in the lastfield, the program name is different from the service-name.
185

Chapter 24 The Internet Super Server
24.7 Adding a ServiceMany times a systems administrator will find that they need to add a service to their system that is notalready in inetd or they may wish to move a service to it because it does not get very much traffic. This isusually pretty simple, so as an example we will look at adding a version of pop3 on a NetBSD system.
In this case we have retrieved and installed the cucipop package. This server is pretty simple to use, theonly oddities are different path locations. Since it is pop3 we know it is a stream oriented connectionwith nowait. Using root will be fine, the only item that is different is the location of the program and thename of the program itself.
So the first half of the new entry looks like this:
pop3 stream tcp nowait root
After installation, pkgsrc deposited cucipop in /usr/pkg/sbin/cucipop. So with the next field wehave:
pop3 stream tcp nowait root /usr/pkg/sbin/cucipop
Last, we want to use the Berkeley mailbox format, so our server program must be called with the -Yoption. This leaves the entire entry looking like so:
pop3 stream tcp nowait root /usr/pkg/sbin/cucipop cucipop -Y
Now, to have inetd use the new entry, we simply restart it using the rc script:
# /etc/rc.d/inetd restart
All done, in most cases, the software you are using has documentation that will specify the entry, in theoff case it does not, sometimes it helps to try and find something similar to the server program you willbe adding. A classic example of this is a MUD server which has built-in telnet. You can pretty muchborrow the telnet entry and change parts where needed.
24.8 When to use or not to use inetdThe decision to add or move a service into or out of inetd is usually arrived at based on serverload. As anexample, on most systems the telnet daemon does not require as many new connections as say a mailserver. Most of the time the administrator has to feel out if a service should be moved.
A good example I have seen is mail services such as smtp and pop. I had setup a mail server in whichpop3 was in inetd and exim was running in standalone, I mistakenly assumed it would run fine sincethere was a low amount of users, namely myself and a diagnostic account. The server was also setup toact as a backup MX and relay in case another heavily used one went down. When I ran some tests Idiscovered a huge time lag for pop connections remotely. This was because of my steady fetching of mailand the diagnostic user constanty mailing diagnostics back and forth. In the end I had to move the pop3service out of inetd.
186

Chapter 24 The Internet Super Server
The reason for moving the service is actually quite interesting. When a particular service becomesheavily used, of course, it causes a load on the system. In the case of a service that runs within the inetdmeta daemon the effects of a heavily loaded service can also harm other services that use inetd. If themultiplexor is getting too many requests for one particular service, it will begin to affect the performanceof other services that use inetd. The fix, in a situation like that, is to make the offending service runoutside of inetd so the response time of both the service and inetd will increase.
24.9 Other ResourcesFollowing is some additional reading and information about topics covered in this document:
24.9.1 NetBSD/i386 Man Pages
• inetd(8) (http://netbsd.gw.com/cgi-bin/man-cgi/man?inetd+8+NetBSD-current)
• protocols(5) (http://netbsd.gw.com/cgi-bin/man-cgi/man?protocols+5+NetBSD-current)
• rpc(5) (http://netbsd.gw.com/cgi-bin/man-cgi/man?rpc+5+NetBSD-current)
• services(5) (http://netbsd.gw.com/cgi-bin/man-cgi/man?services+5+NetBSD-current)
24.9.2 Misc. Links
• IANA: Protocol Numbers and Assignment Services (http://www.iana.org/numbers.htm)
• RFC1700: Assigned Numbers (http://www.isi.edu/in-notes/rfc1700.txt)
187

Chapter 25
Miscellaneous operations
This chapter collects various topics, in sparse order, which didn’t find a place in the previous chapters.
25.1 Creating install boot floppies for i386First of all, you need to be running a kernel with the vnd pseudo device enabled (this is the default for aGENERIC kernel.).
1. First, you must create a valid kernel to put on your floppies, let’s call it FLOPPY. This kernel mustbe derived from some INSTALL model. Then, you have a valid/sys/arch/i386/compile/FLOPPY/netbsd file.
2. Go to /usr/src/distrib/i386/floppies/ramdisk and do
# make
This will create the ramdisk.fs file in the directory.
3. Go to /usr/src/distrib/i386/floppies/fdset and do
# make KERN=/sys/arch/i386/compile/FLOPPY/netbsd
This will create one or two (depending on the size of kernel) files named boot1.fs and boot2.fs
4. Transfer these files to the floppies with the commands
# dd if=boot1.fs of=/dev/fd0a bs=36b# dd if=boot2.fs of=/dev/fd0a bs=36b
5. Put the first floppy in the drive and power on!
25.2 Creating a CD-ROMTo create a data CD-ROM the mkisofs and cdrecord programs can be used: both SCSI and IDE recordersare supported. IDE/ATAPI drives are supported by NetBSD without the need of an emulation layer,because the driver can receive ATAPI commands directly, which is a simple and elegant solution.
Two steps are required to create a CD: first the ISO image of the CD must be created on the hard drivewith the mkisofs program. Next, the image must be written to the CD with cdrecord. In the followingexample an IDE/ATAPI CD-Writer supported by cdrecord is used. This is the dmesg output:
cd1 at atapibus1 drive 0: <HP CD-Writer Plus 8100> type 5 cdrom removable
188

Chapter 25 Miscellaneous operations
Note: when burning a CD the execution speed is critical: the data flow to the CD-Writer must beconstant and there can be no pauses; the data buffer of cdrecord must never be empty. This meansthat it is better to burn CD’s when the system is idle or nearly idle (don’t recompile the kernel orencode an MP3 while you are running cdrecord...)
25.2.1 Creating the ISO image
CD-ROM file systems
CD-ROM’s can be created using different (and sometimes incompatible) file systems.Therefore it is possible that a CD created on one system cannot be read (or losesinformation) on another system. This situation is manifest, for example, when you try toread under NetBSD a CD created under Windows. The following paragraphs give a briefoverview of the most common file systems for CD-ROM’s.
The ISO9660 is the first format, having appeared in 1988, and represents a sort of commondenominator between different operating systems: Apple, MS-DOS, Unix and VMS. ACD-ROM written under Windows with this format will have several limitations: 8.3 formatfor file names and only 8 levels of nesting for subdirectories. For this reason if, for example,you create a NetBSD installation CD under Windows, the file names which appearednormal with Explorer will be truncated on the CD.
To solve this type of limitation, some sets of extensions to the original ISO9660 format havebeen introduced. The drawback of these extensions is that they are not supported on allplatforms.
The Joliet format, introduced by Microsoft for DOS/Windows systems, extends ISO9660with the support of long file names and more nested directories. This format is usually notreadable by Unix systems (it is supported by NetBSD-current.)
The Rock Ridge extensions were introduced for Unix systems to support Unix conventionsfor file systems without losing the compatibility with the original ISO9660. This is theformat to use when creating a CD under NetBSD or another Unix system (in the followingparagraphs it will be explained how to create a CD compatible with both Joliet and RockRidge.
In addition to these standards, there are other standards (for example El Torito which areused to produce bootable CD’s, supported by all recent PC’s.
Since ISO images tend to be quite large, it is better to check that there is sufficient space on the hard diskfor the data that you are writing (up to 700MB.) To create the image, if the data are in the mydatadirectory and its subdirectories, write the following command:
# mkisofs -flrTv -o cdimage mydata/
When the cdimage file has been created, it can be examined and browsed like a regular file system, tocheck that there are no errors before writing it to the CD. For example:
# ls -l cdimage
189

Chapter 25 Miscellaneous operations
-rw-rw-r-- 1 auser user 284672 Dec 1 11:58 cdimage# vnconfig -v vnd0 cdimage 512/556/1/1# mount -r -t cd9660 /dev/vnd0c /mnt
... browsing su /mnt ...# umount /mnt# vnconfig -u vnd0
The value 556 is the result of the size of the cdimage file divided by 512.
Creating a hybrid CD: mkisofs can create CDs using the Joliet format; such CDs will be readable onMicrosoft platforms. It is also possible to create hybrid CDs, with both RockRidge and Jolietextensions, which will be readable on Unix and Windows platforms. For example:
$ mkisofs -l -J -R -o cd.iso mydata/
Check the mkisofs man page for the details of the available options.
25.2.2 Writing the image to the CDIn the second step the image is written to the CD with the following command:
# cdrecord -v speed=2 dev=/dev/rcd1d cdimage
Note: for ATAPI drives the rcd#d must be used because the a device does not accept ATAPIcommands.
before writing the image it is possible to perform a test, disabling the laser: just add the -dummy and-nofix options to the command line. For example:
# cdrecord -v -dummy -nofix speed=2 dev=/dev/rcd1d cdimage
The two steps, creating and burning the image, can be combined in a single command, without the needto create a (big) temporary file on the hard disk. The command looks like this:
# (nice -18 mkisofs -flrT mydata/) | cdrecord -v fs=16m speed=2 dev=/dev/rcd1d -
The option fs=16m is used to allocate a bigger fifo, avoiding cdrecord buffer underflow errors (thismeans that cdrecord has no data to write.)
25.2.3 Copying a CDTo copy directly a CD the -isosize option of cdrecord can be used. For example:
# cdrecord -v fs=16m -isosize speed=2 dev=/dev/rcd1d /dev/rcd0d
190

Chapter 25 Miscellaneous operations
Note: if you are using two IDE/ATAPI CD(-RW) it is better if they are connected to two different IDEcontrollers (one to the primary and one to the secondary) because the data flow is better. This is anexample configuration:
wd0: hard disk, IDE primary mastercd0: CD reader, IDE primary slavecd1: CD writer, IDE secondary master
25.2.4 Creating a bootable CDCreating a bootable CD is only a matter of having a boot binary file to put on the CD: this boot fileemulates a floppy. Then the -b option of mkisofs can be used. For example:
# mkisofs -vr -b boot.fs -o cdimage mydata/
boot.fs is the boot binary for the CD. Note that the path of boot.fs must be relative to the mydata/directory.
25.3 Synchronizing the system clockIt is not unusual to find that the system clock is wrong, often by several minutes: for some strange reasonit seems that computer clocks are not very accurate. The problem gets worse if you administer manynetworked hosts: keeping the clocks in sync can easily become a nightmare. To solve this problem, theNTP protocol (version 3) comes to our aid: this protocol can be used to synchronize the clocks of anetwork of workstations using one or more NTP servers.
Thanks to the NTP protocol it is possible to adjust the clock of a single workstation but also tosynchronize an entire network. The NTP protocol is quite complex, defining a hierarchical master-slavestructure of servers divided in strata: the top of the hierarchy is occupied by stratum 1 servers, connectedto an external clock (ex. a radio clock) to guarantee a high level of accuracy. Underneath, stratum 2servers synchronize their clocks with stratum 1, and so on. The accuracy decreases as we proceedtowards lower levels. This hierarchichal structure avoids the congestion which could be caused by havingall hosts refer to the same (few) stratum 1 servers. If, for example, you want to synchronize a network,you don’t connect all the hosts to the same public stratum 1 server. Instead, you create a local serverwhich connects to the main server and the remaining hosts synchronize their clocks with the local server.
Fortunately, to use the NTP tools you don’t need to understand the details of the protocol and of itsimplementation (if you are interested, refer to RFC 1305) and you only need to know how to configureand start some programs. The base system of NetBSD already contains the necessary tools to utilize thisprotocol (and other time related protocols, as we’ll see), derived from the xntp implementation. Thissection describes a simple method to always have a correct system time.
First, it is necessary to find the address of the public NTP servers to use as a reference; a detailed listingcan be found at http://www.eecis.udel.edu/~mills/ntp/servers.html. As an example, for Italy the twostratum 1 servers tempo.cstv.to.cnr.it and time.ien.it can be used.
191

Chapter 25 Miscellaneous operations
Next, to adjust the system clock give the following command as root:
# ntpdate -b tempo.cstv.to.cnr.it time.ien.it
(substitute the names ot the servers in the example with the ones that you are actually using. Option -b
tells ntpdate to set the system time with the settimeofday system call, instead of slewing it with adjtime(the default.) This option is suggested when the difference between the local time and the correct timecan be considerable.
As you’ve seen, ntpdate is not difficult to use. The next step is to start it automatically, in order to alwayshave the correct system time. If you have a permanent connection to the Internet, you can start theprogram at boot with the following line of /etc/rc.conf:
ntpdate=YES ntpdate_hosts="time.ien.it"
The name of the NTP server to use is specified in the ntpdate_hosts variable; if you leave this fieldempty, the boot script will try to extract the name from the /etc/ntp.conf file.
If you don’t have a permanent Internet connection (ex. you have a dial-up modem connection through anISP) you can start ntpdate from the ip-up script, as explained in Chapter 11. In this case add thefollowing line to the ip-up script:
/usr/sbin/ntpdate -s -b time.ien.it
(the path is mandatory or the script will probably not find the executable.) Option -s diverts loggingoutput from the standard output (this is the default) to the system syslog(3) facility, which means that themessages from ntpdate will usually end up in /var/log/messages.
Besides ntpdate there are other useful NTP commands. It is also possible to turn one of the local hostsinto an NTP server for the remaining hosts of the network. The local server will synchronize its clockwith a public server. For this type of configuration you must use the xntpd daemon and create the/etc/ntp.conf configuration file. For example:
server time.ien.itserver tempo.cstv.to.cnr.it
Xntpd can be started too from rc.conf, using the relevant option:
xntpd=YES
NTP is not your only option if you want to synchronize your network: you can also use the timeddaemon, which was developed for 4.3BSD. Timed too uses a master-slave hierarchy: when started on anhost, timed asks the network time to a master and ajusts the local clock accordingly. A mixed structure,using both timed and xntpd can be used. One of the local hosts gets the correct time from a public NTPserver and is the timed master for the remaining hosts of network, which become its clients andsynchronize their clocks using timed. This means that the local server must run both NTP and timed;care must be taken that they don’t interfere with each other (timed must be started with the -F
hostname option so that it doesn’t try to adjust the local clock.)
192

Chapter 25 Miscellaneous operations
25.4 Installing the boot managerSysinst, the NetBSD installation program, can install the NetBSD boot manager on the hard disk. Theboot manager can also be installed or reconfigured at a later time, if needed, with the fdisk command.For example:
# fdisk -B wd0
If NetBSD doesn’t boot from the hard disk, you can boot it from the installation floppy and start thekernel on the hard disk. Insert the installation disk and, at the boot prompt, give the following command:
> boot wd0a:netbsd
This boots the kernel on the hard disk (use the correct device, for example sd0a for a SCSI disk.)
Note: sometimes fdisk -B doesn’t give the expected result (at least it happened to me), probably ifyou install/remove other operating systems like Windows 95. In this case, try a fdisk /mbr from DOSand then run again fdisk from NetBSD.
25.5 Deleting the disklabelThough this is not an operation that you need to perform frequently, it can be useful to know how to do itin case of need. Please be sure to know exactly what you are doing before performing this kind ofoperation. For example:
# dd if=/dev/zero of=/dev/rwd0c bs=8k count=1
The previous command deletes the disklabel (not the MBR partition table.) To completely delete thedisk, the wd0d device must be used. For example:
# dd if=/dev/zero of=/dev/rwd0d bs=8k
25.6 SpeakerI found this tip on a mailing list (I don’t remember the author.) To output a sound from the speaker (forexample at the end of a long script) the kernel spkr device can be used, which is mapped on/dev/speaker. For example:
echo ’BPBPBPBPBP’ > /dev/speaker
Note: the spkr device is not enabled in the generic kernel; a customized kernel is needed.
193

Chapter 25 Miscellaneous operations
25.7 Forgot root password?If you forget root’s password, not all is lost and you can still “recover” the system with the followingsteps: boot single user, mount / and change root’s password. In detail:
1. Boot single user: when the boot prompt appears and the five seconds countdown starts, give thefollowing command:
> boot -s
2. At the following prompt
Enter pathname of shell or RETURN for sh:
press Enter.
3. Write the following commands:
# fsck -y /# mount -u /# fsck -y /usr# mount /usr
4. Change root’s password with passwd.
5. Use the exit command to go to multiuser mode.
25.8 Adding a new hard diskThis section describes how to add a new hard disk to an already working NetBSD system. In thefollowing example a new SCSI controller and a new hard disk, connected to the controller, will be added.If you don’t need to add a new controller, skip the relevant part and go to the hard disk configuration. Theinstallation of an IDE hard disk is identical; only the device name will be different (wd# instead of sd#).
As always, before buying new hardware, consult the hardware compatibility list of NetBSD and makesure that the new device is supported by the system.
When the SCSI controller has been physically installed in the system and the new hard disk has beenconnected, it’s time to restart the computer and check that the device is correctly detected, using thedmesg command. This is the sample output for an NCR-875 controller:
ncr0 at pci0 dev 15 function 0: ncr 53c875 fast20 wide scsincr0: interrupting at irq 10ncr0: minsync=12, maxsync=137, maxoffs=16, 128 dwords burst, large dma fifoncr0: single-ended, open drain IRQ driver, using on-chip SRAMncr0: restart (scsi reset).scsibus0 at ncr0: 16 targets, 8 luns per targetsd0(ncr0:2:0): 20.0 MB/s (50 ns, offset 15)sd0: 2063MB, 8188 cyl, 3 head, 172 sec, 512 bytes/sect x 4226725 sectors
194

Chapter 25 Miscellaneous operations
If the device doesn’t appear in the output, check that it is supported by the kernel that you are using; ifnecessary, compile a customized kernel (see Chapter 9.)
Now the partitions can be created using the fdisk command. First, check the current status of the disk:
# fdisk sd0NetBSD disklabel disk geometry:cylinders: 8188 heads: 3 sectors/track: 172 (516 sectors/cylinder)
BIOS disk geometry:cylinders: 524 heads: 128 sectors/track: 63 (8064 sectors/cylinder)
Partition table:0: sysid 6 (Primary ’big’ DOS, 16-bit FAT (> 32MB))
start 63, size 4225473 (2063 MB), flag 0x0beg: cylinder 0, head 1, sector 1end: cylinder 523, head 127, sector 63
1: <UNUSED>2: <UNUSED>3: <UNUSED>
In this example the hard disk already contains a DOS partition, which will be deleted and replaced with anative NetBSD partition. The command fdisk -u sd0 allows to modify interactively the partitions. Themodified data will be written on the disk only before exiting and fdisk will request a confirmation beforewriting, so you can work relaxedly.
Disk geometries
The geometry of the disk reported by fdisk can appear confusing. Dmesg reports 4226725sectors with 8188/3/172 for C/H/S, but 8188*3*172 gives 4225008 and not 4226725. Whathappens is that most modern disks don’t have a fixed geometry and the number of sectorsper track changes depending on the cylinder: the only interesting parameter is the number ofsectors. The disk reports the C/H/S values but it’s a fictitious geometry: the value 172 is theresult of the total number of sectors (4226725) divided by 8188 and then by 3.
To make things more confusing, the BIOS uses yet another “fake” geometry (C/H/S524/128/63) which gives a total of 4225536, a value which is a better approximation to thereal one than 425008. To partition the disk we will use the BIOS geometry, to mantaincompatibility with other operating systems, although we will loose some sectors (4226725 -4225536 = 1189 sectors = 594 KB.)
To create the BIOS partitions the command fdisk -u must be used; the result is the following:
Partition table:0: sysid 169 (NetBSD)
start 63, size 4225473 (2063 MB), flag 0x0beg: cylinder 0, head 1, sector 1end: cylinder 523, head 127, sector 63
1: <UNUSED>2: <UNUSED>3: <UNUSED>
195

Chapter 25 Miscellaneous operations
Now it’s time to create the disklabel fot the NetBSD partition. The correct steps to do this are:
# disklabel sd0 > tempfile# vi tempfile# disklabel -R -r sd0 tempfile
If you try to create the disklabel directly with
# disklabel -e sd0
you get the following message
disklabel: ioctl DIOCWDINFO: No disk label on disk;use "disklabel -r" to install initial label
because the disklabel does not yet exist on the disk.
Now we create some disklabel partitions, editing the tempfile as already explained. The result is:
# size offset fstype [fsize bsize cpg]a: 2048004 63 4.2BSD 1024 8192 16 # (Cyl. 0*- 3969*)c: 4226662 63 unused 0 0 # (Cyl. 0*- 8191*)d: 4226725 0 unused 0 0 # (Cyl. 0 - 8191*)e: 2178658 2048067 4.2BSD 1024 8192 16 # (Cyl. 3969*- 8191*)
Note: when the disklabel has been created it is possible to optimize it studying the output of thecommand newfs -n /dev/sd0a, which warns about the existence of unallocated sectors at the end ofa disklabel partition. The values reported by newfs can be used to adjust the sizes of the partitionswith an iterative process.
The final operation is the creation of the file systems for the newly defined partitions (a and e.)
# newfs /dev/sd0a# newfs /dev/sd0e
The disk is now ready for usage, and the two partitions can be mounted. For example:
# mount /dev/sd0a /mnt
25.9 Password file is busy?If you try to modify a password and you get the mysterious message “Password file is busy”, it probablymeans that the file /etc/ptmp has not been deleted from the system. This file is a temporary copy of the/etc/master.passwd file: check that you are not loosing important information and then delete it(ptmp, not master.passwd.)
196

Chapter 25 Miscellaneous operations
Note: if the file /etc/ptmp exists you can also receive a warning message at system startup. Forexample:
root: password file may be incorrect - /etc/ptmp exists
25.10 How to rebuild the devices in /devFirst shutdown to single user, partitions still mounted “rw” (read-write); You can do that by just typingshutdown now while you are in multi user mode, or reboot with the -s option and make / and /devread-writable by doing.
# mount -u /# mount -u /dev
Then:
# mkdir /nudev# cd /nudev# cp /dev/MAKEDEV* .# sh ./MAKEDEV all# cd /# mv dev odev# mv nudev dev# rm -r odev
Or if you fetched all the sources in /usr/src:
# mkdir /nudev# cd /nudev# cp /usr/src/etc/MAKEDEV.local .# cp /usr/src/etc/etc.$arch/MAKEDEV .# sh ./MAKEDEV all# cd /# mv dev odev; mv nudev dev# rm -r odev
You can determine $arch by
# uname -m
or
# sysctl hw.machine_arch
Using the second way by copying the new MAKEDEV’s from the source tree will add some additionaldevices in at least the i386 architecture. For example now it’s possible to have 16 partitions instead of 8.If you use the “old” MAKEDEV’s from /dev, the additional devices wont be made.
197

Appendix A.
Information
A.1 Guide historyThis guide was born as a collection of sparse notes that I wrote mostly for myself. When I realized thatthey could be useful to other NetBSD users I started collecting them and created the first version of theguide using the groff formatter. In order to “easily” get a wider variety of output formats (eg. HTML andPostScript/PDF), I made the “mistake” of moving to SGML/DocBook, which is the current format of thesources. The format was changed to XML/DocBook later due to better tools and slightly more knownowon customisations.
The following open source tools were used to write and format the guide:
• the vi editor which ships with NetBSD (nvi.)
• the libxslt parser from GNOME for transforming XML/DocBook into HTML.
• the TeX system from the NetBSD packages collection. TeX is used as a backend to produce the PSand PDF formats.
• the tgif program for drawing the figures.
• the gimp and xv programs for converting between image formats and making small modifications tothe figures.
Many thanks to all the people involved in the development of these great tools.
198

Appendix B.
Contributing to the NetBSDguide
There is a interest for both introductory and advanced documentation on NetBSD: this is probably a signof the increased popularity of this operating system and of a growing user base. It is therefore importantto keep adding new material to this guide and improving the existing stuff.
Whatever your level of expertise with NetBSD, you can contribute to the development of this guide. Thisappendix explains how you can contribute to the NetBSD guide and what you should know before youstart.
If you are a beginner and you found this guide helpful, please send your comments and suggestions to<[email protected]>. For example, if you tried something described here and it didn’t work for you, orif you think that something is not clearly explained, or if you have an idea for a new chapter, etc: thistype of feedback is very useful.
If you are an intermediate or advanced user, please consider contributing new material to the guide: youcould write a new chapter or improve an existing one.
If you have some spare time, you could translate the guide into another language.
If you have some spare time, you could translate the guide into another language.
Whatever you choose to do, don’t start working before having contacted us, in order to avoid duplicatingefforts.
B.1 Translating the guideIf you want to translate the guide the first thing to do is, as already said, to contact <[email protected]>or to write to the <[email protected]> mailing list. There are several possible scenarios:
• someone else is already working on a translation into your language; you could probably help him.
• nobody is currently working on a translation into your language, but some chapters have already beentranslated and you can translate the remaining chapters.
• you start a new translation. Of course you don’t need to translate all the guide: this is a big effort, but ifyou start translating one or two chapters it’ll be a good starting point for someone else.
Even if a translation is already available, it is always necessary to keep it up do date with respect to themaster version when new material is added or corrections are made: you could become the mantainer ofa translation.
199

Appendix B. Contributing to the NetBSD guide
B.1.1 What you need to start a translationIn order to translate the guide you must get the guide sources. Send an e-mail to me and I’ll send you thelatest sources, makefiles, etc.
In short, all you need is:
• the guide sources
• a text editor, such as vi or emacs.
Note: don’t start working with HTML or other formats: it will be very difficult to convert you work toSGML/DocBook, the format used by the NetBSD guide.
B.1.2 Writing SGML/DocBookIn order to translate the guide you don’t need to learn SGML/DocBook: get the SGML/DocBooksources and work directly on them, in order to reuse the existing format (i.e. tags) in your work. Forexample, to translate the previous note, you would do the following:
1. load the english source of the current chapter, ap-contrib.sgml, in your editor.
2. find the text of the previous note. You will see something like:
<note><para>
don’t start working with HTML or other formats:it will be very difficult to convert you workto SGML/DocBook, the format used by the NetBSDguide.
</para></note>
3. add your translation between the tags, after the english version. The text now looks like this:
<note><para>
don’t start working with HTML or other formats:it will be very difficult to convert you workto SGML/DocBook, the format used by the NetBSDguide.your translation goes hereyour translation goes hereyour translation goes here
</para></note>
4. delete the four lines of english text between the tags leaving your translation.
<note><para>
your translation goes here
200

Appendix B. Contributing to the NetBSD guide
your translation goes hereyour translation goes here
</para></note>
When you write the translation please use the same indentation and formatting style of the original text.See Section B.3 for an example.
One problem that you will probably face when writing the DocBook text is that of national characters(eg. accented letters like “è”). You can use these characters in your source document but it’s preferable toreplace them with SGML entities. For example, “è” is written as “è”. Of course this makes yoursource text difficult to write and to read; the first problem, writing, can be solved using a good editor withmacro capabilities. Vi and emacs, which are very popular choices, both have this feature and you canmap the accented keys of you keyboard to generate the required entities automatically. For example, forvi you can put a line like the following in your .exrc file:
map! è è
Appendix C explains how to install the software tools to generate HTML and other formats from theDocBook sources. This is useful if you want to check your work (i.e. make sure you didn’t inadvertedlydelete some tag) or to see what the output looks like, but it is not a requirement for a translation. If youdon’t want to install the software tools, send me the sources and I’ll check them and create the variousoutput formats.
B.2 Sending contributionsIf you want to contribute some material to the guide you have several options, depending on the amountof text you want to write. If you just want to send a small fix, the easiest way to get it into the guide it tosend it to <[email protected]> via e-mail. If you plan to write a substantial amount of text, such as asection or a chapter, you can choose among many formats:
• SGML/DocBook; this is the preferred format. If you choose to use this format, please get the guidesources and use them as a template for the indentation and text layout, in order to keep the formattingconsistent.
• text; if the formatting is kept simple, it is not difficult to convert text to SGML format.
• HTML; handwritten HTML (i.e. written with a text editor) is preferred over automatically generatedHTML because it is easier to convert. There is no real advantage in using HTML except that it gives abetter idea of you want your text to look like. Another small benefit is that the HTML text probablyalready contains the required entities for accented characters, etc.
• other formats are also accepted if you really can’t use any of the previous ones.
B.3 SGML/DocBook templateFor the guide I use a formatting style similar to a program. The following is a template:
201

Appendix B. Contributing to the NetBSD guide
<chapter id="chap-xxxxx"><title>This is the title of the chapter</title>
<para>This is the text of a paragraph. This is the text of a paragraph.This is the text of a paragraph. This is the text of a paragraph.This is the text of a paragraph.
</para>
<!-- ============================================================= -->
<sect1><title>This is the title of a sect1</title>
<para>This is the text of a paragraph. This is the text of a paragraph.This is the text of a paragraph. This is the text of a paragraph.This is the text of a paragraph.
</para>
<!-- ........................................................... -->
<sect2><title>This is the title of a sect2</title>
<para>A sect2 is nested inside a sect1.
</para></sect2>
</sect1>
<!-- ============================================================= -->
<sect1><title>This is the title of another sect1</title>
<para>An itemized list:<itemizedlist>
<listitem><para>text
</para></listitem><listitem>
<para>text
</para></listitem>
</itemizedlist></para>
202

Appendix B. Contributing to the NetBSD guide
</sect1></chapter>
The defaults are:
• two spaces for each level of indentation
• lines not longer than 72 characters.
• use separator lines (comments) between sect1/sect2.
203

Appendix C.
Getting started withXML/DocBook
HFHFHF - THIS WHOLE SECTION NEEDS REWRITING FOR THE NEW XML/DocBook basedsetup!!! Either ask Grant to do it or maybe even rip out the whole thing. - HFHFHF
This appendix describes the installation of the tools needed to produce a formatted version of theNetBSD guide. XML/DocBook and the XSLT are not described here, but at the end of this appendixthere is a section containing links to useful documents which can get you started.
The XML/DocBook environment can be installed using the netbsd-docs meta-package; this is the easiestway and you are encouraged to use it. This appendix describes the installation of the components one byone and can be used for a more fine grained installation or as a reference for troubleshooting yourinstallation.
Note: the netbsd-docs meta-package installs some packages which are not described in thisdocument because they are not needed for the NetBSD guide. These are:
• iso12083-1993
• unproven-pthreads-0.17nb2
• opensp-1.4
• html-4.0b
This document describes the installation of the XML tools using precompiled packages. For details onpackages see Chapter 10.
Note: the version numbers of the tools that we are going to install can change, as new versions areadded to the package system.
C.1 What is XML/DocBookXML (Standard Generalized Markup Language) is a language which is used to define other languagesbased on markups, i.e. with XML you can define the grammar (i.e. the valid constructs) of markuplanguages. HTML, for example, can be defined using XML. If you are a programmer, think of XML likethe BNF (Backus-Naur Form): a tool used to define grammars.
204

Appendix C. Getting started with XML/DocBook
DocBook is a markup template defined using XML; DocBook lists the valid tags that can be used in aDocBook document and how they can be combined together. If you are a programmer, think of DocBookas the grammar of a language specified with the BNF. For example, it says that the tags
<para> ... </para>
define a paragraph, and that a <para> can be inside a <sect1> but that a <sect1> cannot be inside a<para>.
Therefore, when you write a document, you write a document in DocBook and not in XML: in thisrespect DocBook is the counterpart of HTML (although the markup is richer and the concepts aredifferent.)
The DocBook specification (i.e. the list of tags and rules) is called a DTD (Document Type Definition.)
In short, a DTD defines how your source documents look like but it gives no indication about the formatof your final (compiled) documents. A further step is required: the DocBook sources must be convertedto some other representation like, for example, HTML or PDF. This step is performed by a tool like Jade,which applies the DSSSL transforms to the source document. DSSSL (Document Style Semantics andSpecification Language) is a format used to define the stylesheets necessary to perform the conversionfrom DocBook to other formats.
The life of a DocBook document is thus the following:
• DocBook source document.
• the DocBook DTD is used by nsgmls to “validate” the document.
• Jade is used to apply the DSSSL stylesheets to the source document and generate a new document.
It is still not possible to print or view this document. The new document is just the original documentwhere formatting directives have been added and DocBook tags removed; it could be HTML, RTF,TeX, etc.
• a formatter (HTML viewer, Word or another RTF word processor, TeX, ...) is used to create the finalversion of the source document.
Therefore what you need to start working is
• a DTD for DocBook.
• the DSSSL stylesheets used by Jade, to generate HTML/RTF, etc.
• the Jade program and the nsgmls parser.
C.2 JadeJade is an XML/XML parser which implements the DSSSL engine. The Jade package includes thevalidating parser, nsgmls.
205

Appendix C. Getting started with XML/DocBook
Note: OpenJade is a more recent version of Jade. It currently doesn’t compile on NetBSD. It is notneeded for the NetBSD guide.
Install Jade using a precompiled package:
# pkg_add jade-1.2.1.tgz
You will find some documentation in /usr/pkg/share/doc/jade/index.htm, but the mostimportant directory installed is /usr/pkg/share/sgml/jade/: this is where you can find Jade’scatalog file.
C.3 DocBookThe next thing that you need to install is the DocBook DTD (i.e. the template used to write DocBookdocuments.)
This package requires the package with the character entity sets from ISO 8879:1986. Therefore let’s addthe entities:
# pkg_add iso8879-1986.tgz
The entities are installed in the directory /usr/pkg/share/sgml/iso8879/ and the catalog file is/usr/pkg/share/sgml/iso8879/catalog.
Now we can install the DocBook DTD.
# pkg_add docbook-4.1.tgz
Despite its name this package installs several versions of the DocBook DTD (i.e. 2.4.1, 3.0, 3.1, 4.0, 4.1).This lets you process documents which use different versions of the DTD.
Note: the current version of the NetBSD guide uses version 4.1 of the DocBook DTD. Therefore theother versions are not strictly necessary for the guide. Each version requires less than 250 KB soyou might want to keep them in order to process other documents.
The root of the installation is /usr/pkg/share/sgml/docbook/4.1/. Each version of the DTD has aseparate directory and each has its catalog file, eg. /usr/pkg/share/sgml/docbook/4.1/catalog.
C.4 The DSSSL stylesheetsNow it’s time to install the DSSSL stylesheets:
# pkg_add dsssl-docbook-modular-1.57.tgz
206
Appendix C. Getting started with XML/DocBook
The stylesheets install their catalog too, in/usr/pkg/share/sgml/docbook/dsssl/modular/catalog. You will find the documentation ofthe Modular DocBook stylesheets in/usr/pkg/share/sgml/docbook/dsssl/modular/doc/index.html.
C.5 Using the toolsLet’s try to use the tools that we have installed and produce an HTML version of the english guide.
Cd to the base directory of the guide and then:
$ cd en$ make netbsd.html
You will get a long list of errors, because the XML parser, nsgmls, can’t find the catalog files. Therefore,type the following commands (and add them to your ~/.profile):
SGML_ROOT=/usr/pkg/share/sgmlSGML_CATALOG_FILES=${SGML_ROOT}/jade/catalogSGML_CATALOG_FILES=${SGML_ROOT}/iso8879/catalog:$SGML_CATALOG_FILESSGML_CATALOG_FILES=${SGML_ROOT}/docbook/3.0/catalog:$SGML_CATALOG_FILESSGML_CATALOG_FILES=${SGML_ROOT}/docbook/3.1/catalog:$SGML_CATALOG_FILESSGML_CATALOG_FILES=${SGML_ROOT}/docbook/4.0/catalog:$SGML_CATALOG_FILESSGML_CATALOG_FILES=${SGML_ROOT}/docbook/4.1/catalog:$SGML_CATALOG_FILESSGML_CATALOG_FILES=${SGML_ROOT}/docbook/dsssl/modular/catalog:$SGML_CATALOG_FILESexport SGML_CATALOG_FILES
Note: modify the commands if you are using a csh style shell.
When the SGML_CATALOG_FILES environment variable is active, do another
$ make netbsd.htmlnsgmls -sv netbsd.sgmlnsgmls:I: SP version "1.3.3"jade -d ../dsl/myhtml.dsl -t sgml -o netbsd.html netbsd.sgml
This time everything goes well and the HTML version of the guide is generated. The RTF version iscreated in the same way:
$ make netbsd.rtfnsgmls -sv netbsd.sgmlnsgmls:I: SP version "1.3.3"
207

Appendix C. Getting started with XML/DocBook
jade -d ../dsl/myrtf.dsl -t rtf -o netbsd.rtf netbsd.sgml
With this setup you can create only the HTML and RTF versions; the generation of PS and PDF requiresthe installation and configuration of TeX and Jadetex.
C.6 An alternative approach to catalog filesIn my installations I usually create a master catalog file which references all the other catalog files. Ifyou like this approach, create the /usr/pkg/share/sgml/catalog file containing the following lines:
CATALOG "/usr/pkg/share/sgml/docbook/3.0/catalog"CATALOG "/usr/pkg/share/sgml/docbook/3.1/catalog"CATALOG "/usr/pkg/share/sgml/docbook/4.0/catalog"CATALOG "/usr/pkg/share/sgml/docbook/4.1/catalog"CATALOG "/usr/pkg/share/sgml/docbook/dsssl/modular/catalog"CATALOG "/usr/pkg/share/sgml/iso8879/catalog"CATALOG "/usr/pkg/share/sgml/jade/catalog"
When you have created this file you can simplify your ~/.profile like this:
SGML_CATALOG_FILES=/usr/pkg/share/sgml/catalogexport SGML_CATALOG_FILES
C.7 Producing PostScript outputTo create a printable version of the guide the following steps are needed:
• installing TeX
• enabling the hyphenation for the italian language
• creating the hugelatex format required by jadetex
• installing jadetex
The following sections describe each of the steps in detail.
C.7.1 Installing TeXYou don’t need to do anything special to install TeX; it’s a huge package, but thanks to the packagesystem it is easy to install. To add the packages that you need (the version numbers could be different):
# pkg_add teTeX-share-1.0.2.tgz# pkg_add teTeX-bin-1.0.7nb1.tgz
208

Appendix C. Getting started with XML/DocBook
C.7.2 Enabling hyphenation for the italian languageThe NetBSD guide is currently available in three languages: english, french and italian. Of these, onlyenglish and french are automatically hyphenated by TeX. To turn on hyphenation for the italianlanguage, some simple steps are required:
Edit /usr/pkg/share/texmf/tex/generic/config/language.dat and remove the comment(%) from the line of the italian hyphenation. I.e.
%italian ithyph.tex
becomes
italian ithyph.tex
Note: as more translations of the guide become available, you will probably need to enable otherhyphenation patterns as well.
Now the latex and pdflatex formats must be recreated:
# cd /usr/pkg/share/texmf/web2c# fmtutil --byfmt latex# fmtutil --byfmt pdflatex
If you check, for example, latex.log you will find something like
Babel <v3.6Z> and hyphenation patterns for american, french, german,ngerman, italian, nohyphenation, loaded.
Note: there are many ways to perform these operations, depending on your level of expertise withthe TeX system (mine is very low.) For example, you could use the texconfig interactive program, oryou could recreate the formats by hand using the tex program.
If you know a better way of doing the operations described in this appendix, please let me know.
C.7.3 Creating the hugelatex formatJadetex requires the hugelatex format, which is not included in the default installation of teTeX. Make abackup copy of /usr/pkg/share/texmf/web2c/texmf.cnf and add the following lines at the endthe file (we will need the jadetex and pdfjadetex settings when we install Jadetex later):
% hugelatex settingsmain_memory.hugelatex = 1100000param_size.hugelatex = 1500
209

Appendix C. Getting started with XML/DocBook
stack_size.hugelatex = 1500hash_extra.hugelatex = 15000string_vacancies.hugelatex = 45000pool_free.hugelatex = 47500nest_size.hugelatex = 500save_size.hugelatex 5000pool_size.hugelatex = 500000max_strings.hugelatex 55000font_mem_size.hugelatex = 400000
% jadetex & pdfjadetexmain_memory.jadetex = 1500000param_size.jadetex = 1500stack_size.jadetex = 1500hash_extra.jadetex = 15000string_vacancies.jadetex = 45000pool_free.jadetex = 47500nest_size.jadetex = 500save_size.jadetex 5000pool_size.jadetex = 500000max_strings.jadetex 55000
main_memory.pdfjadetex = 2500000param_size.pdfjadetex = 1500stack_size.pdfjadetex = 1500hash_extra.pdfjadetex = 50000string_vacancies.pdfjadetex = 45000pool_free.pdfjadetex = 47500nest_size.pdfjadetex = 500save_size.pdfjadetex 5000pool_size.pdfjadetex = 500000max_strings.pdfjadetex 55000
This is how the hugelatex format can be created according to the Jadetex installation guide:
# cp -R /usr/pkg/share/texmf/tex/latex/config /tmp# cd /tmp/config# tex -ini -progname=hugelatex latex.ini# mv latex.fmt hugelatex.fmt# mv hugelatex.fmt /usr/pkg/share/texmf/web2c# ln -s /usr/pkg/bin/tex /usr/pkg/bin/hugelatex
Note: as before, there is more than one way to create the hugelatex format. The one outlined aboveis more thoroughly described in the Jadetex install guide.
Another possibility is to add the following lines describing the hugelatex format to the fmtutil.cnf
file (in the /usr/pkg/share/texmf/web2c directory)
# hugelatex format created for jadetexhugelatex tex language.dat latex.ini
210

Appendix C. Getting started with XML/DocBook
save the file and run the command
fmtutil --byfmt hugelatex.
C.7.4 Installing Jadetex
Note: you can get jadetex from http://www.tug.org/applications/jadetex/
Fetch the most recent distribution of Jadetex (currently jadetex-3.6.zip), unzip it, then:
# cd jadetex# make install# mktexlsr
When you install the jadetex and pdfjadetex format files are copied to the tex tree along with other utilityfiles.
The jadetex distribution contains two manual pages that are not installed automatically. You can justcopy them manually; for example:
# cp jadetex.1 pdfjadetex.1 /usr/local/man/man1
Now you are ready to create the Postscript version of the NetBSD guide (and of any document you like,of course.)
C.8 LinksYou can find a simple and well written introduction to SGML/DocBook and a description of the tools inSGML comme format de fichier universel (http://casteyde.christian.free.fr/tools/SGML.html).
The official DocBook home page (http://www.oasis-open.org/docbook/) is where you can find thedefinitive documentation on DocBook. You can also read online or download a copy of the bookDocBook: The Definitive Guide (http://www.oasis-open.org/docbook/documentation/reference/) byNorman Walsh and Leonard Muellner.
For DSSSL start looking at http://nwalsh.com.
Jade/OpenJade sources and info can be found on the OpenJade Home Page(http://openjade.sourceforge.net/).
If you want to produce Postscript and PDF documents from your DocBook source, look at the homepage of JadeTex (http://www.tug.org/applications/jadetex).
211

Appendix C. Getting started with XML/DocBook
The home page of Markus Hoenicka (http://ourworld.compuserve.com/homepages/hoenicka_markus/)explains everything you need to know if you want to work with SGML/DocBook on the Windows NTplatform.
212

Appendix D.
Acknowledgements
This document was originally created by Federico Lupi. Since then, it has been updated and maintainedby the NetBSD www team and it has progressed thanks to the contributions of many people who havevolunteered their time and effort, supplied material and sent in suggestions and corrections.
D.1 Original acknowledgementsFederico’s original credits are:
• Paulo Aukar
• Grant Beattie, converted to XML DocBook.
• Manolo De Santis, Audio Chapter
• Eric Delcamp, Boot Floppies
• Hubert Feyrer, who contributed the Introduction to TCP/IP Networking in Section 11.1 including Nextgeneration Internet protocol - IPv6 and the section on getting IPv6 Connectivity & Transition via 6to4in Section 11.3.5. Helped the SGML to XML transition.
• Jason R. Fink
• Daniel de Kok, audio and linux chapters fixes.
• Reinoud Koornstra, CVS chapter and rebuilding /dev in th Misc chapter.
• Brian A. Seklecki <[email protected]> who contributed the CCD Chapter.
• Guillain Seuillot
• Martti Kuparinen, RAIDframe documentation.
• David Magda
D.2 Current acknowledgementsThis document is currently maintained by the NetBSD www team. Thanks to their efforts, the documentis kept up to date and available online at all times. In addition, special thanks go to (in alphabeticalorder):
• Jason R. Fink, for maintaining this document and integrating changes.
• Daniel de Kok, for constant contributions of new chapters, maintenance of existing chapters and histranslation work.
213

Appendix D. Acknowledgements
• Hiroki Sato, for allowing us to build PDF and PS versions of this document.
• Jan Schaumann, for maintenance work and www/htdocs managment.
214