Embed Size (px)
Citation preview
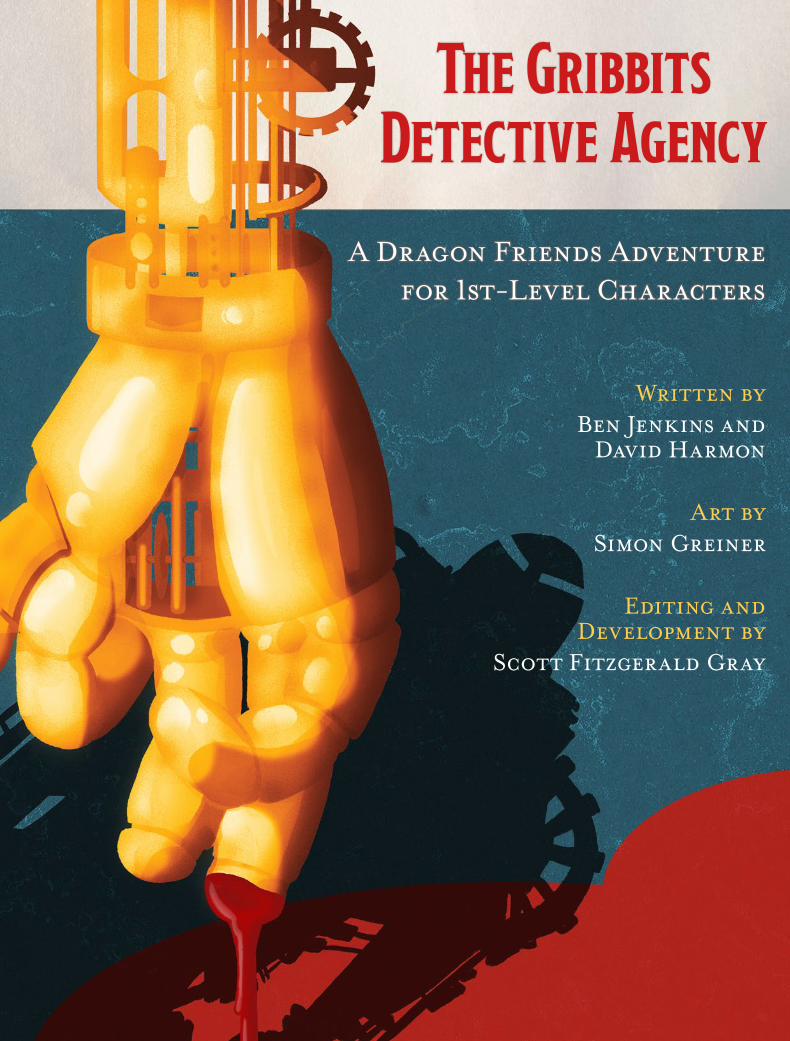
Written byBen Jenkins and
David Harmon
Art bySimon Greiner
Editing and Development by
Scott Fitzgerald Gray
The Gribbits Detective Agency
A Dragon Friends Adventure for 1st-Level Characters
2Dragon+ 18 | The Gribbits Detective Agency
Not for resale. Permission granted to print or photocopy this document for personal use only.
Janos Meer, the powerful underworld figure known as the Beggar King, has vanished. Gribbits—Meer’s right-hand goblin—has tasked a group of neophyte adventurers with getting to the bottom of where his boss has gone, and why. This is easier said than done, of course. The explosive destruction quite accidentally meted out by the Dragon Friends some months prior has made their city a dangerous place. It’s up to the adventurers to follow the clues through the urban chaos, unravel the mystery of the missing Meer, and maybe—just maybe—expose a conspiracy greater than any of them expected. (Unless the players have read this bit . . . in which case, they might well be expecting a great big conspiracy.) The Gribbits Detective Agency is a Dungeons & Dragons adventure for four 1st-level characters.
Adventure SummaryFor the past two months, Janos Meer—better known as the Beggar King—has been investigating the rise and collapse of the city’s sinister Artificer Cult. The Artificers were exposed by the Dragon Friends (working for Meer), in an investigation that culminated with the great fire that consumed half the city. With the cult outlawed, its members have seemingly fled the city, leaving their glitterman construct guards standing dormant throughout the streets. In this time of urban renewal, much praise has been given to a newly famous Barovian émigré by the name of Alexei ‘Lexi’ Holstmann. He is a recent investor in an area known as the Shipline district, where the city’s shipwrights dry-dock, salvage, and decommission decrepit warships. But Holstmann is better known for having used his wealth to open his factories to the poor and displaced folk of the city. Food and shelter are provided for all those willing to work for the Barovian merchant prince. Unknown to all, Janos Meer uncovered a plot by Holstmann to convert the vessels of the Shipline into a working armada in service to the Artificers—and was seized as a result. He’s now being held in the Shipline to prevent Holstmann’s plans from being undone. The characters have just three hours to uncover this plot before Holstmann’s refurbished armada launches, and a great new power is established along the Sword Coast. Unfortunately for the cause of natural justice, the characters are not the only ones investigating Meer’s disappearance. The Dragon Friends are also on the trail, and though they mean well, that group of oft-bumbling adventurers is likely to become an incompetent thorn in the side of the party. Even as clever characters expose Holstmann’s plots, the Dragon Friends will be coming to entirely wrong conclusions about the source of those plots—and possibly murdering dozens of innocents as a result. It’s all in a day’s work.
LocationsThe Gribbits Detective Agency is written to take place between seasons one and two of the Dragon Friends podcast. As such, it is located in the Dragon Friends’
own peculiar version of Waterdeep—after the collapse of the Artificer Cult and the release of the black dragon Gabu’strath, but before the Dragon Friends leave for Barovia. Interested Dungeon Masters can immerse themselves in this particularly dumb expanded universe at www.thedragonfriends.com and wherever good podcasts are downloaded. With that said, the events herein can be transported with little effort to any major coastal fantasy city whose people are recovering from traumatic events. Feel free to substitute Waterdeep with Baldur’s Gate, Neverwinter, or another city of your own devising. The adventure takes place at the following locations within the city:• The Beggar Court in the sewers and tunnels beneath
the streets, where the Beggar King holds sway over the wretched thieves and vagrants of the city.
• Various locations in the streets of the city, as the characters pursue Janos Meer and his kidnappers.
• Among the decrepit hulks of the Shipline and on board The Fury of Holstmann, the Barovian merchant prince’s secret flagship.
Key CharactersThe following NPCs are central to the adventure. Janos Meer. Cocky, grizzled, and devious, the so-called Beggar King has run the city’s unofficial Guild of Thieves, Tricksters, and Beggars as long as anyone
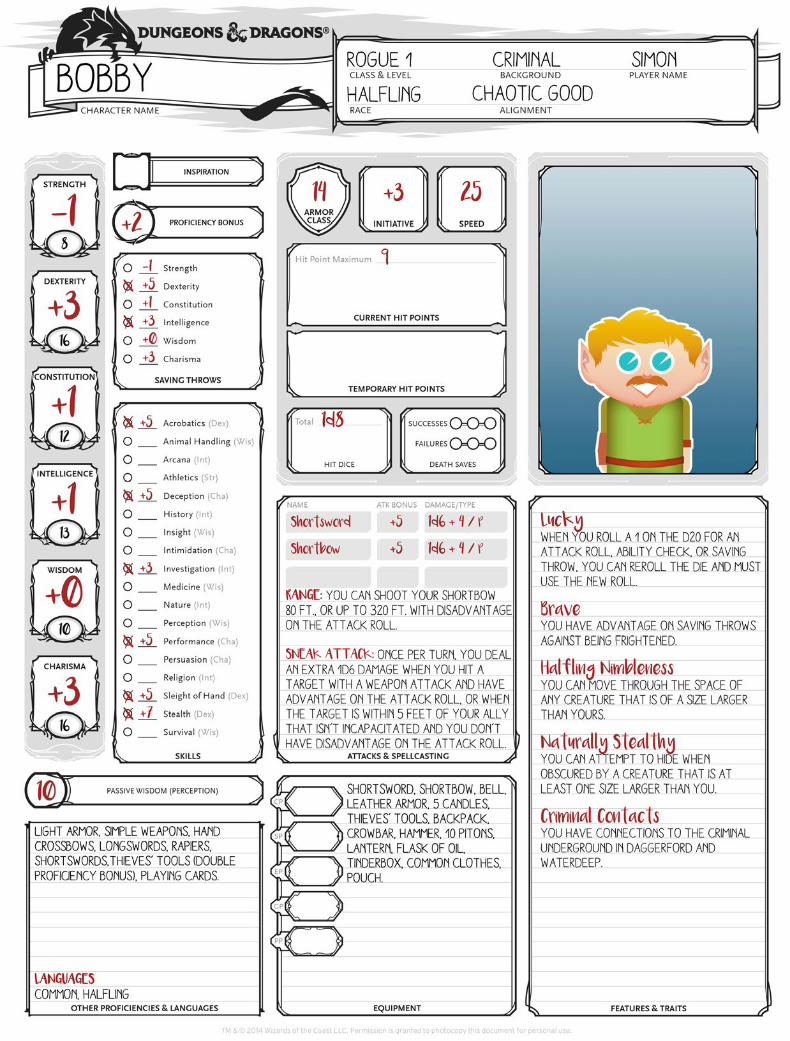
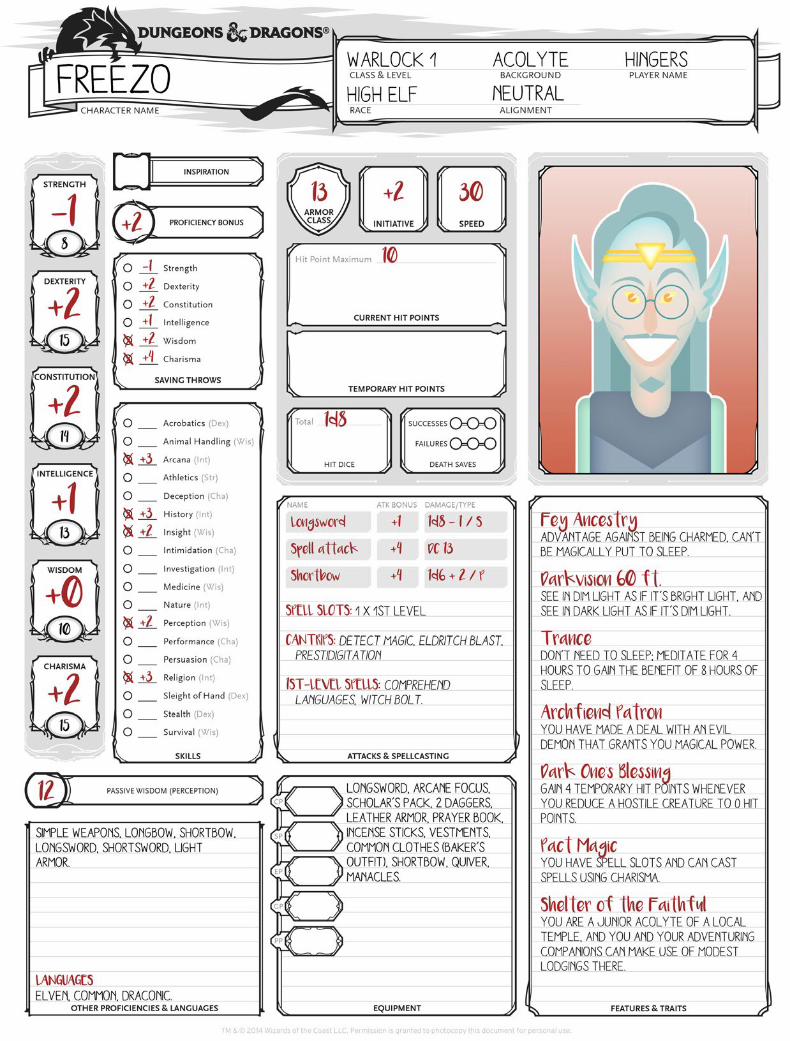
The Dragon Friends’ Detective AgencyThis adventure takes place within a tight three-hour time frame. While the characters are investigating the disappearance of Janos Meer, another group of his friends have been tasked with the same job. The Dragon Friends are on the case. Gods help us all. Use the following guidelines to track the Dragon Friends’ movements during the adventure. You can choose to keep Freezo, Philge, and Bobby an “off-screen” presence, with the characters dealing only with the aftermath of their aggressive inquiries. Or you can have the characters bump into them, playing the Dragon Friends using the 1st-level character sheets at the end of the adventure. It’s up to you how these two investigations dovetail. During the First Bell. Bobby has found a coded message left for him by Janos Meer that suggests something has happened to the Beggar King. He summons his friend Philge but can’t find Freezo, leaving a note at the latter’s bakery. When Freezo finds the note, he quickly sets out and the three meet up. Before the Second Bell. The Dragon Friends make their way to the tavern known as the Shady Dock. There—mistaking the bartender’s angling for a bribe as complicity in some sort of conspiracy—they begin an all-out bar brawl with the patrons. While one of those patrons is being beaten senseless, he lets slip that something nefarious is happening at a Southern Ward almshouse operated by the Grunwertz Trust. Before the Third Bell. Following their lead, the Dragon Friends make their way to the almshouse. There, they confront Leopold Grunwertz and (incorrectly) decide that he is at the center of a grand conspiracy to use down-and-out folk as slave labor on the Shipline. They burn his operation to the ground.
3Dragon+ 18 | The Gribbits Detective Agency
Not for resale. Permission granted to print or photocopy this document for personal use only.
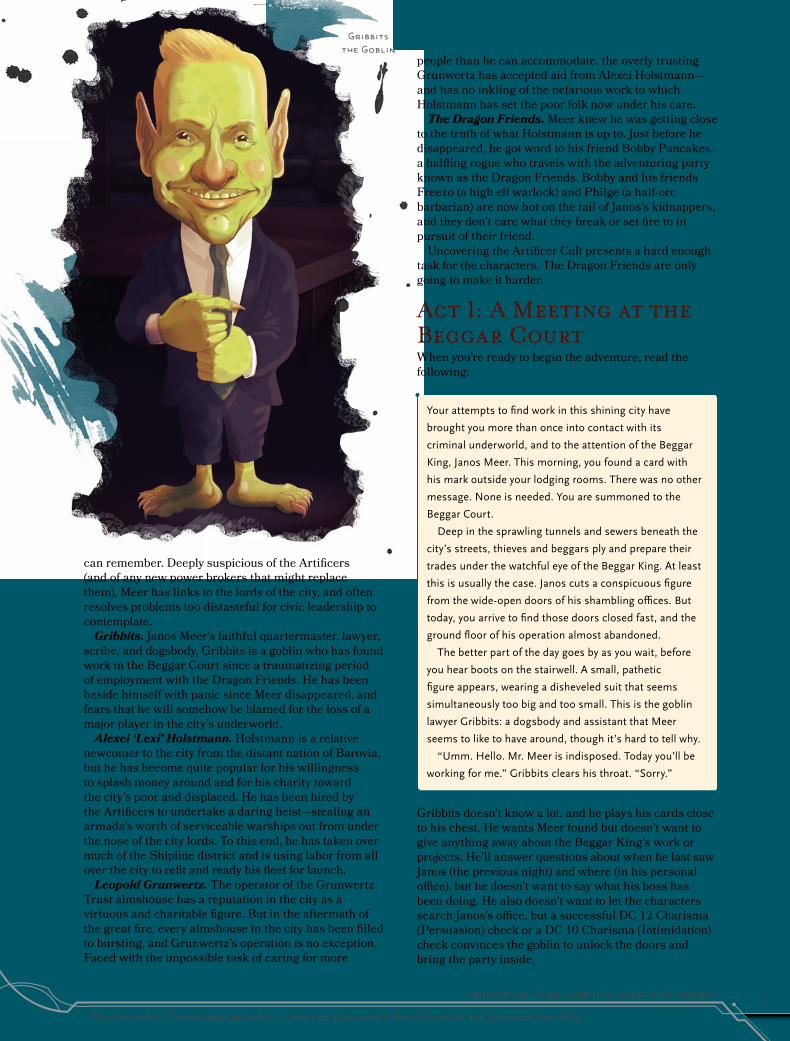
can remember. Deeply suspicious of the Artificers (and of any new power brokers that might replace them), Meer has links to the lords of the city, and often resolves problems too distasteful for civic leadership to contemplate. Gribbits. Janos Meer’s faithful quartermaster, lawyer, scribe, and dogsbody, Gribbits is a goblin who has found work in the Beggar Court since a traumatizing period of employment with the Dragon Friends. He has been beside himself with panic since Meer disappeared, and fears that he will somehow be blamed for the loss of a major player in the city’s underworld. Alexei ‘Lexi’ Holstmann. Holstmann is a relative newcomer to the city from the distant nation of Barovia, but he has become quite popular for his willingness to splash money around and for his charity toward the city’s poor and displaced. He has been hired by the Artificers to undertake a daring heist—stealing an armada’s worth of serviceable warships out from under the nose of the city lords. To this end, he has taken over much of the Shipline district and is using labor from all over the city to refit and ready his fleet for launch. Leopold Grunwertz. The operator of the Grunwertz Trust almshouse has a reputation in the city as a virtuous and charitable figure. But in the aftermath of the great fire, every almshouse in the city has been filled to bursting, and Grunwertz’s operation is no exception. Faced with the impossible task of caring for more
people than he can accommodate, the overly trusting Grunwertz has accepted aid from Alexei Holstmann—and has no inkling of the nefarious work to which Holstmann has set the poor folk now under his care. The Dragon Friends. Meer knew he was getting close to the truth of what Holstmann is up to. Just before he disappeared, he got word to his friend Bobby Pancakes, a halfling rogue who travels with the adventuring party known as the Dragon Friends. Bobby and his friends Freezo (a high elf warlock) and Philge (a half-orc barbarian) are now hot on the tail of Janos’s kidnappers, and they don’t care what they break or set fire to in pursuit of their friend. Uncovering the Artificer Cult presents a hard enough task for the characters. The Dragon Friends are only going to make it harder.
Act 1: A Meeting at the Beggar CourtWhen you’re ready to begin the adventure, read the following:
Your attempts to find work in this shining city have
brought you more than once into contact with its
criminal underworld, and to the attention of the Beggar
King, Janos Meer. This morning, you found a card with
his mark outside your lodging rooms. There was no other
message. None is needed. You are summoned to the
Beggar Court.
Deep in the sprawling tunnels and sewers beneath the
city’s streets, thieves and beggars ply and prepare their
trades under the watchful eye of the Beggar King. At least
this is usually the case. Janos cuts a conspicuous figure
from the wide-open doors of his shambling offices. But
today, you arrive to find those doors closed fast, and the
ground floor of his operation almost abandoned.
The better part of the day goes by as you wait, before
you hear boots on the stairwell. A small, pathetic
figure appears, wearing a disheveled suit that seems
simultaneously too big and too small. This is the goblin
lawyer Gribbits: a dogsbody and assistant that Meer
seems to like to have around, though it’s hard to tell why.
“Umm. Hello. Mr. Meer is indisposed. Today you’ll be
working for me.” Gribbits clears his throat. “Sorry.”
Gribbits doesn’t know a lot, and he plays his cards close to his chest. He wants Meer found but doesn’t want to give anything away about the Beggar King’s work or projects. He’ll answer questions about when he last saw Janos (the previous night) and where (in his personal office), but he doesn’t want to say what his boss has been doing. He also doesn’t want to let the characters search Janos’s office, but a successful DC 12 Charisma (Persuasion) check or a DC 10 Charisma (Intimidation) check convinces the goblin to unlock the doors and bring the party inside.
Gribbits the Goblin
4Dragon+ 18 | The Gribbits Detective Agency
Not for resale. Permission granted to print or photocopy this document for personal use only.
OfficeJanos Meer’s office is a perfect study in conspiracy theorist clichés: an overflowing desk, pitchers of now-cold coffee, and a vast map of the city behind his chair, covered in a mess of notes, etchings, pins, and string. This map tracks Janos’s recent investigations into both the collapse of the Artificers and the corruption of the Shipwrights Guild—a criminal fraternity sprung out of the city’s Order of Master Shipwrights. The corrupt Shipwrights have long been a thorn in Meer’s side, and have been in turmoil since the death of their leader, the werewolf Albrecht Rumsfeld—another victim of the Dragon Friends’ brand of indiscriminate justice. Several locations on the map are clearly marked as being worthy of additional investigation—Freezo’s bakery, the House of the Artificers, the Grunwertz Trust almshouse, the Shady Dock tavern, and Manor Holstmann. See “Act 2: The Streets of the City” for more information. Beyond the map, the office holds little of note. The wall opposite the desk features a truly repulsive example of the local art scene in a gaudy frame. (Sort
of a sad, smiling child on a boat. But he’s maybe . . . an angel?) Behind the picture is a locked wall safe. Gribbits becomes quite upset if the characters remove anything from the room or the safe, but he is too much of a coward to try to stop them. The safe can be opened with a successful DC 15 Dexterity check using thieves’ tools, and contains papers relating to the movements of the Shipwrights, ledgers documenting various ne’er-do-wells indebted to Janos, and a bag containing 25 gp.
What happened to Janos Meer?Following the destruction of the Artificers and the great fire, Meer was tasked by the city lords with hunting down and eradicating any remaining traces of the cult. Meer suspected that the Shipwrights—his longtime enemies and a proxy of the Artificers—were up to something in the Shipline district. This naturally led him to suspect Alexei Holstmann (who has invested heavily in the district) and Leopold Grunwertz (who has provided much of Holstmann’s workforce) of being in cahoots with the Shipwrights and the Artificers. It was while searching for proof of these connections that Meer learned of how some of the Shipwrights’ leaders have used their influence to have serviceable warships decommissioned and sent to the Shipline. For getting so close to the truth, Meer has paid a steep price. The previous night, a team of Artificer operatives intercepted him in the course of his investigations. He has been beaten until incapacitated, then bound and transferred to the warship The Fury of Holstmann, where he’s to be held while Holstmann’s final plans play out.
Act 2: The Streets of the CityJanos’s map features five locations that he felt were significant enough to mark—Freezo’s bakery, the House of the Artificers, the Grunwertz Trust almshouse, the Shady Dock tavern, and Manor Holstmann. The characters can visit one location per hour, not knowing that things will come to a head after they visit three of the five locations—one before each of the next three bells that mark off the passage of hours in the city. It’s late afternoon when the characters set out. Allow them to pursue their leads in any order, but make sure they are aware of how time is progressing. After they have visited three locations, they are ambushed by forces in the employ of Holstmann and the Artificers. See the “Ambush!” section for more information.
Rumors and InnuendoIt is a time of rebuilding in the city. A character who succeeds on an Intelligence (Investigation) check of your devising (or who just makes a new friend) might discover a useful bit of information. Roll a d8 or choose from the following:1. [In your best (worst) Northern English accent] “Here’s
something for ya’. Come closer . . . closer still! I’ve got me a new hat. All pretty like, you can see it atop me head, here.”
2. “There are some nefarious goings-on at the Grunwertz Trust—an almshouse in the Southern Ward. Residents are being exploited for slave labor and the like by their cruel overlord, Leopold Grunwertz.”
3. “Stay away from that warlock’s bakery. Freezo, I think his name is? I heard that an orphan tried to steal a loaf of bread, and this Freezo turned him into a swarm of bees!”
4. “I saw Alexei Holstmann last week in a tavern, shouting the entire room drinks for the night. As if it wasn’t anything.”
5. “There’s tension between the Shipwrights and the Beggar King. No one really knows who’s in charge of the guild since Albrecht Rumsfeld died. Seems that Janos Meer is none too trusting of whoever it is, though.”
6. “The Shipwright’s Guild? Everyone knows they’re actually a secret society operated out the back of the Shady Dock tavern. The guild’s leader, Albrecht Rumsfeld, was an emerging player in the underworld before he was killed. And it’s whispered that he was a werewolf to boot.”
7. “Those glittermen guards the Artificers built might be shiny, but the rusting hulks on every corner are made of worthless alloy. It’s not surprising they didn’t catch on. Word is they couldn’t even operate down at the docks without seizing up. Something about all that salt water.”
8. “I was talking to someone at the Shady Dock tavern, used to be a captain. Told me that every single one of the ‘derelict’ ships abandoned on the Shipline is still true seaworthy.”
Ben and Dave Slack NotesBen: How many options do we need for the rumors and
innuendo bit?Ben: Twenty?Dave: Reckon we’ll be good with ten.Ben: Ah! I reckon twenty’s doable, though.Dave: If you think you can do twenty, go for it. But ten is fine.[Thirty minutes passes]Ben: F*** it. I’ve done eight, and it was a slog.
5Dragon+ 18 | The Gribbits Detective Agency
Not for resale. Permission granted to print or photocopy this document for personal use only.
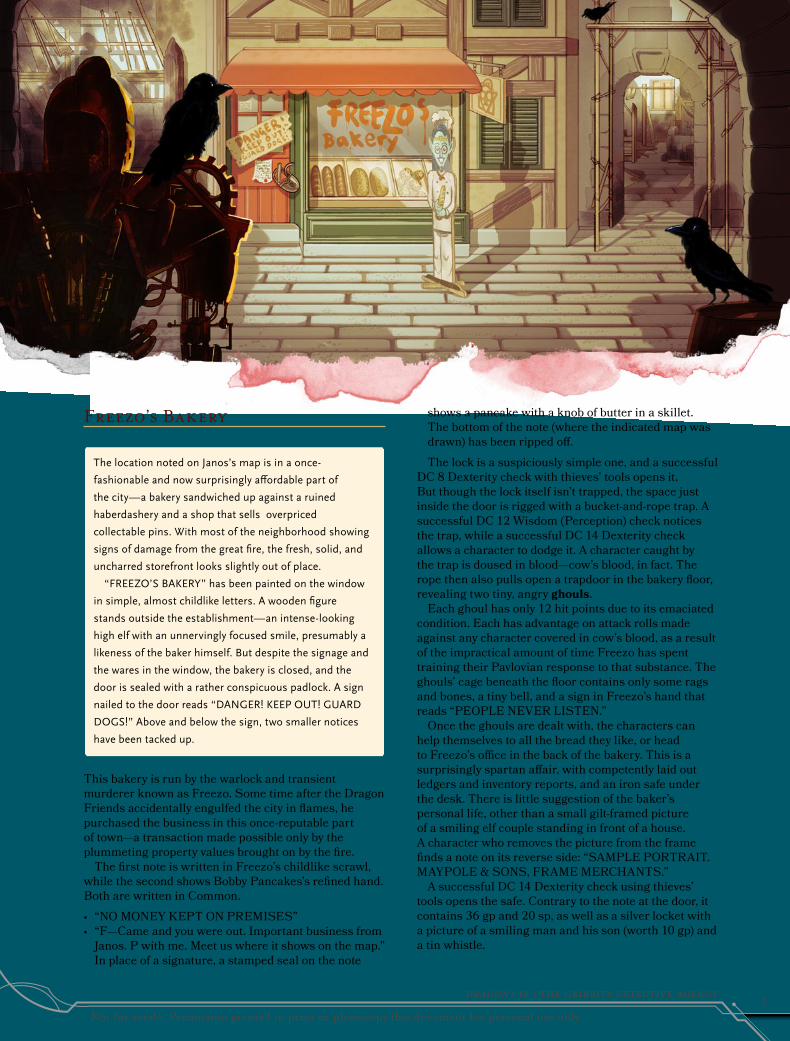
Freezo’s Bakery
The location noted on Janos’s map is in a once-
fashionable and now surprisingly affordable part of
the city—a bakery sandwiched up against a ruined
haberdashery and a shop that sells overpriced
collectable pins. With most of the neighborhood showing
signs of damage from the great fire, the fresh, solid, and
uncharred storefront looks slightly out of place.
“FREEZO’S BAKERY” has been painted on the window
in simple, almost childlike letters. A wooden figure
stands outside the establishment—an intense-looking
high elf with an unnervingly focused smile, presumably a
likeness of the baker himself. But despite the signage and
the wares in the window, the bakery is closed, and the
door is sealed with a rather conspicuous padlock. A sign
nailed to the door reads “DANGER! KEEP OUT! GUARD
DOGS!” Above and below the sign, two smaller notices
have been tacked up.
This bakery is run by the warlock and transient murderer known as Freezo. Some time after the Dragon Friends accidentally engulfed the city in flames, he purchased the business in this once-reputable part of town—a transaction made possible only by the plummeting property values brought on by the fire. The first note is written in Freezo’s childlike scrawl, while the second shows Bobby Pancakes’s refined hand. Both are written in Common.• “NO MONEY KEPT ON PREMISES”• “F—Came and you were out. Important business from
Janos. P with me. Meet us where it shows on the map.” In place of a signature, a stamped seal on the note
shows a pancake with a knob of butter in a skillet. The bottom of the note (where the indicated map was drawn) has been ripped off.
The lock is a suspiciously simple one, and a successful DC 8 Dexterity check with thieves’ tools opens it. But though the lock itself isn’t trapped, the space just inside the door is rigged with a bucket-and-rope trap. A successful DC 12 Wisdom (Perception) check notices the trap, while a successful DC 14 Dexterity check allows a character to dodge it. A character caught by the trap is doused in blood—cow’s blood, in fact. The rope then also pulls open a trapdoor in the bakery floor, revealing two tiny, angry ghouls. Each ghoul has only 12 hit points due to its emaciated condition. Each has advantage on attack rolls made against any character covered in cow’s blood, as a result of the impractical amount of time Freezo has spent training their Pavlovian response to that substance. The ghouls’ cage beneath the floor contains only some rags and bones, a tiny bell, and a sign in Freezo’s hand that reads “PEOPLE NEVER LISTEN.” Once the ghouls are dealt with, the characters can help themselves to all the bread they like, or head to Freezo’s office in the back of the bakery. This is a surprisingly spartan affair, with competently laid out ledgers and inventory reports, and an iron safe under the desk. There is little suggestion of the baker’s personal life, other than a small gilt-framed picture of a smiling elf couple standing in front of a house. A character who removes the picture from the frame finds a note on its reverse side: “SAMPLE PORTRAIT. MAYPOLE & SONS, FRAME MERCHANTS.” A successful DC 14 Dexterity check using thieves’ tools opens the safe. Contrary to the note at the door, it contains 36 gp and 20 sp, as well as a silver locket with a picture of a smiling man and his son (worth 10 gp) and a tin whistle.
6Dragon+ 18 | The Gribbits Detective Agency
Not for resale. Permission granted to print or photocopy this document for personal use only.
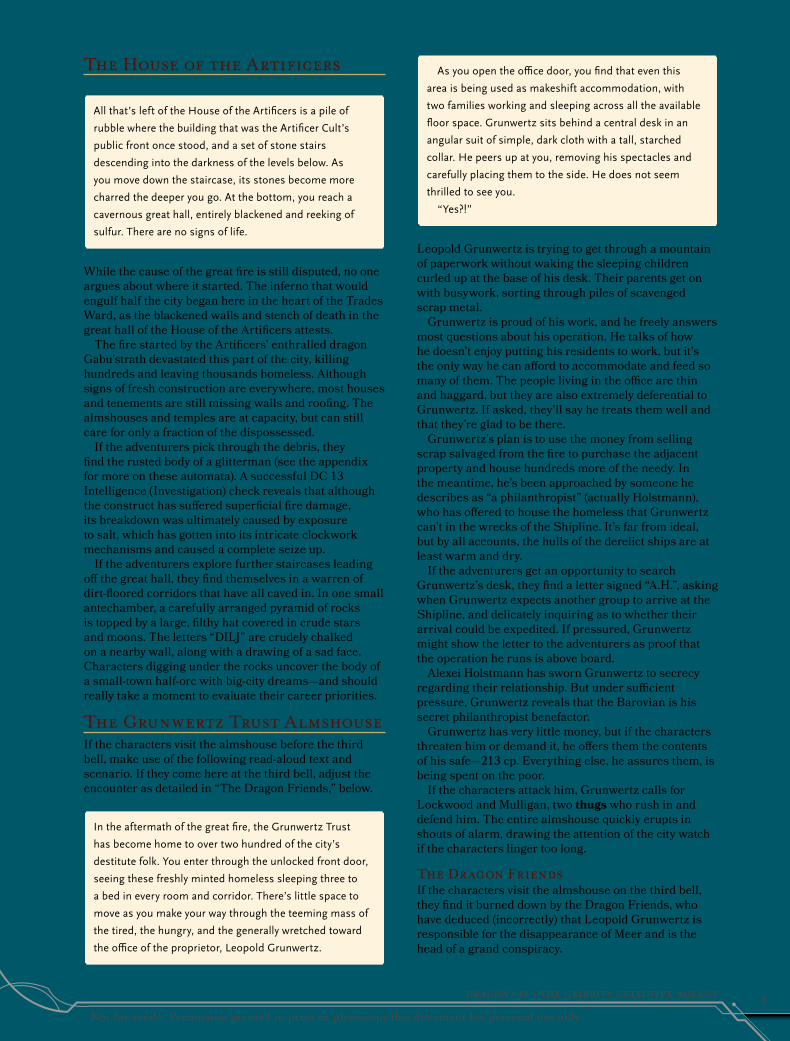
The House of the Artificers
All that’s left of the House of the Artificers is a pile of
rubble where the building that was the Artificer Cult’s
public front once stood, and a set of stone stairs
descending into the darkness of the levels below. As
you move down the staircase, its stones become more
charred the deeper you go. At the bottom, you reach a
cavernous great hall, entirely blackened and reeking of
sulfur. There are no signs of life.
While the cause of the great fire is still disputed, no one argues about where it started. The inferno that would engulf half the city began here in the heart of the Trades Ward, as the blackened walls and stench of death in the great hall of the House of the Artificers attests. The fire started by the Artificers’ enthralled dragon Gabu’strath devastated this part of the city, killing hundreds and leaving thousands homeless. Although signs of fresh construction are everywhere, most houses and tenements are still missing walls and roofing. The almshouses and temples are at capacity, but can still care for only a fraction of the dispossessed. If the adventurers pick through the debris, they find the rusted body of a glitterman (see the appendix for more on these automata). A successful DC 13 Intelligence (Investigation) check reveals that although the construct has suffered superficial fire damage, its breakdown was ultimately caused by exposure to salt, which has gotten into its intricate clockwork mechanisms and caused a complete seize up. If the adventurers explore further staircases leading off the great hall, they find themselves in a warren of dirt-floored corridors that have all caved in. In one small antechamber, a carefully arranged pyramid of rocks is topped by a large, filthy hat covered in crude stars and moons. The letters “DILJ” are crudely chalked on a nearby wall, along with a drawing of a sad face. Characters digging under the rocks uncover the body of a small-town half-orc with big-city dreams—and should really take a moment to evaluate their career priorities.
The Grunwertz Trust AlmshouseIf the characters visit the almshouse before the third bell, make use of the following read-aloud text and scenario. If they come here at the third bell, adjust the encounter as detailed in “The Dragon Friends,” below.
In the aftermath of the great fire, the Grunwertz Trust
has become home to over two hundred of the city’s
destitute folk. You enter through the unlocked front door,
seeing these freshly minted homeless sleeping three to
a bed in every room and corridor. There’s little space to
move as you make your way through the teeming mass of
the tired, the hungry, and the generally wretched toward
the office of the proprietor, Leopold Grunwertz.
As you open the office door, you find that even this
area is being used as makeshift accommodation, with
two families working and sleeping across all the available
floor space. Grunwertz sits behind a central desk in an
angular suit of simple, dark cloth with a tall, starched
collar. He peers up at you, removing his spectacles and
carefully placing them to the side. He does not seem
thrilled to see you.
“Yes?!”
Leopold Grunwertz is trying to get through a mountain of paperwork without waking the sleeping children curled up at the base of his desk. Their parents get on with busywork, sorting through piles of scavenged scrap metal. Grunwertz is proud of his work, and he freely answers most questions about his operation. He talks of how he doesn’t enjoy putting his residents to work, but it’s the only way he can afford to accommodate and feed so many of them. The people living in the office are thin and haggard, but they are also extremely deferential to Grunwertz. If asked, they’ll say he treats them well and that they’re glad to be there. Grunwertz’s plan is to use the money from selling scrap salvaged from the fire to purchase the adjacent property and house hundreds more of the needy. In the meantime, he’s been approached by someone he describes as “a philanthropist” (actually Holstmann), who has offered to house the homeless that Grunwertz can’t in the wrecks of the Shipline. It’s far from ideal, but by all accounts, the hulls of the derelict ships are at least warm and dry. If the adventurers get an opportunity to search Grunwertz’s desk, they find a letter signed “A.H.”, asking when Grunwertz expects another group to arrive at the Shipline, and delicately inquiring as to whether their arrival could be expedited. If pressured, Grunwertz might show the letter to the adventurers as proof that the operation he runs is above board. Alexei Holstmann has sworn Grunwertz to secrecy regarding their relationship. But under sufficient pressure, Grunwertz reveals that the Barovian is his secret philanthropist benefactor. Grunwertz has very little money, but if the characters threaten him or demand it, he offers them the contents of his safe—213 cp. Everything else, he assures them, is being spent on the poor. If the characters attack him, Grunwertz calls for Lockwood and Mulligan, two thugs who rush in and defend him. The entire almshouse quickly erupts in shouts of alarm, drawing the attention of the city watch if the characters linger too long.
The Dragon FriendsIf the characters visit the almshouse on the third bell, they find it burned down by the Dragon Friends, who have deduced (incorrectly) that Leopold Grunwertz is responsible for the disappearance of Meer and is the head of a grand conspiracy.
7Dragon+ 18 | The Gribbits Detective Agency
Not for resale. Permission granted to print or photocopy this document for personal use only.
In this event, the characters find Leopold lingering in the wreckage of his life’s work, baffled and broken. He is so distraught that he can’t speak, and the characters have no opportunity to learn anything from him or from the terrified folk who fled the fire. However, with no need to spend any time here, the characters can seek out a fourth location before the next bell.
The Shady DockIf the characters visit the tavern before the second bell, make use of the following read-aloud text and scenario. If they come here after the second bell, adjust the encounter as detailed in “The Dragon Friends,” below.
The sound of off-key sea shanties is heard long before
you see the Shady Dock. The waterfront tavern is a
weatherboard shack, whose walls lean in a way that
suggests the entire structure is trying to hurl itself into
the harbor.
As you enter the bar, you’re struck by the overpowering
smell of vomit and rum. As far as you can tell in the dim
light, about twenty patrons are present, all in various
states of inebriation. A few stools are available at the bar.
The Artificers might be outlawed in the city, but that cult’s junior associates in the criminal fraternity known as the Shipwright’s Guild remain a thorn in the Beggar King’s side. The Shady Dock is not just the Shipwrights’ unofficial guild house and a venue of regular and unspeakable violence. (Although it definitely is both those things.) It’s also a trading post for gossip, hearsay, slander, half-truths, and whopping lies. An investigator could do worse than to take a seat and listen in on a conversation or two. The bartender is an intelligent bugbear by the name of Brilig Blackbash. He hears a lot, but—knowing the value of what he hears—is not usually forthcoming with it. Some gold can help him open up. Five thugs of the Shipwrights Guild sit near the bar, drunkenly arguing the news of the day. With a successful DC 10 Dexterity (Stealth) check (to get close) or Wisdom (Perception) check (to listen in from a distance), a character learns of any of the following useless topics from the patrons of the tavern:• A recent mutiny near the Moonshae Isles• A treasure hunter bragging about looting a wreck off
the coast of the Mhair Archipelago• Two drunken half-orcs trying to settle who can shout
the loudestA character who sits discreetly for long enough can also catch a useful tidbit of information: that the Shipline district is full to bursting with the poor and dispossessed of the city, all being paid by ‘this new Barovian lord’ for their service therein. No one in the bar has seen Janos Meer for a while, but he never used to come by that much in the first place.
The Dragon FriendsIf the characters visit the Shady Dock after the second bell, the Dragon Friends have already stopped by. This has left the public rooms all but demolished, the thugs unconscious, and a very jittery Brilig sporting a black eye—and, inexplicably, a bite mark on his nose. The bugbear makes it clear he wants “no more trouble with adventurers,” and breaks down almost immediately in response to a successful DC 15 Charisma (Intimidation) check (made with advantage if the party includes a half-orc, a halfling, or an elf). Brilig then explains that the Dragon Friends demanded access to Rumsfeld’s office, and gives them the key to the office while pleading to be left in peace.
Locked OfficeThe Shady Dock doubles as the de facto headquarters of the Shipwright’s Guild—a secret criminal fraternity in almost-open warfare with Janos Meer’s Beggar Court. Albrecht Rumsfeld, the recently deceased leader of the Shipwrights, kept an office in the tavern’s back room. Brilig has the key, but the lock can be picked with a successful DC 11 Dexterity check using thieves’ tools. The small office stinks of wolfsbane, and contains a utilitarian desk, a chair set with manacles, a small folio, and a long presentation case. The folio contains notes about the building and decommissioning of ships. A character who studies it and has a seafaring background (or who succeeds on a DC 14 Intelligence check) notes the curious fact that a number of heavy warships are being decommissioned while still well in their prime. All of those ships have been sent to the graveyard of the Shipline. The presentation case is empty, though an impression in its velvet lining suggests that it once held a ceremonial sword. A note tucked inside the case has been opened, but still holds a seal impressed with the sigil of the Artificers. The note reads: “Albrecht: I could not ask for a better dockmaster or a fairer friend. Take this gift for your troubles. It’s been in my family for generations—and is probably even older than you!—Lexi.”
Manor Holstmann
The palatial manor that is home to Alexei Holstmann is
located in the Sea Ward. After walking down a driveway
that can be described only as ‘punishingly, ostentatiously,
and compensatingly long’, you arrive at the house proper.
Two enormous oak doors are yours to knock on.
Any knocking sees the doors opened by McElroy—a human butler (commoner) who informs the party that Commodore Holstmann is not home. McElroy isn’t keen on visitors, but if the characters can demonstrate (or fake) decorum and good breeding, he answers a few questions if politely asked. He’ll happily explain that the commodore is newly arrived to the city, and can tell a little of Holstmann’s history if pressed. His family escaped somehow from Barovia when he was a
8Dragon+ 18 | The Gribbits Detective Agency
Not for resale. Permission granted to print or photocopy this document for personal use only.
child, bringing fabulous wealth from the old country. In addition to that wealth, Commodore Holstmann is known for his intelligence, grace, and charity. If the adventurers inquire about Janos Meer, McElroy says that no one by that name has come by the house, but a successful DC 12 Wisdom (Insight) check suggests that he’s lying. If the characters sufficiently pressure McElroy, he confesses that in truth, Meer stopped by last week, demanded to speak to the commodore, and was turned away. If the adventurers want to bypass the aged retainer, they can get inside the ostentatiously arranged Waterdavian townhouse by any appropriate means—picking the lock on a side door and sneaking in, bluffing or intimidating the butler, fighting their way through, climbing in a window, and so forth. Holstmann’s furnishings and art are expensive, but are awkwardly bolted down. A skilled thief with plenty of time could claim 75 gp worth of filchable art and goods on the first floor of the townhouse. The second floor and the basement are occupied by servants at all hours of the day, putting them off limits for effective burglary. Although most members of Holstmann’s staff are noncombatants, he employs one inadvisably brave kennel hand (a commoner) with five hunting mastiffs. The dogs can be released at any point if the characters attract attention, threaten McElroy or other servants, or when it’s time for them to move on.
Private StudyHolstmann’s study is upstairs in the family wing. Characters will discover it only if they decide to explore the house. If the characters get into the study, they see it dominated by a giant scale model of the Shipline and the commodore’s public works in the district. A successful DC 18 Intelligence (Investigation) check notes that the miniature of one of the warships has hairline hinges and opens up, revealing a cavity holding a signet ring bearing the sigil of the Artificers.
Ambush!While the characters have been poking their noses into Lexi Holstmann’s business, some of the commodore’s associates have become aware of their activities. At the end of the third bell, those associates attempt to dissuade the characters from making any further inquiries.
After the adventurers have investigated their third location, but before they leave that location, one scout and three guards arrive. The guards attempt to sneak up on the party from concealed ambush points while their scout leader approaches the characters, warning them to back off of their investigation. “The days of the Beggar Court are over, and the bastard Janos Meer is finished—as he should have been long ago.” If the characters do not immediately agree to cease their investigation and leave the city, Holstmann’s goons attack. Once defeated, the attackers are each revealed to be wearing a dull clay pendant bearing the unmistakable sigil of the Artificers. One also bears a chit of receipt of payment concerning the delivery of a “valuable item” to a vessel called The Fury of Holstmann, docked at the Shipline. If any of the goons are left alive for interrogation, they’ll admit their allegiance to the cult and that they were recently hired to kidnap Meer and transfer him to The Fury of Holstmann. Their contract came through the Shipwrights, though they don’t know who the client was. If the characters are unfortunate enough to have this encounter at the Shady Dock, Brilig Blackbash and the Shipwright Guild thugs might well join in against the party—making for a fight the characters had best run from. In other areas, the NPCs will run at the first sign of trouble.
Act 3: The ShiplineAs the adventurers make their way into the Shipline district, read the following:
It is the fate of every ship made by Waterdavian hands
to end up one day propped among the derelict timbers
of the Shipline. Once a dry dock of last resort, the
Shipline is a place where galleons go to die. Those rotten
hulks now teem with life, however, as the destitute
and wretched of the city find shelter among their
ruined timbers.
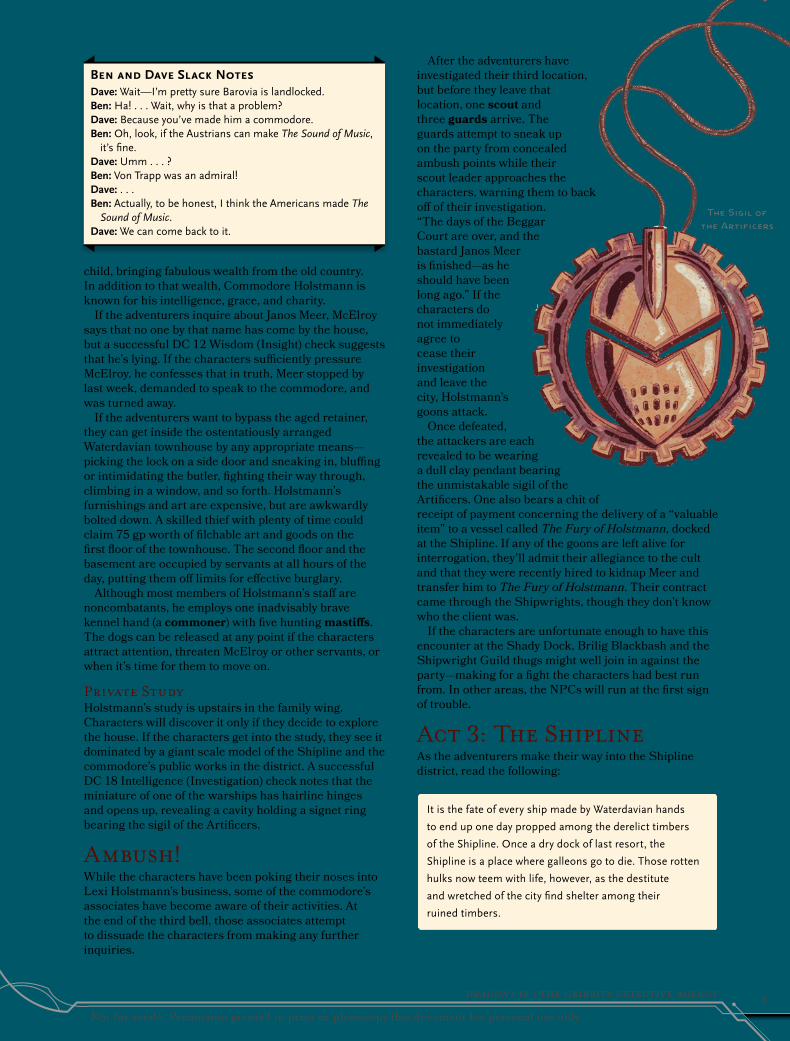
The Sigil ofthe Artificers
Ben and Dave Slack NotesDave: Wait—I’m pretty sure Barovia is landlocked.Ben: Ha! . . . Wait, why is that a problem?Dave: Because you’ve made him a commodore.Ben: Oh, look, if the Austrians can make The Sound of Music,
it’s fine.Dave: Umm . . . ?Ben: Von Trapp was an admiral!Dave: . . .Ben: Actually, to be honest, I think the Americans made The
Sound of Music.Dave: We can come back to it.

9Dragon+ 18 | The Gribbits Detective Agency
Not for resale. Permission granted to print or photocopy this document for personal use only.
Tonight, the Shipline is a hive of activity even by its
typical noisy standards. It’s well past twilight, and yet
gangs of impoverished laborers are hard at work on at
least half the vessels present. A company of six better-
dressed sailors is seen heading toward the largest ship
on the line—an old triple-master whose weight makes
the dry dock groan beneath her. Emblazoned across the
bow of the ship is the legend The Fury of Holstmann.
Lexi Holstmann has been using the poor and displaced of the city to refurbish the wrecks and hulking landlocked vessels of the Shipline into a serviceable armada. The Artificer Cult has paid him handsomely for this, promising him power and glory as admiral of their newly minted fleet—once he successfully steals that fleet out from under the noses of the city’s leaders. Much of the activity of this refurbishment is centered around The Fury of Holstmann—the pride of the line, and already marked by Alexei Holstmann as his flagship. Six sailors (use bandit statistics) are headed to it as the characters approach. The cult has been moving sailors onto the ships all day in small groups, in preparation for the pending launch of the fleet. Characters not wanting to board The Fury of Holstmann by way of the gangplank can climb up
the rough sides of the ship with a successful DC 13 Strength (Athletics) or Dexterity (Acrobatics) check. Using a rope and a grappling hook grants advantage on the check. Climbing characters end up on the open deck of the ship, where each must then succeed on a DC 10 Dexterity (Stealth) check to avoid notice from a nearby patrol of three sailors (bandits). Similar patrols make rounds along the dry dock if the characters take too long to decide how to get on board.
The Fury of HolstmannThe Fury of Holstmann is a labyrinthine old frigate. The details of how the characters move between the keyed areas of the ship can be as easy or as complex as desired, but those unaccustomed to shipboard life might struggle to find their way through the maze of decks.
Moving Around the DecksAll the outside decks of the ship are dotted with barrels and crates filled with provisions, black powder, and rum. Sailors and laborers move regularly across the decks, but most keep to their own business. The Fury of Holstmann is large and newly crewed, and most members of the crew don’t know each other yet. As such, the characters can easily move throughout the ship if they don’t cause a ruckus. If the characters are prowling around any area that doesn’t have crew members present in its description,
10Dragon+ 18 | The Gribbits Detective Agency
Not for resale. Permission granted to print or photocopy this document for personal use only.
they have a 1-in-6 chance of attracting the attention of a patrol of three sailors (bandits) if that seems interesting.
A. GangplankThe main point of entrance onto the decks of The Fury of Holstmann is a long, narrow ramp leading up from the dry dock. The gangplank is overseen by shift master Carlyle—a no-nonsense sailor (bandit) whose flair for penmanship is evidenced by the surprisingly well-kept journal in his pocket. He is immediately suspicious of the adventurers if they attempt to board the ship by the gangplank, and it takes a successful DC 15 Charisma (Deception or Persuasion) check or a DC 13 Charisma (Intimidation) check for him to let them through. Examination of Carlyle’s journal shows that the ship is currently full to bursting with crew members, most of whom have been assigned space in the holds. The journal also shows (or Carlyle can confirm) that Commodore Holstmann is currently on board, and that Janos Meer is detained in the brig.
B. CannonsFifteen cannons line the starboard deck, each pointing east toward the rest of the “fleet.” Black powder and cannon balls in barrels and crates are stacked neatly nearby. A small chest, more gilded and ornate than the other mundane crates scattered around the decks, sits near the cannon closest the stern, and is sealed with an arcane lock spell. It contains a pair of Barovian dueling pistols, recently commissioned by Holstmann and only just delivered, as well as a bag of twenty powder charges and twenty bullets. Treat a dueling pistol as a hand crossbow that deals 1d10 piercing damage. As an action, a character can reload up to two pistols with powder charges and bullets. Characters who decide to use the cannons will, unsurprisingly, alert everyone on the ship to their presence. Five of the cannons are loaded, primed, and helpfully aimed at a perilously stacked row of nearby warships, if that’s the kind of thing the adventurers might be interested in. A sailor boss (thug) and three sailors (bandits) race up from the hold 1d3 + 1 rounds after a cannon is fired (see area E for information).
C. RiggingA character can climb the rigging with a successful DC 10 Strength (Athletics) or Dexterity (Acrobatics) check, but Meer is nowhere to be found here.
D. GalleyThe galley is well stocked with cured meats, barrels of fresh water, and various folk remedies for scurvy. The ship’s cook, Steggins, is always present but does not want any trouble. He’ll let the characters ransack the room without making a fuss as long as they let him finish making his soup. If they get in the way of his work, the cook goes absolutely berserk, using the statistics of a thug and attacking with his huge chef’s knife (dealing slashing damage) instead of a mace. Characters searching the room find a barrel of rum that smells faintly medicinal—because it is. A full waterskin of this tonic provides the benefit of a potion
of healing. However, a character who drinks the rum again within a 24-hour period gains no benefit and has disadvantage on any ability checks except Charisma (Intimidation) checks for the next 1d3 hours.
E. HoldMost of the work still being done on the ship is being performed in the hold. Twenty carpenters (noncombatant commoners) are watched over by eleven heavily armed sailors (bandits) and a sailor boss (thug). The cacophony of construction noise and swearing in the confined space of the hold means that no attention is paid to the characters as they approach, and a successful DC 10 group Dexterity (Stealth) check allows them to traverse the room to the brig. Aside from the carpenters and crew, the hold contains a small fortune in building equipment, hammocks, and rope. If the alarm is raised anywhere on the ship, the sounds of shouting reach the hold in 3 rounds. The sailor boss responds by taking three of the sailors and racing toward the trouble. The other sailors split up into two groups of four to protect the doors to the brig and the captain’s quarters.
F. Captain’s QuartersOrnate, ostentatious, and dominated by a giant fresco of Castle Ravenloft and the Balinok Mountains of Barovia, this area of the ship makes no attempt to hide its splendor. Expensive furniture fills the room to the point of making it difficult to move, and a candelabra chandelier hangs from the ceiling—an incredibly dangerous bit of decor this close to the gunnery decks. The commodore is not here. His dressing gown—monogrammed with an “L”—is draped over a needlessly fancy chair. The fresco on the wall hides a secret door that reveals itself with careful study and a successful DC 13 Intelligence (Investigation) check. Pushing on the slightly protruding image of Castle Ravenloft causes it to depress. The entire fresco then swings open,
Scuttling Holstmann’s PlansAs they investigate the ship, the characters are able to see that The Fury of Holstmann is only lightly secured to the dry dock, held by twelve heavy ropes that can each be cut through with an axe and a successful DC 12 Strength check. Cutting the mooring lines will cause the scuttling of the dry dock, allowing the flagship and the rest of Holstmann’s fleet to slip into the harbor. This sabotage has been carefully set up so that Holstmann can steal the fleet in a minimal amount of time. If the characters decide to cut the lines on The Fury of Holstmann, the ship glides into the harbor over the wreckage of the disintegrating drydock. You can decide what ability checks and actions are necessary as the ship lurches into the water, but start with having all the characters succeed on a DC 15 Dexterity (Acrobatics) check to avoid being thrown against a bulkhead or into the harbor. While the ship is in the water, roll a d6 each round of combat. On a 5 or 6, a heavy wave heaves the ship, imposing disadvantage on attack rolls and ability checks. Anyone proficient in Acrobatics or proficient with water vehicles (which includes all crew members) ignores this effect.
11Dragon+ 18 | The Gribbits Detective Agency
Not for resale. Permission granted to print or photocopy this document for personal use only.
revealing a shaft and a ladder leading down to the secret cult room beyond.
G. BrigTwo guards, Langley and Steve, stand before the door to the brig, and are bickering in the way that two guards out in front of any door are wont to do. Any character observing the guards notes that Langley appears to be really into the job. Steve, not so much. Langley believes in his mission and will fight to the death. He also carries an alarm bell, and will ring it in response to any attack or threat. Steve has disadvantage on any Charisma contest to convince him to do anything that involves less work. If Steve is reduced to 5 or fewer hit points, he is happy to surrender and tell the adventurers everything he knows: where Meer is held (the brig; Steve has the key), how Holstmann plans to steal the ship (by cutting the mooring lines and scuttling the dry dock), and the fact that Holstmann’s pet glitterman arrived on the ship earlier that day. The brig door can also be opened with a successful DC 15 Dexterity check using thieves’ tools. If the characters get into the brig, they find a gagged, bound, and rake-thin Janos Meer. He smells terrible, is unconscious and of no help to anyone, but is alive. Meer is in dire shape and comatose. Any healing, magical or otherwise, will stabilize him, but the Beggar King remains unconscious and will need to be carried off the ship and back to the Beggar Court. If the adventurers have not yet fully searched the flagship and confronted Holstmann, the door is sturdy and can be locked up again, ensuring Meer’s safety for the short term.
H. Secret RoomA hatch at the bottom of the ladder can be opened as an action, revealing a secret room prepared and hidden at exorbitant expense by Holstmann. From here, he communes with his masters in the Artificer Cult. The room contains a small bench next to a sending stone, along with a weapon rack full of dueling swords and a chest holding some of Holstmann’s emergency funds. If the characters make it here without having the alarm raised, Holstmann is caught unawares. The characters find Holstmann using the sending stone to contact the cult, and attempting to negotiate an increase in his fee before his final moment of triumph. Holstmann is not unguarded, however, as his personal glitterman stands motionless and concealed by the side of the hatch. Statistics for Holstmann and the glitterman can be found at the end of the adventure. The glitterman has been ordered to protect Holstmann at all costs. The first character to enter this area must succeed on a DC 14 Wisdom (Perception) check to notice the glitterman, which otherwise attacks the character with surprise and alerts Holstmann.
If the characters have caused the crew to go on alert during their infiltration of the ship, Holstmann is ready for them. He has his vicious hand crossbow loaded, and has engaged a poisoned needle trap on the door of the hatch to buy time while pleading with the Artificers for more backup. It takes a successful DC 13 Wisdom (Perception) check to spot the trap, and a successful DC 14 Dexterity check with thieves’ tools to disable it. The character opening the hatch otherwise takes 1 piercing damage and 5 (1d10) poison damage, and must succeed on a DC 12 Constitution saving throw or be poisoned for 1 hour. Alternatively, the hatch can be kicked in with a successful DC 15 Strength (Athletics) check. Holstmann might be an idiot, but he fights to the end. Once he is defeated, the rest of the sailors on the ship fall into disarray. If the characters haven’t already located Meer (or if they left him behind for safety), he can be quickly rescued in the chaos. Treasure. Holstmann carries a +1 scimitar and a vicious hand crossbow, along with a concealed sleeve
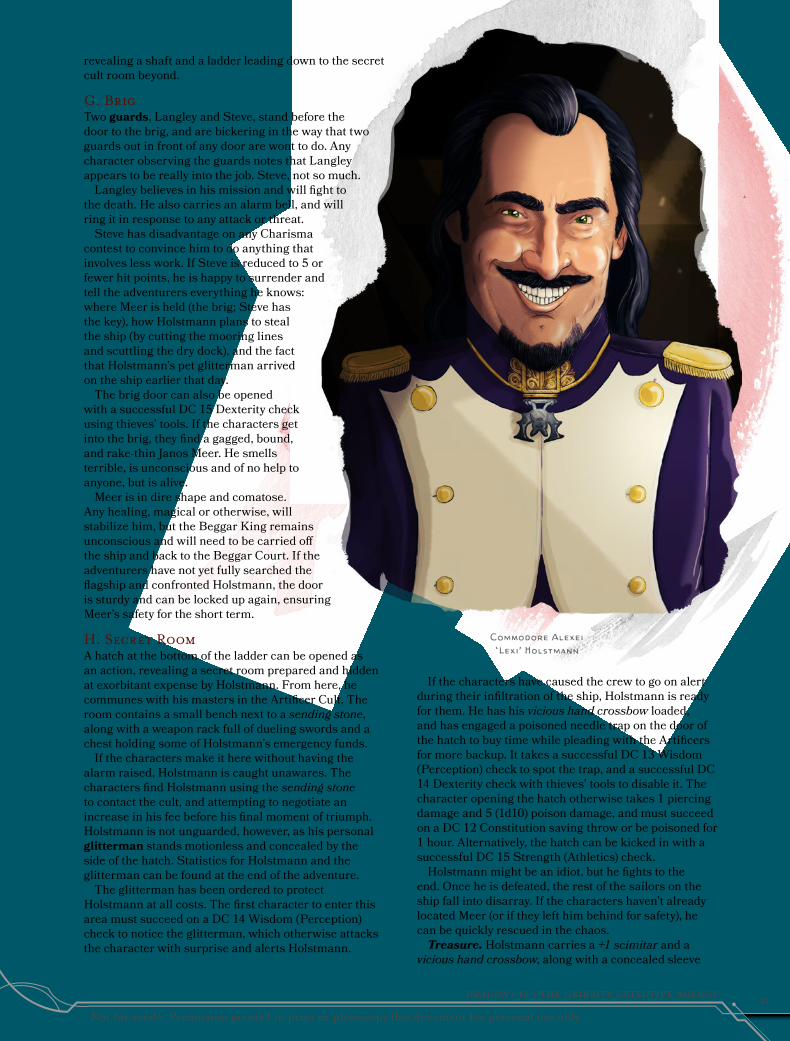
Commodore Alexei‘Lexi’ Holstmann
12Dragon+ 18 | The Gribbits Detective Agency
Not for resale. Permission granted to print or photocopy this document for personal use only.
quiver holding ten bolts. His fine Barovian clothes are worth 40 gp to an appropriate buyer. Around his neck, he wears an Artificer sigil mark—a bronze amulet bearing the secret sign of the Artificer—that he uses to control his glitterman. This has no cash value, but might be a useful tool for those wanting to infiltrate the cult. Holstmann also wears a gold signet ring worth 25 gp, engraved with his family crest. The locked trunk in this area contains 100 gp. The key is in Holstmann’s pocket, or the lock can be picked with a successful DC 15 Dexterity check using thieves’ tools.
AftermathWhen the adventurers return to Gribbits, read the following:
Gribbits is beside himself with joy, staring at Meer like he
can’t believe his awful, weird eyes.
“You’ve done it! You’ve bloody done it! He’s back
and he’s . . .” The goblin pauses to check the still-
unconscious Meer’s pulse. “He’s alive!”
Gribbits claps his hands twice above his head. “Meat
and drink for our brave adventurers!” An awkward couple
of moments pass while nothing happens. The goblin
lowers his arms. “Right. Well, I guess catering is off for
the day. But, you know, good on you and all that.”
Meer will need time to recover, but he does not forget the characters’ service. Any favor the Beggar King can do for the adventurers, they need but ask, and he instructs Gribbits to pay the characters 50 gp each. In addition, he invites them to open up permanent underground lodgings in the Beggar Court. There, the characters will be paid a stipend to report to Gribbits as and when the Beggar King requires their services. A sign on the door of their new offices reads: “The Gribbits Detective Agency.” And the adventure is done.
The Dragon Friends: Alex Lee, Edan Lacey, Michael Hing, and Simon Greiner
Editing, Development, and Layout for Dragon+: Scott Fitzgerald Gray
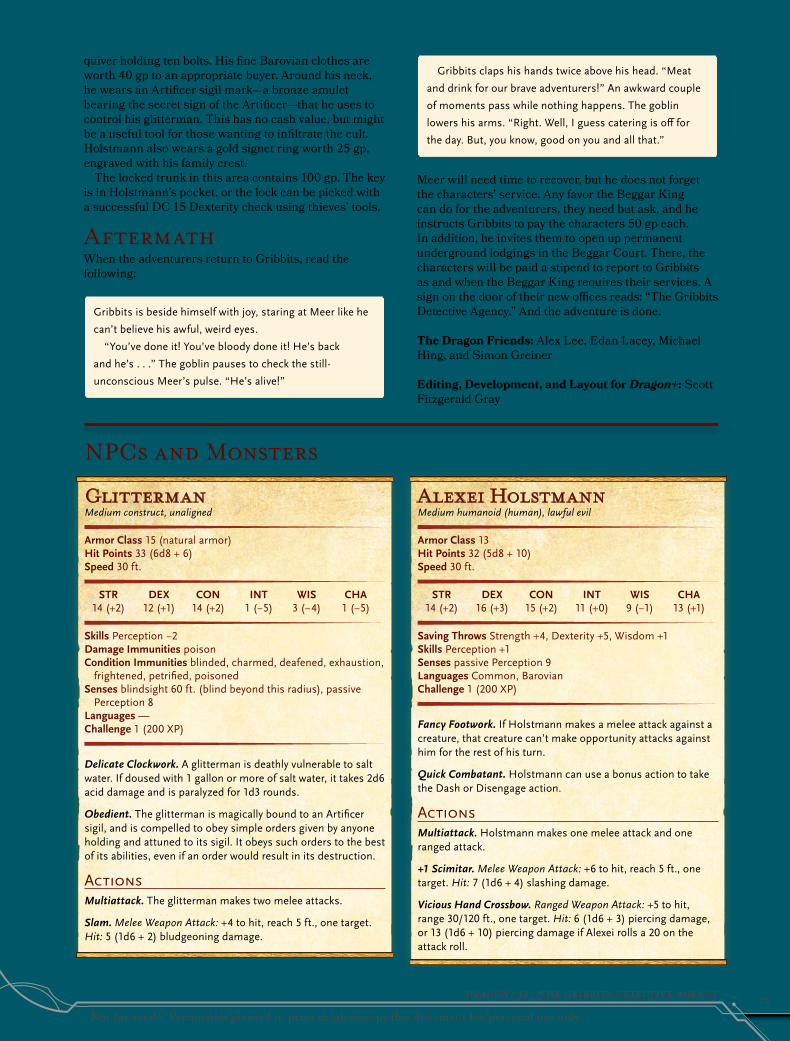
NPCs and Monsters
GlittermanMedium construct, unaligned
Armor Class 15 (natural armor)Hit Points 33 (6d8 + 6)Speed 30 ft.
STR DEX CON INT WIS CHA 14 (+2) 12 (+1) 14 (+2) 1 (−5) 3 (−4) 1 (−5)
Skills Perception −2Damage Immunities poisonCondition Immunities blinded, charmed, deafened, exhaustion,
frightened, petrified, poisonedSenses blindsight 60 ft. (blind beyond this radius), passive
Perception 8Languages —Challenge 1 (200 XP)
Delicate Clockwork. A glitterman is deathly vulnerable to salt water. If doused with 1 gallon or more of salt water, it takes 2d6 acid damage and is paralyzed for 1d3 rounds.
Obedient. The glitterman is magically bound to an Artificer sigil, and is compelled to obey simple orders given by anyone holding and attuned to its sigil. It obeys such orders to the best of its abilities, even if an order would result in its destruction.
ActionsMultiattack. The glitterman makes two melee attacks.
Slam. Melee Weapon Attack: +4 to hit, reach 5 ft., one target. Hit: 5 (1d6 + 2) bludgeoning damage.
Alexei HolstmannMedium humanoid (human), lawful evil
Armor Class 13Hit Points 32 (5d8 + 10)Speed 30 ft.
STR DEX CON INT WIS CHA 14 (+2) 16 (+3) 15 (+2) 11 (+0) 9 (−1) 13 (+1)
Saving Throws Strength +4, Dexterity +5, Wisdom +1Skills Perception +1Senses passive Perception 9Languages Common, BarovianChallenge 1 (200 XP)
Fancy Footwork. If Holstmann makes a melee attack against a creature, that creature can’t make opportunity attacks against him for the rest of his turn.
Quick Combatant. Holstmann can use a bonus action to take the Dash or Disengage action.
ActionsMultiattack. Holstmann makes one melee attack and one ranged attack.
+1 Scimitar. Melee Weapon Attack: +6 to hit, reach 5 ft., one target. Hit: 7 (1d6 + 4) slashing damage.
Vicious Hand Crossbow. Ranged Weapon Attack: +5 to hit, range 30/120 ft., one target. Hit: 6 (1d6 + 3) piercing damage, or 13 (1d6 + 10) piercing damage if Alexei rolls a 20 on the attack roll.