Embed Size (px)
DESCRIPTION
guia de materiales para diseñadores
Citation preview
> “This buyer’s guide will give you all what you need for a great start !”
- Chou-Tac
TheDesignermaterialGuide
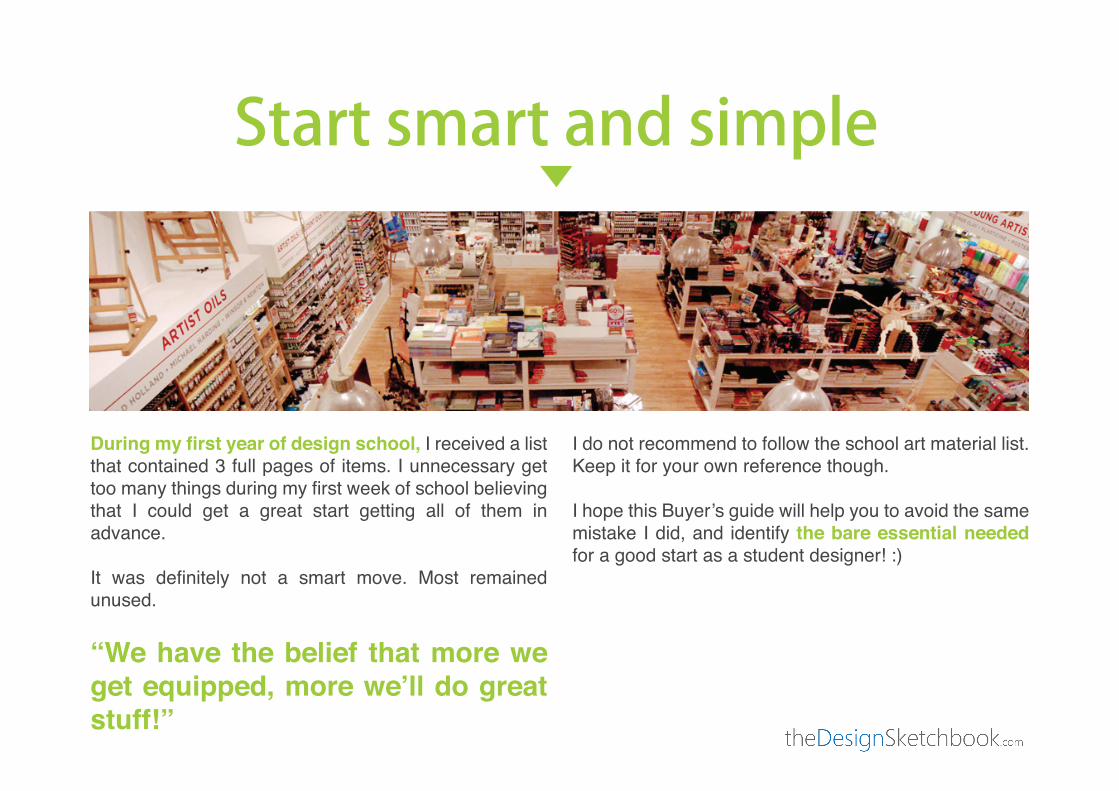
During my first year of design school, I received a list that contained 3 full pages of items. I unnecessary get too many things during my first week of school believing that I could get a great start getting all of them in advance.
It was definitely not a smart move. Most remained unused.
“We have the belief that more we get equipped, more we’ll do great stuff!”
I do not recommend to follow the school art material list. Keep it for your own reference though.
I hope this Buyer’s guide will help you to avoid the same mistake I did, and identify the bare essential needed for a good start as a student designer! :)
Start smart and simple

“Reality leaves a lot to the imagination.”
- John lennon

Student Buying list
1- X-ACTO 2- Cutting mat 3- Metallic ruler 4- Foam board 6- Felt pen5- Ball point pen
7- Mechanical penciland colour leads
8- Paper 9- Sketchbook A4 11- Spray mount10- Art portfolio 12- Markers
12.1- Blender 13- Layout paper 15- A4 Scanner14- A3 Printer 16- Mac or PC? 17- Graphic tablet
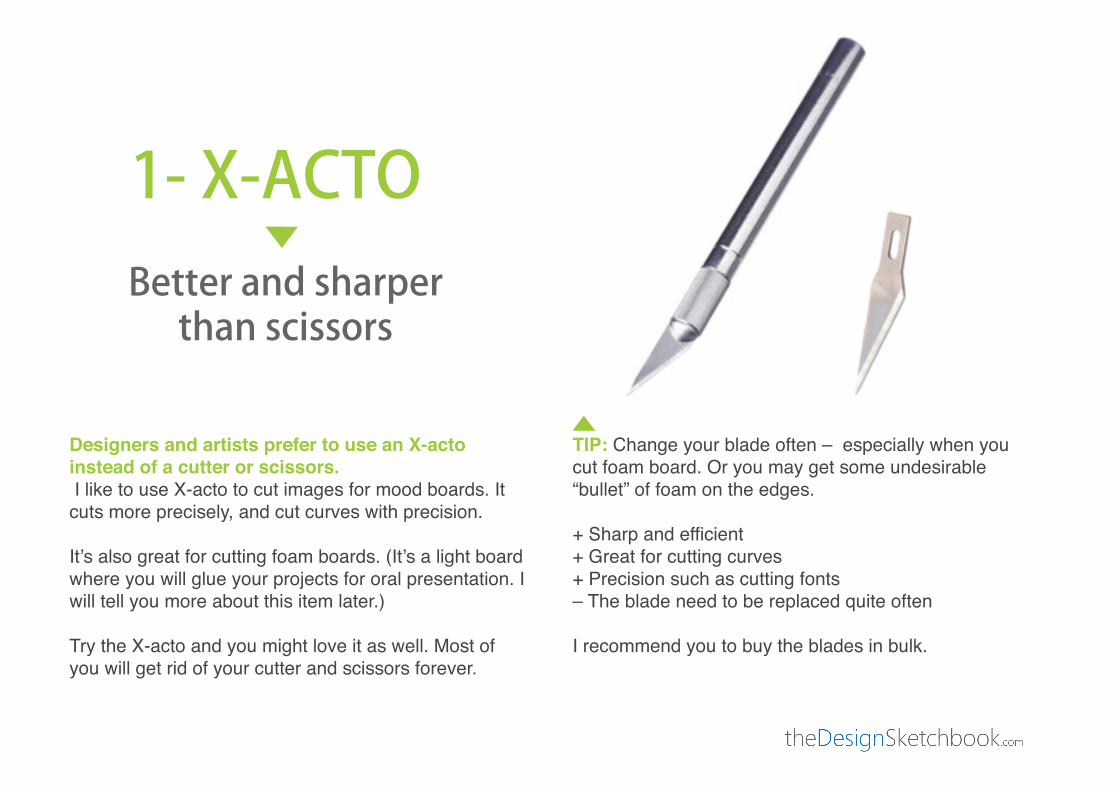
Designers and artists prefer to use an X-acto instead of a cutter or scissors. I like to use X-acto to cut images for mood boards. It cuts more precisely, and cut curves with precision.
It’s also great for cutting foam boards. (It’s a light board where you will glue your projects for oral presentation. I will tell you more about this item later.)
Try the X-acto and you might love it as well. Most of you will get rid of your cutter and scissors forever.
TIP: Change your blade often – especially when you cut foam board. Or you may get some undesirable “bullet” of foam on the edges.
+ Sharp and efficient+ Great for cutting curves+ Precision such as cutting fonts– The blade need to be replaced quite often
I recommend you to buy the blades in bulk.
1- X-ACTOBetter and sharper
than scissors

Protect your desk from the blade of the X-acto and ink stains.
Try to keep your work station clean for a good working environment.
2- Cutting matTake care of your desk
The mat pairs well with a metallic ruler.

During my first year of design school, I received a list that contained 3 full pages of items. I unnecessary get too many things during my first week of school believing that I could get a great start getting all of them in advance.
It was definitely not a smart move. Most remained unused.
“We have the belief that more we get equipped, more we’ll do great stuff!”
A metallic ruler is better than plastic to cut paper and foam board safely. The plastic ruler is made of “soft” material, the blade might damage it and you may acci-dentally lose control of your knife.
TIP: To keep your finger safe:- Make sure to hold your metallic ruler firmly. Protect your finger using your nails as a “shield”. (Some chef use a similar technique for chopping onions)
Bonus:Get a ruler with cork on the back.- It’s anti-slippery.- It’s ideal for inking (The millimeter gap between the ruler and the paper avoid making stains from liquid or gel ink pen).
3- Metallic rulerSafety comes first
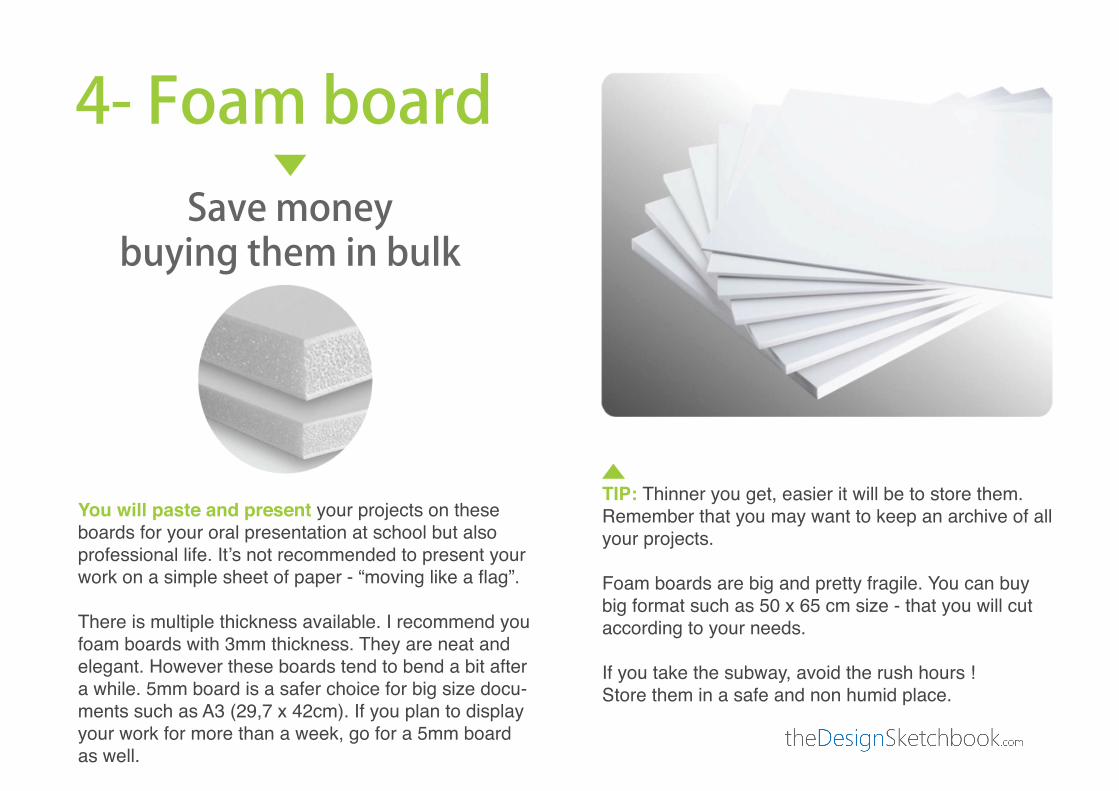
You will paste and present your projects on these boards for your oral presentation at school but also professional life. It’s not recommended to present your work on a simple sheet of paper - “moving like a flag”.
There is multiple thickness available. I recommend you foam boards with 3mm thickness. They are neat and elegant. However these boards tend to bend a bit after a while. 5mm board is a safer choice for big size docu-ments such as A3 (29,7 x 42cm). If you plan to display your work for more than a week, go for a 5mm board as well.
TIP: Thinner you get, easier it will be to store them. Remember that you may want to keep an archive of all your projects.
Foam boards are big and pretty fragile. You can buy big format such as 50 x 65 cm size - that you will cut according to your needs.
If you take the subway, avoid the rush hours !Store them in a safe and non humid place.
4- Foam boardSave money
buying them in bulk

If you find a ball point pen that suits you, buy them in pack if you can.
Train with the same pen and you will better sharpen your pen pressure sensitivity.
Avoid the “fancy” pens such as mini size or multi colours pen. Usually the grip is not as good as regular pen. Oh, expensive pens doesn’t automatically means good. There is a lot of cheap pens that give great result.
TIP: Each brand of pen is different – try to stick to the same. Make sure to choose one that offers a good variation of lines.
+ Improve your skills faster+ Cheaper price buying them in pack+ Be able to bring them anywhere. Put one in you bag, an other in your jacket, one in your desk…
5- Ball point penKeep training
with the same pen

Designers and artists prefer to use an X-acto instead of a cutter or scissors. I like to use X-acto to cut images for mood boards. It cuts more precisely, and cut curves with precision.
It’s also great for cutting foam boards. (It’s a light board where you will glue your projects for oral presentation. I will tell you more about this item later.)
Try the X-acto and you might love it as well. Most of you will get rid of your cutter and scissors forever.
The Stabilo Stylist is a great choice for drawing on Layout paper (Special paper for markers).
+ The ink doesn’t blend in contact with marker’s ink, compared to ball point pen.+ Good pen pressure sensitivity– The tip dries fast. Remember to put back the cap after usage. – Draw gently with the pen, the nib is fragile and get shorter from the “paper abrasion”
The Paper Mate Flair original complement well your Ballpoint pen and Stabilo stylist. You can use it for adding thicker lines in your sketches.
+ Great for doodling+ Play with different line thickness+ Great for playing with the line weight
6- Felt penSmooth and beautiful

Colour leads are great for preliminary research. It’s common to draw with the colour lead, then retrace on top of of your sketch with a ink pen.
The colour leads are often more fragile than the regular “charcoal” one.
Colour leads are more difficult to erase. Get a good rubber such as Staedtler.
7- Mechanical penciland colour leads
Protect your desk with a wide cutting mat.
TIP: 0.5mm colour leads often break and start to be irritating. Get colour lead from 0.7mm or even 1mm. Blue and red leads are the most common used.
A metallic ruler is better than plastic to cut paper and foam board safely. The plastic ruler is made of “soft” material, the blade might damage it and you may acci-dentally lose control of your knife.
TIP: To keep your finger safe:- Make sure to hold your metallic ruler firmly. Protect your finger using your nails as a “shield”. (Some chef use a similar technique for chopping onions)
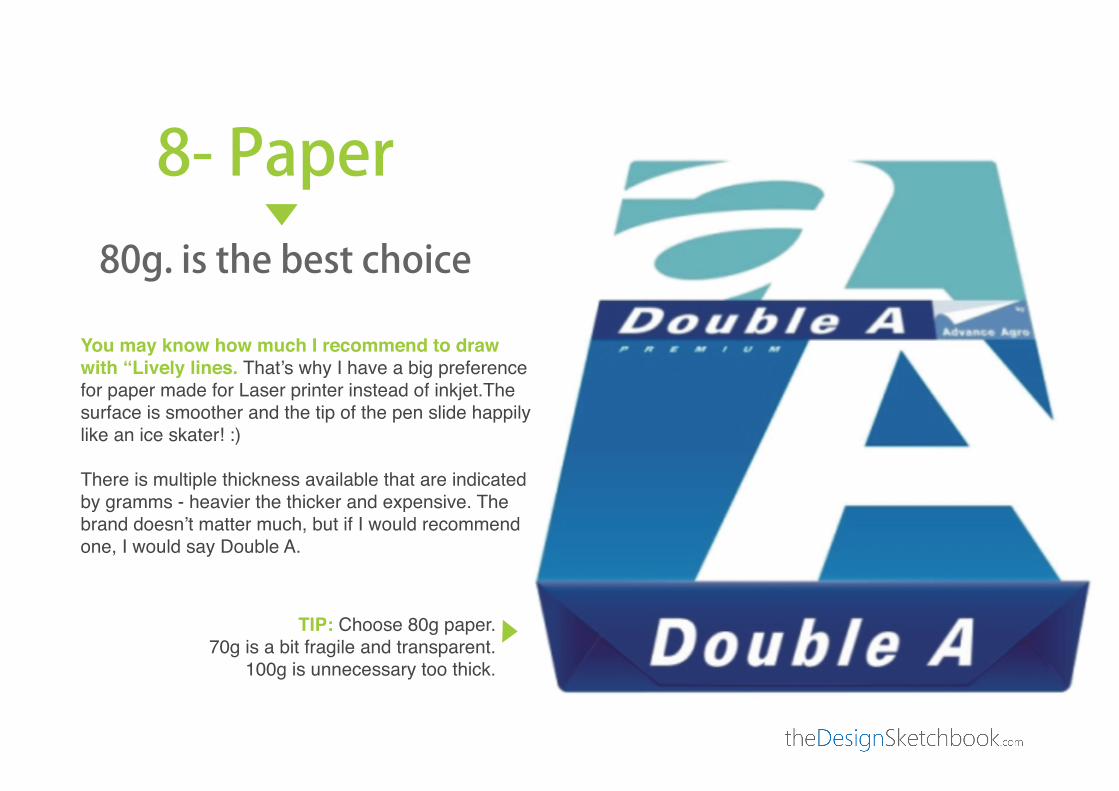
8- Paper80g. is the best choice
You may know how much I recommend to draw with “Lively lines. That’s why I have a big preference for paper made for Laser printer instead of inkjet.The surface is smoother and the tip of the pen slide happily like an ice skater! :)
There is multiple thickness available that are indicated by gramms - heavier the thicker and expensive. The brand doesn’t matter much, but if I would recommend one, I would say Double A.
TIP: Choose 80g paper.70g is a bit fragile and transparent.
100g is unnecessary too thick.
You will paste and present your projects on these boards for your oral presentation at school but also professional life. It’s not recommended to present your work on a simple sheet of paper - “moving like a flag”.
There is multiple thickness available. I recommend you foam boards with 3mm thickness. They are neat and elegant. However these boards tend to bend a bit after a while. 5mm board is a safer choice for big size docu-ments such as A3 (29,7 x 42cm). If you plan to display your work for more than a week, go for a 5mm board as well.
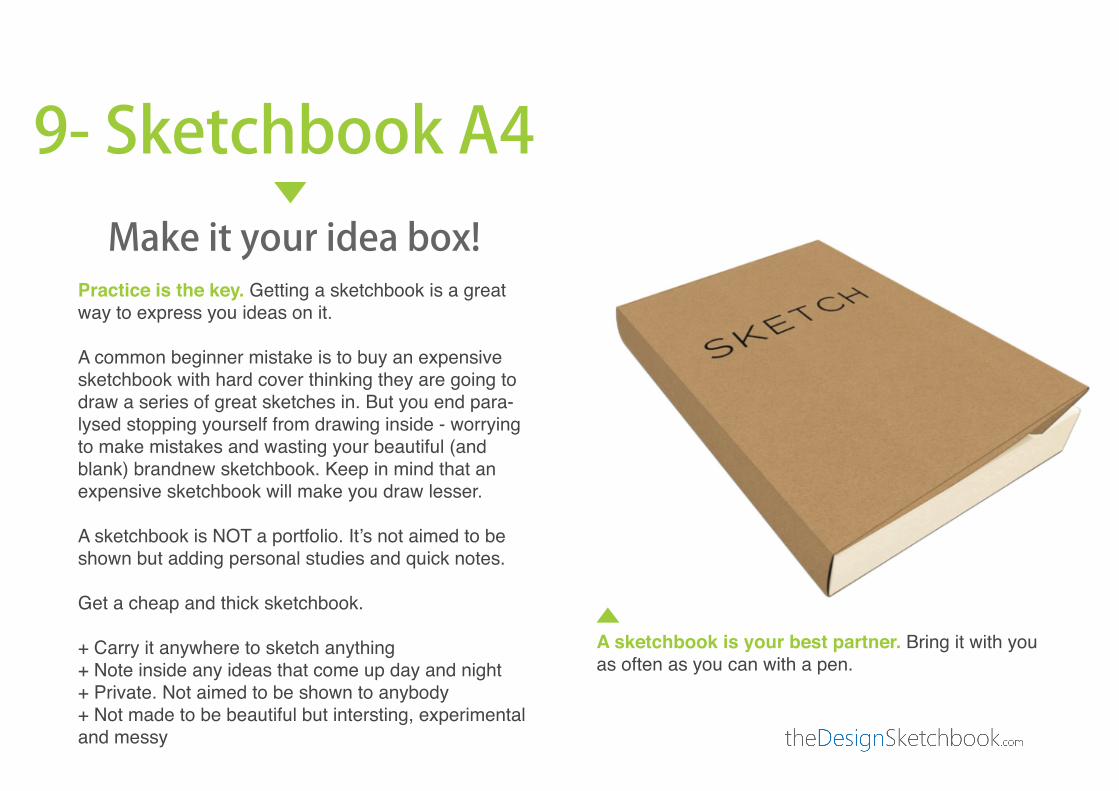
Practice is the key. Getting a sketchbook is a great way to express you ideas on it.
A common beginner mistake is to buy an expensive sketchbook with hard cover thinking they are going to draw a series of great sketches in. But you end para-lysed stopping yourself from drawing inside - worrying to make mistakes and wasting your beautiful (and blank) brandnew sketchbook. Keep in mind that an expensive sketchbook will make you draw lesser.
A sketchbook is NOT a portfolio. It’s not aimed to be shown but adding personal studies and quick notes.
Get a cheap and thick sketchbook.
+ Carry it anywhere to sketch anything+ Note inside any ideas that come up day and night+ Private. Not aimed to be shown to anybody+ Not made to be beautiful but intersting, experimental and messy
A sketchbook is your best partner. Bring it with you as often as you can with a pen.
9- Sketchbook A4Make it your idea box!

If you find a ball point pen that suits you, buy them in pack if you can.
Train with the same pen and you will better sharpen your pen pressure sensitivity.
Avoid the “fancy” pens such as mini size or multi colours pen. Usually the grip is not as good as regular pen. Oh, expensive pens doesn’t automatically means good. There is a lot of cheap pens that give great result.
Bring your A3 files at school with this portfolio. I recommend to get one with elastic instead of ribbons. It’s faster and easier to use. Plus, it won’t open acci-dentally.
10- Art portfolioChoose the elastic version

The Stabilo Stylist is a great choice for drawing on Layout paper (Special paper for markers).
+ The ink doesn’t blend in contact with marker’s ink, compared to ball point pen.+ Good pen pressure sensitivity– The tip dries fast. Remember to put back the cap after usage. – Draw gently with the pen, the nib is fragile and get shorter from the “paper abrasion”
Make sure to get the REPOSITIONABLE spray. Never buy any permanent one.It allows you to glue your work on the foam board and readjust the position if needed even hours later with a minimum of damage. If you make some mood board manually (not digital), use preferably that spray instead of a regular UHU stick of glue.
+ Repair your mistake anytime+ Clean work+ Spray a light layer of glue is enough– Need an open space
11- Spray mountBuy a repositionable
adhesive spray
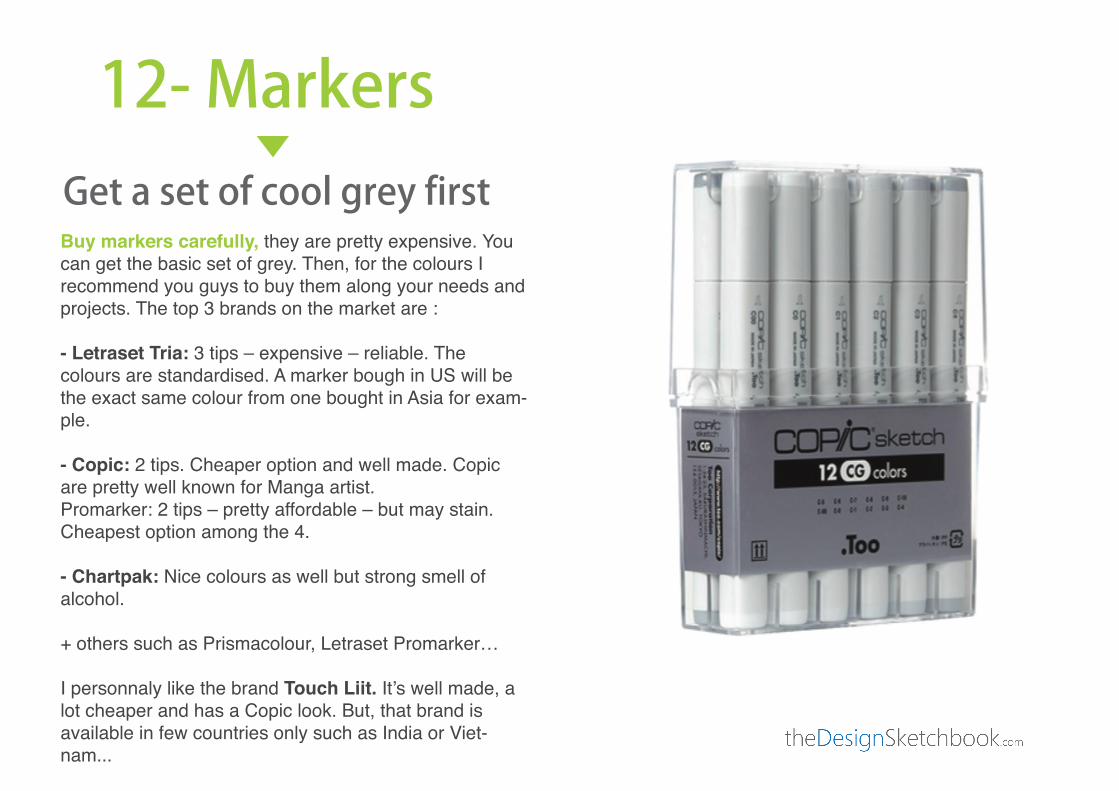
Buy markers carefully, they are pretty expensive. You can get the basic set of grey. Then, for the colours I recommend you guys to buy them along your needs and projects. The top 3 brands on the market are :
- Letraset Tria: 3 tips – expensive – reliable. The colours are standardised. A marker bough in US will be the exact same colour from one bought in Asia for exam-ple.
- Copic: 2 tips. Cheaper option and well made. Copic are pretty well known for Manga artist.Promarker: 2 tips – pretty affordable – but may stain. Cheapest option among the 4.
- Chartpak: Nice colours as well but strong smell of alcohol.
+ others such as Prismacolour, Letraset Promarker…
I personnaly like the brand Touch Liit. It’s well made, a lot cheaper and has a Copic look. But, that brand is available in few countries only such as India or Viet-nam...
12- MarkersGet a set of cool grey first

12.1- BlenderTreat yourself
Bonus:A blender is a colourless marker. First, draw with a regular marker, then apply the blender on it. You will make some nice gradients.
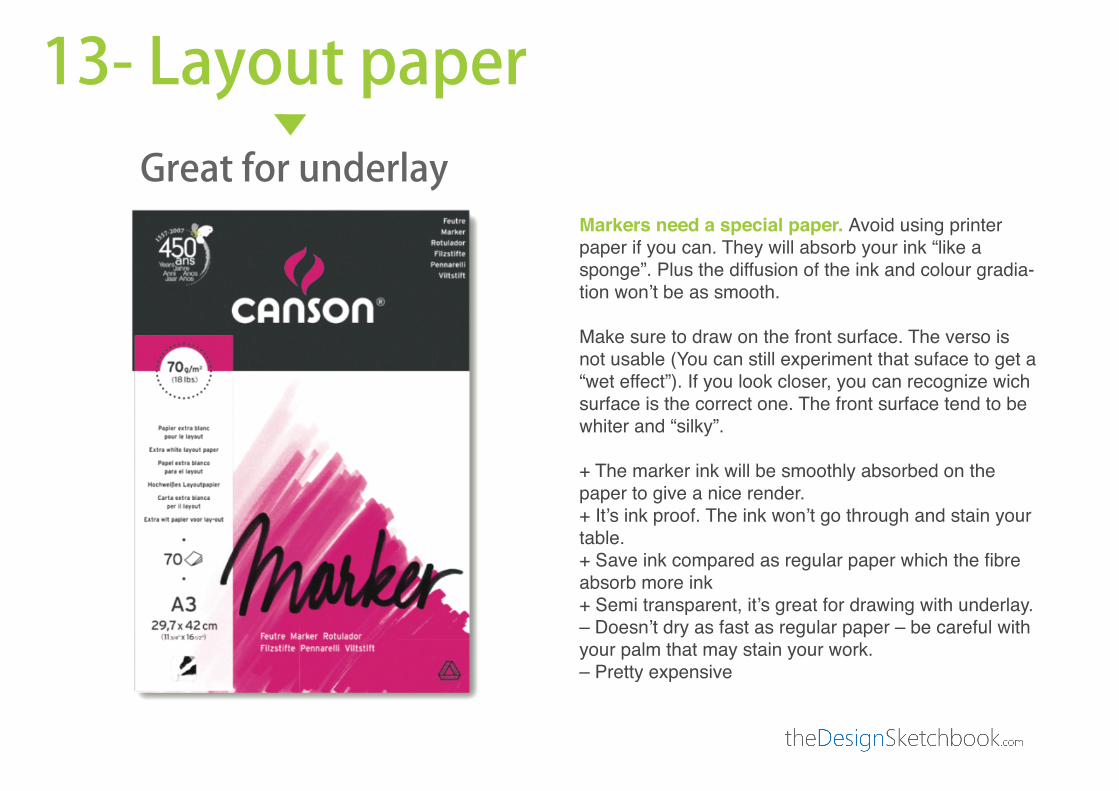
Markers need a special paper. Avoid using printer paper if you can. They will absorb your ink “like a sponge”. Plus the diffusion of the ink and colour gradia-tion won’t be as smooth.
Make sure to draw on the front surface. The verso is not usable (You can still experiment that suface to get a “wet effect”). If you look closer, you can recognize wich surface is the correct one. The front surface tend to be whiter and “silky”.
+ The marker ink will be smoothly absorbed on the paper to give a nice render.+ It’s ink proof. The ink won’t go through and stain your table.+ Save ink compared as regular paper which the fibre absorb more ink+ Semi transparent, it’s great for drawing with underlay.– Doesn’t dry as fast as regular paper – be careful with your palm that may stain your work.– Pretty expensive
13- Layout paperGreat for underlay
Bring your A3 files at school with this portfolio. I recommend to get one with elastic instead of ribbons. It’s faster and easier to use. Plus, it won’t open acci-dentally.
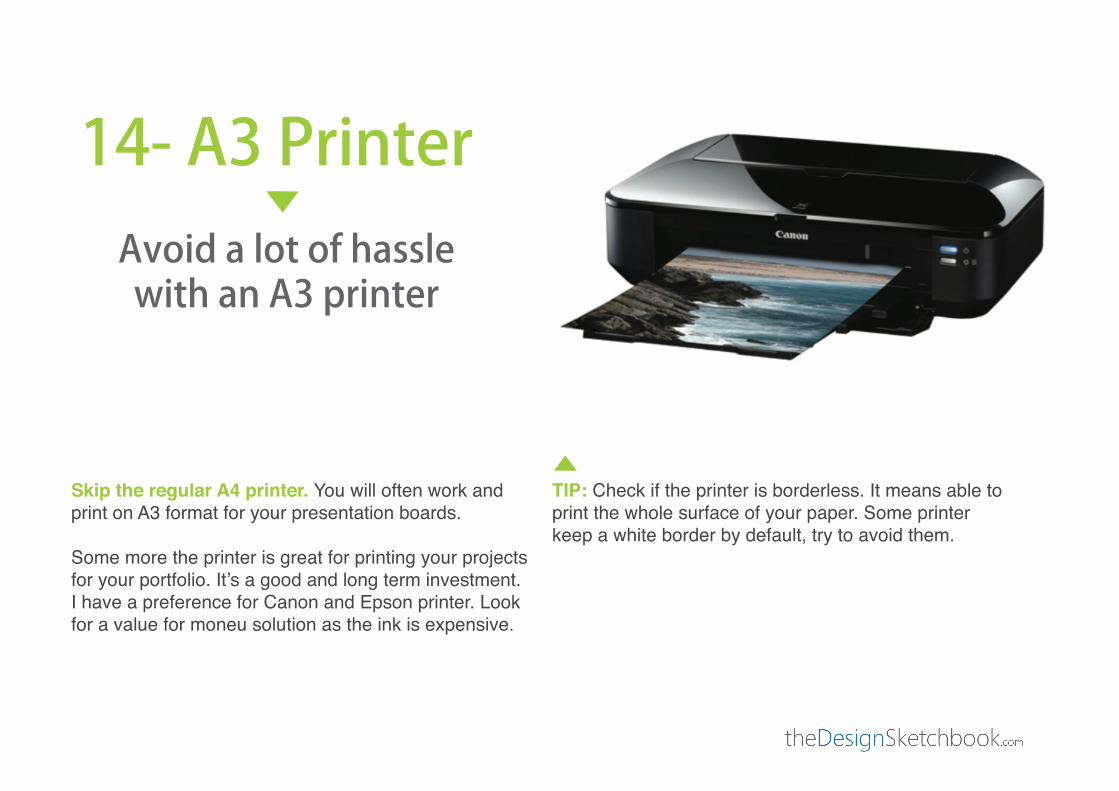
TIP: Check if the printer is borderless. It means able to print the whole surface of your paper. Some printer keep a white border by default, try to avoid them.
Skip the regular A4 printer. You will often work and print on A3 format for your presentation boards.
Some more the printer is great for printing your projects for your portfolio. It’s a good and long term investment. I have a preference for Canon and Epson printer. Look for a value for moneu solution as the ink is expensive.
14- A3 PrinterAvoid a lot of hasslewith an A3 printer
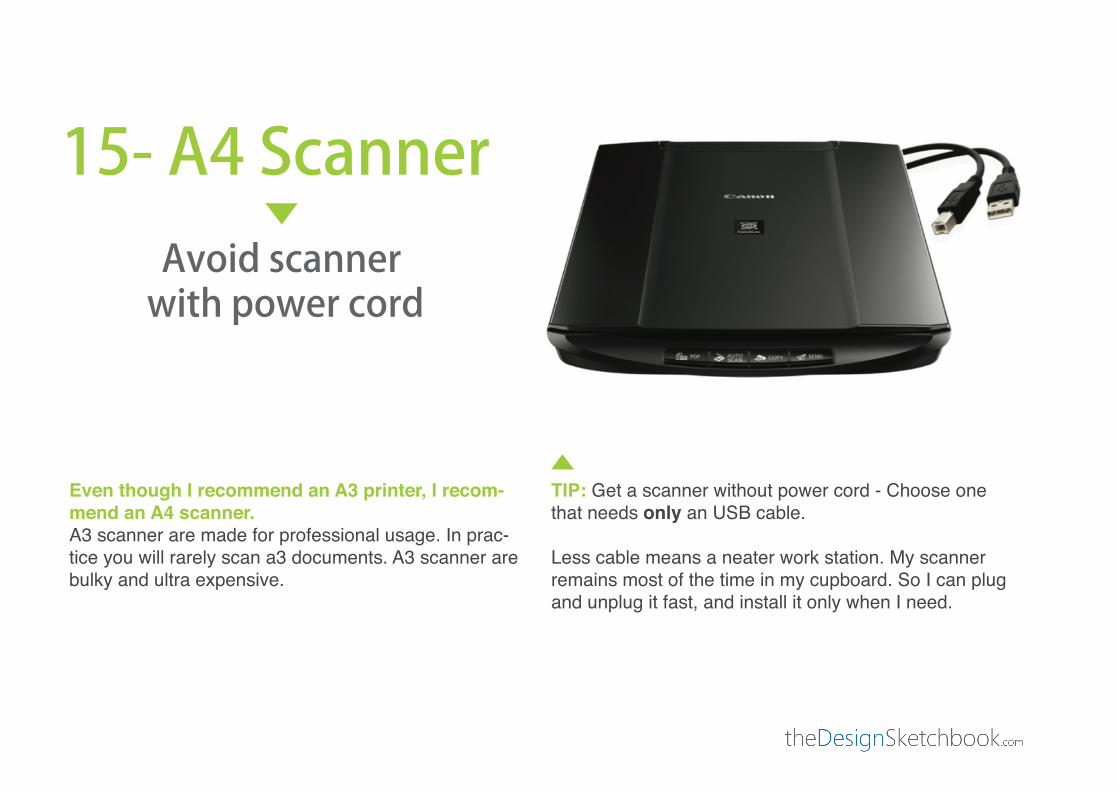
Even though I recommend an A3 printer, I recom-mend an A4 scanner.A3 scanner are made for professional usage. In prac-tice you will rarely scan a3 documents. A3 scanner are bulky and ultra expensive.
TIP: Get a scanner without power cord - Choose one that needs only an USB cable. Less cable means a neater work station. My scanner remains most of the time in my cupboard. So I can plug and unplug it fast, and install it only when I need.
15- A4 ScannerAvoid scanner with power cord

Definitely Mac !Most industrial designers might answer Mac as well.
IMPORTANT NOTE: Consider a PC if you plan to use 3D software that Mac doesn’t support, such as Solid-works or 3DsMax (Rhino 3D is compatible). Ask your school which softwares they plan to teach you.
I would recommend a portable computer to work from anywhere. I recommend a 15” screen at least.
Bonus: Plug an extra monitor to work in Dual screen at home. It’s very convenient and confortable for Photoshop and Illustrator for example. (Or consider a Wacom Cintiq as an extra screen)
Why I like Mac a lot+ Safe environment+ No virus (super rare)+ Low updates needed compared to Windows+ Possibility to install Windows on a Mac using the software Parallel Desktop.+ Easy to choose which one is made for you
If you are a PC user, it’s all fine. They also give amaz-ing performance. Just make sure to choose the one that fit your needs and get an anti-virus.
16- Mac or PC?Opt for a safe environment
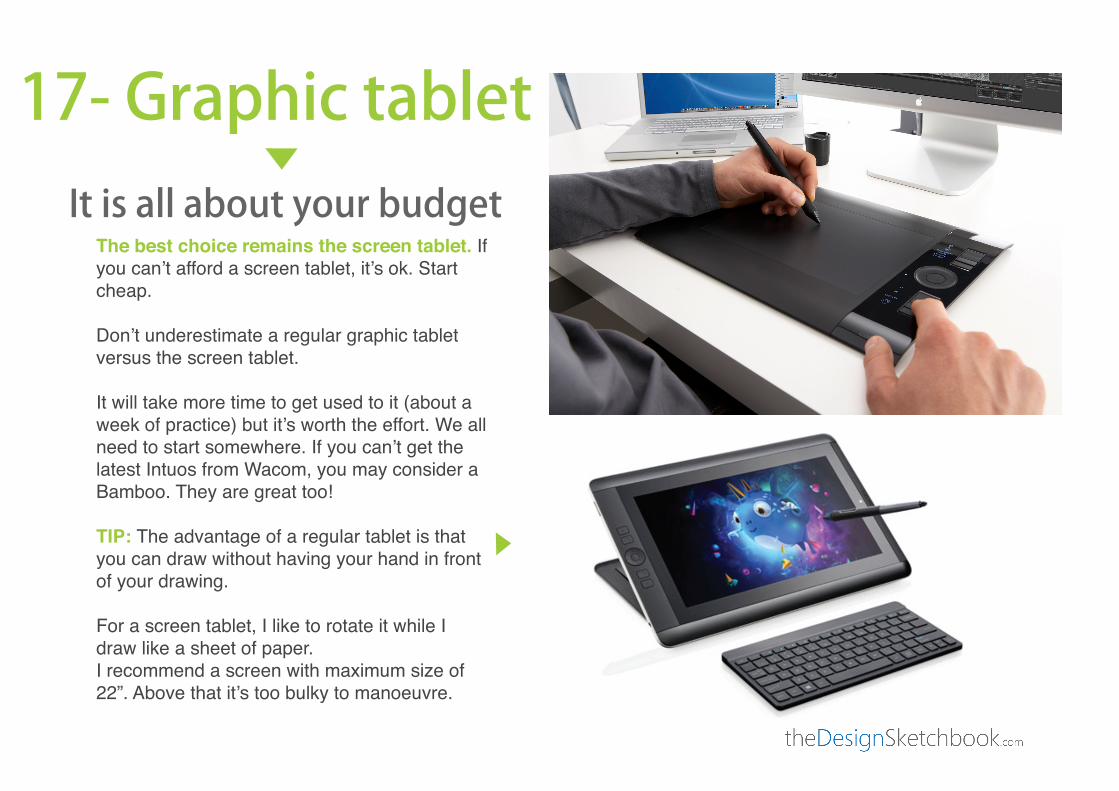
The best choice remains the screen tablet. If you can’t afford a screen tablet, it’s ok. Start cheap.
Don’t underestimate a regular graphic tablet versus the screen tablet.
It will take more time to get used to it (about a week of practice) but it’s worth the effort. We all need to start somewhere. If you can’t get the latest Intuos from Wacom, you may consider a Bamboo. They are great too!
TIP: The advantage of a regular tablet is that you can draw without having your hand in front of your drawing.
For a screen tablet, I like to rotate it while I draw like a sheet of paper.I recommend a screen with maximum size of 22”. Above that it’s too bulky to manoeuvre.
17- Graphic tabletIt is all about your budget

“Discovery is said to be an accidentmeeting a prepared mind.”
- Albert Szent-Gyorgyi

Good shopping!See you on the blog!
Cheers,- Chou-Tac

Even though I recommend an A3 printer, I recom-mend an A4 scanner.A3 scanner are made for professional usage. In prac-tice you will rarely scan a3 documents. A3 scanner are bulky and ultra expensive.