Embed Size (px)
Citation preview

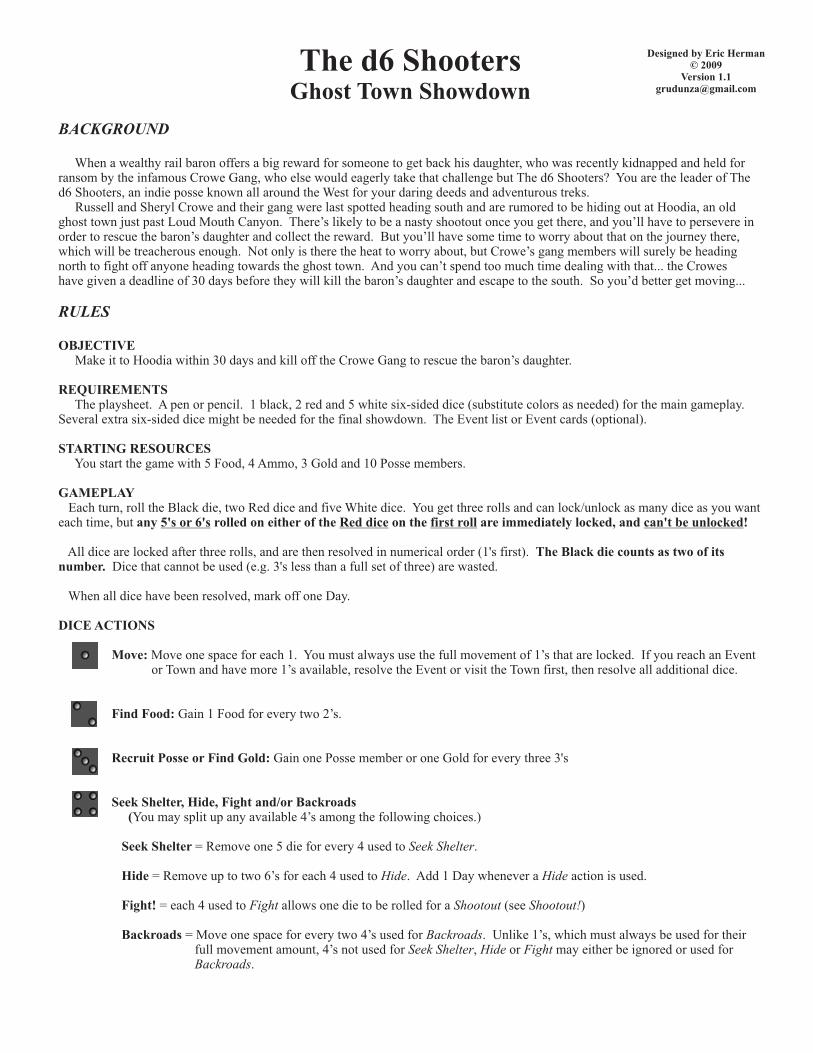
BACKGROUND When a wealthy rail baron offers a big reward for someone to get back his daughter, who was recently kidnapped and held for ransom by the infamous Crowe Gang, who else would eagerly take that challenge but The d6 Shooters? You are the leader of The d6 Shooters, an indie posse known all around the West for your daring deeds and adventurous treks. Russell and Sheryl Crowe and their gang were last spotted heading south and are rumored to be hiding out at Hoodia, an oldghost town just past Loud Mouth Canyon. There’s likely to be a nasty shootout once you get there, and you’ll have to persevere in order to rescue the baron’s daughter and collect the reward. But you’ll have some time to worry about that on the journey there, which will be treacherous enough. Not only is there the heat to worry about, but Crowe’s gang members will surely be heading north to fight off anyone heading towards the ghost town. And you can’t spend too much time dealing with that... the Crowes have given a deadline of 30 days before they will kill the baron’s daughter and escape to the south. So you’d better get moving...
RULES
OBJECTIVE Make it to Hoodia within 30 days and kill off the Crowe Gang to rescue the baron’s daughter.
REQUIREMENTS The playsheet. A pen or pencil. 1 black, 2 red and 5 white six-sided dice (substitute colors as needed) for the main gameplay. Several extra six-sided dice might be needed for the final showdown. The Event list or Event cards (optional).
STARTING RESOURCES You start the game with 5 Food, 4 Ammo, 3 Gold and 10 Posse members.
GAMEPLAY Each turn, roll the Black die, two Red dice and five White dice. You get three rolls and can lock/unlock as many dice as you want each time, but any 5's or 6's rolled on either of the Red dice on the first roll are immediately locked, and can't be unlocked!
All dice are locked after three rolls, and are then resolved in numerical order (1's first). The Black die counts as two of its number. Dice that cannot be used (e.g. 3's less than a full set of three) are wasted.
When all dice have been resolved, mark off one Day.
DICE ACTIONS
Move: Move one space for each 1. You must always use the full movement of 1’s that are locked. If you reach an Event or Town and have more 1’s available, resolve the Event or visit the Town first, then resolve all additional dice.
Find Food: Gain 1 Food for every two 2’s.
Recruit Posse or Find Gold: Gain one Posse member or one Gold for every three 3's
Seek Shelter, Hide, Fight and/or Backroads (You may split up any available 4’s among the following choices.)
Seek Shelter = Remove one 5 die for every 4 used to Seek Shelter.
Hide = Remove up to two 6’s for each 4 used to Hide. Add 1 Day whenever a Hide action is used.
Fight! = each 4 used to Fight allows one die to be rolled for a Shootout (see Shootout!)
Backroads = Move one space for every two 4’s used for Backroads. Unlike 1’s, which must always be used for their full movement amount, 4’s not used for Seek Shelter, Hide or Fight may either be ignored or used for Backroads.
The d6 ShootersGhost Town Showdown
Designed by Eric Herman© 2009
Version [email protected]

The d6 ShootersGhost Town Showdown
Extreme Heat! (immediately locks if rolled on a Red die on the first roll)
The Crowe Gang Attacks! (immediately locks if rolled on a Red die on the first roll)
Reroll each remaining 5 (that wasn't removed by Seek Shelter). For each 4-6 rolled, lose 1 Posse.
If any 4's are used to Fight, then all 6's are used for a Shootout (see Shootout!). Otherwise, reroll each 6 and lose one Posse for each 3-6 rolled.
Shootout! When 6's are rolled, there will be a Shootout if any 4's are used to Fight. Reroll all 6's for the Griggs Gang and add them together. Reroll the 4's used to Fight and add them together, plus the amount of Ammo you have, to get your total. The high score wins (reroll any ties). Remove one die from the losing side and continue until one side has no dice left. If you win, check off one of the boxes in the “Crowe Gang” area on the playsheet (Russell and Sheryl are never crossed off from a Shootout). If the Gang wins the Shootout, you lose 1 Posse for each remaining Gang die.
** After EVERY Shootout, reduce your total Ammo by one. ** (Ammo total does not go below 0.)
YOUR POSSE The number of your Posse represents the number of people in your Party, as well as their general morale and strength. You beginwith 10 Posse and can never have more than 10 in your Posse. If your total Posse is ever reduced to 0, you lose the game.
DAYS Each turn is considered to be one Day. Some turns may end up costing more Days due to Events or other situations. Mark off the number of Days as you go. If you do not reach Hoodia within 30 Days, you lose the game. If a "Hide" action or an Event adds a Day, mark that off immediately. If that reaches a "Rations" day, Food must be payed immediately before continuing. Mark another Day off as usual at the end of the turn.
FOOD Food represents your total source of sustenance, including water. You begin the game with 5 Food. At the end of every 5th Day you must hand out Rations and provide one Food to each person in your Posse, including yourself. If you don't have enough Food to feed everyone, you spend what you have and lose as many people as were not fed. If you have no Food at all remaining when Rations need to be handed out, you lose the game. You cannot carry more than 10 Food at a time.
EVENTS Events are triggered whenever you reach certain spaces on the map. If you have additional movement dice available when an Event space is reached, pause movement at the Event space and continue after the Event is resolved. When an Event is reached, draw an Event card, or to use the Event list, roll two dice and compare the numbers rolled to the Event list, choosing the corresponding card to resolve (e.g. for a roll of 6 and 5, use the “Army Deserters” card, labeled 5-6).
If you do not wish to use the Event cards/list, roll a die when an Event is encountered and consult the following chart: 1 = SHORTCUT: Move 3 additional spaces immediately 2 = ANIMAL HERD: You may spend 1 Ammo for 2 food 3 = WAGON TRAIN: You may buy (1 Gold = 2 Food or 2 Ammo) or sell (2 Food or 2 Ammo = 1 Gold) 4 = OPEN ROAD: Nothing happens. 5 = LOST: Add 1 Day and lose 1 Food 6 = POSSE DEMANDS: Either lose 2 Posse -or- lose 1 Gold and 1 Food -or- lose 2 Gold -or- lose 2 Food
If you cannot fulfill the requirements of an Event (e.g. you are “Lost” and have no Food left), you lose the game.
MOVEMENT You must always move the exact amount of spaces indicated by the number of 1 dice you have locked at the end of your rolls.If you reach an Event or Town, resolve the Event or visit the Town first, then resolve any remaining dice. Backroads travel using two 4’s is a specific action choice and may be ignored. Movement from 1’s and from Backroads 4’s is considered separate, so movement stops after 1’s and after 4’s, which may be relevant for Resource Spaces (see below).
RESOURCE SPACES There are some spaces on the map that will provide a bonus or a loss to your resources if the space is landed on exactly (not merely passed over). If you land on one of these spaces, gain or lose one resource as indicated:-P+ = -/+ Posse-F+ = -/+ Food-G+ = -/+ Gold -A+ = -/+ AmmoD+ = + Day (Days can only be added)

The d6 ShootersGhost Town Showdown
TOWNS At each Town, you can buy Items.
1 = Compass (2) One Red 1's counts as two 1’s 2 = Hunter (3) Counts as a Posse member; One Red 2 counts as two 2’s 3 = Lucky Charm (2) Each turn you may change one locked White die by one pip 4 = Binoculars (2) May reroll one Red 5 or 6 rolled on the first roll 5 = Medicine/Bandages (2) Prevent all Posse loss from a single source, then discard 6 = Better Guns (*) Add +* to your final total during Shootouts (* = the Gold you spent, up to 3)
THE GHOST TOWN SHOWDOWN
If you make it to Hoodia, the turn immediately ends and all additional dice are disregarded. Make two separate dice groups; one group with a number of dice equal to your current Posse, and one group of dice equal to the number of Crowe Gang members remaining on the Crowe Gang section of the playsheet. Russell and Sheryl are never crossed off from Shootouts, so the Crowe Gang should always have at least two dice available to begin with, if not more.
COMBAT For each round of combat, roll both groups of dice separately. For each 4-6 your Posse rolls, you may either remove a Crowe Gang die that was 1-2 or set aside one Crowe Gang die that was 5-6. For each remaining Crowe Gang die that is 5-6, remove one of your Posse dice. Once per round of combat, you may spend 1 Ammo to reroll up to three dice (three dice total, but from either side).This continues until one side has no dice remaining. (Note that to “remove” a die means that it will not return. To “set aside” a die means that it is out of the current round of combat, but will return to its group for the next round.)
TACTICS During combat, you may use the following Tactics, one time only. You must declare which Tactic you are using before rolling.
DEFEND: For each 3-6 your Posse rolls, remove a Crowe Gang die that is 1-2. For each remaining Crowe Gang die that is a 6 remove one of your Posse dice. CHARGE: For each 3-6 your Posse rolls, remove a Crowe Gang die that is 1-3. For each remaining Crowe Gang die that is 4-6 remove one of your Posse dice. DISTRACT: You may change up to three pips total on any dice. This may be combined in any way. For example, you could change one die by three pips, or three dice by one pip, or one die by one pip and another die by two pips.
END OF THE GAME If at any time your Posse is reduced to 0, or it is a Rations Day and you have no Food remaining, or you cannot fulfill the needsof a particular Event as stated, the game is over and you lose. The game is also over after the 30th Day, whether you’ve made it to Hoodia or not. You must reach Hoodia on the 30th Day or sooner and defeat the remaining Crowe Gang members there in order to win the game. Once Hoodia has been reached, any other dice are disregarded for that turn and you proceed directly to the GhostTown Showdown (you do not give out Rations if that would have been a Rations Day).
SCORING (only applies if you reach Hoodia within 30 days and defeat the Crowe Gang there) Reward = 15 points Each Day you arrived early = 2 points Each remaining Posse member = 3 points Each Gold you have = 3 points Each Food you have = 1 point Every 2 Ammo you have = 1 point
Game designed by Eric Herman Endres © 2009 Many thanks to folks at BGG and F:AT for valuable input.
You may buy as many Items as you wish and can afford, or none if you choose. If you are interested in purchasing something at a Town, draw card from the Items deck to see what is available. If you are not using the Items deck, then use the following reference:
ITEMS THAT ARE ALWAYS AVAILABLE TO BUY 2 Food or 2 Ammo for 1 Gold 5 Food or 5 Ammo for 2 Gold Up to 2 Posse Members for 1 Gold each
SPECIAL ITEMS Roll a die to see what Special Item (cost in Gold) is available. (One per Town. You may only have one per type. You may reroll if you already have the Item that was rolled.):

The d6 ShootersGhost Town Showdown
TURN EXAMPLE
CURRENT LOCATION & RESOURCES 18 Days have passed. Joe’s Posse is two spaces past the Town of Levitra. Food is at 4, Posse is at 6, Ammo is at 4 and Gold is at 0.
First roll: Joe rolls the Black die, 2 Red dice and 5 White dice and gets 1 on the Black die, 1, 2, 4, 5 and 6 on the White dice and 6 and 6 on the Red dice. The Red 6’s are locked automatically. Joe opts to lock the black1, the white 1, 2 and 4 and the Red 4.
FIRST ROLL
SECOND ROLL
THIRD ROLL
LOCKED
LOCKED
LOCKED
Joe rerolls the remaining two white dice and gets 3 and 5, neither of which he wants to keep. He decides to unlock the white 2 to have a better chance at getting more 4’s, which he wants to defend against the 6’s.
Joe rolls the three remaining white dice and gets 2, 4 and 5. Three rolls have passed, so all dice are locked now.
The dice are resolved in numerical order, so for the1’s, Joe’s Posse moves three spaces (the Black die counts as two), which lands them on an Event space. He rolls for the Event (using the basic table on the playsheet) and gets a 5, which is “Lost: Lose 1 Day and 1 Food”. He marks off a Day and discards one Food, bringing his total Days to 19 and his Food down to 3.
Next, the 2’s are resolved, but since he only has one 2, that is not enough to gain a Food with, so it is wasted.
Joe must decide what to do with the 4’s he has. He decides to use one 4 as Shelter and one to Fight against the attacking Gang members (the 6’s).
For the Shelter action, the 4 die removes the 5 die, so Joe will not lose any Posse members to the Extreme Heat.
Since Joe is using a 4 die to Fight against the attacking 6’s, there will be a Shootout. Joe rerolls his one 4 die and gets a 5, to which he adds the 4 Ammo that he has remaining, for a total of 9. The two 6’s are rerolled and the result is 3 and 4, for a total of 7. Joe has won this round and so one of the attacking dice are removed, leaving one on each side. Joe rolls a 2, adding the 4 Ammoagain, to get 6. The attacker’s remaining die is rolled for a 6, so they tie and must roll again. Joe rolls a 1 and adds the 4 Ammo to get 5. The attacker’s die is again a 6, so Joe has lost the Shootout and loses one Posse member (for the one remaining Gang die). He now has 5 Posse. At the end of every Shootout, Joe must reduce his Ammo by one, so he now has only 3 Ammo left.
That ends the turn, so Joe checks off the next Day, which is Day 20, a Rations Day, so he must pay Food to each of his Posse.He only has 3 Food remaining, and there are 5 Posse members, so two Posse members are lost, and Joe is now out of Food.
Alternately, Joe might have opted to use his other 4 to Hide against the 6’s. He could have removed both 6’s by hiding with the 4,and he’d have been guaranteed not to lose any Posse to the attacking Gang members. However, he would have had to add a Day, and he wanted the chance to win a Shootout to reduce the number of Crowe Gang members at Hoodia. So he opted to Fight, whichdidn’t work out... Joe might also have used both 4’s to Fight, which would have made the Shootout a more likely win, but would have given a chance for the Heat to claim a Posse member. Still, considering that he was going to lose two Posse members anyway for not having enough food on Rations Day, that was probably the best option at that time. He could also have used the two 4’s to take the Backroads and move one space (which would gain him 1 Ammo), but that would have left him completely defenseless against both the Extreme Heat and the Crowe Gang attack.
- - - - - - - - - - - - - - - - - - - - - -

The d6 ShootersGhost Town Showdown
SHOWDOWN EXAMPLE
SHOWDOWNIf you reach Hoodia within 30 Days, make two separate dice groups; one group with
dice equal to your Posse and one group with dice equal to the remaining Crowe Gang. Roll all dice (keep them separate) and resolve each round of combat as follows: For each 4-6 that you rolled for your Posse, either remove one Crowe die that is 1-2 or set aside one Crowe die that is 5-6. For each remaining Crowe die that is 5-6, remove one Posse die. You may spend 1 Ammo per round of combat to reroll up to three dice (from either side). Return dice set aside to their group and roll remaining dice again. Continue until one side has no dice remaining. If the Crowe Gang is defeated, you win!
Joe’s Posse has reached Hoodia on the 28th Day and will now fight the remaining Crowe Gang members there. During the course of the journey, he was able to win 13 Shootouts, so that leaves five Gang Members, plus Russell and Sheryl, for a total of seven dice on the Crowe Gang side. Joe has 5 Posse members remaining and 2 Ammo.
Posse dice
Crowe Gang dice
In the first round of combat, Joe decides to use the “Distract” tactic.He rolls all of the dice, and gets this result:
X
He uses “Distract” to change the pipson three dice, changing the yellow 4’sto 5’s and the red 3 to a 2:
Next, he spends one Ammo to reroll up to three dice.He rerolls the red 6 and the red 5’s, rolling 3, 6 and 4:
At this point, Joe can use his two 5’s and one 6 to either remove the three red 2’s, or remove two of them and set aside the red 6,which would prevent any loss of his Posse. But he takes the first option and removes the three red 2’s, losing one of his dice fromthe remaining red 6. Now each side has 4 dice. Joe decides to use the “Charge” tactic and rolls all of the dice:
X
Joe decides to let that result stand as is and save his last Ammo for a later roll. He will remove two of the red dice, but two of his dice are also removed, leaving two on each side. For the next round, Joe uses the “Defend” tactic and rolls all of the dice:
X
At this point, Joe will not remove any dice and will lose one himself,so he spends his last Ammo to reroll his 1 and both Red dice:
With his 5, Joe can remove the red 1. That leaves two dice for Joe and 1 die for the Gang. Joe has no tactics remaining and noAmmo remaining. He rolls the dice:
He cannot remove the red die, but with his 6, Joe can set the red 5 aside so it doesn’t do any damage. He rolls again:
Neither side can do any damage, so the dice are rolled again:
With Joe’s 5, he can remove the red 2. Joe wins the Showdown!
X
X X X X
X X X X X X X X

The d6 Shooters: Ghost Town Showdown - EVENT LIST
Roll two dice and choose the corresponding Event. (e.g. A roll of 4 and 3 would be 3-4: Posse Demands)
1-1: Tumbling Tumbleweeds. A tumbleweed tumbles on by and runs right into a cactus. You laugh and proceed as normal.
1-2: Traitor: One of your Posse turns out to be a member of Crowe’s gang. Lose 1 Posse and add one Crowe Gang member.
1-3: Rattlesnakes! Roll one die per Posse member. Add 1 Day for the first 6 rolled. Lose 1 Posse member for any additional 6’s rolled.
1-4: Stampede! Roll two dice. If you roll lower than the total number of your Posse, lose 2 Posse.
1-5: Deer Herd. A herd of deer passes by, and you see a lot more down across the valley. You may spend 1 Ammo to gain 2 Food. OR You may spend 2 Ammo to roll a die and get Food equal to the number rolled +1.
1-6: There’s Gold in Them Hills! Until you reach the next Town or Event, you may change one White die to a 3 after the first roll of each turn.
2-2: Wagon Train. You may buy or sell Food and/or Ammo at a rate of 2 Food or 2 Ammo for 1 Gold.
2-3: Wagon Train. You may buy or sell Food and/or Ammo at a rate of 3 Food or 3 Ammo for 1 Gold.
2-4: Slow Train Crossing. No further movement (from 1’s or 4’s) can be made on this turn.
2-5: Downhill Ride. Red 1’s count as two moves until you reach the next Town or Event. (Roll again if you have the Compass.)
2-6: Crowe’s Hometown. If you stop at the next Town you reach, you will have a Shootout there; two dice against two dice.
3-3: Shortcut? One of your Posse suggests a shortcut. If you decide to try it, roll a die and subtract 3 from the number rolled. If the total is positive, move ahead that many spaces. If the total is -1, add 1 Day. If the total is -2, add 2 Days.
3-4: Posse Demands. Your Posse is demanding more money and food. Lose 2 Gold or 2 Food. OR Lose 1 Gold and 1 Food. OR Lose 2 Posse members. If you cannot fully meet one of those options, lose as much as you can.
3-5: Fishing Hole. Roll a die for each Posse member. Gain 1 Food for each 1-2 rolled.
3-6: Bandits! Bandits attack your Posse. You may give them all of your Gold (or, if you have no Gold, all of your Food and Ammo), or you may try to fight them off. If you fight, there is a Shootout with two dice per side. If you lose the Shootout, you lose one Posse per Bandit die left, and lose all Gold, Food and Ammo. If you win, do not cross off a Crowe Gang member.
4-4: Prisoner. The next time you roll a 6, you may put the die on this sheet to take a Crowe gang member “prisoner”. If you lose a Shootout before you reach the next Town, return the die to the dice pool and lose 1 Gold (if you have it). If you reach the next Town with the die still on this sheet, gain 3 Gold and return the die. While on this sheet, the die does not take part in any Shootouts.
4-5: Campfire Songs. You may spend 1 Food to stop early for the night and make a campfire to share stories and sing songs with your Posse, which would be good for their morale. If you do that, add an extra die to your Fight dice pools for all Shootouts you are involved in until you reach the next Town or Event.
4-6: Critters Everywhere. Until you reach the next Town or Event, lock one Red die on 2 at the beginning of each turn.
5-5: Lost Family. You come across a pioneer family that is lost. If you stop to help them, add 1 Day. They have nothing to offer in return but their thanks and a blessing. On your next turn, you may lock the black die on any number before rolling it.
5-6: Indian Guide. You come across an Indian who knows this area very well. He joins you for part of your journey, but he is never considered to be part of your Posse. Before each turn, take one Red die and lock it, with whatever number you choose. You may not unlock that die this turn. The Indian Guide moves on when you reach the next Town or Event.
6-6: Army Deserters. You come across two Army deserters. You may add them to your Posse. The two circles below represent them. (Do not add them to your Posse number on the playsheet.) You may cross out the circles to use them for Posse loss at any time, and they are considered Posse members for all other purposes (Rations, etc.). Before each turn, roll a die for each intact circle on this sheet. If you roll a 5, cross out the circle and lose 1 Gold (if you have it). That person has deserted you and stole some of your Gold. If you roll a 6, cross out the circle and lose 1 Food and 1 Gold (or as much Food/Gold as you have).