Embed Size (px)
Citation preview
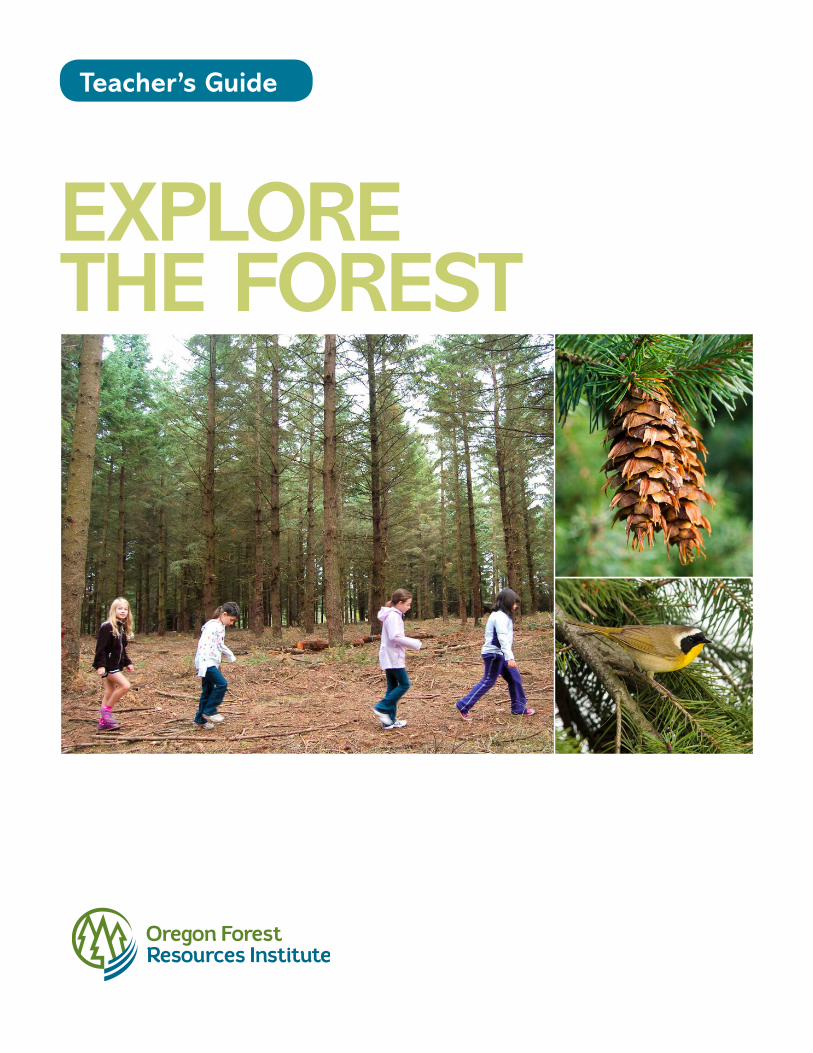
EXPLORE THE FOREST
Teacher’s Guide
2 EXPLORE THE FOREST | TEACHER’S GUIDEOregon Forest Resources Institute
CONTENTSAbout Explore the Forest ................................................................................................................. 3
Relevant education standards ....................................................................................................... 4
Exploring the forest with your students ......................................................................................... 6
Activity 1: Modeling a tree ............................................................................................................ 7
Activity 2: Site investigation ......................................................................................................... 8
Activity 3: Oregon forest legends ................................................................................................ 11
Activity 4: Design a forest plant ..................................................................................................13
Activity 5: Making paper ............................................................................................................15
Activity 6: Tree rings and climate ...............................................................................................16
Resources .................................................................................................................................19
Glossary ...................................................................................................................................20
AcknowledgmentsADVISORY GROUP AND REVIEW TEAMKathy Behrends, Salem-Keizer School District
Nickie Carter, Beaverton School District
Maureen Foelkl, Salem-Keizer School District
Sandy Hoppenrath, Beaverton School District
Susan Shepard, Neah-Kah-Nie School District
PROJECT TEAM
OFRI staff
Paul Barnum, Executive Director
Inka Bajandas, Public Outreach Manager
Mike Cloughesy, Director of Forestry
Norie Dimeo-Ediger, Director of K-12 Education Programs
Rikki Heath, Environmental Educator
Julie Woodward, Senior Manager, Forestry Education
Curriculum writer
Leslie Comnes, Writing for Education
The Oregon Legislature created the Oregon Forest Resources Institute in 1991 to advance public understanding of how forest stewardship meets the social, environmental and economic needs of both present and future generations. OFRI works closely with the scientific, academic and educational communities at Oregon State University, the Oregon Department of Forestry and other agencies to ensure its K-12 resources are accurate and objective.
Oregon Forest Resources Institute 317 SW Sixth Ave., Suite 400 Portland, OR 97204-1705 971-673-2944 LearnForests.org | OregonForestCareers.org
Follow OFRI on Facebook
© 2016 Oregon Forest Resources Institute
3EXPLORE THE FOREST | TEACHER’S GUIDE Oregon Forest Resources Institute
ABOUT EXPLORE THE FORESTThis teacher’s guide is a companion to Explore the Forest, a standards-based informational text that introduces students to Oregon’s forests. Through engaging graphics, age-appropriate language and student activities, it helps students understand the basics of the forest ecosystem and ways that people depend on forests. This guide contains class activities designed to deepen student understanding of the concepts presented in the book. Explore the Forest was reviewed by educators to ensure it supports classroom instruction and enhances student learning.
1Lieberman, G. A., and Hoody, L. L. Closing the Achievement Gap: Using the Environment as an Integrating Context for Learning. San Diego: State Education and Environment Roundtable. 1998. Executive Summary at http://www.seer.org/extras/execsum.pdf.
Why teach about Oregon’s forests?All life, including our own, depends on forests. Forests help filter fresh water, supply oxygen, modulate temperatures and rainfall, provide habitat for diverse animal and plant species, and store atmospheric carbon. In Oregon, nearly 50 percent of our state’s 61 million acres is forestland. Our forests supply renewable resources for lumber, paper and heating, along with jobs that support families and communities. They also provide us with places for recreation and relaxation.
Because we depend on forests in many different ways, Oregonians must play an active role in ensuring the long-term sustainability of our forests. To do this, our students need the knowledge and skills to make decisions and understand the impact of their choices. They need to understand how forests work and how people are connected to them ecologically, economically and socially.
Studies have found that direct experiences in nature – with students actively involved in their own learning – can improve students’ overall academic performance, self-esteem, community involvement and personal health.1 Young people in Oregon, as in other parts of the United States, are spending more time indoors and less time connecting with nature. Now more than ever, we must find ways to engage them with the natural world. A good place to start is with the forests in Oregon’s own backyard.
How to use this guideThis teacher’s guide suggests a variety of ways to use Explore the Forest with your students. It offers discussion questions, classroom activities and resources to deepen your students’ understanding of Oregon’s forests. It may be used to enhance instruction in science, English language arts, math and social studies.
You may opt to have students read Explore the Forest one section at a time, and then do the class activity associated with a particular section. Or you may have the class read the booklet as a whole over a couple days or over the course of the year, and choose the activities from this guide that best fit specific curriculum standards.
In addition to the class activities suggested in this guide, Explore the Forest includes individual student activities. Depending on your objectives, you may encourage students to do these activities on their own, or assign them as homework or as group activities in class.
4 EXPLORE THE FOREST | TEACHER’S GUIDEOregon Forest Resources Institute
Expl
ore
the
Fore
st
Act
ivit
y 1
Act
ivit
y 2
Act
ivit
y 3
Act
ivit
y 4
Act
ivit
y 5
Act
ivit
y 6
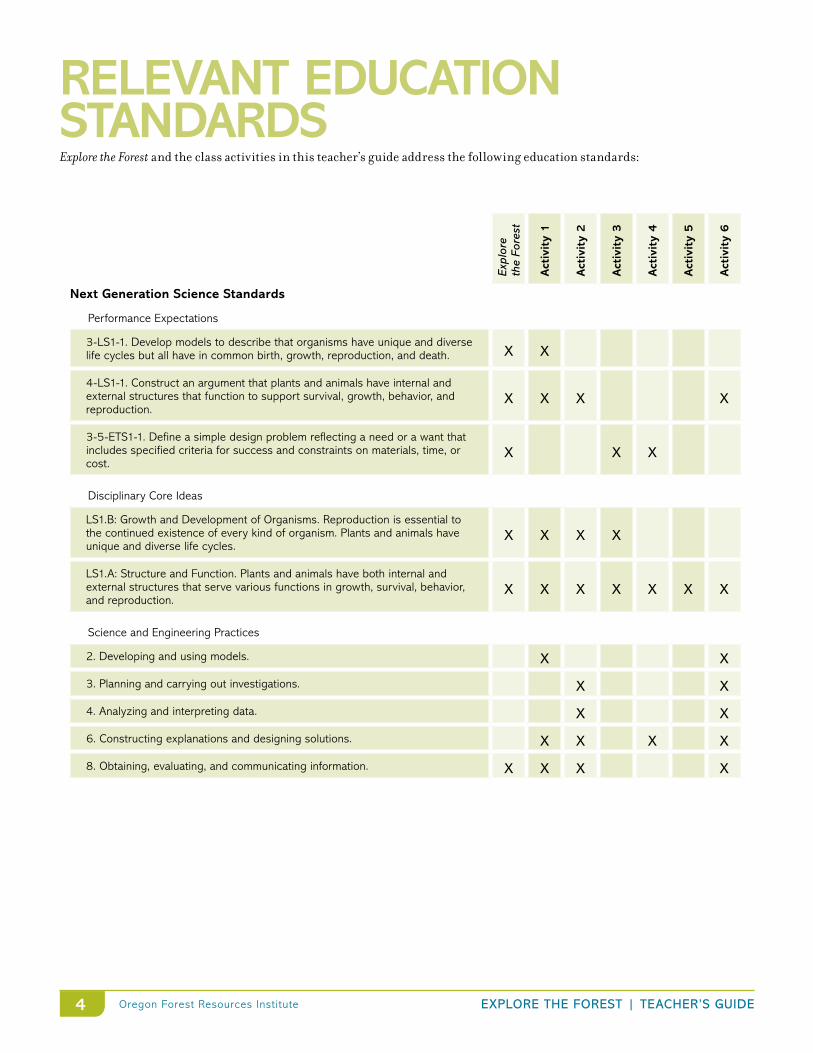
Next Generation Science Standards
Performance Expectations
3-LS1-1. Develop models to describe that organisms have unique and diverse life cycles but all have in common birth, growth, reproduction, and death. x x
4-LS1-1. Construct an argument that plants and animals have internal and external structures that function to support survival, growth, behavior, and reproduction.
x x x x
3-5-ETS1-1. Define a simple design problem reflecting a need or a want that includes specified criteria for success and constraints on materials, time, or cost.
x x x
Disciplinary Core Ideas
LS1.B: Growth and Development of Organisms. Reproduction is essential to the continued existence of every kind of organism. Plants and animals have unique and diverse life cycles.
x x x x
LS1.A: Structure and Function. Plants and animals have both internal and external structures that serve various functions in growth, survival, behavior, and reproduction.
x x x x x x x
Science and Engineering Practices
2. Developing and using models. x x 3. Planning and carrying out investigations. x x4. Analyzing and interpreting data. x x6. Constructing explanations and designing solutions. x x x x8. Obtaining, evaluating, and communicating information. x x x x
RELEVANT EDUCATION STANDARDSExplore the Forest and the class activities in this teacher’s guide address the following education standards:

5EXPLORE THE FOREST | TEACHER’S GUIDE Oregon Forest Resources Institute
Expl
ore
the
Fore
st
Act
ivit
y 1
Act
ivit
y 2
Act
ivit
y 3
Act
ivit
y 4
Act
ivit
y 5
Act
ivit
y 6
Common Core State Standards – English Language Arts
RI.3.7. Use information gained from illustrations (e.g., maps, photographs) and the words in a text to demonstrate understanding of the text (e.g., where, when, why, and how key events occur).
x x x x x x x
W.3.3, W.4.3. Write narratives to develop real or imagined experiences or events using effective technique, descriptive details, and clear event sequences.
x
RI.4.7. Interpret information presented visually, orally, or quantitatively (e.g., in charts, graphs, diagrams, time lines, animations, or interactive elements on Web pages) and explain how the information contributes to an understanding of the text in which it appears.
x x x x x
Common Core State Standards – Mathematics
3.MD.B.4. Generate measurement data by measuring lengths using rulers marked with halves and fourths of an inch. x x
4.MD.A.2. Represent measurement quantities using diagrams such as number line diagrams that feature a measurement scale. x
Oregon Social Science Academic Content Standards
Geography 3.12. Identify and analyze Oregon’s natural resources and describe how people in Oregon and other parts of the world use them. x x x
Geography 4.12. Explain how people in Oregon have modified their environment and how the environment has influenced people’s lives. x
Historical Thinking 4.6. Create and evaluate timelines that show relationships among people, events, and movements in Oregon history. x x
6 EXPLORE THE FOREST | TEACHER’S GUIDEOregon Forest Resources Institute
Oregon’s forests are a vital part of our landscape, our economy and our history. Exploring trees and forests – whether it’s examining a tree on the school grounds, walking to a grove in a neighborhood park or going on a field trip to a nearby forest – enriches student learning and extends it beyond the classroom walls.
Experiencing trees and forests firsthand can bring them to life in ways that looking at pictures or reading about them simply cannot. This is especially true for urban and suburban students, many of whom have never seen or experienced a forest in real life.
That is why we encourage you to take students outside to explore trees and forests firsthand. To ensure success, we recommend focusing on three areas for planning and carrying out your outdoor exploration: learning objectives, logistics and safety. We offer the tips on the right side of this page for addressing each of these areas.
In the following activities, we have noted opportunities for getting students out and exploring trees and forests. For additional suggestions, see OFRI’s K-12 Forest Education Opportunities, which is a directory of field experiences, events and other experiences for teachers and students (described in the Resources section on page 19).
Have fun exploring!
Learning objectives• Clarify for yourself and your students the purpose of the outdoor
experience. Identify academic, behavioral and attitudinal goals you hope to achieve.
• Consider starting small with short, focused learning experiences, particularly if you or your students are new to learning outside.
• Before heading outside, be sure students understand the expected behavior for learning in the outdoors. Sample norms include:
o Be safe.
o Respect all living things, including all plants, animals and fungi.
o Stay with your partner or adult leader.
o Stay within the boundaries.
o Follow all directions.
• Part of the excitement and challenge of being outdoors is that nature happens in unplanned ways. Be flexible and aim to capitalize on these teaching moments.
• For some students, being outside means playtime. Be patient and remind students of the expectations. Give them multiple opportunities and they soon will get used to learning outside.
Logistics• Outdoor experiences may require extra supervision. Arrange to have at
least one parent volunteer or aide for every five to 10 students, to help guide outdoor investigations.
• Bring all the materials you will need for the experience – both those specific to the activity and any general materials such as clipboards, extra pencils and field notebooks.
• Ask students to dress appropriately for the weather and for the possibility of getting wet and dirty. Depending on the site, encourage them to wear long pants, closed-toed shoes, a hat, sunscreen and insect repellent.
Safety• If possible, check the site beforehand to identify any safety hazards such
as deep holes, sharp objects and poisonous or irritating plants.
• Obtain any necessary permission to visit the sites you have chosen.
• Before a field trip, create a list of students who have allergies or need medication.
• Stay on trails, to protect plant and wildlife habitats and keep students safe.
• Establish a signal for getting everyone’s attention and gathering together, such as raising your hand, clapping several times or imitating a bird call.
• Bring along first aid supplies, including sunscreen, water and a whistle.
EXPLORING THE FOREST WITH YOUR STUDENTS
7EXPLORE THE FOREST | TEACHER’S GUIDE Oregon Forest Resources Institute
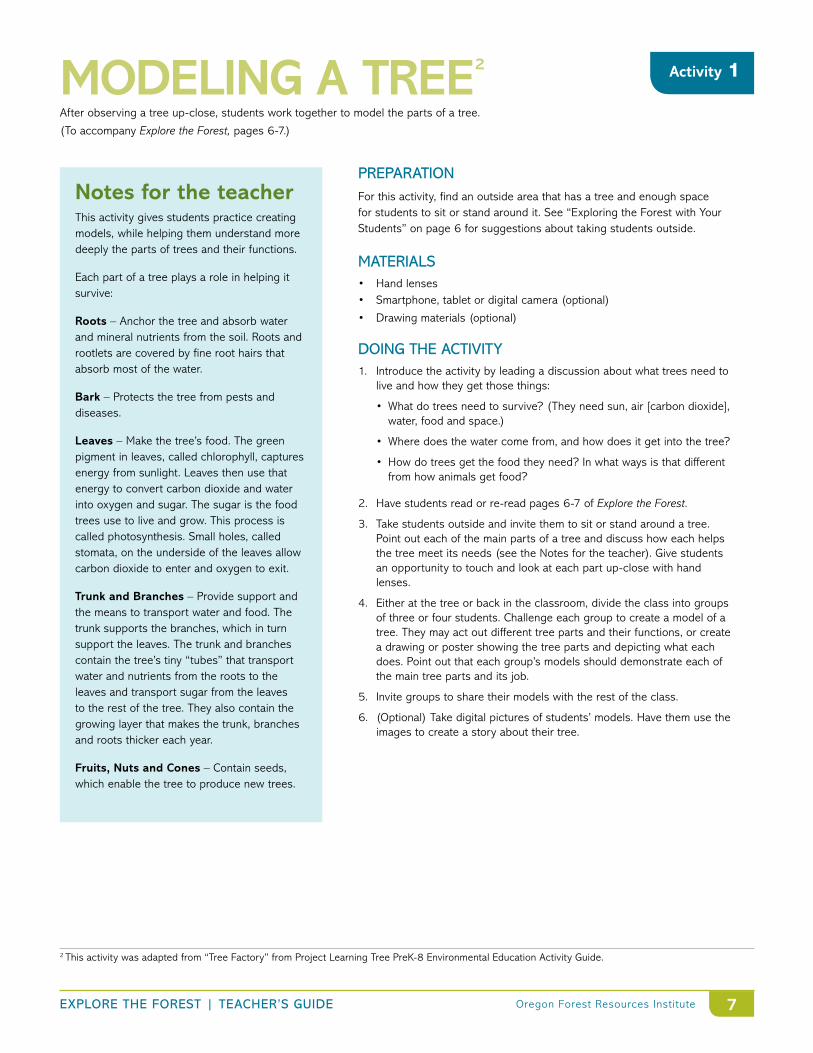
MODELING A TREE2
After observing a tree up-close, students work together to model the parts of a tree.
(To accompany Explore the Forest, pages 6-7.)
Notes for the teacherThis activity gives students practice creating models, while helping them understand more deeply the parts of trees and their functions.
Each part of a tree plays a role in helping it survive:
Roots – Anchor the tree and absorb water and mineral nutrients from the soil. Roots and rootlets are covered by fine root hairs that absorb most of the water.
Bark – Protects the tree from pests and diseases.
Leaves – Make the tree’s food. The green pigment in leaves, called chlorophyll, captures energy from sunlight. Leaves then use that energy to convert carbon dioxide and water into oxygen and sugar. The sugar is the food trees use to live and grow. This process is called photosynthesis. Small holes, called stomata, on the underside of the leaves allow carbon dioxide to enter and oxygen to exit.
Trunk and Branches – Provide support and the means to transport water and food. The trunk supports the branches, which in turn support the leaves. The trunk and branches contain the tree’s tiny “tubes” that transport water and nutrients from the roots to the leaves and transport sugar from the leaves to the rest of the tree. They also contain the growing layer that makes the trunk, branches and roots thicker each year.
Fruits, Nuts and Cones – Contain seeds, which enable the tree to produce new trees.
Activity 1
2 This activity was adapted from “Tree Factory” from Project Learning Tree PreK-8 Environmental Education Activity Guide.
PREPARATION For this activity, find an outside area that has a tree and enough space for students to sit or stand around it. See “Exploring the Forest with Your Students” on page 6 for suggestions about taking students outside.
MATERIALS• Hand lenses• Smartphone, tablet or digital camera (optional)
• Drawing materials (optional)
DOING THE ACTIVITY1. Introduce the activity by leading a discussion about what trees need to
live and how they get those things:
• What do trees need to survive? (They need sun, air [carbon dioxide], water, food and space.)
• Where does the water come from, and how does it get into the tree?
• How do trees get the food they need? In what ways is that different from how animals get food?
2. Have students read or re-read pages 6-7 of Explore the Forest.
3. Take students outside and invite them to sit or stand around a tree. Point out each of the main parts of a tree and discuss how each helps the tree meet its needs (see the Notes for the teacher). Give students an opportunity to touch and look at each part up-close with hand lenses.
4. Either at the tree or back in the classroom, divide the class into groups of three or four students. Challenge each group to create a model of a tree. They may act out different tree parts and their functions, or create a drawing or poster showing the tree parts and depicting what each does. Point out that each group’s models should demonstrate each of the main tree parts and its job.
5. Invite groups to share their models with the rest of the class.
6. (Optional) Take digital pictures of students’ models. Have them use the images to create a story about their tree.

8 EXPLORE THE FOREST | TEACHER’S GUIDEOregon Forest Resources Institute
SITE INVESTIGATIONStudents investigate an outdoor site to determine whether it might be suitable for Oregon forest trees.
(To accompany Explore the Forest, pages 10-11.)
Notes for the teacherOregon is a state with staggering geographic diversity. In a day’s drive, a traveler can experience fog-drenched coastline, dense green forests, farm-filled valleys, glaciated volcanoes and vast desert expanses. Generally speaking, though, Oregon can be divided into its dry east side and wet west side.
Where specific tree species grow is no accident. In the wild, trees may be where they are for a variety of reasons. They may compete better for a shady space near a stream, be able to withstand the hot summer drought on a clay hillside, or simply grow faster than other species in a particular place.
In this activity, students will examine a study site and evaluate its suitability for different Oregon forest tree species. They’ll be making observations and assessments of three factors:
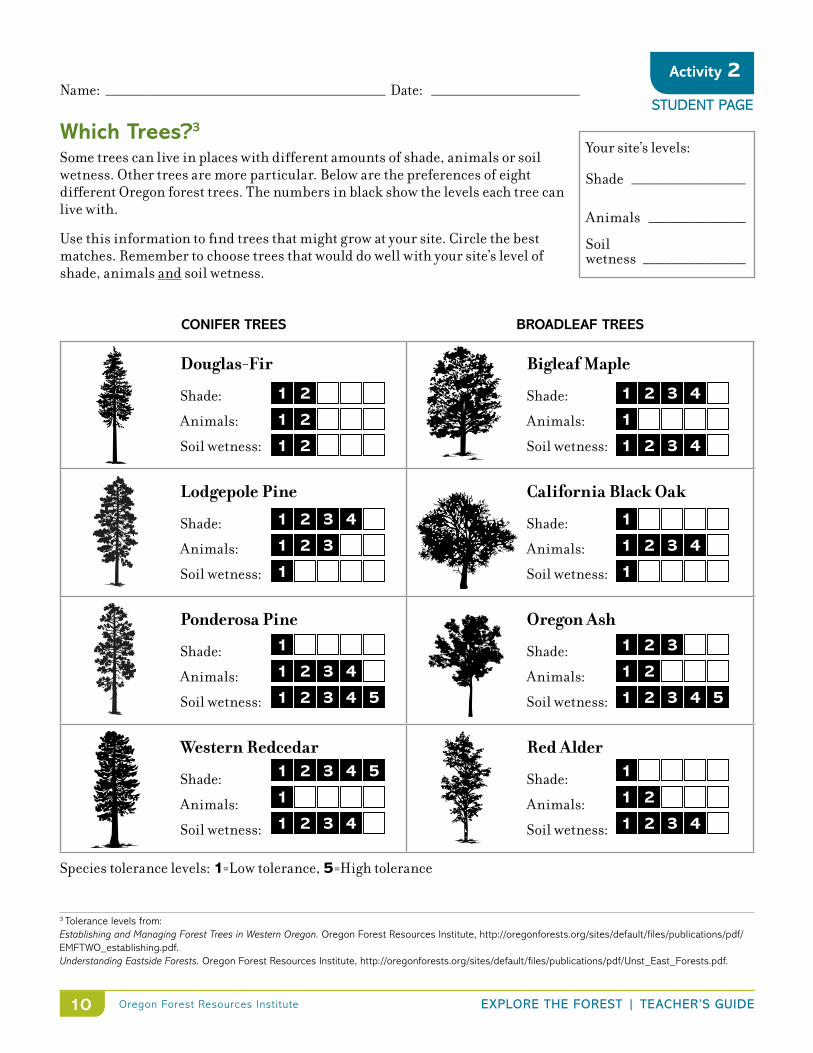
Shade: Most trees prefer full sunlight, and some won’t be able to survive in a low-light environment. Trees with a rating of 4 or 5 will tolerate some shade, while trees with a rating of 1 or 2 need full sun.
Animals: Some trees are more susceptible to damage by wildlife and insects. Trees with a rating of 4 or 5 are more tolerant of animal damage, while trees with a rating of 1 or 2 are more sensitive. As students may not be able to see the animals themselves, they will also look for animal evidence (nests, chewed leaves or branches and the like) and rate the site based on their findings.
Soil Wetness: Almost all species prefer deep, well-drained soil. Trees need water, but not too much. On sites that seem to stay wet or soggy, species with a rating of 4 or 5 are the best choice.
PREPARATION Find two sites on or near the school grounds that differ in terms of shade and soil moisture. They need not be forested areas, but can be a school lawn, park, playground, landscape border, garden or open field. Plan to have at least one adult volunteer or aide assist on the day of the investigation. See “Exploring the Forest with Your Students” on page 6 for suggestions about taking students outside.
MATERIALS• Trowel or stick• Light-meter app on smart phone or tablet (optional)• Copies of “Site Study” and “Which Trees?” student pages
DOING THE ACTIVITY1. Have the class read or re-read pages 10-11 of Explore the Forest. Discuss
the factors that may influence what trees will grow where:
• Are all trees the same?• In what ways can trees be different from each other?• Why do different trees grow in different places?• What factors influence what kinds of trees can grow in a place?
2. Explain that students will investigate and compare two different study areas to find out which forest trees might thrive there (see Notes for the teacher). One half of the class will investigate one study site while the other half investigates the other.
3. Give students copies of the “Site Study” student page and go over the investigation procedure described on it.
4. Show students the two study sites and direct them to work in pairs at one or the other of the sites.
5. (Optional) If students will be using a light-meter app to assess the level of shade, show them how to use it.
6. As students assess the levels of shade, animal evidence and soil wetness at each site, walk among them to answer any questions they may have and help keep them on task.
7. Ask pairs from each group to share their ratings for their site. Discuss the similarities and differences between them.
8. Either at the site or back in the classroom, give students copies of the “Which Trees?” student page. Direct them to write their ratings at the top of the page for each of the site factors. Demonstrate how to use the information provided to determine what trees might be suitable for a site, and then have students identify the best trees for their site.
9. Discuss: Is your site better suited for a Douglas-fir seedling or a bigleaf maple seedling? Why? Challenge students to use evidence to justify their responses. What else does the evidence from our investigation tell us about this site? What other questions might we be able to explore at this site?
Activity 2

9EXPLORE THE FOREST | TEACHER’S GUIDE Oregon Forest Resources Institute
SHADE
Observations
See how much sunlight reaches the ground. Use your eye or a light meter to tell. What do you notice?
Rating
Circle the number that matches your observations.
very bright
bright
medium light
shady
very shady
ANIMALS
Observations
Record the animals (insects, birds, etc.) or evidence of animals (tracks, nests, chewed leaves) you see. Count the different kinds of animals or animal evidence.
Rating
Circle the number that matches your observations.
no animals or evidence
one or two different ones
three different ones
four different ones
five or more different ones
SOIL WETNESS
Observations
Use a stick or trowel to scrape the surface of the ground, making a small hole the size of your palm and about one inch deep. Grab some soil in your fingers from the bottom of the hole. How does it feel?
Rating
Circle the number that matches your observations.
completely dry
nearly dry
slightly moist
wet
very wet
Name: _________________________________________________ Date: __________________________
Site StudyDirections: Investigate your site to see how much shade, animal evidence and soil wetness it has. Record your observations. For each factor, rate the site by number.
Site location: ____________________________________________________________________________
STUDENT PAGE
Activity 2
1
2
3
4
5
1
2
3
4
5
1
2
3
4
5
10 EXPLORE THE FOREST | TEACHER’S GUIDEOregon Forest Resources Institute
CONIFER TREES BROADLEAF TREES
Douglas-Fir
Shade:
Animals:
Soil wetness:
Bigleaf Maple
Shade:
Animals:
Soil wetness:
Lodgepole Pine
Shade:
Animals:
Soil wetness:
California Black Oak
Shade:
Animals:
Soil wetness:
Ponderosa Pine
Shade:
Animals:
Soil wetness:
Oregon Ash
Shade:
Animals:
Soil wetness:
Western Redcedar
Shade:
Animals:
Soil wetness:
Red Alder
Shade:
Animals:
Soil wetness:
Name: _________________________________________________ Date: __________________________
Your site’s levels:
Shade ____________________
Animals _________________
Soil wetness __________________
1
1
1
2
2
2
3
3
3
4
4
4
5
5
5
1
1
1
2
2
2
3
3
3
4
4
4
5
5
5
1
1
1
2
2
2
3
3
3
4
4
4
5
5
5
1
1
1
2
2
2
3
3
3
4
4
4
5
5
5
1
1
1
2
2
2
3
3
3
4
4
4
5
5
5
1
1
1
2
2
2
3
3
3
4
4
4
5
5
5
1
1
1
2
2
2
3
3
3
4
4
4
5
5
5
1
1
1
2
2
2
3
3
3
4
4
4
5
5
5
Species tolerance levels: 1=Low tolerance, 5=High tolerance
3 Tolerance levels from: Establishing and Managing Forest Trees in Western Oregon. Oregon Forest Resources Institute, http://oregonforests.org/sites/default/files/publications/pdf/EMFTWO_establishing.pdf. Understanding Eastside Forests. Oregon Forest Resources Institute, http://oregonforests.org/sites/default/files/publications/pdf/Unst_East_Forests.pdf.
Which Trees?3
Some trees can live in places with different amounts of shade, animals or soil wetness. Other trees are more particular. Below are the preferences of eight different Oregon forest trees. The numbers in black show the levels each tree can live with.
Use this information to find trees that might grow at your site. Circle the best matches. Remember to choose trees that would do well with your site’s level of shade, animals and soil wetness.
STUDENT PAGE
Activity 2
11EXPLORE THE FOREST | TEACHER’S GUIDE Oregon Forest Resources Institute
OREGON FOREST LEGENDSStudents write inventive stories that explain various forest phenomena.
(To accompany Explore the Forest, pages 12-13.)
Notes for the teacherBefore humans found scientific explanations for things such as rainbows or the phases of the moon, they created stories to help understand them. In Oregon, the Native peoples told stories such as how Crater Lake came to be and how the Bridge of the Gods near Cascade Locks was formed. These stories often served other purposes, too: to bring people together, to explain the tribe’s beliefs, to teach children how to behave or simply to entertain. People still enjoy these kinds of stories today.
A legend is a story that explains something in nature. Legends often highlight animals or objects that can talk, or feature gods or other supernatural characters who can make extraordinary things happen. They are often fanciful, far-fetched or exaggerated, but usually contain some truth. They also have a plot, which includes a beginning, a middle and an end.
In this activity, students combine their writing skills with their understanding of forests to write a legend about a forest phenomenon. This not only gives them practice creating a narrative with a clear storyline, it also strengthens their personal connection to Oregon’s forests.
Before they write, consider taking students on a walk to see trees or a forest grove to help inspire their stories and provide details for them. See “Exploring the Forest with Your Students” on page 6 for suggestions about taking students outside.
MATERIALS• “Writing a Forest Legend” student page
• Paper and pencils for writing
DOING THE ACTIVITY1. Read aloud the “The Mouse, the Douglas-fir and the Great Forest Fire” on
page 12-13 of Explore the Forest. Point out that this story is a legend, a type of story that explains how something in nature came to be.
2. Using this story as an example, discuss the elements of a legend: It explains something in nature; it has animals or objects that talk, or gods that have other special powers; it has a plot (a beginning, a middle and an end); and it is often either imaginary or exaggerated, with some elements of truth.
3. Explain that students will be writing their own legends about the forest. Invite students to look through Explore the Forest for ideas of forest plants, animals or processes they could write about. Begin a class list on the board. (You might also take students on a walk to see trees or a forested area to spur ideas.)
4. Give students a copy of the “Writing a Forest Legend” student page. Walk them through the steps of writing their stories, as described on the student pages. Encourage them to make their stories as imaginary as they would like.
5. Allow time for students to draft their stories. You may want them to conference with a peer before revising their drafts.
6. Make a class book of students’ final stories.
Activity 3

12 EXPLORE THE FOREST | TEACHER’S GUIDEOregon Forest Resources Institute
Name: _________________________________________________ Date: __________________________
Writing a Forest Legend1. Choose a forest plant, animal or event to write about. Look through Explore the Forest for ideas.
2. What do you know about this forest plant, animal or event?
3. Write down key words related to this forest plant, animal or event. What are its main features?
4. Choose one thing about your forest plant, animal or event to write about. See the box below for some ideas.
5. Ask yourself, “What if?” to start your story. What exaggerations or imaginary elements will your story contain? What elements of truth?
6. Be sure that your story has
• A setting • A beginning • A middle • An end
OREGON FOREST LEGEND IDEAS
Legend titles are often in a format like “How (or Why) the _________ Got _________.” Here are some story titles you might write about.
How the Deer Got Its Antlers
How the Turtle Got Its Shell
How the Acorn Got Its Cap
How the Porcupine Got Its Spines
Why the Opossum’s Tail is Bare
How the Douglas-fir Cone Got Its Shape
How the Lodgepole Pine Beat Fire
Why the Maple Tree Loses Its Leaves
Why the Cedar Tree is Red
How Crater Lake Came to Be
STUDENT PAGE
Activity 3
13EXPLORE THE FOREST | TEACHER’S GUIDE Oregon Forest Resources Institute
DESIGN A FOREST PLANT4 Students “design” a plant suited for specific forest conditions, making either a
physical model or a drawing. (To accompany Explore the Forest, pages 18-19.)
MATERIALS• Copies of “Forest Conditions Cards,” cut apart (one card per student)
• For models:- A variety of scrap materials: cardboard, construction paper, tissue paper,
yarn, wire
- Leaves, twigs and other ground litter collected from outside
- Lumps of clay or egg cartons to support plants
- Scissors
- Glue
- Tape
• For drawings:
- Paper
- Colored pens or crayons
DOING THE ACTIVITY1. Discuss the lodgepole pine cones and huckleberry plants described on
pages 18-19 of Explore the Forest. What features of these plants help them survive a fire?
2. Point out that plants and animals have special features that enable them to live where they do. These features are called adaptations.
3. Give each student one of the “Forest Conditions Cards” and invite students to design a plant to meet the condition described on their card. Suggest that they first think about what features might help a plant in that situation.
4. Provide either model-building or drawing materials, and allow time for students to create their designs.
5. Read each of the “Forest Conditions Cards” and ask students with that card to share the characteristics they included in their designs.
6. Take students on a walk outside, either on the school grounds or to a nearby open space, to look for real plant adaptations. Challenge students to find a plant adapted to one of the situations in the “Forest Conditions Cards.”
4This lesson was adapted from “Invent-a-Plant,” OBIS (Outdoor Biology Instructional Strategies), Lawrence Hall of Science.
Notes for the teacherEvery species of plant or animal has a unique set of characteristics that help it thrive under the specific conditions where it lives, such as the available water or sunlight.
An adaptation or adaptive trait is any feature of an organism that helps it live and reproduce within its environment. Examples of plant adaptations include the fire-resistant bark of Douglas-fir trees and the protective thorns of wild rose bushes.
Adaptations are the result of changes in a species over very long periods of time. They usually stem from a chance mutation or change in an individual’s genes, which happens to help the individual survive. Over time, individuals with this favorable genetic trait reproduce more than those without, until eventually the entire species displays the trait.
In this activity, students will invent a plant that meets certain environmental conditions. The aim is to help them understand that organisms suited to living in certain conditions may not survive well in other conditions. However, it is important to note that real plants or animals do not “adapt themselves,” nor does the process of adaptation have an intention or direction.
Plan to take students on a walk around the school grounds or nearby open space to find real plant adaptations. See “Exploring the Forest with Your Students” on page 6 for suggestions about taking students outside.
Activity 4
14 EXPLORE THE FOREST | TEACHER’S GUIDEOregon Forest Resources Institute
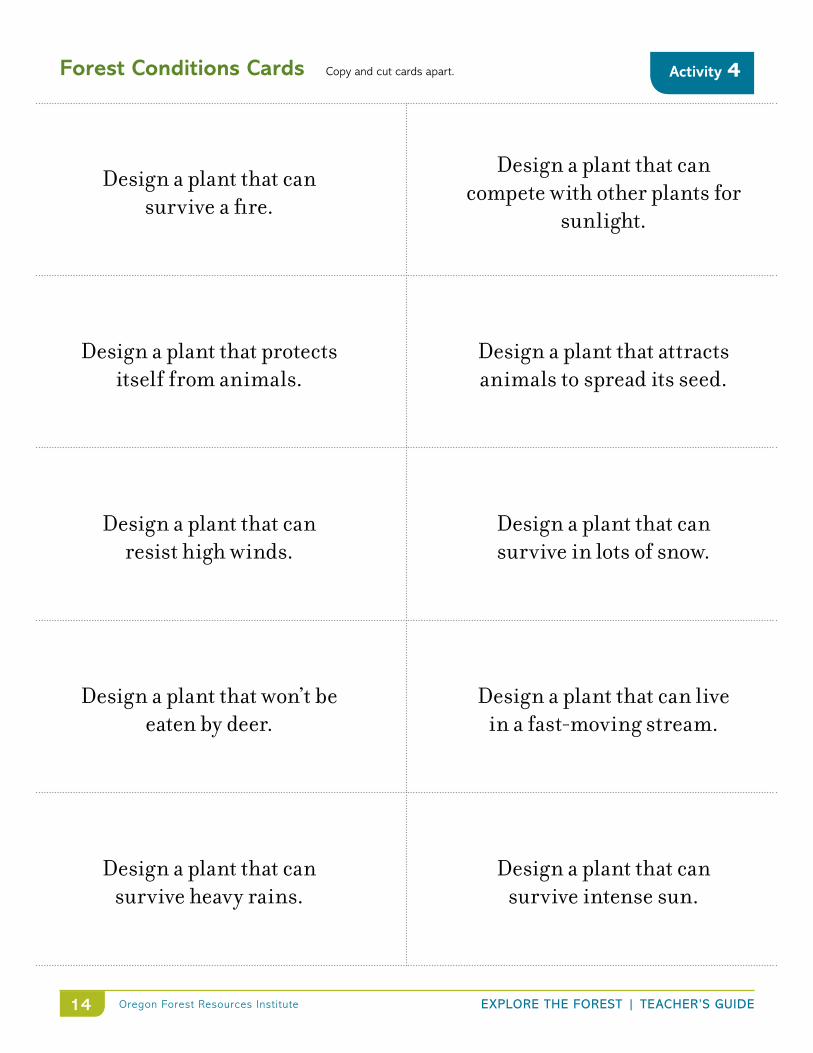
Forest Conditions Cards Copy and cut cards apart.
Design a plant that can survive a fire.
Design a plant that can compete with other plants for
sunlight.
Design a plant that protects itself from animals.
Design a plant that attracts animals to spread its seed.
Design a plant that can resist high winds.
Design a plant that can survive in lots of snow.
Design a plant that won’t be eaten by deer.
Design a plant that can live in a fast-moving stream.
Design a plant that can survive heavy rains.
Design a plant that can survive intense sun.
Activity 4
15EXPLORE THE FOREST | TEACHER’S GUIDE Oregon Forest Resources Institute
MAKING PAPERStudents make paper out of recycled pulp, giving them firsthand experience in this important process
that has key ties to Oregon’s history and economy. (To accompany Explore the Forest, pages 14-15.)
Notes for the teacherPaper is a surprisingly simple material. It’s made of wood, recycled paper or other fiber held together by the fiber’s roughness. The papermaking process was invented in China in approximately 100 AD. For many hundreds of years after that, paper was made one sheet at a time from wood or cotton fibers broken down by a mortar and pestle. This activity is based on that ancient technique.
The papermaking machine was invented in 1798; it used a conveyor belt to make a continuous web of paper. In Oregon, the first paper mill opened in the late 1800s on the Willamette Falls, taking advantage of the plentiful availability of wood fiber. Oregon pulp and paper mills continue to make newsprint, printing paper, packaging, tissue and toweling.
Most Oregon paper is made from pieces of wood and sawdust that are left over from the lumber milling process. Trees are usually not cut specifically to make paper, but paper is one of the many products that come from Oregon’s trees.
As an alternative to this activity, you might arrange a presentation by the Talk About Trees program, whose representatives will come to the classroom and make paper with students. (See http://learnforests.org/resource_article/talk-about-trees.)
PREPARATION This activity requires a bit of preparation on the teacher’s part and can be rather messy. But it is completely worth the effort as students experience the “magic” of making their own paper. The activity works best set up as a papermaking station with a parent or aide helping a few students at a time while the rest of the class does another activity. If you are short on adult help, you can do the activity as a demonstration instead.
Plan to use a work space that won’t be damaged by water. Also, remove any plastic or staples from the scrap paper and tear it into small pieces before soaking it in hot water for at least 30 minutes before the activity.
You will need a deckle, which is a frame used in papermaking to hold the pulp and form each sheet. Make a simple deckle by tightly stapling nylon or wire screen onto a 5” x 7” wooden picture frame (see Materials).
MATERIALS• Scrap paper torn into 1” x 1” pieces (avoid printed newsprint)
• Large bowl or tub for soaking paper
• Hot water
• 5” x 7” wooden picture frame (for the deckle)
• Piece of nylon or wire screen, at least 6” x 8” (for the deckle)
• 2.5-gallon or larger plastic basin (must be larger than frame)
• Cloth dish towels or paper towels
• Large stack of newspaper
• Blender
• Sponge
• For decorating paper: small bits of colored paper, colored thread, dried herbs, or dried leaves or flowers collected from outside (optional)
DOING THE ACTIVITY1. Introduce the activity by asking students what objects in the classroom
come from trees. If they don’t think of it, be sure to point out that paper is made from trees and that Oregon has a long history of paper mills. Discuss: What is paper? How is it made? How is paper important to Oregon history?
2. Tell students that they will be making their own paper and explain how the papermaking session will be organized.
(continued on next page)
Activity 5

16 EXPLORE THE FOREST | TEACHER’S GUIDEOregon Forest Resources Institute
MAKING PAPER (continued)
3. At the paper-making station (or demonstration):
a. Fill the blender halfway with warm water, then add a handful of soaked paper. Blend at medium speed until pulp is completely smooth.
b. Pour the mixture into the large basin and then fill the basin halfway with warm water. Mix thoroughly until the ingredients are evenly dispersed.
c. Stir in the optional colored paper, thread, flowers or herbs.
d. Help students:
• Dip the deckle into the pulp, touching the bottom of the basin.
• Lift the deckle out of the pulp, keeping it flat.
• Allow most of the water to drain off.
• Press the pulp gently with a hand to squeeze out excess moisture.
• Sponge up excess water from the bottom of the screen.
• Turn the deckle over onto a kitchen towel on one half of a newspaper.
• Gently tap the screen to help release the paper.
• Fold the newspaper over the wet paper.
• Write their name on the newspaper.
• Lay it on a flat surface to dry.
e. Replenish the pulp as necessary.
4. When the sheets of paper are dry, have students remove them from the towels and newspaper.
5. Invite students to use the paper to create a card or letter to their parents, or to write a paragraph or poem about the importance of paper and other forest products in Oregon.
TREE RINGS AND CLIMATE5
Notes for the teacherOne way scientists are learning about past climate is by studying tree rings. They use tree rings not only to measure the age of a tree, but also to learn about the local climatic conditions the tree experienced during its lifetime. The width of a tree’s rings depends on the climate in that particular location. Trees generally grow more when the weather is wetter and warmer, forming wider rings. Narrow rings may be caused by stressful periods such as droughts. Different tree species will grow tree rings at different rates.
How can scientists study a tree’s rings without cutting down the tree? They use an increment borer to take samples from the tree. This instrument is like a long, hollow drill bit that works similarly to an apple corer. It cuts into the tree and pulls out a cylinder-shaped sample without hurting the tree. In these core samples, the tree’s annual rings show as stripes or lines.
Trees of the same species growing in the same area at the same time will show the same ring patterns for those years. By piecing together core samples from different living trees, as well as from fallen trees or even logs found in buildings, scientists can discern growth patterns for several centuries. The ring patterns from the dead trees can be matched up to the rings of the living wood in a process called cross-dating, which establishes the dates a dead tree was alive.
In this activity, students look at diagrams of core samples for two different trees and compare the amount of growth the trees experienced. One (A) is from a living tree that was sampled in 2015, and the other (B) is from a fallen tree found in the same area. By looking at the core samples and matching up growth rings that are the same width, students can tell that the trees overlapped for a few years. They can use this information to make inferences about the climate of that place over time.
Students examine model tree-core samples and use them to analyze changes in climate.
(To accompany Explore the Forest, pages 11 and 20-21.)

17EXPLORE THE FOREST | TEACHER’S GUIDE Oregon Forest Resources Institute
TREE RINGS AND CLIMATE5
MATERIALS• “Looking at Tree Rings” student page
• Scissors
• Tape
• Ruler marked with millimeters
DOING THE ACTIVITY1. Introduce the activity by asking students to read
the sections in Explore the Forest on tree rings (page 11) and on the changing climate (pages 20-21). Discuss:
• How might scientists use tree rings to learn more about climate?
• How can scientists study the rings of trees that are alive?
2. Use the information in the Notes for the teacher to explain the process of tree core sampling. On the board, sketch a sample tree cross-section as on page 11 of Explore the Forest. Use it to show students that on a narrow core sample, the rings would appear as stripes.
3. Explain to students that they’ll be using tree core samples to find out about the climate of an area.
4. Invite students to cut apart the two striped strips of paper on the student page. Explain that these cores were taken from two different trees from the same forest. One (A) is from a living tree, and the other (B) is from a fallen, dead tree. Point out that since both trees are from the same area, they likely grew under similar conditions.
5. Direct students to use the ring patterns to match up the two samples, lining them up where they are the same. (The bottom four bands of Sample A match up with the bottom four bands of Sample B, so that there is an overlap.) Explain that scientists use these types of overlaps to age trees with unknown histories. When the cores are lined up, have students tape the two core samples together.
6. Guide students to label each of the rings with its year, working backward from 2015. (The rings that match up will have the same year on each core sample.)
7. Have students measure the width of all the tree rings in millimeters, and record the measurements in the table along with the year. (See answers to the right.)
8. Discuss:
• What might have caused the differences in the tree rings?
• How do the numbers at the beginning of the chart compare to the numbers at the end? (Students may notice that the earlier rings are closer together, while the later rings tend to be further apart. This indicates more growth each season, and warmer, wetter conditions.)
• How might we use tree ring data to tell about climate changes over time?
• How do we know whether tree growth is an effect of climate change or some other factor?
2015 14
2014 18
2013 20
2012 14
2011 6
2010 18
2009 18
2008 14
2007 12
2006 4
2005 14
2004 14
2003 16
2002 2
2001 16
2000 14
1999 12
1998 10
1997 8
1996 8
1995 8
1994 6
1993 6
1992 6
1991 6
1990 4
1989 4
1988 2
YEA
R
WID
TH o
f Tr
ee
Rin
g (
in m
m)
ANSWERS
Activity 6
5Activity and sample tree cores were adapted from “Tree Rings: A Climate Record of the Past.” Royal Society of Chemistry, UK. http://www.rsc.org/Education/Teachers/Resources/jesei/treering/home.htm.

18 EXPLORE THE FOREST | TEACHER’S GUIDEOregon Forest Resources Institute
Name: _________________________________________________ Date: __________________________
Looking at Tree Rings
2015
2014
2013
2012
2011
2010
2009
2008
2007
2006
2005
2004
2003
2002
2001
2000
1999
1998
1997
1996
1995
1994
1993
1992
1991
1990
1989
1988
WIDTH of Tree Ring (in mm)
YEAR
A B
2015{
tree trunk center
tree bark The core samples at left were
taken from two trees from the same forest. “A” is from a living tree and “B” is from a fallen, dead tree.
1. Cut apart the two core samples.
2. Use the ring patterns to match up the two samples. Line up rings that are the same for several years. Tape the two core samples together where they match.
3. Working backward from 2015, write the year on each ring. (The rings that match up will have the same year on each sample.)
4. Measure the width of each tree ring (in millimeters), and record in the table at right.
STUDENT PAGE
Activity 6

19EXPLORE THE FOREST | TEACHER’S GUIDE Oregon Forest Resources Institute
RESOURCESThe following OFRI resources may be used to enhance your study of Oregon forests. They are available at LearnForests.org.
A TEACHER’S SAMPLER PACKET – GRADES K-5The teacher’s sampler is a great way to receive an overview of OFRI’s K-12 education programs and materials. It includes all the following resources, plus a few more.
CARBON CYCLE POSTERThis classroom poster illustrates the role of forests and wood products in the carbon cycle.
FOREST ESSAYS
This collection of leveled readings, available in booklets for different grade levels, supports literacy skills and also teaches important Oregon science and social science topics. Each one-page reader tackles a subject related to Oregon’s vast and critically important forests, and includes multiple-choice and short-answer questions to gauge comprehension.
FOREST FACT BREAKS These animated videos simplify complex topics into fun, educational and engaging two-minute takes that bring each topic to life. Topics include Carbon Capture, Clearcutting, Ecosystems, Fire Safety, Forest Fire, Forest Management, Forest Types in Oregon, Green Building, Photosynthesis, Reforestation, Sustainability, Tree Biology, Water, Wildlife and Wood Products.
FORESTS OF OREGON POSTERThis colorful 24” by 36” poster includes a map showing where the most common conifer and hardwood tree species are found in Oregon.
GUIDE TO PRIORITY PLANT AND ANIMAL SPECIES IN OREGON FORESTSThis publication describes the specific habitat requirements of selected species found in forested habitats across all ecoregions in Oregon, and can be used to help students learn more about wildlife species and forest habitats.
K-12 FOREST EDUCATION OPPORTUNITIESThis directory highlights field sites, special events and ongoing forestry programs for Oregon educators and their students.
OREGON FOREST FACTS AND FIGURES This pocket-size reference is loaded with charts, graphics and numbers illustrating the magnitude and importance of Oregon’s public and private forest resources.
OREGON FOREST LITERACY PLAN
This forest-education conceptual framework and scope and sequence offers guidance to formal and non-formal educators for developing curricula and classroom lessons related to forests. It includes sample lesson ideas for different grade levels.
TREES OF OREGON’S FORESTSThis online tree guide can be viewed at http://oregonforests.org/content/tree-variety.
20 EXPLORE THE FOREST | TEACHER’S GUIDEOregon Forest Resources Institute
Glossary The following terms include all those listed in “Words to Know” in Explore the Forest, as well as a few additional ones from this guide.
Adaptation – a feature of an organism that helps it live and reproduce in its environment.
Atmosphere – the mixture of gases that surrounds Earth.
Carbon dioxide (CO2) – a gas with no color or smell. It is formed by burning fuels and when people and animals exhale. Plants take it in during photosynthesis.
Climate – the usual weather in a place.
Deckle – a wooden frame used in handmade papermaking.
Ecosystem – all the living and non-living things in an area. The forest ecosystem includes the plants, animals, water, sunlight and soil.
Elevation – the height above the level of the sea.
Fiber – a long, thin thread of materials, such as wood or cotton.
Food chain – who eats what in an ecosystem. For example, plants are eaten by deer, which are eaten by cougars.
Food web – all the food chains in an ecosystem linked together.
Legend – a story explaining something in nature.
Model – an image, object or display used to help show something that is difficult to see directly.
Organism – a living plant or animal.
Paper – a thin sheet of material made from wood pulp or other fiber. Paper is used for writing, printing, drawing and wrapping.
Photosynthesis – the way trees and other plants use energy from the sun to make food.
Pulp – a soft, wet mixture, as in wood pulp.
Renewable resource – a natural resource that can be replenished over time, such as trees.
Tolerance – the ability to endure a certain condition.