Embed Size (px)
Citation preview

BAND SWAMI

SPECIFICATIONS
Product SWAMI Band
# of Courses 38,000+ Worldwide
Battery 170mAh Lithium Ion Polymer
Battery Life Up to 7 hours (Golf Mode) Up to 8-10 days (Time Mode)
Weight 1.2 oz
Display Size 1”
Band Length 10”
2 INTRODUCTION

ENGLISH 3
CHARGING1. Attach the magnetic pins on the charging cord to the magnetic charging ports located on the back of the band (under the heart rate sensor). 2. Be sure the pins are aligned, then insert the other end of the charging cord into a USB port or AC adapter (not included).
CHARGING PORT
CHARGING PINS
SETTING THE TIME
1. To set the correct time, the device must be connected to satellites (must be outside). This can be done by using Golf Mode or by going to Settings (see page 11).

DESCRIPTION OF TERMS • PRESS - Press & Release button quickly. • HOLD - Press & Hold button until desired screen appears or change happens.
A. [ POWER / BACK ] - HOLD to Power On/Off. Press & Release to return to a previous screen.
B. [ OK ] - Press & Release to select options. C. [ UP ] - Press & Release to scroll. HOLD while in Golf Mode to access Shot Distance screen.
D. [ DOWN ] - Press & Release to scroll. HOLD while in Golf Mode to access Scorecard.
4 HOW TO USE

ENGLISH 5
GOLF MODE1. From Time Screen, Press & Release the [ DOWN ] button to display Golf Mode (A). 2. Press & Release the [ OK ] button to select Golf Mode.
3. Device will begin searching for satellite signal (Press & Release the [ BACK ] button to cancel).
4. Once satellite connection is established,the nearest golf courses will be listed. Use [ UP / DOWN ] buttons to scroll to desired course, and then PRESS [ OK ] button to select the course.

6 HOW TO USE
DISPLAY DIAGRAM
A. Distance to the Front of GreenB. Distance to the Center of GreenC. Distance to the Back of GreenD. Hole NumberE. Par for the holeF. Unit of Measure (Yards or Meters) 5. While on the Play Mode screen, HOLD the [UP] button to access Shot Distance, or HOLD the [DOWN] button to access the Scorecard.
PLAY MODE

ENGLISH 7
SHOT DISTANCE1. From the Play Mode Screen, HOLD the [ UP ] button display Shot Distance. 2. As you travel to your ball, the distance will begin calculating.
3. Once you arrive at your ball, the distance displayed is the distance of your previous shot (the distance you traveled). 4. Press & Release the [POWER/BACK] button to exit and return to Play Mode.
SCORECARD1. From the Play Mode Screen, HOLD the [DOWN] button display the Scorecard. 2. Press & Release the [UP/DOWN] buttons until your correct score is displayed.
3. Press & Release the [POWER/BACK] button to exit and return to Play Mode.

8 HOW TO USE
END ROUND 1. To end your round, PRESS [ POWER/BACK ] button.Scroll to the desired option then PRESS [OK] button to select.
• Save & Exit - Save Scorecard, end round,and return to Main Menu.
• Discard & Exit - Discard Scorecard, endround, and return to Main Menu.
• Cancel - Select to return to Play Mode.

ENGLISH 9
SCORE HISTORY 1. From Time Screen, Press & Release the [ DOWN ] button until you reach the Score History screen.
2. Press & Release the [ OK ] button to select Score History. 3. Use the [UP/DOWN] buttons to scroll to the scorecard you would like to view, then PRESS [OK].
4. Use the [UP/DOWN] buttons to scroll to the scorecard you would like to view, then PRESS [OK]. Note: If you have already uploaded the scorecard to the App, it will no longer appear on the band.
10 HOW TO USE
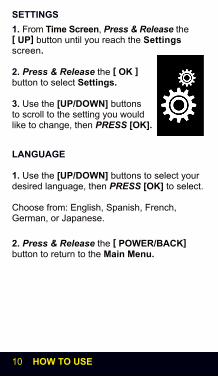
SETTINGS 1. From Time Screen, Press & Release the [ UP] button until you reach the Settings screen.
2. Press & Release the [ OK ] button to select Settings. 3. Use the [UP/DOWN] buttons to scroll to the setting you would like to change, then PRESS [OK]. LANGUAGE
1. Use the [UP/DOWN] buttons to select your desired language, then PRESS [OK] to select.
Choose from: English, Spanish, French, German, or Japanese. 2. Press & Release the [ POWER/BACK] button to return to the Main Menu.

ENGLISH 11
TIME SET 1. While in Settings, Use the [UP/DOWN] but-tons to scroll to the Time Set screen, then PRESS [OK]. • Auto - will start search for satellite connection to set the correct time (must be outside). • Format - Choose from 24 or 12 hr time format. • Daylight - Turn Daylight Savings Time ON or OFF.
2. Press & Release the [ POWER/BACK] button to return to the Main Menu.
UNIT OF MEASURE1. While in Settings, Use the [UP/DOWN] buttons to scroll to the Y/M screen, then PRESS [OK]. 2. Use the [UP/DOWN] buttons to select Yards or Meters, then PRESS [OK]. 3. Press & Release the [ POWER/BACK] button to return to the Main Menu.

12 HOW TO USE
SCREEN DISPLAY1. While in Settings, Use the [UP/DOWN] buttons to scroll to the Screen Display screen, then PRESS [OK]. 2. Use the [UP/DOWN] buttons to select Type 1 or 2, then PRESS [OK]. 3. Press & Release the [ POWER/BACK] button to return to the Main Menu. FREE APPSearch for SWAMI Band in the Google Play StoreTM or in iTunesTM
Note: Compatibility depends on model of Smartphone and version of operating software. Features may vary or could be limited due to compatibility conflicts.
For AppleTM: Compatible with iOS 9.0 or above. For AndroidTM: Compatible with OS 5.0 or above.*ANDROID IS A TRADEMARK OF GOOGLE INC.

ENGLISH 13
PAIRING BAND WITH APP1. Make sure the phone you’re pairing tohas Bluetooth enabled and your Swami Band is powered on. 2. Open the SWAMI BAND App. Select the settings tab in the bottom right corner.
3. On the settings screen, scroll down to “Bluetooth Pair” and select.

14 PAIRING
4. Select your specific device when it is listed under “Scan BlueTooth.”
5. Once you select your SWAMI BAND, the band will pair with the app. Once the pairing is successful, “Connect Success” will appear on the screen.

WARRANTY 15
WARRANTY POLICYThis product is warranted to be free from defects for up to (1) year from the original purchase date. IZZO Golf cannot refund your purchase unless purchased directly from IZZO Golf. IZZO Golf will replace or repair any unit that is determined defective under normal use within the warranty period. Please call Customer Service at 888-606-4634 to request a Return Authorization. All defective products must be returned to:
IZZO GolfAttn: Returns Dept.1635 Commons ParkwayMacedon, NY 14502
Please include a note with your Name, Address, Phone # and Return Authorization #.Your replacement will be shipped once we diagnose the returned unit.
To register your product visit:
www.callawaydmd.com/registration
If you have any other questions or concerns, please call 1-888-606-4634 or
go to www.callawaydmd.com

CAUTIONGlobal Position System (GPS) was developed and is managed by the United States Department of Defense (DOD) which is responsible for its normal operation and position precision control; the U.S. is entitled to affect function or position precision of the whole system without prior notification or announcement based on its political considerations or safety of national defense.In order to use the device correctly and safely, you must be aware of the following information prior to operating the device:
• The device was only designed for the purpose of leisure and recreation and is not applicable for industrial or special measurement.• The device is only an auxiliary device. IZZO Golf will not accept any legal liability for accidents due to mistaken operation, or any use of the device for measurement.• Please do not try to dissemble the device or repair any part of the device discreetly.• Please do not store the device in places exposed to direct sunlight or in extremely high temperatures.