Embed Size (px)
Citation preview

SPL Analog Code PluginManual
EQ Ranger Plus
2 EQ Ranger Plus Analog Code Plugin
Manual
EQ Ranger Analog Code PluginsManual Version 3.0 03/2016
This user‘s guide contains a description of the product. It in no way represents a guarantee of particular characteristics or results of use. The information in this document has been carefully com-piled and verified and, unless otherwise stated or agreed upon, correctly describes the product at the time of packaging with this document.
Sound Performance Lab (SPL) continuously strives to improve its products and reserves the right to modify the product described in this manual at any time without prior notice. This document is the property of SPL and may not be copied or reproduced in any way, in part or fully, without authorization by SPL electronics GmbH.
SPL electronics GmbH Sohlweg 80, 41372 Niederkruechten, Germany Phone: +49 (0)2163 983 40 Fax: +49 (0)2163 983 420 E-Mail: [email protected] Website: spl.info
© 2016 SPL electronics GmbH. All rights reserved. The SPL logo, The Analog
Code, Vitalizer and Atmos are trademarks of SPL electronics GmbH. All other
logos and brand names are registered trademarks of their respective owners.

3EQ Ranger Plus Analog Code Plugin
Content
Installation 4Plugin Alliance Activation 4System Requirements and Compatibility 4MAC and Windows Installation 4The Analog Code 5EQ Ranger Plus 5
Introduction 5Mouse Wheel Control 7Power LED 7Signal LED 7Overload LED 7Reset 7
Control Elements 7Output 8Faders 8Modules 8Bass Ranger: Fader Settings 9Vox Ranger: Fader Settings 10Full Ranger: Fader Settings 11Vox Ranger: filter curves 12Bass Ranger: filter curves 13Full Ranger: filter curves 13Plugin Settings Toolbar 14Plugin Alliance Toolbar 15
Applications 16EQ Principles 16
Your Notes 17

4 EQ Ranger Analog Code Plugins
Plugin Alliance ActivationYour Analog Code plugin must be activated in your Plugin Alliance account. You can set it up and log into your account anytime at http://www.plugin-alliance.comFor details about the activation process, read the Plugin Alliance Activation Manual. The PDF file is stored in the same folder of your computer like this product manual file.Alternatively, the following web page provides the same informa-tion: https://plugin-alliance.com/en/learn/article/items/plugin-alliance-activation-manual.html
System Requirements and CompatibilityFor details about system requirements and supported platforms or formats visit https://plugin-alliance.com/en/systemrequire-ments.html
MAC and Windows Installation1. Check for the latest plugin software version before installation:
https://plugin-alliance.com/en/products.html2. Execute the installer file and follow the instructions.
Installation

EQ Ranger Plus Analog Code Plugin 5
Introduction
The Analog CodeFor more than two decades, SPL of Germany is well-known as man-ufacturer of handmade analog hardware processors. Innovations like the Vitalizer™ and Transient Designer™ are accompanied by a complete analog range from frontend to backend and culminate in the Mastering Series with exemplary specs thanks to SPL’s propri-etary 120 V rails technology. While SPL’s hardware has been fascinating audio professionals from home studio owners to mastering engineers in the world’s most famous facilities, there has been a continuing and ever growing demand for digital (DAW) users to be able to enjoy this technology. Our software design team has managed to transfer the class and excellence of our analog processors into the digital domain. Latest methods for high-precision modeling of our analog circuit designs now give us results beyond a pure mathematical approach. The digital products are so amazingly close to their analog equivalents that we call them the Analog Code plugins.
EQ Ranger Plus The EQ Ranger legacy from SPL has always been a go-to source of quick and intuitive frequency treatment for the fast-moving studio professional. This passive EQ design was centered on a concept that involved selecting certain optimal center frequencies for each of the eight bands in each unit, proposing a clear and quick path to the exact tones that need adjustment on a particular source. With EQ Rangers Vol. 1, this tool was available in plugin form as three separate EQ modules with uniquely optimized frequency settings: The Vocal Ranger, Bass Ranger, and Full Ranger. These extremely musical EQs allowed engineers to use handpicked critical bands to quickly dial in a frequency response for the different sources in their mix. Now, SPL has collaborated with Brainworx in evolving the EQ Rangers to their next level- EQ Ranger Plus. With frequency band settings designed by Grammy winning mixer/ producer Craig Bauer and Brainworx founder Dirk Ulrich, the EQ Ranger Plus

6 EQ Ranger Plus Analog Code Plugin
offers a vast array of new, optimized combinations of center fre-quencies and bandwidths. These settings span across six genres and 181 modules to dramatically open up the options for source treatment in any mix. Working on a dirty guitar riff in a Metal mix? Just select the “Metal/Guitar Riffs” module by selecting “Metal” in the Genre menu and “Guitar Riffs” in the Source menu and you’ll instantly get an EQ that’s been customized for just this purpose. Need to clean up and punch out that kick in an Electronic mix? Just select “Electronic” in the Genre menu and “Kick Heartbeat” in the Source menu and you’re covered. With a total of 181 mod-ules across six genres, there’s a custom EQ available for nearly any situation. It is literally like having a Grammy winning engineer set up your EQ for you! Not sure which module to pick? Simply step through each set-ting with convenient navigation buttons until you find the module that works for your sound. Every module setting also comes with a preset of boosts and cuts per-band, so you can see the intended gain setting behind each frequency selection, and have an even quicker path to dialing in your sound. Aside from all the new module options, EQ Ranger Plus also includes the three modules from the original plugin; Vox, Bass and Full Ranger. These clas-sic modules provide existing users of EQ Ranger with the sound they’re familiar with.
Introduction

EQ Ranger Plus Analog Code Plugin 7
Control Elements
Mouse Wheel ControlAll SPL Analog Code plugins support mouse wheel control for rotary controls and faders. Place the mouse cursor over a rotary control or fader and move the wheel or scroll ball of your mouse to adjust the control or fader. Hold the CTRL (Windows) or APPLE/COMMAND key while moving the wheel or scroll ball for fine adjustments with higher control resolution.
Power LEDWith a click on the POWER LED you can turn an EQ Ranger Plus on or off. The POWER LED is illuminated when the plugin is acti-vated. You can also click the ON button to activate or bypass an EQ Ranger Plus.
Signal LEDThe SIG. LED indicates that an audio signal reaches the input. In the analog world this LED helps the operator especially in com-plex setups to determine immediately whether the unjt actually receives any signal. In the digital domain it simply tells you that the channel where you inserted the plug contains a signal that is loud enough to ensure correct processing.
Overload LEDThe OVL LED indicates internal clipping. Wether the clipping is audible or not depends on the kind of audio material you are pro-cessing. Nevertheless it should be avoided that the OVL LED illu-minates. Use the Output Gain control to reduce the output level if the OVL-LEDs keeps flashing.
ResetThe Reset button allows you to reset all the gain settings, including the output gain, in the currently selected bank.

8 EQ Ranger Plus Analog Code Plugin
Control Elements
OutputWith the OUTPUT fader control you can readjust levels that were changed by previous EQ settings. For exam-
ple, if you have by and large applied cut values to the signal, the overall output level can be lifted again to meet the input level’s value. The same of course applies vice versa: simply lower the output to compensate for boosts.
FadersThe EQ Ranger plugin provides nine fader controls (also refer to “Mouse Weel Control” on page 6). The upper eight faders control the eight frequency bands, the lowest fader controls the output stage. The bell filters have individually optimized bandwidths and boost/cut values. The frequency range around the center fre-quency can be boosted (fader into direction “+”) or can be cut (fader into direction “-”). On the following pages we give examples for setting the bands of each EQ rangers Vol. 1 plugin. This is of course not a complete list as there are hundreds of modules in the plugin—we just want to give some orientation to start from.
ModulesThe modules have been designed to fit a specific instrument in a specific genre. These are contributed by some of our highest-regarded studio engineer part-ners. The center frequencies and Q factors of each band
vary between each module, according to the source and style from which the setting was designed. Every module also comes with a corresponding preset of suggested gain settings for each band. Try stepping through the modules with the + and - buttons to get a feel for the variety of possibilities for passive frequency treatment with Ranger Plus.
EQ Ranger Plus Analog Code Plugin 9
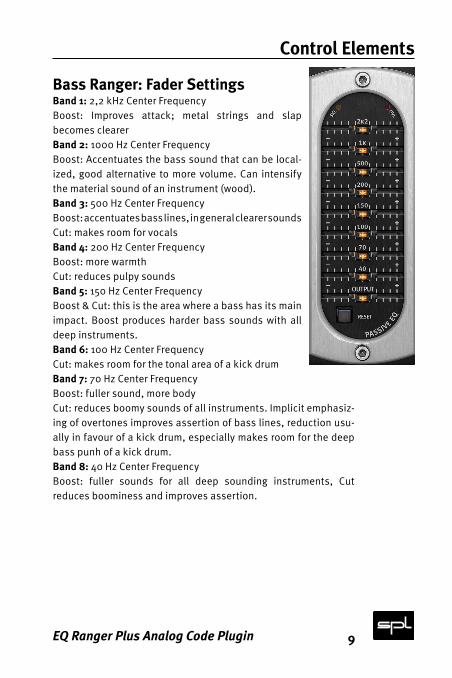
Bass Ranger: Fader Settings Band 1: 2,2 kHz Center Frequency Boost: Improves attack; metal strings and slap becomes clearerBand 2: 1000 Hz Center Frequency Boost: Accentuates the bass sound that can be local-ized, good alternative to more volume. Can intensify the material sound of an instrument (wood).Band 3: 500 Hz Center Frequency Boost: accentuates bass lines, in general clearer sounds Cut: makes room for vocals Band 4: 200 Hz Center Frequency Boost: more warmth Cut: reduces pulpy soundsBand 5: 150 Hz Center Frequency Boost & Cut: this is the area where a bass has its main impact. Boost produces harder bass sounds with all deep instruments.Band 6: 100 Hz Center Frequency Cut: makes room for the tonal area of a kick drumBand 7: 70 Hz Center Frequency Boost: fuller sound, more body Cut: reduces boomy sounds of all instruments. Implicit emphasiz-ing of overtones improves assertion of bass lines, reduction usu-ally in favour of a kick drum, especially makes room for the deep bass punh of a kick drum.Band 8: 40 Hz Center Frequency Boost: fuller sounds for all deep sounding instruments, Cut reduces boominess and improves assertion.
Control Elements

10 EQ Ranger Plus Analog Code Plugin
Control Elements
Vox Ranger: Fader Settings Band 1: 3,4 kHz Center Frequency Boost: improves intelligibility for (singing) vocals. Cut: reduces risk of feedback (live).Band 2: 2 kHz Center Frequency Boost: gets vocals up front, intensifies presence, improved intelligibility for voices (speech). Cut: masks wrong intonation, more air in backings.Band 3: 1,3 kHz Center Frequency Band 4: 880 Hz Center Frequency Band 5: 610 Hz Center Frequency Band 6: 460 Hz Center Frequency The main vocal area from about 500 to 2000 Hertz is covered from these four bands. Particular fundamen-tals can be processed here. Band 3 reaches up into the presence area, Band 6 processes the foundation.Band 7: 350 Hz Center Frequency Boost: more warmth, full sound. Cut can bring more clarity.Band 8: 240 Hz Center Frequency
Boost: Emphasizes the “belly“ of singing voices. Cut can reduce pulpy sounds/improves clarity.

EQ Ranger Plus Analog Code Plugin 11
Control Elements
Full Ranger: Fader Settings Band 1: 16 kHz Center Frequency Boost: Glitter, brilliance, air.Band 2: 5,1kHz Center Frequency Boost: Brightens up, intensifies presence. Cut: can reduce sibilance.Band 3: 2,4 kHz Center Frequency Boost: Improves intelligibility of singing voices, more attack for ac. and e-guitars or deep toms.Band 4: 890 kHz Center Frequency Boost: more bass definition and presence Cut reduces metal for brassBand 5: 350 Hz Center Frequency Boost: more profound vocals, clearer basses Cut: softens snares and toms Band 6: 140 Hz Center Frequency Boost: more warmth for everything,
main impact of bass instruments; full snare sounds Cut for vocals: avoids collisions with bass soundsBand 7: 70 Hz Center Frequency Boost: fills bass area of ac. guitars, fuller floor toms, satu-rated depth for piano. Cut for kick drum: makes room for bass; generally reduces boom-ing sounds.Band 8: 40 Hz Center Frequency Boost: in general fuller sounds, deep bass punch (kick drum). Cut: reduces booming sounds and sub harmonic interferences.

12 EQ Ranger Plus Analog Code Plugin
Vox Ranger: Filter CurvesControl Elements
Vox
Rang
er: fi
lter
cur
ves

EQ Ranger Plus Analog Code Plugin 13
Bass Ranger, Full Ranger: Filter Curves Control Elements
All diagrams on this double page show the filter characteristics of the analog RackPack Ranger modules. The lower bands have relatively narrow bandwidths for fundamental tones, the upper bands have broader bandwidths to process groups of overtones in common.
Full Ranger: filter curves
Bass Ranger: filter curves
14 EQ Ranger Plus Analog Code Plugin
Plugin Settings Toolbar Control Settings
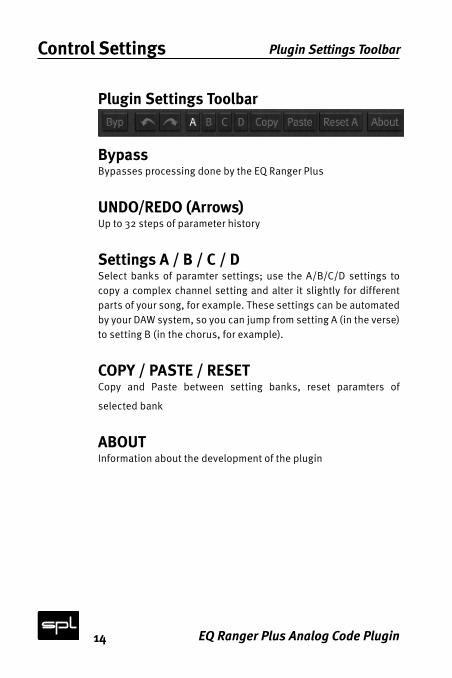
Plugin Settings Toolbar
BypassBypasses processing done by the EQ Ranger Plus
UNDO/REDO (Arrows)Up to 32 steps of parameter history
Settings A / B / C / DSelect banks of paramter settings; use the A/B/C/D settings to copy a complex channel setting and alter it slightly for different parts of your song, for example. These settings can be automated by your DAW system, so you can jump from setting A (in the verse) to setting B (in the chorus, for example).
COPY / PASTE / RESETCopy and Paste between setting banks, reset paramters of
selected bank
ABOUTInformation about the development of the plugin

EQ Ranger Plus Analog Code Plugin 15
Plugin Alliance Toolbar Control Settings
Plugin Alliance Toolbar
“KEY” ICONOpens the plugin Activation Dialog
“?” ICONOpens a dialog thorugh which one can access the plugin’s help documentation, online product page, or any available updates.
“$” ICON (When Applicable)If you’ve purchased your plugin using the Plugin Alliance Installment Payments option, the “$” icon, links to your account so you can make a payment on your Lease-License

16 EQ Ranger Plus Analog Code Plugin
Applications
EQ PrinciplesFirst cut, then boost: The hearing system is more used to energy reductions in a frequency range, thus boosts attract more atten-tion. That is, a 6 dB boost is perceived to be similar in amount to a 9 dB cut. Therefore when wishing to emphasize one frequency, it is typically better first to consider a reduction in others. The result will bring more transparency and clarity as well as reduce possible unwanted coloration of the signal.Boost harmonics: Harmonic enhancement is one of the foremost techniques for increasing the clarity and definition of an instru-ment. Examples for bass instruments: 400 Hz—bass lines will be accented, 1500 Hz—more clarity and attack sounds. Note that each instrument will have at least two frequencies where EQ can achieve a greater clarity or brilliance.Cutting fundamental levels: Cutting fundamental frequencies provides for a perceived increase in harmonics and is therefore an effective alternative to boosting harmonic levels. This is a common practice in Rock/Pop productions that can be effective in all musical recording genre. An example for the bass: reduction at 40 Hz may limit boominess and increase presence.Boosting fundamental levels: Inexperienced audio engineers will often first try to make corrections by boosting fundamentals, some-thing which in fact should be the last thing one considers. Boost-ing fundamentals typically lowers clarity and produces a muddy sound. If two instruments are playing the same part and thereby produce the same fundamental, raising these levels will lead to a decrease in the sonic difference between them. This is also true when two instruments play similar parts in the same key. Exception: When an instrument sounds thin or small, boosting the fundamental can help. Or perhaps a microphone was poorly placed or the harmonics had been raised excessively through EQ. Finally, increasing fundamental levels can also play a construc-tive role when instruments play alone or as soloists with others in the background.

EQ Ranger Plus Analog Code Plugin 17
. . . . . . . . . . . . . . . . . . . . . . . . . . . . . . . . . . . . . . . . . . . . . . . . . . . . . . . . . .
. . . . . . . . . . . . . . . . . . . . . . . . . . . . . . . . . . . . . . . . . . . . . . . . . . . . . . . . . .
. . . . . . . . . . . . . . . . . . . . . . . . . . . . . . . . . . . . . . . . . . . . . . . . . . . . . . . . . .
. . . . . . . . . . . . . . . . . . . . . . . . . . . . . . . . . . . . . . . . . . . . . . . . . . . . . . . . . .
. . . . . . . . . . . . . . . . . . . . . . . . . . . . . . . . . . . . . . . . . . . . . . . . . . . . . . . . . .
. . . . . . . . . . . . . . . . . . . . . . . . . . . . . . . . . . . . . . . . . . . . . . . . . . . . . . . . . .
. . . . . . . . . . . . . . . . . . . . . . . . . . . . . . . . . . . . . . . . . . . . . . . . . . . . . . . . . .
. . . . . . . . . . . . . . . . . . . . . . . . . . . . . . . . . . . . . . . . . . . . . . . . . . . . . . . . . .
. . . . . . . . . . . . . . . . . . . . . . . . . . . . . . . . . . . . . . . . . . . . . . . . . . . . . . . . . .
. . . . . . . . . . . . . . . . . . . . . . . . . . . . . . . . . . . . . . . . . . . . . . . . . . . . . . . . . .
. . . . . . . . . . . . . . . . . . . . . . . . . . . . . . . . . . . . . . . . . . . . . . . . . . . . . . . . . .
Your Notes
SPL – Sound Performance LabSohlweg 80, 41372 Niederkrüchten, GermanyFon: +49 (0) 21 63 9 83 40Fax: +49 (0) 21 63 98 34 20E-Mail: [email protected], Website: spl.info
EQ Ranger PlusAnalog Code Plugins
Manual


![DIALux4[1].0- · PDF filedialux 2 plugin. 1.X. plugin , plugin. luminaire selection Plugin plugin . home page, Intenet Explorer](https://img.dokumen.tips/doc/110x75/5a715aac7f8b9a98538cccda/dialux410-wwwpowerengineeringblogfacomssuacirkhadamatkarkonanarticlesbarghdialux4-learningpdfpdf.jpg)


![DataManager Plugin - d36j349d8rqm96.cloudfront.net Plugin - M… · DataManager Plugin 6Version History 6 Version History 6.1Plugin Version Plugin-Version Date [dd.mm.yyyy] Notes](https://img.dokumen.tips/doc/110x75/5f05b5577e708231d4144e44/datamanager-plugin-plugin-m-datamanager-plugin-6version-history-6-version.jpg)