Embed Size (px)
Citation preview

SOLESciences of Life Explorations:
Through AgricultureGrades 4 and 5
Teacher GuideUnit: Experimenting With Seeds


UNIT PLAN
UNIT TITLE Experimenting with Seeds
MONTH March
GOALStudents will become familiar with the scientific method and learn about the balance of environmental factors that plants need in order to grow strong and healthy.
OBJECTIVESStudents will:
Write observations of experiments in their journals, demonstrating an ability to explain data. (NYS Learning Standard 3a: Universal Foundation Skills, Elementary 1).
Demonstrate an ability to take turns speaking and responding to others’ ideas in conversations about planting seeds. (NYS Learning Standard 4: Language for Social Interaction, Elementary 1)
Write and speak using language consisting of simple seed-planting vocabulary in face-to-face conversation with peers and familiar adults. (NYS Learning Standard 1: Communication Skills, Checkpoint A Modern Languages)
Ask “why” questions in an attempt to seek greater understanding concerning objects and events they have observed and heard about. (NYS Learning Standard 1: Analysis, Inquiry, and Design, Elementary 1)
Use simple measurement instruments to carry out plans for exploring phenomena through direct observation by doing experiments on seed treatments. (NYS Learning Standard 1: Analysis, Inquiry, and Design, Elementary 2)
Describe organized observations and measurements, recognizing simple patterns and relationships in data. (NYS Learning Standard 1: Analysis, Inquiry, and Design: Elementary 3)
Explain how to test a proposed solution and perform, record, and evaluate their test under teacher supervision. (NYS Learning Standard 1: Analysis, Inquiry, and Design, Elementary 1)
Explain that measurement is approximate, never exact. (NYS Learning Standard 3: Mathematics, Elementary 5)
Record predictions related to experimental probabilities. (NYS Learning Standard 3: Mathematics, Elementary 6)
Present results of an extended mathematics and science project that requires students to gather and process information, generate and analyze ideas,and observe common themes to realize ideas.(NYS Learning Standard 7: Interdisciplinary Problem Solving, Elementary 2)
Explain how agriculture provides people’s basic food. (Food and Fiber Literacy Standard I: Understanding: A, 2-3)
1.
2.
3.
4.
5.
6.
7.
8.
9.
10.
11.

TERMS These terms are highlighted in bold throughout the =lesson pages.
Compacted - packed downConclusion - fi nal step of the scientifi c method; evaluate the hypothesis and the resultsControl - a subject in an experiment that isn’t treated with the variable (the “normal” subject to
which others are compared) Experiment - a test that is performed in order to discover or prove somethingFertilizer - material or chemicals containing nutrients added to soil to increase its ability to support
growthFirst root - the new plant’s root that grows before other roots growFirst shoot - the new plant’s fi rst leaves and stemGermination - the process in which a seed begins to grow into a new plantHypothesis - the third step of the scientifi c method; a prediction or guess of what the answer to
a question will be, based on what you may already knowMethods - the fourth step in the scientifi c method; the steps that are taken in order to test a
hypothesisNutrient - a substance that provides nourishment for growth; plants obtain nutrients from soilObservation - the fi rst step in the scientifi c method; using your fi ve senses to learn more about
somethingOversaturated - having much more than the proper amountPhotosynthesis - the process green plants use to make their own food energy using sunlight Question - the second step in the scientifi c method; wondering why something happened or what
else might happen, based on your observationsResults - the fi fth step in the scientifi c method; what happened after each step of the
experimentScientifi c method - a six-step process of fi nding an answer to a question by performing an
experimentSeed - the part of a plant that, on its own, will grow into a new plantSeed coat - outer covering that protects the seedVariable - something that is being tested in an experiment, making it different from the control
Integrated Pest Management is a specialized form of environmental management wherein scientific research and real-world application work together to reduce pests such as insects, diseases or weeds. 1. Properly identify pests 2. Learn the pest/host biology 3. Sample the environment for pests 4. Determine an action threshold 5. Choose the best tactic 6. Evaluate results
SAFETYThis unit does not have any special tools with safety concerns. Follow standard classroom safety procedures.

Standards:
Mon
th
Uni
t
Mat
h/Sc
ienc
e/an
d Te
chno
logy
Engl
ish
Lang
uage
A
rts
Soci
al S
tudi
es
HEA
LTH
AR
TS
Food
& F
iber
Li
tera
cy
CD
OS
Oth
er L
angu
ages
Inte
rcon
nect
edne
ss
3 Experimenting With Seeds 1:7 e1 1:6 A I A 2-3
1:7 e2 4:5 e1
1:7 e33:9 e53:9 e6
3a:2 e17:13 e2
Standards Matrix for this Lesson:
Standards Matrix Key:NYS Learning Standards arranged by Standard: Category, Level e = elementary i = intermediateCategories:1 Career Development 10 Science2 Universal Foundation Skills 11 Technology3 Language for Information and Understanding 12 Interconnectedness: Common Themes4 Language for Literary Response and Expression 13 Interdisciplinary Problem Solving5 Language for Social Interaction 14 History of the United States and NY6 Communication Skills 15 World History7 Analysis, Inquiry, and Design 16 Geography8 Information Systems 17 Economics9 Mathematics

ADDITIONAL RESOURCESCreepy Crawlies and the Scientific method by Sally Kneidel ISBN # 1-55591-118-8http://www.theideabox.com/ib.php/web=idea&idea=7541http://www.sciencenetlinks.com/lessons.cfm?BenchmarkID=8&DocID=377http://www.theideabox.com/ib.php?web=idea&idea=7541http://www.ars.usda.gov/is/kids/fair/story.htmhttp://www.livinghistoryfarm.org/farminginthe40s/lrScience01.htmlhttp://www.dnr.state.md.us/forests/education/needs.html
SUPPLIES AND EQUIPMENTEmpty milk cartons Crayons or colored pencils Paper towelsPotting soil Trays (4 or more) LabelsWatering can Small plastic cups Zippered plastic bagsRuler Spoons Apple juiceJournals Liquid dish soap Sweetened sodaBaking soda Seeds (Forget-me-not, kidney bean, grass) Used coffee grounds

BACKGROUND FOR TEACHERSIn the plant growth experiments that follow, students are making use of the scientific method - observing and coming up with questions, predicting answers (hypothesizing), and setting out to prove whether their hypotheses are true through experimentation. The more involvement a student has in a project, the more it impacts him or her. Experiments inspire students to learn more about a topic. The scientific method encourages students to question what they see, feel, hear, taste or smell. Forming a hypothesis and performing an experiment to test it promote higher levels of thinking skills and innovation.These experiments explore the important environmental factors that plants need for growth: sun, soil, air, and water. The sun provides the warmth and energy plants need to survive. Plants make their own food through photosynthesis, using the chlorophyll contained in their leaves and the sun’s light. Not enough sun will slow a plant’s growth and can even kill it. Too much sun can also be a problem, if the plant and soil are drying out too quickly.Soil provides a base for the roots to anchor themselves in and provides the plants with water and nutrients to help them grow. It is important that soil be loose and not packed down (compacted). It is harder for a plant to spread its roots in compacted soil. This limits their access to nutrients and weakens their hold in the ground.Air is important because plants take in carbon dioxide to use during photosynthesis and give off oxygen as a by-product. Pollution in the air can block sunlight from getting to plants and harmful chemicals can also impede plant growth. The wind is useful in carrying pollen and seeds of plants to spread them around.Water comes from the sky as precipitation and flows over or through soil into lakes, rivers, and streams. Water helps the plant move nutrients from the soil through its roots to its stems and leaves. Water keeps the plant moist and flexible, and helps it make its own food. However, a plant’s roots not only need room to spread out in the soil, they also need air. If the ground is oversaturated, it has too much water and not enough air. Some plants can die if the water is not drained away soon enough.Through these experiments, students will gain a better understanding that plants do not grow independently and discover that different factors of nature and human action influence the growth of plants. They will have a first-hand experience in learning about germination.Germination is the process of seed growth that occurs in response to warmth and water. Dormant seeds are very dry and require the absorption of water to initiate respiration and begin to digest the food stored in the endosperm. Respiration requires oxygen, which must be sufficiently available in the soil for germination to proceed. The soil must be wet, but not so waterlogged that oxygen is inaccessible. Temperatures must be above freezing, but not excessively hot (not more than about 45 degrees Celsius or 113 degrees Fahrenheit). If conditions are right, a root emerges from the seed coat, anchoring the seed; it then grows and puts out lateral roots. The first shoot of the plant, along with the first leaves, will then emerge and appear above the soil.
QUESTIONS FOR STUDENTSWhat is the scientifi c method?What is an experiment? What are the parts of a seed?What do plants need in order to grow? Can a seed survive if it is missing water, air, sun or soil?What is fertilizer?

INTEREST APPROACH ACTIVITIES
DISSECTING A SEED
Materials:Lima bean seedsWaterPanPlastic knivesMagnifying glass
ProcedureSoak lima bean seeds in a pan of water overnight.Have students examine each seed with a magnifying glass.Have students split the seeds open using their fi ngernails or a plastic knife.Re-examine the seeds, looking at the different parts:
Seed coat - protects the seedSoft fl esh - food for plantFirst rootFirst shoot/Leaves
Teacher or students draw the seed on the chalkboard and label its parts.
FACTORS INFLUENCING SEED GERMINATION Factor A: Depth of Planting
Materials:2-quart milk cartonsPotting soilSeeds (corn and radish)
ProcedurePunch several holes in the side of the cartons, near the base, for drainage.Cut off or open up the tops of the cartons.Add 2 inches of potting soil to one of the cartons.On top of the 2-inch layer of soil, place 3 corn seeds and 6 radish seeds.Fill the remaining portion of the carton with potting soil.Fill a second carton nearly full with potting soil, to about 1 inch from the top.Following the directions on the back of the seed packet for depth, plant 3 corn and 6 radish seeds.Cover the seeds with approximately 3/4 inch of potting soil.Place both cartons, side by side, on a classroom window sill or under grow lights.Water as needed (suggested every other day) keeping the potting soil moist.Make predictions about the seeds’ growth.Students make observations briefl y as needed, recording data in journals.After a couple of weeks, discuss observations in class.Draw conclusions about how planting depth affected seed growth.
1.2.3.4.
A.B.C.D.
4.
1.2.3.4.5.6.7.
8.9.10.11.12.13.14.

Factor B: Excess Water and Drainage
MaterialsSame as for Factor A Procedure
Punch several holes in the bottom of one of the cartons.Open up or cut the tops off of both cartons.Fill both cartons 4/5 full of potting soil.Place 3 corn seeds and 6 radish seeds on the top of the soil in each carton.Cover the seeds in both cartons with approximately 3/4 inch of potting soil.Using a measuring cup, add 2 cups of water to each carton.Place each carton on a paper plate and place them on a window sill or under grow lights. Label each container with the date, type of seeds, and carton treatment.Predict what will happen to the seeds.Make observations for the next two weeks.State observations in class discussion.Draw conclusions about the results. How did the drainage affect growth?
Factor C: Light and Dark
Materials:Potting soilStyrofoam coffee cupsShoebox (large enough fora cup to stand upright inside)Marigold seeds
ProcedureThe following demonstration may be for the entire class or done individually, depending on the amount of classroom space and the number of participants.
Using a ballpoint pen or sharpened pencil, punch 3 holes in the bottom of 2 cups.Fille the cups most of the way with potting soil, and plant 3 marigold seeds in each of the cups according to package directions.Place one cup on a window sill or under grow lights.Place the other in a dark place, such as inside a shoebox. Punch several air holes in the box.Make predictions about how the seeds will grow.Make observations as the days go by and record them in journals. During this time, be sure to water the seeds regularly, givign each the same amount of water each time.After a couple of weeks, discuss the results and make conclusions.
The class may decide to try seed treatments of their own in addition to those given here, such as the effect of seed damage or the effect of temperature on germination.
1.2.3.4.5.6.7.8.9.10.11.12.
1.2.
3.4.5.6.7.
8.
(For related activities, refer to student worksheets 2A, 2B, & 3)
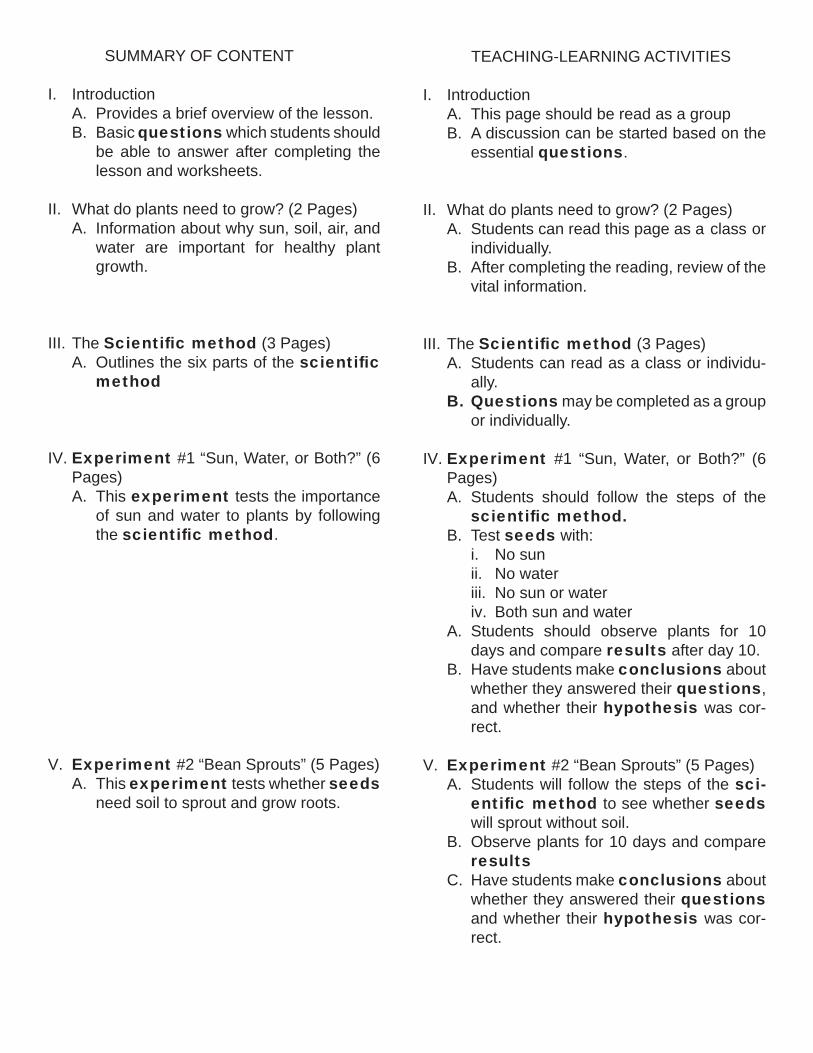
SUMMARY OF CONTENT
IntroductionProvides a brief overview of the lesson.Basic questions which students should be able to answer after completing the lesson and worksheets.
What do plants need to grow? (2 Pages)Information about why sun, soil, air, and water are important for healthy plant growth.
The Scientifi c method (3 Pages)Outlines the six parts of the scientifi c method
Experiment #1 “Sun, Water, or Both?” (6 Pages)
This experiment tests the importance of sun and water to plants by following the scientifi c method.
Experiment #2 “Bean Sprouts” (5 Pages)This experiment tests whether seeds need soil to sprout and grow roots.
I.A.B.
II.A.
III.A.
IV.
A.
V.A.
TEACHING-LEARNING ACTIVITIES
IntroductionThis page should be read as a groupA discussion can be started based on the essential questions.
What do plants need to grow? (2 Pages)Students can read this page as a class or individually.After completing the reading, review of the vital information.
The Scientifi c method (3 Pages)Students can read as a class or individu-ally.Questions may be completed as a group or individually.
Experiment #1 “Sun, Water, or Both?” (6 Pages)
Students should follow the steps of the scientifi c method. Test seeds with:
No sun No water No sun or waterBoth sun and water
Students should observe plants for 10 days and compare results after day 10.Have students make conclusions about whether they answered their questions, and whether their hypothesis was cor-rect.
Experiment #2 “Bean Sprouts” (5 Pages)Students will follow the steps of the sci-entifi c method to see whether seeds will sprout without soil.Observe plants for 10 days and compare results Have students make conclusions about whether they answered their questions and whether their hypothesis was cor-rect.
I.A.B.
II.A.
B.
III.A.
B.
IV.
A.
B.i.ii.iii.iv.
A.
B.
V.A.
B.
C.

SUMMARY OF CONTENT
Experiment #3 “Fertilizer” (5 Pages)Tests what works as a fertilizer.You may choose to tell students what their fertilizer is or have them guess.Hypothesize about how they think differ-ent fertilizers work.
ReviewSummary of main facts and lesson vo-cabulary.
Test Your KnowledgeCovers the four things that plants need to grow Asks students what experiments they like best and least.
Vocabulary
VI.A.B.
C.
VII.A.
VIII.A.
B.
IX.
TEACHING-LEARNING ACTIVITIES
Experiment #3 “Fertilizer” (5 Pages)Students should follow the steps of the scientifi c method to see what types of products work as fertilizerStudents should observe plants for 10 days and compare results.Have students draw conclusions about whether they answered their questions and whether their hypothesis was cor-rect.You may choose to tell students what their fertilizer is or have them guess.Students may hypothesize about how they think different fertilizers work.
ReviewProvided for student reference
Test Your KnowledgeStudent should complete this page indi-viduallyThis sheet can be used as a review or as a quiz grade
VocabularyProvided for student reference
VI.A.
B.
C.
D.
E.
VII.A.
VIII.A.
B.
IX.A.

name____________________________
Student Lesson: Experimenting with SeedsIntroduction
Do you ever wonder why grass grows, fl owers bloom, and fruits blossom and ripen? It is because they are getting the right things they need to help them grow! In the wilderness, plants have to get everything directly from the Earth. In a garden, people help the plants get what they need.
Sunlight, healthy soil, clean air, and clean water all work together to help a seed become a strong, healthy plant. What would happen if a plant didn’t get enough water, air, sun, or nutrientsfrom the soil? Would the plant still grow? Or would it die?
The word “science” comes from the Latin word “sciens” meaning “to know.” But science isn’t just facts in a book that you have to learn and memo-rize. It’s a process of discovery, a way to learn how things work by drawing conclusions from what you learn and observe.
Scientists have not learned all there is to know about life on Earth and how the universe works. People are fi nding out new things every day by us-ing science. It can be a lot of fun! In this lesson you will have the chance to perform experiments on plant seeds, and to be a real scientist!
What do plants need in order to grow?
What is an experiment?
What is the scientifi c method?
Can seeds survive if they are missing water, air, sun, or soil?
What does fertilizer do?

Student Worksheet 2-A
name____________________________
Student Lesson: Experimenting with SeedsWhat do plants need to grow?
SunThe sun provides warmth and energy for plants to survive. Plants use the sun’s energy to make their own food energy in their leaves. Not enough sun will slow down a plant’s growth and can even kill it. Too much sun can also be a problem, if the plant and soil dry out too quickly.
SoilSoil provides a base for the roots to hold on to as a plant grows bigger. It also provides plants with water and the nutrients they need to be healthy. Nutrients in the soil help plants grow strong. In turn, some plants become healthy food for us.It is important for soil to be healthy and not packed down (compacted). If the soil in a fi eld is compacted, farmers plow to loosen it before they plant their seeds.Think of compacted soil as a snowball. When snow falls, it is fl uffy. To make a snowball, you have to pack it tightly with your hands. It becomes heavier and the snowfl akes move closer together. That is what compacted soil is like. Or, have you ever tried to walk through a room that’s so full of people you can’t get in between them? That’s what roots have to do in compacted soil.Compacted soil makes it harder for roots to spread out. This limits their access to water and nu-trients and weakens the plant’s hold in the ground. The more room roots have, the more soil the plant can hold in place so it doesn’t wash away during a rain storm, or erode.

Student Worksheet 2-B
name____________________________
Student Lesson: Experimenting with SeedsWhat do plants need to grow?
AirPlants take in carbon dioxide from the air to use in the process of photosynthesis (making their own food energy) and give off oxygen which we use. Pollution in the air, from machines, fi res, and other sources, can block sunlight from plants. Harmful chemicals in pollution can be bad for plant growth too. The wind carries pollen and seeds of plants to help spread them around. This is the plant’s way of reproducing.
WaterIt comes from the sky as precipitation and it fl ows over or through soil into lakes, rivers, and streams. Water is very important to plant growth. Water helps the plant move nutrients from the soil up through its stems and leaves. Water keeps the plant moist and fl exible, and helps the plant make its own food.When growing your own plants, pay attention to how often it rains and how long the ground takes to soak up the water. If it hasn’t rained in a while and the soil feels dry, you may need to water your plants. You can do this with a hose, a sprinkler, or a watering can.
However, don’t over-water your plants, either. A plant’s roots not only need room to spread out in the soil, they also need air! If the ground is oversaturated, it has too much water and not enough air. Some plants can die if the water is not drained away soon enough.

Student Worksheet 3-A
name____________________________
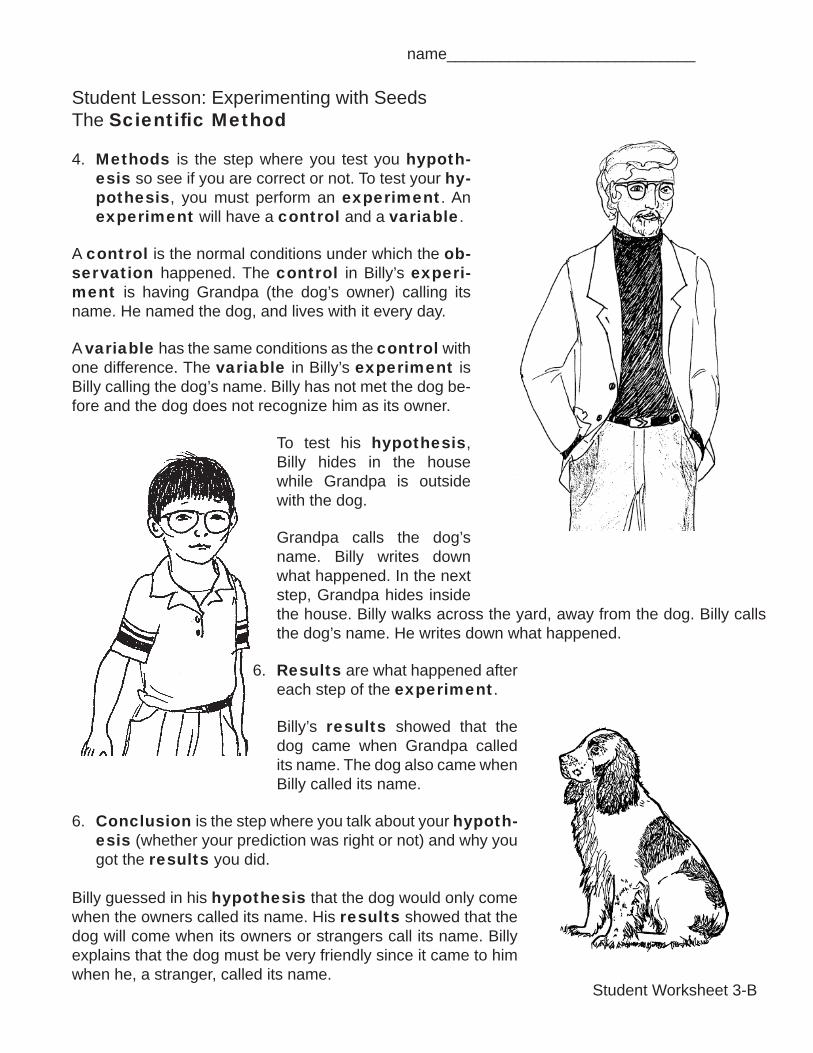
Student Lesson: Experimenting with SeedsThe Scientifi c Method
The scientifi c method is the process of fi nding the answer to a question by performing an experiment. There are six steps to follow when using the scientifi c method and they are: observation, question, hypothesis, methods, results, and conclusion. Billy is going to use the scientifi c method to learn about dogs.
Observation is using any of your fi ve senses (sight, touch, taste, listen, and smell) to learn more about something.
When observing Grandpa’s dog, Billy can use his sight to see how the dog wags its tail. He can pet the dog to feel his fur. He can smell the dog and listen to the dog’s bark. However, Billy probably wouldn’t want to try tasting the dog. Would you?
Question is the step where you think of questions based on your observations. You might wonder why something happened, or what else could hap-pen.
Billy thinks of questions he would like to ask about the dog.
Does it come when a stranger calls its name? Does it prefer to chew on bones or squeaky toys? Does the dog prefer being outside or inside during the day?
Hypothesis is a prediction or guess of what the answer is to a question. You can predict what will happen or will not happen based on what you al-ready know.
Billy wants to know if the dog comes when a stranger calls its name. Billy knows that when people train their dogs, they usually teach the dog to come to them when they call its name. Billy’s hypothesis is that the dog will only come when its name is called by its owner.
1.
2.
•••
3.
?
Student Worksheet 3-B
name____________________________
Student Lesson: Experimenting with SeedsThe Scientifi c Method
Methods is the step where you test you hypoth-esis so see if you are correct or not. To test your hy-pothesis, you must perform an experiment. An experiment will have a control and a variable.
A control is the normal conditions under which the ob-servation happened. The control in Billy’s experi-ment is having Grandpa (the dog’s owner) calling its name. He named the dog, and lives with it every day.
A variable has the same conditions as the control with one difference. The variable in Billy’s experiment is Billy calling the dog’s name. Billy has not met the dog be-fore and the dog does not recognize him as its owner.
To test his hypothesis, Billy hides in the house while Grandpa is outside with the dog.
Grandpa calls the dog’s name. Billy writes down what happened. In the next step, Grandpa hides inside the house. Billy walks across the yard, away from the dog. Billy calls the dog’s name. He writes down what happened.
Results are what happened after each step of the experiment.
Billy’s results showed that the dog came when Grandpa called its name. The dog also came when Billy called its name.
Conclusion is the step where you talk about your hypoth-esis (whether your prediction was right or not) and why you got the results you did.
Billy guessed in his hypothesis that the dog would only come when the owners called its name. His results showed that the dog will come when its owners or strangers call its name. Billy explains that the dog must be very friendly since it came to him when he, a stranger, called its name.
4.
6.
6.

Student Worksheet 3-C
name____________________________
Student Lesson: Experimenting with SeedsThe Scientifi c Method
List the steps of the scientifi c method in order:
_____________________
_____________________
_____________________
_____________________
_____________________
_____________________
What is a hypothesis?
___________________________________________________________________________
___________________________________________________________________________
___________________________________________________________________________
In which step do you perform an experiment to test your hypothesis?
___________________________________________________________
In this lesson, you will be performing experiments on the seeds of plants. You have alredy learned what plants need to grow.
Write down a question you have about how plants grow:
___________________________________________________________________________
___________________________________________________________________________
___________________________________________________________________________
1.
1)
2)
3)
4)
5)
6)
2.
3.
4.

Student Worksheet 4-A
name____________________________
Student Lesson: Experimenting with SeedsExperiment #1: “Sun, Water, or Both?”
Observation: Outside the sun shines during the day and water falls from rain clouds. Plants seem to be growing all of the time. But the sun doesn’t shine at night and clouds don’t always rain.
Question: If seeds can grow, whether or not the sun is shining or clouds are raining, do they even need sun and water to grow?
Write your hypothesis (educated guess)
______________________________________________________________________________
______________________________________________________________________________
______________________________________________________________________________
The methods (experiment) used to test your hypothesis:
Materials: 4 clear plastic cups Potting soil Spoon Flower seeds Paper towels RulerCrayon/pencil Labels Masking tape
Procedure:
Use your spoon to scoop potting soil into your plastic cups until each cup is 3/4 full.
Plant 3 to 4 seeds in each cup.
Label each cup with your name. Then, label the fi rst cup “no sun,” the second cup “no water,” and the third cup “no sun or water.” These cups will be the variables.
Label the fourth cup “sun and water”. This cup will be the control.
Set each cup on its assigned tray: all “no water” cups on the “no water” tray, etc.
Over the next two weeks, look at your cups each day. Water the “no sun” and the “sun and water” cups. Write down your observations and draw a picture of what you see.

Student Worksheet 4-B
name____________________________
Student Lesson: Experimenting with SeedsExperiment #1: “Sun, Water, or Both?”
Draw and write what’s happening in your cup each day.DAY 1 _____________________________________________
_____________________________________________
_____________________________________________
_____________________________________________
_____________________________________________
DAY 2 _____________________________________________
_____________________________________________
_____________________________________________
_____________________________________________
_____________________________________________
DAY 3 _____________________________________________
_____________________________________________
_____________________________________________
_____________________________________________
_____________________________________________

Student Worksheet 4-C
name____________________________
Student Lesson: Experimenting with SeedsExperiment #1: “Sun, Water, or Both?”
DAY 4 _____________________________________________
_____________________________________________
_____________________________________________
_____________________________________________
_____________________________________________
DAY 5 _____________________________________________
_____________________________________________
_____________________________________________
_____________________________________________
_____________________________________________
DAY 6 _____________________________________________
_____________________________________________
_____________________________________________
_____________________________________________
_____________________________________________
DAY 7 _____________________________________________
_____________________________________________
_____________________________________________
_____________________________________________
_____________________________________________

Student Worksheet 4-D
name____________________________
Student Lesson: Experimenting with SeedsExperiment #1: “Sun, Water, or Both?”
DAY 8 _____________________________________________
_____________________________________________
_____________________________________________
_____________________________________________
_____________________________________________
DAY 9 _____________________________________________
_____________________________________________
_____________________________________________
_____________________________________________
_____________________________________________
DAY 10 _____________________________________________
_____________________________________________
_____________________________________________
_____________________________________________
_____________________________________________
After you make your last observations on Day 10, collect all four of your cups and pick up a couple of paper towels.
Using a spoon, carefully scoop the plants out of the fi rst cup and set them on the paper towel. Draw what you see on the next page.
Use a ruler to measure the height of each plant, from the top of the sprout to the tip of the roots. The seeds may still be attached. Write your measurement next to your bean drawings on the next page.

Student Worksheet 4-E
name____________________________
Student Lesson: Experimenting with SeedsExperiment #1: “Sun, Water, or Both?”
Repeat steps 8 and 9 with each of your other three cups.
Cup Labeled: ________________________________
Cup Labeled: ________________________________
Cup Labeled: ________________________________
Cup Labeled: ________________________________

Student Worksheet 4-F
name____________________________
Student Lesson: Experimenting with SeedsExperiment #1: “Sun, Water, or Both?”
You are almost done!
Results: What happened in your experiment? Answer the questions below to record your results.
Which cup grew the tallest plants? _____________________________
Which cup grew the shortest or no plants? _____________________________
Did any plants grow to about the same height? _____________________________
Conclusion: Do your results answer the question at the beginning of the experiment? Is your hypoth-esis? Write your answers below.
___________________________________________________________
___________________________________________________________
___________________________________________________________
___________________________________________________________
___________________________________________________________
___________________________________________________________
___________________________________________________________
___________________________________________________________
___________________________________________________________
___________________________________________________________
___________________________________________________________
___________________________________________________________
___________________________________________________________
1.
2.
3.

Student Worksheet 5-A
name____________________________
Student Lesson: Experimenting with SeedsExperiment #1: “Bean Sprouts”
Observation: The roots of plants seem to always be in the soil.
Question: Do seeds need soil to sprout and grow roots?
Write your hypothesis (educated guess):
___________________________________________________________
___________________________________________________________
___________________________________________________________
The methods (experiment) used to test your hypothesis/guess:
Materials: 1 zippered plastic bagPaper towelsWater1 plastic cupPotting soilSpoon6 to 8 beans (seeds of the bean plant)
Procedure:Fold a damp sheet of paper towel so it fi ts inside the bag. Put 3 to 4 beans inside This is the variable (no soil).
Close the bag and write your name on it with a permanent marker. Your teacher may help you with this.
Set your bag on a window sill where it can receive sunlight during the day. Each day, open the bag to give the seeds fresh air and redampen the paper towel if it is get-ting too dry.
Use your spoon to fi ll your cup 3/4 full of potting soil. Plant 3 to 4 beans in the soil. This is the control.
Label your cup with your name and set it where it can receive sunlight during the day. Remember to keep the soil moist - not too wet or dry.
Over the next two weeks, draw your observations of the beans in the bag. Write down your observations of the beans in the cup. Use the following pages.
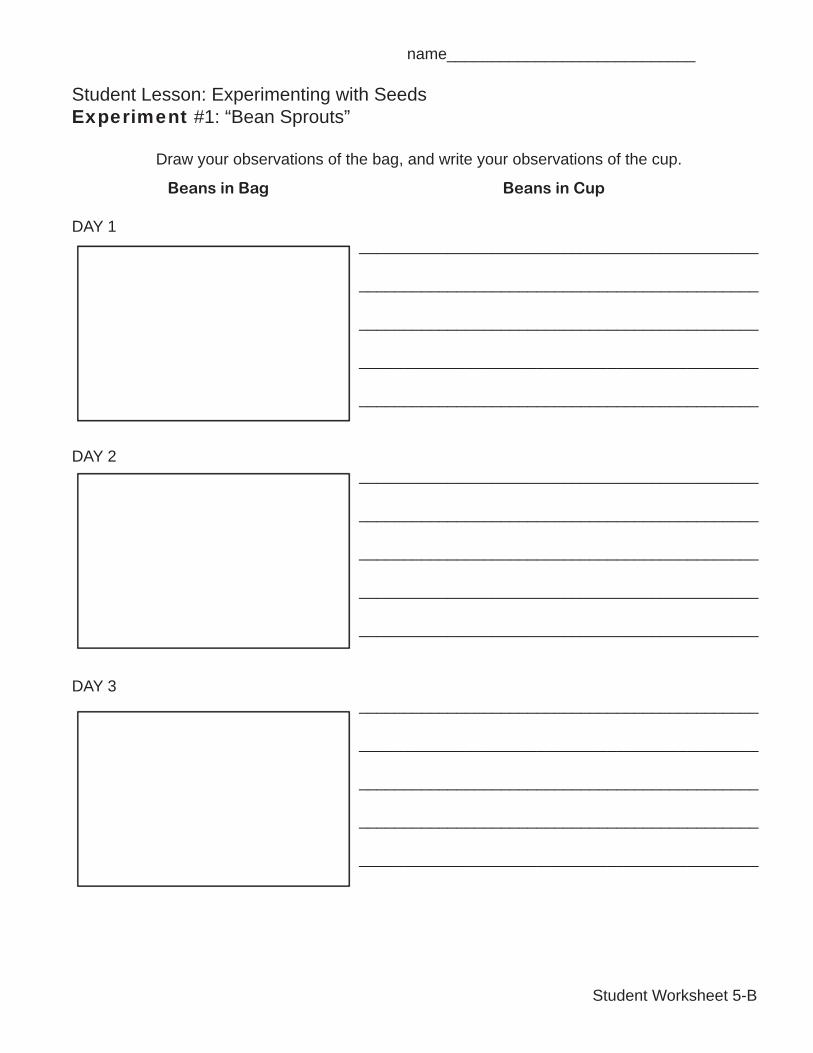
Student Worksheet 5-B
Beans in Bag Beans in Cup
DAY 1 _____________________________________________
_____________________________________________
_____________________________________________
_____________________________________________
_____________________________________________
DAY 2 _____________________________________________
_____________________________________________
_____________________________________________
_____________________________________________
_____________________________________________
DAY 3 _____________________________________________
_____________________________________________
_____________________________________________
_____________________________________________
_____________________________________________
name____________________________
Student Lesson: Experimenting with SeedsExperiment #1: “Bean Sprouts”
Draw your observations of the bag, and write your observations of the cup.

Student Worksheet 5-C
name____________________________
Student Lesson: Experimenting with SeedsExperiment #1: “Bean Sprouts”
Beans in Bag Beans in CupDAY 4 _____________________________________________
_____________________________________________
_____________________________________________
_____________________________________________
_____________________________________________
DAY 5 _____________________________________________
_____________________________________________
_____________________________________________
_____________________________________________
_____________________________________________
DAY 6 _____________________________________________
_____________________________________________
_____________________________________________
_____________________________________________
_____________________________________________
DAY 7 _____________________________________________
_____________________________________________
_____________________________________________
_____________________________________________
_____________________________________________

Student Worksheet 5-D
name____________________________
Student Lesson: Experimenting with SeedsExperiment #1: “Bean Sprouts”
Beans in Bag Beans in CupDAY 8 _____________________________________________
_____________________________________________
_____________________________________________
_____________________________________________
_____________________________________________
DAY 9 _____________________________________________
_____________________________________________
_____________________________________________
_____________________________________________
_____________________________________________
DAY 10 _____________________________________________
_____________________________________________
_____________________________________________
_____________________________________________
_____________________________________________
After you make your last observations on Day 10, collect your bag and cup. Get a sheet of paper towel and use your spoon to scoop the seedlings out of the cup.
Compare what you see in the bag with what you scooped out of the cup.

Student Worksheet 5-E
name____________________________
Student Lesson: Experimenting with SeedsExperiment #1: “Bean Sprouts”
You are almost done!
Results: What happened in your experiment? Why? Answer the questions below to record your results.
Where did beans grow both roots and sprouts: the bag or the cup? __________________
Were there any beans that didn’t grow roots or sprouts? __________________
Conclusion: Do your results answer the question at the beginning of the experiment? Is your hypoth-esis or guess correct? Write your answers below.
___________________________________________________________
___________________________________________________________
___________________________________________________________
___________________________________________________________
___________________________________________________________
___________________________________________________________
___________________________________________________________
___________________________________________________________
___________________________________________________________
___________________________________________________________
___________________________________________________________
___________________________________________________________
___________________________________________________________
___________________________________________________________
1.
2.

Student Worksheet 6-A
name____________________________
Student Lesson: Experimenting with SeedsExperiment #3: “Fertilizer”
Observation: Garden and agriculture supply stores sell fertilizers. Gardeners and farmers use fertilizers to help their plants grow better and faster by giving them extra nutrients.
Question: If I don’t want to spend money on pre-made fertilizer, what can I use around my house to fer-tilize my plants? We suggest you try making a fertilizer solution out of each of these items: sugar-sweetened soda, apple juice, dish soap, baking soda, and leftover coffee grounds. You can also use a purchased indoor plant fertilizer.
Write your hypothesis (educated guess):
___________________________________________________________
___________________________________________________________ ___________________________________________________________
The methods (experiment) used to test your hypothesis/guess:
Materials: Large Styrofoam cups Grass seedsPotting soil SpoonsPermanent marker Water or fertilizer solutionRuler
Procedure:
Divide into groups. Some groups will water their cups with different types of fertil-izer and water solutions. Some will water their cups with just water (they will be the control).Fill your cup 3/4 full with potting soil. Plant your seeds in the soil. Write your name on the side of the cup.
Lightly water your seeds. Make sure you label your cup with the type of solution you are using. Your teacher may choose to label them with the name of fertilizer or just use a letter like A, B, C, D or E.Write down your observations each day for the next ten school days. After the grass plants sprout, measure and record their heights.

Student Worksheet 6-B
name____________________________
Student Lesson: Experimenting with SeedsExperiment #3: “Fertilizer”
Record your observations here.
My fertilizer solution is: plain water OR ________________________
Day 1 _______________________________________________________
_______________________________________________________
_______________________________________________________
Day 2 ______________________________________________________
_______________________________________________________
_______________________________________________________
Day 3 ______________________________________________________
_______________________________________________________
_______________________________________________________
Day 4 ______________________________________________________
_______________________________________________________
_______________________________________________________
Day 5 ______________________________________________________
_______________________________________________________
_______________________________________________________

Student Worksheet 6-C
name____________________________
Student Lesson: Experimenting with SeedsExperiment #3: “Fertilizer”
Day 6 _______________________________________________________
_______________________________________________________
_______________________________________________________
Day 7 ______________________________________________________
_______________________________________________________
_______________________________________________________
Day 8 ______________________________________________________
_______________________________________________________
_______________________________________________________
Day 9 ______________________________________________________
_______________________________________________________
_______________________________________________________
Day 10 ______________________________________________________
_______________________________________________________
_______________________________________________________

Student Worksheet 6-D
name____________________________
Student Lesson: Experimenting with SeedsExperiment #3: “Fertilizer”
Results: What happened in this experiment?Is it obvious which produced the tallest plants? _________________
Each group should determine the average height of their plant. Your teacher will advise you how to measure the plants, so that everyone uses the same method.
Add the height of each plant in your group together, then divide that answer by the number of plants. Write the name or letter of each solution and the average height.
Which fertilizer solution produced the tallest plants?______________
What was that fertilizer solution made of?______________________
Student Worksheet 6-E
name____________________________
Student Lesson: Experimenting with SeedsExperiment #3: “Fertilizer”
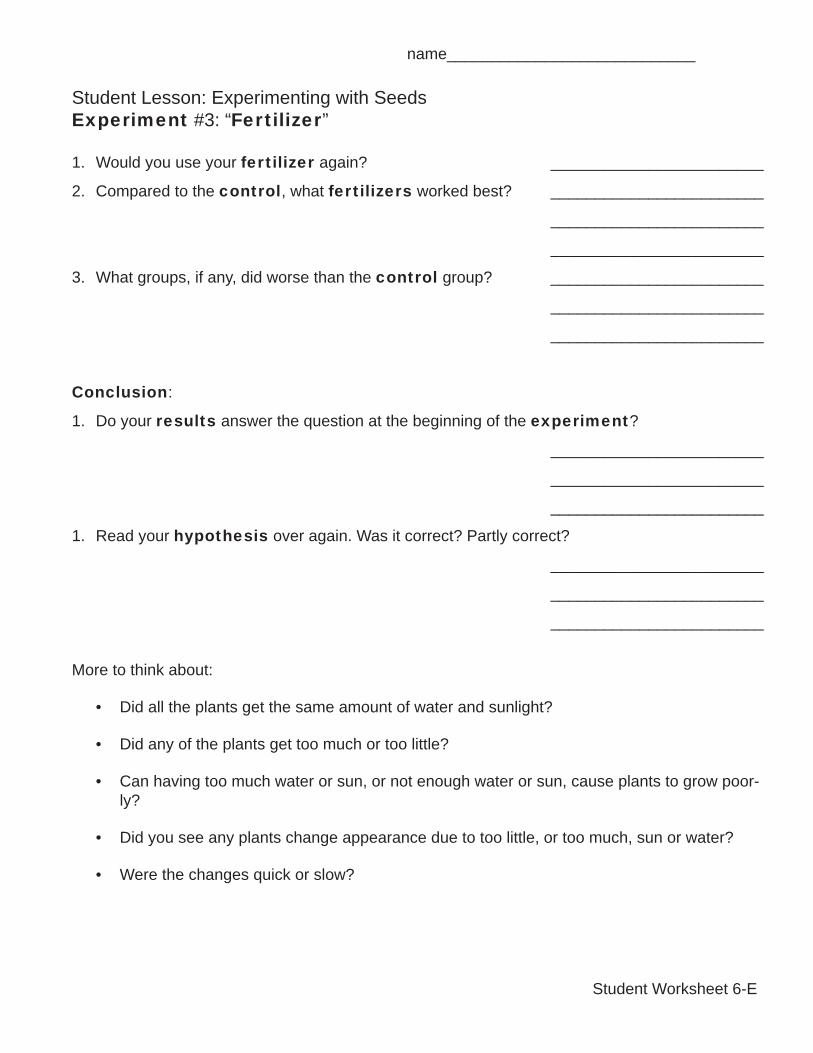
Would you use your fertilizer again? ________________________
Compared to the control, what fertilizers worked best? ________________________
________________________
________________________
What groups, if any, did worse than the control group? ________________________
________________________
________________________
Conclusion:
Do your results answer the question at the beginning of the experiment?
________________________
________________________
________________________
Read your hypothesis over again. Was it correct? Partly correct?
________________________
________________________
________________________
More to think about:
Did all the plants get the same amount of water and sunlight?
Did any of the plants get too much or too little?
Can having too much water or sun, or not enough water or sun, cause plants to grow poor-ly?
Did you see any plants change appearance due to too little, or too much, sun or water?
Were the changes quick or slow?
1.
2.
3.
1.
1.
•
•
•
•
•
Student Worksheet 7
name____________________________
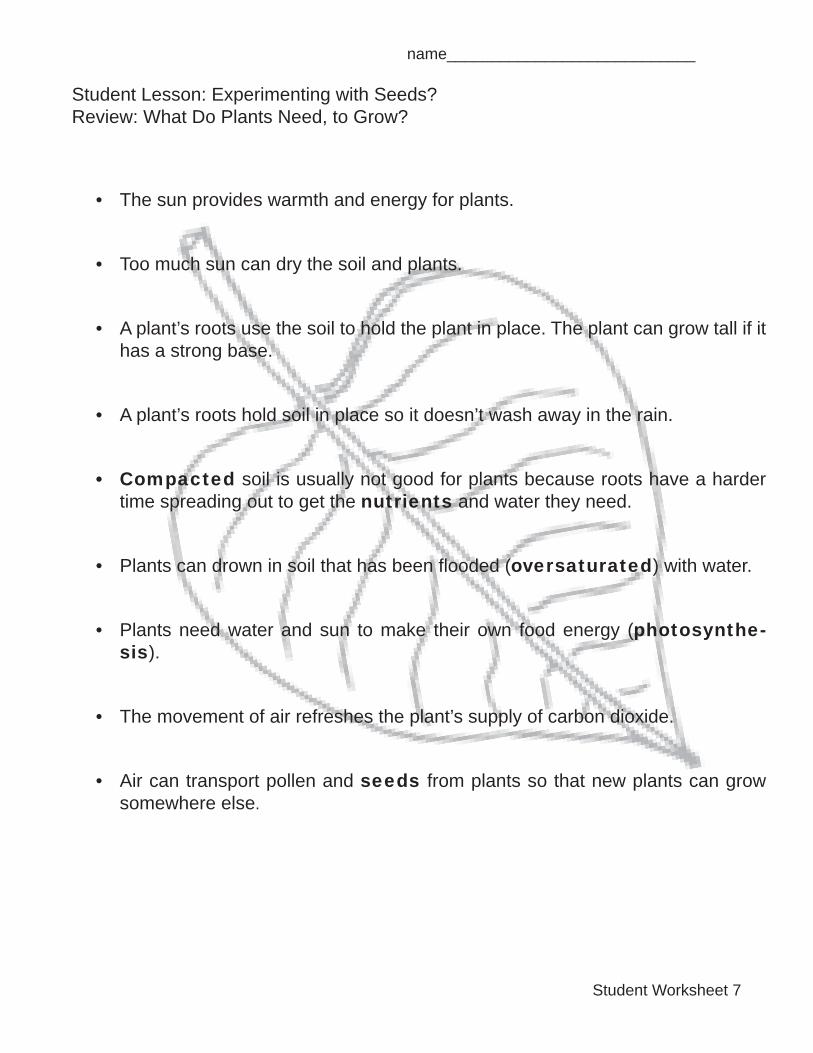
Student Lesson: Experimenting with Seeds?Review: What Do Plants Need, to Grow?
The sun provides warmth and energy for plants.
Too much sun can dry the soil and plants.
A plant’s roots use the soil to hold the plant in place. The plant can grow tall if it has a strong base.
A plant’s roots hold soil in place so it doesn’t wash away in the rain.
Compacted soil is usually not good for plants because roots have a harder time spreading out to get the nutrients and water they need.
Plants can drown in soil that has been fl ooded (oversaturated) with water.
Plants need water and sun to make their own food energy (photosynthe-sis).
The movement of air refreshes the plant’s supply of carbon dioxide.
Air can transport pollen and seeds from plants so that new plants can grow somewhere else.
•
•
•
•
•
•
•
•
•

Student Worksheet 8
name____________________________
Student Lesson: Experimenting with SeedsTest Your Knowledge
1. What would happen to a plant without water? How about a plant without light?
______________________________________________________________________
______________________________________________________________________
2. What can you do to help a plant if the soil is dry?
______________________________________________________________________
3. Can a plant have too much water? Explain.
______________________________________________________________________
4. Why is compacted soil bad for growing plants?
______________________________________________________________________
5. Why is polluted air not good for growing plants?
______________________________________________________________________
6. Which experiment did you like best? Why?
______________________________________________________________________
______________________________________________________________________
______________________________________________________________________
7. Which experiment did you like the least? Why?
______________________________________________________________________
______________________________________________________________________
______________________________________________________________________

name____________________________
Student Lesson: Experimenting with SeedsVocabulary
Compacted - packed downConclusion - fi nal step of the scientifi c method; evaluate the hypothesis and the resultsControl - a subject in an experiment that isn’t treated with the variable (the “normal” subject to
which others are compared) Experiment - a test that is performed in order to discover or prove somethingFertilizer - material or chemicals containing nutrients added to soil to increase its ability to support
growthFirst root - the new plant’s root that grows before other roots growFirst shoot - the new plant’s fi rst leaves and stemGermination - the process in which a seed begins to grow into a new plantHypothesis - the third step of the scientifi c method; a prediction or guess of what the answer to
a question will be, based on what you may already knowMethod - the fourth step in the scientifi c method; the steps that are taken in order to test a
hypothesisNutrient - a substance that provides nourishment for growth; plants obtain nutrients from soilObservation - the fi rst step in the scientifi c method; using your fi ve senses to learn more about
somethingOversaturated - having much more than the proper amountPhotosynthesis - the process green plants use to make their own food energy using sunlight Question - the second step in the scientifi c method; wondering why something happened or what
else might happen, based on your observationsResults - the fi fth step in the scientifi c method; what happened after each step of the
experimentScientifi c method - a six-step process of fi nding an answer to a question by performing an
experimentSeed - the part of a plant that, on its own, will grow into a new plantSeed coat - outer covering that protects the seedVariable - something that is being tested in an experiment, making it different from the control
Integrated Pest Management is a specialized form of environmental management wherein scientific research and real-world application work together to reduce pests such as insects, diseases or weeds. 1. Properly identify pests 2. Learn the pest/host biology 3. Sample the environment for pests 4. Determine an action threshold 5. Choose the best tactic 6. Evaluate results Student Worksheet 9
Teacher Information for Student Worksheets
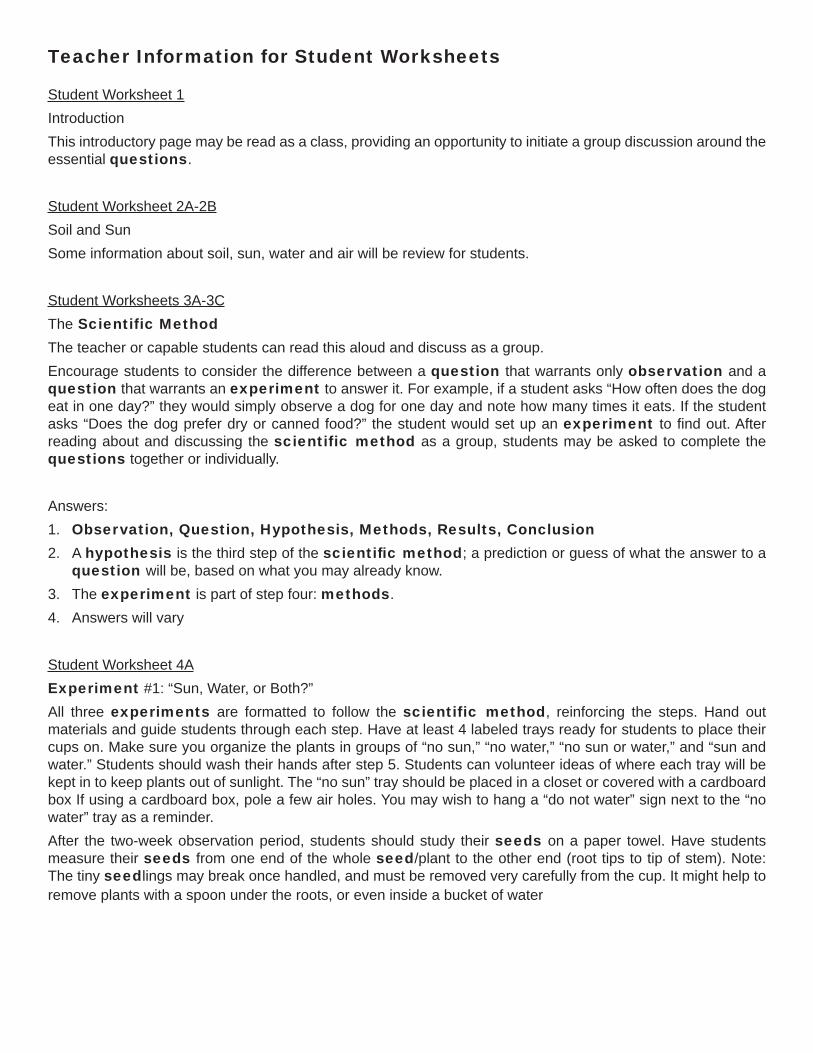
Student Worksheet 1IntroductionThis introductory page may be read as a class, providing an opportunity to initiate a group discussion around the essential questions.
Student Worksheet 2A-2BSoil and SunSome information about soil, sun, water and air will be review for students.
Student Worksheets 3A-3CThe Scientific MethodThe teacher or capable students can read this aloud and discuss as a group.Encourage students to consider the difference between a question that warrants only observation and a question that warrants an experiment to answer it. For example, if a student asks “How often does the dog eat in one day?” they would simply observe a dog for one day and note how many times it eats. If the student asks “Does the dog prefer dry or canned food?” the student would set up an experiment to find out. After reading about and discussing the scientific method as a group, students may be asked to complete the questions together or individually.
Answers:Observation, Question, Hypothesis, Methods, Results, ConclusionA hypothesis is the third step of the scientifi c method; a prediction or guess of what the answer to a question will be, based on what you may already know.The experiment is part of step four: methods.Answers will vary
Student Worksheet 4AExperiment #1: “Sun, Water, or Both?”All three experiments are formatted to follow the scientific method, reinforcing the steps. Hand out materials and guide students through each step. Have at least 4 labeled trays ready for students to place their cups on. Make sure you organize the plants in groups of “no sun,” “no water,” “no sun or water,” and “sun and water.” Students should wash their hands after step 5. Students can volunteer ideas of where each tray will be kept in to keep plants out of sunlight. The “no sun” tray should be placed in a closet or covered with a cardboard box If using a cardboard box, pole a few air holes. You may wish to hang a “do not water” sign next to the “no water” tray as a reminder.After the two-week observation period, students should study their seeds on a paper towel. Have students measure their seeds from one end of the whole seed/plant to the other end (root tips to tip of stem). Note: The tiny seedlings may break once handled, and must be removed very carefully from the cup. It might help to remove plants with a spoon under the roots, or even inside a bucket of water
1.2.
3.4.

.Student Worksheet 4B-DExperiment #1: “Sun, Water, or Both?”Students should use the boxes on the left of their page to draw what they see, and the lines on the right to write their observations. Complete sentences are not needed: short notes like “nothing growing yet” or “one small sprout” are acceptable.
Student Worksheet 4EExperiment #1 “Sun, Water, or Both?” Students draw their final observations of what the seeds from each cup look like. Remind students to label which box describes which cup. The measurement should be next to its corresponding drawing. Have students clean up their mess and wash their hands. Students may wish to keep a plant that was doing well; you can help them re-pot it so they can take it home.
Student Worksheet 4FExperiment #1: “Sun, Water, or Both?” The questions help to organize the students’ results so it is easier for them to grasp what the experiment proved. Students’s conclusions should discuss what their original hypothesis was and how the results proved it correct or incorrect. Remind students that they did not fail just because their hypothesis was incorrect; they simply discovered something new they did not know before.
Student Worksheet 5AExperiment #2: “Bean Sprouts”Hand out materials to students and guide them through each step. You should label their bags and cups with permanent marker.
Student Worksheet 5B-DExperiment #2 “Bean Sprouts” Students should record observations by drawing the beans in bags (in the boxes) and writing observations of the beans in cups (on the lines).
Student Worksheet 5EExperiment #2: “Bean Sprouts”Reinforce the steps of the scientific method by asking students what their original observations were, and what question they answered by doing the experiment. Ask them to restate their hypothesis, and why the methods were chosen. What was the control? What were the variables? What was their conclusion, and how did it compare with their hypothesis?
Student Worksheet 6AExperiment #3: “Fertilizer”This experiment is designed as a group activity. It requires that you mix the fertilizer solutions ahead of time. One group will receive plain water to act as the control group. The other groups gets 5mL of their assigned fertilizer (sugar-sweetened soda, apple juice, liquid dish soap, baking soda, or leftover coffee grounds) mixed with 450mL of water. You may choose to use a commercially-prepared indoor plant fertilizer as one of the variables. Groups will share their container of water or fertilizer solution. Students should write what fertilizer their group is testing on the blank space in their materials list. You may choose to tell your students what their fertilizer is, or use only a letter. They can guess what is in the solution by color, sight or smell. Students may also hypothesize about how different solutions may work.

Student Worksheet 6B-DExperiment #3: “Fertilizer” Students will write down their daily observations of their own cup. Students should lightly water their plants each day with their solution. Remind them that if the cups have no drainage holes, they can easily overwater their plants. It can be difficult and messy to remove excess water. If your class has access to medicine droppers this may be an easier way to water. Students can use the name of the fertilizer solution or the code letter you have given them. If students have used a code, reveal what the solution contained at the end of the experiment.
Student Worksheet 6EExperiment #3: “Fertilizer” The questions help to organize the students’ results so it is easier for them to grasp what the experiment proved. Students’s conclusions should discuss what their original hypothesis was and how the results proved it correct or incorrect. Call on each group to offer their results. Determine which fertilizer worked best and which one was least effective. Remind students that they did not fail if their hypothesis was incorrect, they simply discovered something new they did not know before.
Student Worksheet 7Review Students may read this page individually or as a class.
Student Worksheet 8Test Your KnowledgeStudents should complete this page individually, It may be counted as a test or quiz grade. Questions 6 and 7 could be used as feedback for future lessons.Answers:
The plant would dry up. Or, It would not be able to move nutrients from the ground to its leaves. Without light, it would stop growing. Or, it would not be able to make food.Water it with a watering can, a sprinkler, or a water hose.Yes; too much water can oversaturate the soil, leaving little or no room for roots to get air.It is harder for plants to spread their roots out to get the nutrition, water, and air they need.Pollution can block sunlight from reaching the plants. Or, chemicals in pollution can harm them.Answers wil vary.Answers wil vary.
Student Worksheet 9VocabularyProvided for student reference
1.
2.3.4.5.6.7.