Embed Size (px)
Citation preview

Software Development Tools
COMP220/COMP285Sebastian Coope
Eclipse and JUnit:Creating and running
a JUnit test case
These slides are mainly based on “Java Development with Eclipse” – D.Gallardo et al., Manning Publications., 2003

2
Eclipse and JUnit
Eclipse’s JDT provides a powerful, flexible environment for
writing, running, and debugging Java code.
But developing quality software requires more than that.
Here we examine JUnit as Eclipse’s integral testing framework (plug-in).
Later, we will consider Ant plug-in in Eclipse.

3
Persistence project
Here we begin (but not finish!) developing a sample application :
a lightweight persistence component that allows one to save data in files.
Persisting data means saving it, using some form of storage, so one can retrieve it later.
Our goal is to illustrate by a simple example how JUnit testing framework may be used in Eclipse during developing this application.

Junit conceptsFixture Loading a database with a specific, known
set of data Copying a specific known set of files Preparation of input data and
setup/creation of fake or mock objects
Test case Test with given set of test data (e.g.
fixture)
4

5
Persistence projectThe first step is to create a new Java project, called
Persistence with choosing the option:
“Create separate folders for sources and class files”. (You already know how to do this.)
Create under src directory in this project: the stub class FilePersistenceServices.java with some stub methods (see below), but without the main() method under the new package
org.eclipseguide.persistence or, in the labs, it should be your personalised package:
surname.name.ID123456.persistence check Generate Comments click Finish

6
package org.eclipseguide.persistence;
public class FilePersistenceServices{ public static boolean write(String fileName, int key, Vector v) { return false; // false – because the method is not yet implemented }
public static Vector read(String fileName, int key) { return null; // null – just to return anything }}
FilePersistenceServices.java
write() and read() (stub) methods are intended to
1. insert a key -numbered vector record v into a file with returning true , if successful,
2. retrieve a vector record from a file by its key number.
Extend the resulting Java class in the editor as follows:

7
Note Red syntax error marks on the right and left hand side of the editor
FilePersistenceServices.java

8
FilePersistenceServices.javaRed marks on the right and left hand side of the editor "say":
"Vector cannot be resolved to a type".
In fact, this is because
there is no import statement for the Vector class.
The easiest way to add it consists in using Eclipse’s Quick Fix feature:
Click on one of the light bulbs (on left margin of the Editor)
Double click on suggested fix:
Import 'Vector' (java.util)

9
Click on a light bulb (left to the Editor)
FilePersistenceServices.java
double-click

10
FilePersistenceServices.javaThis class should now be error-free because the above actions automatically generated new import declaration:
import java.util.Vector;
Tidy up and save the file:
1. Right-click on the editor area and select
Source->Format
or do the same from the menu
or use Ctrl+Shift+F
2. Save the file.
Formatting and saving aren’t necessary, but they make some of Eclipse’s automated features work better.
Some yellow coloured warnings (not errors) remain which mean that in corresponding places Vector should be replaced with Vector<String> (Generic)

11
The JUnit testing framework in Eclipse
We are ready to create a test case :
a special Java class called JUnit Test Case class.
It is normal to have
one test class for each class in the program
and to name them by adding the suffix Test to the class name:
FilePersistenceServices.java – given source (stub) class;
FilePersistenceServicesTest.java – corresponding test case;
The easiest way to create JUnit test case classes is using
JUnit wizard in Eclipse.

12
Create test case stub by using the JUnit wizardwizard in Eclipse
Right-click on the file
FilePersistenceServices.java
in the Package Explorer and
Select
New ->JUnit Test Case
See next slide

13
Accept the default values for
•Source folder,
•Package,
•Name of test case, and
•Class under test.
Check options for Junit 4
and for creating stubs for
setUp(), tearDown(),
(and optionally Generate
Comments).
Click Next.
Create test case stub by using the JUnit wizardwizard in Eclipse

14
In the next dialog box check boxes for the FilePersistenceServices read() and write() methods to create stub test methods for each of them.
Click Finish.
Confirm adding Junit 4 library to the build path.IF Junit 4 will not appear in Package Explorer under Persistence as here,
Create test case stub by using the JUnit wizardwizard in Eclipse
THEN see the second half of Slide 47 from EclipseJava.ppt.

15
package org.eclipseguide.persistence;import static org.junit.Assert.*;import org.junit.After;import org.junit.Before;import org.junit.Test;
public class FilePersistenceServicesTest{ @Before //Runs before each @Test method public void setUp() throws Exception {}
@After //Runs after each @Test method public void tearDown() throws Exception {}
@Test public void testWrite() { fail("Not yet implemented"); }
@Test public void testRead() { fail("Not yet implemented"); }}
The resulting test case stub created by the wizard
stub test methodsfor testing write() and read()
stub methodsfor setUp() and tearDown()
Importing the necessaryJunit4 classes

16
Further work on the test case stub
FilePersistenceServicesTest.java
Now we need to create a fixture: data and objects for which @Test
annotated methods testWrite() and testRead() in a test case will be applied:
The annotated by @Before and @After methods setUP() and tearDown() are provided to set up and clean fixtures,
they are run by JUnit, respectively, before and after each @Test method (testXXX()).

17
Declare Vector variable at the beginning of the test case class declaration
public void setUp() throws Exception { v1 = new Vector(); v1.addElement("One"); v1.addElement("Two"); v1.addElement("Three"); }
fixing someVector v1consistingof three strings
public class FilePersistenceServicesTest{ Vector v1;
You will need to use Quick Fix light bulb to add Vector import statement.
Set up the fixture , Vector v1, as follows:
Further work on the test case stub
FilePersistenceServicesTest.java

18
In the most cases tearDown() method is unnecessary.
But we can implement it to release v1 as
In general, tearDown() is used to release system resources (probably expensive!) that might not otherwise be released.
Now, we are ready to run this test case in Eclipse.
protected void tearDown() throws Exception { v1 = null; // release v1 }
Further work on the test case stub
FilePersistenceServicesTest.java

19
Running the JUnit tests in Eclips
Running the JUnit tests in Eclipse is similar to running a Java application:
1. First make sure that the test case you want to run
FilePersistenceServicesTest.java
is selected – either in the editor or on the Package Explorer view.
2. Select Run->Run As->JUnit Test
JUnit view is automatically added, covering Package Explorer view.
(See next slide)

20
Running the JUnit tests in EclipsRed bar turns green once your class passes all tests successfully.
Our tests do not pass.
nothing strange!
the tests fail by trivial reason: being “Not yet implemented ”
more precisely: they are deliberately implemented to be failed
Further work both on the source file and on the test case is required.
Try to double-click
on failed tests in JUnit view,
on the second line of the Failure Trace,
and also on various elements in Outline view.
This will lead you to corresponding places in the editor. (Very helpful!)
After viewing the test results, you can click on the Package Explorer tab to return this view on the top.
The JUnit test view.Notice the red coloured bar!

21
Further work on the Test Case stub
Let us test whether read() and write() methods return reasonable values by using more general JUnit assert* methods (instead of fail()).
assert* methods will be further discussed in our lectures. The boolean write() method should return true if it
succeeds in writing the values stored in the Vector into a file:
public void testWrite(){
// fail("Not yet implemented"); assertTrue("NOT WRITTEN???", FilePersistenceServices.write ("TestTable", 1, v1));}
Writing datato fileshould besuccessfulfile name key vector
Comment or omit this line

Further work on the test case stub
Analogously, for read() method we expect it to pass the following test:
public void testRead(){
FilePersistenceServices.write("TestTable", 1, v1); Vector w = FilePersistenceServices.read("TestTable", 1); assertEquals(v1,w);}
reading from a file should produce the same value which has been written into the file beforehand
expected actual
fail("Not yet implemented");
replaced with the following:
22

Running the JUnit tests in Eclips again
To re-run, click Run button
Our tests again do not pass!
Again try to double-click
on failed tests in JUnit view,
on the second line of the Failure Trace,
This will lead you to corresponding places in the editor.
For example, we can see that testWrite failed because of
assertTrue which expects true. Our message "NOT WRITTEN???" helps to understand the reason.
Now, select testRead. We see that it failed because of java.lang.AssertionError: expected:<[One, Two, Three]> but was: <null>.
All of this can help to understand the reason of test failures.
The JUnit test view appears.Again red coloured bar! 23

24
You can get a little instant gratification by
changing the return value of the write() method in the FilePersistenceServices class from false to true and
commenting out the whole testRead() method in FilePersistenceServicesTest class.
Selected code may be commented out or uncommented by Ctrl-/.
Running the JUnit tests in Eclips

25
To re-run a selected Junit test case, click Run button
Now we see green bar:
the only remaining testWrite() method succeeded (of course, by trivial reason).
Recover the original versions of our files by using Undo (Ctrl-Z).
Running the JUnit tests in Eclipse

26
Further testing-coding
Thus, two minimal tests and zero functionality!
But we should not expect anything else because the source code is just a stub.
Anyway, we have already seen how JUnit works in Eclipse.
To develop functionality of our source code, let us
test and code at a finer level of detail.

27
Further testing-codingTo implement our methods
boolean write(String fileName, int key, Vector v)
Vector read(String fileName, int key)
we will need intermediate – helper methods
vector2String()
string2Vector()
This is an intermediate step to write/read vectors via their string representation into/from a file.

28
Further testing-codingWe intend to store data in a text file line-by-line for each record:
using comma-separated values (CSV)
Here "1","2",… serve as keys to locate a specific record.
E.g. [Antbook,Hatcher,Manning,2003] is vector or record saved into the file as a string under the key 2.
Each line in the file is a string to be created first by the method vector2String(Vector v, int key) which is not yet implemented.
"1","One","Two","Three""2","Antbook","Hatcher","Manning","2003""3","Eclipse","Gallardo","Manning","2003"
Our string s1 considered below

29
Further testing-codingAccording to test-first philosophy, let’s start with extending FilePersistenceServicesTest class:
1. Add the following String s1 attribute under the Vector v1 attribute
String s1 = "\"1\",\"One\",\"Two\",\"Three\"";
@Testpublic void testVector2String(){ assertEquals(s1, FilePersistenceServices.vector2String(v1,1));}
expected
actual
Recall that actually v1 = [One, Two, Three]2. Add new @Test method in
FilePersistenceServicesTest class which we expect to pass:

30
Further testing-coding
But now red sign and light bulb appear on the right and left boarders of the Editor view witnessing on a syntax error in the test class which uses non-existing yet method vector2String.
Click on the light bulb which suggests to
create automatically(!) the stub method vector2String(Vector v, int key) in the source file FilePersistenceServices.
Agree with this suggesstion by double clicking, and
Continue editing the resulting method as it is shown in the next slide with the goal for it
to pass the above test.

31
public static String vector2String(Vector v, int key) { String s = null; StringBuffer buffer = new StringBuffer(); // start with key in quotation marks and comma buffer.append("\"" + Integer.toString(key) + "\","); // add quote delimited entry // for each element in Vector v: for (int i = 0; i < v.size(); i++) { buffer.append("\""); buffer.append(v.elementAt(i)); buffer.append("\""); if (i != (v.size() - 1)) // if i is not last { buffer.append(","); // Add comma in case } // of not last element } s = buffer.toString(); return s; }
vector2String() added to FilePersistenceServices
Do not forget to regularly format, Ctrl+Shift+F, and save your files.

32
Run FilePersistenceServicesTest again using : the first two tests still fail, but the new third test
passes!!! Indeed, we see the green
tick and the empty Failure Trace
Not a complete success, but the new testtestVector2String() successfully passes!
Further testing-coding

Further testing-coding To implement string2Vector(String s), let’s first add the following new @Test method to FilePersistenceServicesTest
suggests again to implement string2Vector()
in the source file (as we are testing a non-existing method).
We also need to use Java’s StringTokenizer class to
parse any String s into tokens, and add each token to a Vector v as shown in the next slide:
@Test public void testString2Vector() { assertEquals(v1, FilePersistenceServices.string2Vector(s1)); }
expected
actual
33

34
Further testing-coding
public static Vector string2Vector(String s){ Vector v = new Vector(); // use comma and double quotation mark as delimiters StringTokenizer st = new StringTokenizer(s, "\",");
while (st.hasMoreTokens()) { v.addElement(st.nextToken()); } return v;}
string2vector() added to FilePersistenceServices
parsing string sinto tokens and adding them tovector v
E.g. string ""One","Two","Three"" transforms to vector [One,Two,Three].
suggests to import java.util.StringTokenizer;

35
However, the test for string2Vector fails:
Failure Trace in the JUnit view indicates that the comparison of
the expected value v1 and
the returned string2Vector(s1) are different:
java.lang.AssertionError: expected:<[One, Two, Three]> but was:<[1, One, Two, Three]>
CORRECT implementation of the method string2Vector() to make testString2Vector passing.
Just ignore the initial token 1 (How? Think, it is easy!)
Run the test again; it should succeed!
Further testing-coding

36
Further testing-coding Iimplement yourself another method
in FilePersistenceServices class, but ...
Preliminary write testGetKey() in FilePersistenceServicesTest classs:
public static int getKey(String s){???}
@Testpublic void testGetKey(){ assertEquals(1, FilePersistenceServices.getKey(s1));}
expectedactual
suggests further actions:to create and implement!!! getKey ...
Run the test for GetKey()again to assure that it passes.

37
Further testing-codingOur work on Persistence project is not finished yet.
See yourselves further steps and details in Eclipse Book.
Our goal was to give you a flavour of Test Driven approach to programming, and how Eclipse helps in this approach.
This only could help you to start using this approach.
Try to use this approach in your programming practice.
Read more on JUnit testing to study it deeper and to learn best practices of its using.
Then you will get a better understanding and some benefits of this approach.
Recall that testing many times a day will rather save your time , and
make your work much more comfortable and confident.

The button makes running JUnit test classes In Eclipse very easy.
However, JUnit in itself is a Java application and can be run just from the command line.
E.g., from the directory Persistence corresponding to our project we can
compile both source code and the test class and then
run the test class as follows:38
Running tests from the command line

39
Compiling and Running tests from the command line
C:\workspace\Persistence>javac -d bin src\org\eclipseguide\persistence\*.java
C:\workspace\Persistence>java -cp bin;C:\JAVA\junit4.9\junit-4.9.jar org.junit.runner.JUnitCore org.eclipseguide.persistence.FilePersistenceServicesTest
JUnit version 4.9
.E.E...
Time: 0.015
There were 2 failures:
1) testWrite(org.eclipseguide.persistence.FilePersistenceServicesTest)
java.lang.AssertionError: NOT WRITTEN???
<many lines skipped>
2) testRead(org.eclipseguide.persistence.FilePersistenceServicesTest)
java.lang.AssertionError: expected:<[One, Two, Three]> but was:<null>
<many lines skipped>
FAILURES!!!
Tests run: 5, Failures: 2
Do not forget to recompile each time!!!
Your message to yourself
E (error) means that the previous testXXX methods – shown as one dot (.) – failed
Complicated commands and a lot of unimportant lines (skipped) makes this way of running tests not very comfortable. Compare how it was done in Eclipse!
Last lines show that we should look upwards for the failures
Test runner
Test case to run
Class path
Where (direction) to compileWhat to compile
Description of a test failure

40
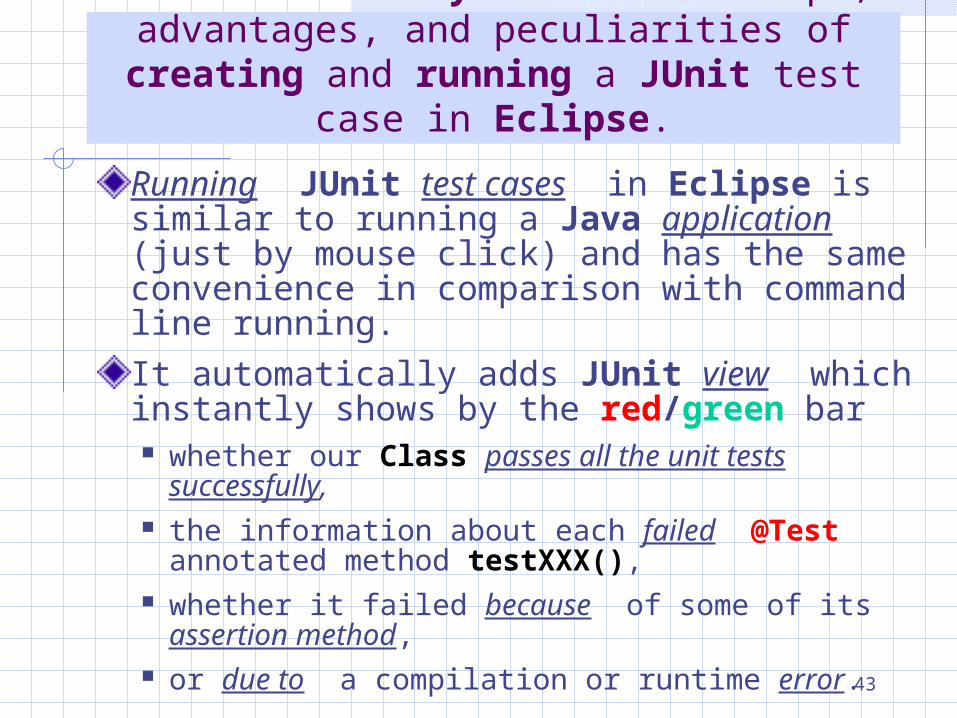
Detailed Summary: Essential steps, advantages, and peculiarities of creating and running a JUnit test case in Eclipse.
JUnit is included in Eclipse as a well-integrated plug-in.
Eclipse has a wizard creating test cases from existing Java Classes to be tested.
Therefore it makes sense to create first a Java Class to be tested, but initially only with method stubs.

41
Detailed Summary: Essential steps, advantages, and peculiarities of creating and running a JUnit test case in Eclipse.
The wizard automatically suggests the default names for source folder (src), folder where to compile (bin), test case name ClassTest
corresponding to the name of the tested Class
package for test case ClassTest, the same as that of the tested Class
The wizard also suggests the options for creating stub methods setUp() and tearDown()
annotated as @Before and @After, respectively.

In the Next step the wizard presents the options to create @Test method stubs, testXXX(), to test each of the methods xXX() in the Class under testing. All of these considerably alleviates and even automates the preliminary routine editing work to create a test case. Next step is to finish creating test case:
to setUp() (and, optionally, tearDown()) a fixture, and to finish writing testXXX() methods.
The latter is, of course, not an automated part of work. Nevertheless, Eclipse can help, as in the case of editing of any Java code.
Detailed Summary: Essential steps, advantages, and peculiarities of creating and running a JUnit test case in Eclipse.
42
43
Running JUnit test cases in Eclipse is similar to running a Java application (just by mouse click) and has the same convenience in comparison with command line running.
It automatically adds JUnit view which instantly shows by the red/green bar whether our Class passes all the unit tests
successfully, the information about each failed @Test
annotated method testXXX(), whether it failed because of some of its
assertion method, or due to a compilation or runtime error.
Detailed Summary: Essential steps, advantages, and peculiarities of creating and running a JUnit test case in Eclipse.

44
For each failed @Test method testXXX() there is a Failure Trace in JUnit view which can help to find out the reason of the failure.
To investigate further, the powerful debugger tool of Eclipse can be used as well.
(We have not considered this in detail, but you should know about existence of debugger in Eclipse)
After correcting all errors and passing all tests
the cycle on further writing tests and adapting the source code to pass tests is repeated ...
until a satisfactory source code will be obtained.
Detailed Summary: Essential steps, advantages, and peculiarities of creating and running a JUnit test case in Eclipse.