Embed Size (px)
Citation preview

SiFive Freedom E310 Arty FPGA Dev Kit Getting StartedGuide
c© SiFive, Inc.
April 11, 2017

2 SiFive Freedom E310 Arty FPGA Dev Kit Getting Started Guide 1.0.6

SiFive Freedom E310 Arty FPGA DevKitGetting Started Guide
Copyright NoticeCopyright c© 2017, SiFive Inc. All rights reserved.
Information in this document is provided as is, with all faults.
SiFive expressly disclaims all warranties, representations and conditions of any kind, whether ex-press or implied, including, but not limited to, the implied warranties or conditions of merchantabil-ity, fitness for a particular purpose and non-infringement.
SiFive does not assume any liability rising out of the application or use of any product or circuit, andspecifically disclaims any and all liability, including without limitation indirect, incidental, special,exemplary, or consequential damages.
SiFive reserves the right to make changes without further notice to any products herein.
Release Information
Version Date Changes1.0.6 April 11, 2017 Some helpful hints for udev/screen1.0.5 Jan 3, 2017 Corrections to udev rules1.0.4 Dec 21, 2016 Corrections to Software Development Flow1.0.3 Dec 19, 2016 Add Arduino IDE Instructions1.0.2 Dec 10, 2016 Updates to match 1.0.2 of the MCS1.0 Nov 29, 2016 First release
i

ii SiFive Freedom E310 Arty FPGA Dev Kit Getting Started Guide 1.0.6

Contents
SiFive Freedom E310 Arty FPGA Dev KitGetting Started Guide i
1 Required Hardware 1
1.1 Xilinx Artix-7 35T Arty FPGA Evaluation Kit . . . . . . . . . . . . . . . . . . . . . . . 1
1.2 USB A to Micro-B Cable . . . . . . . . . . . . . . . . . . . . . . . . . . . . . . . . . . 1
1.3 Olimex ARM-USB-TINY-H Debugger . . . . . . . . . . . . . . . . . . . . . . . . . . . 1
1.4 USB A to B Cable . . . . . . . . . . . . . . . . . . . . . . . . . . . . . . . . . . . . . 1
1.5 Male-To-Female Jumper Cables (10) . . . . . . . . . . . . . . . . . . . . . . . . . . . 2
2 Board Setup 3
2.1 Connecting the USB Interface . . . . . . . . . . . . . . . . . . . . . . . . . . . . . . . 3
2.2 Connecting the Debugger . . . . . . . . . . . . . . . . . . . . . . . . . . . . . . . . . 3
3 Freedom E310 Arty FPGA Flash Programming File 7
4 Boot and Run 9
4.1 Terminal Log . . . . . . . . . . . . . . . . . . . . . . . . . . . . . . . . . . . . . . . . 12
5 Software Development Flow 13
5.1 Supported Platforms . . . . . . . . . . . . . . . . . . . . . . . . . . . . . . . . . . . . 13
5.2 Software Development with the Freedom E SDK . . . . . . . . . . . . . . . . . . . . 13
5.2.1 Compiling the Freedom E SDK Toolchain . . . . . . . . . . . . . . . . . . . . 13
5.2.2 Compiling Software Programs . . . . . . . . . . . . . . . . . . . . . . . . . . 14
5.2.3 Uploading Software Programs . . . . . . . . . . . . . . . . . . . . . . . . . . 14
5.2.4 Debugging Running Programs . . . . . . . . . . . . . . . . . . . . . . . . . . 14
5.3 Software Development Using the Arduino IDE . . . . . . . . . . . . . . . . . . . . . . 14
5.3.1 Installing the Freedom E310 Arty FPGA Dev Kit Board Package . . . . . . . 15
5.3.2 Open Source Board Support Package Code . . . . . . . . . . . . . . . . . . . 15
iii

iv SiFive Freedom E310 Arty FPGA Dev Kit Getting Started Guide 1.0.6
6 Modifying the FPGA Image 19
7 For More Information 21

List of Figures
2.1 Debugging Connections between Olimex ARM-USB-TINY-H and Arty Board’sPMOD header JD . . . . . . . . . . . . . . . . . . . . . . . . . . . . . . . . . . . . . 4
2.2 Debug Connections To the Olimex ARM-USB-TINY-H . . . . . . . . . . . . . . . . . 4
2.3 Debug Connections to the Arty Board JD PMOD Header . . . . . . . . . . . . . . . . 4
2.4 Photo of the Arty Board showing USB and Debug Connections . . . . . . . . . . . . 5
5.1 Adding the SiFive Dev Kits Board URL to your Arduino IDE . . . . . . . . . . . . . . 16
5.2 Selecting Freedom E310 Arty FPGA Dev Kit in the Arduino IDE . . . . . . . . . . . . 17
v

vi SiFive Freedom E310 Arty FPGA Dev Kit Getting Started Guide 1.0.6
Chapter 1
Required Hardware
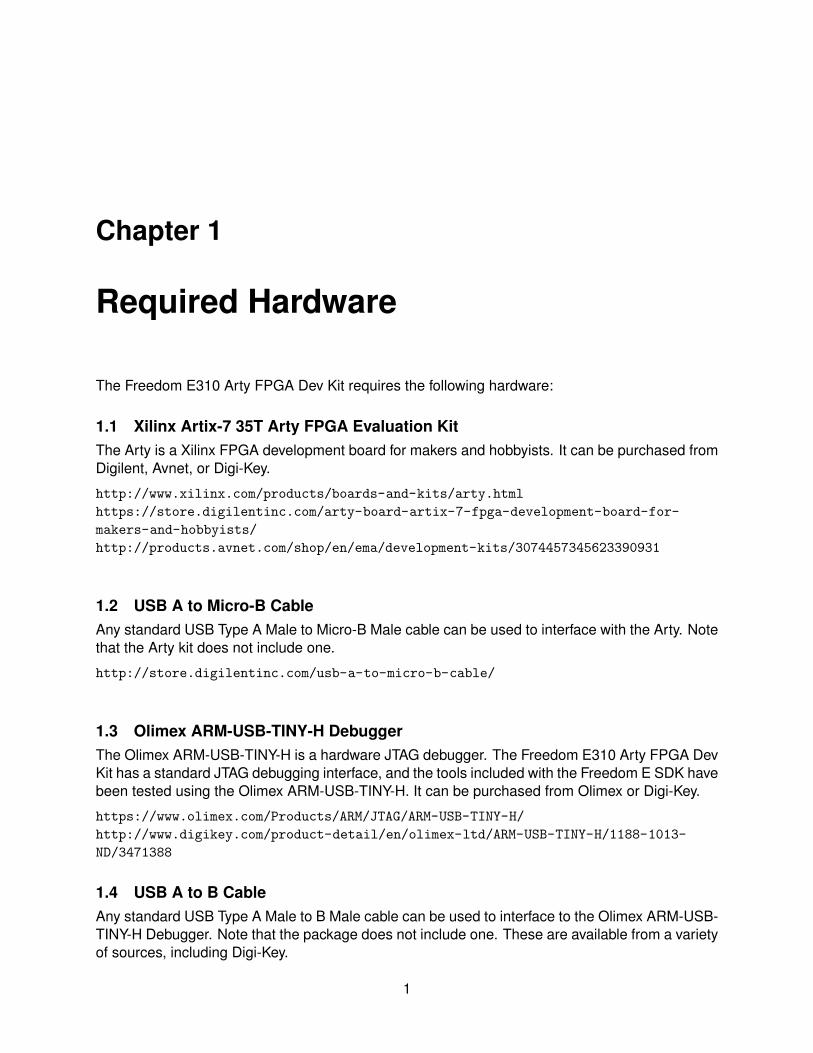
The Freedom E310 Arty FPGA Dev Kit requires the following hardware:
1.1 Xilinx Artix-7 35T Arty FPGA Evaluation KitThe Arty is a Xilinx FPGA development board for makers and hobbyists. It can be purchased fromDigilent, Avnet, or Digi-Key.
http://www.xilinx.com/products/boards-and-kits/arty.html
https://store.digilentinc.com/arty-board-artix-7-fpga-development-board-for-
makers-and-hobbyists/
http://products.avnet.com/shop/en/ema/development-kits/3074457345623390931
1.2 USB A to Micro-B CableAny standard USB Type A Male to Micro-B Male cable can be used to interface with the Arty. Notethat the Arty kit does not include one.
http://store.digilentinc.com/usb-a-to-micro-b-cable/
1.3 Olimex ARM-USB-TINY-H DebuggerThe Olimex ARM-USB-TINY-H is a hardware JTAG debugger. The Freedom E310 Arty FPGA DevKit has a standard JTAG debugging interface, and the tools included with the Freedom E SDK havebeen tested using the Olimex ARM-USB-TINY-H. It can be purchased from Olimex or Digi-Key.
https://www.olimex.com/Products/ARM/JTAG/ARM-USB-TINY-H/
http://www.digikey.com/product-detail/en/olimex-ltd/ARM-USB-TINY-H/1188-1013-
ND/3471388
1.4 USB A to B CableAny standard USB Type A Male to B Male cable can be used to interface to the Olimex ARM-USB-TINY-H Debugger. Note that the package does not include one. These are available from a varietyof sources, including Digi-Key.
1

2 SiFive Freedom E310 Arty FPGA Dev Kit Getting Started Guide 1.0.6
http://www.digikey.com/product-detail/en/assmann-wsw-components/AK672-2-1/AE1462-
ND/930247
1.5 Male-To-Female Jumper Cables (10)The connection between the Olimex ARM-USB-TINY-H and Freedom E310 Arty FPGA Dev Kitrequires 10 connections. These can be made with Male-to-Female jumper cables. These cablesare available from Adafruit in convenient rip-apart ribbon cables:
https://www.adafruit.com/products/826

Chapter 2
Board Setup
2.1 Connecting the USB InterfaceConnect the USB Type A to Micro-B cable between the USB-JTAG port (J10) of the Arty and thehost machine. This provides UART console access to the Freedom E310 Arty FPGA Dev Kit aswell as a 5V power source for the board. This is also the interface by which the FPGA fabric willbe programmed.
2.2 Connecting the DebuggerThe debugger is essentiall for downloading and debugging code to your SDK. The software will bedownloaded to SPI Flash, so it will be retained. Without the debugger you can only flash the FPGAimage and run the included demo program, you cannot change the software which executes.
Connect the Olimex ARM-USB-TINY-H with the USB Type A to B cable to the host machine. Thenconnect the Olimex ARM-USB-TINY-H debugger to PMOD header JD using the 10 jumper cables.The pinout is as shown in Figure 2.2. Note that the Olimex ARM-USB-TINY-H and the PMODheader on the Arty Board have different numbering schemes. Figures 2.2 and 2.2 clarify thedifferent pinouts for the two connectors.
Figure 2.4 shows what the board looks like with all the debug connections in place.
Note: It is important to connect to PMOD header JD (not JA, JB, or JC). JD was selected over theother PMOD headers to avoid damage to the Arty board in the event of mismatched connections.
3

4 SiFive Freedom E310 Arty FPGA Dev Kit Getting Started Guide 1.0.6
SignalName
ARM-USB-TINY-H PinNumber
SuggestedJumperColor
Freedom E310 ArtyDev Kit JD Pin Number
VREF 1 red 12VREF 2 brown 6 (“VCC”)nTRST 3 orange 2TDI 5 yellow 7TMS 7 green 8TCK 9 blue 3TDO 13 purple 1GND 14 black 5 (“GND”)nRST 15 grey 9GND 16 white 11
Figure 2.1: Debugging Connections between Olimex ARM-USB-TINY-H and Arty Board’s PMODheader JD
1 : VREF (red) 2 : VREF (brown)3 : nTRST (orange) 4
5 : TDI (yellow) 67 : TMS (green) 8
NOTCH 9 : TCK (blue) 10NOTCH 11 12
13 : TDO (purple) 14 : GND (black)15 : nRST (grey) 16 : GND (white)
17 1819 20
LED
Figure 2.2: Debug Connections To the Olimex ARM-USB-TINY-H
square pad 1 : TDO (purple) 7 : TDI (yellow)2 : nTRST (orange) 8 : TMS (green)
3 : TCK (blue) 9 : nRST (grey)4 10
“GND” 5 : GND (black) 11 : GND (white)“VCC” 6 : VREF (brown) 12 : VREF (red)
Figure 2.3: Debug Connections to the Arty Board JD PMOD Header

Copyright c© 2017, SiFive Inc. All rights reserved. 5
Figure 2.4: Photo of the Arty Board showing USB and Debug Connections

6 SiFive Freedom E310 Arty FPGA Dev Kit Getting Started Guide 1.0.6

Chapter 3
Freedom E310 Arty FPGA FlashProgramming File
The Xilinx Artix-7 XC7A35T FPGA configures on power-on from an on-board quad SPI flash chip.
The Freedom E310 Arty FPGA SPI flash programming file can be downloaded from:
https://dev.sifive.com/develop/freedom-e310-arty-dev-kit-v1-0
Use the “Configuration Memory File (.mcs)” download link.
The Xilinx Vivado Design Suite is used for flash programming. Both the Vivado Lab Edition andWebPACK Edition 2016.1 support Artix-7 devices free of charge.
To program the SPI flash with Vivado:
1. Launch Vivado
2. Open Hardware Manager, open target board
3. Right click on the FPGA device and select ”Add Configuration Memory Device”
4. Select
Part n25q128-3.3vManufacturer Micron
Family n25qType spi
Density 128Width x1 x2 x4
5. Click OK to ”Do you want to program the configuration memory device now?”
6. Add freedom-e310-arty-1-0-2.mcs
7. Select OK
8. Once the programming completes in Vivado, press the “PROG” Button on the Arty Board toload the image into the FPGA.
7

8 SiFive Freedom E310 Arty FPGA Dev Kit Getting Started Guide 1.0.6

Chapter 4
Boot and Run
The MCS file includes software for a simple demo program. This program is loaded to the SPIFlash along with the FPGA image. On reset, the RISC-V core will execute a simple demo programwhich prints a message over the UART and uses interrupts to blink and change the LEDs. Thisprogram will be overwritten in the SPI Flash when you program new software into the board withthe SDK, but the FPGA image will not be modified.
9
10 SiFive Freedom E310 Arty FPGA Dev Kit Getting Started Guide 1.0.6
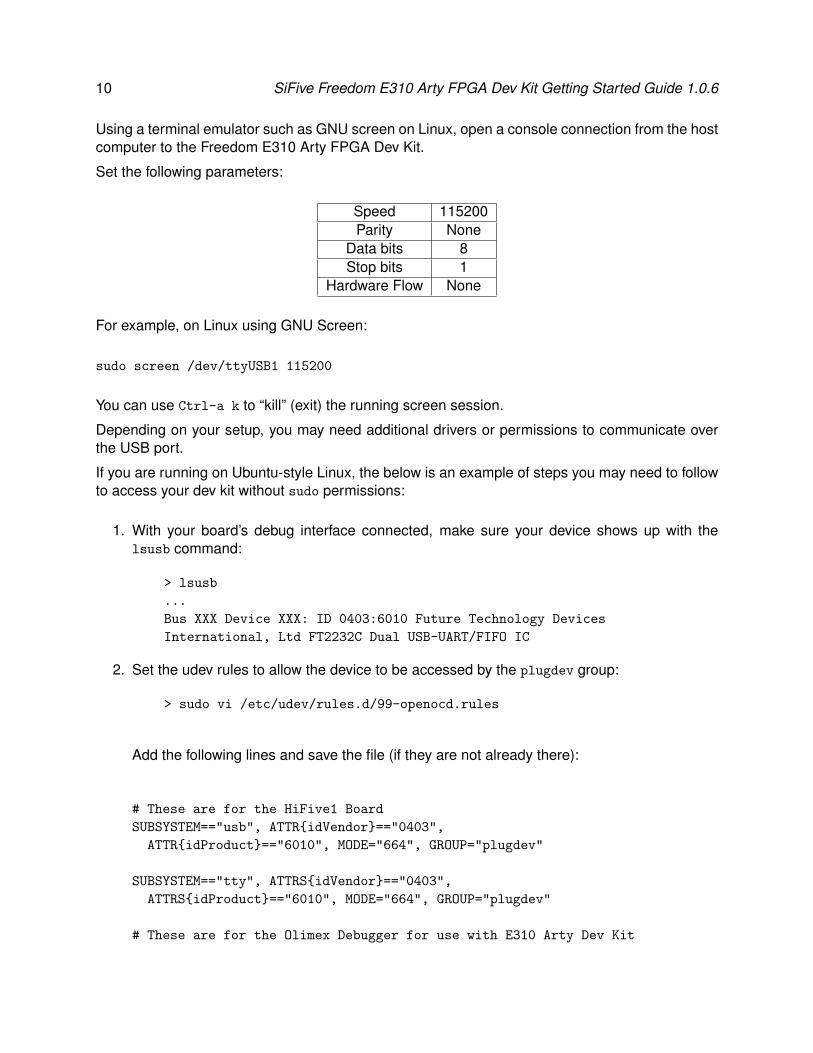
Using a terminal emulator such as GNU screen on Linux, open a console connection from the hostcomputer to the Freedom E310 Arty FPGA Dev Kit.
Set the following parameters:
Speed 115200Parity None
Data bits 8Stop bits 1
Hardware Flow None
For example, on Linux using GNU Screen:
sudo screen /dev/ttyUSB1 115200
You can use Ctrl-a k to “kill” (exit) the running screen session.
Depending on your setup, you may need additional drivers or permissions to communicate overthe USB port.
If you are running on Ubuntu-style Linux, the below is an example of steps you may need to followto access your dev kit without sudo permissions:
1. With your board’s debug interface connected, make sure your device shows up with thelsusb command:
> lsusb
...
Bus XXX Device XXX: ID 0403:6010 Future Technology Devices
International, Ltd FT2232C Dual USB-UART/FIFO IC
2. Set the udev rules to allow the device to be accessed by the plugdev group:
> sudo vi /etc/udev/rules.d/99-openocd.rules
Add the following lines and save the file (if they are not already there):
# These are for the HiFive1 Board
SUBSYSTEM=="usb", ATTR{idVendor}=="0403",
ATTR{idProduct}=="6010", MODE="664", GROUP="plugdev"
SUBSYSTEM=="tty", ATTRS{idVendor}=="0403",
ATTRS{idProduct}=="6010", MODE="664", GROUP="plugdev"
# These are for the Olimex Debugger for use with E310 Arty Dev Kit

Copyright c© 2017, SiFive Inc. All rights reserved. 11
SUBSYSTEM=="usb", ATTR{idVendor}=="15ba",
ATTR{idProduct}=="002a", MODE="664", GROUP="plugdev"
SUBSYSTEM=="tty", ATTRS{idVendor}=="15ba",
ATTRS{idProduct}=="002a", MODE="664", GROUP="plugdev"
3. See if your board shows up as a serial device belonging to the plugdev group:
> ls /dev/ttyUSB*
/dev/ttyUSB0 /dev/ttyUSB1
(If you have other serial devices or multiple boards attached, you may have more deviceslisted). For serial communication with the UART, you will always want to select the highernumber of the pair, in this example /dev/ttyUSB1.
> ls -l /dev/ttyUSB1
crw-rw-r-- 1 root plugdev 188, 1 Nov 28 12:53 /dev/ttyUSB1
4. Add yourself to the plugdev group. You can use the whoami command to determine youruser name.
> whoami your user name > sudo usermod -a -G plugdev your user name
5. Log out and log back in, then check that you’re now a member of the plugdev group:
> groups
... plugdev ...
Now you should be able to access the serial (UART) and debug interface without sudo permis-sions.
12 SiFive Freedom E310 Arty FPGA Dev Kit Getting Started Guide 1.0.6
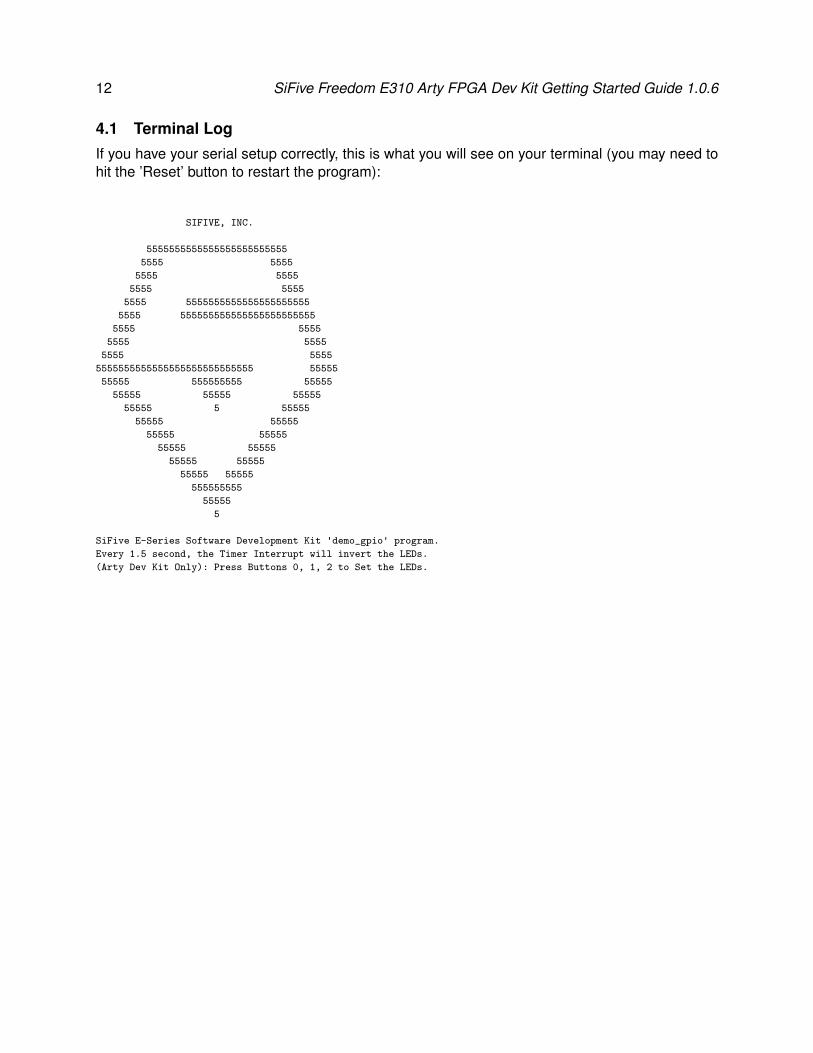
4.1 Terminal LogIf you have your serial setup correctly, this is what you will see on your terminal (you may need tohit the ’Reset’ button to restart the program):
SIFIVE, INC.
5555555555555555555555555
5555 5555
5555 5555
5555 5555
5555 5555555555555555555555
5555 555555555555555555555555
5555 5555
5555 5555
5555 5555
5555555555555555555555555555 55555
55555 555555555 55555
55555 55555 55555
55555 5 55555
55555 55555
55555 55555
55555 55555
55555 55555
55555 55555
555555555
55555
5
SiFive E-Series Software Development Kit 'demo_gpio' program.
Every 1.5 second, the Timer Interrupt will invert the LEDs.
(Arty Dev Kit Only): Press Buttons 0, 1, 2 to Set the LEDs.

Chapter 5
Software Development Flow
The Freedom E310 Arty FPGA Dev Kit’s boot code contains a jump to the external SPI Flash onthe board, at address 0x20400000. You can change the program which the dev kit runs by usingthe debug/programming interface to flash a new compiled program into the SPI Flash.
SiFive supports two methods of obtaining the software development toolchain: compiling the Free-dom E SDK from source, and installing precompiled tools using the Arduino IDE. The two tech-niques will install the same set of tools, but the install paths and associated software libraries aredifferent.
5.1 Supported Platforms
This document assumes that you are running on a Linux system, either natively or on a LinuxVirtual Machine. Future versions of this document will include details on how to install on otherplatforms.
5.2 Software Development with the Freedom E SDK
5.2.1 Compiling the Freedom E SDK Toolchain
The Freedom E Software Development Kit provides everything required to compile, customize,and debug C and/or RISC-V assembly programs: GCC 6.1.0 cross-compilation toolchain, RISC-Venabled GDB and OpenOCD, etc.
To clone the Freedom E SDK git repository:
git clone --recursive https://github.com/sifive/freedom-e-sdk.git
Install all the necessary packages described in the repository’s README.md file.
To build the software toolchain:
cd freedom-e-sdk
make tools
To keep your software toolchain up to date with the upstream repository:
13

14 SiFive Freedom E310 Arty FPGA Dev Kit Getting Started Guide 1.0.6
cd freedom-e-sdk
git pull origin master
git submodule update --init --recursive
make tools
5.2.2 Compiling Software Programs
To build a C program that will be loaded by the debugger/programmer into the SPI Flash, use theFreedom E SDK to compile. An example is provided in the software/demo gpio directory. To buildthe program:
cd freedom-e-sdk
make software PROGRAM=demo gpio BOARD=freedom-e300-arty
To compile the Dhrystone benchmark instead:
cd freedom-e-sdk
make software PROGRAM=dhrystone BOARD=freedom-e300-arty
5.2.3 Uploading Software Programs
To upload the program to the SPI flash, connect the board’s debug interface as described inChapter 2. Then execute:
cd freedom-e-sdk
make upload PROGRAM=<your desired program> BOARD=freedom-e300-arty
5.2.4 Debugging Running Programs
To debug your program with GDB, connect your board and launch the debugger:
cd freedom-e-sdk
make run debug PROGRAM=<your desired program> BOARD=freedom-e300-arty
This will automatically launch OpenOCD and GDB, connect to the board, and halt the currentlyrunning program. You can step through the running program with stepi, or load the new programusing load. The usual suite of GDB commands are available to set breakpoints, examine andmodify memory, continue execution, etc.
5.3 Software Development Using the Arduino IDE
SiFive also supports software development for the Freedom E310 Arty FPGA Dev Kit with theArduino IDE. When using this method, the Freedom E SDK is automatically installed, so you donot need to install it seperately. Follow these steps:

Copyright c© 2017, SiFive Inc. All rights reserved. 15
5.3.1 Installing the Freedom E310 Arty FPGA Dev Kit Board Package1. Download and install the Arduino IDE, following the instructions at
https://www.arduino.cc/en/Guide/HomePage
2. Launch the Arduino IDE
3. Navigate to File → Preferences and add the SiFive additional Board Manager URL asshown in Figure 5.1:
http://static.dev.sifive.com/bsp/arduino/package_sifive_index.json
4. Add the SiFive development kit boards using the Board Manager:
Tools → Board → Board Manager.
Search for “SiFive” and click Install to download and install the package. Restart your ArduinoIDE, then find the Freedom E310 Arty FPGA Dev Kit under Tools → Board, as shown inFigure 5.2.
5. Select SiFive OpenOCD as the Programmer from the Tools menu.
6. To compile and upload a simple example program, select
File → Examples → Basics → Blink
Click the “upload” button in the Arduino IDE, your program will compile and upload to yourDev Kit, and the green LED will blink.
5.3.2 Open Source Board Support Package CodeThe code installed with the Board package is open-source, and available to view or download at:
http://github.com/sifive/cinco

16 SiFive Freedom E310 Arty FPGA Dev Kit Getting Started Guide 1.0.6
Figure 5.1: Adding the SiFive Dev Kits Board URL to your Arduino IDE

Copyright c© 2017, SiFive Inc. All rights reserved. 17
Figure 5.2: Selecting Freedom E310 Arty FPGA Dev Kit in the Arduino IDE

18 SiFive Freedom E310 Arty FPGA Dev Kit Getting Started Guide 1.0.6

Chapter 6
Modifying the FPGA Image
The Freedom E310 Arty FPGA Dev Kit source code is fully open sourced, and you can use therepository to create different Freedom E300 variants. You can find the code and scripts to re-createthe source RTL and MCS file at http://github.com/sifive/freedom.
19

20 SiFive Freedom E310 Arty FPGA Dev Kit Getting Started Guide 1.0.6

Chapter 7
For More Information
Additional information, the latest version of this guide, and supporting files can be found at https://dev.sifive.com.
21