Embed Size (px)
Citation preview

Siebel Training Guide
Version 7.7June 2004

Siebel Systems, Inc., 2207 Bridgepointe Parkway, San Mateo, CA 94404Copyright © 2004 Siebel Systems, Inc. All rights reserved.Printed in the United States of America
No part of this publication may be stored in a retrieval system, transmitted, or reproduced in any way, including but not limited to photocopy, photographic, magnetic, or other record, without the prior agreement and written permission of Siebel Systems, Inc.
Siebel, the Siebel logo, TrickleSync, Universal Agent, and other Siebel names referenced herein are trademarks of Siebel Systems, Inc., and may be registered in certain jurisdictions.
Other product names, designations, logos, and symbols may be trademarks or registered trademarks of their respective owners.
PRODUCT MODULES AND OPTIONS. This guide contains descriptions of modules that are optional and for which you may not have purchased a license. Siebel�s Sample Database also includes data related to these optional modules. As a result, your software implementation may differ from descriptions in this guide. To find out more about the modules your organization has purchased, see your corporate purchasing agent or your Siebel sales representative.
U.S. GOVERNMENT RESTRICTED RIGHTS. Programs, Ancillary Programs and Documentation, delivered subject to the Department of Defense Federal Acquisition Regulation Supplement, are �commercial computer software� as set forth in DFARS 227.7202, Commercial Computer Software and Commercial Computer Software Documentation, and as such, any use, duplication and disclosure of the Programs, Ancillary Programs and Documentation shall be subject to the restrictions contained in the applicable Siebel license agreement. All other use, duplication and disclosure of the Programs, Ancillary Programs and Documentation by the U.S. Government shall be subject to the applicable Siebel license agreement and the restrictions contained in subsection (c) of FAR 52.227-19, Commercial Computer Software - Restricted Rights (June 1987), or FAR 52.227-14, Rights in Data�General, including Alternate III (June 1987), as applicable. Contractor/licensor is Siebel Systems, Inc., 2207 Bridgepointe Parkway, San Mateo, CA 94404.
Proprietary Information
Siebel Systems, Inc. considers information included in this documentation and in Siebel eBusiness Applications Online Help to be Confidential Information. Your access to and use of this Confidential Information are subject to the terms and conditions of: (1) the applicable Siebel Systems software license agreement, which has been executed and with which you agree to comply; and (2) the proprietary and restricted rights notices included in this documentation.

Siebel Training Guide Version 7.7 ■ 3
Contents
Siebel Training Guide 1
Chapter 1: What�s New in This Release
Chapter 2: Getting Started with Siebel TrainingSiebel Training Installation and Configuration Overview 12
Administrator Setup Tasks 13
Setting Up Automatic Training Notification Messages 14Verifying and Activating Training Workflow Processes 14Configuring Workflow Policies for Training Email Notification 15Configuring the Email Driver and Notification Templates for Training 16
Customizing the Training User Interface 17
Navigating to Training Administration Screens 18
Setting Up a Delegated Training Administrator 19
Chapter 3: Setting up Training Regions and LocationsProcess of Defining Training Regions and Locations 22
Defining Regions and Region Hierarchies 22
Defining Training Locations 23
Defining Classroom Characteristics and Resources 25
Specifying Hotels Located Near a Training Location 26
Adding Links to a Training Location 26
Assigning a Class to a Training Location 27
Resolving Scheduling Conflicts at a Location 27
Chapter 4: Adding Materials to a Training LibraryProcess of Adding Materials to a Training Library 30
Adding Files to the Training Library 30
Modifying a Training Library File 31
Changing the URL in a Training Library Record 32
Downloading a Training Library File 33

Contents
Siebel Training Guide Version 7.74 ■
Chapter 5: Setting Up Training CoursesProcess of Setting Up Training Courses 36
Adding or Modifying a Training Course 37
Specifying Training Course Details 40Specifying Training Course Topics 40Specifying Training Course Objectives 41Specifying Training Skills 41Specifying Prerequisites and Related Courses 42Specifying Training Course Materials 43Specifying Course Launching Links 44
Creating a Training Catalog with Categorized Courses 44
Creating Training Bundles 46
Training for Customers and Partners 47
Chapter 6: Setting Up Class Schedules and SessionsProcess of Setting Up Class Schedules and Sessions 50
Scheduling Classes 50Specifying Additional Class Details 51Scheduling Class Sessions 52
Chapter 7: Importing an AICC or SCORM CourseAbout AICC and SCORM Standards 54
The AICC Specification and Siebel Training 55
The SCORM Specification and Siebel Training 57
Scenario for Importing an AICC or SCORM Course 58
Process of Importing an AICC or SCORM Course 59
Preparing for AICC and SCORM Course Import 59
API Adapter Cross-Server Security Issue 60Lesson Content and Siebel Training on the Same Server 61Lesson Content and Siebel Training on Different Servers 62
Importing an AICC Course into Siebel Training 63
Importing a Packaged SCORM Course into Siebel Training 63
Importing an Unpackaged SCORM Course into Siebel Training 64

Contents
Siebel Training Guide Version 7.7 ■ 5
Chapter 8: Setting Up a Training CurriculumProcess of Setting Up a Training Curriculum 68
Training Curriculum Elements 68
Adding a Training Curriculum 68
Specifying Training Curriculum Steps 70
Specifying Courses for the Training Curriculum Steps 71
Modifying Records, Canceling Changes, and Deleting Curriculum Paths 72
Viewing and Adding Training Curriculum Enrollments 72
Specifying Training Curriculum Materials 74
Releasing a Curriculum to Training Users 74
Chapter 9: Creating and Modifying Skills TestsAbout Creating Skills Tests and Test Questions 78
Process of Creating Skill Tests and Questions 79
Creating Training Test Questions and Answers 79
Creating and Verifying Training Question Pools 81
Creating Headers and Footers for Training Test Elements 82
Adding a Skills Test for Training 83
Modifying a Skills Test Record 85
Specifying Skills Test Details 86
Chapter 10: Managing Enrollments, Test Results, and Reports
Process of Working with Enrollments, Cancellations, Test Results, and Reports 90
Adding and Viewing Course Enrollments 90
Viewing Enrollment Information for a Self-Paced Course 92
Viewing Enrollment Information for a Scheduled Class 92
Viewing All Course and Class Registration Information 93
Viewing All Curriculum Enrollments Information 94
Viewing Partner Enrollments 94
Registering Training Customers 95Registering a Customer for a Self-Paced (CD-ROM or Web) Course 96
Enrolling Groups for Self-Paced and Scheduled Class Sessions 97

Contents
Siebel Training Guide Version 7.76 ■
Enrolling Students (Delegated Administrator) 98
Canceling Training Enrollments 99
Manually Viewing and Scoring Skills Tests 100
Generating Training Reports 102
Chapter 11: Accessing the Training SiteProcess of Accessing the Siebel Training Site 106
Logging in for Enterprise Application End Users 106
Siebel Training Web Site Login Methods 107Browsing a Training Site Anonymously 107Registering as a New User for Training 108Logging in with an Established User ID and Password 109
Chapter 12: Finding and Viewing Training InformationAbout the Training Learning Center 112
Process of Finding Training on the Siebel Training Web Site 112
Finding Available Training 113
Finding Available Curriculum Paths 114
Finding Training Library Materials 115
Finding Training Materials for a Course or Curriculum 115
Using the Siebel Catalog 116
Assessing Skills and Development 116
Chapter 13: Course Registration, Withdrawal, and Completion
About Training Course or Class Registration 120
Process of Registration, Withdrawal, and Completing Courses 120
Registering for a Media-Based Course 120
Registering for a Scheduled Class 122
Submitting Third-Party Training Events for Manager Approval 124
Using the Siebel Catalog to Register for Training 125
Viewing My Training Enrollments Information 127

Contents
Siebel Training Guide Version 7.7 ■ 7
Launching a Web-Based Course 128
Enrolling in a Curriculum and Viewing Curriculum Progress 129
Withdrawing from a Course, Class, or Curriculum 130
Chapter 14: Taking Tests, Tracking Progress, and Viewing Transcripts
Process of Taking Tests, Tracking Progress, and Viewing Transcripts 133
Taking a Skills Test 134
Reviewing Skills Test Results 135
Checking the Transcript 136
Assessing Training Progress of Employees (Manager) 137
Viewing and Approving Third-Party Training 139
Appendix A: Siebel Training Workflow ProcessesSiebel Training Workflow Processes 142
Appendix B: Lists of Values (LOVs) for Training
Appendix C: AICC and SCORM File StructureCRS (Course File) 147
AU (Assignable Unit File) 148
DES (Descriptor File) 149
CST (Course Structure File) 149
Appendix D: Siebel Training ProcessesExample Process Flow for Setting Up Training Courses 152
AICC or SCORM Course System Processes 153AICC Course Launch Processes 154SCORM Course Launch Process 155
Index

Contents
Siebel Training Guide Version 7.78 ■

Siebel Training Guide Version 7.7 ■ 9
1 What�s New in This Release
What�s New in Siebel Training Guide, Version 7.7Table 1 lists changes in this version of the documentation to support Release 7.7 of the software.
Table 1. New Product Features in Siebel Training Guide, Version 7.7
Topic Description
Setting Up a Delegated Training Administrator on page 19
This new feature allows organizations to set up a delegated administrator who can enroll other users into training.
For general setup procedures to set up an employee with responsibilities, see Applications Administration Guide.
Chapter 3, �Setting up Training Regions and Locations�
This new feature allows the administrator to set up a region hierarchy, logically grouping geographically related locations.
Chapter 5, �Setting Up Training Courses�
New features include enhancements to the training catalog and other administrative functions.
Chapter 7, �Importing an AICC or SCORM Course�
Support for AICC and SCORM standards when importing courses, including AICC compliance, SCORM support for version 1.2 specifications, and compliance with leading content providers.
Chapter 11, �Accessing the Training Site�
Training site enhancements include a Web-like interface that allows users to bookmark and use the Back button.
Chapter 12, �Finding and Viewing Training Information�
A new navigation bar on the Training home page helps end users navigate within the Training site. This navigation bar remains visible regardless of what page the user is accessing within the Training site. In addition, the training home page now includes a section of the page for posting news articles, which allows administrators to post unstructured communication to their user base. A news article might be annoucement the training organization wants to communicate, such as a new course or curriculum introduction, and so on.
For more information on posting feature articles, see Siebel Employee Relationship Management Administration Guide.
Chapter 12, �Finding and Viewing Training Information�
Using an improved search capability, end users can search for specific training, view the entire training catalog, view a list of courses appropriate to the job role, find a list of upcoming classes in a specific location, search for a specific curriculum, and search for training by job skills.

Siebel Training Guide Version 7.7
What�s New in This Release ■
10 ■
Chapter 13, �Course Registration, Withdrawal, and Completion�
The one-click enrollment features allows end users to select a class, register, and receive registration confirmation by clicking Enroll.
Chapter 14, �Taking Tests, Tracking Progress, and Viewing Transcripts�
This new feature provides improved display of test results and transcripts.
Table 1. New Product Features in Siebel Training Guide, Version 7.7
Topic Description

Siebel Training Guide Version 7.7 ■ 11
2 Getting Started with Siebel Training
This chapter covers how to get started with Siebel Training and discusses the installation, configuration, and administrative setup tasks required. It includes the following topics:
■ Siebel Training Installation and Configuration Overview on page 12
■ Administrator Setup Tasks on page 13
■ Setting Up Automatic Training Notification Messages on page 14
■ Verifying and Activating Training Workflow Processes on page 14
■ Configuring Workflow Policies for Training Email Notification on page 15
■ Configuring the Email Driver and Notification Templates for Training on page 16
■ Customizing the Training User Interface on page 17
■ Navigating to Training Administration Screens on page 18
■ Setting Up a Delegated Training Administrator on page 19

Siebel Training Guide Version 7.7
Getting Started with Siebel Training ■ Siebel Training Installation and Configuration Overview
12 ■
Siebel Training Installation and Configuration OverviewSiebel Training can be deployed in conjunction with another Siebel application, such as Employee Relationship Management, Sales, Call Center, Service, Marketing, and Siebel Partner Manager or Siebel Training can be deployed as a stand-alone application and as a partner application using the Partner Portal.
Most Siebel Training software is installed as part of your Siebel Server installation. Your unique license key allows access to Siebel Training along with your other Siebel software applications. The Siebel Server Installation Guide describes how to create the Siebel Administrator account that is used to perform the administrator tasks described in this guide. Siebel Training uses Siebel Workflow to control enrollment processes, and it integrates with Siebel eSales to control order management processes.
Administrators typically use the following process steps when installing and configuring Siebel Training:
1 Install and test a standard Web server.
For more information on installing and testing a Web server, see the Siebel Server Installation Guide for the operating system you are using.
2 Verify that you have a supported database server ready to work with your Siebel software.
3 Install the Siebel Gateway Name Server.
4 Install the Siebel Server.
5 If AICC or SCORM courses are to be imported, perform AICC or SCORM setup tasks.
For more information, see Preparing for AICC and SCORM Course Import on page 59.
6 Set up the Training Web site.
When your Siebel software has been installed, configured, and tested, you can set up your Training Web site.

Getting Started with Siebel Training ■ Administrator Setup Tasks
Siebel Training Guide Version 7.7 ■ 13
Administrator Setup TasksAs a training administrator, you may perform the tasks listed in Table 2 using administration screens.
Table 2. Administrative Setup Tasks for Siebel Training
Administrative Task Description For More Information
Set up Siebel Workflow processes and policies
Verify and activate, if necessary, workflow processes, and configure workflow policies for Training email notification.
Verifying and Activating Training Workflow Processes on page 14
Configuring Workflow Policies for Training Email Notification on page 15
Appendix A, �Siebel Training Workflow Processes�
Siebel Business Process Designer Administration Guide
Set up Siebel Training communications drivers and email templates.
Configure the communications driver profile, and associate the email templates with the profile.
Setting Up Automatic Training Notification Messages on page 14
Configuring the Email Driver and Notification Templates for Training on page 16
Siebel Communications Server Administration Guide
Siebel System Administration Guide
Review and modify LOVs as needed
Review and expand the lists of values (LOVs) before you begin to set up your Training Web site.
Navigate to the Applications Administration screen, and choose the List of Values view to review and add values.
Appendix B, �Lists of Values (LOVs) for Training�
Applications Administration Guide
(Optional) Edit eai.cfg and set system preferences.
If AICC or SCORM courses are to be launched, edit the eai.cfg file, and set system preferences for training.
Preparing for AICC and SCORM Course Import on page 59
(Optional) Create predefined queries (PDQs)
Create predefined queries for Siebel Training.
Applications Administration Guide
Fundamentals
(Optional) Create a delegated administrator
Set up a user to enroll other users in training through a nonadministrative view.
Setting Up a Delegated Training Administrator on page 19
Applications Administration Guide

Siebel Training Guide Version 7.7
Getting Started with Siebel Training ■ Setting Up Automatic Training Notification Messages
14 ■
Setting Up Automatic Training Notification MessagesYou can set up automatic email notification messages for confirmations, notifications, and reminders, including:
■ Confirmation that a user has successfully used Training to register for a self-paced course.
■ Confirmation that a user has successfully used Training to register for an Instructor-Led or Distance Learning class.
■ Notification that a class is full and the user has been placed on the waiting list.
■ Reminder that a class for which the user is registered starts in a few days.
For these messages to be sent automatically, Siebel Training must be configured to work with Siebel Workflow and Siebel Communications Server.
These configuration tasks include:
■ Verifying and Activating Training Workflow Processes on page 14
■ Configuring Workflow Policies for Training Email Notification on page 15
■ Configuring the Email Driver and Notification Templates for Training on page 16
For more information on these topics, see Appendix A, �Siebel Training Workflow Processes,� Siebel Business Process Designer Administration Guide, Siebel Communications Guide, and Siebel Communications Server Administration Guide.
Verifying and Activating Training Workflow ProcessesSiebel Training uses Siebel Workflow to control enrollment processes, and Training also integrates with Siebel eSales to control order management processes.
Workflow processes are created using the Process Designer in Siebel Tools. See Appendix A, �Siebel Training Workflow Processes� for a list of required workflows. For information on creating and managing workflow processes, see Siebel Business Process Designer Administration Guide.
Perform the steps in the following procedures to verify the status of Training workflow processes, and activate the processes if necessary.
To verify the Training workflow processes are active
1 From the application-level menu, choose Navigate > Site Map > Administration - Business Processes > Workflow Deployment.
2 In the Active Workflow Processes list, query for the workflow processes, and then verify that the Deployment Status is Active.

Getting Started with Siebel Training ■ Setting Up Automatic Training NotificationMessages
Siebel Training Guide Version 7.7 ■ 15
To activate the Training workflow processes
1 From the application-level menu, choose Navigate > Site Map > Administration - Business Process > Workflow Deployment.
2 In the Repository Workflow Processes list, query for the inactive workflow process, and then click Activate.
For more information on creating, activating and managing workflow processes, see Siebel Business Process Designer Administration Guide.
Configuring Workflow Policies for Training Email NotificationIf email notification will be used for Siebel Training, you must log in to the application (for example, ERM Administration) and make sure the expiration date for the workflow policies are later than the current date.
To configure workflow policies for email notification
1 From the application-level menu, choose Navigate > Site Map > Administration - Business Process > Policies.
2 In the Policies List, query for the eTraining Policy Group.
Four policies are returned:
■ Training Course Confirmation Email
■ Training Class Confirmation Email
■ Training Class Reminder Email
■ Training Class Waitlisted Email
3 For each policy, change the Expiration date to a date in the future.
4 Activate the following workflow processes:
■ Course Confirmation Email (Training)
■ Class Confirmation Email (Training)
■ Class Reminder Email (Training)
■ Class Waitlisted Email (Training)

Siebel Training Guide Version 7.7
Getting Started with Siebel Training ■ Setting Up Automatic Training Notification Messages
16 ■
Configuring the Email Driver and Notification Templates for TrainingIf email notification will be used for training, you must verify that the Training Email Notification templates are set up correctly by specifying two parameters in the third-party registration driver profile, and then associating the templates to the driver profile. For more information on working with drivers and communications templates, see Siebel Communications Guide.
To configure the third-party registration communications driver
1 Log into the application (for example, ERMAdmin) as the administrator.
2 From the application-level menu, choose Navigate > Site Map > Administration - Communication > Communication Drivers and Profiles.
3 In the Communications Drivers list, query for Internet SMTP/POP3 Server, and then select the Profiles view tab.
4 In the Profiles list, select Third Party Registration Profile, and specify two parameters for this profile:
■ SMTP Server: sendmail.siebel.com
■ From Address: (use your own email address in the Siebel application)
5 Save the modified profile.
To associate email templates with the third-party registration profile
1 From the application-level menu, choose Navigate > Site Map > Administration - Communications > All Templates.
2 In the Templates list, query for *eTraining*.
The query returns five templates:
■ Class Confirmation Email Package (eTraining)
■ Class Reminder Email Package (eTraining)
■ Class Waitlisted Email Package (eTraining)
■ Course Confirmation Email Package (eTraining)
■ Third Party Registration Approve Email Package (eTraining)
3 In the Templates list, select a template, and click the Advanced view tab.
4 In the form, select Third Party Registration Profile in the Delivery Profile field.
5 Repeat Step 3 and Step 4 for each of the five templates.
6 Restart the Siebel Server, and then run the server tasks gentrig and workmon in srvrmgr.

Getting Started with Siebel Training ■ Customizing the Training User Interface
Siebel Training Guide Version 7.7 ■ 17
Running GenTrig and WorkMon after Restarting the ServerAfter you set up the communications driver profile for training, and restart the Siebel Server, you must rerun two server tasks, GenTrig and WorkMon, in srvrmgr for Class Confirmation Email, Class Waitlisted Email and Course Confirmation Email. Before you run the server tasks, make sure that Workflow Management and the training component groups are enabled.
After the student registers for a class, the class confirmation email is sent. The reminder email is sent 10 days before the class begins. For example, the student registers for a class that starts in three days. The first email the student gets is the class confirmation email and then, after workmon is run in Batch Mode, the class reminder email is sent to the student.
NOTE: These server tasks must be rerun each time the Siebel Server is restarted.
To run GenTrig and WorkMon
1 Connect to srvrmgr, navigate to $siebsrvr\bin, and use the command:
"srvrmgr /g gtwysrvr /s siebsrvr /e siebel /u user /p password""start task for comp Gentrig with Exec=�TRUE�, PrivUser=�SIEBEL�, PrivUserPass=�your_password�"list task for comp gentrig"
2 If the status is Completed, run workmon:
"start task for comp workmon with SleepTime=10, Groupname=�eTraining Group�, RetryInterval=1""list task for comp workmon"
If the status is Running, email notification setup is completed.
3 Run the workmon task in Batch Mode again for Class Reminder Email.
"start task for comp workmon with SleepTime=10, Groupname=�eTraining Group�, RetryInterval=1, BatchMode=TRUE"
Customizing the Training User InterfaceYou can customize Siebel Training to change the look and feel of your Siebel Training Web site. Using Siebel Tools, you can:
■ Modify Web templates
■ Change colors
■ Modify the behavior caused by clicking a button
■ Add or removing applets
■ Change controls
■ Make fields in forms required
■ Deploy Siebel Training without using frames
See Configuring Siebel eBusiness Applications for information on customizing the user interface.

Siebel Training Guide Version 7.7
Getting Started with Siebel Training ■ Navigating to Training Administration Screens
18 ■
Navigating to Training Administration ScreensMost Siebel Training administration tasks are performed using the following Training Administration screens:
■ All Enrollments. Shows all course enrollments.
■ Class Details. Shows class details such as location, class schedule, and so on.
■ Course Details. Shows detailed information about the courses
■ Curriculum Enrollments. Shows the enrollments associated with curriculums.
■ Curriculums. Shows curriculum-related details. Curriculums are a set of courses that fulfill a specific educational requirement.
■ Test Questions. Provides multiple question formats for skill testing which can be associated with tests.
■ Test Results. Shows test results.
■ Tests. Provides a list of skill tests used to determine if the training user has mastered the material presented in the course.
■ Training Library. Used to store training materials and files related to courses and curriculums.
To navigate to a training administration screen as an administrator, you must log in to the Siebel application that is licensed to include Training Administration screens. These screens may be included in Siebel Sales, Siebel Call Center, Siebel Service, Siebel Partner Manager, Siebel Marketing, and Siebel ERM (Employee Relationship Management Administration). For basic information about using Siebel applications, see Fundamentals.
To navigate to a Training Administration screen
1 Start the Siebel application that is licensed to include Training Administration screens.
2 From the application log-in screen enter the appropriate administrator information in the User ID and Password fields, and then click OK.
3 From the application-level menu, choose Navigate > Site Map > Administration - Training to display the list of links to individual training administration screens and views.
4 Click the link for the screen or view you want to use.

Getting Started with Siebel Training ■ Setting Up a Delegated Training Administrator
Siebel Training Guide Version 7.7 ■ 19
Setting Up a Delegated Training AdministratorThe Delegated Administrator feature allows managers and other designated users who are not training administrators to enroll other users in training. Using the Enroll Others functionality, the delegated administrator can enroll any contact in a course and is not limited to direct or indirect reports.
Related TopicEnrolling Students (Delegated Administrator) on page 98
To set up a nonmanagerial employee as delegated administrator
1 Navigate to Site Map > Administration - User > Users.
2 In the Users list, query for the user you want to designate as delegated administrator.
3 Select the employee record, and in the Miscellaneous section of the detail form, make sure the Training Delegation check box is selected.
To verify that the employee has delegated administrator visibility
1 Login to Siebel Training, using the ID of the end user you designated as delegated administrator.
2 From the Home Page, navigate to Find Training > All Training, and verify that in the list of courses, you have access to "Enroll Others" hyperlink.

Siebel Training Guide Version 7.7
Getting Started with Siebel Training ■ Setting Up a Delegated Training Administrator
20 ■

Siebel Training Guide Version 7.7 ■ 21
3 Setting up Training Regions and Locations
This chapter covers how to create and update location records and logical regions. It includes the following topics:
■ Process of Defining Training Regions and Locations on page 22
■ Defining Regions and Region Hierarchies on page 22
■ Defining Training Locations on page 23
■ Defining Classroom Characteristics and Resources on page 25
■ Specifying Hotels Located Near a Training Location on page 26
■ Adding Links to a Training Location on page 26
■ Assigning a Class to a Training Location on page 27
■ Resolving Scheduling Conflicts at a Location on page 27

Siebel Training Guide Version 7.7
Setting up Training Regions and Locations ■ Process of Defining Training Regions and Locations
22 ■
Process of Defining Training Regions and LocationsThe following list shows the procedures that administrators typically perform to set up training locations. Your company may follow a different process according to its business requirements.
Administrator ProceduresTo set up training regions and locations, perform the following procedures:
1 Defining Regions and Region Hierarchies on page 22
2 Defining Training Locations on page 23
3 Defining Classroom Characteristics and Resources on page 25
4 Specifying Hotels Located Near a Training Location on page 26
5 Adding Links to a Training Location on page 26
6 Assigning a Class to a Training Location on page 27
7 Resolving Scheduling Conflicts at a Location on page 27
Defining Regions and Region HierarchiesYou can define logical regions for training, and each region can be associated with multiple locations. Locations can likewise be associated with multiple regions for reporting purposes. In addition, a region can be associated with another region to create a parent-child relationship.
This task is a step in Process of Defining Training Regions and Locations on page 22.
Defining a RegionPerform the following steps to set up a region for training locations.
To define a region
1 From the application-level menu, choose Navigate > Site Map > Administration - Location > Regions.
2 In the Regions list, create a new record.
3 In the region record, set the value in the Type field to Training Region and set the value in the Status field to Active.
4 Complete the remaining fields and save the record.

Setting up Training Regions and Locations ■ Defining Training Locations
Siebel Training Guide Version 7.7 ■ 23
Creating a Hierarchy of RegionsThe administrator can create a hierarchy of regions. For example, the administrator might set up a parent region called Eastern United States and then associate child regions called MidAtlantic, Southeast with the parent region.
To create subregions for a region
1 From the application-level menu, choose Navigate > Site Map > Administration - Location > Regions.
2 In the Regions list, create a new record and complete the fields or if you had created it previously, query for the region.
3 Click the Sub Regions view tab and create a record.
4 In the subregion record, set the value in the Type field to Training Regions, and set the value in the Status field to Active.
5 Complete the remaining fields and save the record.
To delete a subregion
1 From the application-level menu, choose Navigate > Site Map > Administration - Location > Regions.
2 In the Regions list, query for the subregion and delete it.
Defining Training LocationsYou can provide detailed information about training locations for instructor-led classes. Location information might include the following:
■ Address of each training location including directions for reaching each training location.
■ Individual classrooms available within each training location, showing available seating, equipment, and other classroom-specific resources.
■ Information about hotels that are located near training locations.
■ Links to maps and other helpful information.
This task is a step in Process of Defining Training Regions and Locations on page 22.
To add a location record
1 From the application-level menu, choose Navigate > Site Map > Administration - Location.

Siebel Training Guide Version 7.7
Setting up Training Regions and Locations ■ Defining Training Locations
24 ■
2 In the Locations list, add a new record and complete the fields.
The following table describes some of the fields.
Field Comment
Account Account associated with a particular location. Several read-only fields are automatically populated with the information included in the Account Addresses form.
Address Address of the training facility.
City City where the training facility is located.
Country Country where the training facility is located.
Comments Description of the location or any other information useful to the user.
Email Location (or contact) email address.
Fax # Fax number for the training facility.
First Name The first name of the location contact.
Hotel Rate The room rate if the hotel room is used as a training location.
Last Name The last name of the location contact.
Name Name of the training facility.
Phone # Phone number of the training facility.
Region Region where the training facility is located. Click the select button and query for the predefined region you want to add.
State State where the training facility is located.
Status The status of the location record. Typical values are Inactive, Pending, Retired, and Active.
Time Zone Time zone of the training facility.
Type Type of training facility. Typical values include Convention Center, Corporate Training Center, Hotel, and Third Party Training Center.
Direction URL
URL to directions information for the location.
Postal Code The Postal Code for the location of the training facility.

Setting up Training Regions and Locations ■ Defining Classroom Characteristics andResources
Siebel Training Guide Version 7.7 ■ 25
Defining Classroom Characteristics and ResourcesUse the following procedures to define a training classroom, and specify its characteristics and resources. Typical classroom resources might include projectors, whiteboards, printers, flip charts, and so on.
This task is a step in Process of Defining Training Regions and Locations on page 22.
To assign a classroom and specify the classroom characteristics
1 From the application-level menu, choose Navigate > Site Map > Administration - Location.
2 In the Locations list, select the location of the classroom, and click the Rooms view tab.
3 In the Rooms list, create a new record, complete the fields, and save the record.
The following table describes the fields.
To specify classroom resources
1 From the application-level menu, choose Navigate > Site Map > Administration - Location.
2 In the Locations list, select the location of the classroom, and click the Rooms view tab.
3 In the Rooms list, select the room, and then scroll down to the Equipment list.
4 In the Equipment list, click New to add a record, and then complete the text fields (Resource, Description and Qty) to detail an available resource.
Field Comments
# of Computers
Number of computers in the classroom.
# of Seats Maximum number of seats in the classroom. This number does not include a seat for the instructor. This number defaults to the class size when the administrator is scheduling training classes.
Drops Number of computer network connections available in the classroom.
Name Classroom name.
Operating System
Operating system used by the computers in the classroom.
Phone # Phone number of the classroom.
Room Rate Daily rental rate for the classroom.
Type Type of room being classified as a classroom.
Values are Ballroom, Bar, Conference Room, Dinner Room, Exhibition Hall, Hotel Room, Lecture Hall, Lounge, Office, and Outdoors.
Directions Directions to the room within the location.

Siebel Training Guide Version 7.7
Setting up Training Regions and Locations ■ Specifying Hotels Located Near a Training Location
26 ■
5 Save the record.
Repeat this procedure for each classroom resource.
Specifying Hotels Located Near a Training LocationInformation about hotels located near the selected training facility is made available to potential trainees when they use Training to browse or register for classes. Before you begin, make sure each hotel is entered as a location record.
This task is a step in Process of Defining Training Regions and Locations on page 22.
To specify hotels located near a training location
1 From the application-level menu, choose Navigate > Site Map > Administration - Location.
2 In the Locations list, select the location of the training facility, and click the Hotels view tab.
3 In the Hotels list, click New.
4 In the new record, click the select button in the name field and choose a hotel listing.
5 Repeat Step 3 and Step 4 for each additional hotel you want to associate with the selected location.
Adding Links to a Training LocationYou can specify links to information, such as maps to the training location, that training students can use when evaluating training options.
This task is a step in Process of Defining Training Regions and Locations on page 22.
To add links to a training location
1 From the application-level menu, choose Navigate > Site Map > Administration - Location.
2 In the Locations list, select the location of the training facility, and click the Links view tab.
3 In the Links list, add a new record, and name the link.
4 In the Type field, select the type of link that is being defined.
Options are Directions, Download, Image, Map, More Info.
5 In the Status field, set the status to Active.
6 In the URL field, enter the URL information.

Setting up Training Regions and Locations ■ Assigning a Class to a Training Location
Siebel Training Guide Version 7.7 ■ 27
Assigning a Class to a Training LocationFrom the Locations screen, you can associate a predefined class to the location. You can also associate a new class with a training location, provided that the training location information is defined within your Training system before you create the class.
This task is a step in Process of Defining Training Regions and Locations on page 22.
To assign an existing class to a training location
1 From the application-level menu, choose Navigate > Site Map > Administration - Location.
2 In the Locations list, select the location, and click the Scheduled Classes view tab.
3 In the Scheduled Classes list, click New, and choose the class from the Add Class dialog box.
To change the classroom of an existing class
1 In the Locations list, select the location, and click the Scheduled Classes view tab.
2 In the Scheduled Classes list, select the session for which you want to assign or change the classroom location, and in the Classroom field, click the select button.
3 In the Pick Classroom dialog box, select a location, and then click OK.
To remove a scheduled class from the location
1 From the application-level menu, choose Navigate > Site Map > Administration - Location.
2 In the Locations list, select the location, and click the Scheduled Classes view tab.
3 In the Scheduled Classes list, select the class record.
4 Click Delete.
Resolving Scheduling Conflicts at a LocationYou can verify that there are no scheduling conflicts for a location and classroom using the Scheduled Classes view, and if conflicts exist, change times and dates as needed.
This task is a step in Process of Defining Training Regions and Locations on page 22.
To check for location and room scheduling conflicts
1 From the application-level menu, choose Navigate > Site Map > Administration - Location.
2 In the Locations list, select the location, and then click the Scheduled Classes view tab.

Siebel Training Guide Version 7.7
Setting up Training Regions and Locations ■ Resolving Scheduling Conflicts at a Location
28 ■
3 In the Scheduled Classes list verify that classes are not scheduled to use the same room at the same time.
NOTE: You may find it helpful to sort the records by Start or by Room. Click the up arrow or down arrow in the header of the column to sort in ascending or descending order.
To reschedule conflicting classes
1 From the application-level menu, choose Navigate > Site Map > Administration - Location.
2 In the Locations list, select the location, and then click the Scheduled Classes view tab.
3 In the Scheduled Classes list, select the class that needs to be rescheduled or relocated, and click the link in the Start Date field.
4 From the Administration - Training Classes list, click the More Info view tab.
5 In the more Info form, change the values as desired in the Start Date, End Date, Start Time, and End Time fields.

Siebel Training Guide Version 7.7 ■ 29
4 Adding Materials to a Training Library
This chapter covers how to how to use the Training Library, which is included with Siebel Training, to store files that are related to the courses and curriculum paths you offer. The Training Library can store many types of files, in formats that include .pdf, .xls, .doc, and .ppt. Users can view these files, which may include reading material, self-paced learning topics, training presentations, curriculum guides, course syllabus information, audio and video clips, and other training information.
Training library items are also listed in the Literature screen with Literature Type set to Training Literature. However, it is strongly recommended that you always administer training library items from the Training Library screen. For more information on Literature, see Applications Administration Guide.
This chapter includes the following topics:
■ Process of Adding Materials to a Training Library on page 30
■ Adding Files to the Training Library on page 30
■ Modifying a Training Library File on page 31
■ Changing the URL in a Training Library Record on page 32
■ Downloading a Training Library File on page 33

Siebel Training Guide Version 7.7
Adding Materials to a Training Library ■ Process of Adding Materials to a Training Library
30 ■
Process of Adding Materials to a Training LibraryThe following list shows the procedures that administrators typically perform when adding and modifying training library materials. Your company may follow a different process according to its business requirements.
Administrator ProceduresTo set up the Training Library, the administrator typically performs the following tasks:
1 Adding Files to the Training Library on page 30
2 Modifying a Training Library File on page 31
3 Changing the URL in a Training Library Record on page 32
4 Downloading a Training Library File on page 33
Adding Files to the Training LibraryYou can add reference materials associated with the training course to the Training Library.
This task is a step in Process of Adding Materials to a Training Library on page 30.
To add a file to the Training Library
1 From the application-level menu, choose Navigate > Site Map > Administration - Training > Training Library.
2 In the Training Library list, perform one of the following:
a Click New File, and in the Choose File dialog box, navigate to the file and click Open.
b Click New URL, and in the Add URL dialog path, enter the path and then click Add.
3 In the new record, add a descriptive name for the Training file or URL in the Title field.
4 Complete the remaining fields in the More Info form, and save the record.
Some fields are described in the following table.
Field Comments
Author Author of the file you are storing.
Auto Update When selected, the check box indicates that the library file is automatically updated as changes to the file occur.
Description A brief description of the item.
Distribution Method
Intended method for distributing the file, such as email, direct mail, and so on. For informational purposes only.

Adding Materials to a Training Library ■ Modifying a Training Library File
Siebel Training Guide Version 7.7 ■ 31
Modifying a Training Library FileYou can modify the file or URL referenced in the training library record and make other changes to the training record details using the following procedures.
NOTE: If you are modifying a file located in the file system on your local drive, make the changes in the original file before you update the training library file.
This task is a step in Process of Adding Materials to a Training Library on page 30.
To modify a training library record
1 From the application-level menu, choose Navigate > Site Map > Administration - Training > Training Library.
Expiration A date after which the file automatically becomes unavailable to Training Library end users.
An expired file listing is visible to administrators but not to end users.
File Name The name of the file to be placed in the Training Library, without the filename extension. Click the select button to navigate to the file. The extension appears in the File Type field. The file size automatically appears in the read-only Size field.
The File Name may also be referred to as Attachment Name.
File Type The extension of the filename of the item, such as .doc or .txt. Automatically populated when you fill in the File Name field.
Internal If the check box is selected, then the item is available only to employees.
Launch Intended method by which the material is launched, for example in-line, new window, and so on. For informational purposes only.
Literature Type The purpose or category of the item. The default value is Training Literature. Other values may include Technical Reference Material, White Paper, and so on.
Local Selecting this check box indicates that the file resides on a local file system.
Organization The document ownership. This value facilitates inquiries about updates or other maintenance.
Release The date when the item becomes visible and available to end users. Before this date, only administrators see the listing and can access to the item. Useful for preventing distribution before appropriate conditions are met.
Size Automatically populated. The size of the file in bytes.
Title A text field that you can use to enter the name of the item you are storing.
Type Automatically populated to reflect the type of file (URL or a file).
Field Comments

Siebel Training Guide Version 7.7
Adding Materials to a Training Library ■ Changing the URL in a Training Library Record
32 ■
2 In the Training Library list, query for the training library record.
3 In the More Info form, modify the information in the fields and save the record.
To undo the changes to a training library record
1 In the Training Library list, select the record.
2 Click the menu button, and choose Undo Record.
NOTE: Undo must be performed before you save or leave the record.
To modify a file referenced in a training library record
1 From the application-level menu, choose Navigate > Site Map > Administration - Training > Training Library.
2 In the Training Library list, query for the training library record.
3 In the training library record, click the select button in the Attachments field, and in the Add Attachments dialog box, click Browse.
4 Navigate to the record and click Add.
To delete a training library record■ In the Training Library list, select the record, and click Delete.
Changing the URL in a Training Library RecordPerform the steps in the following procedure to change the URL referenced in a training library record.
This task is a step in Process of Adding Materials to a Training Library on page 30.
To change the URL in a training library record
1 From the application-level menu, choose Navigate > Site Map > Administration - Training > Training Library.
2 In the Training Library list, query for the training library record.
3 In the training library record, click the select button in the Attachments field.
4 In the Add Attachments dialog box, add the new URL in the URL field, and click Add.

Adding Materials to a Training Library ■ Downloading a Training Library File
Siebel Training Guide Version 7.7 ■ 33
Downloading a Training Library FilePerform the steps in the following procedure to save training materials from the Training Library list to your local drive.
This task is a step in Process of Adding Materials to a Training Library on page 30.
To download training library materials
1 From the application-level menu, choose Navigate > Site Map > Administration - Training > Training Library.
2 In the Training Library list, query for the training library record.
3 In the training library record, click the link in the Title field.
4 In the File Download dialog box, click Save, and complete the information in the Save As dialog box.

Siebel Training Guide Version 7.7
Adding Materials to a Training Library ■ Downloading a Training Library File
34 ■

Siebel Training Guide Version 7.7 ■ 35
5 Setting Up Training Courses
This chapter covers how to add or modify a course and how to specify course details. A course is the main training element in Siebel Training and can be in any training format available, such as instructor-led classes, Web-based courses, course bundles, and so on.
This chapter includes the following topics:
■ Process of Setting Up Training Courses on page 36
■ Adding or Modifying a Training Course on page 37
■ Specifying Training Course Details on page 40
■ Specifying Training Course Topics on page 40
■ Specifying Training Course Objectives on page 41
■ Specifying Training Skills on page 41
■ Specifying Prerequisites and Related Courses on page 42
■ Specifying Training Course Materials on page 43
■ Specifying Course Launching Links on page 44
■ Creating a Training Catalog with Categorized Courses on page 44
■ Creating Training Bundles on page 46
■ Training for Customers and Partners on page 47

Siebel Training Guide Version 7.7
Setting Up Training Courses ■ Process of Setting Up Training Courses
36 ■
Process of Setting Up Training CoursesThe following list shows the procedures that administrators typically perform to set up training courses. For more information, see Example Process Flow for Setting Up Training Courses on page 152 in Appendix D, �Siebel Training Processes.� Your company may follow a different process according to its business requirements.
Administrator ProceduresTo set up courses, the administrator typically performs the following tasks:
1 Adding or Modifying a Training Course on page 37
2 Specifying Training Course Topics on page 40
3 Specifying Training Course Objectives on page 41
4 Specifying Training Skills on page 41
5 Specifying Prerequisites and Related Courses on page 42
6 Specifying Training Course Materials on page 43
7 Specifying Course Launching Links on page 44
8 Creating a Training Catalog with Categorized Courses on page 44
9 Creating Training Bundles on page 46

Setting Up Training Courses ■ Adding or Modifying a Training Course
Siebel Training Guide Version 7.7 ■ 37
Adding or Modifying a Training CourseBefore Training Web site users can learn about a course that your organization offers, you must add a listing for the course. A course listing can be modified at a later time if you choose. For more information about importing and setting up an AICC- or SCORM-compliant course, see Chapter 7, �Importing an AICC or SCORM Course.�
Some of the available course setting values depend on records in the Administration - Data > List of Values list. List of Values (LOV) setting names are mentioned throughout the Training administrative procedures in this guide. For information about editing lists of values to make additional values available, see Applications Administration Guide. For information on LOVs specific to Siebel Training, see Appendix B, �Lists of Values (LOVs) for Training.�
This task is a step in Process of Setting Up Training Courses on page 36.
To add or modify a course
1 From the application-level menu, choose Navigate > Site Map > Administration - Training > Course Details.
2 In the Courses list, create a new record, and complete the fields.
3 Scroll down to the Description field, and enter a detailed description of the course.
The following table describes some of the fields.
Field Comments
Admin Notes Use this text field to enter administrative notes about the course. The notes are not visible to the end user.
Access Period (Days)
Number of days the course may be accessed. The value in this field is used to manage how long users have access to Web-based training courses. For example, if this value is set to 90 days, a user can take and retake the course an unlimited number of times for 90 days after the registration date. But after the access period, the user will have a record of the course in the user�s transcript but will not be able to launch the course, unless the user re-enrolls in the course.
The Registration date (the date when the user enrolls) plus the Access Period equals the number of days the end user will have access to the course.
Accrue Units Select the check box to allow units to accrue as part of student transcript or as part of a curriculum. Default value is selected.
Waitlist Limit Select the check box to manage the waitlist to unlimited size or Max Size, depending on user-defined criteria. If a waitlist is not allowed, then overflow enrollees receive a message that the class is full and class enrollment is no longer allowed.
The value in this field only applies to Class Schedules. You can adjust the value in the detail form for the course.
Siebel Training Guide Version 7.7
Setting Up Training Courses ■ Adding or Modifying a Training Course
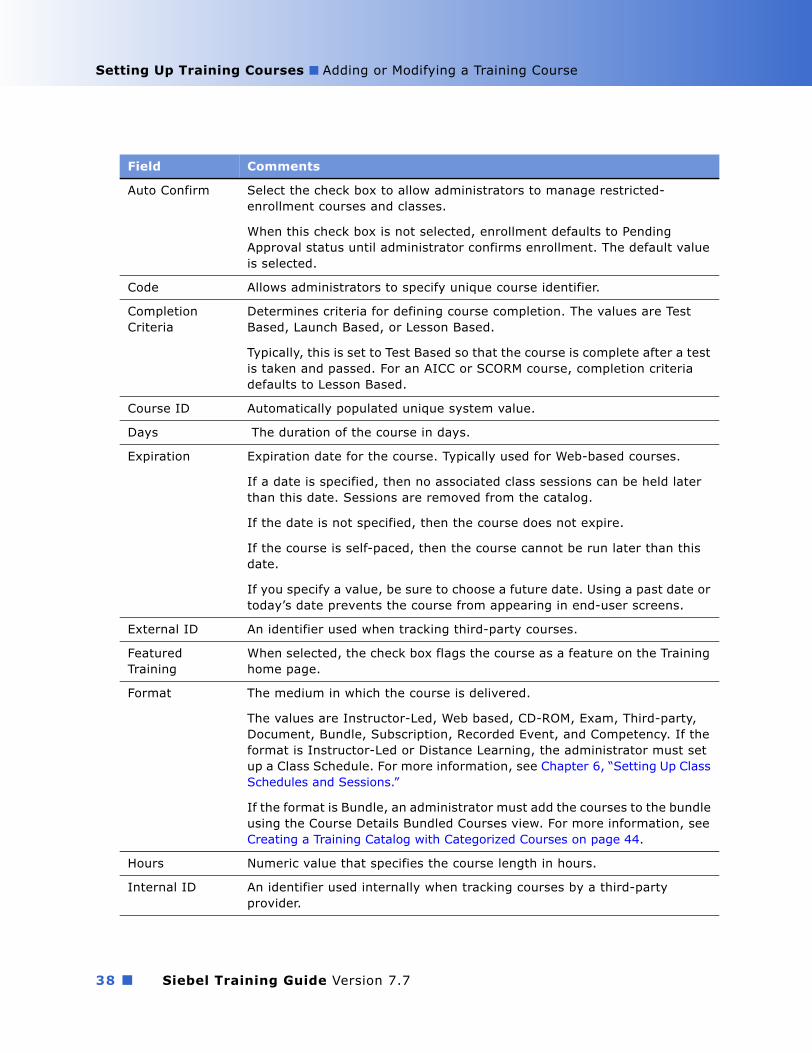
38 ■
Auto Confirm Select the check box to allow administrators to manage restricted-enrollment courses and classes.
When this check box is not selected, enrollment defaults to Pending Approval status until administrator confirms enrollment. The default value is selected.
Code Allows administrators to specify unique course identifier.
Completion Criteria
Determines criteria for defining course completion. The values are Test Based, Launch Based, or Lesson Based.
Typically, this is set to Test Based so that the course is complete after a test is taken and passed. For an AICC or SCORM course, completion criteria defaults to Lesson Based.
Course ID Automatically populated unique system value.
Days The duration of the course in days.
Expiration Expiration date for the course. Typically used for Web-based courses.
If a date is specified, then no associated class sessions can be held later than this date. Sessions are removed from the catalog.
If the date is not specified, then the course does not expire.
If the course is self-paced, then the course cannot be run later than this date.
If you specify a value, be sure to choose a future date. Using a past date or today�s date prevents the course from appearing in end-user screens.
External ID An identifier used when tracking third-party courses.
Featured Training
When selected, the check box flags the course as a feature on the Training home page.
Format The medium in which the course is delivered.
The values are Instructor-Led, Web based, CD-ROM, Exam, Third-party, Document, Bundle, Subscription, Recorded Event, and Competency. If the format is Instructor-Led or Distance Learning, the administrator must set up a Class Schedule. For more information, see Chapter 6, �Setting Up Class Schedules and Sessions.�
If the format is Bundle, an administrator must add the courses to the bundle using the Course Details Bundled Courses view. For more information, see Creating a Training Catalog with Categorized Courses on page 44.
Hours Numeric value that specifies the course length in hours.
Internal ID An identifier used internally when tracking courses by a third-party provider.
Field Comments

Setting Up Training Courses ■ Adding or Modifying a Training Course
Siebel Training Guide Version 7.7 ■ 39
Job Profiles Associates the course with one or more specific job roles. End users can then locate the course using a search by job role.
For information on creating new job profiles, see Siebel Employee Relationship Management Administration Guide.
Language Language in which the class is taught.
Launch Type An attribute specifying the type of content that is launched.
Max. Attendees Use to manage number of enrollments for a course. Typically used for Web-based courses where network bandwidth may be constrained.
Waitlist Count Use this value to manage maximum number of waitlisted students enrolled for a course. The value in this field only applies to Class Schedules.
Message Use this text field to communicate additional information to end users.
Name Course name.
Organization The company sponsoring or teaching the course, which may differ from course vendor. It can also specify the division within an organization for whom the course applies.
Overview Use this field to provide descriptive text about the course, which can be viewed by potential attendees in Training Web site screens. For a longer description, use the Description field at the bottom of the Training Administration screen�s Course Details More Info view.
Provider General information about the provider for the course.
Rating Popularity rating for the course. Manually specified by the administrator.
Sponsor Attribute indicating the source of the course internally in an organization. Examples are Customer Education, End-User Education, and so on.
Status The current status of the course. By default, a course must have Status set to Active to be listed on the Training Web site and allow registration.
The values are Active, Inactive, End of Life, Pre-Release, Pending, QA, and Near Term.
Use another value for this setting until you are ready to accept registrations. Use Siebel Tools to alter the course Status values that appear on the Web site and allow registration.
For more information, see Configuring Siebel eBusiness Applications.
Tests Associates one or more skills tests with the course.
For information about creating skills tests, see Chapter 9, �Creating and Modifying Skills Tests.�
Units Numeric value specifying the credit received for a course.
Version The version of the course. The version is used internally within your organization to identify different versions of the same course.
Field Comments

Siebel Training Guide Version 7.7
Setting Up Training Courses ■ Specifying Training Course Details
40 ■
Specifying Training Course DetailsAfter basic course information is set up, other course details such as Topics, Objectives, and so on can be specified. In addition to these sections, course details may include additional information, which can be accessed by clicking the appropriate view tab.
NOTE: For additional information on setting up Instructor-Led type courses, see Chapter 6, �Setting Up Class Schedules and Sessions.�
The view tabs are:
■ Topics. For more information, see Specifying Training Course Topics on page 40.
■ Objectives. For more information, see Specifying Training Course Objectives on page 41.
■ Skills. For more information, see Specifying Training Skills on page 41.
■ Associated Training. For more information, see Specifying Prerequisites and Related Courses on page 42.
■ Materials. For more information, see Specifying Training Course Materials on page 43.
■ Course Launching. For more information, see Specifying Course Launching Links on page 44.
■ Class Details. For more information, see Adding and Viewing Course Enrollments on page 90.
■ Categories. For more information, see Creating a Training Catalog with Categorized Courses on page 44
■ Add Enrollments. For more information, see Adding and Viewing Course Enrollments on page 90.
■ Partner Enrollments. For more information, see Viewing Partner Enrollments on page 94.
■ Bundled Courses. For more information, see Creating Training Bundles on page 46.
NOTE: A class only needs to be defined if the course is being held at a specific time. Instructor-Led and Distance Learning type courses must have classes defined, but Web-based courses, CD-ROM courses, and exam courses do not need defined classes.
Specifying Training Course TopicsYou may find it useful to list the topics that are covered in a particular training course. Topic information specified using Training is visible to employees, partners, and customers, whenever the course status is set to Active, and the user views detailed course information.
When a topic has been specified for any course in the system, other courses may be associated with that topic.
NOTE: If you edit an existing topic record, the changes you make are effective for each course that is associated with that topic.
This task is a step in Process of Setting Up Training Courses on page 36.
Setting Up Training Courses ■ Specifying Training Course Details
Siebel Training Guide Version 7.7 ■ 41
To specify course topics
1 From the application-level menu, choose Navigate > Site Map > Administration - Training > Course Details.
2 In the Courses list, select the course, and then click the Topics view tab.
3 In the Topics list, click New.
4 In the Add Topics dialog box, select the topics you want to add, and then click Add.
This dialog box lists topics that have previously been created, whether for the current course or another course. You can select multiple topics by holding down SHIFT or CTRL when you select records.
To add items to the dialog box list, click New.
Specifying Training Course ObjectivesObjectives specified using Training are visible to employees, partners, and customers, whenever the course status is set to Active, and the user views detailed course information.
When an objective has been specified for a course in the system, other courses may be associated with that objective.
NOTE: If you edit an existing objective record, changes you make are effective for any courses that are associated with that objective. Objectives are not related to Topics.
This task is a step in Process of Setting Up Training Courses on page 36.
To specify course objectives
1 From the application-level menu, choose Navigate > Site Map > Administration - Training > Course Details.
2 In the Courses list, select the course, and then click the Topics view tab.
3 Scroll down to the Objectives sub view list.
4 In the Objectives list, click New.
5 In the Add Objectives dialog box, select the objective, and then click Add.
The dialog box lists objectives that have previously been created, whether for the current course or another course. To add items to the dialog box list, click New.
Specifying Training SkillsYou may also find it useful to specify the skills that are achieved by completing a particular training course. Skills specified using Training are visible to employees, partners, and customers, whenever the course status is set to Active, and the user views detailed course information.

Siebel Training Guide Version 7.7
Setting Up Training Courses ■ Specifying Training Course Details
42 ■
Skills and ratings are defined using the Siebel Competency Management module. Specifying skills for a course allows administrators to set what skills will be acquired by learners who attend and successfully pass that course. For information on adding and changing skills and ratings, see Siebel Employee Relationship Management Administration Guide.
When a skill has been specified for any course in the system, other courses may be associated with that skill.
NOTE: If you edit an existing skill record, any changes you make are effective for any courses that are associated with that skill.
This task is a step in Process of Setting Up Training Courses on page 36.
To specify skills
1 From the application-level menu, choose Navigate > Site Map > Administration - Training > Course Details.
2 In the Courses list, select a course, click the Skills view tab.
3 In the Skills list, click New.
4 In the new record, click the select button in the Skill Name field.
5 In the Skills dialog box, select the skill that you want to associate with the current course, and then click OK.
This dialog box lists skills that have previously been created, whether for the current course or another course. The Skill Description and Skill Rating Types fields are filled in with information from the selected skills.
6 In the Level field click the select button, and in the Pick Rating dialog box select a rating, and then click OK.
Repeat the procedure to associate additional skills with the selected course.
Specifying Prerequisites and Related CoursesSome of the training courses you offer may be related to each other in specific ways. For example, a course called Introduction to Web Design might be a prerequisite for a course called Intermediate Web Design. You can specify any other courses that are related to any course you offer using Training, and whether each course is a prerequisite to the current course or not.
This task is a step in Process of Setting Up Training Courses on page 36.
To specify prerequisite training
1 From the application-level menu, choose Navigate > Site Map > Administration - Training > Course Details.
2 In the Courses list, select the course, and then click the Pre-Requisites view tab.
3 In the Pre-Requisites list, click New.

Setting Up Training Courses ■ Specifying Training Course Details
Siebel Training Guide Version 7.7 ■ 43
4 In the new record, click the select button in the Name field, and in the Pick Course dialog box, select a course and then click OK.
To add items to the dialog box list, click New.
5 In the Relationship Type field, select the value that indicates whether the associated course is a prerequisite or optional.
If the associated course must be completed before registering for the current course, select Prerequisite. If the associated course does not need to be completed before registering for the current course, select Optional.
6 Save the changes.
7 Repeat the procedure to associate additional courses with the selected course.
Specifying Training Course MaterialsFor each course you offer using Training, you can designate one or more files as course materials. Students can view these materials as part of their course work. The course material files are stored in the Training Library.
You can place each file in the library ahead of time, as described in Chapter 4, �Adding Materials to a Training Library,� or you can add the file to the Training Library when you designate it as course material.
This task is a step in Process of Setting Up Training Courses on page 36.
To specify materials (training literature) for a selected course
1 From the application-level menu, choose Navigate > Site Map > Administration - Training > Course Details.
2 In the Courses list, select the course, click the Links view tab, and scroll down to the Materials list.
3 In the Materials list, click New.
4 In the Add Literature dialog box, select the literature item you want to designate as course material, and then click Add.
The new item appears in the Materials list.
You can select multiple items by holding down SHIFT or CTRL when you select records. To add items to the dialog box list, click New.
5 Save the materials.

Siebel Training Guide Version 7.7
Setting Up Training Courses ■ Creating a Training Catalog with Categorized Courses
44 ■
Specifying Course Launching LinksYou can specify how the course is to be launched if you are setting up a Distance-Learning session or a Web-based course. If you offer online classes in multiple formats, each format may require different launching information.
NOTE: This procedure is not required if you are importing an AICC or SCORM course. If a course is imported using AICC or SCORM, the lessons and associated URLs appear in the Lessons view.
This task is a step in Process of Setting Up Training Courses on page 36.
To specify technical launching information for a Web-based course
1 From the application-level menu, choose Navigate > Site Map > Administration - Training > Course Details.
2 In the Courses list, select the course and click the Links view tab.
3 In the Links list, click New.
4 Complete the fields, and save the record.
The following table describes the fields.
5 Repeat this procedure to create additional records for different versions of the course.
Creating a Training Catalog with Categorized CoursesAs an administrator, you can create a catalog of training courses which are grouped by categories. To create a catalog of courses, perform the following procedures:
1 Creating a Training Catalog on page 45
2 Defining Catalog Categories on page 45
3 Assigning Courses to Categories on page 45
Field Comments
Label The text that Training users see when they want to start the selected course.
If you offer different versions of the course based on the speed of the attendee�s network connection, include speed-identifying text in the label.
URL The URL for the specific version of the course being launched, which is visible to attendees.
Provide a URL for a self-paced (Web-based) course, or provide a URL address for the location of the file directory or specific course file.
Status Values are Active, Inactive, and Pending.

Setting Up Training Courses ■ Creating a Training Catalog with Categorized Courses
Siebel Training Guide Version 7.7 ■ 45
This task is a step in Process of Setting Up Training Courses on page 36.
Creating a Training CatalogPerform the steps in the following procedure to create a training catalog.
To create a training catalog
1 From the application-level menu, choose Navigate > Site Map > Administration - Catalog.
2 In the Catalogs list, create a new record.
3 In the new record, complete the fields.
a Set the value in the Catalog Type field to Training.
b Enter an Effective Start Date and Effective End Date.
c Select the Active check box.
4 Save the catalog.
Defining Catalog CategoriesUsing the Categories view, you define logical groupings of training courses within the catalog. For example, one category might be Instructor-Led Classes, and another category might be Media-Based Training.
To set up training categories
1 From the application-level menu, choose Navigate > Site Map > Administration - Catalog.
2 In the Catalogs list, query for the catalog, and then click the link in the Name field.
3 In the Categories list, create a new record and complete the fields.
Set the value in the Display Template field to Product Basic.
Assigning Courses to CategoriesYou associate courses with categories using the Categories view. You can also perform this task from the Course Details view.
To associate courses and categories from the Categories view
1 From the application-level menu, choose Navigate > Site Map > Administration - Catalog.
2 In the Catalogs list, query for the catalog, and then click the link in the Name field.
3 In the Categories list, select the predefined category.
4 Click the Categories view tab, and from the Categories form, click the Training link.
Click the arrow at the end of the row of links to expose additional links.
Siebel Training Guide Version 7.7
Setting Up Training Courses ■ Creating Training Bundles
46 ■
5 In the Training list, click New and from the Add Courses dialog box, click Go.
6 In the Add Courses list, query for the course, and then click OK.
To specify the category by course
1 From the application-level menu, choose Navigate > Site Map > Administration - Training > Course Details.
2 In the Courses list, select the course and click the Category view tab.
3 In the Category list, click New.
4 In the Add Subcategories dialog box, select the category for the course, and click OK.
Creating Training BundlesYou can create any type of Web-based course or class as a training bundle, with supporting materials packaged and sold as one item, and with one enrollment and purchase process. However, bundles typically are priced independently. Examples of bundled products are packaged Web courses, pre-exams, CD-ROMs, workbooks, and videos.
This task is a step in Process of Setting Up Training Courses on page 36.
To create training bundles
1 From the application-level menu, choose Navigate > Site Map > Administration - Training > Course Details.
2 In the Courses list, click New.
3 In the course record, enter a name for the bundled or packaged courses, and in the Format field, select Bundle.
4 Complete the remaining fields and save the record.
For more information, see Adding or Modifying a Training Course on page 37.
To add the courses to the course bundle
1 From the application-level menu, choose Navigate > Site Map > Administration - Training > Course Details.
2 In the Courses list, select the course.
3 Click the Bundled Courses view tab.
4 In the Bundled Courses list, click New.
5 In the new record, click the select button in the Name field, and select the course that you want to add to the bundle.
Only Web-based courses appear in the Pick Course dialog box.

Setting Up Training Courses ■ Training for Customers and Partners
Siebel Training Guide Version 7.7 ■ 47
6 Repeat this procedure for each course you want to add to the bundle. When you have completed the process, save the changes.
Training for Customers and PartnersWhen courses are used to sell training to customers and partners, you may need to perform additional activities to prepare the items for sale. These activities might include the following:
■ Adding prices to courses, which includes creating price lists, course prices, pricing models, discounts, and so on.
■ Setting up access groups, which includes creating access restrictions that define the audiences that can view certain training courses.
■ Setting up catalogs and categories, which includes creating catalog structures and navigation paths to allow for course grouping and display.
■ Setting up parametric search, which includes creating a structure that allows users to search for products based on values of the attributes of those products. For example, searching by course format, location, price, and so on.
For more information on these procedures, see Siebel eSales Administration Guide, Pricing Administration Guide, and Product Administration Guide.

Siebel Training Guide Version 7.7
Setting Up Training Courses ■ Training for Customers and Partners
48 ■

Siebel Training Guide Version 7.7 ■ 49
6 Setting Up Class Schedules and Sessions
This chapter covers how to set up class schedules and sessions. Class schedules and session are created for training that is instructor-led, distance learning, seminars, brown-bag sessions, and so on. Each class is an instance of a course (child of a course record). Sessions are useful when you are segmenting a class into multiple events to provide more flexible scheduling of rooms and instructors.
This chapter includes the following topics:
■ Process of Setting Up Class Schedules and Sessions on page 50
■ Scheduling Classes on page 50
■ Specifying Additional Class Details on page 51
■ Scheduling Class Sessions on page 52

Siebel Training Guide Version 7.7
Setting Up Class Schedules and Sessions ■ Process of Setting Up Class Schedules and Sessions
50 ■
Process of Setting Up Class Schedules and SessionsThe following list show the procedures that administrators typically perform to set up classes and class sessions. Your company may follow a different process according to its business requirements.
Administrator ProceduresTo set up classes and class sessions, perform the following tasks:
1 Scheduling Classes on page 50
2 Specifying Additional Class Details on page 51
3 Scheduling Class Sessions on page 52
Scheduling ClassesIf a course is offered at more than one time or more than one location, each offering of the course is called a class. You can schedule multiple sessions for a class. Each class session is identified by a unique numerical code.
You can schedule class sessions for the same day and the same time, but in different rooms. Instructors and students can be associated with a class. Though not required, class sessions allow for greater flexibility in managing time, room, and instructor changes that may occur during the course of a multiday classroom event.
This task is a step in Process of Setting Up Class Schedules and Sessions on page 50.
To schedule classes for a course
1 From the application-level menu, choose Navigate > Site Map > Administration - Training > Course Details.
2 In the Courses list, select the course, and then click the Class Schedule view tab.
3 In the Class Schedule form, create a new record, complete the fields, and save the record.
NOTE: The format for the course must be Instructor-Led or Distance Learning. You should not create a new class schedule record for other formats such as Web based formats.
The following table describes some of the fields. If the fields do not appear, click the menu button in the Class Schedule form and select Columns Displayed.
Field Comments
Class ID The identification number automatically assigned to the class.
Name The name of the class.
Start Date The start date for the Instructor-Led class.

Setting Up Class Schedules and Sessions ■ Scheduling Classes
Siebel Training Guide Version 7.7 ■ 51
Specifying Additional Class DetailsUsing the Class Details view, you can enter additional information about classes such as the waitlist count.
This task is a step in Process of Setting Up Class Schedules and Sessions on page 50.
To enter class details
1 From the application-level menu, choose Navigate > Site Map > Administration - Training > Class Details.
2 In the Classes list, query for the class, and then click the More Info view tab.
End Date (Optional) The end date for the Instructor-Led class.
Status Values are Active, Inactive, End of Life, Pre-Release, Pending, QA, and Near Term.
Taken Number of seats in the class already taken by enrollees.
Open Number of seats in the class still available for enrollees. Open seats are automatically calculated.
Course Sponsor Values are Customer Education, Employee Education, End User Education, and Technical Education.
Location Training location. Only existing locations can be selected. Click the Primary check box to designate the primary class location. You must assign a location to a class before you can assign a classroom.
Version Read-only field associated with course version.
Code Shortened identifier for the class. Defaults to a unique, editable row ID number.
Instructor Last Name Instructor last name. Assigns an instructor to teach a class.
Instructor First Name Read-only field that is automatically populated with the instructor's first name.
Instructor Read-only field used to display instructor's first and last name in one field for the student.
Classroom The classroom that the class session will use, based on the location selected.
Cancellation Deadline The last date that users can cancel the class. After this date has passed, the Drop button is removed from the user's class details.
Field Comments

Siebel Training Guide Version 7.7
Setting Up Class Schedules and Sessions ■ Scheduling Classes
52 ■
3 In the More Info form, complete additional details for the class.
The following table describes some of the fields.
Scheduling Class SessionsYou can schedule multiple sessions for each class. A session is the period of time that room and instructor are engaged for a particular training event. A single class can have multiple sessions that can span various days. Similarly, a one-day class can have two sessions, one in the morning and one in the afternoon. Setup of sessions are not required for a training class unless the added scheduling flexibility is needed.
Before you schedule class sessions, define the relevant class information in the Classes view. For more information, see Scheduling Classes on page 50.
This task is a step in Process of Setting Up Class Schedules and Sessions on page 50.
To schedule class sessions for a class
1 Navigate to the Class Details view, and select the class for which you want to schedule sessions.
2 Click the Sessions view tab, and, in the Sessions list, click New.
3 In the session record, add specific Start Time and End Time values for the session.
4 In the Classes list, click Create Sessions.
Class sessions are created automatically, and class values are copied to session records.
If desired, use the Sessions view to change individual values for each session, for example location, classroom, start and end times, instructors, and so on.
Field Comments
Waitlist Count The number of students on the waitlist.
Admin Notes Notes about the class that are not visible to end users.
Allow Cancel Indicates whether class cancellation is allowed.
Max Seats The maximum number of seats allowed in the class.
Instructor Rating An optional, manually entered rating assigned to the instructor.
Cancellation Period The period (number of days) allowed for student cancellations.
Classroom The assigned classroom. A location must be assigned to a class before a classroom can be specified. The classroom determines the default available number of open seats.
Taken Seats Number of seats already taken in the class.

Siebel Training Guide Version 7.7 ■ 53
7 Importing an AICC or SCORM Course
This chapter covers how to import an AICC or SCORM course. It includes the following topics:
■ About AICC and SCORM Standards on page 54
■ The AICC Specification and Siebel Training on page 55
■ The SCORM Specification and Siebel Training on page 57
■ Scenario for Importing an AICC or SCORM Course on page 58
■ Process of Importing an AICC or SCORM Course on page 59
■ Preparing for AICC and SCORM Course Import on page 59
■ API Adapter Cross-Server Security Issue on page 60
■ Lesson Content and Siebel Training on the Same Server on page 61
■ Lesson Content and Siebel Training on Different Servers on page 62
■ Importing an AICC Course into Siebel Training on page 63
■ Importing a Packaged SCORM Course into Siebel Training on page 63
■ Importing an Unpackaged SCORM Course into Siebel Training on page 64

Siebel Training Guide Version 7.7
Importing an AICC or SCORM Course ■ About AICC and SCORM Standards
54 ■
About AICC and SCORM StandardsSiebel Training supports two major industry-recognized eLearning standards, AICC (Aviation Industry CBT Committee) and SCORM (Sharable Content Object Reference Model). Using AICC and SCORM standards, Siebel Training administrators can integrate sharable content objects, such as Web-based courses, live eLearning courses, and tests. AICC and SCORM support also allows the organization to track course metadata.
AICC Initially developed by the aviation industry, AICC is now widely used as an eLearning standard across all industries. This standard provides guidelines for the development, delivery, and evaluation of CBT (computer-based training) and related training technologies.
For more information on AICC standards, refer to the AICC organization�s Web site.
SCORMThe ADL (Advanced Distributed Learning) Initiative has published the SCORM (Sharable Content Object Reference Model specification), a set of interrelated technical specifications based on AICC and other industry standards to create one unified content model.
For more information on SCORM standards, refer to ADL Initiative�s Web site.

Importing an AICC or SCORM Course ■ The AICC Specification and Siebel Training
Siebel Training Guide Version 7.7 ■ 55
The AICC Specification and Siebel TrainingSiebel Training stores information about imported training content based on the AICC standard format and communicates with the content.
AICC specifications define the data structure for the course import, as well as the interaction for the run-time execution of the content. Siebel Training supports the following AICC requirements:
■ Siebel Training supports the data model. For more information, see AICC Data Model Support on page 55.
■ Siebel Training can exchange run-time data with the launched content using HACP or API Adaptor protocols. For more information, see Run-Time AICC Data Exchange Using HACP or API Adapter Protocols on page 56.
■ Siebel Training meets AICC-specified requirements for importing files and populating fields. For more information, see AICC or SCORM Course System Processes on page 153.
Related TopicsAICC or SCORM Course System Processes
AICC Course Launch Processes
AICC Data Model SupportSiebel Training supports the AICC Level 1 data model, maintaining the course data structure for course import, URL creation, course launching, and tracking. As shown in Figure 1 on page 56, the course data structure includes the following principles:
■ Lessons are learning objects or training content.
■ Courses are groupings of one or many lessons.
■ Lessons can be grouped into blocks.
■ Only lessons can be launched and must be associated with a URL to launch in HTTP. Blocks and courses cannot be launched.

Siebel Training Guide Version 7.7
Importing an AICC or SCORM Course ■ The AICC Specification and Siebel Training
56 ■
Figure 1 illustrates the AICC course structure.
AICC defines Level 1-compliant course structure using the following files:
■ CRS. This is the Course File, which contains information about the course as a whole, including the group of different lessons in the course�s hierarchy.
■ AU. This is the Assignable Unit File, which provides information relating to the assignable units (AU) in the course. This is the smallest element of instruction or testing to which a student may be routed, assigned, or tracked by Siebel Training.
■ DES. This is the Descriptor File, which gives a list of every course element in the course.
■ CST. This is the Course Structure File, which provides basic data on the structure of the course.
NOTE: The CST file does not enforce prerequisites.
For AICC data file structure details and examples, see Appendix C, �AICC and SCORM File Structure.�
Run-Time AICC Data Exchange Using HACP or API Adapter ProtocolsSiebel Training exchanges run-time data with the launched AICC content using HACP, an HTTP-based AICC Computer-Managed Instruction protocol, or API, the Application Program Interface adapter protocol.
These launch protocols allow Siebel Training end users to click on a link to launch the course content using HTTP to a specified URL.
During run time, Siebel Training interacts with the launched content to exchange specified data. This interaction causes data to be passed back and forth between the Siebel Training and the AICC-format content so that the course begins at the appropriate point when launched, and data, such as test results, can be stored in Siebel Training when the user has completed the course.
Figure 1. AICC Course Structure

Importing an AICC or SCORM Course ■ The SCORM Specification and Siebel Training
Siebel Training Guide Version 7.7 ■ 57
The SCORM Specification and Siebel TrainingThe SCORM standard mandates that learning resources be reusable and interoperable across multiple Learning Management Systems (LMS), such as Siebel Training. For this to be possible, there must be a common way to start learning resources, a common mechanism for learning resources to communicate with an LMS, and a predefined language or vocabulary forming the basis of the communication. These three aspects of the SCORM run-time environment are Launch, Application Program Interface (API), and Data Model.
Related TopicsAICC or SCORM Course System Processes on page 153
SCORM Course Launch Process on page 155
SCORM Run-Time Data Exchange Using API Adapter ProtocolAs shown in Figure 2, in the SCORM run-time environment Siebel Training launches the Sharable Content Object (SCO), which is a collection of one or more assets.
The Launch mechanism presents a common way for the LMS to start Web-based learning resources. This mechanism defines the procedures and responsibilities for the establishment of communication between the delivered learning resource and the LMS. The communication protocols are standardized through the use of a common API.
The API is the communication mechanism used to inform the LMS of the state of the learning resource (for example, initialized, finished, or in an error condition), and is used to get and set data (score, time limits, and so on) between the LMS and the Sharable Content Object (SCO).
A Data Model is a standard set of data elements used to define the information being communicated, such as, the status of the learning resource. In its simplest form, the data model defines elements that both the LMS and SCO are expected to know about. The LMS must maintain the state of required data elements across sessions, and the learning content must use only these predefined data elements if reuse across multiple systems is to occur.

Siebel Training Guide Version 7.7
Importing an AICC or SCORM Course ■ Scenario for Importing an AICC or SCORM Course
58 ■
Assets are electronic representations of media text images, sound, Web pages, assessment objects, or other pieces of data that can be delivered on the Web client. Some examples of assets are HTML, WAV, GIF, and XML files or JavaScript functions that include a specific launchable asset that uses the SCORM run-time environment to communicate with Siebel Training.
Although the SCO typically uses JavaScript to talk to the API adapter, it is not a requirement. Siebel Training launches the SCO and API adapter, and the API adapter communicates with the SCO.
Scenario for Importing an AICC or SCORM Course This scenario provides an example of a process performed by an administrator who is importing an AICC or SCORM course. Your company may follow a different process according to its business requirements.
The training administrator at a large company needs to import an AICC and a SCORM course. The administrator navigates to the Administration - Training screen�s Course Details view, selects the appropriate import course command from the menu, specifies the course location, and then clicks Import.
The training data from the imported course is brought into Siebel Training as well as lesson-specific information. The administrator reviews the information, and then enters additional information for the imported course. The administrator then clicks on the Lessons tab to make lesson modifications as needed.
After the edits are complete, the administrator sets the course status to Active to publish the course in the training catalog.
Figure 2. SCORM Run-Time Environment

Importing an AICC or SCORM Course ■ Process of Importing an AICC or SCORM Course
Siebel Training Guide Version 7.7 ■ 59
Process of Importing an AICC or SCORM CourseThe following list shows the procedures that administrators typically perform when importing an AICC or SCORM course into Siebel Training. Your company may follow a different process according to its business requirements.
Administrator ProceduresTo import AICC/SCORM courses into Siebel Training, perform the procedures in the following list:
1 Preparing for AICC and SCORM Course Import on page 59
2 Importing an AICC Course into Siebel Training on page 63
3 Importing a Packaged SCORM Course into Siebel Training on page 63
4 Importing an Unpackaged SCORM Course into Siebel Training on page 64
Preparing for AICC and SCORM Course ImportAfter the Training application is installed and configured, the training administrator must perform three additional tasks to enable AICC or SCORM course import. These tasks, which must be performed one time only and do not need to be repeated for each import, are:
1 Editing the eai.cfg File for AICC or SCORM Courses
2 Verifying that the Enterprise Application Integration (EAI) component group is enabled
For more information on enabling EAI component groups, see Transports and Interfaces: Siebel eBusiness Application Integration Volume III.
3 Setting System Preferences for Training
Editing the eai.cfg File for AICC or SCORM CoursesDuring Siebel Server installation, the EAI components that AICC or SCORM uses are automatically enabled. However, you must edit the eai.cfg file so that the named subsystem used to route AICC or SCORM requests is identified for EAI HTTP Transport.
In eai.cfg, add following two lines in the [HTTP Services] section:
LMSAPI = LMSAPI
HACP = HACP
For more information on configuration files and working with server component and component groups, see Siebel System Administration Guide.

Siebel Training Guide Version 7.7
Importing an AICC or SCORM Course ■ API Adapter Cross-Server Security Issue
60 ■
Setting System Preferences for TrainingPerform the following steps to set system preferences for Training.
1 Navigate to Administration - Applications > System Preferences.
2 In the System Preferences list, query for the following records:
■ Training: EAI HTTP Password
■ Training: EAI HTTP User Name
■ Training: Lesson Adaptor URL
3 In the Training: EAI HTTP User Name record, enter a valid user name in the System Preference Value field.
4 In the Training: EAI HTTP Password record, enter a valid password in the System Preference Value field.
5 In the Training: Lesson Adaptor URL record, edit the value in the System Preference Value field so that it includes the LMS prefix, as the following example shows:
LMS/LmsLessonAdapter.html
For more information on system preferences, see Applications Administration Guide.
API Adapter Cross-Server Security IssueThe AICC and SCORM learning content integration standards include methods that allow lesson content to interact with a learning management system (LMS) such as Siebel Training.
One of the integration methods for AICC�and the only one for SCORM�requires the use of an API adapter object which the lesson content uses to communicate with Siebel Training. This API adapter object is typically a Java applet or ActiveX control in one frame of a multiframe HTML window, and the lesson content (in another frame) typically locates and interacts with this object through the use of JavaScript.
However, because of security risks, web browsers by default do not allow executable code in one HTML frame to access another frame whose contents may have come from a different Web server (cross-frame scripting).
There are several ways to address this limitation, and the solution varies according to the customer�s requirements.
Some alternatives are:
■ Place lesson content on the same server as Siebel Training. For more information, see Lesson Content and Siebel Training on the Same Server on page 61.
■ Place lesson content on a different server from Siebel Training and modify the Siebel lesson adapter and the lesson content files to address the cross-frame scripting limitation. For more information, see Lesson Content and Siebel Training on Different Servers on page 62.
NOTE: There may be other alternatives which work for specific customer installations. Contact Siebel Customer Support to discuss other alternatives.

Importing an AICC or SCORM Course ■ API Adapter Cross-Server Security Issue
Siebel Training Guide Version 7.7 ■ 61
Lesson Content and Siebel Training on the Same Server One method used as a solution to the API adapter cross-server security issue is placing the lesson content on the same Web server as the Siebel Training application. How this placement is accomplished depends on the Web server being used and the lesson content itself. This approach is preferred, because it is the simplest.
Example of Placing Lesson Content and Siebel Training on Same Server For this example, assume that you have an AICC course and its import files (.AU, and so on), that you are using Microsoft IIS as the Web server for the Siebel Training, and that Siebel Training is accessible at the URL http://myserver/erm_enu.
The administrator uses the Internet Services Manager application to create a new virtual directory (in this case named SampleContent), and then establishes content properties. Figure 3 shows the Internet Services Manager Sample Content Properties screen that you can use to set sample content properties.
The administrator then places the AICC files in a subdirectory of the SampleContent virtual directory called TestAICC, so that the files are accessible using a URL similar to the following:
http://myserver/SampleContent/TestAICC.
Figure 3. Sample Content Properties for the Virtual Directory

Siebel Training Guide Version 7.7
Importing an AICC or SCORM Course ■ API Adapter Cross-Server Security Issue
62 ■
Assuming the AICC import files have been set up properly with this URL, and the course is imported and activated, when a user registers for the course and launches a lesson within the course, the lesson content is loaded from the URL http://myserver/SampleContent/TestAICC. Because this is the same server name (myserver) as the Siebel application, the lesson content can access the API adapter without error.
Lesson Content and Siebel Training on Different ServersAn alternative method used to address the API adapter cross-server security issue is used when the lesson content is hosted on a server other than the LMS server. The previous approach (placing lesson content and Siebel Training on the same server) is preferred, because the method described in this section requires modification of lesson content files. For more information, see Lesson Content and Siebel Training on the Same Server on page 61.
The two servers must still be in the same second-level domain for this approach to work. For example, Siebel Training could be located at erm.mycompany.com, and the lesson content could be located at lcms.mycompany.com. This approach does not work if the second-level domains are different (for example, mycompany.com and yourcompany.com). For hostnames in country-specific top-level domains, the names to the third level must match, for example. erm.myplace.co.uk and lcms.myplace.co.uk.
For Siebel Training and the lesson content to interact in this way, two sets of files must be modified:
■ The Siebel API adapter wrapper files
■ The lesson content API locator files
The Siebel API adapter wrapper is implemented in these three files:
■ <applicationRoot>/LMS/LmsLessonAdapter.html
■ <applicationRoot>/LMS/LmsScripts.html
■ <applicationRoot>/LMS/LmsEmpty.html
For example, the file path might be erm_enu/LmsLessonAdapter.html.
In each of these files, there are JavaScript if (false) statements that are clearly commented in this way:
// Change to 'true' for cross-server hosting.
if (false)
{
Change each of the false statements to true. There are a total of four instances that should be changed (one each in LmsLessonAdapter.html and LmsEmpty.html and two in LmsScripts.html).
NOTE: Whatever scripts or code the lesson content uses to locate the API adapter also must be changed in a similar way to set the domain property to the same domain. The way to perform this change depends on the lesson content. Contact the lesson content vendor for details.

Importing an AICC or SCORM Course ■ Importing an AICC Course into Siebel Training
Siebel Training Guide Version 7.7 ■ 63
Importing an AICC Course into Siebel TrainingPerform the steps in the following procedure to import an AICC course into Siebel Training. For more information, see AICC or SCORM Course System Processes on page 153.
To import an AICC course
1 From the application-level menu, choose Navigate > Site Map > Administration � Training > Course Details.
2 In the Courses list, click the menu button and choose Import AICC.
3 In the Import from AICC dialog box, enter the URL corresponding to the location of the files in the URL of the AU file field.
4 In the Launch Type field, specify the protocol for the course you are importing, and click Import.
The Import dialog closes, and the Course Details view shows a single record.
NOTE: AICC does not provide a method to specify the run-time protocol in the imported files. The administrator must determine which protocol is correct before importing the course. In the majority of cases, AICC files use the HACP protocol.
5 Verify the course information.
6 Click the Lessons view tab.
The Lesson Data list appears beneath the Lessons list.
7 In the Lessons list, verify that all imported lessons appear and that the field values match the information in the imported files.
■ If the data is not present in the original file, the field is blank.
■ The Status field value for each lesson should be Active.
■ The URL field value is the URL value specified in the import file.
8 (Optional) If the course is for credit, set the Units field in the Course More Info form to a nonzero value.
9 In the course record, change the value in the Status field from Inactive to Active.
Changing the status to Active enables course enrollment.
Importing a Packaged SCORM Course into Siebel Training Perform the steps in the following procedure to import a packaged SCORM-format course into Siebel Training.

Siebel Training Guide Version 7.7
Importing an AICC or SCORM Course ■ Importing an Unpackaged SCORM Course into Siebel Training
64 ■
To import a packaged SCORM course into Siebel Training
1 From the application-level menu, choose Navigate > Site Map > Administration � Training.
2 From the Courses list, click the menu button and choose Import Packaged SCORM.
3 In the Import from packaged SCORM dialog box, click Browse to navigate to the location of the SCORM package, and then click Open.
The full file name appears in the Zip file field in the dialog box.
4 In the Unzip target location field, enter the path to the directory where the file should be unzipped.
NOTE: This path must be a file path on the server. For example, C:\Inetpub\wwwroot\SampleImport\testImport.
5 In the URL of target location field, enter the URL to the same location specified in Step 4.
6 Click Import.
The courses appear in the Courses list.
7 Verify that all imported course files are extracted from the zipped file in the installation directory.
Examine the installation directory and verify that all files are extracted from the imported ZIP file.
8 Modify the course information as needed, and, if the course is for credit, set the Units field in Course More Info form to a nonzero value.
9 Set the status to Active.
Importing an Unpackaged SCORM Course into Siebel TrainingBefore you import an unpackaged SCORM course, the SCORM content must be placed on the Web server from which it is launched. The SCORM content to be imported includes the imsmanifest.xml file.
To import an unpackaged SCORM course
1 From the application-level menu, choose Navigate > Site Map > Administration � Training > Course Details.
2 In the Courses list, click the menu button and choose Import Unpackaged SCORM.
3 In the Import from Unpackaged SCORM dialog box, enter the URL to the imsmanifest.xml file location in the URL of IMS Manifest File field.
The location of the imsmanifest.xml file identifies the location of other resources so that lessons launch properly.
4 Click Import.
All of the courses specified in the imsmanifest.xml file are imported.

Importing an AICC or SCORM Course ■ Importing an Unpackaged SCORM Course intoSiebel Training
Siebel Training Guide Version 7.7 ■ 65
5 In the Courses view, verify the course information.
For field value information, see Importing an AICC Course into Siebel Training on page 63.
6 Modify the values in the fields, if desired.
7 Click the Lessons view tab.
The Lesson Data list appears beneath the Lessons list.
8 In the Lessons and Lessons Data lists, verify that all imported lessons appear, and that the field values match the information in the imported files.
■ If the data is not present in the original file, the field will be blank.
■ The Status field value for each file should be Active.
■ The URL field value is a calculated field based on the input value in the Import Directory field of the Import dialog box and the URL <resource> element in the imsmanifest.xml file.
9 In the course record, change the value in the Status field from Inactive to Active.
Changing the status to Active enables course enrollment.

Siebel Training Guide Version 7.7
Importing an AICC or SCORM Course ■ Importing an Unpackaged SCORM Course into Siebel Training
66 ■

Siebel Training Guide Version 7.7 ■ 67
8 Setting Up a Training Curriculum
This chapter describes how to add and modify curriculums and how to specify curriculum details. It includes the following topics:
■ Process of Setting Up a Training Curriculum on page 68
■ Training Curriculum Elements on page 68
■ Adding a Training Curriculum on page 68
■ Specifying Training Curriculum Steps on page 70
■ Specifying Courses for the Training Curriculum Steps on page 71
■ Modifying Records, Canceling Changes, and Deleting Curriculum Paths on page 72
■ Viewing and Adding Training Curriculum Enrollments on page 72
■ Specifying Training Curriculum Materials on page 74
■ Releasing a Curriculum to Training Users on page 74

Siebel Training Guide Version 7.7
Setting Up a Training Curriculum ■ Process of Setting Up a Training Curriculum
68 ■
Process of Setting Up a Training CurriculumThe following list shows the procedures that administrators typically perform when setting up a training curriculum. Your company may follow a different process according to its business requirements.
Administrator Procedures■ Adding a Training Curriculum on page 68
■ Specifying Training Curriculum Steps on page 70
■ Specifying Courses for the Training Curriculum Steps on page 71
■ Modifying Records, Canceling Changes, and Deleting Curriculum Paths on page 72
■ Viewing and Adding Training Curriculum Enrollments on page 72
■ Specifying Training Curriculum Materials on page 74
■ Releasing a Curriculum to Training Users on page 74
Training Curriculum ElementsA curriculum is a set of courses designed to fulfill a specific educational requirement such as a certification program or degree program.
Curriculums are predefined, ordered sequences of training elements. Each curriculum has a sequence of required steps. Each step can include one or more individual training elements (courses, events, exams, and so on) with specifications of how many elements are required to pass each step. This flexibility allows for electives (for example taking three courses from a set of six) to be mixed with standard required elements. Each element and step can be individually weighted for tracking purposes.
Before Training users can enroll in a curriculum, you must provide detailed information about the curriculum and the courses included. Then, you can also specify literature materials that are associated with the curriculum itself, rather than being associated with individual courses. Curriculum materials and course materials are designated separately and are visible to Training users using different screens.
When you are satisfied with the details of the curriculum, you must release the curriculum to lock the content and make it available to users. Training end users can enroll in curriculum paths and can review their progress as they take successive courses within their career paths.
Adding a Training CurriculumPerform the steps in the following procedure to add a curriculum to a training database. For information on establishing the courses that make up the curriculum, see Specifying Courses for the Training Curriculum Steps on page 71.

Setting Up a Training Curriculum ■ Adding a Training Curriculum
Siebel Training Guide Version 7.7 ■ 69
This task is a step in Process of Setting Up a Training Curriculum on page 68.
To add a curriculum
1 From the application-level menu, choose Navigate > Site Map > Administration - Training > Curriculums.
2 In the Curriculum list, click New, and complete the fields for the new record.
The following table describes the fields.
Field Comments
Audience Use this field to create visibility restrictions. Click the select button and choose an audience type in the Curriculum Audience dialog box.
Categories The curriculum category. Category examples are Communications Skills and Computer Science.
Available values for Category are set in the TRAINING_CURR_CATEGORY_TYPE list of values. For more information about editing lists of values, see Applications Administration Guide. For information on training-specific LOVs, see Appendix B, �Lists of Values (LOVs) for Training.�
Check Transcript
Select this check box to automatically credit courses that users have completed as part of a curriculum or to credit courses that users have previously taken.
Description The Curriculum description. Click the text box icon to expand the Description text entry field.
Job Profiles Click the select button in this field to associate the course with one or more specific job roles. End users can locate the course using a search by job role.
Max Points Automatically calculated value specifying the total number of points that can be obtained by completing the curriculum.
Min Points Automatically calculated value specifying the minimum number of points that can be obtained by completing the required portion of the curriculum.
Name Curriculum name.
Release Select this check box to lock the curriculum and make it available to end users. Administrators can edit a released curriculum by selecting Edit Curriculum from the curriculum menu.
Total Steps The number of steps in the curriculum path.

Siebel Training Guide Version 7.7
Setting Up a Training Curriculum ■ Specifying Training Curriculum Steps
70 ■
Specifying Training Curriculum StepsYou can specify the series of steps that the training user must complete in a curriculum.
This task is a step in Process of Setting Up a Training Curriculum on page 68.
To specify curriculum steps
1 From the application-level menu, choose Navigate > Site Map > Administration - Training > Curriculums.
2 In the Curriculum list, select the curriculum, and then click the Curriculum Steps view tab.
3 In the Curriculum Steps list, add a record and complete the fields.
The following table describes the fields.
Status Use this field to indicate the status of the curriculum and determine its availability.
When the value is Active, the curriculum can be taken by any student enrolled in a course associated with the curriculum. After the curriculum is released, the administrator can change the Status to Inactive.
Type This field is used for informational purposes to indicate why courses in the curriculum are grouped together. The values are Course Bundle and Training Plan.
Field Comments
# of Required Courses
Number of courses required to complete the step, derived by adding together how many courses are required in a step. This value is automatically calculated when the Release check box is checked.
Description Curriculum description.
Max Points Sum of the course points for the step, derived by adding together all the course-specific points. This value is automatically calculated when the Release check box is checked.
Min Points Minimum number of points required to complete the step based on the number of courses required and their respective point values. For example, if, in a step, you want to specify that a user can complete three courses out of eight, then set the Min Points accordingly and leave the Required field in the Curriculum Courses list set to N for each course.
Field Comments

Setting Up a Training Curriculum ■ Specifying Courses for the Training Curriculum Steps
Siebel Training Guide Version 7.7 ■ 71
Specifying Courses for the Training Curriculum StepsPerform the steps in the following procedure to designate the required courses for each step in the Training curriculum.
This task is a step in Process of Setting Up a Training Curriculum on page 68.
To specify courses for the steps
1 From the application-level menu, choose Navigate > Site Map > Administration - Training > Curriculums.
2 In the Curriculum list, select the curriculum, and then click the Curriculum Steps view tab.
3 In the Curriculum Steps list, select the step for which you want to specify courses.
The # of Required Courses field in the Curriculum Steps list determines how many courses are required to complete the step. If all of the courses are set to Optional, then any course is part of the step requirements.
For example, if in a step you want to specify that a user can complete three courses out of eight, then set the Min Points accordingly and leave the Required field in the Curriculum Courses listset to N for each course.
4 In the Curriculum Courses subview list, add a record.
5 In the Name field, click the select button, and in the Pick Course dialog box, select a course and click OK.
6 In the Required field, select Optional or Required, depending on whether or not the course is optional or is required to complete the step.
Curriculum courses that are defined as prerequisites allow you to select values of Optional or Prerequisite in the Required field.
7 (Optional) In the Points field, edit the point value for the course.
The default value for each course is 10 points.
8 Repeat Step 4 through Step 7 for each course you want to add to each curriculum step.
Name Description of the step.
Step # A step number is automatically assigned to each step in the curriculum. You can edit the step number before the curriculum is released. Renumber the steps (prior to curriculum release) by manually changing the numbers in the Step field.
Field Comments

Siebel Training Guide Version 7.7
Setting Up a Training Curriculum ■ Modifying Records, Canceling Changes, and Deleting Curriculum Paths
72 ■
Modifying Records, Canceling Changes, and Deleting Curriculum PathsThe following procedures describe how to modify or delete records and cancel changes in curriculum paths.
This task is a step in Process of Setting Up a Training Curriculum on page 68.
To modify a curriculum record
1 From the application-level menu, choose Navigate > Site Map > Administration - Training > Curriculums.
2 In the Curriculums list, select the curriculum record.
3 In the Curriculum More Info form, click the menu button and select Edit Curriculum to unlock the fields.
4 Modify the values in the Audience, Categories, Check Transcript, Description, Job Profiles, Name, Release, Status, and Type fields if necessary.
5 Click the Curriculum Steps subview tab and modify Min Points, if required.
NOTE: Only the Min Points field is editable. Max Points and Steps are calculated automatically when the Release flag is checked.
To undo changes to a curriculum record before it is released
1 In the Curriculums list, select the curriculum record.
2 Click the menu button and choose Undo Record.
To delete a curriculum record
1 In the Curriculums list, select the curriculum record.
2 Click Delete.
Viewing and Adding Training Curriculum EnrollmentsUse the following procedures to view user enrollment details and add curriculum enrollments.
This task is a step in Process of Setting Up a Training Curriculum on page 68.
To view curriculum enrollments
1 From the application-level menu, choose Navigate > Site Map > Administration - Training > Curriculums.

Setting Up a Training Curriculum ■ Viewing and Adding Training Curriculum Enrollments
Siebel Training Guide Version 7.7 ■ 73
2 In the Curriculum list, select the curriculum, and then click the Enrollments view tab.
The following table describes the fields.
To add curriculum enrollments
1 From the application-level menu, choose Navigate > Site Map > Administration - Training > Curriculums.
Field Comments
Account The account number for the company sending the student to the curriculum.
Completed Date
The date the student completed the curriculum.
Depth The student�s depth score.
This score is the calculated percentage value representing the sum of the points of the completed courses divided by the value of minimum requirements and completion points.
Division The organization associated with the curriculum. Used for informational purposes only.
Email The student�s email address.
Enrolled The date the student enrolled in the course.
First Name Student�s first name.
Last Name Student�s last name.
Max Points Maximum number of points obtained by completing all courses in the curriculum.
Min Points Minimum number of points required to complete the curriculum.
Progress Student�s progress score.
Progress scores are updated as users complete each step in the curriculum.
The score is a calculated percentage value representing the minimum completion points (sum of the minimum step points), divided by the sum of the points of the completed courses and limited by the defined weight of the step.
For example, for a step with a minimum point value of 40, the maximum point value for the step as applied to the progress value would be 40; any additional course points accrued beyond 40 would only apply to the Depth calculation.
As a result, the progress calculation indicates how close an individual is to completing the minimum requirements for the curriculum, while the Depth value indicates how completely the individual explored the curriculum.
Total Points Total number of curriculum points earned.
Total Steps The total number of steps in the curriculum.

Siebel Training Guide Version 7.7
Setting Up a Training Curriculum ■ Specifying Training Curriculum Materials
74 ■
2 In the Curriculum list, select the curriculum, and then click the Enrollments view tab.
3 In the Enrollments list, click Add User.
4 In the new record, click the select button in the Last Name field.
5 In the Pick Contact dialog box, perform the following actions:
■ To select a student with an existing record, query for the student�s name, select the name, and click OK.
■ To add a name of a student with no existing record, click New, add the student�s First Name and Last Name, and click OK.
Specifying Training Curriculum MaterialsPerform the steps in the following procedure to specify existing curriculum materials (literature), and to add new curriculum materials.
This task is a step in Process of Setting Up a Training Curriculum on page 68.
To specify curriculum materials
1 From the application-level menu, choose Navigate > Site Map > Administration - Training > Curriculums.
2 In the Curriculum list, select the curriculum, and then click the Materials view tab.
3 In the Materials list, click New.
4 In the Add Literature dialog box, perform the appropriate action:
■ If the literature item you want to associate with the curriculum already appears in the Add Literature dialog box list, select the literature item, and click Add.
■ If the literature item that you want to add is not listed in the Add Literature dialog box, click New, and complete the fields.
For more information about adding items to a dialog box list, see Fundamentals.
Repeat these steps for each additional item you want to specify as curriculum materials. For more information about literature items, see Applications Administration Guide.
Releasing a Curriculum to Training UsersA curriculum is not available to users until it is released by the administrator. Perform the steps in the following procedure to release a curriculum.
This task is a step in Process of Setting Up a Training Curriculum on page 68.

Setting Up a Training Curriculum ■ Releasing a Curriculum to Training Users
Siebel Training Guide Version 7.7 ■ 75
To release a curriculum
1 From the application-level menu, choose Navigate > Site Map > Administration - Training > Curriculums.
2 In the Curriculums list, select the curriculum you want to release.
3 In the Curriculum form, select the Release check box.
This action locks the curriculum and makes it available to users.
If a curriculum needs to be modified after it is released, perform the steps in the following procedure.
This task is a step in Process of Setting Up a Training Curriculum on page 68.
To modify a curriculum after it has been released
1 In the Curriculums list, select the curriculum record.
2 Click the menu button and choose Edit Curriculum.

Siebel Training Guide Version 7.7
Setting Up a Training Curriculum ■ Releasing a Curriculum to Training Users
76 ■

Siebel Training Guide Version 7.7 ■ 77
9 Creating and Modifying Skills Tests
This chapter covers how to create skills tests and perform assessments, how to add skills test questions and other elements, how to add or modify a skills test, and how to specify skills test details. It includes the following topics:
■ About Creating Skills Tests and Test Questions on page 78
■ Process of Creating Skill Tests and Questions on page 79
■ Creating Training Test Questions and Answers on page 79
■ Creating and Verifying Training Question Pools on page 81
■ Creating Headers and Footers for Training Test Elements on page 82
■ Adding a Skills Test for Training on page 83
■ Modifying a Skills Test Record on page 85
■ Specifying Skills Test Details on page 86

Siebel Training Guide Version 7.7
Creating and Modifying Skills Tests ■ About Creating Skills Tests and Test Questions
78 ■
About Creating Skills Tests and Test QuestionsSkills tests can include the following kinds of knowledge assessment methods:
■ True-or-false questions
■ Single-choice questions with one correct answer
■ Multiple-choice questions with multiple correct answers
■ Questions that require the student to type in a text answer
■ Questions to which the student chooses a response from a numerical range
True-or-false, single-choice, multiple-choice, and range questions can be graded automatically within Training. Text answers must be read, evaluated, and graded by a person with administrator privileges. Questions with a range of responses are often used to allow the student to evaluate the effectiveness of the course or instructor and are not graded.
You can define stand-alone questions that can be used in multiple tests. Similarly, you can define stand-alone tests that are not associated with training courses, allowing you to associate a test with multiple courses. You also can define pools of questions from which individual test questions are randomly drawn each time a student takes the test.

Creating and Modifying Skills Tests ■ Process of Creating Skill Tests and Questions
Siebel Training Guide Version 7.7 ■ 79
Process of Creating Skill Tests and QuestionsTo create a skills test for a training course, the administrator typically performs the following procedures. Your company may follow a different process according to its business requirements.
Administrator Procedures1 Creating Training Test Questions and Answers on page 79
2 Creating and Verifying Training Question Pools on page 81
3 Creating Headers and Footers for Training Test Elements on page 82
4 Adding a Skills Test for Training on page 83
5 Modifying a Skills Test Record on page 85
6 Specifying Skills Test Details on page 86
Creating Training Test Questions and AnswersThe following procedures describe how to create a question that can later be associated with one or more skills tests and how to create an answer for each question.
This task is a step in Process of Creating Skill Tests and Questions on page 79.
To create a question for use in skills tests
1 From the application-level menu, choose Navigate > Site Map > Administration - Training > Test Questions.
2 In the Questions list, create a new record, complete the fields, and save the record.
The following table describes the fields.
Field Comments
Name Use this field to indicate a short name for the test question. This field can be used for querying and sorting later.
Question ID This value is system assigned.
Status Set this field to Active to make it active for selection.

Siebel Training Guide Version 7.7
Creating and Modifying Skills Tests ■ Creating Training Test Questions and Answers
80 ■
To create an answer to the question
1 From the application-level menu, choose Navigate > Site Map > Administration - Training > Test Questions.
2 In the Questions list, select a question.
NOTE: The Release field check box should be selected after answers are created.
3 Click the More Info view tab, and in the Answers list, click New and complete the fields for the answer.
A number is automatically entered in the Sequence field.
The following table describes the fields.
Type The type of question you are defining. This value is used to determine how the question appears, and what options are available. Choices include True or False, Text, Essay, Multiple Choice, Single Choice, Header, Range, Random Pool, Footer, Sub-Header, Ranged Response, and Survey. If you want to randomly draw a question from a pool, you must create a placeholder question by choosing the type Random Pool.
Points The default point value of the question within a test. You can specify a different point value when you specify test details.
Category Use this field to indicate the general type of information sought in the question. The choices are All, Industry, Product, Job Role, and Organization.
Explanation A text field optionally used to specify a single question pool to which the question belongs.
Release Select this check box to lock the test and release it to end users. After release, administrators have to create a new test version to change the test.
Text The question text that appears to test takers.
Admin. Notes This field is not displayed to the user and allows administrator to enter notes about the test for administrative purposes.
Field Comments
Sequence Indicates the order in which possible answers appear to test takers.
Answer Text The text of a possible answer that test takers see.
Correct When selected, indicates that the current answer is correct. When there are multiple correct answers, select this field for all of them.
Partial Value % Point value for the selected answer. For example, if two correct answers in a multiple choice should total 10 points, assign each answer a partial value of 5.
Field Comments

Creating and Modifying Skills Tests ■ Creating and Verifying Training Question Pools
Siebel Training Guide Version 7.7 ■ 81
4 Repeat Step 3 for each possible answer you want to appear to test takers.
You can sort records or use queries to find information of particular interest. To sort, click the menu button and select Advanced Sort.
5 If you remove an answer, leaving a gap in the sequence numbers, click Renumber.
Creating and Verifying Training Question PoolsQuestion pools are grouping of many questions that can then be randomly selected when a user takes a test. Questions can be shared among multiple pools, that is, a single question can be selected as part of any number of pools. You can also use one random pool many times in the same test, and you can create tests from various test questions and predefined question pools.
For example, if you want to create a test with 10 randomly selected questions, you can create 10 pools or create one pool and use it 10 times.
■ When you are using 10 different question pools, each pool should contain a unique set of questions.
■ When you are developing one large question pool, be sure to add enough questions to the pool to avoid duplicate questions. Then, create a test that uses the same pool for every test question.
This task is a step in Process of Creating Skill Tests and Questions on page 79.
To create a question pool
1 Create the individual questions for the pool.
2 Create and save an additional record in the Questions list with its Type set to Random Pool.
You do not need to specify answers for this question. It acts as a placeholder in tests, indicating that a randomly chosen question from the pool should be inserted at that point.
For more information, see Creating Training Test Questions and Answers on page 79.
3 In the Questions list, select the question that you set to Random Pool and click the Question Pool view tab.
NOTE: The release check box must be selected in the Question record for the question to be available for the Question Pool.
4 In the Question Pool list, click New, and in the new record, click the select button in the Name field.
5 In the Pick Child Questions dialog box, select the question you want to include in the question pool and then click OK.
6 Save the changes.
7 Repeat Step 4 through Step 6 for each additional question you want to place in the pool.

Siebel Training Guide Version 7.7
Creating and Modifying Skills Tests ■ Creating Headers and Footers for Training Test Elements
82 ■
To verify that all questions for the pool appear in the list
1 In the Question list, select the any question, and then click the Question Pool view tab.
2 In the Question Pool list, verify that all the questions for the pool appear in the list.
Training administrators can allow multiple questions from single-question pools. The test question sequence can be renumbered.
To create tests from various test questions and predefined pools
1 From the application-level menu, choose Navigate > Site Map > Administration - Training > Tests.
2 In the Tests list, select a test to which you want to add test questions and question pools, and then click the Test Questions view tab.
You can create a new test record by clicking New.
3 In the Test Questions list, add a record.
The Test Question ID field is automatically populated.
4 In the new record, click the select button in the Questions Text field.
5 In the Pick Question dialog box, select a question or a question pool question, and then click OK.
The remainder of the fields in the Test Questions record are completed, based on information provided when the selected question was created.
6 Repeat Step 3 through Step 5 for each question or question pool question you want to add to the test.
To view the answers for a question
1 In the Tests list, select the test, and then click the Test Questions view tab.
2 In the Test Questions list, select the question, and click the link in the Text field.
The answers display in the More Info form of Test Questions view.
To preview the finished test with questions
1 In the Tests list, select the test, and click the link in the Display Title field.
2 From the test Details form, click Preview.
Creating Headers and Footers for Training Test ElementsYou can create a text header that can be included in a skills test as a title, a subtitle for a group of questions, or a generic visual separator between questions or question groups. A text footer can also be created.

Creating and Modifying Skills Tests ■ Adding a Skills Test for Training
Siebel Training Guide Version 7.7 ■ 83
This task is a step in Process of Creating Skill Tests and Questions on page 79.
To create a header, subheader, and footer for use in skills tests
1 From the application-level menu, choose Navigate > Site Map > Administration - Training > Test Questions.
2 In the Questions list, click New.
3 In the Questions More Info list, enter the text of the header in the Text field, and select Header in the Type field.
4 Select the Release check box.
5 Click the menu button and save the record.
6 Repeat Step 2 through Step 4, selecting Sub Header, and then Footer from the Type field.
Adding a Skills Test for TrainingYou can add a skills test and then associate the skills test with one or more courses. For Instructor-Led type courses that have multiple class sessions, all class sessions of the course are automatically associated with the same test or tests. In previous releases of Training, skills tests were associated with individual class sessions.
This task is a step in Process of Creating Skill Tests and Questions on page 79.
To add a skills test
1 From the application-level menu, choose Navigate > Site Map > Administration - Training > Tests.
2 In the Tests list, click New, and complete the fields for the new record.
The fields are described in the following table.
Field Comments
Display Title A name you choose to identify the test.
Test ID This value is system assigned.
Test Status Use to indicate the status of the test and determine its availability. When value is Active, the test can be taken by any student enrolled in a course associated with the test.
Release Select this check box to lock the test and release the test to end users. Administrators must create a new test version to change a test that is locked.
Header Text Text to display in the header of the test.
Footer Text Text to display in the footer of the test.

Siebel Training Guide Version 7.7
Creating and Modifying Skills Tests ■ Adding a Skills Test for Training
84 ■
Language Language in which the test is written.
Test Type The kind or purpose of the test. Typical values include Evaluation, Certification Exam, Course Survey, and Instructor Survey.
Associated Courses
One or more courses with which the test is associated. Students enrolled in these courses can access the test when the status of the test is active. In the Add Course dialog box, select the check box is the primary field to designate the main course associated with this test.
Time Limit (Minutes)
Amount of time a test taker may spend before submitting the test.
Siebel Training does not enforce this time limit. You can manually verify how much time the test taker used by comparing starting and ending timestamps. If the test taker exceeded the time limit, you can manually change pass/fail results, but automatic scoring still takes place and displays its results as specified by the selected scoring method.
Auto Grade Allows automatic scoring of tests.
If this field is selected, the test taker's curriculum Weighted Completion value is automatically updated after the grading of any test that has no questions of type Text or Essay.
If this field is cleared, or when a test contains Text or Essay questions, the test status is set to Pending for an administrator to grade. The curriculum Weighted Completion value is updated when an administrator selects the Update Grade command from the Test Results form menu after manually grading the test.
Max Attempts Number of times a student may take the test.
If you enter a value for Max Attempts that is greater than 1, you should use extra care in selecting the value for the Scoring field, as this determines whether or not users can see correct answers to test questions after their first attempt to take the test.
Total Points The total number of points available from the test.
Partial Grade If this field is selected, then users receive partial credit for any multiple-choice test question for which they choose a correct response.
If this field is cleared (normal method of use), then users get all multiple-choice selections correct or they get no points for the question.
Admin. notes This field is not displayed to the user and allows administrator to put notes about the test for administrative purposes.
Pass Score % The score required to pass the test. It is best to leave this field blank until you know the total number of points that are available in the test.
Field Comments

Creating and Modifying Skills Tests ■ Modifying a Skills Test Record
Siebel Training Guide Version 7.7 ■ 85
Modifying a Skills Test RecordPerform the steps in the following procedures to modify and delete a skills test record.
This task is a step in Process of Creating Skill Tests and Questions on page 79.
To modify a skills test record
1 From the application-level menu, choose Navigate > Site Map > Administration - Training > Tests.
2 In the Tests list, select the test, and modify the record.
3 Save the changes.
To delete a test record
1 In the Tests list, select the test.
2 Click the menu button, and choose Delete Record.
Review Score (%)
Numeric value that sets the point at which users can see correct, graded test questions upon completion.
If users fail, and the score is less than the % set by this value, then they see no test results.
If users fail, and the score is greater than the % set by this value, then they see all test results and can tell which questions they missed (correct answers are not provided).
If users pass, then they see all test results with correct answers.
Scoring Method The method used for grading the test results. The values are:
■ No Score. Displays a test and calculates results, but does not compute a score or grade for the end user. Typically used for surveys or evaluations.
■ Standard. Displays number of points earned and pass-fail status. Allows test taker to click test name for details on correct answers to test questions.
■ Category. Grades tests using two methods�Standard and Category. With category scoring, each question is assigned a particular category, for example Product, Industry, and so on. Then, the results are calculated and reported to the user by category type. Users, managers, and administrators use this functionality to assess scoring trends and identify particular areas of user strengths and weaknesses.
■ Knowledge Check. Same as Standard scoring.
Field Comments

Siebel Training Guide Version 7.7
Creating and Modifying Skills Tests ■ Specifying Skills Test Details
86 ■
Specifying Skills Test DetailsBefore a student can take a skills test, you must specify the details of the test, including test questions, answers, and the number of points each answer is worth.
This task is a step in Process of Creating Skill Tests and Questions on page 79.
To specify skills test details
1 From the application-level menu, choose Navigate > Site Map > Administration - Training > Tests.
2 In the Tests list, select the test, and then click the link in the Display Name field.
The Test Details form appears in the upper part of the screen, and a Test Questions list appears in the lower part of the screen.
3 In the Test Questions list, click New.
4 In the new record, click the select button in the Question Text field, and in the Pick Question dialog box, select a question or another test element, and click OK.
■ To include a specific question in the test for every test taker, select the question and then click OK.
■ To indicate that a question should be randomly drawn from a pool of questions for each separate test taker, select the placeholder record of the pool of questions, and then click OK.
■ To indicate header, subheader, or footer text, select a Question (with a value in the Type field) as a header, a subheader or footer, and then click OK.
5 Complete the rest of the fields in the Test Questions record, and then save the record.
The following table describes the fields.
Field Comments
Name The name used to identify the question.
Sequence The numeric order in which the question should appear on the test.
Test Question Id
This value is a unique, system-created row ID.
Status The status of the question (Active or Inactive).
Question Text
The text of the question.
Type Use to indicate the type of question or other test element chosen. Automatically populated based on the value chosen in the Text field.

Creating and Modifying Skills Tests ■ Specifying Skills Test Details
Siebel Training Guide Version 7.7 ■ 87
6 Repeat Step 3 through Step 5 for each additional question or other element you want to include in the test.
7 Calculate the total number of points that test takers can earn if they answer all questions correctly.
8 On the More Info view tab, click Preview to verify that your questions and answers appear correctly in a Web browser.
The test text appears in a separate window.
9 After you have inspected the test, click the Tests link to return to the Tests list, and verify that the test you are defining is still selected.
10 Click the More Info view tab and, complete the following fields:
a In the Total Points field, enter the total number of points available in the test.
b In the Pass Score % field, enter the minimum number of points necessary to pass the test.
11 When you are satisfied with all the attributes for the test, save the record, and then select the Release check box.
Releasing the test locks the test attributes and makes the test available for use with courses.
Points The number of points the question is worth in this test.
Defaults to the number of points currently assigned to the question, independent of tests.
If you enter a different value here, this value takes precedence for this test, but does not affect the test-independent value.
Category Automatically populated to show the category associated with the particular test question selected.
Field Comments

Siebel Training Guide Version 7.7
Creating and Modifying Skills Tests ■ Specifying Skills Test Details
88 ■

Siebel Training Guide Version 7.7 ■ 89
10 Managing Enrollments, Test Results, and Reports
This chapter covers how to work with enrollments, test results and other information in Siebel Training. It includes the following topics:
■ Process of Working with Enrollments, Cancellations, Test Results, and Reports on page 90
■ Adding and Viewing Course Enrollments on page 90
■ Viewing Enrollment Information for a Self-Paced Course on page 92
■ Viewing Enrollment Information for a Scheduled Class on page 92
■ Viewing All Course and Class Registration Information on page 93
■ Viewing All Curriculum Enrollments Information on page 94
■ Viewing Partner Enrollments on page 94
■ Registering Training Customers on page 95
■ Registering a Customer for a Self-Paced (CD-ROM or Web) Course on page 96
■ Enrolling Groups for Self-Paced and Scheduled Class Sessions on page 97
■ Enrolling Students (Delegated Administrator) on page 98
■ Canceling Training Enrollments on page 99
■ Manually Viewing and Scoring Skills Tests on page 100
■ Generating Training Reports on page 102

Siebel Training Guide Version 7.7
Managing Enrollments, Test Results, and Reports ■ Process of Working with Enrollments, Cancellations, Test Results, and Reports
90 ■
Process of Working with Enrollments, Cancellations, Test Results, and ReportsThe following list show the procedures that training administrators typically perform when working with enrollments, cancellations, test results, and reports. Your company may follow a different process according to its business requirements.
Administrator ProceduresTo work with enrollments, cancellations, test results, and reports, perform the following tasks:
1 Adding and Viewing Course Enrollments on page 90
2 Viewing Enrollment Information for a Self-Paced Course on page 92
3 Viewing Enrollment Information for a Scheduled Class on page 92
4 Viewing All Course and Class Registration Information on page 93
5 Viewing All Curriculum Enrollments Information on page 94
6 Viewing Partner Enrollments on page 94
7 Registering Training Customers on page 95
8 Registering a Customer for a Self-Paced (CD-ROM or Web) Course on page 96
9 Enrolling Groups for Self-Paced and Scheduled Class Sessions on page 97
10 Enrolling Students (Delegated Administrator) on page 98
11 Canceling Training Enrollments on page 99
12 Manually Viewing and Scoring Skills Tests on page 100
13 Generating Training Reports on page 102
Adding and Viewing Course EnrollmentsUse the procedures in this section to add enrollments to courses and scheduled classes, and to view current enrollments.
NOTE: Registered contacts who are not associated with an account cannot register for a class unless a system default price list is set up. For more information, see Siebel eSales Administration Guide.
This task is a step in Process of Working with Enrollments, Cancellations, Test Results, and Reports on page 90.
To add enrollments to self-paced courses
1 From the application-level menu, choose Navigate > Site Map > Administration - Training > Course Details.
In the Courses list, select the course, and then click the Add Enrollments view tab.

Managing Enrollments, Test Results, and Reports ■ Adding and Viewing CourseEnrollments
Siebel Training Guide Version 7.7 ■ 91
2 In the Add User list, click Add User.
3 In the new record, click the select button in the Last Name field, select a contact, and click OK.
4 From the Add Enrollments list, select the Override Prerequisites check box to override any conflicts that occur from adding a user who has not met prerequisites.
5 When you are done adding names, click Finish.
NOTE: If the user being added by the administrator is not an employee, the Shopping Cart view appears. The remaining steps apply for nonemployee users.
6 In the Shopping Cart view, verify that the appropriate training charges appear, and then click Check Out.
7 Enter the enrolled user�s credit card information and any other information, and then confirm the order.
To add enrollments to scheduled classes
1 From the application-level menu, choose Navigate > Site Map > Administration - Training > Class Details.
2 In the Classes list, review the dates In the Start field, and select the class to which you want to add enrollments.
3 Click the Add Enrollments view tab, and in the Add User list, click Add User.
4 In the Last Name field, click the select button, and in the Pick Contact dialog box, select a name and click OK.
5 In the Add Enrollments list, select the Override Prerequisites check box to override any conflicts that occur from adding a user that has not met prerequisites.
6 When you are done adding names, click Finish.
NOTE: If the user being added by the administrator is not an employee, a shopping cart view appears. The remaining steps apply for nonemployee users.
7 In the Shopping Cart view, verify that the appropriate training charges appear, and then click Check Out.
8 Enter the attendee credit card information and other information for which you are prompted, and confirm the order.
To view current enrollments
1 From the application-level menu, choose Navigate > Site Map > Administration - Training > Course Details.
2 In the Courses list, select the course, and click the Class Details link.

Siebel Training Guide Version 7.7
Managing Enrollments, Test Results, and Reports ■ Viewing Enrollment Information for a Self-Paced Course
92 ■
3 In the Classes list, click the link in the Start field for the session.
The Enrollments list, showing enrolled students, appears.
NOTE: Enrollments can also be viewed by navigating to the Administration - Training screen�s All Enrollments view. For more information, see Viewing All Course and Class Registration Information on page 93.
Viewing Enrollment Information for a Self-Paced CourseYou can view available information about persons who have registered for a self-paced course. A self-paced course, such as a Web-based course or a CD-ROM course, does not have class sessions.
This task is a step in Process of Working with Enrollments, Cancellations, Test Results, and Reports on page 90.
To view registration information for a self-paced course
1 From the application-level menu, choose Navigate > Site Map > Administration - Training > Course Details.
2 In the Courses list, select the course, and click the link in the Name field.
3 Click the Enrollment List view tab.
The Enrollment list includes information such as the names of course enrollees, the enrollment status and registration number, and so on.
Viewing Enrollment Information for a Scheduled ClassYou can view enrollment information for a particular class session of an instructor-led course. For information on adding enrollments, see Adding and Viewing Course Enrollments on page 90.
This task is a step in Process of Working with Enrollments, Cancellations, Test Results, and Reports on page 90.
To view registration information for a scheduled class
1 From the application-level menu, choose Navigate > Site Map > Administration - Training > Class Details.
2 In the Classes list, select the class session for which you want to view enrollment information, and click the Enrollments view tab.
The Current Enrollment list appears, showing all enrollments for the selected class session.

Managing Enrollments, Test Results, and Reports ■ Viewing All Course and ClassRegistration Information
Siebel Training Guide Version 7.7 ■ 93
Viewing All Course and Class Registration InformationYou can view enrollment information for all courses listed in the system, including class sessions.
This task is a step in Process of Working with Enrollments, Cancellations, Test Results, and Reports on page 90.
To view all course and class registration information
1 From the application-level menu, choose Navigate > Site Map > Administration - Training > All Enrollments.
2 In the Enrollments list, sort records or use queries to find information of particular interest.
The Enrollments list shows all registered participants and the classes for which they have registered. The list also includes information about all registration for all classes and courses in the system. See the following table for a description of some fields.
3 Click the Tests Attempts view tab to review the tests attempted by each the enrollee.
The following table describes some of the fields.
Field Comment
Account Click this link to drill down to the Account Detail for the student on the Contact view.
Account Site Part of the user key for Accounts (accounts are unique by name and site); used to describe address; Account Location field in the Account BusComp.
Account Status Current status of an account in the company's system.
Admin. Notes A text box for administrator comments.
Cancellation Billing Status There are three status selections�Student Cancel Bill, Student Cancel No Bill, Admin Cancel Bill, and Admin Cancel No Bill.
Class Code The unique number identifying the class.
Completed Date The date the course was completed.
Course Code The unique number identifying the course.
Course Format Indicates whether the course type was Web-based or Instructor-Led.
Course Name The title of the course.
Course Status Available values are Active, Inactive, and Pending.
Course Version The version of the course.
Created By Auto-generates name of person who created the enrollment (whether admin or end user).
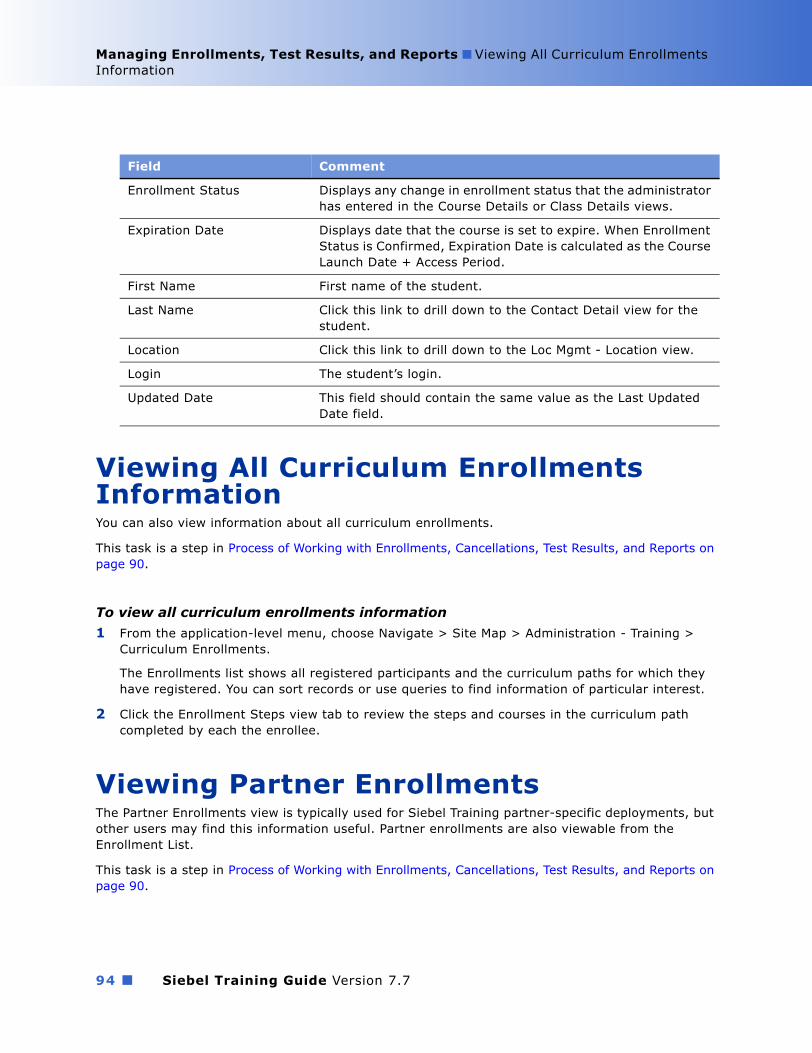
Siebel Training Guide Version 7.7
Managing Enrollments, Test Results, and Reports ■ Viewing All Curriculum Enrollments Information
94 ■
Viewing All Curriculum Enrollments InformationYou can also view information about all curriculum enrollments.
This task is a step in Process of Working with Enrollments, Cancellations, Test Results, and Reports on page 90.
To view all curriculum enrollments information
1 From the application-level menu, choose Navigate > Site Map > Administration - Training > Curriculum Enrollments.
The Enrollments list shows all registered participants and the curriculum paths for which they have registered. You can sort records or use queries to find information of particular interest.
2 Click the Enrollment Steps view tab to review the steps and courses in the curriculum path completed by each the enrollee.
Viewing Partner EnrollmentsThe Partner Enrollments view is typically used for Siebel Training partner-specific deployments, but other users may find this information useful. Partner enrollments are also viewable from the Enrollment List.
This task is a step in Process of Working with Enrollments, Cancellations, Test Results, and Reports on page 90.
Enrollment Status Displays any change in enrollment status that the administrator has entered in the Course Details or Class Details views.
Expiration Date Displays date that the course is set to expire. When Enrollment Status is Confirmed, Expiration Date is calculated as the Course Launch Date + Access Period.
First Name First name of the student.
Last Name Click this link to drill down to the Contact Detail view for the student.
Location Click this link to drill down to the Loc Mgmt - Location view.
Login The student�s login.
Updated Date This field should contain the same value as the Last Updated Date field.
Field Comment

Managing Enrollments, Test Results, and Reports ■ Registering Training Customers
Siebel Training Guide Version 7.7 ■ 95
To view partner enrollments
1 From the application-level menu, choose Navigate > Site Map > Administration - Training > Course Details.
2 In the Courses list, select the course, and then click the Partner Enrollments view tab.
3 In the Partner Enrollments list, query to find the course for which you want to view partner enrollments, and review the records.
The following table describes the fields.
Registering Training CustomersCustomers of an organization can use the same Training application to view, register, and purchase training. They can use their Web browsers to register for courses and classes at an Training Web site, and you can use administrative screens to register a student who has contacted your organization by telephone, fax, mail, or in person.
This topic includes the following procedures:
■ Registering a Customer for a Self-Paced (CD-ROM or Web) Course on page 96
■ Registering a Customer for a Scheduled Class Session on page 96
■ Enrolling Groups for Self-Paced and Scheduled Class Sessions on page 97
This task is a step in Process of Working with Enrollments, Cancellations, Test Results, and Reports on page 90.
Field Comments
Account The partner account.
Enrolled Date
Date and time of the enrollment.
Enrollment Status
Status of the enrollment.
This field is read-only. Use the Enrollment List view tab to edit enrollment status.
First Name Partner student�s first name.
Last Name Partner student�s last name.
Location Training location.
Name Course name. Drill down on the hyperlink to view associated training.
Order # The order number of the partner course.
Enrollment #
Unique identifier for the partner enrollment. Drill down on the hyperlink to view associated tests.
Start Course start date.
Siebel Training Guide Version 7.7
Managing Enrollments, Test Results, and Reports ■ Registering Training Customers
96 ■
Registering a Customer for a Self-Paced (CD-ROM or Web) CourseYou can register a customer for a self-paced course, such as a Web-based course or a CD-ROM course. The following procedure assumes that the prospective student is already listed as a contact.
To register a customer for a self-paced course
1 From the application-level menu, choose Navigate > Site Map > Administration - Training > Course Details.
2 In the Courses list, select the self-paced course, and then click the link in the course Name field.
3 Click the Add Enrollments view tab, and in the Add User list, click Add User.
4 In the Contact Last Name field, click the select button, and in the Pick Contact dialog box, select the prospective attendee, and then click OK.
5 In the Add User list, click Finish, and then click the Enrollments view tab.
A read-only value appears in the Status field for the attendee registered, reflecting the attendee�s registration status.
NOTE: If users have not met certain course prerequisites, a message appears indicating that prerequisite courses must be completed before this enrollment can be confirmed. Administrators can select the Override Prerequisites check box on the Add Enrollments view tab and then click Finish to bypass all prerequisites and complete the current enrollment. Prerequisite override capability can be used for single or multiple enrollments.
If you want to register another attendee:
■ Who uses the same credit card for fee payment, or who is also exempt from paying a fee, repeat Step 4 through Step 5. When you have registered all the attendees, click Finish.
■ Who has fees to be paid, go to Step 6. The Shopping Cart appears.
For more information on Shopping Cart functionality, see Siebel eSales Administration Guide.
6 Verify that the appropriate training charges appear, and click Check Out.
7 Enter the attendee credit card information and other information for which you are prompted, and confirm the order.
NOTE: Users can edit and save quotes as well as add details to the order if necessary. For more information on quotes and orders, see Product Administration Guide.
8 Click the Enrollment List view tab to verify that the attendee or attendees have a registration status of Confirmed.
Registering a Customer for a Scheduled Class SessionYou can register a prospective student for a scheduled class session of an instructor-led class. This procedure assumes that the prospective student is already listed as a contact in the contact table.

Managing Enrollments, Test Results, and Reports ■ Enrolling Groups for Self-Paced andScheduled Class Sessions
Siebel Training Guide Version 7.7 ■ 97
To register a customer for a scheduled class session
1 From the application-level menu, choose Navigate > Site Map > Administration - Training > Class Details.
2 In the Classes list, select the class session for which you want to view enrollment information.
3 Click the Add Enrollments view tab, and in the Add User list, click Add User.
4 In the Add Contacts dialog box, select the prospective student, and then click OK.
5 Click Finish.
If fees need to be paid, the Shopping Cart appears.
6 Verify that the appropriate training charges appear, and then click Check Out.
7 Enter credit card information for the prospective student and other information for which you are prompted, and confirm the order.
8 Click the Enrollments view tab.
A read-only value appears in the Status field for the attendee registered, reflecting the attendee�s registration status.
If you want to register another attendee who will use the same credit card for fee payment, or who is also exempt from paying a fee, repeat the procedure.
NOTE: If users have not met certain course prerequisites, a message appears indicating that prerequisite courses must be completed before this enrollment can be confirmed. Administrators can select the Override Prerequisites check box on the Add Enrollments view tab and then click Finish to bypass all prerequisites and complete the current enrollment. Prerequisite override can be used for single or multiple enrollments.
Enrolling Groups for Self-Paced and Scheduled Class SessionsYou can register groups of students for a self-paced class and for a scheduled class session of an Instructor-Led class. Members of the group should already be listed as contacts.
To enroll multiple students at the same time
1 From the application-level menu, choose Navigate > Site Map > Administration - Training.
2 Click the one of the following links:
■ Course Details (for self-paced classes)
■ Class Details (for scheduled classes)
3 In the Courses or Classes list, select the course or class session, and then click the Add Enrollments view tab.
4 In the Add User list, click Add User.

Siebel Training Guide Version 7.7
Managing Enrollments, Test Results, and Reports ■ Enrolling Students (Delegated Administrator)
98 ■
5 In the Add Contacts list, select multiple users, and click OK.
Select multiple contiguous users by holding down the SHIFT key and selecting the rows. Select noncontiguous users by holding down the CTRL key, and then selecting each user.
6 In the Add Users list, select the users to be enrolled, and click Finish.
All the users selected are enrolled at the same time.
To cancel enrollments for a group of students
1 From the application-level menu, choose Navigate > Site Map > Administration - Training.
2 Click the one of the following links:
■ Course Details (for self-paced classes)
■ Class Details (for scheduled classes)
3 In the Courses or Classes list, select the course or class, and click the Enrollments view tab.
4 In the Enrollments list, select one or more students (for more than one, hold down the shift key while selecting the rows).
5 From the application-level menu, choose Edit > Change Records.
6 In the Change Records dialog box, select Status as the field, and in the Value field, enter a status such as Cancelled.
To verify registration status for students
1 From the application-level menu, choose Navigate > Site Map > Administration - Training > Class Details.
2 In the Classes list, select the class, and then click the Enrollments view tab.
The enrolled students should have a registration status of confirmed.
Enrolling Students (Delegated Administrator)Managers who have been assigned ERM Manager responsibility, and other users whose user profiles have the Training Delegation flag selected can access the Enroll Others link. When delegated administrators click the Enroll Others link, they automatically navigated to an enrollment view where the delegated administrator can enroll other students in courses. See Setting Up a Delegated Training Administrator, for instructions on how to assign a delegated administrator.
To enroll students as a delegated administrator
1 From the Training home page, locate the course using the Find Training links or the Catalog screen.
2 From the Search Courses page, query for the course.

Managing Enrollments, Test Results, and Reports ■ Canceling Training Enrollments
Siebel Training Guide Version 7.7 ■ 99
3 In the Course record, click the Enroll Others link.
4 In the Delegated Admin Enrollment view appears for the enrollments.
5 Click Add User.
6 Select one or more users from the Add Contacts dialog box, and then click OK to return to the Training Delegated Admin Enrollment view.
7 Click Enroll Current User to complete the enrollment for the selected user.
Enrollment checks are performed, and the user is added to the quote. The Shopping Cart view displays if the user being added is a nonemployee. Otherwise the user is enrolled automatically.
The Shopping Cart view includes line items for student names. Click the Delete button to remove a user from quote or order.
8 (Optional) If there are other users to enroll in the course, click Add User and perform queries on any field in the Contacts list to find the next student to be enrolled.
9 After all students are added, complete the order if a shopping cart was created during the enrollment process.
■ You can review the quote and order details by navigating to the My Accounts screen and selecting either My Quotes or My Orders. Students, however, will not have access to QuoteOrder information.
■ Students on the order receive a course confirmation email and see confirmed or waitlisted enrollments in their My Media Training or My Live/Classroom Training lists.
Canceling Training EnrollmentsAs a Training administrator, you can cancel customer or employee enrollment for training.
When a customer or employee cancels an enrollment for an instructor-led class, the number of available seats in the class is automatically updated. However, if an administrator cancels an enrollment, the administrator must manually update the number of available seats in the class. In all instances of cancellation, refunds must be manually calculated and distributed.
The cancellation procedure differs, depending on whether a self-paced course or an instructor-led class is being cancelled:
■ For a self-paced course, use the Course Details screen.
■ For an instructor-led class, use the Class Details screen.
NOTE: If an order containing training courses is canceled from the order management views, training enrollments are automatically canceled.
To cancel a course enrollment for an attendee
1 From the application-level menu, choose Navigate > Site Map > Administration - Training > Course Details.

Siebel Training Guide Version 7.7
Managing Enrollments, Test Results, and Reports ■ Manually Viewing and Scoring Skills Tests
100 ■
2 In the Courses list, query for the course, and then click the Enrollment view tab to display a list of current enrollments.
3 Select the enrollment record, and in the Status field change the value (for example, Pending, Confirmed) to Cancelled.
4 (Optional) If the course or class involved a fee, and if the enrollee�s status was Confirmed, follow your organization�s standard procedures for refunding any amount due.
To cancel a class enrollment for an attendee
1 From the application-level menu, choose Navigate > Site Map > Administration - Training > Class Details.
2 In the Class Details list, query for the class, and then click the Enrollments view tab to display a list of current enrollments.
3 Select the enrollment record you want to cancel and in the Status field, change the value to Cancelled.
4 Click the More Info view table and, in the Class Details form, reduce the number in the Taken Seats field by 1.
The number of Open Seats is automatically recalculated.
5 (Optional) If the class involved a fee, and if the enrollee�s status was Confirmed, follow your organization�s standard procedures for refunding any amount due.
Manually Viewing and Scoring Skills TestsA Siebel Training skills test can be scored automatically if all the questions in the test are multiple choice. In such a case, viewing skill test results is an option for the Training administrator, but it is not a necessity.
If a skills test includes Text or Essay type questions, a person with administrator privileges for Training must evaluate students� answers to those questions and assign appropriate scores.
The following procedures describe how to view skills test results and how to manually score questions of type Text or Essay.
Viewing Skill Test ResultsPerform the steps in the following procedure to view test results.

Managing Enrollments, Test Results, and Reports ■ Manually Viewing and Scoring SkillsTests
Siebel Training Guide Version 7.7 ■ 101
To manually view skills test results
1 From the application-level menu, choose Navigate > Site Map > Administration - Training > Test Results.
Each Test Results list record shows the name of a person who took a test, the test that person took, the score, and other information.
2 To view detailed information about a user�s performance on a test, select the appropriate record in the Test Results list, and click the Result Details view tab.
The User Answers list, located below Results Details, shows the selected user�s answers to the question.
3 To view detailed information about the selected user�s answers to a particular question, select the question in the Result Details list, and then scroll down to view the User Answers and Answers lists.
The Answers list shows the available answers for multiple-choice questions. Each correct answer is indicated by a check mark in the Correct field.
Manually Scoring Skills Test QuestionsAutomatically graded test scores and correct answers become available to students almost immediately after they submit their tests. For tests that include questions that must be manually graded, test scores become available to students shortly after grading is complete.
For information about how students view test results, see Reviewing Skills Test Results on page 135.
NOTE: When a student has passed all required tests for a course, that student�s enrollment status for the course is automatically updated to Completed. If the student is enrolled in a curriculum that includes the course, the curriculum Weighted Completion value is updated when the course is completed. Use the Update Grade command when manually grading a test to make sure that the curriculum Weighted Completion value is updated correctly. Do not directly set the student�s enrollment status to Completed.
To manually score skills test questions of type Text or Essay
1 From the application-level menu, choose Navigate > Site Map > Administration - Training > Test Results.
2 In the Test Results list, select any test result record that you want to grade manually, and then click the Result Details view tab.
3 For each question that has the value of Essay or Text in the Type field:
a Select the question in the Result Details list.
b Compare the user�s answers in the User Answers list with the correct answers in the Answers list.
c In the Result Details list, enter the appropriate number of points in the Question Point field for the user�s answers, and save the changes.

Siebel Training Guide Version 7.7
Managing Enrollments, Test Results, and Reports ■ Generating Training Reports
102 ■
4 After you have finished assigning points to all questions that require manual scoring, click Update Grade in the Test Results form.
A new value reflecting the points manually assigned appears in the Points Received field.
5 Click the More Info view tab to return to the Tests Results list to grade another set of test answers.
Generating Training ReportsYou can generate various Siebel Training reports to view information on enrollments, test results, materials and so on. Each report can be accessed by navigating to a specific view from the Administration - Training screen, clicking the Reports icon on the toolbar, and then selecting the report.
When the report is generated, it appears in the Siebel Report Viewer window. After generating a report, you can view data on screen, save report data to disk, or print report data. For more information on reports, see Siebel Reports Administration Guide.
Table 3 describes the report and the view from which the report is accessed.
Table 3. Siebel Training Reports
Report View Description
Course List Course Details This report provides information about all the courses in the current query of the Courses list. It displays the same data as the Courses list, except that the Created By field is omitted.
Course Schedule Course Details, Enrollments view tab
This report provides information about all the dates and times when a course is scheduled to be held. It displays selected fields from the Course form and the Class Schedule list.
Course Registration Course Details, Enrollments view tab
This report provides information about students who are registered to attend a selected course. It displays selected fields from the Course form and the Class Registration list.
Curriculum Registrants Curriculums, Enrollments view tab
The Curriculum Registrants report lists the individuals who are registered for any of the curriculum paths defined in the system. The report displays selected fields from the Curriculum form and the Enrollments list.
Skills Test Detail Tests, Test Questions view tab
This report provides information about the selected skills test.
The Tests list, select the test and click the Test Questions view tab.

Managing Enrollments, Test Results, and Reports ■ Generating Training Reports
Siebel Training Guide Version 7.7 ■ 103
Generating Reports Using Siebel AnalyticsAdditional Training reports can be generated through Siebel Analytics. Training reports available through Siebel Analytics include:
■ Skill Test Detail
■ Compliance
■ Training Operations
■ Training Performance
For further information on Training reports available using Siebel Analytics, see Siebel Analytics User Guide.
Training Library List Training Library This report provides a list of items in the Training Library.
Class Registration Class Details, Enrollments view tab
This report provides information about registrations for a particular class.
Curriculum Materials Curriculums, Materials view tab
This report provides information about materials used in the curriculum.
Table 3. Siebel Training Reports
Report View Description

Siebel Training Guide Version 7.7
Managing Enrollments, Test Results, and Reports ■ Generating Training Reports
104 ■

Siebel Training Guide Version 7.7 ■ 105
11 Accessing the Training Site
This chapter covers how to access and log in to Siebel Training. It includes the following topics:
■ Process of Accessing the Siebel Training Site on page 106
■ Logging in for Enterprise Application End Users on page 106
■ Siebel Training Web Site Login Methods on page 107
■ Browsing a Training Site Anonymously on page 107
■ Registering as a New User for Training on page 108
■ Logging in with an Established User ID and Password on page 109
Siebel Training Guide Version 7.7
Accessing the Training Site ■ Process of Accessing the Siebel Training Site
106 ■
Process of Accessing the Siebel Training SiteThe following list shows the procedures that end users typically perform to access the Siebel Training site. Your company may follow a different process according to its business requirements.
End-User ProceduresTo access Siebel Training, perform the applicable procedures.
■ Logging in for Enterprise Application End Users on page 106
■ Browsing a Training Site Anonymously on page 107
■ Registering as a New User for Training on page 108
■ Logging in with an Established User ID and Password on page 109
Logging in for Enterprise Application End UsersEnd users employed by an organization that uses Siebel Training to conduct internal training programs typically access Training screens through a Siebel employee application, such as Siebel Employee Relationship Management, Siebel Call Center or Siebel Sales, rather than through a separate Web site.
If Training screens are accessed from within another Siebel application, the end user may see that application�s login prompts and home page, rather than the Training login prompts and home page.
The following procedure describes how end users can locate Training information when using a Siebel application.
This task is a step in Process of Accessing the Siebel Training Site on page 106.
To locate Training screens within another Siebel application
1 Start your Siebel employee application and log in according to the procedures for that application.
2 From the application-level menu, choose Navigate > Site Map > Training.
This navigates you to the Training Home Page where a list of Training end-user links appears. For information about viewing the information available to you using the links, see Chapter 12, �Finding and Viewing Training Information.�
3 Click the appropriate link to find training.
NOTE: If you use Training screens within the Siebel ERM (Employee Relationship Management), Siebel Sales, or Siebel Partner Relationship Management application, you may also be able to navigate to Training screens by clicking the Training screen tab, as an alternative to using the Site Map.

Accessing the Training Site ■ Siebel Training Web Site Login Methods
Siebel Training Guide Version 7.7 ■ 107
Siebel Training Web Site Login MethodsA Siebel Training Web site provides information and services related to training. Any of the following methods can help users find the URL for an Training Web site:
■ Web links from the corporate home page of the organization offering the training
■ Advertisements or press releases from the organization offering the training
■ Web searches
■ Referral to the site by another person
The Siebel Training Web site provides different levels of visibility, depending on how the user accesses the site. Users can enter the Training site in the following ways:
■ Browsing a Training Site Anonymously. This option provides access to the site�s home page. Training links appear on the home page, but the user cannot access other views.
■ Registering as a New User for Training. Logging in as a newly registered Siebel user allows access to the other views in the Training site. Users who register using Training become Siebel users in your Siebel application. For information about setting up user access for Siebel customer applications, see Security Guide for Siebel eBusiness Applications and Applications Administration Guide.
■ Logging in with an Established User ID and Password. Logging in as a previously registered Siebel user with an established user ID allows access to the other views in the Training site.
Browsing a Training Site AnonymouslyTraining users can browse the training site anonymously. This option provides access to the site�s home page information, but anonymous users must register before they can sign up for any class or curriculum.
Siebel Training Web site visitors can view the following kinds of information without entering a user ID and password:
■ Home page and course descriptions. Descriptions of top 10 new courses listed in the new Training section on the home page. This list is compiled automatically.
The courses that appear as Featured Training are those courses that are designated by the training administrator to appear as Featured Training.
■ Find Training page. This page provides links to additional pages, which include the following lists:
■ All Training
■ Find Training By Classes
■ Find Training By Location
■ Find Training By Job Role
■ Find Training By Skills

Siebel Training Guide Version 7.7
Accessing the Training Site ■ Siebel Training Web Site Login Methods
108 ■
■ Find Curriculum Paths
■ Find Curriculums Paths By Job Role
This task is a step in Process of Accessing the Siebel Training Site on page 106.
To browse an Training site anonymously
1 Using your browser, enter the URL for the Training site, and navigate to the site.
2 Click the links in the Find Training section of the page.
Registering as a New User for TrainingWhen the end user navigates to a Training Web site using a browser and a URL, a generic home page appears. The page displays login prompts in the User Log In area and contains numerous links to training information.
Figure 4 shows the home page that appears after the training user enters the correct user ID and password.
This task is a step in Process of Accessing the Siebel Training Site on page 106.
Figure 4. Home Page View for Registered Web User

Accessing the Training Site ■ Siebel Training Web Site Login Methods
Siebel Training Guide Version 7.7 ■ 109
To register as a new user for training
1 Using your browser, enter the URL for the Training site, and navigate to the site.
2 Click the New User link in the User Login form.
A Personal Information form appears, prompting you to supply information about yourself, including a user ID that you will use in the future and a password to accompany that user ID.
3 Complete the fields in the Personal Information form, enter your user ID and password, and then click Next.
A Contact Information form appears, prompting you to supply your address and work phone number.
4 Complete the fields in the Contact Information form, and then click Next.
A Usage Terms form appears, containing license agreement information.
5 Read the license agreement, and then click I agree.
A Registration Confirmation message appears.
6 Click Finish to complete the new user registration process.
Logging in with an Established User ID and PasswordIf an end user logs in to a Training site with an established user ID and password, the user can view information about training for which he or she has registered, view the associated training materials, and take skills tests associated with those courses.
On the My Account page, users can update their profiles, and view saved quotes and orders. Users can also reorder items using a favorites list, templates, and orders.
This task is a step in Process of Accessing the Siebel Training Site on page 106.
To log in using an established user ID and password
1 Using your browser, enter the URL for the Training site, and navigate to the site.
2 At the home page, enter your user ID and password, and then click OK.
A greeting appears, and My Training links become available for your use.
If you are using a Training Web site, a My Training tab appears near the top of the display. Depending on your assigned Siebel responsibility, a Managers tab (My Team's Training) may also appear.
For more information on how to find and view Training information, see Chapter 12, �Finding and Viewing Training Information.�

Siebel Training Guide Version 7.7
Accessing the Training Site ■ Siebel Training Web Site Login Methods
110 ■

Siebel Training Guide Version 7.7 ■ 111
12 Finding and Viewing Training Information
This chapter covers how to find training information on the Training Web site. It includes the following topics:
■ About the Training Learning Center on page 112
■ Process of Finding Training on the Siebel Training Web Site on page 112
■ Finding Available Training on page 113
■ Finding Available Curriculum Paths on page 114
■ Finding Training Library Materials on page 115
■ Finding Training Materials for a Course or Curriculum on page 115
■ Using the Siebel Catalog on page 116
■ Assessing Skills and Development on page 116

Siebel Training Guide Version 7.7
Finding and Viewing Training Information ■ About the Training Learning Center
112 ■
About the Training Learning CenterThe Training Learning Center home page provide links that help the end user manage training activities.
The Learning Center page includes the following sections:
■ Navigation bar. The navigation bar on the left side of the Training home page helps users navigate within the Training site. This navigation bar is visible regardless of what page the user is accessing. The following links are available on the left navigation bar:
■ Find Training
■ Training Catalog
■ Curriculum Paths
■ My Training
■ My Transcripts
■ Recommended Training
■ Training Library
■ My Team's Training
■ Feature Articles. This section provides links to pertinent training-related news and updates to available training such as a new course, with prerequisites and contact information. The feature articles are created using Group News Administration. For more information on creating Feature Articles, see Siebel Employee Relationship Management Administration Guide and Applications Administration Guide. If no feature articles are active, this section does not appear on the Training home page.
■ My Skills Development. This section includes links that help the user navigate to:
■ My Recommended Training
■ My Skills Gaps
■ Featured Training. This section provides links to new courses. The courses that appear in the list are the most recently created courses that are flagged as featured Training.
Process of Finding Training on the Siebel Training Web SiteThe following list shows the procedures that end users typically perform to find training courses and manage training objectives. Your company may follow a different process according to its business requirements.
End-User ProceduresPerform the following procedures to locate training and manage training objectives.
1 Finding Available Training on page 113

Finding and Viewing Training Information ■ Finding Available Training
Siebel Training Guide Version 7.7 ■ 113
2 Finding Available Curriculum Paths on page 114
3 Finding Training Library Materials on page 115
4 Finding Training Materials for a Course or Curriculum on page 115
5 Using the Siebel Catalog on page 116
6 Assessing Skills and Development on page 116
Finding Available TrainingUsers can locate training by clicking the Find Training link in the left navigation bar, or by clicking a link in the Find Training section of the Learning Center home page.
The Find Training section includes links that automatically filter available training by the following criteria:
■ All Training. Click this link to search for specific training or view the entire training catalog.
■ By Classes. Click this link to search for specific instructor-led or distance learning classes or view the entire schedule.
■ By Location. Click this link to find a list of upcoming classes in your area. Using the list of training locations, the user can a schedule of training events by location.
■ By Job Role. Click this link to view a list of courses appropriate to a job role. A list of training offerings appears, indicating the job profile for which each offering is appropriate.
■ By Skills. Click this link to search for courses needed to acquire specific skills.
■ Curriculum Paths. Click this link to search for a specific curriculum or view all curriculums. This link provides a list of predefined training paths for a variety of specialized needs. The user can search the list for a curriculum and then drill down on the curriculum name to show the Curriculum Details view.
■ Curriculum Paths By Job Role. Click this link to view a list of curriculums by job role. This link displays a list of predefined training paths and indicates the job role for which each path is appropriate. In the Curriculums by Job Roles list, the user can run a query, sort the list by job role, and drill down on a curriculum name to display the Curriculum Details view.
This task is a step in Process of Finding Training on the Siebel Training Web Site on page 112.
To view available training
1 Log in to the Training site.
2 From the Learning Center home page, click one of the Find Training links to locate information about available training.
3 Using the Search form, search the list for instructor-led or media based courses of particular interest, or search for courses that have specific attributes.

Siebel Training Guide Version 7.7
Finding and Viewing Training Information ■ Finding Available Curriculum Paths
114 ■
4 In the results list, select a course, and then click the link in the Name field for more detailed information about the course.
Detailed information may include course objectives, topics to be covered, materials to be used, and information about other courses that are associated with the selected course.
If the course is instructor-led, users can view course detail information by clicking the name link or by clicking View Schedule.
Finding Available Curriculum Paths Training offerings may be grouped together into curriculum paths that allow you to accomplish a specific educational goal, such as completing a professional certification or degree program.
This task is a step in Process of Finding Training on the Siebel Training Web Site on page 112.
To view available curriculum paths
1 Log in to the Training site, and navigate to the Learning Center home page.
2 In the Find Training section, click either the Find Curriculums or Find Curriculums By Job Role links to find information about available curriculum paths.
3 In the Curriculums list, query for the curriculum, and then click the link in the curriculum Name field.
The Curriculum Details view provides curriculum details as well as two lists, Curriculum Steps, and Materials. You can enroll in the Curriculum by clicking Enroll on the detail form. For more information, see Enrolling in a Curriculum and Viewing Curriculum Progress on page 129.
Reviewing the Steps for Each CurriculumThe Curriculum Steps list provides an ordered series of learning opportunities and allows for the optional selection of coursework. Users may select only the minimum requirements for each step, or choose to take all training included in the step.
To view curriculum steps and requirements
1 Log in to the Training site, and navigate to the Training Learning Center.
2 In the Find Training section, click the Curriculum Paths link.
3 In the Curriculum Paths list, query for the curriculum.
4 In the curriculum record, click the link in the Name field.
5 In the Curriculum Details form, note the number of required courses.
6 In the Curriculum Steps list, review the steps.

Finding and Viewing Training Information ■ Finding Training Library Materials
Siebel Training Guide Version 7.7 ■ 115
Curriculum MaterialsThe Materials list identifies the materials that are associated with the curriculum as a whole, rather than with individual courses in the curriculum. For more information, see Finding Training Materials for a Course or Curriculum on page 115.
Finding Training Library MaterialsEach Training Web site includes a Training Library that stores files related to the kinds of training and curriculum paths being offered. End users can view these files, which may include reading material, self-paced learning topics, training presentations, curriculum guides, course syllabus information, audio or video clips, or other training information.
This task is a step in Process of Finding Training on the Siebel Training Web Site on page 112.
To view materials in the Training Library
1 Log in to the Training site.
2 Click the Training Library link on the navigation bar.
3 In the Training Library list, query for training materials.
4 In the training material record, click the link in the Name field, and use one of the following methods to view or download the selected item:
■ Click Open to view the file without downloading.
■ Click Save this file to disk, specify the location for the download in the file system, and then click OK to download the file.
NOTE: The Training Library stores a file in the file�s original format. To open and view the file, the appropriate application must be installed on your computer.
Finding Training Materials for a Course or CurriculumEnd users can locate training library materials for a specific course or curriculum. Siebel Training allows the user to find Training Library materials for courses or curriculums, by instructor-led classes, location, job roles, skills, and curriculum paths.
This task is a step in Process of Finding Training on the Siebel Training Web Site on page 112.
To view training library materials for a specific course or curriculum
1 Log in to the Training site, and navigate to the Learning Center home page.
2 In the Find Training section, click the Curriculum Paths link.
3 In the Curriculum Paths list, query for the curriculum.

Siebel Training Guide Version 7.7
Finding and Viewing Training Information ■ Using the Siebel Catalog
116 ■
4 In the curriculum record, click the link in the Name field.
Additional details about the course or the curriculum appear, including a Materials list, which specifies the training library items that are associated with the course or curriculum.
5 From the Curriculum Details form, scroll down to the Materials list.
6 In the Materials list, select the material record and click the link in the Name field.
7 In the Training Library list, query for materials, and in the record, click the link in the Name field.
8 Use one of the following methods to view or download the selected item:
■ Click Open to view the file without downloading.
■ Click Save to save this file to a location on your computer.
Using the Siebel CatalogUsers can browse the Siebel Catalog to find and purchase products, including training. The Siebel Catalog offers customer and partner training in such areas as pricing, access control, and user interface options. For more information on setting up Siebel Catalog, see Siebel eSales Administration Guide.
This task is a step in Process of Finding Training on the Siebel Training Web Site on page 112.
Viewing the Siebel CatalogUse the following procedure to view the Siebel Training Catalog.
To view the Training Catalog
1 Log in to the Training site, and click the Training Catalog link on the navigation bar.
If a catalog is set up by the administrator, the user sees different categories of courses. Users can drill down on these categories to locate the appropriate course.
2 From the Catalog page, click a link to browse for training.
3 From the Catalog Items page, click Show Details to view course information.
Course detail information includes associated topics, objectives, lessons, skills, suggested training, job roles, materials, and bundled products.
NOTE: Users can also choose to enroll in training by clicking Enroll.
Assessing Skills and Development The My Skills Development section appears in the Learning Center page if Siebel Competency Management is installed as part of the Siebel application installation. The My Skills Development section includes links to My Recommended Training and My Skill Gaps pages.

Finding and Viewing Training Information ■ Assessing Skills and Development
Siebel Training Guide Version 7.7 ■ 117
■ The Recommended Training page allows the user to browse for suggested training associated with the user�s job profile, and to browse training recommended for other job profiles designated as part of the user�s career path.
■ The My Skill Gaps page provides a summary of the job profile associated with the user, including job code details and job requirements. The following view tabs provide additional detail:
■ Career Path Options. This view lists the subsequent job profiles in the career path.
■ Competency Profile. This list shows the skills or competencies required for the selected job profile.
■ Recommended Training. This list shows the courses or skills that are recommended for the user to close the competency or skill gap for the selected job profile.
For more details on setting up and managing employee skills and competencies, see Siebel Employee Relationship Management Administration Guide.
This task is a step in Process of Finding Training on the Siebel Training Web Site on page 112.
Reviewing My Recommended Training and My Skill GapsPerform the steps in the following procedures to review recommended training and skill gaps.
To view My Recommended Training
1 Log in to the Training site.
2 From the Training Learning Center, click the My Recommended Training link in the My Skills Development section.
A list of courses appear that address the current skill gaps in the user's current job profile. After these courses are completed, the user�s skills are updated with the skill types and levels associated with each training course.
3 Click Browse Other Job Profiles to view other jobs in the established career path.
Users can assess current skill gaps against other job profiles and view recommended training.
To view My Skill Gaps
1 Log in to the Training site.
2 From the Training Learning Center, click the My Skills Gaps link in the My Skills Development section.
3 From the Career Management page, review the current job profile, job code details, and job requirements.
The Competency Profile list shows the required competency levels and the skill gaps that are used to derive Recommended Training courses.

Siebel Training Guide Version 7.7
Finding and Viewing Training Information ■ Assessing Skills and Development
118 ■
4 Click the Career Options view tab to view other career path options and skill gaps associated with the job profile.
Drilling down on a different career profile shows the skill gaps and recommendations associated with the profile and the existing skills of the user.

Siebel Training Guide Version 7.7 ■ 119
13 Course Registration, Withdrawal, and Completion
This chapter covers how to register for, withdraw from, or complete a course in Siebel Training. It includes the following topics:
■ About Training Course or Class Registration on page 120
■ Process of Registration, Withdrawal, and Completing Courses on page 120
■ Registering for a Media-Based Course on page 120
■ Registering for a Scheduled Class on page 122
■ Submitting Third-Party Training Events for Manager Approval on page 124
■ Using the Siebel Catalog to Register for Training on page 125
■ Viewing My Training Enrollments Information on page 127
■ Launching a Web-Based Course on page 128
■ Enrolling in a Curriculum and Viewing Curriculum Progress on page 129
■ Withdrawing from a Course, Class, or Curriculum on page 130

Siebel Training Guide Version 7.7
Course Registration, Withdrawal, and Completion ■ About Training Course or Class Registration
120 ■
About Training Course or Class RegistrationA Training Web site may offer several different kinds of training, including traditional instructor-led classes and Web-based courses. If you use a Training Web site to register for training, the registration procedure varies slightly depending on the type of training you choose.
For registration, training offerings can be grouped as follows:
■ Media-Based training. This type of training, including Web-based courses and CD-ROM courses, can be taken at any time until an optional Expiration Date or Access Period deadline.
■ Instructor-Led and Distance Learning courses. These courses are offered at specific times and locations. For Distance Learning courses, times are specified but not locations, because the course is taught at a specific time using the Web.
Process of Registration, Withdrawal, and Completing CoursesThe following list shows the procedures that end users typically perform when registering for, withdrawing from, and completing training courses. Your company may follow a different process according to its business requirements.
End-User ProceduresPerform the following steps to manage training enrollments and course completion.
■ Registering for a Media-Based Course on page 120
■ Registering for a Scheduled Class on page 122
■ Submitting Third-Party Training Events for Manager Approval on page 124
■ Using the Siebel Catalog to Register for Training on page 125
■ Viewing My Training Enrollments Information on page 127
■ Launching a Web-Based Course on page 128
■ Enrolling in a Curriculum and Viewing Curriculum Progress on page 129
■ Withdrawing from a Course, Class, or Curriculum on page 130
Registering for a Media-Based CourseUse the following procedure to register for any course that is not scheduled to take place at a particular time, such as a self-paced Web-based or CD-ROM course.
NOTE: Nonemployee contacts who are not associated with an account cannot register for a class unless a system default price list is set up. For more information, see Siebel eSales Administration Guide.

Course Registration, Withdrawal, and Completion ■ Registering for a Media-BasedCourse
Siebel Training Guide Version 7.7 ■ 121
This task is a step in Process of Registration, Withdrawal, and Completing Courses on page 120.
To register for a media-based course
1 Log in to the Training Web site as a registered user or a new user.
2 From the Learning Center home page, click the All Training link in Find Training section.
For an explanation of other Find Training links, see Chapter 12, �Finding and Viewing Training Information.�
3 If the course for which you want to register is not visible on the Courses list, search for it using the Search Courses form.
You can search for courses by the following criteria:
■ Course Name
■ Format (can be CD-ROM, Web-based, or Third-Party)
■ Course Code
■ Provider
■ Units
■ Hours
■ Days
■ Rating
■ Language
4 In the course record, click the Enroll link.
If you are trying to register for a course that has prerequisites you have not fulfilled, the following message appears:
Incomplete Prerequisites
The following prerequisites have not yet been completed. We suggest that you complete theses pre-requisites prior to taking the course. You can enroll in the pre-requisite courses by clicking on the course name.
If you are trying to register for a course in which you are already enrolled, the following message appears:
Duplicate Enrollment
You are already enrolled in this course. This duplicate attempt will not be saved. If you would like to enroll in this particular course, then cancel the previous enrollment and return to this course to complete the registration.
If there is no fee for the training you have selected (or if you are exempt from the fee), the registration process is complete and the following changes occur:
■ The My Courses view appears, and registration number and a confirmed status for your registration are listed.

Siebel Training Guide Version 7.7
Course Registration, Withdrawal, and Completion ■ Registering for a Scheduled Class
122 ■
■ In the Course Links section, you click the Course Launch button to begin the course immediately.
■ My Media Training is updated to include an Expires date and a Confirmed status.
NOTE: If the administrator did not select the Auto-Confirm flag (check box cleared), then enrollment status is set to Pending-Approve. This functionality allows administrators to manually manage the enrollment process.
■ If there is a fee for the training, the Shopping Cart appears. The Shopping Cart contains information about the charge for the training.
If you want to register for more courses before paying, navigate to the appropriate screen and continue registering. Your registration status is Pending until you pay. When you are ready to pay, continue to the next step.
5 Click Check Out to display the Payment Method form, and enter your credit card and billing information.
If you have used the Shopping Cart before, your previously entered information may appear for you to edit or confirm.
6 Click Continue to display the Order Summary, verify that all the information is correct, and click Confirm Order.
If your registration is successful, you automatically receive an email confirming your course enrollment.
7 Click Return to Home Page, and click View Your Course Schedule to display the My Courses list.
Registering for a Scheduled ClassIf an instructor-led class is being offered at various times or locations, each offering of the course is called a class or class session. Registering for a scheduled class also applies to courses of type Distance Learning where the live Web class can be offered at various times.
Nonregistered contacts who are not associated with an account cannot register for a class unless a system default price list is set up. For more information, see Siebel eSales Administration Guide.
This task is a step in Process of Registration, Withdrawal, and Completing Courses on page 120.
To register for a scheduled class
1 Log in to the Training site as a registered user or a new user.
2 From the Learning Center page, click the appropriate link in the Find Training section.
For an explanation of the Find Training links, see Chapter 12, �Finding and Viewing Training Information.�
3 In the Courses list, click the name of the course for which you want to register.
If the course for which you want to register is not visible on the Courses list, you can search for it, using the Search Classes form. You can search for courses by the following criteria:

Course Registration, Withdrawal, and Completion ■ Registering for a Scheduled Class
Siebel Training Guide Version 7.7 ■ 123
■ Course Name
■ Format (can be Instructor-led, Distance Learning, or Third-Party)
■ Instructor
■ Course Code
■ Provider
■ Units
■ Hours
■ Days
■ Rating
■ Start Date
■ End Date
4 Enroll for the class you want to take:
■ If the class you want to take has multiple sessions available, a View Schedule link is displayed. Click this link and then click Enroll in the row for the class session you want to attend.
■ If the class you want to take has only one session, click Enroll in the row for the class you want to attend.
If you are trying to register for a course that has prerequisites you have not fulfilled, the following message appears:
Incomplete Prerequisites
If you are trying to register for a course in which you are already enrolled, the following message appears:
Duplicate Enrollment
If you are trying to register for a class that is filled, but has an open waitlist, the Add to Waitlist button appears instead of the Enroll button.
5 In the My Class Details, verify the values in the Name, Start, End, Location, and Classroom fields.
If there is no fee for the training you have selected, and if space is still available, the registration process is complete and the following changes occur:
■ The My Class Details view appears, and registration number and a confirmed status for your registration are listed.
■ In the Course Links section, you can click the Course Launch button to begin the course immediately.

Siebel Training Guide Version 7.7
Course Registration, Withdrawal, and Completion ■ Submitting Third-Party Training Events for Manager Approval
124 ■
■ My Live/Classroom Training is updated to include a Confirmed status.
NOTE: If the administrator did not select the Auto-Confirm flag (check box cleared), then enrollment status is set to Pending-Approve. This functionality allows administrators to manually manage the enrollment.
If there is no room in the class (that is, if the maximum enrollment has already been reached), the you can use the Add to Waitlist button to automatically be placed on a waiting list for any open spaces. Skip the remaining steps of this procedure.
When a student is wait-listed, the My Live/Classroom Training is updated to include a status of Waitlisted for the registration. The My Classes view are updated to include a registration number and wait-listed status.
NOTE: If the administrator has specified a maximum waitlist size and the waitlist has been filled, then the user receives a message saying that no space is available on the waitlist. At this point, go to the Class Schedule view and select another class session.
If there is a fee for the training, and if space is still available, the Shopping Cart appears, containing information about the charge for the training.
If you want to register for more training before paying, navigate to the appropriate screen and continue registering. Your registration status is Pending until you pay.
6 Click Check Out to display the Payment Method form, and enter your credit card and billing information.
If you have used the Shopping Cart before, your previously entered information may appear for you to edit or confirm.
7 Click Continue to show the Order Summary, verify that all information is correct, and click Confirm Order.
8 Click Return to Home Page, and then click View My Class Schedule to show the My Classes list.
The list that appears includes the training you selected, with the Status field set to Confirmed, showing that you have been registered for the training.
If your registration is successful, you automatically receive an email confirming your course enrollment. A reminder email is also sent three days before the course is scheduled to begin.
NOTE: Users can also view quote and order details from the My Account page. For more information, see Siebel eSales Administration Guide.
Submitting Third-Party Training Events for Manager ApprovalThe third-party training process allows organizations to track progress by a student that is taking a course outside the organization. Employees register for third-party classroom or media-based training using the same method as for any other type of course using the following procedures:
■ Registering for a Media-Based Course on page 120
■ Registering for a Scheduled Class on page 122

Course Registration, Withdrawal, and Completion ■ Using the Siebel Catalog toRegister for Training
Siebel Training Guide Version 7.7 ■ 125
Third-party training must be submitted to a manager for approval. Siebel Training is preconfigured to invoke a manager approval process for third-party training. Your company may follow a different process according to its business requirements.
Employees can enter third-party training records into their transcripts. This capability allows managers to approve, decline, or return the training records.
This task is a step in Process of Registration, Withdrawal, and Completing Courses on page 120.
To submit third-party training events to a manager for approval
1 Log in to the Training Web site as a registered user or a new user.
2 On the Training home page, click the My Training link in the left navigation bar, and then click My 3rd-Party Training.
3 In the My 3rd-Party Training list, click New.
4 In the new record, click the select button in the Name field.
5 In the Pick 3rd-Party Course dialog box, select the course, and then click OK.
6 Complete the remaining fields, and then click Save.
The following table describes the fields.
7 Click the link in the Registration # field, and verify that the information in the fields is correct.
8 Click Submit to route the course information to your manager for approval.
Using the Siebel Catalog to Register for TrainingUse the Siebel Catalog to browse and purchase training from your company's Web site.
This task is a step in Process of Registration, Withdrawal, and Completing Courses on page 120.
Field Comments
Name The name of the course of class.
Units The number of hours for the course.
# of Hours The number of hours for the course. This field is automatically populated.
Completed Date
Date the course was completed. This field is automatically populated when the 3rd-party training is submitted. Enter the date, using the calculator button.
Description Description of the course.
This text field may be used to include location and instructor details or more information about the course.

Siebel Training Guide Version 7.7
Course Registration, Withdrawal, and Completion ■ Using the Siebel Catalog to Register for Training
126 ■
To register for training using the Siebel Catalog
1 Log in to the Training Web site as a registered user or a new user.
2 From the Training home page, click the Training Catalog link in the left navigation bar.
3 Click a category link to navigate to a group of courses that are part of the category.
4 Enroll in the course or class:
■ Click Enroll to complete your registration.
■ If you want more details about the course before registering, click Show Course Details to view more information about the course or class.
Review the Course Detail information (Topics, Objectives, Lessons, Skills, Suggested Training, Materials, Job Roles, and Bundled Products).
After reviewing this information, then, in the header of the Course Detail form, click Enroll to register.
■ If there is no fee for the training you have selected, the registration process is complete. The Enrollment Details view appears. A registration number and a confirmed status for your registration are listed. The Enrollment Details view appears both for cases where no one is charged a fee for the selected training and for cases where you are exempt from the fee.
NOTE: If the administrator did not select the Auto-Confirm check box, then the enrollment status is set to Pending-Approve. This functionality allows administrators to manually manage the enrollment process.
The Course Details view appears, and it now contains a Course Launch button where the course can be immediately accessed. At the same time, the My Training Enrollments My Media Training view is updated to include a registration number and confirmed status.
■ If there is a fee for the training, the Shopping Cart appears. The Shopping Cart contains information about the charge for the training.
If you want to register for more courses before paying, navigate to the appropriate screen and continue registering. Your registration status is Pending until you pay. When you are ready to pay, continue to Step 5.
5 Click Check Out to display the Payment Method form, and enter your credit card and billing information.
If you have used the Shopping Cart before, your previously entered information may appear for you to edit or confirm.
6 Click Continue to display the Order Summary, verify that all the information is correct, and click Confirm Order.
If your registration is successful, you automatically receive an email confirming your course enrollment.

Course Registration, Withdrawal, and Completion ■ Viewing My Training EnrollmentsInformation
Siebel Training Guide Version 7.7 ■ 127
7 Click Return to Home Page, and click View Your Course Schedule to display the My Courses list.
The list includes the training you selected, with the Status field set to Confirmed, showing that you have been registered for the training.
NOTE: Users can also view quote and order details from the My Account page. For more information, see Siebel eSales Administration Guide.
Viewing My Training Enrollments InformationPerform the steps in the following procedure to view the classes in which you have enrolled.
This task is a step in Process of Registration, Withdrawal, and Completing Courses on page 120.
To view My Training Enrollments information
1 Log in to the Training site as a registered user or a new user.
2 On the Training home page, click the My Training link in the left navigation bar.
3 Click the My Training Enrollments link.
The My Media Training and My Live/Classroom Training lists appear.
The My Media Training list provides information on:
■ Course (name of the course)
■ Format (Web-based or CD-ROM)
■ Expires (date the course enrollment expires)
■ Status (for example, Confirmed, Waitlisted, or Completed-Passed)
The My Live/Classroom Training list provides information on:
■ Course (name of the course)
■ Format (Instructor-Led or Distance Learning)
■ Date (the date or dates of the class)
■ Location (the location where the class will be held)
■ Status (Pending Confirmed, Expired, Completed, Waitlisted, Cancelled, Terminated, Completed - Passed, Completed - Failed, Pending - Approve, Declined, Approved, No Show, No Show-Bill)
4 Locate course or class information by performing one of the following steps:

Siebel Training Guide Version 7.7
Course Registration, Withdrawal, and Completion ■ Launching a Web-Based Course
128 ■
■ Click the link in the Course field for either My Media Training or My Live/Classroom Training to navigate to My Course Details (media-based courses) or My Class Details (live/classroom classes).
These views provide information on Topics, Objectives, Skills, Suggested Training, Tests and Evaluations, and Course Materials. My Live/Classroom Training also provides the Daily Schedule for the class selected.
■ Click Query on either the My Media Training or My Live/Classroom Training lists to search for course or class information by Course:
Search My Media Training by Course, Format, Expires, or Status
Search My Live/Classroom Training by Course, Format, Date, Location, or Status
Launching a Web-Based CourseSiebel Training allows end users to start a registered Web-based courses from Training screens.
This task is a step in Process of Registration, Withdrawal, and Completing Courses on page 120.
To start a Web-based course from Training
1 Log in to the Training Web site with the user ID and password you used to register for the Web-based course.
2 On the Training home page, click the My Training link in the left navigation bar.
3 Click the My Training Enrollments link.
4 In the My Media Training list, select the course, and then click the link in the Course field.
5 On the My Course Details form, click Course Launch.
The Enrollments Details view, which includes Lesson Launching, Test & Evaluations, and Materials lists appears.
6 In the Enrollment Details view, click Launch.
If the course is AICC or SCORM, the course is launched from the Lessons list. The user select a lesson and clicks Launch.
NOTE: If the lesson is a block, Launch is inactive as blocks are not launchable.
If the course is not an AICC- or SCORM-format course, from the Course list select the option that best fits your situation.
Depending on how the training organization has configured its system, the course may start immediately, or your browser may display a new page that provides start capabilities.

Course Registration, Withdrawal, and Completion ■ Enrolling in a Curriculum andViewing Curriculum Progress
Siebel Training Guide Version 7.7 ■ 129
Enrolling in a Curriculum and Viewing Curriculum Progress If a training user is seeking a professional certification or a degree that requires that the user take several training courses, the user can enroll in a curriculum which tracks progress. There is no fee associated with curriculum enrollment. However, the courses that make up the curriculum may have fees.
This task is a step in Process of Registration, Withdrawal, and Completing Courses on page 120.
Enrolling in a CurriculumUse the following procedure to enroll in a curriculum.
To enroll in a curriculum
1 Log in to the Training site as a registered user or a new user.
2 On the Training home page, locate the Find Training section of the Learning Center, and click either the Find Curriculum Paths or the Find Curriculums By Job Role links.
■ If you click the Find Curriculum Paths, the Curriculums list appears.
■ If you click the Find Curriculums By Job Role link, the Curriculums By Job Role list appears.
3 In the Curriculums list, select the curriculum, and then click the link in the Name field.
The Curriculum Details view, which includes the Curriculum Steps list and the Materials list, appears.
4 Click Enroll to enroll in the curriculum.
The My Curriculums list appears, listing the curriculum you selected.
Viewing Progress Within a CurriculumEnd users can view their progress towards completing the courses in a curriculum.
To view your progress within a curriculum
1 Log in to the Training Web site with the user ID and password you used when you enrolled in the curriculum.
2 Click the My Training link in the left navigation bar.
3 Click the My Curriculums link.

Siebel Training Guide Version 7.7
Course Registration, Withdrawal, and Completion ■ Withdrawing from a Course, Class, or Curriculum
130 ■
4 In the My Curriculums list, select the curriculum, and then click the link in the Name field.
The following table describes the fields in the My Curriculum Details form.
Withdrawing from a Course, Class, or Curriculum If end users have registered for a course, class, or curriculum that is offered using Training, but later need to cancel the registration, Siebel Training allows them to do so.
NOTE: Many organizations specify the last date on which a cancellation is accepted. You cannot automatically cancel your registration after this date has passed; in order to cancel, you must obtain special approval from the instructor or training administrator.
Withdrawing from a Course or ClassPerform the steps in the following procedure to withdraw from a media-based course or live/classroom class.
Field Comments
Name Name of the curriculum.
Enrolled The date the user enrolled in curriculum.
Status Values can be Not Started, In Progress, or Completed.
Description A brief description of the curriculum.
Minimum Points
The minimum points that have to be acquired by a student to complete the curriculum. This is based on the sum of the points for courses that are set as required in the curriculum.
Maximum Points
The maximum number of points that can be obtained if a student successfully completed all the courses (required and optional).
Completed The date the user completed all steps in the curriculum.
Total Points The total number of points earned.
Progress Calculated percentage value that represents the minimum completion points (sum of the minimum step points) divided by the sum of the points of all completed courses, limited by the defined weight of the step.
For example, for a step with a minimum point value of 40, the maximum point value for the step as applied to the progress value would be 40; any additional course points accrued beyond 40 would apply only to the Depth calculation.
As a result, the progress calculation indicates how close an individual is to completing the minimum requirements for the curriculum, while the Depth value indicates how completely the individual explored the curriculum.
Depth Calculated percentage value representing the sum of the points of all completed courses divided by the value of minimum requirements and completion points.

Course Registration, Withdrawal, and Completion ■ Withdrawing from a Course, Class,or Curriculum
Siebel Training Guide Version 7.7 ■ 131
To cancel your registration for an upcoming course or class
1 Log in to the Training Web site with the user ID and password you used to register for the course or class.
2 On the Training home page, click the My Training link in the left navigation bar, and then click the link for My Training Enrollments.
3 Click one of the following links, depending on the type of training you want to cancel:
■ My Media Training
■ My Live/Classroom Training
The My Media Training and My Live/Classroom Training lists appear.
4 Click the link in the Course Name field for the course or class you want to drop.
A My Course Details or My Class Details form appears. The information about the selected course or class appears.
5 In the header, click Drop to withdraw.
■ If cancellation are allowed for the course or class at the time you click Drop, your cancellation is accepted automatically, and the course or class no longer appears.
■ If cancellation are not allowed for the course or class at the time you intend to cancel (the cancellation deadline has passed), the Drop button is not visible from the Course Details page. You can check the cancellation period for a class by viewing the Cancellation Deadline field in the Class Details view page. The Cancellation Deadline is the date on which users no longer have access to the Drop button for course cancellation.
Withdrawing from a CurriculumIf end users have enrolled in a Training curriculum, but later need to cancel the enrollment, they can drop the curriculum in much the same way they can drop a course or class.
To withdraw from a curriculum
1 Log in to the Training Web site.
2 On the Training home page, click the My Training link in the left navigation bar, and then click the My Curriculums link to display the My Curriculums list.
3 Query for the curriculum, and then click the link in the Name field.
4 On the My Curriculum Details form, click Drop.
The curriculum is removed from the My Curriculums list.
NOTE: If a user wants to enroll in a curriculum after canceling, that user must contact the training administrator to change the status from Cancelled to In Progress.

Siebel Training Guide Version 7.7
Course Registration, Withdrawal, and Completion ■ Withdrawing from a Course, Class, or Curriculum
132 ■

Siebel Training Guide Version 7.7 ■ 133
14 Taking Tests, Tracking Progress, and Viewing Transcripts
This chapter covers how an end-user can take tests, track progress, and view transcripts using Siebel Training and how managers can asses a direct report�s progress and view and approve third-party training for employees. It includes the following topics:
■ Process of Taking Tests, Tracking Progress, and Viewing Transcripts on page 133
■ Taking a Skills Test on page 134
■ Reviewing Skills Test Results on page 135
■ Checking the Transcript on page 136
■ Assessing Training Progress of Employees (Manager) on page 137
■ Viewing and Approving Third-Party Training on page 139
Process of Taking Tests, Tracking Progress, and Viewing TranscriptsThe following list shows the procedures that end users typically perform when working with tests and transcripts, and the procedures that managers perform when assessing the progress of direct reports. Your company may follow a different process according to its business requirements.
End-User Procedures1 Taking a Skills Test on page 134
2 Reviewing Skills Test Results on page 135
3 Checking the Transcript on page 136
Manager Procedures■ Assessing Training Progress of Employees (Manager) on page 137
■ Viewing and Approving Third-Party Training on page 139

Siebel Training Guide Version 7.7
Taking Tests, Tracking Progress, and Viewing Transcripts ■ Taking a Skills Test
134 ■
Taking a Skills Test When an end user takes a Training course or class, one or more skills tests may be required to determine whether the user has mastered the concepts presented in the course. The instructor may direct the student to take skills tests at a specific time, or the student may choose to take associated tests at a time that is convenient.
NOTE: Users may not be able to take a skills test more than once.
Skills tests can include multiple-choice questions with single or multiple correct answers, true-or-false questions, and questions for which you must supply a short text answer or a text essay. Multiple-choice questions and true-or-false questions are automatically graded immediately. An instructor or another individual in the training organization must grade questions that require the test takers to supply an answer.
This task is a step in Process of Taking Tests, Tracking Progress, and Viewing Transcripts on page 133.
To take a skills test
1 Log in to the Training Web site.
2 Click the My Training screen tab, and then click the My Training Enrollments link.
Two sections appear on the page:
■ My Media Training. This section lists Web-based and CD-ROM-based courses.
■ My Live/Classroom Training. This section lists Instructor-Led classes.
3 Locate the course in the appropriate section list, and click the link in the Course Name field.
4 On the My Course Details page, scroll down to the Tests Evaluation list, and click the Take Test button for the appropriate test.
Multiple tests can be associated with one course or class.
5 In the Skills Test page, answer each test question, and then click Submit.
Test results may or may not be available for immediate viewing, depending on the kind of questions included in the test, and the type of scoring that the training administrator has set for the test. For example, test results for Web-based courses can be viewed a short time after clicking Submit.
If test results are not available within an expected amount of time, ask the instructor when the results are expected to be compiled.
Related TopicReviewing Skills Test Results on page 135

Taking Tests, Tracking Progress, and Viewing Transcripts ■ Reviewing Skills TestResults
Siebel Training Guide Version 7.7 ■ 135
Reviewing Skills Test Results After a user has completed a skills test, the user can view test results using the following procedure.
This task is a step in Process of Taking Tests, Tracking Progress, and Viewing Transcripts on page 133.
To view the results of a skills test you have taken
1 Log in to the Training Web site.
2 Click the My Training link.
3 From the My Training page, click the My Test Scores link.
4 In the My Test Scores list, query for the test, and review the information.
The following table describes the fields in the test score record.
Field Comments
Name The name of the test taken. Click the link to view more test details.
Status This value can be Graded, Ungraded, or Pending. If the value of the Status field is Pending, the test has been partially graded, but the point value may change after text and essay questions have been manually graded.
Final Score The score achieved on the test.
Passed This field shows no value (blank) if the test was not passed, and a check mark, if the test is completed successfully.
Pass Score % The score required to pass the test.
Test Date The date on which the test was taken.

Siebel Training Guide Version 7.7
Taking Tests, Tracking Progress, and Viewing Transcripts ■ Checking the Transcript
136 ■
Checking the Transcript End Users can view information about the training courses, classes, and tests they have completed.
This task is a step in Process of Taking Tests, Tracking Progress, and Viewing Transcripts on page 133.
To view your transcript
1 Log in to the Training Web site.
2 Click the My Training link, and then click the My Transcripts link.
The My Transcript list appears, showing all courses that were completed successfully. For each course, other details are included such as the format, the registration number, the dates on which the user enrolled and completed each course, and the number of units earned.
To view descriptive information about a completed training course or class
1 Log in to the Training Web site.
2 Click the My Training link, and then click My Transcripts.
3 In the My Transcript list, find the appropriate record for a course or class, and click the ink in the Registration # field to show details for the course.
Taking Tests, Tracking Progress, and Viewing Transcripts ■ Assessing TrainingProgress of Employees (Manager)
Siebel Training Guide Version 7.7 ■ 137
Assessing Training Progress of Employees (Manager)Managers can use the Training Web site to view training-related progress information for direct reports, if the following conditions are met:
■ The manager must be registered in the Siebel Training system with a Siebel responsibility that gives the manager access to the Training Managers screen.
■ The Siebel position is set to show that the manager supervises other Training users.
For general information about user access to Siebel applications, see Security Guide for Siebel eBusiness Applications.
This task is a step in Process of Taking Tests, Tracking Progress, and Viewing Transcripts on page 133.
Employee Training Information Available to ManagersManagers can view the following training information associated with direct reports.
■ Information about the classes and courses in which employees have enrolled.
■ Status of each enrollment (Confirmed, Pending, Waiting List, Cancelled, Completed, and so on).
■ Scores for any skills tests taken by employees that are managed.
■ Information about the curriculum paths in which direct reports have enrolled.
■ Progress of the employees in the curriculum paths.
Viewing Employee Enrollments and Test ScoresThe following procedures describe how to view information about employees that you manage.
To view employee enrollment information and test scores
1 Log in to the Training Web site.
2 Click the My Team�s Training link.
On the Direct Reports page, the following links appear:
■ My Team�s Curriculums
■ My Team�s Enrollments
■ My Team�s 3rd Party Training
3 Click the My Team�s Enrollments link.
4 In the My Team�s Enrollments list, select a record, and then click the link in the Registration # field.
The following additional information appears:
■ Description of the course or class associated with the selected enrollment.

Siebel Training Guide Version 7.7
Taking Tests, Tracking Progress, and Viewing Transcripts ■ Assessing Training Progress of Employees (Manager)
138 ■
■ Information about tests associated with the course or class.
■ The team member�s scores for the tests.
Viewing Employee Curriculum Paths and ProgressThe following procedure describes how a manager can view the curriculum progress of a direct report. A curriculum is a specific set of training offerings that address a particular goal, such as earning a certification or degree. Curriculum paths are established by the training organization.
To view curriculum information and progress for your employees
1 Log in to the Training Web site.
2 Click the My Team�s Training link.
The following links appear:
■ My Team�s Curriculums
■ My Team�s Enrollments
■ My Team�s 3rd Party Training
3 Click the My Team�s Curriculums link.
A summary of curriculum enrollment information for all direct reports appears.
4 In the My Team�s Curriculums list, locate the curriculum enrollment, and click the link in the Name field.
The My Team�s Curriculum Progress page appears, detailing the progress of the direct report in the selected curriculum. The details include:
■ Status of the report�s progress through the curriculum, such as Not Started, In Progress, or Completed.
■ Weighted completion percentage, based on the number of curriculum steps or courses completed.
■ Date the direct report enrolled in the curriculum.
■ Date the direct report completed the curriculum, if applicable.
In addition, information appears about each course in the curriculum:
■ The percentage weight given to the course in the curriculum.
■ The direct report�s status for the course, such as Confirmed, Canceled, or Completed.

Taking Tests, Tracking Progress, and Viewing Transcripts ■ Viewing and ApprovingThird-Party Training
Siebel Training Guide Version 7.7 ■ 139
Viewing and Approving Third-Party TrainingThird-party training is training from a source other than what the organization has set up. Siebel Training allows employees to enroll in and track external training in the same system that hosts courses developed and deployed by the organization. Employees receive training credits for the third-party training, and managers can monitor and approve the third-party training.
This task is a step in Process of Taking Tests, Tracking Progress, and Viewing Transcripts on page 133.
Related Topic
Finding Available Training on page 113
To view and approve enrollment information for direct reports
1 Log in to Training Web site.
2 Click the My Team�s Training link.
3 Click the My Team's 3rd Party Training link.
A summary of third-party enrollment information for direct reports appears.
4 Select the third-party enrollment record, and then click the link in the Name field.
5 View enrollment details for the course, and then click Approve or Decline.
If Approve is selected, the user�s course status changes from Pending-Approve to Completed, and the course becomes part of the user�s transcript.
If Decline is selected, the user�s course status changes from Pending-Approve to Declined. The course becomes part of the user�s transcript but shows a status of Declined.

Siebel Training Guide Version 7.7
Taking Tests, Tracking Progress, and Viewing Transcripts ■ Viewing and Approving Third-Party Training
140 ■

Siebel Training Guide Version 7.7 ■ 141
A Siebel Training Workflow Processes
This appendix lists the workflows processes for Siebel Training. It includes the following topic:
Siebel Training Workflow Processes on page 142

Siebel Training Guide Version 7.7
Siebel Training Workflow Processes ■ Siebel Training Workflow Processes
142 ■
Siebel Training Workflow ProcessesThe following list shows the preconfigured workflow processes that must be active to use Siebel Training. After installation is complete, administrators should perform the following tasks:
1 Verifying and Activating Training Workflow Processes on page 14
2 Configuring Workflow Policies for Training Email Notification on page 15
Training Workflow ProcessesTable 4 shows the eTraining, eSales, and User Registration workflow processes that must be activated. User Registration workflows are used for a standalone Training application.
Table 4. Training Workflow Processes
Process Name Group
Credit Check - Orders eSales
Credit Check - Quotes eSales
eSales - Add To Template Process eSales
eSales - Approve Order Process eSales
eSales - Authorize Order Process eSales
eSales - Cancel Order Process eSales
eSales - Checkout Process eSales
eSales - Complete Checkout Process eSales
eSales - Current User Type eSales
eSales - Delete Old Anonymous Quotes eSales
eSales - Display Error Process eSales
eSales - Edit Quote Process eSales
eSales - Enter Payment Details Process eSales
eSales - Enter Shipping Details Process eSales
eSales - Save Account Shipping Address eSales
eSales - Login View eSales
eSales - Modify Order Process eSales
eSales - Order Confirmation View eSales
eSales - Order Quote Process eSales
eSales - Power Customer Quotes View eSales
eSales - Reject Order Process eSales

Siebel Training Workflow Processes ■ Siebel Training Workflow Processes
Siebel Training Guide Version 7.7 ■ 143
eSales - Reorder Process eSales
eSales - Reprice Process eSales
eSales - Save Cart Process eSales
eSales - Save Credit Card eSales
eSales - Save Shipping Address eSales
eSales - Set Primary Account Address eSales
eSales - Setting PO Status eSales
eSales - Shopping Cart View eSales
eSales - Silent Authorize Order Process eSales
Send Order Accepted Email (eSales) eSales
Send Order Awaiting Approval Email (eSales) eSales
Send Order Failed Email (eSales) eSales
Send Order Rejected Email (eSales) eSales
Send Order Shipped Email (eSales) eSales
Shipping Calculation Process eSales
Class Confirmation Email (eTraining) eTraining
Class Reminder Email (eTraining) eTraining
Class Waitlisted Email (eTraining) eTraining
Course Confirmation Email (eTraining) eTraining
eTraining - Approve Third Party Registration eTraining
eTraining - Checkout Enrollment Process eTraining
eTraining - Class Enrollment Process eTraining
eTraining - Class Reg Enroll Process eTraining
eTraining - Course Enrollment Catalog Process eTraining
eTraining - Course Enrollment Process eTraining
eTraining - Course Reg Enroll Process eTraining
eTraining - Decline Third Party Registration eTraining
eTraining - Drop Class Process eTraining
eTraining - Drop Course Process eTraining
eTraining - Drop Enrollment Process eTraining
eTraining - Goto Shopping Cart Process eTraining
Table 4. Training Workflow Processes
Process Name Group

Siebel Training Guide Version 7.7
Siebel Training Workflow Processes ■ Siebel Training Workflow Processes
144 ■
eTraining - Show Course Details Process eTraining
eTraining - Third Party Registration - Submit eTraining
eTraining Enrollment Message Process eTraining
eTraining Enrollment Process eTraining
eTraining Leftover Course View eTraining
Show Course Detail (Int Prod) Process eTraining
Show Course Detail Add To Cart Process eTraining
Show Course Detail Favorite List eTraining
Show Course Detail Quote Comparison eTraining
Show Course Detail Quote Template eTraining
User Registration Forgot Password Process User Registration
User Registration Initial Process User Registration
User Registration Process User Registration
User Registration SubProcess User Registration
Table 4. Training Workflow Processes
Process Name Group

Siebel Training Guide Version 7.7 ■ 145
B Lists of Values (LOVs) for Training
This appendix describes lists of values (LOVs) that are specific to Siebel Training. You can modify these LOVs by navigating to Administration > Data > List of Values.
Table 5 describes the purpose of each Training-specific LOV. See Applications Administration Guide for specific instructions on modifying or adding LOVs.
Table 5. Lists of Values for Siebel Training
LOV Purpose
LOCATION_STATUS Status of a location
LOCATION_URL_STATUS Status for location links
LOCATION_URL_TYPE Type of location link
TRAINING_ACTION_TYPE Links for browsing and course enrollment
TRAINING_AUD_TYPE Job roles for courses
TRAINING_CATEGORY_TYPE Categories of your choosing that you can use to group training courses together as needed
TRAINING_CLASS_STATUS Status of a particular class
TRAINING_COURSE_CRITERIA How course completion is defined
TRAINING_COURSE_FORMAT Type of course being taught
TRAINING_COURSE_LAUNCH_STATUS Status of course launch links
TRAINING_COURSE_PERSON_STATUS Status values for user enrollment
TRAINING_COURSE_REL Relationships between associated courses
TRAINING_CRSE_AUD_TYPE Audiences for courses
TRAINING_CRSE_LIT_REL Course literature types
TRAINING_CRSE_SKILL_LEVEL Skill levels
TRAINING_CRSE_STATUS Status of the course
TRAINING_CURR_AUD_TYPE Audiences for curriculum paths
TRAINING_CURR_CATEGORY_TYPE Categories for curriculum paths
TRAINING_CURR_CRSE_TYPE Relationship between the course and curriculum, such as optional or required
TRAINING_CURR_JOB_TYPE Job roles for curriculum paths
TRAINING_CURR_LIT_REL Curriculum literature types

Siebel Training Guide Version 7.7
Lists of Values (LOVs) for Training ■
146 ■
TRAINING_CURR_PER_STATUS Levels of completeness within curriculum paths
TRAINING_CURR_TYPE Curriculum type
TRAINING_LOC_REGION Regions for grouping training locations; useful for searches by location
TRAINING_LOC_ROOM_TYPE Types of rooms where training may be held
TRAINING_LOC_TYPE Types of venues where training may be held, such as training centers, convention centers, and hotels
TRAINING_QUES_CAT Question categories
TRAINING_QUES_TYPE Types of questions available for use in skills tests
TRAINING_REG_STATUS Test results status values
TRAINING_STEP_PERSON_STATUS Status for a curriculum step
TRAINING_TESTRUN_STATUS Test completion status values
TRAINING_TEST_SCORING_TYPE Test scoring methods
TRAINING_TEST_STATUS Test status values
TRAINING_TEST_TYPE Test types
TRAINING_AICC_EXPIRY_ACTION Valid keywords for AICC time_limit_action field
TRAINING_AICC_SCORM_CREDIT Valid keywords for AICC/SCORM credit field
TRAINING_AICC_SCORM_ENTRY Valid keywords for AICC/SCORM status field flags
TRAINING_AICC_SCORM_STATUS Valid keywords for AICC/SCORM status field
TRAINING_CRSE_CONTENT_TYPE Training course content type
TRAINING_CRSE_LAUNCH_TYPE Course launch type - launch or download
TRAINING_CRSE_SPONSOR Training course sponsor within the organization
TRAINING_DISTRIBUTION_METHOD Method of distribution for Training Library file
TRAINING_LESSON_LAUNCH_TYPE Valid keywords for AICC/SCORM lesson launch types
TRAINING_LS_DATA_TYPE Type code for AICC/SCORM data record containing comments
TRAINING_LS_RUNTIME_DATA_TYPE Type code for AICC/SCORM data record containing lesson suspend data
TRAINING_TEST_QUES_STATUS Status of test question
REGION_TYPE_CD Type of region
REGION_STATUS_CD Status of region
Table 5. Lists of Values for Siebel Training
LOV Purpose

Siebel Training Guide Version 7.7 ■ 147
C AICC and SCORM File Structure
This appendix provides information on the files that Siebel Training must access for AICC and SCORM course import. It includes the following topics:
■ CRS (Course File) on page 147
■ AU (Assignable Unit File) on page 148
■ DES (Descriptor File) on page 149
■ CST (Course Structure File) on page 149
Related TopicsChapter 7, �Importing an AICC or SCORM Course�
AICC or SCORM Course System Processes on page 153
CRS (Course File) The CRS file contains information about the course as a whole, and defines the course. The course information must include all of the fields in the following list, except optional fields.
This file contains the following information:
[Course]Course_CreatorCourse_IDCourse_SystemCourse_TitleLevelMax_Fields_CST Total_AUsTotal_BlocksVersionMax_Fields_ORT (optional)Total_Complex_Obj (optional)Total_Objectives (optional)
[Course Behavior]Max_Normal
[Course Description]

Siebel Training Guide Version 7.7
AICC and SCORM File Structure ■ AU (Assignable Unit File)
148 ■
CRS Example[Course]Course_Creator = SmartForceCourse_ID =MO97A03Course_System = SmartForce StylusCourse_Title =Microsoft Office 97: Advanced Access 97Level = 1Max_Fields_CST = 2Total_AUs = 1Total_Blocks = 1Version = 3.01
[Course_Behavior]Max_Normal = 1
[Course_Description]To demonstrate how to create, run, and customize queries and macros in Access 97
AU (Assignable Unit File)The AU file contains information relating to the assignable units (lessons) in the course. Each AU has its own record (row in the table). The information about the AU should be linked to the title and description.
AU files have the fields in the following list. The fields that are designated as optional are not required to meet AICC compliance. Some AU files may not contain the optional fields.
System_IDCommand_LineFile_NameCore_VendorType (optional)Max_Score (optional)Mastery_Score (optional)Max_Time_Allowed (optional)Time_Limit_Action (optional)System_Vendor (optional)
Example AU File"System_ID","Type","Command_Line","File_Name","Max_Score","Mastery_Score","Max_Time_Allowed","Time_Lmit_Action","System_Vendor","Core_Vendor","Web_Launch","AU_Password""A0000","COURSE","","http://127.0.0.1/cbtlib/mo97a03/mo97a03.htm",100,70,"","","","","",""
The following example shows an AU called System_ID=A000, which has the following attributes:
Type = COURSECommand line = noneFile Name = http://127.0.0.1/cbtlib/mo97a03/mo97a03.htm

AICC and SCORM File Structure ■ DES (Descriptor File)
Siebel Training Guide Version 7.7 ■ 149
Max Score = 100Mastery Score = 70Core Vendor = none
DES (Descriptor File) The DES file contains a list of every course element in the course. For each AU that is included in the .cst file, there must be a description for it in the .des file.
Each course element (Assignable Units) is defined in this file with the following attributes so that it can be associated with the information provide in the AU file.
System_IDDeveloper_IDTitleDescription (optional)
Example DES File"System_ID","Title","Description","Developer_ID""A0000","Microsoft Office 97: Advanced Access 97","To demonstrate how to create, run, and customize queries and macros in Access 97","SF1_MO97A03_A0000""J0100","Select queries","To introduce you to queries in general and select queries in particular in Microsoft Access","SF1_MO97A03_O0100""J0200","Working with queries","To introduce you to total, crosstab, and action queries","SF1_MO97A03_O0200" "J0300","Automating with macros
This example shows a course with four course elements. The first element is the AU with System_ID = A0000, which was defined in the AU file example and has the title Microsoft Office 97: Advanced Access 97.
CST (Course Structure File)The Course Structure file contains basic data on how the course is structured. Siebel Training uses the simplest structure of this file, which consists of only one or more Assignable Units (AUs).
Example CST File"block","member""root","A0000"
In this example, the AU System ID = A000 is the only AU in this course. If there are multiple entries, the course has multiple AUs.

Siebel Training Guide Version 7.7
AICC and SCORM File Structure ■ CST (Course Structure File)
150 ■

D Siebel Training Processes
This appendix provides graphical flowcharts that illustrate Siebel Training process flows and is intended as a supplement to related chapter discussions. It includes the following topics:
■ Example Process Flow for Setting Up Training Courses on page 152
■ The AICC Specification and Siebel Training on page 55
■ AICC or SCORM Course System Processes on page 153
■ AICC Course Launch Processes on page 154
■ SCORM Course Launch Process on page 155
Related TopicsChapter 5, �Setting Up Training Courses�
Chapter 7, �Importing an AICC or SCORM Course�
Appendix C, �AICC and SCORM File Structure�
Siebel Training Guide Version 7.7 ■ 151

Siebel Training Processes ■ Example Process Flow for Setting Up Training Courses
Example Process Flow for Setting Up Training CoursesFigure 5 illustrates a typical administrator process flow when setting up Siebel Training Courses. For more information, see Chapter 5, �Setting Up Training Courses.�
As Figure 5 shows, the administrator performs the following steps:
1 Determines if the course exists, and if so, modifies course details.
2 Determines if an AICC/SCORM course should be imported.
3 Creates new courses.
Figure 5. Administrator Process Flow for Course Setup
Siebel Training Guide Version 7.7152 ■

Siebel Training Processes ■ Example Process Flow for Setting Up Training Courses
4 Creates topics for the courses.
5 Creates course objectives.
6 Associates skills with the courses.
7 Specifies course prerequisites
8 Associates materials with each course
9 Creates course categories
10 If course bundles are required, creates training bundles
11 If Distance Learning sessions are required, specifies link information.
12 If instructor-led classes are required, specifies the class schedule.
13 If customer or partner training is being developed, set up course pricing.
AICC or SCORM Course System ProcessesWhen creating a new AICC or SCORM course, the administrator performs the following steps:
1 Browses directories to locate AICC or SCORM files.
2 Imports the files into the Learning Management System (LMS).
The following system processes occur:
3 The LMS imports the files and creates the file structure.
4 The data is stored in the Siebel database.
5 The LMS populates the relevant fields.
When the system processes are complete, the administrator:
6 Edits the course details and adds additional information.
7 Reviews the end user performance data.
Siebel Training Guide Version 7.7 ■ 153

Siebel Training Processes ■ Example Process Flow for Setting Up Training Courses
AICC Course Launch ProcessesFigure 6 illustrates the system processes that occur when an AICC course is launched.
As Figure 6 shows, the following processes occur when launch is clicked from the Course Details Lesson view:
1 The Learning Management System (LMS) generates the URL, and performs an HTTP call to the Content system.
2 Content starts up, and sends a request for detailed information.
Figure 6. AICC Course Launch System and Content Processes
Siebel Training Guide Version 7.7154 ■

Siebel Training Processes ■ Example Process Flow for Setting Up Training Courses
3 The LMS generates data. Based on what Content is requesting (name and value pairs), Siebel Training responds with the data from the Siebel database.
4 The LMS sends the response. Based on the information gathered, Training sends the information back as HTTP.
5 Content processes the data and starts to play the training content.
6 Contact tracks data as the user interacts with the training content.
7 When the user finishes a session, the LMS interprets and stores the data. Training receives the Content information, interprets the information, and maps it to the database.
SCORM Course Launch ProcessFigure 7 illustrates the system processes that occur when a SCORM course is launched.
As Figure 7 shows, the following processes occur when launch is clicked from the Course Details Lesson view:
1 The LMS determines the SCO course to launch, initializes the SCO, and launches it.
Figure 7. SCORM Course Launch
Siebel Training Guide Version 7.7 ■ 155
Siebel Training Processes ■ Example Process Flow for Setting Up Training Courses
2 The API adapter is initialized, and processes information. The LMSInitialize API initializes the communication between the SCO and API Adapter. When the student launches the course, the SCO (the course) finds the API Adapter, and initiate the communication with the API Adapter.
3 SCO sends information to the LMS. In some cases, the SCO will need to send information to the LMS about the learner's status. For example, if the student finishes the course, the LMS will want to know the status for this student. The LMS updates the information.
4 The LMSFinish API completes the communication between the SCO and API Adapter. When the student has completed the course, the SCO lets the API adapter know that it is finished. SCO sends the LMSFinish API to communicate the completion.
Siebel Training Guide Version 7.7156 ■

Siebel Training Guide Version 7.7 ■ 157
Index
AADL (Advanced Distributed Learning
Initiative), and SCORM 54administrator
AICC launch processes 154AICC or SCORM course import system
processes 153class, assigning to a training location 27class, changing a location 27class, removing from a location 27courses process flow example 152delegated administrator visibility,
verifying 19enrolling students as delegated
administrator 98hotels, specifying near training 26links, adding to a training location 26nonmanagerial employee, setting up as
delegated administrator 19region hierarchy administration 22region, creating a hierarchy 23region, defining 22rescheduling conflicting classes 28scheduling conflicts, resolving at a
location 27SCORM course launch process 155setup tasks 13subregions, creating for a region 23training enrollments, canceling 99training locations, about defining 23
Advanced Distributed Learning Initiative, and SCORM 54
AICCAICC launch processes 154AICC or SCORM course import system
processes 153AICC file structure
AU (assignable unit file), about 148AU (assignable unit file), example 148CRS (course file), about 147CRS (course file), example 148CST (course structure file), about 149DES (descriptor file), about 149
AICC formatadministering course scenario 58administering, process for 59AICC course, importing 63
AICC data model support 55AICC organization and Web site 54AICC specification and Siebel Training 55EAI components groups, enabling 59importing, about 59lesson launch and run-time data exchange,
using HACP or API 56standards, about 54system preferences, setting 60
AICC HACP adaptercross-server security issue, about 60lesson content and training on different
servers 62lesson content and training on the same
server 61answers
creating for questions 80viewing answers for a question 82
API protocolAICC lesson launch and run-time data
exchange 56SCORM lesson launch using API
protocol 57AS (assignable unit file)
about 148example 148
attendeecanceling course enrollment 99
automatic notification messagesabout 14
Aviation Industry CBT CommitteeSee AICC format
Ccancellations, working with
process of canceling 90training enrollments, canceling 99
catalogSee Siebel Catalog
categorized courses45
catalog categories, defining 45training catalog, about creating 44training catalog, creating 45
CD-ROM courseregistering customers 96registering for 120

Index ■ C
Siebel Training Guide Version 7.7158 ■
class schedulesclass details, specifying 51class sessions, scheduling for a class 52classes and class sessions, scheduling 50process of setting up 50
class sessionsclass details, specifying 51class, scheduling for 52process of setting up 50scheduling, and class sessions 50
classescanceling enrollments 99course and class registration information,
viewing 93current enrollments, viewing 91curriculum enrollments information,
viewing 94location, changing 27location, removing from a 27partner enrollments, viewing 94registering customers for scheduled
class 96registering customers for self-paced
course 96registering training customers, about 95registration status, verifying 98scheduled classes, adding enrollments 91scheduled classes, viewing enrollment
information 92self-paced courses, adding enrollments 90self-paced courses, viewing enrollment
information 92training location, assigning to 27training offerings, grouped for
registration 120withdrawing from a class 130
classroomsclass, assigning to a training location 27class, changing a location 27class, removing from a location 27hotels, specifying near training 26links, adding to a training location 26rescheduling conflicting classes 28scheduling conflicts, resolving at a
location 27competency profile, about 116completed class
descriptive information, viewing 136completing training courses
process of completing courses 120conflicts
rescheduling conflicting classes 28scheduling conflicts at a location,
resolving 27
contactsnonemployee contacts, about registering for a
course 120registering for a class, about 90
coursesEAI component groups, enabling for AICC/
SCORM 59importing formats 59media-based course, registering for 120setting up, administrator process flow 152system preferences, setting 60training offerings, grouped for
registration 120CRS (course file)
about 147example 148
CST (course structure file)about 149
curriculumavailable curriculum paths, finding 114curriculum elements 68curriculum enrollments information,
viewing 94curriculum enrollments, adding 73curriculum enrollments, viewing 72curriculum materials, specifying 74curriculum record, deleting a record 72curriculum record, modifying 72curriculum record, modifying after
release 75curriculum record, undoing changes before
release 72curriculum steps, specifying 70curriculum steps, specifying courses 71curriculum, about enrolling and viewing
progress 129curriculum, about reviewing materials
associated with curriculum 115curriculum, adding 68curriculum, enrolling 129curriculum, process of setting up 68curriculum, releasing to users 74curriculum, reviewing steps for each
curriculum 114curriculum, viewing your progress 129employee curriculum paths and progress,
viewing by managers 138training library materials, finding for a
curriculum 115withdrawing from 131withdrawing, about and canceling after last
acceptance date 130

Index ■ D
Siebel Training Guide Version 7.7 ■ 159
curriculum enrollmentsadding 73viewing 72
curriculum recorddeleting a record 72modifying 72undoing changes before release 72undoing modifying after release 75
customer deploymentsinstallation and configuration
requirements 12customers
training, setting up training for 47
Ddelegated administrator
nonmanagerial employee, setting up 19students, enrolling 98visibility, verifying 19
deletingcurriculum record 72test record 85training library record 32
deploymentsinstallation overview 12
DES (descriptor file), about 149distance-learning
courses, about 120scheduled class, registering for 122
downloading a training library file 33
EEAI component groups
AICC/SCORM, enabling for 59email notification
about messages 14workflow process, configuring for 15, 16
employeedelegated administrator visibility,
verifying 19delegated administrator, setting up 19
enrollingcurriculum, about enrolling and viewing
progress 129curriculum, enrolling 129curriculum, viewing your progress 129Pending-Approve enrollment status 124
enrollmentscurriculum enrollments, adding 73curriculum enrollments, viewing 72employee enrollment information and test
scores, viewing by managers 137
enrollments, working withcourse and class registration information,
viewing 93current enrollments, viewing 91curriculum enrollments information,
viewing 94partner enrollments, viewing 94process of enrolling 90registering customers for scheduled
class 96registering customers for self-paced
course 96registering training customers, about 95registration status, verifying 98reports, about generating 102reports, generating using Siebel
Analytics 103scheduled classes, adding enrollments 91scheduled classes, viewing enrollment
information 92self-paced courses, adding enrollments 90self-paced courses, viewing enrollment
information 92skill test questions, manually scoring 101skill tests, about manually viewing and
scoring 100skill tests, viewing results 100students, enrolling 98training enrollments, canceling 99
enterprise applicationlocating training screens 106
essay questions, manually scoring 101
Ffeatures, new 9footers and headers, creating for test
elements 82
HHACP protocol
using for lesson launch and run-time data exchange 56
headers and footerscreating for test elements 82
home page, entering training from 108hotels, specifying near training 26
Iimporting
AICC course 63AICC data model support 55packaged SCORM course 63SCORM course, and unpackaging 64

Index ■ L
Siebel Training Guide Version 7.7160 ■
informationSee training information
installinginstallation and configuration overview 12
Instructor-Led classclass details, specifying 51class sessions, scheduling for a class 52classes and class sessions, scheduling 50enrollments, canceling 99process of setting up class schedules and
sessions 50registering customers 96registration status, verifying 98registration, about training offerings 120scheduled class, registering for 122
Llesson launch
AICC lesson launch and run-time data exchange 56
SCORM lesson launch using API protocol 57
librarySee training library
linkscourse launching links, specifying 44training location, adding to 26
literaturecourse, specifying for 43curriculum literature, specifying 74
locationsSee training locations
LOVs for training, list and modifying 145, 147
Mmanager
employee curriculum paths and progress, viewing 138
employee enrollment information and test scores, viewing 137
employee training information available to managers 137
employee training progress, about accessing 137
third-party training, approving 139third-party training, submitting for
approval 124materials
curriculum materials, specifying 74curriculum, about reviewing materials
associated with curriculum 115library materials, viewing 115
training course materials, specifying 43training library materials, finding for a course
or curriculum 115media-based training
about 120registering for 120
messagesautomatics notification messages,
about 14multiple Learning Management Systems
(LMS)See SCORM format
My Skill Gaps pageaccessing 116My Skill Gaps, viewing 117recommended training, accessing 117
My Skills Development sectionaccessing 116My Skill Gaps, viewing 117recommended training, reviewing 117
My Training Enrollments information, viewing 127
Nnew features 9nonemployee contacts
about registering for a course 120
Ppackaged SCORM course, importing 63partner deployments
partner enrollments, viewing 94preinstallation requirements 12
preferencessystem preferences, setting 60
prerequisite trainingoverriding 96specifying 42
progress, trackingemployees training information available to
managers 137employees training progress, about accessing
by managers 137process of taking tests 133
Qquestion pools
answers, viewing for a question 82creating 81finished test, previewing with questions 82questions, verifying appear in pool 82tests, creating from questions and
pools 82

Index ■ R
Siebel Training Guide Version 7.7 ■ 161
questionsSee test questions
Rregion
See training regionsregion hierarchy administration
about 22class, assigning to a training location 27class, changing a location 27class, removing from a location 27hotels, specifying near training 26links, adding to a training location 26region, creating a hierarchy 23region, defining 22rescheduling conflicting classes 28scheduling conflicts, resolving at a
location 27subregions, creating for a region 23training locations, about defining 23
registered contacts, about registering for a class 90
registeringcourse and class registration information,
viewing 93curriculum enrollments information,
viewing 94curriculum, about enrolling and viewing
progress 129curriculum, enrolling 129curriculum, viewing your progress 129media-based course, registering for 120My Training Enrollments information,
viewing 127registering customers for scheduled
class 96registering customers for self-paced
course 96registration status, verifying 98scheduled class, registering for 122scheduled classes, viewing enrollment
information 92self-paced courses, viewing enrollment
information 92Siebel Catalog, using to register for
training 125training customers, about 95training offerings, about 120training registration, process of 120Web-based course, launching 128withdrawing from a course or class 130withdrawing from a curriculum 131
withdrawing, about and canceling after last acceptance date 130
releasing curriculum to users 74reports, working with
generating, about 102process of working with reports 90Siebel Analytics, using to generate
reports 103results
employees training information available to managers 137
employees training progress, about accessing by managers 137
skill test results, reviewing 135run-time data exchange
using HACP and API protocols 56
Sscheduled classes
course and class registration information, viewing 93
current enrollments, viewing 91curriculum enrollments information,
viewing 94enrollment information, viewing 92enrollments, adding 91partner enrollments, viewing 94registering customers for scheduled
class 96registering for 122registering training customers, about 95registration status, verifying 98self-paced courses, adding enrollments 90
schedulesSee class schedules; class sessions
scheduling conflictsrescheduling conflicting classes 28resolving at a location 27
scoresviewing employee test scores by
managers 137scoring
manually scoring skill test questions 101SCORM format
administering course scenario 58administering, process for 59AICC course, importing 63AICC data model support 55AICC or SCORM course import system
processes 153AICC specification and Siebel Training 55course launch process 155cross-server security issue, about 60

Index ■ S
Siebel Training Guide Version 7.7162 ■
EAI component groups, enabling 59importing and unpackaging SCORM
course 64importing packaged SCORM courses 63importing, about 59lesson content and training on different
servers 62lesson content and training on the same
server 61lesson launch and run-time data exchange,
using API protocol 57lesson launch and run-time data exchange,
using HACP or API 56SCORM specification and Siebel
Training 57standards, about 54system preferences, setting 60Web site 54
screensTraining Administration screens, about 18Training Administration screens, navigating
to 18self-paced courses
course and class registration information, viewing 93
current enrollments, viewing 91curriculum enrollments information,
viewing 94enrollments, adding 90enrollments, canceling 99partner enrollments, viewing 94registering training customers 96registering training customers, about 95registration information, viewing 92registration status, verifying 98
sessionsSee class sessions
setup tasks, administrator 13Sharable Content Object (SCO)
about launching 57Sharable Content Object Reference Model
See SCORM formatSiebel Analytics
using to generate reports 103Siebel application
locating training screens 106Siebel Catalog
training, using to register for training 125using, about 116viewing 116
Siebel Training siteavailable curriculum paths, finding 114browsing anonymously 107
curriculum, about reviewing materials associated with curriculum 115
curriculum, reviewing steps for each curriculum 114
home page, entering with user ID 108logging in and visibility levels 107media-based course, registering for 120My Skill Gaps, viewing 117process of accessing 106recommended training, reviewing 117registration, about training offerings 120scheduled class, registering for 122Siebel Catalog, about using 116Siebel Catalog, viewing 116skills and development, accessing 116third-party training, submitting for
approval 124training information, process of
finding 112Training Learning Center, about 112training library materials, finding for a course
or curriculum 115training library materials, viewing 115training screens, locating within Siebel
application 106user ID and password, logging in with 109
skill testsadding a skills test 83answers, creating 80answers, viewing for a question 82descriptive information, viewing about
completed course or class 136employee curriculum paths and progress,
viewing by managers 138employee enrollment information and test
scores, viewing by managers 137employees training information available to
managers 137employees training progress, about accessing
by managers 137finished test, previewing with questions 82headers and footers, creating for test
elements 82manually viewing and scoring, about 100process of creating skill tests 79question pools, creating 81question pools, verifying questions
appear 82questions, creating 79questions, types of 78results, reviewing test results 135skill test questions, manually scoring 101skill test results, viewing 100skills test details, specifying 86

Index ■ T
Siebel Training Guide Version 7.7 ■ 163
skills test record, deleting 85skills test record, modifying 85tests, creating from questions and
pools 82transcript, viewing 136
skillsspecifying training skills 41
skills and developmentaccessing 116My Skill Gaps, viewing 117recommended training, reviewing 117
skills test recorddeleting a test record 85modifying a test record 85
studentsenrolling as delegated administrator 98
subregionscreating for a region 23
system preferences, setting 60
Ttest courses
course and class registration information, viewing 93
current enrollments, viewing 91curriculum enrollments information,
viewing 94partner enrollments, viewing 94registering customers for scheduled
class 96registering customers for self-paced
course 96registering training customers, about 95registration status, verifying 98scheduled classes, adding enrollments 91scheduled classes, viewing enrollment
information 92self-paced courses, adding enrollments 90self-paced courses, viewing enrollment
information 92students, enrolling 98training enrollment, canceling 99
test questionsadding a skills test 83answers, creating 80answers, viewing for a question 82finished test, previewing with questions 82headers and footers, creating for test
elements 82process of creating test questions 79question pools, creating 81question pools, verifying questions
appear 82
questions, creating 79skills test details, specifying 86skills test questions, manually scoring 101skills test record, deleting 85skills test record, modifying 85tests, creating from questions and
pools 82types of 78
test results, working withprocess of 90
test scoresviewing employee test scores by
managers 137tests
adding a skills test 83answers, creating 80answers, viewing for a question 82finished test, previewing with questions 82headers and footers, creating for test
elements 82process of creating tests 79question pools, creating 81question pools, verifying questions
appear 82questions, creating 79questions, types of 78skills test details, specifying 86skills test record, deleting 85skills test record, modifying 85tests, creating from questions and
pools 82tests, taking
descriptive information, viewing about completed course or class 136
employee curriculum paths and progress, viewing by managers 138
employee enrollment information and test scores, viewing by managers 137
employees training information available to managers 137
employees training progress, about accessing by managers 137
process of taking tests 133results, reviewing test results 135transcript, viewing 136
text questionsmanually scoring 101
third-party trainingmanager, approving 139submitting for approval 124
Training Administration screenslist of 18navigating to 18

Index ■ T
Siebel Training Guide Version 7.7164 ■
training bundlesadding courses to bundle 46creating training bundles 46
training catalog45
catalog categories, defining 45creating for categorized courses 45creating, about for categorized courses 44viewing 116
training coursescompleting training courses, process of
training courses 120curriculum, about enrolling and viewing
progress 129curriculum, enrolling 129curriculum, viewing your progress 129media-based course, registering for 120My Training Enrollments information,
viewing 127scheduled class, registering for 122setting up, administrator process flow 152Siebel Catalog, using to register for
training 125third-party training, submitting for
approval 124training curriculum steps, specifying
courses 71training library materials, finding for a
course 115training offerings, grouped for
registration 120Web-based course, launching 128withdrawing from 130
training curriculumSee curriculum
training informationavailable curriculum paths, finding 114curriculum, about reviewing materials
associated with curriculum 115curriculum, reviewing steps for each
curriculum 114My Skill Gaps, viewing 117process of finding 112recommended training, reviewing 117Siebel Catalog, about using 116Siebel Catalog, viewing 116skills and development, accessing 116Training Learning Center, about 112training library materials, finding for a course
or curriculum 115training library materials, viewing 115
Training Learning Centerabout 112
training libraryabout and file formats 29downloading a training library file 33materials, process of adding 30materials, viewing 115training library file, deleting 32training library file, modifying 31training library file, modifying a file referenced
in 32training library file, undoing changes 32training library materials, finding for a course
or curriculum 115training record, adding 30URL, changing in a record 32
training locationsclass, assigning to a training location 27class, changing a location 27class, removing from a location 27hotels, specifying near training 26links, adding to a training location 26process of defining 22region hierarchy administration 22region, creating a hierarchy 23region, defining 22rescheduling conflicting classes 28scheduling conflicts, resolving at a
location 27subregions, creating for a region 23training locations, about defining 23
training recorddeleting a record 32downloading a training library file 33modifying 31modifying a file referenced in 32training library, adding to 30undoing changes 32URL. changing in a record 32
training regionsclass, assigning to a training location 27class, changing a location 27class, removing from a location 27hotels, specifying near training 26links, adding to a training location 26process of defining 22region hierarchy administration 22region, defining 22regions, creating a hierarchy 23rescheduling conflicting classes 28scheduling conflicts, resolving at a
location 27subregions, creating for a region 23training locations, about defining 23

Index ■ U
Siebel Training Guide Version 7.7 ■ 165
training registrationcurriculum, about enrolling and viewing
progress 129curriculum, enrolling 129curriculum, viewing your progress 129media-based course, registering for 120My Training Enrollments information,
viewing 127process of training registration 120scheduled class, registering for 122Siebel Catalog, using to register for
training 125third-party training, submitting for
approval 124training offerings, about 120Web-based course, launching 128withdrawing, about and canceling after last
acceptance date 130withdrawing, from a course or class 130withdrawing, from a curriculum 131
Training screen tab, using 106training screens
locating screens in Siebel applications 106training site
See Siebel Training sitetranscripts
descriptive information, viewing about completed course or class 136
viewing your transcript 136viewing, process of taking tests 133
Uunpackaging
SCORM course 64URL
Siebel Training Web site, browsing anonymously 107
Siebel Training Web site, entering from home page 108
Siebel Training Web site, logging in and visibility levels 107
training library record, changing in 32user ID and password, logging in with 109
user IDentering training from home page 108logging in using 109
user interfaceabout customizing 17
users, releasing curriculum 74
Vvisibility
delegated administrator visibility, verifying 19
Siebel Training Web site, browsing anonymously 107
Siebel Training Web site, differing levels of 107
Siebel Training Web site, entering from home page 108
user ID and password, logging in with 109
Wwaitlist
no space on waitlist message 124Web site
browsing anonymously 107home page, entering with a user ID 108Siebel Training Web site, logging in and
visibility levels 107user ID and password, logging in with 109
Web-based coursescourses, adding to course bundle 46launching 128media-based course, registering for 120registering customers 96registration status, verifying 98registration, about training offerings 120SCORM lesson launch using API
protocol 57technical launching information,
specifying 44training bundles, creating 46
Weighted Completion value, updating 101withdrawing
about and canceling after last acceptance date 130
course or class, from 130curriculum, from 131process of withdrawing 120
workflowactivating workflow processes 15email notification, configuring for 15, 16preconfigured workflow processes, list
of 142verifying workflow processes are active 14

Index ■ W
Siebel Training Guide Version 7.7166 ■