Embed Size (px)
Citation preview

Shoot Your Own Test Scene
When do you need a self test?
• Agent asks you
• Overseas or interstate
• To submit for something you haven’t scored an audition for
• Practice practice practice


What camera should I use?
• Anything you can get your hands on!
• DSLRs
• Camcorders• Beware storage costs
• Smart phones

Use a tripod!• Cheap tripods are under $30

Use a tripod!• Even for your smartphone!
Where should you shoot?
• Don’t try to “set the scene”
• No visual distractions in background• Plain: blue, grey, white• Avoid wall hangings, light switches, shadows
What should you wear?
• No logos
• No distracting patterns
• No shimmery make up

Aspect Ratio
http://www.mediacollege.com/video/aspect-ratio/

Aspect Ratio
Width to height ratio
1 1 1 1
1
1
1
4 : 3

Aspect Ratio
What aspect ratio is this?
16 : 9
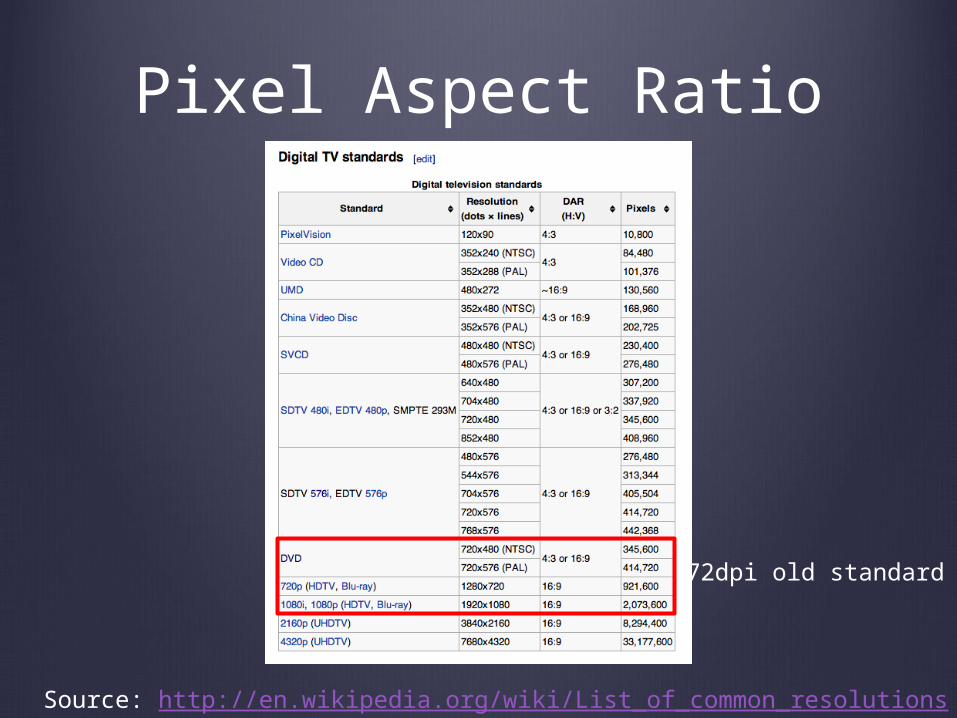
Pixel Aspect Ratio
Source: http://en.wikipedia.org/wiki/List_of_common_resolutions
72dpi old standard

Aspect Ratio
4:31.33:1
VIDEO + PC
16:91.78:1
WIDESCREEN(PLASMA + Dig.TV)

Aspect Ratio
Pillarboxing Letterboxing

Shot composition
http://www.mediacollege.com/video/shots/

Shot composition
http://www.mediacollege.com/video/shots/

Eye lines
• As close to the side of the camera as possible without looking down the barrel
• Decide on your reference points (objects, people, places) before shooting – make sure your eyes are still visible
• Can be helpful to have a “thinking spot”

Focus
• Zoom in, focus, compose your shot
• Do not trust those tiny camera screens
• Auto focus is ok for basic stuff

Demonstration

Exercise – framing and focus
• Form pairs
• Set up your camera
• Place your actor and frame up a shot
• Focus your shot
• Test out different eye lines to work out your prime acting zone
Lighting theory• 3 point lighting technique

Lighting theory
www.mediacollege.com/lighting/three-point
Basic lighting
• Basic lighting in film is to control your exposure and contrast
• For guerilla filmmaking bounced light is your friend
• Use reflector boards, poly boards, bed sheets
• Use domestic lamps
• Be careful of mixing colour temps (white balance)
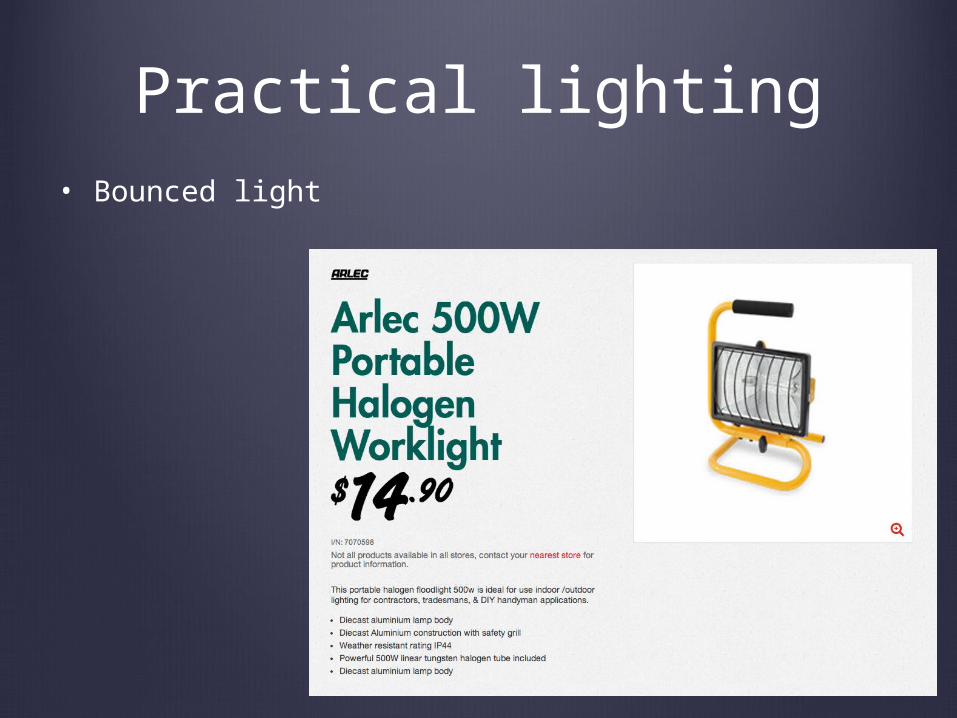
Practical lighting• Bounced light

Practical lighting• Diffused light
eg China ball
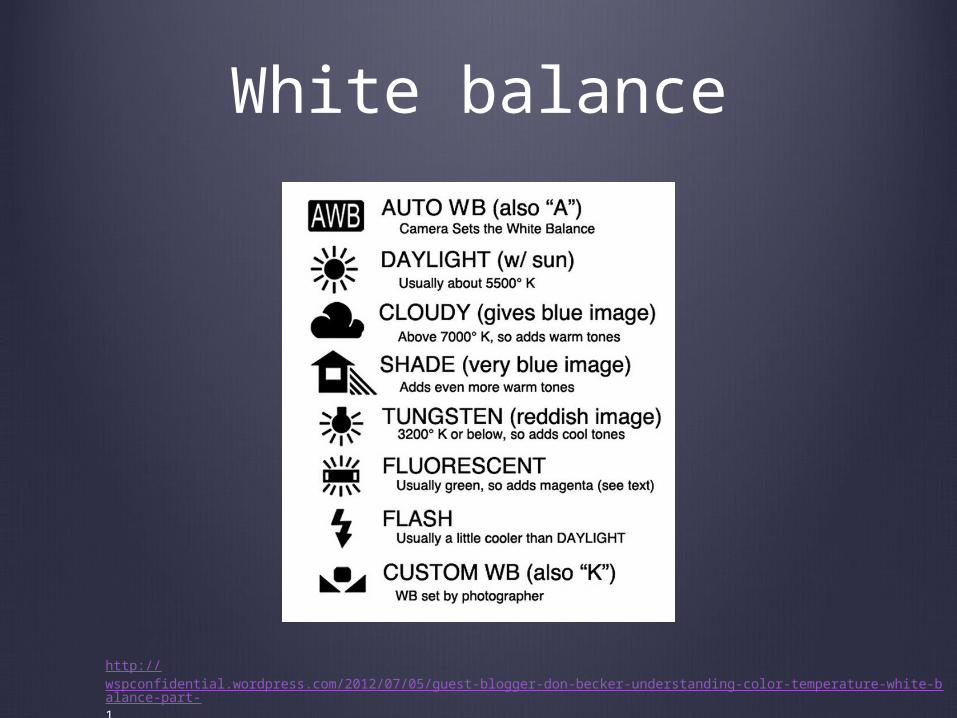
White balance
http://wspconfidential.wordpress.com/2012/07/05/guest-blogger-don-becker-understanding-color-temperature-white-balance-part-1
Sound
• Do you need an external microphone?
• Camera microphones are omniscient
• Close windows and doors, turn off fridge, fans, air conditioning etc
• Be careful where you put your reader – try to put them as far away from the camera as you are and make sure they’re not bellowing (or auditioning off screen)

Exposure• Shutter speed• Double the frame rate• On a DSLR: 50
• F Stop• The lower the number, the more light is let in, like your
pupil. Eg f/2.8, f/4, f/5.6, f/8, f/11
• ISO• Film’s sensitivity to light
• Exposure auto function

Frame rate or FPS
• Progressive vs interlaced
• PAL: 25fps
• Film: 24fps
• NTSC: 29.97fps

Demonstration & Experimentation
The next two slides may be confusing…
DON’T STRESS!!!

What is a container?
• Where and how the video files are stored
• Physical examples• 35mm film, 16mm film, VHS, Mini DV, DVD, DigiBeta,
Beta SP, CF Cards, SD Cards, Micro SD Cards, Hard Drives
• Digital examples• Quicktime file or .mov file, .mp4 file, .avi file, .wmv
file

What is a codec?
• Stands for code/decode or compression/decompression
• The key to the filing cabinet
• Different codecs for different purposes• smaller files for capturing• larger more detailed/flexible files for editing
• Examples• H.264, MP4, Apple Pro Res 422, AVI
Ingesting
• Getting the footage fro your camera onto your computer ready for editing
• There are multiple methods, so…
• Let’s give it a shot!
Editing
• Import at highest quality with original aspect ratio
• Edit in and out points
• Adjust order ie Editing!
• No need for transitions (eg fade/cross dissolve) in test scenes
• No need for titles/text in test scenes
• Export/share

Editing demonstrations
• MPEG Streamclip
• iMovie on a Mac
• Windows Movie Maker on a PC
• iMovie on an iPhone
• FCPX as an option for the future

Exporting/sharing
• To reduce the file size ie Emailable
• By changing the container or codec• Typically create a .mov file with a H.264 codec
• Shrink the pixel aspect ratio• MAKE SURE IT’S CORRECT!
• Keep the same frame rate

Pixel aspect ratio cheat sheet…
• 16:9 (1.78:1)• 1920 x 1080 (Full HD)• 1280 x 720 (YouTube HD)• 1024 x 576 (Standard Definition)• 640 x 360
• 4:3 (1.33:1)• 1024 x 768• 640 x 480

Sending your file
• Large file sending service – downloadable• Hightail (formerly YouSendIt)• WeTransfer
• Streaming services• YouTube (unlisted link)
• 2 in 1 Streaming and download services• Vimeo (password protected)• Dropbox (unlisted link, also downloadable)• Google Drive (like Dropbox)

File name
• Casting directors have no time!
• Don’t assume that they’re organised, make their job as easy as possible
• Title of your video file should include…• Project name• Name of your character• Your name

Other tools…
• VLC Player – plays all codecs
• Zamzar – converts documents, videos and audio files
• MPEG Streamclip – rip from DVD, convert video formats
• Handbrake – like MPEG Streamclip
• Keepvid – rip videos from YouTube

Let’s play!