Embed Size (px)
Citation preview
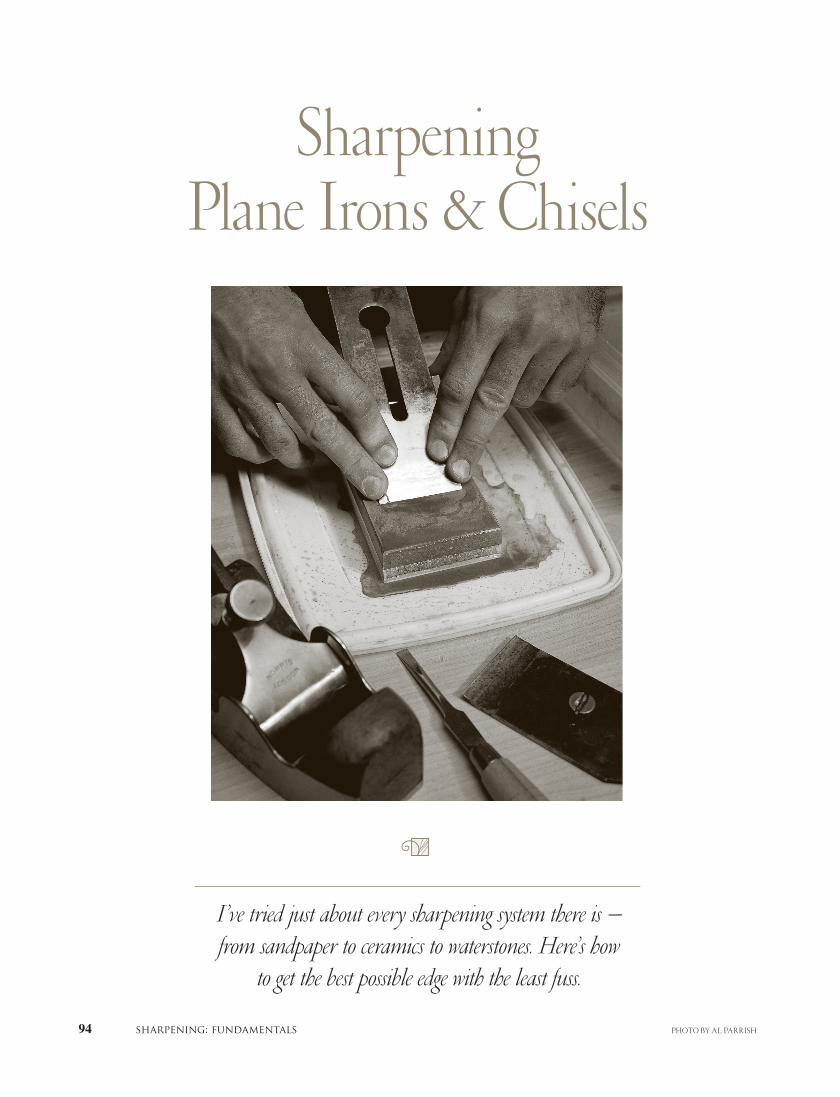
Sharpening Plane Irons & Chisels
I’ve tried just about every sharpening system there is – from sandpaper to ceramics to waterstones. Here’s how
to get the best possible edge with the least fuss.
94 sharpening: fundamentals PHOTO BY AL PARRISH
1-SharpeningPlaneIrons&Chisels.i94 941-SharpeningPlaneIrons&Chisels.i94 94 6/10/09 4:07:37 PM6/10/09 4:07:37 PM

When I took my fi rst class in woodwork-
ing some years ago, the fi rst thing the
instructor showed us was his shop-made
waterstone pond.
With a reverence and care usually reserved for
religious artifacts and small injured animals, the
teacher brought the pond out from its special place
in his cabinet. For more than an hour he talked with
a furrowed brow about secondary bevels, wire edges
and polishing the backs of our edge tools.
All of us in the class did our best to stifl e our
yawns. I kept looking at the rows of chisels and
backsaws and wondered when we were going to get
to the important part.
Within a week we all realized that we should
have paid more attention to the sharpening lecture.
Soon there were only two sharp chisels in the shop
for a class of 10 students, and we quarreled over
them. Trimming tenons with the equivalent of a but-
ter knife was no fun.
So I made it a point to learn to sharpen well.
And I’ve been fortunate to be able to use a variety
of methods, including: oilstones, diamond stones,
waterstones, ceramic stones, sandpaper, electric
grinders and the Tormek system.
Each system has its good and bad points. Some
are simple, others don’t make a mess, some are less
expensive and most systems can put an astound-
ingly good edge on tool steel.
For me, the two most important qualities a
sharpening system needs are that it must be fast and
it must produce the keenest edge. I’ll pay a little
more and suffer a little mess to get a good edge in a
hurry and get back to the bench.
That’s because I’m more interested in wood-
working than I am in the act of sharpening. I have
no desire to look at my edges under a microscope
or fret about tiny imperfections in the metal. I’m
not the kind of guy who wants to meditate on my
“power animal” as I proceed up to #500,000 grit. I
want to be done and get back to the good part.
FAMILIARITY BREEDS A KEEN EDGE
The steps I’m about to describe will work with
every sharpening and honing system I know of on
the market. That’s because no matter what system
you use, sharpening is about one thing: Grinding
and polishing the two intersecting planes of a cut-
ting edge to as fi ne a point as possible.
The tools you use to get there are up to you. But
here are a few words of advice: Pick a sharpening
system and stick with it for a good long time before
giving it up. Many woodworkers who I’ve talked to
jump around from system to system, trying to fi nd
the best thing (and spending a lot of money).
If you stick with one system, your edges will
improve gradually as you get better and better at
using your particular set of stones or sandpaper.
Skipping around from one system to the next will
only stunt your sharpening skills.
Second, please buy a honing guide to try. It’s a
big old lie that these things slow you down. In fact,
these simple and inexpensive guides are quick to set
up and ensure your edge will be perfect every time
you sharpen.
However, don’t buy a whole rolling army of
honing guides. I use a $14 Eclipse-style guide (the
gray-colored side-clamp contraption shown in most
of the photos) for sharpening my chisels and most
plane irons. I also own a Veritas Mark II honing
guide. It excels at sharpening skew chisels and spe-
cialty plane irons that won’t fi t in the Eclipse guide,
such as irons for shoulder planes.
Each honing guide holds the blade a little dif-
ferently, and few of them are ever perfectly square.
That’s OK because what you’re after with a honing
guide is repeatability. Use the same guide over and
over, and your edges will come out the same.
sharpening plane irons & chisels 95ILLUSTRATIONS BY JOHN HUTCHINSON
IF YOU DON’T POLISH THE backside of your newly acquired chisels and plane irons, your cutting edges will always be jagged and eas-ily dulled. You need to polish just the area up by the cutting edge. This is a process you’ll only have to do once.
1-SharpeningPlaneIrons&Chisels.i95 951-SharpeningPlaneIrons&Chisels.i95 95 6/10/09 4:07:37 PM6/10/09 4:07:37 PM

Grinding the Edge
POLISH YOUR BACKSIDE
There are three sharpening operations that must
be performed on all chisels and plane irons that are
new to you. First you must polish the fl at backside
(sometimes called the “cutting face”) of the tool.
Next you grind the cutting bevel. Finally you hone
and polish a small part of that cutting bevel, which
most people call the “secondary bevel.”
Keep in mind that these three steps are only for
tools that you have newly acquired. Once you do
these three things, maintaining an edge is much eas-
ier. You’ll probably only have to polish the backside
once. You’ll have to regrind an edge mostly when
you hit a nail or your secondary bevel becomes too
large. Most sharpening is just honing and polishing
the secondary bevel so you can get back to work.
Begin with the backside of the tool. This is the
side of the tool that doesn’t have a bevel ground into
it. It’s one-half of your cutting edge so you need to
get it right.
Start sharpening by rubbing the backside back
and forth across a medium-grit sharpening stone or
sandpaper. You don’t need to polish the entire back,
just the area up by the cutting edge. I begin this pro-
cess with a #1,000-grit waterstone, then do the same
operation with the #4,000-grit and then the #8,000-
grit stone. The backside should look like a mirror
when you’re fi nished.
WHEN HONING NARROW TOOLS, THIS is the best way I’ve found to keep things steady and square. Put one fi nger on the cutting edge; put the other behind the jig to move it.
1TO BEGIN GRINDING YOUR EDGE, put the tool in your honing guide and adjust it until the cutting bevel is fl at on your stone. Eyeball it at fi rst. After a couple passes on the stone you’ll know if you’re off or not.
FLAT-GRINDING YOUR CUTTING BEVEL SHOULD not take long on a coarse diamond stone. If you’re having trouble gauging your progress, color the cutting bevel with a permanent marker and you’ll get a quick snapshot of where you stand.
WHEN YOU’RE DONE GRINDING, THIS is what your edge should look like.
2
3
96 sharpening: fundamentals
plane iron
bevel is flat against stone
coarse-grit diamond stone
25° bevel typical
1-SharpeningPlaneIrons&Chisels.i96 961-SharpeningPlaneIrons&Chisels.i96 96 6/17/09 1:52:13 PM6/17/09 1:52:13 PM

Why I Switched to Waterstones
There are a lot of sharpening systems out there. And while I haven’t tried every one of them, I’ve tried
most. After much experimentation, I settled about 12 years ago on a system that used DMT diamond stones and oilstones. My system worked pretty well, but the oilstone part was slow, and my fi nal cutting edge was always “almost” perfect.
A few years ago, I got my hands on a set of Norton’s American-made waterstones and it was like a door had been opened for me. These things cut wicked fast. And the edge they produce is darn-near perfect.
They feel different than many Japanese waterstones I’ve used. The best way to describe the difference is that the Norton stones give you different “feedback” as you sharpen. The #4,000-grit Norton actually feels like it is cutting (it is). The #4,000-grit Japanese stones I’ve used have a more rubbery feel to them in use in my opinion. And they didn’t seem to cut as fast at that level. The #8,000-grit Norton waterstone also pro-vides great feedback to the user.
The downside to all waterstones is that they need to be fl attened regularly. For this job, I use a DMT DuoSharp stone with the coarse grit on one side and the extra-coarse on the other. I also use this same dia-mond stone for grinding the cutting edge of all my chisels and plane irons.
The most economical way to get started with this system is to buy a Norton combination waterstone that has #1,000 grit on one side and #4,000 grit on the other. Then buy an #8,000-grit Norton waterstone for polishing. Norton also makes a #220-grit waterstone, but if you buy the DMT diamond stone you won’t need it.
FOR MORE INFORMATIONnortonabrasives.com, 800-446-1119
THE NOT-SO-DAILY GRIND
The next step is to grind the cutting bevel of the
tool. You can do this on an electric grinder that has
a tool rest, which will produce a slightly dished cut-
ting bevel called a hollow-ground edge. Or you can
do it on a coarse sharpening stone, which will pro-
duce a fl at-ground edge.
Lots has been written about the advantages and
disadvantages of each system. In comparing my
hollow-ground edges vs. fl at-ground edges I per-
sonally have found little difference between them in
terms of edge durability.
I typically grind using a diamond stone for
three reasons. First, it will never destroy a tool due
to overheating (which can happen with electric
grinders). Second, I use the diamond stone to fl at-
ten the waterstones. And third, the diamond stone is
great for touching up my router bits.
I use DMT’s extra-coarse stone for grinding my
edges unless I have a lot of metal to remove (800-
666-4368 or dmtsharp.com). Put the tool in your
honing guide and set it so the cutting bevel is dead
fl at against the stone. Most tools come ground at a
25° bevel, which is good for most tasks. Mortising
chisels should be ground at 30°; tools for light par-
ing only can be set for 20°.
NORTON WATERSTONES AND THE DMT DuoSharp stone are a great combination. The DMT handles the grinding jobs and fl attens the Norton water-stones.
sharpening plane irons & chisels 97
Shapton Stones: The Latest Thing In Sharpening
If you think white-lab-coat wizardry is reserved for the manufacturers of power tools, think again. Some
of the highest-tech science-fi ction stuff happens in the knuckle-dragging hand-tool industry: think unbreak-able “nodular” cast iron, cryogenically treated tool steel and super-strong “rare earth” magnets that are incorporated into both tools and jigs.
And now the latest innovation is in sharpen-ing. Shapton waterstones from Japan are all the rage among the sharpening gurus, who say the stones cut faster and wear longer than other stones. They also are expensive. There are several grades of the Shapton stones, and a basic setup of three stones can cost more than $200 – plus you’ll need some way to fl at-ten them.
We use the stones in our shop now and are impressed. They do cut faster and stay true longer than other waterstones.
FOR MORE INFORMATIONshaptonstones.com or
japanesetools.com, 877-692-3624
1-SharpeningPlaneIrons&Chisels.i97 971-SharpeningPlaneIrons&Chisels.i97 97 6/10/09 4:07:39 PM6/10/09 4:07:39 PM

Honing the Edge
Don’t get too worked up about angles as you
begin sharpening. Somewhere in the 25° neighbor-
hood will be fi ne for most tools.
I use mineral spirits to lubricate my diamond
stone. Most people use water, but a sharpening guru
at DMT turned me on to mineral spirits. It evapo-
rates more slowly than water and won’t allow rust
to build up easily on the stone.
BEFORE YOU BEGIN HONING THE second-ary bevel, loosen the clamp on your honing guide and nudge the blade backward in the guide about 1 ⁄8".
BEGIN WITH A #1,000-GRIT STONE and rub the tool back and forth across the work. Try to wear the stone evenly by moving the tool in a regular pattern.
AFTER A DOZEN LICKS, TURN the tool over and remove the burr from the backside by rubbing it a couple times over the #8,000-grit stone.
AFTER HONING THE TOOL ON the #1,000-grit stone, this is what the secondary bevel should look like.
1 2
3 4
Rub the cutting bevel against the diamond stone
then check your progress. You want to grind the
entire cutting bevel of the chisel or plane iron all the
way across. If you set the tool properly in the jig, this
should be approximately fi ve to 10 minutes of work.
As you progress on this coarse stone, you
should make a substantial burr on the backside of
the tool. This is called a “wire edge,” and you’ll
plane iron
tool is raised 2° so only the front of the tool is honed
98 sharpening: fundamentals
sharpening stone
1-SharpeningPlaneIrons&Chisels.i98 981-SharpeningPlaneIrons&Chisels.i98 98 6/17/09 1:54:35 PM6/17/09 1:54:35 PM

More Honing & Polishing
want to remove it by rubbing the backside on your
fi nest-grit stone a couple times. Never rub the back-
side on your coarse stone. That just undoes all your
polishing work there.
How you hold the jig is important, too. For
plane irons and wide chisels, put a fi nger on each
corner of the tool up near the cutting bevel and use
your thumbs to push the jig. For narrower chisels,
put one fi nger on the tool by the cutting bevel and
push the jig from behind with one fi nger.
With the cutting bevel ground, it’s time to refi ne
the leading edge to a keen sharpness.
HONING: THE FUN PART
Honing is quick and painless if your stones are
fl at and you’ve done the fi rst two steps correctly.
REPEAT THE SAME PROCESS ON the #8,000-grit stone. You are almost fi nished. Tip: You can move the tool back 1 ⁄32" in the jig and hone a third bevel, another trick used by some sharp-eners. If your entire bevel isn’t getting polished after a few strokes, your stone likely needs to be trued.
CONTINUE HONING THE EDGE BY switching to a #4,000-grit stone. Remove the burr on the backside with the #8,000-grit stone. Note that some woodwork-ers skip this intermediate #4,000-grit stage when honing. I have found this trick works best with waterstones and when the secondary bevel is small.
AFTER WORKING THE #4,000-GRIT STONE, here’s what the secondary bevel should look like. It got a little bigger and it is more polished.
POLISH THE SECONDARY BEVEL ON the #8,000-grit stone until it is a mirror.
HERE’S HOW TO TEST YOUR edge without fl aying your fi nger open. Pull your thumbnail across the edge at about a 90° angle. If the edge catches and digs in immediately, you’re sharp. If it skids across your thumbnail, you have more work to do.
1 2
3 4
5
sharpening plane irons & chisels 99
1-SharpeningPlaneIrons&Chisels.i99 991-SharpeningPlaneIrons&Chisels.i99 99 6/10/09 4:07:41 PM6/10/09 4:07:41 PM
Sharpening Jigs for Almost Every Job
100 sharpening: fundamentals
The fi rst thing to do is to reset the tool in your hon-
ing guide. Loosen the screw that clamps the tool
and slide the tool backward about 1⁄8". Retighten the
screw of the honing guide.
This will set the tool so only a small part of
the cutting bevel will get honed. This speeds your
sharpening greatly.
Start honing with a #1,000-grit waterstone,
soft Arkansas oilstone or #320-grit sandpaper. I use
the #1,000-grit Norton waterstone. Lubricate your
stones as recommended by the manufacturer. Rub
the tool back and forth on the stone. Turn it over
and check your progress. You should see a second-
ary bevel appear up at the cutting edge. Rub your
thumb along the backside; you should feel a small
burr all the way across the cutting edge. If there’s no
burr, then you’re not sharpening up at the edge; so
continue honing until you feel that burr.
Once you have that burr, remove it by rubbing
the backside across your #8,000-grit stone. Go back
to your #1,000-grit stone and refi ne the second-
ary bevel some more until all the scratches on your
secondary bevel look consistent. This is the stage
where you can introduce a camber to the iron if you
are sharpening a bench plane. Add a little additional
fi nger pressure to each corner of the iron to start
cambering the iron.
Put the #1,000-grit stone away and get out a
#4,000-grit waterstone, a hard black Arkansas oil-
stone or #600-grit sandpaper. Go through the same
process you did with the #1,000-grit stone. Remove
the wire edge on the back with your #8,000-grit
stone. The bevel should look a bit polished.
Finally, you want to polish the secondary bevel
with your fi nest-grit stone or #1,500-grit sandpaper.
I use an #8,000-grit Norton waterstone. There are
Japanese waterstones at this grit level, too. However
there are no comparable oilstones. A translucent oil-
stone is somewhat close.
Polishing is a little different. You’re not likely
going to feel a wire edge on the backside of the tool
after polishing the bevel. Work both the secondary
bevel and the backside of the tool on the #8,000-grit
stone and watch the scratches disappear. And when
they’re gone, you’re done.
Test the edge using your fi ngernail – see the
photo on the previous page for details. Some people
fi nish up by stropping their edges at this point with
a piece of hard leather that has been charged with
honing compound. I don’t fi nd it necessary. In fact,
if you’re not careful, you will round over your cut-
ting edge while stropping.
Remove the tool from your honing guide, wipe
it down with a little oil to prevent rusting and go to
work on some end grain.
The tool should slice through the wood with lit-
tle effort. And if that doesn’t convince you of the
value of sharpening, I don’t know what will.
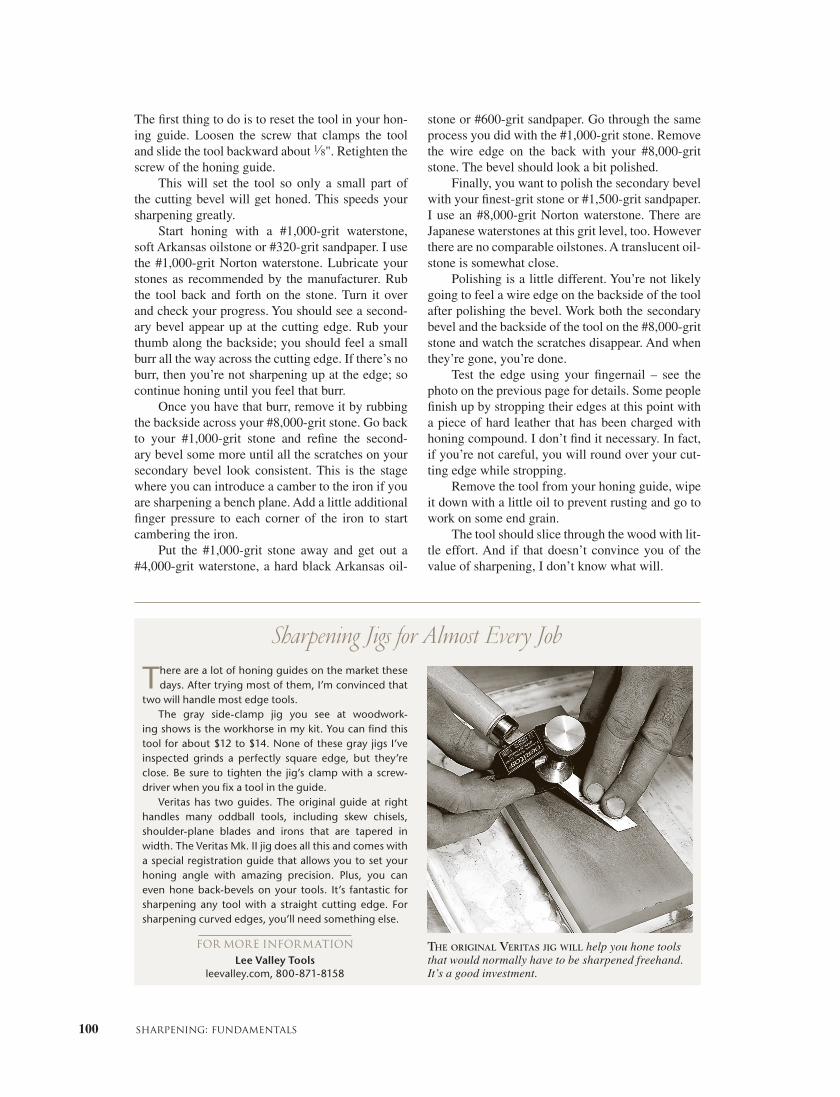
There are a lot of honing guides on the market these days. After trying most of them, I’m convinced that
two will handle most edge tools.The gray side-clamp jig you see at woodwork-
ing shows is the workhorse in my kit. You can fi nd this tool for about $12 to $14. None of these gray jigs I’ve inspected grinds a perfectly square edge, but they’re close. Be sure to tighten the jig’s clamp with a screw-driver when you fi x a tool in the guide.
Veritas has two guides. The original guide at right handles many oddball tools, including skew chisels, shoulder-plane blades and irons that are tapered in width. The Veritas Mk. II jig does all this and comes with a special registration guide that allows you to set your honing angle with amazing precision. Plus, you can even hone back-bevels on your tools. It’s fantastic for sharpening any tool with a straight cutting edge. For sharpening curved edges, you’ll need something else.
FOR MORE INFORMATIONLee Valley Tools
leevalley.com, 800-871-8158
THE ORIGINAL VERITAS JIG WILL help you hone tools that would normally have to be sharpened freehand. It’s a good investment.
1-SharpeningPlaneIrons&Chisels.i100 1001-SharpeningPlaneIrons&Chisels.i100 100 6/10/09 4:07:43 PM6/10/09 4:07:43 PM