Embed Size (px)
Citation preview
MARCH 2014
OKLAHOMA HOME AND COMMUNITY EDUCATION LESSON
KAY COUNTY
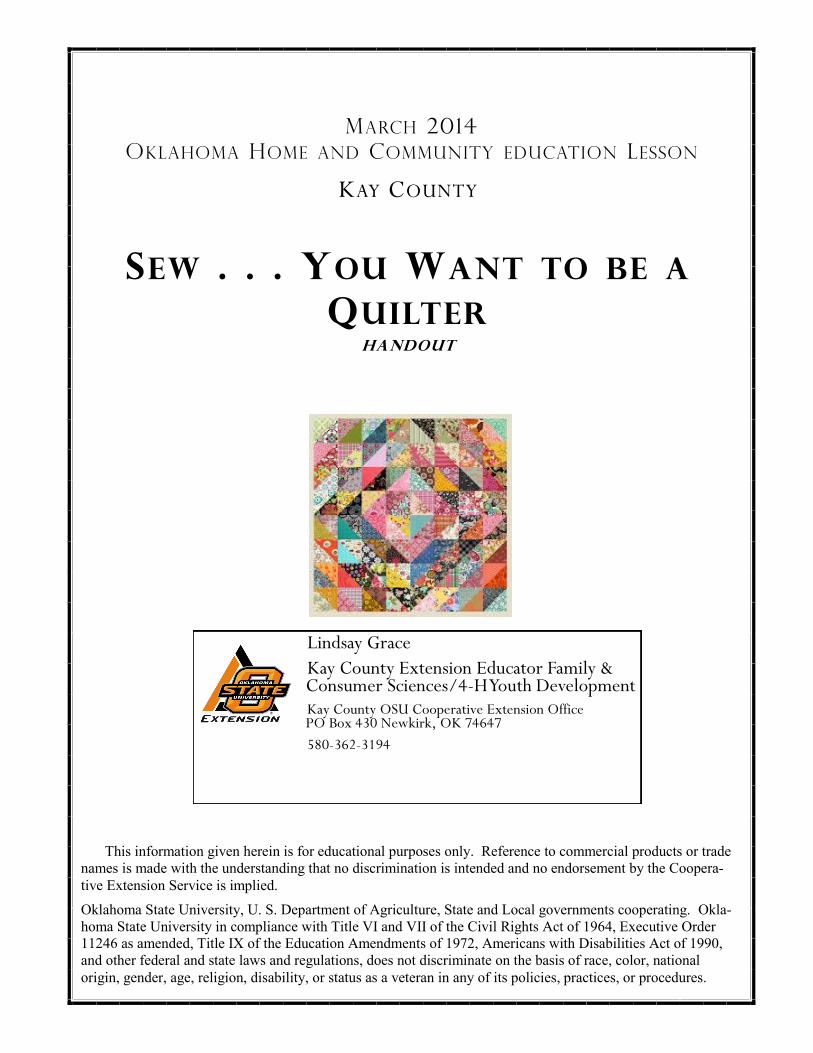
SEW YOU WANT TO BE A
QUILTER HANDOUT
Lindsay Grace
Kay County Extension Educator Family amp Consumer Sciences4-H Youth Development Kay County OSU Cooperative Extension Office PO Box 430 Newkirk OK 74647
580-362-3194
This information given herein is for educational purposes only Reference to commercial products or trade
names is made with the understanding that no discrimination is intended and no endorsement by the Coopera-
tive Extension Service is implied
Oklahoma State University U S Department of Agriculture State and Local governments cooperating Okla-
homa State University in compliance with Title VI and VII of the Civil Rights Act of 1964 Executive Order
11246 as amended Title IX of the Education Amendments of 1972 Americans with Disabilities Act of 1990
and other federal and state laws and regulations does not discriminate on the basis of race color national
origin gender age religion disability or status as a veteran in any of its policies practices or procedures
2
Sew You Want to be a Quilter
Table of Contents
Easy Quilt Patterns --------------------------------------------------------------- 3mdash5
Quilting Terms and Vocabulary ------------------------------------------------ 6mdash7
Putting Your Quilt Together -------------------------------------------------- 8mdash12
Quilt Sandwich ---------------------------------------------------------------------- 13
Machine Quilting (straight lines and free motion) ------------------------ 14mdash16
Quilt Binding ------------------------------------------------------------------ 17mdash24
Learn How to Hand Quilt ---------------------------------------------------- 25mdash28
3
Sew You Want to be a Quilter
Easy quilt patterns
A simple place to start learning to
quilt is a small quilt like a baby
quilt or a lap throw The 9 Patch
pattern is simple and very attractive
The Disappearing 9 Patch has just a
small addition to the pattern that
makes it look completely different
Nine-Patch Quilt Block Structure
Nine-patch quilt blocks initially contain nine equal squares The squares are arranged three rows
across and three down like the simple nine-patch quilt blocks left and center in the illustration
The drawing on the right illustrates one of thousands of nine-patch block variations Called a
double nine-patch it replaces the square grids at the blocks center and corners with smaller nine
patch units
6-inch squares would yield 8-inch blocks 7-inch squares would yield 9frac12- inch block
MAKING THE DISAPPEARING 9 PATCH BLOCKS
Group your squares into sets of nine and arrange them in three rows with three squares in each
row
For maximum contrast place a dark square in the center a medium or light square on each side
and a novelty or bright square in each corner
Stitch the squares together to
form a traditional nine patch
Cut the block into four equal
pieces by cutting through the
block vertically and
horizontally
Repeat this with the remainder
of your basic nine patch blocks
until they are all stitched and
cut into four
SETTING THE BLOCKS
Arrange the blocks either in
rows or sets of four depending upon how
many blocks you have in your finished
quilt
Experiment by turning the blocks and
arranging in various ways to create the
desired layout
Here are a couple of suggestions Have
fun
Figure 1 Nine patch block and split
4
Sew You Want to be a Quilter
Rotary Cutting and safety ndash
Cutting Rotary cutting can be fast easy and accurate Yoursquoll need a rotary cutter a
24rdquo see through ruler and a self-healing cutting mat The 24rdquo x 36rdquo mat size
is perfect for quilting Make sure you keep a sharp blade in your cutter Dull
blades make for jagged cuts and can be unsafe if you have to press too hard
to make your cuts Get in the habit of closing the blade of your cutter when
itrsquos not in use Safety first
Fabric right off a bolt probably has uneven edges or may be folded off
center The first step in rotary cutting is to square up the fabric edge With
freshly ironed fabric lay your fabric on your self-healing cutting mat Fold
the fabric in half lengthwise wrong sides together Line up the two selvages
and adjust the edges until the fold hangs evenly or lays flat without
wrinkles This will make sure the grain of the fabric is straight and you will
get nice straight width of fabric cuts
You may want to fold your fabric again lengthwise bringing the folded
edge down to line up with the selvage edge This will give you a shorter
cutting length (yoursquoll have 4 layers) and you wonrsquot need to reposition
your hand when you cut
To start cutting make sure the folded edge lines up with a horizontal line
on your cutting mat Then place your ruler along a vertical line on the mat
for a straight cut If you are right handed the bulk of the
fabric will be on your right The opposite applies if you
are left-handed The first cut you make will be to trim
off the raw edge and square up the fabric Cut off just
enough fabric to make a straight edge
Now yoursquore ready to cut your strips Irsquom cutting 2rdquo
strips so I line up the edge of the fabric with the 2rdquo
mark on my ruler Make sure the 2rdquo mark lines up all
the way down the edge of the fabric not just at one
place Check that measurement Measure twice cut
once
Place your left hand on the ruler spreading your fingers for stability
Always cut away from yourself Be safe Rotary cutters are sharp Cut
along the right edge of the ruler and keep the blade flush against the
ruler Never cut beyond your hand position Stop cutting reposition
your hand up the ruler and continue cutting
5
Sew You Want to be a Quilter
Always open up your first strip and check that it is straight and
even If not adjust the fabric and square it up again Itrsquos better
to check at the beginning than cut a bunch of crooked strips
After your strips are cut you can line them up on the
horizontal lines of your mat and use your ruler to sub cut
them into the shapes and sizes that you need for your quilt
(Continued from page 4)
6
Sew You Want to be a Quilter
Quilting terms and vocabulary ndash
Wonky - Is typically a geometrical block but the shapes are not perfectly square they are
ldquowonkyrdquo
Scrappy - Made with small pieces of fabric scraps
Improv - Piecing without prior planning or preparation
Interlacing - Piecing with the appearance of weaving fabrics
Sampler Quilt - One quilt with many different style blocks
Medallion Quilt - Patchwork design with a sequence of borders and sections around a cen-
tral block
Quilt-as-you-go - Piecing together a 12Prime block adding the batting and backing and com-
pleting the quilting before moving on to another block
String Patchwork - Patchwork made from thin strips of fabric
Wholecloth - A traditional blanket made from one whole piece of fabric not pieced
Appliqueacute - A decorative design made of one material sewn over another
Freezer Paper Appliqueacute - Freezer Paper is pressed to the backside of your fabric and then
the edges are folded over and pressed into place So the fabric is precisely the same shape as
your freezer paper template
Raw Edge Appliqueacute - Usually fused on to your fabric the edges are left raw and the appli-
queacute is sewn inside the edge
Bias Strip Appliqueacute - Used to make narrow designs such as a flower stem
Reverse Appliqueacute - An appliqueacute method where the foundation fabric is on top of the shape
The foundation piece is cut away to reveal the appliqueacute shape
Fussy Cutting - Cutting a print fabric in such a way as to center or otherwise highlight part
of the print
Mitering - Technique for finishing quilt borders or bindings to resemble picture frames
Backing - Is the back piece of your quilt Usually less extensive or detailed than your quilt
top
Basting - Temporary holds together multiple layers of fabric Can be done with a tack
stitch spray baste or basting pins
Quilt Sandwich - The Backing Batting and Quilt Top make a quilt sandwich
Binding - Using strips of enclosed fabric to finish the raw edges of a quilt
Bias Binding - Binding strips are cut on the bias of the fabric This is the longest lasting
binding It is essential for biding around curves and usually require more fabric
Straight Binding - Binding strips are cut parallel with the grain of the fabric and usually
require less fabric
7
Sew You Want to be a Quilter
Machine Sewn Binding - Binding is sewn on completely with a machine
Hand Sewn Binding - Usually machine sewn onto your quilt and then folded over to hand
sew with a slip stitch
Turned-in Edges - Sewn much like a pillow case The quilt is sewn with right sides to-
gether then flipped inside out and sewn along the edge
Sashing - Is the fabric strips sewn in-between your quilt blocks
Bearding - Migration of batting fibers through the surface of the quilt Often more
noticeable on darker quilt sandwiches
Ironing - Gliding your iron back and forth over fabric to smooth away wrinkles
Pressing - Unlike ironing you do not move your iron back and forth but lightly press your
fabric
Home Machine - Standard sewing machine
Mid-Arm Machine - Is made for quilting with a throat space of up to 18Prime Can be used
while sitting or standing
Long-Arm Machine - Is a large commercial sewing machine with an extended throat
space of up to 36rdquo Used while standing up
(Continued from page 6)
8
Sew You Want to be a Quilter
Putting your quilt together
A Perfect Scant Quarter Inch Seam Quarter inch seams are the standard in quilt piecing Being
able to piece accurately will save you lots of quilting
headaches A quarter inch seam in quilting is not really a
quarter inch Itrsquos a scant quarter inch a few threads less than a
full frac14rdquo The difference is taken up by the slight fold or ridge
created by the seam
It seems like a few threads less wouldnrsquot make a difference but multiply a little bit across the
many seams in a quilt and it can become a problem when itrsquos time to put everything together
Use a frac14rdquo foot on my machine which creates a scant frac14rdquo seam when I run the edge of the foot
along the edge of my fabric but if you donrsquot have a frac14 ldquo foot and even if you do itrsquos a good
idea to do this little test to see if yoursquore sewing an accurate scant quarter inch Not all quilting
involves precision piecing but if you need to be precise a scant frac14rdquo
seam is your friend
The Test Cut two 2rdquo x 4rdquo rectangles Be sure to cut accurately Sew the piec-
es together along the 4rdquo side using your frac14 ldquo seam allowance Press
the seam (see below for pressing tips) and then measure the unit
It should measure exactly 3 frac12 ldquo wide If your piece measures more
or less adjust your seam allowance You can make adjustments by moving the needle position
or by marking a new line to follow on your stitch plate Some quilters place moleskin or tape
on their stitch plates to mark their accurate frac14rdquo seam allowance Repeat the test until you
achieve a perfect measurement
Piecing With an accurate scant frac14 ldquo seam yoursquore ready to piece I use cotton thread for piecing I like to
match my thread color to my fabric if possible If not I use a neutral thread in cream taupe or
medium grey
I use a stitch length of 12 to 15 stitches per inch for piecing If you
find your units separating at the ends as you work with them reduce
your stitch length just a bit and that might help As you piece keep
fabric edges aligned and sew a nice straight seam I donrsquot pin as I
sew If your edges stay aligned forget the pins If your edges tend to
shift a few pins might make a difference for you
Pressing Donrsquot you love when your seams lay flat and your block is crisp
and square Proper pressing techniques can help you achieve just
that Pressing is using the weight of the iron and its heat to re-
move wrinkles and flatten seams Ironing is moving the iron back
and forth Pressing is lifting the iron up and down Pressing is for
quilters
Pressing technique is a matter of preference Some quilters
9
Sew You Want to be a Quilter
press seams to the side some press seams open Pressing to the side has been the standard for
many years but pressing open is gaining in popularity Itrsquos nice how flat the pieces lay and
piecing is more accurate with seams pressed open There is an interesting article by Mabry
Benson about pressing seams open at httpwwwstrawcomequilterslibrarytechniques
SeamsOpenhtml You might find it enlightening You need to decide what works best for you
Yoursquoll also need to decide if you want to use steam Steam can cause blocks or units to distort
If you need a little help with a stubborn seam you can use a tiny spritz of water or Best Press
Best press is a starch alternative and it works without the gunkiness of starch You can find
Best Press at most local quilt shops
Pressing routine
1 Set seams before you press them open This helps rsquosetrsquo the
threads into the fabric and will ensure that extra fabric doesnrsquot get
caught up in the seam Put your sewn unit flat on your ironing board
as you sewed it Lower your iron for a few seconds and set the
seam You might find when pressing to the side that setting the
seam helps the seam allowance flip more easily and results in a flat-
ter seam
2 Open the
unit right
sides down
and do a
quick finger
press to open
the seam and
then use your iron to press it flat lifting and lowering the iron not sliding back and forth
3 For long seams use your fingers to open the seam and work the iron down the length of the
seam pressing as you go
4 Then flip the unit over to press again from the right side A couple of touches of the iron
will give a nice flat seam
Proper pressing can give you units and blocks that lay flat and are not distorted This can make
your quilt come together accurately and with less stress for you
A Good Match Yoursquove prepped your fabric your pieces are cut and yoursquore piecing away You have your units
sewn and now itrsquos time to start putting things together In most quilts yoursquore probably going to
have to join units and match some seams Itrsquos not as difficult as it
looks to achieve
How you join units will depend on how you decide to press your
seams Here are demonstrations methods for both As you gain expe-
rience with joining units you may be able forget the pins Then you
may tend to use a pin or two especially if you want a perfect match
That said try not to focus on perfection it can be paralyzing in
10
Sew You Want to be a Quilter
quilting A smidge off here and there wonrsquot affect the beauty or utility of your quilt A very ex-
perienced quilter said ldquoget my nose out of the quiltrdquo Stand back and look at your work Yoursquoll
be surprised how small imperfections disappear and the beauty emerges (Irsquom trying to let go of
my perfectionist tendencies)
Joining With Side Pressed Seams If you press your seams to the side when you join units at seams yoursquoll want the seams laying
in opposite directions so you can nest the seams together Pressing to
the side creates a tiny ridge Nesting seams takes advantage of those
ridges by butting them against each other Opposing seams will also
help distribute the bulk of the seam
With both methods I pin the side of the seam allowance that the needle
will reach last This keeps the intersection from shifting allows me to
sew up to the center of the seam remove the pin and continue sewing
DO NOT sew over pins You could damage your machine dull your
needle or hurt yourself
If you press to one side you will need to be aware of which direction you are pressing your
seams as you assemble your quilt so that nesting is possible Most quilt patterns will give you
instructions for which direction to press
Joining With Seams Pressed Open If you press your seams open joining is a little different You wonrsquot
have ridges to butt against each other When matching seams that
have been pressed open align them on top of each other right sides
together
Some quilters stab a pin through the center
of the seam in the top piece and through to
the bottom piece to align You can simply
wiggle them together with your fingers
Again pin on the side that the needle will reach last You might find
thatrsquos enough to keep the seams aligned and get accurate matches
You may want to pin more or less
When joining sections of a quilt that contain multiple seams to match you will probably pin
more You can pin at each seam match and then again halfway between seam intersections
You will find your own way to keep your edges aligned and give you accurate seam matching
Herersquos what the matched units look like either with seams
pressed open or seams pressed to the side
11
Sew You Want to be a Quilter
Quick Piecing
There are a few techniques to share that will speed up your piecing These two techniques can
be used in many quilt patterns The first is strip piecing
Strip Piecing Strip piecing involves joining two or more strips of fabric and then cut-
ting smaller units from those joined strips The center sections of the
lsquoSnippetsrsquo quilt pictured below were strip pieced using 22rdquo long 1rdquo wide
strips
When strip piecing do your best to keep your edges aligned and use that
scant frac14rdquo seam Pin if you need to
One problem that sometimes occurs when sewing strips is that multiple
strips sewn together will tend to curve and form an arc and not lay flat
There are a couple of ways to pre-
vent this If you have many strips to
join sew them in pairs first press your seams then join
those units and continue joining units until you have all
the strip sets joined Irsquove also found when joining multi-
ple strips sewing from the top down on the first set and
then sewing from the bottom up on the second set will
help keep the strip set straight and flat
When your strips are joined you can line up the bottom
edge with a horizontal line on your cutting mat and sub-cut units whatever size you need Look
at all the units that were made from one strip set made up of two joined strips
Chain Piecing Another method that you can use to speed up your piecing is chain piecing
The pairs of squares below are candidates for chain piecing
Chain piecing involves stitching similar units one after the other without clip-
ping the threads between the units
You can stack your units to be chain pieced with the edge to be sewn to the
right Lay them beside your machine so you can pick
them up and move them to the machine in an orderly manner This
helps make sure that yoursquore sewing the correct side
Stitch the first unit as usual and stop with your needle down at the end
of the unit Without lifting the presser foot feed the
second unit under the presser foot without clipping the threads Continue
feeding and sewing all of your units Clip your final threads and the units will
be connected in a long chain that you can carry over to your ironing board
Clip the thread between the units and press
12
Sew You Want to be a Quilter
Chain piecing saves time and thread and can also help you keep units in the correct sewing or-
der To save even more time you can chain piece your strip sets Yoursquoll have a quilt in no time
13
Sew You Want to be a Quilter
Quilt sandwich
The quilt ldquosandwichrdquo consists of the backing batting and the pieced top Layer these 3
together baste then quilt them
BACKING
Plan on making the backing a minimum of 8Prime longer and wider than the quilt top Piece if
necessary Trim the selvages before you piece to the desired size
To economize piece the back from any leftover quilting fabrics or blocks in your collection
BATTING
The type of batting to use is a personal decision consult your local quilt shop Cut batting
approximately 8˝ longer and wider than your quilt top Note that your batting choice will affect
how much quilting is necessary for the quilt Check the manufacturerrsquos instructions to see how
far apart the quilting lines can be
LAYERING
Spread the backing wrong side up and tape the edges down with masking tape (If you are
working on carpet you can use T-pins to secure the backing to the carpet) Center the batting on
top smoothing out any folds Place the quilt top right side up on top of the batting and backing
making sure it is centered
BASTING
Basting keeps the quilt ldquosandwichrdquo layers from shifting while you are quilting
If you plan to machine quilt pin baste the quilt layers together with safety pins placed 3Primendash4Prime
apart Begin basting in the center and move toward the edges first in vertical then horizontal
rows Try not to pin directly on the intended quilting lines
If you plan to hand quilt baste the layers together with thread using a long needle and light-
colored thread Knot one end of the thread Using stitches approximately the length of the
needle begin in the center and move out toward the edges in vertical and horizontal rows
approximately 4Prime apart Add 2 diagonal rows of basting
QUILTING
Quilting whether by hand or machine enhances the pieced or appliqueacuted design of the quilt
You may choose to quilt in-the-ditch echo the pieced or appliqueacute motifs use patterns from
quilting design books and stencils or do your own free-motion quilting Remember to check
your batting manufacturerrsquos recommendations for how close the quilting lines must be
14
Sew You Want to be a Quilter
Quilting ndash straight lines and free motion
Straight Line Quilting - Can be parallel lines or
random lines quilted straight
Cross hatching - Can be parallel lines or random
lines quilted straight
Stitch in the Ditch - Stitching directly in the
seams of a quilt
Free Motion Quilting - Machine quilting done
with the feed dogs down so the quilt can be
moved any direction under the needle
Contour Quilting - Quilting parallel to quilt
seams
Echo Quilting - Echoing a shape or appliqueacute in a
quilt (echoed zig zags below)
Stippling or Meandering - Is a single meandering
stitch that never crosses itself
What is Free Motion Stitching and why would I
ever want to do it Free motion stitching gives you total control over
the direction and stitch length of your sewing
Normally when you sew your sewing machine
takes care of all of these things When you push
down on your foot pedal activating the motor of
your machine the feed dogs under your presser
foot move in perfect timing with the movement of
your presser foot bobbin amp needle creating the
stitches in your fabric Arenrsquot sewing machines
wonderful
Free motion sewing involves lowering your
machinersquos feed dogs and releasing the pressure on
your presser foothellip Once you have done this itrsquos
now up to you to move the fabric while gauging
the speed of your machinersquos motor to perfectly
time the creation of your stitcheshellip Sounds tricky
It is definitely a learned skill and one that requires
patience and perseverance to perfect but it isnrsquot
rocket science and anyone can do this with
practice
Machine Quilting
15
Sew You Want to be a Quilter
Free motion stitching is used to create the beautiful swirls and curls and
any other number of designs that you may like to use to quilt your
quilt Free motion sewing allows you to move your project in any
direction you desire to create whatever design you desire Sounds
fantastic doesnrsquot it It can also be used to finish the edges of appliqueacute
which can provide the freedom to create any design you dream up
There are a few features that will make the process of Free Motion
Stitching a whole lot easier should you want to give this technique a
whorlhellip Here are a few
Lowering Feed-Dogs This is enables you to disengage your feed-dogs
which stops the machine from
grabbing hold of the underside of your project in an
attempt to feed it under the presser foot If your machine
doesnrsquot have this feature then you are able to cover your
feed-dogs with a platehellip However I would guess that if
your machine doesnrsquot have this feature it would be
unlikely to have many (if any) of the other features that
make this process more pleasurable
There are people who donrsquot lower their feed dogs when
they quilt I have on occasions spent time sewing away
only to find that I havenrsquot lowered my feed-dogs My
stitches are fine and no one would probably ever be able to tellhellip However I find that the drag
created by the feed-dogs makes it harder to make my project move smoothly under my
machine
Needle Down This feature enables you to program your sewing machine to stop with itrsquos
needle down This is a particularly desirable feature because it means that your project doesnrsquot
move around while you reposition your hands readjust your quilt or take a sip of your cup of
tea
Again this isnrsquot essential If you are particularly careful you can try and time your stopping to
coincide with the needle being in the down position Alternatively you just need to make sure
that you hold your project still while you lower the needle with your
other hand
Hands-Free Needle Down This is a terrific feature that allows you to
raise amp lower your needle using your foot pedal This allows you to
keep your hands on your project the entire time When you need to
raise or lower your needle you only need to give your foot pedal a little
tap
Knee Lift This is a great feature It can take some getting used to but
you might not want to be without one of these When using a knee-lift
your presser foot is controlled by your knee This is perfect for free
motion stitching because you never have to lift your hand while you are sewing a project ndash
giving you more control and you will be more likely to create better shapes
DarningFree Motion Foot There are many different looks to these feet In addition to this
there are many different styles for each different brand of sewing machine The best advice to
16
Sew You Want to be a Quilter
you when you are looking at purchasing one of these feet Make
sure that you can see your work clearly around it Many brands
also have a lot of mechanics around this area and it can make it
virtually impossible to see behind the foot so look out for this if
you a buying a new machine
Foot 1 looks like it would be easy to work with however you
might find that the clear plastic actually distorts the view of
your project beneath it making it very hard to sew precise and
intricate patterns or around the edges of shapes You can get a
foot similar to this one with the center part between the two red
lines removed which corrects this issue
Foot 2 is particularly difficult to work with The metal foot
obscures your vision and the mechanics behind it are right in
your field of view
Foot 3 isnrsquot a bad one as it has a clear field of vision behind
the foot and the front of the foot is open You might find that
the clear plastic is not as easy to work with as the next
examplehellip
Foot 4 not only allows you to see your needle it also allows
you to see the stitches around it and your project behind the
presser foot Itrsquos amazing how much of a difference being able
to see your work makes
Foot 1
Foot 2
Foot 3
Foot 4
Extension Table (or a cabinet capable of lowering your
machine into) Being able to work on a large flat surface
really helps to make your free motion stitching lines and
shapes smoother and more consistent
Many machines have optional extension tables or even better
if you have a sewing table that your machine can lower into
you will be amazed at how this alone improves your
techniquehellip It also helps a lot with your posture
If you do give this technique a try make sure you are kind to
your machine Free Motion Stitching can be hard work for a
domestic sewing machine Clean
out the areas around your bobbin
case and under the foot plate
regularly Oil your machine
regularly Change your sewing
machine needles regularlyndash They
donrsquot last any longer than around
5 hours of sewing
17
Sew You Want to be a Quilter
Machine Quilt Binding Tutorial
Bind a quilt completely by machine and have it look like it was done by hand
Use for wall hangings baby quilts hot pads and any item you are not having judged or want to
hold up to lots of washings This method is so fast you can bind the quilt in no time
1 Once your quilt top is quilted stitch around the perimeter 18rdquo from the edge if you have not
already done so to hold all the layers together
3 Join the strips by mitering the
adjoining edges trim to frac14rsquo and press
seams open
2 Cut (2 frac14rdquo) strips of binding fabric
so you have enough to go around your
quilt plus 10rdquo
Step 3 Step 3 Step 3
4 Press long raw edges of binding
strip wrong sides together
5 Optional Wrap binding on an empty thread
spool and place on your extra sewing machine
spindle
18
Sew You Want to be a Quilter
6 Leaving a 5rdquo tail and starting on the bottom
middle of top of your quilt stitch binding to
quilt using frac14rdquo seam allowance
7 Stop frac14rdquo before you get to the
corner and sew off the edge of you
quilt at a 45 degree angle
8 Next fold the binding up forming a 90
degree angle and then fold it down so the fold
is even with the edge you just finished
sewing
9 When nearing the
fourth side where you
started stop sewing 5rdquo
before you meet where
you started adding the
binding
10 Overlap by the total
width of the binding in
this example 2 frac14rdquo and
trim the two overlapped
binding strips at 90
degree angle
11 Line up the two ends of the binding at a 90 degree angle and draw a 90 degree line on the top one Stitch along
this line trim seam allowance to frac14rdquo and finger press seam open
19
Sew You Want to be a Quilter
12 Check to ensure the binding length matches the
quilt and stitch the remainder of the binding down
Trim the batting and backing to match the raw edge of
the binding and the quilt front
13 If necessary change your presser foot and
set your machine for a small zigzag For my
machine it is 30 setting for the width and 20
setting for the length
15 Next fold the binding around from the
front to the back and match the folded edge of
the binding with the stitch line on the back of
the quilt where you attached the binding on the
front
14 Lay your quilt on your machine table with the back side up
16 Place the right side this fold directly centered under your
presser foot and start sewing right where the angle of the
binding meets the fold of the quilt back
17 Slowly hold everything in place and zigzag so when the
needle goes left it catches that layer of binding and quilt back
and when it goes right it goes off the edge completely
18 You will want to catch the very edge of binding AND the
very edge of the backing of the quilt right inside the stitching
line where you attached the binding EVERY time you zig to
the left
19 You will not want the needle to go through any fabric
when you zag to the right
20 Sew until you get to the corner and either backstitch or tie
off the threads
20
Sew You Want to be a Quilter
24 This is the wrong side of the quilt after stitching
with the binding unfolded
23 This is the wrong side of the quilt after stitching
and the binding is still folded back
21 Continue on with the other three sides
22 Tack the corners of the binding on the back of
the quilt
25 Ta-dahellip This is the close up of the right side of
the quilt with the binding ALL SEWN BY
MACHINE
21
Sew You Want to be a Quilter
Hand-Stitching the Binding to the Back
by Ann Johnson
What supplies do I need
You only need a needle and thread but most quilters have their favorite gadgets to make the
process more comfortable
Hand-Sewing Needle Appliqueacute sharps and milliners needles are the most popular Short
needles such as betweens used for hand-quilting work less well for sewing on binding Some
needles have larger eyes to facilitate threading
Needle Threader Thread Thread color is important hand-sewing stitches for binding ideally are almost
invisible Most quilters try to match the thread to the binding (some say to match the backing)
100 silk thread is sometimes used on wall hangings and art quilts
Thimble I am amazed how few of my quilting friends use thimbles My Grandma Willie Ann
who taught me to sew as a child insisted I use one and I always have There are a wide variety
of thimble styles I prefer a fingernail-friendly open-sided thimble which accommodates a
longer nail
Binding Clips Using clips to hold the binding in place as you sew is optional Metal hair
clips have been used
Thread Wax Many quilters like to draw their thread through blocks or discs of thread wax
to keep the thread from tangling back on itself and twisting Good Lighting Adequate lighting helps you see what you are doing and prevents eye strain
Many quilters enjoy the realistic color of a broad-spectrum day-light lamp which also gives
off less heat than an incandescent light bulb
How do I start
Press the binding on the front toward the edge to flatten the binding before folding it back
Clean up the raw edges by trimming any extra threads or uneven areas
Thread the needle Due to the way thread is wound on the spool the end you pull off is the
one you thread through the needle The end closest to the spool is the end you tie Doubling the
thread adds strength but stitches may be more visible the need for durability versus the desire
for invisibility of stitches for your project will help you decide Whether single or doubled
limit your total length of thread to about 18 longer threads tend to tangle knot and fray If you
use a single fine thread making one simple knot at the eye of the needle will keep the needle
from unthreading it will still go through the fabric
Tie a knot in the end of the thread The Connecting Threads video tutorial Hand Appliqueacute
Stitch has a demonstration of the quilters knot Very useful
Start somewhere on a side and turn the binding to the back being sure to cover the machine
stitching Take a stitch through the layers on the edge and bury the knot inside the binding
22
Sew You Want to be a Quilter
What stitch do I use for hand-sewing binding
The blind stitch and ladder stitch are the most popular because the stitches can be hidden A
whip stitch shows too much thread on the surface and is very time-consuming
The blind stitch is most common for binding and also used for hand-appliqueacute The needle
comes up through the quilt back takes a small stitch at the edge of the folded binding and
returns to tunnel through the quilt for one stitch length With minimal practice the steps
combine into one stitching motion shown below in the large photo The secret to hidden
stitches is to catch only 2-3 threads with each bite of the binding and to take the stitch slightly
under the edge of the binding fold Evenly-spaced stitches are desirable stitches 18 to 14
apart work well A darker thread is used in the photos for contrast usually the thread and fabric
match The blind stitch is demonstrated in the Connecting Threads video tutorial Hand
Appliqueacute Stitch although it is being shown doing hand appliqueacute and not binding
For the ladderrdquo stitch the needle comes up through quilt back tunnels through the edge of
the folded binding for one stitch length and back into the quilt for one stitch length The
stitches are not visible but the binding may not lay as consistently smooth and the stitch
cannot be easily make in one fluid motion This stitch works well for closing the fold in mitered
corners
Placing a few binding clips (optional) will hold the binding in the folded position they are
removed as you sew It is not necessary to place a large number of them at a time just enough
for the next section ahead
Be careful to not sew through to the front (see OOPS photo) so that your stitch shows it is
easy to do Some quilters prevent this by tunneling through the folded binding edge to the next
stitch instead of the quilt
When you run out of thread or you are finished make a loop and draw your needle through
it to tie a knot at the last stitch tunnel through the quilt edge to bury the thread inside the
binding before cutting thread The quilt can be held away from you or toward you as you bind Most quilters hold the quilt
horizontally and sew right or left (depending on handedness) One left-handed quilter friend I
know holds the binding vertically with the quilt to the left and sews upward Experiment to find
the most natural way of holding the quilt for you
23
Sew You Want to be a Quilter
Every few stitches stop to give a gentle tug to bury the stitches in the binding
When you get a looped knot as you sew pulling on the threads on either side of the knot
will tighten it Put your needle in the loop and tug gently the knot will go away Continue to sew the binding on until you come to a corner
How do I hand-stitch a mitered corner
Sewing a tidy well-made mitered corner is quite satisfying Here are some tips to help you
have successfully mitered corners Judges look closely at binding and mitered corners They
like to see evenly-space stitches well-filled binding and perfectly mitered corners I had a
judge once comment that the diagonal fold of my mitered corner did not line up well with the
seam in my mitered border So much to learn Please keep in mind as you look at the photos
that bright purple thread does not hide well on green fabric the stitches should be tiny and
hidden by taking stitches slightly under the edge of the folded edges
Sew to the corner bringing the last stitch up through the quilt to where the two seams
intersect
A miter forms more easily on front but you will need to shape it on the back Fold the other
side of the binding over the edge and form a 45 degmiter Holding the mitered fold on the back
turn the quilt over to see how it looks on the front The direction of the mitered fold will usually
24
Sew You Want to be a Quilter
go in opposite directions on the front and back Take a tacking stitch to secure this spot
Go up inside the mitered fold on both the back and front to take a tiny tacking stitch to
close the folds A couple of ladder stitches also works very well for this
Bring the needle to the back again coming up at the tacked corner or one stitch over on the
next side to be sewn
25
Sew You Want to be a Quilter
Learn How to Hand Quilt
Yoursquoll need a few special tools to get started Itrsquos important use a hand quilting thread These
threads are often wax coated for strength stability and to prevent tangling (If you choose to
use an uncoated thread you can coat it yourself with quiltersrsquo beeswax) Yoursquoll want to try
using a between needle which are shorter than many other sewing needles The shorter needle
is important for keeping control over the length of your stitches A quilting hoop or frame is
important to keep all three layers of the quilt sandwich from sliding around while you sew
And finally yoursquoll need to choose a thimble They come in a variety of styles including steel
and leather You may want to try several types to what feels most comfortable to you
Before you make your first stitch yoursquoll need to
make a knot at the end of your thread I use a
quilterrsquos knot Start by threading your needle
then laying the last centimeter or two of the
thread on your right index finger with the end
pointing down Pinch your needle on top of it
between your thumb and index finger with the
point facing away from your hand
Holding the end of the thread connected to the
needle in your left hand 2 inches away from the
the pinch and needle wrap it around the needle
going from front to back 3 to 4 times
Then making sure that the end of the thread is on
top of the long tail slide (without releasing your
pinch on the end and wraps) your thumb and
index finger around the wraps and let go of the
thread in your left hand
26
Sew You Want to be a Quilter
(For the next steps here is some unconventional steps Traditionally quilters are taught to wear
their thimble on their middle finger while gripping the needle with their thumb and index
finger and then moving the needle with the thimble only You might feel awkward holding the
needle this way so you can wear my thimble on your ring finger and then grip and move the
needle in and out of the fabric with my thumb and middle finger As long as it feels
comfortable you should make modifications for your personal preference)
Start by holding the quilting hoop on the arm you are not sewing with and keeping your hand
under where you will be sewing at Place the needle straight up and down into the quilt
sandwich
Pull the point of the needle with your left hand
and keep the knot to be tight in the pinch until
the entire length of the thread has slid through the
pinch in your right hand Give it a little tug and
you have a quilterrsquos knot
To pop in your thread insert your needle next to
where you want to start quilting and into the
batting Pull the needle up to where yoursquoll be
starting your stitches at and tug at the knot until it
pops into the quilt top The knot should embed
itself into the batting and will secure itself
Yoursquore just about ready to quilt
27
Sew You Want to be a Quilter
Then without pushing the needle all the way
through push up from underneath the quilt with
your thumb and gently rock your needle with
your thimble to pick up a new stitch from the
bottom
When the tip of the needle shows on the top of
the quilt point your needle back to the starting
position of straight up and down and repeat the
previous steps
Once you have 2 to 3 even stitches on your
needle push the needle all the way through the
fabric with your thimble
Continue quilting with controlled even stitches
until you are one stitch from where you would
like to finish
28
Sew You Want to be a Quilter
Source httpwwwsewmamasewcomtagskills-techniquestutorials
Yoursquoll need to make another quilterrsquos knot to end
the line of quilting Start once again by holding
the thread between your finger and needle and
wrap from front to back around the needle 3 to 4
times
Making sure not to twist anything gently slide
the knot down and tighten about frac14 inch from the
last stitch
Finish off by inserting your needle into the quilt
sandwich pop the knot into the center of the
batting and cut the end of the thread Easy peasy
If this seems like a lot to think about just
concentrate one or two things at first Start out by
just working on making your stitches all the same
lengthmdashit will help to make your quilting look
neat and tidy Keep practicing and in no time
yoursquoll be ready to tackle a quilt of your own