Embed Size (px)
Citation preview

Nexus SmartHub Setup Guide
Windows Server 2008 (32-bit and 64-bit)
AppSpace Installation Guide
Release 4.1.1

AppSpace Installation Guide | 4.1.1
1
Disclaimer Information in this document is subject to change without notice. Copyright © 2012 Nexus On-Demand All rights reserved. No part of this publication may be reproduced, transmitted, transcribed, stored in a retrieval system, or translated into any language, in any form or by any means, electronic, mechanical, photocopying, recording, or otherwise, without prior written permission from Nexus On-Demand. All copyright, confidential information, patents, design rights and all other intellectual property rights of whatever nature contained herein are and shall remain the sole and exclusive property of Nexus On-Demand. The information furnished herein is believed to be accurate and reliable. However, Nexus On-Demand assumes no responsibility for its use, or for any infringements of patents or other rights of third parties resulting from its use.

AppSpace Installation Guide | 4.1.1
2
OVERVIEW This document is intended for IT Administrator who wishes to install the AppSpace Base software on a compatible Windows Server 2008 R2 server. The recommended server specifications are below.
Item Minimum Specification Recommended Specification
Operating System
Windows Server 2008 R2 Standard Edition 32-bit
Windows Server 2008 R2 Standard Edition 64-bit
CPU 1 x Intel Xeon E5520 @ 2.26 GHz 2 x Intel Xeon X5560 @ 2.8GHz
Memory 8GB RAM @ 1333 MHz 16 GB RAM @ 1333MHz
HDD 3 x 250GB SATA, 7.2K RPM, RAID-5 4 x 500GB SATA, 7.2K RPM, RAID-10
Network Dual 10/100/1000 NIC Dual 10/100/1000 NIC
WINDOWS SERVER 2008 R2 CONFIGURATION A compatible Windows Server 2008 R2 server is required to run AppSpace. To ensure maximum compatibility we highly recommend that there should be no existing applications or third-party services installed. Please follow the steps outlined in the document to correctly install AppSpace Base. 1. Open Server Manager
2. Select Features, and click Add Features

AppSpace Installation Guide | 4.1.1
3
3. Check .NET Framework 3.5.1 Features
4. When the Add Features Wizard pops up, click Add Required Role Services.
AppSpace Installation Guide | 4.1.1
4
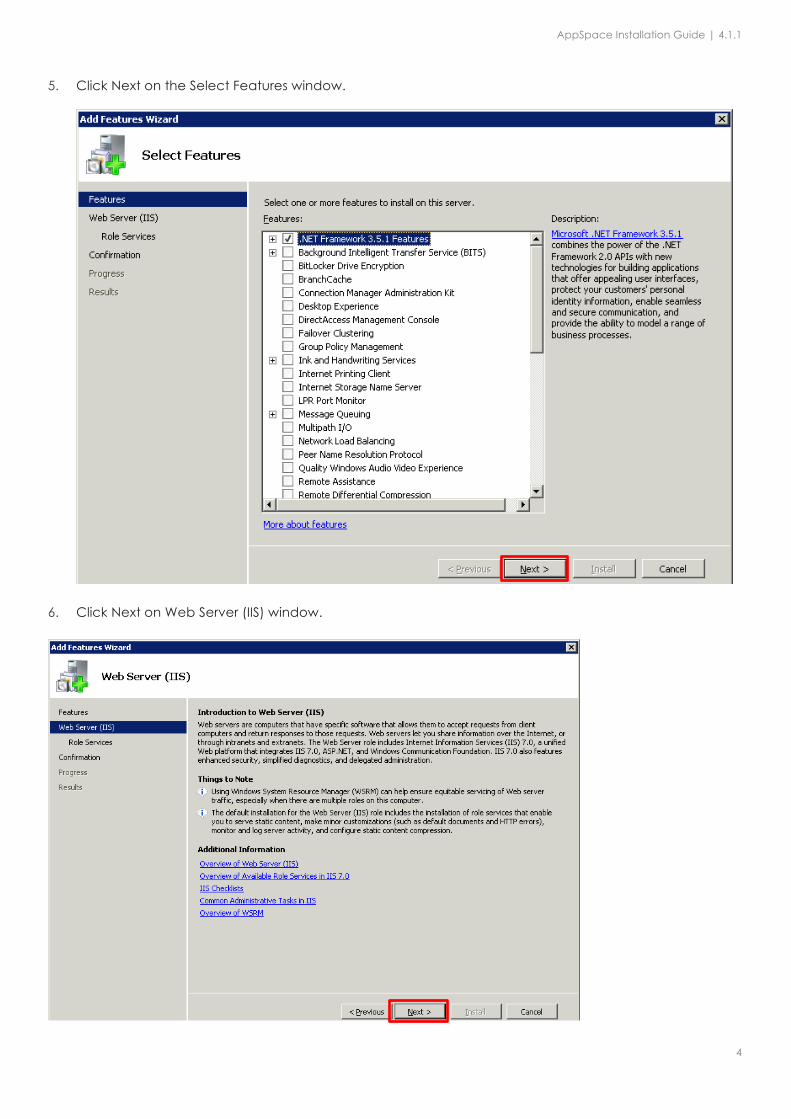
5. Click Next on the Select Features window.
6. Click Next on Web Server (IIS) window.

AppSpace Installation Guide | 4.1.1
5
7. Leave the default selection on the Select Role Services window and click Next.

AppSpace Installation Guide | 4.1.1
6
8. Click Install to confirm installation selections.
9. Wait for the installation to complete. This could take up to a couple of minutes, and click Close once
the installation is completed.
AppSpace Installation Guide | 4.1.1
7
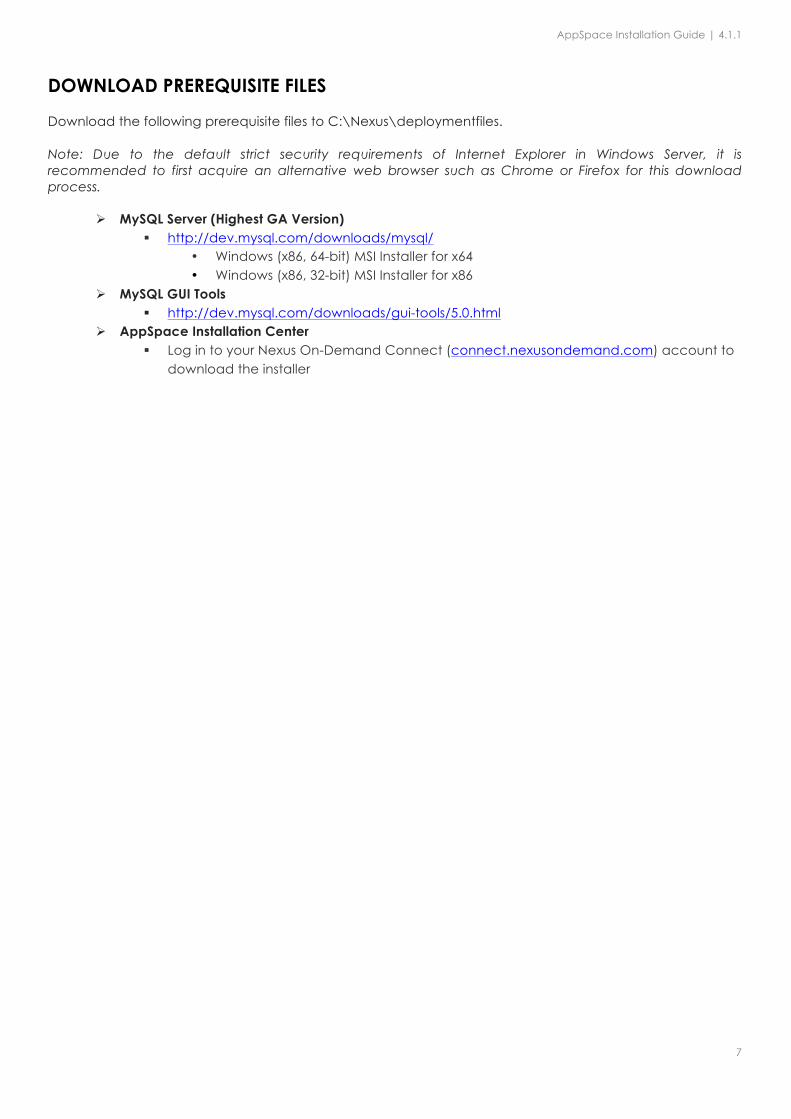
DOWNLOAD PREREQUISITE FILES Download the following prerequisite files to C:\Nexus\deploymentfiles. Note: Due to the default strict security requirements of Internet Explorer in Windows Server, it is recommended to first acquire an alternative web browser such as Chrome or Firefox for this download process.
Ø MySQL Server (Highest GA Version) § http://dev.mysql.com/downloads/mysql/
• Windows (x86, 64-bit) MSI Installer for x64 • Windows (x86, 32-bit) MSI Installer for x86
Ø MySQL GUI Tools § http://dev.mysql.com/downloads/gui-tools/5.0.html
Ø AppSpace Installation Center § Log in to your Nexus On-Demand Connect (connect.nexusondemand.com) account to
download the installer

AppSpace Installation Guide | 4.1.1
8
MYSQL INSTALLATION
MySQL Server is required by AppSpace for operation. To install AppSpace the server requires a licensed copy of MySQL Server 5.5 installed and correctly configured. Please follow the steps below to correctly install and configure MySQL Server. 1. Click Next on the welcome page.
2. Accept the License Agreement and click Next

AppSpace Installation Guide | 4.1.1
9
3. Click Custom.
4. Ensure server data files is pointing to C:\ProgramData\MySQL\MySQ Server 5.5, click Next.

AppSpace Installation Guide | 4.1.1
10
5. Click Install.
6. Ensure the Launch MySQL Instance Configuration Wizard checkbox is checked. Click Finish.

AppSpace Installation Guide | 4.1.1
11
7. Click Next on the MySQL Server Instance Configuration Wizard.
8. Select Detailed Configuration and click Next.

AppSpace Installation Guide | 4.1.1
12
9. Select Server Machine and click Next
10. Select Multifunctional Database and click Next.

AppSpace Installation Guide | 4.1.1
13
11. Ensure tablespace is pointing to C:\ProgramData\MySQL\MySQ Server 5.5\data, click Next.
12. Select Manual Settings. Set the Concurrent connections to be 500 and click Next.

AppSpace Installation Guide | 4.1.1
14
13. Ensure firewall is checked. Click Next.
14. Select Standard Character Set and click Next.
AppSpace Installation Guide | 4.1.1
15
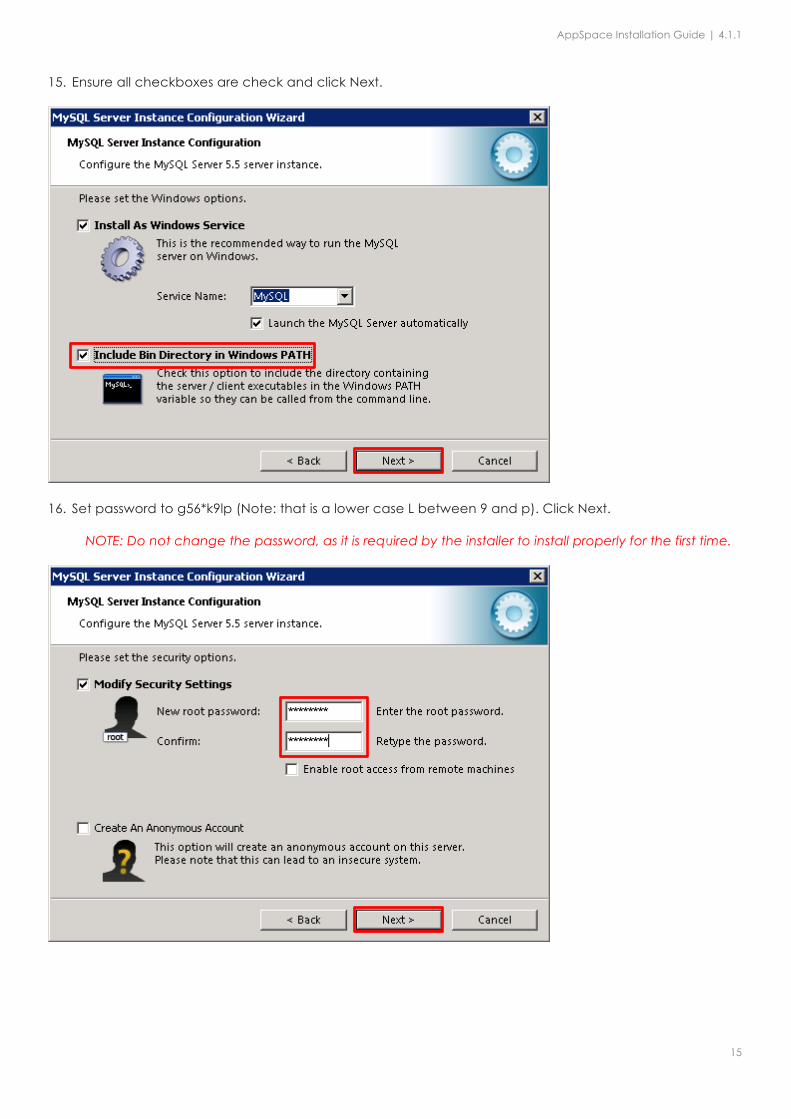
15. Ensure all checkboxes are check and click Next.
16. Set password to g56*k9lp (Note: that is a lower case L between 9 and p). Click Next.
NOTE: Do not change the password, as it is required by the installer to install properly for the first time.

AppSpace Installation Guide | 4.1.1
16
17. Click Execute.
18. Click Finish.
19. Install MySQL GUI Tools (use default settings).

AppSpace Installation Guide | 4.1.1
17
MYSQL SETUP 1. Open MySQL Administrator as an Administrator
• Go to Start Menu à All Programs à MySQL à Right-Click MySQL Administrator and select “Run as Administrator”
2. Enter server host as localhost, username as root, and password as g56*k9lp and click OK.
3. Click Startup Variables.

AppSpace Installation Guide | 4.1.1
18
4. Select the Advanced Networking tab. Make sure Wait timeout and Interactive timeout are checked
and value is 30. Click Apply changes.
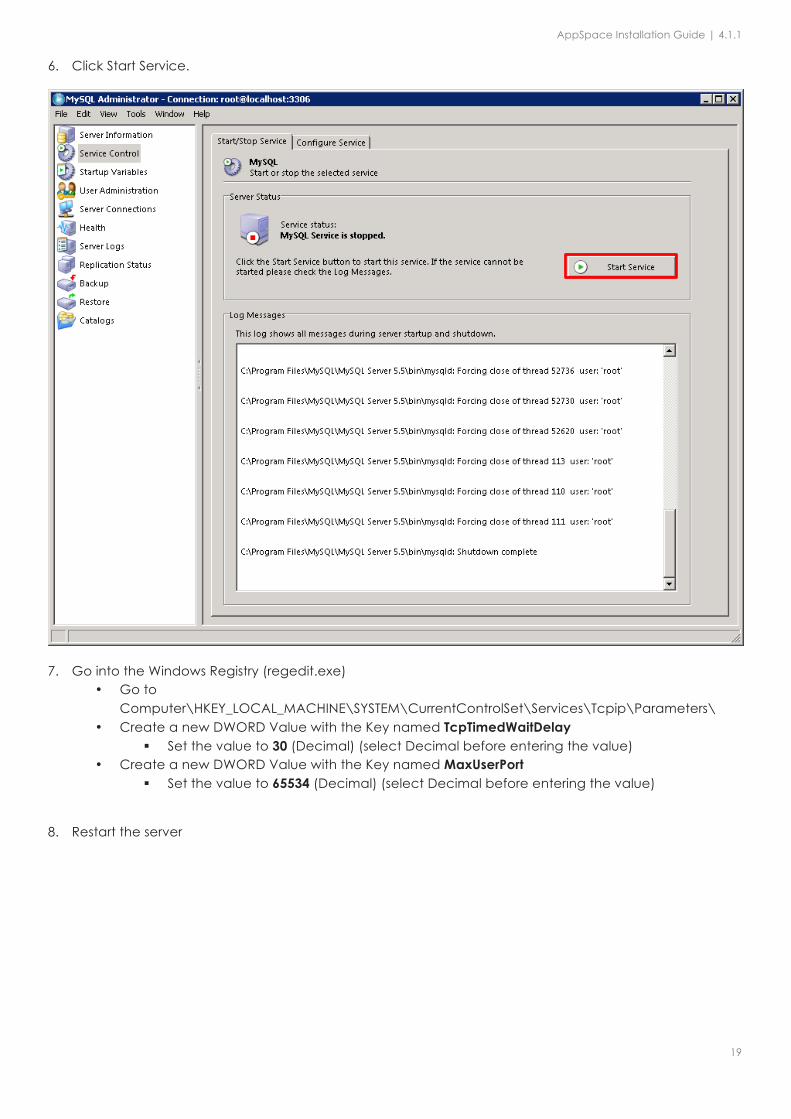
5. Select Service Control. Click Stop Service.
AppSpace Installation Guide | 4.1.1
19
6. Click Start Service.
7. Go into the Windows Registry (regedit.exe)
• Go to Computer\HKEY_LOCAL_MACHINE\SYSTEM\CurrentControlSet\Services\Tcpip\Parameters\
• Create a new DWORD Value with the Key named TcpTimedWaitDelay § Set the value to 30 (Decimal) (select Decimal before entering the value)
• Create a new DWORD Value with the Key named MaxUserPort § Set the value to 65534 (Decimal) (select Decimal before entering the value)
8. Restart the server

AppSpace Installation Guide | 4.1.1
20
INSTALLING APPSPACE Once the server has been successfully configured you will need to install AppSpace using the Application Installation Center. 1. Start the installation from the AppSpace Installation Center package you have downloaded. Click
Install.
2. Select which folder you want to install AppSpace to (default is C:\Nexus). You can also select the
location for the Content Folder (default is C:\Nexus\MediaNetFTP\FastNetV2). Click Next to continue.

AppSpace Installation Guide | 4.1.1
21
3. Please wait while AppSpace is being installed. This will usually take about 20 minutes to complete.
4. Once the installation is complete, close the program and restart the server.

AppSpace Installation Guide | 4.1.1
22
ACTIVATING APPSPACE 1. Access AppSpace by going to http://[appspace.yourdomain.com]/app where
[appspace.yourdomain.com] is the Server URL that you have configured during installation. Key in your Nexus On-Demand Connect credentials and click Next.
2. Enter your product key and click Submit.
3. Click Proceed to Login Page. Key in these credentials for first time login: • Admin • password123
AppSpace Installation Guide | 4.1.1
23
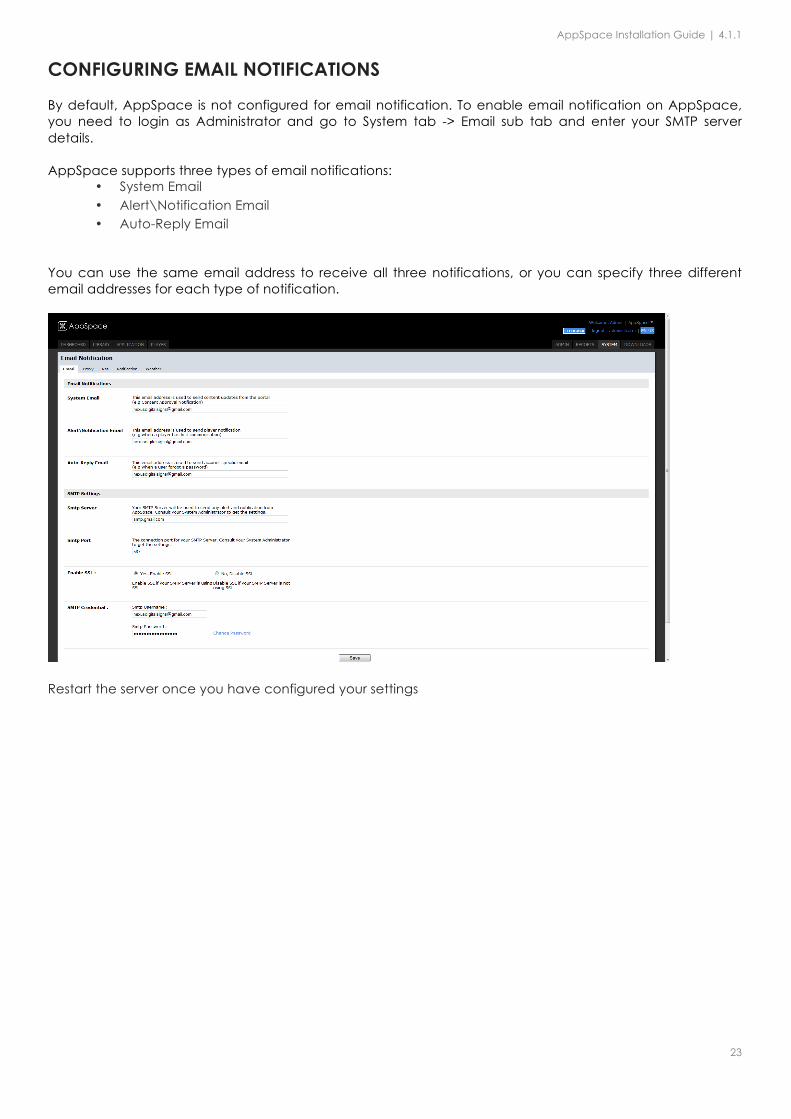
CONFIGURING EMAIL NOTIFICATIONS By default, AppSpace is not configured for email notification. To enable email notification on AppSpace, you need to login as Administrator and go to System tab -> Email sub tab and enter your SMTP server details. AppSpace supports three types of email notifications:
• System Email • Alert\Notification Email • Auto-Reply Email
You can use the same email address to receive all three notifications, or you can specify three different email addresses for each type of notification.
Restart the server once you have configured your settings

AppSpace Installation Guide | 4.1.1
24
CONFIGURING PROXY By default, AppSpace is configured to use the default system proxy. Depending on the proxy server software that you use, you may need to configure AppSpace so that it will work with your proxy software. If you could not activate your server online, then you may have a proxy blocking AppSpace from making outgoing connection. Ensure that the proxy allows AppSpace to make outgoing connections to the following domain names:
• http://integration.connect.nexusondemand.com
This url is used for activation purposes. • http://weather.wdtinc.com
This url is used by the weather widget to get data from the weather provider. • http://free.worldweatheronline.com
This url is used by the weather widget to get data from the weather provider.
If you are still having problems making outgoing connections from the server, you can login to AppSpace as Administrator and go to System tab -> Proxy sub tab to configure the proxy settings.
Restart the server once you have configured your settings.
AppSpace Installation Guide | 4.1.1
25
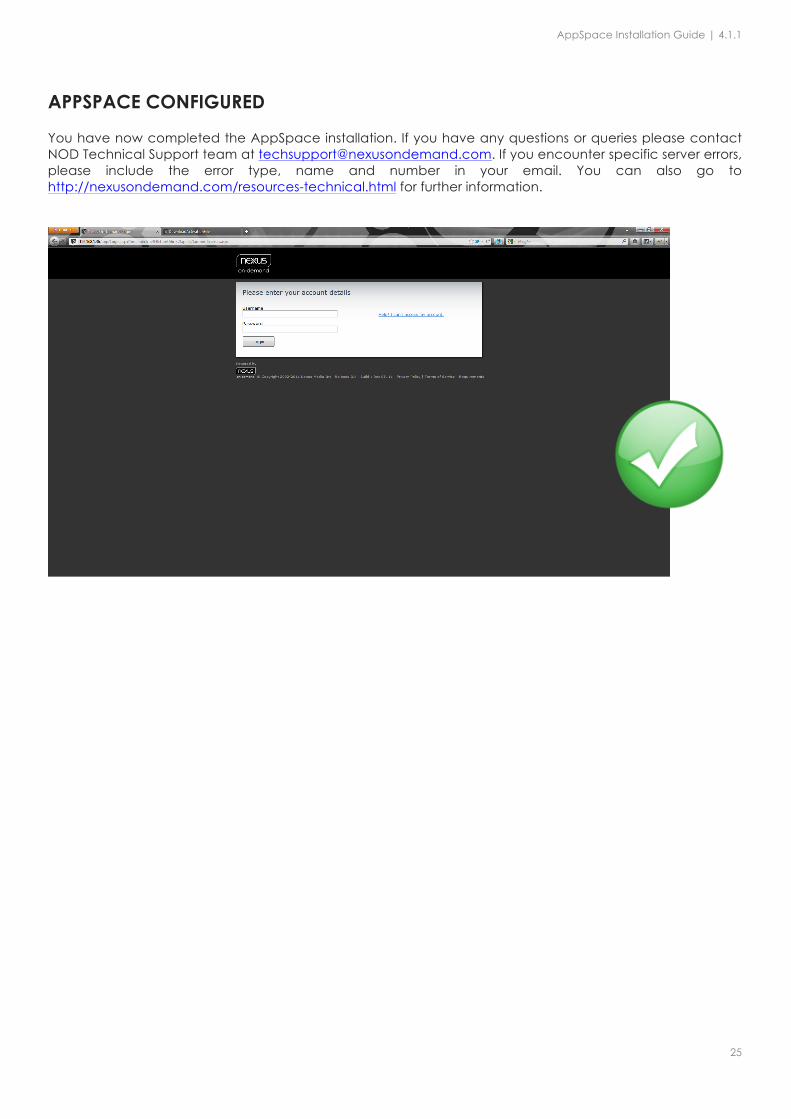
APPSPACE CONFIGURED You have now completed the AppSpace installation. If you have any questions or queries please contact NOD Technical Support team at [email protected]. If you encounter specific server errors, please include the error type, name and number in your email. You can also go to http://nexusondemand.com/resources-technical.html for further information.