Embed Size (px)
Citation preview
A Dell EMC Technical White Paper
Securing 14th generation Dell EMC PowerEdge servers with System Erase Overview of the System Erase feature used to repurpose or retire a PowerEdge server.
Dell EMC Server Solutions June 2017
Authors
Texas Roemer, Principal Test Engineer Paul Rubin, Senior Product Manager
Shekar Babu S, Firmware Senior Engineer
Srinivasulu E, Firmware Engineer
Anis A Ahmed, Firmware Senior Engineer
Sheshadri PR Rao (InfoDev)
2 Securing 14th generation Dell EMC PowerEdge servers with System Erase
Revisions
Date Description
June 2017 Initial release
The information in this publication is provided “as is.” Dell Inc. makes no representations or warranties of any kind with respect to the information in this
publication, and specifically disclaims implied warranties of merchantability or fitness for a particular purpose.
Use, copying, and distribution of any software described in this publication requires an applicable software license.
Copyright © June-2017 Dell Inc. or its subsidiaries. All Rights Reserved. Dell, EMC, and other trademarks are trademarks of Dell Inc. or its subsidiaries.
Other trademarks may be the property of their respective owners. Published in the USA [6/20/2017] [Technical White Paper] [
Dell believes the information in this document is accurate as of its publication date. The information is subject to change without notice.
3 Securing 14th generation Dell EMC PowerEdge servers with System Erase
Contents Revisions............................................................................................................................................................................. 2
Executive summary ............................................................................................................................................................. 4
1 Introduction ................................................................................................................................................................... 5
1.1 iDRAC with Lifecycle Controller .......................................................................................................................... 5
1.2 Lifecycle Controller Graphical User Interface (GUI) ........................................................................................... 5
1.3 Using System Erase to repurpose or retire servers ........................................................................................... 6
1.4 Details for Drive Erase ...................................................................................................................................... 17
1.5 Details for BIOS Reset ..................................................................................................................................... 18
1.6 System Erase by using RACADM .................................................................................................................... 18
1.7 System Erase by using WS-Man ...................................................................................................................... 19
2 Summary .................................................................................................................................................................... 23
4 Securing 14th generation Dell EMC PowerEdge servers with System Erase
Executive summary
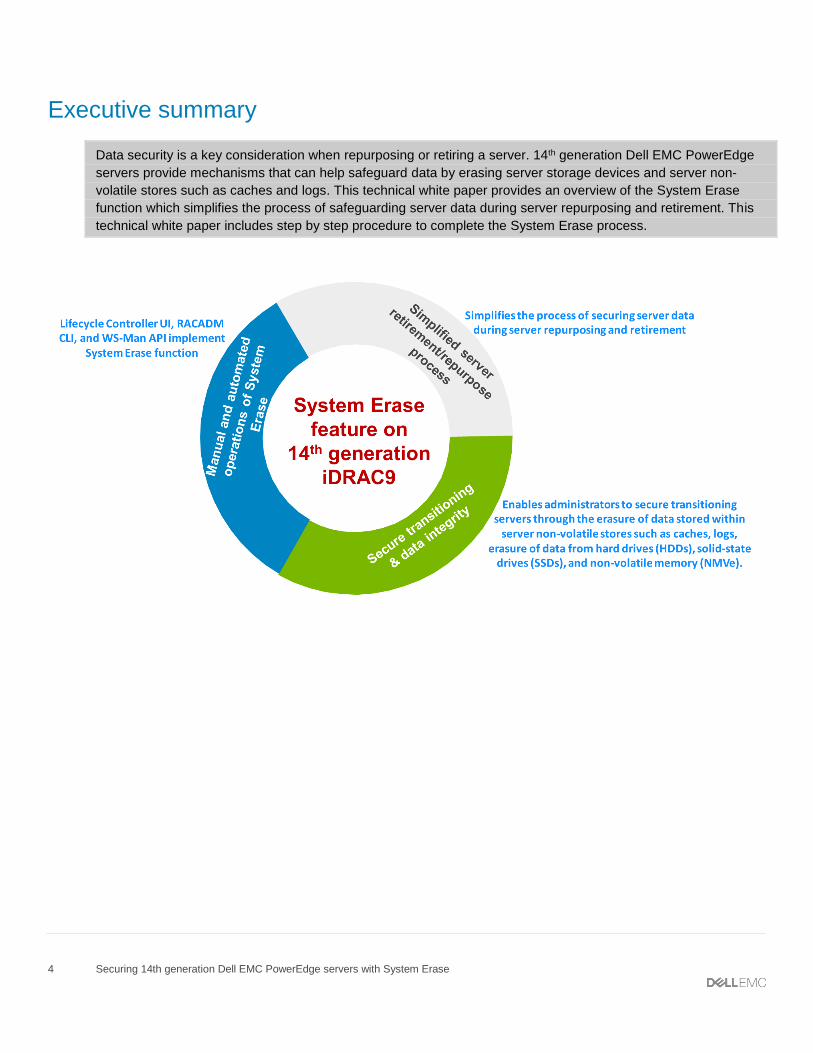
Data security is a key consideration when repurposing or retiring a server. 14th generation Dell EMC PowerEdge
servers provide mechanisms that can help safeguard data by erasing server storage devices and server non-
volatile stores such as caches and logs. This technical white paper provides an overview of the System Erase
function which simplifies the process of safeguarding server data during server repurposing and retirement. This
technical white paper includes step by step procedure to complete the System Erase process.
5 Securing 14th generation Dell EMC PowerEdge servers with System Erase
1 Introduction Data security is a key consideration throughout the lifecycle of a server system. The 14th generation Dell EMC
PowerEdge servers have been engineered to provide data security at every stage of the server lifecycle.
When a server is to be repurposed because of change in workload or change in ownership, or a server is to
be retired, IT administrators must ensure that confidential information is not inadvertently disclosed.
System Erase can be performed by following methods:
Lifecycle Controller
WS-Man
RACADM
This technical white paper provides an overview of System Erase and step by step procedure to complete the
process.
1.1 iDRAC with Lifecycle Controller The Integrated Dell Remote Access Controller (iDRAC) is designed to:
Enhance the productivity of server administrators and improve the overall availability of PowerEdge
servers.
Alert administrators to server problems and enabling remote server management
Reduce the need for an administrator to physically visit the server
iDRAC with Lifecycle Controller allows administrators to:
Deploy, update, monitor, and manage PowerEdge servers from any location without the use of
agents in a one-to-one or one-to-many method.
Enables configuration changes and firmware updates to be managed from Dell EMC or appropriate
third-party consoles directly to iDRAC with Lifecycle Controller on a PowerEdge server, regardless of
the operating system that may or may not be running.
For more information about the iDRAC with Lifecycle Controller, see the iDRAC with Lifecycle Controller
documents at dell.com/idracmanuals.
1.2 Lifecycle Controller Graphical User Interface (GUI) Lifecycle Controller provides advanced embedded Systems Management features to perform various tasks by
using a Graphical User Interface (GUI). It is delivered as part of the iDRAC out-of-band solution and
embedded Unified Extensible Firmware Interface (UEFI) applications in the PowerEdge servers. iDRAC
works with the UEFI firmware to access and manage every aspect of the hardware, including component and
subsystem management that is beyond traditional Baseboard Management Controller (BMC) capabilities.

6 Securing 14th generation Dell EMC PowerEdge servers with System Erase
The iDRAC with Lifecycle Controller technology in the server’s embedded management:
Enables administrators to perform key tasks such as configuring BIOS and hardware settings,
deploying operating systems, changing RAID settings, backing up and restoring hardware profiles,
and managing server retirement and repurposing.
Provides a robust set of management functions that can be used throughout the entire server
lifecycle.
Simplifies server lifecycle management—from provisioning, deployment, patching and updating to
servicing and user customization—both locally and remotely.
Includes managed and persistent storage that embeds systems management features and Operating
System device drivers directly on the server. This eliminates the media-based system management
tools and utilities traditionally needed for systems management.
1.3 Using System Erase to repurpose or retire servers Many servers are repurposed during their lifetime as they transition from workload to workload, or change
ownership from one organization to another. When such transitions occur or when a server reaches the end
of its useful life and is retired, IT best-practices recommend removing all data from the server to ensure that
confidential information is not inadvertently shared. The Lifecycle Controller GUI includes functionality called
the Repurpose or Retire System.
Using Repurpose or Retire System, an administrator can reset a PowerEdge server to its original state
(factory settings) with all data removed from internal server non-volatile stores and from all storage devices
within the server.
7 Securing 14th generation Dell EMC PowerEdge servers with System Erase
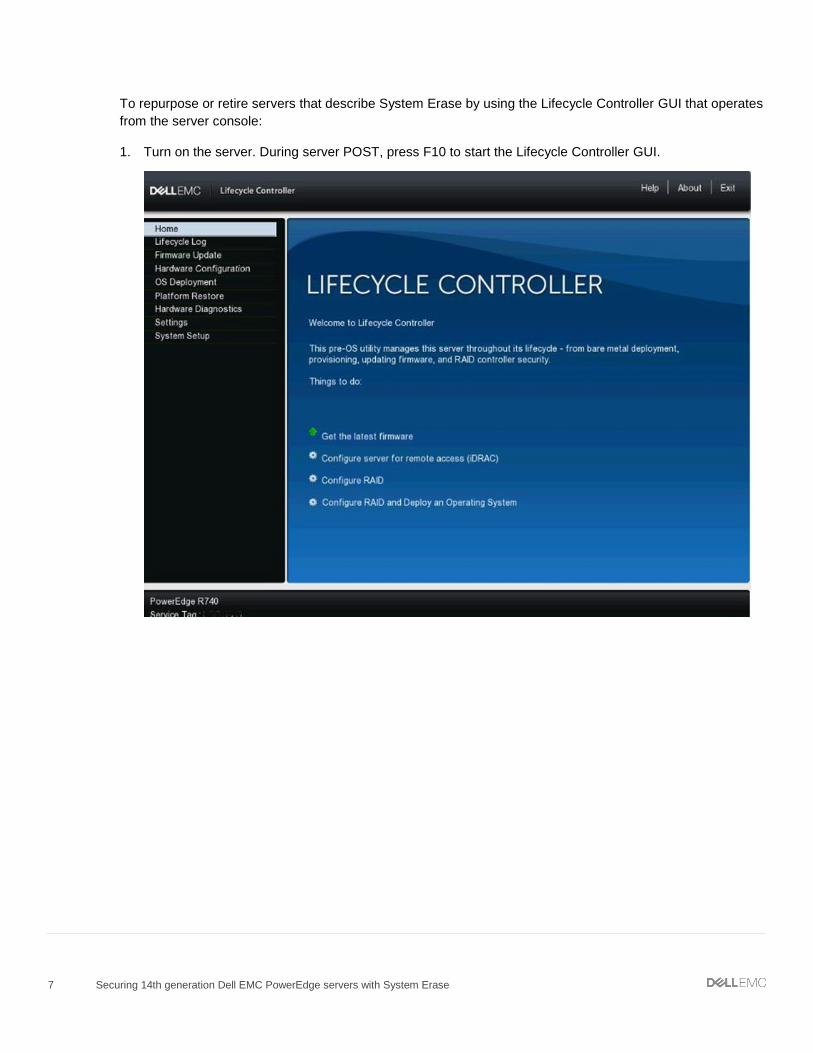
To repurpose or retire servers that describe System Erase by using the Lifecycle Controller GUI that operates
from the server console:
1. Turn on the server. During server POST, press F10 to start the Lifecycle Controller GUI.

8 Securing 14th generation Dell EMC PowerEdge servers with System Erase
2. In the left pane, click Hardware Configuration. The available hardware configuration features are
displayed in the working pane. Click Repurpose or Retire System.

9 Securing 14th generation Dell EMC PowerEdge servers with System Erase
The Retire or Repurpose System function enables removal of data from the server by erasing server non-volatile
stores and data stored on hard disk drives (HDDs), Self-encrypting drive (SED), Instant Secure Erase (ISE), and
non-volatile memory drives (NVMes).
Server non-volatile stores are listed in the Server Features section. Also, includes BIOS settings, the server
NVCache, any data used by embedded UEFI applications, and iDRAC with Lifecycle Controller log data.
3. In the Servers Features section, select the check boxes corresponding to the server features that you want to
erase.
4. To protect data stored on HDDs, SSDs, and NVMes, click View Storage and Disks.
A list all storage drives attached to the server that are supported for erase is displayed. Only those drives that can
be erased and are detected are listed.
Note: The Retire or Repurpose System feature provides two types of drive erase:
Instant Secure Erase (ISE) for those devices that support this emerging industry-standard function
Overwrite for remaining devices.

10 Securing 14th generation Dell EMC PowerEdge servers with System Erase
Both drives that require Overwrite and drives that support Secure Erase are detected.
11 Securing 14th generation Dell EMC PowerEdge servers with System Erase
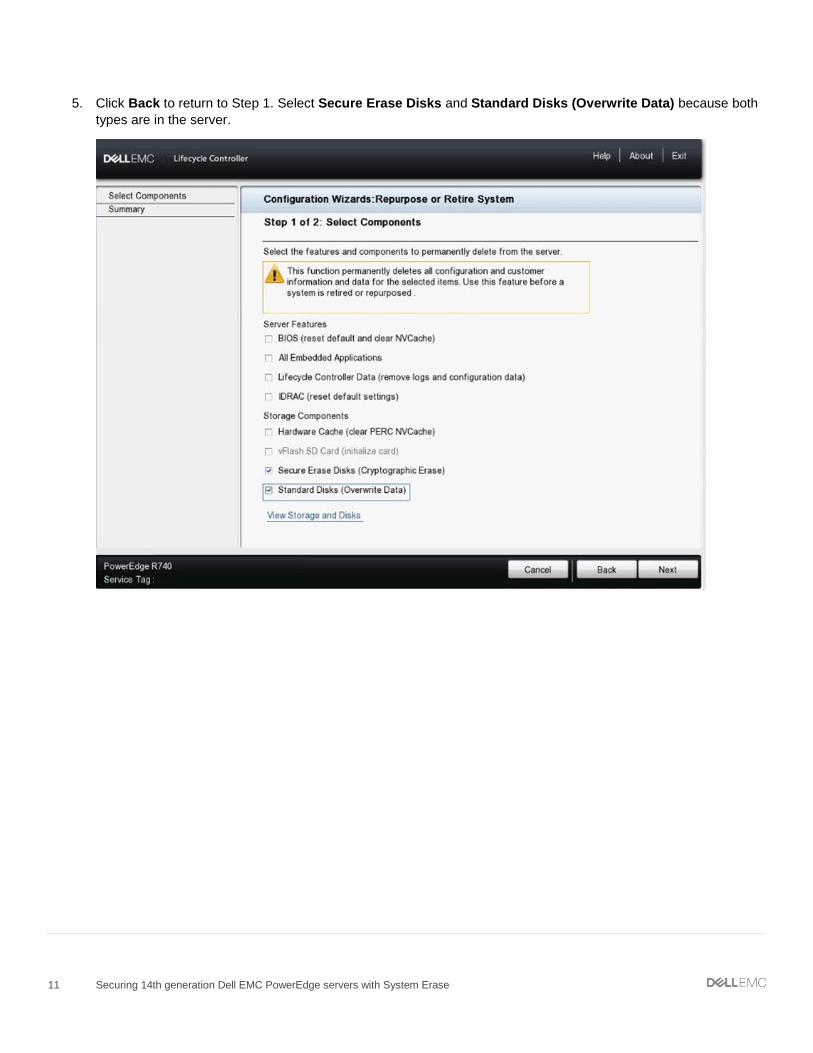
5. Click Back to return to Step 1. Select Secure Erase Disks and Standard Disks (Overwrite Data) because both
types are in the server.
12 Securing 14th generation Dell EMC PowerEdge servers with System Erase
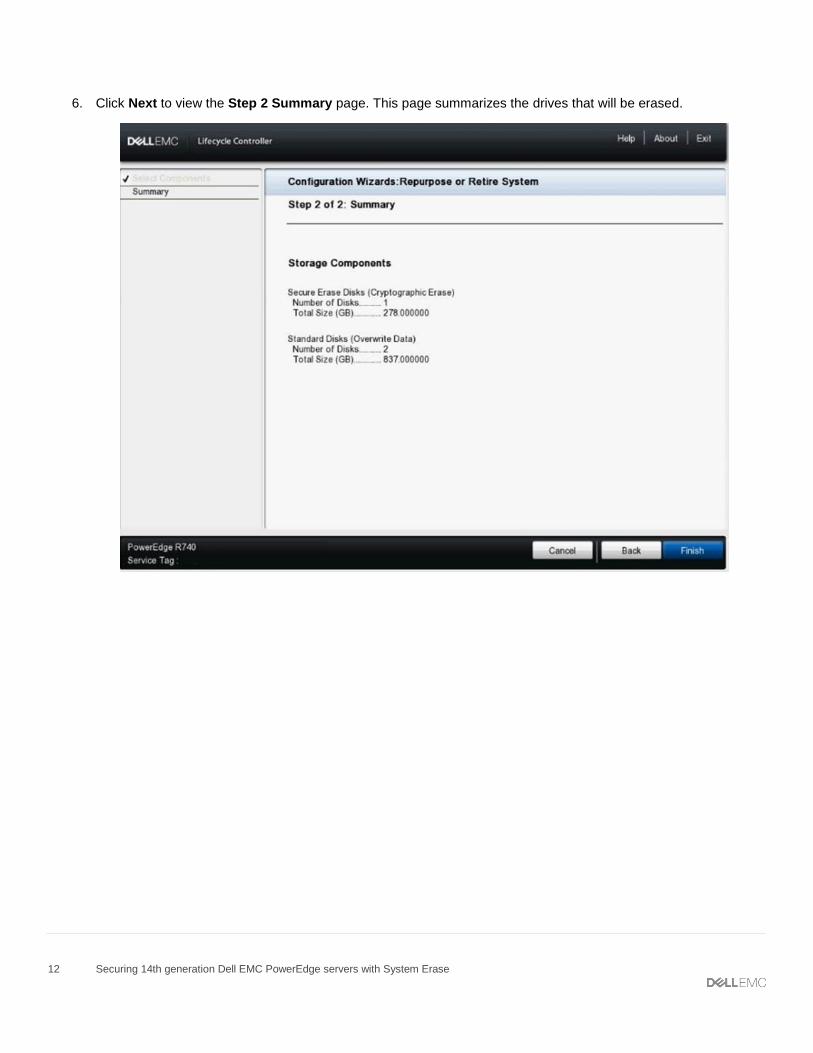
6. Click Next to view the Step 2 Summary page. This page summarizes the drives that will be erased.
13 Securing 14th generation Dell EMC PowerEdge servers with System Erase
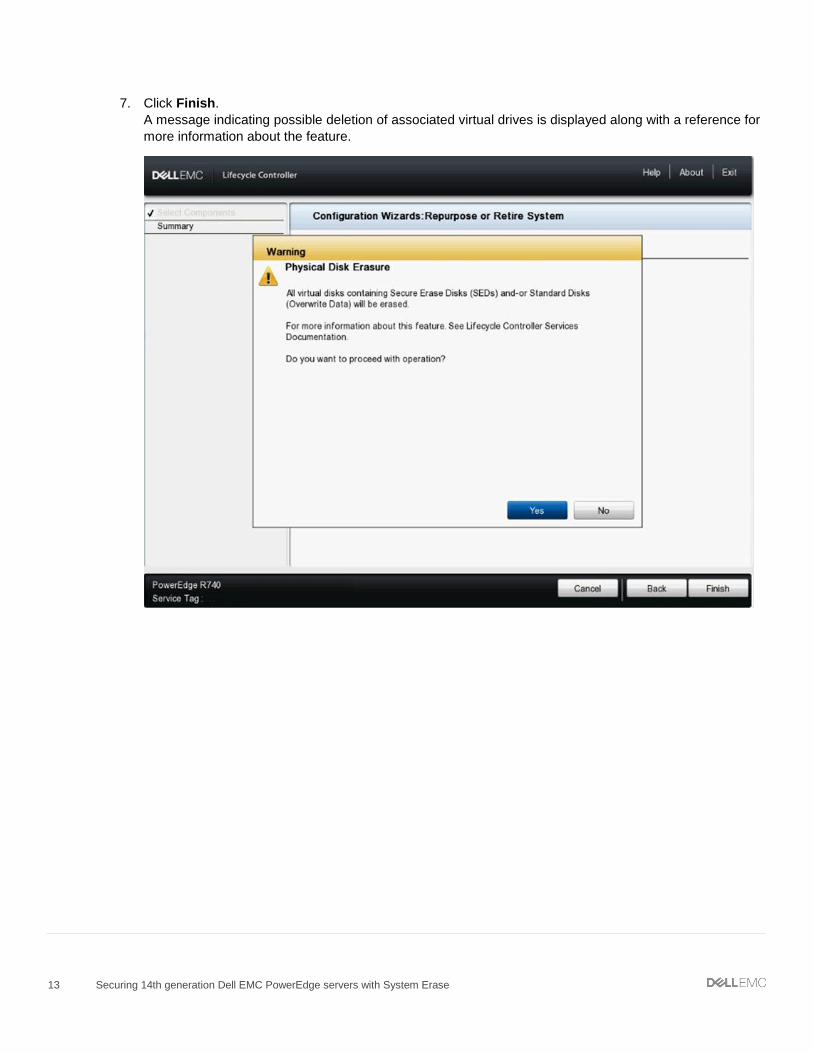
7. Click Finish.
A message indicating possible deletion of associated virtual drives is displayed along with a reference for
more information about the feature.
14 Securing 14th generation Dell EMC PowerEdge servers with System Erase
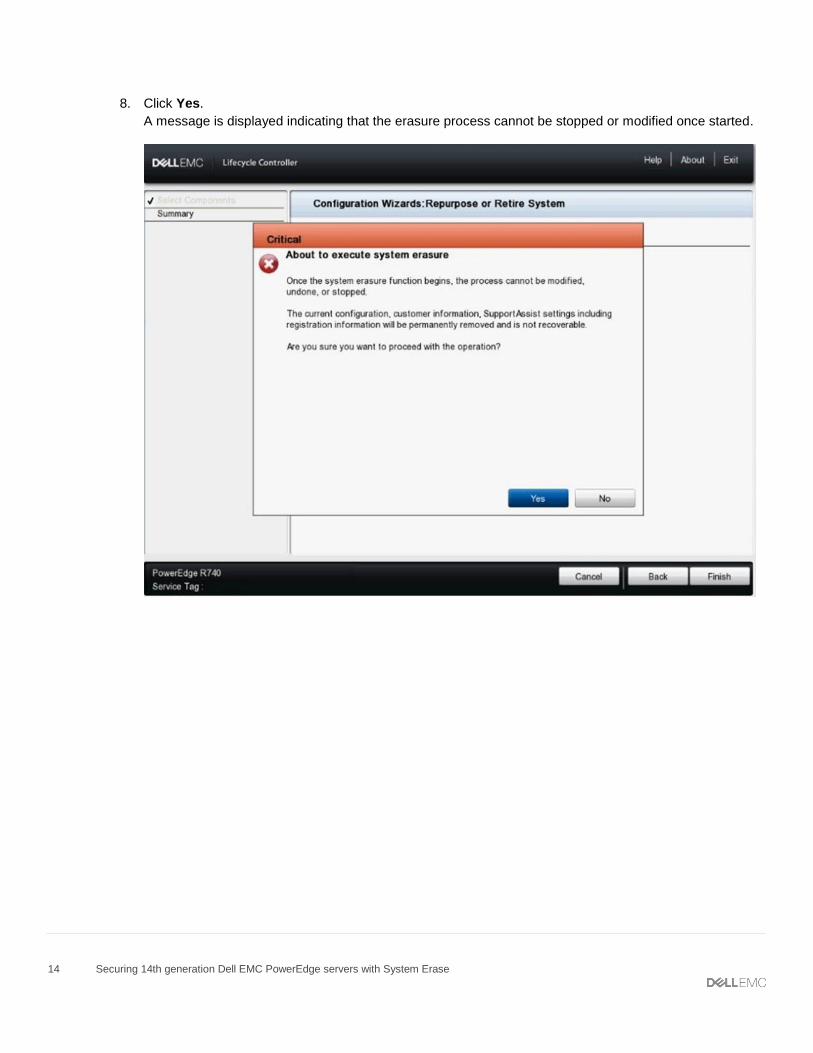
8. Click Yes.
A message is displayed indicating that the erasure process cannot be stopped or modified once started.
15 Securing 14th generation Dell EMC PowerEdge servers with System Erase
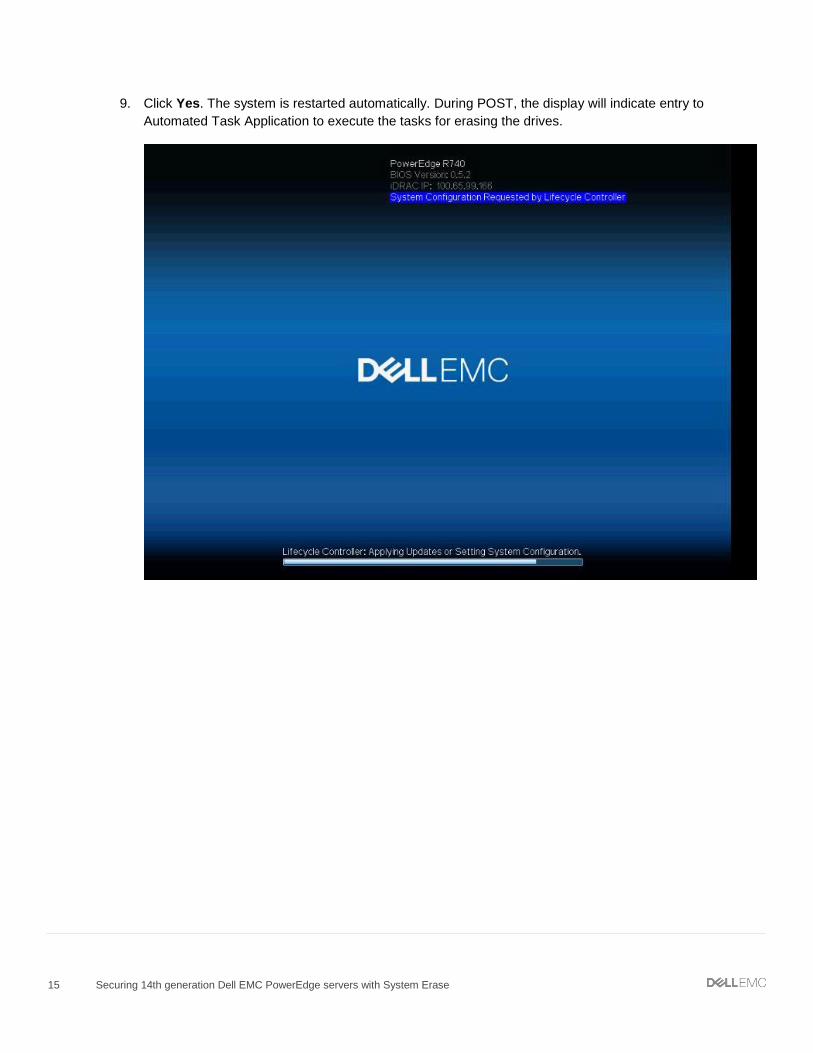
9. Click Yes. The system is restarted automatically. During POST, the display will indicate entry to
Automated Task Application to execute the tasks for erasing the drives.
16 Securing 14th generation Dell EMC PowerEdge servers with System Erase
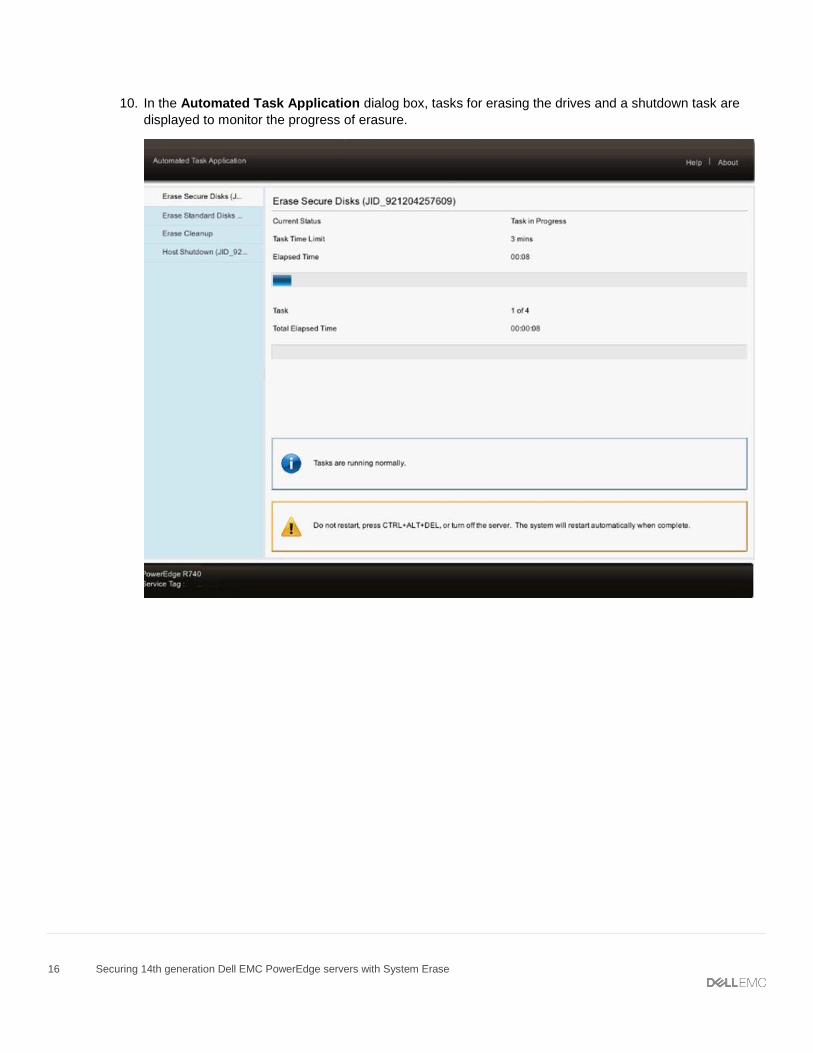
10. In the Automated Task Application dialog box, tasks for erasing the drives and a shutdown task are
displayed to monitor the progress of erasure.
17 Securing 14th generation Dell EMC PowerEdge servers with System Erase
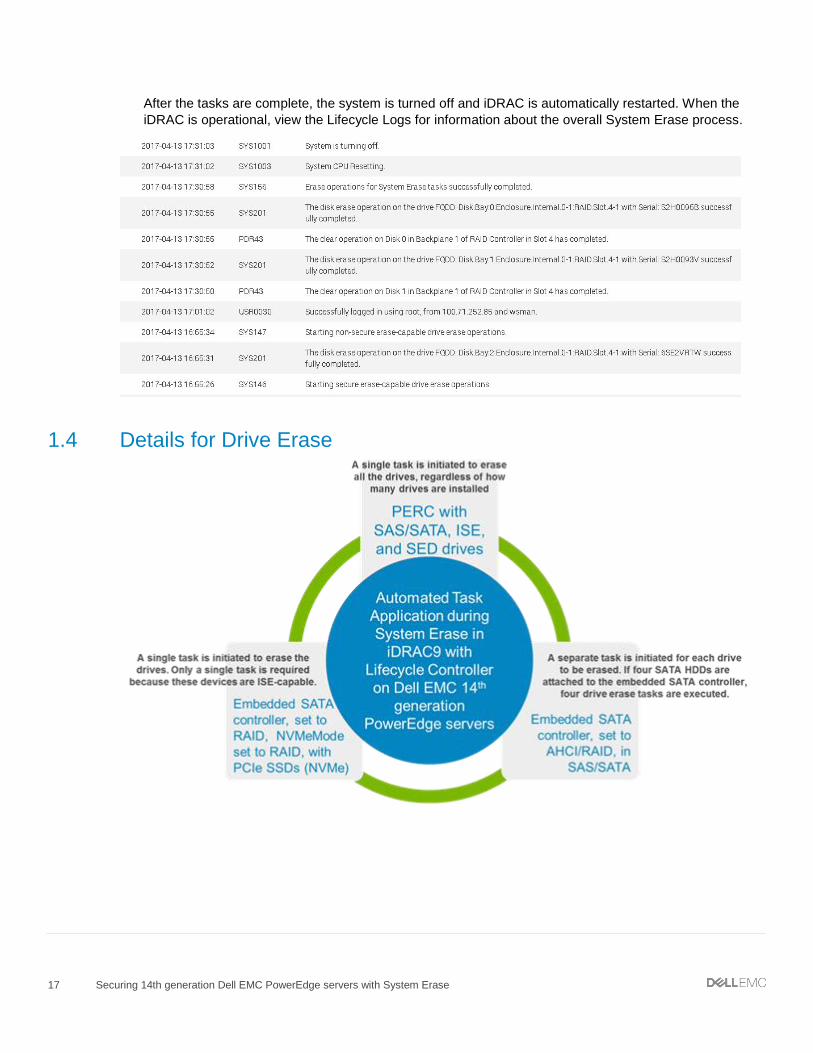
After the tasks are complete, the system is turned off and iDRAC is automatically restarted. When the
iDRAC is operational, view the Lifecycle Logs for information about the overall System Erase process.
1.4 Details for Drive Erase
18 Securing 14th generation Dell EMC PowerEdge servers with System Erase
1.5 Details for BIOS Reset When BIOS is selected for System Erase, the server will be turned off and the iDRAC is reset at the end of
the Automated Task Application. To complete the process of BIOS reset, the server power must be restored.
When the server is turned on, during POST, the BIOS completes the process of resetting to the default
properties. At the completion of the reset process, the server will once again be turned off.
Resetting the BIOS also includes the erasing of BIOS related non-volatile settings used by the OS and
embedded in the UEFI applications.
1.6 System Erase by using RACADM The RACADM systemerase sub-command implements the System Erase function by using the RACADM
command line interface (CLI):
Synopsis
1. To erase a specific component:
racadm systemerase <component>
2. To erase multiple components:
racadm systemerase <component>,<component>,<component>
Input
3. <component> — the valid types of components are:
o –bios Reset BIOS settings and clear NV Cache
o –idrac Reset iDRAC, clear data / logs
o –lcdata Clear Lifecycle Controller data / logs
o –allaps data Clear Diagnostics data, Driver Packs, OS Collector data, and LC ISM dat
o –secureerasepd Erase ISE / SED drives
o –overwritepd Erase overwrite drives
o –percnvcache Clear PERC Cache
o –vflash Clear vFlash
To see the list of erasable storage devices similar to step 4, check the system erase capability of all physical
storage devices by running:
# racadm storage get pdisks –o –p SystemEraseCapability
19 Securing 14th generation Dell EMC PowerEdge servers with System Erase
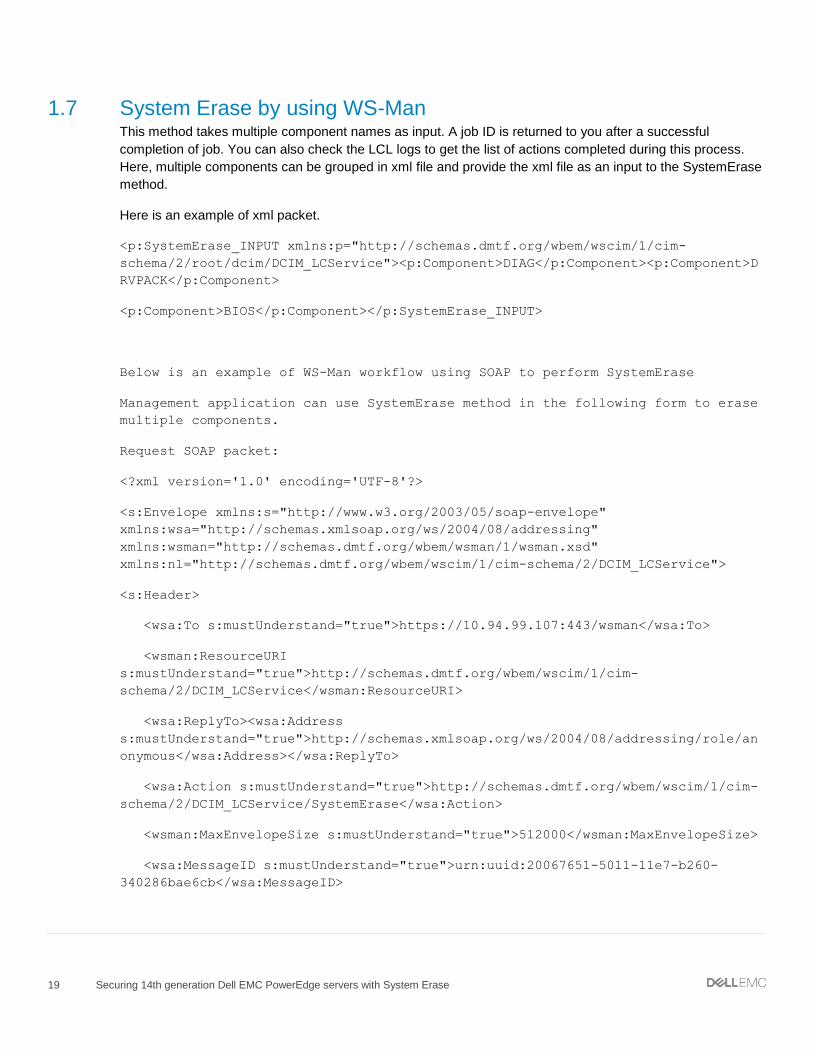
1.7 System Erase by using WS-Man This method takes multiple component names as input. A job ID is returned to you after a successful
completion of job. You can also check the LCL logs to get the list of actions completed during this process.
Here, multiple components can be grouped in xml file and provide the xml file as an input to the SystemErase
method.
Here is an example of xml packet.
<p:SystemErase_INPUT xmlns:p="http://schemas.dmtf.org/wbem/wscim/1/cim-
schema/2/root/dcim/DCIM_LCService"><p:Component>DIAG</p:Component><p:Component>D
RVPACK</p:Component>
<p:Component>BIOS</p:Component></p:SystemErase_INPUT>
Below is an example of WS-Man workflow using SOAP to perform SystemErase
Management application can use SystemErase method in the following form to erase
multiple components.
Request SOAP packet:
<?xml version='1.0' encoding='UTF-8'?>
<s:Envelope xmlns:s="http://www.w3.org/2003/05/soap-envelope"
xmlns:wsa="http://schemas.xmlsoap.org/ws/2004/08/addressing"
xmlns:wsman="http://schemas.dmtf.org/wbem/wsman/1/wsman.xsd"
xmlns:n1="http://schemas.dmtf.org/wbem/wscim/1/cim-schema/2/DCIM_LCService">
<s:Header>
<wsa:To s:mustUnderstand="true">https://10.94.99.107:443/wsman</wsa:To>
<wsman:ResourceURI
s:mustUnderstand="true">http://schemas.dmtf.org/wbem/wscim/1/cim-
schema/2/DCIM_LCService</wsman:ResourceURI>
<wsa:ReplyTo><wsa:Address
s:mustUnderstand="true">http://schemas.xmlsoap.org/ws/2004/08/addressing/role/an
onymous</wsa:Address></wsa:ReplyTo>
<wsa:Action s:mustUnderstand="true">http://schemas.dmtf.org/wbem/wscim/1/cim-
schema/2/DCIM_LCService/SystemErase</wsa:Action>
<wsman:MaxEnvelopeSize s:mustUnderstand="true">512000</wsman:MaxEnvelopeSize>
<wsa:MessageID s:mustUnderstand="true">urn:uuid:20067651-5011-11e7-b260-
340286bae6cb</wsa:MessageID>
20 Securing 14th generation Dell EMC PowerEdge servers with System Erase
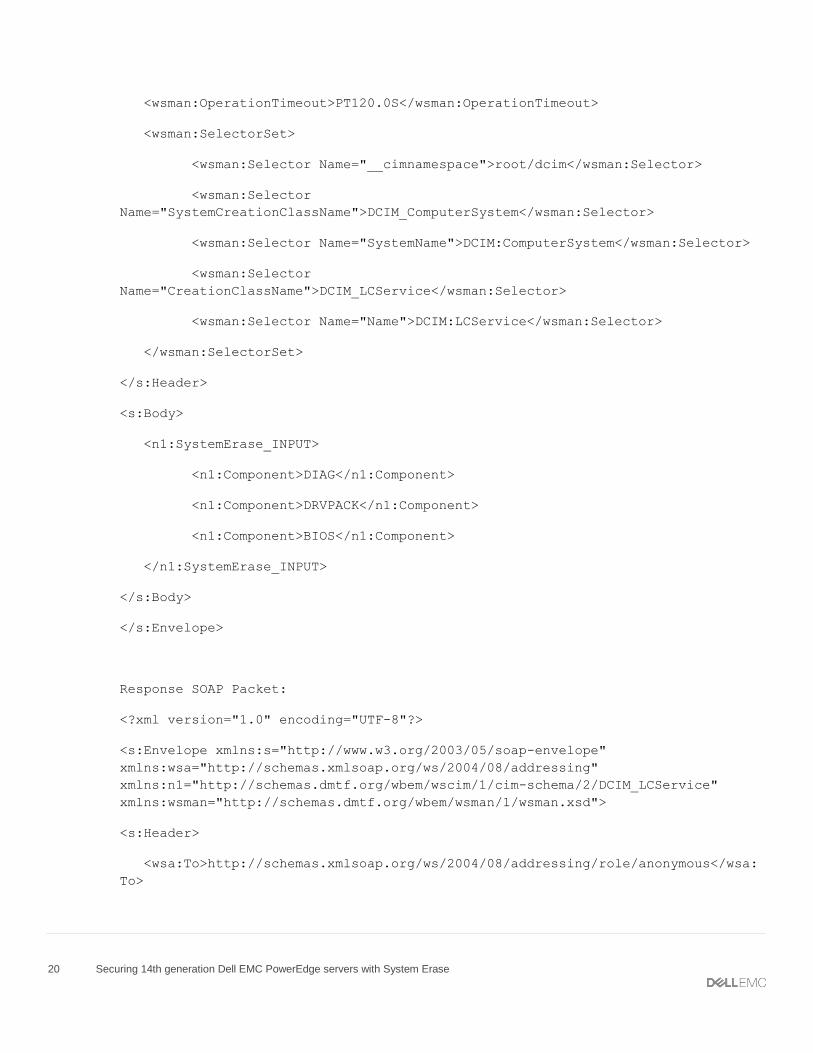
<wsman:OperationTimeout>PT120.0S</wsman:OperationTimeout>
<wsman:SelectorSet>
<wsman:Selector Name="__cimnamespace">root/dcim</wsman:Selector>
<wsman:Selector
Name="SystemCreationClassName">DCIM_ComputerSystem</wsman:Selector>
<wsman:Selector Name="SystemName">DCIM:ComputerSystem</wsman:Selector>
<wsman:Selector
Name="CreationClassName">DCIM_LCService</wsman:Selector>
<wsman:Selector Name="Name">DCIM:LCService</wsman:Selector>
</wsman:SelectorSet>
</s:Header>
<s:Body>
<n1:SystemErase_INPUT>
<n1:Component>DIAG</n1:Component>
<n1:Component>DRVPACK</n1:Component>
<n1:Component>BIOS</n1:Component>
</n1:SystemErase_INPUT>
</s:Body>
</s:Envelope>
Response SOAP Packet:
<?xml version="1.0" encoding="UTF-8"?>
<s:Envelope xmlns:s="http://www.w3.org/2003/05/soap-envelope"
xmlns:wsa="http://schemas.xmlsoap.org/ws/2004/08/addressing"
xmlns:n1="http://schemas.dmtf.org/wbem/wscim/1/cim-schema/2/DCIM_LCService"
xmlns:wsman="http://schemas.dmtf.org/wbem/wsman/1/wsman.xsd">
<s:Header>
<wsa:To>http://schemas.xmlsoap.org/ws/2004/08/addressing/role/anonymous</wsa:
To>
21 Securing 14th generation Dell EMC PowerEdge servers with System Erase
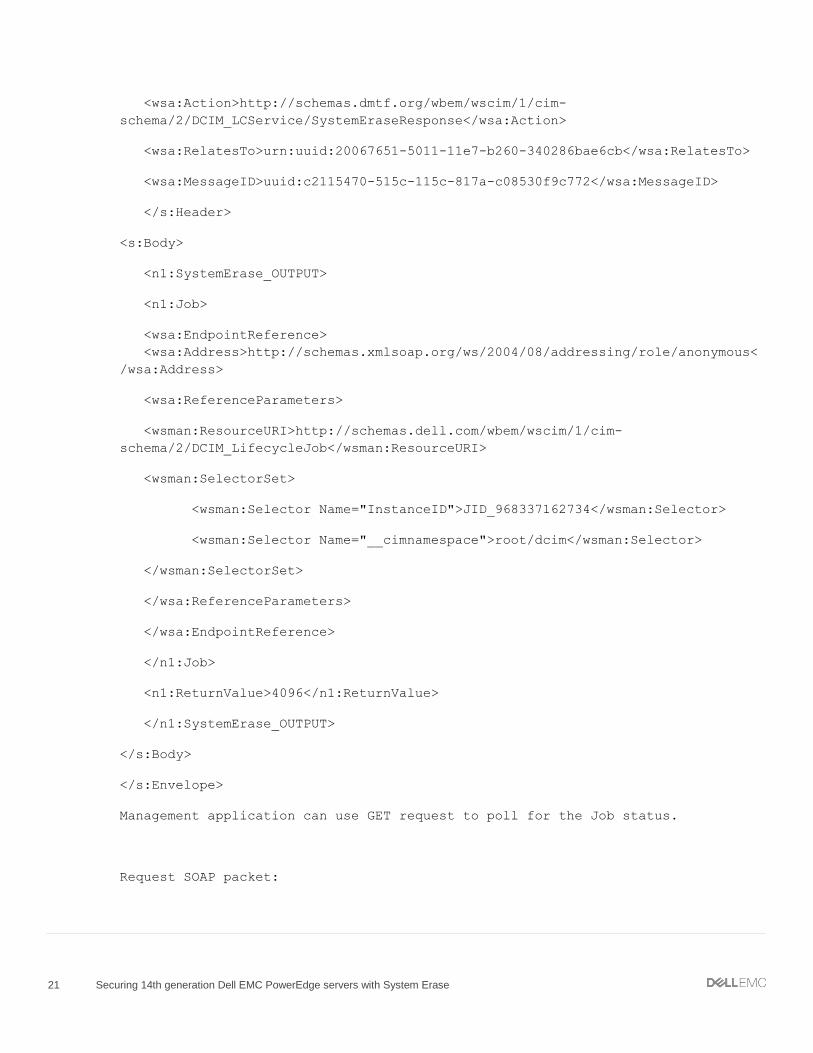
<wsa:Action>http://schemas.dmtf.org/wbem/wscim/1/cim-
schema/2/DCIM_LCService/SystemEraseResponse</wsa:Action>
<wsa:RelatesTo>urn:uuid:20067651-5011-11e7-b260-340286bae6cb</wsa:RelatesTo>
<wsa:MessageID>uuid:c2115470-515c-115c-817a-c08530f9c772</wsa:MessageID>
</s:Header>
<s:Body>
<n1:SystemErase_OUTPUT>
<n1:Job>
<wsa:EndpointReference>
<wsa:Address>http://schemas.xmlsoap.org/ws/2004/08/addressing/role/anonymous<
/wsa:Address>
<wsa:ReferenceParameters>
<wsman:ResourceURI>http://schemas.dell.com/wbem/wscim/1/cim-
schema/2/DCIM_LifecycleJob</wsman:ResourceURI>
<wsman:SelectorSet>
<wsman:Selector Name="InstanceID">JID_968337162734</wsman:Selector>
<wsman:Selector Name="__cimnamespace">root/dcim</wsman:Selector>
</wsman:SelectorSet>
</wsa:ReferenceParameters>
</wsa:EndpointReference>
</n1:Job>
<n1:ReturnValue>4096</n1:ReturnValue>
</n1:SystemErase_OUTPUT>
</s:Body>
</s:Envelope>
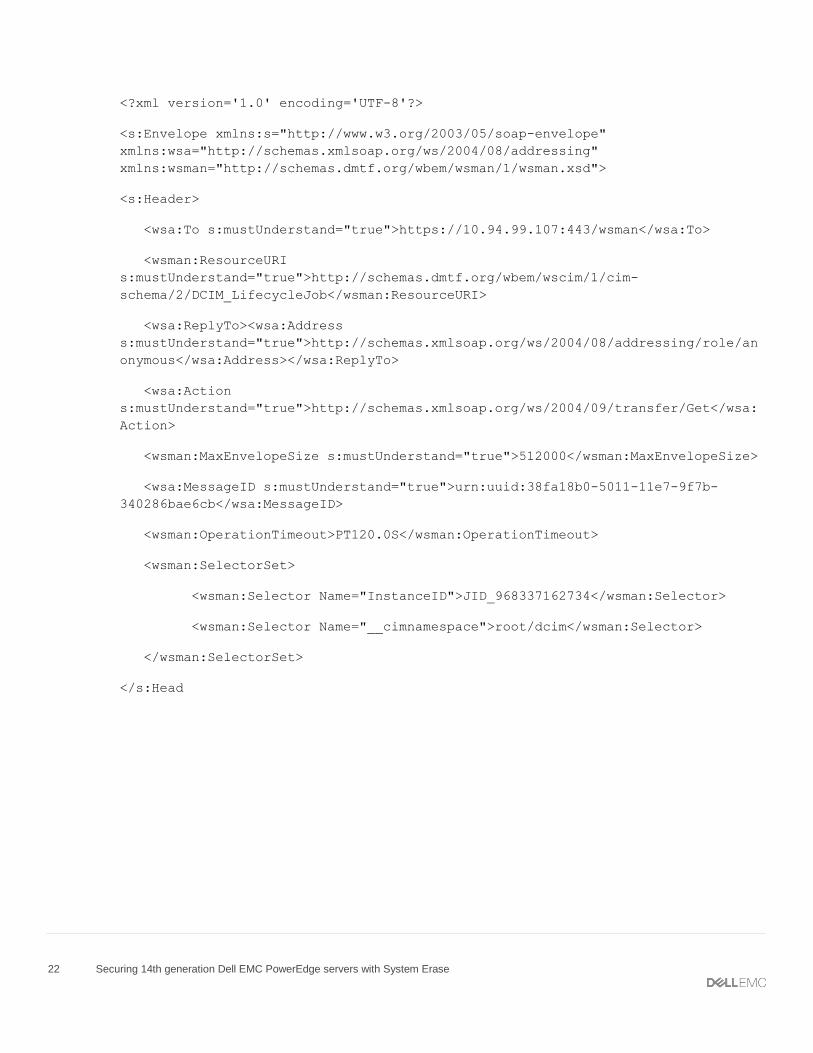
Management application can use GET request to poll for the Job status.
Request SOAP packet:
22 Securing 14th generation Dell EMC PowerEdge servers with System Erase
<?xml version='1.0' encoding='UTF-8'?>
<s:Envelope xmlns:s="http://www.w3.org/2003/05/soap-envelope"
xmlns:wsa="http://schemas.xmlsoap.org/ws/2004/08/addressing"
xmlns:wsman="http://schemas.dmtf.org/wbem/wsman/1/wsman.xsd">
<s:Header>
<wsa:To s:mustUnderstand="true">https://10.94.99.107:443/wsman</wsa:To>
<wsman:ResourceURI
s:mustUnderstand="true">http://schemas.dmtf.org/wbem/wscim/1/cim-
schema/2/DCIM_LifecycleJob</wsman:ResourceURI>
<wsa:ReplyTo><wsa:Address
s:mustUnderstand="true">http://schemas.xmlsoap.org/ws/2004/08/addressing/role/an
onymous</wsa:Address></wsa:ReplyTo>
<wsa:Action
s:mustUnderstand="true">http://schemas.xmlsoap.org/ws/2004/09/transfer/Get</wsa:
Action>
<wsman:MaxEnvelopeSize s:mustUnderstand="true">512000</wsman:MaxEnvelopeSize>
<wsa:MessageID s:mustUnderstand="true">urn:uuid:38fa18b0-5011-11e7-9f7b-
340286bae6cb</wsa:MessageID>
<wsman:OperationTimeout>PT120.0S</wsman:OperationTimeout>
<wsman:SelectorSet>
<wsman:Selector Name="InstanceID">JID_968337162734</wsman:Selector>
<wsman:Selector Name="__cimnamespace">root/dcim</wsman:Selector>
</wsman:SelectorSet>
</s:Head
23 Securing 14th generation Dell EMC PowerEdge servers with System Erase
2 Summary The14th generation of Dell EMC PowerEdge servers has the capabilities, features and management options
to help ensure both the security and integrity of data. Using the System Erase function, system administrators
can easily secure server data during server repurposing and retirement. From server conception, design and
manufacturing to decommissioning, Dell EMC Security Development Lifecycle and secure server
management tools help ensure PowerEdge servers remain secure. Dell EMC technologies, manageability
and design minimize the chance of vulnerability at all points in the server lifecycle. Dell EMC diligence and
timely firmware updates help the PowerEdge platforms stay ahead in today’s threat landscape.
Keeping your IT infrastructure and your data secure are paramount, and the PowerEdge server platform and
Dell EMC robust security offerings and wide-spectrum enterprise security and server management portfolio
can help enterprises adhere to standards, reduce data breaches and stay ahead of the ever-present growing
threats companies face today.