Embed Size (px)
Citation preview

making w
ood tools w
ilson
makingwood toolsSecond Edition with More for You to Learn Making Wood Tools with John Wilson
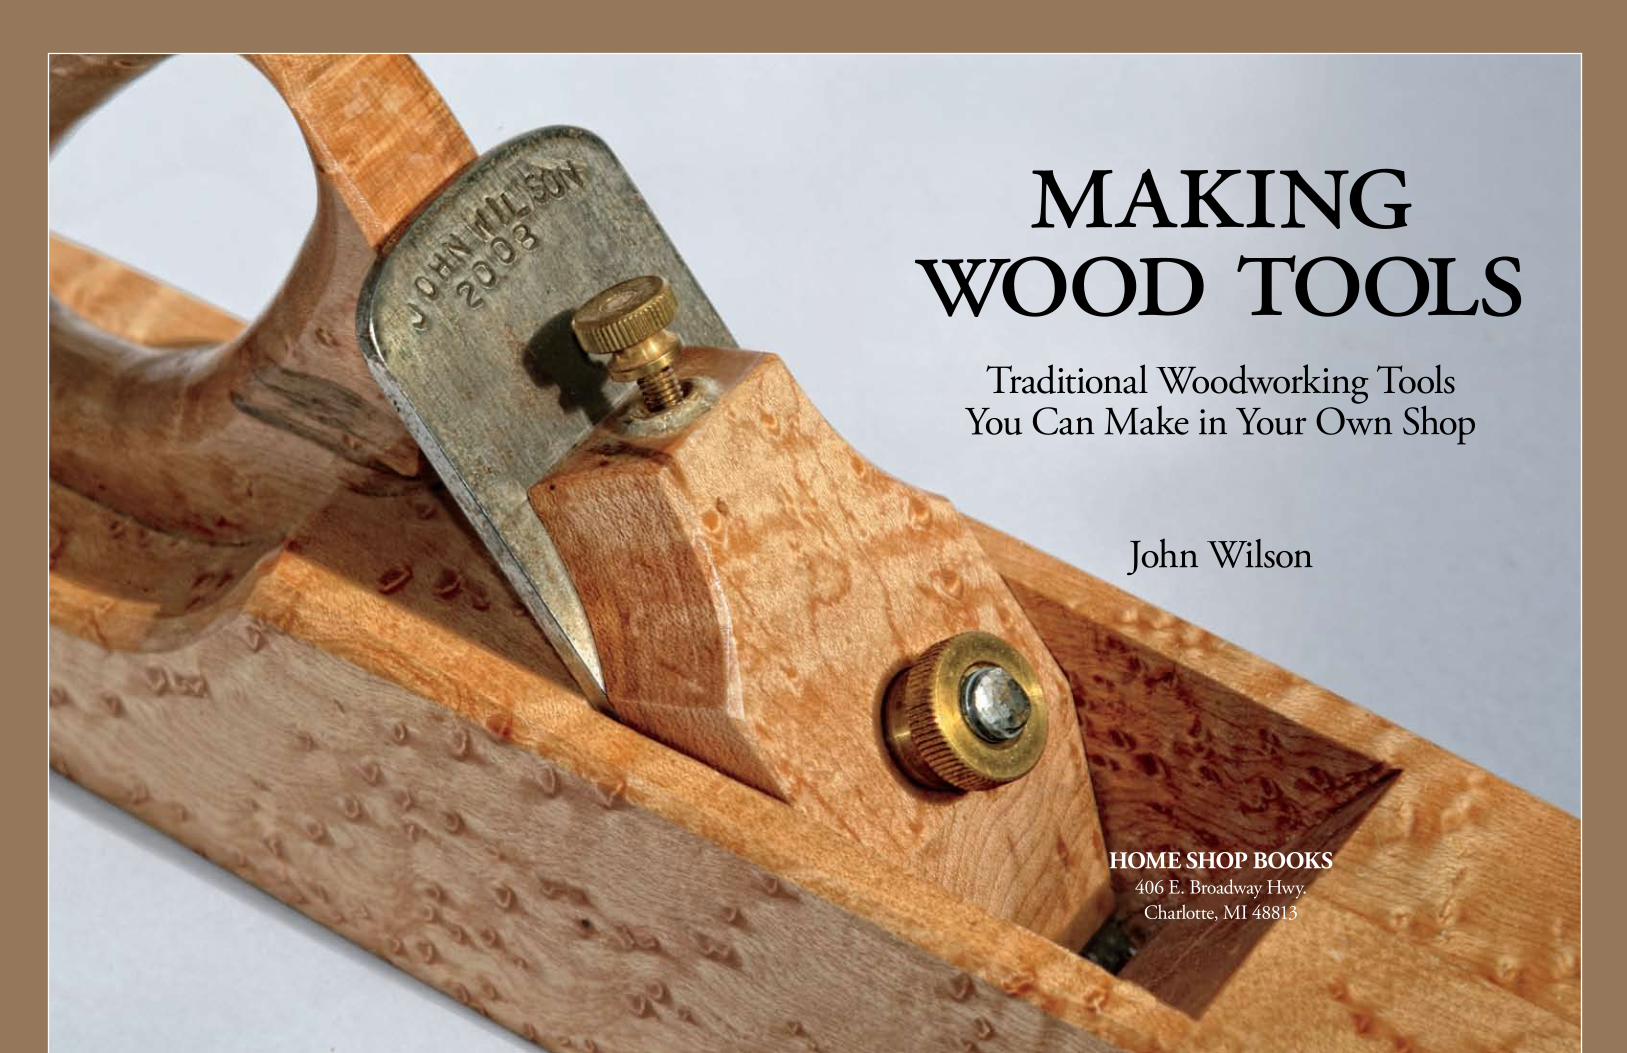
Traditional Woodworking Tools You Can Make in Your Own Shop
with John Wilson
Home Shop Books406 E. Broadway Hwy.Charlotte, MI 48813
www.ShakerOvalBox.com
John Wilson and the work of the Home Shop, which he founded in Charlotte, Michigan in 1988, is well known for qual-ity wood instruction. Classes focus on projects that teach skills, imparting tech-niques while giving a � ne project. You will � nd here a full collection of his tool-making projects that will enable you to make them in your shop.
Born in Syracuse, New York, trained as a residential carpenter, and educated as a social anthropologist, he taught for a decade in university and college in that � eld before turning to woodworking. For 23 years, he taught wood courses at Lansing Commu-nity College in Michigan, from which he developed his independent teaching career both at the Home Shop and on the road.
Wilson is perhaps best known for being at the forefront of the revival in Shaker oval box making, both as a teacher and supplier of a full range of materials for that craft. Information may be found at www.ShakerOvalBox.com.
� is is the second edition of John’s book featuring projects from the Home Shop for the serious woodworker and home crafts-man alike.
jacket design: linda watts
Hands-on involvement separates the craftsman
from the collector. Whether you are an armchair craftsman or a shop dust veteran, you are invited to participate in the process of tool making described in the pages of this book.
� ese tools harken to the classical period
of woodworking, 1700 to 1900, when a student made his tools as part of his education in moving from apprentice to journeyman. In the late 1800s a series of changes in how wood tools were made took place. � e blades became integrated into more complicated adjustment mechanisms, and the tool body was made from a casting rather than a block of wood. Wood tools became the province of the metal shop. What you see in this volume recaptures both the look and the feel of classical wood tools, as well as reclaims the making of them by woodworkers themselves.
You will � nd tools that can be made for
woodworking, by woodworkers, in the wood shop. � ey are insightful of how tools are made, inviting to be put to use, and worthy of collecting. Explore this world in Making Wood Tools. With the resources at hand in the wood shop, you can do it.
photo by scott phillips
isbn: 0-9729947-5-0 $39.95
MAKING
WOOD
TOOLS
“Veteran tool maker and
teacher John Wilson
brings us what may be
both the most beautiful
book of the year as
well as the most useful.
Interesting stories,
innovative designs, and
detailed plans.”
— Chris Bagbee
Highland Woodworking News
Second Edition
Second Edition
2nd
edition
US $39.95 ISBN 978-0-9729947-5-0
9
780972 994750
53995>
US $39.95 ISBN 978-0-9729947-5-0
9
780972 994750
53995>
MWT_2nd_Rev_JACKET.indd 1 8/6/13 12:02 PM
makingwood tools
makingwood tools
Traditional Woodworking Tools You Can Make in Your Own Shop
John Wilson
Home SHop BookS406 E. Broadway Hwy.Charlotte, MI 48813
v
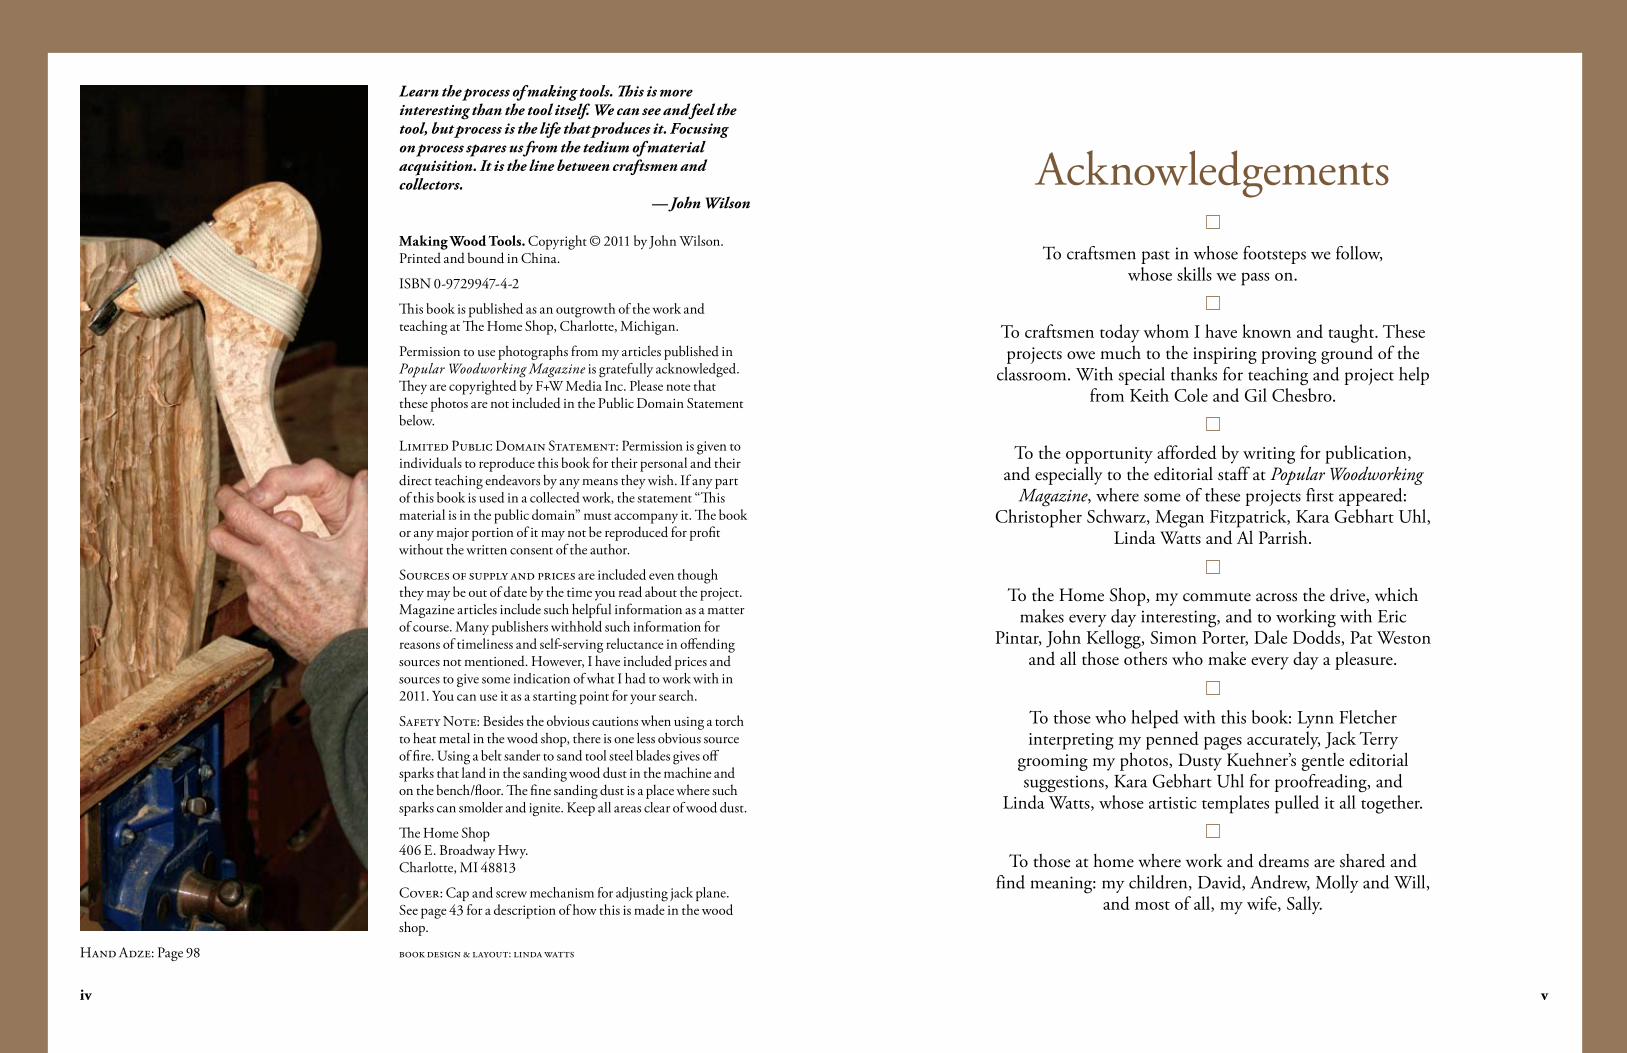
Learn the process of making tools. This is more interesting than the tool itself. We can see and feel the tool, but process is the life that produces it. Focusing on process spares us from the tedium of material acquisition. It is the line between craftsmen and collectors.
— John Wilson
Hand Adze: Page 98
iv
AcknowledgementsTo craftsmen past in whose footsteps we follow,
whose skills we pass on.
To craftsmen today whom I have known and taught. These projects owe much to the inspiring proving ground of the
classroom. With special thanks for teaching and project help from Keith Cole and Gil Chesbro.
To the opportunity afforded by writing for publication, and especially to the editorial staff at Popular Woodworking
Magazine, where some of these projects first appeared: Christopher Schwarz, Megan Fitzpatrick, Kara Gebhart Uhl,
Linda Watts and Al Parrish.
To the Home Shop, my commute across the drive, which makes every day interesting, and to working with Eric
Pintar, John Kellogg, Simon Porter, Dale Dodds, Pat Weston and all those others who make every day a pleasure.
To those who helped with this book: Lynn Fletcher interpreting my penned pages accurately, Jack Terry
grooming my photos, Dusty Kuehner’s gentle editorial suggestions, Kara Gebhart Uhl for proofreading, and
Linda Watts, whose artistic templates pulled it all together.
To those at home where work and dreams are shared and find meaning: my children, David, Andrew, Molly and Will,
and most of all, my wife, Sally.
making Wood Tools. Copyright © 2011 by John Wilson. Printed and bound in China.
ISBN 0-9729947-4-2
This book is published as an outgrowth of the work and teaching at The Home Shop, Charlotte, Michigan.
Permission to use photographs from my articles published in Popular Woodworking Magazine is gratefully acknowledged. They are copyrighted by F+W Media Inc. Please note that these photos are not included in the Public Domain Statement below.
Limited Public Domain Statement: Permission is given to individuals to reproduce this book for their personal and their direct teaching endeavors by any means they wish. If any part of this book is used in a collected work, the statement “This material is in the public domain” must accompany it. The book or any major portion of it may not be reproduced for profit without the written consent of the author.
Sources of supply and prices are included even though they may be out of date by the time you read about the project. Magazine articles include such helpful information as a matter of course. Many publishers withhold such information for reasons of timeliness and self-serving reluctance in offending sources not mentioned. However, I have included prices and sources to give some indication of what I had to work with in 2011. You can use it as a starting point for your search.
Safety Note: Besides the obvious cautions when using a torch to heat metal in the wood shop, there is one less obvious source of fire. Using a belt sander to sand tool steel blades gives off sparks that land in the sanding wood dust in the machine and on the bench/floor. The fine sanding dust is a place where such sparks can smolder and ignite. Keep all areas clear of wood dust.
The Home Shop406 E. Broadway Hwy.Charlotte, MI 48813
Cover: Cap and screw mechanism for adjusting jack plane. See page 43 for a description of how this is made in the wood shop.
book design & layout: linda watts
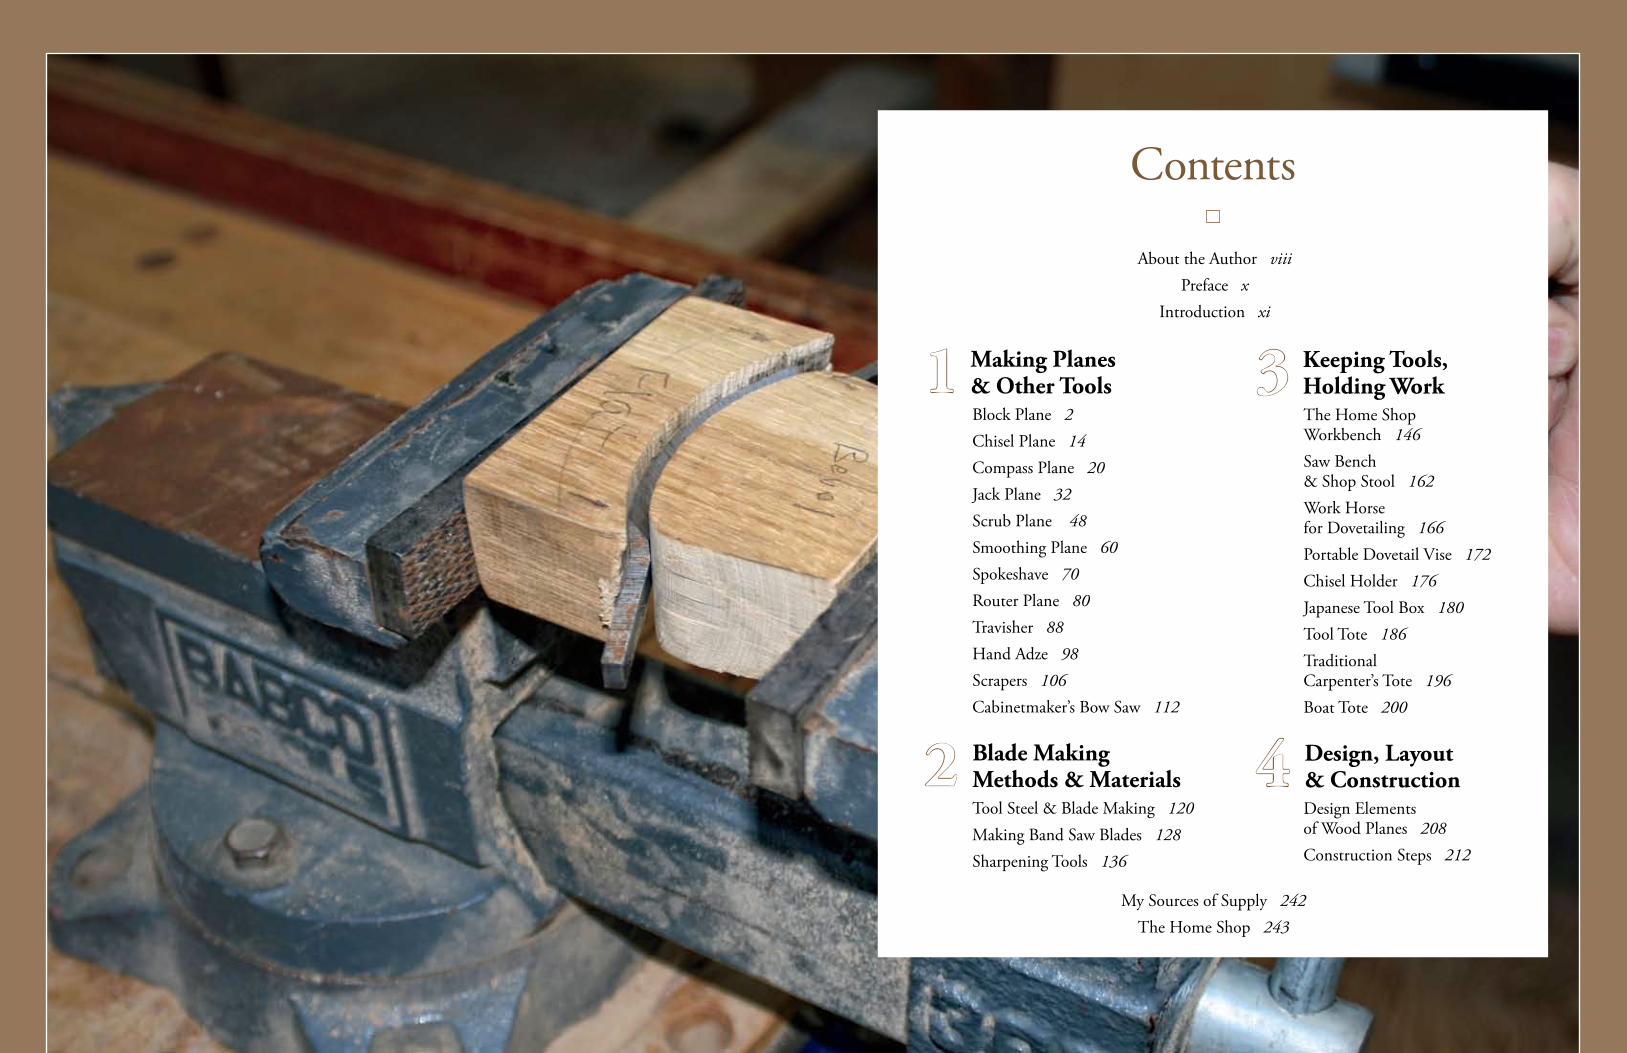
1 making planes & other ToolsBlock Plane 2Chisel Plane 14Compass Plane 20Jack Plane 32Scrub Plane 48Smoothing Plane 60Spokeshave 70Router Plane 80Travisher 88Hand Adze 98Scrapers 106Cabinetmaker’s Bow Saw 112
2 Blade making methods & materialsTool Steel & Blade Making 120Making Band Saw Blades 128Sharpening Tools 136
3 keeping Tools, Holding WorkThe Home Shop Workbench 146Saw Bench & Shop Stool 162Work Horse for Dovetailing 166Portable Dovetail Vise 172Chisel Holder 176Japanese Tool Box 180Tool Tote 186Traditional Carpenter’s Tote 196Boat Tote 200
4 Design, Layout & ConstructionDesign Elements of Wood Planes 208Construction Steps 212
Contents
About the Author viiiPreface x
Introduction xi
My Sources of Supply 242The Home Shop 243

viii ABoUT THe AUTHoR ABoUT THe AUTHoR ix
scrape a porch needing refinishing. I was pro-vided with a good education concluding in a liberal arts degree from Carleton College (1962) and a graduate degree in social anthropology from the School of Oriental and African Studies, University of London (1964).
For a decade I taught anthropology at vari-ous colleges and universities, until the inability to complete the doctoral dissertation brought my college teaching career to an end. One door closed, another opened: residential con-struction, pretty much as a one-man business; teaching part-time as a woodworking instructor at Lansing Community College for 23 years; and the formation of the Home Shop in 1988. The mission of the Home Shop is to supply the Shaker oval box trade with all the materials and instruction needed to engage in this traditional craft.
Parallel to oval boxes are an array of proj-ects and activities that spark my interest. Boatbuilding, furniture, and wood tools have all been on the agenda of workshops. Lacking dedicated teaching facility, all of these classes
have been by necessity short in duration and focused in subject. Friday is a busy day finishing the backlog of orders for shipment, and this goes on until sweeping and rearranging the shop at the end of the day for the upcoming workshop. Constraints of time and space have served to dis-till class projects into focused entities. Many of these projects are the subject of Making Wood Tools.
The Home ShopMy commute across the drive gives me space to work. The Home Shop is represented at www.ShakerOvalBox.com.
The shop was completed May 8, 1988, in time for a celebration: the reception following Sally’s and my wedding. The building was not yet a working wood shop with all the equipment that entails, so there was space to have a pot luck followed by a dance with piano and hammer dulcimer accompaniment. It was a celebration appropriate to the many good times people have joined together since, both as production facility and a classroom.
The home Shop exhibits the architectural lessons and quirks of a decade as a residential contractor.
Bits and pieces of my story are scattered throughout this book. For instance, tell-ing about the shop stool as a badge of
the journeyman carpenter as a 19-year-old in Cazenovia, New York. Seeing for the first time a wood block plane made by Adolph Peschke in St. Louis, which sparked interest in both making and teaching tools. Relating how the classroom at the Home Shop has been a prov-ing ground in which to test the prototypes of wood tools and work-benches. All these are steps along the way to authoring this book on making wood tools.
My great grandfather, William Dexter Wilson, was an academic of some renown on the found-ing faculty of Cornell University (1867-1885) who authored some 16 books on Church his-tory, philosophy, eco-nomics and jurisprudence. The lineage of teaching and writing goes back that far at least. Manual arts were not a part of his life, and presumably, he felt it a lack to rectify in his son. So he sent my grandfa-ther as a Saturday learner to a cabinetmaker. My
grandfather was rector of St. Mark’s Episcopal Church, Syracuse, New York, and his carvings grace the altar and reredos to this day. His carv-ing tools reside under my bench, though I have carved only two motifs: one in the headboard and one in the footboard of my bed in the lit-
tle house next to the shop. I lived there for 12 years, and made oval boxes before the completion of the Home Shop. Still a guest house for visi-tors, it is testimony to making shop space wherever you are.Teaching and writ-ing, tools and wood, are all elements with a goodly heritage.
I was free to work in my father’s basement work shop as it was a hand tool only envi-ronment, although I remember the pur-chase of his first elec-tric drill. In this shop
I was free to work as a child, presumably because my parents felt that pain would intervene before damage was done using hand tools. I learned from my father how to sharpen tools on an oil stone followed by a whetstone, and how to hand
About the Author
x xi
Preface Introduction
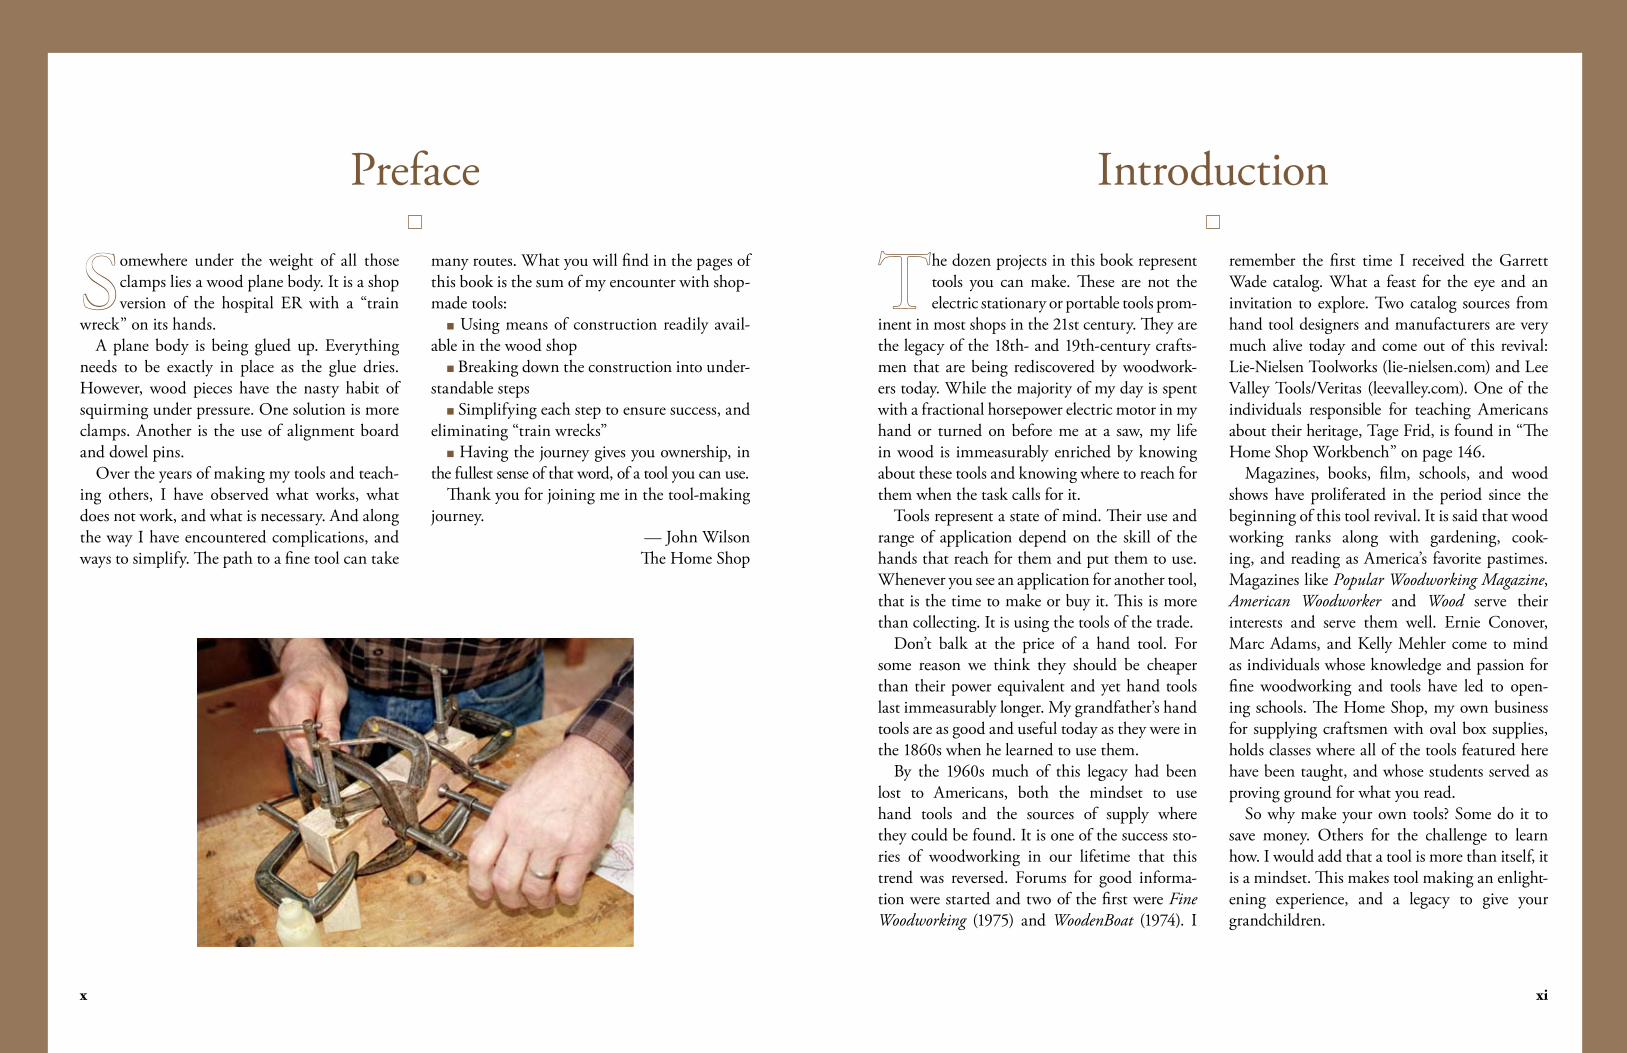
Somewhere under the weight of all those clamps lies a wood plane body. It is a shop version of the hospital ER with a “train
wreck” on its hands.A plane body is being glued up. Everything
needs to be exactly in place as the glue dries. However, wood pieces have the nasty habit of squirming under pressure. One solution is more clamps. Another is the use of alignment board and dowel pins.
Over the years of making my tools and teach-ing others, I have observed what works, what does not work, and what is necessary. And along the way I have encountered complications, and ways to simplify. The path to a fine tool can take
he dozen projects in this book represent tools you can make. These are not the electric stationary or portable tools prom-
inent in most shops in the 21st century. They are the legacy of the 18th- and 19th-century crafts-men that are being rediscovered by woodwork-ers today. While the majority of my day is spent with a fractional horsepower electric motor in my hand or turned on before me at a saw, my life in wood is immeasurably enriched by knowing about these tools and knowing where to reach for them when the task calls for it.
Tools represent a state of mind. Their use and range of application depend on the skill of the hands that reach for them and put them to use. Whenever you see an application for another tool, that is the time to make or buy it. This is more than collecting. It is using the tools of the trade.
Don’t balk at the price of a hand tool. For some reason we think they should be cheaper than their power equivalent and yet hand tools last immeasurably longer. My grandfather’s hand tools are as good and useful today as they were in the 1860s when he learned to use them.
By the 1960s much of this legacy had been lost to Americans, both the mindset to use hand tools and the sources of supply where they could be found. It is one of the success sto-ries of woodworking in our lifetime that this trend was reversed. Forums for good informa-tion were started and two of the first were Fine Woodworking (1975) and WoodenBoat (1974). I
many routes. What you will find in the pages of this book is the sum of my encounter with shop-made tools:
■ Using means of construction readily avail-able in the wood shop
■ Breaking down the construction into under-standable steps
■ Simplifying each step to ensure success, and eliminating “train wrecks”
■ Having the journey gives you ownership, in the fullest sense of that word, of a tool you can use.
Thank you for joining me in the tool-making journey.
— John WilsonThe Home Shop
remember the first time I received the Garrett Wade catalog. What a feast for the eye and an invitation to explore. Two catalog sources from hand tool designers and manufacturers are very much alive today and come out of this revival: Lie-Nielsen Toolworks (lie-nielsen.com) and Lee Valley Tools/Veritas (leevalley.com). One of the individuals responsible for teaching Americans about their heritage, Tage Frid, is found in “The Home Shop Workbench” on page 146.
Magazines, books, film, schools, and wood shows have proliferated in the period since the beginning of this tool revival. It is said that wood working ranks along with gardening, cook-ing, and reading as America’s favorite pastimes. Magazines like Popular Woodworking Magazine, American Woodworker and Wood serve their interests and serve them well. Ernie Conover, Marc Adams, and Kelly Mehler come to mind as individuals whose knowledge and passion for fine woodworking and tools have led to open-ing schools. The Home Shop, my own business for supplying craftsmen with oval box supplies, holds classes where all of the tools featured here have been taught, and whose students served as proving ground for what you read.
So why make your own tools? Some do it to save money. Others for the challenge to learn how. I would add that a tool is more than itself, it is a mindset. This makes tool making an enlight-ening experience, and a legacy to give your grandchildren.
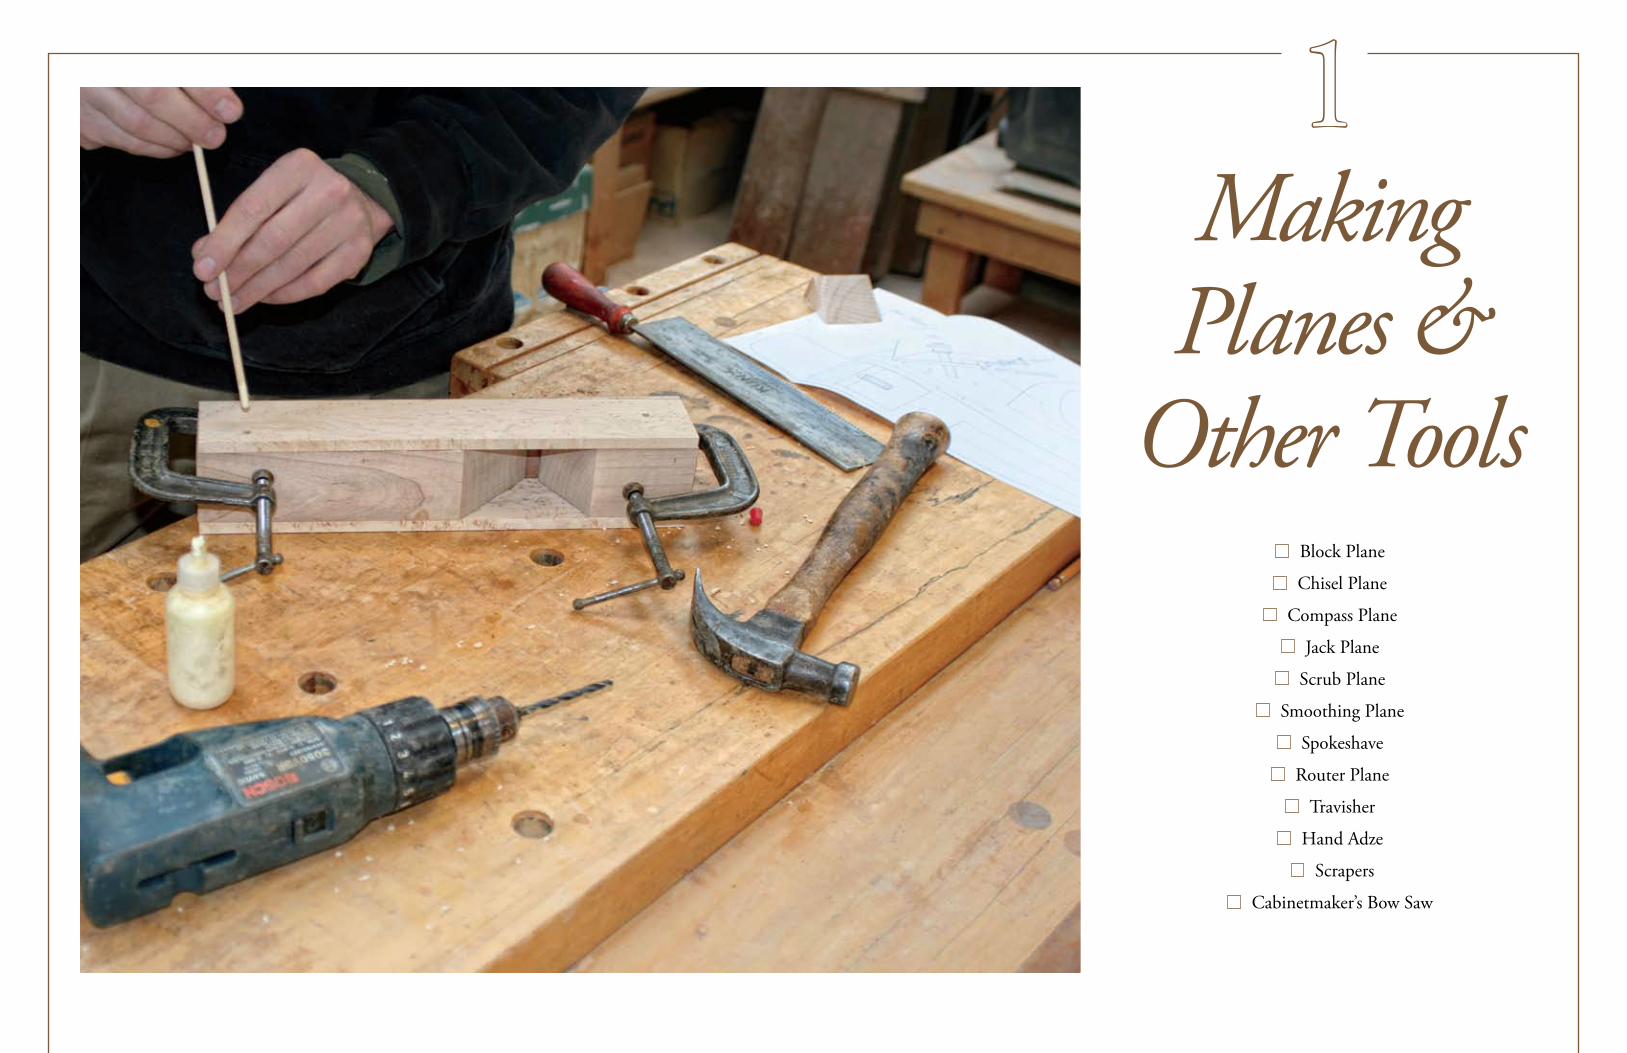
1Making Planes &
Other ToolsBlock Plane
Chisel Plane
Compass Plane
Jack Plane
Scrub Plane
Smoothing Plane
Spokeshave
Router Plane
Travisher
Hand Adze
Scrapers
Cabinetmaker’s Bow Saw

2
Block Plane
he block plane is a good place to start. It is the first
woodworking tool for which I can claim owner-
ship. I don’t mean ownership in laying out money,
but tool ownership of acquired proficiency. After leaving high
school I hired on as a carpenter. The uniform was a baggy
white coverall with bib and suspender front, ample pockets
including a ruler slot at the hip, and a nail apron across the
waist. The tools of the trade were a 20 oz. Estwing curved claw
hammer slung in a canvas loop in the coverall, an 8" Stanley
square which we called a handy-dandy tucked into the ruler
slot and used for a myriad of tasks that would make a tool
purist flinch, a Lufkin 6' folding rule with sliding brass exten-
sion for inside measurements, and a block plane. It resided in
the nail apron and was employed for everything from cham-
fering a shelf board to making a door fit. If a tool is an object
to solve a problem, and a wood tool is a way to work wood,
then the block plane became my introduction to the world of
hand tools.
3
4 BLOCK PLANE BLOCK PLANE 5
Block Plane DesignA plane is a frame, wooden or metal, for hold-ing a blade much like a chisel. It fits comfortably in hand at a fixed angle for removing shavings from wood. Wood grain runs differently along the side and across the end of a board. The block plane is spoken of as being the tool of choice for working, or blocking, end grain. It does that, and so much more. Being the right size for single handed operation, it gets employed for chamfer-ing edges either side or end grain. For ease of long strokes the length of a board its big brother planes come into play, but the block plane is handy, and kept sharp will serve the craftsman well.
There are several types of block planes sold today. Stanley has two versions of a metal block plane: the standard, No. 91⁄ 2, and the low angle No. 601⁄ 2. The low angle block plane is 1⁄4" nar-rower as well as having a blade bedded to cut at a lower angle of attack as its name implies. The standard angle of a plane blade is 45° which expe-rience has shown to be best for general work. Two attributes of blade angle are ease of opera-tion and smoothness of cut. The first relates to
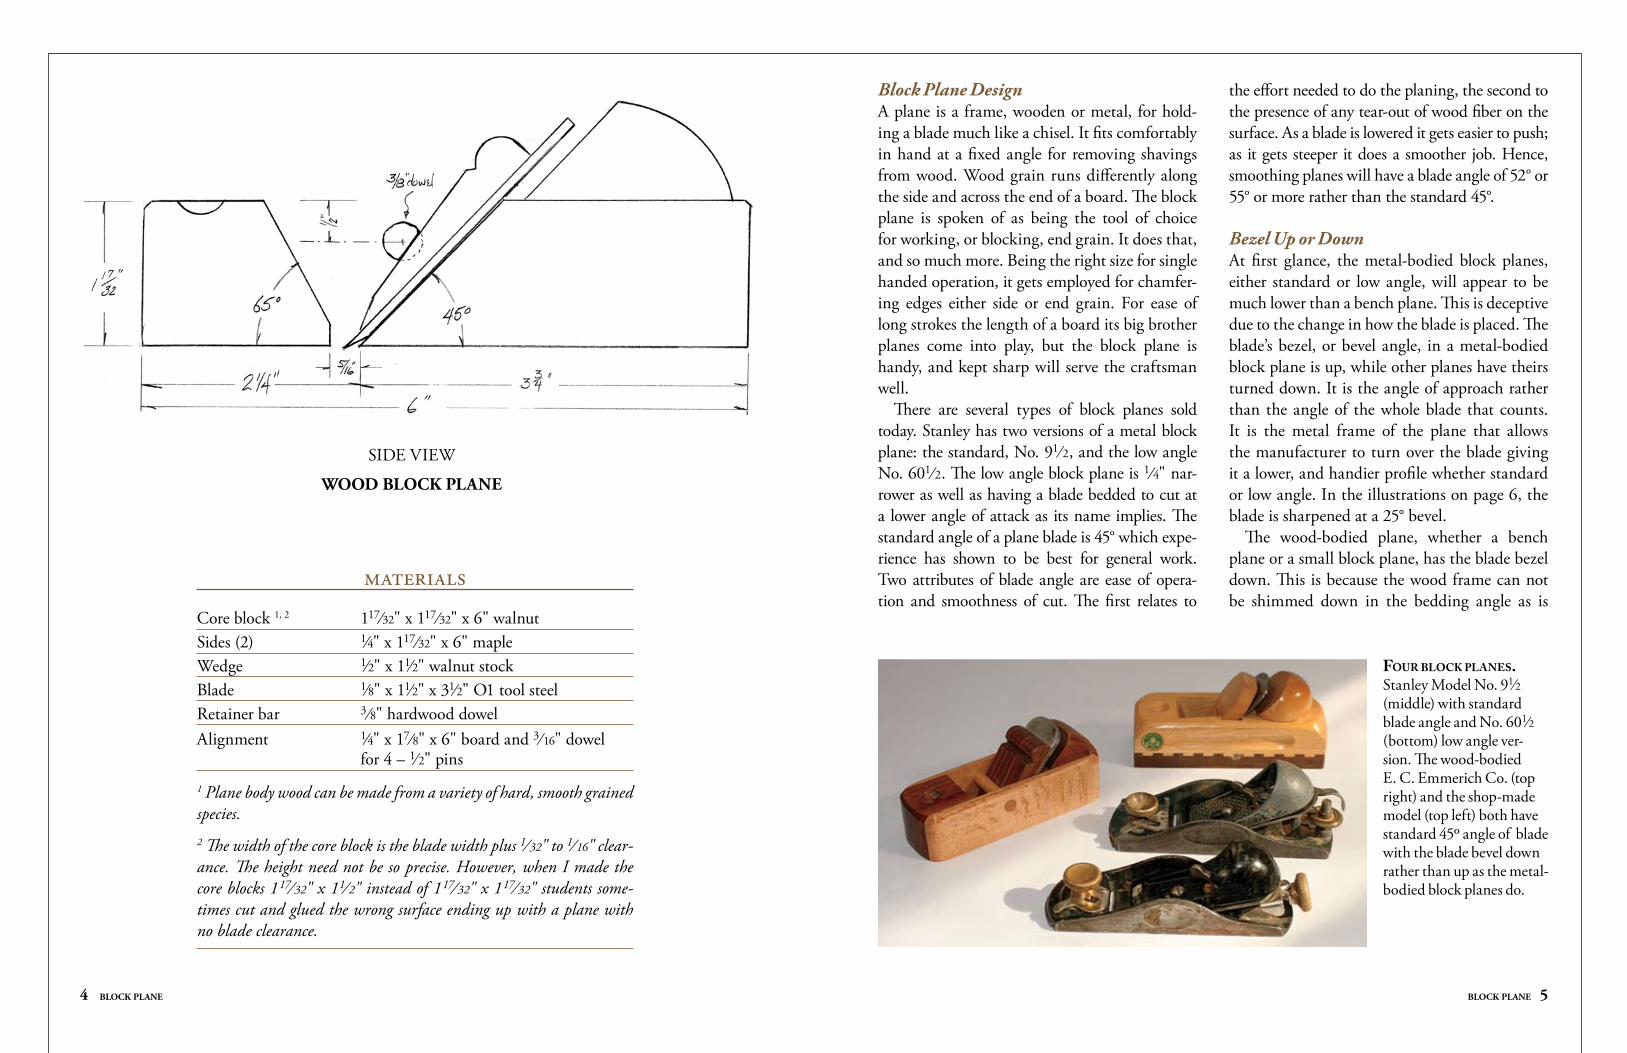
SIdE vIEW
wOOd BLOCK PLANE
materials
Core block 1, 2 117⁄32" x 117⁄32" x 6" walnutSides (2) 1⁄4" x 117⁄32" x 6" mapleWedge 1⁄2" x 11⁄2" walnut stockBlade 1⁄8" x 11⁄2" x 31⁄2" O1 tool steelRetainer bar 3 ⁄8" hardwood dowelAlignment 1⁄4" x 17⁄8" x 6" board and 3⁄ 16" dowel for 4 – 1⁄ 2" pins
1 Plane body wood can be made from a variety of hard, smooth grained species.2 The width of the core block is the blade width plus 1⁄ 32" to 1⁄ 16" clear-ance. The height need not be so precise. However, when I made the core blocks 117⁄ 32" x 11⁄ 2" instead of 117⁄ 32" x 117⁄ 32" students some-times cut and glued the wrong surface ending up with a plane with no blade clearance.
Four block planes. Stanley Model No. 91⁄2 (middle) with standard blade angle and No. 601⁄2 (bottom) low angle ver-sion. The wood-bodied E. C. Emmerich Co. (top right) and the shop-made model (top left) both have standard 45o angle of blade with the blade bevel down rather than up as the metal-bodied block planes do.
the effort needed to do the planing, the second to the presence of any tear-out of wood fiber on the surface. As a blade is lowered it gets easier to push; as it gets steeper it does a smoother job. Hence, smoothing planes will have a blade angle of 52° or 55° or more rather than the standard 45°.
Bezel Up or DownAt first glance, the metal-bodied block planes, either standard or low angle, will appear to be much lower than a bench plane. This is deceptive due to the change in how the blade is placed. The blade’s bezel, or bevel angle, in a metal-bodied block plane is up, while other planes have theirs turned down. It is the angle of approach rather than the angle of the whole blade that counts. It is the metal frame of the plane that allows the manufacturer to turn over the blade giving it a lower, and handier profile whether standard or low angle. In the illustrations on page 6, the blade is sharpened at a 25° bevel.
The wood-bodied plane, whether a bench plane or a small block plane, has the blade bezel down. This is because the wood frame can not be shimmed down in the bedding angle as is
6 BLOCK PLANE BLOCK PLANE 7
possible in a metal casting. It is still a small handy tool, but not as much as the low angle Stanley No. 601⁄ 2 which remains in a class by itself.
Teaching Block Plane MakingNot only was the block plane the first tool for which I could claim ownership, but it was the first plane I saw being made in a class. I credit Adolph Peschke for showing me this project. The father of Woodsmith editor don Peschke taught classes in plane making at their family store in St. Louis. I was there to teach oval box mak-ing and learned from Adolph. The class has been the flagship event in plane making at the Home Shop since 1987. It set the pattern for every proj-ect to follow where students do both the plane construction as well as blade making. Being able to make your own blade gives versatility to project design as well as being a great learning experience.
A wood-bodied plane uses materials and methods you can do in the shop. In this regard it echoes the experience of apprentices for gen-erations in learning their trade, and acquiring the tools needed to be a journeyman. The pro-portions of the block plane design are similar to the beautifully crafted Primus plane made in Germany and sold by the ECE Company. It also is based on a three-piece body which allows for accurate cutting of blade rest and fore angles
that otherwise require difficult chiseling opera-tions in a solid block. The use of a walnut core block and contrasting Birdseye maple cheek pieces introduces a striking appearance. From a durability standpoint, an all-maple body would be more serviceable, as wood-bodied planes do wear on the sole and require periodic resurfacing if given extended use.
Making the BladeThe blade is made from an O1 tool steel blank 1⁄ 8" x 11⁄ 2" x 31⁄ 2". This steel is very serviceable, easily worked in shop conditions (meaning the heat treatment tolerances are forgiving of the imprecise methods we have available) and pro-duces a finished blade as good as any. While other alloys are touted in the market, one well-known producer of plane blades said in conversa-tion that O1 would be his preference for a plane iron intended for this project. The steel is sold in 18" and 36" lengths at a reasonable cost of $3 per blade. It comes annealed, meaning softer than what results from heat treatment, so shap-ing and beveling can be accomplished, as well as drilling blades used in the chisel plane described next.
Grinding the blade blank begins with round-ing the top end to be comfortable in your hand. I call this style a tombstone end. The bezel or bevel cutting end is ground to an angle of 25°.
Leave off grinding while a small flat remains (1⁄ 64") so that the feathered edge will not become carbon starved in heat treatment. Use the belt sander with 80-grit belt to level the bezel. The advantage is the flat surface and control possible with this tool. Caution: Sparks can ignite wood dust so clean your work area first. The sander is also used to ease the edges of the sides and tombstone end.
Everyone is fascinated with fire. The bezel end of the blade needs to be heated to 1,450° F to 1,600° F which renders the steel a glowing cherry red. This is a color as seen in the dim inte-rior of the old blacksmith’s forge, so be cautious in bright sunlight where it might be overdone. Only a band a half-inch wide at the end need be brought to this temperature. The use of a double tin can used as a heat shield, or elemental fur-nace, can help get an even glow to the blade end when using a propane or MAPP gas torch which may be more accessible than the intense heat of an acetylene torch used by welders. In either case, the blade when hot is quenched in oil, the whole of the blade immediately submerged in
one stroke to avoid warping the blade if dipped slowly, also flame will surround the hot steel at the surface where oxygen can ignite the oil. (Read the section on “Tool Steel & Blade Making,” pages 120-127.)
The realignment of the molecular structure produces a blade very hard, yet brittle. drop a blade at this stage and it is likely to chip. I have had one flake similar to that seen at the edge of glass. To achieve a useful balance between hard-ness and toughness, the blade is tempered. This involves heating the blade in an oven and hold-ing it for 20 minutes at 350° F to 400° F. This results in an edge with a Rockwell hardness of 60-62 (in contrast to the brittle hard 65 to 70 or the annealed 45) which can hold an edge with-out chipping.
The final sharpening will bring your blade making to an end. Lap the back to ensure it is straight and smooth at the cutting edge. The entire blade can be polished, or left with heat treating colors and slight roughness that can help secure the blade when wedged. Imprint name and date on your creation.
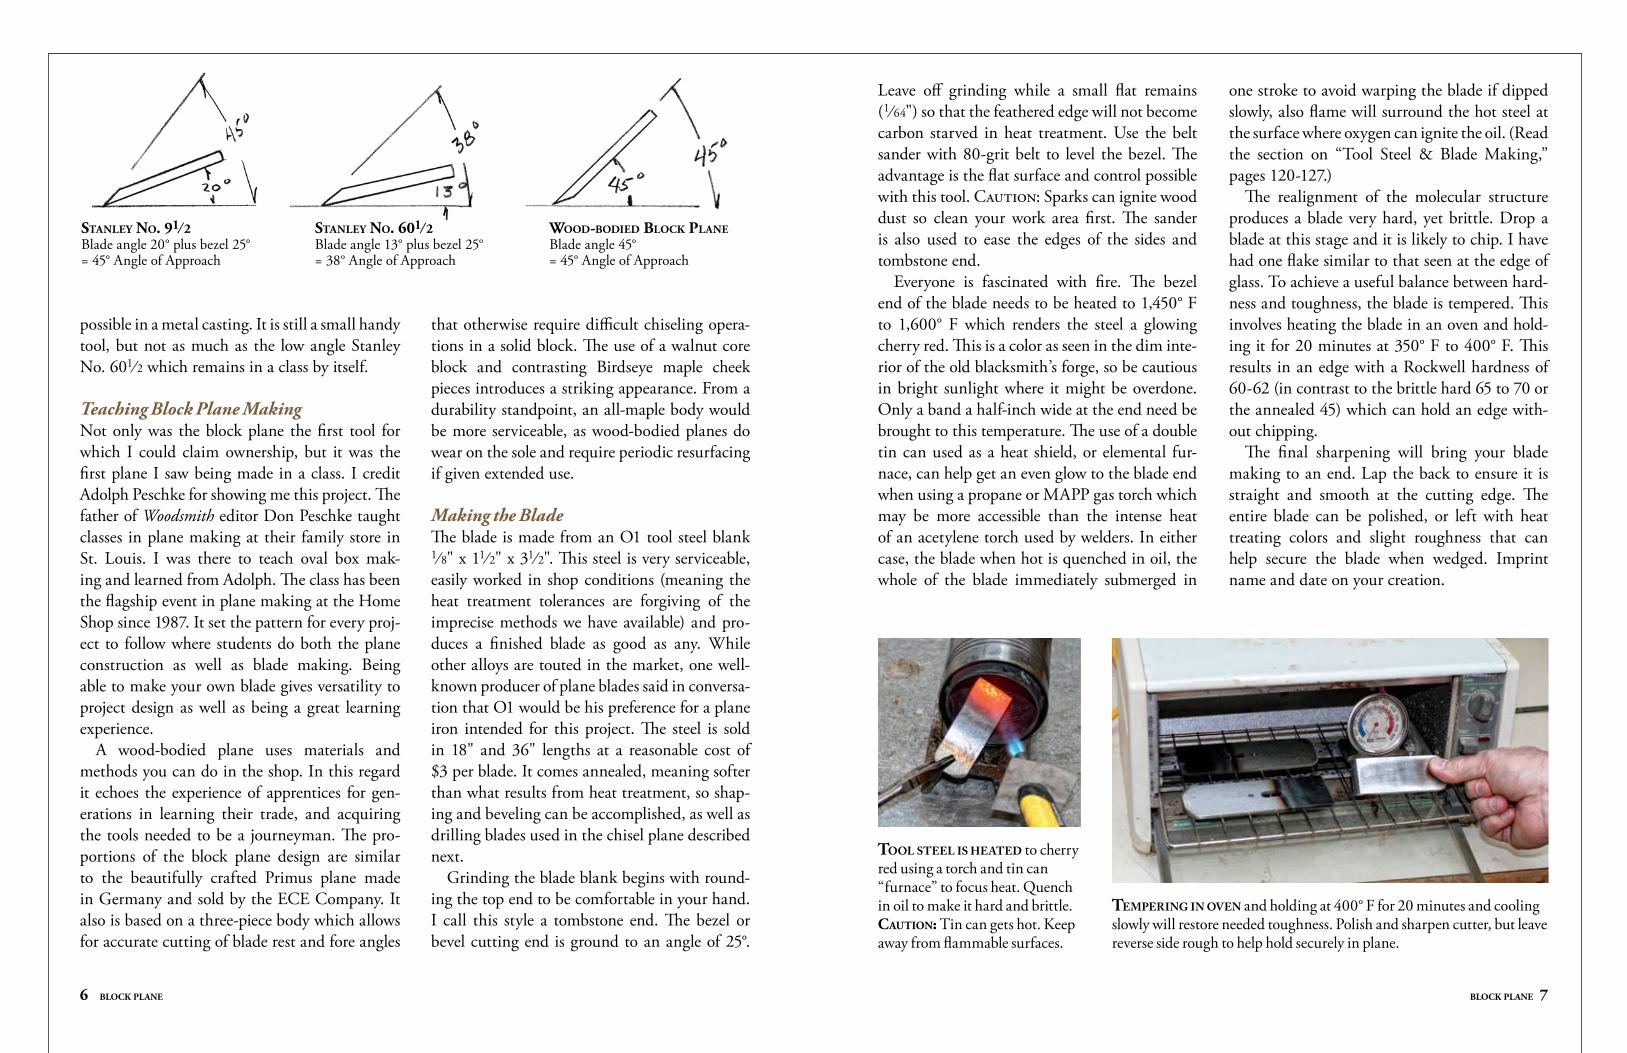
Stanley no. 91 ⁄ 2Blade angle 20° plus bezel 25° = 45° Angle of Approach
Stanley no. 601 ⁄ 2Blade angle 13° plus bezel 25° = 38° Angle of Approach
Wood-bodied block PlaneBlade angle 45° = 45° Angle of Approach
Tempering in oven and holding at 400° F for 20 minutes and cooling slowly will restore needed toughness. Polish and sharpen cutter, but leave reverse side rough to help hold securely in plane.
Tool sTeel is heaTed to cherry red using a torch and tin can “furnace” to focus heat. Quench in oil to make it hard and brittle. caution: Tin can gets hot. Keep away from flammable surfaces.
8 BLOCK PLANE BLOCK PLANE 9
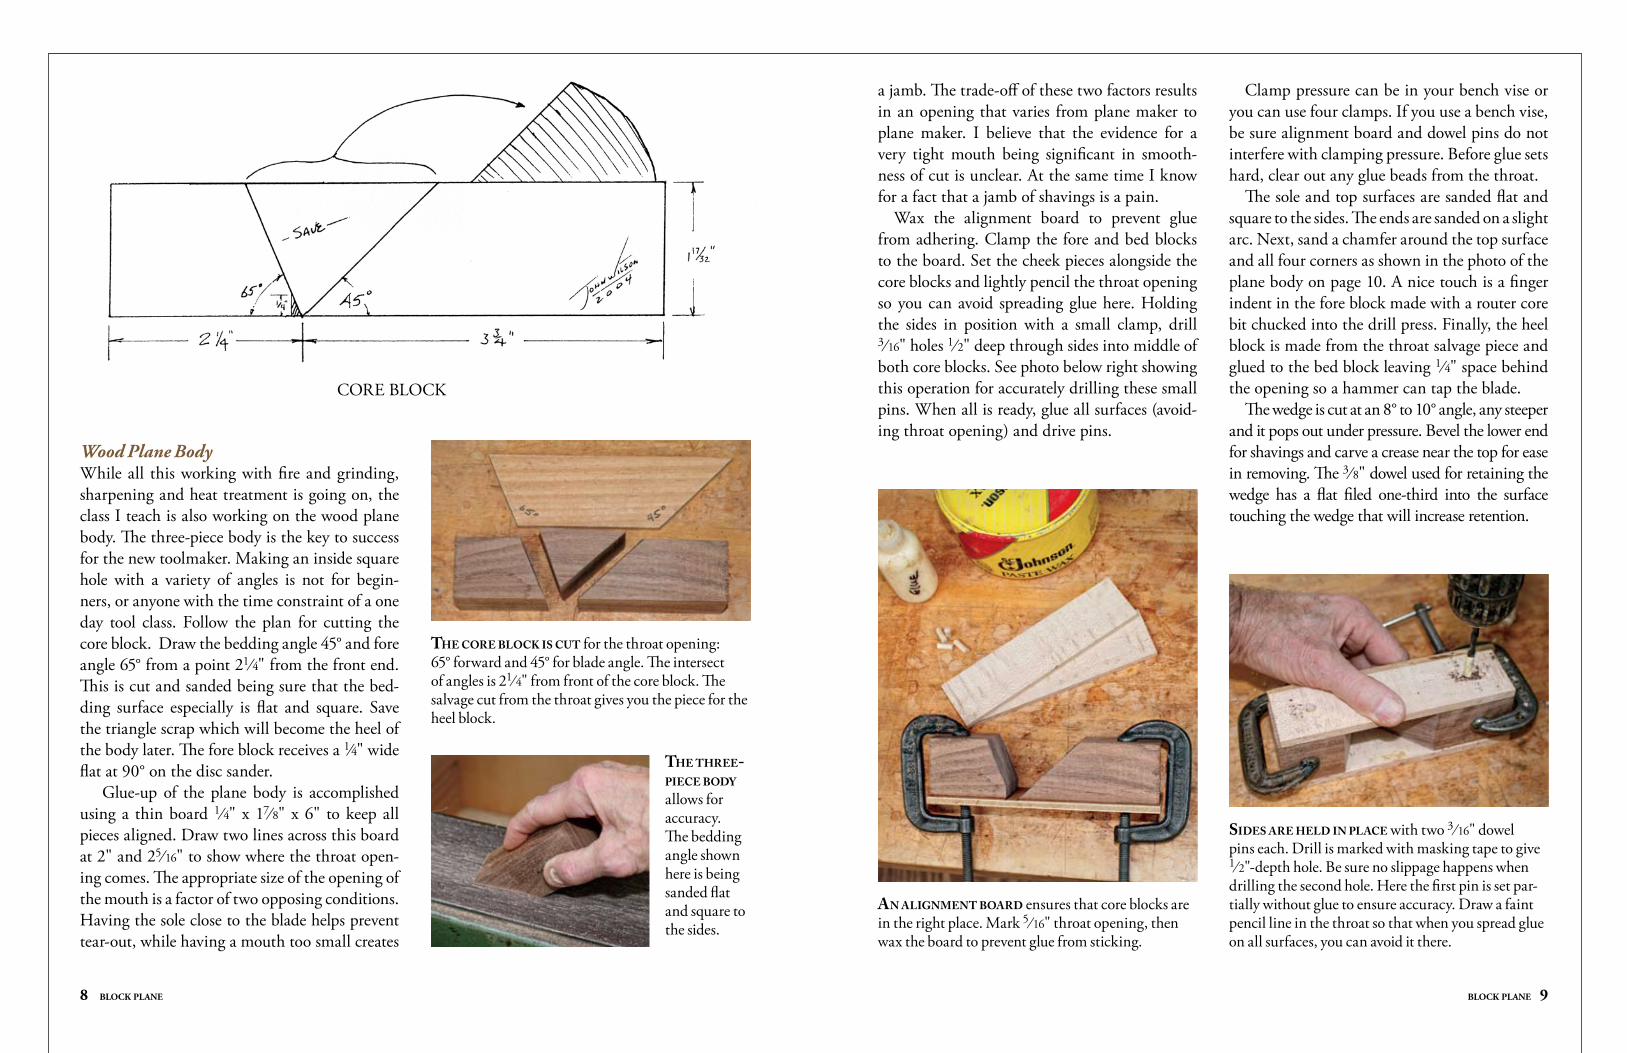
Wood Plane BodyWhile all this working with fire and grinding, sharpening and heat treatment is going on, the class I teach is also working on the wood plane body. The three-piece body is the key to success for the new toolmaker. Making an inside square hole with a variety of angles is not for begin-ners, or anyone with the time constraint of a one day tool class. Follow the plan for cutting the core block. draw the bedding angle 45° and fore angle 65° from a point 21⁄4" from the front end. This is cut and sanded being sure that the bed-ding surface especially is flat and square. Save the triangle scrap which will become the heel of the body later. The fore block receives a 1⁄4" wide flat at 90° on the disc sander.
Glue-up of the plane body is accomplished using a thin board 1⁄4" x 17⁄ 8" x 6" to keep all pieces aligned. draw two lines across this board at 2" and 25⁄ 16" to show where the throat open-ing comes. The appropriate size of the opening of the mouth is a factor of two opposing conditions. Having the sole close to the blade helps prevent tear-out, while having a mouth too small creates
a jamb. The trade-off of these two factors results in an opening that varies from plane maker to plane maker. I believe that the evidence for a very tight mouth being significant in smooth-ness of cut is unclear. At the same time I know for a fact that a jamb of shavings is a pain.
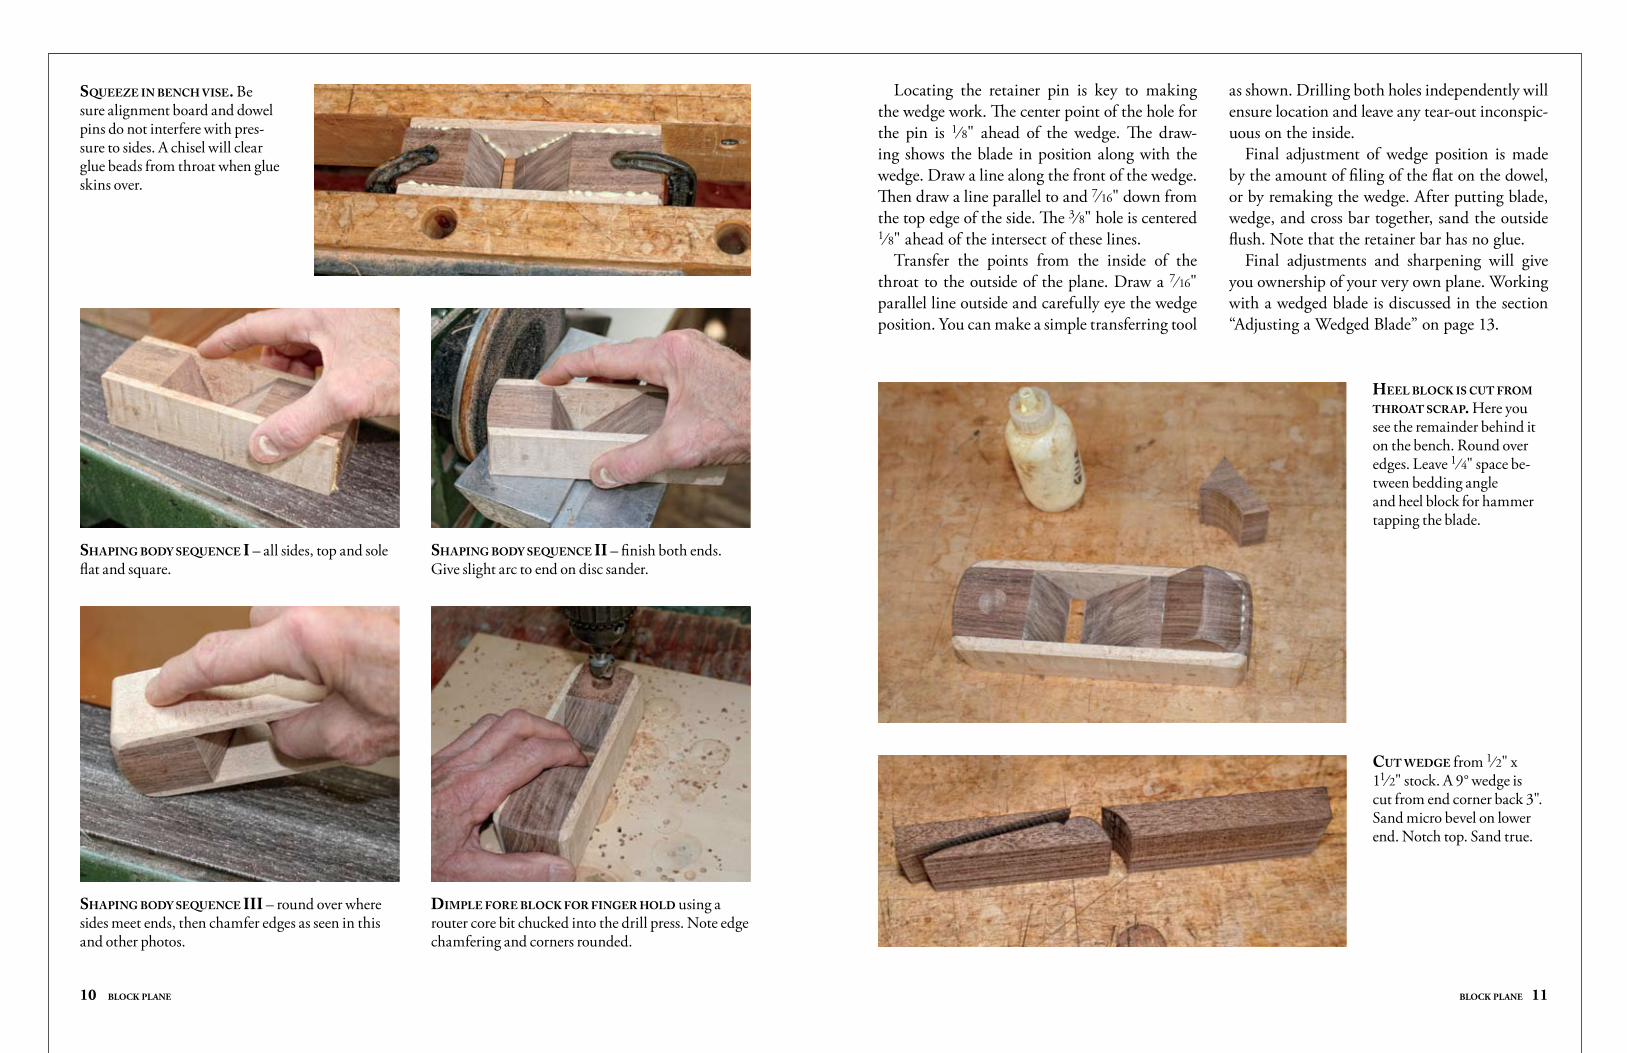
Wax the alignment board to prevent glue from adhering. Clamp the fore and bed blocks to the board. Set the cheek pieces alongside the core blocks and lightly pencil the throat opening so you can avoid spreading glue here. Holding the sides in position with a small clamp, drill 3⁄ 16" holes 1⁄ 2" deep through sides into middle of both core blocks. See photo below right showing this operation for accurately drilling these small pins. When all is ready, glue all surfaces (avoid-ing throat opening) and drive pins.
CORE BLOCK
The core block is cuT for the throat opening: 65° forward and 45° for blade angle. The intersect of angles is 21⁄ 4" from front of the core block. The salvage cut from the throat gives you the piece for the heel block.
The Three-piece body allows for accuracy. The bedding angle shown here is being sanded flat and square to the sides.
Clamp pressure can be in your bench vise or you can use four clamps. If you use a bench vise, be sure alignment board and dowel pins do not interfere with clamping pressure. Before glue sets hard, clear out any glue beads from the throat.
The sole and top surfaces are sanded flat and square to the sides. The ends are sanded on a slight arc. Next, sand a chamfer around the top surface and all four corners as shown in the photo of the plane body on page 10. A nice touch is a finger indent in the fore block made with a router core bit chucked into the drill press. Finally, the heel block is made from the throat salvage piece and glued to the bed block leaving 1⁄4" space behind the opening so a hammer can tap the blade.
The wedge is cut at an 8° to 10° angle, any steeper and it pops out under pressure. Bevel the lower end for shavings and carve a crease near the top for ease in removing. The 3⁄ 8" dowel used for retaining the wedge has a flat filed one-third into the surface touching the wedge that will increase retention.
an alignmenT board ensures that core blocks are in the right place. Mark 5 ⁄ 16" throat opening, then wax the board to prevent glue from sticking.
sides are held in place with two 3 ⁄ 16" dowel pins each. drill is marked with masking tape to give 1⁄ 2"-depth hole. Be sure no slippage happens when drilling the second hole. Here the first pin is set par-tially without glue to ensure accuracy. draw a faint pencil line in the throat so that when you spread glue on all surfaces, you can avoid it there.
10 BLOCK PLANE BLOCK PLANE 11
Locating the retainer pin is key to making the wedge work. The center point of the hole for the pin is 1⁄ 8" ahead of the wedge. The draw-ing shows the blade in position along with the wedge. draw a line along the front of the wedge. Then draw a line parallel to and 7⁄ 16" down from the top edge of the side. The 3⁄ 8" hole is centered 1⁄ 8" ahead of the intersect of these lines.
Transfer the points from the inside of the throat to the outside of the plane. draw a 7⁄ 16" parallel line outside and carefully eye the wedge position. You can make a simple transferring tool
as shown. drilling both holes independently will ensure location and leave any tear-out inconspic-uous on the inside.
Final adjustment of wedge position is made by the amount of filing of the flat on the dowel, or by remaking the wedge. After putting blade, wedge, and cross bar together, sand the outside flush. Note that the retainer bar has no glue.
Final adjustments and sharpening will give you ownership of your very own plane. Working with a wedged blade is discussed in the section “Adjusting a Wedged Blade” on page 13.
shaping body sequence i – all sides, top and sole flat and square.
shaping body sequence ii – finish both ends. Give slight arc to end on disc sander.
shaping body sequence iii – round over where sides meet ends, then chamfer edges as seen in this and other photos.
dimple Fore block For Finger hold using a router core bit chucked into the drill press. Note edge chamfering and corners rounded.
squeeze in bench vise. Be sure alignment board and dowel pins do not interfere with pres-sure to sides. A chisel will clear glue beads from throat when glue skins over.
heel block is cuT From ThroaT scrap. Here you see the remainder behind it on the bench. Round over edges. Leave 1 ⁄ 4" space be-tween bedding angle and heel block for hammer tapping the blade.
cuT wedge from 1⁄ 2" x 11⁄ 2" stock. A 9° wedge is cut from end corner back 3". Sand micro bevel on lower end. Notch top. Sand true.

12 BLOCK PLANE BLOCK PLANE 13
LOCATING CROSSBAR HOLES
FINdER
locating the 3 ⁄ 8" doWel holding Pin. With blade and wedge in place, mark point 7⁄16" down from the edge and 1⁄ 8" ahead of the wedge, as shown in the drawing above right. Transfer this point to the outside. A simple toast tong tool is used here.
drill 3 ⁄ 8" holeS for dowel pin.
reTainer pin is in place with wedge tapped snug. Cut pin remainder, then sand both sides flush. Note there is no glue used with this pin.
Adjusting A Wedged BlAdeTapping a blade and wedge to adjust the shav-ing size is not part of modern plane culture. The Bailey and Stanley inventions of the last quarter of the 1800s made screw adjustment standard. Planes in this book employ both old and new ways. Looking ahead, the jack plane, chisel plane, and spokeshave have screw mechanisms, while the block plane, compass plane, scrub plane, and smoothing plane rely on a wedge. From a construction standpoint, the wedge is easier to make in shop-built tools. So for this reason alone, becoming familiar with adjusting the wedged blade is worth it. Additionally all those old planes collecting dust in the flea market, or maybe some you already own, can become part of your tool kit.
Advancing the blade is always easier than retracting it, or at least it is more obvious. Just tap the blade and it goes down. Alignment is accomplished the same way with sidewise taps
to the blade. But how to reduce shaving size is mysterious. Tapping the sharp end of the blade is not an option. What is done is tapping the plane body, either on the back end or the top surface, to jar loose the wedge, or slightly move the blade back in the throat.
The plane body is first placed on a hard-wood surface, and the blade is inserted and wedge engaged to give blade placement rest-ing squarely on the flat surface. Tap the wedge with a light blow. Over-tightening the wedge will complicate adjusting. Sight down the sole and adjust the blade by tapping the blade to extend it. To retract the blade, tap the sur-face immediately ahead or behind the blade. Tapping the heel of the stock to retract the blade will provide finer adjustment. Hold the wedge and blade with one hand while tapping both to retain control of a loose blade as well as provide pressure to retract.


![PYTHON- Learn Python the hard way [3rd edition]](https://img.dokumen.tips/doc/110x75/54c25c084a795997188b4635/python-learn-python-the-hard-way-3rd-edition.jpg)


