Embed Size (px)
Citation preview

Scrivener®
Jennifer Kettell
800 East 96th Street, Indianapolis, Indiana 46240

Scrivener Absolute Beginner’s GuideCopyright © 2014 by Pearson Education, Inc.
All rights reserved. No part of this book shall be reproduced, stored in a retrieval system, or transmitted by any means, electronic, mechanical, photocopying, recording, or otherwise, without written permission from the publisher. No patent liability is assumed with respect to the use of the information contained herein. Although every precaution has been taken in the preparation of this book, the publisher and author assume no responsibility for errors or omissions. Nor is any liability assumed for damages resulting from the use of the information contained herein.
ISBN-13: 978-0-7897-5145-4ISBN-10: 0-7897-5145-3
Library of Congress Control Number: 2013937699
Printed in the United States of America
First Printing: June 2013
TrademarksAll terms mentioned in this book that are known to be trademarks or service marks have been appropriately capitalized. Que Publishing cannot attest to the accuracy of this information. Use of a term in this book should not be regarded as affecting the validity of any trademark or service mark.
Warning and DisclaimerEvery effort has been made to make this book as complete and as accurate as possible, but no warranty or fitness is implied. The information provided is on an “as is” basis. The author and the publisher shall have neither liability nor responsibility to any person or entity with respect to any loss or damages arising from the information contained in this book.
Bulk SalesQue Publishing offers excellent discounts on this book when ordered in quantity for bulk purchases or special sales. For more information, please contact
U.S. Corporate and Government [email protected]
For sales outside the United States, please contact
International [email protected]
Editor-in-ChiefGreg Wiegand
Senior Acquisitions EditorLaura Norman
Development EditorLora L. Baughey
Managing EditorSandra Schroeder
Project EditorSeth Kerney
IndexerKen Johnson
Copy EditorKaren Annett
ProofreaderChuck Hutchinson
Technical EditorJennifer Hughes
Publishing CoordinatorCindy Teeters
Book DesignerAnne Jones
CompositorMary Sudul
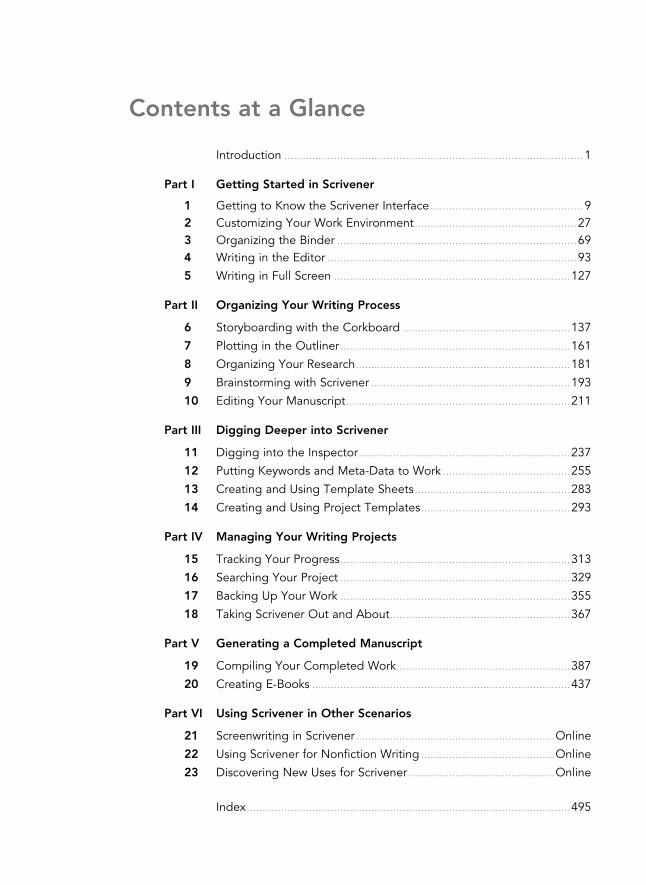
Contents at a Glance
Introduction ................................................................................................ 1
Part I Getting Started in Scrivener
1 Getting to Know the Scrivener Interface ................................................. 92 Customizing Your Work Environment ....................................................273 Organizing the Binder .............................................................................694 Writing in the Editor ................................................................................93
5 Writing in Full Screen ............................................................................127
Part II Organizing Your Writing Process
6 Storyboarding with the Corkboard ......................................................137
7 Plotting in the Outliner ..........................................................................161
8 Organizing Your Research .....................................................................181
9 Brainstorming with Scrivener ................................................................193
10 Editing Your Manuscript ........................................................................211
Part III Digging Deeper into Scrivener
11 Digging into the Inspector ....................................................................237
12 Putting Keywords and Meta-Data to Work .........................................255
13 Creating and Using Template Sheets ..................................................283
14 Creating and Using Project Templates ................................................293
Part IV Managing Your Writing Projects
15 Tracking Your Progress ..........................................................................313
16 Searching Your Project ..........................................................................329
17 Backing Up Your Work ..........................................................................355
18 Taking Scrivener Out and About ..........................................................367
Part V Generating a Completed Manuscript
19 Compiling Your Completed Work ........................................................387
20 Creating E-Books ...................................................................................437
Part VI Using Scrivener in Other Scenarios
21 Screenwriting in Scrivener ................................................................Online
22 Using Scrivener for Nonfiction Writing ...........................................Online
23 Discovering New Uses for Scrivener ...............................................Online
Index ........................................................................................................495

Table of Contents Introduction ...............................................................................................................1
What Is Scrivener? ......................................................................................................................2
Mac Versus Windows Versus Linux Versus iPad ......................................................................2
How This Book Is Organized .....................................................................................................3
Conventions Used in This Book ................................................................................................4
Assumptions About Computer Knowledge .............................................................................7
Getting More Help .....................................................................................................................7
I Getting Started in Scrivener
1 Getting to Know the Scrivener Interface ............................................................9
Understanding Projects ............................................................................................................10Creating a New Project ......................................................................................................10Selecting a Project Template .............................................................................................14Saving Projects ....................................................................................................................15
Introducing the Main Scrivener Components ........................................................................15Examining the Editor ..........................................................................................................16Using the Binder..................................................................................................................17Opening the Inspector .......................................................................................................19
Changing the Group View Mode ............................................................................................20
Understanding Folders Versus Files ........................................................................................23
Accessing Other Panels............................................................................................................23
2 Customizing Your Work Environment ................................................................27
Setting General Preferences ....................................................................................................28Startup Options ...................................................................................................................29Saving ...................................................................................................................................29Services (Mac Only) .............................................................................................................30Separators (Mac Only) ........................................................................................................30Scratch Pad ..........................................................................................................................31Bibliography Manager ........................................................................................................31
Customizing Scrivener’s Appearance .....................................................................................32Binder ...................................................................................................................................33Outliner ................................................................................................................................34Notepad Lines .....................................................................................................................34General .................................................................................................................................35Full Screen ...........................................................................................................................35Fonts .....................................................................................................................................36Modifying the Color Scheme .............................................................................................36
Customizing the Corkboard Appearance ..............................................................................40Appearance .........................................................................................................................41Fonts .....................................................................................................................................43Dragging and Double-Clicking ..........................................................................................43
Setting Full Screen Composition Mode Preferences ............................................................44Composition Mode Setup ..................................................................................................45Editing Options ...................................................................................................................46

TABLE OF CONTENTS vv
Composition Mode Appearance .......................................................................................47Composition Mode Customizable Colors ........................................................................47Default View Settings .........................................................................................................48
Customizing the Editor.............................................................................................................48Editing Options ...................................................................................................................49Wrap to Editor Mode .........................................................................................................50Wrap to Page Mode ...........................................................................................................51
Setting a Writing Font ..............................................................................................................53
Saving and Sharing Your Preference Settings .......................................................................55Saving Preference Presets ..................................................................................................57Saving Theme Preferences .................................................................................................58
Using Workspace Layouts ........................................................................................................59Creating Layouts .................................................................................................................61Accessing Layouts ...............................................................................................................62Modifying Layouts ...............................................................................................................63Renaming Layouts ...............................................................................................................63Deleting Layouts .................................................................................................................64Exporting and Importing Layouts ......................................................................................64
Customizing the Toolbar ..........................................................................................................65
3 Organizing the Binder ...........................................................................................69Working with Files and Folders ...............................................................................................70
Adding Documents and Folders to the Binder .....................................................................73Adding Text Documents ....................................................................................................74Adding Folders ....................................................................................................................75Adding a Folder at the Root Level....................................................................................76Adding a File at the Root Level.........................................................................................77Grouping Documents and Folders ....................................................................................77
Organizing Documents and Folders in the Binder ...............................................................78Moving Items .......................................................................................................................79Duplicating Items ................................................................................................................80Renaming Items ...................................................................................................................81Deleting Items .....................................................................................................................81
Adding Icons to Documents and Folders (Mac Only) ..........................................................82Installing Additional Icons ..................................................................................................83Restoring Original Icons .....................................................................................................85
Importing an Existing Manuscript ...........................................................................................85Setting Import Preferences ................................................................................................87Importing Documents .........................................................................................................88Splitting and Merging Files ................................................................................................88Using Import and Split ........................................................................................................89
Focusing on the Chapter at Hand ..........................................................................................90Revealing and Hiding Items ...............................................................................................90Hoisting the Binder (Mac Only) .........................................................................................91
4 Writing in the Editor .............................................................................................93Examining the Editor Window .................................................................................................94
Using the Header Bar ...............................................................................................................95Navigation History Buttons ................................................................................................95

vi SCRIVENER ABSOLUTE BEGINNER’S GUIDE
The Item Icon Menu............................................................................................................96Sidebar Navigation Buttons ...............................................................................................98
Splitting the Screen ..................................................................................................................98Splitting the Editor ..............................................................................................................99Selecting an Item in Split Screen ................................................................................... 101Binder Affects Menu ........................................................................................................ 101Closing a Split .................................................................................................................. 103Saving Your Layout .......................................................................................................... 103
Formatting Text and Paragraphs ......................................................................................... 104Preserving Formatting ..................................................................................................... 107
Using Formatting Presets (Mac Only) .................................................................................. 107Creating a Formatting Preset ......................................................................................... 108Deleting a Formatting Preset ......................................................................................... 110
Accessing the Ruler ............................................................................................................... 110Setting Tabs ...................................................................................................................... 111Adjusting Indents ............................................................................................................. 112
Using the Footer Bar ............................................................................................................. 112
Checking Spelling .................................................................................................................. 113Automatic Spell Checking ............................................................................................... 113Manually Checking Your Spelling................................................................................... 115Automating Corrections as You Type ............................................................................ 116
Adding Images to a Document ............................................................................................ 118Inserting Linked Images (Mac Only) ............................................................................... 119Embedding PDF Images (Mac Only) ............................................................................. 120
Viewing Scrivenings ............................................................................................................... 120
Using QuickReference Panels (Mac Only) ........................................................................... 121
Taking Notes in the Scratch Pad .......................................................................................... 123Adding and Deleting Notes............................................................................................ 125Sending a Note to a Project ........................................................................................... 125
5 Writing in Full Screen ......................................................................................... 127Using Composition Mode ..................................................................................................... 128
Making Adjustments in the Control Strip ............................................................................ 130
Using Composition Mode with Multiple Displays .............................................................. 134
Using the Mac’s Full Screen Mode ...................................................................................... 134
II Organizing Your Writing Process
6 Storyboarding with the Corkboard ................................................................. 137Opening the Corkboard ........................................................................................................ 138
Viewing Multiple Containers in a Stacked Corkboard ................................................. 139Adding Documents to the Corkboard ........................................................................... 141
Examining Index Cards ......................................................................................................... 142
Adding Index Card Options ................................................................................................. 143
Setting Corkboard Options on the Footer Bar ................................................................... 145
Using the Corkboard in Split Screen ................................................................................... 146Putting Split Screen to Work .......................................................................................... 148

TABLE OF CONTENTS vii
Using Images to Your Advantage .................................................................................. 150
Locking the View Mode (Mac Only) ..................................................................................... 152
Working with the Freeform Corkboard (Mac Only)............................................................ 152
Printing Index Cards .............................................................................................................. 155
7 Plotting in the Outliner ...................................................................................... 161Exploring the Outliner ........................................................................................................... 162
Customizing the Outliner ...................................................................................................... 163Expanding and Collapsing Containers .......................................................................... 163Adding and Removing Columns .................................................................................... 164Arranging Columns and Items ........................................................................................ 167Hiding the Synopsis ......................................................................................................... 168Sorting by Outliner Columns (Mac Only) ...................................................................... 168
Printing an Outline on the Mac ............................................................................................ 170
Exporting an Outline ............................................................................................................. 173Exporting to a Spreadsheet (CSV Format) .................................................................... 173Exporting to OPML Format............................................................................................. 174
Importing an OPML or Freemind Outline ........................................................................... 177
8 Organizing Your Research ................................................................................. 181Importing Research Files ....................................................................................................... 182
Using File Import .............................................................................................................. 182Opening Files in an External Editor ............................................................................... 183Linking to an Alias ............................................................................................................ 185
Using PDFs ............................................................................................................................. 188
Accessing Media Files ........................................................................................................... 189
Importing Web Pages ........................................................................................................... 190
9 Brainstorming with Scrivener ........................................................................... 193Using the Name Generator .................................................................................................. 194
Searching for Names on the Mac................................................................................... 194Adding Names to the Mac Name Generator ............................................................... 196Searching for Names in Windows .................................................................................. 198Adding Names to the Windows Name Generator ....................................................... 201
Creating a Sketchpad ............................................................................................................ 202
Using Aeon Timeline with Scrivener (Mac Only) ................................................................ 205
10 Editing Your Manuscript .................................................................................... 211Using Inline Annotations ....................................................................................................... 212
Adding Annotations ......................................................................................................... 212Editing Annotations ......................................................................................................... 213Changing the Appearance of Annotations ................................................................... 214
Adding and Reviewing Comments ...................................................................................... 217Adding Comments ........................................................................................................... 217Editing Comments ........................................................................................................... 218Changing the Appearance of Comments ..................................................................... 219Moving Comments .......................................................................................................... 219Removing All Document Notations ............................................................................... 220

viii SCRIVENER ABSOLUTE BEGINNER’S GUIDE
Converting Annotations to Comments (and Vice Versa) ................................................... 221
Searching for Annotations and Comments ......................................................................... 222
Exporting Annotations and Comments ............................................................................... 223
Using Revision Mode (Mac Only) ......................................................................................... 223Marking Text ..................................................................................................................... 224Marking Text for Deletion ............................................................................................... 226Customizing Revision Mode ........................................................................................... 226Finding Revisions ............................................................................................................. 227Removing Revisions ......................................................................................................... 228
Taking Snapshots ................................................................................................................... 229Creating Snapshots .......................................................................................................... 229Viewing Snapshots ........................................................................................................... 230Comparing Snapshot Versions (Mac Only) .................................................................... 232Reverting to a Prior Snapshot ......................................................................................... 233
III Digging Deeper into Scrivener
11 Digging into the Inspector ................................................................................ 237Navigating the Inspector ...................................................................................................... 238
Adding a Synopsis in the Inspector ..................................................................................... 239Automatically Generating a Synopsis ............................................................................ 240Adding an Image to the Synopsis .................................................................................. 241
Toggling the Created and Modified Date .......................................................................... 242
Selecting Compile Settings .................................................................................................. 242
Adding Project and Document Notes ................................................................................. 243Adding Images to Notes ................................................................................................. 244Managing Project Notes (Mac Only) .............................................................................. 246
Using Reference Links ........................................................................................................... 247Adding Internal References ............................................................................................ 248Adding Internal References to the Item Icon Menu (Mac Only) ................................. 249Adding External References ........................................................................................... 250Viewing References .......................................................................................................... 251Editing and Deleting References ................................................................................... 252
Locking the Inspector ............................................................................................................ 253
12 Putting Keywords and Meta-Data to Work ................................................... 255Setting Status and Labels ..................................................................................................... 256
Changing the Label and Status Titles ............................................................................ 256Removing Status and Label Values ................................................................................ 259Adding Status and Label Values .................................................................................... 260Setting a Default Status or Label ................................................................................... 262Associating Color with Labels ......................................................................................... 262Applying Label Color to Interface Elements ................................................................. 264Applying a Status Stamp to Index Cards ...................................................................... 266Using Glyphs as a Status Stamp on the Mac ................................................................ 266Adding Glyphs as a Status Stamp in Windows............................................................. 268
Using Keywords...................................................................................................................... 270Viewing the Keywords Inspector Pane .......................................................................... 271

TABLE OF CONTENTS ix
Adding Keywords to Documents ................................................................................... 271Removing Keywords from a Document ......................................................................... 272Using the Keywords Panel .............................................................................................. 272Organizing Project Keywords ......................................................................................... 274Searching by Keyword ..................................................................................................... 274Deleting Keywords from a Project ................................................................................. 276
Adding Custom Meta-Data (Mac Only) ............................................................................... 276Adding Fields ................................................................................................................... 277Adding Values .................................................................................................................. 279Deleting Custom Meta-Data Fields ............................................................................... 280
13 Creating and Using Template Sheets ............................................................. 283Using Predesigned Template Sheets .................................................................................. 284
Changing the Template Folder ...................................................................................... 285Modifying Template Sheets ............................................................................................ 285Creating a Document from a Template ........................................................................ 287
Creating Your Own Template Sheets .................................................................................. 288
Setting a Default Document Type ....................................................................................... 290
14 Creating and Using Project Templates ........................................................... 293Creating a Project to Build a Template ............................................................................... 294
Developing a Good Template ............................................................................................. 295Create a Workspace Layout ............................................................................................ 296Set Up the Draft Folder ................................................................................................... 296Add or Modify the Information File ............................................................................... 297Create Non-Draft Folders and Files ............................................................................... 297Set Default Meta-Data ..................................................................................................... 300Set Project Targets ........................................................................................................... 301Create Template Sheets .................................................................................................. 301Create Initial Collections ................................................................................................. 302Designate Compile Settings ........................................................................................... 303
Using Template Placeholder Tags (Mac Only) ................................................................... 303
Saving a Project Template .................................................................................................... 306Modifying a Project Template ........................................................................................ 307Setting a Default Project Template ................................................................................ 308Deleting a Project Template ........................................................................................... 308
Importing and Exporting Project Templates ...................................................................... 309Importing a Project Template ......................................................................................... 310Exporting a Project Template ......................................................................................... 311
IV Managing Your Writing Projects
15 Tracking Your Progress ...................................................................................... 313Using Project Targets ............................................................................................................ 314
Setting Target Options (Mac Only) ................................................................................ 315Setting Draft Targets ....................................................................................................... 319Setting Session Targets ................................................................................................... 320Resetting Target Sessions ............................................................................................... 320

x SCRIVENER ABSOLUTE BEGINNER’S GUIDE
Using Document Targets ...................................................................................................... 321
Using Project Statistics .......................................................................................................... 323
Viewing Word Frequency ...................................................................................................... 325
16 Searching Your Project ...................................................................................... 329Conducting Project Searches ............................................................................................... 330
Narrowing Project Search Results by Element .............................................................. 331Limiting Project Searches with Operators ..................................................................... 332Narrowing Search Options .............................................................................................. 333Using Project Replace ...................................................................................................... 334
Using Document Find and Replace ..................................................................................... 336Performing a Document Find ......................................................................................... 336Using Document Replace with Document Find............................................................ 338
Using the Find Synopsis Tool (Mac Only) ........................................................................... 338
Searching by Format ............................................................................................................. 340
Creating and Using Collections............................................................................................ 342Creating a Standard Collection ...................................................................................... 343Adding and Removing Files from Standard Collections ............................................. 346Moving Files in a Standard Collection ........................................................................... 347Creating a Search Collection .......................................................................................... 348Converting a Search Collection to a Standard Collection........................................... 349Renaming Collections ...................................................................................................... 349Removing Collections ...................................................................................................... 349Toggling the Collection View ......................................................................................... 349
Setting Bookmarks (Mac Only) ............................................................................................. 350Adding Bookmarks ........................................................................................................... 350Using Bookmark Headers for Navigation ...................................................................... 351
Choosing Favorites (Mac Only) ............................................................................................ 352
17 Backing Up Your Work....................................................................................... 355Setting Backup Preferences .................................................................................................. 356
Backing Up to Dropbox ........................................................................................................ 359
Excluding a Project from Automatic Backups ..................................................................... 361
Performing Manual Backups ................................................................................................. 361
Backing Up to Time Machine or Windows Backup ............................................................ 364
Restoring from a Backup ....................................................................................................... 364
18 Taking Scrivener Out and About ..................................................................... 367Using Scrivener on Multiple Computers ............................................................................. 368
Using Dropbox to Access Your Scrivener Project .............................................................. 369
Syncing Your Project (Mac Only) .......................................................................................... 371Using Files in the External Folder .................................................................................. 375Working Wisely with Synced Folders ............................................................................. 376
Using iPad Apps with Scrivener Files (Mac Only) ............................................................... 376Using iA Writer with Scrivener Files (Mac Only) ........................................................... 377Using Index Card for iOS (Mac Only) ............................................................................ 380
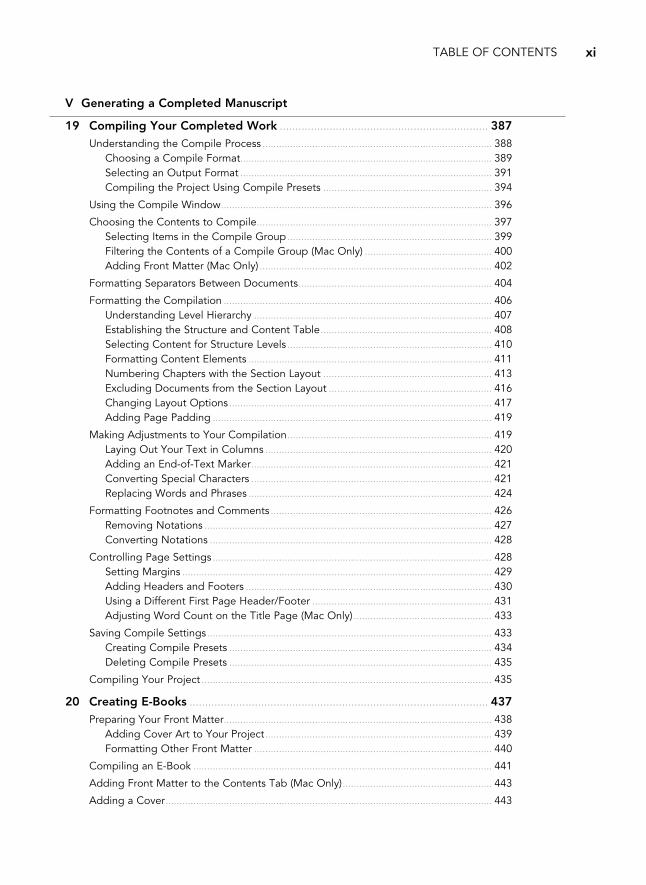
TABLE OF CONTENTS xi
V Generating a Completed Manuscript
19 Compiling Your Completed Work ................................................................... 387Understanding the Compile Process ................................................................................... 388
Choosing a Compile Format........................................................................................... 389Selecting an Output Format ........................................................................................... 391Compiling the Project Using Compile Presets ............................................................. 394
Using the Compile Window .................................................................................................. 396
Choosing the Contents to Compile ..................................................................................... 397Selecting Items in the Compile Group .......................................................................... 399Filtering the Contents of a Compile Group (Mac Only) .............................................. 400Adding Front Matter (Mac Only) .................................................................................... 402
Formatting Separators Between Documents ...................................................................... 404
Formatting the Compilation ................................................................................................. 406Understanding Level Hierarchy ...................................................................................... 407Establishing the Structure and Content Table .............................................................. 408Selecting Content for Structure Levels .......................................................................... 410Formatting Content Elements ........................................................................................ 411Numbering Chapters with the Section Layout ............................................................. 413Excluding Documents from the Section Layout ........................................................... 416Changing Layout Options ............................................................................................... 417Adding Page Padding ..................................................................................................... 419
Making Adjustments to Your Compilation .......................................................................... 419Laying Out Your Text in Columns .................................................................................. 420Adding an End-of-Text Marker ....................................................................................... 421Converting Special Characters ....................................................................................... 421Replacing Words and Phrases ........................................................................................ 424
Formatting Footnotes and Comments ................................................................................ 426Removing Notations ........................................................................................................ 427Converting Notations ...................................................................................................... 428
Controlling Page Settings ..................................................................................................... 428Setting Margins ................................................................................................................ 429Adding Headers and Footers ......................................................................................... 430Using a Different First Page Header/Footer ................................................................. 431Adjusting Word Count on the Title Page (Mac Only) .................................................. 433
Saving Compile Settings ....................................................................................................... 433Creating Compile Presets ............................................................................................... 434Deleting Compile Presets ............................................................................................... 435
Compiling Your Project ......................................................................................................... 435
20 Creating E-Books ................................................................................................ 437Preparing Your Front Matter................................................................................................. 438
Adding Cover Art to Your Project .................................................................................. 439Formatting Other Front Matter ...................................................................................... 440
Compiling an E-Book ............................................................................................................ 441
Adding Front Matter to the Contents Tab (Mac Only) ...................................................... 443
Adding a Cover ...................................................................................................................... 443

xii SCRIVENER ABSOLUTE BEGINNER’S GUIDE
Generating an E-Book Table of Contents ........................................................................... 445
Reviewing HTML Settings (Mac Only) ................................................................................. 447
Adding Document Properties to E-Books ........................................................................... 448
Using KindleGen for Kindle MOBI Files .............................................................................. 451
Compiling an E-Book for iBooks (Mac Only) ...................................................................... 452
Previewing Your E-Book File ................................................................................................ 452
VI Using Scrivener in Other Scenarios
21 Screenwriting in Scrivener ........................................................................... OnlineEntering Scriptwriting Mode
Using a Scriptwriting TemplateImporting a Script from Final Draft
Formatting Your Script
Modifying the Script Settings
Compiling a Script
22 Using Scrivener for Nonfiction Writing ..................................................... OnlineApproaching a Nonfiction Project
Creating Formatting PresetsInserting Figure References
Adding and Formatting FootnotesAdding FootnotesUsing Referenced Inline Footnotes (Mac Only)Customizing Linked Footnote Markers (Mac Only)
Creating a Table of Contents (Mac Only)
Creating a Bibliography
23 Discovering New Uses for Scrivener .......................................................... OnlineWriting a Complete Series in Scrivener
Using Multiple Draft FoldersUsing Scrivener Links Within a Project
Blogging with Scrivener
Creating a Cookbook Database
Index ............................................................................................................................. 495

ABOUT THE AUTHOR xiii
About the AuthorJennifer Kettell switched from being a long-time Windows user to working on a Mac in 2006 for the primary purpose of being able to use Scrivener for her fiction writing. Since then, she’s written several tutorials, given workshops, and helped many other writers adopt Scrivener as the keystone of their writer’s toolkit.
Jenn is the author of My Kindle Fire HD, and has written or contributed to more than two dozen other books. When Jenn isn’t writing about technology, she writes romantic fiction. She’s a member of Romance Writers of America and recently served as president of her local chapter.
Jenn has lived all over the United States, but currently resides in upstate New York. She loves to read, debate current events, and do all manner of puzzles, but she spends the better part of every day thinking of ways to torture the fictional characters who live in her head.
DedicationFor Amanda and Zachary. Watching you grow up has been a privilege.
AcknowledgmentsThis book would not have been possible without my husband and children. They’ve always been supportive of my writing, even when it means cooking their own dinners and sorting through unfolded laundry. Greg, Zach, and Amanda, I love you!
Thank you to Jamie Hutchinson, my English professor at Bard College at Simon’s Rock, for giving me the courage to write.
Thanks to the Romex sisterhood, especially Julie Hurwitz, Mary Strand, Judith Arnold, Carol Prescott, Katy Cooper, Beth Pattillo, Melissa McClone, Pam Baker, Teresa Hill, and Sharyn Cerniglia. You’ve inspired, supported, and prodded me, and I love you all for it. Thanks also goes to my CritGirls—Robin Thomas, Taryn Elliott, Karen Keyes, and Megan Ryder. I’d be lost without our collective snark and the excitement of discovering new office supplies together.
I want to thank Keith Blount and the entire Literature & Latte team for bringing Scrivener to life and sharing it with the writing world.
Finally, thank you to everyone who’s had a hand in this book. Laura Norman saw the potential and fought for it. Jennifer Hughes has been an amazing tech editor and resource. Lora Baughey and Karen Annett caught my consistency and copy mistakes. Seth Kerney kept the project on track and offered guidance on formatting. I appreciate everything you do.

xiv SCRIVENER ABSOLUTE BEGINNER’S GUIDE
We Want to Hear from You!As the reader of this book, you are our most important critic and commentator. We value your opinion and want to know what we’re doing right, what we could do better, what areas you’d like to see us publish in, and any other words of wisdom you’re willing to pass our way.
We welcome your comments. You can email or write to let us know what you did or didn’t like about this book—as well as what we can do to make our books better.
Please note that we cannot help you with technical problems related to the topic of this book.
When you write, please be sure to include this book’s title and author as well as your name and email address. We will carefully review your comments and share them with the author and editors who worked on the book.
Email: [email protected]
Mail: Que PublishingATTN: Reader Feedback800 East 96th StreetIndianapolis, IN 46240 USA
Reader ServicesVisit our website and register this book at quepublishing.com/title/9780789751454 for convenient access to any updates, downloads, or errata that might be available for this book.

If you’re reading this book, you’ve probably decided to write your own
book. Congratulations and good luck! Maybe you’ve already written
dozens of books and are looking for a new approach to your work.
Congratulations and good luck to you, as well! No matter where you are
in the writer’s journey, your path is undoubtedly fraught with milestones
and challenges. There will be all manner of dragons—in the form of
sick children, reluctant heroes and heroines, inopportune empty printer
cartridges, or poorly motivated villains—and it’s your job to handle them
all, be they real or in your fictional world, with aplomb.
INTRODUCTION
• What is Scrivener?
• Mac versus Windows versus Linux versus iPad
• How this book is organized
• Conventions used in this book
• Assumptions about computer knowledge
• Getting more help

2 SCRIVENER ABSOLUTE BEGINNER’S GUIDE
What Is Scrivener?The process of getting your words from your head onto the screen should not be one of those challenges. Thanks to Scrivener, it doesn’t have to be. Unlike a word processor, which allows you to sequentially type your story, Scrivener acts as a complete writing project management system. Scrivener stores not only your manuscript, but also your research, target data, and synopsis and project notes. You can plot your book on virtual index cards or in an outline, and then use those elements to write scenes out of order or even move them around in the manuscript. When you’ve completed your manuscript, you can compile all of the scenes into one document. Scrivener can even compile your manuscript into ePub or Kindle format for self-publishing.
Perhaps the best part of Scrivener is that you can use it the way you choose. Plotters may want to dig deep into every feature of the application, plotting out their entire story in advance, attaching keywords to every scene, setting word count targets, and creating collections of scenes based on point-of-view characters. Pantsers may appreciate the ability to create a new scene on the fly, type as much or as little as they want, and then figure out where to place it later.
Although ideally suited to fiction writing, Scrivener is not limited to this use. Scrivener works well in an academic setting, with footnote features and the ability to collect research directly into the application or link to external sources. Screenwriters will appreciate the screenplay templates and formatting options, as well as the ability to export into Final Draft format. There are dozens of creative uses for Scrivener, as well. You can use it as a daily journal, creating a new entry every day and using keywords and collections to sort entries by topic. You can even use it to sort your recipe collection, creating folders for different courses or food groups and entering an image of the dish on the related index card.
Mac Versus Windows Versus Linux Versus iPadScrivener has been developed for multiple platforms. Scrivener for the Mac was first released in 2005 and is, therefore, the furthest along in development. Scrivener was released for the Windows platform in late 2011. Scrivener 1 for Windows did not initially contain all of the features of Scrivener 2 for Mac, although it is gaining features quickly. Scrivener for Windows 1.5 has recently been released, narrowing the gap between platforms. I will point out any differences between the versions throughout the book, along with workarounds where possible. Eventually, however, this point might well be moot, as the developers intend for the Mac and Windows platforms to reach parity.

INTRODUCTION 3
Scrivener is also unofficially available for Linux as a free beta version. Development of the Linux version is on par with the Windows version. Thus, any differences between Mac and Windows platforms will be the same between Mac and Linux. Keep in mind, however, that there is no official support for the Linux version.
If you’re an iPhone or iPad user, there’s both good news and bad news. The good news is that an iOS version of Scrivener is in development. The bad news is that it most likely will not be released until late 2013, at the earliest. The other good news, however, is that in the meantime you can work on your Scrivener files in other iOS word processors using methods described in this book. Chapter 18, “Taking Scrivener Out and About,” explains this process in detail.
How This Book Is OrganizedThis book is divided into six main parts, as follows:
• Part I, “Getting Started in Scrivener,” discusses the main components of Scrivener, how to customize your writing space, and how to begin writing your book in Scrivener.
• Part II, “Organizing Your Writing Process,” covers how to use the corkboard and outliner tools, how to use Scrivener to collect your research, and features to help you revise your manuscript.
• Part III, “Digging Deeper into Scrivener,” explains how to get the most out of the Inspector, keywords, and other meta-data. You also learn how to create your own template sheets and project templates to fully customize Scrivener to work with your writing process.
• Part IV, “Managing Your Writing Projects,” shows you how to track your progress with project and document targets. You learn how to search your project and create collections of related project elements. Finally, this section discusses how to back up your work and use Scrivener on multiple computers, share a project between Mac and Windows computers, or even work on a scene on your iPad and sync it back to your project.
• Part V, “Generating a Completed Manuscript,” covers the process of turning your scenes and chapters into a compiled manuscript or e-book to submit to an editor or agent or directly self-publish.
• Part VI, “Using Scrivener in Other Scenarios,” explains some of the other ways people use the application. If you’re a screenwriter, lawyer, student, or translator, this section gives you ideas to help you integrate Scrivener into your workflow. If you purchased this book in hard copy format, please note that the chapters of Part VI are available online at quepublishing.com/title/9780789751454.

4 SCRIVENER ABSOLUTE BEGINNER’S GUIDE
The chapters in this book are organized in a logical order, at least to my mind. If you’re looking for an explanation of a particular Scrivener feature, however, feel free to skip around or use the index to hone in on exactly what you seek.
Conventions Used in This BookThis book uses standard conventions to explain menu commands and keyboard shortcuts. As with most computer-related topics, there is often more than one way to do things. In those cases, I’ve tried to present multiple options and leave it to you, the reader, to discover which method works best for you.
Menu and Toolbar CommandsWhen you need to access a command from the menu, you will see instructions such as “Select Project, New Text.” This means you choose Project from the menu bar, and then click on New Text from that menu. When you need to access a command from the toolbar, you will see instructions such as “Click the Show Project Statistics icon.” If there is any doubt as to where you can find a command, I specify to access the menu bar or click a button in the toolbar.
Although the Scrivener developers have attempted to put menu commands in the same locations across both platforms, there are some differences between Windows and Mac OS X, which occasionally hinder this effort. Table I.1 lists some of these differences.
TABLE I.1 Menu Differences Between Mac OS X and Windows
Menu Command Mac OS X Windows
Preferences Scrivener, Preferences Tools, Options
Scratch Pad Window, Show Scratch Pad Tools, Scratch Pad
Customize Toolbar View, Customize Toolbar Tools, Customize Toolbars
Special Characters Edit, Special Characters Edit, Character Map
Spelling Edit, Spelling and Grammar Tools, Spelling
Writing Tools Edit, Writing Tools Tools, Writing Tools
Exit Scrivener, Quit Scrivener File, Exit

INTRODUCTION 5
Keyboard ShortcutsMany commands can be accessed directly from the keyboard using a series of key combinations. For example, instead of going to the menu bar and clicking Project, New Text to create a new text file, you can use Cmd-N. To use this keyboard shortcut, press and hold the Cmd key while typing the letter N. If you’re on a PC, you can use Ctrl+N to create a new text file—that is, press and hold the Ctrl key while typing the letter N.
I note keyboard shortcuts when introducing pertinent commands. You can also locate the keyboard shortcuts in the Scrivener menus themselves, which is a good way to learn the shortcuts for your most-accessed commands.
Scrivener for Mac follows the OS X convention of using characters to represent certain keys for keyboard shortcuts. Table I.2 explains the keyboard shortcut characters and the keys to which they correlate.
TABLE I.2 Keyboard Shortcut Characters
Character Key
⌘ Cmd
Shift
⌃ Ctrl
⌥ Option/Alt
⎋ Esc
⏎ Return
⌫ Delete
Context MenusContext menus are pop-up menus that contain commands appropriate to the context of the position of the mouse pointer or cursor. Instead of moving the mouse to the menu bar and navigating a series of menus, you can often right-click to bring up a context menu and access the necessary command from there. As with keyboard shortcuts, I note where commands are available from a context menu.
Most Windows mice have two buttons, with the left button used to make a selection and the right button used to bring up context menus. If you are using a one-button Mac mouse or a Magic Mouse, you can press the Control key as you click to get the same result. If you’re using a Mac trackpad, you can either Control-click or click with two fingers to bring up a context menu.

6 SCRIVENER ABSOLUTE BEGINNER’S GUIDE
Special ElementsThis book includes special elements that provide additional warnings or information about some features. These elements are designed to draw your attention to these points.
TIP A Tip is a piece of advice or a trick to help you use Scrivener more efficiently or effectively.
NOTE Notes are designed to provide additional information that may be useful but is not completely necessary to accomplish a task.
CAUTION A Caution warns you of quirks or problems when taking certain actions. Ignoring a caution may impede your work, so take special note of these!
Extra SidebarsScrivener Absolute Beginner’s Guide also contains two extra sidebars specific to this book.
THE CREATIVE PROCESSThis element provides ideas for putting the tools and features of Scrivener to work for you. Beyond just the how-to, these sidebars explain why you may want to use certain features.
A WINDOWS VIEWThis element notes differences between the Mac and Windows/Linux versions of Scrivener. In some cases, I also provide workarounds, where available.
INTRODUCTION 7
Assumptions About Computer KnowledgeScrivener Absolute Beginner’s Guide is an introductory-level book about Scrivener. It is not, however, an introductory-level book about computers in general. I assume that you know how and have already installed the Scrivener application and that you know how to perform basic computer tasks such as Cut and Paste.
If you need help with these basic computer topics, I suggest OS X Mountain Lion Absolute Beginner’s Guide by Yvonne Johnson for Mac users and Using Windows 8 by J. Peter Bruzzese or My Microsoft Windows 7 PC by Katherine Murray for Windows users. These books will get you up to speed.
Getting More HelpScrivener is a complex application, and the demands your personal approach to writing make of it may not be fully covered in this book. Fortunately, help is always close at hand! The best source of support is the forum at the Literature & Latte website (http://www.literatureandlatte.com). On this site, you can join the thriving Scrivener user community and get help directly from the extremely helpful developer, Keith Blount, and his staff as well as other users. Come for the tech support—stay for the quirky conversations about writing and just about anything else under the sun.
The Help menu in Scrivener contains links to an interactive tutorial, the PDF Scrivener Manual, and online video tutorials. If you are a visual or kinetic learner, I highly recommend using the interactive and video tutorials along with this book.
You can also find information about Scrivener on my own website at http://www.jenniferkettell.com.

This page intentionally left blank
STORYBOARDING WITH THE CORKBOARDFrom multicolored index cards and post-it notes to foam-core plotting
boards and decoupage collages, the process of planning a story can
become quite an artistic adventure. Seeing a visual representation of your
story engages the creative side of your brain while also appeasing your
logical side by potentially highlighting dangling plot threads, the balance
of point-of-view (POV) characters, and other story elements.
If you like to storyboard your books before you begin writing, the
Corkboard will prove to be an invaluable tool in your writer’s toolkit. Even
if you are a pantser, you may find that viewing the Corkboard when you’re
blocked can help you see the flow of your story to discover what should
come next. It can also be used as an editing tool to analyze your com-
pleted draft before undertaking revisions.
I N T H I S C H A P T E R
6• Opening the Corkboard
• Examining index cards
• Adding index card options
• Setting Corkboard options on the Footer bar
• Using the Corkboard in Split Screen
• Locking the View mode
• Working with the Freeform Corkboard
• Printing index cards

138 SCRIVENER ABSOLUTE BEGINNER’S GUIDE
Academic and nonfiction writers can also benefit from using the Corkboard. Viewing your project in such a visual manner can ensure you have established enough supporting elements for your thesis and put your sections in proper order to provide the most impact.
Scrivener’s Corkboard is based on the concept of index cards tacked up to a board, but without the mess of glue sticks or dropped pushpins. Each item in the Binder is represented by an index card, and cards can be color-coded and moved around the Corkboard, just like their nonvirtual counterparts. Unlike a physical corkboard, however, Scrivener’s Corkboard travels with your work in progress; anywhere you use Scrivener, you can view your Corkboard.
Opening the CorkboardAs with Scrivenings, the Corkboard is another way to view multiple items from the Binder together as a group. To open the Corkboard:
1. Select the container you want to view from the Binder.
2. Choose one of the following options:
• Click the Corkboard icon in the Group mode on the toolbar.
• Choose View, Corkboard from the menu.
• Press Cmd-2 (Ctrl+2 in Windows).
The Editor window displays the Corkboard view, as shown in Figure 6.1. The standard Corkboard displays a single level of your project hierarchy. Each file at that level is represented by an index card. Folders or file groups containing subdocuments are represented by a stack of index cards, indicating content at a lower level in the hierarchy.
CAUTION You can view multiple folders, file groups, or nonsequential files and folders. You can also select a collection (which are explained in Chapter 16, “Searching Your Project”). The appearance of the Corkboard and the actions you can perform with the index cards change depending on the selection. If you select a container, for example, you can rearrange the index cards , whereas you cannot move or add cards when the Corkboard dis-plays a selection of multiple items from various folders.
NOTE See Chapter 3, “Organizing the Binder,” for more information about establishing the file and folder hierarchy for a project.

CHAPTER 6 STORYBOARDING WITH THE CORKBOARD 139
FIGURE 6.1
The Corkboard displays index cards of each document in the selected container. The Synopsis area displays either text or an image, as added in the Inspector.
The Corkboard is not a fixed view of your documents. If you loaded a container into the Corkboard, you can move cards around to change their order within the container, and these changes are reflected immediately in the Binder. To move a card, just click and drag it to its new location. You can also drag the card from the Corkboard into a different container in the Binder.
Viewing Multiple Containers in a Stacked CorkboardWhen you click on a single container in the Binder, the Corkboard displays all of the documents within the top level of that container. If you select multiple containers on the Mac, however, you can stack Corkboards in order to view them all at the same time, as shown in Figure 6.2. To do this, hold down the Cmd key on the Mac while clicking on multiple containers in the Binder.
Corkboard Options menu
Selected container
Image added in Inspector

140 SCRIVENER ABSOLUTE BEGINNER’S GUIDE
CAUTION Be careful not to click individual documents while making this selection. If any individual files are in the selec-tion, the standard Corkboard appears, instead of the stacked Corkboard.
NOTE Unfortunately, this feature is not available in Windows.
Arrange cards
Selected containers
FIGURE 6.2
A stacked Corkboard displays two or more containers simultaneously.
When the Corkboard is stacked, each container’s contents appear on the Corkboard. A line appears between the cards for each container, and the shading of the background changes. By default, the cards for each container wrap within the window, as you can see in Figure 6.2, and the containers are stacked horizontally. Change the arrangement of the cards using the three buttons on the right side of the Footer bar. Your options are as follows:
• Wrap Cards: The default view. The cards for the container wrap as they do in the standard Corkboard view, and the Corkboards are stacked horizontally on top of each other.

CHAPTER 6 STORYBOARDING WITH THE CORKBOARD 141
• Arrange Cards in Rows: The cards within a container appear in a single row, with the Corkboards stacked horizontally.
• Arrange Cards in Columns: The cards within a container appear in a single column, with the Corkboards arranged side by side vertically.
Adding Documents to the CorkboardIf you get an idea for a new scene or concept in your writing project, you can add a new document within the Corkboard. Click the Add button in the toolbar, and a new card appears on the Corkboard. You can also use any of the other methods for adding a new document you learned in Chapter 3. If you want to add a new card directly after an existing card, select that card before adding the new one.
CAUTION You cannot add new items to the Corkboard when displaying a multiple selection.
When you are viewing a stacked Corkboard, if no card is selected when you add a new card, it gets added to the end of the final stack. If a card is selected, the new card is added immediately after it.
TIP If you use the Corkboard as a plotting/planning tool and frequently add new documents while in this view, change your Preferences/Options to add a new document when you double-click in the background. Open the Corkboard tab in the Preferences/Options window. On the Mac, click the Double-Clicking Corkboard Background drop-down menu and select Creates a New Card. In Windows, click the Empty Space Double-Click Will drop-down menu and select Create a New Card.
THE CREATIVE PROCESS: WHICH CAME FIRST—THE BINDER, THE INSPECTOR, OR THE CORKBOARD?
Just as there is no one way to approach a writing project, there is no one way to use Scrivener. I’ve laid out the chapters in this book so that those who want to proceed quickly to creating documents and getting to work in the Editor have the tools they need to do so without having to wade through a lot of extra steps. Many other writers prefer laying out scenes on the Corkboard (or the Outliner, covered in the next chapter), possibly in conjunction with the Inspector before writing a single line of text. You can also use the Inspector and the Binder together and avoid the Corkboard and Outliner completely. Play with the options to discover how you and Scrivener work best together.

142 SCRIVENER ABSOLUTE BEGINNER’S GUIDE
Examining Index CardsIndex cards represent your files, but they do not display the content of the document itself. Rather, the index card contains elements of the meta-data for the file. Imagine it as a physical index card you paper clip to each document describing its content.
As shown in Figure 6.3, there are three mandatory elements on every index card, as follows:
SynopsisTitleIcon
FIGURE 6.3
An index card displays the icon, title, and synopsis of the document.
• Icon: The item’s icon, matching the one that appears in the Binder. You can easily see if the file contains document text or has been saved as a Snapshot, for example, by looking at the icon. The icon has a functional purpose, as well: to open a document in the Editor window in order to work on the document itself, double-click the icon on the index card.
NOTE Icon types were explained in Chapter 3.
• Title: The title of the document, as it also appears in the Binder. Double-click the title to highlight and rename it. If you change the title of the document on the index card, it is updated in the Binder and the Inspector.
• Synopsis: The synopsis of the document. Double-click to type or edit the synopsis on the index card. You can also enter the synopsis in the Inspector. If you want to use an image in place of a text synopsis, as shown in Figure 6.1, you must add it in the Inspector. You are not required to enter a synopsis; if you do not, this area of the card remains blank.
CAUTION The synopsis is not the actual text of your docu-ment. Enter your document text by opening the document in the Editor. Do not enter your document text in the Corkboard or Inspector.
CHAPTER 6 STORYBOARDING WITH THE CORKBOARD 143
NOTE Learn about the Inspector and adding an image in the synopsis in Chapter 11, “Digging into the Inspector.”
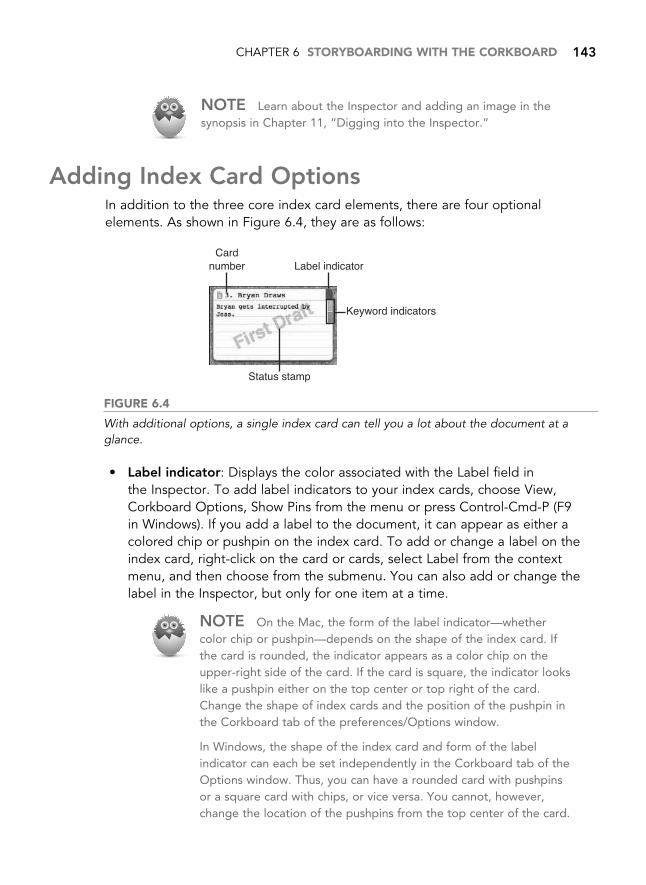
Adding Index Card OptionsIn addition to the three core index card elements, there are four optional elements. As shown in Figure 6.4, they are as follows:
Cardnumber Label indicator
Status stamp
Keyword indicators
FIGURE 6.4
With additional options, a single index card can tell you a lot about the document at a glance.
• Label indicator: Displays the color associated with the Label field in the Inspector. To add label indicators to your index cards, choose View, Corkboard Options, Show Pins from the menu or press Control-Cmd-P (F9 in Windows). If you add a label to the document, it can appear as either a colored chip or pushpin on the index card. To add or change a label on the index card, right-click on the card or cards, select Label from the context menu, and then choose from the submenu. You can also add or change the label in the Inspector, but only for one item at a time.
NOTE On the Mac, the form of the label indicator—whether color chip or pushpin—depends on the shape of the index card. If the card is rounded, the indicator appears as a color chip on the upper-right side of the card. If the card is square, the indicator looks like a pushpin either on the top center or top right of the card. Change the shape of index cards and the position of the pushpin in the Corkboard tab of the preferences/Options window.
In Windows, the shape of the index card and form of the label indicator can each be set independently in the Corkboard tab of the Options window. Thus, you can have a rounded card with pushpins or a square card with chips, or vice versa. You cannot, however, change the location of the pushpins from the top center of the card.

144 SCRIVENER ABSOLUTE BEGINNER’S GUIDE
TIP You can also apply the label color to the icon or the entire index card, or both. To do this, choose View, Use Label Color In, and select Icons or Index Cards from the submenu. As you can see in the menu, you can also apply the label color to the file in the Binder and the Outliner. If you apply the label color to the icon, the color is visible wherever the icon is used in Scrivener—the Binder, Corkboard, Outliner, and the Header bar in the Editor. If you apply the label color to the index card, adjust the tint in the Appearance tab of the Preferences window on the Mac or the Corkboard tab of the Options window in Windows.
• Status stamp: Displays the Status of the document as a watermark across the index card. Choose View, Corkboard Options, Show Stamps or press Control-Cmd-S (F10 in Windows) to enable this feature. Adjust the opacity of the stamp in the Corkboard tab of the Preferences/Options window.
TIP Chapter 12, “Putting Keywords and Meta-Data to Work,” offers a neat trick to assign symbols as a status indicator.
• Keyword indicators: Displays color swatches associated with keywords applied to the document. Keyword indicators are displayed by default on the Mac but need to be enabled in Windows. To disable or reenable keyword indicators, choose View, Corkboard Options, Show Keyword Colors or press Control-Cmd-K (Ctrl+F12 in Windows). Keyword indicators only appear if keywords have been assigned to the file. Assign keywords from the Inspector or directly on the Corkboard. To add a keyword, click the Keywords button on the toolbar to open the Keywords panel. Drag the desired keyword from the panel onto the index card. You can also select multiple index cards and then drag and drop one or more keywords onto the selection to assign them.
NOTE On the Mac, index cards display up to five keyword indicators by default. In Windows, index cards display all key-word indicators by default. You can change this setting from the Corkboard Options menu accessible in the Footer bar, as explained in the next section of this chapter.
• Card number (Mac only): Assigns numbers to each card based on their order in the container. If you move cards around in the Corkboard, they are renumbered to reflect the new order, and they are reordered in the Binder. To display card numbers, choose View, Corkboard Options, Show Card Numbers from the menu.

CHAPTER 6 STORYBOARDING WITH THE CORKBOARD 145
TIP When you view a stacked Corkboard, card numbers con-tinue sequentially throughout the visible containers. If you want to start the numbering over in each container, choose View, Corkboard Options, Number Per Section from the menu.
NOTE To learn more about using labels, status, and key-words, see Chapter 12.
Setting Corkboard Options on the Footer BarAside from the Corkboard options on the View menu, which primarily control the index card elements, the Corkboard Options menu on the Footer bar controls the layout of the index cards and Corkboard. By fine-tuning the size and spacing of the index cards, you can customize this view to maximize the use of your screen real estate. The options on the Corkboard Options menu, shown in Figure 6.5, are as follows:
FIGURE 6.5
The Corkboard Options menu controls the size and positioning of index cards on the Corkboard.
NOTE In Windows, click the Layout Options icon in the Footer bar to open the Corkboard Options menu.
• Card Size: Determines the size of index cards by using this slider and then letting the Corkboard determine how many cards fit across the window.
TIP Another method to determine card size is to set the num-ber of cards you want in each row in the Cards Across option on this menu and let the Corkboard determine the size of the cards required to meet this criteria. In this case, the Size control is disabled.

146 SCRIVENER ABSOLUTE BEGINNER’S GUIDE
• Ratio: Sets the ratio between the height and width of the cards. The default is 3×5, the ratio of a physical index card. On the Mac, cards displaying images are always 5×5.
• Spacing: Adjusts the space between columns and rows of index cards. If space is at a premium, move this slider to the left to minimize the space between cards.
• Cards Across: Determines the number of cards to place in each row on the Corkboard. Use Auto to allow the size of the cards to regulate this setting.
• Keyword Chips: Sets the maximum number of keyword indicators to be displayed on index cards. If this number is lower than the number of keywords assigned to a card, the additional keywords are ignored.
• Size to Fit Editor: Resizes cards to fit the current width of the Editor window if this check box is selected in conjunction with a fixed number set in the Cards Across option. If this option is deselected, you may need to scroll to see the contents of the Corkboard. If Cards Across is set to Auto, this option is disabled. If this option is selected, the Size slider is disabled.
• Use Small Font: Instructs the index cards to make use of the Small Text setting in the Corkboard tab of the Preferences window. To access this setting in Windows, choose the Appearance tab of the Options window, then select Corkboard in the Fonts pane and choose Index Text Small.
You can immediately see how changes on this menu affect the Corkboard, so it is easy to fine-tune your settings. To close the menu on the Mac, click outside it. In Windows, click the X button at the top of the menu.
Using the Corkboard in Split ScreenIn Chapter 4, “Writing in the Editor,” you learned how to use Split Screen mode to divide the Editor window into two separate panes. If you’re a planner who likes knowing what’s coming next while working in a document, keeping the Corkboard visible in Split Screen mode, as shown in Figure 6.6, can help.
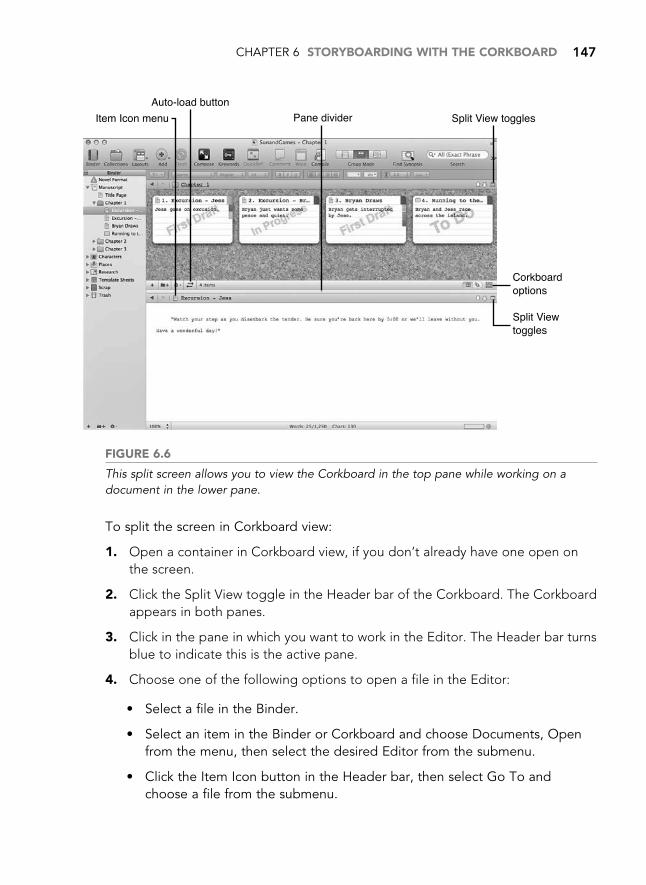
CHAPTER 6 STORYBOARDING WITH THE CORKBOARD 147
FIGURE 6.6
This split screen allows you to view the Corkboard in the top pane while working on a document in the lower pane.
To split the screen in Corkboard view:
1. Open a container in Corkboard view, if you don’t already have one open on the screen.
2. Click the Split View toggle in the Header bar of the Corkboard. The Corkboard appears in both panes.
3. Click in the pane in which you want to work in the Editor. The Header bar turns blue to indicate this is the active pane.
4. Choose one of the following options to open a file in the Editor:
• Select a file in the Binder.
• Select an item in the Binder or Corkboard and choose Documents, Open from the menu, then select the desired Editor from the submenu.
• Click the Item Icon button in the Header bar, then select Go To and choose a file from the submenu.
Auto-load button
Pane dividerItem Icon menu Split View toggles
Split Viewtoggles
Corkboardoptions
148 SCRIVENER ABSOLUTE BEGINNER’S GUIDE
• Right-click on an index card in the Corkboard, then select Open and choose the Editor in which the document should open.
If you are currently in Document view in the Editor and want to split the screen and add a Corkboard to one pane, you can do this, as well. Split the screen and then open a container in one pane and choose Corkboard view from the toolbar or menu.
TIP You may need to adjust the Corkboard options to position your index cards exactly as you want in the smaller real estate of the Split Screen pane. You can also adjust the amount of space allocated to each pane by sliding the divider bar between panes.
In step 4 above , you had the option of using the Corkboard to control the Editor. You can automate this by clicking the Auto-load button in the Footer bar of the Corkboard. On the Mac, the icon turns blue to signify the feature is enabled. In Windows, the button appears depressed. Whenever you select an index card in the Corkboard, the document opens in the other Editor pane.
CAUTION If you are clicking around in the Corkboard, it’s easy to lose track of which document is open in the other Editor. If you have the Auto-load option enabled, get into the habit of looking at the Header bar before typing in your document to ensure you are in the correct document.
Putting Split Screen to WorkYou can combine your knowledge of several Scrivener options and commands to build a custom layout. Figure 6.7 shows my usual writing layout when drafting a project. This layout works well on a widescreen display because it makes use of the extra horizontal space while showing as much text in the document as possible.

CHAPTER 6 STORYBOARDING WITH THE CORKBOARD 149
FIGURE 6.7
Using multiple settings in conjunction with each other allows you to create a unique workspace.
This is how it works:
• The screen is split vertically. Press the Option key while clicking the Split View toggle to change the orientation of the split on the Mac. In Windows, click the Vertical Split button.
• The Corkboard is loaded into the left pane. The width of the Corkboard pane has been adjusted to fit one index card across, and the Corkboard options have been adjusted to change the size and ratio of the index cards to suit the space.
• The Binder Affects (View, Binder Affects) option has been set to Left Editor, so anything selected in the Binder opens in the left Editor pane.
• The Auto-load option in the Footer bar of the Corkboard has been enabled, so any item selected in the Corkboard automatically opens in the right Editor pane.
• If you want to move items in the Binder without affecting the Corkboard, use the Lock in Place option (View, Editor, Lock in Place). This can be toggled as needed.
Auto-load button

150 SCRIVENER ABSOLUTE BEGINNER’S GUIDE
• To maximize screen real estate, you can hide the Binder completely (View, Layout, Hide Binder on the Mac or deselect View, Layout, Show Binder in Windows). You can also hide the toolbar (View, Hide Toolbar on the Mac or deselect View, Toolbar in Windows).
Your mileage may vary. Each of the options I set to suit my needs can be set differently to match yours. This is merely one example of how to work in Scrivener.
NOTE As an example of how Scrivener’s features can work together, this figure also shows customized Appearance prefer-ences and the application of the Label field to the color of the icons in the Corkboard and Binder and the background of the index cards. See Chapter 2 to learn how to customize colors and Chapter 12 to discover how to use the label color in vari-ous elements.
CAUTION Don’t forget to save your layout and preferences settings when you get things arranged as you like!
Using Images to Your AdvantageIf you add images to your synopsis in the Inspector (explained in Chapter 11), you can use the Corkboard as a reference tool of a different sort. Figure 6.8 shows a container from the Research folder in Corkboard view in the top pane and an open document in the bottom pane. The images aid in describing the objects in the document. If you need to access the content of the research document, right-click the index card and choose Open, As QuickReference from the context menu.
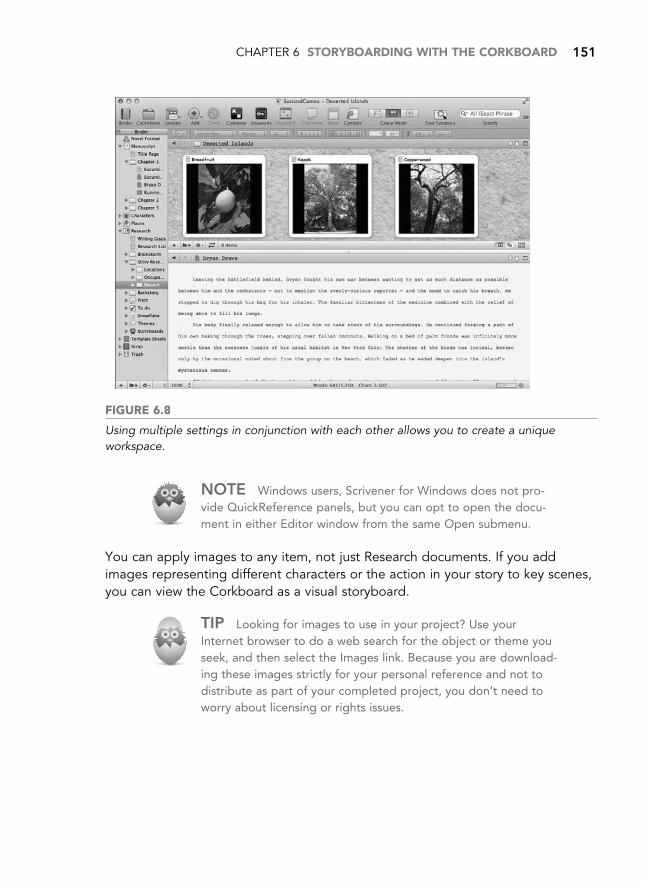
CHAPTER 6 STORYBOARDING WITH THE CORKBOARD 151
FIGURE 6.8
Using multiple settings in conjunction with each other allows you to create a unique workspace.
NOTE Windows users, Scrivener for Windows does not pro-vide QuickReference panels, but you can opt to open the docu-ment in either Editor window from the same Open submenu.
You can apply images to any item, not just Research documents. If you add images representing different characters or the action in your story to key scenes, you can view the Corkboard as a visual storyboard.
TIP Looking for images to use in your project? Use your Internet browser to do a web search for the object or theme you seek, and then select the Images link. Because you are download-ing these images strictly for your personal reference and not to distribute as part of your completed project, you don’t need to worry about licensing or rights issues.

152 SCRIVENER ABSOLUTE BEGINNER’S GUIDE
Locking the View Mode (Mac Only)The Group View mode that is applied to a container depends on the last Group View mode you selected. For example, if you select a container and view it in the Outliner, the next time you select any container, it automatically opens in the Outliner. If you want to set a container to always open in a particular View mode, you can change this default behavior. Select View, Editor, Lock Group View Mode in the menu.
When Lock Group View mode is selected, it remembers the last Group View mode applied to the container you select while this command is enabled, and automatically reopens that container in the same view the next time it is selected. A lock symbol appears on the Group View mode icon in the toolbar to signify the container is locked to that mode. Scrivener remembers which containers have been locked to a Group View mode and which have not.
Working with the Freeform Corkboard (Mac Only)
The standard Corkboard is also called the Linear Corkboard because it displays items in a fixed order. Scrivener for Mac also offers a Freeform Corkboard. This view allows you to move cards around the background without the constraints of document order or a grid. Best of all, you can group your index cards into different arrangements without changing the order of the documents in the Binder. This gives you a different view of your project, without risking any permanent changes.
To access the Freeform Corkboard, shown in Figure 6.9, open a Corkboard for a single container and then select the Freeform Corkboard button in the Footer bar. You can also toggle the Freeform Corkboard by choosing View, Corkboard Options, Freeform from the menu. The background of the Freeform Corkboard is different by default so you can easily tell which type of Corkboard is active.
NOTE You can also use the Freeform Corkboard if you open a standard collection. Learn more about collections in Chapter 16, “Searching Your Project.”

CHAPTER 6 STORYBOARDING WITH THE CORKBOARD 153
FIGURE 6.9
The Freeform Corkboard lets you move cards freely around the screen without committing to change the order of your documents.
Rearrange cards as you desire by dragging them around the Freeform Corkboard. If you want to return to the Linear Corkboard, click the Linear Corkboard button. Scrivener remembers the card position so you can return to the Freeform Corkboard later.
TIP Even if you don’t use card numbers on your index cards as a matter of course, you may want to turn them on when you are in the Freeform Corkboard. The numbering remains the same as you move cards around the Freeform Corkboard, so you can still tell where the scene falls in your project sequence.
You can also use the Reveal in Binder command (View, Reveal in Binder from the menu or right-click on an index card and choose Reveal in Binder from the context menu) to select the document in the Binder so you can see it within the context of your project hierarchy.
Commit Order button Linear Corkboard button
FreeformCorkboardbutton

154 SCRIVENER ABSOLUTE BEGINNER’S GUIDE
If you decide you like the order in which the cards appear in the Freeform Corkboard, you can commit this card order to the Binder. Take the following steps:
1. Click the Commit Order button in the Footer bar. The Commit Freeform Corkboard Order dialog box opens, as shown in Figure 6.10.
FIGURE 6.10
The Commit Freeform Corkboard Order dialog box confirms the order in which Scrivener should scan cards on the Freeform Corkboard to change the card order.
2. In the Start At column, select the location Scrivener should look for the first card in the new sequence.
3. In the Order From column, select the direction in which Scrivener should scan the index cards to determine the new card order.
4. Click OK.
If you enabled card numbers, you can see that the number assigned to each card has changed to reflect the new order. Your items are also reordered in the Binder. Confirm that each card was positioned as you want; you can rearrange items in the Binder if anything is out of place.
If you change your mind about committing the new card order, use the Undo command (Edit, Undo, or Cmd-Z).
CHAPTER 6 STORYBOARDING WITH THE CORKBOARD 155
THE CREATIVE PROCESS: PLOT-TESTING YOUR MANUSCRIPT OR PROJECT
The Freeform Corkboard excels at allowing you to look at your project in different ways. For fiction writers, you can move your cards into groups based on POV character, subplot, setting, and so on. This can make it easier to see if your story is unbalanced—having too many scenes in one character’s point-of-view or leaving a subplot without resolution.
For nonfiction writers, consider grouping index cards based on the type of information you are providing. If your project contains a mix of quantitative, observational, and interactive research, for example, you can group your index cards by these categories to ensure you have the proper balance. For an analytical paper, you can group items by those that support a thesis statement and those that may disprove or run counter to that thesis and need to be argued against.
Windows users, don’t feel left out! You can use labels, status stamps, and keyword chips to get a visual overview of various elements of your project. You can also use collections to gather groups of documents in one place, as explained in Chapter 16.
Printing Index CardsAlthough Scrivener provides great flexibility in the Corkboard, there is still something about the feel of holding a stack of physical index cards in your hands and quickly arranging them in various ways. You can print index cards directly from the Corkboard to bring the virtual into physical form.
NOTE The instructions here are for the Mac platform. If you use Scrivener for Windows, see “A Windows View: Printing Index Cards from Scrivener for Windows,” later in this section.
The settings for printing index cards are optimized to work with Avery Perforated Index Card stock, but you can print on plain paper or card stock and cut the cards yourself.
Before printing index cards, ensure that the virtual index cards contain the proper titles and synopses you want to print. If a synopsis is too long for a 3×5 index card, the additional text prints on subsequent cards. If this is the desired behavior, you’re all set. If you want each virtual index card to be limited to a single physical index card, however, you may need to edit your synopses to fit. If an index card is

156 SCRIVENER ABSOLUTE BEGINNER’S GUIDE
displaying an image rather than text on the Corkboard, the image is used when printing. If this is not what you intend, use the Inspector to change the item to the synopsis text view.
TIP Before you potentially waste expensive card stock, you can save your index cards to PDF so you can view the layout exactly as it will appear on the printed cards. In the Print window, click the PDF button, then select either Save as PDF or Open PDF in Preview from the drop-down menu.
Before you print index cards, you need to set up the print options by doing the following:
1. Go to File, Page Setup.
2. In the Page Setup dialog box, click the Settings drop-down list and select Scrivener. The window changes to display margin settings.
3. Click Options below the list of margin settings.
4. In the Print Options dialog box, click Index Cards in the center, as shown in Figure 6.11.
FIGURE 6.11
The Print Options dialog box displays a sample preview of your printed index cards based on the options you select.
CHAPTER 6 STORYBOARDING WITH THE CORKBOARD 157
5. Choose from the following options:
• Include Titles: Selected by default, this prints the document title at the top of each card.
• Include Card Numbers: This includes the card number with the title.
NOTE Cards are numbered based on their order within the selected container on the Corkboard. Without this context, print-ing card numbers on physical index cards may be of limited use to you.
• Ignore Cards with Titles Only: If a card contains only a document title and no synopsis, the card will not be printed.
• Highlight Titles with Label Color: Selected by default, this uses the label color in the title. The label name is also added in parentheses after the title.
• Include Keywords: This adds keywords below the title. Keywords are underlined and separated by commas on the card.
• Print Cutting Guides: Selected by default, this adds dashed lines around the card to guide cutting them with scissors or a cutting block. This option is not necessary if you are printing on perforated card stock.
• Force Landscape Orientation: If you are printing to regular sheets of paper or card stock instead of perforated index cards, you can opt to print in landscape orientation. This increases the number of cards per page from three to four.
• Embolden Titles: Selected by default, this prints document titles in bold typeface.
• Print Using Font: This allows you to override the Corkboard fonts you set in the preferences window and print in a different font and font size.
6. Click OK to close the Print Options window.
7. Click OK to close the Page Setup window.
Once the print options are configured, you are ready to print your cards. If you are printing on perforated index cards or another specialty paper, load the stock into your printer’s paper tray. To print:
1. Select the container or files you want to print by loading them into the Corkboard.
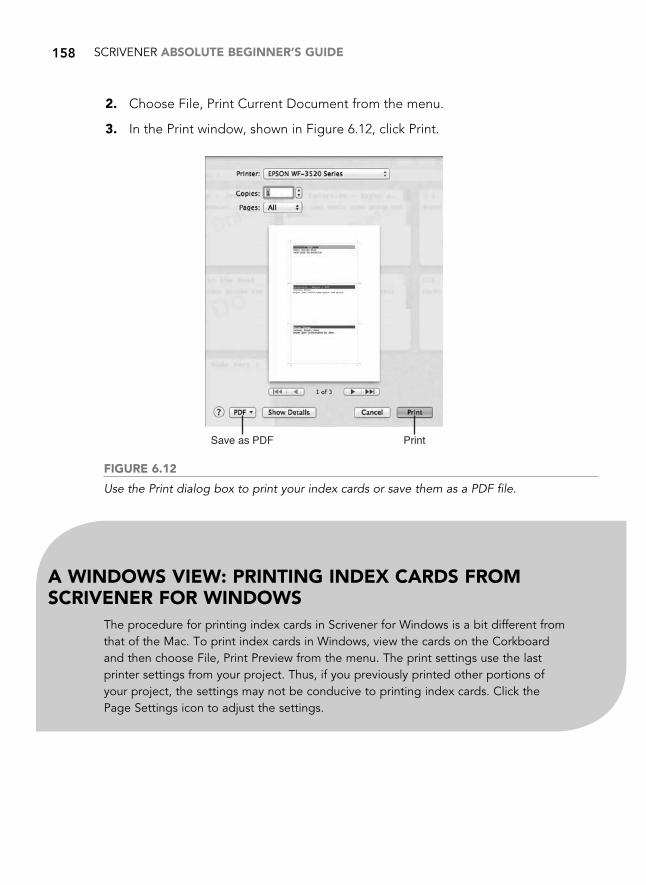
158 SCRIVENER ABSOLUTE BEGINNER’S GUIDE
2. Choose File, Print Current Document from the menu.
3. In the Print window, shown in Figure 6.12, click Print.
Save as PDF Print
FIGURE 6.12
Use the Print dialog box to print your index cards or save them as a PDF file.
A WINDOWS VIEW: PRINTING INDEX CARDS FROM SCRIVENER FOR WINDOWS
The procedure for printing index cards in Scrivener for Windows is a bit different from that of the Mac. To print index cards in Windows, view the cards on the Corkboard and then choose File, Print Preview from the menu. The print settings use the last printer settings from your project. Thus, if you previously printed other portions of your project, the settings may not be conducive to printing index cards. Click the Page Settings icon to adjust the settings.

CHAPTER 6 STORYBOARDING WITH THE CORKBOARD 159
If you want to change the margins or print in landscape orientation, make those changes in the toolbar at the top of the Print Preview dialog box. When you are ready to print, click the Print button in the right corner of the Print Preview toolbar .
PrintScroll through pages
Paper orientation Page settings

160 SCRIVENER ABSOLUTE BEGINNER’S GUIDE
THE ABSOLUTE MINIMUMThe following are the highlights from this chapter:
• Double-click the icon on an index card to open the document itself. Double-clicking on the title or synopsis areas of the index card allows you to edit those entries.
• Index cards can hold both a synopsis and an image.
• When you adjust the appearance of labels, status, and keywords on index cards, a single card can tell you a lot about your project.
• Lock the View mode (Mac only) to set a container to always open in the Corkboard (or Outliner or Scrivenings) view.
• If you want to use the Freeform Corkboard layout (Mac only) to determine your card order, use the Commit Order command. You can use the Freeform Corkboard, however, without committing to change the order of your cards.
• You can use the Corkboard in conjunction with Document view in Split Screen mode to create a streamlined workflow from Binder to Corkboard to Document.

This page intentionally left blank

AAbout the Author pages, 440academic projects, 467
bibliographies, 482Binder, organizing, 469collaborations, 474figure references, 471-473footnotes, 474-480formatting presets, 470-471tables, 474tables of contents (ToC),
480-482templates, 468-469
Acknowledgment pages, 440Aeon Timeline (Mac only), 205-208Amazon Kindle, 393, 442, 451-452annotations, 113, 325. See also
notesadding, 212, 213bookmarks (Mac only), 350color, changing, 214-216, 221converting
comments to, 221text to, 213
copying/pasting text into, 213customizing, 214-216deleting, 214, 220editing, 213exporting, 223searching for, 222-223Windows and, 350
appearances, customizing, 32Binder, 33-34color, 36-39Composition mode, 47Fonts options, 36Full Screen mode, 35gradients, 35labels, 35Mac options, 33Notepad, 34Outliner, 34QuickRef panel, 35text in PDF documents, 35
artcover art, 439-440figure references, 471-473placeholder tags, 472-473sketchpads, 202-204Smooth Text and Line Art
option, 35ASIN codes, 450attachments (.rtfd), 391-392
audio files, 72authors, About the Author pages,
440Auto-Complete Lists, 116-118automatic backups, 357-361autonumbering, 422
Bbackdrop images, 129background images, 134backups
automatic backups, 357-361Back Up as Zip File option, 368catastrophic events and, 356computer failures, 356corrupted projects, 356Dropbox backups, 359-360flash drives, 363, 368Google Drive backups, 360jump drives, 363, 368manual backups, 361-363, 368preferences, setting, 356-359Project Replace and, 336restoring from, 364SkyDrive backups, 360Snapshots, 229-234theft and, 356Time Machine backups (Mac
only), 364Windows Backup, 364
Barnes & Noble .epub files, 442bibliographies, 31, 482Binder, 69, 82, 91, 333
academic projects, 469appearance, customizing, 33-34closing/opening, 19collections, 19Collection view, 349containers, 70, 80documents
adding, 74-75adding icons to (Mac only),
82deleting, 18dragging to Editor, 101grouping, 77-78importing, 88importing/splitting, 89-90
Editor and, 96-98, 101file groups, defining, 71
filesadding to root folders, 77defining, 71duplicating, 81merging, 89splitting, 88-89
foldersadding, 75-77adding icons to (Mac only),
82defining, 71Draft folder, 71grouping, 77-78Pitch folder, 76Research folder, 71root folders, 76-77Scrap folder, 76Trash folder, 71
highlighting text, 34icons, 82-85label color, applying to, 264manuscripts, importing, 85-87nonfiction projects, 469organizing, 469rearranging documents, 17Research folder, importing
research files, 182blogging, 257, 491Bluetooth keyboards and iPad, 379bold text, 105, 423bookmarks (Mac only), 350-352brainstorming tools, 194-208bulleted lists, 106, 240
CCalibre eBook management
application, 393, 449case sensitivity (text), 334catastrophic events and backups,
356Celtx, Plain Text Screenplay
compilation format, 389centering
tab stops, 111text, 418
chapters, numbering, 413-416character counts (text), 113citations (bibliographies), 31, 482class notes, taking, 491
Index

496 COLLABORATIONS
collaborations, 474collections, 19, 302-303, 330, 334,
343-349, 373color, 129
annotations, changing in, 214-216, 221
Binder, applying label color to, 264
comments, changing in, 219-221customizing, 36-39, 47footnotes, changing in, 476gradients, customizing, 35highlighting, 423icons, 265index cards, 144, 157, 265keywords, 274labels, 35, 264-266multipass revisions, 220Outliner rows, 265Revision mode (Mac Only),
226-227template sheets (Mac only), 289text, 105, 423
columnscompilations, 420-421Corkboard, 141, 146Outliner, 164-169
comments, 113, 325adding, 217-218annotations, converting to, 221color, changing, 219-221customizing, 219deleting, 219-220editing, 218exporting, 223fonts, setting, 55formatting, 426-428moving, 219multiple comments, viewing, 219searching for, 222-223
compiling, 166, 316-317, 325, 435-436
choosing contents to compile, 397-403
compilations, 406adjusting word count on title
pages (Mac only), 433changing layout options,
417-419column layouts, 420-421comments, 426-428content elements, 411-413converting notations, 428converting special characters,
421-423end-of-text markers, 421establishing structure and
content tables, 408-409excluding documents from
layout, 416-417footnotes, 426-428headers/footers, 430-432
level hierarchies, 407-409margins, 429-430numbering chapters, 413-416page padding, 419removing notations, 427removing words and phrases,
424-425selecting content for structure
levels, 410Compile As-Is option (Inspector
compile settings), 243compile formats, choosing,
389-390compile groups, 397-403compile presets, 394-395Compile settings (templates), 14Compile window, 388, 396-397,
408-413, 417-425customizing settings, 397.docx files, 392e-books, 438, 441-442, 452file groups, 406formats, choosing, 390Inspector compile settings,
selecting, 242-243links and, 491outlines, 389-390output formats, choosing,
391-394presets, 434-435process of, 388-395project templates, 303.rtfd files, 391-392saving, 396, 433-435scripts in Scriptwriting mode, 465separators between documents,
formatting, 404-405starting, 388templates, compile settings, 14transitions, formatting, 404-405
Composition mode. See also Full Screen mode
Macs, 128-134Windows, 33-35, 44-48, 130-134
computer failures and backups, 356containers, 70, 80, 97, 128, 139-140Control Strip (Composition mode),
130-134converting, 374, 381
annotations to comments, 221comments to annotations, 221documents to template sheets
(Mac only), 289files to folders/folders to files, 73imported web pages, 190notations, 428saved search collections to
standard collections, 349special characters in
compilations, 421-423text to annotations, 213
copyingcontainers in Binder, 80files in Binder, 81images, 118keywords, 273Snapshots, 229-234text into annotations, 213
Copyright pages, 440Corkboard, 17, 20-22, 137
containers, 139-140customizing, 40-43documents, adding, 141double-clicking actions, 43dragging actions, 43Editor window, 138Footer bar, 145-146Freeform Corkboard, 41, 44,
152-155Group View mode, 152index cards, 41-43, 138-146, 157keyboard shortcuts, 44Macs and, 33, 41, 44opening, 138Split Screen mode, 146-150stacked Corkboard, 139-140Synopsis area, 139Wrap Cards option, 140
corrections (text), automating, 116-118
corrupted files, 10corrupted projects and backups, 356cover art, 439-440covers, adding to projects, 443-444critiques, 234crossplatforming and Scrivener,
368-369.CSV files, 173-174, 197, 201customizing
addresses, 50annotations, 214-216appearances, 32
Binder, 33-34color, 36-39Composition mode, 47Fonts options, 36Full Screen mode, 35gradients, 35labels, 35Mac options, 33Notepad, 34Outliner, 34QuickRef panel, 35text in PDF documents, 35
backup preferences, 356-359color, 47comments, 219compilation settings, 397Composition mode, 47, 133Control Strip, 133Corkboard, 40-43dates, 50Editor, 48-50

E-BOOKS 497
Full Screen mode (Windows only), 133
gradients, 35index cards (Corkboard), 143-144labels, 35layouts, 63linked footnote markers (Mac
only), 478-480Outliner
adding/removing columns, 164-167
arranging columns, 167column headers, 165hiding synopses, 168meta-data, 165-167, 170sizing columns, 167sorting columns (Mac only),
168-169preferences
accessing preferences window, 27
Bibliography/Citations Manager, 31
general preferences, 28-32Mac options, 28, 32restoring settings, 59saving projects, 29-30Scratch Pad, 31Separators, 30-31Services, 30Startup options, 29Windows options, 28, 32
QuickRef panel, 35Revision mode (Mac only),
226-227scrollbars, 47Startup options, 29text, 49-50, 53-55toolbars, 65-67
Ddate/time, 166
customizing, 50Use Date in Backup File Names
option (backups), 358Decimal tab stops (text), 112Dedication pages, 440deleting
annotations, 214, 220collections, 349comments, 219-220compilation formatting
presets, 435custom meta-data fields, 280-281documents from Binder, 18footnotes, 220formatting presets, 110keywords, 166, 276label values, 259-260layouts, 64
names from Name Generator (Mac only), 198
notes from Scratch Pad, 125project templates, 308-309reference links, 252revisions in Revision mode (Mac
only), 228Scrap folders, 18Snapshots, 231status values, 259-260text, Revision mode (Mac
only), 226Trash, 18
dictionaries, 114displays (multiple), 134-135.doc files, 86, 392documents, 287, 334
Binderadding to, 74-75dragging to Editor, 101grouping to, 77-78
changes, manually importing, 474Composition mode (Mac
only), 128Corkboard, adding to, 141deleting, 18Document Notes section
(Inspector), 19Document Replace, 338document targets, 321-322Editor, 97
Document view, 17dragging from Binder, 101opening in, 93Progress bar (Footer bar), 113Target icon (Footer bar), 113
finding, 330, 336-338fonts, setting, 54Full Screen mode (Windows
only), 128icons, adding (Mac only), 82images, 118-120importing/splitting, 88-90merging, 30naming, 75notes, 220, 243-245.PDF, 35, 72project statistics, 325rearranging, 17retitling, 240searches, 330, 336-338template sheets (Mac only),
283-291document targets, 321-322.docx files, 86, 392-393double-clicking actions
(Corkboard), 43Draft folder
defining, 71multiple Draft folders, using,
486-487nontext files, 72
project templates, 296-298Sync the Contents of the Draft
Folder option (Mac only), 372drafts, editing, 211
annotationsadding, 212-213changing color, 214-216, 221converting text to, 213converting to comments, 221copying/pasting text into, 213customizing, 214-216deleting, 214, 220editing, 213exporting, 223searching for, 222-223
commentsadding, 217-218changing color, 219-221converting to
annotations, 221customizing, 219deleting, 219-220editing, 218exporting, 223moving, 219searching for, 222-223viewing multiple
comments, 219critiques, 234finding, 333footnotes, 220multipass revisions, 220notes, 220Revision mode (Mac only),
223-228searches, 333Snapshots, 229-234
draft targets, 314, 319drawing (sketchpads), 202-204Dropbox
accessing projects from, 369-371backing up to, 359-360
Ee-books, 437
ASIN codes, 450Calibre eBook management
application, 393, 449compiling, 389, 438, 441-442,
451-452covers, adding, 443-444footnotes, 448formatting, 451-452front matter, 438-440, 443HTML settings (Mac only),
447-448ISBN, 441, 450meta-data and, 448-450previewing files, 452-453Tables of Contents (ToC),
445-447

498 EDITING
editingannotations, 213comments, 218Composition mode options, 46corrupted files, 10manuscripts (drafts), 211-228NaNoEdMo (National Novel
Editing Month) website, 323.PDF files, 189project templates, 307reference links, 252synopses, 240, 340
Editor, 16, 93Auto-Complete Lists, 116-118Binder
Binder Affects menu, 101-103communicating with, 96-98dragging documents from,
101Corkboard, 17, 146corrections, automating, 116-118customizing, 48-50dictionaries, 114documents
adding images to, 118Document view, 17dragging from Binder, 101embedding PDF images (Mac
only), 120linked images (Mac only), 119opening, 93resizing images in, 118
Footer bar, 94, 112-113, 188Format bar, 17, 94, 104-110Header bar, 94-98images, 118-120navigating, 94Outliner, 17QuickReference panels (Mac
only), 121-123Ruler, 94, 110-112Scrivenings mode, 97, 120-121spell checking, 113-116Split Screen mode, 98-103style guides, 110translating text, 114typing area, 94Windows options, 52Wrap to Editor mode, 50-52Wrap to Page mode, 51
Elements app (iPad), 376embedding .PDF images (Mac
only), 120emphasizing text, 105, 240.epub files, 393, 442exporting
annotations, 223comments, 223layouts, 64-65outlines (Outliner), 173-177project templates, 311
Ffailures (computer) and backups,
356Favorites (Mac only), 352.fcf files, 86, 393.fdx files, 86, 371, 393, 458-459figure references, 471-473file groups, 71files
aliases, 185-187audio files, 72backup files, 358Binder
adding to root folders, 77copying, 81
collections, 330, 343closing, 346Collection view (Binder), 349hiding, 349moving files, 346-347organizing files, 346removing, 349renaming, 349saved search collections, 334,
343, 348-349standard collections, 343-349viewing, 345
converting to folders, 73copying, 81.CSV files, 173-174, 197, 201defining, 71.doc files, 86.docx files, 86.eBook files, 452-453.epub files, 442external editors, opening in,
183-185External folder (Mac only), using
synchronized files in, 375.fcf files, 86.fdx files, 86, 371, 458-459file data fields (meta-data),
Outliner, 166file groups, 406folders versus, 23fountain files, 86, 371, 374.html files, 393, 446-448image files, 72.indexcard files, 86media files, 72, 189merging, 89.mm files, 86.mobi files, 442, 451-452naming, 75, 358, 373no extension files, 86non-draft files, 245, 297-299nontext files, 72.odt files, 86.opml files, 86, 174-178.PDF files, 35, 72, 120,
188-189, 391
research files, 182-190root folders, adding to, 77.rtf files, 31, 85, 371, 376.rtfd files, 85.scriv files, 310sequential/nonsequential files,
selecting, 78splitting, 88-89structuring, 73.txt files, 86, 201, 371, 376unsupported file formats, 72video files, 72web pages, 72
Final Draftexporting scripts to Scriptwriting
mode, 458-459.fdx files, 86, 371, 458-459Final Draft 5-7 Converter (fcf)
output compilation format, 393Final Draft 8 (fdx) output
compilation format, 393finding
annotations, 222-223comments, 222-223revisions in Revision mode (Mac
only), 227First Line indents (text), 112flash drive backups, 363, 368folders
backup folders, 359Binder
adding to, 75-77grouping to, 77-78Pitch folder, 76Root folders, 76-77Scrap folder, 76
converting to files, 73defining, 71Delete folder, 82Draft folder
adding nontext files to, 72defining, 71project templates, 296-298Sync the Contents of the
Draft Folder option (Mac only), 372
using multiple Draft folders, 486-487
files versus, 23Folder and Text Separator
transitions, 405icons, 71, 82non-draft folders, creating
project templates, 297-299Pitch folder, 76Research folder, 71-72, 182root folders, 71-72, 76-77, 82Scrap folder, 76sequential/nonsequential files,
selecting, 78synchronized folders (Mac only),
372-376

IMAGES 499
Template folder (Mac only), changing, 285
Text and Folder Separator transitions, 405
Trash folder, 71fonts (text)
comments, 55document fonts, setting, 54Font family option (Editor,
Format bar), 104Fonts options, 36footnotes, 55hyperlinks, 54index cards (Corkboard), 43, 146project fonts, setting, 54Scrivenings, 55writing fonts, setting, 53-55
footers/headersFooter bar
Corkboard, 145-146Editor, 94, 112-113, 183, 188Inspector, 238
formatting compilations, 430-432footnotes, 113, 325, 448
color, changing, 476deleting, 220fonts, setting, 55formatting, 426-428inline footnotes, 475-478linked footnotes, 475-480nonfiction/academic projects,
474-480whitespace and, 476
forenames, 195formatting, 374
About the Author pages, 440academic projects, 470-471Acknowledgment pages, 440comments, 426-428compilations, 406
changing layout options, 417-419
choosing compile formats, 389-390
column layouts, 420-421comments, 426-428content elements, 411-413converting notations, 428converting special characters,
421-423Custom format, 390E-Book format, 389end-of-text markers, 421Enumerated Outline
format, 389establishing structure and
content tables, 408-409excluding documents from
layout, 416-417footnotes, 426-428formatting separators
between documents, 404-405
headers/footers, 430-432level hierarchies, 407-409margins, 429-430NaNoWriMo (Obfuscated)
format, 390Non-Fiction Manuscript
format, 389numbering chapters, 413-416Obfuscated (NaNoWriMo)
format, 390Original format, 389output formats, 391-394page padding, 419Paperback Novel format, 389Plain Text Screenplay (Celtx,
Movie Magic) format, 389Proof Copy format, 389removing notations, 427removing words and phrases,
424-425Script or Screenplay
format, 390selecting content for structure
levels, 410Standard Manuscript
format, 390Synopses and Titles
format, 390Synopses Outline format, 390word count on title pages
(Mac only), 433Copyright pages, 440Dedication pages, 440.docx files, 392e-books, 440, 451-452footnotes, 426-428, 474-480Format bar (Editor), 17, 94,
104-110format searches, 330, 340-342Formatting editor (Compile
window), 411-413hyperlinks, 448index cards (Corkboard), 157links, 448nonfiction projects, 470-471notes, 412-413, 427-428presets, 107-110, 470-471.rtfd files, 391-392scripts in Scriptwriting mode,
460-461separators between documents,
compiling and, 404-405style guides, 110text, 54-55, 104-107, 129,
412-413transitions, compiling and,
404-405fountain files, 86, 371, 374Freeform Corkboard, 41, 44,
152-155Freemind outlines, 177-178front matter, 402-403, 438-440, 443
Full Screen mode. See also Composition mode
Composition mode versus, 35, 44
Macs, 134-135Windows, 127-134
G - Hgoals, tracking, 313
document targets, 321-322project statistics, 323-325project targets, 314-322text statistics, 325-326
Google Drive backups, 360gradients, customizing, 35grammar, checking, 113-116grouping documents/folders in
Binder, 77-78Group View mode, 20-22, 97, 152
headers/footersbookmark headers (Mac only),
navigating via, 351-352column headers (Outliner), 165formatting compilations, 430-432Header bar (Editor), 94-98Not for Distribution tags, 389
hidingcollections, 349synopses, Outliner, 168
hierarchies (level), formatting compilations, 407-409
highlighting text, 34, 49, 105, 423horizontal splits (Editor, Split Screen
mode), 100.html files, 393, 446-448HUD-style displays (QuickRef
panel), 35hyperlinks, 54, 423, 448hyphenation, 49-50
IiA Writer app (iPad), 376-379iBooks, 393, 452icons
documents, adding to (Mac only), 82
folders, adding to (Mac only), 82index cards (Corkboard), 142installing, Binder, 83-84label color, applying to, 265restoring original icons,
Binder, 85images
backdrop images, 129background images, 134copying, 118

500 IMAGES
Corkboard, Split Screen mode, 150-151
cover art, 439-440documents, adding to, 118-120figure references, 471-473image files, 72index cards (Corkboard), 41notes, adding via Inspector,
244-245placeholder tags, 472-473resizing, 118resolution, 439-440sizing, 439-440sketchpads, 202-204synopses, adding to, 241-242
importing, 374changes to documents
manually, 474.doc files, 86documents, Binder, 88-90.docx files, 86.fcf files, 86.fdx files, 86fountain files, 86.indexcard files, 86layouts, 64, 65manuscripts, 25, 85-87.mm files, 86names, 202no extension files, 86.odt files, 86.opml files, 86, 177-178outlines (Outliner), 177-178project templates, 310Research folder files, 182.rtf files, 85.rtfd files, 85scripts from Final Draft, 458-459.txt files, 86web pages, 190Word files, 86
indents (text), 50, 54, 112, 418, 423index cards
CorkboardArrange Cards in Columns
option, 141Arrange Cards in Rows
option, 141Card Number option, 144-145color, 144components of, 142customizing, 41-43, 143-144formatting, 157icons, 142images on, 41keywords, 144-146labels, 143, 157moving, 138-139numbering, 144-157pins, 41printing, 155-159rearranging, 138-139rounding, 41
shadows, 42shaping, 143sizing, 145-146Small Font option (Footer
bar), 146Status Stamp option, 144synopses, 41-42, 142text, 41-43titles, 142, 157watermarks, 42Wrap Cards option, 140
Index Card app (iPad), 380-384.indexcard files, 86label color, applying to, 265status stamps, 266
inline annotations, 212-216, 220-223. See also notes
inline footnotes, 475-478insertion points (text), 46, 50Inspector
compile settings, selecting, 242-243
Editor screen, 239Footer bar, 238General pane, 242-243Item Icon menu (Mac only), 249Keywords pane, 271-276locking, 253meta-data, 19, 239navigating, 238notes, 19, 34, 243-247opening, 16, 238reference links, 247-252retitling, 240sidebar, 238Status tag, watermarks, 42synopses, 239-242
installingicons, Binder, 83-84Scrivener, 364
interface (Scrivener)Binder, 17-19Corkboard, 20-22Editor, 16-17Group View mode, 20Inspector, 16, 19Outliner, 21, 22QuickRef (QuickReference)
panel, 23-24, 29, 35Scratch Pad, 24Scrivenings, 21-22
internal reference links, 247-249iPad, 86, 376-384ISBN (International Standard Book
Numbers), 441, 450italicized text, 105, 423
J - Kjump drive backups, 363, 368
kerning, 50. See also spacing
keyboards (Bluetooth), iPads and, 379
keyboard shortcutsannotations, 213compiling, 388Composition mode (Mac only),
exiting, 133Corkboard, 44, 144Editor
closing Split Screen mode, 103
QuickReference panels (Mac only), 122-123
Split Screen mode, 100files
merging, 89opening in external
editors, 185splitting, 89
Full Screen mode (Windows only), exiting, 133
navigating without mouse, 81Reveal in Binder option (Editor,
Item Icon menu), 96Ruler (Editor), 111Scratch Pad, 24, 31-32, 124status stamps, 266typewriter scrolling,
disabling, 130zooming in/out, 188
keywords, 144-146color associations, 270, 274copying, 273deleting, 166, 276documents, adding to/removing
from, 271-272Keywords pane (Inspector),
271-276Keywords option (Control Strip),
131multiple keywords, applying, 273organizing, 274project templates, 300saving, 273searching by, 275sorting, 274viewing, 271
Kindle (Amazon), 393, 442, 451-452
Llabels
assigning, 256color, 262-266customizing, 35default labels, 262index cards (Corkboard), 143-
144, 157nonfiction projects, 257organizing, 257, 261project templates, 300titles, changing, 256-259

MOVIE MAGIC 501
valuesadding, 260-261deleting, 259-260rearranging, 261
layouts, 59, 417-421accessing, 62-63creating, 61-62customizing, 63deleting, 64elements of, 60importing/exporting, 64-65naming, 61-63previewing, 61project templates, 296renaming, 63saving, 60, 62
lesson plans, 257line art, 35links
adding, 489compiling and, 491files to aliases, 185-187footnotes, 475-480formatting, 448images (Mac only), 119projects, using within, 487-491reference links, 247-252removing, 490
lists (bulleted), 240
MMacs
Aeon Timeline, 205-208backups to Time Machine, 364Binder
adding folders, 76customizing appearance, 34dragging documents from,
101bookmarks, 350-352brainstorming tools, 194-198compilations, 433, 443compiling, 400-403, 418-419Composition mode, 33, 44,
127-134Corkboard, 41, 44
customizing appearance, 33customizing options, 40Freeform Corkboard, 152-155Lock Group View mode
option, 152documents
adding icons to, 82converting to template
sheets, 289creating from template
sheets, 287dragging from Binder, 101dragging to Editor, 101embedding PDF images, 120linked images, 119
setting default document types, 290-291
eBooks, 452Editor, 113
Binder Affects menu, 103dictionaries, 114dragging documents to, 101embedding .PDF images, 120linked images, 119Lock Group View Mode (Item
Icon menu), 97Match Split Documents
option, 97QuickReference panels,
121-123Split Screen mode, 99
External folder, synchronizing with, 372-375
Favorites, 352files
no extension files, 86opening in external
editors, 185folders, adding
icons to, 82to Binder, 76
Footer bar, 183footnotes, 477-480Front Matter folder, 443Full Screen mode, 35, 44, 134iBooks, 452icons, adding to documents/
folders, 82images, 119-120.indexcard files, 86Inspector, 246-249iPads, 86, 376-384meta-data, 276-281Name Generator, 194-198Outliner
column headers, 165custom meta-data fields, 167meta-data, 165-167, 170printing outlines, 170-172sorting columns, 168-169total progress meta-data
fields, 167total target meta-data
fields, 167placeholder tags, 303-306, 472projects
appearance, 10naming, 13reopening, 11sharing with Windows, 368-
369synchronizing, 371-376
project targets, 31-319project templates, 303-306QuickReference panels, 121-123Revision mode, 223-228Scratch Pad, 24, 124Scrivener
crossplatforming, 368-369options, 32preferences, 28
Smooth Text and Line Art option, 35
Snapshots, 232-233status stamps, 266-268synopsis searches, 330, 338-340tables, 474tables of contents (ToC), 480-481template sheets, 283-291Time Machine, backing up
to, 364manual backups, 361-363, 368manuscripts, 211
annotations, 212-216, 220-223comments, 217-223compiling, 389-390critiques, 234footnotes, 220importing, 25, 85-87Manuscipt folder, 14, 487multipass revisions, 220non-fiction, 389removing all notations, 220Revision mode (Mac only),
223-228Snapshots, 229-234
margins, 423, 429-430.md files, 393media files, 72, 189merging
documents, 30files, Binder, 89
meta-data, 255custom meta-data (Mac only),
276-281ebooks and, 448-450Inspector, 19
adding images to synopses, 241-242
adding synopses to, 239-240automatically generating
synopses, 240-241compile settings, 242-243editing synopses in, 240viewing meta-data in, 239viewing synopsis created/
modified dates, 242keywords, 270-276, 300labels, 256-266, 300Outliner, 165-167, 170project templates, 300-301status fields, 256-262, 266-269synopses, 239-242target fields, 166
misspellings, correcting, 113-116.mm (Mindmap) files, 86.mobi files, 339, 442, 451-452Movie Magic, Plain Text Screenplay
compilation format, 389
502 MOVING
movingcomments, 219files in collections, 346-347index cards (Corkboard), 138-139
MultiMarkdown (md) output compilation format, 393, 491
multipass revisions, 220multiple displays, 46, 134-135
Nnaming
collections, 349covers and, 444documents, 75files, 75, 358, 373layouts, 61-63Name Generator, 194-202projects, 12-13Snapshots, 230-231
NaNoEdMo (National Novel Editing Month) website, 323
NaNoWriMo (National Novel Writing Month), 14, 314, 322, 390
navigatingbookmark headers (Mac only),
351-352Editor, 94keyboard shortcuts, 81Navigation History buttons
(Editor Header bar), 95-98Outliner, 162, 163Sidebar Navigation buttons
(Editor Header bar), 98no extension files, 86non-draft files, 245, 297-299nonfiction projects, 389, 467
bibliographies, 482collaborations, 474figure references, 471-473file structuring, 73footnotes, 474-480formatting presets, 470-471labels, 257organizing, Binder, 469status fields, 257tables, 474tables of contents (ToC), 480-482templates, 468-469
nonsequential/sequential files/folders, 78
nontext files, 72Nook (Barnes & Noble), epub
files, 442notations, 427-428Notebooks app (iPad), 376notes, 381, 418
adding, 125class notes, taking, 491deleting, 125document notes, 243-245
formatting, overriding, 412-413images, adding via Inspector,
244-245Notepad, 34Notes pane (Inspector), 243-247project notes, 125, 243-247.rtf files, 31Scratch Pad, 24, 30-32,
123-126, 245synopsis notes, 245uses for, 245
novelsNaNoEdMo website, 323NaNoWriMo, 14, 314, 322, 390Novel project template, 14Paperback Novel compilation
format, 389numbering, 422
chapters, 413-416index cards (Corkboard), 144,
145, 157Name Generator and, 199numbered lists, 106Prefix File Names with Numbers
option (Mac only), 373
O.odt (Open Document Text) files,
86, 392.opml (Outline Processor Markup
Language) files, 86, 174-178Outliner, 17, 21-22, 161
columnsadding/removing, 164-167arranging, 167headers, 165sizing, 167sorting, 168-169
compiling, 389-390customizing
adding/removing columns, 164-167
appearance, 34arranging columns, 167column headers, 165hiding synopses, 168meta-data, 165-167, 170sizing columns, 167sorting columns (Mac only),
168-169keywords, deleting, 166label color, applying to rows, 265meta-data, 165-167, 170navigating, 162-163opening, 162outlines, 170-178synopses, 168timelines, 170
outlinesFreemind outlines, 177-178Outliner, 170-178
overriding formatting, 412-413, 418
Ppage breaks, 243page orientation, 159Pages app (iPad), 377.PDF files, 35, 72, 120, 188-189, 391pins, index cards (Corkboard), 41Pitch folder, 76placeholder tags, 303-306,
472-473, 482PlainText app (iPad), 376Plain Text Screenplay (Celtx, Movie
Magic) compilation format, 389Plain Text (.txt) output compilation
format, 392plotting, Outliner and, 161
columns, 164-169customizing
adding/removing columns, 164-167
arranging columns, 167column headers, 165hiding synopses, 168meta-data, 165-167, 170sizing columns, 167sorting columns (Mac only),
168-169keywords, deleting, 166meta-data, 165-167, 170navigating, 162-163opening, 162outlines, 170-178synopses, 168timelines, 170
posts (blogging), writing, 491PostScript (.ps) output compilation
format, 393POV (point of view), organizing
labels/status fields by, 257preferences
backup preferences, setting, 356-359
Bibliography/Citations Manager, 31
Composition mode, 45-46general preferences, 28-32import preferences, 87Macs, 28preferences window,
accessing, 27restoring, 59saving, 29-30, 55-58Scratch Pad, 31Separators, 30-31Services, 30Startup options, 29Windows, 28
prefixes, 373, 414-416

RULERS 503
presetscompile presets, 394-395,
434-435formatting presets (Editor),
107-110previewing
e-book files, 452-453layouts, 61
printingindex cards (Corkboard), 155-159outlines (Outliner), 170-173Print output compilation
format, 391progress, tracking, 313
document targets, 321-322Progress bar (Editor, Footer
bar), 113progress fields (meta-data), 167project statistics, 323-325project targets, 314-321text statistics, 325-326
projects, 11-13About the Author pages,
formatting, 440academic projects, 467
bibliographies, 482Binder organization, 469collaborations, 474footnotes, 474-480formatting presets, 470-471inserting figure references,
471-473manually importing
changes, 474tables, 474tables of contents (ToC),
480-482templates, 468-469
Acknowledgment pages, 440ASIN codes, 450backups (automatic), 361Copyright pages, 440corrupted files, 10, 356cover art, 439-440covers, 443-444Dedication pages,
formatting, 440defining, 10Dropbox, accessing projects
from, 369-371e-books, 437-453editing outside of Scrivener, 10fonts, setting, 54footnotes, 448help, 13HTML and e-book settings (Mac
only), 447-448keywords, 274-276Macs
appearance in, 10reopening in, 11
meta-data, 448-450naming, 12-13
New Project window, 13nonfiction, 467-482notes, 125, 243-247Project Replace, 334-336project searches, 330-336project statistics, 323-325project targets, 35, 314-321project templates, 293
academic projects, 468-469Blank, 14, 74choosing, 11, 14collections, 302-303compile settings, 14, 303creating, 294-306default meta-data, 300-301deleting, 308-309editing, 307exporting, 311importing, 310information files, 297-298keywords, 300labels, 300modifying, 307-308NaNoWriMo, 14non-draft files/folders,
297-299nonfiction projects, 468-469Novel, 14placeholder tags (Mac only),
303-306Project Templates window,
10-15reading descriptions, 12saving, 306-307scriptwriting templates,
457-458.scriv file extension, 310setting default templates, 308setting project targets, 301setting up Draft folder,
296-298template sheets, 301
reopening, 10-11saving, 12, 15, 29-30series, 486-491sharing across platforms,
368-369synchronizing (Mac only),
205-208, 371-376Tables of Contents (ToC),
445-447tutorials, 13Windows
appearance in, 10reopening in, 11
.ps files, 393publishing, 441, 450
Q - RQuickRef (QuickReference) panel,
23-24, 29, 35, 121-123
referenced inline footnotes (Mac only), 477-478
reference links, 247-252reinstalling Scrivener, 364removing
collections, 349columns, Outliner, 164-167files from standard
collections, 346keywords from documents, 272links, 490notations, 220, 427revisions in Revision mode (Mac
only), 228renaming
collections, 349layouts, 63
research filesaliases and linked files, 185-187external editors, opening in,
183-185importing, 182media files, 189.PDF files, 188-189web pages, importing, 190
Research folder, 71-72, 182resolution (images), 439-440restoring
data from backups, 364icons, Binder, 85
retitlingdocuments, Inspector, 240reference links, 252
revisingmultipass revisions, 220Revision mode (Mac only),
223-228root folders
Binder, 76-77Draft folder, 71-72Research folder, 71Trash folder, 71, 82
rowsArrange Cards in Rows option
(Corkboard), 141index cards (Corkboard), 146label color, applying
(Outliner), 265RR Bowker website, ISBN
registration, 441.rtf (Rich Text Format) files, 31, 85,
371, 376, 391.rtfd (Rich Text Format Directory)
files, 85, 391-392rulers
customizing, 50Ruler (Editor), 94, 110-112
504 SAVING
Ssaving, 334
backups, 357-359compilations, 396, 433-435keywords, 273layouts, 60-62, 103preferences, 55-58projects, 12, 15, 29-30project templates, 306-307search collections, 343, 348-349Snapshots, 229-234
scene type, organizing labels/status fields by, 257
Scrap folder, 18, 76Scratch Pad, 24, 30-32, 123-126, 245screenplays, 389-390screens (secondary), using in
Composition mode, 46scriptwriting
Scriptwriting mode, 390, 456-465
scriptwriting templates, 457-458Scrivener
containers, 70crossplatforming, 368-369file groups, 71files, 71folders, 71importing manuscripts into, 25interface overview, 16-24, 29iPad apps and, 376-384multiple computers, using on,
368-369reinstalling, 364sharing projects across
platforms, 368-369updating, 29word processing and, 9
Scrivenings, 21-22, 55, 97, 120-121.scriv files, 310scrolling (typewriter), 130searching
annotations, 222-223bookmarks (Mac only), 350-352collections, 330, 343-349comments, 222-223document searches, 330,
336-338Favorites (Mac only), 352format searches, 330, 340-342keyword searches, 275project searches, 330-336revisions in Revision mode (Mac
only), 227Search menu, 333-334synopsis searches (Mac only),
330, 338-340Sente software, bibliography
creation, 482
sequential/nonsequential files/folders, 78
session targets, 315-320sharing projects across platforms,
368-369short form writing, 15Sigil website, compiling e-books,
438SimpleNote, 375sizing
columns, Outliner, 167images, 118, 439-440index cards (Corkboard), 145-146Size to Fit Editor option
(Corkboard, Footer bar), 146text, 50, 105windows in Split Screen mode
(Editor), 101sketchpads, 202-204SkyDrive backups, 360Snapshots, 71, 97, 232, 373, 381
accessing, 230creating, 229-230deleting, 231naming, 230-231reverting to prior versions,
233-234saving projects, 15, 29sorting, 230viewing, 230-231
Sony Readers, .epub files, 442sorting
keywords, 274Outliner columns (Mac only),
168-169Snapshots, 230
spacing, 146, 374, 381, 422-423footnotes and, 476kerning, 50line spacing in text, 105
special characters, 266-270, 421-423spell checking, 113-116Split Screen mode
Corkboard, 146-150Editor, 97-103
spreadsheets, exporting to Outliner, 173-174
stacked Corkboard, 139-140standard collections, 343-349Startup options, customizing, 29statistics
project statistics, 323-325statistics fields (meta-data),
Outliner, 166text statistics, 325-326
statusadding values, 260-261assigning, 256changing titles, 256-259
default status fields, 262deleting values, 259-260nonfiction projects and, 257organizing, 261rearranging values, 261status fields, organizing by, 257status stamps, 144, 266-269Status tag (Inspector), 42
storyboarding, Corkboard and, 137Arrange Cards in Columns
option, 141Arrange Cards in Rows
option, 141containers, 139-140documents, adding, 141Editor window, 138Footer bar, 145-146Freeform Corkboard (Mac only),
152-155Group View mode, 152index cards, 138-146, 155-159Split Screen mode, 146-151stacked Corkboard, 139-140Synopsis area, 139Wrap Cards option, 140
storyline, organizing labels/status fields by, 257
struck-through text, 422style guides, 110subtitles, 418suffixes, 414-416surnames, 195symbols
status stamps, 266-269Unicode characters versus
symbol fonts, 270synchronizing
Aeon Timeline timelines with projects (Mac only), 205-208
folders (Mac only), 372-376projects (Mac only), 371-376SimpleNote and, 375Sync with Index Card dialog
(iPad), 381Windows, operating without sync
tools, 379synopses
bulleted lists, 240compiling, 390editing, 340emphasizing text in, 240index cards (Corkboard),
41-42, 142Inspector, 239-242Outliner, hiding synopses, 168Synopsis area (Corkboard), 139Synopsis Finder (Mac only),
338-340synopsis notes, 245synopsis searches (Mac only),
330-340

WEBSITES 505
Ttables, 106, 474tables of contents (ToC), 445-447,
480-482tabs (text), 50
adding/removing, 54repositioning, 54tab stops, 111-112
target fields (meta-data), Outliner, 166
target type fields (meta-data), Outliner, 166
templates (project), 293academic projects, 468-469Blank, 14, 74choosing, 11, 14collections, 302-303compile settings, 14, 303creating, 294-306default templates, 308deleting, 308-309descriptions, reading, 12Draft folder, 296-298editing, 307exporting, 311importing, 310information files, 297-298keywords, 300labels, 300layouts, 296meta-data, 300-301modifying, 307-308NaNoWriMo, 14non-draft files/folders, 297-299nonfiction projects, 468-469Novel, 14placeholder tags (Mac only),
303-306project targets, 301saving, 306-307.scriv file extension, 310
template sheetsMacs, 283
Character Sketch template sheet, 284-286
color in, 289creating, 288-290, 301documents, 287-291modifying, 285-286predesigned sheets, 284-287scriptwriting templates,
457-458Setting Sketch template
sheet, 284-286Template folder, 285uses for, 290
Windows, 291text, 106, 318, 405, 418
addresses, customizing, 50annotations, 113, 213Auto-Complete Lists, 116-118
bold text, 105, 423case sensitivity, 334color, 423comments, 55, 113converting, 381, 423Corkboard, 144-146corrections, automating, 116-118customizing, 49-50, 53-55deleting, Revision mode (Mac
only), 226dictionaries, 114Emphasis option (Editor, Format
bar), 105fonts, 36, 43, 54-55, 104footnotes, 55, 113formatting, 54-55, 105-110, 129,
157, 412-413grammar, checking, 113-116Highlight Color option (Editor,
Format bar), 105highlighting, 34, 49hyperlinks, 54hyphenation, 49-50indents, 50, 54, 112index cards (Corkboard),
41-43, 146insertion points, 50italics, 105, 423kerning, 50keywords, 131, 166replacing words and phrases,
424-425Revision mode (Mac only),
224-227rulers, customizing, 50Scrivenings, 55Size option (Editor, Format
bar), 105sizing, 50Smooth Text and Line Art
option, 35special characters, 270, 421-423spell checking, 113-116struck-through text, 422synopses, 240tabs, 50, 54, 111-112Text Scale option, 112, 131Text Separator transitions, 405text statistics, 325-326translating, 114Word and Character Count
option, 113, 132theft and backups , 356themes (preferences), saving, 58time/date
customizing, 50file date fields (meta-data),
Outliner, 166Use Date in Backup File Names
option (backups), 358timelines, 170, 205-208Time Machine backups (Mac
only), 364
title pages, 433titles, 414-416
covers and, 444index cards (Corkboard),
142, 157labels, 256-259Not for Distribution tags, 389reference links, 252retitling documents, 240status changes, 256-259Synopses and Titles compilation
format, 390ToC (tables of contents), 445-447,
480-482toolbar, customizing, 65-67total progress fields (meta-data),
Outliner, 167total target fields (meta-data),
Outliner, 167tracking progress, 313
document targets, 321-322project statistics, 323-325project targets, 314-322text statistics, 325-326
transferring projects between platforms, 368-369
transitions, formatting, 404-405translating
names, 201text, 114
Trash folder, 18, 71, 82, 333tutorials (projects), 13Twitter, 319.txt (plain text) files, 86, 201, 371,
376, 392typewriter scrolling, 130
U - V - WUnicode characters versus symbol
fonts, 270unsupported file formats, 72updating
Scrivener, 29Snapshots, 373, 381
USB flash drive backups, 363, 368
video files, 72
watermarks, index cards (Corkboard), 42
webarchive files, 393web pages, 72, 190, 393websites
Calibre multiplatform e-book management application website, 449
Dropbox, 360

506 WEBSITES
Fountain, 374KindleGen app (Amazon),
451, 452Kindle Previewer app
(Amazon), 452MultiMarkdown, 491NaNoEdMo (National Novel
Editing Month), 323NaNoWriMo (National Novel
Writing Month), 314, 390RR Bowker, ISBN registration,
441Sigil website, compiling
e-books, 438whitespace, 374, 381, 422-423, 476Whole World operator, project
searches, 333width
Outliner columns, sizing, 167paper, 131
Windowsannotations, 350backups, 364bookmarks, 350brainstorming tools, 198-202Corkboard, customizing
options, 40Editor, 52
Split Screen mode, 99translating text, 114
Full Screen mode, 35, 127-134Name Generator, 198-202Outliner, printing outlines, 173placeholder tags, 472projects
appearance, 10New Project window, 13reopening, 11sharing with Macs, 368-369
saving, 334Scratch Pad, 24, 124Scrivener
crossplatforming, 368-369options, 32preferences, 28
searching, 334status stamps, 268-269sync tools, operating with, 379tables of contents (ToC), 482template sheets, 291
Windows Backup, 364Word and Character Count option
Control Strip, 132Footer bar (Editor), 113
wordsfrequency, viewing, 325-326replacing, 424-425
workspace layouts. See layouts
X - Y - Z.xhtml files, 393
zip files, 358-360, 368zooming in/out, 188


![Adobe® Analytics Quick-Reference Guide: Market Reports …ptgmedia.pearsoncmg.com/images/9780321926944/samplepages/... · marketing reports and analytics [Formerly SiteCatalyst]](https://img.dokumen.tips/doc/110x75/5ac23bbd7f8b9a213f8e0ee5/adobe-analytics-quick-reference-guide-market-reports-reports-and-analytics.jpg)