Embed Size (px)
Citation preview

Scouter’s Guide to Campfires and Camp Stoves
Camping and Other Outdoor Activities
September 2013
NOTE: THIS IS NOT AN OFFICIAL BOY SCOUTS OF AMERICA PUBLICATION

1
Page intentionally left blank

2
Scouter’s Guide: Campfires and Camp Stoves
(Not an official Boy Scouts of America publication)
Forward This guide is a continuation of the handouts prepared for our local Boy Scout District Roundtable meeting. As we started
researching and putting it together, we quickly realized that it might fill a greater void in information that had not been
collected before in one publication. We have never found an official BSA guide on the subject, though all units have the
need and requirement. We believe this guide should be useful to a lot of different units, both small and large. It is a
collection of many different web articles, manufacturer’s owner manuals, user guides, experiences of longtime
scoutmasters and leaders and hard earned common sense. Some of the information was learned from simply walking
around while at different camporees and scouting events, talking with and looking at other troop’s campsites and
equipment, and from roundtable meeting discussions. This Scouter’s Guide is by no means an exhaustive study, but it
should be a great starting point and reference for a new scouts and scouters. Experienced scouts can also learn some
new technics maybe even that crusty old Scoutmaster!
We hope you find it as useful as we did!
Introduction Scouters come in all ages and experience levels. Scoutmaster are expected to be the magically leader that knows all!
Well sometimes we need to ask for a little help.
Do your best and Be Prepared!

3
Table of Contents
Chapter Subject title Page No.
Forward 2
Introduction 2
Table of Contents 3
1 Scout Skills – Fire Lighting 5
Basics of Fire and Heat 5
Invasive species – Don’t move firewood 5
Cooking methods 6
Types of fuel 7
2 Kinds of Fire 9
Campfire Basics 9
Campfires at Campgrounds 9
Campfires in the Backcountry 10
Starting and Extinguishing a Fire 10
Summary 10
3 Fire Hazards and Safety 11
Fire Hazards 11
Extinguish Fires 12
Types of Hazards and Treatments 12
Individual 12
Burning Trash in your Campfire 12
What are the Dangers of Pressure-Treated Wood? 12
Do not burn treated wood 12
Environment and Landscape 12
Leave No Trace - Minimize Campfire Use 12
True Leave No Trace fires are small 13
Campfire or Camp stove 13
4 Types and uses of different Fire Lays 14
Alter 14
Trench 14
Teepee fire Lay 15
Lean to fire Lay 15
Crisscross Fire Lay 15
Pyramid/Platform or Log-Cabin Fire Lay 16
Star or Indian Fire 16
Fire Stick Fire Lay 16
Reflector Fire 16
5 Methods of Fire starting 17
Fire by Heat or Flame 17
Fire by Friction 17
Fire by Spark 26

4
Fire by Compression 34
Fire by Reflection 36
6 Camp Stoves 37
Small Group & Backpacking Stoves 37
Large Group Stoves 45
Care and Cleaning of Liquid Fuel Lanterns and Stoves 47
Care and Cleaning of Propane Stoves 48
Care and maintenance of 20 lbs. Propane Tanks 49
Specialty and Camp Ovens 50
7 Fire-related who da-thunk its! 55
Techniques for teaching Fire Starting 55
Teach Yourself 55
How to Train Others 57
How to start a fire in the rain 56
How to Light a Fire in the Snow When Backpacking 67
Camp Stoves in Winter 68
Collection of fire related situational helps 70
Fire Starters and Helpers 71
Putting Out Your Campfire 72
About Chert 73

5
Chapter One
Scout Skills – Fire Lighting
Scout Skills - Fire Lighting Fire lighting is an important basic skill in Scouting. It is integral to cooking, keeping warm, camping and as a focal point on various activities. People have needed and congregated around fires since man lived in caves! Knowing how to prepare, lay and light different sorts of fires is therefore very important. It is equally important to know how to put out a fire and to clear the fire place correctly. A fire needs to be built carefully - you don't just pile lots of wood together and hope for the best! So, whether you are lighting the fire directly on the ground or using a raised, ready-made altar fire, it is always necessary to take time to prepare everything before you actually strike the match. You need to think about where your fire is going to be, collecting suitable materials, how to build your fire appropriately and make preparation for putting the fire out in an emergency.
Basics of Fire and Heat Essential Elements There are three elements needed to make a fire:
Oxygen | Heat | Fuel For the wood to burn it needs oxygen (which is in the air).
However, too much wind can blow out a small flame. You will need
to watch the fire carefully and shield it from strong winds. You may
also need to blow gently to help the flames spread. Remove any
one of the three elements and the fire will go out.
How Fires Start
Fire is a chemical reaction involving the rapid oxidation or burning of a fuel. It requires three elements to occur.
Oxygen Heat Fuel
These three elements make up what is commonly called the fire triangle. Fire can only occur when the three elements
are present and in the proper conditions and proportions. If any one of these factors is taken away, fire cannot begin or
in the case of an already burning fire, extinguishment will occur.
Oxygen - The air we breathe is about 21 % oxygen. Fire requires an atmosphere with at least 16 % oxygen. This
means that oxygen is always present in the home. If, however, you can separate the other two elements, you will
have taken the first step towards effective fire prevention.
Heat - Heat is the energy necessary to increase the temperature of the fuel to a point where sufficient vapors are
given off for ignition to occur.
Fuel - Fuel can be any combustible material in any state of matter - solid, liquid, or gas. Most solids and liquids
become a vapor or gas before they will burn.
Invasive species - Don't move firewood NOTE: This info is provided by the State of Wisconsin, but each state and some local counties also have very similar laws.

6
Firewood easily transports harmful pests and other problems to trees in your backyard, along your street, or at your favorite campsite. Firewood that looks clean may actually be hiding insects like emerald ash borer or gypsy moth, or the tiny spores of a tree-killing fungus like oak wilt. Instead of taking firewood along on your next camping trip or bringing some home with you from far away, get your firewood where you’re going to use it. Make sure it was produced from trees harvested nearby.
If you are bringing wood to a state property it must be all of the following:
1. from within Wisconsin; 2. from within 25 miles of the state property; and 3. from outside of a quarantined area unless the property is also within a quarantine.
Or, even easier, consider buying your firewood from a WI certified dealer. This wood has been treated to eliminate pests and diseases and is allowed on state properties.
Many campgrounds now restrict firewood use. Call ahead for specific information for your campsite.
Insects and diseases are excellent hitchhikers in firewood. Identifying these threats is the next step after keeping firewood local.
To help protect the trees in all your favorite places, don’t give those tree-killers a free ride. Don’t move firewood.
Tips for your camping trip Allowable firewood types: 1) Wisconsin certified firewood, which has been processed to remove harmful
hitchhikers. 2) Dimensional lumber, such as 2x4 or 4x6 scraps from a building project, will be allowed on state
property upon the discretion of park staff. 3) Firewood that meets firewood regulations described above.
Not allowed: 1) Full or partial pallets, skids or slabs. This wood is fresh enough to harbor pests and has traveled
long distances. 2) Wood that is painted, treated with preservatives, or made up of a composite of wood and glue
such as chipboard and plywood. Toxins are released when this is burned causing a serious health hazard.
Most parks offer quality firewood for sale at a reasonable price by the park’s friends group. Proceeds return to
the park’s budget and pay for things like educational programs, buildings and picnic shelters, seasonal
naturalists and needed equipment. Private sellers often have firewood for sale just outside of the park as well.
For firewood availability at your destination, contact the park. USDA Forest Service, Bugwood.org
Use up the firewood you have at each place on your camping vacation. Do not leave any unused wood behind
and do not take it with you to another destination.
When buying firewood, make sure the pieces are dry and have either no bark or bark that is loose (a sign that
the wood is very dry). This will reduce the threat of spreading diseases and your fire will be easier to start.
Reduce your need for open fire by cooking over gas or charcoal. Instead of an evening campfire, explore new
night-time activities like star-gazing or viewing wildlife by flashlight.
If you are a camper from outside of Wisconsin, please do not bring firewood with you. It will be confiscated and
if the wood is from a quarantined area, you could be violating a federal law forbidding hardwood movement of
any kind out of your state or county of residence. Federal fines up to $1,000.00 may be imposed.
If you are a camper from Wisconsin and purchase your firewood outside of the park please have a receipt ready
to show proof of that purchase. It will be checked for location against firewood quarantined areas of the state.
Cooking methods One of the main things to be considered will be the weight and shape of the stove that you are taking. If you are taking a
vehicle then a stove will be the best idea where as if you are going hiking the smallest and lightest will be.

7
Earth-oven or cooking pit
A hole is dug and a fire built. Once the fire has died down slightly, food wrapped in aluminum foil and placed in the
embers.
Positives: Makes fantastic food if you know how to use it. A lot of fun and is one of oldest known forms of outdoor
oven, no weight.
Negatives: Takes a long time to set up, can easily over-cook/under-cook food.
Grill or skewers
One of the most simple and original ways to cook food in the outdoors. Meat or vegetables are cooked over an open fire
via a variety of means. Many types of Grills can be bought or evens sticks with their bark stripped could be used.
Positives: Makes fantastic tasting food, cheapest option, potentially no weight in your pack.
Negatives: Dependent on the weather/cover, grills can be very heavy.
Dutch Oven
Standing in an open fire on stilts, the dutch oven is a versatile instrument to have in any camp, as long as you have
patience. It can be used to cook a variety of food types using layers of ovens.
Positives: Versatile, allowing you to expand your cooking repertoire
Negatives: Too heavy to take hiking, may take longer than other types of stove.
Backpacking stoves
Usually small and light comprising of a single burner, generally can be used for any purpose and generally run on liquid
or solid fuel.
Positives: Easy to pack, light to carry and cheap to run.
Negatives: May take longer to cook food than other stoves due to size of flame etc. Not recommended for longer or
larger group adventures.
Camping stove
Usually larger than the backpacking stove, most camping stove are designed for ease and safety of use. Comprised of at
least one burner it will generally be heavier and the design will follow that of a household hob. This may also come with
a grill attachment.
Positives: Best for ease of use and arguably cooking ability.
Negatives: Too large and heavy to hike with.
Disposable BBQ
Can be bought from any shop and taken along if you have enough space.
Positives: Very easy to use and will prevent the need to forage for sticks, logs etc.
Negatives: Large and cumbersome to carry for long distances, may go out in high winds and then be hard to re-
light.
Non-disposable
See 'open fire - grill'
Types of fuel Pressurized gas
Butane, Propane, Isobutane, etc.
Positives: Available worldwide, cheap and burn well in most temperatures.
Negatives: Does not burn cleanly, dangerous to use inside tents and can't be re-fueled whilst alight.

8
Flammable Liquid
Alcohol, white fuel, gasoline, kerosene, Sterno, methylated spirits etc.
Positives: Clean and easy to use and regulate. Generally safer than liquid fuels
Negatives: Does not work well in colder temperatures, difficult to gauge volume of remaining gas and difficult to
dispose of.
Solid
Wood, charcoal, chemical blocks (Hexamine fuel tablets), etc.
Positives: Easy to store and less volatile than the other types of fuel.
Negatives: Doesn't release as much energy pound per pound as other fuels, generally more difficult to regulate.
When it comes to having to pick out the right camping equipment, being that there’s so many different categories and
types, it can make your head spin! This includes camping stoves. They are found in a large amount of types and cost. If
you want your searching to be a pleasant one, make sure you know these crucial things.
When looking for a camping stove, the options are almost endless. There are smaller, compact stoves that can be carried
easily from one location to the next. Some camping stoves are larger and feature many of the same options available on
traditional stoves, such as warming areas and ovens that allow the chef to bake items. Even though the majority of
stoves that are mobile run off of propane, you’ll find that there are some will run off of electricity or charcoal.
The first factor to consider when purchasing a stove for camping is the amount of food the stove will be used to cook. If
you anticipate cooking for larger crowds of five or more people, consider purchasing a larger stove that holds more food.
You may want to search for a camping stove that contains burners that are bigger in size or that possess more than two
burners. Otherwise, a smaller stove with two burners will probably fit your needs.
It is also important to consider the campground’s resources. Many campgrounds do not offer electricity. If this is the
case, you will need a stove that runs on propane or charcoal. In addition, look to see the area where you plan on setting
up camp gives propane refills for those that think about vacationing for a while.
The cost and how much money you have available will also be an important factor that you’ll have to weigh in. Although
most stoves for camping are reasonably priced and can be found for less than 0, many stoves that have extra features
can be much more expensive. Deciding ahead of time how much your budget will allow can definitely make the decision
making process easier. Finally, remember that stoves for camping will require certain accessories. The usual stove
accessories & parts that most people will need include fuel, an extra bottle adapter for propane tanks, a carrying case, a
protective cover, and cooking supplies and utensils. A lot of stoves, in fact the majority, come already with these
accessories on hand. However, cooking utensils and supplies must usually be purchased separately. Choosing a stove
that fits your needs does not have to be overwhelming as long as you know exactly what you are looking for. Remember
to keep your needs in mind while shopping because purchasing the right camping gear will definitely make your camping
experience fun, relaxing, and enjoyable.

9
Chapter Two
Kinds of Fire Campfire Basics To many campers, the campfire is a beloved and indispensable outdoor tradition—a kinetic, luminous, dreamlike force
of nature that for generations has served as the centerpiece of backwoods gatherings.
Campfires remain a cherished institution among visitors to drive-in campgrounds. In backcountry settings, though, their
use has diminished greatly for a number of compelling reasons.
Campfires at Campgrounds
If camping at a developed site, check with the campground operator to make sure fires are permitted. In some
areas, severe dry periods can cause campfires to be prohibited even in campgrounds.
If car camping in an undeveloped site (a so-called "dispersed" area), check in advance with the agency that
administers the land (U.S. Forest Service, Bureau of Land Management, et al.) to make sure fires are allowed. A
campfire permit may be required. It is your responsibility to know the regulations and how to maintain a fire.
Use only local firewood. Do not bring wood with you if you’re traveling from more than 50 miles away.
Campgrounds may even ban bring-your-own firewood regardless of the distance you travel. Why? To avoid
introducing troublesome insects into a forest. Transported firewood may harbor hitchhiking insects that can
escape into a new environment and become invasive pests. Learn more at dontmovefirewood.org, owned by
The Nature Conservancy. Nearby stores often carry firewood, and sometimes campground hosts offer bundles
for sale. Call the campground or a local ranger office in advance for information and advice.
If you forage for firewood, gather only downed wood far from your site. Never cut live trees or break off
branches from standing trees, even dead trees. Birds and wildlife makes use of dead branches and snags.
Build fires only in designated fire rings, grills or fireplaces. If you're at an undeveloped camp, evaluate the site
before starting a fire. If the site is brushy or has low-hanging branches, keep your fire small or skip it altogether.
In dry conditions, fly-away embers could easily ignite a wildfire.
Campfires in the Backcountry Some high-elevation wilderness destinations prohibit campfires. Why? The reasons include:
Repeated wood-gathering has depleted the high country of soil-stabilizing, nutrient-building ground cover.
Human-built fire rings, with their sooty residue, have tarnished many natural settings with scars of human
intrusion.
Poorly tended fires have escalated into ruinous wildfires.
Today's backpacking stoves are lightweight, clean, convenient and fuel-efficient, making backcountry fires nearly
obsolete.
Campfires, though, can be lifesavers in emergency situations. If you are wet, cold, without a working stove and unable to
find shelter, a fire can help you fight off hypothermia. Follow these guidelines when building a fire in the backcountry.
Know fire restrictions before you leave the trailhead. Rangers usually provide fire-related information when they
issue wilderness permits. At self-service trailheads, look for posted information on signs or kiosks regarding fire
and fire danger. Be aware that during extremely dry conditions, ordinary fire restrictions may be overridden by
tighter restrictions. It is your responsibility to know the regulations and how to maintain a fire.
Gather only downed wood, ideally far from your site. Otherwise, over time the area will appear unnaturally
denuded. Never cut live trees or break off branches from a standing tree, even a dead tree. Wildlife makes use
of such snags.
Do not gather or burn pieces thicker than an adult's wrist. Thick chunks of wood are rarely allowed to burn
completely and are typically left behind as blackened, unsightly scraps.

10
In backcountry areas where fires are permitted, use an existing fire ring if one has been left behind. Build a new
one only in emergency situations and, if the situation permits, dismantle it when you are done. If one already
exists, clean it out before you depart.
Clear away all flammable material from your fire pit. Ideally, the pit (base) of your fire should be nonflammable
earth (sand, gravel) or mineral soil (often found in streambeds or on gravel bars). Intense heat can sterilize
healthy soil, so choose your site conscientiously.
If you are building an emergency fire to stay warm and survive, it's understandable if land stewardship is not
your primary focus. Still, don't pillage the landscape. At this point, firestarter and waterproof matches will be
two of your most valued possessions.
An alternative to a fire ring is a mound fire. Using your sanitation trowel, build a circular, flat platform of mineral
soil (sandy, light-colored, non-fertile dirt) about 6" to 8" high. Use this as the base for your fire. Ideally, build this
platform on a flat rock. The goal is to avoid searing (thus sterilizing) any plant-supporting soil below. You can
easily disperse the mound when you're finished. Some people even haul items like barbecue pans into the
backcountry to serve as portable bases for fires.
Pack out any trash found in your pit. Extract any charcoal pieces left inside your ring, carry them away from your
site, crush the chunks, then scatter the remnants and dust throughout a broad area. Dismantle any structure
you might have built, and please don't leave behind any stacks of wood. This may sound like a lot of work, but it
is the responsible way to disguise a campfire's long-lasting aftereffects.
Starting and Extinguishing a Fire
Start the fire by building a small, inverted cone of dry sticks, twigs and forest duff and igniting it with a match.
(Be sure to carry waterproof matches and firestarter. Fire-making materials are considered one of the 10
Essentials.)
Add larger pieces of wood as the fire's kindling temperature increases. Move embers to the fire's center to burn
them completely. Ideally, you should reduce them to white ash.
Burn trash items only if they can be fully consumed by fire and turned to ash. Do not attempt to burn plastic,
cans or foil. If you do burn something that's not fully consumed, collect the remains when the fire is out and
either pack it out or put it in a trash receptacle.
Never leave a campfire unattended!
If you need to dry out clothing, tie a cord tautly between a pair of trees well above the flames; carefully drape a
few wet items across the cord and over the fire.
Extinguish all fires by pouring water on them, stirring the ashes, then applying more water. Repeat as often as
needed. Ashes should be cool to the touch before you leave the site. Be utterly certain a fire and its embers are
out and cold before you depart.
Summary Campfires are 1) fun in campgrounds, 2) many times restricted in high-elevation wilderness settings and 3) often vital in
emergencies. If you build a fire, it is your responsibility to know how to build it, maintain it, extinguish it, then minimize
any impact it creates. Happy camping, and please be safe.
Editor's note: A previous version of this story stated that "at high-elevation wilderness destinations (typically those
above 4,000 feet), campfires are rarely permitted." This assertion was based on guidance from land-management
agencies such as the New York State Department of Environmental Conservation, which prohibits fires in the Adirondack
Mountains above 4,000 feet on a year-round basis (see final bullet point in the agency's list of rules). Elevation
prohibitions, however, vary by park and agency. In Yosemite National Park, for example, 2012 regulations mandate that
no backcountry wildfires be burned above 9,600 feet or near certain lakes. It's smart to inquire locally in advance for fire
regulations at your destination.

11
Chapter Three
Fire Hazards and Safety Fire Hazards
Fire Danger Levels Description
Low
Fuels do not ignite readily from small firebrands, although a more intense heat source
such as lightning may start many fires in duff or punky wood.
Fires in open cured grassland may burn freely a few hours after rain, but woods fire
spread slowly by creeping or smoldering, and burn in irregular fingers.
There is little danger of spotting.
The color code is green.
Moderate
Fires can start from most accidental causes, but with the exception of lightning fires in
some areas, the number of starts is generally low.
Fires in open-cured grassland will burn briskly and spread rapidly on windy days. Wood
fires spread slowly to moderately fast.
The average fire is of moderate intensity, although heavy concentrations of fuel,
especially draped fuel, may burn hot. Short-distance spotting may occur, but is not
persistent.
Fires are not likely to become serious, and control is relatively easy.
The color code is blue.
High
All fine dead fuels ignite readily and fires start easily from any cause.
Unattended brush and campfires are likely to escape.
Fires spread rapidly and short-distance spotting is common.
High intensity burning may develop on slopes, or in concentrations of fine fuel.
Fire may become serious and their control difficult unless they are hit hard and fast
while small.
The color code is yellow.
Extreme
Fires under extreme conditions start quickly, spread furiously and burn intensely.
All fires are potentially serious.
Development into high intensity burning will usually be faster and occur from smaller
fires than in the high danger class.
Direct attack is rarely possible and may be dangerous, except immediately after
ignition.
Fires that develop headway in heavy slash or in conifer stands may be unmanageable
while the extreme burning conditions last. Under these conditions, the only effective
and safe control action is on the flanks until the weather changes, or the fuel supply
lessens.
The color code is red.

12
Extinguish Fires Baking soda can help in the initial handling of minor grease or electrical kitchen fires, because when baking soda is
heated, it gives off carbon dioxide, which helps to smother the flames. For small cooking fires (frying pans, broilers,
ovens, grills), turn off the gas or electricity if you can safely do so. Stand back and throw handfuls of baking soda at the
base of the flame to help put out the fire–and call the Fire Department just to be safe. (And, you should have a fire
extinguisher on hand anyway, here’s why.
Types of Hazards and Treatments Individual Horse play around a fire is the most common cause of individual injuries; Burns, cuts, Burning Trash in your Campfire Here’s a table I gleaned from a US Forest Service study listing what toxins are produced by burning different items:
Trash Burned Toxins Released Styrofoam Cup Benzene, Acetaldehyde, Acrolein (2-propenal) Plastic Bag Benzene, Styrene, Acrolein (2-propenal), Furan Foil Naptha Paper boxes Cadmium
The study concluded: This study shows that even campfires that just burn wood release a significant amount of air pollutants. Adding garbage to the campfire increases many of these air pollutants. The ash left from a campfire that just burned wood is made up mainly of non-toxic elements. When garbage is burned in the campfire, toxic elements in the ash are greatly increased. Anyone handling the ashes from a trashed campfire should wear gloves to reduce their exposure to toxic materials … … The common-sense summary of the results of this study is: Do not burn garbage in a campfire! Pack it in, pack it out. What are the Dangers of Pressure-Treated Wood? Preservative treated wood should not be burned. For many years, the most common preservative mixture used for treated wood was CCA, a combination of chromium, copper and arsenic. When wood treated with this preservative is burned, some of the arsenic is released into the air with the fly ash, and the rest is concentrated in the ash that remains in the fireplace. The Environmental Protection Agency banned the use of pressure-treated wood for residential use in 2004, though industrial and agricultural endeavors still use the material. Newer preservative formulations that do not contain arsenic have largely replaced CCA, but it is still not recommended that they be burned. Do not burn treated wood When burning the wood, the arsenic enters into the air and it can kill those who breathe in the fumes directly. Because of this, burning pressure-treated wood is illegal in all 50 states. The arsenic has no distinct odor, so those breathing in the fumes will not realize what they're breathing. As a result, firefighters and landfill operators must take special precautions when working with burning pressure-treated wood. Even small amounts of pressure-treated wood ash can lead to major health problems. When cleaning up after burned pressure-treated wood, technicians should wear a respirator and treat the region as a toxic zone.
Environment and Landscape Leave No Trace - Minimize Campfire Use Some people would not think of camping without a campfire. Yet the naturalness of many areas has been degraded by overuse of fires and increasing demand for firewood.

13
Lightweight camp stoves make low-impact camping possible by encouraging a shift away from fires. Stoves are fast, eliminate the need for firewood, and make cleanup after meals easier. After dinner, enjoy a candle lantern instead of a fire. If you build a fire, the most important consideration is the potential for resource damage. Whenever possible, use an existing campfire ring in a well-placed campsite. Choose not to have a fire in areas where wood is scarce-at higher elevations, in heavily used areas with a limited wood supply, or in desert settings.
True Leave No Trace fires are small Use dead and downed wood no larger than an adult's wrist. When possible, burn all wood to ash and remove all unburned trash and food from the fire ring. If a site has two or more fire rings, you may dismantle all but one and scatter the materials in the surrounding area. Be certain all wood and campfire debris is dead out. Minimize Site Alterations Do not dig tent trenches or build lean-tos, tables, or chairs. Never hammer nails into trees, hack at trees with hatchets or saws, or damage bark and roots by tying horses to trees for extended periods. Replace surface rocks or twigs that you cleared from the campsite. On high-impact sites, clean the area and dismantle inappropriate user-built facilities such as multiple fire rings and log seats or tables. Good campsites are found, not made. Avoid altering a site, digging trenches, or building structures. Camp and Travel on Durable Surfaces Damage to land occurs when visitors trample vegetation or communities of organisms beyond recovery. The resulting barren areas develop into undesirable trails, campsites, and soil erosion. Concentrate Activity, or Spread Out? In high-use areas, campers should concentrate their activities where vegetation is already absent. Minimize resource damage by using existing trails and selecting designated or existing campsites. In more remote, less-traveled areas, campers should generally spread out. When hiking, take different paths to avoid creating new trails that cause erosion. When camping, disperse tents and cooking activities-and move camp daily to avoid creating permanent-looking campsites. Always choose the most durable surfaces available: rock, gravel, dry grasses, or snow. These guidelines apply to most alpine settings and may be different for other areas, such as deserts. Learn the Leave No Trace techniques for your crew's specific activity or destination. Check with land managers to be sure of the proper technique.
Campfire or Camp stove With the well-deserved emphasis on Leave No Trace finally becoming fairly main-stream, alternatives to the good old campfire have become a viable option. Rather than burning up all the natural vegetation in a highly used area or in a pristine wilderness area, many campers and backpackers are choosing to make less of an impact by curtailing their voracious appetite for fire. It is amazing to see the diverse products now available to replace cooking fires - and if you are doing without a campfire, that really is the main requirement needed. By properly fueling and insulating your body, you do not need an external fire for warmth. So, alternatives to campfires are really stoves for preparing food.

14
Chapter Four
Types and uses of different Fire Lays The Different Types of Campfire Lays Any fire can give you feelings of warmth. However, knowing how different fires direct and produce differing amounts of heat can help you choose which fire to make for your needs and circumstances. The “science” of a fire is based on three elements: fuel, oxygen and heat. The fuel is the material that will start and then keep the fire burning. In order to burn it must have oxygen. The oxygen combines with the gases emitted from the fuel as it’s consumed – that gas is released by heat applied to the fuel. Eventually the fuel is consumed, the energy is released in light and heat and the process is sustained by adding more fuel. The key to any good fire is a quick start, sometimes with only one or two chances to do so. Good tinder – small dry shavings or strands or globs or drippings of quickly combustible material used to start a fire – is critical. Practice with whatever fire igniter you prefer and practice lighting the myriad varieties of tinder you can find outdoors: cattail fluff, birch bark, shredded dry leaves, small blades and stalks of grass, lint from you pockets – practicing what lights quickly and produces enough heat to start your tinder burning is a key skill in becoming a competent fire starter. Tinder is the base of your fire. Most any larger fire will usually be started from a tiny, burning pile of tinder. Once you’re comfortable selecting and using tinder, learn what type of kindling can be used to further fuel your fire. The tinder should burn long and hot enough to generate the gases that will ultimately ignite and start the combustion process with the larger pieces of wood or burning material that will be used to sustain your fire for a longer period of time. Tinder is usually dry sticks and twigs that can usually be collected on the ground, or in wet country, from downed and dead branches and trees. It’s often called “squaw wood” inferring it can be gathered without tools and much effort. Sometimes larger, thicker pieces of bark or even stout canes and stalks from vegetation can be used as kindling. Tinder can also be used to generate a quick burst of heat for cooking, or light for better visibility around the camp. Once a fire is up and going, the larger pieces of wood can be used to maintain the fire with less monitoring than with smaller, more quickly consumed materials. All fires are not the same; they can be built for specific purposes, to accent either heat or light, and can be constructed so as to radiate heat in a certain direction.
Altar Fire Some camp sites do not allow ground fires so an altar fire is a useful alternative. An altar fire may be built from substantial logs laid at right angles to one another. The top layer consists of a number of logs side by side and covered with mud. The mud provides a base that will not catch alight and the fire is built on this base. Altar fires may also be built out of metal or be permanent, free standing on site. Trestles must be braced and lashed very firmly.
Trench fire To build a trench fire, dig a trench or pit and place a screen of logs, bricks or stones along the side. The fire is built in this trench. This is an ideal fire for cooking on a hot day as you are shielded from much of the heat.

15
Teepee fire lay This fire lay will give you a quick fire for boiling in pots and frying in pans. Start by placing a large handful of tender in the middle. Then lean a circle of kindling around the tender. The tips should come together like the poles in an Indian teepee. Feed fire from downwind side.
This is probably the most basic of fire designs. It is often used as a starter upon which bigger, longer-lasting fires are founded. It’s also a great fire for a quick warm-up or water-boiling snack break. This fire uses mostly kindling, but larger teepees can be created by adding larger logs vertically to the fire. Many beach fires are large teepee fires where pole-sized driftwood is laid upright against others to form this familiar shape. A teepee fire is a good fire to direct heat upward and can be used beneath a hung pot on a tripod for fast heating.
Lean to fire lay This is an improved version of the teepee fire lay. Start by placing a green "lean-to" stick in the ground at a slant. Point its tip into the wind. This stick should hold the tender upright while the tender is burned out.
Crisscross Fire Lay Just the thing when you need a bed of coals in a hurry for boiling of baking. Place two sticks on the ground parallel to each other put kindling between them then place kindling sticks crosswise over the two supports a little finger width apart. Continue with more crisscross layers. Increase the thickness from layer to layer.
Pyramid/Platform or Log-Cabin Fire This is the ideal council fire for a whole camp of scouts. It consists of crisscross made from logs at the bottom. The smaller crisscross fire lay is made from branches on top. As the campfire progresses, the fire eats its way down through the pile.
This fire consists of a foundation framework of large logs laid side by side to form a solid base. A slightly shorter log is laid perpendicular and on top of this first layer. Each subsequent layer is slightly shorter as the platform or pyramid rises. This solid mass of right angle firewood takes a little effort to light but it’s well worth it for the huge amount of coals it produces, especially when the fire is lit on the top most layer and burns down through the layers.
A lighter version of the Pyramid fire is the platform. It’s similar in shape to the pyramid fire except the logs are layered only along the outside edge (like walls on a log cabin) with each level of logs slightly shorter than the ones beneath. This creates a hollow wood platform into which smaller kindling can be placed and ignited. It can provide quick warmth and be the start of any number of larger blazes.

16
Parallel Fire or Hunters Fireplace If you have logs use them for a hunter’s fire. Place two of them close enough together to support your utensils. Since the fire eats the logs from the inside they will have to be replaced from time to time. Sometimes a fire is built between two long logs. If the logs are the same size, the tops of the log can be used to place pots for cooking. It has the added advantage of prolonging the fire since the insides of the log are burning too, and it’s easy to direct the fire up or down the length of the side log, literally until the entire log eventually consumed. A similar fire is the trench fire, used almost exclusively for cooking. These work by either blocking the wind or in funneling the wind into the fire for a more concentrated and hotter “burn”. Several pots can be placed over the trench and the fire can be maintained at different levels for a variety of cooking options.
Star or Indian Fire This is a small fire started in the center of three logs placed in a star shape. A star fire, or Indian fire, is the fire design often depicted as the campfire of the old West. Imagine five or six logs laid out like the spokes of a wheel (star shaped). A fire is started at the “hub” and each log is pushed towards the center as the ends are consumed. It’s another fire that can be kept burning all night long with little maintenance.
Fire Stick Fire Lay Use this fire to start a fire in a rock or hunters fireplace. Lay a fire stick across the fireplace. Put a handful of tender under the fire stick lean a number of kindling against the fire stick build up the fire lay with thicker and thicker fuel then ignite the tender.
Reflector Fire A reflector fire is really any fire that has some sort of flat surface behind it to direct the heat back out past the fire. This surface is erected behind the fire and pointed, for example, at the face of a tent, lean-to or other shelter. This back reflector can be made out of a few large slabs of bark, several logs laid against supports and stacked upon each other to form the surface. Rocks can also be used but just like those used to ring a fire, make sure they do not contain moisture. That trapped moisture can be heated to where it’s like a steam engine with no release valve. Exploding rocks can send shrapnel and shards flying in every direction!
Several fire starters are on the market, from the basic match to clever kits that contain a flint-like material and striker unit all packaged together. Space-age lighters and water/stormproof matches all can be your choice of fire starter. The most important thing to remember about fires is learning how to build and lit them long before you need one to save your life. Practice at home, make it a ceremonial task at your next camp out. As humans I am convinced that the feelings evoked by a good campfire are remnants of our cave-dwelling ancestral days. Even if we have a good coat on our back, and a belly full of warm food cooked on a camp stove, there is something about a fire that makes the campsite complete.

17
Chapter Five
Methods of Fire starting Fire-Making Methods Most experienced Scouts know how to start a fire without a lighter or matches. Do you? When lost in the wilderness, being able to make a fire can be a lifesaver, both to signal your location and to use for warmth and cooking. Here are five ways to start a small fire in an emergency. Before you attempt to start a fire, you must have tinder and kindling materials available and understand how to use them. Many people fail to start fires even when they have good matches! A fire is built in stages. You first need to cause a small spark to ignite your tinder, small dry items like tissue paper, dead grass, twigs, leaves, lint or even paper money. Blow on the tinder carefully, so it stays lit and grows into a larger fire. Then carefully add kindling—sticks, branches or thick paper—to keep the fire going. Once the kindling is burning, you can add larger logs or other fuel.
Fire by Heat or Flame Modern survivalists often carry Swedish fire steel sticks in their kits as a means for making fire. These ferrocerium rods have become very popular as they are light-weight, convenient to carry and they are effective in creating instant flame with certain tinder. Similar to other modern fire starting tools the principle involves the transfer of flame, such as from a match or lighter, to a combustible material. These modern methods require little effort, they are effective under favorable conditions and their use has become so common that for many people they are the only methods known. However, an isolated flame can be a fragile thing and one adversely affected by the natural elements, as anyone who has attempted to light a campfire on a wet and windy day knows.
Sulfur matches- Need to maintain the striker on the side of the box. We
use an old peanut butter jar to keep the strike-anywhere and non-
waterproof matches dry.
Keep it simple! Hold the safety release and pull the trigger. Works as long as
you have butane.
Adjustable flame, can still use flint
striker after fuel is used up.
Stormproof Match Kit
features a waterproof plastic case, 25 stormproof matches
and 3 strikers.
Windproof and waterproof matches are easy to light and they will relight after being submerged in water
Matches burn for up to 15 sec.
Case features an integrated striker on the outside for easy lighting of matches
Fire by Friction Rather than creating a spark into tinder, fire by friction causes the fuel to heat up until it reaches the combustion temperature and ignites. This is around 800 degrees Fahrenheit. Moisture is the biggest obstacle to overcome when attempting to create fire by rubbing wood. Start with extremely dry wood and keep it dry to ensure success. In areas of higher humidity, more effort is required. Following are some of the more common methods of creating fire by friction in order of increasing complexness. All of these methods create a coal of smoldering wood dust which is then transferred to waiting tinder to be coaxed into flame. They also employ one piece of hard wood and another slightly softer wood which wears away. Neither of these

18
woods should be too soft nor too hard. Excessive resin in the wood will also cause failure since it will cause the wood to become polished and smooth. These are simple introductions to each method. Individual success depends on strength, practice, materials used, and troubleshooting. These methods require a lot of effort and consistency. Some woods to consider using:
Cedar
Willow and Redwood
Yucca and Oak
MAKE A FIRE PLOW What You’ll Need:
Hard stick with a blunted tip Flat piece of wood Tinder Kindling Knife or sharp-edged rock
What You’ll Do: Using the knife or sharp rock, scratch a straight indentation in the center of the flat piece of wood about the same width as the blunt stick. Arrange the tinder so air can easily circulate, and set it at the foot of the piece of wood. Then, in a kneeling position, hold the flat piece of wood between your knees at an angle and move the stick rapidly back and forth in the indentation until friction ignites the fibers of tinder at the base. Mix in more tinder material and fan the smoke until a small fi re starts. To keep the fire going, carefully add kindling material.
Form a plow board of softer wood that is flat and a couple inches across and 2 feet long.
Form a plow stick that is hardwood and has a sharpened tip.
Cut or rub a depression about 6 or 8 inches long in the plow board. This is the trough in which you will scrape he plow stick.
Hold the plow board firm as shown or kneel on it or sit on it if it is a longer board. The idea is to keep the board steady.
Point the plow stick into the plow board at about a 60 degree angle and push it forward with downward pressure.
Release the downward pressure and pull the plow stick back to the start of the trough.
Push and pull the plow stick quickly, creating wood dust at the far end of the trough. It is important to end each stroke at the same spot so dust can accumulate there.
Eventually, the wood dust will combust and can be pushed into waiting tinder. Fire Saw
A softer wood stick is cracked along its length (but not completely split) and a small peg or pebble is placed in the end to hold the two halves apart about 1/4 inch. You may want to tightly wrap the end which you do not want to split before cracking.
Tinder is stuffed in the crack.
A sharp edged harder wood stick is sawn back and forth across the crack, perpendicular to it.
Sawdust is worn away and drops into the tinder, eventually heating enough to develop a coal.
Dried bamboo stalks are also used for fire saws with a notch cut across half a stock and the ember falls through the cut onto tinder under the hollow bamboo stalk.

19
The Bow Drill
Primitive fire making by the American Indian manner is very practically. I have made it
several hundred times even in rainy weather and in the winter. It works without
special trick or mystery.
Cut first a V-shaped notch into the side of the fireboard, which is about 2 cm deep. The point with the notch is to make friction with the spindle producing smoldering black dust and collecting this dust, forming a coal. Make first a hole to hold the drill in place, with the point of a knife ca 0.6 mm from the bottom of the notch.
Place the fireboard on level ground and slip a thin piece of bark under the V-shaped notch. Placing the left foot on the fireboard steadies it. Wrap the cord around the spindle and set one end of the drill into the fireboard depression, the other end held in place with the hand grip. Brace the left wrist up against your shin. Now slowly, begin to move the bow backward and forward. When spinning smoothly, apply some pressure with the hand socket.
Soon black dust begins running in the notch. When the smoke is billowing and black dust is piling up in the notch, give a few more cranks on the bow. A live coal should be formed, but that is only half of the story.
There is a glow inside, often invisible but still hot in a couple minutes. Pick up the glowing ember with the bark and set it on the tinder bundle. Cradling it in your hands, blow steadily.
Growing brighter and brighter orange, the coal and bundle will burst into flames. All this takes about one minute.
Failure depends on:
If you don't support the left hand enough; your hands get tired, or
You don’t steady the fireboard or hand socket; the drill flips into the air, or The black dust is not running in the notch; the hole is then too far from the notch.
Drilling by hand
The basic principle for making a fire with a hand drill is the same as that for making one with the bow drill. Instead of using a bow and socket, the drill is simply twirled between the palms of the hands.
Make first a hole to hold the drill in place, with the point of a knife ca 1½ cm from the side of the 1½ cm thick fireboard. A spindle of mullein with a straight cut end, puts into this hole and spin until the first wisp of smoke begin appearing. Not until now can you first cut a V-shaped notch into the side of the fireboard. The point with the notch is to do friction for the spindle to producing smoldering black dust and collecting this dust, forming a coal. The best notches have a form of an isosceles triangle, so the inner corner just about reach to center of the hole.
Place the tinder (shredded bark of juniper) in the notch under the hole
and begin to spin the drill again. In twirling the drill, the hands will
gradually work down toward the base of the drill, when they are

20
passed quickly to the top and the movements repeated.
The twirls have to be going on until black dust running in the notch and begin to smoke. There is a glow inside, often invisible but still hot in a couple minutes. The drill is then carefully a lifted away and pick up the glowing ember with the bark and set it on the tinder bundle. Cradling it in your hands, blow steadily.
Growing brighter and brighter orange, the coal and bundle will burst into flames. All this takes about one minute.
If the drills begin to creak, it is a mark that the holes in the fireboard have been conical, and the fire making will probably fail this time. Then you have to start at the beginning.
How to Make Fire without Matches By Dr. Walter Hough, Smithsonian Institution,
Washington, D. C. Kinds of Wood The best wood is dry and long seasoned till it begins to show signs of decay, as in a dead branch. It must not be gummy, or resinous or fibrous like walnut or pine, or acid like oak, ash, and chestnut. The test for all wood is that the dust ground off is real dust and not gritty. Try the dust in the fingers and if it feels sandy try some other wood. Elm, linden, poplar, soft maple, sycamore, and buckeye will often furnish good wood. The best wood is of the roots of the cottonwood of the west and of the willow.
Root wood is better than stem wood as a rule. The flowering stalks of the yucca are excellent for fire making. Scouts should be on the lookout for wood and tinder. There is nothing as good as questioning nature yourself; you may thus become a discoverer. The Tools A flat piece of wood or a branch flattened on two sides and not over 3/4 inch thick is selected for the hearth or lower piece. It may be of any length, but long enough to set the foot firmly on one end. The spindle should be whittled out tapering to both ends, not over inch in diameter at the middle, and 12 inches long. It will wear down and can be used as short as 4 inches. The ends should be rounded, not sharp.
The bow is 17 inches long, inch wide, 1/2 inch thick, and has a curve inch high on the belly. It can thus be whittled out of a strip 1-1/8 inches wide. The ends are swelled a little and holes put through for the cord. The thong may be of belt lacing 5/16 inch wide or of any good pliable leather. One end of the thong is slit, put through the hole, the other end put through the slit and drawn down. Merely run the thong through the other hole in the bow. The nut is a block 6 inches long, 1-1/2 inches square. Set in the middle a piece of soapstone and make a small smooth pit in the soapstone.
As to the tinder, or first swaddling clothes of the fire, this is of many kinds and may be found anywhere by any scout who sees that soft, finely divided, inflammable material is needed. Cedar bark, dry grass, willow or other catkins, leaves,

21
wood scrapings, a bird’s nest, etc., etc.; whatever comes handy, rubbed and reduced to a fluffy mass. Have ready also a bunch of long-stemmed grass, a strip of bark, or anything that can be bent over the new fire. Fire Now to make fire: Scratch or nick a small place on the upper surface near the edge of the hearth and set it on firm ground or on flat rocks. If the ground is soft, imbed a rock under the hearth where the pressure comes. Take the spindle, upper end from you, in the left hand, bow in right hand, string to left. Lay the spindle diagonally on the cord and give the bow a half turn. Grasp both so, and set the end of the drill on the hearth near the edge. Make a few turns to start the socket, then cut a clean groove down the edge of the hearth well into the socket. Take the tools up again and run the drill easily at first, and when it bites a little put on more pressure. When the dust pushes out of the slot as a compact bunch you likely have fire. If so, fan it gently for a moment with the hand till the fire appears and transfer it to the finely divided mass of fuel which has been laid on a strip- of bark or grass stems, fold over and wave with gentle circular motion in the air and it will burst into flame. Bows are of two kinds, elastic and rigid. If elastic the spindle can be set in on a stretched cord, but this sort of bow does not give good results. In the rigid bow the spindle is set in with a loose cord, the cord is then drawn tight and given a turnaround under the hand against the bow to secure it. Then reach forward the thumb and pinch the cord down against the curved forefinger. By moving the thumb up and down, the cord is tightened or slackened as desired. A little practice will show the relation between the pressure on the top of the spindle and the tension of the cord. This has to be learned and thoroughly under control before fire can be successfully made. Keep the spindle straight up and keep the bow away from it. The spindle must not joggle or the hearth shake, or you will lose the fire. Both fire -making pieces may be of the same wood; indeed it is better that they should be the same. Some tribes, when their wood is not long enough to make a spindle, splice a bit of the good wood in at the point of another piece. From "Handbook for Boys", 1925 BSA
Fire: Rubbing-Stick by Ernest Thompson Seton
I have certainly made a thousand fires with rubbing sticks, and I have made at least five
hundred different experiments. So far as I can learn, my own record of thirty-one seconds
from taking the sticks to having the fire ablaze is the world's record (this was written in 1907;
since then the record has been repeatedly lowered by others), and I can safely promise this:
That every man who will follow the instructions I now give will certainly succeed in making a
rubbing-stick fire.
Take a piece of dry, sound, balsam-fir wood (or else yucca, cedar, cypress, tamarack,
basswood, or cottonwood, in order of choice) and make of it a drill and a block, thus:
The drill should be not more than five eighths of an inch in diameter and 12 to 15 inches long. The larger your drill, the
harder you have to work. There is no use in having an immense pile of powder to get a spark. If the drill averages five
eighths of an inch in diameter, is perfectly straight, and tapers off at the top nicely, it will revolve smoothly and bring
your spark quickly. The drill should be held perpendicularly and should be held solidly by the hand resting firmly against
the shin bone. The drill should be placed in the bow so that the loop is on the outside of the thong away from the bow.
This prevents the drill from rubbing against the bow.
Block, or board, two inches wide, six or eight inches long, five eighths of an inch thick. In this block, near one end, cut a
side notch one half an inch deep, and near its end half an inch from the edge make a little hollow or pit in the top of the
block, as in the above illustration (cut 1 b).
The notch should be cut into the board deeper at the bottom than at the top, and wider from a side view at the bottom
than at the top. The narrower the notch is, while allowing the powder to drop, the better. The notch should be so cut

22
that when the hole has been drilled, there will be just a little slit running from the side to the center of the hole through
which the powder drops down. The wood must be cut smooth, or the spark may stick and not drop below. I have found
it best to have the notch face me rather than have it the other side of the board away from me. I have noticed that the
average person leans his drill, which causes it to push against the outside rim of the hole and to break the side away.
Usually it is better to start your hole above the notch and then open up the notch until it connects with the hole.
Tinder. For tinder use a wad of fine, soft, very dry, dead grass mixed with shredded cedar bark, birch bark, or even cedar
wood scraped into a soft mass.
A meadow mouse's nest does very well for tinder. It is easy to get a number of them after the snow has gone from the
wet meadows in spring time.
Bow. Make a bow of any bent stick two feet long, with a strong buckskin or belt-lacing thong on it (cut 1c).
Socket. Finally, you need a socket. This simple little thing is made in many different ways. Sometimes I use a pine or
hemlock knot with a pit one quarter inch deep, made by boring with the knife point. But it is a great help to have a good
one made of a piece of smooth, hard stone or marble, set in wood; the stone or marble having in it a smooth, round pit
three-eighths inch wide and three-eighths inch deep. The one I use most was made by the Eskimo. A view of the
underside is shown in cut 1 (fig. d).
The hole in the soapstone should be large enough and deep enough to hold the upper point of the drill solidly without
slipping out. The socket itself should not be held in the fingers but in the palm of the hand. Never let a light muscle do
what a heavy muscle can do. There is a very general tendency to let the wrist get away from the shin bone, which leaves
the hand wobbling, unsupported in the air.
The Foot. The foot is placed close to the drill, with all the weight on the ball of the foot, the heel off the floor so that you
can regulate the pressure by the raising and lowering of the heel.
Now we are ready to make the fire: Under the notch in the fire-block set a thin chip.
Turn the leather thong of the bow once around the drill: the thong should now be quite tight. Put one point of the drill
into the pit of the block, and on the upper end put the socket, which is held in the left hand, with the top of the drill in
the hole of the stone (as in cut 2). Hold the left wrist against the left shin, and the left foot on the fire-block. Now, draw
the right hand back and forth steadily on level and the full length of the bow. This causes the drill to twirl in the pit. Soon
it bores in, grinding out powder, which presently begins to smoke. When there is a great volume of smoke from a
growing pile of black powder, you know that you have the spark. Cautiously lift the block,
leaving the smoking powder on the chip. Fan this with your hand till the live coal appears.
Now, put a wad of the tinder gently on the spark; raise the chip to a convenient height, and
blow till it bursts into flame.
N. B. The notch roust reach the middle of the fire-pit.
You must hold the drill steadily upright, and cannot do so without bracing the left wrist against the left shin, and having
the block on a firm foundation.
You must begin lightly and slowly, pressing heavily and sawing fast after there is smoke.

23
The Spark. When you get your spark, hold your left hand on the board as you take your foot off, and tap with the right
hand (to loosen any spark that might hang onto the notch) before lifting the board. When you put your tinder on the
spark, hold it down in the back and on the sides so that you will not blow the spark away.
If the fire does not come, it is because you have not followed these instructions.
The Birch Bark Roll
How to Make Fire by Rubbing Sticks "How do the Indians make a fire without matches?" asked a boy who loved to "play Indian." Most of us have heard the
answer to this. "The Indians use a flint and steel, as our own fathers and mothers did one hundred years ago, and before
they had flint and steel they used rubbing-sticks." We have all read about bringing fire out of two sticks by rubbing them
together. I tried it once for an hour, and I know now I never would have got it in a thousand years as I was doing it.
Others have had the same experience; consequently, most persons look upon this as a sort of fairy tale, or, if they
believe it to be true, they think it so difficult as to be worth no second thought. All scouts, I find, are surprised and
greatly interested to learn that not only is it possible, it is easy, to make a friction fire, if you know how; and hopeless, if
you don't. I have taught many boys and men (including some Indians) to do it, and some have grown so expert that they
make it nearly as quickly as with an old-fashioned sulphur match. When I first learned from Walter Hough, who learned
from the Indians, it took me from five to ten minutes to get a blazing fire - not half an hour, as some books have it. But
later I got it down to a minute, then to thirty-one seconds from the time of taking up the rubbing-sticks to having a fine
blaze, the time in getting the first spark being about six seconds.
My early efforts were inspired by book accounts of Indian methods, but, unfortunately, I have never yet seen a book
account that was accurate enough to guide any one successfully in the art of fire-making. All omit one or other of the
absolute essentials, or dwell on some triviality. The impression they leave on those who know is that the writers did not.
The surest and easiest method of making a friction fire is by use of the bow-drill. Two sticks, two tools, and some tinder
are needed.
The two sticks are the drill and the fire-board, or fire-block. The books generally tell us that these must be of different
kinds of wood. This is a mistake. I have uniformly gotten the best results with two pieces of the same kind - all the
better, indeed, if they are parts of the same stick.
What Kind of Wood
This is a very important question, as woods that are too hard, too soft, too wet, too oily, too gummy, or too resinous will
not produce fire. The wood should be soft enough to wear away, else it produces no punk, and hard enough to wear
slowly, or the heat is not enough to light the punk, and, of course, it should be highly inflammable. Those that I have
had the best luck with are balsam fir, cottonwood roots, tamarack, European larch, red cedar, white cedar, Oregon
cedar, basswood, cypress, and sometimes second-growth white pine. It should always be a dry, sound stick, brash, but
not in the least punky.
In each part of the country there seems to be a kind of wood well suited for fire-making. The Eastern Indians used cedar;
the Northern Indians, cedar or balsam fir; the plains Indians used cottonwood or sage-brush roots.
Perhaps the most reliable of all is dry and seasoned balsam fir; either the species in the North woods or in the Rockies
will do. It gives a fine big spark or coal in about seven seconds.
When in the grinding the dust that runs out of the notch is coarse and brown, it means that the wood is too soft; when it
is very fine and scanty it means that the wood is too hard.

24
1. The simplest kind of bow; a bent stick with a stout leather thong fastened at each end. It is about 27 inches long
and 5/8 inch thick. 2. A more elaborate bow with a hole at each end for the thong. At the handle end it goes through a disc of wood.
This is to tighten the thong by pressure of the hand against the disc while using. 3. Simplest kind of drill-socket; a pine or hemlock knot with a shallow hole or pit in it.
3a is under view of same. It is about 41/2 inches long. 4. A more elaborate drill-socket; a pebble cemented with gum in a wooden holder.
4a is under view of same. 5. A very elaborate drill-socket; it is made of tulip wood, carved to represent the Thunderbird. It has eyes of green
felspar cemented in with resin. On the under side (5a) is seen, in the middle, a soapstone socket let into the wood and fastened with pine gum, and on the head a hole kept filled with grease, to grease the top of the drill before use.
6. The drill; 12 to 18 inches long and about 3/4 inch thick; it is roughly eight-sided so the thong will not slip, and pointed at each end. The best wood for the drill is old, dry brash, but not punky, balsam fir or cottonwood roots; but basswood, white cedar, red cedar, tamarack, and sometimes even white pine, will do.
7. Fire-board or block; about 3/4 inch thick and any length handy; (a) is notch with pit just begun, (b) shows the pit after once using and in good trim for second time, (c) shows the pit bored through and now useless; the notch is 1/2 inch wide and 3/4 inch deep.
8. Shows the way of using the sticks. The block (a) is held down with one foot, the end of the drill (b) is put in the pit, the drill-socket (c) is held on top in left hand, one end of the bow (d) is held in the right hand, while the bow is drawn back and forth.
9. Is a little wooden fire-pan, not essential but convenient; its thin edge is put under the notch to catch the powder that falls.
I have made many experiments to determine whether there is anything in the idea that it is better to have the block and
the drill of different woods. But no hybrid combination was so successful as "two of a kind." The drill and the bow and
socket are fully described in the illustration.
The preparing of the fire-board is one of the most important things. At the edge cut a notch half an inch wide and about
three fourths of an inch deep; at the top of this notch make a pit or shallow hole, and the board is ready. The
importance of this notch is such that it is useless to try fire-making without it. While these are the essentials, it is well to
get ready, also, some tinder. I have tried a great many different kinds of lint and punk, including a number that were
artificially prepared, soaked with saltpetre or other combustibles. But these are not really fair play. The true
woodcrafter limits himself to the things that he can get in the woods, and in all my recent fire-making I have contented
myself with the tinder used for ages by the red men: that is, cedar wood finely shredded between two stones. Some use
the fringes that grow on birch, improving it by rubbing in powdered charcoal.

25
Now that he has the tools and material ready, it will be an easy matter for the matchless castaway to produce a fire.
Pass the leather thong once around the drill - and this should make the thong taut; put the lower point of the drill in the
pit at the top of the notch in the fire-board, and hold the socket with the left hand on top of the drill. The notch of the
fire-board should be resting on a chip or thin wooden tray. Hold the bow by the handle end in the right hand, steady the
board under the left foot, and the left arm against the left knee. Now draw the bow back and forth with steady, even
strokes, its full length. This causes the drill to turn in the pit and bore into the wood; ground-up wood runs out of the
side of the notch, falling on the chip or tray. At first it is brown; in two or three seconds it turns black, and then smokes;
in five or six seconds it is giving off a cloud of smoke. A few more vigorous strokes of the bow, and now it will be found
that smoke still comes from the pile of black wood-dust on the chip. Fan this gently with the hand; the smoke increases,
and in a few seconds you see a glowing coal in the middle of the dust. (There are never any visible flying sparks.)
Now take a liberal pinch of the cedar tinder - about a teaspoonful; wrap this in some bark fibre or shredded rope to keep
it from blowing away. Hold it down on the coal, and, lifting tray and all, blow or fan it until in a few seconds it blazes.
Carefully pile over it the shreds of birch bark or splinters of fat pine prepared beforehand, and the fire is made.
If you have the right wood and still cannot get the fire, it is likely because you do not hold the drill steady, or have not
cut the side notch quite into the middle point of the little fire pit. The advantages of learning this method are threefold:
First: Fire-making by friction is an interesting experiment in woodcraft.
Second: A boy is better equipped having learned it. He can never afterward freeze to death for lack of matches if he has
wood and an old shoe lace.
Third: For the very reason that it is difficult, compared with matches, it tends to prevent the boys making unnecessary
fires, and thus reduces the danger of their setting the woods ablaze or of smoking the forbidden cigarette.
There is such a fascination in making the rubbing-stick fire that one of my Western cooks, becoming an expert, gave up
the use of matches for a time and lit his morning fire with the fire-drill, and, indeed, he did not find it much slower than
the usual way.
Walter Hough told me a story of an Apache Indian who scoffed at the matches of white men, and claimed that he could
light a fire with rubbing-sticks faster than Hough could with matches. So each made ready. They were waiting for the
word "go" when the Indian said:
"Wait. I see if him right." He gave a few strokes with the drill, and called - "Stop - stop him no good He rearranged
the sticks, and tried a few more strokes. Just as Mr. Hough was going to strike the match, he said: "Stop - stop - him no
good." He did this three times before he called "Ready." Then the word "Go" was given. The white man struck the slow,
sizzling match. The Indian gave half a dozen twirls to the drill - the smoke burst forth. He covered it with the tinder,
fanned a few seconds, then a bright flame arose, just before the white man got his twigs ablaze. So the Indian won, but
it was by an Indian trick; for the three times when he pretended to be trying it, he was really warming up the wood -
that is, doing a large part of the work. I am afraid that, deft as he was, he would have lost in a fair race. Yet this incident
shows at least that, in point of speed, the old rubbing-sticks are not very far behind the matches, as one might have
supposed.
It is, indeed, a wonder that the soldiers at West Point are not taught this simple trick, when it is so easily learned, and
might some day be the one thing to save the lives of many of them.

26
Fire by Spark Fire from Batteries and Steel Wool Electricity makes sparks, as everyone knows. Harnessing that spark to create a fire is pretty easy and fun to see.
Have your fine, dry tinder ready.
Get some fine steel wool - 0000 grade left over from polishing your pop can fire starter would work great. SOS Pads used to be steel wool, the news ones are not.
Pull the steel wool into a thin length about 6 inches long and 1/2 inch wide.
Get a 9-volt or a couple of "D", "C", or "AA" batteries.
Touch the steel wool to both contacts of the battery and the steel wool will begin to glow and burn.
It does not burn long, so get it into your tinder quickly. Fire with a Cellphone NOTE: Although a cell phone can start a fire, it depends on battery life---so carry a backup source of fire. Cellphones
can be tracked and coordinated – save the battery to help the SAR team find you. If you find yourself in a survival situation, cell phones---while not the best choice---can be used to start a fire. In some situations, it may be your only choice. Even when there is no need for a survival plan, starting a fire with a cell phone is a great trick to liven up the campsite. Things You’ll Need:
Tinder
Cell phone
Steel wool Instructions Step 1: Collect tinder. Drier and smaller tinder is better, because a cell phone won't generate a big flame. Be sure to collect enough tinder to keep adding to the fire once it starts and have plenty of dry, finger-sized sticks ready to add to the fire. Step 2: Take the battery out of the phone. Find the contact points. Note the locations of the positive and negative contact points. There are usually three contact points on cell phone batteries; the two outer points are the positive and negative. Step 3: Roll a chunk of steel wool into a 1 1/2-inch cylinder. Although you want the roll to be tight, don't compact the wool completely. For fire to start, air must be able to access the steel fibers. Step 4: Bend the steel wool in half and press the ends to the contact points. Make sure one end of the steel wool cylinder touches the positive contact point and the other end touches the negative contact point. Wait for wool to smolder. The steel wool will get hot, so be careful not to burn yourself. Step 5: Light the tinder with the smoldering steel wool. Once the tinder catches fire, add more tinder. When the fire is big enough, add finger-sized sticks. Work your way up in stick sizes until you can burn logs. In a survival situation, keeping the fire burning is one of your most important jobs.
Ferrocerium Rod – Ferro Rod Fire Starter The most important item in your survival kit is the means to make a fire. The best accessory to ensure you can start a fire when you need one, is this Ferro Cerium Flint Fire Starter. With this flint, you can start fire easily and quickly with just some spark. Its 3,000°C spark makes fire building easy in any weather and at any altitude. It is an essential tool for any one in any outdoor activities, including fishing, camping, hiking or

27
hunting trips. It is also good as a survival tool -- the bright spark can be used as an emergency signal or to deter attackers. It is approved by the International Survival Instructors Association. Its small size fits on a key chain or as a zipper pull so it’s always handy. Use the back of an old hack saw blade or your knife blade to spark it.
How to Use a Magnesium Firestarter There are different models of magnesium firestarters out there, but the standard is a small block—it can be carried on a keychain—with soft magnesium on one side and a flint on the other. Magnesium is highly flammable when it comes in contact with the small hot sparks produced by the flint. All you need is a knife, some tinder and kindling, and you are well on your way to a warm, and potentially life-saving, fire. The fire starter uses magnesium, a flame source of 5400°F (2982°C). One fire starter should provide sufficient shavings to start hundreds of fires. Things You'll Need
Knife
Magnesium fire starter block
Tinder (bark, paper or dried leaves)
Kindling (small dry sticks or twigs)
Larger pieces of wood Instructions
1. Gather your tinder, kindling and wood for burning. Keep them dry and in separate piles right next to where you plan start your fire.
2. Dig a slight depression in the ground to catch your shavings. If this is not possible, use a flat piece of wood, tree bark or cardboard or some other platform to keep them all in one place.
3. Take out your knife. Holding the firestarter upright, with the flint side facing you, shave off a small pile of magnesium onto the ground or the platform you have set up. Pare a small pile of magnesium shavings (at least enough to cover a quarter). Use a sharp knife held at 90° angle to the magnesium block to prevent it from catching on the notches your knife may make in the magnesium.
4. Gather your tinder (twigs, leaves, paper, etc.) in a pile adjoining the magnesium shavings.
5. Hold the firestarter with the flint side facing outward. Hold the Fire Starter with the sparking insert up at about a 45° angle within 1 inch (2.5 cm) of the shavings. Scrape the length of the starter using the back (spine) of the knife creating sparks which will ignite the magnesium shavings.
It may take you a few tries before you get the spark you need, but it should happen rather quickly. The magnesium will ignite and the tinder will catch right away. Be ready to add (not pile) on more tinder and kindling. Be prepared to add additional fuel to build and maintain an adequate fire. Tips & Warnings Practice using your firestarter at home before you are forced to use it in an emergency situation. Caution: Magnesium in solid form is safe and is not combustible. Do not pare shavings before they are needed. Note: The magnesium shavings will burn rapidly but the extreme heat will ignite even damp (not wet) tinder. Use a char cloth, and a birds net may be of assistance.

28
Making Fire with Flint & Steel By J. Gottfred
Being a 'how to' on all aspects of producing a fire in the eighteenth century manner by using flint and steel, by a gentleman who has done it successfully. (See also "Tips for Fast Fires with Flint & Steel" at the end of this article) I have always been intrigued by the idea of lighting a fire with flint and steel. I have often read in period novels how someone reached for their tinder box and lit a cheroot. Statements of this kind make it sound as easy as striking a match, but was it really that simple & fast? Early Failures Many survival or scouting books give different instructions on how one can start a fire with flint and steel. These books suggest various materials that are supposed to catch the spark. I have tried many of them, and I can attest that the people who wrote those books had obviously never tried it! I tried all of the following materials without success: punk (the powdery dry rot from the insides of fallen logs), cottonwood fluff, fine dry grass, fine wood shavings, dry moss, and various lichens. None of these materials worked, although they all made excellent small kindling once I gave up and used a match. The Problem Solved For a clue, I turned to my copy of the Oxford Universal Dictionary, which defined tinder as "a flammable substance used to kindle a fire, especially charred linen" [my italics]. At about the same time, I stumbled upon an article on fire-starting by Mr. Warren Boughton in which he describes how to make charred cloth. I followed Mr. Boughton's recipe, and the results were amazing. When a spark hits charred cloth, it creates a tiny red spot, which slowly grows like a glowing fairy ring. It is impossible to blow out; in fact, the more wind there is the better, as the spark simply gets hotter and hotter. The only way to put it out is by suffocation (which preserves the rest of the charred cloth for future use), or by dousing it with water (which ruins the char cloth). The amazing thing is that with the magic of charred cloth, in windy weather it is easier to start a fire with flint and steel than it is to use a match! Making Charred Cloth Here is how to put together your own tinder box, so that you can make a fire the same way that people did two hundred years ago. First, you will need some cloth. Linen is the traditional fabric, but 100% cotton works just fine, and it is a lot cheaper! You must be sure to use only completely natural fabrics. This is for two reasons; first, synthetics didn't exist two hundred years ago, and secondly, they don't char —they melt, and leave you with a useless mess! Cut the cloth into pieces. I have had success with patches as small as two inches square, but I would suggest that you start with patches that are about four to five inches on a side. Next, you will have to find a small tin can with a tight lid. A small paint tin would work. I have used both a small twist lid tobacco tin and a tea tin with success. You will have to punch two small holes —one in the top and one in the bottom of the can. The holes should be less than 1/8" in diameter. You should have two little twigs on hand, about six inches or more in length and whittled so as to fit snugly into the holes you punched in the tin. Some tongs will be needed to remove the hot tin from the fire safely. Build a fire, and let it die down until you have a nice bed of roasting coals. (You could probably use a charcoal barbecue for this, if that is more convenient.) If this is the first time you have used your tin, I would strongly suggest that you put it in the fire to burn off any paint or oils that might be on the can. If you don't, these materials will ruin your first batch of char cloth. When the tin is black with peeling paint, take it out of the fire, let it cool, and brush off the ash. You will be left with a dark, mottled steel effect that has a certain charm. Once your tin has been cleaned out, put the pieces of cloth into the tin, and tighten down the lid. Place the tin on or near the coals, and watch it carefully. The secret to charring cloth is that it is an anaerobic process — the chemical transformation of the cloth occurs only in the absence of oxygen. If air is present, then the cloth will not char; instead, it will burn to ashes and be useless. As the cloth heats up, it gives off volatile gasses which rapidly fill the interior of the tin, driving out the air. These gasses are then vented to the outside of the tin through the tiny holes in the top and bottom.

29
You will see these hot gasses ignite when they hit the air, and tiny jets of flame will come out of both ends of the tin. A lot of smoke also comes out of the holes of the tin, and this is what you must watch for. When the volume of smoke dies down, turn the tin over; this will ensure even charring of the cloth, and will usually cause an increase in the volume of smoke. Once smoke has ceased to come out of the holes, then the cooking process is finished. Using your tongs, pull the tin out of the fire and immediately plug the two holes with the twigs. If air gets into the tin while it is still hot, then the cloth will burn to ashes. Set the tin aside and wait ten minutes for it to cool before you open it. Problems Encountered when Charring Properly charred cloth should be a uniform black. If there is still color left in the fabric, then you did not cook it for long enough, or the tin was not hot enough. I have found that putting it back in the fire to cook some more yields an inferior product. I would suggest that you start again from scratch. The cloth should not be sooty, although the pieces right next to the holes in the tin tend to be so. The cloth, although weak, should not disintegrate, fall apart under its own weight, or be ashy. Properly charred cloth requires a gentle force to tear it, and it should not leave black marks on the fingers when handled. If this happens, then you have over-cooked the cloth, or air got into the tin either during or after cooking. When cooking, I have found that heating the tin beyond a very dull red can lead to over charring — the tin only needs to be hot enough to induce the smoke to flow from the holes. Although it sounds like it might be difficult to get it just right, it really isn't. Just wait until the smoke stops flowing from the holes, wait maybe thirty seconds longer just for luck, then plug the holes and you will get a usable product. The length of time that it takes to cook varies depending upon the amount of cloth that you have in the tin. I generally do only about a dozen pieces at a time in a small tin, and this usually only takes about five minutes to cook, but I never time it, I always go by watching the smoke. Generating Sparks To use the char cloth, you need to generate a spark. You will need a length of hard high-carbon steel. When I first started out, I used the bare steel handle of a metal file. Later, when I got a local blacksmith to make a replica fire steel for me, I got him to make it out of an old file that he had in the shop. Every other kind of steel that I tried was too soft to produce a good spark. Fortunately, old steel files are relatively easy to find. For flints, I have used flint, jasper, and locally found chert. You can obtain these materials from a rock shop or lapidary supplier. I hold the flint in one hand, and strike it a downward blow with the steel. When I used the steel file, I was able to get sparks that would work, but they were weak. Once I had a replica fire steel, I was able to generate sparks that bounced a couple of feet, and hurt when they landed on my hand —that is the kind of spark you want to strive to generate! When you can hear your sparks fizzing as they fly, you know you have achieved your goal! Creating a Flame The first time you attempt to make a fire, I suggest the following method. Place a nice nest of small kindling on the ground. Select a nice piece of char cloth for tinder, and place it on top of the "nest". Hold your flint over the cloth, and strike away! When a spark has been caught, pick up the nest of kindling, and fold it around the cloth. Hold it above the level of your face (to avoid getting smoke in your eyes) and blow gently. Within a few seconds, your bundle should burst into flames. David Thompson wrote about the 'Canadians' (voyageurs) waving their tinder in the air to get a flame. It works, but blowing is easier to control when you are a beginner. Once you have had a little practice, you can try another method which I now use all the time, and which is great if the ground is snowy or wet. Take your piece of tinder and fold it down to a compact square. Place this on top of a flat flint so that the edge of the tinder is right next to the edge that you are going to strike. Hold the flint and tinder tightly with your thumb, and strike. More often than not the tinder catches a spark on my first strike. I then put away my fire steel and flint, and take a handful of dry small kindling out of my tinderbox, place the tinder on it, fold it over, and away I go. If I smoked, I could probably light my cheroot straight from the compact, glowing tinder. Folding a piece of tinder this way is also a great way to increase its heat, which really helps when your small kindling is shavings or thin sticks that you have split from your large kindling with a knife. With a little practice, I have been able to generate a flaming pile of small kindling in as little as 20 seconds. With more practice, I have no doubt that I can improve on that time! Use of the Burning Glass Another way to get a spark onto your tinder is to use a 'burning glass'. A magnifying glass of the Sherlock Holmes variety

30
will instantly start your tinder glowing. My tinder box, which I purchased from a reproductions supplier in the United States, has a tight friction-fit lid that also contains a magnifying glass. I use it to hold my tinder, fire steel, and a little bit of small kindling for wet conditions. It looks period, and works great! (How often have you heard the phrase 'Keep your tinder dry’? Well, now you actually have to do it!) Charred cloth appears to have been the universal tinder two hundred years ago, but what did people use when cloth was too precious a commodity to burn? What did the voyageurs, traders, and Indians use? In his Narrative, David Thompson noted that 'a Canadian never neglects to have touchwood for his pipe.' Touchwood is a kind of fungus that grows on tree trunks. The voyageurs likely charred this to turn it into tinder. In fact, I suspect that just about any charred organic material will work as tinder. All of those materials that I tried so long ago in their 'raw' form would probably have worked reasonably well once charred. Use of Old Fire Remains What if you have run out of charred cloth? I have had success using the remains of the previous evening's fire by using my knife to cut down to the deep charred layer of a partly-burned log. Such a layer will catch and hold sparks, although not as easily as with charred cloth. If the sun is out and you have a burning glass, you can get it glowing hot in a few seconds. That is all there is to it! It is surprisingly easy and fast once you have had a little practice.
Tips for Fast Fires with Flint & Steel by J. Gottfred
Lighting a fire with flint and steel at public demonstrations can be a great way to kindle an interest in history. When you make a flame using two very unlikely-looking objects (a hunk of rock and a piece of metal), people's jaws drop in amazement— especially if you are fast. Demonstrations often include a flint and steel fire-lighting contest. The winner makes a flame in the shortest time. In this article, I will give the reader already familiar with flint and steel some suggestions on how to light fires faster. I will explain exactly how flint and steel generates sparks, and then give some tips on how to increase your fire-lighting speed. After reading this article, I hope readers will reach the point where lighting fires with flint and steel has become as quick and easy as using a match. Just how fast are we talking about? In fire lighting contests, my best time has been eight seconds. Usually ten to fifteen seconds is all that is needed in order to go from the first strike to a flame. When I first started learning to do this, my times were much worse — two minutes or longer was pretty typical in those days! Sparks Let's start right at the beginning— making sparks. Everyone is probably clear on the general idea: you hit a chunk of flint with a piece of steel, and sparks fly off. But what are the sparks? You can easily answer this question by conducting an experiment. Lay out a piece of newspaper, and strike a few good sparks above it with your flint and steel. Then pick up the newspaper at the edges and carefully pour the contents onto a sheet of white paper. With the naked eye, it won't look like much — just a little dirty grit and some small rock chips. If you tilt the piece of paper, some of the small gray gritty bits scoot down the page much faster than the rest. The material can easily be sorted into two distinct groups (fast & slow) this way. Have a look at the fast guys with a stamp magnifier or jeweler's loupe. Behold! They are tiny balls: gray, shiny, knobby-surfaced spheres that look a bit like they are made from pencil lead. If you hold a magnet under the paper, the little spheres will roll and cavort, piling one on top of the other in the strong magnetic field. It is clear that they are made of iron.

31
Captured Sparks These tiny spheres are formed as molten, white-hot steel flies through the air. These little globules are the sparks that ignite your tinder. (Image taken trough a microscope. Printed image 32X actual size.) When the steel struck the flint, the energy in the blow was converted to the heat of friction between the rock and the steel. This heat was so great on some small portions of the steel that small, white-hot molten blobs flew through the air making glowing sparks. Incredible as it may seem, the spheres were made as the blob of molten steel flew through the air, making a natural spherical shape. (The sphere has the smallest surface to volume ratio of any three-dimensional object). As the tiny spheres cooled, solidified, and dimmed, they disappeared from view. If you look with your magnifier at the other pile of material (the 'slow' pile), you can see all kinds of other forms. Some pieces of steel haven't melted at all; they are just shavings. Others look like comets with a round head and one or more tails attached. I have even seen little strings of pearls: little spheres each a little smaller than the next, piled one on top of the other. So now we know what the sparks are. They come from the steel, not from the flint. The flint simply acts as a knife, slicing off tiny shavings of steel. Does the rock have to be flint? The experiment suggests that the only requirement for the rock is that it must be hard enough to shave off bits of the steel, and not the other way around. Geologists have classified the hardness of rocks into a scale from one to ten, with talc being the softest (1) and diamond being the hardest (10). Talc is so soft that almost anything can scratch it, including a fingernail. Diamond is so hard that nothing but another diamond can scratch it. On this scale a fingernail has a hardness of about 2½, a penny is around 3½, a typical knife blade is around 5½, and tool steel is about 6½ (Hamilton et. al., 10). Fire steels vary in hardness from about 5½ to 6½, depending on their composition and tempering. Just because a fire steel is made out of tool grade steel or an old file does not necessarily mean that it has a hardness of 6½. The blacksmith who made the steel must re-temper its face to attain the ideal hardness. The harder the steel is, the more difficult it is for the rock to tear little chunks out of it. To tear out small chunks of progressively harder steel, more and more energy is required. At some point, the energy required to pull a bit of steel from the face of the fire steel is so great that the steel is melted in the process, and a spark results. With a softer steel, slivers of steel can be cut from the face without generating enough friction to melt the steel. Little nearly-invisible shavings go flying, but no sparks are seen. A fire steel with a hardness of 5½ will generate sparks, but they don't stay hot for long. A fire steel with a hardness of 6½ is capable of generating long lasting, hot sparks ideal for the fast ignition of your tinder. This explains why some fire steels don't seem to work very well— they may not have the right hardness. What about the hardness of the 'flint' you use? Flint, chert, jasper, and quartzite all have a hardness of about 6½. Granites are in the 6 range. Obsidian (volcanic glass) is in the 5 to 6 range. Any of these rocks are strong enough to generate sparks. Many metamorphic rocks, especially quartzite, are also hard enough to generate sparks. Although all of these materials will work, obsidian, quartzite, and granite quickly wear away and lose their sharp edges. Only the hard, non-grainy flint, chert, and jasper are strong enough to shave away the hardest steel and resist crumbling away in the process. Incidentally, chert, jasper, and flint are all different forms of the same mineral— chalcedony. They are all composed of precipitated silicon dioxide. There is nothing magical about flint; many other hard rocks will work to generate sparks. From a historical perspective, this suggests that Natives and fur traders found their own hard rocks to use to make sparks. I have never seen 'fire flints' in lists of trade goods. Flint, chert and jasper are the best rocks for fast fire lighting, and the harder fire steels are better. Preparing and Holding the Flint The idea is to use the flint like a knife to shave off tiny bits of steel. Bashing a billiard-ball shaped piece of flint is not

32
going to produce many sparks, yet some folks do just that. The idea is to break that billiard ball so that you have a sharp edge. In fact, the best thing to do is to use a nice, palm-sized flake of flint, and keep its edge sharp by knapping it now and then with a small hammerstone. If you hold the flint in one hand with the sharp edge angled upwards towards the descending steel, the flint edge will slice off a nice shower of hot sparks. The Stroke The trick to generating hot sparks is not to hit the flint hard, but to hit it fast. The energy contained in the force of the blow is a function of the weight of the fire steel multiplied by the square of the speed. For example, if you hit a flint with a steel of one unit of mass with a speed of one unit of velocity, you will get one unit of energy. If you double the weight of the steel (or 'use more strength' by striking harder with the steel) then two units of mass times the square of one unit of speed will yield twice the energy. But, if you keep the weight of the fire steel the same, and double the speed, then one unit of mass times the square of two units of speed yields four times the energy. So speed makes all the difference. It takes a while to get that flint up to speed, so don't use a short stroke with the fire steel! Tapping the flint with a twist of the wrist is not going to give you the energy you need. You must practice taking a long stroke at the flint, bending the arm at the elbow, and accelerating the steel through at least a foot of space before it contacts the flint. One good stroke should be all you need. A good stroke with a good steel against a sharp freshly-knapped flint will produce extremely hot sparks that fly through the air for at least two feet, make a fizzing sound as they fly, and feel like tiny pin-pricks when they hit the back of your hand. That's the kind of spark you want to generate every time you use your fire steel. Incidentally, I prefer fire steels that are at least half an inch thick— it keeps your knuckles away from that sharp flint edge! For the same reason, I always strike the steel against a convex flint edge, never against a concave one. Use the steel itself to guard your knuckles. Catching the Spark Once you are generating hot sparks, you need to catch them with your charred cloth. There is a simple trick that I use which almost guarantees catching a spark on the first strike. Consider again what is happening. The sharp flint is shaving off tiny blobs of molten steel— which side of the 'knife' are the savings going to come from? If you are holding the flint with the edge angled upwards towards the steel, and striking down with the steel, then the shavings are going to scoot along the top of the flint. Yet many people are under the impression that the sparks travel downwards from the point of impact. (This view makes perfect sense if you thought that the sparks were coming from the flint.) To catch the sparks, take three or four pieces of charred cloth, fold it in half, and place the cloth on top of the flint so that the many stacked edges of the cloth are right next to the sharp flint edge. Hold the char cloth onto the flint in this position with your thumb. Make sure that the edges are 'fluffed up' so that you have a large surface area to catch the sparks right next to the flint edge. One good stroke is all you need to catch a spark using this technique, and best of all, you can do it standing up, sitting down, in a canoe, or on a horse — it's much more convenient that crawling around on your hands and knees in the mud! The 'Bird's Nest' To make a fire, you need to have three things: heat, fuel, and air. The spark you caught on the charred cloth is your heat source, but you will need more fuel to make a flame. This is done by placing the charred cloth in a 'bird's nest' of small kindling (dried grass, paper strips, wood shavings, etc.) and blowing on it to create a flame. Consider what is going on here. The idea is to generate heat, so tune your bird's nest to accomplishing that goal. Many folks start out with a bird's nest of dried grass that is the size of a robin's nest, and so lose you can see lots of daylight through it. This will work, but not in championship time! To get a fast flame, start with a bird's nest about four inches

33
across, and squish it down into a tight compact mass. I use nests that are so small that I can hold them in the same hand as my flint. You need to compact the small kindling so that it keeps in the heat that your charred cloth is generating. You don't need to keep it 'open for air' because you supply the air by blowing on it like mad! Use three or four pieces of charred cloth to generate heat fast. The Fast Action Now, here is how I light a fire in championship time. Before striking:
— Inspect the flint, and knap the edge so that it is good and sharp. — Find small kindling for your bird's nest. Nice dry grass works just fine for small kindling. Shreds of paper birch
and wood shavings from your workbench are great too. — Crush the small kindling so that the air spaces between the bits of kindling are one-eighth of an inch in diameter
or less. Stuff the bird's nest into the palm of the hand that you will use to hold the flint. — Take three or four pieces of 3" x 3" charred cloth, fold them in half, and place them on the flint as described
earlier. — Hold the charred cloth with your thumb, and support the flint with your fingers. The bird's nest will stay stuck in
the palm of your hand, so you don't need to hold onto it at this time. Now it's time to strike:
— Angle the flint upwards towards the steel. — With a long, smooth motion, strike the flint with the steel. — Drop the steel and pick up the charred cloth. Do not blow on the charred cloth at this time! The spark will not go
out. — Drop the flint (but hold onto the bird's nest), and using both hands quickly fold the charred cloth one or two
more times to increase its density. Be careful not to smother the spark! — Place the charred cloth in the center of your bird's nest, and then hold the nest above your face. Cup the nest
with both hands in order to help keep in the heat. Some folks seem afraid to do this for fear getting burned. I assure you that the heat does not build up so fast that getting burned is a danger. (If for some reason the thing suddenly bursts into flame à la Hollywood, at least you have the satisfaction of having won the competition!)
The action so far should have taken you less than three seconds. From this point on things are a bit more chancy. How fast you get a flame depends upon what you have for kindling and how dry it is. Remember that it is very important to hold in the heat until you have a flame. Keep those hands cupped around the birds nest! I have found that the best way to proceed at this point is to give the dense piece of charred cloth a long, strong blast of air. Just empty your lungs into the thing. This action will turn the charred cloth into a little nugget of hot coal. If, when you pause for breath, you don't have a flame, then blow again, but perhaps somewhat more gently. However, at this stage too much wind is better than too little wind. When you pause for breath a flame will appear if things are hot enough. Remember, blowing will not make the charred cloth go out! All of this blowing is another good reason to do this standing up. You can hold the bird's nest over your head so that you don't choke on smoke when you inhale; also, you are in a great posture to let out a good blast of air. Two or three good puffs of air should be all that you need to get a flame. If blowing makes you faint, and you are not doing this in competition, there are a couple of other methods you can use. You can fold the bird's nest around the charred cloth, and then simply lift it up into the wind. If there is no wind then you can simply wave it back and forth for a while. This will usually produce a flame in a minute or so. Or you can take a tin can, punch a whole bunch of large holes in it, and attach it to a string. Pop your bird's nest into the can and whiz it around with the string for a while until it bursts into flame.

34
Conclusion When you have learned these methods for flint and steel fire starting, there is one more thing you can do to increase your speed: practice! The more you use flint and steel, the more natural and familiar flint and steel fire starting will become. Furthermore, flint and steel has two major advantages over matches: it is windproof and childproof! (It can be a bit messier, though.) Use your flint and steel to start campfires and fireplace fires year round and you will be in top form the next time some cocky voyageur challenges you to a contest!
Tinderbox Flint and steel were commonly used until the beginning of the 1800's. Industrial manufacturing of matches was started in 1832. It caused the use of flint and steel to be gradually given up.
Genuine tinder is got from tinder fungus [punk, touchwood] (Fomes fomentarius) that grows on dead birches and beech. When sparks are struck, tinder is always put on top of the flint. A straight and sharp edge of the flint is chosen and the steel is struck severely against it with a downward movement keeping the steel in vertical position.
When tinder starts to smolder, the oldest way is to put it on a dry and shredded kindling and gently blow the sparks into flame. SPARK GENERATION What You’ll Need:
Knife or steel Sharp-edged rocks Tinder Kindling
What You’ll Do: Use this method with very dry tinder material in a secluded, non-windy environment. Depending on what items are available, strike two rocks together to create a small spark close to tinder material. If a spark catches the tinder, you will see a glow. Carefully blow on it so it turns into a small flame. Fan the material until it starts to smoke and burn. If you have an item made of steel, like a knife, scrape it against various rocks until a spark appears.
Fire by Compression The Indonesian fire piston One of the strangest ways of making fire was conceived by the natives of Indonesia. This was combustion by compressed air on the same principle as the diesel engine.
To make fire in this way, a cylinder of bamboo, 12 or15 cm long, was used. One end of the bamboo was cut at the joint so that the base was closed. A piston of hardwood, wrapped at one end with tow or fiber, was pushed into the open end of the bamboo cylinder.
Added wrappings must wound about the piston until it fitted tightly against the cylinder wall. The sides of the cylinder, the fiber-wrapped piston and the tinder greased with dog fat. But I have used other fats also.

35
To start a fire with the fire piston, a small piece of char is held in an indentation at the end of the piston; it is plunged into the cylinder, then quickly removed. Several tinder’s can be used: dry moss tinder, shredded bark of juniper, the interior material of the true tinder fungus or the false tinder fungus.
When hitting the piston repeatedly with the palm of the hand, the air inside the cylinder being so highly compressed that head is generated, igniting the tinder. When a small ember should be glowing in the char, blow gently on it to spread the ember, then transfer it to a tinder bundle and blow it into flame.
The setting sun lingered two fingers high as the hunters reached their village. It had been many days since Makua and his people last tasted fresh meat and the young pig that had fallen to his arrow would be a welcomed treat. According to their tradition, the honor of igniting the roasting fire went to the successful hunter and a fire made quickly was regarded as a good omen. As Makua reached into the fire-making pouch at his waist he was well aware of the elder’s watchful eyes and his responsibility to bring good fortune to his people. Makua pulled out a few tufts of shredded bark which he briskly rolled between his palms to form a ball and he placed this next to the waiting kindling wood. Then Makua did a very peculiar thing. The hunter grasped a carved wooden cylinder that hung on a cord around his neck and with a sudden, practiced movement withdrew a smoldering, live coal from its core. This he placed in the ball of shredded bark and with three long breaths the smoking bark suddenly burst into flame. Makua smiled at his own quickness and imagined he could already taste the juicy pig. The elders nodded their approval . .
Of all the fire starting methods discovered over millennia, none are more remarkable than the fire piston. This palm-sized device, constructed completely from natural materials, is capable of instantly creating a burning ember with a single push of the piston. With practice, open flames can easily be achieved in a few second and with little more effort than lighting a match. Unlike other primitive methods, the fire piston can be used one-handed, it requires minimal physical effort and it performs reliably even in inclement weather because the live coal is created by compressed air! Incredible! A glowing ember is more lasting than an isolated flame and unlike a flame it is made stronger by moving air. When an ember is placed in tinder such as the shredded inner bark of certain trees, fungus, punk wood, etc. it expands rapidly, increases in temperature and bursts into open flame with a few breaths. With a little breeze blowing these materials can become virtually self-igniting and have sufficient heat to sustain combustion. As an outdoor tool, the fire piston represents a unique and effective fire making option. Because it creates ignition by compression, the fire piston is unaffected by water and will light dry tinder even after total submersion. With a little practice it’s even possible to ignite a fire piston with one hand and its ability to perform under less than ideal circumstances makes it a strong consideration for inclusion in any modern survival kit. In addition, everyone who sees the fire piston used is completely amazed . . . .

36
Fire by Reflection Make Fire with a Lens If it’s bright and sunny, it’s possible to use a lens to focus the heat of the sun on tinder material and start a fire. What You’ll Need:
Lens (from eyeglasses—reading glasses only, a magnifying glass, binoculars or telescope) Tinder Kindling
What You’ll Do: With plenty of dry tinder available, aim the lens at it until it starts to smoke. Have other tinder material available to keep the fire going. When the tinder begins to burn, add kindling material.
Make Fire with a Reflector What You’ll Need:
A reflector from a flashlight or headlight Tinder Kindling
What You’ll Do: Position the tinder material in or in front of the reflector for maximum absorption of the sun’s rays. With plenty of sunshine available overhead, and a little luck, the tinder material will get hot enough to catch fire.
Make Fire with Water When positioned properly, water can act as a lens and focus enough of the sun’s heat to ignite tinder. What You’ll Need:
Water Jar or bottle Tinder Kindling
What You’ll Do: Pour about two teaspoons of water into a clear jar or bottle. Tilt the jar so the water rests in a corner at the bottom and position it so the sun’s rays shine through the water onto the tinder and ignite it.

37
Chapter Six
Camp Stoves Small Group & Backpacking Stoves
Large Group Stoves
Specialty and Camp Ovens
Small Group & Backpacking Stoves Picking the Right Stove Gone are the days of the bulky camp stove and the kerosene tank. Today’s stoves are compact, lightweight, and fuel-efficient. As the demands on the backcountry puts more strain on the outdoors, and changing weather patterns make long term burning bans a reality in some parts of the country, the portable stove has become a key part of your camping equipment. Stoves can range from $20 to $200. A fair price to pay for a quality unit is from $50 to $90, although bargains can be found for less and units can be found for much more. One of the biggest effects to how efficient your stove is the type of fuel it uses. Today’s stoves use a wide variety of fuels, and many stoves are capable of burning more than one fuel type. Another consideration is the efficiency of a stove. Some stoves measure their efficiency in BTU, or British Thermal Units. The higher the BTU's, the hotter the stove is. Your gas grille at home probably creates between 25,000 and 30,000 BTU's under ideal conditions. A better gauge is boiling time. Most stove manufacturers will publish a boiling time which is the time it takes to boil a quart of water. The faster the boiling time the more efficient the stove. Size can be an issue also. If you are going into the backcountry you don't want a big heavy stove that takes a lot of fuel weighing you down. Likewise your stove needs to be big enough to feed the masses.
Performance & Efficiency
Performance
Stove performance is typically measure in boil time. Boil time is the time it takes to boil one quart of water, using the
idea fuel for the stove (for dual fuel stoves), at full throttle, at 70 F. and at sea level. Performance can range from 2-1/2 minutes all the way to ten minutes or more. A good range to look for in a stove is from 3 to 5 minutes. Remember, the cooler it is outside or the higher you go, the lower your stove will perform. A stove that can boil one quart of water quickly will have an easy time cooking larger portions of soup or stew, while a stove that takes ten minutes to boil water may not be able to get a soup for six up to an acceptable temperature.
Efficiency

38
Stove efficiency is typically measured in how long it can run at full throttle on a fuel tank. This figure has to be watched careful, a stove may have a 60-minute burn time, but it also may have a 32-ounce fuel talk making it a very inefficient stove. A good formula to look for is about 10 minutes of burning time to one ounce of fuel. For lightweight backpacking, assume 4 ounces of fuel per day to cook three quick meals. For larger groups or more elaborate meals you may need more fuel. Types and Fuels
Butane Butane is extremely popular in Europe. Butane is sold in canisters and is typically already pressurized. When the canisters are empty, they are simply thrown away. Pure Butane burns very efficiently, but doesn’t work well in cold
weather. If the temperature is going to be below 50 F you should consider other types of fuel. Also, pure butane does not burn as hot as other blended fuels. If you will be doing three-season camping in generally tepid weather, this is a good choice to consider for a stove. Butane comes in disposable tanks.
Isobutane Isobutane is a close cousin to butane. Isobutane is used to make aviation fuel, and burns more efficiently than butane. It
also takes the cold a little better, and can be used when the mercury is 40 F or above. Isobutane comes in disposable tanks. This is a good choice for tepid three season camping.
Propane Propane is a clear gas that probably runs your barbeque grill outside. It produces a hot steady flame and burns clean and efficiently. It performs moderately well in cold weather. Propane comes in disposable tanks. A good choice for three season camping, but not the best choice at higher altitudes if you are in cold conditions. If you are cooking for a large group of scouts, with a large propane tank, an extension tree and hoses you can hook up one or two Coleman stoves and a lantern.
Blended Fuel Blended fuel typically is a combination of propane, butane and/or isobutane. When blended with isobutane it burns efficiently even as the pressure in the gas canister fades. More reliable than straight butane or isobutane, like its gas
cousins its performance drops with the outside temperature, and generally shouldn’t be used below 30 F. Blended fuel comes in disposable tanks. A good choice for three season camping, but not the best choice for higher altitudes if you are in cold conditions.
White Gas Coleman has the market cornered on white gas or white fuel. Very inexpensive, available by the gallon at almost any hardware store, white gas produces a hot, clean flame. Unlike most other fuels, white gas will burn in almost any weather condition or temperature. Because it is a liquid, the stove that burns it will have to come with a pump to keep the fuel pressurized. This is an excellent fuel source. This is an ideal choice for almost any weather condition and at almost any altitude.

39
Alcohol Alcohol is safe, stable and clean burning. However you won’t find to many stoves that use alcohol as a fuel. Alcohol burns with a cool flame so it is not very efficient for cooking. Also, when alcohol burns there is no visible flame, which adds a minor risk of a fire accidentally spreading.
Gasoline This should only be used as a last resort. Gasoline is very noxious, puts out a lot of soot and does not burn efficiently. If you must cook with gasoline, get the lowest octane you can find, 84 to 86 is best and make sure it is unleaded. Cook your food with a lid on it to help prevent toxic soot from getting into your food. In extreme cold it can be hard to get a stove powered by gasoline to stay burning. Because it is a liquid, the stove that burns it will have to come with a pump to keep the fuel pressurized.
Kerosene Kerosene is the grandfather of fuel for stoves. Available all around the world, kerosene burns very hot in almost any condition. Kerosene and derivatives are used as jet fuel because of the heat they generate. Kerosene, like gasoline, is very noxious and produces a lot of soot. Because of the soot it produces, it can clog the burners of a stove pretty quick. Kerosene should only be used as a last resort. Because it is a liquid, the stove that burns it will have to come with a pump to keep the fuel pressurized. This is a fair choice for any season.
Sterno Sterno or Canned Heat is a jelly that is typically used in restaurants to keep food warm. Sterno burns very cool and offers no way to control the flame. Once it is lit, the only way to extinguish it is to put its lid back on. Some Sterno sets come with a small stovetop to put your cookware on top of. Good luck getting water to boil with Sterno. A good choice to throw into a winter survival kit, make sure you check it frequently and seal it well as Sterno will dry out over time and will be rendered useless.
Fuel Tablets Hexamine fuel tablets are a form of solid fuel in tablet form. The tablets burn smokeless, have a high energy density, do not liquefy while burning and leave no ashes. Invented in Germany, in 1936, the main component is hexamine. A number of alternative names are in use, including heat tablet and Esbit. Each tablet burns for approximately 12 to 15 minutes. Average boil time is 14 minutes.
Wood A couple of companies make stoves that use wood as a fuel. If you are going into an area where open fires are allowed and there is a ready fuel supply, this can make a good alternative. Get caught in a burning ban or four days of rain, and you will have to use an alternative stove or carry your own fuel, which with wood can get heavy. Good for lightweight backpacking when open burning is permitted and fuel is readily available.
Options and Accessories
Push Button Ignition Push Button Ignition, also called Piezo ignition lets you start your stove with a push, well maybe a couple pushes of a button. Long term these push button ignition systems can lose their ability to light, and if exposed to too much heat can

40
melt. If your stove comes with the convenience of push button ignition, always carry an alternative source to get it started up, like matches or a lighter.
Windscreen Some stoves come with an outer loop of aluminum to protect the flame from wind to keep it burning efficiently and keep the heat focused on warming your food and not being carried away in the breeze. Some stoves have a thin bar around the burner itself that protects the flame, and doesn’t do as good of a job. If your stove keeps its fuel canister under the burner, never use a windscreen that reflects the heat back down from the top, as you can overheat your fuel, damage the pump, and melt your push button ignition system.
Repair Kit Some stoves come with a repair kit that provides all the necessary parts to do minor repairs and keep your stove burning efficiently in the field. If your stove doesn’t come with one standard, you should consider buying one if the option is available.
Hard Shell Case A hard shell case helps protect your stove from the rigors of the trail and the trunk. They also can add weight to your pack.
Stuff Sack The lightweight version of the hard shell case, the stuff sack holds all of the parts of your stove together. Lighter than a hard shell case; make sure your stove is completely cooled off before stowing it back into its stuff sack.
Dual Fuel or Multi Fuel Some stoves will burn a variety of fuels. Although not many will burn say propane or white gas, a stove that can accept a variety of fuels may burn white gas, kerosene or gasoline or it may burn propane or isobutane. If your stove burns a variety of fuels it increases the range of locations you can use it based on what fuels are available.
Fuel Bottles Most stoves do not come with a fuel bottle. Bottles typically come in a variety of sizes and are measured in ounces or milliliters. Make sure the capacity of the bottles you select if your stove uses refillable bottles will meet your needs without weighing you down.
Tips and Tricks
Never cook inside a tent or an enclosed shelter. Tent material burns and melts easily meaning an accident can cause a field disaster. Also, when a stove burns it uses valuable oxygen and emits carbon monoxide and other deadly gasses. Don’t become a statistic, cook outside and never fire up a stove in a closed tent in an attempt to get warm.
Put a lid on it. When you are cooking food make sure to keep a lid on those pots. Doing so helps trap the heat and decreases cooking time.
Use a windscreen. If your stove doesn’t come with one, some heavy duty foil around the stove can serve as an adequate screen to keep the wind from throwing the heat around, or blowing your stove out.
Keep your fuel warm. If you are winter camping, keep your fuel warm. There are a number of things you can do to help this. If your fuel bottles

41
are small, you may want to keep them in a pocket of your jacket. Duct taping a hand warmer around the bottle can help.
In extreme conditions putting your bottle in water will help keep it warm. If the water is liquid, it is warmer than 32 F (OK, with altitude and mineral content that number can fluctuate, but for the purpose of this discussion…). In an emergency situation when temperatures are bitter cold, even packing it in snow is better than the ambient air. Warm fuel burns more efficiently.
Don’t place your stove on frozen ground or on the snow. As the stove runs it will melt the ground or snow around it, causing your stove to possibly tip over, dumping your meal. Put your stove on a metal or durable surface like a rock or an unused lid of your cookware set.
Bring your cookware with you when you buy your stove. When you buy your stove, bring your cookware with you. The burner of the stove, minus the tank should fit nicely in a 1-1/2 quart to 2-quart pot. Any smaller and the stove may have problems heating larger amounts of water or food, any larger and the stove is probably too big for backpacking. When traveling in the backcountry you can store your stove in the pan, this makes it easier to find when it is time to cook and the durable pan helps protect your stove.
Don’t handle fuel by your food or drink.
Be extremely careful not to get any fuel into anything you plan to eat or drink, even a small amount can be harmful.
Care and Maintenance
Make sure you know how to use your stove. Discovering your stove is difficult to prime should not happen while shivering and hungry on the trail. Learn to use your stove at home in a more controlled environment. Become familiar with its quirks. Some stoves ship with protective coatings or a thin layer of oil to protect them in shipping and transit. By running your stove prior to entering the field, you can burn off these residues. The place to find out your stove does not work is not on the trail.
Use the ideal fuel. If your stove uses multiple fuels and the manufacturer recommends one type over the other, always use the preferred fuel. Using alternative fuels can clog your burner. Using the wrong fuel and you can ruin your stove.
Check your fuel. And double check it. Murphy’s Laws of Camping dictates that full fuel containers mysteriously become empty on the trail. Make sure to double check that all of your containers are full before hitting the trail.
Do not store your stove with fuel, especially liquid fuels. When you are done with your trip make sure to remove all the fuel canisters from your gear. Leaking fuel canisters can ruin your pack and other nylon materials and will also give you a false sense of security that you have, “full bottles,” in your pack.
Do not take full or empty fuel bottles on a plane, bus or train, and declare them when on a ferry. Before transporting fuel bottles on passenger aircraft, safely empty all fuel, wash inside with soapy water, rinse thoroughly, air dry, and stow bottle uncapped. Carrying flammable fuel on passenger aircraft in carry-on or checked luggage is forbidden. If you are going on a ferry, make sure to declare that you have fuel canisters so the proper precautions are taken.
Don’t smoke around your stove. I know this really shouldn’t go without saying. All of these fuels are volatile stuff. Smoking around your stove, especially when you are trying to light it is only asking for trouble.

42
Get a repair kit, and become familiar with how to use it for your stove. Make sure to clean your stove after each adventure. A properly cared for stove can literally give decades of service to you. Never operate a broken stove as this is only asking for trouble or even serious injury.
Dispose of your empty fuel canisters properly. Don’t leave empty fuel canisters behind. Do not put them in a fire and do not bury them. Even the slopes of Mount Everest are covered in the litter of spent oxygen and fuel bottles to the point that serious restrictions are under consideration. If there is a recycling program available, then try and recycle your bottles, if not dispose of them properly and per the instructions on the bottle.
Remember Leave No Trace ethics, pack it in, pack it out.
White Gas Stoves
Lighting a white-gas stove. Pump the fuel bottle until you can feel firm resistance when you push the pump in-usually after about twenty strokes when the bottle is full.
1) The emptier the bottle, the more pumping is required. It's easiest to do this before you attach the fuel bottle to the stove. When the fuel bottle has been pressurized, open the valve a little until a teaspoon or so of fuel has squirted out and run down into the priming cup or onto the priming wick or pad.
2) With stoves without a pump, dribble fuel into the priming cup from a fuel bottle with a pouring spout or an eyedropper filled from the fuel bottle. Light the priming fuel and wait until it has almost burned out.
3) Just before it does so open the valve; the stove should roar into life, burning with a blue flame. If the priming flame goes out before you've opened the valve, use a lighter or a match; do this quickly, before the stove cools down. If the stove spurts yellow flames, turn it off; you haven't primed if enough. Wait for the yellow flames to die down, then turn it on again. If it still doesn't light properly, turn it off, wait for it to cool, and then prime it again. Once the stove is lit, let it burn for a minute or so at a low flame and then turn it on full
4) Don't turn the valve more limes than recommended in the stove’s instructions or you could damage the connection with the bottle. To maintain full power, pump a few strokes every so often.
5) If you want a simmering flame, use the stove simmer control (if it has one), leaving the main valve on full. If there is only one control, turn it down to simmer and don't pump the stove again as it will simmer better with low pressure in the fuel bottle. There will be a short delay between turning a value on the pump housing and the flame changing. Controls on the burner affect the flame immediately.

43
Mountain Safety Research (MSR) WhisperLite Backpacking Stove How do I travel/fly with my stove? Each airline has different rules regarding the transportation of camping stoves. Please ask your airline about their regulations. Please note: Carrying flammable fuel on passenger aircraft in carry-on or checked luggage is forbidden. Before transporting fuel bottles on passenger aircraft, safely empty all fuel, wash inside with soapy water, rinse thoroughly, air dry, and stow bottle uncapped. What pumps are compatible with what stoves? MSR’s stove pumps are compatible with all MSR liquid fuel stoves, except the DragonFly stove. Cleaning the Fuel line for the WhisperLite, WhisperLite Internationale & XGK Cleaning the Fuel line for the WhisperLite, WhisperLite Internationale & XGK:
Remove the fuel line from the stove by unscrewing the priming cup, then pushing down on the generator tube to remove it from the mixer tube (XGK model stove owners can skip this step).
Remove the jet from the fuel line and clean it with the jet cleaning wire or shaker needle.
Remove the cable from the fuel line, wipe it off, then reinsert it.
Run the cable back and forth in short strokes, using it like a pipe cleaner to scour the inside of the fuel line - pushing it back and forth ten to twenty times.
Concentrate your strokes in the area of the generator tube.
This is where most of the clogging takes place.
Pull the cable out and wipe it off.
Repeat this procedure one more time, then reinsert the cable.
Connect the fuel line to your pressurized pump and bottle and open the control valve to allow about a quarter of a cup of fuel to flush any debris out of the fuel line.
COMMON SENSE PRECAUTION: When flushing keep away from heat, sparks and flame. Reinsert jet (and shaker jet needle for those with the shaker jet stove), then reinstall fuel line to the body of the stove. Burn test the stove. If clogging persists, repeat the flushing process with the jet off. See the Whisperlite/Whisperlite 600 schematic drawing. Inadequate fuel bottle pressure could be another reason your stove is not lighting or priming. To remedy this, remove the pump plunger assembly from the pump. At the end of it is a Leather Pump Cup. Moisten it with MSR Pump Cup Oil or mineral oil (available at any hardware or drug store). If necessary, reshape it to fit snugly against the inner wall of the pump. Then reinsert it into the pump. Why won't my stove light / prime? There are several reasons your stove may not be priming or lighting. The most common one is that the jet is clogged. First try cleaning your jet. Shaker jet stove owners simply shake your stove vigorously up and down. Non shaker jet stove owners use the jet cleaning wire that was provided with your stove to poke out any debris that may be blocking the passage of fuel. If unsuccessful, remove jet and clean, then hold the jet up and look through hole to make sure it is clear, crisp, and round. If that doesn't resolve the problem, you will need to clean the fuel line. My stove lights, but has a very weak flame. There are several reasons your stove may have a weak flame. The most common one is that the jet and fuel line are clogged.
First try cleaning your jet. "Shaker Jet" stove owners simply shake your stove vigorously up and down.
Non-"shaker-jet" owners use the jet cleaning wire that was provided with your stove to poke out any debris that may be blocking the passage of fuel.
If that doesn't resolve the problem, you will need to clean the fuel line. See Cleaning the Fuel line for the WhisperLite, WhisperLite Internationale & XGK above Can I upgrade my old MSR Stove to the new Shaker Jet model?

44
It depends on which MSR stove you own. The WhisperLite™ can be upgraded by simply installing the new Shaker Jet fuel line (part #419423). This can be ordered from your local MSR dealer or from MSR directly. Can I upgrade my WhisperLite to a WhisperLite Internationale? No, the larger diameter generator tube on a WhisperLite Internationale will not fit through the slot on the WhisperLite’s flame reflector. I can't find white gas anywhere; is Coleman Fuel the same thing? Yes, Coleman fuel is a white gas. MSR also makes a high quality white gas that will reduce clogging (MSR SuperFuel. Camplite also makes white gas. Both MSR SuperFuel™ and Camplite are available at your local outdoor stores. Where do I get fuels in foreign countries and what other types of fuels can I use? Camping fuel is sold in a variety of places worldwide. If you can’t find fuel in an outdoor store, try a gas station or hardware store. Liquid Fuel Stoves - If you can’t find white gas, you may use unleaded auto fuel in your white gas-only stove. It will, however, require frequent cleanings. If you have a multi-fuel stove, like an XGK, DragonFly or WhisperLite Internationale, try kerosene. Just remember to use the “k” jet included with your stove. Can you simmer with an MSR Stove? There are two effective ways to simmer with your MSR stove. The most efficient way is to run the stove with extremely low pressure in the fuel bottle. One pump stroke in a half full bottle is optimal. Another way is to put a "burner plate" on top of the stove. This will diffuse the heat before it hits the pot. You can purchase one at your local outdoor store or you can use the metal lid from a coffee can (the big ones). Can I leave my pump in the fuel bottle? Yes, there is no problem with leaving the pump in the bottle. However, we recommend that the pressure is released when not in use. Do this by slowly unscrewing the pump, away from open flames, while holding the bottle upright. Why does my cable become stuck and how can I remove it? In general, cables become stuck due to a lack of Fuel Line cleaning and maintenance. Diminished stove performance also results from lack of maintenance. Therefore, it is important to perform routine maintenance on your stove. Stuck cables can be removed by performing the following procedure:
First, begin by familiarizing yourself with different parts of the Fuel Line, which are described in your stove instructions.
Following the stove instructions, remove the Fuel Line from the Burner Assembly.
Remove the Jet by using the Jet and Cable Tool; turn Jet counterclockwise to loosen and remove.
Using a common lubricant spray, direct the “straw” inside the Elbow and spray a small amount, such that the lubricant is directed inside the Fuel Line.
Note: Orienting the Fuel Line vertically will facilitate better flow of lubricant into the Fuel Line.
Let the Fuel Line soak for a short time; after which, refer to your stove instructions for Cleaning the Jet and Fuel Line.
Pliers may have to be used to remove a cable that cannot be pulled out with the Jet and Cable Tool, regardless of using a lubricant.
If pliers are used, grip the weld at the tip of the cable only. Do not grip the cable itself as this might result in fraying.
A frayed cable can damage the Fuel Tube O-ring when connecting the stove with the pump; damaged O-rings can result in a dangerous fuel leaks, fire and personal injury.
How to remove a stuck jet The following tip applies to both models of the WhisperLite stove. Stuck Jets can be removed by performing the following procedure:
First, begin by familiarizing yourself with the Mixer Tube and different parts of the Fuel Line, these are described in your stove instructions.
Following the stove instructions, remove the Fuel Line from the Burner Assembly.

45
Once the Fuel Line is removed and free from the Legs, turn the Burner Assembly “upside-down,” placing it on a bench is preferable, with the slotted end of the Mixer Tube facing up.
Then, orient the Fuel Line so that the Jet is also facing up.
Re-insert the Elbow into the Mixer Tube, but the “wrong way,” with the Jet exposed rather than hidden, in other words the Jet should be “sticking out” so that it can be accessed with the Jet and Cable Tool.
While supporting the Fuel Line and Burner Assembly, use the Jet and Cable Tool to unscrew the Jet, turning it in a counterclockwise fashion.
For Jets that are severely stuck, a screwdriver may be placed through the “air hole” in the side of the Mixer Tube so that additional leverage is provided.
Note: This configuration provides support for the Fuel Line so that it does not bend while the stuck Jet is being unscrewed. What do I use to lubricate the fuel line before putting it into the pump? We recommend MSR Pump Cup Oil (which is the same as Mineral Oil). A tube of Pump Cup Oil is currently included with every MSR stove. If you have an older model stove that did not come with Pump Cup Oil, you can purchase a tube of it at your local MSR dealer. You can also use saliva or any NON-petroleum based lubricant. It is important to lubricate the fuel line in order to protect the tube O-ring. How do I avoid the black soot that deposits on the bottom of my stove after I prime it? Avoid the black soot by priming with alcohol or a priming paste (available at most camping stores). NOTE: Alcohol will NOT generate enough heat to prime your stove if you are burning kerosene or jet fuel. For these fuels prime your stove as described in the instructions. Can I burn alcohol in my MSR Stove? No, MSR stoves will not burn alcohol, and alcohol will damage MSR Fuel Bottles. How do I get parts for obsolete stoves? Our in-house repair facility stocks a wide variety of parts for current and older model stoves. You can contact the product service center Monday through Friday from 8 a.m. to 4 p.m. PST at 800.531.9531 or 206.505.9500. Can I send my stove in to be serviced? Yes. MSR's Product Service Department can perform services for a modest price. Please check the MSRgear.com website for product service pricing information and mailing instructions.
Large Group Stoves Coleman EvenTemp™ InstaStart™ 3-Burner Stove - 5444 Series - Model No.2000004960 - $118.99 You’ll have consistent heat under one large dish or independently-adjustable heat under three smaller ones when you take the Coleman® Even-Temp™ Stove on your next outdoor adventure. Three stainless steel burners are specially-designed to evenly distribute heat all over—eliminating the need to make burgers, steaks and pancakes differently, depending where they are on the grill or skillet. The InstaStart™ Matchless Lighting System ignites with just the push of a button for up to 28,000 BTUs of power. PerfectHeat™ Technology gets the temperatures just right, WindBlock™ Shields keep the wind from blowing the flames around and the PerfectFlow™ Pressure Control System keeps the heat steady on each of the high-performance burners. When you’re done, the removable copper-nickel-chrome-plated grate makes

46
cleaning quick and easy. An accessory griddle is available separately.
Even-Temp™ three-burner design for even cooking throughout
Make up to three dishes at once
Three fully-adjustable, independently-controlled high-performance burners for up to 28,000 BTUs of power
Large cooking area for space to work comfortably
Easy-to-use, easy-to-clean setup makes camp cooking simple and quick
Removable heavy-duty copper-nickel-chrome-plated grates for easy cleaning
Accessible cooktop makes wiping it down quick
InstaStart™ Push-Button Ignition for matchless lighting
PerfectFlow™ System for consistent fuel, no matter the conditions • PerfectHeat™ Technology gets the temperatures just right
WindBlock™ Shields keep the wind from blowing the flames around
Perfect for camping, tailgating, hunting and emergency outdoor cooking
Dimensions: 24 in. x 18.5 in. x 5.5 in.
EvenTemp™ Stove Full Size Griddle - Model No.2000004994 - $34.99 Get more meals out of your Coleman® EvenTemp™ Stove by adding a full-size
Coleman® EvenTemp™ Griddle. Cook up all sorts of meals, from pancakes to
fajitas, on 285 sq. in. (724 sq. cm) of non-stick cooking area. The heavy-duty,
cast-aluminum griddle is easy to clean while you’re cooking with a removable
grease cup and after the meal with an easy-wipe surface. The griddle fits
Coleman® stove models 5444, 2000000502, 2000000503, 2000002028 and
2000004960.
Designed exclusively for the Coleman® EvenTemp™ stove
Spacious 285 sq. in. (724 sq. cm) cooking surface
Heavy duty cast aluminum with non-stick surface
Grease cup can be removed and emptied while griddle is operating
EVENTEMP™ STOVE CARRY CASE - Model No.2000006237 - $27.99 Add even more portability to your Coleman EvenTemp™ Stove when you pack it in a durable Coleman® EvenTemp™ Stove Carry Case. This heavy-duty vinyl case protects the stove while you’re storing it and transporting it. The bag’s strong, easy-carry handles and durable zipper secure the stove during transport, and two storage pouches keep standard 16.4-oz. (4.94 g) propane cylinders close. The carry case fits most Coleman® EvenTemp™ Stove models
Designed exclusively for the Coleman® EvenTemp™ stove
Durable, zippered vinyl case protects stove during transport and storage
Two drawstring pouches hold propane cylinders
Fits the following Coleman® stove models (sold separately): Even Temp™ series stoves
Dimensions: 28 in. x 16 in. x 4 in.
5-ft High-Pressure Propane Hose & Adapter - Model No.2000005062 - $13.99 Use your Coleman stoves and lanterns almost 20 times longer without refueling with
help from the Coleman 5 Ft. High-Pressure Propane Hose and Adapter. This accessory
is all you need to hook a 20-lb. tank to your camp stove or lantern for high-pressure
fuel.
Connects appliance to refillable 20 lb. propane cylinder (not included)
Hand-tighten counterclockwise

47
Camp Chef Explorer Stove Regular Price: $134.99 Sale Price: $99.99 Item: IK-519734
Two 30,000-BTU burners All-steel range Three-sided steel screen blocks drafts
Ready for the camp or cabin, this reliable, no-frills stove features two 30,000-BTU commercial-grade cast burners. The all-steel range features sturdy grates built to support hefty cast-iron cookware. It's surrounded by a three-sided steel screen to block drafts and grease splatter. The heavy-duty steel legs slide off for transportation and storage. Cooks up to 15 hours on a 20-lb. propane cylinder (not included). Includes hose and regulator. Dimensions: 29"H x 32-5/8"W x 14"D (with legs attached). Weight: 40 lbs.
Accessories Camp Chef 20-qt. Hot Water Pot Regular Price: $55.99 Item: IK-519839 Spigot-style valve makes dispensing hot water or beverages easy and spill-free. Use it to dispense hot chocolate at tailgate or holiday parties. Or make camp chores easier by using it as a wash station for food prep and camp cleanup. Heavy-duty steel. Coated with enamel inside and out and around lid.
Camp Chef Super Griddle - Double 2-Burner Regular Price: $119.99 Sale Price: $109.99 Item: IK-514261 Prepare a great breakfast of bacon, eggs and fried potatoes with this quality griddle. Fits over two burners on a Pro 60 and the Explorer Stove. Dimensions: 14" x 32".
Care and Cleaning of Liquid Fuel Lanterns and Stoves With a liquid fuel lantern, transfer as much fuel as possible out of the fuel tank and back into the fuel can to prevent a lacquer buildup on the tank's fuel tube. Keep in mind that storing a liquid fuel appliance with fuel in the tank can eventually cause a buildup on the fuel tube, which restricts fuel flow to the generator and burner. When it's time to take out your lantern, remember to oil the pump cup on the tank's pump plunger at least twice a year with a light machine oil. This allows the cup to seal against the inside of the pump barrel and insures the pump will work smoothly and push air into the tank properly. Helpful hints related to Liquid Fuel Lanterns and Stoves Why does my lantern only stay lit a few seconds before going out or make a hissing sound but not light? If a liquid fuel lantern lights for only a few seconds then goes out, it could be one of a few problems.

48
If the lantern lights for a few seconds then goes out and there is no sound of air passing through the generator, there is either no pressure in the fuel tank or the generator is clogged. Make sure the tank is pumped up at least 35 times before lighting the lantern. If there is still no fuel flow, try cleaning the tip of the generator. If you lantern has a tip-cleaning lever, turn it clockwise three or four times and leave it in the down position. If your lantern does not have a tip cleaning lever, turn the knob from off to on three or four times. Both of these actions run a small needle through the hole in the tip of the generator and should remove any small blockage. If you still get no fuel flow to the mantles, the generator will need to be replaced.
If the lantern lights for a few seconds then goes out but you still hear air passing through the generator, there is either not enough fuel in the tank or the fuel and air tube in the tank has a lacquer build-up that is preventing the fuel from reaching the generator. Make sure the fuel tank is three-quarters full before lighting the lantern. A low fuel level can make it difficult for the fuel and air tube to draw fuel properly. If there is plenty of fuel in the tank and the lantern still will not light and continue to burn, the fuel and air tube may have a lacquer build-up preventing fuel to be drawn from the tank.
If a lantern is stored for long periods with fuel in the tank, it can cause a coating of lacquer to build up on the fuel and air tube. The tube has a small hole at the bottom that draws in the fuel. If it is obstructed, the fuel will pass into the generator and mantles in surges. You can sometimes clean the fuel and air tube by pouring out the fuel in the tank then filling it about halfway with denatured alcohol. Do not use rubbing alcohol as it has water in it and do not pump up the tank or open the valve while the alcohol is in the tank. Let the lantern sit for 24 hours then shake the tank and pour out the alcohol. Rinse the tank with clean Coleman Fuel and refill with fresh fuel. If the lantern's light still pulsates, you will need to replace the fuel and air tube.
We suggest that if you are storing your lantern for more than two weeks, pour the fuel in the tank back into the fuel can. This will eliminate the build-up of lacquer on the fuel and air tube.
Why can't I pump pressure into the tank of my stove? The pump plunger must be turned one full turn counter-clockwise before pumping up the stove. There is an air stem inside the pump plunger that seals the pump closed during use and guides the plunger straight up and down inside the pump barrel. The air stem must be partially unscrewed from the check valve at the base of the pump barrel before any air will pass into the tank.
You must also be sure that the pump cup on the end of the pump plunger is lubricated so that it seals against the sides of the barrel and pushes air into the tank.
At the beginning of every season it is a good idea to remove the pump plunger from the tank and oil the pump cup. If the cup is leather, take your thumb and spread it out, then soak it in a good leather oil for a few minutes. It the cup is neoprene, oil it with a light machine oil such as 3 in 1 or a light motor oil.
When you re-insert the cup into the pump barrel, make sure the outside edge of the cup is not creased or deformed.
Care and Cleaning of Propane Stoves The benefits of regular cleanings include better fuel efficiency, flame control and no rust or corrosion. Although there isn't a set schedule for cleaning your stove, you should clean it whenever it is dirty or after a boil-over that causes buildup in the burners. Annual cleanings are recommended before storing your stove at the end of camping season. Under most conditions, stoves can be wiped out with warm water and dishwashing soap or baking soda and water, then dried before storing. For a deeper cleaning, here are a few suggestions:
If there has been a boil-over, remove the screw from the center of each burner and lift off the burner rings and bowl to check the manifold for fluid or food debris. If there is a build-up, clean it with dishwashing soap and warm water before rinsing with clean water.
If the stove has a massive amount of grease and dirt build-up inside the case, on the grill or burners, you can take the stove to a car wash and use a high-pressure hose on it. Don't use any type of tire, oven or engine cleaner because it can damage the paint on the inside of the case and the metal of the grate and manifold.

49
If a stove has been cleaned with any type of water hose, turn the stove upside down to ensure all the water is removed from inside the manifold. Any water left inside the manifold can cause it to rust and disturb the flow of fuel to the burner, preventing the stove from burning properly.
NOTE: It is strongly suggest you do not use oven cleaner. Oven cleaner can remove the paint and aluminized coating from the metal of the stove and discolor or rust the steel. After cleaning, proper storage of your propane stove is also important.
Put it into a plastic bag, sealing with a twist tie to prevent spiders or other insects from crawling in the unit, which can block the fuel and airflow.
Maintenance
1. Clean entire outside with plastic scouring pad and scouring powder or other degreaser. The object is to remove all the dirt and grease that builds up on the inside and outside of the stove.
2. Clean inside hood and wings with plastic scouring pad and scouring powder or other degreaser. 3. Remove inside grill and clean the reflective splash guard as above.
4. Inspect the hoses and piping for cuts, gouges, dents and rusting and replace, if necessary. Helpful hints related to Propane Stoves A 20-pound propane tank is the standard tank size for most backyard grills and Troop camp stoves.
Use your propane stoves and lanterns almost 20 times longer without refueling with the 5 or 8 Ft. High-Pressure Propane Hose and Adapter. This accessory is all you need to hook a 20-lb. tank to your camp stove or lantern for high-pressure fuel.
Add a Propane Tee to expand to two outlets or a Propane Tree to expand to three outlets.
Shut off your propane tanks when in use. You may have a small leak or loose fitting,
Make a Camp stove grill reinforcements. Heating large pots full of water tends to warp the grill on our Coleman stoves. One solution is:
1. Bend a piece of ½” x 38 inch rebar in the middle into a rounded “V” that will support two legs on the back and the bend to the front of the stove.
2. Place across stove over the grill rails for support.
3. This prevents the grill from warping when hot and heavy pots are used.
Use a Milk Crate to store your Propane Tank. A great way to transport and store a 20 lbs. propane tank is a 12 x 12 inch plastic milk crate. It keeps the tank portable but not rolling around during transport or storage and it packs better. Additionally, we store our hand tools - large crescent, flat blade and Phillips screwdrivers, slip lock pliers and small mallet in the corners.
Make a plastic table hot pad. A hot stove will melt into one of the popular new plastic tables. Cut a piece of plywood or sheet metal to the size of the plastic table before you use it with your stove.
Care and maintenance of 20 lbs. Propane Tanks Propane (also called LPG – Liquefied Petroleum Gas – or LP gas) is a widely used fuel. To make propane easier to detect in the event of a leak or spill, a chemical compound is added to give it a distinctive smell, like rotten eggs or boiling cabbage. How to Check the Level of Propane without a gauge Firing up the grill can be a letdown when the propane tank is empty and the grill won't start. Worse yet is when you are halfway through cooking your meal and the gas runs out. Learning to measure the level of propane left in your tank is something most avid grillers find themselves doing at some point. Knowing your tank's propane level will help make sure your cooking experience is a success. How to safely transport Propane Tanks to and from the campsite Whether you are packing a propane stove to go camping or need to pick up more gas for the grill, it is sometimes necessary to transport propane in a car or truck. Even an empty tank may still contain enough propane to cause a

50
problem if the tank leaks, especially in an enclosed area such as an automobile. Transporting a propane tank safely is not difficult but it is important. It takes only a few extra seconds to follow propane transportation safety guidelines. When transporting a propane cylinder in a vehicle:
Ensure the cylinder valve is tightly closed.
Install the threaded plug or cap on the valve outlet of the tank.
Always transport and store propane cylinders in an upright, vertical position in order that the safety release valve will function properly. (We use a milk crate - the cylinder just fits and it keeps it stable.)
Secure the tank in an upright, vertical position in the rear passenger compartment of your vehicle.
Open all vehicle windows for ventilation and REFRAIN FROM SMOKING during transportation.
If transporting a propane cylinder in the trunk of a vehicle, ensure that it’s well secured in an upright, vertical position and the trunk lid is left open for ventilation until your return home.
If you are taking your tank to be refilled, make sure it's free of rust, leaks, and other damage.
Never refill a propane tank yourself; and dispose of one only in hazmat collection sites.
Inspect the propane cylinder for cuts, gouges, dents and rusting and replace, if necessary.
Check hose connections for leaks by brushing a 50% liquid dish soap and 50% water solution onto all hose connections and valves. Look for bubbles everywhere you applied the water and soap. Any bubbling where you applied the mix indicates propane gas is escaping. Turn off the valve, then repair or replace the hoses and fittings. Do not use the propane-fueled equipment until the leaks are corrected.
Never use matches or lighters to check for leaks.
Never store propane tanks indoors or near any heat source. Proper disposal of propane tanks To properly dispose of an EMPTY 16.4 oz. propane cylinder:
1. Take the EMPTY cylinder outdoors away from any open flame or ignition source as they can ignite leaking gas.
2. Attach the EMPTY cylinder to an appliance.
3. In an outdoor, well-ventilated area, open the control valve on the appliance and light the burner(s).
4. Operate the appliance until the flame completely extinguishes.
5. Turn the appliance control valve off and let appliance cool.
6. Detach the EMPTY cylinder.
7. Dispose of the EMPTY cylinder in an OUTDOOR trash container for the next normal trash collection.
8. If the cylinders are properly "burned off" with an appliance, less than 1 gram of fuel remains, meaning the cylinders can be discarded with household trash.
Specialty and Camp Ovens
How to Use a Chimney Starter A chimney starter is a metal cylinder with a charcoal grate mounted inside.
Unlit charcoal is placed into the top of the cylinder and newspaper is placed
into the bottom, under the grate. When the newspaper is lit, it burns and lights
the charcoal above. The "chimney effect" causes the charcoal to light from the
bottom all the way up to the top.
No matter the make of the starter, the process is the same regardless of how
much charcoal you're lighting or whether you're using briquettes or lump
charcoal.
Chimney Starter Safety Tips
Wear heat-resistant gloves whenever handling a hot chimney starter.

51
Remember that a chimney will remain hot for a while even after the charcoal has been poured out.
Never place a chimney starter on or near flammable materials like a wooden deck or dry grass.
Important: Never light a chimney starter directly on a concrete surface. Heat from the chimney may cause the concrete
to explode, damaging the concrete surface and possibly causing physical injury.
Safe locations to light a chimney include:
On the charcoal grate of the grill you are lighting
On the grate of another grill
On fire-safe bricks placed on your deck or patio
On a terra cotta flower pot saucer without a drain hole
Lighting a Chimney Starter using Newspaper
1. Using a double-wide sheet of newspaper, roll loosely on the diagonal from one corner to the other. Bring the ends together to form a donut that fits inside the chimney starter.
2. Repeat with a second sheet of newspaper. 3. Stick the two newspaper donuts in the bottom of the chimney. Note that this leaves a hole in the center for air
to flow up through the newspaper for faster lighting. 4. Turn the chimney right-side up, place it on a fire-safe surface, and fill it with the amount of charcoal you want to
light. 5. Light the newspaper in several locations. You'll begin to see smoke coming out the top of the chimney starter. 6. After the newspaper has burned completely, wait 1-2 minutes, then hold your hand over the chimney...you
should feel the heat of the coals starting to light. 7. It will take 10-20 minutes for the coals to light, depending on wind conditions, how much charcoal is in the
chimney, and the type of charcoal being used. 8. The charcoal is ready when you see orange color deep inside the chimney starter, flames licking at the charcoal
at the top of the chimney, and gray ash just starting to form on some of the charcoal at the top. 9. If you wait for all of the charcoal at the top of the chimney to be fully ashed-over, much of the charcoal in the
bottom of the chimney will be spent, so go ahead and dump the charcoal into your cooker when most of the edges are ash colored.
Lighting Small Amounts of Charcoal
Sometimes you need to light just a few briquettes. Here are three ways to light small amounts of charcoal more
effectively:
Turn the chimney starter upside down and place the charcoal in the bottom—which is now the top.
Bank all the briquettes against one side of the chimney.
Put the briquettes inside a small bottomless coffee can.
Use any of these methods and light as usual from below:
Applying Vegetable Oil to the Newspaper
A few sheets of paper towel sprayed with non-stick cooking spray will get your charcoal started, and since it burns more completely than newspaper, it makes less of a mess.
Some folks light chimneys over the gas side burner on a gas grill or over a turkey deep-fryer burner. Be careful when using a gas side burner...if you leave the chimney on too long your side burner may experience a meltdown!

52
The Cardboard Box Oven A cardboard box will make an oven -- and it works just as well as your oven at home! There are different ways to make a
cardboard box oven.
1. The open top Box Oven Cut off the flaps so that the box has four straight sides and bottom. The bottom of the box will be the top of the oven.
Cover the box inside COMPLETELY with foil, placing the shiny side out.
To use the oven, place the pan with food to be baked on a footed grill over the lit charcoal briquettes. The grill should be
raised about ten inches above the charcoal. Set the cardboard oven over the food and charcoal. Prop up one end of the
oven with a pebble to provide the air charcoal needs to burn - or cut air vents along the lower edge of the oven.
2. The copy paper Box Oven The cardboard boxes that hold reams of paper, 10 reams of 8 1/2 by 11 inch paper, or 10 reams of 8 1/2 by 14 inch
paper, will make very nice box ovens. Line the inside of the box and lid with aluminum foil. Use a sponge to dab some
Elmer's glue around the inside and cover to hold the foil in place. Make a couple holes in the cover to let the combustion
gases out, and make a few holes around the sides near the bottom, to let oxygen in.
Make a tray to hold the charcoal using one or two metal pie plates. You can either make feet for a single pie plate using
nuts and bolts, or bolt two pie plates together bottom to bottom. Cut a couple coat hangers to make a rack to hold up
the cooking pan. Poke the straight pieces of coat hanger through once side, and into the other. Two pieces will usually
do fine.
Put several lit briquettes on the pie pan, put your cooking pan on the rack, and place the cover on top. The first time you
use this box oven, check it a few times to make sure that enough oxygen is getting in, and enough gases are escaping, to
keep the charcoal burning.
3. Box oven without the box! Procedure:
1. Pound four one inch + diameter by about 1.5 ft. length sticks into the ground in the shape of a square about 1.5
ft. per side and wrap them with heavy duty foil.
2. Arrange aluminum foil around stakes and drape over top and crimp to hold in place. Also line floor with foil.
3. Drive three or four stakes into the ground through the foil floor to hold up the baking dish.
It looked kind of ugly but worked pretty well for baking the biscuits. If you make it this way, you don't have to take up
room with a bulky box. Anyway, that's what the person doing the demo said."
4. Yet another description of a Box Oven You need:
1. One large box (whiskey or any double corrugated box that will fit a cake pan or cookie sheet with about 1" all
around will do.) Note: This does not have to have a lid or top.
2. Lots of large high quality, heavy duty, tin foil (commercial time, use Reynolds wrap)
3. Four small TIN juice cans
4. A 9x13 cake pan or small cookie sheet
5. One #10 can, open at both ends and vented at bottom for charcoal chimney.
6. One small friendly stone to vent bottom

53
First cover the inside of box with two layers of foil. Be sure you have no box showing anywhere. You can tape it down on
the OUTSIDE. Place a large sheet of foil on a level, not burnable, piece of ground. Place the charcoal chimney on the foil
and place a fire starter and whole charcoals (one for every 40 degrees of temperature plus one or two for cold, wet, or
wind) Light the chimney and wait about 20 min for charcoal to be ready. Pull off chimney and spread out charcoal to fit
under pan used. Place four small juice cans to support cake pan and lower box oven over all. Vent on leeward (that’s
away from the wind for non-mariners) side with small stone. Cook for amount of time called for in recipe. If cooking for
much more than 30 minutes replenish charcoal.
Note: Be sure and lift box straight up or you will "dump" the heat. No peeking allowed!! Anything you can cook in an
oven at home can be done in a box though I prefer things that can be done in 30 min or so. Good Eating!"
For all box ovens:
Control the baking temperature of the oven by the number of charcoal briquettes used. Each briquette supplies 40
degrees of heat (a 360 degree temperature will take 9 briquettes).
Experiment! Build an oven to fit your pans - or your menu: Bake bread, brownies, roast chicken, pizza or a coffee cake.
Construct a removable oven top or oven door. Punch holes on opposite sides of the oven and run coat hanger wire
through to make a grill to hold baking pans. Try the oven over the coals of a campfire.
5. How to Make a Cardboard Box Oven Take a sturdy large box. Not too big. A box that was used to ship a 14-15" Computer Monitor is an excellent size.
Completely line the inside of the box with aluminum foil (reflective side out).
Seal the top of the box closed with duct tape. Cut a hole in the front (door to pass baking trays in and out of. Put steel
rods or hangers through the middle of the box (forming a rack to place your baking trays). Place an inverted pie tin in the
bottom and then another pie tin (right side up) on top.
This is where your charcoal goes. It is important to have the inverted pie tin in order to insulate the bottom of the box
from the charcoal. Place 1-2 pieces of charcoal in box per 100 (Fahrenheit) degrees of cooking temp. It is easy and
simple. The only key here is make sure that there is absolutely NO exposed card board inside your box. This all must be
covered with aluminum foil, otherwise your box will ignite.
We used two ovens, because we were making 2 cakes. Here is our material list:
• Standard photocopier paper box (Xerox), with a slip-on lid.
• 6 pieces of coat hanger wire, about 13-14" long
• Aluminum foil to line.
• 9" X 12" foil cake pan.
• 9 charcoal briquettes.
The box was completely lined with aluminum foil. We used 18" heavy duty foil for this. Before the boxes were lined, we
punctured the sides for the grill wires, at about a third of the way down from the top. Leave about 2-3" between wires.
The 18" foil allowed us to run one piece of foil down one side, across the bottom, and up the other, with a little overlap
on each side. We did the same, end to end. Then, we placed a piece of foil about twice the size of the box doubled over
in the bottom.
The wires were then inserted through the pre-punched holes, then bent over at each end. Then we lined the lid. That
takes an end to end pass, then a side to side pass also. At this point, you cut a ventilation hole at the bottom-middle of
each of the four sides. Our holes were cut triangular and about 1.5" high and across the base. Pour the prepared cake

54
mix into the cake pans. Using tongs, place 9 charcoal briquettes, spaced, in the bottom of the box-oven. Put the pan on
the grill rack, and level the box if necessary.
Now cover the box and wait 40-50 minutes for the cake to bake.
We did not make any special provisions to keep the coal from the bottom of the box, as there was already 4 layers of foil
on the bottom.
One final note: The amount of heat generated by a charcoal briquette has been quoted as 30° F. My understanding, for
Dutch Oven work, is 25° F. For the box oven, we figured 50° F. The difference is that for a Dutch Oven, the coals are out
in the air, which takes some of the heat. When the coals are enclosed in an oven, not as much heat is lost.
6. Here's another method -- for use on a plain old wood fire. You take a box, line it with several layers of foil, like you've heard from other people. You make a fire, and burn it down
to lots of coals -- like you're going to toast marshmallows, or cook in the coals. You put something *safe* into the fire --
rocks or bricks, just make sure it can be in the fire -- to hold up a cookie sheet. You put the cookie sheet on top of your
props over the fire. Make sure that the fire is not too hot/the pan is far enough above the fire so that food will not burn.
Place food on cookie sheet, and place box over cookie sheet. I've also used the box oven as a makeshift reflector oven --
set it with the open side toward the fire and tilt it slightly forward -- this works well for something like mini pizzas, so
that they don't get burned on the bottom if your fire is just too hot.
If you have never tried a box oven, let me describe how we've done it. First, you need: a cardboard box, newspaper,
aluminum foil, heavy cloth tape (we use duct tape), a grill that will fit under the box, coffee cans to support the grill
(optional if the grill is free standing), and a pie tin to hold the charcoal briquettes if you use a free standing grill.
You wrap the cardboard box in newspapers for insulation and foil to keep the newspaper from burning. The object is to
wrap so not much tape is exposed to the inside of the box (because the adhesive will melt). I have used both free
standing grills (which can tilt and give your brownies a lovely slant) and grills supported by coffee cans. The briquettes in
coffee cans or under the grill in a pie tin are your fuel source. Somewhere I think I read that each briquette is worth
about 30 degrees (F) of heat. Combine this figure with the heat loss from a lot of lifting of the box (grin) and heat loss
from insulation, and you will get a rough idea of what you need. This is a fun project but not really applicable to
backpacking! Enjoy!

55
Chapter Seven
Fire-related who da-thunk its!
Techniques for teaching Fire Starting Teach Yourself Time Preparation is often longer than actually lighting the fire. Allow yourself between 20 and 30 minutes to include both. Equipment
Punk or tinder - Dead leaves, paper, bark, birch, wood chippings;
Kindling - Thin twigs and sticks;
Larger twigs, sticks, and wood of different sizes; Logs or stones (optional);
Matches (kept in a plastic bag or waxed in case of wet weather);
Knife or spade if turf needs lifting;
Bucket of water, sand or fine soil.
Learning All About It A. Preparation This is definitely the most time consuming part of the whole process. A lot needs to be done before any matches are lit!
Decide where you are going to light the fire. This should be in a safe area away from trees, hedges, buildings and tents which could potentially catch fire. If you are lighting the fire directly on the ground (as opposed to a raised altar fire), look for where fires have been lit before. The area will simply need to be checked that it is ready to use. If it is a grassed area, check whether it is normal practice to lift the turf. If the landowner gives permission, lift enough turf to give a patch of bare ground for your fire. Usually, a 1 meter square x 10cm thick area will suffice. If the turf is to be kept for more than a day, turn it upside down and keep it well watered. Collect plenty of wood of different sizes. You will need kindling to get the fire started. This material will not burn for long and you must use the heat from this to make the larger wood catch fire; thin twigs first and in turn, larger twigs and sticks to help light small logs.
Have ready a bucket of water, sand or earth and a spade should you need to put out the fire in an emergency. B. Laying and Lighting the Fire
Stand the first twig upright in the ground. Surround it with tinder or punk.
Start to a wigwam shape by surrounding this with kindling.
Use progressively thicker twigs, expanding this shape and leaving a gap at the bottom for your match.
Light your match, shielding the flame in your hand and getting as near as possible to the fire.

56
Light the tinder or punk and any small pieces of kindling.
Add more twigs as necessary to each flame until it spreads to thicker wood.
If you need to blow the fire, get in close and blow gently.
Once alight, add larger and larger twigs and sticks. Then add a few pieces of wood at one end so that they catch light. When these are well alight, add more wood to the other end.
When it is firmly established, and the wigwam shape has been abandoned, lay bricks of thick logs parallel with the wind direction on either side of the fire.
If you intend to cook, you will have to wait until there are hot embers as this is where the heat is retained.
C. Putting Out the Fire and Cleaning Up You must always make sure that any fire you have lit is well and truly put out. There are two main methods:
With water - Let the fire die down. Spread out sticks and coals, sprinkle with water being careful that it does not turn to steam and scald you. Without water - Let the fire die down. Spread sticks and coals out, scrape any burning embers from the logs and sticks. Cover thoroughly with earth or soil.
In both cases, check thoroughly and make sure that the fire is out. Any fire pits must be thoroughly cleared out and re-filled with the earth before turf is replaced. Safety Rules
No matter what happens, don't panic!
Never use paraffin, petrol or methylated spirits to light or revive a fire.
Choose the site of your fire with care - especially if you are in camp where it will be in a permanent place for a weekend or longer.
Get everything ready before lighting any matches.
Never leave a fire unattended.
Never underestimate a fire or the strength of the wind.
It is a wise precaution to keep handy a bucket of water, earth or fire beaters for use in an emergency. This is especially true in periods of extended hot, dry weather.
Can you do it? When you feel confident about lighting fires, check how you are doing and see which of the following you can tick off:
Can you...
Prepare the ground for a fire?
List the different types of wood required for a fire?
Demonstrate how to build a fire?
State what needs to be done when putting out and clearing up after a fire?
State the safety rules for fire lighting? Build and light a fire in dry, wet and windy conditions? So you want more? There are many different types of fires. Talk to other Leaders and find out about some of the others including their names and uses. Try to build and light a camp fire. This is a special skill. Why not ask the Warden of your nearest camp site for information and if you can, assist with building one of these?

57
How to Train Others: This section is designed to give some practical ideas about how you can help other people to understand how to light fires safely and effectively. This might be Leaders or Scouts - either in an informal way on a Troop night or more formally on a skills workshop, training course or something similar. Objectives By the end of this session, participants will be able to:
I. Prepare an area for lighting a fire; II. Lay and light a fire; III. Put out a fire and clear the area correctly; IV. State the safety rules involved in fire lighting.
Time You should allow about one hour. This may seem a great length of time but fire lighting is one of those activities that can take longer than anticipated, as it can often be dependent on the weather. The time allowed is to cover all aspects of the session. Equipment
Punk or tinder - dead leaves, paper, bark, birch, wood chippings;
Kindling - thin twigs and sticks;
Larger twigs, sticks, and wood of different sizes;
Logs or stones (optional);
Matches (kept in a plastic bag or waxed in case of wet weather;
Knife or spade if turf needs lifting; Bucket of water, sand or fine soil;
Games equipment for training activities, as required;
Visual aid showing the three essential elements for a fire: fuel, oxygen and heat. Training method Details on lighting fires for the session are contained in the other sections. Essentially this is, of course, a practical activity but it will require some introduction about principles and the safety elements involved. There are several ways that it might be approached:
Introductory talk followed by a demonstration. Demonstration with explanation as you go along as to what you
are doing and why, and highlighting what not to do, for example, piling on too much wood at once and suffocating the fire.
Explanation as to what to do first and then put participants into pairs to light a fire and to report on what happens. The session leader will need to keep a close eye on what is happening.
Follow up any of these methods with one or more of the training activities outlined below. General points The following may seem very obvious and straightforward common sense, but all too often, they are neglected in the rush to light a match! They need to be included in any explanation given to participants.
The necessity to prepare the area and how this is done.
Stress the elements needed to make a fire - fuel, oxygen, heat.
Having everything ready before the match is lit.
Being aware of and following the safety rules.
Remember that fire lighting is a different experience in wet and windy weather. Training activities
1. Set a task to light a fire within a given time. 2. Set a task to light a fire and boil one pint of water against the clock.

58
3. Make a visual aid to show others the steps in lighting a fire. 4. Play a safety game - arrange two teams opposite each other, each member numbered off. Place a chair at each
end between the two teams, one for 'yes' and one for 'no'. Read out a statement, call a number and the relevant person has to run to the correct chair. For example,
Number 6 -'It is a good idea to have some paraffin or meths. in case the fire won't light.' [NO] Number 1 -'You should pile on as much wood as possible once there is a reasonable flame.' [NO] Number 3 -'There are three elements needed to light a fire: fuel, oxygen and heat.' [YES] Number 4 -'It is a good idea to light your fire under overhanging trees in case it rains.' [NO] ... and so on.
5. In bad weather, challenge groups of participants to light a fire against the clock. This can be extended by changing places and the other person puts the fire out and clears up.
6. Participants, in small groups, are given one log of wood, a hand-axe, one match, and the components required for brewing a cup of tea. The first team to make a cup of (hot!) tea are the winners.
What is Paraffin wax? Paraffin wax is a white or colorless soft solid that is used as a lubricant and for other applications. Paraffin may also refer to:
Alkane, a saturated hydrocarbon Kerosene, a fuel that is also known as paraffin Tractor vaporizing oil, a fuel Liquid paraffin (medicinal), a very highly refined mineral oil used in cosmetics and for medical purposes Mineral oil, any of various colorless, odorless, light mixtures of alkanes in the C15 to C40 range from a non-
vegetable (mineral) source, particularly a distillate of petroleum Petroleum jelly, also called soft paraffin
Useful hints and tips
Practice fire lighting in different weathers and conditions. How would you cope with one foot of snow on the ground?
Keep your kindling dry overnight at a weekend or longer camp.
Be prepared - if you are going to camp, take firelighters, or if necessary, dry materials in a plastic bag to start the fire should all else fail!
If on a hike or expedition, it is worth 'waxing' some matches so that even if the rest of your kit gets wet, your matches will still light.
If the fire you are preparing is for cooking, remember to start it long before you need to start cooking. It won't be like turning the oven on.
Dried orange peel also makes excellent kindling! Checking their progress Ask participants whether they feel happy with their ability to:
Prepare an area for lighting a fire
Lay and light a fire in a) dry weather b) windy weather c) wet weather
Put out a fire and clear the area correctly. State the safety rules involved in fire lighting So they want to know more?
Find out about how to prepare and use different types of fire.
Learn to build and light a camp fire.
Find out about the requirements for backwoods cooking and have a go.
Investigate the burning properties of different wood.

59
How to start a fire in the rain How to start a fire in the woods, even when it’s wet. One a bone-dry day or when there’s plenty of dry paper or fire-starter, anyone can make a fire. If the weather deteriorates to a persistent rain, they might get smoke. But that’s no guarantee they’ll get fire. Here’s how you can make a fire when the woods are wet with rain. This method isn’t fast, but it works with any kind of wood—even damp wood. You’ll need a:
Sharp knife. To split fine kindling, set the sharpened edge of the knife on the end of an upright piece of wood then pound the spine through with a thick stick. Use a folding knife with a secure lock so the blade won’t close on your hand when you pound on the spine.
Folding saw.
Small hatchet to use as a splitting wedge, never as a chopper. First, collect your wood. Locate a dead, downed tree, out-of-sight of tents, trails, and waterways. Saw off an arm-thick limb. Touch the sawed end of the limb to your cheek (the center should feel dry). Don’t worry if there’s a ring of wet wood near the bark; you’ll discard it when you split the piece. Reject the wood if it smells damp or punky. The wood is good if it passes both cheek and smell tests.
Saw the limb into foot long sections and split each section into kindling. Note that the hatchet is used as a splitting wedge so there’s no chance of an accident (Figure 1).
FIGURE 1, at left: Splitting wood is easier (and safer) with two people. Hold the hatchet with both hands and have a friend knock it through.
Hold the hatchet firmly with both hands and allow a friend with a log chunk to pound the hatchet head through.
Use that same procedure (with a lighter log) to split fine kindling with your knife. Then, use your knife to prepare your tinder. Cut a handful of wafer-thin shavings (Figure 2) from your dry splittings.
FIGURE 2, at right: Now that you’ve reached the dry part of the wood splittings, slice off several wafer-thin shavings to use as tinder.
Assemble the tinder (a handful of dry wood shavings no thicker than a match), kindling (one-eighth to one-quarter-inch thick dry wood splittings), and fuel (quarter-split logs). Trim all bark and damp wood from your tinder and kindling, and separate your wood into piles—tinder, kindling, and fuel. If it’s raining, work under a tarp so that all the materials stay dry. Starter Accessories
1. Carry a candle and chemical fire-starters. 2. Cotton balls dipped in Vaseline, a flattened wax milk carton, and cigar-size newspaper logs that have been
dipped into melted paraffin make good fire-starters. Don’t use loose newspaper pages; they absorb moisture on damp days.
3. Make a “fire blower” as a bellows to nurse a developing flame by attaching a 6-inch piece of aluminum or copper tubing to a piece of rubber hose.

60
4. Once you have gathered the materials, build your fire from the ground up by following the four steps below. Build It Right
1. Set two 1-inch-thick sticks about 6 inches apart on the ground (Figure 3, at right). Place four pencil-thin support sticks across the base. Space the support sticks about half an inch apart.
2. Stack an inch-thick layer of wafer-thin shavings on top of the support sticks. Leave some space between each shaving to allow for airflow. Set two half-inch thick “bridge” sticks across each end of the base structure to support the heavier kindling you’ll add next.
3. Place fine, split kindling across the support sticks. Splittings should be parallel to one another with plenty of space in between. They should not compress the tinder below.
4. Apply your match directly underneath the tinder (shavings). When the first flame appears, hand feed shavings (not kindling) into the developing flame. Don’t add kindling until you have a reliable blaze. The raised firebase will produce a powerful draft that creates a bright, smoke-free flame.
How to Light a Fire in the Snow When Backpacking While a campfire isn't usually necessary when camping in the backcountry, it can be a lifesaver when you have to
confront the threat of hypothermia or deal with wet clothing and gear.
Things You'll Need
Waterproof Matches
Plastic Freezer Bags
Wilderness Permits
Instructions
1. Carry dry tinder in a zipper-lock bag; it's great for getting wet wood to burn.
2. Remember to bring firestarter paste or sticks with you.
3. Carry waterproof matches and a windproof lighter; store these in a zipper-lock bag for extra measure.
4. 4 Consider carrying a "fire pan" with you when venturing into snowy environments. A fire pan is basically any flame-
resistant metal pan with high sides that can keep ashes and wood inside of the pan.
5. Place the fire pan onto several rocks or logs to keep it from sinking as the snow melts and light your fire.
6. Dig a hole in the snow and cover the inside of the hole with a layer of small to medium-size sticks if you're building a
fire directly in the snow. These sticks will protect the burning wood from melting snow.
7. Use firestarter paste or sticks to get your fire going. If you don't have these with you, use shavings from dry wood -
or paper torn from any books you have if your situation is desperate.
Tips & Warnings
Never break off twigs or branches from a standing tree, even if the tree appears to be dead.
Only use wood that has fallen on the ground. Make sure that you're allowed to collect fallen wood in the
wilderness area you are visiting.

61
Never light a campfire if camping in an alpine area, even if fallen wood is available. It takes hundreds of years for
alpine areas to recover from fire.
Camping Stoves in Winter Everything is ready for the winter camping trip, but when it comes to the backpacking stove, consideration must be
given to the temperatures it will operate under.
Winter camping brings with it a series of challenges, dealing with snow, keeping warm and which stove to use. Yes as
simple as it sounds, taking the proper stove for backcountry winter camping is not as clear cut as one may think. Things
like how cold is it going to get, what kind of fuel does the stove use and where is it going to be used all enter into the
equation.
There are two types of fuel commonly used for light weight camping stoves, white gas (Coleman Fuel) and canisters
containing a blend of butane and other gases. Where the problem arises is how cold affects the performance of a stove.
If it is cold enough, some will not function at all.
Liquid Camping Stove Fuel
White gas (Coleman Fuel) has a flash point of about -40 degrees F., which makes it perfect for winter camping. What this
means is that at any point above this temperature it will burn when a spark is put to it. So no problem, just turn on the
stove and light it up, right? Well not exactly.
The way the vaporization process works with liquid fueled backpacking and large camp stoves is by using the burner to
heat the portion of the fuel line called the generator. When it is hot, it “generates” vapor from the liquid fuel which is
then fed to the burner.
Many light weight backpacking stoves have a preheating phase during startup but there are stoves that do not use this
system.
Even though the manufactures will say the stoves light in all conditions, and they work fine in warmer weather, many
winter campers have found that preheating the generator will ensure they fire up in the cold. Stoves such as the
Coleman Peak One liquid fueled stove fall into this category as do the larger camp stoves.
To preheat the generator a fire paste will be needed, such as Fire Ribbon or other similar products. All of them squeeze
out like toothpaste and generate a lot of heat when burned.
First make sure the stove is off and then with a Coleman style stove, squeeze out a piece of preheating paste directly
next to the generator where it crosses over the burner. When the paste is lit, it will heat the generator tube enabling the
stove to start much more efficiently. When the paste is about to go out, turn on the stove and if there is a small flame
still burning it will fire up. If not use a match or lighter in the normal way to get things going. When starting any stove, do
this in a safe area away from anything flammable.
With backpacking stoves which must be preheated prior to starting in all conditions, a small amount of fuel or alcohol is
placed in a cup under the fuel line. When it is ignited it provides the needed heat for the fuel to vaporize.
Another concern when surrounded by snow is where the stove will be placed; it cannot be placed directly on the snow.
A way around this is to use a base made of either aluminum or even a small thin piece of plywood cut to size to set the
stove on. Either way the base will help keep things level but be prepared that it will get scorched over time.
Canister Camping Stoves

62
The second fuel commonly used in lightweight camping stoves is canister fuel containing a blend of butane and propane.
These stoves are great as they are easy to use and very reliable, but the problem comes in during cold weather. Butane
alone will not freely vaporize in temperatures below 32 F. This is why nearly all canister fuel sold is a mix of two or three
gasses to give better performance. But even this has limitations.
The current blends are:
Isobutane and propane
Butane and propane
Isobutane, propane and butane
The reasoning behind these blends is that the isobutane and propane vaporize at temperatures much lower than pure
butane. But in cold temperatures, the propane and isobutane vaporize out and all that is left is butane. So the stove may
start up, but very quickly the flame will begin to die and eventually go out. Add to this that as the gas in the canister
vaporizes, it causes the fuel inside to cool further.
In extreme cold, only the propane will burn and the stove ends up with a meager small blue flame. One way around this
is to keep the canister inside the sleeping bag at night. It then starts out warmer and hopefully runs longer. Also placing
the stove on a small piece of insulating foam will help keep it from drawing cold from the snow.
According to Ryan Perry of Brunton Products in Riverton, Wyoming which manufactures a variety of canister stoves, the
property of the propane burning first, can be used to get things started up.
“One tip is to first thing, heat a shallow pan of water, not too hot but on the warm side,” Perry said. “Then you can set
the canister into the warm water and this will help keep things going.”
After that the radiated heat from the burner will also help keep the canister warm. But, Perry added, this will only work
until temperatures drop further than the fuel is intended to be used in.
“A lot of companies will say their fuel burns at such and such a temperature,” Perry said. “But we really don’t have a
bottom number. There are so many variables that can enter into it that it is almost impossible to state this (in the real
world terms).”
So the bottom line on all of this is just how cold it will be when the stove is used. If it will be 20 degrees F, or above a
canister stove should work fine, but in extreme conditions a liquid fueled stove is the only way to go.
Use a snow stand for your camping stove so it doesn't melt right through the snow. Bring plenty of fuel because besides
regular cooking you will also need it to melt the snow for water.
Teach Yourself Time Preparation is often longer than actually lighting the fire. Allow yourself between 20 and 30 minutes to include both. Equipment
Punk or tinder - Dead leaves, paper, bark, birch, wood chippings;
Kindling - Thin twigs and sticks;
Larger twigs, sticks, and wood of different sizes; Logs or stones (optional);
Matches (kept in a plastic bag or waxed in case of wet weather);

63
Knife or spade if turf needs lifting;
Bucket of water, sand or fine soil.
Learning All About It A. Preparation This is definitely the most time consuming part of the whole process. A lot needs to be done before any matches are lit!
Decide where you are going to light the fire. This should be in a safe area away from trees, hedges, buildings and tents which could potentially catch fire. If you are lighting the fire directly on the ground (as opposed to a raised altar fire), look for where fires have been lit before. The area will simply need to be checked that it is ready to use. If it is a grassed area, check whether it is normal practice to lift the turf. If the landowner gives permission, lift enough turf to give a patch of bare ground for your fire. Usually, a 1 meter square x 10cm thick area will suffice. If the turf is to be kept for more than a day, turn it upside down and keep it well watered. Collect plenty of wood of different sizes. You will need kindling to get the fire started. This material will not burn for long and you must use the heat from this to make the larger wood catch fire; thin twigs first and in turn, larger twigs and sticks to help light small logs.
Have ready a bucket of water, sand or earth and a spade should you need to put out the fire in an emergency. B. Laying and Lighting the Fire
Stand the first twig upright in the ground. Surround it with tinder or punk.
Start to a wigwam shape by surrounding this with kindling.
Use progressively thicker twigs, expanding this shape and leaving a gap at the bottom for your match.
Light your match, shielding the flame in your hand and getting as near as possible to the fire.
Light the tinder or punk and any small pieces of kindling.
Add more twigs as necessary to each flame until it spreads to thicker wood.
If you need to blow the fire, get in close and blow gently.
Once alight, add larger and larger twigs and sticks. Then add a few pieces of wood at one end so that they catch light. When these are well alight, add more wood to the other end.
When it is firmly established, and the wigwam shape has been abandoned, lay bricks of thick logs parallel with the wind direction on either side of the fire.
If you intend to cook, you will have to wait until there are hot embers as this is where the heat is retained.
C. Putting Out the Fire and Cleaning Up You must always make sure that any fire you have lit is well and truly put out. There are two main methods:
With water - Let the fire die down. Spread out sticks and coals, sprinkle with water being careful that it does not turn to steam and scald you. Without water - Let the fire die down. Spread sticks and coals out, scrape any burning embers from the logs and

64
sticks. Cover thoroughly with earth or soil. In both cases, check thoroughly and make sure that the fire is out. Any fire pits must be thoroughly cleared out and re-filled with the earth before turf is replaced. Safety Rules
No matter what happens, don't panic!
Never use paraffin, petrol or methylated spirits to light or revive a fire.
Choose the site of your fire with care - especially if you are in camp where it will be in a permanent place for a weekend or longer.
Get everything ready before lighting any matches.
Never leave a fire unattended.
Never underestimate a fire or the strength of the wind.
It is a wise precaution to keep handy a bucket of water, earth or fire beaters for use in an emergency. This is especially true in periods of extended hot, dry weather.
Can you do it? When you feel confident about lighting fires, check how you are doing and see which of the following you can tick off:
Can you...
Prepare the ground for a fire?
List the different types of wood required for a fire?
Demonstrate how to build a fire?
State what needs to be done when putting out and clearing up after a fire?
State the safety rules for fire lighting? Build and light a fire in dry, wet and windy conditions? So you want more? There are many different types of fires. Talk to other Leaders and find out about some of the others including their names and uses. Try to build and light a camp fire. This is a special skill. Why not ask the Warden of your nearest camp site for information and if you can, assist with building one of these? How to Train Others: This section is designed to give some practical ideas about how you can help other people to understand how to light fires safely and effectively. This might be Leaders or Scouts - either in an informal way on a Troop night or more formally on a skills workshop, training course or something similar. Objectives By the end of this session, participants will be able to:
I. Prepare an area for lighting a fire; II. Lay and light a fire; III. Put out a fire and clear the area correctly; IV. State the safety rules involved in fire lighting.
Time You should allow about one hour. This may seem a great length of time but fire lighting is one of those activities that can take longer than anticipated, as it can often be dependent on the weather. The time allowed is to cover all aspects of the session. Equipment
Punk or tinder - dead leaves, paper, bark, birch, wood chippings;
Kindling - thin twigs and sticks;
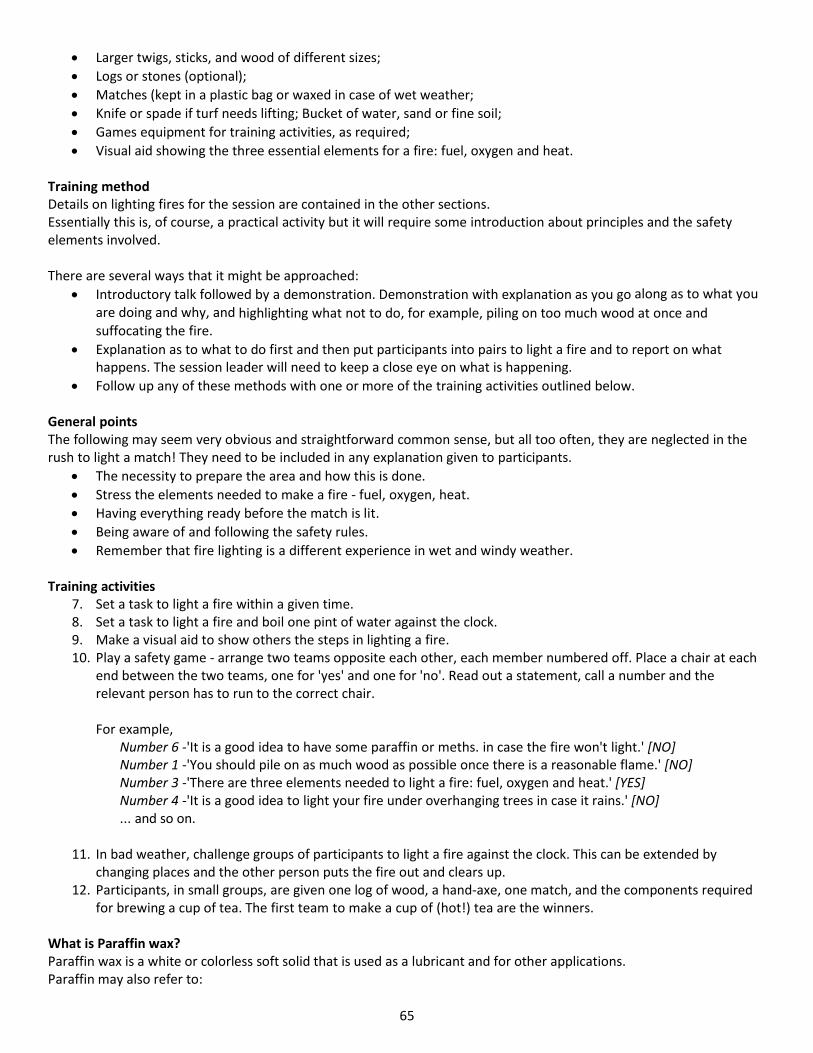
65
Larger twigs, sticks, and wood of different sizes;
Logs or stones (optional);
Matches (kept in a plastic bag or waxed in case of wet weather;
Knife or spade if turf needs lifting; Bucket of water, sand or fine soil;
Games equipment for training activities, as required;
Visual aid showing the three essential elements for a fire: fuel, oxygen and heat. Training method Details on lighting fires for the session are contained in the other sections. Essentially this is, of course, a practical activity but it will require some introduction about principles and the safety elements involved. There are several ways that it might be approached:
Introductory talk followed by a demonstration. Demonstration with explanation as you go along as to what you
are doing and why, and highlighting what not to do, for example, piling on too much wood at once and suffocating the fire.
Explanation as to what to do first and then put participants into pairs to light a fire and to report on what happens. The session leader will need to keep a close eye on what is happening.
Follow up any of these methods with one or more of the training activities outlined below. General points The following may seem very obvious and straightforward common sense, but all too often, they are neglected in the rush to light a match! They need to be included in any explanation given to participants.
The necessity to prepare the area and how this is done.
Stress the elements needed to make a fire - fuel, oxygen, heat.
Having everything ready before the match is lit.
Being aware of and following the safety rules.
Remember that fire lighting is a different experience in wet and windy weather. Training activities
7. Set a task to light a fire within a given time. 8. Set a task to light a fire and boil one pint of water against the clock. 9. Make a visual aid to show others the steps in lighting a fire. 10. Play a safety game - arrange two teams opposite each other, each member numbered off. Place a chair at each
end between the two teams, one for 'yes' and one for 'no'. Read out a statement, call a number and the relevant person has to run to the correct chair. For example,
Number 6 -'It is a good idea to have some paraffin or meths. in case the fire won't light.' [NO] Number 1 -'You should pile on as much wood as possible once there is a reasonable flame.' [NO] Number 3 -'There are three elements needed to light a fire: fuel, oxygen and heat.' [YES] Number 4 -'It is a good idea to light your fire under overhanging trees in case it rains.' [NO] ... and so on.
11. In bad weather, challenge groups of participants to light a fire against the clock. This can be extended by changing places and the other person puts the fire out and clears up.
12. Participants, in small groups, are given one log of wood, a hand-axe, one match, and the components required for brewing a cup of tea. The first team to make a cup of (hot!) tea are the winners.
What is Paraffin wax? Paraffin wax is a white or colorless soft solid that is used as a lubricant and for other applications. Paraffin may also refer to:

66
Alkane, a saturated hydrocarbon Kerosene, a fuel that is also known as paraffin Tractor vaporizing oil, a fuel Liquid paraffin (medicinal), a very highly refined mineral oil used in cosmetics and for medical purposes Mineral oil, any of various colorless, odorless, light mixtures of alkanes in the C15 to C40 range from a non-
vegetable (mineral) source, particularly a distillate of petroleum Petroleum jelly, also called soft paraffin
Useful hints and tips
Practice fire lighting in different weathers and conditions. How would you cope with one foot of snow on the ground?
Keep your kindling dry overnight at a weekend or longer camp.
Be prepared - if you are going to camp, take firelighters, or if necessary, dry materials in a plastic bag to start the fire should all else fail!
If on a hike or expedition, it is worth 'waxing' some matches so that even if the rest of your kit gets wet, your matches will still light.
If the fire you are preparing is for cooking, remember to start it long before you need to start cooking. It won't be like turning the oven on.
Dried orange peel also makes excellent kindling! Checking their progress Ask participants whether they feel happy with their ability to:
Prepare an area for lighting a fire
Lay and light a fire in a) dry weather b) windy weather c) wet weather
Put out a fire and clear the area correctly. State the safety rules involved in fire lighting
So they want to know more?
Find out about how to prepare and use different types of fire.
Learn to build and light a camp fire.
Find out about the requirements for backwoods cooking and have a go.
Investigate the burning properties of different wood.
How to start a fire in the rain How to start a fire in the woods, even when it’s wet. One a bone-dry day or when there’s plenty of dry paper or fire-starter, anyone can make a fire. If the weather deteriorates to a persistent rain, they might get smoke. But that’s no guarantee they’ll get fire. Here’s how you can make a fire when the woods are wet with rain. This method isn’t fast, but it works with any kind of wood—even damp wood. You’ll need a:
Sharp knife. To split fine kindling, set the sharpened edge of the knife on the end of an upright piece of wood then pound the spine through with a thick stick. Use a folding knife with a secure lock so the blade won’t close on your hand when you pound on the spine.
Folding saw.
Small hatchet to use as a splitting wedge, never as a chopper. First, collect your wood. Locate a dead, downed tree, out-of-sight of tents, trails, and waterways. Saw off an arm-thick limb. Touch the sawed end of the limb to your cheek (the center should feel dry). Don’t worry if there’s a ring of wet

67
wood near the bark; you’ll discard it when you split the piece. Reject the wood if it smells damp or punky. The wood is good if it passes both cheek and smell tests.
Saw the limb into foot long sections and split each section into kindling. Note that the hatchet is used as a splitting wedge so there’s no chance of an accident (Figure 1).
FIGURE 1, at left: Splitting wood is easier (and safer) with two people. Hold the hatchet with both hands and have a friend knock it through.
Hold the hatchet firmly with both hands and allow a friend with a log chunk to pound the hatchet head through.
Use that same procedure (with a lighter log) to split fine kindling with your knife. Then, use your knife to prepare your tinder. Cut a handful of wafer-thin shavings (Figure 2) from your dry splittings.
FIGURE 2, at right: Now that you’ve reached the dry part of the wood splittings, slice off several wafer-thin shavings to use as tinder.
Assemble the tinder (a handful of dry wood shavings no thicker than a match), kindling (one-eighth to one-quarter-inch thick dry wood splittings), and fuel (quarter-split logs). Trim all bark and damp wood from your tinder and kindling, and separate your wood into piles—tinder, kindling, and fuel. If it’s raining, work under a tarp so that all the materials stay dry. Starter Accessories
5. Carry a candle and chemical fire-starters. 6. Cotton balls dipped in Vaseline, a flattened wax milk carton, and cigar-size newspaper logs that have been
dipped into melted paraffin make good fire-starters. Don’t use loose newspaper pages; they absorb moisture on damp days.
7. Make a “fire blower” as a bellows to nurse a developing flame by attaching a 6-inch piece of aluminum or copper tubing to a piece of rubber hose.
8. Once you have gathered the materials, build your fire from the ground up by following the four steps below. Build It Right
5. Set two 1-inch-thick sticks about 6 inches apart on the ground (Figure 3, at right). Place four pencil-thin support sticks across the base. Space the support sticks about half an inch apart.
6. Stack an inch-thick layer of wafer-thin shavings on top of the support sticks. Leave some space between each shaving to allow for airflow. Set two half-inch thick “bridge” sticks across each end of the base structure to support the heavier kindling you’ll add next.
7. Place fine, split kindling across the support sticks. Splittings should be parallel to one another with plenty of space in between. They should not compress the tinder below.
8. Apply your match directly underneath the tinder (shavings). When the first flame appears, hand feed shavings (not kindling) into the developing flame. Don’t add kindling until you have a reliable blaze. The raised firebase will produce a powerful draft that creates a bright, smoke-free flame.
How to Light a Fire in the Snow When Backpacking While a campfire isn't usually necessary when camping in the backcountry, it can be a lifesaver when you have to
confront the threat of hypothermia or deal with wet clothing and gear.
Things You'll Need
Waterproof Matches

68
Plastic Freezer Bags
Wilderness Permits
Instructions
8. Carry dry tinder in a zipper-lock bag; it's great for getting wet wood to burn.
9. Remember to bring firestarter paste or sticks with you.
10. Carry waterproof matches and a windproof lighter; store these in a zipper-lock bag for extra measure.
11. 4 Consider carrying a "fire pan" with you when venturing into snowy environments. A fire pan is basically any flame-
resistant metal pan with high sides that can keep ashes and wood inside of the pan.
12. Place the fire pan onto several rocks or logs to keep it from sinking as the snow melts and light your fire.
13. Dig a hole in the snow and cover the inside of the hole with a layer of small to medium-size sticks if you're building a
fire directly in the snow. These sticks will protect the burning wood from melting snow.
14. Use firestarter paste or sticks to get your fire going. If you don't have these with you, use shavings from dry wood -
or paper torn from any books you have if your situation is desperate.
Tips & Warnings
Never break off twigs or branches from a standing tree, even if the tree appears to be dead.
Only use wood that has fallen on the ground. Make sure that you're allowed to collect fallen wood in the
wilderness area you are visiting.
Never light a campfire if camping in an alpine area, even if fallen wood is available. It takes hundreds of years for
alpine areas to recover from fire.
Camp Stoves in Winter Everything is ready for the winter camping trip, but when it comes to the backpacking stove, consideration must be
given to the temperatures it will operate under.
Winter camping brings with it a series of challenges, dealing with snow, keeping warm and which stove to use. Yes as
simple as it sounds, taking the proper stove for backcountry winter camping is not as clear cut as one may think. Things
like how cold is it going to get, what kind of fuel does the stove use and where is it going to be used all enter into the
equation.
There are two types of fuel commonly used for light weight camping stoves, white gas (Coleman Fuel) and canisters
containing a blend of butane and other gases. Where the problem arises is how cold affects the performance of a stove.
If it is cold enough, some will not function at all.
Liquid Camping Stove Fuel
White gas (Coleman Fuel) has a flash point of about -40 degrees F., which makes it perfect for winter camping. What this
means is that at any point above this temperature it will burn when a spark is put to it. So no problem, just turn on the
stove and light it up, right? Well not exactly.

69
The way the vaporization process works with liquid fueled backpacking and large camp stoves is by using the burner to
heat the portion of the fuel line called the generator. When it is hot, it “generates” vapor from the liquid fuel which is
then fed to the burner.
Many light weight backpacking stoves have a preheating phase during startup but there are stoves that do not use this
system.
Even though the manufactures will say the stoves light in all conditions, and they work fine in warmer weather, many
winter campers have found that preheating the generator will ensure they fire up in the cold. Stoves such as the
Coleman Peak One liquid fueled stove fall into this category as do the larger camp stoves.
To preheat the generator a fire paste will be needed, such as Fire Ribbon or other similar products. All of them squeeze
out like toothpaste and generate a lot of heat when burned.
First make sure the stove is off and then with a Coleman style stove, squeeze out a piece of preheating paste directly
next to the generator where it crosses over the burner. When the paste is lit, it will heat the generator tube enabling the
stove to start much more efficiently. When the paste is about to go out, turn on the stove and if there is a small flame
still burning it will fire up. If not use a match or lighter in the normal way to get things going. When starting any stove, do
this in a safe area away from anything flammable.
With backpacking stoves which must be preheated prior to starting in all conditions, a small amount of fuel or alcohol is
placed in a cup under the fuel line. When it is ignited it provides the needed heat for the fuel to vaporize.
Another concern when surrounded by snow is where the stove will be placed; it cannot be placed directly on the snow.
A way around this is to use a base made of either aluminum or even a small thin piece of plywood cut to size to set the
stove on. Either way the base will help keep things level but be prepared that it will get scorched over time.
Canister Camping Stoves
The second fuel commonly used in lightweight camping stoves is canister fuel containing a blend of butane and propane.
These stoves are great as they are easy to use and very reliable, but the problem comes in during cold weather. Butane
alone will not freely vaporize in temperatures below 32 F. This is why nearly all canister fuel sold is a mix of two or three
gasses to give better performance. But even this has limitations.
The current blends are:
Isobutane and propane
Butane and propane
Isobutane, propane and butane
The reasoning behind these blends is that the isobutane and propane vaporize at temperatures much lower than pure
butane. But in cold temperatures, the propane and isobutane vaporize out and all that is left is butane. So the stove may
start up, but very quickly the flame will begin to die and eventually go out. Add to this that as the gas in the canister
vaporizes, it causes the fuel inside to cool further.
In extreme cold, only the propane will burn and the stove ends up with a meager small blue flame. One way around this
is to keep the canister inside the sleeping bag at night. It then starts out warmer and hopefully runs longer. Also placing
the stove on a small piece of insulating foam will help keep it from drawing cold from the snow.
According to Ryan Perry of Brunton Products in Riverton, Wyoming which manufactures a variety of canister stoves, the
property of the propane burning first, can be used to get things started up.

70
“One tip is to first thing, heat a shallow pan of water, not too hot but on the warm side,” Perry said. “Then you can set
the canister into the warm water and this will help keep things going.”
After that the radiated heat from the burner will also help keep the canister warm. But, Perry added, this will only work
until temperatures drop further than the fuel is intended to be used in.
“A lot of companies will say their fuel burns at such and such a temperature,” Perry said. “But we really don’t have a
bottom number. There are so many variables that can enter into it that it is almost impossible to state this (in the real
world terms).”
So the bottom line on all of this is just how cold it will be when the stove is used. If it will be 20 degrees F, or above a
canister stove should work fine, but in extreme conditions a liquid fueled stove is the only way to go.
Use a snow stand for your camping stove so it doesn't melt right through the snow. Bring plenty of fuel because besides
regular cooking you will also need it to melt the snow for water.
Collection of fire related situational helps Fixing Fire Damage
Look around any spot that has been used as a campsite and you will usually find half a dozen fireplaces. Man seems to
have a nesting instinct that requires him to make his own personal hearth before he is at home in a place.
A recent study conducted by the Sierra Club Outing Committee shows that, each time a camper uses an open fire, 4
square ft. of ground is destroyed and 11 lbs. of wood consumed. We cannot continue to use open fires indiscriminately.
Help fix fire damage. If you come across a site with several big or little fireplaces, you can obliterate many of them.
Where fires were built on grassy spots, clear away the ashes, litter and rocks, then place a thick layer of fallen evergreen
needles over the burned-over spot. Your efforts will go a long way to help restore a damaged area.
River Rocks and Campfires?
I just got back from a camping trip and saw a lot of people making campfire rings using river rocks (taking rocks out of
the river and using them to make a circle around a campfire pit).
I seem to remember somewhere that this was a bad idea but I have no idea as to where I heard this (probably on some
sitcom TV show). I seem to remember something like this:
If you use river rocks then there can be minute small amounts of water dissolved into the rocks in cracks or minerals etc.
When the fire heats these rocks they can crack or in the worst case shatter and fling out fragments. Needless to say I
thought this was something you shouldn't do but I have no idea where in my childhood I heard this.
Can anyone let me know if using river rocks around a campfire is dangerous in any way?
Best Answer:
Any rock, whether it is a river rock or otherwise, can explode if heated very vigorously. The smaller the rock, the less risk
of that explosion. So that when we have pebbles they rarely explode. If you toss water on any rock that is heated, you
risk having that rock explode as its outer surface contracts. Water inside the rock will not produce the force of explosion
that expansion of the outer layer does, and it will be far less than sudden cooling of outside layers of rock. Water in rock
does cause freezing rock to break, but not explode.

71
A Nice Warm Fire
Use hardwoods for fire-making. Softwoods catch quickly but also burn very quickly and throw off lots of sparks.
Dead branches on evergreen trees are drier than any wood on the ground. You'll find dead wood near the base of most of these trees. The twigs make great tinder; use larger sticks once the fire is burning well.
Break open dry cattails for an excellent source of tinder.
Check inside hollow logs, stumps or small caves for dry leaves you can use to get a fire started.
If worse comes to worst and you can't find dry fire-lighting materials, check your toilet kit. A stick of solid deodorant burns well.
Survival experts recommend that campers and hikers carry along two or three self-lighting emergency flares. They burn as long as 20 minutes, which means you should be able to start a fire with them under almost any conditions.
If you're out of matches, on a sunny day you might be able to ignite tinder with the reflector from your flashlight. Remove the reflector and stuff some cotton wool or paper into the bulb hole. Hold the reflector to catch as much direct sunlight as possible. Like a magnifying glass, it will concentrate the heat until the cotton or paper catches fire.
Carry candle stubs as fire starters for wet wood. A candle will burn a long time in the tinder to dry the wood.
To get a fire going quickly, toss a couple of candle stubs into the kindling before lighting.
Old paper egg cartons, stuffed with drier lint with melted candle wax makes a great firestarter and you recycle some stuff.
Make waterproof firestarters by tightly rolling a newspaper to a diameter of about 1 ½ in. Tie string around it every 2 inches, then soak it in melted paraffin. When the wax is hard, cut the fire stick into 2 inch lengths. Package in plastic bags to carry in your pack.
To make it less likely for smoke to follow you around your fire, build a short wall of rocks behind one part of the fire ring and sit on the opposite side of the fire. The smoke will rise towards your wall and leave you alone.
Now that you've got a nice roaring fire, why not bake a cake? You don't need an oven. Put the mixed batter in a metal baking pan. Rake aside the fire coals and place the pan on the hot ground. Cover with a metal dish and rake the coals back around the pan. Your cake should be baked in 25 to 35 minutes.
It's much easier to wash soot off the pans you use over your campfire, if you coat the outside of the pans with a thick layer of dishwashing liquid before you cook.
When cooking over coals or a small fire, line the fire box with heavy duty foil and build the fire on the foil. It reflects the heat and distributes it more evenly for more efficient cooking. Clean-up is easy, too. Simply bundle up the ashes and drippings when you're done.
Large # 10 cans, usually available free from restaurants, are great for boiling water and cooking food. Their light-weight makes them ideal for backpackers, and you can stuff them with other things (stove, food, and clothing) to save space.
Tricks of the trade
Never use paraffin, petrol or methylated spirits to light or revive a fire.
Use a left over candle end to build a wigwam shape around (see Teach Yourself for details).
Get everything ready first. The kindling (thin twigs and sticks) is very important. If it has rained recently, dry kindling will still be found under bushes, trees and so on. Keep your kindling dry while hunting for larger twigs and small sticks.
Feed a fire - don't smother it. Fires are fickle and tend to go out if they are not looked after in the early stages.
Replenish fuel frequently, remembering that it is important not to allow the fire to become too 'dead'.
Leave the fire place as you found it, so that there is no trace that you have been there.
For real emergencies, always keep a supply of waxed matches and take readymade firelighters.
If you are intending to cook on your fire, it should not only be 'smokeless' but also 'flameless'. Hot embers give a constant heat suitable for cooking. Do not cook over flames.
Fire Starters and Helpers
Burning stuff is fun, so what better excuse to burn stuff than to do research on making fire starters? It's also fun to make fires in primitive or interesting ways, like with the sun or by friction or with sparking tools. But, for those times when you just want a good fire and you want it fast, you should have some items handy to help make that fire fast. Here's a list of some fire starters and helpers that you can find or make. Have fun!

72
These things should be kept in ziploc baggies to keep them dry and to keep the rest of your gear clean. Some of them can be messy and sitting in your backpack in your car in the sun will melt wax and other stuff.
Birthday Candle - easy to light, little weight and space, waterproof, long burn time, use multiple times.
'Trick' Birthday Candle - even better, this one is great in wind and rain.
Dryer Lint - the fuzz that wears off your cotton clothes makes great tinder. Keep some in a film canister or baggie.
Snack Food - Just light some Fritos, Cheetos cheese puff or Pringles potato chip and see what I mean!
Vaseline - rub into cotton balls and keep in a film canister. They will start with a spark.
Wax Sticks - commercial version of the homemade wax and woodchip starters.
Fire Lighters - pressed wood and wax with a match tip.
Fire Paste - looks like a tube of toothpaste, this fire starter gel smells terrible, weighs a bit, but burns great.
Purell - The hand sanitizer evaporates quickly because it is 66% alcohol. A squirt of this on tinder ensures a quick light from any flame. Be careful because the alcohol flame can be invisible.
Pinecones - Pick up dry ones under pine trees. The high pitch content really burns. They are natural fuzz sticks.
Fatwood - the pitchy parts of pine knots or heartwood. Prepare this as small sticks of kindling and keep some in a pouch.
Wax and Woodchips - make these yourself. They take up a little space and weight, but are fun to make yourself.
Putting Out Your Campfire By far more important than building a good campfire is to make sure you completely put it out! Every year, careless people destroy thousands of acres of wilderness and forest land by leaving campfires.
Extinguish your campfire at least 1/2 hour before you plan to leave.
By planning ahead, you should have burned down all the coals to ash. There should be very few chunks of coal left and no partially burned wood.
If you are extinguishing a burning fire rather than hot ash and coals, first use a stick to stir the wood and ash. This is to extinguish the flames as much as you can.
Sprinkle water over the coals. If they are hot, this will cause a lot of steam mixed with ash so avoid standing directly above or downwind of the fire. You may want to move your gear too.
Once you have wetted down all the ash and coals, use a stick to stir everything together.
Continue to sprinkle water and stir until no more steam rises and you hear no hissing steam.
Let the fire area sit for 10 minutes. Good opportunity to get more water.
Feel the area for hot spots - hold the back of your hand close to the ash, but not in it. Feel around for heat spots.
If everything is cold, you’ve done good! If there is still heat, sprinkle more water and stir.
Once you feel no heat, the ash can be disposed of: o Scoop all the coals, ash, and partially burned wood into a bag, cooking pot, or some other container. o Carry it far out into the woods and spread it around. o Or, carry it down the trail a 1/2 mile and then disperse it far off the trail.
Scatter unused wood back into the surrounding woods or leave it nicely stacked if this is a high-use, established camp site.
Tips & Warnings
Using commercially available tinder will make fire-starting quicker.
A great natural tinder is birch bark. Find a dead and down tree, peal the bark from the tree, and rip it in quarter-inch-wide strips. When the smoldering steel wool is placed on this tinder, it ignites.
Carry homemade tinder, like the lint from a drying machine, to speed up fire-making.
Practice this skill at home before your life depends on it in the woods.

73
About Chert By Andrew Alden, About.com Guide
Chert is the name for a widespread type of sedimentary rock that is made
of silica (silicon dioxide or SiO2). The most familiar silica mineral is quartz,
but the stuff of chert is quartz in microscopic or even invisible crystals—
that is, microcrystalline or cryptocrystalline quartz. Here's how such a rock
comes to be. Radiolarian chert
Chert Ingredients
Like other sedimentary rocks, chert starts with particles accumulating. In this case, the setting is in bodies of water and
the particles are the skeletons (called tests) of plankton—microscopic creatures that spend their lives floating in the
water column. Plankton secrete their tests using one of two substances that are dissolved in water: calcium carbonate or
silica. When the organisms die, their tests sink to the bottom and accumulate in a growing blanket of microscopic
sediment called ooze.
Ooze is usually a mixture of plankton tests and extremely fine grained clay minerals. A clay ooze, of course, eventually
becomes claystone1. An ooze that is primarily calcium carbonate (aragonite or calcite), a calcareous ooze, typically turns
into a rock of the limestone2 group. The creation of chert requires a siliceous ooze. The composition of ooze depends on
details of geography: ocean currents, the availability of nutrients in the water, world climate, depth in the ocean and
much more.
Siliceous ooze is mostly made of the tests of diatoms (one-celled algae) and radiolarians (one-celled "animals" or
protists). These organisms build their tests of completely uncrystallized (amorphous) silica. Other minor sources of silica
skeletons include the particles made by sponges (spicules) and land plants (phytoliths). Siliceous ooze tends to form in
cold, deep water because calcareous tests dissolve in those conditions.
Chert Formation and Precursors|
Siliceous ooze turns to chert by going through a slow transformation unlike that of most other rocks. The lithification3
and diagenesis4 of chert is an elaborate process we still have much to learn about.
In some settings, siliceous ooze is pure enough to lithify into a lightweight, minimally processed rock, called diatomite5 if
composed of diatoms or radiolarite if made of radiolarians. But usually things don't stop there.
The amorphous silica of a plankton test is not stable outside the living things that make it. It seeks to crystallize, and as
ooze is buried to depths greater than 100 meters or so, the silica begins to mobilize with the modest rise in pressure and
temperature. There is plenty of pore space and water for this to happen, and plenty of chemical energy being released
by crystallization as well as by the breakdown of organic matter in the ooze.
The first product of this activity is a hydrated silica (opal6) called opal-CT because it resembles cristobalite (C) and
tridymite (T) in X-ray studies. In those minerals, silicon and oxygen atoms stack together with water molecules in a
different arrangement than that of quartz. A less-processed version of opal-CT is what makes up common opal7. A more-
processed version of opal-CT is often called opal-C because in X-rays it looks more like cristobalite. The rock composed
of lithified opal-CT or opal-C is porcellanite8.
More diagenesis causes the silica to lose most of its water as it fills pore space in the siliceous sediment. This activity
converts the silica into true quartz, in microcrystalline or cryptocrystalline form, also known as the mineral chalcedony9.
This rock is now true chert.

74
Chert Attributes and Signs
Chert is as hard as crystalline quartz, hardness 7 in the Mohs scale10—maybe a bit softer, 6.5, if it still has some hydrated
silica in it. Beyond simply being hard, chert is a tough rock. It stands above the landscape in outcrops that resist erosion.
Oil-well drillers dread it because it's so hard to penetrate.
Chert has a curvy conchoidal fracture that is smoother and less splintery than the conchoidal fracture of pure quartz11;
ancient tool makers favored it, and high-quality rock was a trade item between tribes.
Unlike quartz, chert is never transparent and not always translucent. It has a waxy or resinous luster unlike the glassy
luster of quartz. Whereas sandstone is made of quartz grains, chert is made of quartz stuff.
The colors of chert range from white through red and brown to black, depending on how much clay or organic matter it
contains. It often has some sign of its sedimentary origin, such as bedding and other sedimentary structures12 or
microfossils. They may be abundant enough for a chert to get a special name, as in the red radiolarian chert13 carried to
land by plate tectonics from the central ocean floor.
Special Cherts
Chert is a quite general term for noncrystalline siliceous rocks, and some subtypes have their own names and stories.
In mixed calcareous and siliceous sediments, the carbonate and the silica tend to segregate. Chalk beds, the calcareous
equivalent of diatomites, may grow lumpy nodules of chert14 of the type called flint. (Similarly, thick chert beds may
grow nodules and pods of limerock—limestone or dolomite rock.) Flint is commonly dark and gray, and more lustrous
than typical chert.
Agate and jasper are cherts that form outside the deep-sea setting; instead they occur where fractures allowed silica-
rich solutions to enter and deposit chalcedony. Agate is pure and translucent whereas jasper is opaque. Both stones
commonly have reddish colors from the presence of iron oxide minerals. The peculiar ancient banded iron formations15
consist of thin layers of interbedded chert and solid hematite16.
Some important fossil localities are in chert. The Rhynie Cherts, in Scotland, contain remains of the oldest land
ecosystem from nearly 400 million years ago early in the Devonian Period. And the Gunflint Chert, a unit of banded iron
formation in western Ontario, is famous for its fossil microbes, dating from Early Proterozoic time some 2 billion years
ago.
What Chert Means
As we have seen, chert is primarily a seafloor rock that forms at shallow depths of burial. Because it's made almost
entirely of the bodies of plankton, chert is very often rich in organic matter and typically an important source rock for
petroleum. The diagenetic process that turns ooze into stone helps the organic matter escape while the mineral matter
consolidates.
In the cycle of plate tectonics, most of the material on the world's seafloor ends up recycled into the deep Earth through
the process of subduction. Therefore the silica in chert must be an important ingredient in arc volcanism, ore formation,
silica enrichment of magma, and all the other processes that maintain the continents against erosion. The quartz found
everywhere in veins, in granites and ultimately in sandstones and beaches has surely been recycled from chert at least
once in Earth's history.