Embed Size (px)
Citation preview

5301 Oceanus Drive • Huntington Beach, CA 92649-1030 • 714.489.2080 • FAX 714.230.7070 • www.shelleducation.com
Sample Pages from
Strategies for
Interactive Notetaking
Strategies for
Judith Goodman
The following sample pages are included in this download:
• Table of Contents • Introduction excerpt • Lesson plan or sample chapter selection
For correlations to Common Core and State Standards, please visit http://www.teachercreatedmaterials.com/correlations.

Strategies for
Judith Goodman

© Shell Education #51068—Strategies for Interactive Notetaking 3
Table of ContentsIntroduction . . . . . . . . . . . . . . . . . . . . . . . . . . . . . . . . . . . . . . . . . . . . . . 5
Talking Partners Strategies . . . . . . . . . . . . . . . . . . . . . . . . . . . . . . . . 37
Vocabulary Strategies . . . . . . . . . . . . . . . . . . . . . . . . . . . . . . . . . . . . 79
Activating Prior Knowledge Strategies . . . . . . . . . . . . . . . . . . . . . 139
Summarizing Strategies . . . . . . . . . . . . . . . . . . . . . . . . . . . . . . . . . 177
Building Comprehension Strategies . . . . . . . . . . . . . . . . . . . . . . . 215
Primary Sources Strategies . . . . . . . . . . . . . . . . . . . . . . . . . . . . . . . 257
Review Strategies . . . . . . . . . . . . . . . . . . . . . . . . . . . . . . . . . . . . . . . 299
Appendices . . . . . . . . . . . . . . . . . . . . . . . . . . . . . . . . . . . . . . . . . . . . 345

© Shell Education #51068—Strategies for Interactive Notetaking 11
Introduction
An Introduction to Interactive Notetaking (cont.)
What Is an Interactive Notebook? An interactive notebook can be created using any type of blank bound notebook (e.g., spiral notebook or a journal-style notebook). These can be obtained at any school or office-supply store. The pages of the notebook are then utilized to record new learning in the form of lesson input as well as students’ responses to the learning. Many different strategies that are effective with the interactive notebook are provided in this resource. Some of these strategies include different logs for students to record academic conversations with their peers, numerous types of folded-paper activities used for notetaking, assorted graphic organizers to guide students’ thinking about a particular lesson topic, creative ways to use sticky notes to help students build understanding and represent relationships between concepts, and other types of information such as study guides, mini-projects, and reports. All of the strategies in this resource can be used without implementing them in an interactive notebook. However, the best thing about the interactive notebook is that all of these effective lesson strategies and techniques are either created directly in the notebook itself, or students work to complete a separate worksheet and then glue that page into the notebook in order to create a portfolio of classroom learning and help minimize the supplies needed for each lesson. Most lessons that are modeled in this resource require only basic materials such as photocopied activity sheets, pens, pencils, paper, glue, scissors, paper plates, colored pencils, or markers.
Adjacent to each section of input from the lesson, students utilize the built-in space provided in the notebook format to respond to the lesson. They simply turn to the next page and record the reflections, summarizations, responses, and more as directed in the lesson.
When thinking about what an interactive notebook is, the key word part to remember is the base word active. Keeping the concept of active learning in mind at all times will assist you when implementing these strategies in your classroom. The interactive notebook is not a place for students to just copy notes or word definitions, but a place to respond to what they are learning. Interactive notebooks facilitate a notetaking process that allows students to record information in a personal and meaningful way.

#51068—Strategies for Interactive Notetaking © Shell Education12
Introduction
An Introduction to Interactive Notetaking (cont.)
Students will use their interactive notebooks to store information acquired in class for the purpose of referring to and reflecting on at a later time. It becomes a central location for course content and information. Students can reflect on the information presented in class as new material is introduced by the teacher. Interactive notebooks are a way for students to use teacher-supplied notes to analyze, compare/contrast, summarize, synthesize, apply, and more.
Additionally, the interactive notebook becomes a pathway for interactive discussion between students and teachers. In the interactive notebook format, students either write notes or do a guided activity during or after a lesson instruction. By asking students to reflect on the content taught using a specific strategy in this resource, the teacher is able to informally check students’ work to guide further instruction throughout the course of a lesson or unit. This provides the teacher with data to plan a student-teacher discussion about students’ understanding of the content. The students no longer think of their notes as just an assignment for teachers to grade but as a tool that they can use to review, study, and reference during class discussions. The interactive notebook also gives students opportunities to personalize their work and make sense of what they have learned. Since students have notes in their notebooks and reflections they can reference, they will feel more comfortable when asked to discuss their work with a peer or with the teacher.
The interactive notebook can also be used as an accountability method. Notebooks should be monitored and reviewed on a regular basis so that the teacher can drive the instruction from data gathered from students’ notebooks.
Why Use Interactive Notebooks?
Useful OrganizationSo, why use interactive notebooks? Let’s think about an all-too-familiar series of events. Every year, teachers require students to purchase different amounts and types of composition books, notebooks, or binders on their school-supply list. Parents send the notebooks with students to school and students are directed to label their notebooks with the different content areas and place them in their desks. Now, each student has a desk full of school supplies and notebooks. Throughout the school day, students are taking out of their desks and then putting into their desks and then taking out of their desks the various content notebooks as directed by the teacher. In addition, students are provided activity sheets and graphic organizers and asked to reflect and review information throughout the day. All of these materials are then stuffed in a desk or a backpack, never to be seen again except to be trashed or recycled when it comes time to clean or organize. The alternative: interactive notebooks. Interactive notebooks allow students to systematically organize information distributed by the teacher and create a useful learning tool filled with archived materials of class content.

#51068—Strategies for Interactive Notetaking © Shell Education32
How to Use This Book
Lesson ComponentsEach lesson includes the following components to establish the structure and flow.
Section Overview: The section overview is a brief summary with research information of the particular skill that is focused on in each section.
Strategy Overview: This section provides the background knowledge and research for the strategy as well as what to expect as the teacher utilizes the strategy in his or her classroom.
Lesson Framework: The lesson-framework section is the generic foundation of what the strategy should look like. Regardless of the grade level or the content area focus, teachers can use this template as the foundation of what the strategy will look like when they implement it in their classroom.
Sample Lesson StructureStandards: This section provides the standards that are met in the sample lesson. Post the standards clearly so students can see them. Briefly discuss what students will be learning and the task that will demonstrate this learning. Consider posting the standards in both student-friendly language and the original format.
Materials: Materials are listed for each lesson. The majority of materials are commonly found in a classroom or school for easier implementation of the lessons.
Introduction
© Shell Education #51068—Strategies for Interactive Notetaking 39
Talking Partners Overview (cont.)
Talking Partners InsightTalking Partners strategies are purposeful opportunities for students to talk to one another using academic language. It has been said that talking is key to building literacy. Wilkinson introduced the term oracy as a way for people to think about the role that oral language plays in literacy development, defining it as “the ability to express oneself coherently and to communicate freely with others by word of mouth” (Fisher, Frey, and Rothenberg 2008, 11).
We know that children listen and speak well before they can read or write. This is a natural pattern and our brains are wired to acquire language in this way. Children learn that language is power and they use this power to communicate their wants and needs. Different from initial language acquisition, however, our students do not have years to practice speaking about the content that we teach before they have to learn to write about it. When students enter school, the focus of the teacher is to develop their reading and writing skills, and as such, developing their oral language may not continue as vigorously as it should.
So the real question is, how can we not give students the opportunity to talk to one another about the content they are learning? Teaching by telling students what you want them to know may be a quick way to address all of the required learning standards. But educators need to remember that telling does not mean that students are actually learning. In order to continue to develop students’ oral language, students must spend time having conversations with their peers to develop academic language and to achieve the goal of high levels of literacy. The use of the strategies in this section will demonstrate how to use the interactive notebook to develop oral language, literacy, academic vocabulary, and content knowledge.
Understanding the StrategiesThe strategies in this section are designed to help the teacher create opportunities for students to talk to one another about the skills and standards that have been taught. Students will use conversation to develop rich understanding of the content, build their oral academic language, and increase literacy across the content areas. In addition, allowing students to talk to one another will meet the needs of many different types of learners in the classroom. The goal of Talking Partners strategies is to create an atmosphere of student-centered learning. Students will become more comfortable with new information and transfer that comfort to building their background knowledge about the topic. The strategies in this section are as follows:
• Clock Partners
• Think-Pair-Square-Share
• Peer Partner Review
Talking Partners
© Shell Education #51068—Strategies for Interactive Notetaking 43
Clock Partners Talking Partners
Seasons
Grades KÐ2Standards
• Knowsthatshort-termweatherconditions can change daily, and weather patterns change overtheseasons(McREL1.1)
• Studentswilluseappropriatelearning strategies to construct and apply academic knowledge(TESOL2.3)
Materials
• Our Seasons(page45);onecopy per student
• paperplatewithdullsurface;one per student
• glue
• scissors
• coloringutensils
• eachstudent’sinteractivenotebook
3. Modelforstudentshowtolabelthehours(e.g.,12:00,3:00,6:00,9:00)aroundtheedgesoftheirclock.Then, have students label their plates.
4. Explain to students that at your command, they are to find a classmateforeachlabeledhour.When they find a partner, they are to write each other’s names beside the same hour. For example, Student A partners with Student B. Then, they write each other’s names on the 3:00 spot. Remind students that theymustfindadifferentpartnerforeachhourandthatalloftheirhoursmust be filled in. Allow several minutesforstudentstofindpartnersand provide support, as needed. You may want to do one hour at a time so that you can monitor. For example, allow students to find a 3:00partner.Beforetheywriteeach other’s names down, do a quickcheckofallpartnergroupsto ensure that they have correctly followedinstructions.
Differentiation Tip
Modelforstudentshowtofindpartners by choosing a student “partner” and acting out the process. Repeat the process ofwritingdowneachother’snamesacoupleoftimesbeforeallowingstudentstocontinue on their own.
Procedures
1. Distribute a paper plate to each student.
2. Have students write their name in thecenteroftheirpaperplate.
#51068—Strategies for Interactive Notetaking © Shell Education40
Talking Partners
Clock Partners Lesson Framework
Clock Partners Strategy Overview
Have you ever heard these phrases from students? “I don’t want to be your partner!” “I have not found a partner yet!” This type of confusion can be a catalyst for class disruption. Clock Partners is a quick and easy way to create pairs for partnered activities while avoiding problems such as students always having the same partners or not being able to find a partner at all. This strategy allows students to quickly pair up. Partners always have each other’s names written down on their matching hour on the Clock Partners page of their interactive notebook, for easy access.
In addition to eliminating partner commotion, this strategy gives students the opportunity to get up and move, as well as engage in discussion about content that one has taught. In the sample lessons for this strategy, students will take the information that has been set forth, discuss it with their Clock Partners, and then sum up their conversation in a written summary. By discussing academic topics with a partner, students will expand their knowledge about the topic and have an opportunity to make a personal connection. Remember that talking is the pathway for thinking. That is the goal of this strategy. Teachers should give students the opportunity to process new information by discussing it with a partner.
Clock Partners Strategy Insight
This strategy takes students through a process that exposes them to the content through multiple modalities: auditory, kinesthetic, visual, and linguistic. The way each lesson is modeled varies depending upon the age group, but the core strategy remains consistent.
Remember that the person doing the talking in the classroom is the person who is doing the learning. The Clock Partner strategy allows students to quickly partner up, discuss topics that are assigned, make personal connections, practice oral academic language, and develop their social skills. Talking with one another will enhance students’ learning, which will ultimately lead to improved thinking skills.

© Shell Education #51068—Strategies for Interactive Notetaking 33
How to Use This Book (cont.)
Procedures: This section of the lesson provides explicit step-by-step instructions for what is expected of students and what they need to accomplish throughout the lesson to complete the task for the strategy. The lesson frameworks provide a general overview for how to implement the lessons, while the sample lessons provide more specific directions based on a topic.
Assessment: This section shows the teacher how to connect the content of the lesson to a task for Student Output and how to use this to measure students’ achievement of the learning objectives. This section will indicate how to gather information for formative and/or summative assessment.
Student Reproducibles: Some of the sample lessons include student-activity pages for teacher use. Use these pages to fully implement the sample lessons provided in this resource.
Appendices: On pages 345–356 additional resources can be found, including a content-area and a grade-level matrix that provide an overview of each specific strategy and the content-area focus.
Digital Resource CD: All of the activity pages can be found on the Digital Resource CD. For a complete list of files, see pages 354–356.
Introduction
© Shell Education #51068—Strategies for Interactive Notetaking 105
VocabularyChart and Match
All About Weather
Grades KÐ2Standards
• Understands atmospheric processes and the water cycle (McREL1.0)
• Students will use English to interact in the classroom (TESOL2.1)
Materials
• Rain,Rain,Rain(page107);one copy per student
• PrimaryChartandMatchGrid(page103);onecopyperstudent
• highlighters or pens to annotate text
• scissors
• glue
• eachstudent’sinteractivenotebook
Procedures
1. Distribute the text that you have selected to students. Explain to students that as they read the text, theywillbelookingforimportantvocabularywords.Writefourwordsthatyouhavepreselectedfromthetext on the board and review them with students. Based on the text you select, you may include terms such as flooded, lightning, thunder, or storm. You can practice saying the words aloud with students.
2. Together as a class read the text about weather. Point out the chosen vocabulary words as you read them in the text and model with students how to highlight, circle, or underline the vocabulary words.
3. Afteryouhavecompletedreadingthe text together, noting the important vocabulary words, distribute the PrimaryChartandMatchGrid(page103).Instructstudents to copy the selected vocabulary words that you wrote on the board in the first column, under the VocabularyWord header.
Differentiation Tip
You can write in the selected vocabulary words in the first columnbeforecopyingtheChart andMatchGridforstudents.Thiswill support students by providing them with the correct organization forcompletingthegrid.
#51068—Strategies for Interactive Notetaking © Shell Education106
Vocabulary Chart and Match
All About Weather (cont.)
4. Havestudentscompletetherestofthe chart by drawing an illustration ofthevocabularywordinthePicturecolumn.Then,modelforstudents how to read the context around the vocabulary word. Have students think about what the text says about the word and then write theirowndefinitionofthewordinthe What does it mean? column.
5. Repeatsteps3–4foreachoftheother words, providing support as needed.
6. Afterstudentshavecompletedthechart, have them cut apart all the rows on the grid. Students can use the dashed lines around each row as a guide.
7. Provide support as students then walk around the room with their pieces and find other students to trade rows with. Explain that when they find a classmate, they should only swap rows that have the same vocabulary word in them. Each student should end up with amixtureofpiecesthatcreateacomplete chart.
8. Have students create a new chart on the next clean Lesson Input pageoftheirnotebookwiththepiecestheycollectedfromtheirclassmates. Walk around the room and check students’ new charts created with their traded rows. Students should not glue anything to the page until you have checked theirnewchartforaccuracy.
9. Students should then label the three columns with the same terms used on the PrimaryChartandMatchGridthat they cut apart (VocabularyWord, Picture, and What does it mean?).
10. Ask students to write the main topic, Weather,atthetopofthepage above their chart.
Assessment
OntheStudentOutputpageforthislesson, have students choose one ofthevocabularywordsandrelateit to their own experience. Students shouldwritethewordatthetopofthepage and then write a sentence or two and/ordrawapicture.Forexample,ifastudentchoosesthevocabularyword rain, they can write about a time when they have experienced the rain or they could draw a picture ofthetypeofclothingtheywearinthe rain, such as rain boots or a rain jacket. Students can show their understandingofthevocabularywordby the connections they make in their writing or drawings.
© Shell Education #51068—Strategies for Interactive Notetaking 45
Name: _____________________________________ Date: _______________________
Talking PartnersSeasons
Our Seasons
Directions: Look at the boxes below. Read the word at the top of each box. Draw a picture for each season.
winter spring
summer fall
Digital Resource CDThis CD contains reproducible teacher resource materials
and student activity pages.
© 2014 Shell Education
SEP 51008
NotetakingNotetaki
Strategies for
For use with either Macintosh®
or Windows®
#51068—Strategies for Interactive Notetaking © Shell Education350
Content-Area Matrix
Language Arts Mathematics
Talking Partners Strategies • Summarizing (Grades 3–5; page 60)
Vocabulary Strategies • Story Elements (Grades 3–5; page 92) • A Day at the Pumpkin Patch (Grades K–2;
page 128)
Activating Prior Knowledge Strategies • Julius Caesar (Secondary; page 150) • Figurative Language: Metaphors (Grades
3–5; page 157) • Dogs Help Us (Grades K–2; page 164)
Summarizing Strategies • Conflict: Goldilocks and the Three Bears
(Grades K–2; page 195) • Emilia the Eccentric (Grades 3–5; page 197) • Conflict: Hamlet (Secondary; page 200)
Building Comprehension Strategies • Chrysanthemum (Grades K–2; page 247) • Alice’s Adventures (Grades 3–5; page 249)
Review Strategies • Figurative Language (Grades 3–5; page 326) • A Chair for My Mother (Grades K–2;
page 338) • The Great Kapok Tree (Grades 3–5;
page 340) • The Hunger Games (Secondary; page 342)
Talking Partners Strategies • What Shape Is It? (Grades K–2; page 58) • Understanding Addition and Subtraction
(Grades K–2; page 69) • Organizing Data (Grades 3–5; page 72) • Graphing Linear Equations (Secondary;
page 75)
Vocabulary Strategies • Shapes Are Everywhere! (Grades K–2;
page 86) • Measuring the Volume of Solids and Liquids
(Grades 3–5; page 108) • Multiplication and Division of Fractions
(Secondary; page 112) • Geometry Terms (Grades 3–5; page 121) • Comparing Graphs (Secondary; page 134)
Activating Prior Knowledge Strategies • Pictographs (Grades K–2; page 155)
Summarizing Strategies • Standard and Nonstandard Measurement
(Grades K–2; page 183)
Building Comprehension Strategies • Bake Sale (Grades K–2; page 222) • Comparing Addition and Subtraction
(Grades K–2; page 235)
Review Strategies • 2-D and 3-D Shapes (Grades K–2; page 322) • Algebraic Expressions and Equations
(Secondary; page 331)
Appendices

#51068—Strategies for Interactive Notetaking © Shell Education84
Vocabulary Frayer Model
Frayer Model Lesson Framework (cont.)
Materials
• 8.5" × 11" paper of different colors
• markers
• scissors
• stapler or glue plus small scraps of colored paper for book binding
• each student’s interactive notebook
corners of each fl ap to create a diamond-shaped window in the center of the paper. Then, have students write one of the assigned vocabulary words in the window.
5. With the fl aps folded down, students should write on the top of the four “shutter door” fl aps the following:
Top left fl ap: De� nition
Top right fl ap: Characteristics
Bottom left fl ap: Example
Bottom right fl ap: Non-Example
De�nition Characteristics
Non-ExampleExample
word
6. Under each fl ap, students should write the following:
• De� nition: Students create their own defi nition of the vocabulary word.
• Characteristics: Students write adjectives that describe the vocabulary word. For primary grades, you may ask for synonyms under this fl ap.
• Example: Students write examples of the vocabulary word. This could include illustrations, pictures, or statements.
Procedures
1. Distribute 3–5 sheets of different colored paper to each student. Students will need one sheet of paper for each vocabulary word that you wish to teach in the lesson.
2. Have students fold the paper in a horizontal fold.
3. Have students open the paper back up to 8.5" × 11" size and hold the paper in landscape layout. Fold in each side of the paper to the creased fold to create a “shutter doors” fold.
4. While the “shutter doors” are still folded inward, instruct students to cut both of the shutter doors in half to create four fl aps. While still folded, have students fl ip up, or dog ear, the four center

© Shell Education #51068—Strategies for Interactive Notetaking 85
VocabularyFrayer Model
Frayer Model Lesson Framework (cont.)
• Non-Example: Students write non-examples that demonstrate what the vocabulary word is not. Remind students that a non-example should be meaningful and not random. One way to come up with a non-example is to think of the opposite of the example. You may need to model this for students.
7. Repeat Steps 2–6 for each of the vocabulary words.
8. Have students fold each of the Frayer Model booklets back over the horizontal fold that they made in Step 2, and then lay the books out in alphabetical order of the vocabulary words. Students will number the booklets from left to right.
9. Students should then stack the booklets one on top of the other so all the folds are on the left and all of the open ends are on the right. Booklet #1 should be on top, then booklet #2, #3, and so on for all of the booklets that students have created.
10. Direct each student to attach the booklets together either with glue or staples. To glue the booklets together, create a binding for the booklet using the scraps of paper.
11. Students can then create a title for the book and write it on the front cover of the stacked booklets. The title should be the common topic for all the vocabulary words. You may wish to provide students with sample titles or brainstorm ideas together.
12. Have each student then attach the booklet to the next blank Lesson Input page of their interactive notebook.
Assessment
For primary students, ask them to look at the words included in their Frayer Model booklet. Direct students to the Student Output page of their interactive notebook for this lesson where they will write one thing they have learned about the content taught. Then, students should review their booklet with a partner. As the partners talk to one another, listen for the correct use of the new vocabulary in the students’ dialogue.
For older students, have them turn to the Student Output page of the notebook for this lesson. They should then write a summary of the topic using the vocabulary words in the Frayer Model booklet. Assess students by checking their understanding of the topic through the correct explanation and usage of the vocabulary words in their examples.
#51068—Strategies for Interactive Notetaking © Shell Education86
Frayer Model
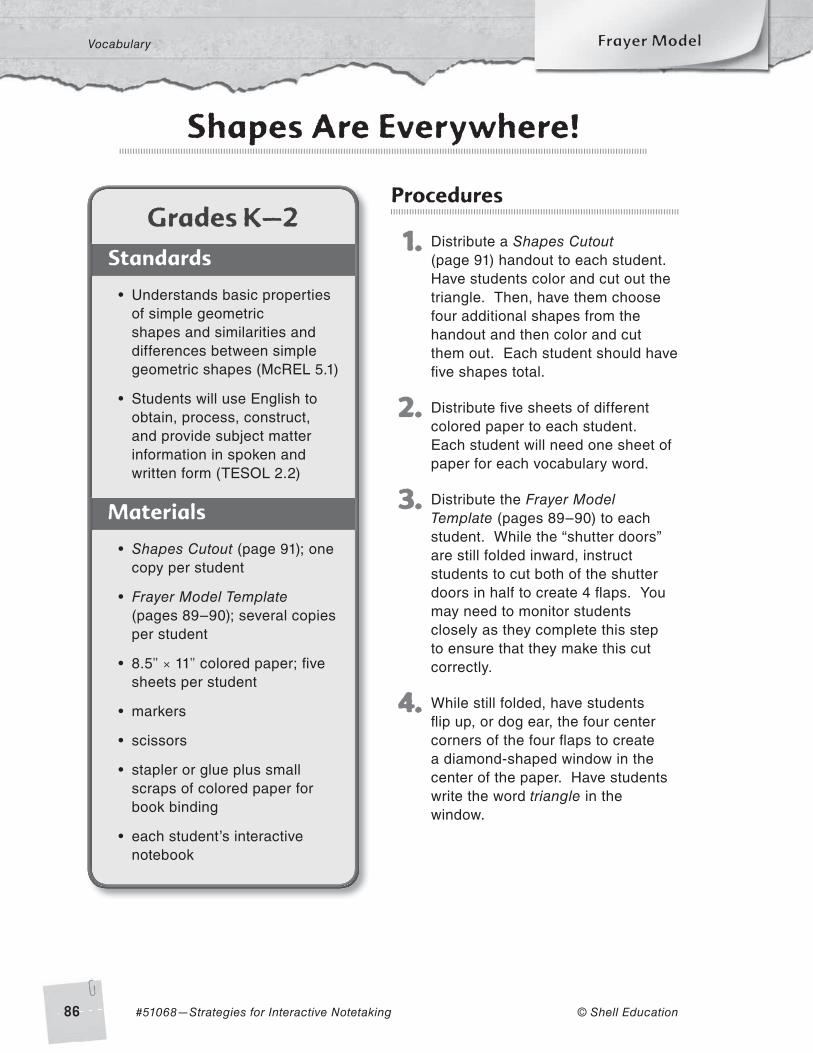
Shapes Are Everywhere!
Grades KÐ2Standards
• Understands basic propertiesof simple geometric shapes and similarities and differences between simple geometric shapes (McREL 5.1)
• Students will use English to obtain, process, construct, and provide subject matter information in spoken and written form (TESOL 2.2)
Materials
• Shapes Cutout (page 91); one copy per student
• Frayer Model Template (pages 89–90); several copies per student
• 8.5" × 11" colored paper; fi ve sheets per student
• markers
• scissors
• stapler or glue plus small scraps of colored paper for book binding
• each student’s interactive notebook
Procedures
1. Distribute a Shapes Cutout (page 91) handout to each student. Have students color and cut out the triangle. Then, have them choose four additional shapes from the handout and then color and cut them out. Each student should have fi ve shapes total.
2. Distribute fi ve sheets of different colored paper to each student. Each student will need one sheet of paper for each vocabulary word.
3. Distribute the Frayer Model Template (pages 89–90) to each student. While the “shutter doors” are still folded inward, instruct students to cut both of the shutter doors in half to create 4 fl aps. You may need to monitor students closely as they complete this step to ensure that they make this cut correctly.
4. While still folded, have students fl ip up, or dog ear, the four center corners of the four fl aps to create a diamond-shaped window in the center of the paper. Have students write the word triangle in the window.
Vocabulary

© Shell Education #51068—Strategies for Interactive Notetaking 87
Shapes Are Everywhere! (cont.)
5. Use the vocabulary term triangle to model for students how to complete the Frayer Model. Under each fl ap write the following:
• De� nition: Think aloud the process for developing your own defi nition for this vocabulary term. In this fl ap, write the following defi nition for a triangle: A shape with three sides.
• Characteristics: Explain to students that they will write adjectives that describe a triangle in this fl ap. Model for students how to do so by writing the following characteristics of a triangle: Straight sides, no curves, closed shape.
• Example: Direct students to glue the shape of the triangle under the Example fl ap. Students can also draw a picture of a real-life object that is shaped like a triangle.
• Non-Example: Have students draw or glue a picture of a shape that is not a triangle to demonstrate what the vocabulary word is not. Model for students how to consider why another shape is not a triangle. For example, draw a square in this fl ap as a non-example. Explain to students that this is a non-example of a triangle because it is a shape with four sides, not three.
6. Repeat Steps 3–5 for each of the remaining shapes that students cut out. Based on students’ readiness, this can be completed as guided practice or independently.
Differentiation Tip
For each vocabulary term in this lesson, you can have the defi nition, characteristics, example, and non-example pre-printed and cut into strips for students. You can distribute these to certain students who will then glue the strips under the correct fl ap rather than write them in.
7. Have students fold each Frayer Model booklet back over the horizontal fold that they made in Step 3, and then guide students in laying the books out in alphabetical order of the vocabulary words. Next, have students number the booklets from left to right, 1–5.
8. Show students how to stack the booklets one on top of the other so all the folds are on the left and all of the open ends are on the right. Booklet #1 should be on top, then booklet #2, #3, #4, and #5.
Frayer Model Vocabulary

#51068—Strategies for Interactive Notetaking © Shell Education88
Shapes Are Everywhere! (cont.)
9. Direct students to attach the booklets together either with glue or staples. To glue the booklet together, create a binding for the booklet using the scraps of paper.
10. Have students write the title for the book, Shapes, on the front cover of the stacked booklets. Students can then attach the booklet to the next blank Lesson Input of their interactive notebooks.
Assessment
Ask students to look at the shape words in their Frayer Model book. Direct students to the Student Output page of their interactive notebook for this lesson, where they will write one real-world connection that they can make to one of the shapes that they learned about. For example, if a student recognized the triangle as a yield sign, then they can draw a yield sign on the facing page. Then, have students review their booklet and real-world connection with a partner. As partners are talking to one another, listen for the correct use of the content-area and academic vocabulary in the students’ dialogue as they discuss the shapes, its characteristics, examples, etc. The key is for students to be able to use their own words to talk about the different shapes and relate some of those shapes to the real world.
Frayer ModelVocabulary

© Shell Education #51068—Strategies for Interactive Notetaking 89
Name: __________________________________ Date: ___________________
Frayer Model Template
Directions: Cut along the dotted lines to create your template.
VocabularyShapes Are Everywhere!
Definition Characteristics
Non-Example Example

#51068—Strategies for Interactive Notetaking © Shell Education90
Frayer Model Template (cont.)
Vocabulary Shapes Are Everywhere!
Definition Characteristics
Non-Example Example

© Shell Education #51068—Strategies for Interactive Notetaking 91
Name: _______________________________________ Date: _______________________
Vocabulary
Shapes Cutout
Directions: Color and cut out the shapes below.
Shapes Are Everywhere!