Embed Size (px)
Citation preview

Sage Pay User Guide for Sage 200

Page 2 of 13
1.0 Getting Started 3
2.0 Activating Sage Pay 4
3.0 Setting up your Merchant Account 8
4.0 Processing Payments 11
Table of Contents
Page 3 of 13
To take full advantage of the Sage Pay features within Sage 200 you will need to contact
your Business Partner to enable the payment module. , You will also need the following:
• Sage 200 A live Sage Pay account
• A Mail & Telephone order payment merchant bank account number to enable you
to accept card payments through the virtual terminal
To find out more about Sage 200 and how it can support your business please visit:
http://www.sage.co.uk/business-resources/big-business-advice/sage-200-resources.html
1.1 How to apply for a Sage Pay account
If you’re an existing Sage 200 customer and new to Sage Pay, it’s easy to get up and
running with accepting card payments. Simply fill in our online application form and we’ll
guide you through each step. Once we receive your, we'll be in touch within 48 hours. You
will also need to speak with your Buisness Partner to enable the payment module.
Click to apply now: https://support.sagepay.com/apply/
1.2 Applying for a merchant bank account
When creating a new Merchant Account, or if you’re looking to switch – we make it easy
for you. Opening a Merchant Account with Sage Pay gives you competitive transaction
charges, no long term contract commitments and a central place to take care of any of
your payments queries. Take a look at our website (www.sagepay.com/merchant-
services) or contact our sales team on 0845 111 44 66 for more information.
1.0 Getting Started
Page 4 of 13
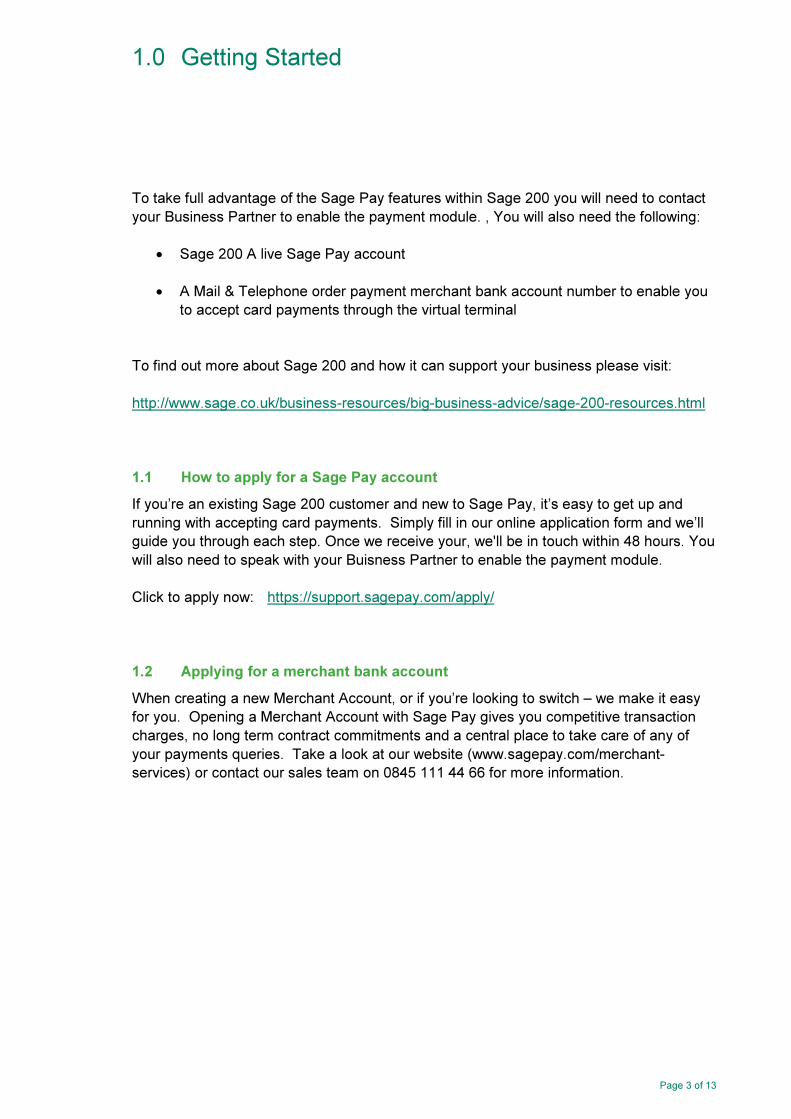
Before you begin, enter your server IP address in Sage Pay settings.
Note: If you are using Sage 200 Online, this is your Windows Azure
Server IP address.
1. To activate Sage Pay online payments within your Sage 200 software, open
System Administration.
2. Enter your Sage Pay vendor account details
a. From Online Payments, right click Vendor Accounts and select Add
New Vendor Configuration.
2.0 Activating Sage Pay
Page 5 of 13
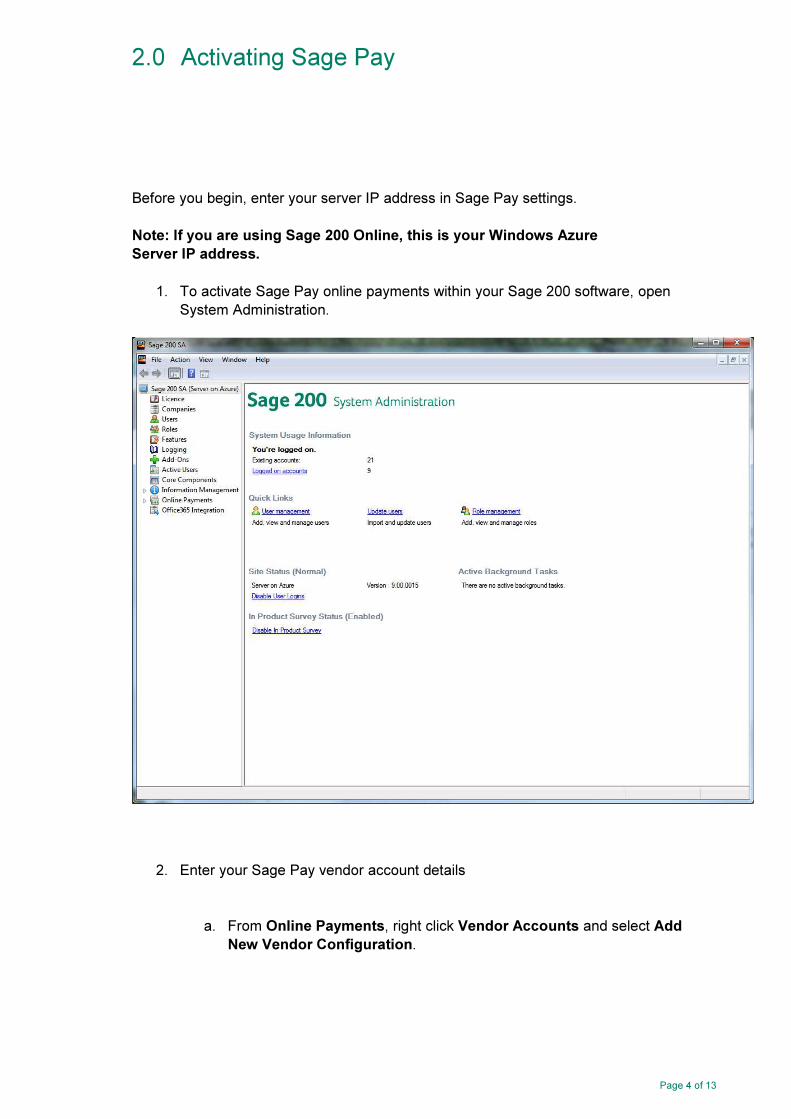
b. Select Sage Pay from the drop-down list and click OK.
3. Under the General tab, enter a Configuration Name.
Page 6 of 13
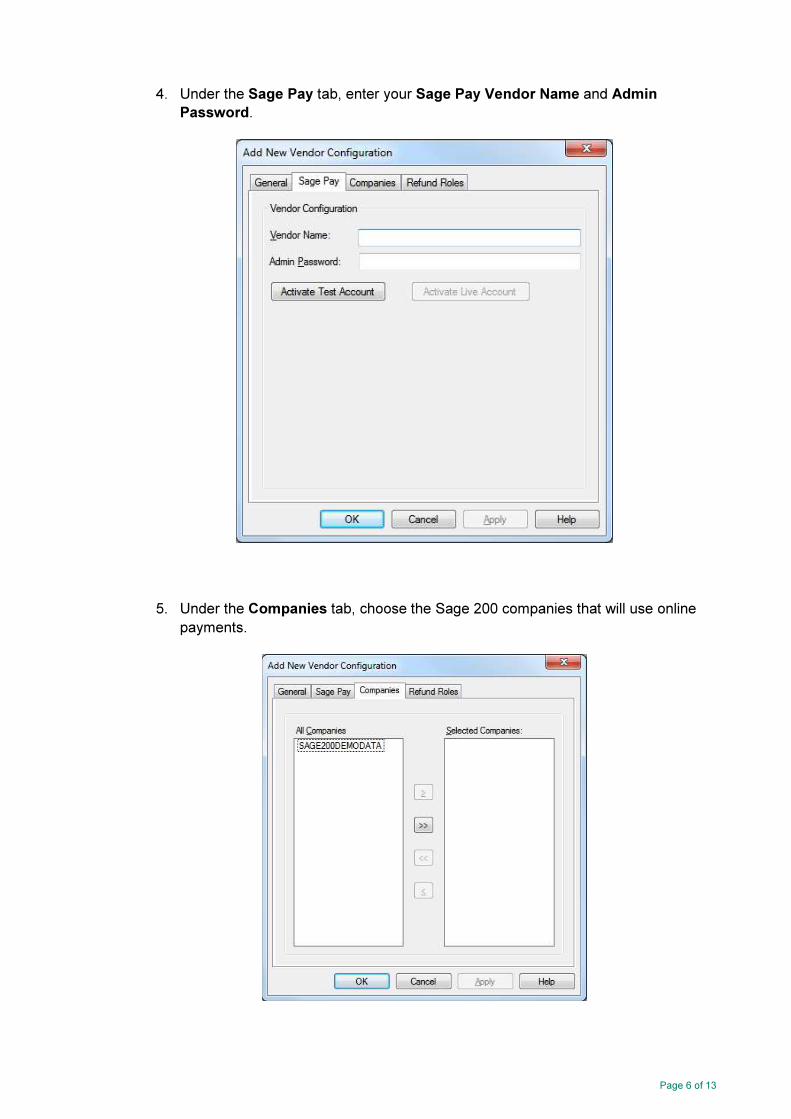
4. Under the Sage Pay tab, enter your Sage Pay Vendor Name and Admin
Password.
5. Under the Companies tab, choose the Sage 200 companies that will use online
payments.

Page 7 of 13
6. Under the Refund Roles tab, choose the Sage 200 roles that are authorised to
make refunds. All Sage 200 users within your chosen roles will be
able to process online refunds in Sage 200.
7. If your Sage Pay account is not already live, return to the Sage Pay tab and click
Activate Test account. A Sage 200 user will now be added to your Sage Pay
Test account, and you’ll receive this message:
8. Now you’ll be able to Activate Live Account. When you click this, you’ll receive
the same message as before, which adds the same Sage 200 user this time to
your Sage Pay Live account. It will also complete the required testing to go live by
automatically performing a £1 payment to your Test account and refunding this
payment.
Page 8 of 13
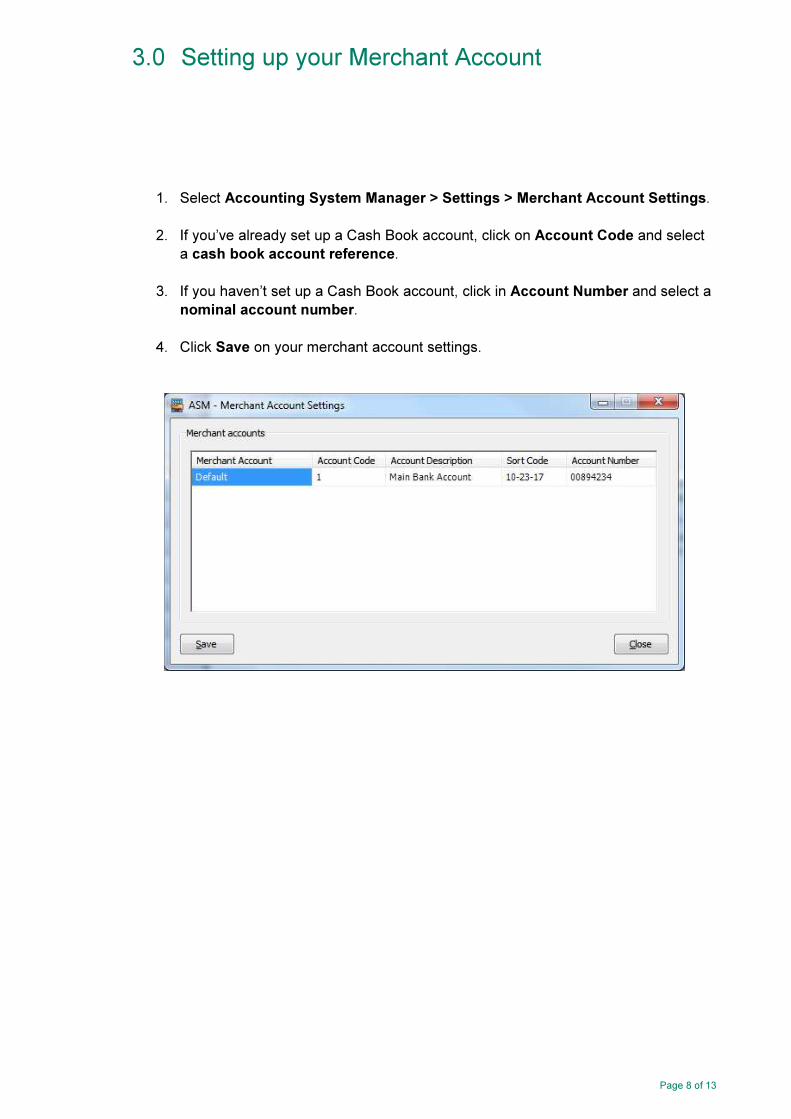
1. Select Accounting System Manager > Settings > Merchant Account Settings.
2. If you’ve already set up a Cash Book account, click on Account Code and select
a cash book account reference.
3. If you haven’t set up a Cash Book account, click in Account Number and select a
nominal account number.
4. Click Save on your merchant account settings.
3.0 Setting up your Merchant Account
Page 9 of 13
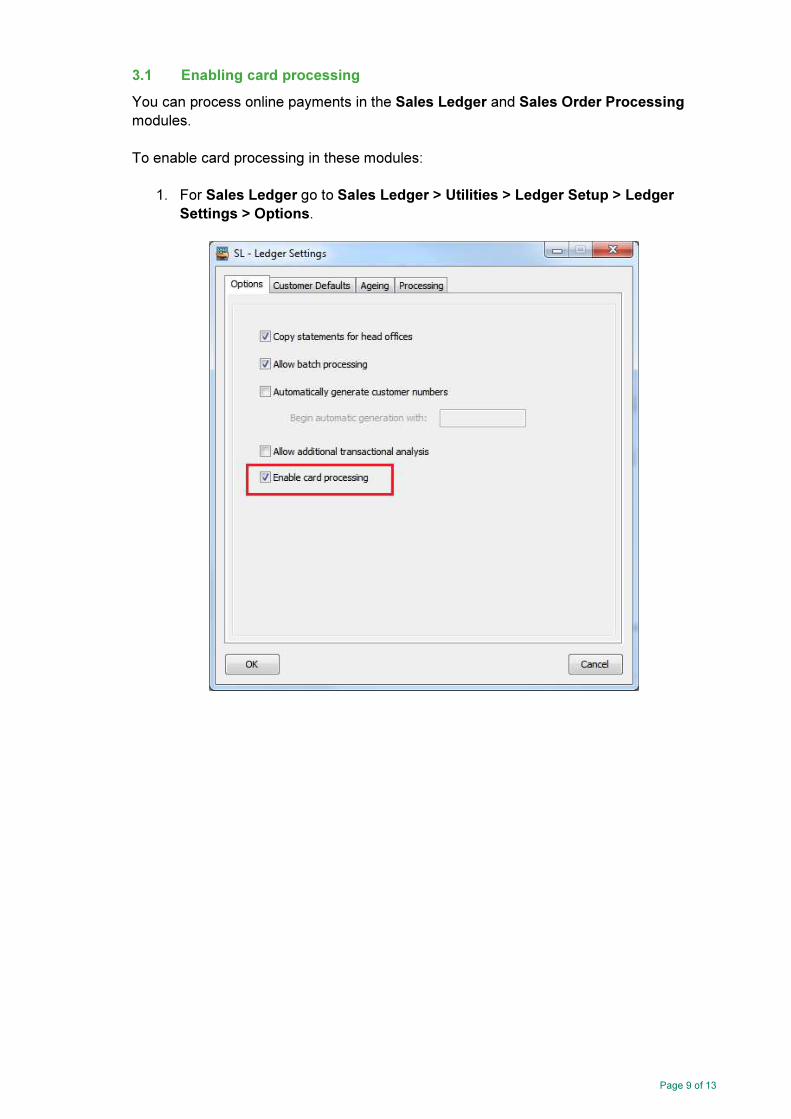
3.1 Enabling card processing
You can process online payments in the Sales Ledger and Sales Order Processing
modules.
To enable card processing in these modules:
1. For Sales Ledger go to Sales Ledger > Utilities > Ledger Setup > Ledger
Settings > Options.
Page 10 of 13
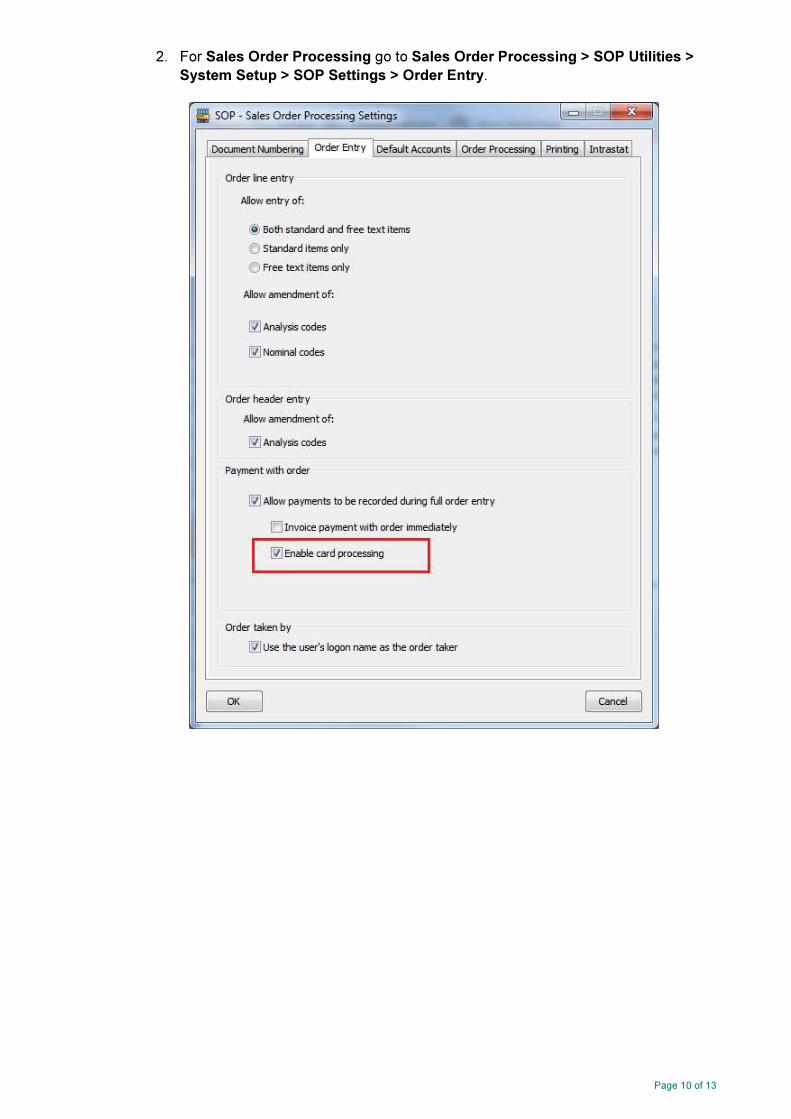
2. For Sales Order Processing go to Sales Order Processing > SOP Utilities >
System Setup > SOP Settings > Order Entry.

Page 11 of 13
4.1 Process a payment in Sales Ledger
1. Select Sales Ledger > Enter transactions > Online Card Receipt.
2. Enter the details of the receipt and click Save.
3. Enter the card details and click Save.
4.0 Processing payments
Page 12 of 13
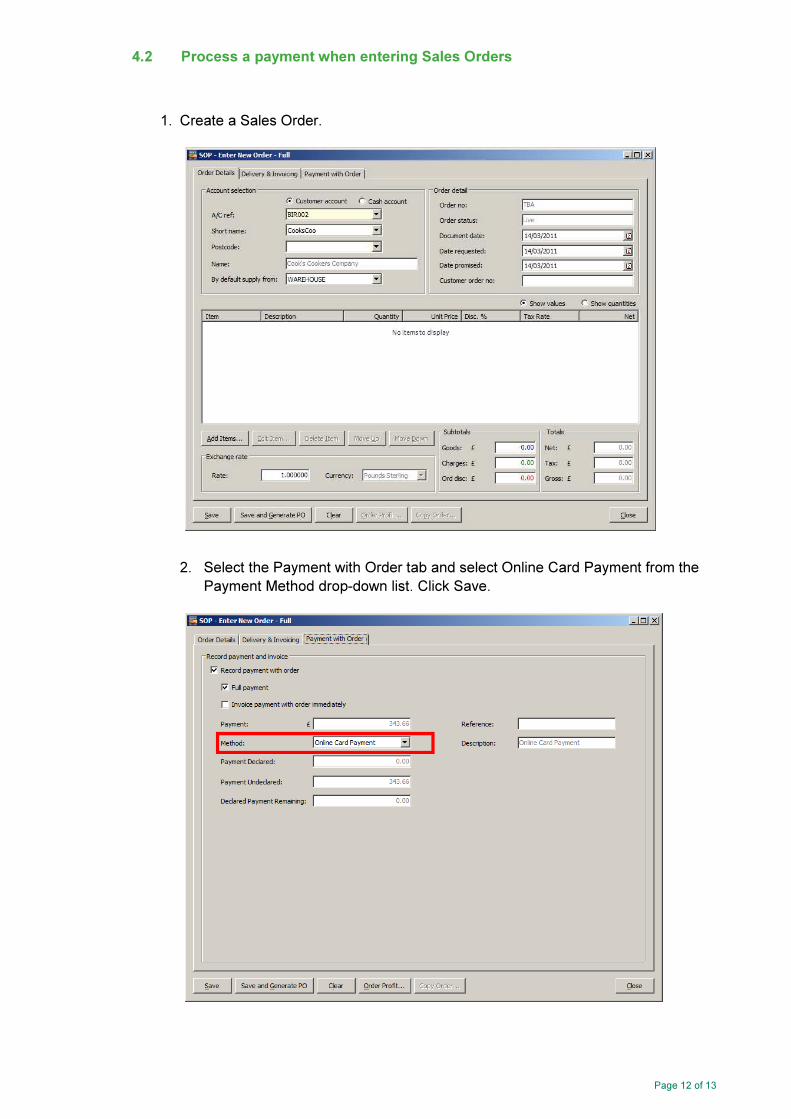
4.2 Process a payment when entering Sales Orders
1. Create a Sales Order.
2. Select the Payment with Order tab and select Online Card Payment from the
Payment Method drop-down list. Click Save.
Page 13 of 13
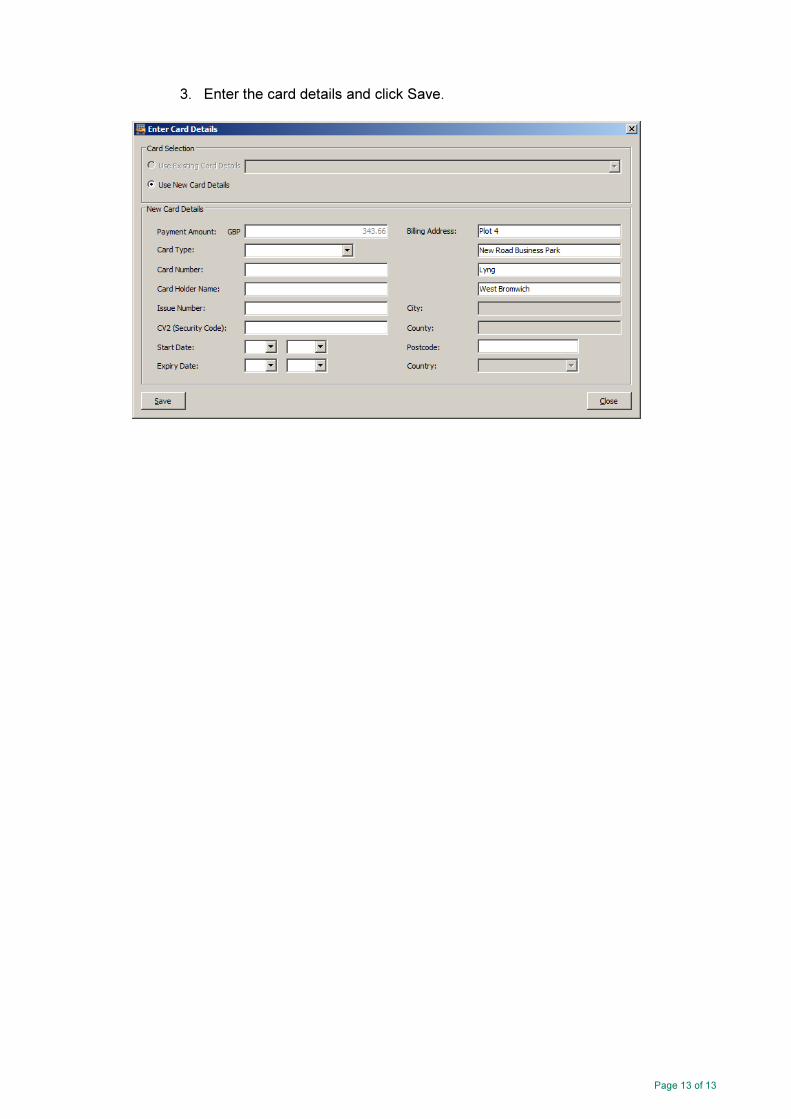
3. Enter the card details and click Save.


![[Sage Pay] User experience in multichannel businesses](https://img.dokumen.tips/doc/110x75/554dd95db4c905cc0e8b4e6a/sage-pay-user-experience-in-multichannel-businesses.jpg)