Embed Size (px)
Citation preview

Copyright 2015, FCA US LLC, All Rights Reserved (wah)
July 2015 Dealer Service Instructions for:
Safety Recall R38
Rear Suspension Lower Control Arms
NOTE: All of the involved vehicles in this recall were also involved in Safety Recall
R33. Due to a change in the build date ranges of the lower control arms, a second
inspection of most of the vehicles that were involved in Safety Recall R33 is required.
2015 (WD) Dodge Durango
(WK) Jeep Grand Cherokee
NOTE: This recall applies only to the above vehicles built from June 12, 2015 through
June 20, 2015 (MDH 061207 through 062015).
IMPORTANT: Many of the vehicles within the above build period have already been
inspected or repaired and, therefore, have been excluded from this recall.
The rear suspension lower control arms on about 5,600 of the above vehicles may
have been incorrectly heat treated during the manufacturing process. This could
cause the rear suspension lower control arm to break. A broken rear suspension
lower control arm(s), during certain driving conditions, could cause a loss of
vehicle control and/or a crash without warning.
The build date code on both rear suspension lower control arms must be inspected.
Lower control arms found within a certain build date range must be replaced.
Models
IMPORTANT: Some of the involved vehicles may be in dealer new vehicle inventory.
Federal law requires you to complete this recall service on these vehicles before retail
delivery. Dealers should also consider this requirement to apply to used vehicle inventory and
should perform this recall on vehicles in for service. Involved vehicles can be determined by
using the VIP inquiry process.
Subject
Repair

Safety Recall R38 – Rear Suspension Lower Control Arms Page 2
Dealers should attempt to minimize customer inconvenience by placing the owner
in a loaner vehicle if inspection determines that the rear suspension control arm(s)
replacement is required and the vehicle must be held overnight.
Part Number Description
52124811AG Arm, Left Rear Lower Control
52124810AG Arm, Right Rear Lower Control
Order one of each part below for each control arm being replaced:
06509622AA Bolt, Clevis
06102252AA Nut, Clevis
06506587AA Bolt, Ball Joint-to-Control Arm
06509298AA Nut, Hub
68077935AA Cap, Bolt Cover
Order two of each part below for each control arm being replaced:
06104266AA Bolt, Lower Control Arm
06104719AA Nut, Lower Control Arm
Order three of each part below for each control arm being replaced:
06509461AA Bolt, Tension/Toe/Camber Link
06104718AA Nut, Tension/Toe/Camber Link
No parts return required for this campaign.
Alternate Transportation
Parts Information
Parts Return

Safety Recall R38 – Rear Suspension Lower Control Arms Page 3
The following special tools are required to perform this repair:
NPN wiTECH VCI Pod Kit
NPN Laptop Computer
NPN wiTECH Software
Special Tools

Safety Recall R38 – Rear Suspension Lower Control Arms Page 4
A. Rear Lower Control Arm Inspection 1. Apply the “Parking” brake.
2. Lift the vehicle on an appropriate hoist, if at the dealership, or crawl under the
vehicle.
3. Carefully clean the rear suspension lower control arms at the area where the
build date code is located (Figure 1).
Service Procedure

Safety Recall R38 – Rear Suspension Lower Control Arms Page 5
4. Inspect the build date code on both rear suspension lower control arms:
NOTE: The build date code numbers are upside down on the control arm
when installed on the vehicle.
For the right rear lower control arm, if the build date code is on or between
1625 9:26:00 and 1635 08:10:00 replace the control arm. If off-site, first have
vehicle towed to the dealership.
For the left rear lower control arm, if the build date code is on or between
1625 9:54:00 and 1645 16:15:00 replace the control arm. If off-site, first have
vehicle towed to the dealership.
If the build date code is not legible, replace the lower control arm(s). If off-site, first
have vehicle towed to the dealership.
If control arm replacement is required, for vehicles with air suspension continue with
Section B. Depressurize Air Suspension. For vehicles without air suspension,
continue with Section C. Replace rear suspension lower control arm.
Service Procedure
RIGHT SIDE REAR LOWER CONTROL ARM
LEFT SIDE REAR LOWER CONTROL ARM
DATE CODE DATE CODE
REAR PROPELLER SHAFT
REAR DIFFERENTIAL
PART NUMBER PART NUMBER
Figure 1 – Date Code Location

Safety Recall R38 – Rear Suspension Lower Control Arms Page 6
B. Depressurize Air Suspension (WK Only)
1. Connect the wiTECH scan tool to the vehicle.
2. Start a wiTECH session.
3. From the “Vehicle View” screen, select the “ASCM” icon.
4. Select the “Misc. Functions” tab.
5. Select “Disable Level Control” from the list.
6. Follow the screen prompts.
7. Select “Spring Deflate to Reservoir” from the list.
8. Follow the screen prompts.
9. Repeat Steps 7 and 8 of this procedure to insure the air suspension is fully
deflated.
10. Continue with Section C. Replace Rear Suspension Lower Control Arms.
Service Procedure (Continued)

Safety Recall R38 – Rear Suspension Lower Control Arms Page 7
C. Replace Rear Suspension Lower Control Arm
1. For WD models only, remove the spare tire.
2. Release the park brake and lift the vehicle on the hoist.
3. Remove the rear wheel(s).
4. Bottom the caliper pistons into the caliper by prying the caliper over.
5. Remove the caliper slide pin covers and slide pins.
CAUTION: Never allow the disc brake caliper to hang from the brake
hose. Damage to the brake hose will result. Provide a suitable support to
hang the caliper securely.
6. Remove the disc brake caliper from the adapter and hang it from a suitable
support.
7. Remove and save the brake caliper adapter.
8. Remove and save the brake rotor.
9. For WD models only, remove and save the spare tire plastic heat shield.
10. Use the following procedure to disconnect the park brake cable end from the
park brake equalizer:
a. Compress the equalizer return spring.
b. Pull the left brake cable out and disconnect the right side park brake cable.
c. Pull the left park brake cable out and hold it in place with needle nose locking
plier that have rubber hose on the jaws.
d. Disconnect the equalizer from the left cable.
11. Disconnect the park brake cable from the frame anchor.
Service Procedure (Continued)

Safety Recall R38 – Rear Suspension Lower Control Arms Page 8
12. For left control arm replacement, disconnect the ride height sensor link at the
lower control arm.
13. Disconnect the rear stabilizer bar link at the lower control arm.
14. Remove the wheel speed sensor from the rear suspension knuckle.
15. Remove and discard the original halfshaft hub nut.
16. Disconnect the tension link from the rear suspension knuckle.
17. Disconnect the camber link from the rear suspension knuckle.
18. Disconnect the toe link from the rear suspension knuckle.
19. Remove and save the rear suspension coil spring or suspension airbag (as equipped).
20. Disconnect the lower shock absorber retaining bolt at the lower control arm.
21. Disengage the halfshaft from the rear wheel hub.
CAUTION: Support the halfshaft, do not allow the halfshaft to hang.
22. Pull the park brake cable out of the plastic routing clip.
23. Remove and discard the lower ball joint nut.
24. Separate the rear suspension knuckle from the lower control arm ball joint.
25. Remove and save the rear suspension knuckle.
26. Remove and discard the lower control arm forward pivot nut.
27. Push the lower control arm pivot bolt forward.
28. Using a cut off wheel, cut off the lower control arm pivot bolt head.
29. Remove and discard the remaining lower control arm pivot bolt.
Service Procedure (Continued)

Safety Recall R38 – Rear Suspension Lower Control Arms Page 9
30. Remove and discard the lower control arm rear pivot bolt nut.
31. While holding the lower control arm, remove and discard the rear lower control
arm pivot bolt and remove the original lower control arm from the vehicle.
32. For left control arm replacement, transfer the load sensor bracket from the
original lower control arm to the new lower control arm.
33. Place the new lower control arm into position and install the lower control arm
forward pivot bolt first.
34. Install the lower control arm forward pivot bolt nut hand-tight.
NOTE: The front control arm to cradle bolt is installed from rear to front
so that the nut is installed on the fuel tank side. This is the opposite of the
manufacturing installation.
35. Install the lower control arm rear pivot bolt and nut. Hand-tighten the nut only.
36. Place the original rear suspension knuckle into position on the lower ball joint
stud. Install the new ball joint nut and tighten to 129 ft. lbs. (175 N·m).
37. Insert the halfshaft into the rear wheel hub.
38. Route the park brake cable through the plastic routing clip.
39. Insert a new tow link nut and bolt. Hand-tighten only.
40. Insert a new camber link nut and bolt. Hand-tighten only.
41. Insert a new tension link bolt and nut. Hand-tighten only.
42. Install a new halfshaft retaining nut. Tighten the nut to 221 ft. lbs. (300 N·m).
43. For left control arm replacement, connect the ride height sensor link to the
lower control arm.
Service Procedure (Continued)

Safety Recall R38 – Rear Suspension Lower Control Arms Page 10
44. Install the wheel speed sensor. Tighten the retaining bolt to 97 in. lbs. (11 N·m).
45. Connect the park brake cable to the park brake equalizer.
46. For WD models only, install the spare tire plastic heat shield.
47. Install the brake rotor.
48. Install the brake caliper adapter. Tighten the adapter bolts to 81 ft. lbs.
(110 N·m).
49. Install the brake caliper. Tighten the brake caliper slide pins to 20 ft. lbs.
(28 N·m). Then install slide pin caps.
50. Install the rear suspension coil spring or suspension airbag (as equipped).
CAUTION: Be sure the spring is “Keyed” correctly to the lower control
arm.
51. Place the shock absorber into position on the lower control arm and install a
new nut and bolt. Tighten the nut to166 ft. lbs. (225 N·m).
52. Connect the rear stabilizer bar link to the lower control arm. Install a new nut
and tighten the nut to 75 ft. lbs. (102 N·m).
53. Install the rear wheel(s).
54. Lower the vehicle from the hoist.
55. For WD models only, install the spare tire.
56. For vehicles:
with air suspension, continue with Section D. Pressurize Air Suspension.
without air suspension, continue with Section E. Four Wheel Alignment.
Service Procedure (Continued)

Safety Recall R38 – Rear Suspension Lower Control Arms Page 11
D. Pressurize Air Suspension
1. Connect the wiTECH scan tool.
2. Start a wiTECH session.
3. From the “Vehicle View” screen, select the “ASCM” icon.
4. Select the “Misc. Functions” tab.
5. Select “Disable Level Control” from the list.
6. Follow the screen prompts.
7. From the “Misc. Functions” tab, select “Fill Spring from Reservoir”.
8. Follow the screen prompts.
9. Perform “Short Fill”.
10. Inspect air spring for proper installation.
11. Select “Complete Fill” from the list.
12. Follow the screen prompts.
13. Clear all Diagnostic Trouble Codes (DTC’s).
14. Remove the wiTECH scan tool from the vehicle.
15. Continue with Section E. Four Wheel Alignment.
Service Procedure (Continued)
Safety Recall R38 – Rear Suspension Lower Control Arms Page 12
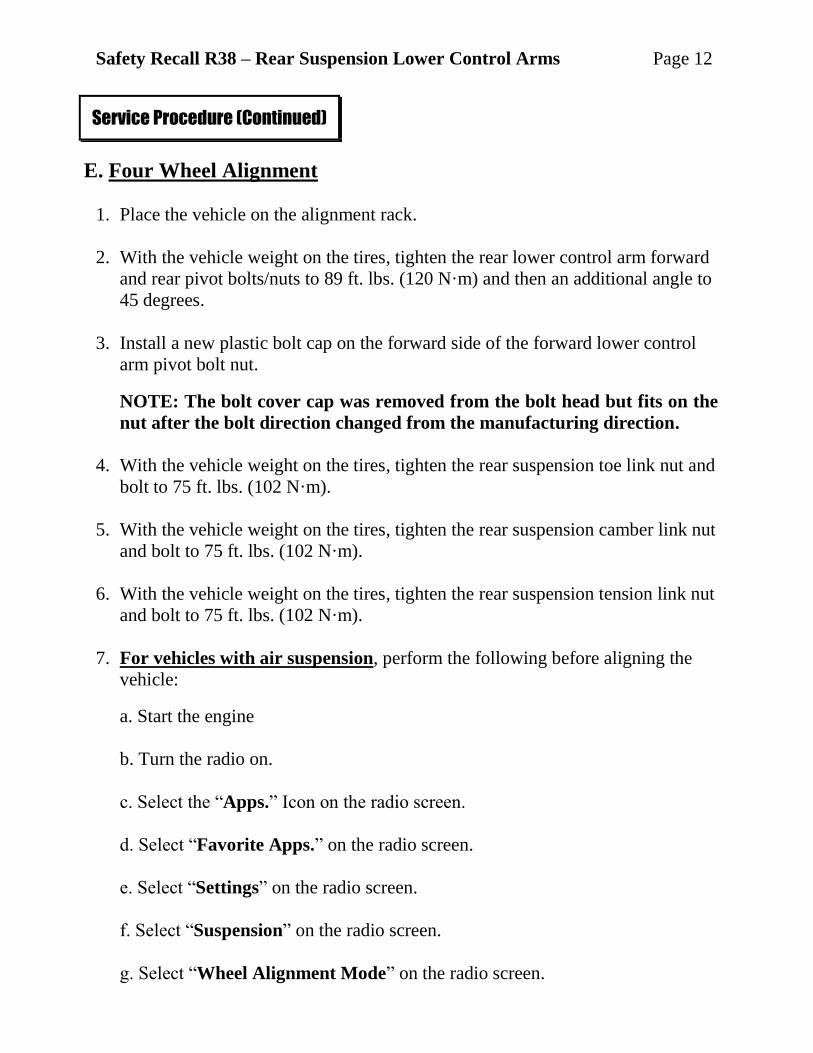
E. Four Wheel Alignment
1. Place the vehicle on the alignment rack.
2. With the vehicle weight on the tires, tighten the rear lower control arm forward
and rear pivot bolts/nuts to 89 ft. lbs. (120 N·m) and then an additional angle to
45 degrees.
3. Install a new plastic bolt cap on the forward side of the forward lower control
arm pivot bolt nut.
NOTE: The bolt cover cap was removed from the bolt head but fits on the
nut after the bolt direction changed from the manufacturing direction.
4. With the vehicle weight on the tires, tighten the rear suspension toe link nut and
bolt to 75 ft. lbs. (102 N·m).
5. With the vehicle weight on the tires, tighten the rear suspension camber link nut
and bolt to 75 ft. lbs. (102 N·m).
6. With the vehicle weight on the tires, tighten the rear suspension tension link nut
and bolt to 75 ft. lbs. (102 N·m).
7. For vehicles with air suspension, perform the following before aligning the
vehicle:
a. Start the engine
b. Turn the radio on.
c. Select the “Apps.” Icon on the radio screen.
d. Select “Favorite Apps.” on the radio screen.
e. Select “Settings” on the radio screen.
f. Select “Suspension” on the radio screen.
g. Select “Wheel Alignment Mode” on the radio screen.
Service Procedure (Continued)

Safety Recall R38 – Rear Suspension Lower Control Arms Page 13
8. Install wheel alignment equipment following the alignment machine
instructions.
9. Use the following procedure to adjust rear wheel camber:
a. Adjust the wheel camber position by loosening the camber link to cradle cam
bolt/nut just enough to rotate the cam bolt. Turning the cam bolt moves the
camber link in or out.
b. Tighten the camber link to cradle cam bolt/nut to 58 ft. lbs. (79 N·m).
c. Verify the specifications.
d. Continue with Step 10 of this procedure.
10. Use the following procedure to adjust rear wheel toe:
a. Adjust the wheel toe position by loosening the toe link to cradle cam bolt/nut
just enough to rotate the cam bolt. Turning the cam bolt moves the toe link in
or out.
b. Tighten the toe link to cradle cam bolt/nut to 58 ft. lbs. (79 N·m).
c. Verify the specifications.
11. Align front wheels as required.
12. Remove the alignment equipment from the vehicle.
13. Road test the vehicle.
14. Return the vehicle to the customer.
Service Procedure (Continued)

Safety Recall R38 – Rear Suspension Lower Control Arms Page 14
NOTE: Specifications are in degrees.
Front Alignment Specifications
Total Toe**
Caster Cross Caster
Left Camber
Right Camber
Cross Camber
Aero Suspension 0.20° +/- 0.13°
5.18° +/- 0.60°
0.00° +/- 1.00°
-0.52° +/- 0.60°
-0.92° +/- 0.60°
0.40° +/- 0.60°
Base Suspension (LHD)
0.20° +/- 0.13°
4.84° +/- 0.60°
0.00° +/- 1.00°
-0.17° +/- 0.60°
-0.57° +/- 0.60°
0.40° +/- 0.60°
Base Suspension (RHD)
0.20° +/- 0.13°
4.84° +/- 0.60°
0.00° +/-1.00°
-0.57° +/- 0.60°
-0.17° +/- 0.60°
-0.40° +/- 0.60°
Air Suspension (Aero Mode) (LHD)
0.20° +/- 0.13°
5.27° +/- 0.60°
0.00° +/- 1.00°
-0.64° +/- 0.60°
-1.04° +/- 0.60°
0.40° +/- 0.60°
Air Suspension (Aero Mode) (RHD)
0.20° +/- 0.13°
5.27° +/- 0.60°
0.00° +/- 1.00°
-1.04° +/- 0.60°
-0.64° +/- 0.60°
-0.40° +/- 0.60°
SRT8 (with 3 season tires)
0.20° +/- 0.13°
5.21° +/- 0.55°
0.00° +/- 0.55°
-1.61° +/- 0.55°
-1.61° +/- 0.55°
0.00° +/- 0.55°
SRT8 (with 4 season tires)
0.20° +/- 0.13°
5.21° +/- 0.55°
0.00° +/- 0.55°
-1.31° +/- 0.55°
-1.61° +/- 0.55°
0.30° +/- 0.55°
Notes:
Positive toe (+) is toe-in and negative toe (−) is Toe-out.
** TOTAL TOE is the sum of both the left and right wheel toe settings. TOTAL TOE should be equally split between each wheel on the same axle to ensure the steering wheel is centered after setting toe.
Rear Alignment Specifications
LHD and RHD Toe Total Toe** Thrust Angle
Camber Cross Camber
Aero Suspension 0.10° +/- 0.15°
0.20° +/- 0.30°
0.00° +/- 0.15°
-0.88 +/- 0.55 0.00° +/- 0.60°
Base Suspension 0.10° +/- 0.15°
0.20° +/- 0.35°
0.00° +/- 0.15°
-0.54 +/- 0.55° 0.00° +/- 0.60°
Air Suspension (Aero Mode)
0.20° +/- 0.15°
0.40° +/- 0.30°
0.00° +/- 0.15°
-1.09° +/- 0.55°
0.00° +/- 0.60°
SRT8 0.125° +/- 0.10°
0.25° +/- 0.20°
0.00° +/- 0.10°
-1.30° +/- 0.50°
0.00° +/- 0.55°
Notes:
Positive toe (+) is toe-in and negative toe (−) is Toe-out.
** TOTAL TOE is the sum of both the left and right wheel toe settings. TOTAL TOE should be equally split between each wheel on the same axle to ensure the steering wheel is centered after setting toe.
Service Procedure (Continued)

Safety Recall R38 – Rear Suspension Lower Control Arms Page 15
Claims for vehicles that have been serviced must be submitted on the
DealerCONNECT Claim Entry Screen located on the Service tab. Claims
submitted will be used by FCA to record recall service completions and provide
dealer payments.
Use the following labor operation numbers and time allowances:
Labor Operation Time
Number Allowance
All Models: Inspect right and left rear
suspension lower control arm build
date codes 02-R3-81-81 0.2 hours
WK Models: Inspect right and left rear
suspension lower control arm build date
codes and replace one lower control arm
(includes four wheel alignment) 02-R3-81-82 3.7 hours
WK Models: Inspect right and left rear
suspension lower control arm build date
codes and replace both lower control arms
(includes four wheel alignment) 02-R3-81-83 5.1 hours
WD Models: Inspect right and left rear
suspension lower control arm build date
codes and replace one lower control arm
(includes four wheel alignment) 02-R3-81-84 4.0 hours
WD Models: Inspect right and left rear
suspension lower control arm build date
codes and replace both lower control arms
(includes four wheel alignment) 02-R3-81-85 5.4 hours
Optional Equipment
Air Suspension (WK models Only) 02-R3-81-60 0.4 hours
Completion Reporting and Reimbursement

Safety Recall R38 – Rear Suspension Lower Control Arms Page 16
Related Operation
Commute to the vehicle to
perform an on-site rear lower
control arm inspection 02-R3-81-50 Actual Time
Fuel Allowance 95-14-01-54 $15.00
Add the cost of the recall parts package plus applicable dealer allowance to your
claim.
NOTE: See the Warranty Administration Manual, Recall Claim Processing
Section, for complete recall claim processing instructions.
To view this notification on DealerCONNECT, select “Global Recall System” on
the Service tab, then click on the description of this notification.
All involved vehicle owners known to FCA are being notified of the service
requirement by first class mail. They are requested to schedule appointments for this
service with their dealers. A generic copy of the owner letter is attached.
Enclosed with each owner letter is an Owner Notification postcard to allow owners
to update our records if applicable.
Completion Reporting and Reimbursement (Continued)
Dealer Notification
Owner Notification and Service Scheduling

Safety Recall R38 – Rear Suspension Lower Control Arms Page 17
All involved vehicles have been entered into the DealerCONNECT Global Recall
System (GRS) and Vehicle Information Plus (VIP) for dealer inquiry as needed. GRS provides involved dealers with an updated VIN list of their incomplete
vehicles. The owner’s name, address and phone number are listed if known.
Completed vehicles are removed from GRS within several days of repair claim
submission.
To use this system, click on the “Service” tab and then click on “Global Recall
System.” Your dealer’s VIN list for each recall displayed can be sorted by: those
vehicles that were unsold at recall launch, those with a phone number, city, zip
code, or VIN sequence.
Dealers must perform this repair on all unsold vehicles before retail delivery.
Dealers should also use the VIN list to follow up with all owners to schedule
appointments for this repair.
Recall VIN lists may contain confidential, restricted owner name and address information that
was obtained from the Department of Motor Vehicles of various states. Use of this information
is permitted for this recall only and is strictly prohibited from all other use.
If you have any questions or need assistance in completing this action, please
contact your Service and Parts District Manager.
Customer Services / Field Operations
FCA US LLC
Vehicle Lists, Global Recall System, VIP and Dealer Follow Up
Additional Information